
DXF-51 - Photo accessory SONY - Free user manual and instructions
Find the device manual for free DXF-51 SONY in PDF.


| Product type | Electronic device |
| Brand | Sony |
| Model | DXF-51 |
| Dimensions (L x W x H) | 150 x 80 x 25 mm |
| Weight | 200 g |
| Power supply | 2 AA batteries (not included) |
| Battery life | Approximately 10 hours |
| Main functions | Digital display, settings, internal memory |
| Care and cleaning | Wipe with a soft, dry cloth. Do not use chemical products. |
| Safety | Do not expose to moisture or extreme temperatures. |
| Spare parts and repairability | Contact Sony support for repairs. Repairability index: 7/10 |
| General information | Manual in French available online. |
Frequently Asked Questions - DXF-51 SONY
User questions about DXF-51 SONY
0 question about this device. Answer the ones you know or ask your own.
Ask a new question about this device
Download the instructions for your Photo accessory in PDF format for free! Find your manual DXF-51 - SONY and take your electronic device back in hand. On this page are published all the documents necessary for the use of your device. DXF-51 by SONY.
USER MANUAL DXF-51 SONY
Electronic Viewfinder
Operating Instructions Page 18
© 1997 by Sony Corporation
The model and serial numbers are located at the rear. Record the serial number in the space provided below. Refer to these numbers whenever you call upon your Sony dealer regarding this product.
Model No. DXF-51 Serial No.
WARNING
To prevent fire or shock hazard, do not expose the unit to rain or moisture.
To avoid electrical shock, do not open the cabinet. Refer servicing to qualified personnel only.


This symbol is intended to alert the user to the presence of uninsulated “dangerous voltage” within the product’s enclosure that may be of sufficient magnitude to constitute a risk of electric shock to persons.

This symbol is intended to alert the user to the presence of important operating and maintenance (servicing) instructions in the literature accompanying the appliance.
For the customers in the U.S.A.
This equipment has been tested and found to comply with the limits for a Class A digital device, pursuant to Part 15 of the FCC Rules. These limits are designed to provide reasonable protection against harmful interference when the equipment is operated in a commercial environment. This equipment generates, uses, and can radiate radio frequency energy and, if not installed and used in accordance with the instruction manual, may cause harmful interference to radio communications. Operation of this equipment in a residential area is likely to cause harmful interference in which case the user will be required to correct the interference at his own expense.
You are cautioned that any changes or modifications not expressly approved in this manual could void your authority to operate this equipment.
The shielded interface cable recommended in this manual must be used with this equipment in order to comply with the limits for a digital device pursuant to Subpart B of Part 15 of FCC Rules.
For the customers in Europe
This product with the CE marking complies with the EMC Directive (89/336/EEC) issued by the Commission of the European Community.
Compliance with this directive implies conformity to the following European standards:
• EN55103-1: Electromagnetic Interference (Emission)
- EN55103-2: Electromagnetic Susceptibility (Immunity) This product is intended for use in the following Electromagnetic Environment(s):
E1 (residential), E2 (commercial and light industrial), E3 (urban outdoors) and E4 (controlled EMC environment, ex. TV studio).
Table of Contents
Features 20
Precautions 20
Location and Function of Parts and Controls ...... 21
How To Attach and Connect the Unit to the Camera 23 How To Attach the Viewfinder Hood 25
Operation....26 Panning....26 Tilting....26
Specifications.... 27
Features
The DXF-51 is a 5-inch monochrome electronic viewfinder, designed for use with Sony DXC series CCD color video cameras.
- High-resolution picture tube with a horizontal resolution of over 650 TV lines.
- H/V regulator ensures a stable picture under all conditions.
- Responds to EIA standard (525/59.94) and CCIR standard (625/50) signals under the control of the camera.
- Controls from a camera for the adjustment of image size transmitted via 16:9 (V compression) and 4:3 signals.
- Has three tally lamps at the front of the camera, and one main tally lamp at the back.
- While maintaining balance, camera tilts 40 degrees up and down, and pans 90 degrees to right and left.
Precautions
Operation
- Do not use the unit in a place subject to direct sunlight, excessive dust, mechanical vibration or shock.
- Do not use the viewfinder outside its operating temperature range of 0°C to +40°C (32°F to 104°F).
- Should any liquid or solid object fall into the cabinet, unplug the unit and have it checked by qualified personnel before operating it any further.
- Allow adequate air circulation to prevent internal heat build-up.
- Do not expose the unit to extremely high temperatures and humidity.
Cleaning
Clean the cabinet, panel and controls with a soft, dry cloth, or a soft cloth that has been lightly moistened with a mild detergent solution. Do not use any type of solvent, such as alcohol or benzine, as this may damage the finish.
Repacking
Do not discard the unit's original packaging. Use the packaging to afford maximum protection whenever the unit is transported.
If you have any questions about your viewfinder, contact your authorized Sony dealer.
Location and Function of Parts and Controls

1 TALLY G indicator (green) Lights while the camera is monitoring. ② TALLY R indicator (red) Lights while the camera is recording. ③ External tally lamp (red) Lights while the camera recording when TALLY switch set to on.
4 LOCK screw Adjusts the angle of viewfinder in the vertical direction. ⑤ D-sub 26-pin connector Connects 20-pin connector (supplied) to the VF (viewfinder) connector of the host camera. This connector carries the video signal, tally signal and power.
Location and Function of Parts and Controls
6 CONTRAST control 1)
Turn to adjust the contrast of the picture on the viewfinder screen.
7 BRIGHT control 1)
Turn to adjust the brightness of the picture on the viewfinder screen.
8 Viewfinder fixing ring
Fix the viewfinder to the camera.
9 TALLY ON/OFF switch
Enables and disables the external tally lamp.
ON: The external tally lamp turns on and off, as the camera mode changes.
OFF: The external tally lamp does not light, regardless of the camera mode.
10 PEAKING ON/OFF switch
Set this switch to on to use the PEAKING control.
11 PEAKING control 1)
Adjusts the outline intensity of the viewfinder image.
12 SHUTTER/GAIN indicator
Lights while the shutter, the gain control, or the AGC function is switched on.
13 R indicator
Lights while the second tally is on in recording.
14 Auxiliary indicator
Signal warning indicator auxiliary lamp (excludes SHUTTER/GAIN).
How to Attach and Connect the Unit to the Camera
Turn off the power of the camera before attempting the installation.
1. Connect the VF connector cable (supplied) to the bottom of the viewfinder.

2. Attach the viewfinder to the accessory shoe of the camera and fix it.
The viewfinder can also be attached with its screen facing the subject, if desired.

3. Connect the 20-pin connector to the camera's VF connector.


How to Attach the Viewfinder Hood
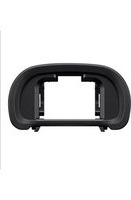
When using the viewfinder outdoors, attach the supplied viewfinder hood to reduce glare.

Operation
Turning on the camera or the camera control unit automatically supplies power to the viewfinder. The viewfinder image will appear within several seconds.
Adjust the viewfinder to the desired angle and height.
Panning
Note
When the BRIGHT control is turned fully counterclockwise, no picture will appear on the viewfinder screen.
Tilting
For details, refer to the instruction manual supplied with the camera or the CCU.
Specifications
Picture tube: 5-inch monochrome
70-degree deflection
Video signal: EIA standard/CCIR standard
Scanning system
2:1 interlace
525 lines
2:1 interlace
625 lines
Scan: 5% underscan
High voltage: 8.5 kV
Horizontal resolution
More than 650 lines (at center)
Frequency response
10 MHz at -3 dB
Connectors Exclusive D-sub 26-pin connector
Video input: 1 V(p-p), sync negative,
3 kΩ
Power supply: 12 V DC
Power consumption
11 W
Operating temperature
0°C to +40°C (32°F to 104°F)
Dimensions Approx. 203 × 199 × 289 mm
(w/h/d) (8 × 7 7/8 × 11 1/2 inches)
including viewfinder hood
Mass Approx. 2.4 kg (4 lb 7 oz)
including viewfinder hood
Accessories supplied
Viewfinder hood (1)
VF connector cable
(20-pin↔26-pin) (1)
Number plate (1)
Operating Instructions (1)
Design and specifications are subject to change without notice.
French
WARNING
Power supply: 12 V DC
For Customer in China


- ELECTRONIC VIEWFINDER
- WARNING
- FOR THE CUSTOMERS IN THE U.S.A
- FOR THE CUSTOMERS IN EUROPE
- TABLE OF CONTENTS
- FEATURES
- PRECAUTIONS
- OPERATION
- CLEANING
- REPACKING
- LOCATION AND FUNCTION OF PARTS AND CONTROLS
- HOW TO ATTACH AND CONNECT THE UNIT TO THE CAMERA
- HOW TO ATTACH THE VIEWFINDER HOOD
- NOTE
- SPECIFICATIONS
- FOR CUSTOMER IN CHINA
Brand : SONY
Model : DXF-51
Category : Photo accessory