SF4390VCX1 - Fridge SMEG - Free user manual and instructions
Find the device manual for free SF4390VCX1 SMEG in PDF.


User questions about SF4390VCX1 SMEG
0 question about this device. Answer the ones you know or ask your own.
Ask a new question about this device
Download the instructions for your Fridge in PDF format for free! Find your manual SF4390VCX1 - SMEG and take your electronic device back in hand. On this page are published all the documents necessary for the use of your device. SF4390VCX1 by SMEG.
USER MANUAL SF4390VCX1 SMEG
1.1 General safety instructions 68
1.2 Appliance purpose 72
1.3 Manufacturer liability 72
1.4 This user manual 72
1.5 Identification plate 72
1.6 Disposal 72
1.7 How to read the user manual 73
2 Description 74
2.1 General Description 74
2.2 Control panel 75
2.3 Other parts 76
2.4 Advantages of steam cooking 76
2.5 Available accessories 77
2.6 Other cooking containers 78
3 Use 79
3.1 Instructions 79
3.2 First use 80
3.3 Using the accessories 80
3.4 Using the oven 81
3.5 Cooking advice 101
3.6 Special functions 103
3.7 Secondary menu 111
4 Cleaning and maintenance 114
4.1 Instructions 114
4.2 Cleaning the surfaces 114
4.3 Cleaning the door 115
4.4 Cleaning the inside of the oven 117
4.5 Extraordinary maintenance 125
5 Installation 126
5.1 Electrical connection 126
5.2 Cable replacement 126
5.3 Positioning 127
TRANSLATION OF THE ORIGINAL INSTRUCTIONS
We advise you to read this manual carefully, which contains all the instructions for maintaining the appliance's aesthetic and functional qualities.
For further information on the product: www.smeg.com
1 Instructions
1.1 General safety instructions
Risk of personal injury
- During use the appliance and its accessible parts become very hot. Never touch the heating elements during use.
- Protect your hands by wearing oven gloves when moving food inside the oven.
- Never try to put out a fire or flames with water: Turn off the appliance and smother the flames with a fire blanket or other appropriate cover.
- This appliance may be used by children aged at least 8 and by people of reduced physical, sensory or mental capacity, or lacking in experience in the use of electrical appliances, provided that they are supervised or instructed by adults who are responsible for their safety.
• Children must not play with the appliance. -
Keep children under the age of eight at a safe distance unless they are constantly supervised.
-
Keep children under the age of 8 away from the appliance when it is in use.
- Cleaning and maintenance must not be carried out by unsupervised children.
- Fats and oils can catch fire if they overheat. Do not leave the appliance unattended while preparing foods containing oils or fats. If fats or oils catch fire, never put water on them. Place the lid on the pan and turn off the relevant cooking zone.
- The cooking process must always be monitored. A short cooking process must be continuously monitored.
- Do not cook dishes containing large quantities of strong alcoholic beverages. Alcohol vapours in the oven could catch fire.
- Do not insert pointed metal objects (cutlery or utensils) into the slots in the appliance.
-
Do not pour water directly onto very hot trays.
-
Keep the oven door closed during cooking.
- If you need to move food or at the end of cooking, open the door 5 cm for a few seconds, let the steam come out, then open it fully.
- DO NOT USE OR STORE FLAMMABLE MATERIALS NEAR THE APPLIANCE.
• DO NOT USE AEROSOLS IN THE VICINITY OF THIS APPLIANCE WHILE IT IS IN USE. - Switch off the appliance immediately after use.
- Do not clean the appliance immediately after turning it off – wait for it to cool down first.
• DO NOT MODIFY THIS APPLIANCE.
• Always use any necessary/required personal protective equipment (PPE) before performing any work on the appliance (installation, maintenance, positioning or movement). -
Before performing any work on the appliance, switch off the power supply.
-
Have qualified personnel carry out installation and assistance interventions according to the standards in force.
- Do not try to repair the appliance yourself or without the intervention of a qualified technician.
- Do not pull the cable to remove the plug.
- If the power supply cable is damaged, contact technical support immediately and they will replace it.
Risk of damaging the appliance
- Do not use cleaning products containing chlorine, ammonia or bleach on parts made of steel or that have metallic surface finishes (e.g. anodizing, nickel- or chromium-plating).
- Racks and trays should be inserted as far as they will go into the side guides. The mechanical safety locks that prevent them from being removed must face downwards and towards the back of the oven cavity.
- Do not seat on the appliance.
Instructions
- Do not use steam jets to clean the appliance.
- Do not obstruct ventilation openings and heat dispersal slots.
- Never leave the appliance unattended during cooking operations where fats or oils could be released, as these could then heat up and catch fire. Be very careful.
- Never leave objects on the cooking surface.
- DO NOT USE THE APPLIANCE AS A SPACE HEATER FOR ANY REASON.
- Do not spray any spray products near the appliance.
- Do not use plastic cookware or containers when cooking food.
- Do not put sealed tins or containers in the oven.
- Remove all trays and racks which are not required during cooking.
- Do not cover the bottom of the oven cavity with aluminium or tin foil sheets.
-
Do not place pans or trays directly on the bottom of the oven cavity.
-
If you wish to use greaseproof paper, place it so that it will not interfere with the hot air circulation inside the oven.
- Do not use the open door to rest pans or trays on the internal glass pane.
- Do not use steam jets to clean the appliance.
- Do not remove the seal on the face of the oven.
- Do not use rough or abrasive materials or sharp metal scrapers.
- Never use the oven door to lever the appliance into place when fitting.
- Avoid exerting too much pressure on the oven door when open.
- Do not use the handle to lift or move the appliance.
Installation
- THIS APPLIANCE MUST NOT BE INSTALLED IN A BOAT OR CARAVAN.
- The appliance must not be installed on a pedestal.
- Position the appliance into the cabinet cut-out with the help of a second person.
- To avoid potential overheating, the appliance must not be installed behind a decorative door or a panel.
- Have the electrical connection performed by authorised technical personnel.
- The appliance must be connected to earth in compliance with electrical system safety standards.
- Use cables withstanding a temperature of at least 90 °C.
- The tightening torque of the screws of the terminal supply wires must be 1.5 - 2 Nm.
For this appliance
• Take care because steam may not be visible at certain temperatures.
- Keep the oven door closed during cooking.
- Open the appliance door carefully during or after cooking.
- When steaming, always place the tray below the perforated tray in order to catch any drips.
- Do not cover the bottom of the oven cavity with aluminium or tin foil sheets.
- The base of the oven and the evaporation tray must always be left free.
- Dishes must be heat and steam resistant.
- Do not use silicone moulds when steaming.
- Ensure that the appliance is switched off before replacing the bulb.
- Do not rest any weight or sit on the open door of the appliance.
• Take care that no objects are stuck in the doors.
1.2 Appliance purpose
- This appliance is intended for cooking food in the home environment. Every other use is considered improper.
- The appliance is not designed to operate with external timers or with remote-control systems.
1.3 Manufacturer liability
The manufacturer declines all liability for damage to persons or property caused by:
- Use of the appliance other than that specified;
- Failure to comply with the instructions in the user manual;
- Tampering with any part of the appliance;
- The use of non-original spare parts.
1.4 This user manual
This user manual is an integral part of the appliance and must therefore be kept in its entirety and within the user's reach for the whole working life of the appliance. Read this user manual carefully before using the appliance.
1.5 Identification plate
The identification plate bears the technical data, serial number and brand name of the appliance. Do not remove the identification plate for any reason.
1.6 Disposal

This appliance must be disposed of separately from other waste (Directives 2002/95/EC, 2002/96/EC, 2003/108/EC). The appliance does not contain substances in quantities sufficient to be considered hazardous to health and the environment, in accordance with current European directives. To dispose of the appliance:
- Cut the power supply cable and remove it along with the plug.

Power voltage Danger of electrocution
- Disconnect the mains power supply.
- Unplug the appliance.
- Deliver the appliance to the appropriate recycling centre for electrical and electronic equipment waste, or return it to the retailer when purchasing an equivalent product, on a one for one basis.
Our appliances are packaged in non-polluting and recyclable materials.
- Deliver the packing materials to the appropriate recycling centre.

Plastic packaging Danger of suffocation
- Do not leave the packaging or any part of it unattended.
- Do not let children play with the plastic bags.
1.7 How to read the user manual
This user manual uses the following reading conventions:
Instructions

General information on this user manual, on safety and final disposal.
Description

Description of the appliance and its accessories.
Use

Information on the use of the appliance and its accessories, cooking advice.
Cleaning and maintenance

Information for proper cleaning and maintenance of the appliance.
Installation

Information for the qualified technician: Installation, operation and inspection.

Safety instructions

Information

Advice
- Sequence of instructions for use.
- Standalone instruction.
2 Description
2.1 General Description
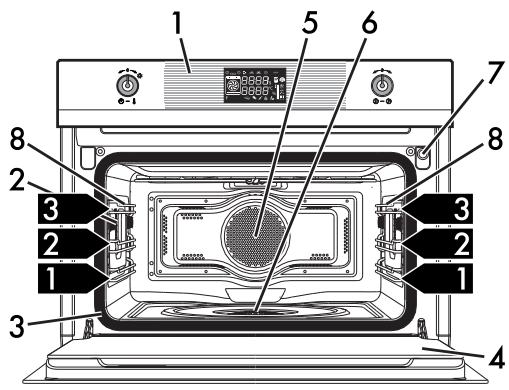
text_image
Technical diagram of an oven with numbered components and control panel, likely for assembly or labeling purposes.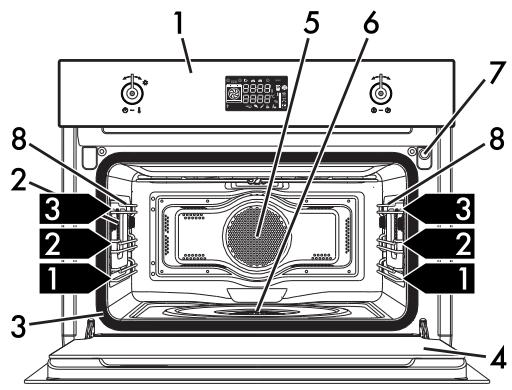
text_image
Technical diagram of an oven with numbered components and labeled parts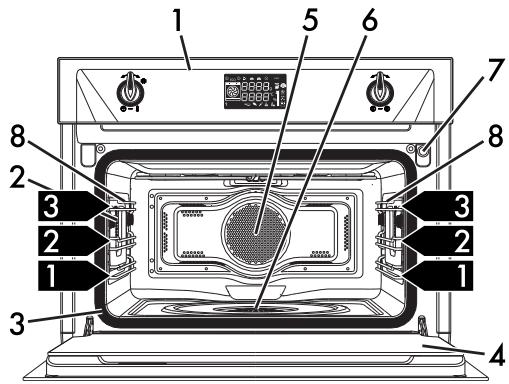
text_image
Labeled diagram of an oven interior showing numbered components for cooking or assembly reference.1 Control panel
2 Oven light
3 Seal
4 Door
5 Fan
6 Evaporation tray
7 Water supply tube
8 Rack support frames
1,2,3... Frame shelf
2.2 Control panel
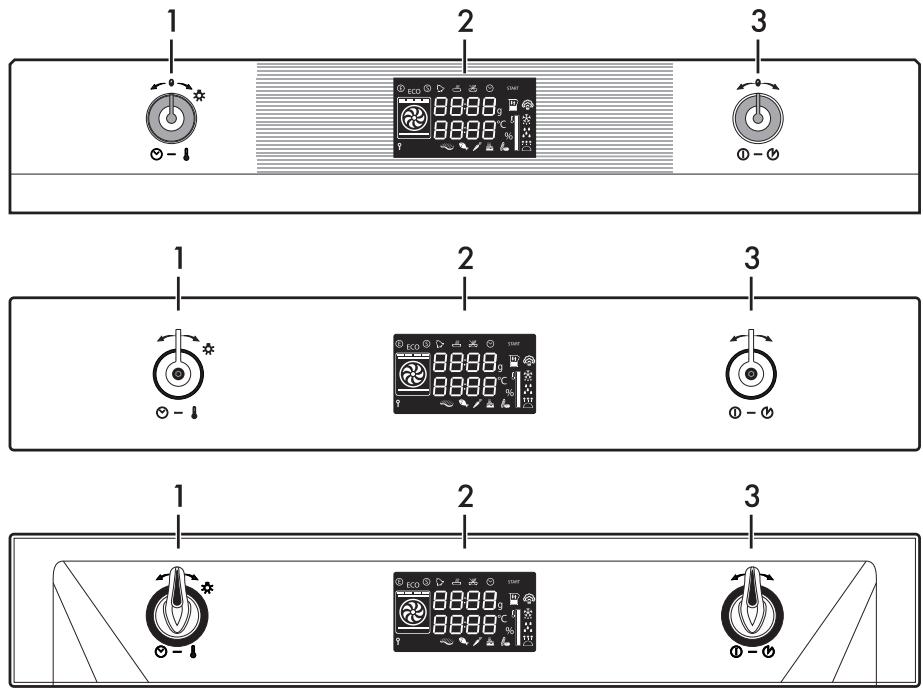
text_image
1 2 3 1 2 3 1 2 31 Temperature knob
This knob can be used to select:
• The cooking temperature
• The duration of a function
- Programmed cooking procedures
- The current time
- The turning on or off of the light inside the appliance.
2 Display
Displays the current time, the function, the selected cooking temperature and any time set.
3 Function knob
This knob can be used to:
- Turn the appliance on and off
- Select a function
• Temporarily start or stop a function.

To stop the active function and switch off the appliance, press the function knob for a few seconds.
2.3 Other parts
Interior lighting
The appliance's interior lighting comes on:
- When the door is opened (on some models only).
- When any function is selected, apart from the Vapor Clean function.
- When no function is selected or during a cooking function, turn the temperature knob briefly to the right towards the symbol to manually activate or deactivate internal lighting.

In order to save energy, the light turns off after a minute at the start of cooking (this function can be deactivated via the secondary menu).

When the door is open, it is not possible to turn off the interior lighting (on some models only).
Shelves
The appliance features shelves to position trays and racks at different heights. The insertion heights are indicated from the bottom upwards (see 2.1 General Description).
Cooling fan
natural_image
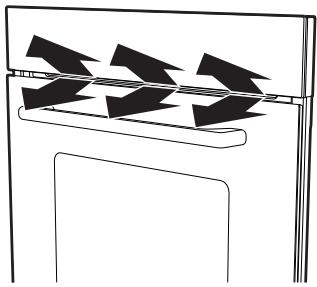
Pure diagram of a mechanical or electrical component with no text, numbers, or symbolsThe fan cools the appliance and comes into operation during cooking.
The fan causes a steady outflow of air from above the door which may continue for a brief period of time even after the appliance has been turned off.
2.4 Advantages of steam cooking
The steam cooking system cooks any type of food much more delicately.
It is also ideal for defrosting foods rapidly, for heating up foods without hardening or drying them out, and for naturally removing salt from foodstuffs preserved with salt.
2.5 Available accessories
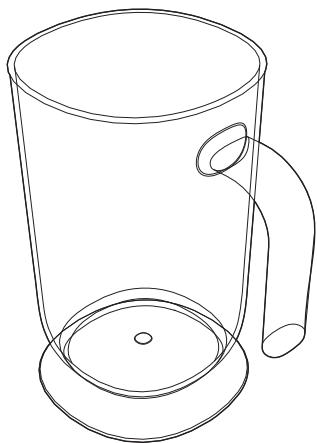
Jug
natural_image
Line drawing of a mug with handle and circular base (no text or symbols)For holding liquids during reservoir filling and emptying.
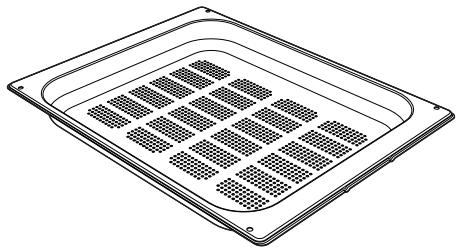
Perforated tray
natural_image
Line drawing of a square metal tray with grid pattern (no text or symbols)Useful for steaming fish and vegetables.
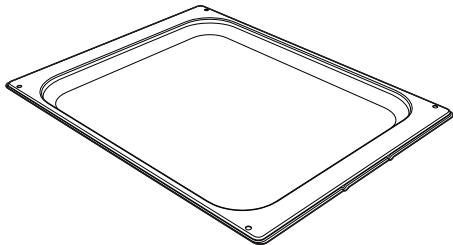
Tray
natural_image
Line drawing of a square frame with rounded corners and mounting holes (no text or symbols)Useful when cooking cakes (with cooking times of less than 25 minutes or without steam), rice, beans and cereals. It is also essential for collecting liquids produced by steaming or defrosting of foods contained in the perforated trays above.
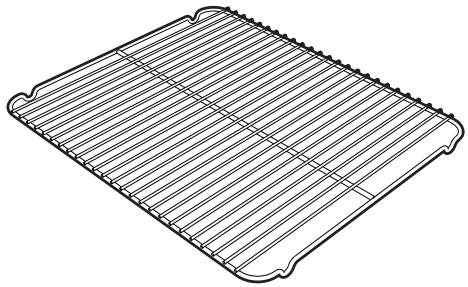
Tray rack
natural_image
Line drawing of a rectangular metal tray with horizontal grooves and a central slot (no text or symbols)To be placed over the top of the oven tray; for cooking foods which may drip.
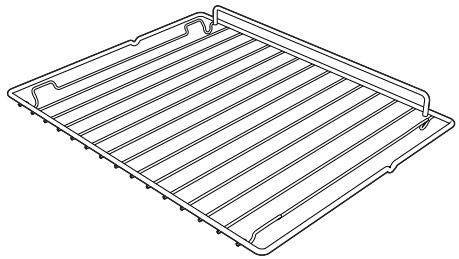
Rack
natural_image
Line drawing of a rectangular tray with horizontal slats and a curved handle (no text or symbols)Useful for supporting containers with food during cooking.
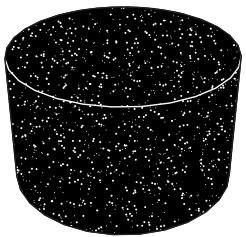
Sponge
natural_image
Black and white illustration of a cylindrical container filled with scattered white particles (no text or symbols)Useful for removing condensation from inside the oven.
Evaporation tray cover
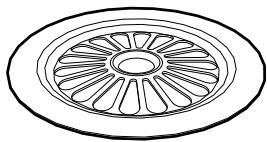
natural_image
Simple line drawing of a circular mechanical component with radial slots (no text or symbols)Evenly distributes steam inside the oven.

Some models are not provided with all accessories.

The appliance accessories intended to come into contact with food are made of materials that comply with the provisions of current legislation.

Original supplied and optional accessories can be requested to Authorised Assistance Centres. Use only original accessories supplied by the manufacturer.
2.6 Other cooking containers
- You may also use your own containers for cooking, as long as they are resistant to high temperatures.
- For steam cooking, the use of metal containers is recommended. Metal facilitates better distribution of heat to the foods.
- It is normal for metal containers to deform somewhat during high-temperature cooking, but they will return to their original shape when they cool down.
- Thick ceramic plates may require more heat than normal. Longer cooking times may be necessary.
3 Use
3.1 Instructions

High temperature inside the oven during use Danger of burns
- Keep the oven door closed during cooking.
- Protect your hands by wearing oven gloves when moving food inside the oven.
- Open the appliance door carefully during or after cooking.
• Take care because steam may not be visible at certain temperatures. - Do not cook dishes containing large quantities of strong alcoholic beverages. Alcohol vapour inside the oven could ignite.
- Do not touch the heating elements inside the oven.
- Do not pour water directly onto very hot trays.
- Do not allow children to approach the appliance when it is in operation.

Improper use Risk of damage to enamelled surfaces
- When steaming, always place the tray below the perforated tray in order to catch any drips.
- Do not cover the bottom of the oven cavity with aluminium or tin foil sheets.
- The base of the oven and the evaporation tray must always be left free.
- Dishes must be heat and steam resistant.
- Do not use silicone moulds when steaming.
- If you wish to use greaseproof paper, place it so that it will not interfere with the hot air circulation inside the oven.
- Do not place pans or trays directly on the bottom of the oven cavity.
- Do not pour water directly onto very hot trays.

High temperature inside the oven during use Danger of fire or explosion
- Do not spray any spray products near the appliance.
- Do not use or leave flammable materials near the appliance.
- Do not use plastic cookware or containers when cooking food.
- Do not put sealed tins or containers in the oven.
- Do not leave the appliance unattended during cooking operations where fats or oils could be released.
- Remove all trays and racks which are not required during cooking.
3.2 First use
- Remove any protective film from the outside or inside of the appliance, including accessories.
- Remove any labels (apart from the technical data plate) from the accessories and from the oven cavity.
-
Remove and wash all the appliance accessories (see 4 Cleaning and maintenance).
-
Heat the empty oven at the maximum temperature for at least 20 minutes to burn off any residues left by the manufacturing process (see 3.4 Using the oven).
- You must set the current time in order to start using the appliance (see "Setting the time").
3.3 Using the accessories
Racks and trays
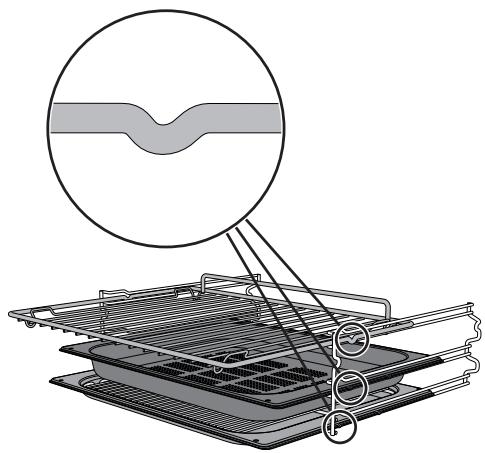
Racks and trays have to be inserted into the side guides until they come to a complete stop.
- The mechanical safety locks that prevent the racks and trays from being taken out accidentally must face downwards and towards the back of the oven cavity.
natural_image
Diagram of a filtration or cooling system with a magnified cross-section showing internal structure (no text or symbols)2+1 configuration
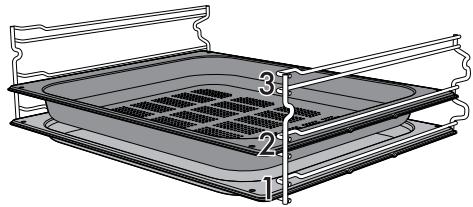
If you intend to use the perforated tray for steam cooking, this must be positioned on the second runner while the tray must be positioned on the first runner. This allows the liquids to be collected separately from the food that is being cooked (2 + 1 configuration, see "Automatic programs table").
natural_image
Technical line drawing of a rectangular tray with internal grating and labeled parts (no text or symbols)
Gently insert racks and trays into the oven until they come to a stop.

Clean the trays before using them for the first time to remove any residues left by the manufacturing process.
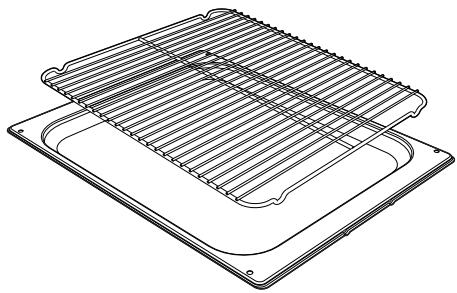
Tray rack
The tray rack has to be inserted into the tray. In this way fat can be collected separately from the food which is being cooked.
natural_image
Technical line drawing of a layered electronic component with grid-like structure (no text or symbols)3.4 Using the oven
Display
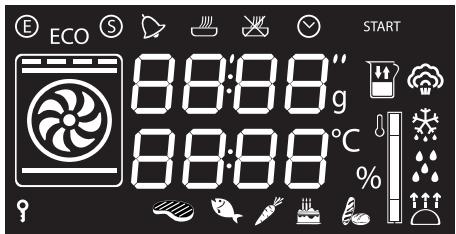
text_image
E CO 88:88" g 88:88°C % START
Eco-logic indicator light

Showroom indicator light

Minute minder timer indicator light

Timed cooking indicator light

Programmed cooking indicator light

Clock indicator light

Child lock indicator light

Temperature indicator light

Reservoir level indicator light

Steam indicator light

Defrost indicator light

Vapor Clean indicator light

Proving indicator light
Setting the time
When using the appliance for the first time, or after a power failure, the symbol
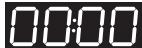
will flash on the display. To be able to start any cooking function, the current time must be set.
- Turn the temperature knob to set the displayed time (keep the knob turned to produce a faster increase or decrease).
- Press the temperature knob.
- Turn the temperature knob to set the minutes (keep the knob turned to produce a faster increase or decrease).
- Press the temperature knob to finish adjustment.

It may become necessary to change the current time, for example for daylight saving time. From the stand-by position, keep the temperature knob turned to the right until the hours flash. It is not possible to change the time if a function is active.
Operating modes
Stand-by: When no function is selected, the display shows the current time.
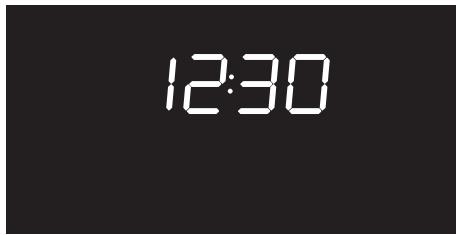
text_image
12:30ON: When a function is activated, the display shows the parameters set such as temperature, duration and temperature reached.
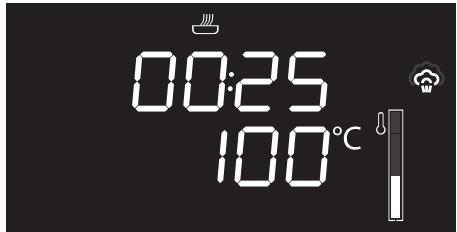
text_image
00:25 100°CSteaming foods
Each time the temperature knob is pressed during a function, the parameters will be cycled through in the following order.

Timed cooking duration

Temperature

Programmed cooking time
Traditional cooking
Each time the temperature knob is pressed during a function, the parameters will be cycled through in the following order.

Temperature

Minute minder

Timed cooking duration

Programmed cooking time (if timed cooking is set)
Combination cooking
Each time the temperature knob is pressed during a function, the parameters will be cycled through in the following order.

Timed cooking duration

Temperature

Steam percentage

Programmed cooking time.
In all modes it is possible to modify the value by turning the temperature knob to the left or right. Keep the knob turned to produce a faster increase or decrease.
Steam function settings

Do not place food or any other object directly on the bottom of the oven. The base of the oven and the evaporation tray must always be left free.
- Place the food inside the oven.
- Press the function knob to activate the appliance. The timed cooking indicator light will flash.
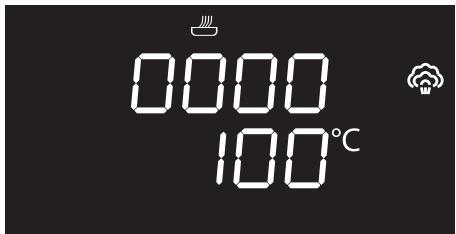
text_image
0000 100°C- Turn the temperature knob to the right or left to set the steaming duration from 00:01 to 02:00. Keep the knob turned for a fast increase or decrease
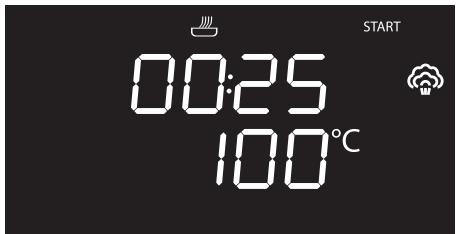
text_image
START 00:25 100°C-
Press the temperature knob to confirm the required cooking duration. The timed cooking indicator light remains on steadily, while the temperature indication starts flashing.
-
If you wish to modify the default temperature (100°C), turn the temperature knob to the right or left until you reach the required value.
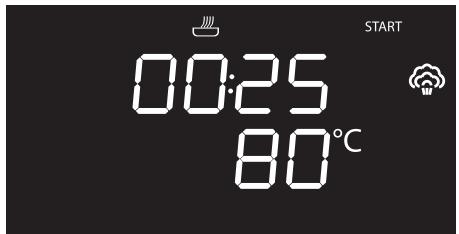
text_image
START 00:25 80°C
The minimum temperature which can be set is 30^ C. Each movement of the temperature knob changes the value by 5^ C.
- Press the temperature knob to confirm the cooking temperature set. The temperature indication remains steady, while the programmed cooking indicator
light 📄 starts flashing.

If cooking has just been performed with temperatures greater than 100^ C, you must wait for the oven to cool in order to use the steam function.
At this point it is possible to set programmed cooking.

Programmed cooking is the function which allows cooking to be stopped at an established time depending on the time set by the user, after which the appliance will switch off automatically.
If you do not wish to set timed cooking, just wait a few seconds until the indicator light
START
starts flashing, otherwise
continue from step 10.
If you do wish to set timed cooking, proceed as follows:
- While the programmed cooking
indicator light is flashing, turn the temperature knob to the right or left to set the cooking end time.
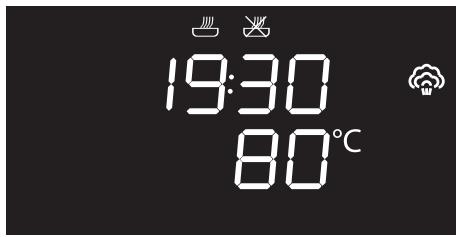
text_image
19:30 80°C-
Press the temperature knob to confirm the cooking end time. The programmed cooking indicator light remains on steadily.
-
After a few seconds, the indicator light
START
flashes on the display.
- Press the function knob. A request to fill the reservoir with water is shown on the display.
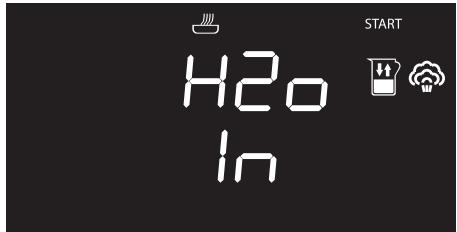
text_image
H2O In STARTFilling the reservoir

- Use cold tap water which is not too hard, softened water or still mineral water.
-
Do not use distilled water, tap water with a high chloride content (> 40 mg/l), or other liquids.
-
Fill the supplied jug or other suitable container with sufficient water for the cooking duration.
- Open the oven door.
- Rest the jug or container on the open door.

Note: the jug or container with the water must have a gross weight lower than 5 kg.
- Extract the tube from its seat and insert its end in the jug or container until it reaches all the way to the bottom.
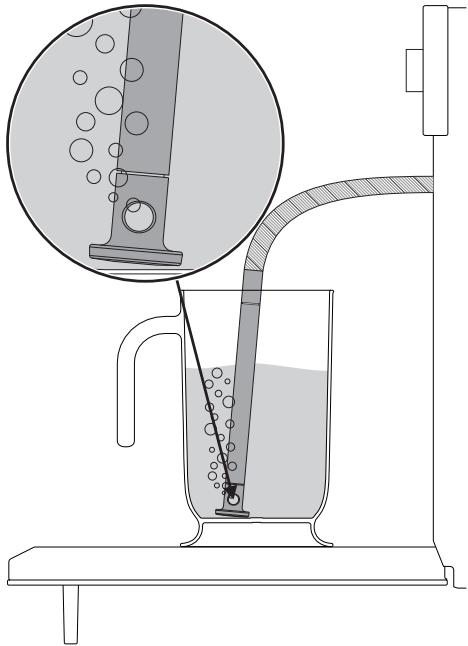
natural_image
Diagram of a laboratory filtration setup with a beaker, tubing, and an inset showing liquid being poured into a container (no text or labels)- Press the function knob to start drawing water into the appliance's reservoir.
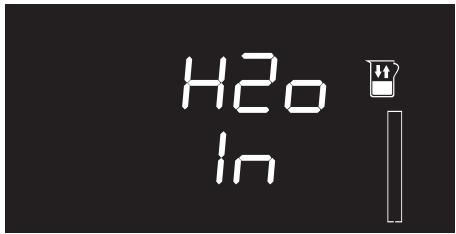
text_image
H2O In
The appliance will automatically draw the quantity of water necessary for cooking on the basis of the set duration.

In the event that the water runs out, the appliance will automatically stop the cooking process, a buzzer will sound and the display will show a request to fill the reservoir with water.
- When the appliance has finished taking in water, shake the tube to remove any residual water.
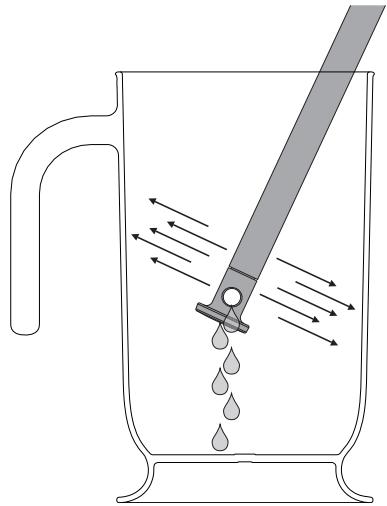
natural_image
Diagram of a glass pitcher with liquid droplets being stirred by a tool, showing fluid flow direction (no text or labels)- Return the tube to its original position, remove the jug/container of solution and close the door.

When the door is closed, an automatic system will automatically draw in any residual water in the tube to avoid drips. A bubbling noise may be heard; this is completely normal.
- Press the function knob to start steaming.

Cooking can be interrupted at any time by pressing and holding the function knob for a few seconds.

Each time the door is opened, the function in progress will stop and then automatically restart when the door is closed again.
Preheating stage
Steaming is always preceded by a preheating stage, which allows the appliance to heat up to cooking temperature.
The temperature reached flashes to indicate that this stage is in progress.
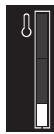
When preheating finishes, the temperature reached remains lit steadily, a buzzer sounds and cooking proceeds automatically.
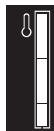
Modifying the set data
During operation, it is possible to modify the cooking duration:
- When the timed cooking indicator light is lit steadily and cooking is in progress inside the appliance, press the temperature knob. The timed cooking indicator light will start flashing.

If you set a longer cooking time than that previously set - meaning that the water added to the reservoir will be insufficient - the indicator light will flash on the display for a few seconds. Cooking will proceed regardless, but when the reservoir is empty a request to add water will be shown on the display.
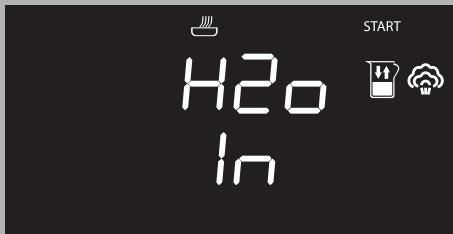
text_image
H2O In START- Turn the temperature knob right or left to alter the pre-set cooking time.

Towards the end, the appliance automatically switches off its heating elements in order to finish cooking using the residual heat inside the oven cavity.
Modifying programmed cooking

If programmed cooking is set, after modifying the cooking time, the end of cooking time must be re-set.
-
When the timed cooking 🎨 and
programmed cooking 📋 indicator lights are lit steadily and the appliance is waiting for cooking to start, press the temperature knob. The timed cooking indicator light 📋 will start flashing. -
Turn the temperature knob right or left to alter the pre-set cooking time.
-
Press the temperature knob again. The
timed cooking indicator light switches off and the programmed
cooking indicator light 📁 starts flashing. The display shows the cooking end time.
-
Turn the temperature knob right or left to delay the cooking end time.
-
After a few seconds the timed cooking and programmed cooking indicator lights stop flashing and programmed cooking restarts with the new settings.
End of the steam function
When cooking finishes, a buzzer will sound and the following screens will alternate on the display.
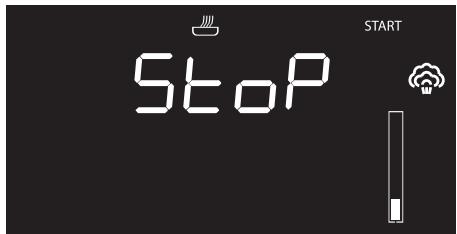
text_image
Stop START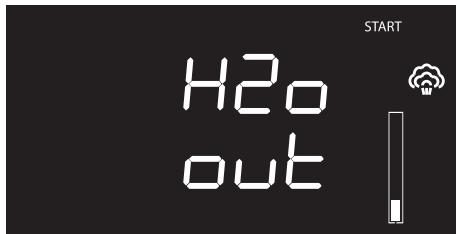
text_image
H2o out START- To deactivate the buzzer, press or turn one of the two knobs or open the door (see points 27 and 28).

To select a further timed cooking, turn the temperature knob right or left again.

When cooking has finished, it is possible to select a new function by rotating the function knob.

To stop the active function and switch off the appliance, press the function knob for a few seconds.
Removing the residual water
At the end of steaming, the water can be emptied from the reservoir.

We recommend emptying the reservoir each time you finish using the appliance to avoid scale build-up.
- Press the function knob for a few seconds. The water drain screen will appear on the display.
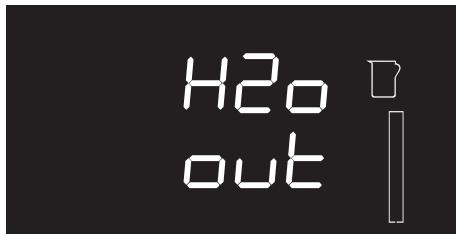
text_image
H2o out- Stand to the side of the appliance and open the door ajar for a few seconds to allow excess steam to escape.
- Fully open the door when safe to do so and cautiously remove the food from the oven.
- Rest the supplied jug (or other suitable container) on the open door.
-
Extract the tube from its seat and immerse its end in the jug or container.
-
Press the function knob to start the drainage of the water into the jug (or container).
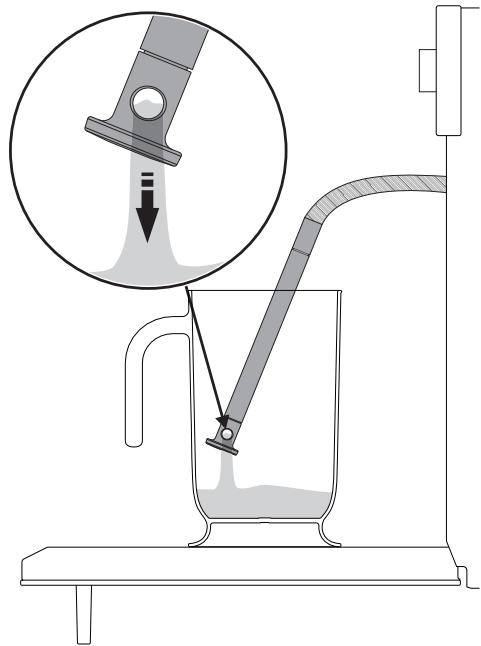
text_image
Diagram illustrating a laboratory filtration setup with labeled components and an inset showing fluid flow or particle transfer.
The water drainage function can only be activated with the door open. Always ensure that you have removed the tube from its seat and inserted it into the jug (or container) before pressing the function knob to start the emptying cycle.
When complete, the display will indicate that the residual water removal process is complete.
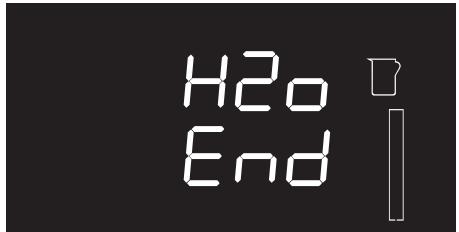
text_image
H2o End- Shake the tube in order to remove any remaining water.
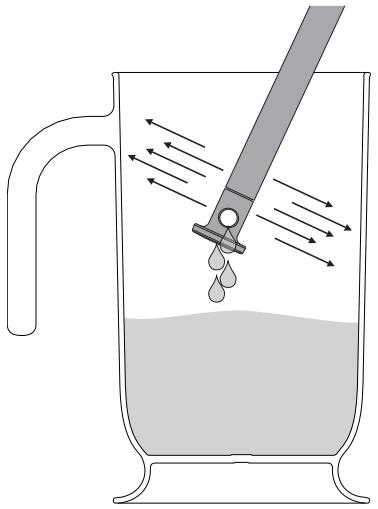
natural_image
Diagram of a beaker with liquid and a tool emitting downward arrows, no text or symbols present-
Place the tube back into its seat and remove the jug.
-
Inside the oven cavity, remove the cover from the evaporation tray and dry it with the sponge provided.
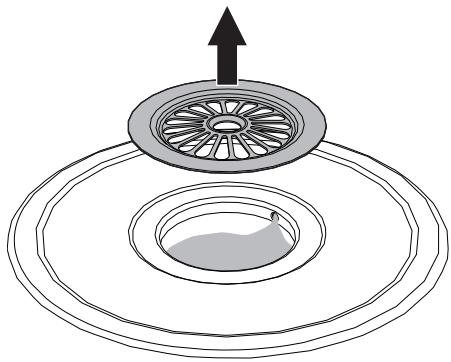
natural_image
Diagram of a circular mechanical component with an upward arrow, showing internal concentric layers and a small leaf-like feature (no text or symbols)
Note: The evaporation tray cover may be very hot: use appropriate protection.
- Using a sponge, remove any condensation from the base and walls of the oven, the door glass and drip tray and the front of the appliance.
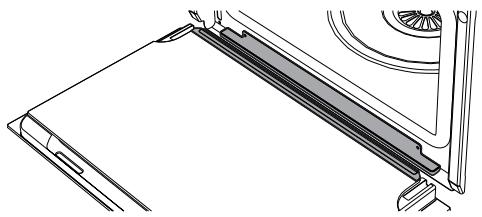
natural_image
Technical line drawing of a mechanical component or bracket assembly (no text or symbols)
Take care: the water may be very hot.
Advice for steam cooking
- Pasta and rice: upon reaching 100°C, the cooking time will be the same as with cooking on a hob. Place the pasta or rice in a metal tray and cover with around a centimetre of water. For best results when cooking rice, place a lid on the container or cover with aluminium foil. This procedure allows the rice to absorb all the water, and it can then be served directly to the table.
- Eggs: these may be boiled, scrambled or poached by using the steam function at 100°C. To obtain perfect boiled eggs, place them on the perforated tray and cook for 4-6 minutes for soft boiled eggs and 8-10 minutes for hard-boiled eggs. For scrambled eggs, place the beaten eggs in a metal tray together with milk, butter and seasoning. Cover the tray with aluminium foil. Mix every couple of minutes using a fork. For poached eggs, pour boiling water into the metal tray with a drop of vinegar and steam cook for around 4-5 minutes.
- Vegetables: steam cooking vegetables gives excellent results. They maintain their colour, flavour and nutritional properties. For dense vegetables such as potatoes, turnips and parsnips, cook at 100°C for the same length of time you would boil them on a hob. For broccoli and carrots, cook for 6 minutes if you want them to remain firm, or 10 minutes if you want them to be softer.
- Fish: due to the delicate nature of fish, steaming gives excellent results. For oily fish such as salmon or trout, cook at 100°C for around 5 minutes. For white fish such as cod or haddock, cook at 80°C for around 5 minutes. If you are cooking different foods, all fish must be cooked in the perforated tray which must be placed on the bottom shelf of the oven to avoid liquid from the fish dripping onto other food products.
- Meat: casseroles and curries are ideal for steam cooking. Prepare the casserole as for normal oven cooking. Place it in a metal tray, cover with a lid or aluminium foil, and cook for between 45 minutes and 3 hours depending on the cut of meat used.
- Thin soups: steam cooking allows flavours to develop perfectly with minimum effort, as the liquids will not boil over. For vegetable soup with the correct consistency, first steam the vegetables, then add broth and steam cook at 100°C. The steam function is also ideal for preparing large quantities for later use.
-
Soups: Thicker soups are also easy and quick to prepare. Place the soup in a metal tray, cover with a lid or aluminium foil and steam cook at 100°C for the same time you would cook it in a microwave oven. To obtain a creamy texture stir halfway through cooking.
-
Reheating: the steam cooking function will not dry foods out and gives a moister result. A previously prepared home-cooked meal, covered with aluminium foil, will take around 10-12 minutes to reheat. Ready meals will require approximately double the time indicated on the package.
- Defrosting: it is possible to use the steam function to defrost foods. Times vary, but defrosting with the steam cooking function takes around half the time necessary for covered foods left to defrost at room temperature.
- Peeling peppers and tomatoes: this is very easy to do when using the steam function. Use a knife to cut a small cross in the skin of the tomato, and steam cook for 1 minute. Peppers have tougher skin, and may require up to 4 minutes to soften it sufficiently for peeling.
- Chocolate: this can be melted using the steam cooking function. Place the chocolate in a metal tray, cover with aluminium foil and steam cook for 1 minute. Unlike other methods, chocolate is unlikely to burn in the steam oven.
- Hot towels: ideal for facial treatments, a close shave or for use after a meal, these are easy to prepare using the steam cooking function. Moisten a towel with water, roll it up and steam it for 1 minute.
Combination cooking functions

Combination cooking functions are ideal for preparing moist cakes and bread and for tender roast meats.
Combination functions list

The combination of the fan, the circulaire heating element and the steam is particularly suitable for preparing roast meats, chicken and baked goods such as bread and leavened sweets.

The operation of the fan combined with traditional cooking, with the assistance of steam, ensures uniform cooking even with complex recipes. Ideal for roast veal, roast duck and cooking whole fish.
- Press the function knob to activate the appliance.
- Turn the function knob to the right or left to set a combination function.
- Turn the temperature knob to set the combination cooking duration 📄.
-
Press the temperature knob ^ C if you wish to change the default temperature.
-
Turn the temperature knob to the right or left to select the required temperature ^ C.
- Press the temperature knob if you wish to change the steam percentage % (25% by default).
- Turn the temperature knob to the right or left to select the required percentage of steam %
- Press the function knob. A request to fill the reservoir with water is shown on the display.
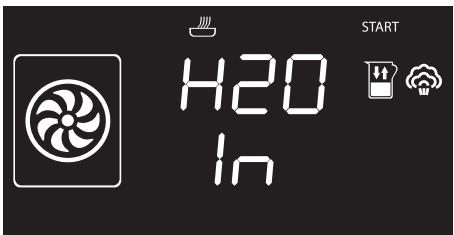
text_image
H2O In START- Fill the reservoir as described in chapter "Filling the reservoir".
- Press the function knob to start combination cooking.
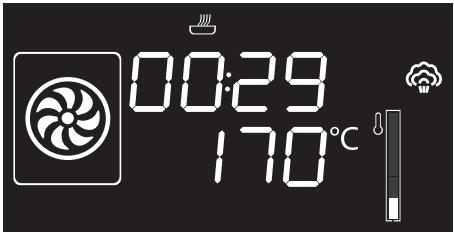
text_image
00:29 170°CPreheating stage
Combination functions are always preceded by a preheating stage, which allows the appliance to heat up to cooking temperature.
The temperature reached flashes to indicate that this stage is in progress.

When the preheating stage is complete, the temperature reached will remain lit steadily and a buzzer will sound to indicate that the food can be placed inside the oven.
This stage is performed without the use of steam.
Then press the function knob to start cooking.

The function in progress can be interrupted at any time by pressing and holding the function knob for a few seconds, or by opening the door.
| Steam percentage | Type of food |
| 25% | Breads and cakes |
| 30% | Duck |
| 40% | Beef, veal and lamb |
| 50% | Chicken and chops |
| 70% | Whole fish |
Traditional cooking functions
- Press the function knob to activate the appliance.
- Turn the function knob to the right or left to select a traditional function.
- Press the temperature knob ^ C if you wish to change the default temperature.
- Turn the temperature knob to the right or left to select the required temperature ^ C.
- Press the function knob to start traditional cooking.
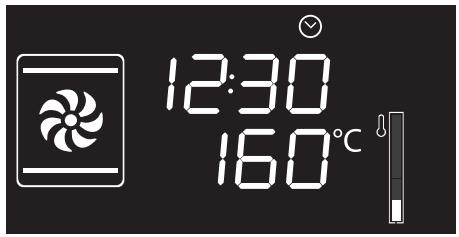
text_image
12:30 160°CPreheating stage
Traditional functions are always preceded by a preheating stage, which allows the appliance to heat up to cooking temperature.
The temperature reached flashes to indicate that this stage is in progress.

When preheating finishes, the temperature reached remains lit steadily, a buzzer sounds and cooking proceeds automatically.

With traditional cooking, food can be placed in the oven immediately or after preheating, as the user prefers.

Cooking can be interrupted at any time by pressing and holding the function knob for at least 3 seconds, or by opening the door.
Traditional functions list

Circulaire
The combination of the fan and the circulaire heating element (incorporated in the rear of the oven) allows you to cook different foods on several levels, as long as they need the same temperatures and type of cooking. Hot air circulation ensures instant and even distribution of heat. It will be possible, for instance, to cook fish, vegetables and biscuits simultaneously (on different levels) without odours and flavours mingling.

Grill
The heat coming from the grill element gives perfect grilling results above all for thin and medium thickness meat and, in combination with the rotisserie (where fitted), gives the food an even browning at the end of cooking. Ideal for grilled cheese and gratinating. This function enables large quantities of food, particularly meat, to be grilled evenly.

Eco

This function is particularly suitable for cooking on a single shelf with low energy consumption.
Ideal for cooking meat, fish and vegetables. It is not recommended for leavened foods.
To obtain maximum energy savings and reduce cooking times, it is recommended to place food in the oven without preheating.

When using the ECO function, avoid opening the door during cooking.

Cooking (and preheating) times are longer with the ECO function.
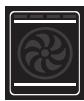
Static
As the heat comes from above and below at the same time, this system is particularly suitable for certain types of food. Traditional cooking, also known as static cooking, is suitable for cooking just one dish at a time. Ideal for pies, bread and casseroles. It is also suitable for fatty meat such as duck and goose.

Fan assisted
The operation of the fan, combined with traditional cooking, ensures consistent cooking even with complex recipes. Perfect for roasts.

Fan with grill
The air produced by the fan softens the strong heatwave generated by the grill, grilling perfectly even very thick cuts of meat such as steaks, pork chops, etc.

Circulaire + fan + lower element
Fan assisted cooking is combined with the heat coming from below and allows you to brown food slightly at the same time. Ideal for pies/flans, quiches and pizza.

Turbo
The combination of fan assisted cooking and traditional cooking allows different foods to be cooked on several levels extremely quickly and efficiently, without odours and flavours mingling. Perfect for large volumes that call for intense cooking.
To obtain a rotisserie effect, set the temperature to maximum. When the appliance reaches maximum temperature, return the temperature to normal. This procedure seals the liquids inside the meat, and reduces shrinkage.
Minute minder

This function only activates the buzzer, without stopping cooking.

The minute minder can be activated both during cooking and when the appliance is in standby.
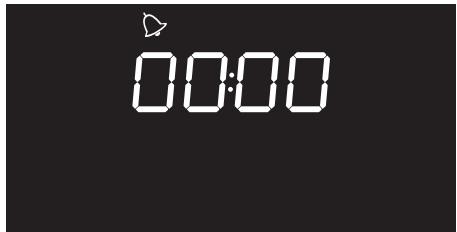
- Press the temperature knob once (twice if cooking is already in progress). The
display shows 0000 and the indicator light ➕ flashes.
text_image
00:00- Turn the temperature knob to set the duration (from 1 minute to 4 hours). After
a few seconds, the indicator light
stops flashing and the countdown starts.

- Select the required cooking function and wait for the buzzer to sound, indicating that the cooking time is over. The
indicator light 🔊 flashes.
- Turn the temperature knob to select another minute minder, or press the temperature knob to stop the buzzer.

You must set the value to zero to remove the minute minder.
Timed cooking

Timed cooking is the function which allows a cooking operation to be started and then ended after a specific length of time set by the user.

Activation of timed cooking cancels any minute minder timer which may previously have been set.
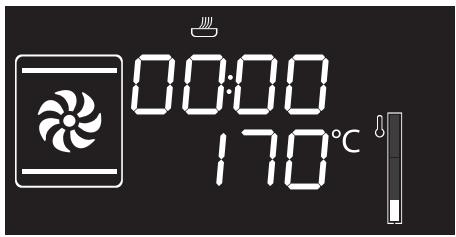
- After selecting a cooking function and temperature, press the temperature knob three times. The display shows
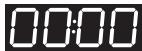
and the indicator light

flashes.
text_image
00:00 170°C- Turn the temperature knob right or left to set the cooking duration from 00:01 to 12:59. Keep the knob turned to produce a faster increase or decrease.
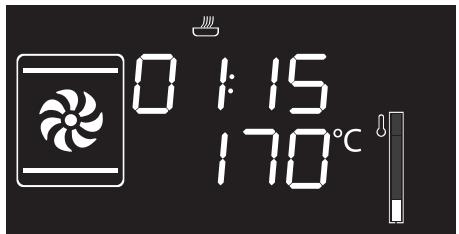
text_image
0:15 170°C- A few seconds after the required duration is set, the indicator light stops flashing and timed cooking starts.
- At the end of cooking, STOP appears on the display and a buzzer sounds that can be deactivated by pressing the temperature knob.
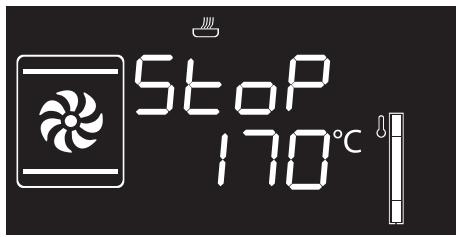
text_image
Stop 170°C
To select a further timed cooking, turn the temperature knob right or left again.

To extend the cooking time manually, press the temperature knob again. The appliance will resume its normal operation with the previously selected cooking settings.

Press and hold the function knob down to switch off the appliance.
Modifying the data set during timed cooking
During operation, it is possible to modify timed cooking duration:
- When the indicator light is steady and cooking is in progress inside the appliance, press the temperature knob twice. The indicator light starts flashing.
- Turn the temperature knob right or left to alter the pre-set cooking time.
Programmed cooking

Programmed cooking is the function which allows cooking to be stopped at an established time depending on the time set by the user, after which the oven will switch off automatically.
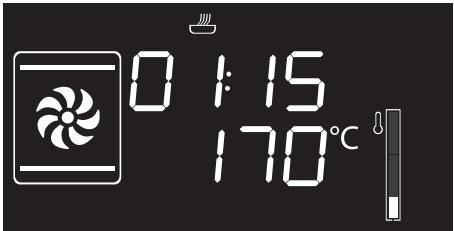
- After selecting a cooking function and temperature, press the temperature knob three times. The display shows
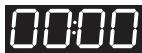
and the indicator light

flashes.
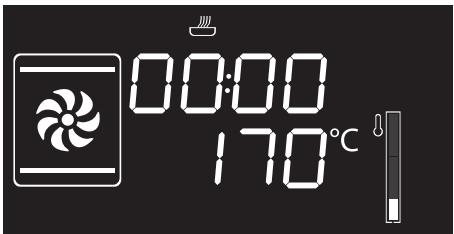
text_image
00:00 170°C- Turn the knob right or left to set the cooking duration from 00:01 to 12:59. Keep the knob turned for a fast increase or decrease.
text_image
0:15 170°C- Press the temperature knob a fourth time.
The indicator light flashes. Turn the knob right or left to set the cooking end time.
- After a few seconds the indicator lights
and stop flashing. The appliance waits for the set start time.
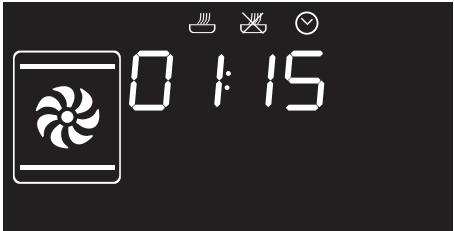
text_image
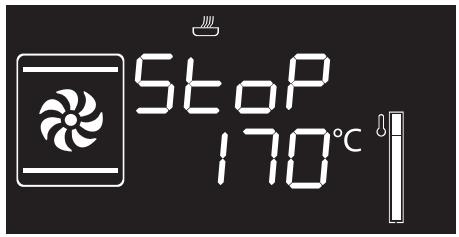
0:15- At the end of cooking, STOP appears on the display and a buzzer sounds that can be deactivated by pressing the temperature knob.
text_image
Stop 170°C
To extend the cooking time manually, press the temperature knob again. The appliance will resume its normal operation with the previously selected cooking settings.

Press and hold the function knob down to switch off the appliance.

For safety reasons, it is not possible to set the end of cooking time by itself without setting the cooking duration.
Modifying the data set during programmed cooking

After modifying the cooking duration, the end of cooking time must be re-set.
During operation, it is possible to modify programmed cooking duration:
-
When the indicator lights 🎨 and 🎨 are lit steadily and the appliance is waiting for cooking to start, press the temperature knob twice. The indicator light 🎨 starts flashing.
-
Turn the temperature knob right or left to alter the pre-set cooking time.
-
Press the temperature knob again. The indicator light switches off and the indicator light starts flashing. The display shows the cooking end time.
-
Turn the temperature knob right or left to delay the cooking end time.
-
After a few seconds the indicator lights and stop flashing and programmed cooking resumes its operation with the new settings.
3.5 Cooking advice
General advice
- It is not possible to shorten cooking times by increasing the temperature (the food could be overcooked on the outside and undercooked on the inside).
- Cooking times vary according to the thickness and quality of the food and to consumer taste.
- The first few times you use the appliance, until acquiring sufficient confidence and knowledge of the required cooking times, we suggest setting slightly longer cooking times and testing the food quickly a little before cooking ends. If it is not ready, it is anyway possible to continue to cook it using the remaining cooking time and without having to add more water to the reservoir. If, however, the food is already cooked, it will be possible to immediately stop cooking and drain the residual water from the reservoir.
Advice for cooking meat
- Cooking times vary according to the thickness and quality of the food and to consumer taste.
- Use a meat thermometer when roasting meat, or simply press on the roast with a spoon. If it is hard, it is ready; If not, it needs another few minutes cooking.
Advice for steam cooking
- Cooking times depend on the density of foods and not their quantity. For example, one piece of broccoli will take the same time as 20 florets. Increasing the quantity of a casserole also increases its density, and so the cooking time will also increase.
- Where possible, use a perforated container to allow the steam to circulate around the food from all sides.
- Steam cooking significantly reduces the migration of flavours between different foodstuffs. Nevertheless, always ensure foods like fish cooked in a perforated tray are placed at the bottom of the oven.
- If the steam is likely to change the consistency of the foods being cooked (e.g. casseroles, puddings) always cover them with aluminium foil.
Advice for cooking desserts/pastries and biscuits
- Use dark metal moulds: They help to absorb the heat better.
- The temperature and the cooking time depend on the quality and consistency of the dough.
- To check whether the dessert is cooked right through: At the end of the cooking time, insert a wooden cocktail stick into the highest point of the dessert. If the dough does not stick to the cocktail stick, the dessert is cooked.
- If the dessert collapses when it comes out of the oven, on the next occasion reduce the set temperature by about 10^ C, selecting a longer cooking time if necessary.
Advice for defrosting
- Place frozen foods without their packaging in a lidless container on the first shelf of the oven.
- Avoid overlapping the food.
- To defrost meat, use the rack placed on the second level and a tray on the first level. In this way, the liquid from the defrosting food drains away from the food.
To save energy
- Reduce any opening of the door to a minimum to avoid heat dispersal.
- Keep the inside of the appliance clean at all times.
3.6 Special functions
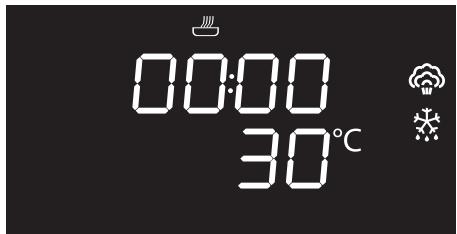
Defrost by time
text_image
00:00 30°C
It is not possible to modify the temperature of the defrost by time function.
- Place the food to be defrosted inside the oven.
- Press and turn the function knob to select the defrost by time function marked by
the indicator lights
and - Press the function knob to confirm your choice of function.
- Turn the temperature knob to set the defrost time (from 00:00 to 13:00).
- Press the function knob to start defrosting.
- At the end, the word STOP will be displayed.


IMPORTANT: always fully defrost foods before cooking.
Proving
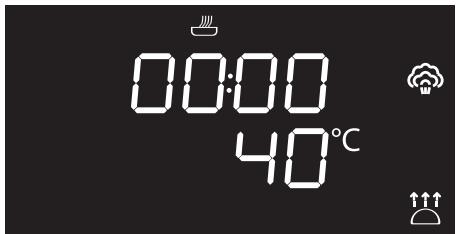
text_image
00:00 40°C
When using the proving function the temperature cannot be altered.
- Place the dough to be proved inside the oven.
- Press and turn the function knob to select the proving function marked by the
indicator lights
and - Press the function knob to confirm your choice of function.
- Turn the temperature knob to set the proving time (from 00:00 to 13:00).
- Press the function knob to start the proving function.
- At the end, the word STOP will be displayed.


Reheat
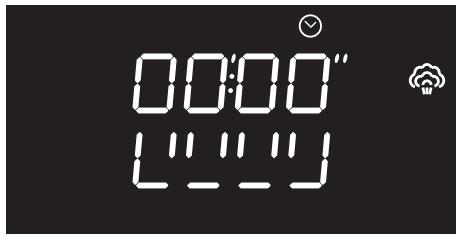
text_image
00:00" L" L" L"
This function allows you to heat previously cooked food which has been kept in the refrigerator.
- Place the food to be heated inside the oven.
- Press and turn the function knob to select the heating function.
- Turn the temperature knob to modify the heating duration.
- Press the function knob to confirm the parameters and start heating.
Sabbath
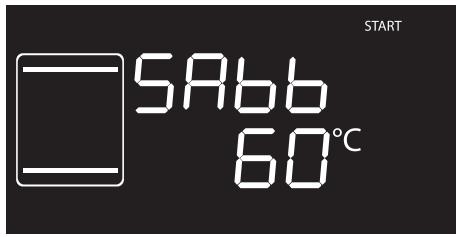
text_image
START 5A66 60°C
This function allows food to be cooked in accordance with the provisions of the Jewish religion day of rest.

This function results in the appliance operating in a particular way:
- Cooking can proceed indefinitely, it is not possible to set any time.
• No preheating will be performed. - The cooking temperature which can be selected varies between 60-100 °C.
- The oven light remains turned off, any action such as opening the door or manually activating the oven does not turn the lamp on.
- The internal fan remains turned off.
- Knob illumination and audible prompts remain disabled.

After activating the Sabbath function the settings cannot be altered.
Any action on the knobs will produce no effect; only the function knob remains active to allow the appliance to be turned off.
- Press the function knob to select the Sabbath function.
- Press the temperature knob.
- Turn the temperature knob to modify the heating duration.
- Press the function knob to confirm the parameters and start the Sabbath function.
- When finished, press and hold the function knob down for at least 3 seconds to turn off the appliance.
Automatic programs
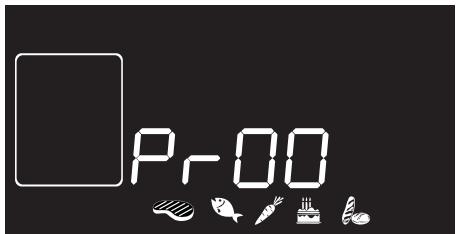
text_image
Pr00
The automatic cooking programs are divided up according to the type of dish to be cooked.
- Place the food inside the oven.
- Press the function knob to select the automatic program, marked by
and the illuminated food
symbols - Turn the function knob to select the required program (see Manual water drainage).
- Press the function knob to start cooking.


Automatic programs table

MEAT (01 - 04)
| Pr | Subcategory | Function | Steam % | Weight (g) | Level | Temp. (°C) | Time (minutes) |
| 01 | Roast pork |  | 50 | 1000 | 2 | 180 | 95 |
| 02 | Roast veal |  | 40 | 1000 | 2 | 170 | 70 |
| 03 | Roast chicken |  | 50 | 1000 | 2 | 200 | 40 |
| 04 | Roast duck |  | 30 | 1000 | 2 | 150 | 105 |

FISH (05 - 08)
| Pr | Subcategory | Function | Steam % | Weight (g) | Level | Temp. (°C) | Time (minutes) |
| 05 | Cod fillet (piece of approx. 150 g) |  | 100 | 200 | 2+1 | 100 | 6 |
| 06 | Salmon fillet (piece of approx. 150 g) |  | 100 | 200 | 2+1 | 100 | 5 |
| 07 | Prawns |  | 100 | 500 | 2+1 | 90 | 5 |
| 08 | Whole fish |  | 70 | 500 | 2+1 | 200 | 25 |

VEGETABLES (09 - 12)
| Pr | Subcategory | Function | Steam % | Weight (g) | Level | Temp. (°C) | Time (minutes) |
| 09 | Carrots (rounds of around 3 cm) |  | 100 | 500 | 2+1 | 100 | 6 |
| 10 | Potatoes (cut into 4-6 pieces) (diameter 4-5 cm) |  | 100 | 500 | 2+1 | 100 | 25 |
| 11 | Cauliflower (in pieces) |  | 100 | 500 | 2+1 | 100 | 12 |
| 12 | Asparagus |  | 100 | 500 | 2+1 | 100 | 6 |

DESSERTS/PASTRIES (13 - 16)
| Pr | Subcategory | Function | Steam % | Weight (g) | Level | Temp. (°C) | Time (minutes) |
| 13 | Biscuits/muffins |  | 0 | 600 | 1 | 160 | 18 |
| 14 | Tart |  | 0 | 800 | 1 | 170 | 40 |
| 15 | Pudding(300 g in moulds)(400 g in a pudding basin) |  | 100 | 200 | 1 | 100 | 50 |
| 16 | Sponge cakeParadise cake |  + +  | 25 | 1000 | 1 | 165 | 35 |

PASTA (17 - 20)
| Pr | Subcategory | Function | Steam % | Weight (g) | Level | Temp. (°C) | Time (minutes) | |
| 17 | White leavened bread |  | + | 25 | 400 | 2 | 180 | 50 |
| 18 | Pasta bake/Lasagne |  | 0 | 2000 | 1 | 220 | 40 | |
| 19 | Quiche | | 0 | 1000 | 1 | 200 | 40 | |
| 20 | Basmati rice |  | 100 | 200 | 2+1 | 100 | 12 | |
Manual water drainage
text_image
H2o out START
This function allows you to empty the reservoir manually.
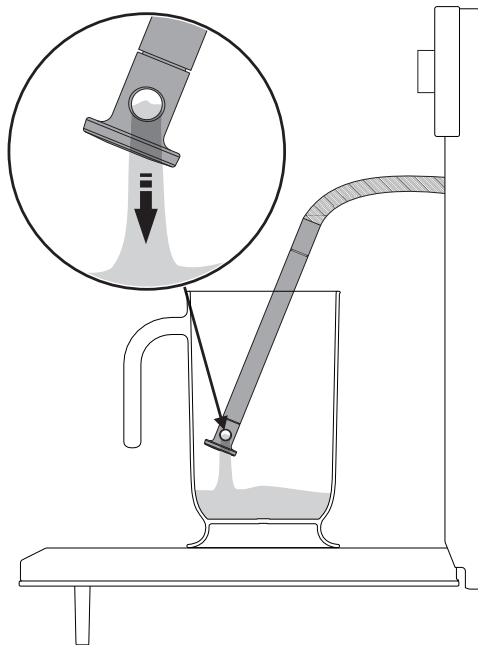
- Rest the supplied jug (or other suitable container) on the open door.
- Extract the tube from its seat and place the end in the jug (or the container).
- Press the function knob to activate the residual water drainage into the jug (or container).
text_image
Diagram illustrating a laboratory filtration setup with labeled components and an inset showing fluid flow or particle transfer.When complete, the display will indicate that the residual water removal process is complete.
text_image
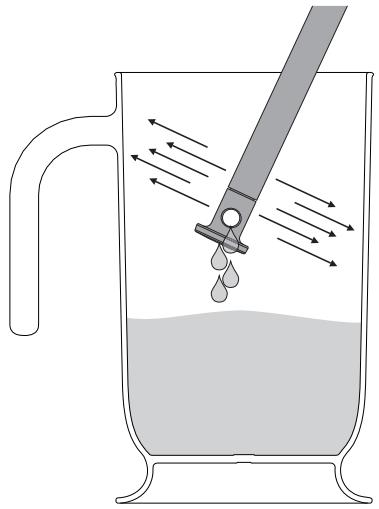
H2o End- Shake the tube in order to remove any remaining water.
natural_image
Diagram of a droplet being poured into a glass with a pipette, showing fluid flow direction (no text or labels)- Return the tube to its original position, remove the jug/container of solution and close the door.
- Press the function knob to exit the function.

To stop the active function and switch off the appliance, press the function knob for a few seconds.
Manual water fill
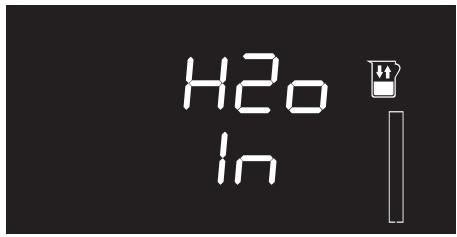
text_image
H2O In
This function allows you to manually fill the reservoir, if you want to perform multiple steam cooking cycles.
- Fill the jug supplied (or container) with a sufficient amount of water for the cooking that you wish to perform.
- Open the oven door.
- Rest the jug or container on the open door.

Note: the jug or container with the water must have a gross weight lower than 5 kg.
- Extract the tube from its seat and insert its end in the jug or container until it reaches all the way to the bottom.
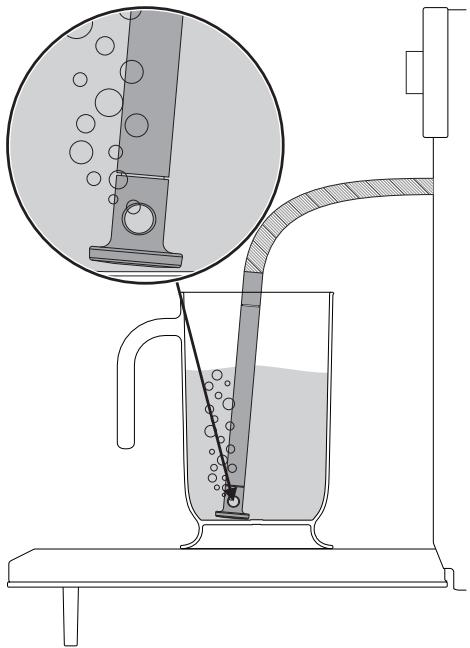
text_image
Diagram illustrating a laboratory filtration setup with labeled components and liquid flow, including a magnified inset showing liquid behavior.- Press the function knob to start drawing water into the appliance's reservoir.

The appliance will take in water until the reservoir is completely full.

To stop the active function and switch off the appliance, press the function knob for a few seconds.
When complete, the display will indicate that the water fill process is complete.
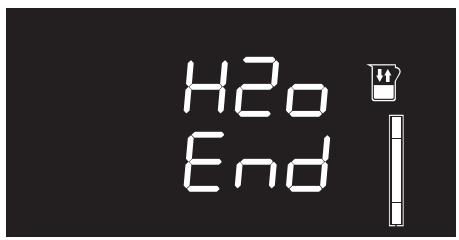
text_image
H2o End- Shake the tube in order to remove any remaining water.
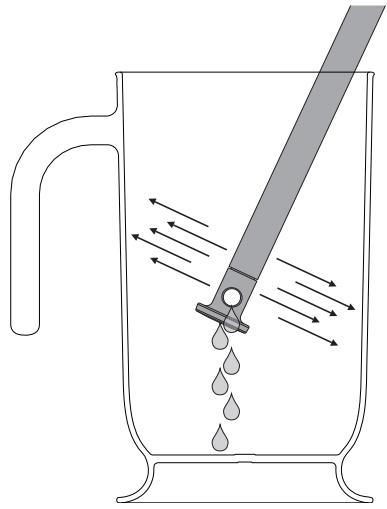
natural_image
Diagram of a glass pitcher with liquid droplets being stirred by a tool, showing fluid flow direction (no text or labels)- Return the tube to its original position, remove the jug/container of solution and close the door.

When the door is closed, an automatic system will automatically draw in any residual water in the tube to avoid drips. A bubbling noise may be heard; this is completely normal.
- Press the function knob to exit the function.
For the following special functions:
Vapor Clean

Clean reservoir

Manual descaling

see the "Cleaning and maintenance" section in this manual.
3.7 Secondary menu
The appliance has a drop-down secondary menu allowing the user to:
- Activate or deactivate the Child lock.
- Activate or deactivate Showroom mode (which disables all the heating elements so that only the control panel works).
- Activate or deactivate Eco-light mode.
- Set the water hardness value.
With the appliance in Stand-by status
- Activate the internal light by turning the temperature knob quickly.
- Press and hold the temperature knob down for at least 5 seconds.
- Turn the temperature knob to the left or right to change the status of the setting (ON/OFF) or to the right to increase the value to set or to the left to decrease it.
- Press the temperature knob to move to the next mode.
Child lock mode
This mode allows the appliance to lock the controls automatically after one minute of normal operation without any intervention from the user.

text_image
on bloc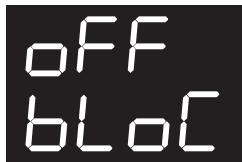
text_image
OFF bLOCDuring normal operation it is indicated by the indicator light 🔒 coming on.
To release the lock temporarily during cooking, hold the temperature knob down for 5 seconds. One minute after the last setting the lock will become active again.

Touching or varying the position of the temperature and function knobs, the display will show
bloC for two seconds.

It is still possible to turn the appliance off instantaneously by pressing and holding the function knob down for 3 seconds when in child lock mode.
Showroom mode (for exhibitors only)
This mode allows the appliance to deactivate all heating elements, while keeping the control panel active.

text_image
OFF SHO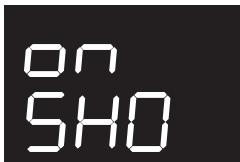
text_image
ON 5H0To use the appliance normally, set this mode to OFF.

If the mode is active, the indicator light Ⓐ lights up on the display.
Low power (Eco-logic) mode
This mode allows the appliance to limit the power used.
Suitable for simultaneous use with further home appliances.
HI: normal power.
LO: low power.

text_image
HI Po
text_image
Lo Po
Activating eco-logic mode means that preheating and cooking times may be extended.

If the mode is active, the indicator light Ⓔ lights up on the display.
Keep Warm mode
This mode allows the appliance to keep cooked food warm (at low temperatures) for around an hour after cooking finishes with a cooking cycle for which a duration has been set (if this is not manually interrupted).
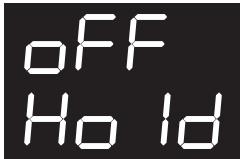
text_image
OFF Ho Id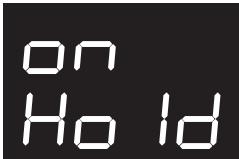
text_image
on HoldEco-light mode
For greater energy savings, the light is automatically deactivated one minute from the start of cooking.
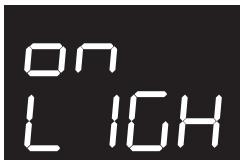
text_image
ON LIGH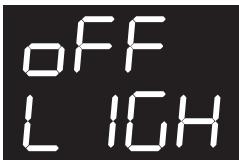
text_image
OFF LIGHTTo stop the appliance from automatically deactivating the light after one minute, set this mode to OFF.

The manual off/on control is always available with both settings by turning the temperature knob to the right.
Water hardness setting mode

The appliance is factory set for water of medium hardness.
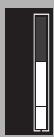
Z
This mode allows you to set the water hardness value in order to optimise the descaling process.

text_image
oDH oDFIt is possible to modify the water hardness setting from the minimum value (one bar)...

... Up to the maximum value (five bars).


Request information on the hardness of your water from your local water board.

If your mains water supply is too hard, we recommend using a water softener.
4 Cleaning and maintenance
4.1 Instructions

Improper use Risk of damage to surfaces
- Do not use steam jets to clean the appliance.
- Do not use cleaning products containing chlorine, ammonia or bleach on parts made of steel or that have metallic surface finishes (e.g. anodizing, nickel- or chromium-plating).
- Do not use abrasive or corrosive detergents (e.g. scouring powders, stain removers and metallic sponges) on glass parts.
- Do not use rough or abrasive materials or sharp metal scrapers.

Improper use Risk of damage to the appliance
- Do not remove the seal on the face of the oven.
4.2 Cleaning the surfaces
To keep the surfaces in good condition, they should be cleaned regularly after use. Let them cool first.
Ordinary daily cleaning
Always and only use specific products that do not contain abrasives or chlorine-based acids.
Pour the product onto a damp cloth and wipe the surface, rinse thoroughly and dry with a soft cloth or a microfibre cloth.
Food stains or residues
Do not use steel sponges and sharp scrapers as they will damage the surface.
Use normal, non-abrasive products and a wooden or plastic tool, if necessary. Rinse thoroughly and dry with a soft cloth or a microfibre cloth.
Do not allow residues of sugary foods (such as jam) to set inside the oven. If left to set for too long, they might damage the enamel lining of the oven.
4.3 Cleaning the door
Removing the door
For easier cleaning it is recommended to remove the door and place it on a tea towel.
To remove the door proceed as follows:
- Open the door completely and insert two pins into the holes on the hinges indicated in the figure.
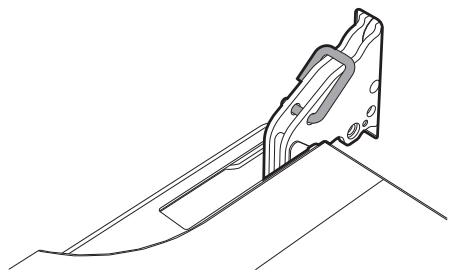
natural_image
Technical line drawing of a mechanical clamp or bracket assembly (no text or symbols)- Grasp the door on both sides with both hands, lift it forming an angle of around 30^ and remove it.
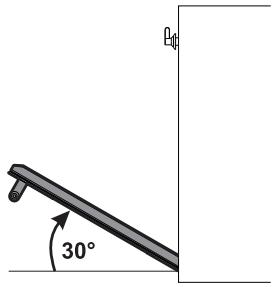
text_image
30°- To reassemble the door, put the hinges in the relevant slots in the oven, making sure that grooved sections A are resting completely in the slots. Lower the door and once it is in place remove the pins from the holes in the hinges.
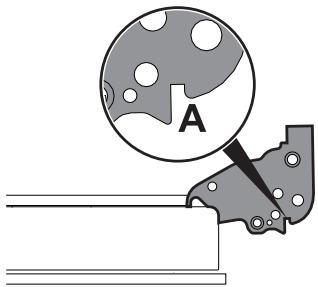
text_image
ACleaning the door glazing
The glass in the door should always be kept thoroughly clean. Use absorbent kitchen roll. In case of stubborn dirt, wash with a damp sponge and an ordinary detergent.

We recommend the use of cleaning products distributed by the manufacturer.
Cleaning and maintenance
Removing the internal glass panes
For easier cleaning the internal glass panes of the door can be removed.
- Open the door.
- Remove the internal glass pane by pulling the rear part gently upwards, following the movement indicated by the arrows (1).
- Then, pull the front part upwards (2). This way, the 4 pins attached to the glass detach from their housings in the oven door.
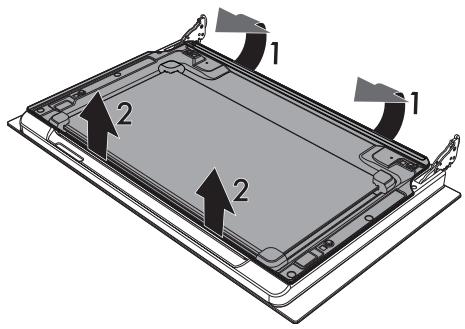
text_image
Diagram of a tablet device showing two labeled components with arrows indicating assembly or movement.- Raise the intermediate glass unit upwards.

natural_image
Diagram of a device's internal structure showing a tray, casing, and mounting bracket (no text or symbols)- Clean the external glass pane and the panes removed previously. Use absorbent kitchen roll. In case of stubborn dirt, wash with a damp sponge and neutral detergent.
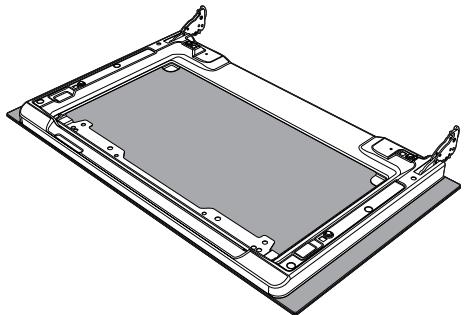
natural_image
Technical line drawing of a rectangular electronic component with mounting brackets and internal structure (no text or symbols)- Reposition the intermediate glass unit.
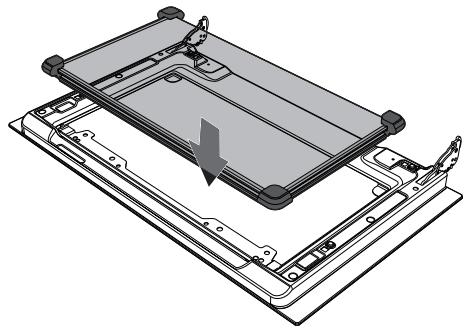
natural_image
Technical illustration of a device's internal structure showing a tray and mounting base (no text or symbols)- The rubber strips A, B and C of the intermediate glass unit must face the outer glass.
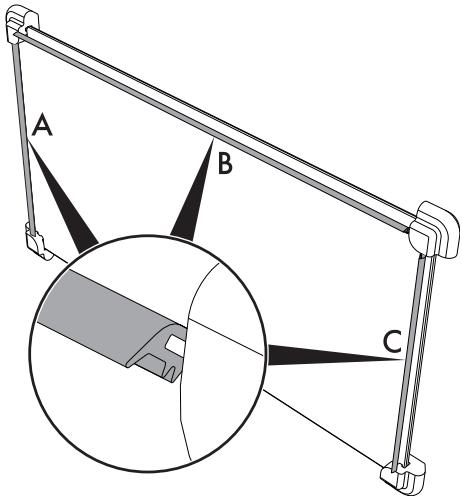
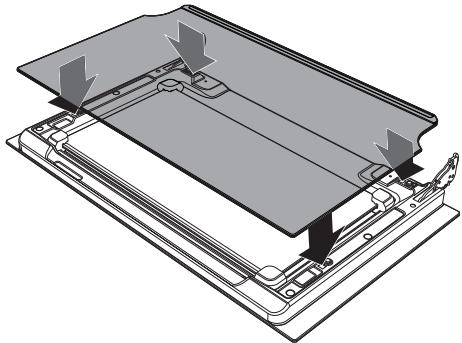
text_image
A B C- Centre and insert the 4 pins into their housings in the oven door by applying slight pressure.
natural_image
Technical diagram of a device with internal components and directional arrows indicating assembly (no text or symbols)4.4 Cleaning the inside of the oven
For the best oven upkeep, clean it regularly after having allowed it to cool.
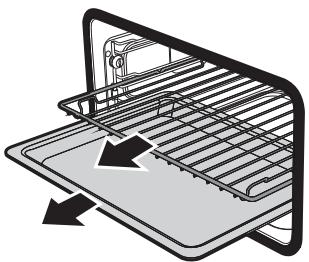
Take out all removable parts.
Clean the oven racks with warm water and non-abrasive detergents. Carefully rinse and dry damp parts.
natural_image
Diagram of a kitchen appliance with a rack and drawer, showing internal components (no text or symbols)
The oven should be operated at the maximum temperature for about 15-20 minutes after the use of specific products, to burn off the residues left inside the oven.

For easier cleaning, remove the door.
Removing rack/tray support frames
Removing the guide frames enables the sides to be cleaned more easily.
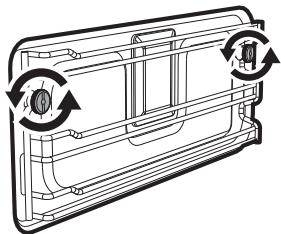
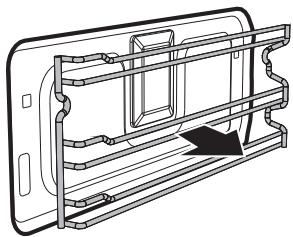
To remove the guide frames:
- Unscrew the frame fastening pins:
natural_image
Diagram of a car air vent with airflow arrows indicating direction (no text or symbols)- Pull the frame towards the inside of the oven to free it from the fastening pins.
natural_image
Technical line drawing of a mechanical component with internal channels and a directional arrow (no text or symbols)- When cleaning is complete, repeat the above procedures to put the guide frames back in.
Vapor Clean

Vapor Clean is an assisted cleaning procedure which facilitates the removal of dirt.
Thanks to this process, it is possible to clean the inside of the oven very easily. The dirt residues are softened by the heat and water vapour for easier removal afterwards.

Improper use Risk of damage to surfaces
- Remove any food residues or large spills from previous cooking operations from the inside of the oven.
- Carry out assisted oven cleaning operations only when the oven is cold.
Preliminary operations
Before starting the Vapor Clean cycle:
- Completely remove all accessories from inside the oven.
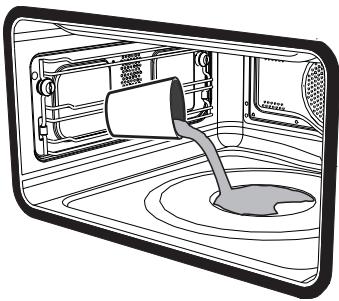
- Pour approx. 40 cc of water onto the floor of the oven. Make sure it does not overflow out of the cavity.
natural_image
Diagram of a microwave oven with a funnel pouring liquid into the interior (no text or symbols)Cleaning and maintenance
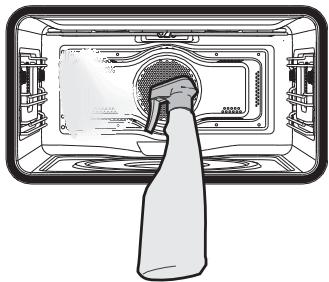
- Spray a water and washing up liquid solution inside the oven using a spray nozzle. Direct the spray against the side walls, upwards, downwards and towards the deflector.
natural_image
Illustration of a microwave oven with a hand inserting a bag into the chamber (no text or symbols)- Close the door.

We recommend spraying approx. 20 times at the most.
Vapor Clean cycle setting
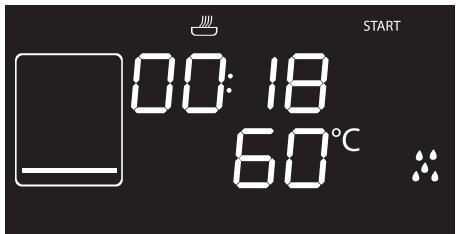
text_image
START 00:18 60°C
If the internal temperature is greater than that required for the Vapor clean cycle, the cycle will be stopped immediately and the message STOP will appear on the display. Let the appliance cool down before activating the assisted cleaning cycle.
- Press the function knob to activate the appliance.
- Turn the function knob to the right or left to select the Vapor Clean function
- The duration and temperature of the cleaning cycle will appear on the display.
- Press the temperature knob to start the Vapor Clean cleaning cycle.
- A buzzer will indicate the end of the Vapor Clean cycle.

The temperature and time parameters cannot be modified by the user.
End of the Vapor Clean cycle
- Open the door and wipe away the less stubborn dirt with a microfibre cloth.
- Use a non-scratch sponge with brass filaments on hard to remove deposits.
- In case of grease residues use specific oven cleaning products.
- Remove the water left inside the oven.
- For improved hygiene and to avoid food being affected by any unpleasant odours, we recommend that the oven is dried using a fan assisted function at 160^ C for approximately 10 minutes.

We recommend wearing rubber gloves for these operations.

We recommend removing the door in order to make the manual cleaning of the parts that are difficult to reach easier.
CLEAN: Cleaning the reservoir

To guarantee optimum performance of your appliance, we recommend cleaning the reservoir every 2-3 months.
- Press and turn the function knob to select the CLEAN function.
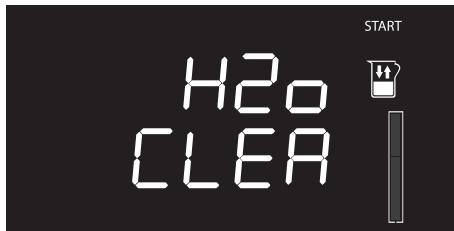
text_image
H2O CLEA START- Press the function knob to confirm your choice of function. The display will show a request to fill the reservoir.
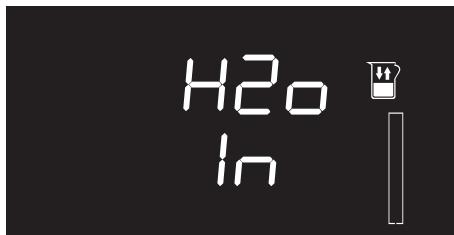
text_image
H2O In- Fill the jug (or container) provided with a solution of water and citric acid.

We recommend mixing 30 g of citric acid with 1.5 litres of water.
Cleaning and maintenance
- Open the oven door.
- Rest the jug or container on the open door.

Note: the jug or container with the mixture must have a gross weight lower than 5 kg.
- Extract the tube from its seat and immerse its end in the jug (or container) until it reaches all the way to the bottom.
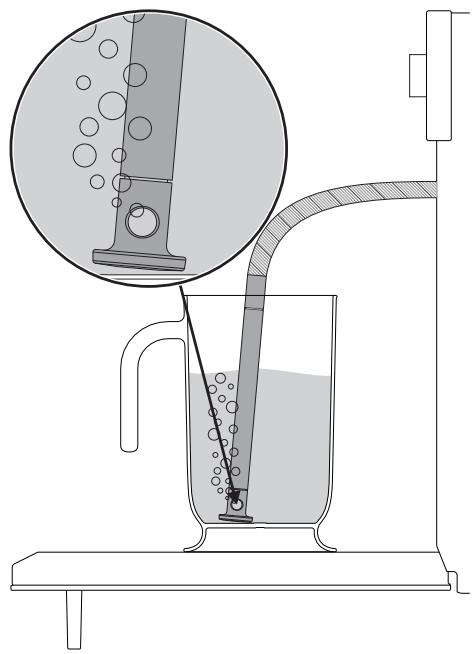
text_image
Diagram illustrating a laboratory filtration setup with labeled components and liquid flow, including a magnified inset showing liquid droplets.- Press the function knob to start drawing the solution into the appliance's reservoir.

The appliance will automatically draw sufficient solution to fill the reservoir.
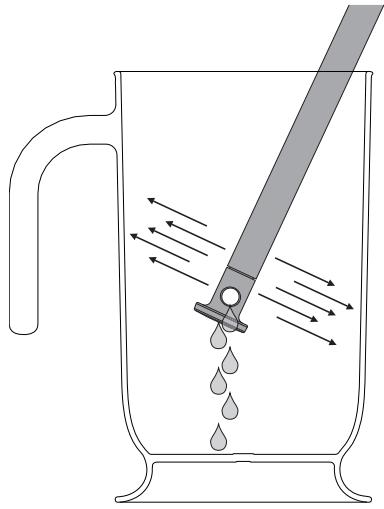
- When the appliance has finished taking in water, shake the tube to remove any residual water.
natural_image
Diagram of a glass pitcher with water droplets being poured into it, showing fluid flow direction (no text or symbols)- Return the tube to its original position, remove the jug/container of solution and close the door.

When the door is closed, an automatic system will automatically draw in any residual solution in the tube to avoid drips.
- Press the function knob to start the reservoir cleaning process. The display will show the time left until the end of the cleaning cycle.
Cleaning and maintenance
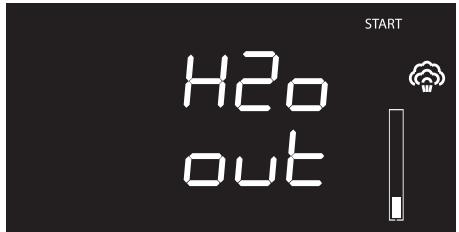
When the cleaning process is complete, a buzzer will sound and the display will show the solution draining screen.
text_image
H2o out START- Rest the supplied jug (or other suitable container) on the open door.
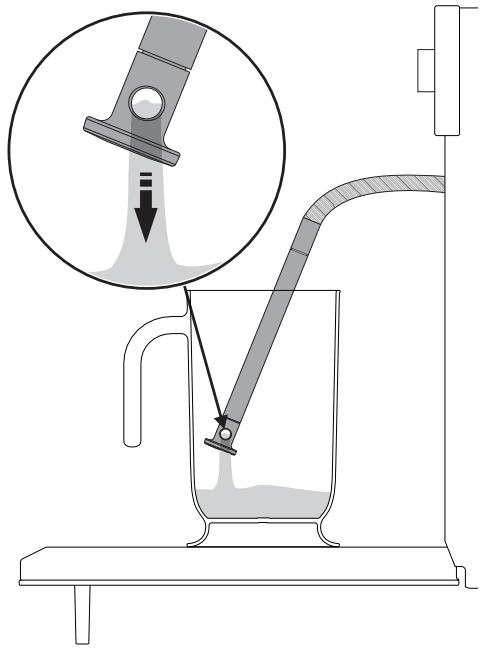
- Extract the tube from its seat and place the end in the jug (or the container).
- Press the function knob to start the drainage of the solution into the jug (or container).
text_image
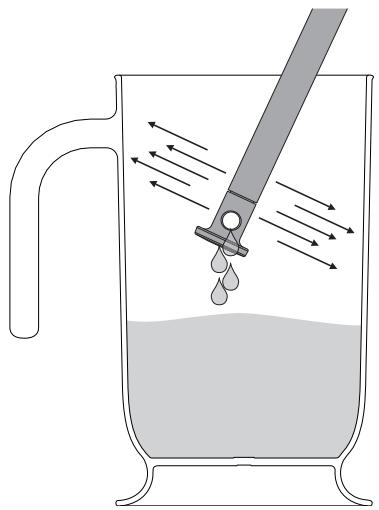
Diagram illustrating a laboratory filtration setup with labeled components and an inset showing fluid flow or particle transfer.- When this has finished, shake the tube to remove any solution residues.
natural_image
Diagram of a droplet being poured into a beaker with a pipette, showing fluid flow direction (no text or labels)- Return the tube to its original position, remove the jug/container of solution and close the door.

After cleaning the reservoir with the water and citric acid solution, perform at least one more CLEAN cycle with clean water in order to rinse any impurities from the reservoir.
Descaling

The presence of scale due to lack of descaling can compromise correct operation of the appliance in the long term.
The following message will periodically appear on the appliance display, notifying you that you need to descale the evaporationtrayonthebaseoftheoven.
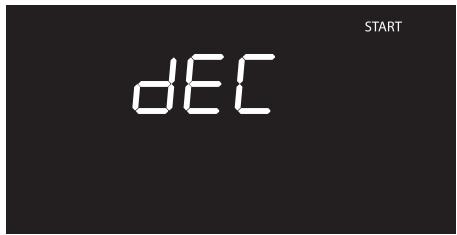
text_image
dEC START- Open the door completely.
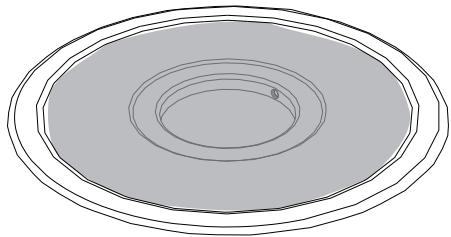
- Pour approximately 250 ml of white vinegar into the evaporation tray, thus also covering part of the base of the oven.
natural_image
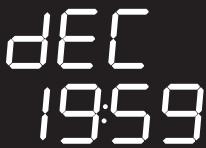
Simple line drawing of concentric ovals with a small dot on the innermost ring (no text or symbols)- Press the function knob to start the descaling function.
text_image
DEC 19:59- At the end of the descaling process, remove the vinegar from the base of the oven with the supplied sponge.
- Use a dish sponge on softened encrustations in order to remove the largest possible quantity of scale.
- When you have finished cleaning, close the door again.

We recommend performing descaling every time this is indicated on the display in order to keep the boiler in perfect operating condition.

If you wish to skip the descaling process, hold down the function knob for a few seconds.

Note: The descaling process can be skipped three consecutive times. After this, the appliance will not allow you to run any other function until the descaling process is performed.
Manual descaling
When you wish to perform descaling in advance, you can run the function manually:
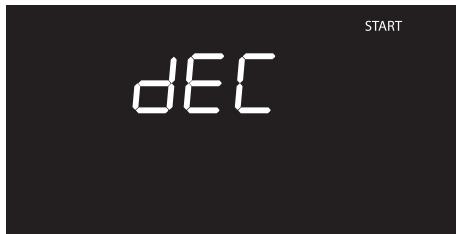
- Press and turn the function knob to select
the descaling dEC function.
text_image
dEC START- Proceed with the procedure described in the "Removing rack/tray support frames" chapter, beginning at point 1.
What to do if...
The display is completely off:
- Check the mains power supply.
- Check that any circuit breakers upline of the appliance supply line are in the "ON" position.
The appliance does not heat up:
- Check whether it has been set in "showroom" mode (for further details see "Secondary menu").
The controls do not respond:
- Check whether "child lock" mode has been set (for further details see "Secondary menu").

If the problem has not been resolved or in the case of other types of fault, contact your local technical support centre.

If other ERRx error messages are indicated:
Note down the error message, function and set temperature and contact your local technical support centre.
4.5 Extraordinary maintenance

Live parts
Danger of electrocution
- Unplug the appliance.
Replacing the internal light bulb
- Completely remove all accessories from inside the oven.
- Remove the rack/tray support frames.
- Remove the bulb cover using a tool (e.g. a screwdriver).

Pay attention not to scratch the oven cavity enamel.
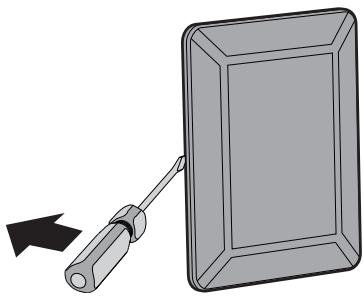
natural_image
Illustration of a screwdriver inserted into a rectangular plate with a black arrow indicating direction (no text or symbols)- Slide out and remove the light bulb.
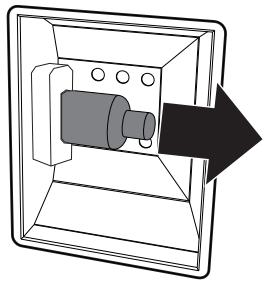
natural_image
Diagram of a mechanical device inside a transparent housing, showing internal components and an arrow indicating direction (no text or symbols)
Do not touch the halogen light bulb directly with your fingers, but wrap it in insulating material.
- Replace the light bulb with one of the same type (40W).
- Refit the cover. Ensure the moulded part of the glass (A) is facing the door.
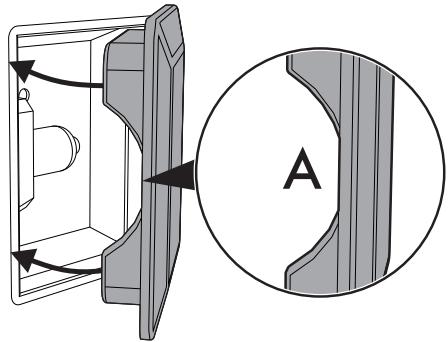
natural_image
Technical diagram showing a mechanical component with directional arrows and a circular inset labeled 'A' (no text or symbols on the diagram itself)- Press the cover completely down so that it attaches perfectly to the bulb support.
5 Installation
5.1 Electrical connection

Power voltage Danger of electrocution
- Have the electrical connection performed by authorised technical personnel.
- The appliance must be connected to earth in compliance with electrical system safety standards.
- Disconnect the mains power supply.
General information
Check the grid characteristics against the data indicated on the plate.
The identification plate bearing the technical data, serial number and brand name is visibly positioned on the appliance.
Do not remove this plate for any reason.
The appliance operates at 220-240 V\~.
Use a three-core cable ( 3 × 1.5 mm^2 internal conductors).
Make the earth connection using a wire that is 20 mm longer than the other wires.
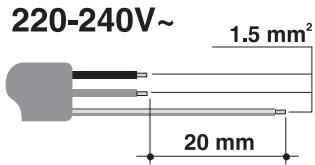
text_image
220-240V~ 1.5 mm² 20 mmFixed connection
Fit the power line with an omnipolar circuit breaker in compliance with installation regulations.
The omnipolar circuit breaker should be located near the appliance and in an easily reachable position, according to applicable electrical codes.
Connection with plug and socket
Make sure that the plug and socket are of the same type.
Avoid using adapters and shunts as these could cause overheating and a risk of burns.
5.2 Cable replacement

Power voltage Danger of electrocution
- Disconnect the mains power supply.
- Unscrew the rear casing screws and remove the casing to access the terminal board.
- Replace the cable.
- Make sure that the cables (for the oven or any hob) follow the best route in order to avoid any contact with the appliance.
5.3 Positioning

Heavy appliance Crushing hazard
- Position the appliance into the cabinet cut-out with the help of a second person.

Pressure on the open door Risk of damage to the appliance
- Never use the oven door to lever the appliance into place when fitting.
- Avoid exerting too much pressure on the oven door when open.

Heat production during appliance operation Risk of fire
- Check that the carcase material is heat resistant.
- Check that the carcase has the required openings.
- Do not install the appliance in a recess which can be closed with a door, or in a cupboard.
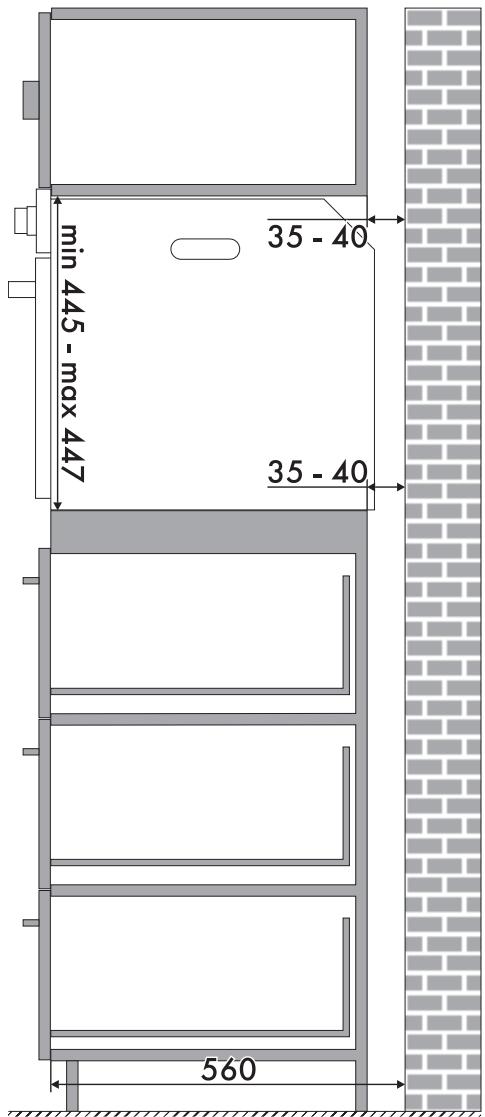
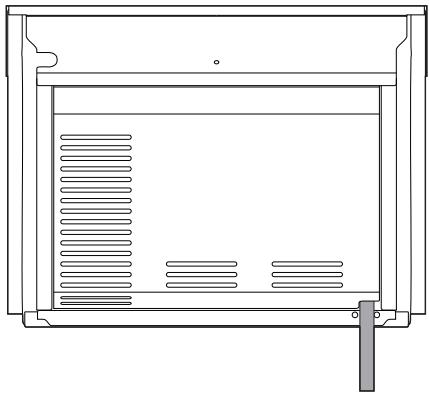
Position of the power cable
natural_image
Technical line drawing of a rectangular enclosure with internal ventilation grilles and a support bracket (no text or symbols)(rear view)
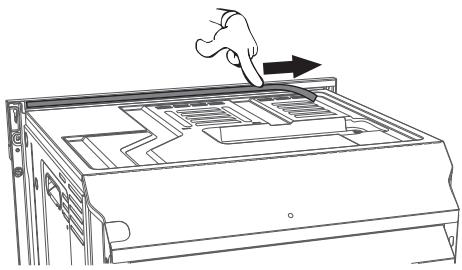
Front panel seal
Glue the supplied seal to the rear part of the front panel to avoid water or other liquids from leaking in.
natural_image
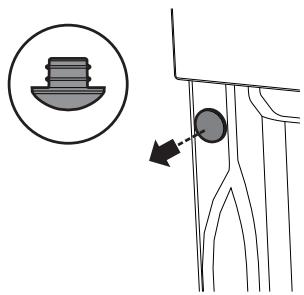
Line drawing of a hand pressing down on a computer chassis with a right-hand rule (no text or symbols)Fastening bushings
Remove the bushing covers on the front of the oven.
text_image
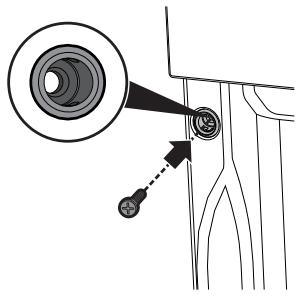
Diagram showing a mechanical component with a circular feature and an arrow indicating direction, alongside a magnified inset of a small component.Mount the appliance into the recess.
Secure the appliance to the carcase using the screws.
text_image
Diagram showing a camera lens system with labeled components and directional arrow indicating motion or positioning.Cover the bushings with the previously removed covers.
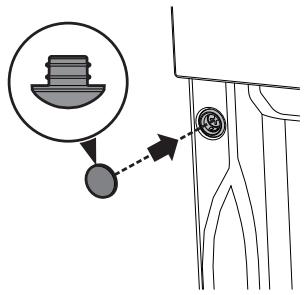
text_image
Diagram showing a mechanical component with a magnified inset of a component and directional arrow indicating motion or force.Appliance overall dimensions (mm)
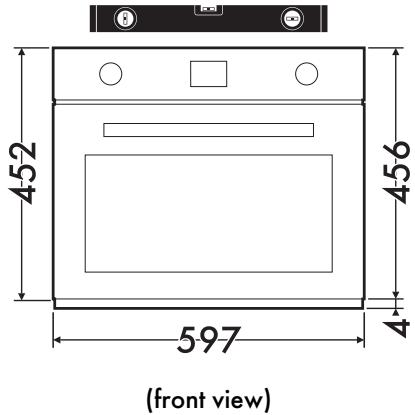
text_image
452 456 597 (front view)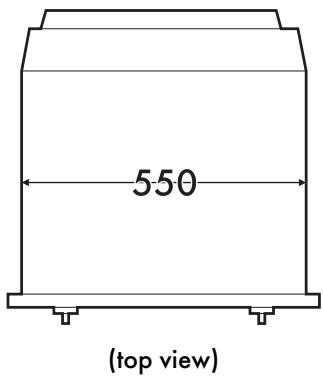
text_image
550 (top view)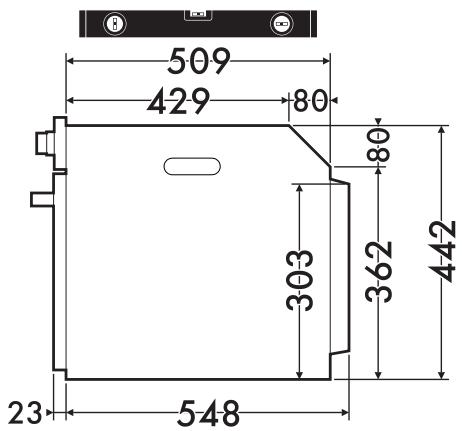
text_image
509 429 80 303 362 442 23 548(side view)
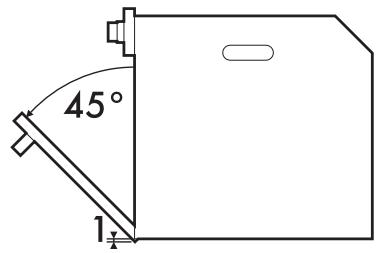
text_image
45° 1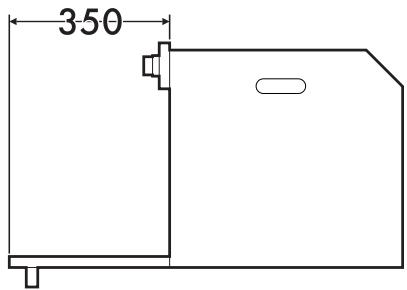
text_image
350Mounting under worktops (mm)
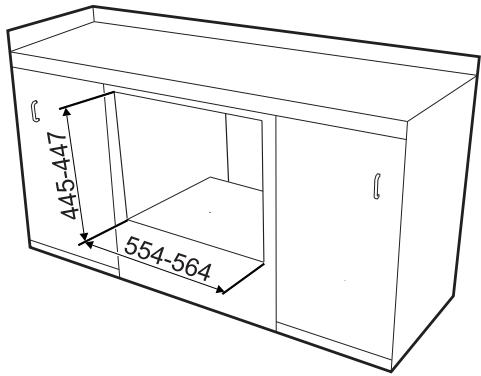
text_image
445-447 554-564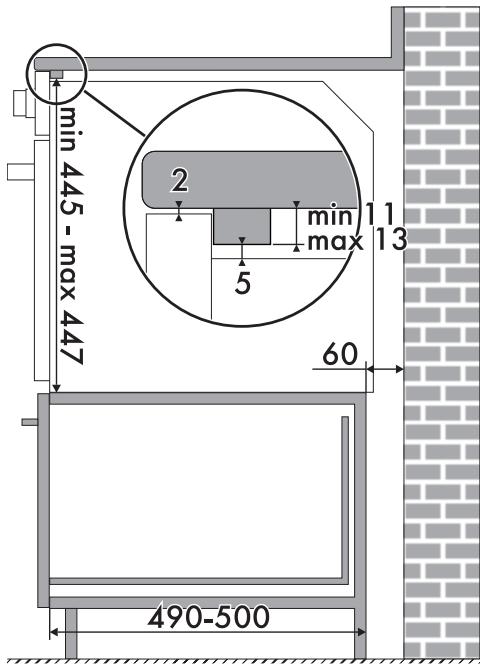
text_image
min 445 - max 447 2 min 11 max 13 5 60 490-500
Make sure that the carcase rear/bottom section has an opening of approx. 60 mm.
Mounting into a column (mm)
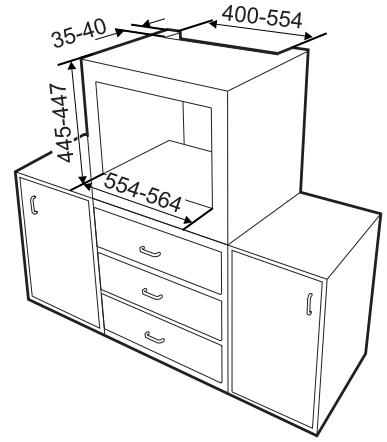
text_image
35-40 445-447 554-564 400-554
Make sure that the carcase top/rear section has an opening approx. 35-40 mm deep.