
HG05427 - Waffle Maker SILVERCREST - Free user manual and instructions
Find the device manual for free HG05427 SILVERCREST in PDF.


| Product Type | Digital Kitchen Scale |
| Brand | SilverCrest |
| Model | HG05427 |
| Dimensions (L x W x H) | 20 cm x 15 cm x 1.5 cm |
| Weight | 210 g (including battery) |
| Power Supply | 1 x CR2032 lithium battery (included) |
| Maximum Capacity | 5 kg / 11 lb |
| Graduation | 1 g / 0.1 oz |
| Units | g, kg, oz, lb:oz, ml (for water), fl.oz (for water) |
| Functions | Tare, auto-off after 2 minutes, low battery indicator, overload indicator |
| Display | LCD screen with white backlight |
| Platform Material | Tempered glass |
| Cleaning and Care | Wipe with a damp cloth; do not immerse in water or use abrasive cleaners |
| Safety Features | Overload protection, non-slip feet, automatic shut-off for battery saving |
| Spare Parts | Battery only (CR2032, widely available) |
| Warranty | 2 years (subject to terms) |
Frequently Asked Questions - HG05427 SILVERCREST
User questions about HG05427 SILVERCREST
0 question about this device. Answer the ones you know or ask your own.
Ask a new question about this device
Download the instructions for your Waffle Maker in PDF format for free! Find your manual HG05427 - SILVERCREST and take your electronic device back in hand. On this page are published all the documents necessary for the use of your device. HG05427 by SILVERCREST.
USER MANUAL HG05427 SILVERCREST
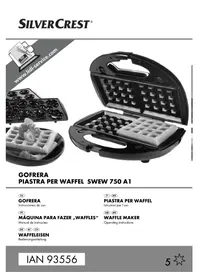
SANDWICH MAKER / TOASTER SSMW 750 D1
ES
SANDWICH MAKER
Operation and safety notes
DE AT CH
SANDWICH MAKER
GB/MT Operation and safety notes Page 44


● Bake sandwiches
Suitable for: sandwiches with sweet or savory filling
Interchangeable plates:
Warnings and symbols used Page 45
Introduction Page 45
Intended use.... Page 45 Scope of delivery.... Page 46 Description of parts ...... Page 46 Technical data Page 46
Safety instructions.... Page 46
Before first use.... Page 49
Assembly Page 49
Operation...... Page 50
Grilling sandwiches....Page 50 Grilling Page 50 Baking waffles ...... Page 51
Recipes Page 51
Tuna sandwich.... Page 51 Turkey sandwich.... Page 52 Belgian waffles.... Page 52 Blueberry waffles.... Page 52 Ham and cheese waffles....Page 53 Brownie Belgian waffles.... Page 53 Shrimp and plum kebabs.... Page 54
Cleaning and care Page 54
Troubleshooting...... Page 55
Storage Page 55
Disposal Page 55
Warranty Page 56
| Warnings and symbols usedThe following warnings are used in this user manual and on the packaging: | |||
 | DANGER! This symbol in combination with the signal word “Danger” marks a high-risk hazard that if not prevented could result in death or serious injury. | V~ | Voltage (alternating current) |
| Hz | Hertz (supply frequency) | ||
| W | Watts | ||
 | WARNING! This symbol in combination with the signal word “Warning” marks a medium-risk hazard that if not prevented could result in death or serious injury. | NOTE: This symbol in combination with “Note” provides additional useful information. | |
| Use the product in dry indoor spaces only. | |||
 | CAUTION! This symbol in combination with the signal word “Caution” marks a low-risk hazard that if not prevented could result in minor or moderate injury. | Danger - risk of electric shock! | |
| Caution, hot surface | |||
 | This appliance is classified as protection class I and must be connected to a protective ground. | Food safe. This product has no adverse effect on taste or smell. | |
 | The exchangeable plates 11, 12 and 13 are dishwasher-safe. | ||
SANDWICH TOASTER
Introduction
We congratulate you on the purchase of your new product. You have chosen a high quality product. The instructions for use are part of the product. They contain important information concerning safety, use and disposal. Before using the product, please familiarise yourself with all of the safety information and instructions for use. Only use the product as described and for the specified applications. If you pass the product on to anyone else, please ensure that you also pass on all the documentation with it.
Intended use
This product is designed for making waffles, sandwiches, and for grilling food. Do not use it for any other purpose.
This product is only intended for private household use, not for commercial purposes.
The manufacturer accepts no liability for damages caused by improper use.
- Scope of delivery
After unpacking the product, check if the delivery is complete and if all parts are in good condition. Remove all packing materials before use.
1x Sandwich toaster 3x Exchangeable plate sets 1x Instruction manual
• Description of parts
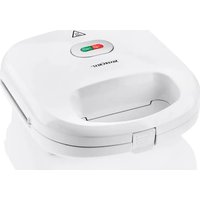
1 Lock 2 Red indicator (power) 3 Green indicator (ready) 4 Power cord with power plug 5 Power cord retainer 6 Heating element 7 Large hook catches 8 Release lever 9 Outer catch (small) 10 Inner catch (large) 11 Sandwich plate (upper and lower plate) 12 Grill plate (upper and lower plate) 13 Waffle plate (upper and lower plate)
- Technical data
Input voltage: 220-240 V ~, 50/60 Hz
Power consumption: 750 W
Protection class: I
TÜV SÜD / GS-certified

Safety instructions
BEFORE USING THE PRODUCT, PLEASE FAMILIARISE YOURSELF WITH ALL OF THE SAFETY INFORMATION AND INSTRUCTIONS FOR USE! WHEN PASSING THIS PRODUCT ON TO OTHERS, PLEASE ALSO INCLUDE ALL THE DOCUMENTS!
In the case of damage resulting from non-compliance with these operating instructions the warranty claim becomes invalid!
No liability is accepted for consequential damage! In the case of material damage or personal injury caused by incorrect handling or non-compliance with the safety instructions, no liability is accepted!
Children and persons with disabilities
⚠ WARNING! RISK OF LOSS OF LIFE OR ACCIDENT TO INFANTS AND CHILDREN!
Never leave children unsupervised with the packaging material. The packaging material represents a danger of suffocation.
Children frequently underestimate the dangers. Always keep children away from the packaging material.
This product can be used by children aged from 8 years and above and persons with reduced physical, sensory or mental capabilities, or lack of experience and knowledge if they have been given supervision or instruction concerning use of the product in a safe way and understand the hazards involved.
■ Children shall not play with the product.
- Cleaning and user maintenance shall not be made by children unless they are older than 8 and supervised.
- Keep the product and its cord out of reach of children less than 8 years.
Intended use
⚠ WARNING! Misuse may lead to injury. Use this product solely in accordance with these instructions. Do not attempt to modify the product in any way.
Electrical safety
⚠️ DANGER! Risk of electric shock! Never attempt to repair the product yourself. In case of malfunction, repairs are to be conducted by qualified personnel only.
DANGER! Risk of burns!
During use the product gets hot. Do not touch the product while in use nor immediately after use.
⚠ WARNING! Risk of electric shock! Do not immerse the product in water or other liquids. Never hold the product under running water.
⚠ WARNING! Risk of electric shock! Never use a damaged product. Disconnect the product from the power supply and contact your retailer if it is damaged.
■ The product is not to be used if it has been dropped, or if there are visible signs of damage.
■ The product is powered at all times while it is connected to the power supply.
Before connecting the product to the power supply, check that the voltage and current rating corresponds with the power supply details shown on the product's rating label.
- Regularly check the power plug and the power cord for damages. If the power cord is damaged, it must be replaced by the manufacturer, its service agent or similarly qualified persons in order to avoid a hazard.
■ Protect the power cord against damages. Do not let it hang over sharp edges, do not squeeze or bend it. Keep the power cord away from hot surfaces and open flames.
Operation
■ The product must not be left unattended while it is connected to the supply mains. - Do not move the product while it is in operation. - Do not use the product without an inserted set of plates.
- Do not place the product on hot plates (gas, electric, coal cooking range etc.). Operate the product on a level, stable, clean, heat-resistant and dry surface.
- Do not cover the product while it is in use or shortly after use, when it is still hot.
■ Make sure that the power cord is not pinched by the plates or touches the rim of the plates.
■ The use of extension cords is not recommended.
If the use of an extension cord is necessary, it must be designed for a current flow of at least 10 A.
■ Lay cords in such a way that they may not be tripped over or otherwise damaged. ■ The product is not intended to be operated by means of an external timer or separate remote-control system.
Cleaning and storage
⚠ WARNING! Risk of injury!
Disconnect the product from the power supply before cleaning work and when not in use.
- Do not store the hot product in a cupboard or in the packaging.
- Do not pull the power plug out of the electrical outlet by the power cord. ■ Protect the product, its power cord and power plug against dust, direct sunlight, dripping and splashing water. ■ Store the product in a cool, dry place, protected from moisture and out of the reach of children. ■ Protect the product against heat. Do not place the product close to open flames or heat sources such as stoves or heating appliances.
Before first use
■ Remove the packaging. Check if all parts are complete. During production, some parts are covered with a thin oil film for their protection.
Before first use, operate the product without any food so that any potential residues evaporate.
- Clean the product and its accessories (see the "Cleaning and care" section).
i NOTES:
The first few times the product is heated up, a faint odour may be present. Ensure sufficient ventilation in the area. - Discard the first set of waffles.
Assembly
⚠ WARNING! Risk of electric shock. Before
installing/removing the plates 11, 12, 13:
Disconnect the power plug 4 from the wall outlet.
DANGER! Risk of burns. Do not change/remove the plates 11, 12, 13 right after operation. Let the product cool first.
Installing the plates
Open the lock. Open the product. Place the inner catch of the chosen plate into the large hook catches 7. Push down the plate until it clicks in place. Repeat on the other side of the product.
NOTE: Install only plates of the same type.
Removing the plates
Open the lock. Open the product. Pull the release levers. Remove the plate. Repeat on the other side of the product.
Operation
Preparation: Grease the upper and lower exchangeable plates 11, 12, 13 with suitable cooking oil.
Turning the product on: Connect the power plug 4 to a suitable wall outlet. The red indicator 2 lights up.
Turning the product off: Disconnect the power plug from the wall outlet. The red indicator 2 goes off.
Keep the product locked while preheating.
Preheat until the green indicator lights up.
Light indicator Status
| Red indicator 2 on | Product on. |
| Red indicator 2 off | Product off. |
| Green indicator 3 off | Product is preheating/reheating. |
| Green indicator 3 on | The baking temperature has been reached. |
NOTE: During operation, the green indicator 3 goes on and off from time to time. This indicates that the product is reheating up to the baking temperature.
This product is designed for making waffles, sandwiches, and for grilling food (see the following sections).
Suggested baking/grilling times
| Sandwiches 3 to 4 minutes | |
| Grilling 4 to 9 minutes | (check the degree ofbrowning from timeto time) |
Waffles (sweet/savoury) 5 minutes
For reference only (see the "Recipes" section for estimated cooking times)
Grilling sandwiches
Suitable for: Sandwich pockets with sweet or savoury filling
Plates:
Sandwich plates (upper and lower plate) 11
Open the lock. Open the product. Place 2 prepared sandwiches onto the lower sandwich plate 11. Close the product. Close the lock. The sandwiches are now grilled.
NOTE: Grilling takes approx. 3 to 4 minutes.
Depending on how crunchy you want your sandwiches to be, the baking time may be shortened or increased.
Removing sandwiches: Use a plastic/wooden spatula (or other suitable non-metallic tools) to avoid damaging the product's non-stick coating. While the sandwiches are being grilled, the green indicator 3 will turn off and on again. This is to regulate the required operating temperature. When you are done with grilling: Disconnect the power plug 4 from the wall outlet.
Grilling
Suitable for: Grilling smaller meat chunks, sausages, or vegetables
Plates:
Grill plates (upper and lower plate) 12
- Open the lock. Open the product. Place the food to be grilled onto the lower grill plate 12.
- Close the product. Close the lock. The food is now being grilled.
⚠️CAUTION! Danger of splashes. Do not use wet food for grilling. Fat splashes and rising steam will occur when opening the product.
NOTE: Grilling takes approximately 4 to 9 minutes.
Check the degree of browning from time to time.
■ Removing the grilled food: Use a plastic or wooden spatula (or other suitable non-metallic tools) to avoid damaging the product's non-stick coating. While the food is grilling, the green indicator 3 will turn off and on again. This is to regulate the required operating temperature. When you are done with grilling: Disconnect the 4 slices Toast bread 4 slices Toast bread
power plug 4 from the wall outlet.
Baking waffles
Suitable for: Sweet and savoury waffles
Plates:
Waffle plates (upper and lower plate) 13
- Open the lock. Open the product.
- Use a wooden or heat-resistant plastic ladle to pour batter onto the lower waffle plate 13. Do not use metal ladles, as this could damage the non-stick surface of the plates. Do not overfill the lower waffle plate with batter.
- Close the product. Close the lock. The batter is now being cooked.
NOTE: The baking process takes approximately 5 minutes. Depending on how brown you want your waffles to be, the baking time may be shortened or increased.
Removing waffles: Use a plastic/wooden spatula (or other suitable non-metallic tools) to avoid damaging the product's non-stick coating. While the waffles are baking, the green indicator 3 will turn off and on again. This is to regulate the required operating temperature. When you are done with cooking: Disconnect the power plug 4 from the wall outlet.
Recipes
Tuna sandwich
Plates:
Sandwich plates (upper and lower plate) 11
Ingredients:
85 g Tahini 85 g Low fat Greek yogurt 80 g Tuna 65 g Fresh basil
1 Squeezed lemon
14 ml Olive oil
1 pinch Salt
1 pinch Pepper
Preparation:
Preheat the product. Blend tahini, Greek yogurt and lemon juice until combined. Add basil, salt and pepper. Blend until combined. Add the olive oil into the tahini yogurt sauce. Spread the tahini yogurt sauce over 2 bottom toast bread slices. Spread drained tuna on top. Top with remaining toast bread slices. Bake for about 4 minutes. Serve immediately.
Turkey sandwich
Plates:
Sandwich plates (upper and lower plate) 11
Ingredients:
4 slices Toast bread
2 slices Young Gouda cheese
50 g Sliced turkey breast
10 g Mustard
1/2 Onion
1 pinch Salt
1 pinch Pepper
Preparation:
■ Preheat the product. - Spread mustard on the inside of the toast bread slices. - Chop the onion into small pieces. - Spread the turkey breast and onion over 2 bottom toast bread slices. ■ Sprinkle with salt and pepper. - Spread the cheese slices on top. ■ Top with remaining toast bread slices. ■ Bake for about 4 minutes. ■ Serve immediately. Waffle plates (upper and lower plate) 13 120 ml Vegetable oil 250 ml Milk 2 Eggs 200 g Sugar 170 g Flour 2.5 g Baking powder
Belgian waffles
Plates:
Waffle plates (upper and lower plate) 13
Ingredients:
5 Eggs, 250 g Butter, 200 g Sugar, 400 ml Milk, 500 g Flour, 2 packets Vanilla sugar, 5 g Baking powder
Preparation:
Preheat the product. In a medium bowl combine egg, vanilla sugar, sugar and butter. Add baking powder, around half of the flour and half of milk into the bowl and stir. Add the rest of flour and milk, then stir until the batter becomes creamy. Spray both exchangeable plates with cooking spray. Evenly spoon the batter onto the lower plate. Bake for 5 minutes.
Blueberry waffles
Plates:
Ingredients:
130 g Blueberries (fresh or frozen)
Preparation:
Preheat the product. In a large bowl, whisk together the oil, milk, eggs, and sugar. Add the flour, baking powder and stir until well combined. Fold in the blueberries. Spray both exchangeable plates with cooking spray. Evenly spoon the batter onto the lower plate. Bake for about 10 minutes, until golden brown.
Ham and cheese waffles
Plates:
Waffle plates (upper and lower plate)

Ingredients:
570 g Package refrigerated hash brown potatoes
225 g Black forest ham, diced
200 g Shredded cheddar cheese
3 Large eggs, beaten
2 cloves Garlic (minced)
2 tsp Chopped fresh parsley leaves
1/2 tsp Dried thyme
1/4 tsp Smoked paprika
Salt and freshly ground black pepper, to taste
Preparation:
Thaw the hash brown potatoes. Preheat the product. Spray both exchangeable plates with cooking spray. In a large bowl, combine hash brown potatoes, ham, cheese, eggs, garlic, parsley, thyme and paprika. Season with salt and pepper, to taste. Evenly spoon the potato mixture onto the lower plate. Bake for about 15 minutes, until golden brown and crisp. Serve immediately.
- Brownie Belgian waffles
Plates:
Waffle plates (upper and lower plate) 13
Ingredients:
180 g All purpose flour 65 g Unsweetened cocoa powder 20 g Granulated sugar
1 tsp Baking powder
1 tsp Sea salt
10 tbsp Melted unsalted butter
2 Large eggs
2 tsp Vanilla extract
60 ml Water
120 g Mini chocolate chips
Optional toppings: Vanilla ice cream, chocolate sauce, powdered sugar
Preparation:
Preheat the product. In a large bowl, mix the flour, cocoa powder, sugar, baking powder, and salt. Melt the butter and set aside to cool a little. In a small bowl, beat the eggs, vanilla extract, and water. Whisk the egg mixture into the dry mixture, then quickly mix in the melted butter. Stir in the chocolate chips. Spray both exchangeable plates with cooking spray. Evenly spoon the batter onto the lower plate. Bake for about 3 minutes. Lift the lid to check the waffle. The waffle should be fully formed, but soft to the touch. Serve with powdered sugar, vanilla ice cream or chocolate sauce.
Shrimp and plum kebabs
Plates:
Grill plates (upper and lower plate)

Ingredients:
2 tbsp Canola oil 2 tbsp Cilantro (chopped fresh)
1 tsp Lime zest (freshly grated)
3 tbsp Lime juice
1/2 tsp Salt
12 Raw shrimps (8 to 12 shrimps per 500 g / peeled and deveined) 3 Jalapeño peppers (stemmed, seeded and quartered lengthwise) 2 Plums (pitted and cut into sixths)
Preparation:
Preheat the product. In a large bowl, whisk canola oil, cilantro, lime zest, lime juice and salt. Set aside 3 tablespoons of the mixture in a small bowl. Add shrimp, jalapeños and plums to the remaining marinade. Toss the mixture to coat and marinade. Alternate shrimps, jalapeños and plums evenly among 4 skewers (25 cm). Discard the marinade. Grill the kebabs until the shrimp are cooked through. Turn the kebabs once. Grill for about 2 minutes on each side. Drizzle with the remaining dressing.
Cleaning and care
DANGER! Risk of electric shock! Before cleaning: Always disconnect the product from the wall outlet.

DANGER! Risk of burns! Do not clean the product right after operation. Let the product cool first.
WARNING! Do not immerse the product's electrical components in water or other liquids. Never hold the product under running water.

NOTE: Clean the product right after it has cooled. Once the food residues have dried, they are not easy to remove.
Part Cleaning method
| ■ Sandwich maker | ■ Wipe down the housing with a slightly damp cloth.■ Do not let any water or other liquids enter the product interior. |
| ■ Plates11, 12, 13 | ■ Rinse the plates in water and/or mild detergent.You can also clean the plates in the dishwasher. |
| ■ Spaces underneath the plates■ Heating element 6■ Lock | ■ Removing fat and liquids:Use a piece of kitchen paper.■ Removing stuck-on burnt residues: Use a wooden spatula or small wooden skewers. |
- Do not use any abrasive, aggressive cleaners or hard brushes to clean the product or its accessories. After cleaning: Let all parts dry.
Troubleshooting
Problem Solution
| The product is not working. | Connect the power card with a suitable wall outlet. |
| The waffles/sandwiches are too dark. | Shorten the baking time. |
| The waffles/sandwiches are too light. | Extend the baking time. |
| The finished waffles/sandwiches are difficult to remove from the product. | Lightly grease the plate $13 before baking.Try using a different batter recipe. |
Storage
DANGER! Risk of burns! Do not store the product right after operation. Let the product cool first.
■ Clean the product before storage. Wind the power cord around the power cord retainer 5 on the bottom of the product. - Store the product in the original packaging when it is not in use. ■ Store the product at a dry location out of the reach of children.
● Disposal
The packaging is made entirely of recyclable materials, which you may dispose of at local recycling facilities.

Observe the marking of the packaging materials for waste separation, which are marked with abbreviations (a) and numbers (b) with following meaning: 1 - 7: plastics / 20 - 22: paper and fibreboard / 80 - 98: composite materials

The product and packaging materials are recyclable, dispose of it separately for better waste treatment. The Triman logo is valid in France only.

Contact your local refuse disposal authority for more details of how to dispose of your worn-out product.

To help protect the environment, please dispose of the product properly when it has reached the end of its useful life and not in the household waste. Information on collection points and their opening hours can be obtained from your local authority.
Warranty
The product has been manufactured to strict quality guidelines and meticulously examined before delivery. In the event of product defects you have legal rights against the retailer of this product. Your legal rights are not limited in any way by our warranty detailed below.
The warranty for this product is 3 years from the date of purchase. Should this product show any fault in materials or manufacture within 3 years from the date of purchase, we will repair or replace it – at our choice – free of charge to you.
The warranty period begins on the date of purchase. Please keep the original sales receipt in a safe location. This document is required as your proof of purchase. This warranty becomes void if the product has been damaged, or used or maintained improperly.
The warranty applies to defects in material or manufacture. This warranty does not cover product parts subject to normal wear, thus possibly considered consumables (e.g. batteries) or for damage to fragile parts, e.g. switches, rechargeable batteries or glass parts.
Warranty claim procedure
To ensure quick processing of your case, please observe the following instructions:
Please have the till receipt and the item number (e.g. IAN 123456_7890) available as proof of purchase.
You will find the item number on the type plate, an engraving on the front page of the instructions (bottom left), or as a sticker on the rear or bottom of the appliance.
If functional or other defects occur, please contact the service department listed either by telephone or by e-mail.
You can return a defective product to us free of charge to the service address that will be provided to you. Ensure that you enclose the proof of purchase (till receipt) and information about what the defect is and when it occurred.
Service
GB Service Great Britain
Tel.: 0800 404 7657
E-Mail: owim@lidl.co.uk
MT Service Malta
Tel.: 80062230
E-Mail: owim@lidl.com.mt
CE


- SANDWICH MAKER / TOASTER SSMW 750 D
- SANDWICH MAKER
- ● BAKE SANDWICHES
- INTERCHANGEABLE PLATES
- WARNINGS AND SYMBOLS USED PAGE
- INTRODUCTION PAGE
- SAFETY INSTRUCTIONS.... PAGE
- BEFORE FIRST USE.... PAGE
- ASSEMBLY PAGE
- OPERATION...... PAGE
- RECIPES PAGE
- CLEANING AND CARE PAGE
- TROUBLESHOOTING...... PAGE
- STORAGE PAGE
- DISPOSAL PAGE
- WARRANTY PAGE
- SANDWICH TOASTER
- INTRODUCTION
- INTENDED USE
- SCOPE OF DELIVERY
- DESCRIPTION OF PARTS
- TECHNICAL DATA
- SAFETY INSTRUCTIONS
- CHILDREN AND PERSONS WITH DISABILITIES
- ⚠ WARNING! RISK OF LOSS OF LIFE OR ACCIDENT TO INFANTS AND CHILDREN
- ELECTRICAL SAFETY
- DANGER! RISK OF BURNS
- OPERATION
- CLEANING AND STORAGE
- ⚠ WARNING! RISK OF INJURY
- BEFORE FIRST USE
- I NOTES
- ASSEMBLY
- INSTALLING THE PLATES
- REMOVING THE PLATES
- GRILLING SANDWICHES
- PLATES
- GRILLING
- BAKING WAFFLES
- RECIPES
- TUNA SANDWICH
- INGREDIENTS
- PREPARATION
- TURKEY SANDWICH
- BELGIAN WAFFLES
- BLUEBERRY WAFFLES
- HAM AND CHEESE WAFFLES
- BROWNIE BELGIAN WAFFLES
- SHRIMP AND PLUM KEBABS
- CLEANING AND CARE
- TROUBLESHOOTING
- STORAGE
- ● DISPOSAL
- WARRANTY
- WARRANTY CLAIM PROCEDURE
- SERVICE
Brand : SILVERCREST
Model : HG05427
Category : Waffle Maker