Alex - Effect machine LEXICON - Free user manual and instructions
Find the device manual for free Alex LEXICON in PDF.


| Product Type | Digital Multi-Effects Processor for Guitar/Bass |
| Brand | Lexicon |
| Model | Alex |
| Housing | Heavy-duty metal chassis with painted finish |
| Dimensions | 5.7 x 4.5 x 2.2 inches (145 x 115 x 56 mm) |
| Weight | 1.2 lbs (540 g) |
| Power Supply | 9V DC, center negative, 300 mA (adapter not included) |
| Battery Option | 9V alkaline battery compartment (battery not included) |
| Audio Inputs | 1 x 1/4" mono instrument input (impedance 1 MΩ) |
| Audio Outputs | 1 x 1/4" mono output, 1 x 1/8" stereo headphone output |
| Controls | Effect select rotary knob, 3 parameter knobs, bypass footswitch, tap tempo switch |
| Display | LED indicators for effect type, bypass status, and tap tempo |
| Built-in Effects | Reverb, delay, chorus, flanger, phaser, vibrato, tremolo, distortion, overdrive, compressor, EQ, wah (auto and pedal) |
| Presets | 30 factory presets, 50 user-programmable memory slots |
| Connectivity | USB Type-B for firmware updates and preset editing via computer |
| MIDI | None (external MIDI adapter not supported) |
| Sample Rate | 44.1 kHz, 24-bit audio conversion |
| Bypass | True bypass with relay switching (no signal degradation when off) |
| Maintenance | Clean with a soft, dry cloth. Do not use solvents or abrasive cleaners. |
| Safety | Do not expose to rain, moisture, or extreme temperatures. Unplug during cleaning. |
| Warranty | 2 years limited warranty from date of purchase |
| Spare Parts & Repairability | Contact Lexicon support for replacement knobs, jacks, and switches. Do not disassemble; qualified service only. |
Frequently Asked Questions - Alex LEXICON
User questions about Alex LEXICON
0 question about this device. Answer the ones you know or ask your own.
Ask a new question about this device
Download the instructions for your Effect machine in PDF format for free! Find your manual Alex - LEXICON and take your electronic device back in hand. On this page are published all the documents necessary for the use of your device. Alex by LEXICON.
USER MANUAL Alex LEXICON
Unpacking and Inspection
After unpacking the unit, save all packing materials in case you ever need to re-ship. Thoroughly inspect the unit and packing materials for signs of damage. Report any shipment damage to the carrier at once; report equipment malfunction to your dealer.
Notice
This equipment generates and uses radio frequency energy and if not installed and used properly, that is, in strict accordance with the manufacturer's instructions, may cause interference to radio and television reception. It has been type tested and found to comply with the limits for a Class B computing device in accordance with the specifications in Subpart J of Part 15 of FCC Rules, which are designated to provide reasonable protection against such interference in a residential installation. However, there is no guarantee that interference will not occur in a particular installation. If this equipment does cause interference to radio or television reception, which can be determined by turning the equipment OFF and ON, the user is encouraged to try to correct the interference by one or more of the following measures: reorient the receiving antenna; relocate the computer with respect to the receiver; move the computer away from the receiver; plug the computer into a different outlet so that the computer and receiver are on different branch circuits. If necessary, the user should consult the dealer or an experienced radio/television technician for additional suggestions. The user may find the following booklet prepared by the Federal Communications Commission helpful: "How to identify and Resolve Radio/TV Interference Problems." This booklet is available from the U.S. Government Printing Office, Washington, DC 20402, Stock No. 004-000-00345-4.
Copyright ©1994, 1995 Lexicon Inc.
All Rights Reserved.
Lexicon Part 070-09526 Rev 2
Printed in the U.S.A.
Table of Contents
Introduction 1
Front Panel Overview 2
Setting Audio Levels 3
Rear Panel Connections.... 4
Footswitch Connections 5
Presets and Parameters 6
The Presets 6
About the Parameters....7
Parameter Settings 8
Loading an Effect 10
Editing an Effect.... 11
Performing an Edit Compare 12
Storing an Effect 13
Using Footswitches 14
Bypass 14
Stepping through the Registers 14
Clearing Registers 14
Skipping Registers and Creating Chains 15
Specifications.... 16
Thank you for your purchase of Alex, Lexicon's Digital Effects Processor.
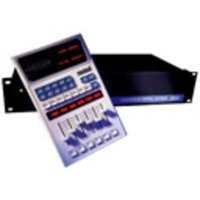
Alex gives you world class reverberation and effects to enhance any audio performance. Sixteen preset effects provide a wide range of superb sounds right out of the box. Three adjustable parameters allow you to make subtle or dramatic changes to each preset, and a bank of 16 registers is available for storing your own customized effects. Footswitch control allows you to set up register loops and chains to suit your performance needs.
Some of the exciting features of Alex are:
• 16 presets, each with 3 adjustable parameters
• 4096 possible effect variations
• Full-rack size with large LED display of currently running effect and parameter settings
• 16 registers where you can store your own customized effects
Introduction
- Edit compare of a preset and your modifications
- Footswitch control of bypass (input mut-ing), register loading and register chains
- Stereo Inputs and Outputs
- Easy operation
To make sure you get the most out of Alex, be sure to read the manual.

Setting Audio Levels
- Turn Alex INPUT and OUTPUT controls all the way down (fully counter-clockwise).
- Connect Alex inputs to an audio source, and outputs to an amplifier or mixer.
-
Apply an input signal at a level that you typically use.
-
While sending audio to Alex, gradually turn up the INPUT control until the Input Status LED* lights green. Continue to advance INPUT until the LED lights red on only the loudest peaks. If the LED is continuously red, turn the INPUT control down.
-
If Alex is using a console's sends and returns, set the MIX control fully clockwise (100% wet). If you are using an instrument amplifier, start with MIX set halfway up.
-
Gradually increase the setting of the OUTPUT control until the audio level from the amplifier or mixer is approximately the same as when Alex is bypassed.
* The Input Status LED is off when the incoming signal is low; it lights to indicate acceptable levels (6dB to 30dB below overload). The LED lights red when the signal approaches overload. Acceptable signals will trigger red flashes only on peaks.

Footswitch Connections
A footswitch connected via the rear-panel footswitch jack allows you to perform register STEP and BYPASS functions. Two footswitches can be wired to a tip-ring-sleeve connector, or a single, mono connector can be used. (With a single connector, insert half-way in for register step, all the way in for bypass.) A stereo Y-connector allows two identical single switches to be used.

or

When shipped, Alex is configured to use push on/push off type switches. You can change this configuration to allow the use of momentary contact switches by performing the following procedure:
- Power up Alex while holding in both the STORE/CLEAR and the PARAMETER buttons. (This will put the unit into Diagnostic mode with a "d" displayed.)
-
Press STORE/CLEAR, then turn the REGIS-TER/PRESET knob until the display reads "0" (push on/push off) or "1" (momentary contact).
-
Press STORE/CLEAR to enter the change. The display will show "+". and then the number you have selected.
- Power the unit off, then on again to restore normal operation with the selected configuration.

A dual-function footswitch is available from Lexicon. A set of labels to identify footswitch functionality is included with your unit.
Presets and Parameters
Alex front panel operation is simple and straightforward. Effect selection, editing, store, and clear functions are easily accomplished with dedicated knobs and buttons.
This section describes all of these basic functions, as well as using footswitches to step through registers and register chains.
The Presets
Alex is loaded with 16 permanent presets, designed to give you the following effects:
Hall and Rooms (1-6) range from large natural-sounding spaces with the spread, attack and build of a concert hall, to small rooms with sudden attacks and the coloration characteristics of tight, intimate spaces. In addition to general instrumental and vocal applications, halls are a good choice for giving separately recorded tracks the sense of belonging to the same performance.
Inverse (7) is similar to a gated reverb, except that the initial portion of the reverb envelope builds up before the sharp reverberation cut-off.
Gate (8) has a fairly constant sound with no decay until the reverberation is cut off abruptly. Inverse and Gate are both excellent effects for percussion — particularly for snare drum.
Plates (9-12) mimic the sound of metal plates, with high initial diffusion and a relatively bright, colored sound. Plates are effective on a variety of percussion instruments, as well as on horns and voice. They are designed to be heard as part of the music, thickening and fattening the source material.
Chorus (13) is a 6-voice stereo chorus with echo. Controls are provided for echo delay and recirculation. Great on guitars and voices.
Flange (14) is a stereo flange with control of resonance and the depth and speed of the flange.
Echo (15) Digital audio's most basic effect. Try it on everything.
Delays (16) is a 4-tap bouncing delay. The bounce goes back and forth between left and right outputs.
Each of the presets contains a unique version of the 3 parameters; DECAY, DELAY and FX LVL. The parameters of each preset are available for front panel adjustment along their entire range, allowing you to create hundreds of variations of each effect.
Presets cannot be erased or overwritten by parameter changes; the original version will always be restored. If you make changes to a preset and want to save the changes as a custom effect, you must store your new version in one of Alex's 16 registers.
About the Parameters
Each of the 16 presets in Alex consists of a unique combination of as many as 32 different parameters. These fixed parameters determine the type of preset — hall, room, plate, etc. that you will hear when you turn the REGISTER/PRESET knob.
For each preset, several parameters have been made available for front panel control through the DECAY, DELAY and FX LVL controls.
In Halls and Rooms (1-6), and in the Plate presets (9-12), DECAY sets the nominal reverberation decay time for a predetermined room size which is unique to each preset.
In the Inverse and Gate presets (7-8), DECAY changes both the size and the character of the program, while DELAY varies the predelay before the gated effect. (Note that changing the setting of DECAY in either of these presets will briefly mute the effect.)
In Chorus (13), Echo (15) and Delays (16), DECAY controls recirculation. In the Flange preset (14), DECAY controls flange resonance.
DELAY generally sets the amount of predelay (the length of time between the input of signal and the onset of reverberation). The range of this control varies with the type of preset.
In Chorus and Echo, DELAY controls the echo delay. In Flange, it controls the depth of the flange effect. In Delays, it controls the delay time for the first of four equally spaced delay taps.
In each preset, FX LVL sets the level of the effects being added to the signal.
Note that the setting of the MIX control is very important with several of the presets. In the Inverse and Gate presets, MIX allows you to set up anything from a subtle thickening or enhancement, to a solid wall of reverb. In the Chorus and Flange presets, MIX should be set higher than 50% wet to get rich chorus and flange effects.
Parameter Settings
The actual parameter values available at each of the 16 settings of the VALUE knob are shown on the following charts.
Presets Parameters 1 2 3 4 5 6 7 8 9 10 11 12 13 14 15 16
Parameter Settings
| 1 Large Hall | DECAY (rm size=60M) | .60 sec | .70 sec | .80 sec | .90 sec | 1.0 sec | 1.2 sec | 1.3 sec | 1.5 sec | 1.7 sec | 2.1 sec | 2.4 sec | 2.9 sec | 3.6 sec | 4.9 sec | 6.1 sec | 8.9 sec |
| 2 String Hall | DECAY (rm size=51M) | .51 sec | .60 sec | .68 sec | .77 sec | .85 sec | 1.02 sec | 1.11 sec | 1.28 sec | 1.45 sec | 1.79 sec | 2.04 sec | 2.47 sec | 3.06 sec | 4.17 sec | 5.19 sec | 7.57 sec |
| 3 Recital Hall | DECAY (rm size=45M) | .45 sec | .53 sec | .60 sec | .68 sec | .75 sec | .90 sec | .98 sec | 1.13 sec | 1.28 sec | 1.56 sec | 1.80 sec | 2.18 sec | 2.70 sec | 3.68 sec | 4.58 sec | 6.68 sec |
| 4 Chamber | DECAY (rm size=38M) | .38 sec | .44 sec | .51 sec | .57 sec | .63 sec | .76 sec | .82 sec | .95 sec | 1.08 sec | 1.33 sec | 1.52 sec | 1.84 sec | 2.28 sec | 3.10 sec | 3.85 sec | 5.64 sec |
| 5 Guitar Room | DECAY (rm size=25M) | .25 sec | .29 sec | .33 sec | .38 sec | .42 sec | .50 sec | .54 sec | .63 sec | .71 sec | .88 sec | 1.00 sec | 1.21 sec | 1.50 sec | 2.04 sec | 2.54 sec | 3.71 sec |
| 6 Tiled Room | DECAY (rm size=15M) | .15 sec | .18 sec | .20 sec | .29 sec | .25 sec | .30 sec | .33 sec | .38 sec | .43 sec | .53 sec | .60 sec | .73 sec | .90 sec | 1.23 sec | 1.53 sec | 2.23 sec |
| 7 Inverse | DECAY (time) | 150 ms | 165 ms | 180 ms | 196 ms | 211 ms | 227 ms | 242 ms | 258 ms | 273 ms | 289 ms | 304 ms | 320 ms | 335 ms | 351 ms | 366 ms | 382 ms |
| 8 Gate | DECAY (time) | 150 ms | 165 ms | 180 ms | 196 ms | 211 ms | 227 ms | 242 ms | 258 ms | 273 ms | 289 ms | 304 ms | 320 ms | 335 ms | 351 ms | 366 ms | 382 ms |
| DELAY (predelay) | 0 ms | 16.3 ms | 32.7 ms | 49.1 ms | 65.5 ms | 81.9 ms | 98.3 ms | 114 ms | 131 ms | 147 ms | 163 ms | 180 ms | 196 ms | 212 ms | 229 ms | 245 ms | |
| 9 Gold Plate | DECAY (rm size=34M) | .34 sec | .40 sec | .45 sec | .51 sec | .57 sec | .68 sec | .74 sec | .85 sec | .96 sec | .1.19 sec | .1.36 sec | .1.64 sec | .2.08 sec | .2.78 sec | .3.46 sec | .5.04 sec |
| 10 Vocal Plate | DECAY (rm size=26M) | .26 sec | .30 sec | .35 sec | .39 sec | .43 sec | .52 sec | .56 sec | .65 sec | .74 sec | .91 sec | .1.04 sec | .1.26 sec | .1.56 sec | .2.12 sec | .2.64 sec | .3.86 sec |
| 11 Brass Plate | DECAY (rm size=23M) | .23 sec | .27 sec | .31 sec | .35 sec | .36 sec | .46 sec | .50 sec | .58 sec | .65 sec | .81 sec | .92 sec | .1.11 sec | .1.38 sec | .1.88 sec | .1.34 sec | .3.41 sec |
| 12 Perc Plate | DECAY (rm size=27M) | .27 sec | .32 sec | .36 sec | .41 sec | .45 sec | .54 sec | .59 sec | .68 sec | .77 sec | .95 sec | .1.08 sec | .1.31 sec | .1.62 sec | .2.21 sec | .2.75 sec | .4.01 sec |
| DELAY (predelay) | 0 ms | 16.3 ms | 32.7 ms | 49.1 ms | 65.5 ms | 81.9 ms | 98.3 ms | 114 ms | 131 ms | 147 ms | 163 ms | 180 ms | 196 ms | 212 ms | 229 ms | 245 ms | |
| 13 Chorus | DECAY (recirculation) | 0% | 6% | 12% | 18% | 24% | 31% | 37% | 43% | 49% | 56% | 62% | 68% | 74% | 81% | 87% | 93% |
| DELAY (echo delay) | 24 ms | 51 ms | 73 ms | 89 ms | 108 ms | 139 ms | 166 ms | 208 ms | 250 ms | 333 ms | 444 ms | 555 ms | 714 ms | 1000 ms | 1200 ms | 1500 ms | |
| 14 Flange | DECAY (resonance) | -5% | -11% | -18% | -24% | -30% | -36% | -43% | -49% | -55% | -61% | -68% | -74% | -80% | -86% | -92% | -99% |
| DELAY (flange depth) | .25 ms | .50 ms | 1.0 ms | 1.51 ms | 2.01 ms | 2.52 ms | 3.02 ms | 3.53 ms | 4.00 ms | 4.50 ms | 5.01 ms | 5.51 ms | 6.02 ms | 6.52 ms | 7.03 ms | 7.53 ms | |
| 15 Echo | DECAY (recirculation) | 0% | 6% | 12% | 18% | 24% | 31% | 37% | 43% | 49% | 56% | 62% | 68% | 74% | 81% | 87% | 93% |
| DELAY (echo delay) | 24 ms | 51 ms | 73 ms | 89 ms | 108ms | 139 ms | 166 ms | 208 ms | 250 ms | 333 ms | 444 ms | 555 ms | 714 ms | 1000 ms | 1200 ms | 1500 ms | |
| 16 Delays | DECAY (recirculation) | 0% | 6% | 12% | 18% | 24% | 31% | 37% | 43% | 49% | 56% | 62% | 68% | 74% | 81% | 87% | 93% |
| DELAY (delay spacing) | 1.7 ms | 2.6 ms | 3.9 ms | 5.8 ms | 8.7 ms | 13.1 ms | 19.7 ms | 29.2 ms | 44.3 ms | 56.4 ms | 99.6 ms | 150 ms | 224 ms | 336 ms | 412 ms | 505 ms | |
| FX LVL | OFF | -28 dB | -26 dB | -24 dB | -22 dB | -20 dB | -18 dB | -16 dB | -14 dB | -12 dB | -10 dB | -8 dB | -6 dB | -4 dB | -2 dB | 0 dB | |
The REGISTER/PRESET button determines whether the knob will load registers or presets. The LED will light when register mode is selected.
In either mode, turn the REGISTER/PRESET knob to select and load an effect. The display will update to show the number of the currently loaded effect.
Loading an Effect
When you change between register and preset modes, you will always recall the last preset or register loaded, in whatever state you left it.
Alex has 16 presets and 16 registers for storing your customized effects. Pressing the REGISTER/PRESET button ...

Editing an Effect
For each preset, three parameters have been made available for front panel control through the DECAY, DECAY, and FX LVL controls. Control over these parameters is simple — press PARAMETER/LEARN to select a parameter, then adjust it with the VALUE knob. All parameter settings made from the front panel can be stored with the effect.
The VALUE knob is always active, and will adjust whichever parameter is indicated by the display LEDs. The first turn of VALUE will display the current parameter setting. Subsequent adjustments will increment or decrement parameter values along their entire range (1-16).
The decimal point on the display will light when a parameter is adjusted to indicate that the effect has been modified since the last store operation. If no further adjustments are made with VALUE, the display will revert to showing the number of the currently running effect. The edit indicator will remain on until the effect is stored, or until changes are lost by selecting another effect with the REGIS-TER/PRESET knob.
The PARAMETER button cycles the selection of DECAY, DELAY and FX LVL. A lit LED indicates the currently selected parameter.

Turn VALUE to adjust the selected parameter. The display will show parameter values while the knob is being turned. A decimal point in the display indicates changes have been made since the last store operation.
Performing an Edit Compare
If you do not perform a store operation, changes made to effects will be lost as soon as another effect within the same mode (preset or register) is selected. Changing between preset and register modes, however, will not erase your changes. This provides an edit compare capability which allows you to toggle back and forth between an effect you are working on and the original version. For example:
- Select a preset and store a copy of it in any register.
- Make any changes you want to either the preset or the register.
- Compare your new effect to the original version simply by pressing the REGIS-TER/PRESET button.
- Use the REGISTER/PRESET button to toggle back and forth as many times as you like between the original effect and the new version, making changes as desired.
When you are satisfied with the effect, perform a store operation to any register you want using the procedure described on the following page.
To store the currently running effect:
Alex presets cannot be erased or overwritten by parameter changes; the original version will always be restored when loaded. If you make changes to a preset and want to save the changes as a custom effect, you must store your new versions into registers.
When first shipped, Alex has a duplicate set of the presets loaded into the registers. Although these are grouped into different effect types (halls, plates, etc.) there is no need to maintain this format. You can, for example, overwrite a gate effect with a chorus effect, or a plate with a hall.
-
Press STORE.
-
If you were in preset mode, the register LED will go on, indicating that Alex has automatically switched to register mode — selecting whatever register is indicated by the position of the REGISTER/PRESET knob. The plus sign (+) on the display will light to indicate that the store function is armed.
-
Releasing STORE will store the currently running effect into the register indicated on the display, overwriting the effect previously stored there. The display will flash briefly to indicate the store operation was successful.
Storing an Effect
- Store operations are executed on release of the STORE button. If you want to store to a different register, or to a different register bank, than the one displayed, turn the REGISTER/PRESET knob to the register number you want before releasing STORE.
Using Footswitches
A dual footswitch can be connected to Alex's rear-panel footswitch jack. Refer to the diagram shown in Rear panel Connections.
Bypass
A footswitch can be used to bypass effects. When active, a "P" (byPass) appears on the display. The + and - symbols, and the parameter LED are turned off. In this state everything is bypassed: effect select, register increment, parameter select and adjustment, etc.
Stepping through the Registers
You can use a footswitch to step through the registers. The footswitch will increment continuously up to register 16 then wrap back to register 1 (or the first uncleared register). If you are in preset mode, the first click of the switch will automatically switch you into register mode, loading whatever register is indicated by the position of the REGISTER/PRESET knob; subsequent clicks will increment from that point on.
Clearing Registers
Aex has a clear function which allows the use of footswitches to link effects in a variety of useful ways. Clearing a register does not erase the contents of a register pair. It clears a space in the register sequence so that the register is skipped in any effect sequence you create.
To clear a register...
- Briefly press STORE/CLEAR until a minus sign (-) is displayed.
- Press and hold STORE/CLEAR. If you were in preset mode, the register LED will go on, indicating that Alex has automati-
cally switched to register mode — selecting whatever register is indicated by the position of the REGISTER/PRESET knob. The "-" symbol in the display will flash, indicating that the CLEAR function is armed.
- Releasing STORE/CLEAR will clear the displayed register. The display will flash briefly to indicate the clear was successful. (The ID number of any cleared register flashes when selected with the REGISTER/PRESET knob.)
To restore a cleared register, simply repeat the clear operation with the "+" displayed.
Note using a footswitch to step through registers will cause a discrepancy between the REGISTER/PRESET knob setting and the display (which will show the number of the register that is actually running.)
Registers 4, 9, 10 and 14 have been cleared.

With the REGISTER/PRESET knob set to Register 1, the footswitch will step through the remaining registers, then loop back to Register 1.

Turning the REGISTER/PRESET knob to any position other than 1, will set up register chains which use cleared registers as loop points.
The combination of cleared registers shown above would create these four chains ...

If the REGISTER/PRESET knob is set to a register within a chain, the foolswitch will cycle through the chain until the next cleared register, then loop back to the first register in the chain.
(To use a chain containing Register 1, you must set the REGISTER/PRESET knob to another register in the chain.)
With the REGISTER/PRESET knob set to Register 7, the footswitch will step through this sequence ...

If the REGISTER/PRESET knob is set to a cleared register, the footswitch will skip to the first register in the next chain, then step through that chain.
Skipping Registers and Creating Chains
Alex's clear function allows you to use a footswitch to skip effects you do not want in a sequence, or to create register chains.
Skipping allows you to create a specific sequence of effects. If, for example, you want to use a series of 8 effects, simply clear the 8 unwanted registers and turn the REGISTER/PRESET knob to 1. Now, the footswitch will increment through the registers, passing over the cleared registers without requiring you to step through them.
Turning the REGISTER/PRESET knob to any position other than 1, will set up register chains which use cleared registers as loop points.
Skip and chain functions are illustrated to the left.
Specifications
Audio Inputs (2)
Level -30dBu minimum
Impedance stereo/50 kΩ unbalanced
mono/25 kΩ unbalanced
Audio Outputs (2)
Level -2dBu nominal
+8dBu maximum
Impedance 600Ω unbalanced
Muting reduces transients during power
on/off
Footswitch Connectors
T/R/S phone jack for bypass and register step
Frequency response
Wet 20Hz-15kHz, +1dB to -3dB
Dry 20Hz-20kHz, +0.5dB
THD+N
Wet <0.05% @ 1kHz
Dry <0.025% @ 1kHz
Dynamic Range
85dB, typical, 20Hz-20kHz bandwidth
Conversion
16 bit linear PCM encoding; 31.25kHz sampling
rate
Power Requirements
9VAC, 1A wall transformer provided
Dimensions
19"W x 1.75"H x 4"D (483 x 45 x 102mm)
Weight
2 lbs 11 oz (1.22 kg)
Environment
Operating
Temperature 32° to 104°F (0° to 40°C)
Storage -20° to 170° F (-30° to 75°C)
Relative
Humidity 95% non-condensing
Specifications subject to change without notice.
Lexicon, Inc.
3 Oak Park
Bedford MA 01730 USA
Telephone: (781) 280-0300
Fax: (781) 280-0490
Part No. 070-09526 Rev 2
- Unpacking and Inspection
- Notice
- Table of Contents
- Introduction
- Setting Audio Levels
- Footswitch Connections
- Presets and Parameters
- The Presets
- About the Parameters
- Parameter Settings
- Loading an Effect
- Editing an Effect
- Performing an Edit Compare
- Storing an Effect
- Using Footswitches
- Bypass
- Stepping through the Registers
- Clearing Registers
- Skipping Registers and Creating Chains
- Specifications
- Audio Inputs (2)
- Audio Outputs (2)
- Footswitch Connectors
- Frequency response
- THD+N
- Dynamic Range
- Conversion
- Power Requirements
- Dimensions
- Weight
- Environment
Brand : LEXICON
Model : Alex
Category : Effect machine