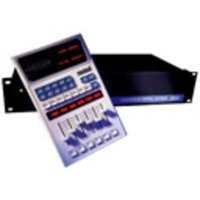
MPX 500 - Effect machine LEXICON - Free user manual and instructions
Find the device manual for free MPX 500 LEXICON in PDF.


| Type | Multi-Effects Processor |
| Dimensions (H x W x D) | 1.75 x 19 x 8.5 inches (1U rackmount) |
| Weight | 5.5 lbs (2.5 kg) |
| Power Supply | Internal, 100-240V AC, 50/60Hz, 15W |
| Display | Backlit LCD, 2 lines x 16 characters |
| Audio Inputs | 2 x XLR/TRS combo, balanced, +4dBu/-10dBV switchable |
| Audio Outputs | 2 x XLR, balanced, +4dBu/-10dBV |
| Digital I/O | S/PDIF coaxial (in/out), 44.1/48kHz |
| MIDI I/O | In, Out, Thru |
| Effects Types | Reverb, Delay, Chorus, Flanger, Phaser, Pitch Shift, Compression, EQ, Modulation, Combinations |
| Presets | 100 factory, 100 user |
| Signal Processing | 24-bit, 48kHz sampling, 110dB dynamic range |
| Control Interface | Rotary encoders, soft buttons, footswitch jack |
| Bypass | True bypass relay (per channel) |
| Protection | Power surge, short circuit, over voltage |
| Operating Temperature | 40°F to 104°F (5°C to 40°C) |
| Humidity | Max 80% non-condensing |
| Accessories Included | Power cord, manual, rack ears |
| Repair | User-serviceable fuses; contact authorized Lexicon service for internal repairs |
| Cleaning | Use dry soft cloth; avoid solvents; disconnect power before cleaning |
| Safety Certifications | CE, FCC Class B, UL, CSA |
Frequently Asked Questions - MPX 500 LEXICON
User questions about MPX 500 LEXICON
0 question about this device. Answer the ones you know or ask your own.
Ask a new question about this device
Download the instructions for your Effect machine in PDF format for free! Find your manual MPX 500 - LEXICON and take your electronic device back in hand. On this page are published all the documents necessary for the use of your device. MPX 500 by LEXICON.
USER MANUAL MPX 500 LEXICON
MPX 500 24-Bit Dual Channel Processor
User Guide
Unpacking and Inspection
After unpacking the unit, save all packing materials in case you ever need to ship the unit. Thoroughly inspect the modules and packing materials for signs of damage. Report any damage to the carrier at once; report equipment malfunction to your dealer.
Communications Notice
This equipment has been tested and found to comply with the limits for a Class B digital device, pursuant to Part 15 of the FCC Rules. These limits are designed to provide reasonable protection against harmful interference in a residential installation. This equipment generates, uses and can radiate radio frequency energy and, if not installed and used in accordance with the instructions, may cause harmful interference to radio communications. However, there is no guarantee that interference will not occur in a particular installation. If this equipment does cause harmful interference to radio or television reception, which can be determined by turning the equipment off and on, the user is encouraged to try to correct the interference by one or more of the following measures:
Reorient or relocate the receiving antenna
Increase the separation between the equipment and receiver
Connect the equipment into an outlet on a circuit different from that to which the receiver is connected
Consult the dealer or an experienced radio/TV technician for help
Copyright 1999, 2000 Lexicon Inc.
All Rights Reserved.
Lexicon Inc.
3 Oak Park
Bedford MA 01730-1441
Telephone 781-280-0300
Fax 781-280-0490
www.lexicon.com
Table of Contents
Getting Started
Introduction 1
Front Panel Overview 2
Setting Audio Levels
Rear Panel Connections.... 4
Audio Connections • Footswitch
Basic Operation
The MPX 500 Display 7
Selecting and Loading Programs 8
Editing 9
The "Adjust" Knob • Tap Tempo Functions:
Varying the rhythm • Audio Tap • Setting Tempo via MIDI
Bypass 12
Storing Programs.... 12
System Mode
System Mode Parameters 15
Bypass • Patching • Program Load • Digital Output
MIDI OUT/THRU • MIDI Pgm Change • MIDI Clock
Receive • Tempo • MIDI Dumps
Program Descriptions
1 Plate 22
2 Gate 23
3 Hall 24
4 Chamber 25
5 Ambience.... 26
6 Rooms 27
7 Tremolo 28
8 Rotary 29
9 Chorus 30
10 Flange.... 31
11 Detune 32
12 Pitch.... 33
13 Delay, Echo 34
About the Dual Programs 36
14 Special FX 38
15 Flange-Delay 39
16 Pitch-Delay 39
17 Chorus-Delay 40
18 Delay-Reverb 40
19 Flange-Reverb 41
20 Pitch-Reverb 41
21 Chorus-Reverb 42
22 MonoSplitDly 43
23 MonoSplitRvb 44
24 Dual Mono 45
MIDI Operation
MPX 500 MIDI Behavior 47
Using Program Change Messages for Program Load... 48
Learning Continuous Controllers 49
Activating Bypass or Tap Functions with Program Change
Messages 50
Clearing a Learned Assignment 51
MIDI Clock 52
MIDI Dumps....52
MIDI Implementation Chart.... 53
Specifications
Getting Started
Introduction
Thank you for your purchase of the MPX 500 24-Bit Dual Channel Processor.
Powered by Lexicon's proprietary Lexichip™, the MPX 500 has 240 presets with classic reverb programs such as Ambience, Plate, Chamber and Inverse, as well as Tremolo, Rotary, Chorus, Flange, Pitch, Detune, 5.5 second Delay and Echo. Dual-channel processing gives you two independent effects in a variety of configurations: Dual Stereo (Parallel), Cascade, Mono Split and Dual Mono.
A large graphics display and dedicated Edit knobs give you instant access to each preset's parameters and an easy Learn mode allows MIDI patching of front panel controls. In addition, temp-controlled delays and modulation rates lock to Tap or MIDI clock, and Tap tempos can be controlled by audio input, the front panel Tap button, dual footswitch, external MIDI controller or MIDI Program Change.
Other features include a software-selectable MIDI OUT/THRU port, pushbutton or footswitch selection of dry or muted audio output and a built-in power supply.
To make sure you get the most out of the MPX 500, be sure to read the manual.
Front Panel Overview

* The level indicators are at their minimum size when the incoming signal is low (more than 30dB below full scale). The highest level indicators are highlighted when the signal approaches full scale.
Setting Audio Levels
As with any audio product, it is good practice to first power on all outboard gear, then the mixer, then any loudspeakers.
Input
- First, bypass all effects. The System parameter, Bypass Mode must be set to pass dry audio. To do this:
Press System to enter System mode.
Turn Edit Knob 1 to display Bypass Mode.
Turn Edit Knob 3 to select Dry.
Press System again to exit System mode.
Press Bypass.
-
With your highest level program material, start with a very low input level and advance it slowly.
-
When you reach audible distortion, or when the display clip indicators light and stay on, lower the input level until the clip meters come on only on the highest peaks.
The Input Trim control allows the MPX 500 to be driven by an input level in the range of +20dBu to +8dBu. The minimum setting (fully counterclockwise) should be optimal for +4dBu (balanced) inputs. The maximum setting (fully clockwise) should be optimal for -10dBV (unbalanced) inputs.
Output
- Press System to enter System mode.
Output Level (the first System parameter) will be displayed.
- Turn Edit Knob 3 to set Output Level.
0dB should be unity gain for a +4dBu input device.
-12dB should be unity gain for a -10dBV input device.
- Press System again to exit System mode.
Rear Panel Connections

The MPX 500 produces effects from either mono or stereo sources. With mono sources, the dry signal appears, along with audio effects, at both outputs. For instruments and sources with stereo outputs, use both inputs. We recommend using the outputs in stereo whenever possible, but if mono output is required, use either output jack.
Footswitch
A footswitch connected via the rear-panel footswitch jack allows control of Tap and Bypass. A momentary footswitch can be wired to a tip-ring-sleeve connector. A stereo Y-connector allows two identical single switches to be used.
Power off the MPX 500 before plugging in the footswitch. (Otherwise, Bypass will be enabled.)
The MPX 500 can be used as two independent Effects Processors with the Dual Programs. Designate two auxiliary sends on your console and connect one to the left MPX 500 input, and the other to the right input. Refer to the Program Descriptions to take advantage of this configuration.


Basic Operation
The MPX 500 Display
The MPX 500 Program Select display shows detailed program information, including routing, the current tempo setting, a full page of as many as four editable parameter settings, and real-time input level meters.

Selecting and Loading Programs
MPX 500 programs are organized into 24 Banks plus a User Bank. (The programs are described in detail later in this manual.) When powered on, the unit will display and load the last program used.
To display any other MPX 500 program, simply turn the front panel PROGRAM knob. The knob will progressively select the rest of the programs in the current Bank, then proceed through each of the remaining Banks. To jump between Banks, push the PROGRAM knob in while turning.
If the selected program is not the currently loaded program, the Load LED will light. After four seconds, the display will revert to showing the current program, but the Load LED will remain lit to indicate that the last selected program is cued for loading. The number of the cued program will appear highlighted to the left of the name of the current Bank on the display. To load the cued program, press Load.
An AutoLoad feature is available which will cause selected programs to load automatically 3/4 second after the knob stops turning. (See System Mode for information on activating this and other System mode parameters.)
Turn PROGRAM to cycle through all of the MPX 500 programs.

To select a specific program Bank, push the PROGRAM knob in while turning.

When the selected program is different from the currently running program, the Load LED will light.

Press to load the selected program.
Editing
Each MPX 500 program has as many as 16 editable parameters, organized into edit "pages" of as many as four parameters each. The front panel Edit Pages button cycles through all of the available pages for the current program.
Dedicated edit knobs corresponding to each page of displayed parameters make program adjustment easy. Simply turn the knob (1-4) for the displayed parameter (1-4) you want to adjust. When you alter a parameter value, it will be highlighted and the Edited LED will light to show that the program is different than the currently running version. (These edit indicators will be turned off when you store the new program, or if you load another program.) If you return to Program Select mode without storing your changes, your edited version will still appear as the currently running program, but the Load LED will light and the original version of the program will be cued.

The "Adjust" Knob
A special control in each program lets you make quick adjustments to the most critical parameters of the sound. We have positioned this custom control under Edit knob 1 on Page 1 of each program and refer to it as the Adjust knob in this manual.
In many cases, this parameter controls several effect parameters simultaneously to provide simple control of a complex editing process. In many Chamber and Room programs, for example, this parameters controls the "liveness" of the space by changing decay, EQ and early reflections all at the same time. For easy identification, this parameter name will always appear in parentheses, as: (Livenes). When you turn the knob, the bottom display line will temporarily show a more complete description of its function in the running program.
NOTE: As the Adjust knob can access and control more internal controls than the 16 displayed parameters in each program, there may be instances where this control (or Tap) will modify a parameter which is not displayed on any of the program's edit pages. In these instances, the Edited LED will light, even though no displayed parameters are highlighted.
Tap Tempo Functions
Varying the Rhythm
The MPX 500 Tempo features allow you to set the delay times and modulation rates of tempo-based programs to the beat of the music. There are several ways to set tempo (40-400BPM), each of which is described below. No matter which method you select, the current tempo rate will be displayed in the upper right corner of the display, and the embedded LED in the Tap button will flash in tempo whenever a program with tempo-controllable parameters is loaded. You can set a global tempo for all of the MPX 500 programs, or have each program stored with its own tempo. (See System Mode.) The global (g) or Program (p) system parameter selection is shown to the right of the tempo display.

To set the tempo from the front panel, simply press the Tap button (or a connected footswitch) twice in time with the music. That's your tempo. No more dialing up what "could be" the delay time in milliseconds — just tap twice — the MPX 500 will figure out the time for you. When you want to change tempo, just tap twice again in the new rhythm.
Audio Tap
You can also use audio input to set the tempo of the MPX 500 delay times.
- Press and hold the Tap button until the Tempo display appears. (Using a footswitch lets you press and hold Tap without taking your hands off your instrument.)
- The message Detecting Audio will be shown, along with a list of parameters in the current program which can be controlled by tempo. Play 2 short notes in rhythm to set the tempo. When you release Tap, the message Use Knob 3 will be displayed to indicate that tempo can now be further adjusted from the front panel. Just turn Edit knob 3 to dial in a tempo (in BPM).
- Press Tap to exit this mode.
Many factory programs are stored with their own tempo rate. You can tap in a new tempo (and store your version in a User location) or set the MPX 500 to always recall the last tempo used and apply it to every program. (See System Mode for information on changing the MPX 500 default Tempo Mode from Global to Program.)
When you select Global Tempo from the MPX 500 System mode, the last tempo tapped in will be applied to all programs with tempo-controlled parameters. (You will know if a program is tempo-controllable because the Tap button LED will flash when the program is loaded and the tempo rate display will appear.)
Setting Tempo via MIDI
When used in conjunction with the Learn feature, Tap can be set remotely from any MIDI device. MIDI controllers, such as Lexicon's MPX R1 Foot Controller, can be used to send Continuous Controller messages or Program Changes to the MPX 500 or you can send Continuous Controller or Program Change messages from the button and fader moves of many mixing consoles. The MPX 500 will Learn these messages and allow you to set tempo via MIDI.
The MPX 500 can also receive and utilize MIDI Clock. So, when used with a MIDI sequencer or drum machine, the MPX 500 automatically adjusts its internal tempo to match. (See MIDI Operation.)
Bypass
Pressing the front panel Bypass button will cause the MPX 500 to pass only unprocessed audio, to mute completely, or to mute the inputs to the current effect.
A System Mode parameter determines which of these three options is in effect. (See System Mode.) Bypass functions can also be activated by footswitch or via MIDI.
Storing Programs
When you want to save a program, press Store. The Store and the Tap/Cancel LEDs will light to indicate that the MPX 500 store function is armed. (If you want to exit without saving the current program, press Tap/Cancel at any time before completing the store operation.)
The first available location in the User Bank will be selected by default when Store is pressed. To select a different location (including the location of a User program you want to overwrite), press and turn PROGRAM to select another location in the User Bank.
The program will be displayed with its original name and a numeric suffix (1-9). You can keep this default name, or use Edit knobs 1 and 3 to select character positions and assign characters to create a different name.
Press Store to save the program with its new name. When the Store operation is complete, the new program will automatically load (becoming the currently running program).
System Mode
System parameters and MIDI dumps are activated in System mode. To enter this mode, press System. The System LED will light to indicate you are in System mode.
The adjustable parameters available in this mode are described on the following page. Edit knob 1 will select parameters, edit knob 3 will change the selected parameter's setting.

Except for MIDI dumps and reinitialization commands, which require confirmation to execute, system parameter changes are effected immediately.
Pressing System again will return the unit to its previous running mode.
System Mode Parameters
| Parameter Settings Default Setting | ||
| Output Level 0dB to -24dB, Off 0dB | ||
| Input Source Analog Stereo, Analog Mono L, Analog StereoAnalog Mono R, S/PDIF Digital | ||
| Clock Source Internal 44.1K, Internal 48K, External (S/PDIF) Internal 44.1K | ||
| Digital Output Processed, Dry Processed | ||
| Mix Mode Program, Global Global | ||
| Bypass Mode Dry/Full Mute/Input Mute Dry | ||
| Program Load Mode Bypass Dry, Full Mute Bypass Dry | ||
| Tempo Mode Program, Global Global | ||
| MIDI Patches | Enabled, Disabled | Enabled |
| MIDI Channel Off, 1-16, Omni | 1 | |
| MIDI Program Change | Enabled, Disabled | Enabled |
| MIDI Clock | Enabled, Disabled | Enabled |
| MIDI Out/Thru | Out, Thru | Out |
| Operating Mode Normal, Locked, Demo | Normal | |
| Memory Protect | Enabled, Disabled | Disabled |
| Auto Load | Enabled, Disabled | Disabled |
| Dump User Bank | - | - |
| Dump Current Program | - | - |
| Dump System Data | - | - |
| Clear User Bank | - | - |
| Factory Init | - | - |
Output Level
This parameter appears by default whenever you press System to give you quick access to output level settings.
Input Source
Allows you to specify the type of input. If S/PDIF Digital is selected and no digital signal is present, the MPX 500 will mute and display an alert message.
Clock Source
Allows you to select 44.1kHz or 48kHz internal clock sources, or external (S/PDIF) clock source.
Digital Output
When Dry is selected, Analog In to Digital Out provides an auxiliary A/D converter.
Mix Mode
Determines whether the current Mix setting of the MPX 500 will be applied to all programs (Global), or whether program-specific Mix levels are restored on each program load.
NOTE: A default Mix value is stored with each program. These individual stored values will take effect when a program is loaded, if Mix Mode is set to Program — the Global mix setting will override the individual stored settings if Mix mode is set to Global.
Bypass Mode
This parameter sets the Bypass button (or the footswitch, or MIDI controller assigned to Bypass) to mute the inputs, to mute the inputs and outputs, or to bypass the processed audio (passing only dry audio to the outputs).
Program Load Mode
This parameter determines whether the MPX 500 will engage full mute or simply bypass processed audio while changing programs.
Tempo Mode
Determines whether the current tempo of the MPX 500 will be applied to all programs (Global), or whether program-specific tempos are restored on each program load.
NOTE: A default Tempo is stored with each program. These individual stored tempos will take effect if Tempo Mode is set to Program — the Global tempo setting will override the individual stored settings if Tempo mode is set to Global.
MIDI Patches
This parameter allows you to temporarily suspend (Disable) and restore (Enable) any Learned patches.
MIDI Channel
Allows selection of a MIDI Channel for all MPX 500 messages (Learned, SysEx and Program Change).
MIDI Program Change
The setting of this parameter determines whether or not the MPX 500 will recognize MIDI Program Change messages for loading programs.
MIDI Clock
The setting of this parameter determines whether or not the MPX 500 will recognize MIDI Clock messages.
MIDI Out-Thru
Sets the rear panel MIDI OUT/THRU jack for either MIDI OUT or MIDI THRU functionality.
NOTE: MIDI Dumps can only be performed when this parameter is set to MIDI Out.
Operating Mode
Allows the MPX 500 front panel controls to be locked into their current settings, or to be placed in continuous program load cycle for demonstration purposes.
When Locked is selected, only the User Bank is available. Program Load Mode is set to Auto Load and only Bypass, Program Select and System modes are available. Edit Mode is not available and Tempo and Patches cannot be Learned.
Changes to this parameter take effect on the next power cycle.
Memory Protect
When enabled, this parameter prevents changes to system parameters and User programs.
Auto Load
When enabled, programs will load approximately 3/4 second after selection. When disabled, Load must be pressed to load selected programs.
MIDI Dumps (Dump User Bank, Dump Current Program, Dump System Data)
These selections allow you to execute MIDI Dumps. See MIDI Operation.
Clear User Bank
Selecting this parameter will arm a reinitialization procedure that will erase the contents of the User Bank and restore it to its factory state. Pressing Store will execute the procedure.
Factory Init
Selecting this parameter will arm a reinitialization procedure that will restore all of the adjustable parameters in the MPX 500 to their factory default states. This includes all User programs, System parameters and Learned patches. Pressing Store will execute the procedure.
Program Descriptions
The 240 programs in the MPX 500 are designed to provide a full palette of high caliber ambience, reverb, delay, pitch shift and other effects. As you audition the programs, be sure to vary the Adjust parameter.
The Adjust parameter (Edit Page 1, Knob 1 in each program) has been carefully customized for each individual program. In many cases it controls several effect parameters simultaneously to provide simple control of a complicated editing process. In many Chamber and Room programs, for example, Adjust controls the "liveness" of the space by changing decay, EQ and early reflections all at the same time. This parameter has a range of 0-127 to make it compatible with MIDI control.
For easy identification, this parameter name will always appear in parentheses, as: (Livenes). When you turn the knob, the bottom display line will temporarily show a more complete description of its function in the running program.
The following section provides a general description of each MPX 500 Bank along with tables that detail all of the programs available in that Bank. These details include the function of the Adjust parameter and the Tap button (for programs that use tempo-controlled rate or delay times).
1 Plate
The Plate programs synthesize the sound of metal plates with high initial diffusion and a relatively bright, colored sound. These programs are designed to be heard as part of the music, mellowing and thickening the initial sound. They are a popular choice for enhancing pop music, particularly percussion.
| # Plate PROGRAMs Adjust Tap | |||
| 1 Small Plate Livenes – | |||
| 2 Medium Plate Livenes – | |||
| 3 Large Plate Livenes Predelay (1/32 Note) | |||
| 4 Tap PreDelay MidRT | Predelay (1/32 Note) | ||
| 5 Tape Slap | ips (7.5/15) | – | |
| 6 Rich Plate | MidRT | Predelay (1/32 Note) | |
| 7 Large &Bright | MidRT | Predelay (1/32 Note) | |
| 8 VocalPlate | Livenes Echo | ||
| 9 Drum Plate | Livenes – | ||
Plate reverb was originally generated by a large, thin sheet of metal suspended upright under tension on springs. Transducers attached to the plate transmitted a signal that made the plate vibrate — making sounds broadcast through the plate seem to be occurring in a large open space.
2 Gate
The Gate programs provide a fairly constant sound with no decay until the reverb is cut off abruptly. These programs work well on percussion — particularly on snare and toms, but be sure to experiment with other sound sources as well.
* Note that audio is muted briefly when Time is altered with Adjust.
| # Gate PROGRAMs Adjust Tap | |||
| 10 StraightGate Time* – | |||
| 11 Slope Down Time* – | |||
| 12 Drum Gate HighCut – | |||
| 13 140ms TapPre | HighCut Predelay (1/32 Note) | ||
| 14 240ms TapPre | HighCut Predelay (1/32 Note) | ||
| 15 340ms TapPre | HighCut Predelay (1/32 Note) | ||
| 16 440ms TapPre | HighCut Predelay (1/32 Note) | ||
| 17 540ms TapPre | HighCut Predelay (1/32 Note) | ||
| 18 Inverse | Time* – | ||
| 19 Dark Inverse Time* – | |||
Gated reverbs were originally created by feeding a reverb, such as a metal plate, through an analog gate device. The decay time was set to instant, and the hold time varied the duration of the sound.
3 Hall
The clean reverberation of the Hall programs is designed to add spaciousness, while leaving the source material unchanged. In addition to general instrumental and vocal applications, the Hall programs are a good choice for giving separately recorded tracks the sense of belonging to the same performance.
| # Hall PROGRAMs Adjust Tap | |||
| 20 Small Hall MidRT – | |||
| 21 Medium Hall MidRT – | |||
| 22 Large Hall MidRT – | |||
| 23 Small Church MidRT – | |||
| 24 Large Church | MidRT – | ||
| 25 Jazz Hall | MidRT – | ||
| 26 Dance Hall | MidRT – | ||
| 27 Synth Hall | MidRT – | ||
| 28 Concert Hall MidRT – | |||
| 29 Gothic Hall | MidRT – | ||
Lexicon's Hall programs recreate the acoustics of actual places, from grand reverberant enclosures to small concert halls.
4 Chamber
The stereo Chamber programs produce even, relatively dimensionless reverberation, with little change in color as the sound decays. The initial diffusion is similar to the Hall programs, but the sense of space and size is much less obvious. This characteristic, along with the low color of the decay tail makes these programs useful on a wide range of material. They are especially useful on spoken voice, giving a noticeable increase in loudness with very low color.
| # Chamber PROGRAMs Adjust Tap | |||
| 30 Brick Wall HighCut – | |||
| 31 Basement HighCut – | |||
| 32 Live Concert Livenes Eko Delay | |||
| 33 Drum Chamber | MidRT | – | |
| 34 Moves on... | Livenes – | ||
| 35 Live Chamber | Livenes – | ||
| 36 VocalChambr1 | Livenes Eko Delay | ||
| 37 VocalChambr2 | Livenes Eko Delay | ||
| 38 Wide Chamber | Livenes – | ||
| 39 PCM60: Large | MidRT | – | |
Historically, recording studio chambers were often oddly shaped rooms with a loudspeaker and set of microphones to pick up the ambience in various parts of the room.
5 Ambience
The Ambience programs simulates reflections from room surfaces with random reflections, a gradual decay of overall level, and a gradual narrowing of the bandwidth.
In these programs, the Mix control adds depth — emulating the movement of a coincident pair of microphones from the sound source into the room.
| # Ambience PROGRAMs Adjust Tap | |||
| 40 Announcer HighCut – | |||
| 41 VerySmallAmb HighCut – | |||
| 42 SmallAmb HighCut – | |||
| 43 MidSizeAmb HighCut – | |||
| 44 Studio "D" HighCut – | |||
| 45 Bright Amb Decay – | |||
| 46 Dark Amb Decay – | |||
| 47 Marble Foyer | Livenes | – | |
| 48 Smooth Amb | Decay – | ||
| 49 Guitar Amb Decay – | |||
Ambience gives warmth, spaciousness and depth to a performance without coloring the direct sound, and is commonly used to add a room sound to recorded music or speech. In music recording, Ambience can realistically add distance to close-miked signal.
6 Room
The Room programs are very useful on drums and percussion and can also be applied to electric guitar tracks.
| # Room PROGRAMs Adjust Tap | |||
| 50 Bedroom Walls – | |||
| 51 Tiled Room LF Boost – | |||
| 52 Studio "C" MidRT – | |||
| 53 Small Room Livenes – | |||
| 54 Studio "B" MidRT – | |||
| 55 Rehursal Room EQ | – | ||
| 56 Studio "A" MidRT – | |||
| 57 Large Room | EQ | – | |
| 58 Fat Space | MidRT – | ||
| 59 Chunky Space | EQ | – | |
The Room programs emulate actual rooms where there is a more apparent sense of being in a small live place.
7 Tremolo
The tremolo programs offer a variety of tremolo shapes (square, sawtooth, triangle, sine and rectified sine). The synchronization of the left and right sides can be adjusted to produce mono and stereo effects. As the tremolo rates of several variations are set with Tap, it's easy to match the tempo of the music. Other variations let you set left and right channel waveforms out-of-phase, resulting in a panning motion.
All of these programs should be used with Mix set to fully Wet. By adding more dry to the wet/dry mix, Mix effectively sets the depth of the Tremolo. As Tremolo is essentially a rhythmic effect, care should also be taken to make the rate work with the tempo of the music.
| # Tremolo PROGRAMs Adjust Tap | ||
| 60 RectSineTap Phase Rate(1/8 Note) | ||
| 61 Square Tap Phase Rate(1/8 Note) | ||
| 62 Sine Tap Trpl Phase Rate(1/8 Note) | ||
| 63 Triangle Phase Rate(1/8 Note) | ||
| 64 Sawtooth Phase Rate(1/8 Note) | ||
Tremolo is a rhythmic change in loudness, commonly employed as an expressive technique by vocalists and wind instrument players. It is also one of the oldest electronic effects — frequently used with electric guitar, electric piano and, sometimes, vocals. Different tremolo effects are largely determined by the rate and waveform shape of the loudness change (fast or slow, smooth or sharp). If the effect is used in a stereo mix, the left and right can be synchronized in a variety of ways to produce dramatic side-to-side motion.
8 Rotary
The rotary effect is a detailed simulation of a Leslie-style cabinet. The input signal is split into high and low frequency bands. The rotation effect is created by a synchronized combination of pitch shifting, tremolo and panning. Like the physical model, the high (horn) and low (drum) frequencies are "spun" in opposite directions. Horn and drum speeds are independent, and are designed with acceleration and deceleration characteristics to simulate the inertia of the original mechanical elements.
A virtual requirement for any organ sound, the rotary programs also sound great with guitar and electric piano rhythm parts. In fact, they're great alternatives to chorus and tremolo effects for any sound source.
All of these programs should be used with Mix set to fully Wet for the full effect.
| # Rotary PROGRAMs Adjust Tap | |||
| 65 Rot | SlowFast Switch – | ||
| 66 Rot | Slow Resnce – | ||
| 67 Rot | SpeedAdj Speed | – | |
| 68 Rot | TapRate1 | Balance | Rate |
| 69 Rot | TapRate2 | Resnce Rate | |
Rotary speaker cabinets were originally designed to provide a majestic vibrato/choir effect for electronic theater and church organs. The most well known rotary speaker is the Leslie™ Model 122, which has two counter-rotating elements — a high frequency horn and a low frequency rotor with slow and fast speeds. The sound generated as the spinning elements change speed is truly magical. The swirling, spacious effect is hard to describe, but is instantly recognizable.
9 Chorus
The stereo Chorus programs uses six independently randomized delay voices panned across the stereo field. These programs, inherited from Lexicon's PCM 80, generate a rich, airy effect that can simulate the sound of multiple sound sources from a single source. These programs are stunning on acoustic or clean electric guitar.
All of these programs should be used with Mix set to fully Wet to achieve the full richness of the 6-voice chorus.
| # Chorus PROGRAMs Adjust Tap | |||
| 70 Chorus1 Resnce – | |||
| 71 Chorus2 HighCut – | |||
| 72 Chorus3 Diffusn – | |||
| 73 Slap Chorus1 Diffusn – | |||
| 74 Slap Chorus2 Depth – | |||
Chorus effects multiply the original audio source to create a lush, full sound. Traditionally used to fatten up tracks and to add body to guitar without coloring the original tone, chorus effects are also often used in combination with echoes, plates and other reverb effects.
10 Flange
The MPX 500 stereo Flanger has two 2-tap delays — one per channel. The first tap is fixed, and the second sweeps past it. Mixing the two delay taps together creates the flanging effect.
All of these programs should be used with Mix set to fully Wet to achieve the full flange effect.
| # Flange PROGRAMs Adjust Tap | |||
| 75 Flng Lite Speed — | |||
| 76 Flng Lite180 Resnce — | |||
| 77 Flng Med180 Speed — | |||
| 78 Flng Deep Resnce — | |||
| 79 Flng Deep180 Resnce — | |||
Flanging effects were originally created by simultaneously recording and playing back two identical programs on two tape recorders, then using hand pressure against the flange of the tape reels to slow down first one machine, then the other. The result was a series of changing phase cancellations and reinforcements, with a characteristic swishing, tunnelling and fading sound.
11 Detune
The 4-voice stereo Detune programs have one pair of voices per channel. As more detune amount is applied (with Adjust), the pair grow more out of tune, providing a lush sound without the need for a dry signal to be mixed in.
All of these programs should be used with Mix set to fully Wet to achieve the full effect.
| # Detune PROGRAMs Adjust Tap | |||
| 80 De | une Mild Dtuning – | ||
| 81 De | une Med&Warm Dtuning – | ||
| 82 De | une Heavy Dtuning – | ||
| 83 De | Xtreme Dtuning – | ||
| 84 Pitch | Detune Dtuning – | ||
| Detune effects add a delayed/pitch shifted version of the original source — thickening up the sound. They can be particularly effective when used to simulate double-tracking. They are also great alternatives to chorus effects, adding the richness of a chorus without the audible sweep caused by the chorus rate. |
12 Pitch
The stereo polyphonic Pitch programs allow complete program material or monophonic sources to be shifted from two octaves down through one octave up.
For pitch correction, use these programs with Mix set to fully Wet. For harmonization, use the desired amount of wet/dry Mix.
| # Pitch PROGRAMs Adjust Tap | |||
| 85 Pch Chrmatic Pitch – | |||
| 86 Pitch Fine Pitch – | |||
| 87 Pch 4th-5ths Pitch – | |||
| 88 Pch PowerInV Pitch – | |||
| 89 Vocal Chorus HighCut – | |||
| Altering the pitch of a sound allows a variety of effects from subtle detuning to the creation of harmonies and chords. |
13 Delay, Echo
The Delay, Echo variations include mono (5.5 seconds), stereo (2.7 seconds) and 6-voice multitap effects. Each of the programs can be used for digital delay or tape echo effects. When the Adjust parameter (Page 1, Edit knob 1) is set to a value between 63 and 3, tape echo effects are produced. (Each repeat is darker and softer.) When the Adjust parameter is set to a value between 64 and 127, digital delay effects are produced. (Each repeat is the same timbre, but softer.)
In programs 90-97, Adjust also sets the amount of feedback — with an increasing number of repeats as the parameter value is increased. Delay time is set with Tap. Each program is preset with a different useful rhythm.
In Variations 98-104, the amount of feedback is preset and Adjust determines Delay time.
NOTE: In all of the Delay programs (including the Dual combinations), Delay times (e.g. L Dly 1, R Dly 1 etc.) not controlled by Tempo, are scaled by the Master Delay parameter (MstrDly). In some programs, Adjust controls MstrDly.
MstrDly values range from 0-100% and are set to 100% in most preset programs. If this control is reset manually (or by Adjust) to less than 100%, individual delay times will scale accordingly. For example, if MstrDly is set to 25%, delay times will be reduced to 1/4 of their normal value. Other knobs which control those delay times become correspondingly less sensitive — requiring, in this example, 4 times as manny clicks to obtain their normal result.
When using any type of delay or echo effects with music, always pay attention to the way the repeats fall rhythmically to the beat. The most effective delay and echo patterns are those that lock in with the tempo of the tune.
| # Delay, Echo PROGRAMs Adjust Tap | |||
| 90 Dly | Mono Tap Feedbk Delay Time | ||
| 91 Dly | Stereo Tap Feedbk Delay Time | ||
| 92 Dly | ShuflTap Feedbk Delay Time | ||
| 93 Dly | Dot8 Tap Feedbk Delay Time | ||
| 94 Dly | 8+3plTap Feedbk Delay Time | ||
| 95 Dly | Pong Tap Feedbk Delay Time | ||
| 96 Dly | XfbkTap1 Feedbk Delay Time | ||
| 97 Dly | XfbkTap2 Feedbk Delay Time | ||
| 98 Dly | Mono | Time: 0-5.5sec | - |
| 99 Dly | Stereo | Time: 0-2.7sec | - |
| 100 Dly | TapeSlap | Time: 3 3/4 to 30ips | - |
| 101 Multi Bounce | Time: 0-100ms | - | |
| 102 MultiInverse | Time: 0-400ms | - | |
| 103 Multi Linear | Time: 0-400ms | - | |
| 104 Multi Pong | Time: 0-150ms + Fbk | - | |
Delays and echoes are effects that repeat a sound a short time after it first occurs. The simplest (and oldest) delay effect is tape slap — a single repeat about 100ms after the original sound. (It was often used on Elvis's voice and rockabilly guitar tracks.) Tape slap becomes tape echo when the output of the tape is fed back into the input (feedback), turning a single repeat into a series of repeats — each a little softer and a little darker than the last. This darkening of each repeat is characteristic of the analog tape recording process. Digital delays don't have this characteristic — each repeat has the same exact timbre and the only difference from repeat to repeat is in loudness.
Digital delay and tape echo are both useful, but they are different. Tape echo is warmer and allows the original sound to stand out more, while digital delay can present a “perfect” copy of the original sound.
About the Dual Programs (Banks 14-24)
The Dual programs combine either a Delay or Reverb algorithm with a Flange, a Pitch or a Chorus. The Effects Lvl/Bal parameter (Page 1 Edit knob 3) controls the relative balance of each effect in the combination.
Four routing configurations are used in the Dual programs: Dual Stereo (Parallel), Cascade, Mono Split and Dual Mono.
Bank 14 (Special FX) contains programs which use a variety of crouting configurations. The remaining Banks (15-23) are organized as follows:
In Banks 15-21, the first six programs in each Bank are set up in the Parallel configuration - two stereo programs placed side by side so that they receive and output stereo audio from both left and right channels. The last four programs in each Bank are set up in the Cascade configuration - two stereo programs, one placed after the other (for example, Flange-Delay, Flange passes its stereo signal to the Delay).
Banks 22 and 23 are set up in the Mono Split configuration which is similar to Parallel, but here, one program (Flange) receives audio from the left input and the other program (Delay) receives audio from the right input. Both programs then output stereo audio.
Because Dual Mono programs are mixed differently, we've grouped them all in the last preset Bank (24). In these programs, one program (Flange) appears on the left channel only and the other program (Delay) appears on the right channel only.

flowchart
graph LR
    subgraph Dual Stereo (Parallel)
        A1["L"] --> A2["A"]
        A2 --> A3["B"]
        A3 --> A4["L"]
        A4 --> A5["R"]
        A5 --> A6["A"]
        A6 --> A7["B"]
        A7 --> A8["L"]
        A8 --> A9["R"]
        A9 --> A10["A"]
    end

    subgraph Cascade
        B1["A"] --> B2["B"]
        B2 --> B3["L"]
        B3 --> B4["R"]
        B4 --> B5["A"]
    end

    subgraph Mbox Split
        C1["L"] --> C2["A"]
        C2 --> C3["B"]
        C3 --> C4["L"]
        C4 --> C5["R"]
        C5 --> C6["A"]
        C6 --> C7["B"]
        C7 --> C8["L"]
        C8 --> C9["R"]
        C9 --> C10["A"]
    end

    subgraph Dual Mbox
        D1["L"] --> D2["A"]
        D2 --> D3["B"]
        D3 --> D4["L"]
        D4 --> D5["R"]
        D5 --> D6["A"]
    end
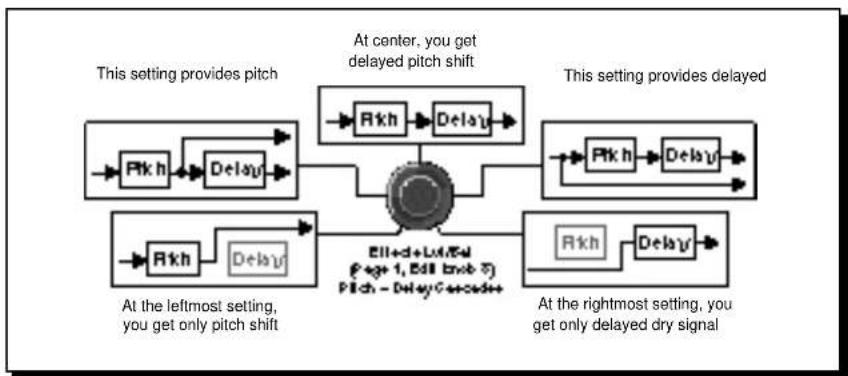
Generally, the Effects Lvl/Bal parameter (Page 1, Edit knob 3) controls the balance of the two effects in each dual program. In the cascade variations, rather than simply controlling balance, the knob varies the amount of the first effect or dry signal which is fed into the second effect.
flowchart
graph TD
    A["At center, you get delayed pitch shift"] --> B["Rkh"]
    B --> C["Delay"]
    C --> D["Central Node"]
    D --> E["Rkh"]
    E --> F["Delay"]
    F --> G["Rkh"]
    G --> H["Delay"]
    H --> I["At the rightmost setting, you get only delayed dry signal"]
    J["At the leftmost setting, you get only pitch shift"] --> K["Rkh"]
    K --> L["Delay"]
    L --> M["Ell+d+Lvl/Evl (F+g+1, Bell brk-5) Pitch - Delay C++c++"]
    N["This setting provides pitch"] --> O["Ptk h"]
    O --> P["Delay"]
    P --> Q["Rkh"]
    Q --> R["Delay"]
    R --> S["Rkh"]
    S --> T["Delay"]
    T --> U["This setting provides delayed"]
Behavior of Effects Lvl/Bal in the cascade programs. Several points from the knob's continuous range are illustrated here, using Pitch-Delay as an example.
14 Special FX
The Special FX programs showcase the flexibility and creative possibilities of the MPX 500. Adjust is completely different in each of the programs, so be sure to experiment with all of them.
| # Special FX PROGRAMs Adjust Tap | |||
| 105 Infinite HighCut Eko | |||
| 106 The Abyss Dtuning – | |||
| 107 Jet Flange Resnce Speed (Whole Note) | |||
| 108 Chorus>Verb HighCut – | |||
| 109 TapRot Dly Time: 0-150ms+Fbk | Rate (Drum/Horn) | ||
| 110 Fader Verb | Level | Echo | |
| 111 LowRumble | Decay – | ||
| 112 Ducker Verb | Decay – | ||
| 113 DuckerChorus | Resnce – | ||
| 114 Ducker Xfeed | Feedbk | – | |
| 115 Echoes:Beats | Delay | Delay Time | |
| 116 Panning Dlys | Feedbk | Dly Time, Pan Rate | |
| 117 DreamSequence | Pitch | – | |
| 118 Infinite Dly | Feedbk | Delay Time (Whole Note) | |
| 119 Diffusor | Diffusn | – | |
15 Flange - Delay
| # Flange-Delay PROGRAMs Adjust Tap Routing | ||||
| 120 F | ng Tap Feedbk Delay Time (1/4 Note) | 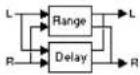 | ||
| 121 F | ng .8Tap Feedbk Dotted 1/8 Note | |||
| 122 F | ng 3plTap Feedbk 1/8 Note Triplet | |||
| 123 F | ng PongTap Feedbk Delay Time (1/4 Note) | |||
| 124 F | ng Xfeed Time: 0-150ms — | |||
| 125 F | ng Bounce Time: 0-200ms, Feedbk — | |||
| 126 F | ng>Tap Feedbk Delay Time (1/4 Note) |  | ||
| 127 F | ngl>Fbk Time: 0-150ms, Feedbk — | |||
| 128 F | ng>Pong Feedbk Delay Time (1/4 Note) | |||
| 129 F | ng>Bnce Time: 0-200ms, Feedbk — | |||
16 Pitch - Delay
| # | Pitch-Delay PROGRAMs | Adjust | Tap | Routing |
| 130 5th Tap | Fitch | Delay Time |  | |
| 131 8ve 3pTap | Fitch | Delay Time | ||
| 132 8ve 8+3plTap | Fitch | Delay Time | ||
| 133 3rd4thPong | Fitch | Delay Time | ||
| 134 4th5th Xfeed | Fitch | Delay Time | ||
| 135 5th6th Xfeed | Fitch | Delay Time | ||
| 136 8ve> Xfeed | Fitch | Delay Time |  | |
| 137 5thXfeed | Fitch | Delay Time | ||
| 138 MajMin>Fbk | Fitch | Delay Time | ||
| 139 StepUp>Tap | Fitch | Delay Time | ||
17 Chorus– Delay
| # | Chorus-Delay PROGRAMs | Adjust | Tap | Routing | |
| 140 | Chor Tap | Feedbk | Delay Time | 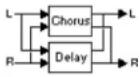 | |
| 141 | Chor .8Tap | Feedbk | Delay Time | ||
| 142 | Chor 8+3pl | Feedbk | Delay Time | ||
| 143 | Chor Pong Feedbk | Delay Time | |||
| 144 | Chor Repeat | Time | — | ||
| 145 | Chor Bounce | Time | — | ||
| 146 | Chor>Tap | Feedbk | Delay Time |  | |
| 147 | Chor>Repeat | Time | — | ||
| 148 | Chor>Pong | Feedbk | Delay Time | ||
| 149 | Chor>Bnce | Time | — | ||
18 Delay - Reverb
| # Delay-Reverb PROGRAMs Adjust Tap Routing | ||||
| 150 Tap | Small MidRT Delay Time |  | ||
| 151 3pl | TapMidSz MidRT Delay Time | |||
| 152 8-3pl | Large MidRT Delay Time | |||
| 153 Pong | Small MidRT Delay Time | |||
| 154 Xeed | MidSz MidRT Delay Time | |||
| 155 Xeed | Large MidRT Delay Time | |||
| 156 Tap > Room Livenes Delay Time | 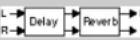 | |||
| 157 8-3pl> | Large MidRT Delay Time | |||
| 158 Xeed > Room Livenes Delay Time | ||||
| 159 Xeed> | Large MidRT Delay Time | |||
19 Flange - Reverb
| # Flange-Reverb PROGRAMs Adjust Tap Routing | ||||
| 160 L | teFI Small MidRT Speed (Whole Note) | 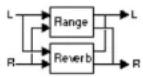 | ||
| 161 L | teFI MidSz MidRT Speed (Whole Note) | |||
| 162 L | teFI Large MidRT – | |||
| 163 D | deepFI Small MidRT – | |||
| 164 D | deepFI MidSz MidRT – | |||
| 165 D | deepFI Large MidRT – | |||
| 166 L | teFI > Small MidRT Speed (Whole Note) |  | ||
| 167 L | teFI > Room Livenes Speed (Whole Note) | |||
| 168 D | deepFI>Large MidRT – | |||
| 169 D | deepFI>Room Livenes — | |||
20 Pitch - Reverb
| # Pitch-Reverb PROGRAMs | Adjust Tap | Routing | ||
| 170 3 | d4th Room | Pitch | PreDelay (1/32 Note) | 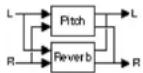 |
| 171 4 | h5th Room | Pitch | PreDelay (1/32 Note) | |
| 172 5 | h6th Room | Pitch | PreDelay (1/32 Note) | |
| 173 8 | ye MidSiz | Pitch | PreDelay (1/32 Note) | |
| 174 | Power MidSiz | Pitch | PreDelay (1/32 Note) | |
| 175 | Detune Room | Dtuning | PreDelay (1/32 Note) | |
| 176 | Fine> Small | Pitch | PreDelay (1/32 Note) |  |
| 177 | Power>Large | MidRT | PreDelay (1/32 Note) | |
| 178 4 | h > MidSiz | MidRT | PreDelay (1/32 Note) | |
| 179 8 | ye> MidSiz | MidRT | PreDelay (1/32 Note) | |
21 Chorus – Reverb
| # Chorus-Reverb PROGRAMs Adjust Tap Routing | |||
| 180 Chor1 Small MidRT – |  | ||
| 181 Chor1 MidSiz MidRT – | |||
| 182 Chor1 Large MidRT – | |||
| 183 Chor2 Small MidRT – | |||
| 184 Chor2 MidSiz MidRT – | |||
| 185 Chor2 Large MidRT – | |||
| 186 Chor1 > Room Livenes – |  | ||
| 187 Chor2 > Room Livenes – | |||
| 188 Chor3 > Room Livenes – | |||
| 189 Chor1 > Small MidRT – | |||
22 MonoSplitDly
| # MonoSplitDly PROGRAMs Adjust Tap Routing | |||
| 190 Fing+Tap Feedbk 1/4 Note | 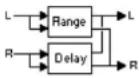 | ||
| 191 Fing+Pong Feedbk 1/4 Note | |||
| 192 Fing+Xfeed Time – | |||
| 193 Fing+Bnce Time – | |||
| 194 DeepFl+Dly Time – | |||
| 195 5th+Tap Pitch Delay Time |  | ||
| 196 8ve+3plTap Pitch Delay Time | |||
| 197 4th5th+Xfeed Pitch Delay Time | |||
| 198 5th6th+Xfeed Pitch Delay Time | |||
| 199 PchFine+Tap | Pitch Delay Time | ||
| 200 Chor+Tap | Feedbk Delay Time |  | |
| 201 Chor+Pong Feedbk Delay Time | |||
| 202 Chor+Xfeed | Time – | ||
| 203 Chor+Bnce | Time – | ||
| 204 Chor+Inverse | Time – | ||
23 MonoSplitRvb
| # MonoSplitRvb PROGRAMs Adjust Tap Routing | |||
| 205 Tap+MidSiz MidRT Delay Time |  | ||
| 206 Pong+Large MidRT Delay Time | |||
| 207 Bnce+MidSz MidRT Delay Time | |||
| 208 Xpeed+Small MidRT Delay Time | |||
| 209 Xpeed+MidSiz MidRT Delay Time | |||
| 210 LiteFL+MidSz MidRT Speed | 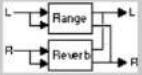 | ||
| 211 LiteFI+Large MidRT - | |||
| 212 DeepFI+Small MidRT - | |||
| 213 DeepFI+MidSz MidRT - | |||
| 214 DeepFI+Room Livenes - | |||
| 215 4th5th+Room | Pitch | PreDelay 1/32 |  |
| 216 5th6th+Room | Pitch | PreDelay 1/32 | |
| 217 4ths+Large | MidRT - | ||
| 218 8ve+MidSz | MidRT - | ||
| 219 PchFin+MidSz Pitch | - | ||
| 220 Chor1+Small | MidRT - |  | |
| 221 Chor1+Large | MidRT - | ||
| 222 Chor2+MidSiz | MidRT - | ||
| 223 Chor2+Large | MidRT - | ||
| 224 Chor3+MidSiz | MidRT - | ||
24 Dual Mono
| # Dual Mono PROGRAMs Adjust Tap | ||
| 225 Tap | Small MidRT Delay Time | ||
| 226 Tap | MidSz MidRT Delay Time | ||
| 227 Tap | Large MidRT Delay Time | ||
| 228 Tap | Room Livenes Delay Time | ||
| 229 DeepFI | Tap Feedbk Speed (1/4) Note) | ||
| 230 DeepFI | Dot8 Feedbk Speed (dotted 1/4 Note) | ||
| 231 8ves | Tap Pitch Delay Time | ||
| 232 8ves | 3pl Pitch Delay Time | ||
| 233 Chor2 | Tap Feedbk Delay Time | ||
| 234 Chor2 | Dot8 Feedbk Delay Time | ||
| 235 LiteFI | Large MidRT Speed | ||
| 236 DeepFI | Large MidRT Speed | ||
| 237 8ves | MidSz MidRT PreDelay 1/32 | ||
| 238 4ths | Large MidRT PreDelay 1/32 | ||
| 239 Chor1 | Room Livenes – | ||
| 240 Chor2 | Room Livenes – | ||
MIDI Operation
MPX 500 MIDI Behavior
The MPX 500 "learns" Program Change and Continuous Controllers in its Learn Mode. All of the parameters controlled by the front panel Edit knobs, as well as the Bypass and Tap buttons are supported.
As all MPX 500 messages use a single, selectable MIDI Channel, before using any of the MIDI control features, you should go to System Mode and select the MIDI Channel you want to use. (See System Parameters.)
Any of the 16 parameters controlled by the Edit knobs can be patched

Using Program Change Messages for Program Load
The MPX 500 will allow loading of all of its preset and User programs via standard MIDI Program Change messages. It also conforms to the use of MIDI controller 32 to perform Bank Select. The MPX 500 banks are ordered numerically from 0-24.
Here's how it works. If a standard MIDI Program Change is sent to the MPX 500, Program Change messages 0-9 will load programs the first ten programs from the current Bank.
If a Bank Select message (controller 32) precedes a Program Change message, any of the MPX 500 programs can be loaded.
For example, Program Change 1 with the Plate Bank selected, will cause the Small Plate program to be loaded. Sending controller 32 with a value of 24 (or higher), followed by Program Change 1, loads the first program of the User Bank. Sending controller 32 with a value of 1, then Program Change 2, loads the second program (Slope Down) in the Gate Bank. Sending controller 32 with a value of 8, then program change 4 will load the last program (Slap Chorus2) in the Chorus Bank
Once a bank is selected, all subsequent Program Change messages will select programs within that bank until a new value for controller 32 is received, or until another PROGRAM or BANK selection is made from the front panel.
This function can be disabled with the MIDI Program Change parameter in System Mode.
| MPX 500 Program Banks | ||
| 0 Plate | 9 Flange | 18 Flange-Reverb |
| 1 Gate | 10 Detune | 19 Pitch-Reverb |
| 2 Hall | 11 Pitch | 20 Chorus-Reverb |
| 3 Chamber | 12 Delay/Echo | 21 MonoSplitDly |
| 4 Ambience | 13 Special FX | 22 MonoSplitRvb |
| 5 Rooms | 14 Flange-Delay | 23 Dual Mono |
| 6 Tremolo | 15 Pitch-Delay | 24 User |
| 7 Rotary | 16 Chorus-Delay | |
| 8 Chorus | 17 Delay-Reverb | |
Learning Continuous Controllers
The MPX 500 recognizes Pitch Bend, AfterTouch and MIDI Continuous Controllers 1-31 and 33-119. To Learn a Continuous Controller:
- Simultaneously press Store and Tap/Cancel to enter Learn Mode. (The LEDs of both these buttons will light to indicate Learn Mode is active.)

- Move one of the MPX 500 front panel controls (Edit Knob 1-4 with any of the four edit pages displayed, Bypass or Tap) to assign it to the controller. (Make sure that the Edit knob you want assigned is displayed before you move its corresponding Edit knob. The selected knob's name will appear highlighted and its current controller number and range will be displayed.)
- Move the MIDI controller through its full range. To use only a fraction of the controller's range, limit your movement to the desired range. An indicator will appear on the display to indicate incoming MIDI activity.
You can also dial up the controller you want with the Edit knob. In this case, the controller is automatically set to full range (0-127).
- Press Store to commit to the assignment.

- To assign another parameter or front panel control to a MIDI controller, repeat steps 2 - 5.
- Simultaneously press Store and Tap/Cancel to exit.
NOTE: When a MIDI controller is assigned to Bypass or Tap, moving it through the mid-point of its Learned range will execute a "press" of the front panel button.
Activating Bypass or Tap functions with Program Change Messages
The MPX 500 recognizes MIDI Program Changes 100-127 (101-128 on some MIDI devices) on any channel. To assign a Program Change message to Bypass or Tap:
- Simultaneously press Store and Tap/Cancel to enter Learn Mode. (Both LEDs will light to indicate Learn Mode is active.)
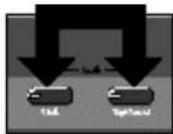
- Press the front panel button you want to control (Bypass or Tap).

-
Send a MIDI Program Change to the MPX 500. The display MIDI indicator will come on to indicate incoming MIDI activity.
-
Press Store to commit to the assignment.
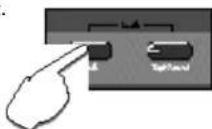
- Simultaneously press Store and Tap/Cancel to exit.
To aid MIDI controllers (such as some foot controllers) which do not allow repeated Program Change messages to be sent by a single button, the MPX 500 learns the next highest Program Change along with every Program Change message it learns for Bypass and/or Tap. For example, if you Learn Program Change 20 as the source for Bypass, Program Change 21 will also control Bypass functions. To avoid conflicting Bypass and Tap assignments, leave a space between the two buttons' assignments. (i.e. if you learn Program Change 20 for Bypass, remember that 21 will also be learned, so you will have to jump to Program Change 22 (and 23) for Tap.
Clearing a Learned Assignment
- Simultaneously press Store and Tap/Cancel to enter Learn Mode.
- Turn the front panel control that you want to clear (Edit Knob 1-4 with the assigned parameter displayed), Bypass or Tap) counterclockwise until None is displayed.
- Press Store to execute.
- Repeat Steps 2 and 3 to clear another front panel assignment.
- Simultaneously press Store and Tap/Cancel to exit.
Learnable Front Panel controls and Assignable MIDI Sources
| MIDI MIDIFront Panel Controllers Pgm ChangeControl 1-31, 33-119 100-127 | ||
| Mix Yes NoEffects Lvl/Bal Yes No | ||
| Adjust | Yes No | |
| Bypass | Yes | Yes |
| Tap | Yes | Yes |
MIDI Clock
The MPX 500 recognizes MIDI Clock messages and applies the tempo (40-400 BPM) to any program which utilizes the Tap-tempo feature. Connect a MIDI device which outputs MIDI Clock (such as the MPX R1 foot controller or a MIDI sequencer) to the MPX 500 MIDI IN jack, to have the MPX 500 automatically recognize and begin to process the MIDI clocks. When you change tempo on the connected device, the MPX 500 will follow along and adjust its delay times or rates to match the tempo.
This can be disabled with the MIDI Clock parameter in System Mode.
MIDI Dumps
MIDI Dumps allow you to back up User programs, the currently running program, or your System Mode settings and Learned patch assignments, to a storage device (typically, a sequencer).
MIDI Dumps are performed in System Mode. To perform a dump of the User programs, the current program, or all of the System Mode parameter settings:
- Press System. The LED will light to indicate you are in System Mode.
- Turn Edit Knob 1 to select:
Dump User Programs
Dump Current Program
Dump System settings and Learned patch assignments
- Press Store to execute the selected dump.
- Press System again to exit System Mode.
NOTE: Dumps will not be executed unless the System parameter MIDI Out/Thru is set to Out (the default setting.)
MIDI Implementation
Lexicon MPX 500
| Function Transmitted Recognized Remarks | ||||
| Basic Default X 1 Selected in System Mode Channel Channel X 1-16 | ||||
| Mode Default Mode 2Messages XX Altered X | ||||
| Note XX Number True Voice | ||||
| Velocity Note ON Note OFF | XX (Off=9n v=0)XX | |||
| After Touch | KeysChannels | XXX | Used as controllerOX | Selected in System Mode |
| Pitch Bender | X OX | used as controller, Learned | ||
| Control Change | X OX | 1-119 (0 and 32 used as Bank Select)Learned | ||
| Program Change True # | X 0-15=1-16 | 100-127 ignored; Program message0-99=Program Change 1-100 forcurrent Program Group as applicable | ||
| System Exclusive | LexiconReal-Timenon Real-Time | OXXX | OXX0-15 = 1-16 | Product ID=20 (decimal)Device ID=MIDI Channel |
| System Common | :Song Pos:Song Sel:Tune | XXXX | ||
| System Real Time | :Clock:Commands | XXX | ||
| Aux Messages | :Local ON/OFF:All Notes OFF:Active Sense:Reset | XXXX | ||
| Notes: | ||||
Mode 1: OMNI ON, POLY Mode 2: OMNI ON, MONO
Mode 3: OMNI OFF, POLY Mode 4: OMNI OFF, MONO
O: Yes
X: No OX: Selectable
Specifications
Audio Inputs
Connectors: XLR/TRS balanced
Level: +20 to +8dBu full scale
Impedance: 50K bal.; 25K unbal.
A/D: 24-Bit Sigma Delta, 20Hz-20kHz ±1dB
Crosstalk: -96dB @1kHz
A/D Dynamic Range: 105dB, typical
Analog Audio Outputs
Connectors: XLR/TRS balanced
Level: +26dBu balanced; +20dBu unbal.
Impedance: <600Ω
D/A: 24-Bit Delta Sigma; 20Hz-20kHz ±1dB
Crosstalk: -96dB @1kHz
D/A Dynamic Range: 101dB, typical
Digital Audio I/O
Connectors: Coaxial RCA; S/PDIF (IEC-958, CP-340)
System Sample Rates
Internal Clock and S/PDIF Input: 44.1, 48kHz
Display
150 x 32 LCD, Backlit
Footswitch
Tip/Ring/Sleeve phone jack for Bypass and Tap (optional)
MIDI Interface
Connectors: IN, OUT/THRU
Power Requirements
90-250V 50-60Hz; 12.5W
3-pin IEC Connector
Dimensions
19"Wx 1.75"H x 5.5"D
(483x45x140.25mm)
Weight
3 lbs (1.4kg)
Environment
Operating Temperature: 32°-104°F
(0°-40°C)
Relative Humidity:
95% non-condensing
RFI/ESD
FCC class B; European EMC
Directive 89/336/ECC
Specifications subject to change without notice.
Lexicon, Inc.
3 Oak Park
Bedford MA 01730-1441 USA
Telephone: (781) 280-0300
Fax: (781) 280-0490
- Unpacking and Inspection
- Communications Notice
- Table of Contents
- Getting Started
- Basic Operation
- System Mode
- Program Descriptions
- MIDI Operation
- Specifications
- Introduction
- Setting Audio Levels
- Input
- Output
- Footswitch
- The MPX 500 Display
- Selecting and Loading Programs
- Editing
- The "Adjust" Knob
- Tap Tempo Functions
- Varying the Rhythm
- Audio Tap
- Setting Tempo via MIDI
- Bypass
- Storing Programs
- Output Level
- Input Source
- Clock Source
- Digital Output
- Mix Mode
- Bypass Mode
- Program Load Mode
- Tempo Mode
- MIDI Patches
- MIDI Channel
- MIDI Program Change
- MIDI Clock
- MIDI Out-Thru
- Operating Mode
- Memory Protect
- Auto Load
- MIDI Dumps (Dump User Bank, Dump Current Program, Dump System Data)
- Clear User Bank
- Factory Init
- Plate
- Gate
- Hall
- Chamber
- Ambience
- Room
- Tremolo
- Rotary
- Chorus
- Flange
- Detune
- Pitch
- Delay, Echo
- About the Dual Programs (Banks 14-24)
- Special FX
- Flange - Delay
- Pitch - Delay
- Dual Mono
- MPX 500 MIDI Behavior
- Using Program Change Messages for Program Load
- Learning Continuous Controllers
- Activating Bypass or Tap functions with Program Change Messages
- Clearing a Learned Assignment
- MIDI Dumps
- Audio Inputs
- Analog Audio Outputs
- Digital Audio I/O
- System Sample Rates
- Display
- MIDI Interface
- Power Requirements
- Dimensions
- Weight
- Environment
- RFI/ESD
Brand : LEXICON
Model : MPX 500
Category : Effect machine