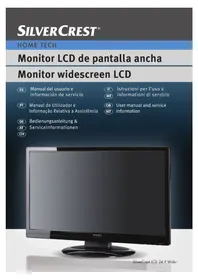
LCD 24-9 Wide - Monitor SILVERCREST - Free user manual and instructions
Find the device manual for free LCD 24-9 Wide SILVERCREST in PDF.


| Product Type | Monitor |
| Brand | SilverCrest |
| Model | LCD 24-9 Wide |
| Screen Size | 24 inches |
| Resolution | 1920 x 1080 (Full HD) |
| Aspect Ratio | 16:9 |
| Panel Type | TN (Twisted Nematic) |
| Refresh Rate | 60 Hz |
| Brightness | 250 cd/m² |
| Contrast Ratio | 1000:1 |
| Viewing Angle | 170° horizontal / 160° vertical |
| Response Time | 5 ms |
| Connectivity | VGA, DVI, HDMI |
| Audio | No built-in speakers |
| Power Consumption | 30 W (typical), <0.5 W (standby) |
| Dimensions (with stand) | 22.6 × 16.1 × 7.9 inches (57.4 × 40.9 × 20.1 cm) |
| Weight (with stand) | 8.8 lbs (4 kg) |
| VESA Mount | 100 x 100 mm |
| Stand Adjustments | Tilt |
| Color | Black |
| Features | On-screen display, energy-saving mode, VESA mountable |
| Maintenance | Clean with a soft, dry cloth; avoid liquid cleaners |
| Safety | Do not block ventilation openings; avoid extreme temperatures |
| Spare Parts | Power cord, VGA cable, DVI cable (if applicable) |
| Repairability | Refer to manual for disassembly; seek professional repair |
Frequently Asked Questions - LCD 24-9 Wide SILVERCREST
User questions about LCD 24-9 Wide SILVERCREST
0 question about this device. Answer the ones you know or ask your own.
Ask a new question about this device
Download the instructions for your Monitor in PDF format for free! Find your manual LCD 24-9 Wide - SILVERCREST and take your electronic device back in hand. On this page are published all the documents necessary for the use of your device. LCD 24-9 Wide by SILVERCREST.
USER MANUAL LCD 24-9 Wide SILVERCREST
Monitor widescreen LCD
GB User manual and service information
SilverCrest LCD 24-9 Wide
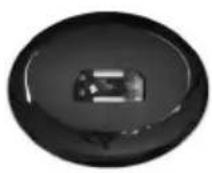
Plataforma base

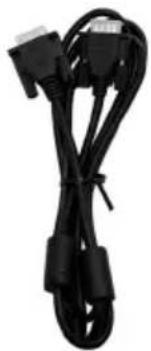
Cable VGA (conectores azules)

Cable DVI (conectores blancos)
SilverCrest LCD 24-9 Wide
Pannello anteriore
Numero Hotline
800 - 62 175
O Menu-no-Ecrã (OSD) 81
Navegar no Menu a partir dos Controlos do Painel Dianteiro......81
Definir o Idioma do Menu 81
SilverCrest LCD 24-9 Wide
Cabo eléctrico
O Menu-no-Ecrã (OSD)
Before you use this device for the first time, please read the following notes in this manual and heed all warnings, even if you are familiar with handling electronic devices. Keep this manual safe for future reference. Keep it near the product. If you sell the device or pass it on, it is essential you hand over this manual also.

This icon denotes important information for the safe operation of the product and for the user's safety.

This symbol denotes further information on the topic.
Warning: Notice on Mains Separation
The power switch does not fully disconnect the device from the mains. Furthermore, the device consumes electricity in the Standby mode. In order to completely disconnect the device from the mains, the power plug must be pulled out from the wall outlet. For this reason, the device should be positioned in such a way that assures unobstructed access to the wall outlet so that the power plug can be immediately pulled out in an emergency situation. To avoid the danger of fire if the device is not going to be used for a long while (e.g. during holidays), it should always be disconnected from the power socket. Before stormy weather when there is the danger of lightning, disconnect the device from the power supply.
Warning: Cables
Unplug all cables by holding the plugs and never pull on the cables themselves. Never place the appliance, pieces of furniture or other heavy objects on the cables and take care that these do not become trapped, especially at the plug and socket. Never make knots in the cable and do not tie it together with other cables. All cables should be positioned so that nobody can trip over them or be obstructed by them. Never use adapter plugs or extension cables that do not comply with the current safety regulations in your country, and do not modify any of the cables yourself.
Danger: Children and Persons with Disabilities
Electrical appliances do not belong in the hands of children. People with disabilities should only use electrical devices in appropriate circumstances. Do not allow children or persons with disabilities to use electrical devices when not under supervision. These may not comprehend the presence of potential risks. Small parts can represent choking hazards. Keep the packaging away from children and persons with disabilities too as there is danger of suffocation.
Important: Repairs
Danger: Never open the housing of the device. By opening the housing you endanger your life through risk of electric shock.
Repairs are required when this device has been damaged in any way, for example, when the device housing is damaged, when liquid has been spilled on the product, when objects have fallen into the product, when the product has been exposed to rain or moisture, when the product does not work normally or if the product has been dropped. If you notice any smoke, unusual noise or strange smells, switch off the device immediately and disconnect the corresponding cable from power supply. In these cases the device should not be
used further until an inspection has been carried out by an expert. Please contact qualified personnel when servicing is needed.
Only use a clean, dry cloth for cleaning. Never use any corrosive liquids. Do not attempt to open the housing of the device otherwise you will void your warranty.
Be careful when the display is broken. The broken pieces are sharp and you may injure yourself. When removing the broken pieces, always wear gloves. Dispose of the broken display according to local environmental regulations. If any liquids escape from the broken display, wipe it carefully with a dry cloth. Also wear protective gloves when performing this task.
Warning: Risk of Hearing Damage
When using headphones at extremely high volume levels, permanent damage to the ears may occur.
Important: Operating Environment
Position the device on a stable, even surface and do not place any objects on the device. The device is not for use in environments with high temperatures or humidity (e.g. bathrooms), and must be kept free of dust. Operating temperature and operating humidity: 5 °C to 35°C, max. 85 % RH.
Always make sure that:
- there is free circulation of air (do not place the device on shelves, on a thick carpet, on a bed, or anywhere that obstructs the ventilation slots, and leave at least 10 cm clearance on all sides);
- no direct heat sources (e.g. heating) can affect the device;
• no direct sunlight or bright artificial light reaches the device; - contact with sprayed and dripping water and abrasive liquids must be avoided and the device should never be operated near water. It must especially never be immersed (do not place any recipients containing liquids such as beverages, vases, etc. onto or next to the device);
- the device is never placed in the immediate vicinity of magnetic fields (e.g. loudspeakers);
- no fire sources (e.g. burning candles) are placed on or near the device;
- no foreign bodies are introduced into the device;
- the device is not subject to any great temperature changes as this may cause moisture through condensation and short-circuit;
- the device should not be subject to excessive shocks and vibrations.
Important: Intended Use
This is an information technology electronics device. It has been designed to be connected to a personal computer. It may only be used for private use, not industrial or commercial purposes and especially not in office environments. In its default configuration, this product has not been designed for medical, lifesaving, rescue or life-maintaining purposes. Furthermore, the device may not be used in tropical climates. Only connection cables and external devices may be used that comply with safety standards and the electromagnetic compatibility and shielding quality of this device. This device fulfils all that relates to CE Conformity, relevant norms and standards. Any modifications to the equipment other than recommended changes by the manufacturer may result in these directives no longer being met. The manufacturer is not liable for any damage or interference caused by unauthorized modifications. Only use the accessories recommended by the manufacturer. Do not use this device for purposes other than those indicated and do not modify it in any way. Any use other than that mentioned above does not correspond to the intended use. If you are not using the device within the Republic of Germany, you must observe the regulations and laws in the country of use.
Important: Disposal

Waste Electric and Electronic Equipment
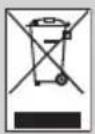
The icon of a crossed-out waste bin means that this product is subject to the European Guideline 2002/96/EC. All electric and electronic devices must be disposed of separately from household waste at established bodies. With the proper disposal of old devices you avoid damage to the environment and your personal health. For further information about proper disposal, contact your local government, disposal bodies or the shop where you bought the device.
Packaging Material
Recycle the packaging material properly also. Cardboard packaging can be taken to paper recycling containers or public collection points for recycling. Any films or plastic contained in the packaging should be taken to your public collection points.
Important: Storing When Not Using the Product
When left unused for a long period of time, unplug the power cord from the wall outlet. Also make sure that the storage temperature is maintained between 5 °C and 40 °C. Humidity must not exceed 90% RH.
Important: Transport and Packaging
If you ever have to transport the product, use the original packaging for safe shipment. This will protect it sufficiently.
Conformity
This device fully complies with the basic and other relevant requirements of the EMC Directive 2004/108/EC and the Low-Voltage Directive 2006/95/EC. The signed Declaration of Conformity can also be found at the end of this User's Manual.
Furthermore, it fulfils all requirements regarding ecological design criteria according to the Commission Regulation 1275/2008 for implementing the Directive 2009/125/EC.
Copyright
The entire content of this User's Manual is copyrighted and is provided to the reader for information purposes only. Copying data and information without the prior written and explicit authorization from the author is strictly forbidden. This also applies to any commercial use of the contents and information.
Table of Contents
Safety Instructions....97
Table of Contents....103
Introduction 104
Package Contents....105
Connectors and Controls 106
Front Panel Controls....106
Back Panel Connectors....107
Getting Started 108
Installing the Stand....108
Connecting the Cables 108
Powering the Monitor On/Off 109
Setting the Picture Resolution....110
On-Screen Menu (OSD)....111
Navigating the Menu from the Front Panel Controls 112
Setting the Menu Language 112
OSD Menu Functions 112
Quick Access Functions 115
Supported Resolutions.... 118
Appendix 120
Troubleshooting....120
Pixel Error Class According to ISO9241-307 120
Removing the Platform for the Stand 122
Wall-Mounting....122
Technical Specifications.... 124
Warranty and Service Information.... 125
Introduction
Thank you for choosing this high-end PC monitor SilverCrest LCD 24-9 Wide. This elegant product with a black piano-gloss finish is like a modern piece of furniture suitable for any living room or desktop and offers crystal-clear playback of digital photos and multimedia contents in wide-screen format. Its built-in speakers boost powerful stereo sound, and it is childplay to use thanks to its automatic image adjustment function to your PC's graphics adapter signal.
Package Contents
First check that the package contents are complete. Remove the packaging material from all accessories and keep it in a safe place in case you need to transport the device in the future.
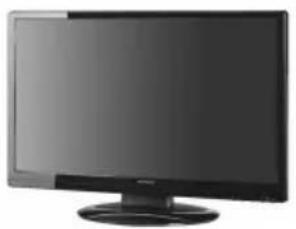
SilverCrest LCD 24-9 Wide

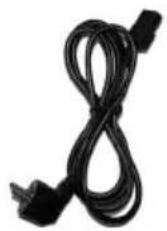
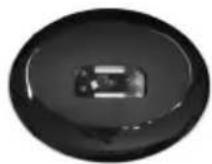
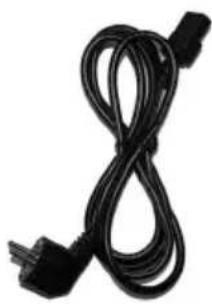
Platform for stand Power cord

VGA cable (blue connectors)
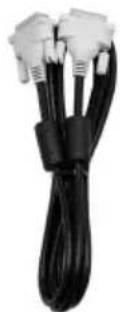
DVI cable (white connectors)
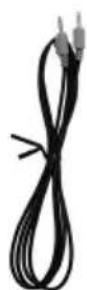
Audio cable (blue and green connectors)
User manual with service information
Connectors and Controls
Before using your SilverCrest LCD 24-9 for the first time, you should familiarize yourself its different controls and connectors.
Front Panel Controls
In the lower-right corner on the front of the monitor you will find the different controls and the power indicator of your SilverCrest LCD 24-9.
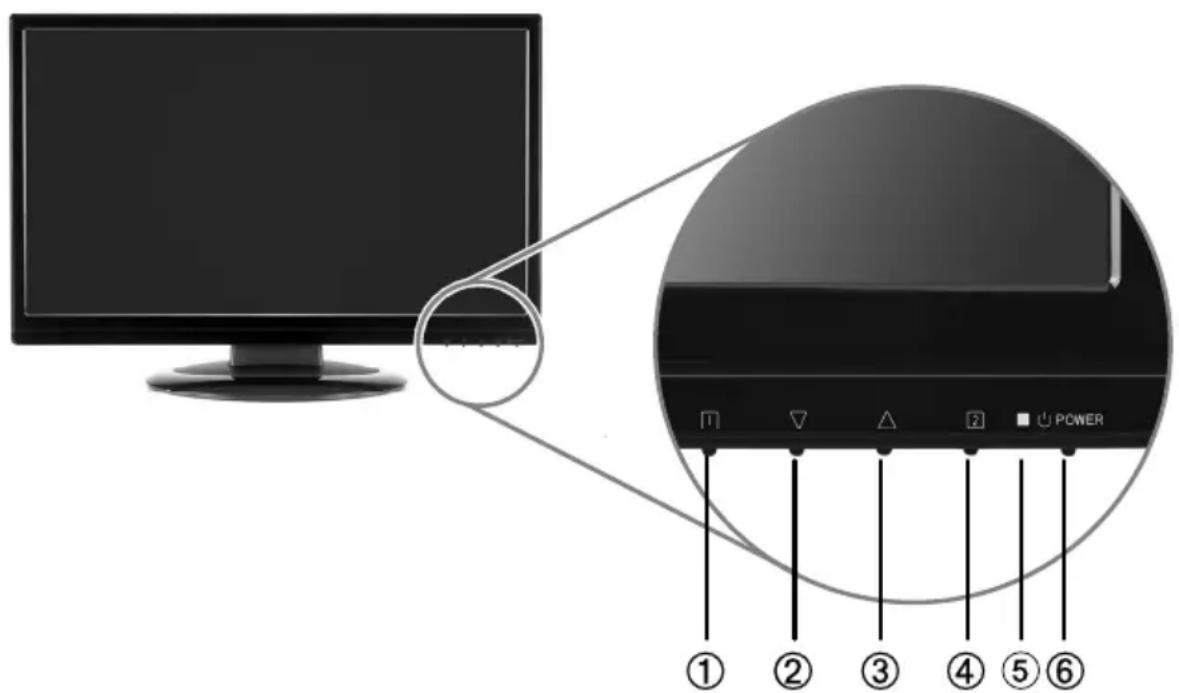
(1) 1 button: Show or hide OSD menu
(2) ▽ button: Reduce value / move downwards in a menu
(3) △ button: Increase value / move upwards in a menu
(4) 2 button: Confirm the set value
(5) Power indicator: Lights blue while the device is powered on. Lights yellow when no signal is detected from the PC's graphics adapter and the device switches to standby mode (e.g. when the PC is powered off or when the signal cable is not connected properly). Stops lighting when you press the ⏻ POWER button (6) to turn the device off.
(6) ⏻ POWER button: Switches the monitor on or to standby mode.
Back Panel Connectors
Via the connector panel located on the back of the SilverCrest LCD 24-9 Wide you can connect the device to your PC. You can either use the traditional VGA or a full-digital DVI signal connection. Depending on the graphics adapter output port available on your PC you can use the corresponding connection type. Furthermore, the device features an audio input so you can listen to the sound generated by the PC through the built-in speakers of your SilverCrest LCD 24-9 Wide.
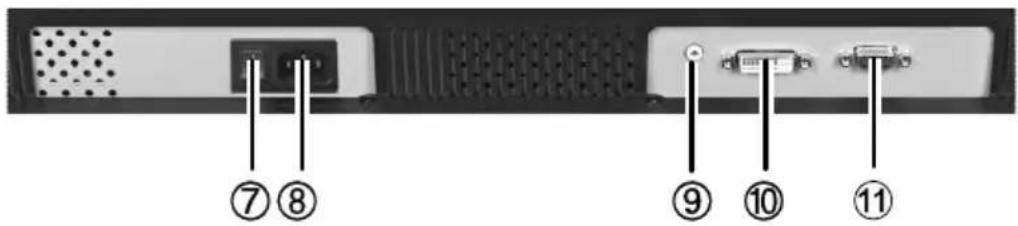
(7) Power switch
(8) AC IN terminal
(9) Audio input port
(10) DVI port
(11) VGA port

You may only use one of the input ports (10) or (11) at a time: never connect the signal cables to both of them otherwise you risk seriously damaging your device or your PC.
Below the connectors panel next to the lower-right corner of the housing (seen from the back) there is a hole for fixing a Kensington lock ⏻. You can use it to secure your monitor against theft. You can purchase a Kensington lock as an optional accessory in retail shops.
Getting Started
Installing the Stand
- Place the platform for the stand carefully onto a sufficiently large and stable surface. The centre of the platform has a hole that is squared to the front and rounded to the back (see the following figure). Make sure that the rounded corners are orientated to the back panel of the monitor.
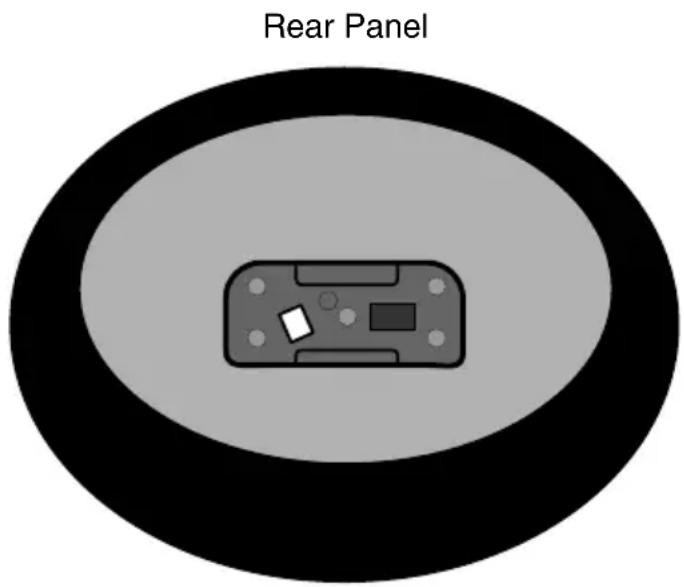
Front Panel
- Lift up the screen by holding it on the left and right edges and place its stand onto the platform. Slightly swivel it sideways and to the front and back until it clicks into place on the platform.
If you ever have to transport the device, you will have to remove the stand platform again. For more information, see page 122 – Removing the Platform for the Stand.
Connecting the Cables
Connecting the Power Cord
- Connect one end of the AC power cord to the AC inlet (8) on the back panel (see page 107).
- Connect the other end to a wall outlet. The wall outlet must be
easily accessible.
- Toggle the main power switch (7) on the back panel of the device to On (position "I").
Connecting the Audio Cable
- Insert the blue connector of the audio cable into the blue input port (9) of your SilverCrest LCD 24-9 Wide.
- If you want to listen to the sound generated by the PC through the built-in speakers of your monitor, insert the green connector of the audio cable into the green port on the back panel of your PC. If necessary, read the User's Manual for your PC.
Connecting the Signal Cable
Depending on the graphics adapter of your PC and the desired transmission type, you can transfer the picture signal from the PC either to the DVI input (10) or the VGA input (11) of your SilverCrest LCD 24-9 Wide. If your computer has a DVI signal output it is recommended that you use this one instead of the VGA port, as DVI offers a higher picture quality.
- Insert one end of the supplied DVI cable into the DVI output port of your PC and the other end into the DVI input port (10) of your SilverCrest LCD 24-9 Wide.
OR
- Insert one end of the supplied VGA cable into the VGA output port of your PC and the other end into the VGA input port (11) of your SilverCrest LCD 24-9 Wide.
Powering the Monitor On/Off
Powering On
- First toggle the main power switch (7) to the On (position "I").
- Press the POWER button (6) on the front panel of the device
to switch it on. When the device is powered on, the front panel power indicator (5) will light blue.
- Turn on your computer. The user interface of your operating system should appear on-screen.
Powering Off
- To power the LCD 24-9 Wide off, press the ⏻ POWER button (6) on the front panel of the device. This will turn the LCD 24-9 Wide to Standby mode and the power indicator (5) on the front panel will stop lighting.
- In order to turn off the Standby mode also, use the main power switch button (7).

If no input signal is available (PC powered off or signal cable not connected properly) the message “No Signal” will appear. The device will then toggle to Suspend mode and the power indicator (5) will light orange.
Setting the Picture Resolution
After powering on your monitor and PC, the user interface of your operating system should appear on-screen. Your SilverCrest LCD 24-9 Wide should detect the currently set resolution automatically. However, this does not necessarily have to match the maximum supported resolution of your monitor. In order to obtain the best picture quality, you should set the recommended resolution of 1920 x 1080 (max. refresh rate: 60 Hz).
In the following there is a guide on how to adjust the resolution for the Windows ® XP and Windows Vista ™ operating systems. Depending on your operating system and individual settings this
procedure may be different for your computer. If necessary, please refer to the documentation of your operating system.
For Microsoft ® Windows ® XP:
- Right-click on the Desktop.
- Click on "Properties".
- Click on the "Settings" tab.
- Use the ruler to select the proper screen resolution.
- Confirm the setting by clicking "OK".
For Microsoft ® Windows Vista TM :
- Right-click on the Desktop.
- Click on "Customize".
- Click on "Display".
- Use the ruler to select the proper screen resolution.
- Confirm the setting by clicking "OK".

If the recommended resolution of 1920 x 1080 is not available on your computer, please update the driver of the graphics card. Contact the manufacturer of the computer or the graphics card.
On-Screen Menu (OSD)
The on-screen menu allows you to customise your SilverCrest LCD 24-9 Wide according to your needs. It contains options for setting the menu display language, the picture parameters, showing information about the current resolution, resetting the factory-default values, etc.
Navigating the Menu from the Front Panel Controls
- Press the button (1) to show or hide the on-screen menu.
- Press the (2) or (3) button to navigate downwards or upwards in the menu and to highlight a menu option. These buttons also increase or reduce the value of the currently selected function or are used to select an option.
- Press the button (1) to save the settings and return to the previous menu level.
Setting the Menu Language
- Press the button (1) to open the on-screen menu.
- Press the (2) or △ (3) button to select the "Setup Menu" option and then press the ② button (4).
- Press the (2) or (3) button to select the "Language Select" option and then press the 2 button (4).
- Press the ∅ (2) or △ (3) button to select the desired language and then press the ② button (4).
- Press the button (1) multiple times to close the on-screen menu.
OSD Menu Functions
In the section “Navigating the Menu from the Front Panel Controls” (see page 112) you have already learned how to open and use the on-screen menu. In the following you’ll find an overview of the functions that allow you to customise your SilverCrest LCD 24-9 Wide according to your needs.

Auto Image Adjust
Automatically adjusts the settings for the horizontal and vertical position, the horizontal size as well as the fine control and sharpness.

Contrast/Brightness
Opens the Contrast and Brightness menu.
Press ▽ (2) and △ (3) to select the desired option and press ② to confirm. Then press the ▽ (2) or △ (3) buttons to select the desired value. The Brightness option will be disabled while DCR is on.
DCR stands for "Dynamic Contrast Ratio" and offers optimum contrast by adjusting the display backlight automatically depending on the picture contents.
The ECO Mode option sets a lower brightness (20%) and therefore a lower power consumption.
Input Select
Select the signal input port that you have used for connecting the device to the computer: Analog (VGA) or Digital (DVI). See page 109 – Connecting the Signal Cable.

Audio Adjust
Press ▽ (2) and △ (3) to select between the Volume and Mute options. Press ② (4) to confirm. Then press the ▽ (2) or △ (3) buttons to select the desired setting.
The option “Volume” allows you to adjust the volume of the built-in speaker; the option “Mute” lets you disable the sound.

Color Adjust
Choose between the following options:
9,300K: Adds blue to the picture achieving a cooler white.
6,500K: Adds red to the picture achieving a warmer white.
5400K: Adds green to the picture achieving a darker colour tint.
User Color: Custom settings for red (R), green (G) and blue (B). Press the 2 button (4) to select the desired colour and press the ▽ (2) or △ (3) buttons to adjust the selected colour.

Information
Shows information about the input signal coming from your computer's graphics card as well as the model and serial number of your monitor.

Manual Image Adjust
To manually adjust the picture position.
Horizontal Size sets the horizontal picture size.
H./V. Position sets the horizontal and vertical picture position.
Fine Tune sets the picture delay and therefore the sharpness.
Sharpness (available only if the set resolution does not match the recommended resolution of 1920x1080). If necessary, re-adjust the sharpness.
Video Mode Adjust toggles between the options Full Screen, Over Screen and Aspect Ratio. Selecting "Aspect Ratio" will not stretch or fit the image on-screen but display it with its original aspect ratio according to the set resolution.
OptiColor Mode will optimise the colour levels according to the selected picture contents. Select one of the options Standard, Game, Cinema, Scenery or Text.
?
Setup Menu
Choose between the following options:
Language Select: Here you select the menu language.
Resolution Notice: If you enable this function, a message will remind you every 30 seconds to set the optimum picture resolution. This message appears only if the set resolution does not match the recommended resolution of 1920x1080.
OSD Position: Press the ▽ (2) or △ (3) buttons to toggle between horizontal and vertical movement and press ② (4) to confirm. Press ▽ (2) or △ (3) to move the OSD menu upwards, downwards, to the left or to the right.
OSD Timeout: After the set time, the OSD menu will disappear if you do not perform any further settings. You can select values between 5, 15, 30 and 60 seconds.
OSD Background: Press the 2 button (4) to enable or disable the coloured background for the OSD display.
[2]
Memory Recall: Restores the factory-default picture and audio configuration. The selected language will not change.
Quick Access Functions
You can adjust the picture brightness, contrast and other functions directly without having to open the on-screen menu and select the corresponding options first.

The following button combinations will work only if there is no on-screen menu currently displayed.
Contrast, Brightness, DCR and ECO Mode
- Press the button (2) to immediately display a settings menu for Contrast, Brightness, dynamic contrast (DCR) and the power-saving operation (low-brightness picture setting).
- Press the (2) or (3) button to select the desired function and then press the 2 button (4) to enable it.
- Press the (2) or (3) button to adjust the desired value.
- When finished, press the 2 button (4) to save it.
- Press the button (1) to return.

DCR stands for "Dynamic Contrast Ratio" and offers optimum contrast by adjusting the display backlight automatically depending on the picture contents.
Resetting Brightness and Contrast
- Press the (2) and (3) buttons simultaneously to reset the values for Contrast and Brightness to the factory-default values.

There will be no indication after the setting has been changed successfully.
Preset Colour Modes
- Press the△ (3) button to display a menu for choosing one of the preset colour modes.
- Press the ∅ (2) or △ (3) button to select the desired option
(Standard, Game, Cinema, Scenery, Text) and then press the 2 button (4) to enable it.
- When finished, press the 1 button (1) to close the on-screen menu.
Selecting the Signal Source (DVI/VGA)
- Press the 2 (4) button to display a menu for choosing the signal source.
- Press the (2) or △ (3) button to select the desired option (Analog-VGA or Digital-DVI) and then press the 2 button (4) to enable it.
Locking / Unlocking the On/Standby Switch
To avoid that any unauthorised people access the device via the ⏻ POWER button (6) you can lock it.
- Keep the button (1) pressed and simultaneously press the ▽ button (2) to lock or unlock the ⏻ POWER button (6).

You must keep the buttons pressed until the corresponding confirmation appears.
Locking / Unlocking the On-Screen Menu
To avoid any unauthorized people changing the monitor settings, you can lock the OSD menu.
- Keep the button (1) pressed and simultaneously press the △ button (3) to lock or unlock the on-screen menu.

You must keep the buttons pressed until the corresponding confirmation appears.
Supported Resolutions
| VGA | 720×400 (70Hz)640×480 (60Hz) |
| VESA | 640 ×480 (75Hz)800 ×600 (56Hz)800 ×600 (60Hz)800 ×600 (72Hz)800 ×600 (75Hz)1024 ×768 (60Hz)1024 ×768 (70Hz)1024 ×768 (75Hz)1152 ×864 (75Hz)1280 ×960 (60Hz)1280 ×768 (60Hz)1280 ×768 (75Hz)1280×1024 (60Hz)1280×1024 (75Hz)1440×900 (60Hz)1440×900 (75Hz)1440×1050 (60Hz)1680×1200 (60Hz)1680×1050 (60Hz)1920×1080 (60Hz) |
| MAC | 640×480 (67Hz)832×624 (74.5Hz) |

Warning: Do not set your computer's graphics card resolution or refresh rate to a value exceeding the above maximum limits, otherwise you risk seriously damaging your monitor.
HDCP Resolutions for AV Mode
| NTSC 480i | |
| NTSC 480p | |
| PAL 576i | |
| PAL 576p | |
| HDTV 720p | |
| HDTV 1080i | |
| HDTV 1080p |
Appendix
Troubleshooting
Unable to power the device on
■ Make sure that the power cord is properly connected to the wall outlet and that the cables to the monitor are fixed properly into their respective ports.
■ Connect a different electrical appliance to the wall outlet to verify that it is working properly.
■ Double-check all cable connections.
Power OK but no picture
■ Make sure that the supplied video cable is properly connected to the graphics card output connector of your computer and to the monitor. If necessary, reconnect it.
■ Adjust the brightness.
■ Select the correct signal input (VGA or DVI).
Wrong or distorted colours
If a colour (red, green, blue) is missing, check the connection of the video cable. Loose, bent or broken pins in the connector may deteriorate the signal transmission.
■ Connect the monitor to a different computer.
Pixel Error Class According to ISO9241-307
Pixels are single dots making up the picture that appears on the screen. One pixel always consists of three sub-pixels for displaying the basic colours (red, green and blue).
The Pixel Error Classes are rated from Level I (very good) to Level IV (bad quality). Your LCD 24-9 Wide belongs to Error Class II and therefore offers a high-quality display. Within the Error Classes a limited number of pixels may present errors. There are three types of errors:
Type 1: Continuous lighting pixel (a bright, white dot), even when it should not light.
Type 2: Non-lighting pixel (a dark or black dot) even when it should light.
Type 3: Abnormal or defective sub-pixels of the basic colours (e.g. steady lighting with half intensity, non-lighting of a specific colour, blinking or flickering, but not included in Type 1 or Type 2).
Furthermore, a so-called cluster (a matrix of 5x5 pixels) may contain a limited number of erroneous pixels only.
For Error Class II, for each 1 million pixels only 2 pixels may contain errors of Type 1, Type 2 and Cluster; it may present up to 5 erroneous pixels of Type 3 (see the following table).
| Error Class | Type 1 | Type 2 | Type 3 | Cluster |
| I | 0 | 0 | 0 | 0 |
| II | 2 | 2 | 5 | 2 |
| III | 5 | 15 | 50 | 5 |
| IV | 50 | 150 | 500 | 50 |
Considering the recommended resolution of your LCD 24-9 Wide (1920 x 1080) it contains 2,073,600 pixels. From this value we can deduce the maximum amount of erroneous pixels (see the following table).
| Error Class | Type 1 | Type 2 | Type 3 | Cluster |
| LCD 24-9 Wide | 4 | 4 | 10 | 4 |
Removing the Platform for the Stand
If you ever have to transport the device you will have to remove the platform for the stand again so you can pack it securely.
- Place a cushion or a blanket on a sufficiently large table.
- Place your SilverCrest LCD 24-9 Wide on the table so that the stand platform slightly protrudes over the front table edge and that the screen lies flat on the cushion.
- Press the two plastic locks together (see the arrows) to unlock the platform and slightly move the platform back and forth to release it.

- Pull the platform from the housing towards the front.
Wall-Mounting
You can mount your LCD 24-9 Wide to the wall by using a VESA wall mount with a 100 x 100 mm receptacle. Please also read the Safety Instructions for your VESA mounting kit (see the documentation for your VESA wall mounting kit). To do so, disassemble the base as follows:
-
Power the device off and unplug all cables and connectors. For the following steps you will need a conventional Philips screwdriver.
-
Lie a soft cloth on an empty, level table and carefully place the LCD 24-9 Wide with its front on it.
- Loosen the monitor socket by carefully pushing the two locks inwards and pulling the socket towards the bottom (see also page 122 - Removing the Platform for the Stand).
- Loosen the four screws located inside the base. You can then pull the base off downwards.
- Install the VESA wall mount on the back of the monitor. Follow the installation instructions that came with your wall mount kit also.
Note: Keep the base, the socket and the screws in a safe place in case you need to reassemble the base again.
Technical Specifications
| LCD Display | 59.8 cm (23.6") Wide TFT (16:10) |
| Power consumption | Operation: max. 40 W, Standby: ≤ 1 W |
| Supported resolution | max. 1920 x 1080 (Full HD)vertical frequency max. 75Hz |
| Pixel pitch | 0.2715 x 0.2715 mm |
| Display Colours | 16.7 million |
| Viewing angle (hor./ver.)* | 170°/160° |
| Contrast Ratio* | 1000:1Dynamic Contrast 60000:1 |
| Brightness* | 300 cd/m2 |
| Response time* | 2 ms |
| Active Screen Area | 523 mm x 295 mm |
| Temperature | Operation: 0°C ~ + 35°CStorage: -20°C ~ + 60°C |
| Regulations / Directives | CE, ISO 9241-307 |
| Pixel Error Class | II |
| Input voltage | 100-240 VAC, 50/60 Hz |
| Max. input current | 1,8 A |
| Speaker | 1W x 2 |
| VESA Wall Mount | Receptacle 100 x 100 mm |
| Signal Input | 15-pin D-Sub VGA (analogue)24-pin DVI-D (digital) |
| Dimensions (WxHxD) | 560 mm x 393 mm x 217 mm |
| Weight | 5.05 kg |
* typical values according to panel specifications
Warranty and Service Information
36 month warranty from date of purchase
Malta
Important warranty information
SILVERCREST®
Dear Customer,
Thank you for purchasing a Silvercrest product.
We ask you to read carefully through the enclosed documentation or online help before putting your Silvercrest product into service. If you have a problem, which can not be solved in this way, please contact our hotline.
In case that trouble solving over the telephone is not possible, our hotline will arrange the service depending on the fault of the device. This will contain the elimination of defects by production and material at no charge.
Up-to-date information and answers to the most frequently asked questions are available on the internet from: www.silvercrest.cc
This guarantee is valid in Malta.
Your statutory guarantees from the seller are in addition to this warranty and are not limited by it.
BT

36
month warranty
Hotline number
800 - 62 175
(Please have your serial number at hand!)
Manufacturer:
TARGA GmbH
Postfach 22 44
D-59482 Soest
www.silvercrest.cc
Sicherheitshinweise
EC-Declaration of Conformity
Adress:
Targa GmbH
Lange Wende 41
59494 Soest, Germany
Product:
LCD Monitor
Model:
Targa Visionary LCD 24-9 Wide
The product complies with the requirements of the following European directives:
2004/108/EC
Electromagnetic Compatibility
2006/95/EC
Low Voltage
2009/125/EC
Energy Relating Products
Compliance was proved by the application of the following standards:
EMC:
EN 55022: 2006 +A1: 2007 class B
EN 55024: 1998 +A1: 2001 +A2: 2003
EN 61000-3-2: 2006
EN 61000-3-3: 1995 +A1: 2001 +A2: 2005
Safety:
EN 60950-1: 2006
ErP:
Regulation 1275/2008
Year of CE marking:
2010
Soest, 13 th of April 2010

Matthias Klauke, Managing Director
CE
TARGA GmbH
Lange Wende 41
D-59494 Soest
www.silvercrest.cc
- MONITOR WIDESCREEN LCD
- O MENU-NO-ECRÃ (OSD)
- WARNING: NOTICE ON MAINS SEPARATION
- WARNING: CABLES
- DANGER: CHILDREN AND PERSONS WITH DISABILITIES
- IMPORTANT: REPAIRS
- WARNING: RISK OF HEARING DAMAGE
- IMPORTANT: OPERATING ENVIRONMENT
- ALWAYS MAKE SURE THAT
- IMPORTANT: INTENDED USE
- IMPORTANT: DISPOSAL
- WASTE ELECTRIC AND ELECTRONIC EQUIPMENT
- PACKAGING MATERIAL
- IMPORTANT: STORING WHEN NOT USING THE PRODUCT
- IMPORTANT: TRANSPORT AND PACKAGING
- CONFORMITY
- COPYRIGHT
- TABLE OF CONTENTS
- INTRODUCTION
- PACKAGE CONTENTS
- CONNECTORS AND CONTROLS
- FRONT PANEL CONTROLS
- BACK PANEL CONNECTORS
- GETTING STARTED
- INSTALLING THE STAND
- CONNECTING THE CABLES
- CONNECTING THE POWER CORD
- CONNECTING THE AUDIO CABLE
- CONNECTING THE SIGNAL CABLE
- OR
- POWERING THE MONITOR ON/OFF
- POWERING ON
- POWERING OFF
- SETTING THE PICTURE RESOLUTION
- ON-SCREEN MENU (OSD)
- NAVIGATING THE MENU FROM THE FRONT PANEL CONTROLS
- SETTING THE MENU LANGUAGE
- OSD MENU FUNCTIONS
- AUTO IMAGE ADJUST
- CONTRAST/BRIGHTNESS
- INPUT SELECT
- AUDIO ADJUST
- COLOR ADJUST
- INFORMATION
- MANUAL IMAGE ADJUST
- SETUP MENU
- [2]
- QUICK ACCESS FUNCTIONS
- CONTRAST, BRIGHTNESS, DCR AND ECO MODE
- RESETTING BRIGHTNESS AND CONTRAST
- PRESET COLOUR MODES
- SELECTING THE SIGNAL SOURCE (DVI/VGA)
- LOCKING / UNLOCKING THE ON/STANDBY SWITCH
- LOCKING / UNLOCKING THE ON-SCREEN MENU
- SUPPORTED RESOLUTIONS
- APPENDIX
- TROUBLESHOOTING
- UNABLE TO POWER THE DEVICE ON
- POWER OK BUT NO PICTURE
- WRONG OR DISTORTED COLOURS
- PIXEL ERROR CLASS ACCORDING TO ISO9241-307
- REMOVING THE PLATFORM FOR THE STAND
- WALL-MOUNTING
- WARRANTY AND SERVICE INFORMATION
- 36 MONTH WARRANTY FROM DATE OF PURCHASE
- IMPORTANT WARRANTY INFORMATION
- SILVERCREST®
- BT
- SICHERHEITSHINWEISE
- EC-DECLARATION OF CONFORMITY
Brand : SILVERCREST
Model : LCD 24-9 Wide
Category : Monitor