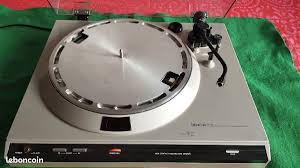
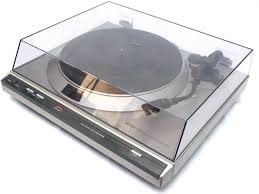
DP-300F - Turntable DENON - Free user manual and instructions
Find the device manual for free DP-300F DENON in PDF.
| Product type | Vinyl turntable |
| Brand | DENON |
| Model | DP-300F |
| Dimensions (closed) | 434 x 122 x 381 mm |
| Dimensions (open) | 434 x 386 x 413 mm |
| Weight | 5.5 kg |
| Power supply | 120 V AC, 60 Hz |
| Power consumption | 2 W |
| Drive type | Belt |
| Motor | Servo-controlled DC motor |
| Speeds | 33⅓ RPM, 45 RPM |
| Wow and flutter | 0.10 % W.R.M.S. |
| Signal-to-noise ratio | 60 dB |
| Tonearm | Straight, static balance, effective length 221.5 mm, overhang 19 mm |
| Cartridge | MM type |
| Output voltage (equalizer OFF) | 2.5 mV |
| Output voltage (equalizer ON) | 150 mV |
| Optimal tracking force | 19.6 mN (2.0 g) |
| Compatible cartridge weight | 44 to 93 mN (4.5 to 9.5 g) |
| Head shell weight | 98 mN (10.0 g) (including screws and nuts) |
| Replacement stylus reference | DSN-85 |
| Replacement head shell reference | PCL-310BK |
| Main functions | Auto start, auto return, anti-skating, tracking force adjustment, size selector (17/30 cm) and speed |
| Included accessories | Platter, felt mat, 45 RPM adapter, head shell with cartridge, dust cover, counterweight, 2 hinges, spare wire |
| Safety | Do not open the casing, avoid moisture, unplug during storms, use on a stable surface |
Frequently Asked Questions - DP-300F DENON
User questions about DP-300F DENON
0 question about this device. Answer the ones you know or ask your own.
Ask a new question about this device
Download the instructions for your Turntable in PDF format for free! Find your manual DP-300F - DENON and take your electronic device back in hand. On this page are published all the documents necessary for the use of your device. DP-300F by DENON.
USER MANUAL DP-300F DENON
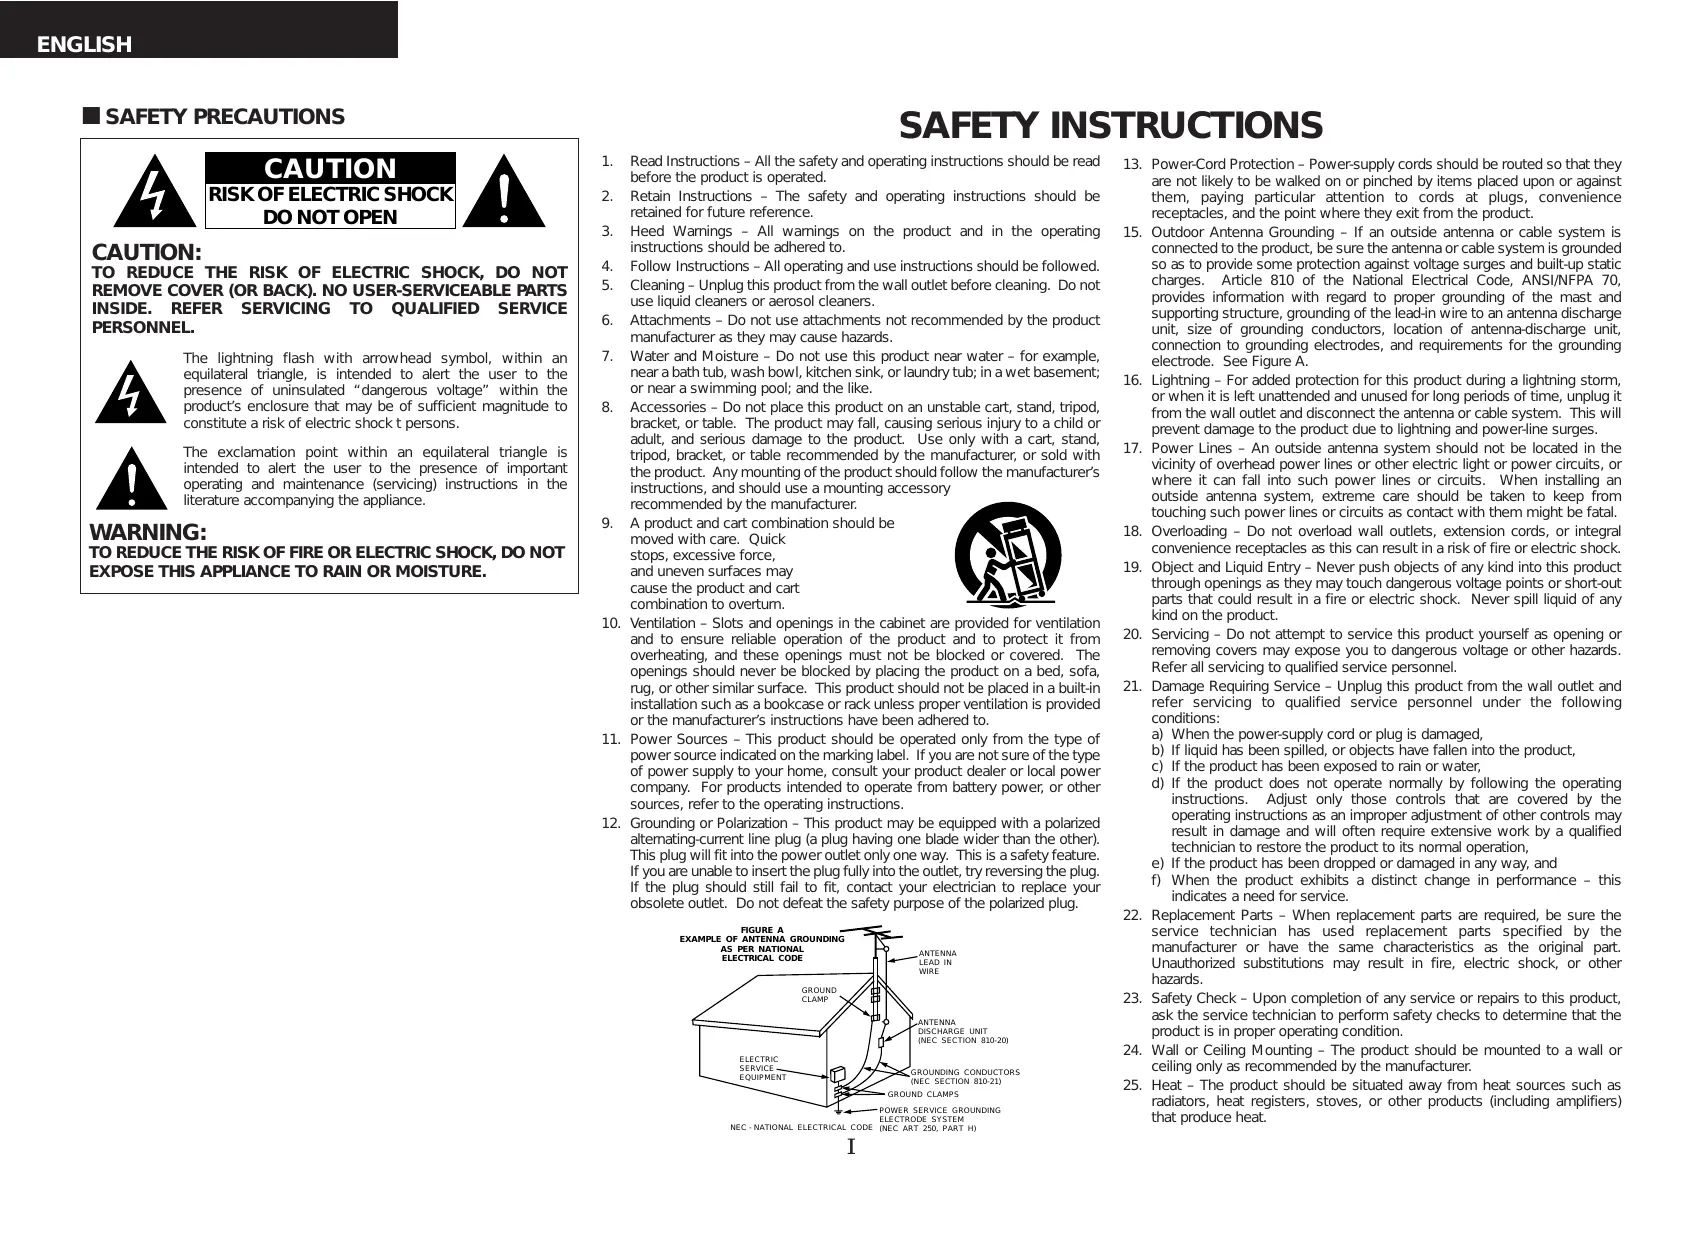
The lightning flash with arrowhead symbol, within an equilateral triangle, is intended to alert the user to the presence of uninsulated "dangerous voltage" within the product's enclosure that may be of sufficient magnitude to constitute a risk of electric shock t persons.

The exclamation point within an equilateral triangle is intended to alert the user to the presence of important operating and maintenance (servicing) instructions in the literature accompanying the appliance.
WARNING:
TO REDUCE THE RISK OF FIRE OR ELECTRIC SHOCK, DO NOT EXPOSE THIS APPLIANCE TO RAIN OR MOISTURE.
SAFETY INSTRUCTIONS
- Read Instructions - All the safety and operating instructions should be read before the product is operated.
- Retain Instructions - The safety and operating instructions should be retained for future reference.
- HeedWarnings - All warnings on the product and in the operating instructions should be adhered to.
- Follow Instructions - All operating and use instructions should be followed.
- Cleaning - Unplug this product from the wall outlet before cleaning. Do not use liquid cleaners or aerosol cleaners.
- Attachments - Do not use attachments not recommended by the product manufacturer as they may cause hazards.
- Water and Moisture - Do not use this product near water - for example, near a bath tub, wash bowl, kitchen sink, or laundry tub: in a wet basement; or near a swimming pool; and the like.
- Accessories - Do not place this product on an unstable cart, stand, tripod, bracket, or table. The product may fall, causing serious injury to a child or adult, and serious damage to the product. Use only with a cart, stand, tripod, bracket, or table recommended by the manufacturer, or sold with the product. Any mounting of the product should follow the manufacturer's instructions, and should use a mounting accessory recommended by the manufacturer.
- A product and cart combination should be moved with care. Quick stops, excessive force, and uneven surfaces may cause the product and cart combination to overturn.
- Ventilation - Slots and openings in the cabinet are provided for ventilation and to ensure reliable operation of the product and to protect it from overheating, and these openings must not be blocked or covered. The openings should never be blocked by placing the product on a bed, sofa, rug, or other similar surface. This product should not be placed in a built-in installation such as a bookcase or rack unless proper ventilation is provided or the manufacturer's instructions have been adhered to.
- Power Sources - This product should be operated only from the type of power source indicated on the marking label. If you are not sure of the type of power supply to your home, consult your product dealer or local power company. For products intended to operate from battery power, or other sources, refer to the operating instructions.
- Grounding or Polarization - This product may be equipped with a polarized alternating-current line plug (a plug having one blade wider than the other). This plug will fit into the power outlet only one way. This is a safety feature. If you are unable to insert the plug fully into the outlet, try reversing the plug. If the plug should still fail to fit, contact your electrician to replace your obsolete outlet. Do not defeat the safety purpose of the polarized plug.
- Power-Cord Protection - Power-supply cords should be routed so that they are not likely to be walked on or pinched by items placed upon or against them, paying particular attention to cords at plugs, convenience receptacles, and the point where they exit from the product.
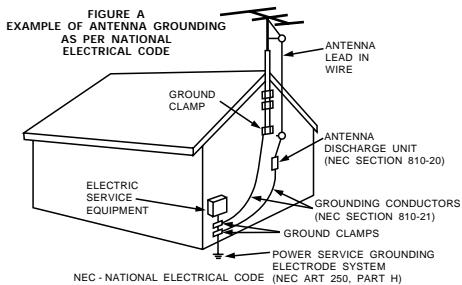
- Outdoor Antenna Grounding - If an outside antenna or cable system is connected to the product, be sure the antenna or cable system is grounded so as to provide some protection against voltage surges and built-up static charges. Article 810 of the National Electrical Code, ANSI/NFPA 70, provides information with regard to proper grounding of the mast and supporting structure, grounding of the lead-in wire to an antenna discharge unit, size of grounding conductors, location of antenna-discharge unit, connection to grounding electrodes, and requirements for the grounding electrode. See Figure A.
- Lightning - For added protection for this product during a lightning storm, or when it is left unattended and unused for long periods of time, unplug it from the wall outlet and disconnect the antenna or cable system. This will prevent damage to the product due to lightning and power-line surges.
- Power Lines - An outside antenna system should not be located in the vicinity of overhead power lines or other electric light or power circuits, or where it can fall into such power lines or circuits. When installing an outside antenna system, extreme care should be taken to keep from touching such power lines or circuits as contact with them might be fatal.
- Overloading - Do not overload wall outlets, extension cords, or integral convenience receptacles as this can result in a risk of fire or electric shock.
- Object and Liquid Entry – Never push objects of any kind into this product through openings as they may touch dangerous voltage points or short-out parts that could result in a fire or electric shock. Never spill liquid of any kind on the product.
- Servicing - Do not attempt to service this product yourself as opening or removing covers may expose you to dangerous voltage or other hazards. Refer all servicing to qualified service personnel.
- Damage Requiring Service - Unplug this product from the wall outlet and refer servicing to qualified service personnel under the following conditions:
a) When the power-supply cord or plug is damaged,
b) If liquid has been spilled, or objects have fallen into the product,
c) If the product has been exposed to rain or water,
d) If the product does not operate normally by following the operating instructions. Adjust only those controls that are covered by the operating instructions as an improper adjustment of other controls may result in damage and will often require extensive work by a qualified technician to restore the product to its normal operation,
e) If the product has been dropped or damaged in any way, and
f) When the product exhibits a distinct change in performance - this indicates a need for service.
- Replacement Parts - When replacement parts are required, be sure the service technician has used replacement parts specified by the manufacturer or have the same characteristics as the original part. Unauthorized substitutions may result in fire, electric shock, or other hazards.
- Safety Check - Upon completion of any service or repairs to this product, ask the service technician to perform safety checks to determine that the product is in proper operating condition.
- Wall or Ceiling Mounting - The product should be mounted to a wall or ceiling only as recommended by the manufacturer.
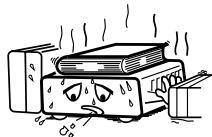
- Heat - The product should be situated away from heat sources such as radiators, heat registers, stoves, or other products (including amplifiers) that produce heat.
FCC INFORMATION (For US customers)
1.PRODUCT
This product complies with Part 15 of the FCC Rules. Operation is subject to the following two conditions: (1) this product may not cause harmful interference, and (2) this product must accept any interference received, including interference that may cause undesired operation.
2. IMPORTANT NOTICE: DO NOT MODIFY THIS PRODUCT
This product, when installed as indicated in the instructions contained in this manual, meets FCC requirements. Modification not expressly approved by DENON may void your authority, granted by the FCC, to use the product.
3. NOTE
This product has been tested and found to comply with the limits for a Class B digital device, pursuant to Part 15 of the FCC Rules. These limits are designed to provide reasonable protection against harmful interference in a residential installation.
This product generates, uses and can radiate radio frequency energy and, if not installed and used in accordance with the instructions, may cause harmful interference to radio communications. However, there is no guarantee that interference will not occur in a particular installation. If this product does cause harmful interference to radio or television reception, which can be determined by turning the product OFF and ON, the user is encouraged to try to correct the interference by one or more of the following measures:
- Reorient or relocate the receiving antenna.
- Increase the separation between the equipment and receiver.
- Connect the product into an outlet on a circuit different from that to which the receiver is connected.
- Consult the local retailer authorized to distribute this type of product or an experienced radio/TV technician for help.
NOTE ON USE
- Avoid high temperatures.
Allow for sufficient heat dispersion when installed in a rack.
- Handle the power cord carefully.
Hold the plug when unplugging the cord.
- Keep the apparatus free from moisture, water, and dust.
- Unplug the power cord when not using the apparatus for long periods of time.
- (For apparatuses with ventilation holes)
- Do not obstruct the ventilation holes.

- Do not let foreign objects into the apparatus
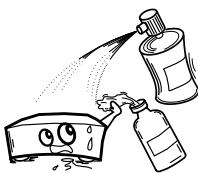
- Do not let insecticides, benzene, and thinner come in contact with the apparatus.

- Never disassemble or modify the apparatus in any way.
Getting Started
Thank you very much for purchasing the DENON turntable.
Please read the operating instructions thoroughly in order to acquaint yourself with the turntable system and achieve maximum satisfaction from it.
Contents
Getting Started
Before using 1
Accessories 1
About the equalizer switch 2
Assembly 2
Mounting the turntable 2
Mounting the counterweight 2
Mounting the head shell with cartridge. 2
Mounting the dust cover 2
Adjustments 3
Stylus pressure and anti-skating adjustment 3
Part names and functions 4
Connections 4
Operation
Starting playback using the auto play function 5
Starting playback manually 5
Stopping playback in the middle of a record 5
Replacing the stylus 6
Replacing the cartridge 6
Others
Troubleshooting 7
Specifications 7
Before using
Pay attention to the following before using this unit:
- Power requirements
Power requirements for electrical equipment differ from area to area. Please ensure that your machine meets the power requirements in your area.
If it doubt, consult a qualified electrician.
- About the power switch
This turntable is not equipped with a primary power switch. The power switch is incorporated in the tone arm of the turntable. The power to the turntable is cut when the tone arm returns to the tone arm rest. Note however, that the power is not completely turned off in this case. If you wish to completely turn the power off, disconnect the power supply cord from the household AC outlet.
- Protect the turntable too
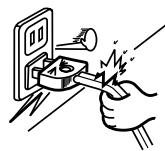
- Never touch the plug with wet hands.
- Always pull out by the plug and never the cable.
- Only let a qualified professional repair or reassemble the turntable. An unauthorized person might touch the internal parts and receive a serious electric shock.
- Never allow a child to put anything, especially metal, into the turntable.
What you should know to protect yourself
- Use only a household AC power source. Never use a DC power source.
- If water is spilled on the turntable, disconnect it and call your dealer.
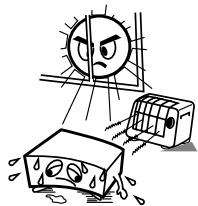
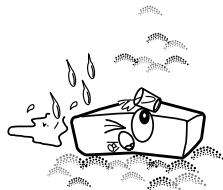
- Make sure that the turntable is well ventilated and away from direct sunlight.
- To avoid damage to the internal circuits and the external surface, keep it away from heat (stoves, etc.).
- Avoid using spray type insecticide near the turntable it can damage the finish and might ignite suddenly.
- To avoid damaging the finish, never use paint thinner or other similar chemicals to clean the turntable.
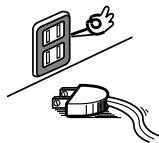
- Place the turntable on a flat and solid surface.
- If you don't plan to use the turntable for a long period of time, disconnect the power supply cord.
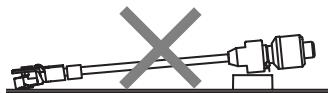
- To protect the insulators, always lift the turntable when you move it. And before moving the turntable, disconnect all the connecting cables.
- When transporting the turntable over a long distance, place it in its original box wrapped in protective wrappers.
- Moving the unit
To prevent short-circuits or damaged wires in the connection cables, always unplug the power supply cord and disconnect the connection cables between all other audio components when moving the unit.
- Before turning the power switch on
Check once again that all connections are correct and that there are not problems with the connection cables. Always set the power switch to the standby position before connecting and disconnecting connection cables.
- Store these instructions in a safe place.
After reading, store this instructions along with the warranty card in a safe place.
- Note that the illustrations in these instructions may differ from the actual unit for explanation purposes.
Accessories
Check that the following parts are attached in addition to the main unit:
① Operating instructions
② Warranty 1
③ Service station list
④ Turntable (with belt) 1
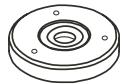
⑤ Turntable sheet 1
⑥ Adapter for 45 rpm records. 1
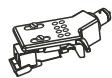
⑦ Head shell with cartridge. 1
⑧ Dust cover 1
⑨ Counterweight 1
10 Hinges. 2
① Spare lead wire. 1
④
⑦
(5)
(6)
8

9
10
Getting Started

Square hole
About the equalizer switch
This record player comes with a built-in equalizer. Switch as shown below according to the terminal being used.
OFF:
When connecting to the PHONO input terminal (The record player's equalizer cannot be used.)
ON:
When connecting a terminal other than the PHONO input terminal (The record player's equalizer can be used.)

- The equalizer switch is set to the "ON" position upon shipment from the factory. Be sure to check before mounting the turntable and turntable sheet.
- The sound may be extremely weak or distorted if the equalizer switch is not properly set.
Assembly
NOTE:
- Do not remove the twist tie for clamping the tone arm until assembly is completed.
- Do not connect the power supply cord until assembly is completed.
Mounting the turntable
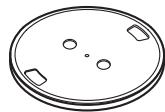
1 Mount the turntable on the center spindle.
2 Turn the turntable so that the roller is visible through the square hole with the ribbon tape for catching the belt.
3 Pinch the ribbon tape and catch the belt on the outer center of the roller.
- Remove the ribbon tape once the belt is caught.
- Turn turntable slowly 5 or 6 turns. The belt is caught at the center of the roller.
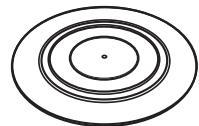
4 Mount the turntable sheet.
Mounting the counterweight
Insert the counterweight onto the shaft at the back of the tone arm and screw it in.
※ Mount with the stylus pressure adjustment ring towards the front.
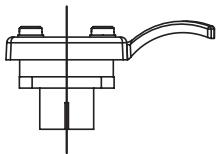
Mounting the head shell with cartridge
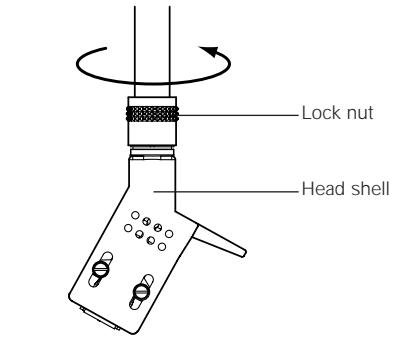
Insert the head shell with cartridge onto the tone arm and fasten it in place with the lock nut ( page 6).
Mounting the dust cover
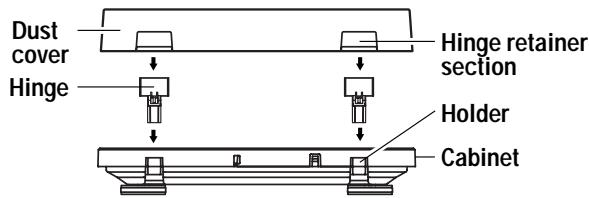
1 Insert the 2 included hinges securely into the holders at the back of the cabinet.
2 Mount the hinge retainer sections of the dust cover onto the hinges.
- Insert fully in the direction of the arrow.
- When removing the dust cover, open the dust cover fully then pull out in the direction opposite the arrow.

- Hold the dust cover near the hinge retainer sections when mounting and removing it.
Once assembly is finished, remove the twist tie for clamping the tone arm.
Adjustments
Turn the power off when making the adjustments.
Stylus pressure and anti-skating adjustment
NOTE:
- Be very careful not to damage the stylus tip on the turntable sheet, etc.
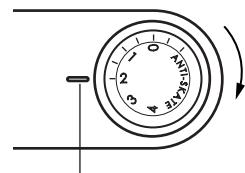
1 Set the anti-skating knob to "0".
2 Lower the lifter lever and move the tone arm over the turntable.
※ For cartridges with removable stylus covers, remove the stylus cover.
3 Balance the tone arm.
- Move the counterweight forward or backward so that the tone arm is parallel to the turntable surface when you are not touching it.
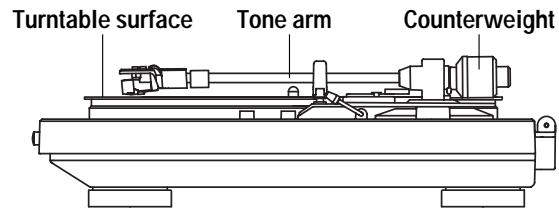

(Weight too far to the back)
(Weight too far to the front)
4 Set the tone arm back on the armrest.
5 Holding the counterweight with a finger so that it does not move, turn the stylus pressure adjustment ring so that it's "0" mark is lined up with the center line of the tone arm's rear shaft.
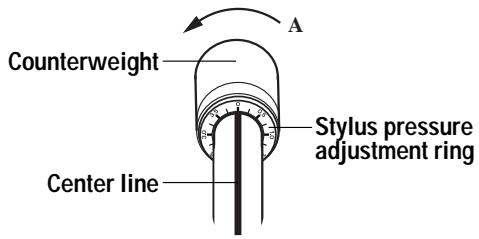
6 Turn the counterweight in the direction of arrow “A” and set to the appropriate stylus pressure for the cartridge.
※ The appropriate stylus pressure for the included cartridge is 2.0 g (19.6 mN). Set to "2".
7 Turn the anti-skating knob and set to the same value as for the cartridge's stylus pressure.
- The proper anti-skating value can be achieved.
Setting reference point
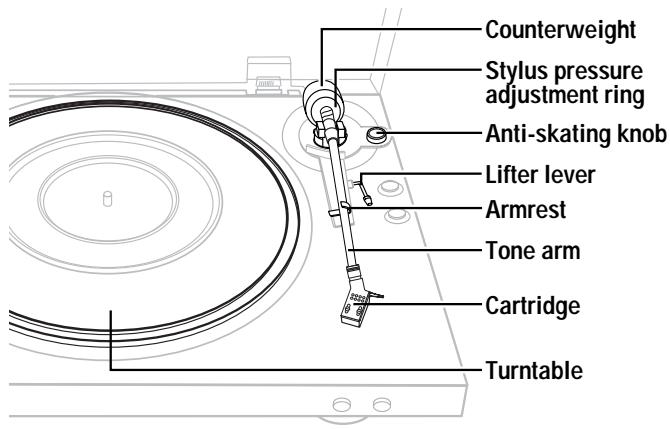
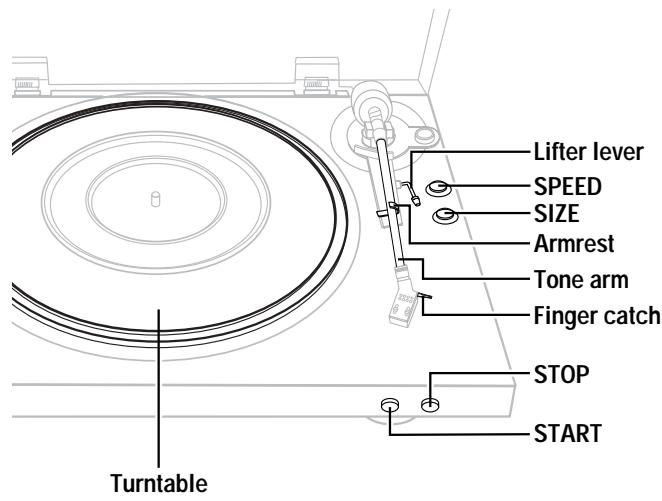
Part names and functions
For details on the functions of these parts, refer to the pages given in parentheses ( ).

q START button (5)
- Starts playback.
w STOP button (5)
- Stops playback.
e Finger catch
r Lock nut (2, 7)
t Armrest
y SIZE button (17/30) ……………………(5)
- Set according to the size of the record to be played (11 ft/30 cm or 6 ft/17 cm).
u SPEED button (45/33) ……………………(5)
- Set according to the speed (revolutions per minute) of the record to be played.
i Lifter lever (3)
O Anti-skating knob (3)
!Stylus pressure adjustment ring(3)
! Counterweight(3)
!Dust cover (2)
! Equalizer switch (2)
! Dust cover hinge (2)
Connections
NOTE:
- Turn off the power of the device to which the record player is being connected. Do not plug the record player's power plug into a power outlet until all connections are finished.
- Check that all connections are proper, then plug the record player's power plug into the AC outlet on the amplifier or into a household AC power outlet.
When connecting to the PHONO input terminal
Equalizer switch: OFF ( page 2)
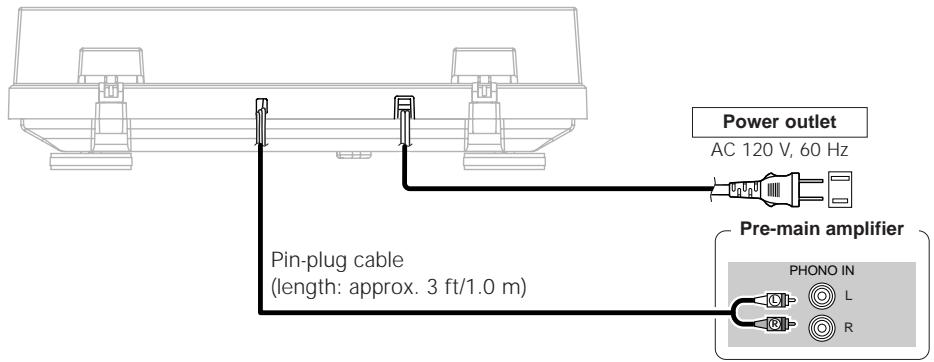
□ When connecting a terminal other than the PHONO input terminal
Equalizer switch: ON (page 2)
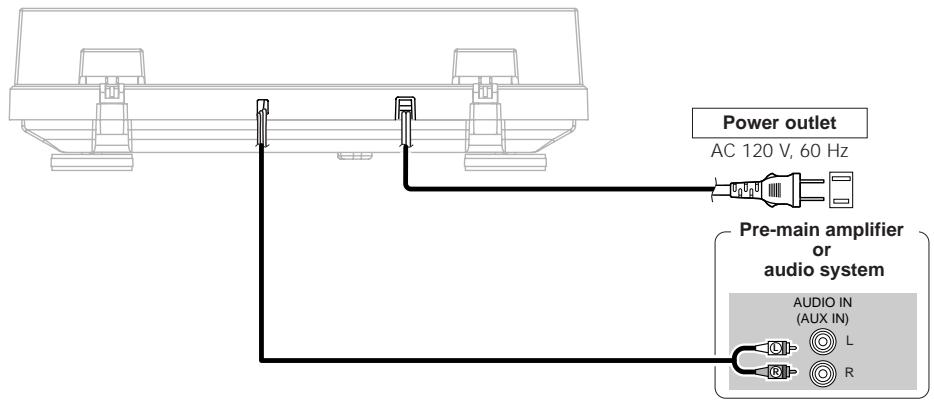

- If the player starts operating when the power supply cord is plugged in, press the STOP button.
Operation
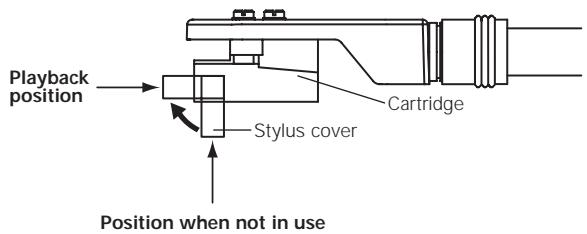
□ Opening the stylus cover
Starting playback using the auto play function
Raise the stylus cover before starting playback.
1 Place the record on the turntable.
※ For EP ("doughnut") records, use the 45 rpm adapter.
2 Set the record's playing speed using SPEED.
※ For 33 1/3 records Set to 33 For 45 records Set to 45
3 Set the record size using SIZE.
※ For 30 cm records....Set to 30 cm For 17 cm records....Set to 17 cm
4 Press START and hold it in for about 1 second.
- The turntable starts turning and playback starts automatically.
- Once the record is played, the tone arm returns to its original position and the turntable automatically stops turning.

- Once you have finished playing records, lower the stylus cover to protect the stylus tip.
- This set has an "auto return" function by which the tone arm automatically returns to its original position once a specific point is reached after a record finishes playing. Though there is no problem with records of normal size, with records including grooves up to this point, the auto return function may be activated before playback is finished.
NOTE:
- Do not touch the tone arm or turntable or turn off the power while a record is playing.
- The auto play system cannot be used for 9 ft/25 cm records. In this case operate manually. If the tone arm does not return to its original position after playback stops, press STOP.
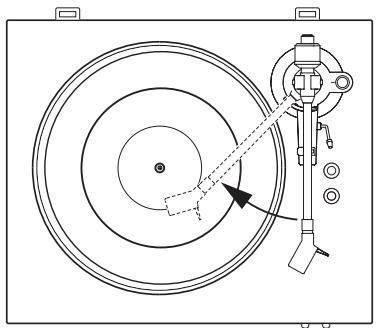
Starting playback manually
1 Place the record on the turntable.
※ For EP ("doughnut") records, use the 45 rpm adapter.
2 Set the record's playing speed using SPEED.
※ For 33 1/3 records . Set to 33 For 45 records . Set to 45
3 Raise the lifter lever and holding the head shell's finger catch move the tone arm to the beginning of the selection you want to play.
4 Lower the lifter lever.
- The tone arm lowers the stylus tip slowly onto the record and playback starts.
NOTE:
- Be careful not to scratch the record.
Stopping playback in the middle of a record
Press STOP.
- Playback stops and the tone arm returns to its original position.
※ It is also possible to stop playback by raising the lifter lever. In this case lift it using the head shell's finger catch and move the tone arm back to the arm rest.
Replacing the stylus
The included stylus has a service life of about 400 hours. To avoid damaging valuable records, replace the stylus without delay.
Purchase a replacement stylus at the store where you purchased the record player or your nearest repair and inquiry outlet. Specify that you want the "DSN-85" replacement stylus exclusively for the DP-300F.
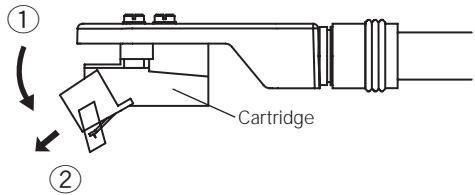
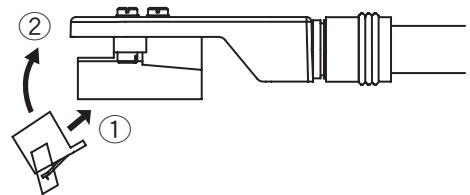
□Removing the replaceable stylus
Holding the cartridge steady with one hand, grasp the replaceable stylus with the other hand, push down in the direction of arrow ①, then pull the stylus off gently in the direction of arrow ②.
Mounting the replaceable stylus
Holding the cartridge steady with one hand, grasp the replaceable stylus with the other hand, point the catch on the replaceable stylus in the direction of arrow ①, insert it all the way into the long hole in the cartridge, then push up in the direction of arrow ② until a click is heard.

- Before replacing the stylus, turn off the amplifier's power and unplug the player's power supply cord.
- The stylus tip is an extremely delicate part, so handle it very carefully. Use a soft brush to gently remove any dust from the stylus tip.
- Removing the head shell makes it easy to replace the stylus.
Replacing the cartridge
If you wish to mount a different cartridge on this player, use one weighing about 44 to 93mN (about 4.5 to 9.5g ).
To purchase a head shell only, ask for a "PCL-310BK" exclusively for the DP-300F at your store of purchase or nearest repair and inquiry outlet.
□Removing the cartridge
- Turn the head shell lock nut in the direction of the arrow and remove the head shell.
- Remove the cartridge mount screws.
- Disconnect the lead wires on the cartridge side.
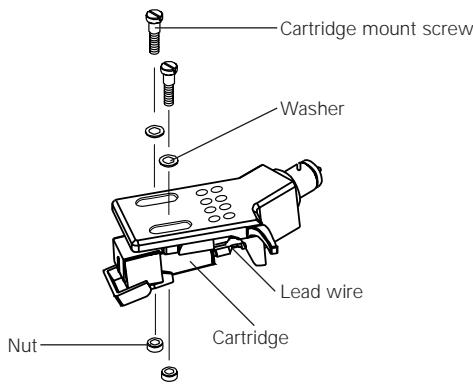
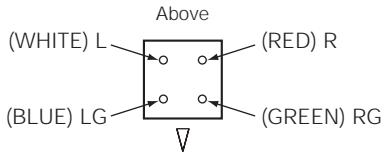
Mounting the cartridge
- Connect the lead wires. They are color-coded as shown below. Be careful to connect them properly.
RED .Right channel (R)
WHITE Left channel (L)
GREEN............Right channel ground (RG)
BLUE .........Left channel ground (LG)
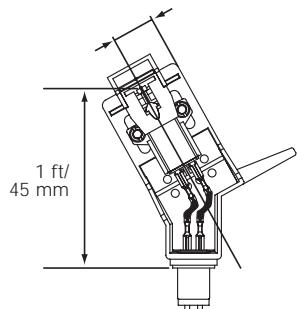
- To achieve the required overhang, mount in such a way that the stylus tip is positioned about 1 ft/45 mm from the edge of the head shell's mount surface (the rubber washer), as shown on the diagram below. (The overhang for this player should be 0.75 ft/19 mm.)

- After replacing the cartridge, do not forget to readjust the horizontal balance, stylus pressure, and anti-skating value ( page 3).
- The thickness of the terminal depends on the replacement cartridge, and some may not connect securely. In this case, use the included spare lead wire.
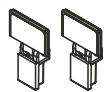
Mount parallel.
(Back side of head shell)
Mount perpendicular.
(Front side of head shell)
(Backside of cartridge)
Others
Troubleshooting
If a problem should arise, first check the following.
1. Are the connections correct?
2. Have you operated the player according to the Operating Instructions?
If this unit is not operating properly, check the items listed in the table below. Should the problem persist, there may be a malfunction. Disconnect the power immediately and contact your store of purchase.
| Symptom | Cause | Measures | Page |
| Power does not turn on.Turntable does not turn. | ·Power supply cord is not fully inserted.Drive belt is detached from the turntable. | ·Check the connection. ·Check the drive belt and driving roller. If the drive belt is detached from the turntable, attach it using the procedure described below. 1.Remove the turntable and turn it upside down. 2.Catch the belt on the inside perimeter. 3.Turn the turntable back right side up and pass the tape ribbon through the hole and between the turn tape and drive belt. 4.Mount the turntable, referring to the assembly instructions on page 2. | 4 2 |
| No sound is produced. | ·The pin-plug cable is not properly connected. ·The amplifier's function is not set for the terminals to which the turntable is connected. ·The replaceable stylus is not properly mounted. | ·Check the connection. ·Check the amplifier's settings. ·Check the stylus. | 4 4 7 |
| The sound is scratchy, the stylus skips or the sound is distorted. | ·The stylus or record is dirty. ·The stylus is worn or the record is scratched. | ·Remove the dirt or replace the stylus. ·Replace the stylus. ·Check the record. | 7 7 — |
| The sound is either extremely weak or too strong and distorted. | ·The equalizer switch is not set at the proper position. | ·Set the switch according to the terminal to which the player is connected. | 2 |
| Howling is produced. | ·The player is too close to the speakers. ·The player is placed in an unstable position. ·The playback sound is too loud. | ·Move the player and speakers apart. ·Check the player's place of installation. ·Adjust the amplifier's volume. | — — — |
| The tone arm does not move even when the START button is pressed. | ·The tone arm is clamped to the armrest. ·The power supply cord is not properly connected. | ·Remove the tone arm's clamp. ·Check the connection of the power supply cord. | 2 4 |
Specifications
Power supply: AC 120 V, 60 Hz
Power consumption: 2 W
| Maximum external dimensions: | With dust cover closed : |
| 434 (W) x 122 (H) x 381 (D) mm | |
| (17-3/32" x 4-51/64" x 15") (including protruding parts) | |
| With dust cover open : | |
| 434 (W) x 386 (H) x 413 (D) mm | |
| (17-3/32" x 15-13/64" x 16-19/64") (including protruding parts) | |
| Mass: | 5.5 kg (12 lbs 2 oz) |
| Drive type: | Belt drive |
| Motor: | DC servo motor |
| Speed: | 33-1/3 rpm, 45 rpm |
| Wow & flutter: | 0.10 % W.R.M.S |
| S/N ratio: | 60 dB |
| Tone arm: | Static balance straight type tone arm |
| Effective arm length: | 221.5 mm |
| Overhang: | 19 mm |
| Cartridge: | MM type |
| Output voltage: | With equalizer OFF : 2.5 mV |
| With equalizer ON : 150 mV | |
| Optimum stylus pressure: | 19.6 mN (2.0 g) |
| Replaceable stylus number: | DSN-85 |
| Stylus pressure adjustment range: | 0 ~ 39.2 mN (0 ~ 4.0 g) |
| One step 0.98 mN (0.1 g) | |
| Suitable cartridge empty weight : | 44 mN ~ 93 mN (4.5 ~ 9.5 g) |
| Head shell weight: | 98 mN (10.0 g) (including screws and nuts) |
| Head shell part number: | PCL-310BK |
- For purposes of improvement, specifications and design are subject to change without notice.


DENON
TOKYO, JAPAN
www.denon.com