
HTZ 5800 - Hedge Trimmers Texas - Free user manual and instructions
Find the device manual for free HTZ 5800 Texas in PDF.


| Product Type | Hedge Trimmer |
| Brand | Texas |
| Model | HTZ 5800 |
| Power Source | Petrol (Gasoline) |
| Engine Displacement | 25.4 cc |
| Cutting Length | 60 cm (23.6 inches) |
| Blade Material | Hardened Steel |
| Blade Type | Double-sided, Dual Action |
| Tooth Gap | 30 mm |
| Weight | 5.2 kg (11.5 lbs) |
| Dimensions (L x W x H) | 100 x 30 x 25 cm |
| Fuel Tank Capacity | 0.5 L |
| Oil Capacity | 0.2 L (2-stroke mix) |
| Vibration Level | ≤ 8.0 m/s² |
| Sound Pressure Level | 96 dB(A) |
| Safety Features | Two-hand operation, blade guard, anti-vibration handle |
| Starting System | Recoil starter |
| Maintenance | Clean air filter, sharpen blades, check spark plug |
| Spare Parts Availability | Blades, air filter, spark plug, fuel lines |
| Warranty | 2 years |
Frequently Asked Questions - HTZ 5800 Texas
User questions about HTZ 5800 Texas
0 question about this device. Answer the ones you know or ask your own.
Ask a new question about this device
Download the instructions for your Hedge Trimmers in PDF format for free! Find your manual HTZ 5800 - Texas and take your electronic device back in hand. On this page are published all the documents necessary for the use of your device. HTZ 5800 by Texas.
USER MANUAL HTZ 5800 Texas
 | Advarsel:Sikkerhedsinformation omkring situationer der kan ende i personskade | Warning:Safety information about hazards that can result in personal injury | Avvertimento:Informazioni di sicurezza su pericoli che possono comportare lesione personale |
 | Læs betjeningsvejledningen grundigt før maskinen benyttes. | Please read the user manual carefully before operating the machine. | Si prega di leggere il manuale utente con attenzione prima di azionare il macchina. |
 | Brug altid sikkerhedsbriller samt høreværn | Wear safety goggles and ear protection | Indossare occhiali di sicurezza e protezioni per le orecchie |
 | Brug arbejdshandsker. | Use work gloves. | Usa guanti da lavoro. |
 | Udsæt ikke udstyret for regn/vand og opbevar det indendørs. | Do not expose the equipment to rain/water and store it indoor. | Non esporre l'apparecchiatura a pioggia/acqua e conservarla al chiuso. |
 MAX.45°C MAX.45°C | Udsæt ikke for temperaturer over 45 grader | Do not expose to temperatures above 45 degrees C. | Non esporre a temperature superiori a 45 gradi C. |
 | Skal genbruges | Must be recycled | Deve essere riciclato |
 | Udsæt ikke udstyret for ekstrem varme eller ild | Do not expose the equipment to extreme heat or fire | Non esporre l'apparecchiatura a calore o fuoco estremi |
 | Udsæt ikke udstyret for regn/vand og opbevar det indendørs | Do not expose the equipment to rain/water and store it indoor | Non esporre l'apparecchiatura a pioggia/acqua e conservarla al chiuso |
 | Læs betjeningsvejledningen grundigt før maskinen benyttes | Please read the user manual carefully before operating the machine | Si prega di leggere il manuale utente con attenzione prima di azionare il macchina |
 | Må kun benyttes indendørs | Must only to be used inddor | Deve essere utilizzato solo inddor |
 | Bortskaffelse af elektriske produkter må ikke ske sammen med almindeligt husholdningsaffald. Elektriske produkter skal medbringes til det lokale genbrugs-center og bortskaffes på korrekt vis der. | Waste electrical products must not be disposed of with the household waste.This tool should be taken to your local recycling center for safe treatment. | I rifiuti di prodotti elettrici non devono essere smaltiti con i rifiuti domestici.Questo strumento deve essere portato al centro di riciclaggio locale per un trattamento sicuro. |
| Fig3 | 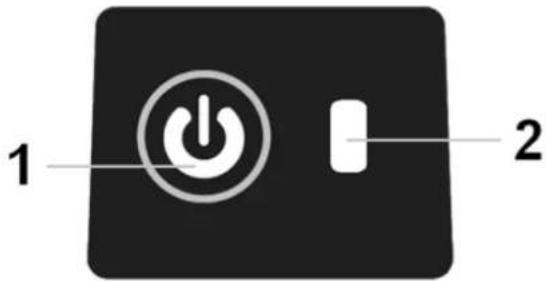 | |||
 | 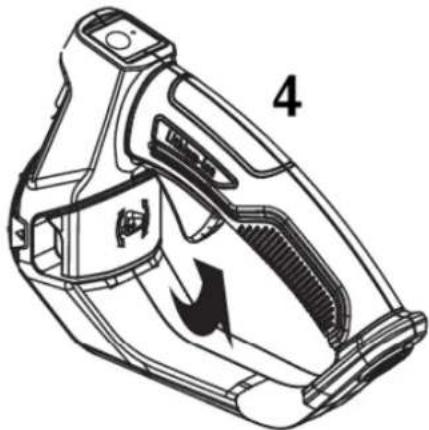 | |||
| Fig4 | 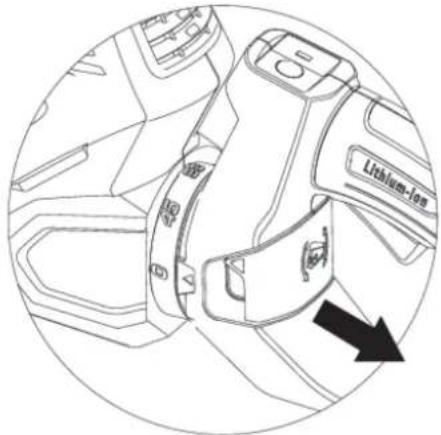 | |||
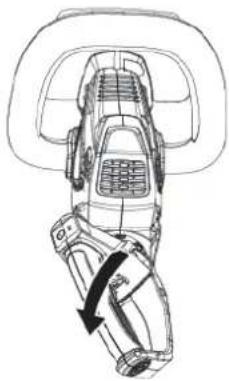 |  | 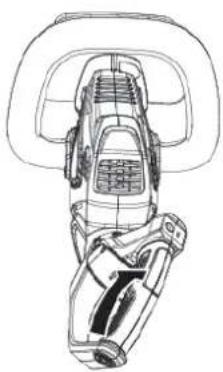 |  | |
Fig 5
A
B



DK - Original brugsanvisning
GB - Original instructions
Warning symbols.... 2
Illustrations....3
-
Safety 10
-
Identification of the machine and components ..... 10
-
Unpacking and assembly 10
-
Battery....11
-
Battery waist bag.... 11
-
Charger 11
-
Use....12
-
Clothing 12
-
Rotatable rear handle.... 12
-
Tips and advices 12
-
Maintenance.... 12
-
Storage.... 12
-
Specifications 12
-
Warranty terms and conditions.... 13
-
Troubleshooting 13
EC Declaration of conformity.... 19
Spare parts
Spare part drawings for the specific product can be found on our website www.texas.dk If you find the part numbers yourself, this will facilitate more rapid service.
For purchase of spare parts, please contact your dealer.
1. Safety
How to read the manual
Please read this instruction manual carefully, especially the safety warnings marked with the symbol:

When using the product, the safety instructions must be closely followed. Read this manual carefully before starting the machine. Make sure that you know how to stop and switch off the engine in case of accident. All instructions regarding safety and maintenance of the machine are for your own safety.
The warnings, precautions and instructions given in this manual, cannot cover all situations that the product can be placed in. The user must therefore present common sense and caution when using the product.
Safety in the work area
- Only use the product in clean and well lit areas
- Do not use the product in areas with explosive danger or where there is flammable fluids, gas or dust present.
- The person that uses the machine is responsible to other persons in the work area. Never use the machine when others, especially children or animals are near.
- This machine is an electric product. It is therefore important, that it ever comes in contact with water or is used in wet surroundings.
Use and maintenance of the product
- This machine must not be used for other work than as described in this manual.
- Only use original spare parts. Mounting of non-approved parts may lead to increased risk and are therefore not legal. Any liability is renounced for accidents or other damage that has happened due
to the use of unauthorised parts.
- Before using the machine, the dealer or other qualified person should instruct you in the use of the machine.
- Minors may not work the machine.
- The machine may only be lent to people who know how to work the machine. This manual should follow the machine under all circumstances.
- The machine may only be used by persons who are rested, well and fit. If the work is tiring, frequent brakes should be made. Do not use the machine under influence of alcohol.
- Always check before start, that all bolts and nuts are tighthened.
- Always wear eye protection when using the machine.
- Keep children and other persons at a distance of at least 5 metres from the work area.
- The battery should always be removed when: 1. maintenance is made.
- the machine is left unattended
- During transport, the main switch must be switched off.
2. Identification of the machine and components
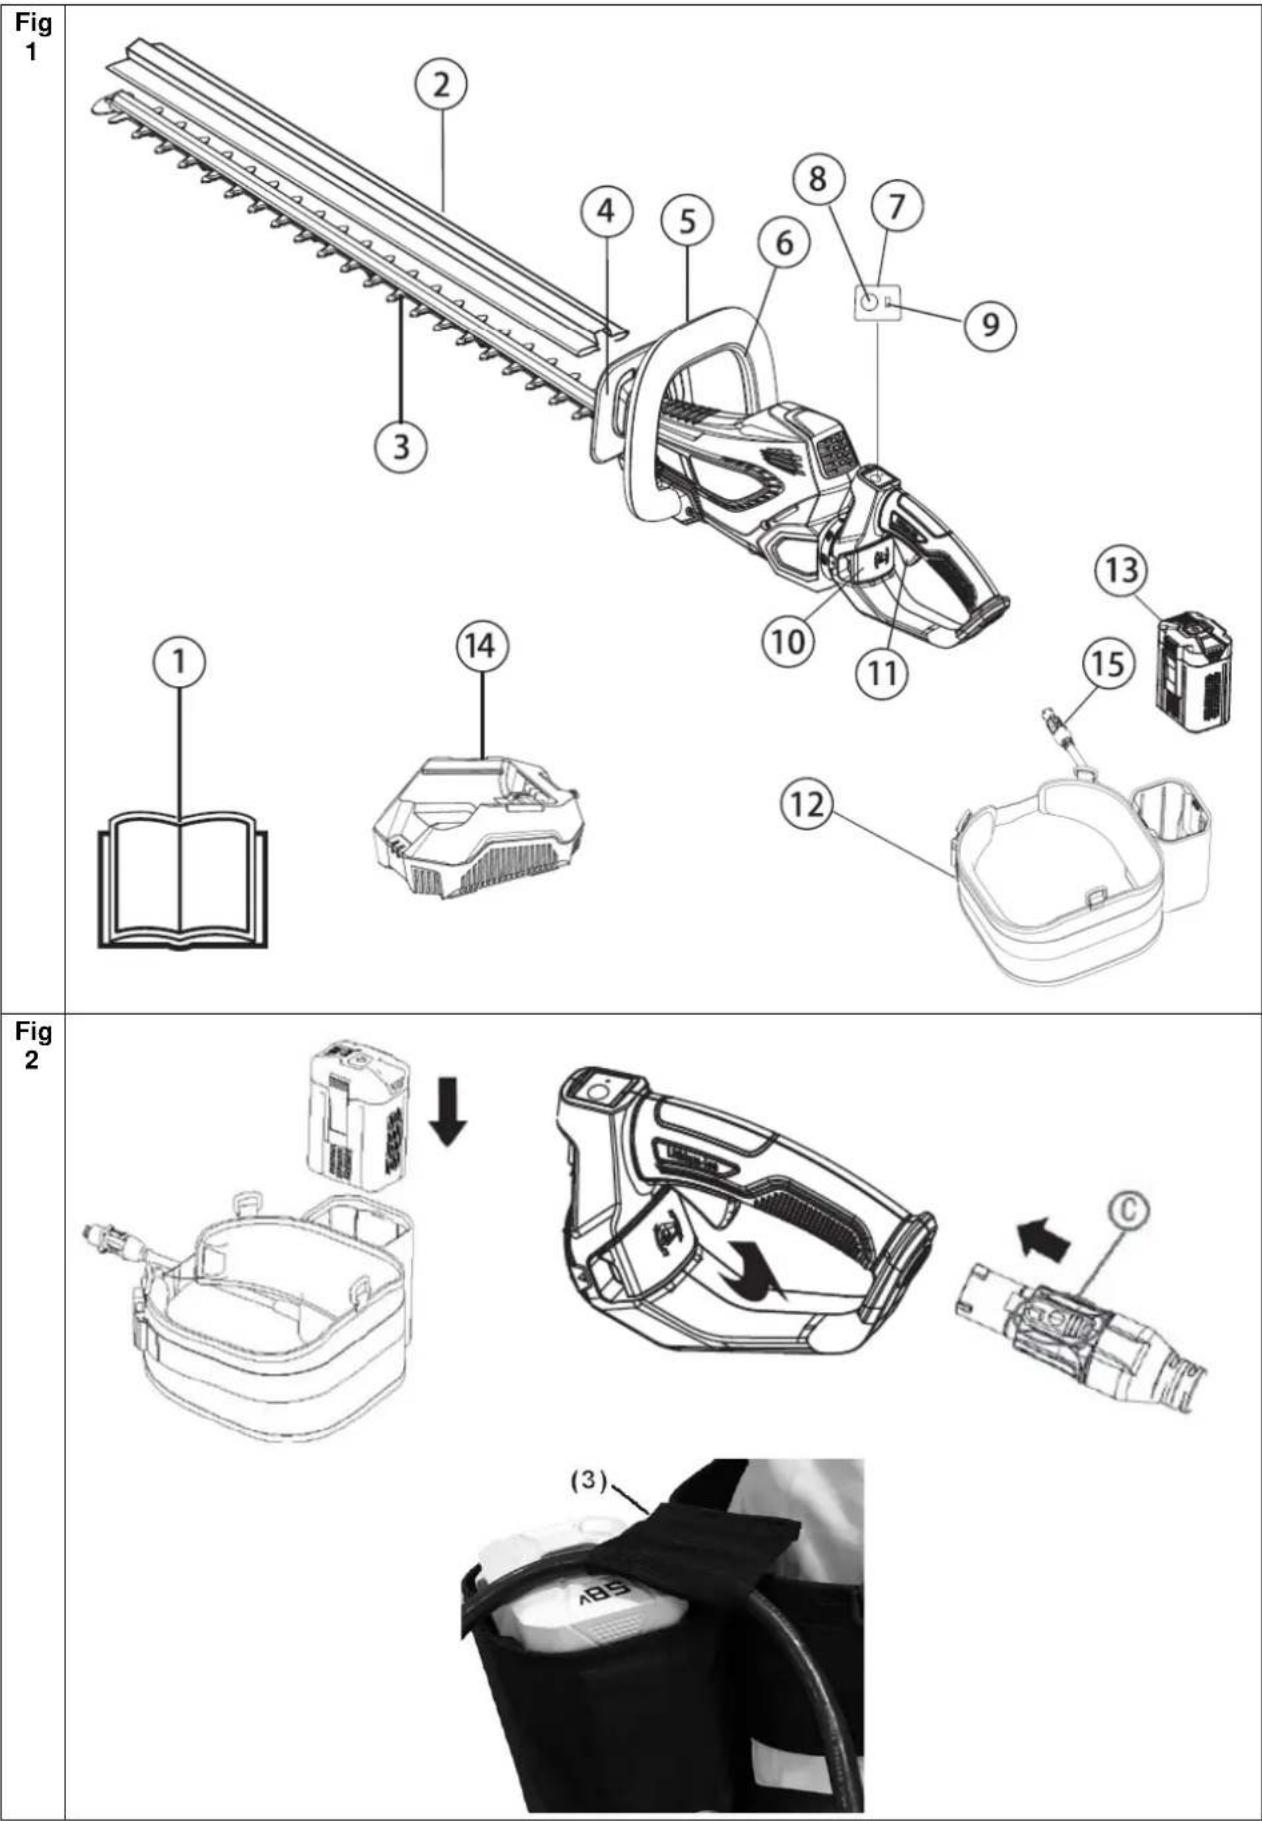
See Fig. 1
- User manual
- Transport protection
- Blade
- Guard
- Front handle
- Safety switch
- Key pad
- Main switch
- Power indicator light
- Lock for rotatable handle
- Trigger switch
- Waist bag for battery
- Battery (not included)
- Charger (not included)
- Waist bag socket
3. Unpacking and assembly
- Unpack all parts and lay them on a flat, stable surface.
- Remove all packing materials and shipping devices, if applicable.
- Make sure the delivery contents are complete and free of any damage. If you find that parts are missing or show damage do not use the product but contact your dealer. Using an incomplete or damaged product represents a hazard to people and property.
-
Ensure that you have all the accessories and tools needed for assembly and operation. This also includes suitable personal protective equipment.
-
Plug in the battery, by pushing it down until you hear a click
-
Remove the battery by push down the battery lock buttons and pull up NOTE: Always remove the battery before assembly and maintenance.
4. Battery
This product is delivered without battery and charger. It is sold separately.
Warning: Do not try to disassemble, short circuit or put it to extreme heat or fire, as it can cause serious inquiry and permanent damage to the battery!
The battery pack is only about 30% charged when delivered.
Charging
- Only use the original charger with art. no. 90070054
- Before the battery is being used the first time, it is recommended to fully charge it first.
| LED lights | Battery Pack |
| All LEDs are lit | Fully charged (75-100%). |
| LED 1, LED 2, LED 3 are lit. | The battery pack is 50%-75% charged |
| LED 1, LED 2 are lit. | The battery pack is 25%-50% charged. |
| LED 1 are lit | The battery pack is 0%-25% charged |
| LED 1 flashes | The battery pack is empty. Charge the battery. |
Note: The indicator lights is only indicative indications, and is not accurate power indications.
Important: To protect the battery from total discharge, the machine will stop, when the battery is nearly empty.
The machine must not be started up again after automatic shutdown, as it can damage the battery. The battery must be recharges before the work can continue.
For further information, see the user manual which is included with the battery.
5. Battery waist bag
See Fig. 2
To keep the weight of the hedge trimmer down, the battery is kept in a bag, which is put around your waist. It is connected to the chainsaw via a cable.
- Inset the battery in the waist bag. Turn it the right way, so it easily slides into place.
- Indset the cable socket (C) in the rear of the hedge trimmer.
- Use the velcro strap (3) near the battery compartment to keep excess cable in place.
- To remove the cable from the hedge trimmer, pull back the metalpart on the socket, turn the socket 45 degrees anti-clockwise and pull the cable out.
6. Charger
A full charge takes around 60 min for 2.0 Ah batteri and 120 min for 4.0 Ah battery.
- Only use the original charger, which is included with the product.
- Do not try to charge other type of batteries in the charger, other than the original batteries with art. no. 90070051 (2.0 Ah) or 90070052 (4.0 Ah).
- Keep the charger in a dry and warm environment (10-25 degrees C) and only use it indoor. It should be connected to a normal 230V AC socket.
- Before the battery is being used the first time, it is recommended to charge it fully.
- The surface of the battery can become warm during charging. This is normal.
- Do not cover battery or charger during charging. Allow free ventilation of air.
Insert the battery into the slots of the charger and slide it into place until it locks.
There are 4 lights on the charger indicating the status and state of charge of the battery
| Status | |
 | Charging |
 | Fully charged |
 | Evaluate |
 | Defective |
For further information, see the user manual which is included with the charger.
Important: The charger will stop, when the battery is full. However, it is not recommended to leave the battery in charger for more than 24 hours. It is recommended to drain the battery completely and fully charge it whenever possible, as it can increase the health of the battery. But partial charge will not damage the battery.
To remove the battery from the charger, hold the button down and pull the battery out.
Before winter storage, the battery should be fully charged and kept warm at 10-20 degrees C. Charge it every 3 months. Make sure to keep ventilation holes clean and free from dirt.
Store the charger indoor between 5-25 degrees C.
7. Use
See Fig. 3
Before use, make sure that the battery is fitted properly with the battery lock in place.
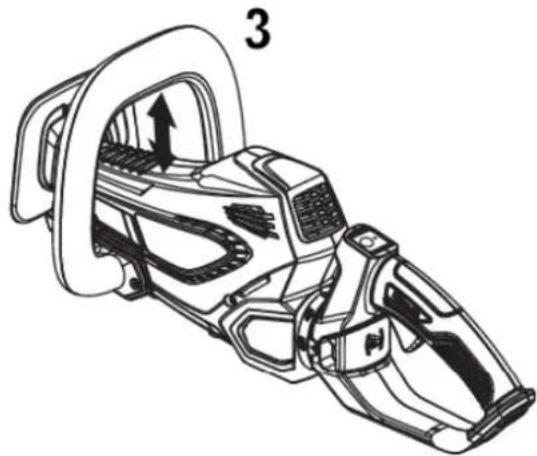
To start the machine first press the main switch (1), so the On/Off indicator (2) lights green. Then hold the safety switch (3) on front handle and activate the trigger switch (4).
For safety reasons, the hedge trimmer only works when both switches are activated (3+4)
Stop the hedge trimmer by releasing the trigger switch (4) or the front handle switch (3).
The free gab between the blade teeth is 22 mm, but to ensure enough power to cut each branch nicely and avoid the blade getting blocked, it is recommended to avoid branches larger than 18 mm depending on hedge type. Use a handsaw or pruning cutter to trim the larger branches.
Automatic switch off function
The machine is equipped with a switch off function that deactivated the machine if not used within approx. 60 seconds. The green power indicator light will switch off too. Press the main switch (1) to restart.
8. Clothing
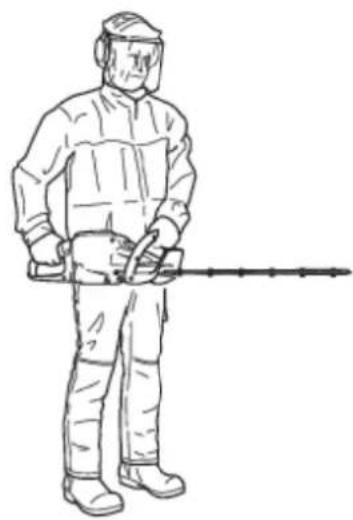
When using the machine, wear tight-fitting work clothes, strong working gloves, hearing protectors, safety goggles and boots with non-skid soles
9. Rotatable rear handle
See Fig. 4
The rotatable handle has 5 positions. Spend some time finding the position that is right for you.
The rotatable handle makes the work more ergonomically correct.
To change position pull the lock and turn the handle.
The trigger switch must not be activated when turning the handle, as it will prevent it to turn.
10. Tips and advices
See Fig. 5
Always use both hands to hold the machine. Hold the machine at the side of your body (A)
Work with a swinging action from the bottom and upwards when trimming sides (B). It is recommended to turn the rotatable rear handle 90 degrees when doing this for optimal ergonomy.
When trimming a hedge, the motor should always face away from the hedge. Hold the machine as close to your body as possible to get the best balance.
Make sure that the tip does not touch the ground.
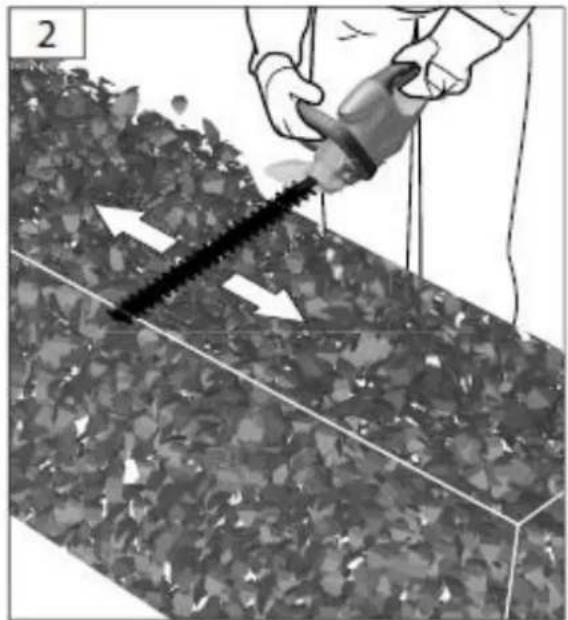
Apart from hedges the hedge trimmer may also be used for cutting bushes. The best cutting effect is achieved when holding the blade at an angle to the hedge of approx. 15° .
The opposite rotating knives cut on both sides, and it is therefore possible to trim the hedge in both directions.
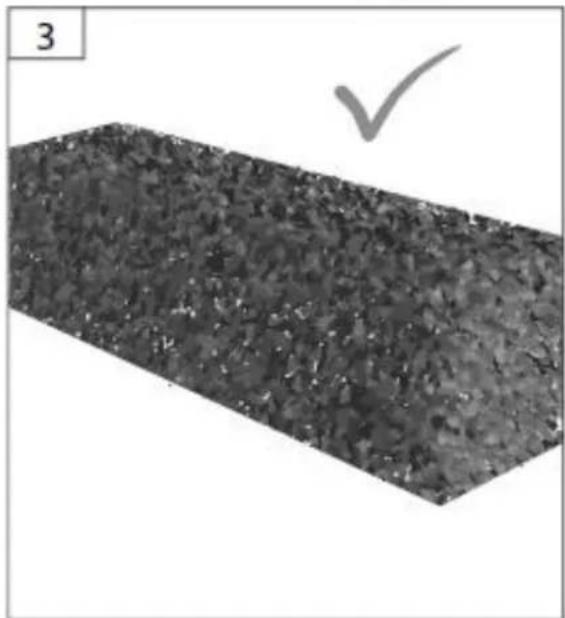
The illustration shows how the hedge trimmer is used to get the optimal result.
11. Maintenance
Before any service and maintenance is done, the power must be disconnected, it means the battery removed from the tool.
- Remove the battery before you clean and store the machine.
- For obtaining the best cutting results the knives must be cleaned and oiled regularly. Remove dirt with a soft brush and oil lightly.
- Use biodegradable oil.
- Clean the housing and other parts with a mild cleanser and a moist cloth. Never use aggressive cleansers or solvents.
- Prevent water from getting into the machine.
12. Storage
Store the hedge trimmer dry and unavailable for children. Keep the blade lubricated. Use the transport protection when the machine is stored.
- Specifications
| Model | HTZ 5800 |
| Battery type | Lithium Ion |
| Battery nominal voltage | 58V |
| Battery rated voltage | 50.4V |
| Motor power | 550W |
| Blade speed | Max 3000 cuts/min |
| Blade length | 65 cm |
| Cutting diameter | Max 22 mm |
| Net weight (tool only) | 3.0 kg |
14. Warranty terms and conditions
The warranty period is 2 years for private end users in EU countries. Products sold for commercial use, only have a warranty period of 1 year.
The warranty covers material and/or fabrication faults.
Restrictions and requirements
Normal wear and replacement of wearing parts are NOT covered by the warranty.
Wearing parts, which are NOT covered for more than 12 months:
- Blade/bar
- Blade tip protector
- Battery: If the battery is not stored correct (frost-free and recharged every 3 months), the durability is only guaranteed for 6 months.
The warranty does NOT cover damages/faults caused by:
- Lack of service and maintenance
- Structural changes
- Exposure to unusual external conditions
- If the machine has been improperly used or overloaded
- Use of unoriginal spare parts.
- Other conditions where Texas cannot be held responsible.
Whether a case is a warranty claim or not is determined in each case by an authorized service center. Your receipt is your warranty note, why it should always be kept safe.
REMEMBER: The purchase of spare parts as well as any request for warranty repair, art. number (e.g. 900700XX), year and serial number should always be informed.
* We reserve the right to change the conditions and accept no liability for any misprints.
15. Troubleshooting
| Symptom | Possible causes | Possible solution |
| Machine stops, power indicator on for half second, off for half second, then flashing for 60 seconds before switching off. | Low battery voltage | Charge the battery |
| Machine stops, power indicator on for 3 seconds, off for 3 seconds, then flashing for 60 seconds before switching off. | Overloaded | The blade is blockedRemove the battery from the machine.Remove the blocked material and restart the machine. |
| Machine stops, power indicator on for 3 seconds, off for 3 seconds, then flashing for 60 seconds | Battery connection failure | Check the battery connection cable from waist bag to machine. Reconnect it. |
For troubleshooting regarding battery and charger, see user manuals included for these items.
2006/42/EC - 2014/30/EU - 2000/14/EC amended by 2005/88/EC
Responsible for documentation
Johnny Lolk
TEXAS
EQUIPMENT


- DK - ORIGINAL BRUGSANVISNING
- GB - ORIGINAL INSTRUCTIONS
- SPARE PARTS
- SAFETY
- HOW TO READ THE MANUAL
- SAFETY IN THE WORK AREA
- USE AND MAINTENANCE OF THE PRODUCT
- IDENTIFICATION OF THE MACHINE AND COMPONENTS
- SEE FIG. 1
- UNPACKING AND ASSEMBLY
- BATTERY
- CHARGING
- BATTERY WAIST BAG
- SEE FIG. 2
- CHARGER
- USE
- SEE FIG. 3
- AUTOMATIC SWITCH OFF FUNCTION
- CLOTHING
- ROTATABLE REAR HANDLE
- SEE FIG. 4
- TIPS AND ADVICES
- SEE FIG. 5
- MAINTENANCE
- STORAGE
- WARRANTY TERMS AND CONDITIONS
- RESTRICTIONS AND REQUIREMENTS
- TROUBLESHOOTING
- TEXAS
Brand : Texas
Model : HTZ 5800
Category : Hedge Trimmers