
KD-T915BTS - Car radio JVC - Free user manual and instructions
Find the device manual for free KD-T915BTS JVC in PDF.


| Product Type | Car Stereo / Receiver |
| Brand | JVC |
| Model | KD-T915BTS |
| Form Factor | Double DIN (approx. 178 x 100 mm) |
| Weight | Approx. 1.5 kg (3.3 lbs) |
| Power Supply | 12 V DC (negative ground) |
| Maximum Output Power | 50 W x 4 channels |
| RMS Output Power | 22 W x 4 channels |
| Disc Playback | CD, CD-R/RW, DVD, DVD-R/RW |
| Bluetooth Version | 4.2 (Hands-free, Audio Streaming) |
| USB Input | 1 x USB (MP3/WMA/AAC/WAV/FLAC playback) |
| AUX Input | 1 x 3.5 mm front auxiliary input |
| Radio Bands | AM / FM (RDS) |
| Display | 6.2-inch TFT LCD color touchscreen (approx.) |
| Audio Features | MOSFET amplifier, 3-band equalizer, loudness |
| Connectivity | Rear USB, AUX, Bluetooth, optional SiriusXM ready |
| Remote Control | Included (wired or wireless? wireless IR) |
| Cleaning Instructions | Use a soft, dry cloth. Avoid solvents. |
| Safety | Fuse rating: 15A (replace with same type) |
| Repairability | Consumer replaceable fuse; professional service for internal repairs |
| Manual Pages | 71 pages (English) |
Frequently Asked Questions - KD-T915BTS JVC
User questions about KD-T915BTS JVC
0 question about this device. Answer the ones you know or ask your own.
Ask a new question about this device
Download the instructions for your Car radio in PDF format for free! Find your manual KD-T915BTS - JVC and take your electronic device back in hand. On this page are published all the documents necessary for the use of your device. KD-T915BTS by JVC.
USER MANUAL KD-T915BTS JVC
KD-T915BTS / KD-T910BTS / KD-TD91BTS / KD-T91MBS / KD-T711BT / KD-T710BT / KD-TD71BT / KD-SR86BT
CD RECEIVER
INSTRUCTION MANUAL
CD RECEIVER
INSTRUCTION MANUAL
CD RECEIVER
Enter below the Model No. and Serial No. which are located on the top or bottom of the cabinet. Retain this information for future reference.
Model No.
Serial No.
B5A-3092-00 [K]
CAUTION
Use of controls or adjustments or performance of procedures other than those specified herein may result in hazardous radiation exposure. In compliance with Federal Regulations, following are reproductions of labels on, or inside the product relating to laser product safety.
JVCKENWOOD Corporation
2967-3. ISHIKAWA-MACHI
THIS PRODUCT COMPLIES WITH DHHS RULES 21CFR
SUBCHAPTER J IN EFFECT AT DATE OF MANUFACTURE.
Location: Top Plate
This product contains a CR Coin Cell Lithium Battery which contains Perchlorate Material—special handling may apply. See www.dtsc.ca.gov/hazardouswaste/perchlorate
FCC CAUTION
Changes or modifications not expressly approved by the party responsible for compliance could void the user's authority to operate the equipment.
NOTE: This equipment has been tested and found to comply with the limits for a Class B digital device, pursuant to part 15 of the FCC Rules. These limits are designed to provide reasonable protection against harmful interference in a residential installation. This equipment generates, uses and can radiate radio frequency energy and, if not installed and used in accordance with the instructions, may cause harmful interference to radio communications. However, there is no guarantee that interference will not occur in a particular installation. If this equipment does cause harmful interference to radio or television reception, which can be determined by turning the equipment off and on, the user is encouraged to try to correct the interference by one or more of the following measures:
– Reorient or relocate the receiving antenna. – Increase the separation between the equipment and receiver. - Connect the equipment into an outlet on a circuit different from that to which the receiver is connected. - Consult the dealer or an experienced radio/TV technician for help.
Supplier's Declaration of Conformity
Trade Name: JVC
Products: CD RECEIVER
Model Name: KD-T915BTS/KD-T910BTS/KD-TD91BTS/KD-T91MBS/KD-T711BT/
KD-T710BT/KD-TD71BT/KD-SR86BT
Responsible Party: JVCKENWOOD USA CORPORATION
2201 East Dominguez Street, Long Beach, CA 90810, U.S.A.
PHONE: 310 639-9000
THIS DEVICE COMPLIES WITH PART 15 OF THE FCC RULES. OPERATION IS SUBJECT TO THE FOLLOWING TWO CONDITIONS:
(1) THIS DEVICE MAY NOT CAUSE HARMFUL INTERFERENCE, AND (2) THIS DEVICE MUST ACCEPT ANY INTERFERENCE RECEIVED, INCLUDING INTERFERENCE THAT MAY CAUSE UNDESIRED OPERATION.
IC (Industry Canada) Caution
This device contains licence-exempt transmitter(s)/receiver(s) that comply with Innovation, Science and Economic Development Canada's licence-exempt RSS(s). Operation is subject to the following two conditions:
- This device may not cause interference.
- This device must accept any interference, including interference that may cause undesired operation of the device.
IC (Industry Canada) Caution
This transmitter must not be co-located or operated in conjunction with any other antenna or transmitter.
CAUTION
This equipment complies with FCC/IC radiation exposure limits set forth for an uncontrolled environment and meets the FCC radio frequency (RF) Exposure Guidelines and RSS-102 of the IC radio frequency (RF) Exposure rules. This equipment should be installed and operated keeping the radiator at least 20 cm or more away from person's body.
ATTENTION
The software embedded in the Product (hereinafter the "Licensed Software") provided by Licensor is copyrighted to or sublicensable by the Licensor, and this Agreement provides for the terms and conditions which Users shall follow in order to use the Licensed Software.
The User shall use the Licensed Software by agreeing with the terms of this Software License Agreement. This Agreement shall be deemed completed at the time the User (hereinafter the "User") initially used the Product in which the "Licensed Software" is embedded.
The Licensed Software may include the software which has been licensed to the Licensor directly or indirectly from any third party. In such case, some third parties require the Users to follow their conditions for use separately from this Software License Agreement. Such software shall not be subject to this Agreement, and the Users are urged to read the "Important Notice concerning the Software" to be provided separately below.
Article 1 General Provision
The Licensor shall grant to the User a non-exclusive and non-transferable (other than the exceptional case referred to in Article 3, Paragraph 1) license to use the Licensed Software within the country of the User (the country where the User bought the Product, hereinafter the "Country").
Article 2 License
- The license granted under this Agreement shall be the right to use the Licensed Software in the Product.
- The User shall not duplicate, copy, modify, add, translate or otherwise alter, or lease the Licensed Software and any related documents, whether in whole or in part.
- The use of the Licensed Software shall be limited to personal purpose, and the Licensed Software shall not be distributed, licensed or sub-licensed whether it is for commercial purpose or not.
- The User shall use the Licensed Software according to the directions described in the operation manual or help file, and is prohibited to use or duplicate any data in a manner violating the Copyright Law or any other laws and regulations by applying whole or a part of the Licensed Software.
Article 3 Conditions for Grant of License
- When the User transfers the Product, it may also transfer the license to use the Licensed Software embedded in the Product (including any related materials, updates and upgrades) on condition that no original, copies or related materials continue in the possession of the User, and that the User shall cause the transferee to comply with this Software License Agreement.
- The User shall not carry out reverse engineering, disassembling, decompiling or any other code analysis works in connection with the Licensed Software.
Article 4 Right pertaining to the Licensed Software
Any and all copyrights and other rights pertaining to the Licensed Software and related documents shall belong to the Licensor or the original holder of the right who granted to the Licensor the license or sublicense for the Licensed Software (hereinafter the "Original Rightholder"), and the User shall not be entitled to any right other than the license granted hereunder, in respect of the Licensed Software and any related documents.
Article 5 Indemnification of Licensor
- Neither the Licensor nor the Original Rightholder shall be liable for any damage incurred by the User or any third party due to the exercise of the license granted to the User under this Agreement, unless otherwise restricted by law.
- The Licensor will offer no guarantee for the merchantability, convertibility and consistency with certain objective of the Licensed Software.
Article 6 Liability to Third Party
If any dispute has arisen with any third party due to an infringement upon a copyright, patent or any other intellectual property right that was caused by the User's use of the Licensed Software, the User shall settle such dispute at its own cost and hold the Licensor and the Original Rightholder harmless from any inconvenience it may cause.
Article 7 Confidentiality
The User shall keep the confidentiality of such portion of the Licensed Software, related documents thereof or any other information to be granted under this Agreement, as well as the conditions of this Agreement as has not yet entered the public domain, and shall not disclose or divulge the same to any third party without approval of the Licensor.
Article 8 Termination
In case the User falls under any of the events described in the following items, the Licensor may immediately terminate this Agreement or claim that the User compensates for the damage incurred by the Licensor due to such event:
(1) when the User violated any provision of this Agreement; or (2) when a petition has been filed against the User for an attachment, provisional attachment, provisional disposition or any other compulsory execution.
Article 9 Destruction of the Licensed Software
If this Agreement is terminated pursuant to the provision of Article 8, the User shall destroy the Licensed Software, any related documents and copies thereof within two (2) weeks from such date of termination.
Article 10 Protection of Copyright
- The copyright and all the other intellectual property rights relating to the Licensed Software shall belong to the Licensor and the Original Rightholder, and in no event shall they be under the ownership of the User.
- The User shall, whenever it uses the Licensed Software, comply with any laws relating to the copyright and other intellectual property rights.
Article 11 Export Restriction
- It is prohibited to export the Licensed Software and any related documents outside the country of the User (including transmission thereof outside the country of the User via Internet of other communication tools).
- The User shall understand that the Licensed Software shall be subject to the export restrictions adopted by the country of User and any other countries.
- The User shall agree that the software will be subject to any and all applicable international and domestic laws (including the export control regulation of the country of User and any other countries, and any restrictions concerning the end-users, the use by end-users and importing countries to be provided by the country of User and any other countries, and any other governmental authorities).
Article 12 Miscellaneous
- In the event any part of this Agreement is invalidated by operation of law, the residual provisions shall continue in force.
- Matters not stipulated in this Agreement or any ambiguity or question raised in the construction of this Agreement shall be provided or settled upon good-faith consultation between the Licensor and the User.
- The Licensor and the User hereby agree that this Agreement is governed by the laws of Japan, and any dispute arising from, and relating to the rights and obligations under, this Agreement shall be submitted to the exclusive jurisdiction of the Tokyo District Court for its first instance.
Important Notice concerning the Software
-jansson
Copyright (c) 2009-2012 Petri Lehtinen petri@digip.org
Permission is hereby granted, free of charge, to any person obtaining a copy of this software and associated documentation files (the "Software"), to deal in the Software without restriction, including without limitation the rights to use, copy, modify, merge, publish, distribute, sublicense, and/or sell copies of the Software, and to permit persons to whom the Software is furnished to do so, subject to the following conditions:
The above copyright notice and this permission notice shall be included in all copies or substantial portions of the Software.
THE SOFTWARE IS PROVIDED "AS IS", WITHOUT WARRANTY OF ANY KIND, EXPRESS OR IMPLIED, INCLUDING BUT NOT LIMITED TO THE WARRANTIES OF MERCHANTABILITY, FITNESS FOR A PARTICULAR PURPOSE AND NONINFRINGEMENT. IN NO EVENT SHALL THE AUTHORS OR COPYRIGHT HOLDERS BE LIABLE FOR ANY CLAIM, DAMAGES OR OTHER LIABILITY, WHETHER IN AN ACTION OF CONTRACT, TORT OR OTHERWISE, ARISING FROM, OUT OF OR IN CONNECTION WITH THE SOFTWARE OR THE USE OR OTHER DEALINGS IN THE SOFTWARE.
-cJSON
Copyright (c) 2009 Dave Gamble
Permission is hereby granted, free of charge, to any person obtaining a copy of this software and associated documentation files (the "Software"), to deal in the Software without restriction, including without limitation the rights to use, copy, modify, merge, publish, distribute, sublicense, and/or sell copies of the Software, and to permit persons to whom the Software is furnished to do so, subject to the following conditions:
The above copyright notice and this permission notice shall be included in all copies or substantial portions of the Software.
THE SOFTWARE IS PROVIDED "AS IS", WITHOUT WARRANTY OF ANY KIND, EXPRESS OR IMPLIED, INCLUDING BUT NOT LIMITED TO THE WARRANTIES OF MERCHANTABILITY, FITNESS FOR A PARTICULAR PURPOSE AND NONINFRINGEMENT. IN NO EVENT SHALL THE AUTHORS OR COPYRIGHT HOLDERS BE LIABLE FOR ANY CLAIM, DAMAGES OR OTHER LIABILITY, WHETHER IN AN ACTION OF CONTRACT, TORT OR OTHERWISE, ARISING FROM, OUT OF OR IN CONNECTION WITH THE SOFTWARE OR THE USE OR OTHER DEALINGS IN THE SOFTWARE.
-CMP
The MIT License (MIT)
Copyright (c) 2014 Charles Gunyon
Permission is hereby granted, free of charge, to any person obtaining a copy of this software and associated documentation files (the "Software"), to deal in the Software without restriction, including without limitation the rights to use, copy, modify, merge, publish, distribute, sublicense, and/or sell copies of the Software, and to permit persons to whom the Software is furnished to do so, subject to the following conditions:
The above copyright notice and this permission notice shall be included in all copies or substantial portions of the Software.
THE SOFTWARE IS PROVIDED "AS IS", WITHOUT WARRANTY OF ANY KIND, EXPRESS OR IMPLIED, INCLUDING BUT NOT LIMITED TO THE WARRANTIES OF MERCHANTABILITY, FITNESS FOR A PARTICULAR PURPOSE AND NONINFRINGEMENT. IN NO EVENT SHALL THE AUTHORS OR COPYRIGHT HOLDERS BE LIABLE FOR ANY CLAIM, DAMAGES OR OTHER LIABILITY, WHETHER IN AN ACTION OF CONTRACT, TORT OR OTHERWISE, ARISING FROM, OUT OF OR IN CONNECTION WITH THE SOFTWARE OR THE USE OR OTHER DEALINGS IN THE SOFTWARE.
Copyright (c) 2011 Petteri Aimonen
This software is provided 'as-is', without any express or implied warranty. In no event will the authors be held liable for any damages arising from the use of this software.
Permission is granted to anyone to use this software for any purpose, including commercial applications, and to alter it and redistribute it freely, subject to the following restrictions:
- The origin of this software must not be misrepresented; you must not claim that you wrote the original software. If you use this software in a product, an acknowledgment in the product documentation would be appreciated but is not required.
- Altered source versions must be plainly marked as such, and must not be misrepresented as being the original software.
- This notice may not be removed or altered from any source distribution.
Contents
Before Use....3
Basics 4
Getting Started 5
1 Cancel the demonstration 2 Set the clock and date 3 Set the basic settings
Radio 7
CD/USB/iPod....9
AUX....12
Pandora® 12
Spotify 14
SiriusXM® Radio 15
Using Other Applications 19
Bluetooth® 20
Bluetooth - Connection
Bluetooth - Mobile phone
Bluetooth - Audio
AMAZON ALEXA 27
Audio Settings 29
Display Settings 35
Learning Steering Remote Control 36
References 37
Maintenance
More information
Change the display information
Troubleshooting....41
Installation/Connection 44
Specifications....48
How to read this manual
- The displays and faceplates shown in this manual are examples used to provide clear explanations of the operations. For this reason, they may be different from the actual displays or faceplates.
- Operations are explained mainly using buttons on the faceplate of KD-T915BTS.
- English indications are used for the purpose of explanation. You can select the display language from the menu. (Page 6) • [XX] indicates the selected items. • (Page XX) indicates references are available on the stated page.

This symbol on the product means there are important operating and maintenance instructions in this manual.
Be sure to carefully read instructions in this manual.
BeforeUse
IMPORTANT
- To ensure proper use, please read through this manual before using this product. It is especially important that you read and observe Warnings and Cautions in this manual.
- Please keep the manual in a safe and accessible place for future reference.
WARNING
- Do not operate any function that takes your attention away from safe driving.
- Do not ingest the battery, Chemical Burn Hazard.
The remote control supplied with this product contains a coin/button cell battery.
If the coin/button cell battery is swallowed, it can cause severe internal burns in just 2 hours and can lead to death.
Keep new and used batteries away from children.
If the battery compartment does not close securely, stop using the product and keep it away from children.
If you think batteries might have been swallowed or placed inside any part of the body, seek immediate medical attention.
CAUTION
Volume setting:
- Adjust the volume so that you can hear sounds outside the car to prevent accidents.
- Lower the volume before playing digital sources to avoid damaging the speakers by the sudden increase of the output level.
General:
- Avoid using the external device if it might hinder safe driving.
- Make sure all important data has been backed up. We shall bear no responsibility for any loss of recorded data.
- Never put or leave any metallic objects (such as coins or metal tools) inside the unit to prevent a short circuit.
- If a disc error occurs due to condensation on the laser lens, eject the disc and wait for the moisture to evaporate.
- Depending on the types of cars, the antenna will automatically extend when you turn on the unit with the antenna control wire connected (page 46). Turn off the unit when parking at a low ceiling area.
Remote control (RM-RK52):
- Do not leave the remote control in hot places such as on the dashboard.
- Risk of fire or explosion if the battery is replaced by an incorrect type. Ensure to replace only with the same type.
- Risk of fire, explosion or the leakage of flammable liquid or gas if the battery is left in an extremely high temperature surrounding environment and/or subjected extremely low air pressure. The battery pack or batteries shall not be exposed to excessive heat such as sunshine, fire or the like.
- Risk of fire, explosion or the leakage of flammable liquid or gas if the battery is disposed into fire or a hot oven, recharged, shorted, mechanically crushed or cut of the battery.
- If spilled fluid comes in contact with your eyes or on clothing, immediately rinse with water and consult a physician.
Basics
Faceplate
KD-T915BTS/KD-T910BTS/KD-TD91BTS/KD-T91MBS:
Volume knob Loading slot Display window*

KD-T711BT/KD-T710BT/KD-TD71BT/KD-SR86BT:

Attach
Detach
How to reset
Reset the unit within 5 seconds after detaching the faceplate.
* Only for illustration purpose.
To On the faceplate
| Turn on the power | Press ⏻SRC.• Press and hold to turn off the power. |
| Adjust the volume Turn the volume knob. | |
| Press the volume knob to mute the sound or pause playback.• Press again to cancel. The volume level returns to the previous level before muting or pause. | |
| Select a source | • Press ⏻SRC repeatedly.• Press ⏻ SRC, then turn the volume knob within 2 seconds. |
| Change the display information | Press ⏻ repeatedly. (Page 39, 40) |

ENGLISH
Basics GettingStarted
Remote control (RM-RK52) (supplied for KD-T711BT)
- For KD-T915BTS/KD-T910BTS/KD-TD91BTS/KD-T91MBS/KD-T710BT/KD-TD71BT; This unit can be remotely controlled with an optionally purchased remote control.
- For KD-SR86BT: Remote control functions are not available.
Remote sensor (Do not expose to bright sunlight.)

Pull out the insulation sheet when using for the first time.
How to replace the battery

To turn on the remote control
Adjust the volume: Press VOL + or VOL - .
- Press and hold VOL + to continuously increase the volume to 15. Press ✗ to mute the sound or pause playback.
- Press again to cancel. The volume level returns to the previous level before muting or pause.
Select a source: Press SOURCE repeatedly.

1 Cancel the demonstration
When you turn on the power for the first time (or [FACTORY RESET] is set to [YES], see page 6), the display shows: "CANCEL DEMO" → "PRESS" → "VOLUME KNOB"
1 Press the volume knob. [YES] is selected for the initial setup. 2 Press the volume knob again. "DEMO OFF" appears.
2 Set the clock and date
1 Press and hold 2 Turn the volume knob to select [CLOCK], then press the knob.
To adjust the clock
3 Turn the volume knob to select [CLOCK ADJUST], then press the knob. 4 Turn the volume knob to make the settings, then press the knob. Set the time in the order of "Hour" "Minute". 5 Turn the volume knob to select [CLOCK FORMAT], then press the knob. 6 Turn the volume knob to select [12H] or [24H], then press the knob.
To set the date
7 Turn the volume knob to select [DATE SET], then press the knob. 8 Turn the volume knob to make the settings, then press the knob. Set the date in the order of "Day" "Month" "Year".
Getting Started
9 Press to exit.
To return to the previous setting item, press Q/3.

Set the basic settings
1 Press and hold 2 Turn the volume knob to select an item (see the following table), then press the knob. 3 Repeat step 2 until the desired item is selected or activated. 4 Press to exit.
To return to the previous setting item, press Q/3
Default: [XX]
| [SYSTEM] | |
| [KEY BEEP] | (Not applicable when 3-way crossover is selected.) (Page 30)[ON]: Activates the keypress tone. ; [OFF]: Deactivates. |
| [SOURCESELECT] | |
| [AM SRC]* | [ON]: Enables AM in source selection. ; [OFF]: Disables. (Page 7) |
| [PANDORA SRC]* | (Except for KD-1711BT)[ON]: Enables PANDORA FRONT/PANDORA REAR/PANDORA/PANDORA BT in source selection. ; [OFF]: Disables. (Page 12) |
| [SPOTIFY SRC]* | [ON]: Enables SPOTIFY FRONT/SPOTIFY REAR/SPOTIFY/SPOTIFY BT in source selection. ; [OFF]: Disables. (Page 14) |
| [BT AUDIO SRC]* | [ON]: Enables BT AUDIO in source selection. ; [OFF]: Disables. (Page 26) |
| [BUILT-IN AUX]* | [ON]: Enables AUX in source selection. ; [OFF]: Disables. (Page 12) |
* Not displayed when the corresponding source is selected.
| [USER S.REMO] (For KD-T711BT)See page 36 for details. | |
| [F/W UPDATE] | |
| [UPDATE SYSTEM] | |
| [F/W UP xxxx] | [YES]: Starts upgrading the firmware.; [NO]: Cancels (upgrading is not activated).For details on how to update the firmware, visit |
| [FACTORYRESET] | [YES]: Resets the settings to default (except the stored station).; [NO]: Cancels. |
| [CLOCK] | |
| [TIME SYNC] | [ON]: The clock time is automatically set using the Clock Time (CT) data in FM Radio Broadcast Data System signal/FM Radio Data System signal.; [OFF]: Cancels. |
| [CLOCK DISPLAY] | [ON]: The clock time is shown on the display even when the unit is turned off.; [OFF]: Cancels. |
| [ENGLISH] | |
| [ESPANOL] | Select the display language for menu and music information if applicable.By default, [ENGLISH] is selected. |
| [FRANCAIS] | |
| [DEMO MODE] | [ON]: Activates the display demonstration automatically if no operation is done for about 15 seconds.; [OFF]: Deactivates. |
Radio

Search for a station
1 Press ⏻ SRC repeatedly to select FM or AM. 2 Press ◀◀◀ / ▶▶▶ (or press ◀◀ / ▶ on the remote control) to search for a station automatically. (or) Press and hold ◀◀◀ / ▶▶▶ (or press and hold ◀◀/▶ on the remote control) until "M" flashes, then press repeatedly to search for a station manually.
Settings in memory
You can store up to 18 stations for FM and 6 stations for AM.
Store a station
While listening to a station...
Press and hold one of the number buttons (1 to 6).
(or)
1 Press and hold the volume knob until "PRESET MODE" flashes. 2 Turn the volume knob to select a preset number, then press the knob. "MEMORY" appears once the station is stored.
Select a stored station
Press one of the number buttons (1 to 6). (or)
1 Press .Q/ 2 Turn the volume knob to select a preset number, then press the knob.
Other settings
1 Press and hold 2 Turn the volume knob to select an item (see the following table), then press the knob. 3 Repeat step 2 until the desired item is selected/activated or follow the instructions stated on the selected item.
4 Press to exit.
To return to the previous setting item, press Q/5.
Default: [XX]
[TUNER SETTING] (except for KD-T711BT)
| [RADIO TIMER] | (For KD-1915BTS/KD-T910BTS/KD-ID91BTS/KD-T91MBS)Turns on the radio at a specific time regardless of the current source.1 [ONCE]/[DAILY]/[WEEKLY]/[OFF]: Select how often the timer will be turned on.2 [FM]/[AM]/[SIRIUS XM]*1: Select the source.3 [01] to [18] (for FM/SIRIUS XM)/[01] to [06] (for AM): Select the preset station.4 Set the activation day*2 and time." ⊙" indicator lights up when complete.Radio Timer will not activate for the following cases.The unit is turned off.[OFF] is selected for [AM SRC] in [SOURCE SELECT] after Radio Timer for AM is selected. (Page 6) |
*1, *2: (see page 8)
Radio
| [SSM] | [SSM 01-06]/[SSM 07-12]/[SSM 13-18]: Automatically presets up to 18 stations for FM. “SSM” stops flashing when the first 6 stations are stored.Select [SSM 07-12]/[SSM 13-18] to store the following 12 stations. |
| [IF BAND] | [AUTO]: Increases the tuner selectivity to reduce interference noises from adjacent FM stations. (Stereo effect may be lost.) ;[WIDE]: Subjects to interference noises from adjacent FM stations, but sound quality will not be degraded and the stereo effect will remain. |
| [MONO SET] | [ON]: Improves the FM reception, but the stereo effect will be lost.;[OFF]: Cancels. |
| [AREA] | [N.AMERICA]: For North/Central/South America, AM/FM intervals: 10 kHz/200 kHz.;[S.AMERICA]: For some South American countries, AM/FM intervals: 10 kHz/50 kHz.;[EUROPE]: For any other areas, AM/FM intervals: 9 kHz/50 kHz. |
| [PTY SEARCH] Select a PTY code for FM Radio Broadcast Data System (see the following “PTY code for FM Radio Broadcast Data System”).If there is a station broadcasting a program of the same PTY code as you have selected, that station is tuned in. | |
*1 Selectable only when SiriusXM Vehicle Tuner is connected. (Page 15) *2 Selectable only when [ONCE] or [WEEKLY] is selected in step 1.
PTY code for FM Radio Broadcast Data System
[NEWS], [INFORM] (information), [SPORTS], [TALK], [ROCK], [CLS ROCK] (classic rock), [ADLT HIT] (adult hits), [SOFT RCK] (soft rock), [TOP 40], [COUNTRY], [OLDIES], [SOFT], [NOSTALGA] (nostalgia), [JAZZ], [CLASSICL] (classical), [R & B] (rhythm and blues), [SOFT R&B] (soft rhythm and blues), [LANGUAGE], [REL MUSC] (religious music), [REL TALK] (religious talk), [PERSNLTY] (personality), [PUBLIC], [COLLEGE], [HABL ESP] (Spanish talk), [MUSC ESP] (Spanish music), [HIP HOP], [WEATHER]
Default: [XX]
| [TUNER SETTING] (for KD-T711BT) | |
| [SSM] | [SSM 01-06]/[SSM 07-12]/[SSM 13-18]: Automatically presets up to 18 stations for FM. “SSM” stops flashing when the first 6 stations are stored. Select [SSM 07-12]/[SSM 13-18] to store the following 12 stations. |
| [IF BAND] | [AUTO]: Increases the tuner selectivity to reduce interference noises from adjacent FM stations. (Stereo effect may be lost.) ; [WIDE]: Subjects to interference noises from adjacent FM stations, but sound quality will not be degraded and the stereo effect will remain. |
| [MONO SET] | [ON]: Improves the FM reception, but the stereo effect will be lost. ; [OFF]: Cancels. |
| [NEWS SET] | [ON]: The unit will temporarily switch to News Programme if available. ; [OFF]: Cancels. |
| [REGIONAL] | [ON]: Switches to another station only in the specific region using the “AF” control. ; [OFF]: Cancels. |
| [AF SET] | [ON]: Automatically searches for another station broadcasting the same program in the same Radio Data System network with better reception when the current reception is poor. ; [OFF]: Cancels. |
| [TI] | [ON]: Allows the unit to temporarily switch to Traffic Information if available (“TI” indicator lights up) while listening to all sources except in AM. ; [OFF]: Cancels. |
| [AREA] | [N.AMERICA]: For North/Central/South America, AM/FM intervals: 10 kHz/200 kHz. ; [S.AMERICA]: For some South American countries, AM/FM intervals: 10 kHz/50 kHz. ; [EUROPE]: For any other areas, AM/FM intervals: 9 kHz/50 kHz. |
| [PTY SEARCH] Select a PTY code for FM Radio Data System (page 9).If there is a station broadcasting a program of the same PTY code as you have selected, that station is tuned in. | |
- [NEWS SET]/[REGIONAL]/[AF SET] is selectable only when in FM source.
Radio
PTY code for FM Radio Data System
[NEWS], [AFFAIRS], [INFO], [SPORT], [EDUCATE], [DRAMA], [CULTURE], [SCIENCE], [VARIED], [POP M] (music), [ROCK M] (music), [EASY M] (music), [LIGHT M] (music), [CLASSICS], [OTHER M] (music), [WEATHER], [FINANCE], [CHILDREN], [SOCIAL], [RELIGION], [PHONE IN], [TRAVEL], [LEISURE], [JAZZ], [COUNTRY], [NATION M] (music), [OLDIES], [FOLK M] (music), [DOCUMENT]
CD/USB/iPod
Insert a disc
The source changes to CD automatically and playback starts.
Connect a USB device
You can also connect to the USB cable from the rear of the unit (USB input terminal).
The source changes to USB FRONT/USB REAR/USB automatically and playback starts.
* Do not leave the cable inside the car when not in use.
CD/USB/iPod
Connect an iPod/iPhone![graph LR A["USB input terminal"] --> B["①"] B --> C["②"] C --> D["③"] D --> E["iPod/iPhone"] C --> F["Accessory of the iPod/iPhone*"] F --> G["③"] G --> H["③"] H --> I["③"] I --> J["③"] J --> K["③"] K --> L["③"] L --> M["③"] M --> N["③"] N --> O["③"] O --> P["③"] P --> Q["③"] Q --> R["③"] R --> S["③…](/content/2026/06/1347942/images/6ac74b54ead0fc14ab81cef75a48c023ea0b5c499795f268ab258ce83c291296.jpg)
KD-T915BTS: You can also connect to the USB cable from the rear of the unit (USB input terminal).
The source changes to iPod FRONT/iPod REAR/iPod USB automatically and playback starts.
- You can also connect iPod/iPhone via Bluetooth. (Page 20)
* Do not leave the cable inside the car when not in use.
Basic operations
Selectable source:
KD-T915BTS: CD/USB FRONT/USB REAR/iPod FRONT/iPod REAR or iPod BT - KD-T910BTS/KD-TD91BTS/KD-T91MBS/KD-T711BT/KD-T710BT/KD-TD71BT/KD-SR86BT: CD/USB/iPod USB or iPod BT
| To On the faceplate On the remote control | ||
| Reverse/ Fast-forward | Press and hold ◀◀/▶▶. | Press and hold ◀/▶. |
| Select a track/file | Press ◀◀/▶▶. | Press ◀/▶. |
| Select a folder*1 | Press 2▲/1▼. | Press ▲/▼. |
| Repeat play*2 | Press 4 ➔ repeatedly.[TRACK REPEAT]/[ALL REPEAT]:Audio CD[TRACK REPEAT]/[FOLDER REPEAT]/[ALL REPEAT]:MP3/WMA/AAC/WAV/FLAC file[REPEAT ONE]/[REPEAT ALL]/[REPEAT OFF]:iPod | |
| Random play*2 | Press 3 ➔ repeatedly.[ALL RANDOM]/[RANDOM OFF]:Audio CD[FOLDER RANDOM]/[ALL RANDOM]/[RANDOM OFF]:MP3/WMA/AAC/WAV/FLAC file[SHUFFLE OFF]/[SHUFFLE ON]:iPod | |
*1 For CD: Only for MP3/WMA/AAC files. This does not work for iPod. *2 For iPod: Applicable only when [HEAD MODE] is selected. (Page 11)
CD/USB/iPod
Select music drive
While in USB FRONT/USB REAR/USB source, press 5 MODE repeatedly.
Stored songs in the following drive will be played back. - Selected internal or external memory of a smartphone (Mass Storage Class). - Selected drive of a multiple drive device.
Select control mode
While in iPod FRONT/iPod REAR/iPod USB source (or iPod BT source), press 5 MODE repeatedly.
[HEAD MODE]: Control iPod/iPhone from this unit.
[IPHONE MODE]: Control iPod/iPhone using the iPod/iPhone itself. However, you can still perform play/pause, file skip, fast-forward or fast-reverse from this unit.
Select a file to play
From a folder or list
- For iPod, applicable only when [HEAD MODE] is selected.
1 Press .Q/ 2 Turn the volume knob to select a folder/list, then press the knob. 3 Turn the volume knob to select a file, then press the knob.
Selected file starts playing.
Quick search (applicable only for CD source and USB FRONT/USB REAR/USB source)
If you have many files, you can search through them quickly.
1 Press .Q/ 2 Turn the volume knob to select a folder/list, then press the knob. 3 Turn the volume knob quickly to browse through the list quickly. 4 Turn the volume knob to select a file, then press the knob. Selected file starts playing.
Alphabet search (applicable only for iPod FRONT/iPod REAR/iPod USB source and iPod BT source)
You can search for a file according to the first character. - For iPod, applicable only when [HEAD MODE] is selected.
1 Press .Q/ 2 Turn the volume knob to select a list, then press the knob. 3 Press 2 ▲ / 1 ▼ or turn the volume knob quickly to select the desired character (A to Z, 0 to 9, OTHERS).
Select "OTHERS" if the first character is other than A to Z, 0 to 9.
4 Press the volume knob to start searching.
Files with the characters you searched for or with similar characters (alphabetical order) will be displayed.
5 Turn the volume knob to select a file, then press the knob.
Selected file starts playing.
• To return to the previous setting item, press Q/3. • To cancel, press and hold Q/3.
AUX
You can listen to music from a portable audio player via the auxiliary input jack.
Preparation:
Select [ON] for [BUILT-IN AUX] in [SOURCE SELECT]. (Page 6)
Start listening
1 Connect a portable audio player (commercially available).
3.5 mm (1/8") stereo mini plug with "L"
shaped connector (commercially available)

2 Press ⏻ SRC repeatedly to select AUX.
3 Turn on the portable audio player and start playback.

Use a 3-core plug head stereo mini plug for optimum audio output.
Pandora® (except for KD-T711BT)
You can listen to Pandora on iPhone/iPod touch (via Bluetooth or via USB input terminal) or Android device (via Bluetooth).
Preparation:
• Install the latest version of the Pandora application on your device (iPhone/iPod touch or Android device), then create an account and log in to Pandora. - Select [ON] for [PANDORA SRC] in [SOURCE SELECT]. (Page 6)
Start listening
1 Start up the Pandora application on your device. 2 Connect your device to the USB input terminal.
![graph TD A["USB Input terminal"] --> B["Device ①"] B --> C["②"] C --> D["Accessory of the iPhone/iPod touch*"] D --> E["iPhone/iPod touch"] E --> F["③"] F --> G["and/or"] G --> B](/content/2026/06/1347942/images/640ff4666ac6b8c7d352f4df92e663b4f8ff7eb6f16c94b33898dc2cb55a1baa.jpg)
KD-T915BTS:
You can also connect to the USB cable from the rear of the unit (USB input terminal).
You can also connect the iPhone/iPod touch or Android device via Bluetooth. (Page 20)
- Make sure the USB input terminal is not connected to any device when you connect via Bluetooth.
3 Press ⏻ SRC repeatedly to select PANDORA FRONT/PANDORA REAR/PANDORA (for iPhone/iPod touch) or PANDORA BT (for Android device).
Broadcast starts automatically.
* Do not leave the cable inside the car when not in use.
Pandora® (except for KD-T711BT)
| To On the faceplate On the remote control | ||
| Play back/pause Press the volume knob. | Press ✗. | |
| Skip a track | Press ▶▶I. Press ▶. | |
| Select thumbs up or thumbs down* | Press 2▲ / 1▼. | Press ▲ / ▼. |
* If thumbs down is selected, the current track is skipped.
Create and store a new station
1 Press Q/
2 Turn the volume knob to select [NEW STATION], then press the knob.
3 Turn the volume knob to select [FROM ARTIST] or [FROM TRACK], then press the knob.
A new station is created based on the current artist or current song.
4 Press and hold one of the number buttons (3, 4, 5 or 6) to store.
To select a stored station: Press one of the number buttons (3, 4, 5 or 6).
Search for a registered station
1 Press Q/→
2 Turn the volume knob to select an item, then press the knob.
[BY DATE]: According to the registered date
[A-Z]: By alphabetical order
3 Turn the volume knob to select the desired station, then press the knob.
To cancel, press and hold Q/5.
Bookmark current song information
Press and hold the volume knob.
"BOOKMARKED" appears and the information is stored to your device.
- The bookmark is available on your Pandora account but not on this unit.
Spotify
You can listen to Spotify on iPhone/iPod touch (via Bluetooth or via USB input terminal) or Android device (via Bluetooth).
Preparation:
- Install the latest version of the Spotify application on your device (iPhone/iPod touch or Android device), then create an account and log in to Spotify.
- Select [ON] for [SPOTIFY SRC] in [SOURCE SELECT] (Page 6)
Start listening
1 Start up the Spotify application on your device. 2 Connect your device to the USB input terminal.
![graph TD A["USB input terminal"] --> B["Device ①"] B --> C["②"] C --> D["Accessory of the iPhone/iPod touch*"] D --> E["③"] E --> F["iPhone/iPod touch"] B --> G["and/or"] G --> B](/content/2026/06/1347942/images/c6b74ed7245935e0e6a76ab4c972205d80a793221765413c67477fd47daf9184.jpg)
KD-T915BTS: You can also connect to the USB cable from the rear of the unit (USB input terminal).
You can also connect the iPhone/iPod touch or Android device via Bluetooth. (Page 20)
- Make sure the USB input terminal is not connected to any device when you connect via Bluetooth. 3 Press ⏻ SRC repeatedly to select SPOTIFY FRONT/SPOTIFY REAR/SPOTIFY (for iPhone/iPod touch) or SPOTIFY BT (for Android device). Broadcast starts automatically. * Do not leave the cable inside the car when not in use.
| To On the faceplate On the remote control | ||
| Play back/pause Press the volume knob. | Press ✗. | |
| Skip a track | Press ◀◀*1 / ▶▶. | Press ◀*1 / ▶. |
| Select thumbs up or thumbs down *2 | Press 2 ▲ / 1 ▼. | Press ▲ / ▼. |
| Start radio Press and hold 5. ( Not available ) | ||
| Repeat play*3 | Press 4 ↔ repeatedly.[ALL REPEAT], [ONE REPEAT]*1,[REPEAT OFF] | ( Not available ) |
| Random play*3 | Press 3 ➕ repeatedly *1.[ALL RANDOM], [RANDOM OFF] | ( Not available ) |
*1 Available for premium account users only. *2 This feature is available for tracks in Radio only. If thumbs down is selected, the current track is skipped. *3 Available for tracks in Playlists only.
Save favorite song information
While listening to the Radio on Spotify...
Press and hold the volume knob.
"SAVED" appears and the information is stored to "Your Music" or "Your Library" on your Spotify account.
To unsave, repeat the same procedure.
"REMOVED" appears and the information is removed from "Your Music" or "Your Library" on your Spotify account.
Spotify
Search for a song or station
1 Press Q/3. 2 Turn the volume knob to select a list type, then press the knob.
The list types displayed differ depending on the information sent from Spotify.
3 Turn the volume knob to select the desired song or station, then press the knob.
You can browse through the list quickly by turning the volume knob quickly.
To cancel, press and hold a/5.
SiriusXM®Radio
(for KD-T915BTS/KD-T910BTS/KD-TD91BTS/KD-T91MBS)
Only SiriusXM® brings you more of what you love to listen to, all in one place. Get over 140 channels, including commercial-free music plus the best sports, news, talk, comedy and entertainment. Welcome to the world of satellite radio. A SiriusXM Vehicle Tuner and Subscription are required. For more information, visit .
Preparation:
1 Connect the optional SiriusXM Vehicle Tuner (commercially available).
![graph LR A["Expansion port on the rear panel"] --> B["Antenna"] B --> C["SiriusXM Vehicle Tuner"]](/content/2026/06/1347942/images/6e582f78202bc501de41b861a0cea9118ed2048af76c6366279600c3db852c00.jpg)
2 Check your Radio ID for activation.
The SiriusXM Radio ID is required for activation and can be found by tuning to Channel 0 as well as on the label found on the SiriusXM Vehicle Tuner and its packaging.
The Radio ID does not include the letters I, O, S or F.
3 Activate the subscription.
For users in the U.S.A.:
Online: Go to
Phone: Call 1-866-635-2349
For users in Canada:
Online: Go to
Phone: Call 1-877-438-9677
4 Press ⏻ SRC repeatedly to select SIRIUS XM to start updating.
SiriusXM® Radio (for KD-T915BTS/KD-T910BTS/KD-TD91BTS/KD-T91MBS)
Start listening
1 Press ⏻ SRC repeatedly to select SIRIUS XM. 2 Press .Q/5 " indicator lights up. 3 Turn the volume knob to select a CATEGORY, then press the knob. 4 Turn the volume knob to select a category from the list, then press the knob. If "ALL CHANNELS" is selected, all the available channels will be shown.
5 Turn the volume knob to select a channel, then press the knob. (or)
Press ◀◀◀ / ▶▶▶ to search for a channel manually.
- Pressing and holding ◀◀/▶▶ changes the channel rapidly.
If a locked channel or a mature channel is selected, a pass code input screen appears. Enter the pass code to receive the channel. (Page 18)
Settings in memory
You can store up to 18 channels.
Store a channel
While listening to a channel...
Press and hold one of the number buttons (1 to 6). (or)
1 Press and hold the volume knob until "PRESET MODE" flashes. 2 Turn the volume knob to select a preset number, then press the knob. The preset number flashes and "MEMORY" appears.
Select a stored channel
Press one of the number buttons (1 to 6) (or press ▲ / ▼ on the remote control).
(or)
1. Press the volume knob to select PRESET, then press the knob. 2. Turn the volume knob to select a preset number, then press the knob.
SiriusXM Replay™
While listening to a channel...
1. Press the volume knob. The " " indicator lights up and the unit memorizes this paused position. 2. Press the volume knob to start Replay. Replay starts from the paused position in step 1.
During Replay...
To | On the faceplate | On the remote control
| Play back/pause Press the volume knob. | Press | |
| Skip backward/forward | Press ◀◀/▶▶. | Press ◀/▶. |
| Rewind/Fast-forward Press and hold ◀◀/▶▶. | Press and hold ◀/▶. | |
| Go to Live and exit Replay | Press and hold the volume knob. | Press and hold |
| 1 Press .Q/D2 Turn the volume knob to select LIVE, then press the knob. | ||
SiriusXM® Radio (for KD-T915BTS/KD-T910BTS/KD-TD91BTS/KD-T91MBS)
SmartFavorites and TuneStart™
User preset channels are initially assigned as the SmartFavorites channels. SmartFavorite channel is available with SXV200 or later SiriusXM tuner models. The SiriusXM Vehicle Tuner automatically buffers the broadcast audio content of the SmartFavorites channels in the background.
Using SXV200: This unit can assign a maximum of 6 SmartFavorites channels. If you try to assign the 7th channel, an error beep tone will be heard. Initially, preset channels 1 to 6 are assigned as SmartFavorites.
Using SiriusXM tuner models later than SXV200: This unit can assign a maximum of 18 SmartFavorites channels. Initially, all preset channels are assigned as SmartFavorites.
- “*” appears following the last character of the channel name for the SmartFavorites channels.
When you select a SmartFavorite channel, you can rewind and replay up to 30 minutes of any of the missed news, talk, sports or music content.
- Playback starts from the beginning of the song if [TUNE START] is set to [ON] (page 18) for most music channels stored as a SmartFavorite.
To turn on the faceplate
| Select a stored SmartFavorite channel | Press one of the number buttons (1 to 6). |
| 1 Press .Q/S2 Turn the volume knob to select PRESET, then press the knob.3 Turn the volume knob to select a preset number, then press the knob. | |
| CancelSmartFavorites channels | 1 Press .Q/S2 Turn the volume knob to select PRESET, then press the knob.3 Turn the volume knob to select a preset number, then press and hold the knob."* " is removed from the last character. |
| ReassignSmartFavorites channels | Repeat step 1 to step 3 of "Cancel SmartFavorites channels"."* " appears following the last character. |
SiriusXM® Radio (for KD-T915BTS/KD-T910BTS/KD-TD91BTS/KD-T91MBS)
TuneScan™
You can get a short preview of the songs that you have missed on each of your SmartFavorites music channels or a music channel currently tuned into.
1 Press .Q/3
2 Turn the volume knob to select TUNE SCAN, then press the knob. Scanning starts for the first 6 seconds of the recorded music contents.
- To listen to the current song, press the volume knob to stop scanning. The unit continues playing the current song. • To select the previous/next song, press ◀◀◀ / ▶▶◀.
- To cancel scanning, press and hold the volume knob. Playback returns to the channel before you entered TuneScan.
SiriusXM settings
1 Press and hold 📋 2 Turn the volume knob to select an item (see the following table), then press the knob. 3 Repeat step 2 until the desired item is selected/activated or follow the instructions stated on the selected item. 4 Press to exit.
To return to the previous setting item, press Q/5.
Default: [XX]
[SIRIUS XM]
[CHANNELLOCK] To unlock settings:
1 Turn the volume knob to select a number. 2 Press ◀◀◀ / ▶▶▶ to move to the entry position. 3 Repeat steps 1 and 2 to enter the current pass code. (Initial pass code is 0000.) 4 Press the volume knob to confirm.
| [CODE SET] | 1 Press the volume knob to enter [NEW CODE].2 Turn the volume knob to select a number.3 Press 1◄◄/►►1 to move to the entry position.4 Repeat step 2 and step 3 to enter a new 4-digit pass code.5 Press the volume knob to confirm.6 Repeat step 2 to step 5 to reconfirm the pass code.• Make a note of the new pass code to enter channel lock settings for next time. |
| [LOCK SETTING] | [MATURE CH]: Selects the SiriusXM-defined lock setting.;[USER DEFINED]: Selects the individual channels the user wants to lock.;[OFF]: Cancels. |
| [CHANNEL EDIT]*1 | 1 Turn the volume knob to select a category, then press the knob.2 Turn the volume knob to select a channel you want to lock, then press the knob."L" appears in front of the channel number.3 Press and hold [IMAGE] |
| [CHANNEL CLEAR]*1 | [YES]: Clears all the locked channels.;[NO]: Cancels. |
| [TUNESTART]*2 | [ON]: All qualified music channels in the SmartFavorites will start playback from the beginning of the song.;[OFF]: Cancels. |
| [SIGNAL LEVEL] | Shows the strength ([NO SIGNAL]/[WEAK]/[GOOD]/[STRONG]) of the current received signal. |
| [BUFFER USAGE] | Shows the memory usage ([0%] to [100%]) for Replay buffer. |
| [SXM RESET] | [YES]: Resets all SiriusXM settings to default.;[NO]: Cancels. |
*1 Displayed only when [LOCK SETTING] is set to [USER DEFINED]. *2 Available only if the connected SiriusXM Vehicle Tuner is SXV200 or later which supports SmartFavorites.
Using Other Applications
JVC Remote application
You can control the JVC car receiver from iPhone/iPod touch (via Bluetooth or via USB input terminal) or Android device (via Bluetooth) using JVC Remote application.
- For more information, visit http://www.jvc.net/cs/car/ .
Preparation:
Install the latest version of JVC Remote application on your device before connecting.
Start using JVC Remote application
1 Start up the JVC Remote application on your device. 2 Connect your device.
- For Android device:
Pair the Android device with this unit via Bluetooth. (Page 20) • For iPhone/iPod touch:
Connect iPhone/iPod touch to the USB input terminal. (Page 10) (or)
Pair the iPhone/iPod touch with this unit via Bluetooth. (Page 20)
(Make sure the USB input terminal is not connected to any device.)
3 Select the device to use from the menu.
See the following "Settings to use JVC Remote application".
By default, [ANDROID] is selected. To use iPhone/iPod touch, select [YES] for [IOS].
Settings to use JVC Remote application
1 Press and hold 2 Turn the volume knob to select an item (see the following table), then press the knob. 3 Repeat step 2 until the desired item is selected or activated. 4 Press to exit.
To return to the previous setting item, press Q/5.
Default: [XX]
[REMOTE APP]
| [SELECT] | Selects the device ([IOS] or [ANDROID]) to use the application. |
| [IOS] | [YES]: Selects iPhone/iPod touch to use the application via Bluetooth or connected via USB input terminal. ; [NO]: Cancels.If [IOS] is selected, select iPod BT source (or iPod USB source if your iPhone/iPod touch is connected via USB input terminal) to activate the application.The connectivity of the application will be interrupted or disconnected if:– You change from iPod BT source to any playback source connected via the USB input terminal.– You change from iPod FRONT/iPod REAR/iPod USB source to iPod BT source. |
| [ANDROID] | [YES]: Selects Android device to use the application via Bluetooth. ;[NO]: Cancels. |
| [ANDROID LIST] | Selects the Android device to use from the list.Displayed only when [ANDROID] of [SELECT] is set to [YES]. |
| [STATUS] Shows the status of the selected device.[IOS CONNECTED]: You are able to use the application using the iPhone/iPod touch connected via Bluetooth or USB input terminal.[IOS NOT CONNECTED]: No iOS device is connected to use the application.[ANDROID CONNECTED]: You are able to use the application using the Android device connected via Bluetooth.[ANDROID NOT CONNECTED]: No Android device is connected to use the application. | |
Bluetooth®
- Depending on the Bluetooth version, operating system and the firmware version of your mobile phone, Bluetooth features may not work with this unit.
- Be sure to turn on the Bluetooth function of the device to make the following operations. • Signal conditions vary depending on the surroundings.
Bluetooth — Connection
Supported Bluetooth profiles
- Hands-Free Profile (HFP)
- Advanced Audio Distribution Profile (A2DP)
- Audio/Video Remote Control Profile (AVRCP)
- Serial Port Profile (SPP)
- Phonebook Access Profile (PBAP)
Supported Bluetooth codecs
- Sub Band Codec (SBC)
- Advanced Audio Coding (AAC)
Connect the microphone![graph TD A["Microphone input jack"] --> B["Rear panel"] B --> C["Microphone (supplied)"] C --> D["Adjust the microphone angle"] D --> E["Secure using cord clamps (not supplied) if necessary."]](/content/2026/06/1347942/images/71c9ef4c3d559e605d385870207adc7a88f2c0b48cd48a8227552a504b3d49bc.jpg)
ENGLISH
Pair and connect a Bluetooth device for the first time
1 Press ⏻ SRC to turn on the unit. 2 Search and select the name of your receiver ("KD-T915BTS"/ "KD-T910BTS"/"KD-TD91BTS"/"KD-T91MBS"/"KD-T711BT"/ "KD-T710BT"/"KD-TD71BT"/"KD-SR86BT") on the Bluetooth device. "BT PAIRING" flashes on the display.
- For some Bluetooth devices, you may need to enter the Personal Identification Number (PIN) code immediately after searching.
3 Perform (A) or (B) depending on what appears on the display. For some Bluetooth devices, pairing sequence may vary from the steps described below.
(A) "Device Name" "XXXXXX" "VOL - YES" "BACK - NO" "XXXXXX" is a 6-digit passkey randomly generated during each pairing.
Ensure that the passkeys appear on the unit and Bluetooth device are the same.
Press the volume knob to confirm the passkey.
Operate the Bluetooth device to confirm the passkey.
(B) "Device Name" "VOL - YES" "BACK - NO" Press the volume knob to start pairing.
2 • If "PAIRING" → "PIN 0000" scrolls on the display, enter the PIN code "0000" into the Bluetooth device. You can change to a desired PIN code before pairing. (Page 24)
- If only "PAIRING" appears, operate the Bluetooth device to confirm pairing.
"PAIRING COMPLETED" appears when pairing is completed and "✗" will light up when the Bluetooth connection is established.
- KD-T915BTS/KD-T910BTS/KD-TD91BTS/KD-T91MBS, "indicator lights up to show the strength of the battery of the connected device. See also[FORMAT] on page 35 for the battery and signal strength shown on the display.
Bluetooth®
- KD-T711BT/KD-T710BT/KD-TD71BT/KD-SR86BT, "PHONE 1" and/or "PHONE 2" indicator(s) light(s) up. • This unit supports Secure Simple Pairing (SSP).
- Up to five devices can be registered (paired) in total.
- Once the pairing is completed, the Bluetooth device will remain registered in the unit even if you reset the unit. To delete the paired device, see [DEVICE DELETE] on page 24.
- A maximum of two Bluetooth phones and one Bluetooth audio device can be connected at any time. To connect or disconnect the registered device, see [PHONE SELECT] or [AUDIO SELECT] in [BT MODE]. (Page 24) However, while in BT AUDIO source, you can connect to five Bluetooth audio devices and switch between these five devices. (Page 26)
- Some Bluetooth devices may not automatically connect to the unit after pairing. Connect the device to the unit manually.
- When the battery of the connected Bluetooth device runs low, "Device Name" → "LOW BATTERY" appears.
- Refer to the instruction manual of the Bluetooth device for more information.
Auto Pairing
When you connect iPhone/iPod touch to the USB input terminal, pairing request (via Bluetooth) is automatically activated if [AUTO PAIRING] is set to [ON]. (Page 24)
Press the volume knob to pair once you have confirmed the device name.
Bluetooth — Mobile phone

Receive a call
When there is an incoming call:
- KD-T915BTS/KD-T910BTS/KD-TD91BTS/KD-T91MBS:
The buttons will blink in the color you have selected in [RING COLOR]. (Page 23)
KD-T711BT/KD-T710BT/KD-TD71BT/KD-SR86BT:
The buttons will blink in the blinking pattern you have selected in [RING ILLUMI]. (Page 23)
- The unit answers the call automatically if [AUTO ANSWER] is set to a selected time. (Page 23)
During a call:
- KD-T915BTS/KD-T910BTS/KD-TD91BTS/KD-T91MBS:
The buttons stop blinking and illuminate in the color you have selected in [RING COLOR]. (Page 23)
KD-T711BT/KD-T710BT/KD-TD71BT/KD-SR86BT:
The buttons stop blinking.
- If you turn off the unit or detach the faceplate, Bluetooth is disconnected.
Bluetooth®
The following operations may differ or be unavailable depending on the connected phone.
To On the faceplate On the remote control First incoming call...
| Answer a call | Press 📊 - 🔒 or the volume knob. | Press ▲ / ▼ / ◀ / ▶. |
| Reject a call | Press and hold 📊 - 🔒 or the volume knob. | Press and hold ▲ / ▼ / ◀ / ▶. |
| End a call | Press and hold 📊 - 🔒 or the volume knob. | Press and hold ▲ / ▼ / ◀ / ▶. |
While talking on the first incoming call...
| Answer another incoming call and hold the current call | Press 📊 - 🔒 or the volume knob. | (Not available) |
| Reject another incoming call | Press and hold 📊 - 🔒 or the volume knob. | (Not available) |
While having two active calls...
| End current call and activate held call | Press and hold 📊 - 🔒 or the volume knob. | Press and hold ▲ / ▼ / ◀ / ▶. |
| Swap between the current call and held call | Press 📊 - 🔒. | ( Not available ) |
| Adjust the phone volume*1 [00] to [35] (Default: [15]) | Turn the volume knob during a call. | Press VOL +*2 or VOL – during a call. |
| Switch between hands-ree and private talk modes*3 | Press 🔒/⇨ during a call. | ( Not available ) |
*1 This adjustment will not affect the volume of the other sources.
*2 Press and hold VOL + to continuously increase the volume to 15.
*3 Operations may vary according to the connected Bluetooth device.
■ Improve the voice quality
While talking on the phone...
1 Press and hold .
2 Turn the volume knob to select an item (see the following table), then press the knob.
3 Repeat step 2 until the desired item is selected or activated.
4 Press to exit.
To return to the previous setting item, press Q/5.
Default: [XX]
| [MIC GAIN] | [LEVEL -10] to [LEVEL +10] ([LEVEL -04]): The sensitivity of the microphone increases as the number increases. |
| [NR LEVEL] | [LEVEL -05] to [LEVEL +05] ([LEVEL 00]): Adjust the noise reduction level until the least noise is being heard during a phone conversation. |
| [ECHOCANCEL] | [LEVEL -05] to [LEVEL +05] ([LEVEL 00]): Adjust the echo cancellation delay time until the least echo is being heard during a phone conversation. |
Make the settings for receiving a call
1 Press to enter Bluetooth mode.
2 Turn the volume knob to select an item (page 23), then press the knob.
3 Repeat step 2 until the desired item is selected or activated.
To return to the previous setting item, press Q/5.
Bluetooth®
Default: [XX]
| [SETTINGS] | |
| [AUTOANSWER] | [01 SEC] to [30 SEC]: Answers an incoming call automatically in the selected time (in seconds). ; [OFF]: Cancels. |
| [RINGCOLOR] | KD-T915BTS/KD-T910BTS/KD-TD91BTS/KD-T91MBS:[COLOR 01] to [COLOR 49] ([COLOR 08]): Selects the illumination color for the buttons as notification when there is an incoming call and during a call. ; [OFF]: Cancels. |
| [RINGILLUMI] | KD-T711BT/KD-T710BT/KD-TD71BT/KD-SR86BT:[BLINK 01] to [BLINK 05] ([BLINK 02]): Selects the blinking pattern for the buttons as notification when there is an incoming call. ; [OFF]: Cancels. |
Make a call
You can make a call from the call history, phonebook, or dialing the number. Call by voice is also possible if your mobile phone has the feature.
1 Press to enter Bluetooth mode.
"(First device name)" appears.
- If two Bluetooth phones are connected, press again to switch to the other phone. "(Second device name)" appears.
2 Turn the volume knob to select an item (see the following table), then press the knob. 3 Repeat step 2 until the desired item is selected/activated or follow the instructions stated on the selected item.
To return to the previous setting item, press Q/5.
| [RECENT CALL] (Applicable only if the phone supports PBAP.)1 Press the volume knob to select a name or a phone number."<" indicates call received, "> " indicates call made, "M" indicates call missed."NO HISTORY" appears if there is no recorded call history or call number.2 Press the volume knob to call. | |
| [PHONEBOOK] (Applicable only if the phone supports PBAP.)1 Press 2▲/1▼to select the desired letter (A to Z, 0 to 9, and OTHERS)."OTHERS" appears if the first character is other than A to Z, 0 to 9.Turn the volume knob to select a name, then press the knob.Turn the volume knob to select a phone number, then press the knob to call.For using phonebook with this unit, make sure to allow access to or transfer from your smartphone. Depending on the connected phone, the process may be different.This unit can display only non-accent letters. (Accent letters such as "U" are shown as "U".) | |
| [DIAL NUMBER] | 1 Turn the volume knob to select a number (0 to 9) or character(*#, +).2 Press ◀◀◀/▶▶to move the entry position.Repeat step 1 and step 2 until you finish entering the phone number.3 Press the volume knob to call. |
| [VOICE] Speak the name of the contact you want to call or the voice command to control the phone functions. (See also the following "Make a call using voice recognition".) | |
Make a call using voice recognition
1 Press and hold to activate the voice recognition of the connected phone. 2 Speak the name of the contact you want to call or the voice command to control the phone functions. - Supported Voice Recognition features vary for each phone. Refer to the instruction manual of the connected phone for details.
Bluetooth®
Store a contact in memory
You can store up to 6 contacts into the number buttons (1 to 6).
1 Press to enter Bluetooth mode. 2 Turn the volume knob to select [RECENT CALL], [PHONEBOOK] or [DIAL NUMBER], then press the knob. 3 Turn the volume knob to select a contact or enter a phone number. If a contact is selected, press the volume knob to show the phone number. 4 Press and hold one of the number buttons (1 to 6).
"MEMORY P(selected preset number)" appears when the contact is stored.
To erase a contact from the preset memory, select [DIAL NUMBER] in step 2, store a blank number in step 3 and proceed to step 4.
Make a call to a registered number
1 Press to enter Bluetooth mode. 2 Press one of the number buttons (1 to 6). 3 Press the volume knob to call.
"NO PRESET" appears if there is no contact stored.
Bluetooth mode settings
1 Press and hold 📞 2 Turn the volume knob to select an item (see the following table), then press the knob. 3 Repeat step 2 until the desired item is selected/activated or follow the instructions stated on the selected item. 4 Press to exit.
To return to the previous setting item, press Q/5.
Default: [XX]
| [BT MODE] | |
| [PHONESELECT] | Selects the phone or audio device to connect or disconnect. "×" appears in front of the device name when connected. |
| [AUDIOSELECT] | "▷" appears in front of the current playback audio device. · You can connect a maximum of two Bluetooth phones and one Bluetooth audio device at a time. |
| [DEVICEDELETE] | 1 Turn the volume knob to select a device to delete, then press the knob.2 Turn the volume knob to select [YES] or [NO], then press the knob. |
| [PIN CODE EDIT] (0000) | Changes the PIN code (up to 6 digits).1 Turn the volume knob to select a number.2 Press ◀◀/▶▶1 to move the entry position.Repeat step 1 and step 2 until you finish entering the PIN code.3 Press the volume knob to confirm. |
| [RECONNECT] | [ON]: The unit is automatically reconnect when the last connectedBluetooth device is within the connectable range.; [OFF]: Cancels. |
| [AUTOPAIRING] | [ON]: The unit is automatically paired with the supported Bluetooth device (iPhone/iPod touch) when it is connected through USB input terminal. Depending on the operating system of the connected device, this function may not work.; [OFF]: Cancels. |
| [INITIALIZE] | [YES]: Initializes all the Bluetooth settings (including stored pairing, phonebook, and etc.).; [NO]: Cancels. |
| [INFORMATION] [MY BT NAME]: Displays the name of your receiver ("KD-T915BTS"/ "KD-T910BTS"/"KD-TD91BTS"/"KD-T91MBS"/"KD-T711BT"/"KD-T710BT"/ "KD-TD71BT"/"KD-SR86BT").; [MY ADDRESS]: Shows address of this unit. | |
Bluetooth®
Bluetooth compatibility check mode
You can check the connectivity of the supported profile between the Bluetooth device and the unit.
- Make sure there is no Bluetooth device paired.
1 Press and hold

"BLUETOOTH" "CHECK MODE" appears. "SEARCH NOW USING PHONE" "PIN IS 0000" scrolls on the display.
2 Search and select the name of your receiver ("KD-T915BTS"/ "KD-T910BTS"/"KD-TD91BTS"/"KD-T91MBS"/"KD-T711BT"/ "KD-T710BT"/"KD-TD71BT"/"KD-SR86BT") on the Bluetooth device within 3 minutes. 3 Perform (A), (B) or (C) depending on what appears on the display.
(A) "PAIRING" → "XXXXXX" (6-digit passkey): Ensure that the same passkey appears on the unit and Bluetooth device, then operate the Bluetooth device to confirm the passkey. (B) "PAIRING"→"PIN IS 0000": Enter "0000" on the Bluetooth device. (C) "PAIRING": Operate the Bluetooth device to confirm pairing.
After pairing is done successfully, "PAIRING OK" → "Device Name" appears and Bluetooth compatibility check starts.
If "CONNECT NOW USING PHONE" appears, operate the Bluetooth device to allow phonebook access to continue.
"TESTING" flashes on the display.
The connectivity result flashes on the display.
"PAIRING OK" and/or "HANDS-FREE OK"*1 and/or "AUD.STREAM OK"*2 and/or "PBAP OK"*3: Compatible
*1 Compatible with Hands-Free Profile (HFP) *2 Compatible with Advanced Audio Distribution Profile (A2DP) *3 Compatible with Phonebook Access Profile (PBAP)
After 30 seconds, "PAIRING DELETED" appears to indicate that pairing has been deleted, and the unit exits check mode.
- To cancel, press and hold ⏻ SRC to turn off the power, then turn on the power again.
Bluetooth®
Bluetooth — Audio
While in BT AUDIO source, you can connect to five Bluetooth audio devices and switch between these five devices.
Listen to the audio player via Bluetooth
1 Press ⏻ SRC repeatedly to select BT AUDIO (or press SOURCE on the remote control). - For KD-T711BT: Pressing enters BT AUDIO directly. 2 Operate the audio player via Bluetooth to start playback.
To On the faceplate On the remote control
| Play back/pause Press the volume knob. | Press ✗. | |
| Select group or folder | Press 2▲/1▼. | Press ▲/▼. |
| Reverse skip/Forward skip | Press ◀◀/▶▶. | Press ◀/▶. |
| Reverse/Fast-forward | Press and hold ◀◀/▶▶. | Press and hold ◀/▶. |
To On the faceplate On the remote control
| Repeat play | Press 4 repeatedly.[TRACK REPEAT], [ALL REPEAT],[GROUP REPEAT]*1, [REPEAT OFF] | ( Not available ) |
| Random play | Press 3 repeatedly.[GROUP RANDOM]*1,[ALL RANDOM], [RANDOM OFF] | ( Not available ) |
| Select a file from afolder/list | Refer to "Select a file to play" on page 11. | ( Not available ) |
| Switch betweenconnectedBluetooth audiodevices | Press 5.*2 | ( Not available ) |
*1 Depending on the connected device, some devices may not support this feature. *2 Pressing the "Play" key on the connected device itself also causes switching of sound output from the device.
Operations and display indications may differ according to their availability on the connected device.
Listen to iPod/iPhone via Bluetooth
You can listen to the songs on the iPod/iPhone via Bluetooth on this unit.
Press ⏻ SRC repeatedly to select iPod BT.
- You can operate the iPod/iPhone in the same way as iPod/iPhone via USB input terminal. (Page 10)
- If you plug in an iPod/iPhone to the USB input terminal while listening to iPod BT source, the source automatically changes to iPod FRONT/ iPod REAR/iPod USB source.
Press ⬇SRC to select iPod BT source if the device is still connected via Bluetooth.
AMAZON ALEXA (except for KD-T711BT)
Alexa is the cloud-based voice service developed by Amazon. You can ask Alexa to play music, get weather reports, traffic information, control smart home devices, shop on Amazon, search the internet, set reminders and more.
Preparation:
- Create an account at , or use the Alexa mobile application. • After installing the latest version of the Alexa mobile application on your device, log in using those credentials.
- Be sure to enable the internet connection on your smartphone.
Setup for the first time
For Android device
1 Pair your device with this unit via Bluetooth. (Page 20) 2 Start up the Alexa mobile application on your device. 3 Search and select the name of your receiver ("KD-T915BTS"/ "KD-T910BTS"/"KD-TD91BTS"/"KD-T91MBS"/"KD-T710BT"/ "KD-TD71BT"/"KD-SR86BT") on SETUP section of the Alexa mobile application to complete a one-time setup process.
For iPhone/iPod touch
1 Pair your device with this unit via Bluetooth. (Page 20) 2 Start up the Alexa mobile application on your device. 3 Press on the unit to enter ALEXA source. - You may also press ⏻ SRC repeatedly to select iPod BT source. 4 Search and select the name of your receiver ("KD-T915BTS"/ "KD-T910BTS"/"KD-TD91BTS"/"KD-T91MBS"/"KD-T710BT"/ "KD-TD71BT"/"KD-SR86BT") on SETUP section of the Alexa mobile application to complete a one-time setup process.
Once the setup process is completed, the Alexa mobile application will establish a connection with this unit.
• The Alexa connection can be disconnected if: - A2DP profile is disconnected - Bluetooth is disconnected - This unit is turned off – Any other conditions depending on the connected device. To establish Alexa connection again, reconnect the A2DP profile. - Alexa connection cannot be established again if you: – Reinstall Alexa mobile application - Delete the paired device and perform pairing again (for Android device). To establish Alexa connection again, perform the setup process again. - You can check the Alexa connection from the Alexa mobile application. If the name of this unit appears on the screen of "ALL DEVICES", you do not need to perform setup process again.

Basic operations
Once Alexa connection is established...
1 Press on the unit to speak with Alexa.
The display shows: "ALEXA" "LISTENING...".
2 Communicate with Alexa via the connected microphone. (Page 20)
"THINKING..." appears when Alexa is processing your voice input.
"SPEAKING..." appears while Alexa is responding to your voice input.
"ALEXA" or display information such as playing time, song title, and etc. appears while Alexa is in idle state.
- To return to the previous source before ALEXA, press ⏻ SRC (or press SOURCE on the remote control). • To activate Alexa, press • To cancel current listening state, press O. • To cancel current thinking/speaking states and go to listening state, press O.
- Only one Alexa connection can be connected at one time.
- "DISCONNECTED" appears if the unit is disconnected from Alexa mobile application or the Bluetooth connection is disconnected.
Start listening
While in Alexa idle state...
1 Press on the unit to activate Alexa. The display shows: "LISTENING...". 2 Communicate with Alexa via the connected microphone. (Page 20) 3 During music playback in ALEXA source, you can perform the following operations:
To On the faceplate On the remote control
| Play back/pause Press the volume knob. | Press ✗. | |
| Reverse skip/Forward skip | Press ◀◀/▶▶. | Press ◀/▶. |
During music playback, press Ⓧ to pause the music and activate Alexa. You can now start to communicate with Alexa.
Audio Settings

1 Press and hold . 2 Turn the volume knob to select an item (see the following table), then press the knob. 3 Repeat step 2 until the desired item is selected/activated or follow the instructions stated on the selected item. 4 Press to exit.
To return to the previous setting item, press Q/3.
Default: [XX]
| [EQ SETTING] | |
| [PRESET EQ] | Selects a preset equalizer suitable to the music genre. Select [USER] to use the settings made in [EASY EQ] or [PRO EQ]. [FLAT]/[DRVN 3]/[DRVN 2]/[DRVN 1]/[HARD ROCK]/[HIP HOP]/[JAZZ]/ [POP]/[R&B]/[USER]/[CLASSICAL]Drive equalizer ([DRVN 3]/[DRVN 2]/[DRVN 1]) boosts specific frequencies in the audio signal to reduce the noise heard from outside the car or running noise of the tyres. |
| [EASY EQ] | Adjusts your own sound settings. The settings are stored to [USER] in [PRESET EQ]. The settings made may affect the current settings of [PRO EQ]. [SUB.W SP]*1*2: [00] to [+06] (Default: [+03] [SUB.W]*1*3: [-50] to [+10] [00] [BASS]: [LVL-09] to [LVL+09] [LVL 00] [MID]: [LVL-09] to [LVL+09] [LVL 00] [TRE]: [LVL-09] to [LVL+09] [LVL 00]) |
| [PRO EQ] Adjusts your own sound settings for each source. The settings are stored to [USER] in [PRESET EQ]. The settings made may affect the current settings of [EASY EQ]. | ||
| [62.5HZ] | ||
| [LEVEL -09] to [LEVEL +09] ([LEVEL 00]): Adjusts the level to memorize for each source. (Before making an adjustment, select the source you want to adjust.) | ||
| [ON]: Turns on the extended bass.; [OFF]: Cancels. | ||
| [100HZ]/[160HZ]/[250HZ]/[400HZ]/[630HZ]/[1KHZ]/[1.6KHZ]/[2.5KHZ]/[4KHZ]/[6.3KHZ]/[10KHZ]/[16KHZ] | ||
| [LEVEL -09] to [LEVEL +09] ([LEVEL 00]): Adjusts the level to memorize for each source. (Before making an adjustment, select the source you want to adjust.) | ||
| [Q FACTOR] | [1.35]/[1.50]/[2.00]: Adjust the quality factor. | |
| [AUDIO CONTROL] | ||
| [BASS BOOST] | [LEVEL +01] to [LEVEL +05]: Selects your preferred bass boost level.; [OFF]: Cancels. | |
| [LOUDNESS] | [LEVEL 01]/[LEVEL 02]: Boosts low or high frequencies to produce a well-balanced sound at low volume.; [OFF]: Cancels. | |
| [SUB.W LEVEL]*1 | [SPK-OUT]*2 | (Not applicable when 3-way crossover is selected.) [SUB.W 00] to [SUB.W +06] ([SUB.W +03]): Adjusts the output level of the subwoofer connected via speaker lead. (Page 46) |
| [PRE-OUT]*3 | [SUB.W -50] to [SUB.W +10] ([SUB.W 00]): Adjusts the output level of the subwoofer connected to the lineout terminals (SW or REAR/SW) through an external amplifier. (Page 47) | |
| [SUBWOOFER SET]*3 | [ON]: Turns on the subwoofer output.; [OFF]: Cancels. | |
*1, *2, *3: (see page 30)
Audio Settings
| [FADER](Not applicable when 3-way crossover is selected.) | |
| [POSITION R15] to [POSITION F15] ([POSITION 00]): Adjusts the front and rear speaker output balance. | |
| [BALANCE]*4 | [POSITION L15] to [POSITION R15] ([POSITION 00]): Adjusts the left and right speaker output balance. |
| [VOLUME ADJUST] | [LEVEL -15] to [LEVEL +06] ([LEVEL 00]): Presets the initial volume level of each source by comparing to the FM volume levels. (Before adjustment, select the source you want to adjust.) |
| [AMP GAIN] | [LOW POWER]: Limits the maximum volume level to 25. (Select if the maximum power of each speaker is less than 50 W to prevent damaging the speakers.) ; [HIGH POWER]: The maximum volume level is 35. |
| [SPK/PRE OUT] (Not applicable when 3-way crossover is selected.) Depending on the speaker connection method, select the appropriate setting for the desired output. (See "Speaker output settings" on page 31.) | |
| [SPEAKER SIZE] Depending on the crossover type you have selected (see the following [X ' OVER TYPE]), 2-way crossover or 3-way crossover setting items will be shown. (See "Crossover settings" on page 32.) By default, 2-way crossover type is selected. | |
| [X ' OVER] | |
| [DTA SETTINGS] | For settings, see "Digital Time Alignment settings" on page 34. |
| [CAR SETTINGS] | |
| [X ' OVER TYPE] | Caution: Adjusts the volume before changing the [X ' OVER TYPE] to avoid the sudden increase or decrease of the output level. |
| [2-WAY] | (Displayed only when [3-WAY] is selected.) [YES]: Selects two way crossover type. ; [NO]: Cancels. |
| [3-WAY] | (Displayed only when [2-WAY] is selected.) [YES]: Selects three way crossover type. ; [NO]: Cancels. |
| [SOUND EFFECT] | |
| [SPACE ENHANCE] | (Not applicable for FM/AM source.) [SMALL]/[MEDIUM]/[LARGE]: Virtually enhances the sound space.; [OFF]: Cancels. |
| [SND RESPONSE] | [LEVEL 1]/[LEVEL2]/[LEVEL3]: Virtually makes the sound more realistic.; [OFF]: Cancels. |
| [SOUND LIFT] | [LOW]/[MIDDLE]/[HIGH]: Virtually adjusts the sound position heard from the speakers.; [OFF]: Cancels. |
| [VOL LINK EQ] | [ON]: Boosts the frequency to reduce the noise heard from outside the car or running noise of the tyres.; [OFF]: Cancels. |
| [K2 TECHNOLOGY] | (Not applicable for FM/AM source, SIRIUS XM source and AUX source.) [ON]: Improves the sound quality of compressed music.; [OFF]: Cancels. |
*1 Displayed only when [SUBWOOFER SET] is set to [ON]. (Page 29)
*2 For 2-way crossover: Displayed only when [SPK/PRE OUT] is set to [SUB.W/SUB.W]. (Page 31)
*3 For 2-way crossover: Displayed only when [SPK/PRE OUT] is set to [REAR/SUB.W] or [SUB.W/SUB.W]. (Page 31)
*4 This adjustment will not affect the subwoofer output.
Audio Settings
Speaker output settings [SPK/PRE OUT]
(Applicable only if [X' OVER TYPE] is set to [2-WAY]) (page 30)
Select the output setting for the speakers [SPK/PRE OUT], based on the speaker connection method.
Connection via lineout terminals
For connections through an external amplifier (Page 47)
KD-T915BTS/KD-T91MBS:
| Setting on[SPK/PRE OUT] | Audio signal through lineout terminal | ||
| FRONT REAR SW | |||
| [REAR/REAR] (default) | Front speakers output | Rear speakers output Subwoofer output | |
| [SUB.W/SUB.W] Front speakers output | L (left): Subwoofer output R (right): (Mute) | Subwoofer output | |
KD-T910BTS/KD-TD91BTS/KD-SR86BT:
| Setting on[SPK/PRE OUT] | Audio signal through lineout terminal | |
| FRONT REAR/SW | ||
| [REAR/REAR] Front speakers output Rear speakers output | ||
| [REAR/SUB.W] (default) Front speakers output Subwoofer output | ||
| [SUB.W/SUB.W] Front speakers output Subwoofer output | ||
KD-T711BT/KD-T710BT/KD-TD71BT:
| Setting on[SPK/PRE OUT] | Audio signal through lineout terminal |
| REAR/SW | |
| [REAR/REAR] Rear speakers output | |
| [REAR/SUB.W] (default) Subwoofer output | |
| [SUB.W/SUB.W] | Subwoofer output |
Connection via speaker leads
You can also connect the speakers without using an external amplifier but still being able to enjoy the subwoofer output with these settings. (Page 46)
| Setting on[SPK/PRE OUT] | Audio signal through rear speaker lead | |
| L (left) | R (right) | |
| [REAR/REAR] Rear speakers output | Rear speakers output | |
| [REAR/SUB.W]* | Rear speakers output | Rear speakers output |
| [SUB.W/SUB.W] | Subwoofer output | (Mute) |
If [SUB.W/SUB.W] is selected: - [120HZ] is selected in [SUBWOOFER LPF] and [THROUGH] is not available. (Page 33) - [POSITION R02] is selected in [FADER] and selectable range is [POSITION R15] to [POSITION 00]. (Page 30) * Except for KD-T915BTS/KD-T91MBS.
Audio Settings
Crossover settings
Below are the available setting items for 2-way crossover and 3-way crossover.
CAUTION
Select a crossover type according to how the speakers are connected.
(Page 46, 47)
If you select a wrong type:
• The speakers may be damaged.
• The output sound level may be extremely high or low.
SPEAKER SIZE
Selects according to the connected speaker size for optimum performance.
- The frequency and slope settings are automatically set for the crossover of the selected speaker.
- If [NONE] is selected for the following speaker in [SPEAKER SIZE], the [X'OVER] setting of the selected speaker is not available.
- 2-way crossover/TWEETER] of [FRONT]/[REAR]/[SUBWOOFER]
- 3-way crossover[WOOFER]
X'OVER(crossover)
- [FRQ]/[F-HPF FRQ]/[R-HPF FRQ]/[SW LPF FRQ]/[HPF FRQ]/[LPF FRQ]: Adjusts the crossover frequency for the selected speakers (high pass filter or low pass filter).
If [THROUGH] is selected, all signals are sent to the selected speakers.
- [SLOPE]/[F-HPF SLOPE]/[R-HPF SLOPE]/[SW LPF SLOPE]/[HPF SLOPE]/[LPF SLOPE]: Adjusts the crossover slope. Selectable only if a setting other than [THROUGH] is selected for the crossover frequency.
- [SW LPF PHASE]/[PHASE]: Selects the phase of the speaker output to be in line with the other speaker output.
- [GAIN LEFT]/[GAIN RIGHT]/[F-HPF GAIN]/[R-HPF GAIN]/[SW LPF GAIN]/[GAIN]: Adjusts the output volume of the selected speaker.
2-way crossover setting items
| [SPEAKERSIZE] | ||
| [FRONT] [SIZE] | [3.5"/[4"/[4.75"/[5"/[6.5"/[6.75"/[7"/[4×6]/[5×7]/[6×8]/[6×9]/[7×10] | |
| [TWEETER] | [SMALL]/[MIDDLE]/[LARGE]/[NONE] (not connected) | |
| [REAR]*1 | [3.5"/[4"/[4.75"/[5"/[6.5"/[6.75"/[7"/[4×6]/[5×7]/[6×8]/[6×9]/[7×10]/[NONE] (not connected) | |
| [SUBWOOFER]*2*3 | [6.5"/[8"/[10"/[12"/[15" OVER]/[NONE] (not connected) | |
| [X'OVER] | ||
| [TWEETER] [FRQ] | [1KHZ]/[1.6KHZ]/[2.5KHZ]/[4KHZ]/[5KHZ]/[6.3KHZ]/[8KHZ]/[10KHZ]/[12.5KHZ] | |
| [GAIN LEFT] | [-08DB] to [00DB] | |
| [GAIN RIGHT] | [-08DB] to [00DB] | |
| [FRONT HPF] [F-HPF FRQ] | [30HZ]/[40HZ]/[50HZ]/[60HZ]/[70HZ]/[80HZ]/[90HZ]/[100HZ]/[120HZ]/[150HZ]/[180HZ]/[220HZ]/[250HZ]/[THROUGH] | |
| [F-HPF SLOPE] | [-06DB]/[-12DB]/[-18DB]/[-24DB] | |
| [F-HPF GAIN] | [-08DB] to [00DB] | |
| [REAR HPF]*1 [R-HPF FRQ] | [30HZ]/[40HZ]/[50HZ]/[60HZ]/[70HZ]/[80HZ]/[90HZ]/[100HZ]/[120HZ]/[150HZ]/[180HZ]/[220HZ]/[250HZ]/[THROUGH] | |
| [R-HPF SLOPE] | [-06DB]/[-12DB]/[-18DB]/[-24DB] | |
| [R-HPF GAIN] | [-08DB] to [00DB] | |
Audio Settings
| [SUBWOOFER LPF]*2*3 | [SW LPF FRQ] | [30HZ]/[40HZ]/[50HZ]/[60HZ]/[70HZ]/[80HZ]/[90HZ]/[100HZ]/[120HZ]/[150HZ]/[180HZ]/[220HZ]/[250HZ]/[THROUGH] |
| [SW LPF SLOPE] | [-06DB]/[-12DB]/[-18DB]/[-24DB] | |
| [SW LPF PHASE] | [REVERSE] (180°)/ [NORMAL] (0°) | |
| [SW LPF GAIN] | [-08DB] to [00DB] |
2-way crossover setting items
| [SPEAKERSIZE] | |
| [TWEETER] [SMALL]/[MIDDLE]/[LARGE] | |
| [MID RANGE] [3.5"/[4"/[4.75"/[5"/[6.5"/[6.75"/[7"/[4×6]/[5×7]/[6×8]/[6×9] | |
| [WOOFER]*3 [6.5"/[8"/[10"/[12"/[15" OVER]/[NONE] (not connected) | |
| [X'OVER] | |
| [TWEETER] [HPF FRQ] | [1KHZ]/[1.6KHZ]/[2.5KHZ]/[4KHZ]/[5KHZ]/[6.3KHZ]/[8KHZ]/[10KHZ]/[12.5KHZ] |
| [SLOPE] | [-06DB]/[-12DB] |
| [PHASE] | [REVERSE] (180°)/[NORMAL] (0°) |
| [GAIN] | [-08DB] to [00DB] |
| [MID RANGE] [HPF FRQ] | [30HZ]/[40HZ]/[50HZ]/[60HZ]/[70HZ]/[80HZ]/[90HZ]/[100HZ]/[120HZ]/[150HZ]/[180HZ]/[220HZ]/[250HZ]/[THROUGH] |
| [HPF SLOPE] | [-06DB]/[-12DB] |
| [LPF FRQ] | [1KHZ]/[1.6KHZ]/[2.5KHZ]/[4KHZ]/[5KHZ]/[6.3KHZ]/[8KHZ]/[10KHZ]/[12.5KHZ]/[THROUGH] |
| [LPF SLOPE] | [-06DB]/[-12DB] |
| [PHASE] | [REVERSE] (180°)/[NORMAL] (0°) |
| [GAIN] | [-08DB] to [00DB] |
| [WOOFER]*3 [LPF FRQ] | [30HZ]/[40HZ]/[50HZ]/[60HZ]/[70HZ]/[80HZ]/[90HZ]/[100HZ]/[120HZ]/[150HZ]/[180HZ]/[220HZ]/[250HZ]/[THROUGH] |
| [SLOPE] | [-06DB]/[-12DB] |
| [PHASE] | [REVERSE] (180°)/[NORMAL] (0°) |
| [GAIN] | [-08DB] to [00DB] |
*1 Displayed only when [SPK/PRE OUT] is set to [REAR/REAR] or [REAR/SUB.W]. (Page 31) *2 Except KD-T915BTS/KD-T91MBS: Displayed only when [SPK/PRE OUT] is set to [REAR/SUB.W] or [SUB.W/SUB.W]. (Page 31) *3 Displayed only when [SUBWOOFER SET] is set to [ON]. (Page 29)
Audio Settings
Digital Time Alignment settings
Digital Time Alignment sets the delay time of the speaker output to create a more suitable environment for your vehicle.
For more information, see the following "Determining the delay time automatically".
| [DTA SETTINGS] | |
| [POSITION] | Selects your listening position (reference point).[ALL]: Not compensating ; [FRONT RIGHT]: Front right seat ;[FRONT LEFT]: Front left seat ; [FRONT ALL]: Front seats• [FRONT ALL] is displayed only when [X' OVER TYPE] is set to[2-WAY]. (Page 30) |
| [DISTANCE]*1 | [OFT] to [20.01FT]: Fine adjust the distance to compensate. |
| [GAIN]*1 | [-8DB] to [ODB]: Fine adjust the output volume of the selected speaker. |
| [DTA RESET] | [YES]: Resets the settings ([DISTANCE] and [GAIN]) of the selected [POSITION] to default.; [NO]: Cancels. |
| [CAR SETTINGS] Identify your car type and rear speaker location in order to make the adjustment for [DTA SETTINGS]. | |
| [CAR TYPE] | [COMPACT]/[FULL SIZE CAR]/[WAGON]/[MINIVAN]/[SUV]/[MINIVAN(LONG)]: Selects the type of vehicle.; [OFF]: Not compensating. |
| [R-SP LOCATION]*2 | Selects the location of the rear speakers in your vehicle to calculate the furthest distance from the listening position selected (reference point).• [DOOR]/[REAR DECK]: Selectable only when [CAR TYPE] is selected as [OFF], [COMPACT], [FULL SIZE CAR], [WAGON] or[SUV].• [2ND ROW]/[3RD ROW]: Selectable only when [CAR TYPE] is selected as [MINIVAN] or [MINIVAN(LONG)]. |
Determining the delay time automatically

If you specify the distance from the currently set listening position to every speaker, the delay time will be automatically calculated.
1 Set [POSITION] and determine the listening position as the reference point (the reference point for [FRONT ALL] will be the center between the right and left in the front seats). 2 Measure the distances from the reference point to the speakers. 3 Calculate the distance between the furthest speaker (subwoofer on the illustration) and other speakers. 4 Set the [DISTANCE] calculated in step 3 for individual speakers. 5 Adjust [GAIN] for individual speakers.
Example: When [FRONT ALL] is selected as the listening position
*1 Before making an adjustment, select the speaker:
When 2-way crossover is selected:
[FRONT LEFT]/[FRONT RIGHT]/[REAR LEFT]/[REAR RIGHT]/[SUBWOOFER]:
[REAR LEFT], [REAR RIGHT] and [SUBWOOFER] are selectable only if a setting other than [NONE] is selected for [REAR] and [SUBWOOFER] of [SPEAKER SIZE]. (Page 32)
When 3-way crossover is selected:
[TWEETER LEFT]/[TWEETER RIGHT]/[MID LEFT]/[MID RIGHT]/[WOOFER]:
- [WOOFER] is selectable only if a setting other than [NONE] is selected for [WOOFER] of [SPEAKER SIZE]. (Page 33)
*2 Displayed only when [X 'OVER TYPE] is set to [2-WAY] (page 30) and if a setting other than [NONE] is selected for [REAR] of [SPEAKER SIZE]. (Page 32)
Display Settings
Zone identification for brightness settings
KD-T915BTS/KD-T910BTS/KD-TD91BTS/KD-T91MBS:

KD-T711BT/KD-T710BT/KD-TD71BT/KD-SR86BT:

Zone identification for color settings
KD-T915BTS/KD-T910BTS/KD-TD91BTS/KD-T91MBS:

1 Press and hold 2 Turn the volume knob to select an item (see the following table), then press the knob. 3 Repeat step 2 until the desired item is selected/activated or follow the instructions stated on the selected item.
4 Press to exit.
To return to the previous setting item, press Q/5.
Default: [XX]
| [DISPLAY] | |
| [DIMMER] | Dims the illumination.[OFF]: Dimmer is turned off. Brightness changes to [DAY] setting.[ON]: Dimmer is turned on. Brightness changes to [NIGHT] setting.(See the following " [BRIGHTNESS]" settings.)[DIMMER TIME]: Set the time to turn on dimmer and to turn off dimmer.1 Turn the volume knob to adjust the [ON] time, then press the knob.2 Turn the volume knob to adjust the [OFF] time, then press the knob.(Default: [ON]: [PM6:00] ; [OFF]: [AM6:00])[DIMMER AUTO]: Dimmer turns on and off automatically when you turn off or on the car headlights.*1 |
| [BRIGHTNESS] Sets the brightness for day and night separately.1 [DAY]/[NIGHT]: Select day or night.2 Select a zone. (See the illustration on the left column.)3 [LEVEL 00] to [LEVEL 31]: Set the brightness level. | |
| [TEXT SCROLL]*2 | [SCROLL ONCE]: Scrolls the display information once.;[SCROLL AUTO]: Repeats scrolling at 5-second intervals.;[SCROLL OFF]: Cancels. |
| [FORMAT]*3 | KD-T915BTS/KD-T910BTS/KD-TD91BTS/KD-T91MBS:Information below is shown on the supplementary display when Bluetooth device is connected. (Page 39)[BATT/SIGNAL]: Shows the strength of the battery and signal.;[DATE]: Shows the date. |
*1 The illumination control wire connection is required. (Page 46)
*2 Some characters or symbols will not be shown correctly (or will be blank).
*3 Functionality depends on the type of phone used.
Display Settings
| [COLOR] (for KD-T915BTS/KD-T910BTS/KD-TD91BTS/KD-T91MBS) | |
| [PRESET]Selects illumination colors for the buttons on different zones separately.1 Select a zone ([ZONE 1], [ZONE 2], [ALL ZONE]). (See the illustration on page 35.)2 Select a color for the selected zone.[COLOR 01] to [COLOR 49][USER]: The color you have created for [DAY COLOR] or [NIGHT COLOR] is shown.[COLOR FLOW01] to [COLOR FLOW03]: Color changes at different speeds.[CRYSTAL]/[FLOWER]/[FOREST]/[GRADATION]/[OCEAN]/[RELAX]/[SUNSET]: The selected color pattern is shown.* (Selectable only when [ALL ZONE] is selected in step 1.) | |
| [DAY COLOR] Stores your own day and night illumination colors for different zones.1 Select a zone ([ZONE 1], [ZONE 2]). (See the illustration on page 35.)2 [RED]/[GREEN]/[BLUE]: Select a primary color.3 [00] to [31]: Select the level. | |
| [NIGHT COLOR] Repeat step 2 and step 3 for all the primary colors.Your setting is stored to [USER] in [PRESET].[NIGHT COLOR] or [DAY COLOR] is changed by turning on or off your car's headlights. | |
| [COLOR GUIDE] [ON]: The illumination color of [ZONE 1] and [ZONE 2] change to white color when settings are performed on menu and list search, except in color setting mode.; [OFF]: Cancels. |
* If one of these color patterns is selected, the [ZONE 1] and [ZONE 2] illumination colors will change to the default colors.
Learning Steering Remote Control
(for KD-T711BT)
You can control the unit with the steering remote control keys on your vehicle. After connection, you can configure the control keys according to your preference.
- You can only make this configuration if your vehicle is equipped with the electrical steering remote control.
- If the steering remote control in your car is not compatible, configuration may not be completed and an error message may appear. (Page 41)
Make the connection![graph LR A["Rear panel"] --> B["Learning steering remote input terminal"] B --> C["Steering remote cable (supplied)"] C --> D["Bright green/red"] C --> E["Purple/red"] C --> F["Gray/red"] D --> G["KEY 1"] E --> H["KEY 2"] F --> I["KEY 3"] G --> J["..."] H --> J I --> J J --> K["Connect to your vehic…](/content/2026/06/1347942/images/7b999800e2bacdc7dcff3e4c03f108032d01a66898be87e758ea4f6562e16b1d.jpg)
Configure the control keys
1 Press and hold 2 Turn the volume knob to select [SYSTEM], then press the knob. 3 Turn the volume knob to select [USER S.REMO], then press the knob. 4 Turn the volume knob to select [SET KEY], then press the knob. A key list of 16 assignable keys appears. K## NONE: No function has been assigned. 5 Turn the volume knob to select any key from the key list to assign the function, then press the knob. "PRESS KEY TO ASSIGN K#" appears.
Learning Steering Remote Control (for KD-T711BT)
6 Press and hold any control keys on your steering remote control which you want to assign.
A list of key functions will appear on the display. [NONE] (default)/[MUTE]/[SEEK UP]/[SEEK DOWN]/[VOL UP]/[VOL DOWN]/[MODE]/[ON HOOK]/[OFF HOOK]/[VOICE]/[ENTER]
7 Turn the volume knob to select a function to assign, then press the knob.
The selected key function is assigned to the steering remote control key you have selected in step 6.
The display returns to the key list as on step 4. - K## (Function): When certain function has been assigned to a key.
8 Repeat step 5 to step 7 to assign other control keys.
9 Press to exit.
Reassign the control keys
1 Press and hold 📋
2 Turn the volume knob to select [SYSTEM], then press the knob.
3 Turn the volume knob to select [USER S.REMO], then press the knob.
4 Turn the volume knob to select [RESET KEY], then press the knob.
5 Turn the volume knob to select [YES], then press the knob.
All the control keys will be reset. Selecting [NO] will cancel the operation.
When [FACTORY RESET] is set to [YES] (page 6), it will also reset the learning steering remote control.
To return to the previous setting item, press Q/3
References
Maintenance
Cleaning the unit
Wipe off dirt on the faceplate with a dry silicone or soft cloth.
Cleaning the connector
Detach the faceplate and clean the connector gently with a cotton swab. Be careful not to damage the connector.
Connector (on the reverse side of the faceplate)
Handling discs
- Do not touch the recording surface of the disc.
- Do not stick tape etc. on the disc, or use a disc with tape stuck on it.
- Do not use any accessories for the disc.
- Clean from the center of the disc and move outward.
- Clean the disc with a dry silicone or soft cloth. Do not use any solvents.
- When removing a disc from this unit, pull it out horizontally.
- Remove burrs from the center hole and disc edge before inserting a disc.
More information
For: — Latest firmware updates and latest compatible item list
— JVC original application
— Any other latest information
Visit .
General
• This unit can only play the following CDs:


- DualDisc playback: The Non-DVD side of a "DualDisc" does not comply with the "Compact Disc Digital Audio" standard. Therefore, the use of Non-DVD side of a DualDisc on this product cannot be recommended.
- For detailed information and notes about the playable audio files, visit .
ENGLISH
References
playablefiles
- Playable audio file: For disc: MP3 (.mp3), WMA (.wma), AAC (.aac) For USB mass storage class device: MP3 (.mp3), WMA (.wma), AAC (.aac), AAC (.m4a), WAV (.wav), FLAC (.flac)
- Playable disc media: CD-R/CD-RW/CD-ROM
- Playable disc file format: ISO 9660 Level 1/2, Joliet, Long file name
- Playable USB device file system: FAT12, FAT16, FAT32 Even when audio files comply with the standards listed above, playback may be impossible depending on the types or conditions of media or devices. The AAC (.m4a) file in a CD encoded by iTunes cannot be played on this unit.
Unplayable discs
• Discs that are not round. • Discs with coloring on the recording surface or discs that are dirty. • Recordable/ReWritable discs that have not been finalized. • 8 cm CD. Attempting to insert using an adapter may cause malfunction.
About USB devices
- You cannot connect a USB device via a USB hub.
- Connecting a cable whose total length is longer than 5 m may result in abnormal playback.
- This unit cannot recognize a USB device whose rating is other than 5 V and exceeds 1.5 A.
About iPod/iPhone
- Made for — iPod touch (6th generation) — iPhone 5S, 6, 6 Plus, 6S, 6S Plus, SE, 7, 7 Plus, 8, 8 Plus, X, XS, XS MAX, XR (iOS 12.1 or later)
- It is not possible to browse video files on the "Videos" menu in [HEAD MODE].
- The song order displayed on the selection menu of this unit may differ from that of the iPod/iPhone.
- You cannot operate iPod if "JVC" or "✓" is displayed on iPod.
- Depending on the version of the operating system of the iPod/iPhone, some functions may not operate on this unit.
About Pandora
- Pandora is only available in certain countries. For more information, visit .
- Because Pandora is a third-party service, the specifications are subject to change without prior notice. Accordingly, compatibility may be impaired, or some or all of the services may become unavailable.
- Some functions of Pandora cannot be operated from this unit.
- For issues using the application, please contact Pandora at pandora-support@pandora.com.
About Spotify
- Spotify application supports:
- iPhone 5S, 6, 6 Plus, 6S, 6S Plus, SE, 7, 7 Plus, 8, 8 Plus, X, XS, XS MAX, XR (iOS 12.1 or later)
- iPod touch (6th generation)
- Android OS 4.0.3 or later
- Spotify is a third party service, therefore the specifications are subject to change without prior notice. Accordingly, compatibility may be impaired or some or all of the services may become unavailable. Some functions of Spotify cannot be operated from this unit.
- For issues using the application, please contact Spotify at .
About AMAZON ALEXA
Alexa is a third party service, therefore the specifications are subject to change without prior notice. Accordingly, compatibility may be impaired or some or all of the services may become unavailable.
References
Change the display information
Each time you press, the display information changes.
If the information is unavailable or not recorded, "NO TEXT", "NO NAME", or other information (e.g., station name) appears or the display will be blank.
KD-T915BTS/KD-T910BTS/KD-TD91BTS/KD-T91MBS:

*1 Date will be replaced with battery and signal strength of the connected Bluetooth device if [FORMAT] is set to [BATT/SIGNAL]. (Page 35)
| Source name Display information: Main (Supplementary) | |
| FM or AM Frequency (Date) | →Frequency (Date) with Music Synchronization Effect*2 → back to the beginning |
| For FM Radio Broadcast Data System stations only:Station name/Program type (Date) → Station name/Program type (Date) with Music Synchronization Effect*2 → Radio text (Date) → Radio text + (Radio text+) → Song title (Artist) → Song title (Date) → Frequency (Date) → back to the beginning | |
| CD or USB FRONT/USB REAR/USB | For CD-DA:Track title (Artist) → Track title (Artist) with Music Synchronization Effect*2 → Track title (Disc title) → Track title (Date) → Playing time (Date) → back to the beginning |
| Source name Display information: Main (Supplementary) | |
| For MP3/WMA/AAC/WAV/FLAC files:Song title (Artist) ➔ Song title (Artist) with Music Synchronization Effect*2 ➔ Song title (Album title) ➔ Song title (Date) File name (Folder name) ➔ File name (Date) ➔ Playing time (Date) ➔ back to the beginning | |
| iPod FRONT/iPod REAR/iPod USB/iPod BT | When [HEAD MODE] is selected (page 11):Song title (Artist) ➔ Song title (Artist) with Music Synchronization Effect*2 ➔ Song title (Album title) ➔ Song title (Date) Playing time (Date) ➔ back to the beginning |
| PANDORA FRONT/PANDORA REAR/PANDORA/PANDORA BT | Station name (Date) ➔ Station name (Date) with Music Synchronization Effect*2 ➔ Shared/Radio (Date) ➔ Song title (Artist) ➔ Song title (Album title) ➔ Song title (Date) Playing time (Date) ➔ back to the beginning |
| SPOTIFY FRONT/SPOTIFY REAR/SPOTIFY/SPOTIFY BT | Context title (Date) ➔ Context title (Date) with Music Synchronization Effect*2 ➔ Song title (Artist) ➔ Song title (Album title) ➔ Song title (Date) Playing Time (Date) back to the beginning |
| SIRIUS XM Channel number (Status) ➔ Channel number (Status) with Music Synchronization Effect*2 ➔ Channel name (Status) ➔ Artist (Status) ➔ Song title (Status) ➔ Content information (Status) ➔ Category name (Status) ➔ Date (Status) ➔ back to the beginning | |
| BT AUDIO/ALEXA Song title (Artist) ➔ Song title (Artist) with Music Synchronization Effect*2 ➔ Song title (Album title) ➔ Song title (Date) Playing time (Date) ➔ back to the beginning | |
| AUX Source name (Date) | ➔ Source name (Date) with Music Synchronization Effect*2 ➔ back to the beginning |
*2 During Music Synchronization Effect, the illumination color or brightness level of the buttons changes and synchronizes with the music level (depending on the color setting made for [PRESET] on page 36).
References
KD-T711BT/KD-T710BT/KD-TD71BT/KD-SR86BT:

| Source name Display information: Main | |
| FM or AM Frequency | → Frequency with Music Synchronization Effect* → Date→ back to the beginning |
| For FM Radio Broadcast Data System/FM Radio Data System stations only:Station name/Program type → Station name/Program type with Music Synchronization Effect* → Radio text →Radio text+ → Radio text+ song title/Radio text+ artist → Frequency →Date → back to the beginning | |
| CD or USB For CD-DA: | Disc title/Artist → Disc title/Artist with Music Synchronization Effect* → Track title/Artist → Playing time Date back to the beginning |
| For MP3/WMA/AAC/WAV/FLAC files:Song title/Artist → Song title/Artist with Music Synchronization Effect* → Album title/Artist →older name File name Playing time → Date back to the beginning | |
| iPod USB/iPod BT When [HEAD MODE] is selected (page 11):Song title/Artist → Song title/Artist with Music Synchronization Effect* → Album title/Artist → Playing time Date back to the beginning | |
| Source name Display information: Main | |
| PANDORA/PANDORA BT Station name → Station name with Music Synchronization Effect* → Shared/Radio → Song title → Artist Album title Playing time → Date → back to the beginning | |
| SPOTIFY/SPOTIFY BT Context title → Context title with Music Synchronization Effect* → Song title → Artist Album title Playing Time Date → back → to the beginning | |
| BT AUDIO/ALEXA Song title/Artist → Song title/Artist with Music Synchronization Effect* → Album title/Artist Playing time Date back to the beginning | |
| AUX Source name → Source name with Music Synchronization Effect* → Date → back to the beginning |
* During Music Synchronization Effect, the brightness level of the buttons changes and synchronizes with the music level.
Troubleshooting
| Symptom Remedy | ||
| General | Sound cannot be heard. • Adjust the volume to the optimum level.• Check the cords and connections. | |
| "MISWIRING CHECK WIRING THEN PWR ON" appears. | Turn the power off, then check to be sure the terminals of the speaker wires are insulated properly. Turn the power on again. | |
| "PROTECTING SEND SERVICE" appears. | Send the unit to the nearest service center. | |
| Source cannot be selected. Check the [SOURCE SELECT] setting. (Page 6) | ||
| The unit does not work at all. Reset the unit. (Page 4) | ||
| Correct characters are not displayed. | • This unit can only display uppercase letters, numbers, and a limited number of symbols.• Depending on the display language you have selected (page 6), some characters may not be displayed correctly. | |
| (For KD-T711BT)"ERROR"/"FAILED" | Your steering remote controller is not compatible, learning may not be completed. Consult your car audio dealer for details. | |
| Radio | • Radio reception is poor.• Static noise while listening to the radio. | Connect the antenna firmly. |
| CD/USB/iPod | Disc cannot be ejected. | Press and hold ▲ to forcibly eject the disc. Be careful not to drop the disc when it is ejected. |
| Noise is generated. Skip to another track or change the disc. | ||
| "IN DISC" appears and disc cannot be ejected. | Make sure nothing is blocking the loading slot when you eject the disc. | |
| "PLEASE EJECT" appears. | Press ▲, then insert the disc correctly. | |
| Symptom Remedy | ||
| CD/USB/iPod | Playback order is not as intended. | The playback order is determined by the order in which files were recorded (disc) or the file name (USB). |
| Elapsed playing time is not correct. | This depends on the recording process earlier (disc/USB). | |
| "NOT SUPPORT" appears and track skips. | Check whether the track is a playable format.(Page 37, 38) | |
| "READING" keeps flashing. • Do not use too many hierarchical levels and folders.• Reload the disc or reattach the device (USB/iPod/iPhone). | ||
| "UNSUPPORTED DEVICE" appears. | • Check whether the connected USB device is compatible with this unit and ensure the file systems are in supported formats. (Page 38)• Reattach the USB device. | |
| "UNRESPONSIVE DEVICE" appears. | Make sure the USB device is not malfunction and reattach the USB device. | |
| "USB HUB IS NOT SUPPORTED" appears. | This unit cannot support a USB device connected via a USB hub. | |
| "CANNOT PLAY" appears. | Connect a USB device that contains playable audio files. | |
| • The source does not change to "USB" when you connect a USB device while listening to another source.• "USB ERROR" appears | The USB port is drawing more power than the design limit. Turn the power off and unplug the USB device. Then, turn on the power and reattach the USB device. If this does not solve the problem, turn the power off and on (or reset the unit) before replacing with another USB device. | |
| The iPod/iPhone does not turn on or does not work. | • Check the connection between this unit and iPod/iPhone.• Disconnect and reset the iPod/iPhone using hard reset. | |
Troubleshooting
| Symptom Remedy | |
| CD/USB/iPod | "LOADING" appears when you enter search mode by pressingA/D. This unit is still preparing the iPod/iPhone music list. It may take some time to load, try again later. |
| "NO DISC" Insert a playable disc into the loading slot. | |
| "NO DEVICE" Connect a device (USB/iPod/iPhone), and change the source to USB/iPod/iPhone again. | |
| "MEMORY FULL" You have reached the maximum storage limit of your iPod/iPhone. | |
| Pandora | "ADD ERROR" New station creation is unsuccessful. |
| "CHK DEVICE" Check the Pandora application on your device. | |
| "NO SKIPS" The skip limit has been reached. | |
| "NO STATIONS" No stations are found. | |
| "STATION LMT" The number of registered stations has reached its limit.Retry after deleting unnecessary stations from your device. | |
| "UPGRADE APP" Make sure you have installed the latest version of the Pandora application on your device. | |
| "CONNECT ERR" Communication is unstable. | |
| "RATING ERR" Registration of thumbs up/thumbs down has failed due to insufficient network connectivity. | |
| "THUMBIS N/A" Registration of thumbs up/thumbs down is not allowed. | |
| "LICENSE ERR" You try to access from a country which Pandora is not deliverable. | |
| Symptom Remedy | |
| Spotify | “DISCONNECTED” USB is disconnected from the head unit. Please make sure the device is connected properly through USB. |
| “CONNECTING” Connected via USB input terminal: The device is connecting to the head unit. Please wait. Connected via Bluetooth: The Bluetooth is disconnected. Please check Bluetooth connection and make sure both the device and unit are paired and connected. | |
| “CHECK APP” The Spotify application is not connected properly or user is not login. End the Spotify application and restart. Then, log in to your Spotify account. | |
| SiriusXM® Radio | “CH LOCKED LOCK CODE?” The selected channel is locked. Enter the correct pass code to unlock. (Page 18) |
| “CHAN UNSUB” The selected channel is unsubscribed. Call 1-866-635-2349 in the U.S.A. or 1-877-438-9677 in Canada to subscribe. (Page 15) | |
| “CH UNAVAIL” The selected channel is unavailable. For more information about the SiriusXM channel lineup, visit<www.siriusxm.com>. | |
| “CHECK ANTENNA” Check that the antenna and its connection are in good condition.. | |
| “CHECK TUNER” Make sure the SiriusXM Vehicle Tuner is connected to the unit. | |
| “NO SIGNAL” Make sure the antenna is mounted outside the vehicle. | |
Troubleshooting
| Symptom Remedy | |
| SiriusXM® Radio | "SUBSCRIPTION UPDATED Your subscription is updated. Press the volume knob to- PRESS ENTER TO continue." continue. |
| "CODE ERROR" Make sure you have entered the correct pass code.(Page 18) | |
| "NO CONTENT" There is insufficient content to start TuneScan. | |
| "SCAN CANCEL" TuneScan has been aborted. | |
| Bluetooth® | No Bluetooth device is detected. Search from the Bluetooth device again.Reset the unit. (Page 4) |
| Bluetooth pairing cannot be made. Make sure you have entered the same PIN code to both the unit and Bluetooth device.Delete pairing information from both the unit and the Bluetooth device, then perform pairing again. (Page 20) | |
| Echo or noise is heard during a phone conversation. Adjust the microphone unit's position. (Page 20)Check the [ECHO CANCEL] setting. (Page 22) | |
| Phone sound quality is poor. Reduce the distance between the unit and the Bluetooth device.Move the car to a place where you can get a better signal reception. | |
| Voice calling method is not successful. Use voice calling method in a more quiet environment.Reduce the distance from the microphone when you speak the name.Make sure the same voice as the registered voice tag is used. | |
| Symptom Remedy | |
| Bluetooth® | Sound is being interrupted or skipped during playback of a Bluetooth audio player. ·Reduce the distance between the unit and the Bluetooth audio player.Turn off, then turn on the unit and try to connect again.Other Bluetooth devices might be trying to connect to the unit. |
| The connected Bluetooth audio player cannot be controlled. ·Check whether the connected Bluetooth audio player supports Audio/Video Remote Control Profile (AVRCP).(Refer to the instructions of your audio player.)·Disconnect and connect the Bluetooth player again. | |
| “PLEASE WAIT” The unit is preparing to use the Bluetooth function. If the message does not disappear, turn off and turn on the unit, then connect the device again. | |
| “NOT SUPPORT” The connected phone does not support Voice Recognition feature or phonebook transfer. | |
| “NO ENTRY”/“NO PAIR” There is no registered device connected/found via Bluetooth. | |
| “ERROR” Try the operation again. If “ERROR” appears again, check if the device supports the function you have tried. | |
| “NO INFO”/“NO DATA” Bluetooth device cannot get the contact information. | |
| “H/W ERROR” Reset the unit and try the operation again. If “H/W ERROR” appears again, consult your nearest service center. | |
| “SWITCHING NG” The connected phones might not support phone switching feature. | |
| The Bluetooth connection between the Bluetooth device and the unit is unstable. Delete the unused registered Bluetooth device from the unit. (Page 24) | |
Troubleshooting
| Symptom Remedy | ||
| AMAZON ALEXA | No response from Alexa after the voice input. | Amazon cloud was unable to analyze the voice input. |
| Wrong response from Alexa. | Alexa misunderstood what was said or did not catch the entire request or sentence spoken. Please try again. (Page 28) | |
| "DISCONNECTED" Be sure to connect your smartphone to the unit via Bluetooth. (Page 20) | ||
| Not able to connect or reconnect to Alexa mobile application. | ·Be sure the audio device is connected via Bluetooth. Select the audio device from [AUDIO SELECT] in [BT MODE]. (Page 24) ·Perform the one-time setup process again. See "Setup for the first time" on page 27. ·Turn off, then turn on the unit and try to connect again. ·For iOS device, make sure ALEXA source or iPod BT source is selected. | |
If you have any troubles, try the following:
1 Check TROUBLESHOOTING 2 Reset the unit (page 4) 3 Contact (USA only)
Call: 1-800-252-5722 (or) visit: http://www.jvc.com
Installation/Connection
This section is for the professional installer.
For safety's sake, leave wiring and mounting to professionals. Consult the car audio dealer.
WARNING
• The unit can only be used with a 12 V DC power supply, negative ground. - Disconnect the battery's negative terminal before wiring and mounting. - Do not connect Battery wire (yellow) and Ignition wire (red) to the car chassis or Ground wire (black) to prevent a short circuit. • To prevent short circuit:
- Insulate unconnected wires with vinyl tape. — Be sure to ground this unit to the car's chassis again after installation.
- Secure the wires with cable clamps and wrap vinyl tape around the wires that come in contact with metal parts to protect the wires.
CAUTION
• Install this unit in the console of your vehicle. Do not touch the metal parts of this unit during and shortly after use of the unit. Metal parts such as the heat sink and enclosure become hot. - Do not connect the wires of speakers to the car chassis or Ground wire (black), or connect them in parallel. - Connect speakers with a maximum power of more than 50 W. If the maximum power of the speakers is lower than 50 W, change the [AMP GAIN] setting to avoid damaging the speakers. (Page 30) - Mount the unit at an angle of less than 30° . - If your vehicle wiring harness does not have the ignition terminal, connect Ignition wire (red) to the terminal on the vehicle's fuse box which provides 12 V DC power supply and is turned on and off by the ignition key. - Keep all cables away from heat dissipate metal parts. - After the unit is installed, check whether the brake lamps, blinkers, wipers, etc. on the car are working properly. - If the fuse blows, first make sure the wires are not touching car's chassis, then replace the old fuse with one that has the same rating.
Installation/Connection
Part list for installation
(A) Faceplate (×1)

(B) Trim plate (×1)

(C) Mounting sleeve (×1)

(D) Wiring harness (×1)

(E) Extraction key (×2)

Basic procedure
1 Remove the key from the ignition switch, then disconnect the ⊖ terminal of the car battery. 2 Connect the wires properly. See "Wiring connection" on page 46. 3 Install the unit to your car. See the following "Installing the unit (in-dash mounting)". 4 Connect the terminal of the car battery. 5 Press ⏻ SRC to turn on the power. 6 Detach the faceplate and reset the unit within 5 seconds. (Page 4)
Installing the unit (in-dash mounting)![graph TD A["1: Hand icon"] --> B["2: Screen with arrows ①→②→③→④→⑤"] B --> C["3: Box with arrow ③"] C --> D["4: Top side insert box with zoomed-in tray"] D --> E["5: Screen with arrow ⑤"] E --> F["6: Trim plate with zoomed-in tray"] F --> G["7: Board with arrow ④"] G --> H["8: Handle panel with zoome…](/content/2026/06/1347942/images/7d76c7a6a2f17bc145ba485017198d109c9b8330023f4a1808e8f5320ca646f9.jpg)
1 Remove the mounting sleeve and trim plate from the unit. 2 Align the holes in the unit (on both sides) with the vehicle mounting bracket and secure the unit with screws (commercially available).

⚠ Use only the specified screws. Using wrong screws might damage the unit.
Removing the unitInstalling the unit (w
Installation/Connection
Wiring connection
IMPORTANT
We recommend installing the unit with a commercially available custom wiring harness specific for your car and leave this job to professionals for your safety. Consult your car audio dealer.
![graph TD A["Fuse (10 A)"] --> B["Antenna terminal"] B --> C["Vehicle dashboard"] C --> D["Factory wiring harness (vehicle)"] D --> E["Custom wiring harness (separately purchased)"] E --> F["Join the same color wires together."] F --> G["Blue: To power antenna"] F --> H["Blue/white: To amplifier"] F…](/content/2026/06/1347942/images/40bac88052cb2c6bb1b864cda07fa61c4b9633518bbbb9fcb6ea5ffd06a3de76.jpg)
Installation/Connection
Connect external components
No Part
For KD-T915BTS: USB cable (DC 5 V 1.5A) (approx. 1 m/3.3 feet) 2 For KD-T711BT: Learning steering remote (page 36) 3 Output terminals (See "Connect external amplifiers via output terminals".) 4 Microphone input jack (page 20) [5] For KD-T91SBTS/KD-T910BTS/KD-TD91BTS/KD-T91MBS: Expansion port (12 V === 500 mA): To the optional SiriusXM Vehicle Tuner (commercially available). (Page 15)
Connect external amplifiers via output terminals![graph LR A["Output terminals"] --> B["Signal cord (not supplied)"] B --> C["JVC Amplifier*"] C --> D["Remote wire (not supplied)"] D --> E["To remote lead (blue/white) of the wiring harness. (Page 46)"]](/content/2026/06/1347942/images/b5245deb21128ce83f7eed3b27b5e4a7f5607a842d92568cd3e04f6ebb239f04.jpg)
* Firmly connect the ground wire of the amplifier to the car's chassis to avoid damaging the unit.
Model Output terminals 2-way crossover 3-way crossover
| KD-T915BTS/KD-T91MBS | REAR: Rear output Tweeter output | |
| FRONT: Front output Mid Range output | ||
| SW: Subwoofer output Woofer output | ||
| KD-T910BTS/KD-TD91BTS/KD-SR86BT | FRONT: Front output Mid Range output | |
| REAR/SW: Rear/subwoofer output Woofer output | ||
| KD-T711BT/KD-T710BT/KD-TD71BT | REAR/SW: Rear/subwoofer output Woofer output |
Specifications
| Tuner | FM Frequency Range 87.9 MHz — 107.9 MHz (200 kHz step)87.5 MHz — 108.0 MHz (50 kHz step) | |
| Usable Sensitivity (S/N = 26 dB) 8.2 dBf (0.71 μV/75 Ω) | ||
| Quieting Sensitivity (DIN S/N = 46 dB) 17.2 dBf (2.0 μV/75 Ω) | ||
| Frequency Response (±3 dB) 30 Hz — 15 kHz | ||
| Signal-to-Noise Ratio (MONO) 64 dB | ||
| Stereo Separation (1 kHz) 40 dB | ||
| AM Frequency Range 530 kHz — 1 700 kHz (10 kHz step)531 kHz — 1 611 kHz (9 kHz step) | ||
| Usable Sensitivity (S/N = 20 dB) 29 dBμ (28.2 μV) | ||
| CD player | Laser Diode GaAlAs | |
| Digital Filter (D/A) 8 times over sampling | ||
| Spindle Speed 500 rpm — 200 rpm (CLV) | ||
| Wow & Flutter Below measurable limit | ||
| Frequency Response (±1 dB) 20 Hz — 20 kHz | ||
| Total Harmonic Distortion (1 kHz) 0.01 % | ||
| Signal-to-Noise Ratio (1 kHz) 96 dB | ||
| Dynamic Range | 91 dB | |
| Channel Separation | 90 dB | |
| MP3 Decode | Compliant with MPEG-1/2 Audio Layer-3 | |
| WMA Decode | Compliant with Windows Media Audio | |
| AAC Decode | AAC-LC “.aac” files | |
| USB | USB Standard | USB 1.1, USB 2.0 (High speed) |
| Compatible Devices | Mass storage class | |
| File System | FAT12/16/32 | |
| Maximum Supply Current | DC 5 V=1.5 A | |
| Digital Filter (D/A) Converter | 24 Bit | |
| Frequency Response ( ± 1 dB) 20 Hz — 20 kHz | ||
| Signal-to-Noise Ratio (1 kHz) | 98 dB | |
| Dynamic Range | 93 dB | |
| Channel Separation | 90 dB | |
| MP3 Decode | Compliant with MPEG-1/2 Audio Layer-3 | |
| WMA Decode | Compliant with Windows Media Audio | |
| AAC Decode AAC-LC “.aac”, ".m4a” files | ||
| WAV Decode | Linear-PCM | |
| FLAC Decode | FLAC file, up to 24 bit/96 kHz | |
| Auxiliary | Frequency Response ( ± 3 dB) | 20 Hz — 20 kHz |
| Input Maximum Voltage | 1 000 mV | |
| Input Impedance | 30 kΩ | |
Specifications
| Bluetooth | Version Bluetooth V4.2 | |
| Frequency Range 2.402 GHz — 2.480 GHz | ||
| RF Output Power (E.I.R.P.) +4 dBm (MAX), Power Class 2 | ||
| Maximum Communication Range Line of sight approx. 10 m (32.8 ft) | ||
| Pairing SSP (Secure Simple Pairing) | ||
| Profile HFP1.7.1 (Hands-Free Profile) | A2DP (Advanced Audio Distribution Profile)AVRCP1.6.1 (Audio/Video Remote Control Profile)PBAP (Phonebook Access Profile)SPP (Serial Port Profile) | |
| Audio | Maximum Output Power 50 W × 4 or50 W × 2 + 50 W × 1 (Subwoofer = 4 Ω) | |
| Full Bandwidth Power(at less than 1 % THD) | 22 W × 4 | |
| Speaker Impedance 4 Ω — 8 Ω | ||
| Preout Level/Load KD-1915BIS: | 5 000 mV/10 kΩKD-T91MBS:4 000 mV/10 kΩKD-1910BTS/KD-TD91BTS/KD-T711BT/KD-1710BT/KD-TD71BT/KD-SR86BT:2 500 mV/10 kΩ | |
| Preout Impedance ≤ 600 Ω | ||
| General | Operating Voltage 12 V DC car battery | |
| Installation Size (W × H × D) 182 mm × 53 mm × 156 mm(7-3/16" × 2-1/8" × 6-3/16") | ||
| Net Weight (includes Trimplate,Mounting Sleeve) | KD-T915BTS:1.3 kg (2.9 lbs)KD-T910BTS/KD-TD91BTS/KD-T91MBS/KD-T711BT/KD-T710BT/KD-TD71BT/KD-SR86BT:1.2 kg (2.6 lbs) | |
Subject to change without notice.
libFLAC
Copyright (C) 2000-2009 Josh Coalson
Copyright (C) 2011-2013 Xiph.Org Foundation
Redistribution and use in source and binary forms, with or without modification, are permitted provided that the following conditions are met:
- Redistributions of source code must retain the above copyright notice, this list of conditions and the following disclaimer.
- Redistributions in binary form must reproduce the above copyright notice, this list of conditions and the following disclaimer in the documentation and/or other materials provided with the distribution.
- Neither the name of the Xiph.org Foundation nor the names of its contributors may be used to endorse or promote products derived from this software without specific prior written permission.
THIS SOFTWARE IS PROVIDED BY THE COPYRIGHT HOLDERS AND CONTRIBUTORS "AS IS" AND ANY EXPRESS OR IMPLIED WARRANTIES, INCLUDING, BUT NOT LIMITED TO, THE IMPLIED WARRANTIES OF MERCHANTABILITY AND FITNESS FOR A PARTICULAR PURPOSE ARE DISCLAIMED. IN NO EVENT SHALL THE FOUNDATION OR CONTRIBUTORS BE LIABLE FOR ANY DIRECT, INDIRECT, INCIDENTAL, SPECIAL, EXEMPLARY, OR CONSEQUENTIAL DAMAGES (INCLUDING, BUT NOT LIMITED TO, PROCUREMENT OF SUBSTITUTE GOODS OR SERVICES; LOSS OF USE, DATA, OR PROFITS; OR BUSINESS INTERRUPTION) HOWEVER CAUSED AND ON ANY THEORY OF LIABILITY, WHETHER IN CONTRACT, STRICT LIABILITY, OR TORT (INCLUDING NEGLIGENCE OR OTHERWISE) ARISING IN ANY WAY OUT OF THE USE OF THIS SOFTWARE, EVEN IF ADVISED OF THE POSSIBILITY OF SUCH DAMAGE.
- Microsoft and Windows Media are either registered trademarks or trademarks of Microsoft Corporation in the United States and/or other countries.
- Use of the Made for Apple badge means that an accessory has been designed to connect specifically to the Apple product(s) identified in the badge and has been certified by the developer to meet Apple performance standards. Apple is not responsible for the operation of this device or its compliance with safety and regulatory standards. Please note that the use of this accessory with an Apple product may affect wireless performance.
- Apple, iPhone, iPod, iPod touch, iTunes, and Lightning are trademarks of Apple Inc., registered in the U.S. and other countries.
- ©2019 Pandora Media, LLC. All rights reserved. PANDORA, the PANDORA logo, and the Pandora trade dress are trademarks or registered trademarks of Pandora Media, LLC. Used with permission.
- SPOTIFY and the Spotify logo are among the registered trademarks of Spotify AB.
- Sirius, XM and all related marks and logos are trademarks of Sirius XM Radio Inc. All rights reserved. • Android is a trademark of Google LLC.
- The Bluetooth® word mark and logos are registered trademarks owned by Bluetooth SIG, Inc. and any use of such marks by JVCKENWOOD Corporation is under license. Other trademarks and trade names are those of their respective owners.
- Amazon, Alexa and all related logos are trademarks of Amazon.com, Inc. or its affiliates.
KD-T915BTS / KD-T910BTS / KD-TD91BTS / KD-T91MBS / KD-T711BT / KD-T710BT / KD-TD71BT / KD-SR86BT
CD RECEIVER
Quick Start Guide
CD RECEIVER
For detailed operations and information, refer to the INSTRUCTION MANUAL on the following website:
http://www.jvc.net/cs/car/

For customer Use:
Enter below the Model No. and Serial No. which are located on the top or bottom of the cabinet. Retain this information for future reference.
Model No.
Serial No.
CAUTION
Use of controls or adjustments or performance of procedures other than those specified herein may result in hazardous radiation exposure. In compliance with Federal Regulations, following are reproductions of labels on, or inside the product relating to laser product safety.
JVCKENWOOD Corporation
2967-3. ISHIKAWA-MACHI
THIS PRODUCT COMPLIES WITH DHHS RULES 21CFR
SUBCHAPTER J IN EFFECT AT DATE OF MANUFACTURE.
Location: Top Plate
Changes or modifications not expressly approved by the party responsible for compliance could void the user's authority to operate the equipment.
NOTE: This equipment has been tested and found to comply with the limits for a Class B digital device, pursuant to part 15 of the FCC Rules. These limits are designed to provide reasonable protection against harmful interference in a residential installation. This equipment generates, uses and can radiate radio frequency energy and, if not installed and used in accordance with the instructions, may cause harmful interference to radio communications. However, there is no guarantee that interference will not occur in a particular installation. If this equipment does cause harmful interference to radio or television reception, which can be determined by turning the equipment off and on, the user is encouraged to try to correct the interference by one or more of the following measures:
– Reorient or relocate the receiving antenna.
– Increase the separation between the equipment and receiver.
– Connect the equipment into an outlet on a circuit different from that to which the receiver is connected.
– Consult the dealer or an experienced radio/TV technician for help.
Supplier's Declaration of Conformity
Trade Name: JVC
Products: CD RECEIVER
Model Name: KD-T915BTS/KD-T910BTS/KD-TD91BTS/KD-T91MBS/KD-T711BT/
KD-T710BT/KD-TD71BT/KD-SR86BT
Responsible Party: JVCKENWOOD USA CORPORATION
2201 East Dominguez Street, Long Beach, CA 90810, U.S.A.
PHONE: 310
639-9000
THIS DEVICE COMPLIES WITH PART 15 OF THE FCC RULES. OPERATION IS SUBJECT TO THE FOLLOWING TWO CONDITIONS:
(1) THIS DEVICE MAY NOT CAUSE HARMFUL INTERFERENCE, AND
(2) THIS DEVICE MUST ACCEPT ANY INTERFERENCE RECEIVED, INCLUDING INTERFERENCE THAT MAY CAUSE UNDESIRED OPERATION.
IC (Industry Canada) Caution
This device contains licence-exempt transmitter(s)/receiver(s) that comply with Innovation, Science and Economic Development Canada's licence-exempt RSS(s). Operation is subject to the following two conditions:
- This device may not cause interference.
- This device must accept any interference, including interference that may cause undesired operation of the device.
Attention de 'IC (Industrie Canada)
This transmitter must not be co-located or operated in conjunction with any other antenna or transmitter.
CAUTION
This equipment complies with FCC/IC radiation exposure limits set forth for an uncontrolled environment and meets the FCC radio frequency (RF) Exposure Guidelines and RSS-102 of the IC radio frequency (RF) Exposure rules. This equipment should be installed and operated keeping the radiator at least 20 cm or more away from person's body.
ATTENTION
The software embedded in the Product (hereinafter the "Licensed Software") provided by Licensor is copyrighted to or sublicensable by the Licensor, and this Agreement provides for the terms and conditions which Users shall follow in order to use the Licensed Software.
The User shall use the Licensed Software by agreeing with the terms of this Software License Agreement. This Agreement shall be deemed completed at the time the User (hereinafter the "User") initially used the Product in which the "Licensed Software" is embedded.
The Licensed Software may include the software which has been licensed to the Licensor directly or indirectly from any third party. In such case, some third parties require the Users to follow their conditions for use separately from this Software License Agreement. Such software shall not be subject to this Agreement, and the Users are urged to read the "Important Notice concerning the Software" to be provided separately below.
Article 1 General Provision
The Licensor shall grant to the User a non-exclusive and non-transferable (other than the exceptional case referred to in Article 3, Paragraph 1) licensed to use the Licensed Software within the country of the User. (the country where the User bought the Product (hereinafter the "Country")
Article 2 License
- The license granted under this Agreement shall be the right to use the Licensed Software in the Product.
- The User shall not duplicate, copy, modify, add, translate or otherwise alter, or lease the Licensed Software and any related documents, whether in whole or in part.
- The use of the Licensed Software shall be limited to personal purpose, and the Licensed Software shall not be distributed, licensed or sub-licensed whether it is for commercial purpose or not.
- The User shall use the Licensed Software according to the directions described in the operation manual or help file, and is prohibited to use or duplicate any data in a manner violating the Copyright Law or any other laws and regulations by applying whole or a part of the Licensed Software.
Article 3 Conditions for Grant of License
- When the User transfers the Product, it may also transfer the license to use the Licensed Software embedded in the Product (including any related materials, updates and upgrades) on condition that no original, copies or related materials continue in the possession of the User, and that the User shall cause the transferee to comply with this Software License Agreement.
- The User shall not carry out reverse engineering, disassembling, decompiling or any other code analysis works in connection with the Licensed Software.
Article 4 Right pertaining to the Licensed Software
Any and all copyrights and other rights pertaining to the Licensed Software and related documents shall belong to the Licensor or the original holder of the right who granted to the Licensor the license or sublicense for the Licensed Software (hereinafter the "Original Rightholder"), and the User shall not be entitled to any right other than the license granted hereunder, in respect of the Licensed Software and any related documents.
Article 5 Indemnification of Licensor
- Neither the Licensor nor the Original Rightholder shall be liable for any damage incurred by the User or any third party due to the exercise of the license granted to the User under this Agreement, unless otherwise restricted by law.
- The Licensor will offer no guarantee for the merchantability, convertibility and consistency with certain objective of the Licensed Software.
Article 6 Liability to Third Party
If any dispute has arisen with any third party due to an infringement upon a copyright, patent or any other intellectual property right that was caused by the User's use of the Licensed Software, the User shall settle such dispute at its own cost and hold the Licensor and the Original Rightholder harmless from any inconvenience it may cause.
Article 7 Confidentiality
The User shall keep the confidentiality of such portion of the Licensed Software, related documents thereof or any other information to be granted under this Agreement, as well as the conditions of this Agreement as has not yet entered the public domain, and shall not disclose or divulge the same to any third party without approval of the Licensor.
Article 8 Termination
In case the User falls under any of the events described in the following items, the Licensor may immediately terminate this Agreement or claim that the User compensates for the damage incurred by the Licensor due to such event:
(1) when the User violated any provision of this Agreement; or (2) when a petition has been filed against the User for an attachment, provisional attachment, provisional disposition or any other compulsory execution.
Article 9 Destruction of the Licensed Software
If this Agreement is terminated pursuant to the provision of Article 8, the User shall destroy the Licensed Software, any related documents and copies thereof within two (2) weeks from such date of termination.
Article 10 Protection of Copyright
- The copyright and all the other intellectual property rights relating to the Licensed Software shall belong to the Licensor and the Original Rightholder, and in no event shall they be under the ownership of the User.
- The User shall, whenever it uses the Licensed Software, comply with any laws relating to the copyright and other intellectual property rights.
Article 11 Export Restriction
- It is prohibited to export the Licensed Software and any related documents outside the country of the User (including transmission thereof outside the country of the User via Internet of other communication tools).
- The User shall understand that the Licensed Software shall be subject to the export restrictions adopted by the country of User and any other countries.
- The User shall agree that the software will be subject to any and all applicable international and domestic laws (including the export control regulation of the country of User and any other countries, and any restrictions concerning the end-users, the use by end-users and importing countries to be provided by the country of User and any other countries, and any other governmental authorities).
Article 12 Miscellaneous
- In the event any part of this Agreement is invalidated by operation of law, the residual provisions shall continue in force.
- Matters not stipulated in this Agreement or any ambiguity or question raised in the construction of this Agreement shall be provided or settled upon good-faith consultation between the Licensor and the User.
- The Licensor and the User hereby agree that this Agreement is governed by the laws of Japan, and any dispute arising from, and relating to the rights and obligations under, this Agreement shall be submitted to the exclusive jurisdiction of the Tokyo District Court for its first instance.
Important Notice concerning the Software
-jansson
Copyright (c) 2009-2012 Petri Lehtinen petri@digip.org
Permission is hereby granted, free of charge, to any person obtaining a copy of this software and associated documentation files (the "Software"), to deal in the Software without restriction, including without limitation the rights to use, copy, modify, merge, publish, distribute, sublicense, and/or sell copies of the Software, and to permit persons to whom the Software is furnished to do so, subject to the following conditions:
The above copyright notice and this permission notice shall be included in all copies or substantial portions of the Software.
THE SOFTWARE IS PROVIDED "AS IS", WITHOUT WARRANTY OF ANY KIND, EXPRESS OR IMPLIED, INCLUDING BUT NOT LIMITED TO THE WARRANTIES OF MERCHANTABILITY, FITNESS FOR A PARTICULAR PURPOSE AND NONINFRINGEMENT. IN NO EVENT SHALL THE AUTHORS OR COPYRIGHT HOLDERS BE LIABLE FOR ANY CLAIM, DAMAGES OR OTHER LIABILITY, WHETHER IN AN ACTION OF CONTRACT, TORT OR OTHERWISE, ARISING FROM, OUT OF OR IN CONNECTION WITH THE SOFTWARE OR THE USE OR OTHER DEALINGS IN THE SOFTWARE.
-cJSON
Copyright (c) 2009 Dave Gamble
Permission is hereby granted, free of charge, to any person obtaining a copy of this software and associated documentation files (the "Software"), to deal in the Software without restriction, including without limitation the rights to use, copy, modify, merge, publish, distribute, sublicense, and/or sell copies of the Software, and to permit persons to whom the Software is furnished to do so, subject to the following conditions:
The above copyright notice and this permission notice shall be included in all copies or substantial portions of the Software.
THE SOFTWARE IS PROVIDED "AS IS", WITHOUT WARRANTY OF ANY KIND, EXPRESS OR IMPLIED, INCLUDING BUT NOT LIMITED TO THE WARRANTIES OF MERCHANTABILITY, FITNESS FOR A PARTICULAR PURPOSE AND NONINFRINGEMENT. IN NO EVENT SHALL THE AUTHORS OR COPYRIGHT HOLDERS BE LIABLE FOR ANY CLAIM, DAMAGES OR OTHER LIABILITY, WHETHER IN AN ACTION OF CONTRACT, TORT OR OTHERWISE, ARISING FROM, OUT OF OR IN CONNECTION WITH THE SOFTWARE OR THE USE OR OTHER DEALINGS IN THE SOFTWARE.
-CMP
The MIT License (MIT)
Copyright (c) 2014 Charles Gunyon
Permission is hereby granted, free of charge, to any person obtaining a copy of this software and associated documentation files (the "Software"), to deal in the Software without restriction, including without limitation the rights to use, copy, modify, merge, publish, distribute, sublicense, and/or sell copies of the Software, and to permit persons to whom the Software is furnished to do so, subject to the following conditions:
The above copyright notice and this permission notice shall be included in all copies or substantial portions of the Software.
THE SOFTWARE IS PROVIDED "AS IS", WITHOUT WARRANTY OF ANY KIND, EXPRESS OR IMPLIED, INCLUDING BUT NOT LIMITED TO THE WARRANTIES OF MERCHANTABILITY, FITNESS FOR A PARTICULAR PURPOSE AND NONINFRINGEMENT. IN NO EVENT SHALL THE AUTHORS OR COPYRIGHT HOLDERS BE LIABLE FOR ANY CLAIM, DAMAGES OR OTHER LIABILITY, WHETHER IN AN ACTION OF CONTRACT, TORT OR OTHERWISE, ARISING FROM, OUT OF OR IN CONNECTION WITH THE SOFTWARE OR THE USE OR OTHER DEALINGS IN THE SOFTWARE.
Copyright (c) 2011 Petteri Aimonen
This software is provided 'as-is', without any express or implied warranty. In no event will the authors be held liable for any damages arising from the use of this software.
Permission is granted to anyone to use this software for any purpose, including commercial applications, and to alter it and redistribute it freely, subject to the following restrictions:
- The origin of this software must not be misrepresented; you must not claim that you wrote the original software. If you use this software in a product, an acknowledgment in the product documentation would be appreciated but is not required.
- Altered source versions must be plainly marked as such, and must not be misrepresented as being the original software.
- This notice may not be removed or altered from any source distribution.
Installation/Connection
This section is for the professional installer. For safety's sake, leave wiring and mounting to professionals. Consult the car audio dealer.
▲ WARNING
- The unit can only be used with a 12 V DC power supply, negative ground.
- Disconnect the battery's negative terminal before wiring and mounting.
- Do not connect Battery wire (yellow) and Ignition wire (red) to the car chassis or Ground wire (black) to prevent a short circuit. • To prevent short circuit: — Insulate unconnected wires with vinyl tape.
- Be sure to ground this unit to the car's chassis again after installation.
- Secure the wires with cable clamps and wrap vinyl tape around the wires that come into contact with metal parts to protect the wires.
CAUTION
• Install this unit in the console of your vehicle. Do not touch the metal parts of this unit during and shortly after use of the unit. Metal parts such as the heat sink and enclosure become hot. - Do not connect the wires of speakers to the car chassis or Ground wire (black), or connect them in parallel. - Connect speakers with a maximum power of more than 50 W. If the maximum power of the speakers is lower than 50 W, change the [AMP GAIN] setting to avoid damaging the speakers. - Mount the unit at an angle of less than 30 degrees. - If your vehicle wiring harness does not have the ignition terminal, connect Ignition wire (red) to the terminal on the vehicle's fuse box which provides 12 V DC power supply and is turned on and off by the ignition key. - Keep all cables away from heat dissipating metal parts. • After the unit is installed, check whether the brake lamps, blinkers, wipers, etc. on the car are working properly. - If the fuse blows, first make sure the wires are not touching car's chassis, then replace the old fuse with one that has the same rating.
Basic procedure
1 Remove the key from the ignition switch, then disconnect the terminal of the car battery. 2 Connect the wires properly. See "Wiring connection" on page 3. 3 Install the unit to your car. See the following "Installing the unit (in-dash mounting)". 4 Connect the terminal of the car battery. 5 Press ⏻ SRC to turn on the power. 6 Detach the faceplate and reset the unit within 5 seconds. See "How to reset" on page 4.
![graph TD A["Installing the unit (in-dash mounting)"] --> B["1: Top side switch"] B --> C["2: Top side bracket with handle"] C --> D["3: Top side door with handle"] D --> E["4: Top side door with handle"] E --> F["5: Top side door with handle"] F --> G["6: Top side door with handle"] G --> H["7: Top…](/content/2026/06/1347942/images/1072ac50ac4984064942892012ed05289951c6be8c88dd1b0906cbaa8aafa971.jpg)
Installing the unit (without mounting sleeve)
1 Remove the mounting sleeve and trim plate from the unit. 2 Align the holes in the unit (on both sides) with the vehicle mounting bracket and secure the unit with screws (commercially available).

▲ Use only the specified screws. Using wrong screws might damage the unit.
Removing the unit
Part list (supplied)
(A) Faceplate (×1) (B) Trim plate (×1) (C) Mounting sleeve (×1) (D) Wiring harness (×1) (E) Extraction key (×2)
Wiring connection![graph TD A["①"] --> B["Fuse (10 A)"] B --> C["②"] C --> D["Antenna terminal"] D --> E["Vehicle dashboard"] E --> F["Factory wiring harness (vehicle)"] F --> G["③"] G --> H["Custom wiring harness (separately purchased)"] H --> I["Join the same color wires together."] I --> J["Recommended connection"]…](/content/2026/06/1347942/images/cd106320477586ae079a9f9551f5fe5f4fb05778cfd52e636a9a5268376774e0.jpg)
(a) Light blue/yellow: To the steering wheel remote control adapter ⑥ Brown (not used) © Blue: To power antenna d Blue/white: To amplifier ① Blue/white: Remote (12 V = 350 mA) f Orange/white: Illumination ⑨ Yellow: Battery 12 V ① Red: Ignition 12 V
① Black: Ground ① Gray ⊕, Gray/black ⊖: Front speaker (right) ④ White ⊕, White/black ⊖: Front speaker (left) ① Purple ⊕, Purple/black ⊖: Rear speaker (right) m Green ⊕, Green/black ⊖: Rear speaker (left)
Before Use
IMPORTANT
• To ensure proper use, please read through this Guide before using this product. It is especially important that you read and observe Warnings and Cautions in this Guide. - Please keep the Guide in a safe and accessible place for future reference.
▲ WARNING
Do not operate any function that takes your attention away from safe driving.
CAUTION
Volume setting:
- Adjust the volume so that you can hear sounds outside the car to prevent accidents.
- Lower the volume before playing digital sources to avoid damaging the speakers by the sudden increase of the output level.
General:
- Avoid using the external device if it might hinder safe driving.
- Make sure all important data has been backed up. We shall bear no responsibility for any loss of recorded data.
- Never put or leave any metallic objects (such as coins or metal tools) inside the unit to prevent a short circuit.
- If a disc error occurs due to condensation on the laser lens, eject the disc and wait for the moisture to evaporate.
- Depending on the types of cars, the antenna will automatically extend when you turn on the unit with the antenna control wire connected. Turn off the unit when parking at a low ceiling area.
Basics (on faceplate)


To On the faceplate
| Turn on the power | Press ⬇SRC.• Press and hold to turn off the power. |
| Adjust the volume Turn the volume knob. | |
| Select a source | Press ⬇SRC repeatedly. |
| Change the display information*2 | Press 📄→ repeatedly. |
2 One of the display information supports Music Synchronization Effect. The illumination color or brightness level of the buttons changes and synchronizes with the music level.
1 Cancel the demonstration
When you turn on the power for the first time (or [FACTORY RESET] is set to [YES]), the display shows: "CANCEL DEMO" → "PRESS" → "VOLUME KNOB"
1 Press the volume knob. [YES] is selected for the initial setup. 2 Press the volume knob again. "DEMO OFF" appears.
2 Set the clock and date
1 Press and hold . 2 Turn the volume knob to select [CLOCK], then press the knob.
To adjust the clock
3 Turn the volume knob to select [CLOCK ADJUST], then press the knob.
4 Turn the volume knob to make the settings, then press the knob. Set the time in the order of "Hour" "Minute". 5 Turn the volume knob to select [CLOCK FORMAT], then press the knob. 6 Turn the volume knob to select [12H] or [24H], then press the knob.
To set the date
7 Turn the volume knob to select [DATE SET], then press the knob. 8 Turn the volume knob to make the settings, then press the knob. Set the date in the order of "Day" "Month" "Year".
9 Press to exit.
To return to the previous setting item, press Q/3
3 Set the basic settings
1 Press and hold. 2 Turn the volume knob to select an item (see the following table), then press the knob. 3 Repeat step 2 until the desired item is selected or activated. 4 Press to exit.
To return to the previous setting item, press Q/5.
Default: [XX]
| [SYSTEM] | |
| [KEY BEEP] | (Not applicable when 3-way crossover is selected.) [ON]: Activates the keypress tone.; [OFF]: Deactivates. |
| [FACTORY RESET] | [YES]: Resets the settings to default (except the stored station).; [NO]: Cancels. |
| [CLOCK] | |
| [CLOCK DISPLAY] | [ON]: The clock time is shown on the display even when the unit is turned off.; [OFF]: Cancels. |
| [ENGLISH] | Select the display language for menu and music information if applicable. |
| [ESPANOL] | By default, [ENGLISH] is selected. |
| [FRANCAIS] | |
Radio
Search for a station
1 Press ⏻ SRC repeatedly to select FM or AM. 2 Press ◀◀◀ / ▶▶▶ to search for a station automatically. (or)
Press and hold ◀◀◀ / ▶▶▶ until "M" flashes, then press repeatedly to search for a station manually.
Settings in memory
You can store up to 18 stations for FM and 6 stations for AM.
Store a station
While listening to a station....
Press and hold one of the number buttons (1 to 6).
(or)
1 Press and hold the volume knob until "PRESET MODE" flashes. 2 Turn the volume knob to select a preset number, then press the knob. "MEMORY" appears once the station is stored.
Select a stored station
Press one of the number buttons (1 to 6).
(or)
1 Press .Q/ 2 Turn the volume knob to select a preset number, then press the knob.
CD/USB/iPod
Selectable source:
- KD-T915BTS: CD/USB FRONT/USB REAR/iPod FRONT/iPod REAR or iPod BT
- KD-T910BTS/KD-TD91BTS/KD-T91MBS/KD-T711BT/KD-T710BT/KD-TD71BT/KD-SR86BT: CD/USB/iPod USB or iPod BT
Start playback
The source changes automatically and playback starts when you load a disc or attach a device (USB device/ iPod/iPhone) to the USB input terminal. - KD-T915BTS: You can also connect to the USB cable from the rear of the unit.
To On the faceplate
| Reverse/Fast-forward | Press and hold ◀◀/▶▶. |
| Select a track/file | Press ◀◀/▶▶. |
| Select a folder | Press 2 ▲/1 ▼. |
| Repeat play | Press 4 ⟶ repeatedly. |
| Random play | Press 3 ⟷ repeatedly. |
Menu Settings
1 Press and hold to enter menu settings. 2 Turn the volume knob to select an item, then press the knob. 3 Repeat step 2 until the desired item is selected/activated. 4 Press to exit.
To return to the previous setting item, press Q/5.
- Refer to the INSTRUCTION MANUAL on the following website for the detailed explanation of each item: http://www.jvc.net/cs/car/ • The availability of each item vary depending on the model.
Menu items
[EQ SETTING] : Selects a preset equalizer or adjusts your own sound settings.
[AUDIO CONTROL] : Sets your preferred audio settings.
[SOUND EFFECT] : Sets your preferred sound effect.
[DISPLAY] : Sets your preferred control for the display window.
[COLOR] : Sets your preferred illumination color for buttons.
[TUNER SETTING] : Settings for radio source.
[SIRIUS XM] : Settings for Sirius XM tuner.
[BT MODE] : Settings for using a Bluetooth device.
[REMOTE APP] : Settings for using smartphone to control this unit.
[MIC GAIN]* : Sets the sensitivity of the microphone.
[NR LEVEL]* : Adjusts the noise reduction level.
[ECHO CANCEL]* : Adjusts the echo cancellation delay time.
[SYSTEM] : Settings for this unit.
[CLOCK] : Adjusts the clock.
[ENGLISH] : Selects language for the menu and music information.
[ESPANOL] : Selects language for the menu and music information.
[FRANCAIS] : Selects language for the menu and music information.
[DEMO MODE] : Activates or deactivates the display demonstration.
* Applicable only while talking on the phone.
Examples of some well-used settings
Subwoofer Level Setting
1 Press and hold to enter menu settings.

2 Turn the volume knob clockwise to select [AUDIO CONTROL], then press the knob.

3 Turn the volume knob clockwise to select [SUBW0OFER SET], then press the knob.

4 Turn the volume knob clockwise to select [ON], then press the knob.

5 Turn the volume knob clockwise to select [SUB.W LEVEL], then press the knob.

6 Press the volume knob if [PRE-OUT] is shown on the display.

7 Turn the volume knob to adjust the subwoofer level, then press the knob.

SUBW
+07
→

Continued on the next page...
8 Press to exit the setting menu.

Note:
For KD-T910BTS/KD-TD91BTS/KD-T711BT/KD-T710BT/KD-TD71BT/KD-SR86BT, you need to set [SPK/PRE OUT] to [REAR/SUB.W] or [SUB.W/SUB.W] before you can make the subwoofer level settings.

Illumination Color Setting
For KD-T915BTS/KD-T910BTS/KD-TD91BTS/KD-T91MBS, you can set your preferred illumination color for each zone.

1 Press and hold to enter menu settings.

2 Turn the volume knob clockwise to select [COLOR], then press the knob.

COLOR →


3 Press the volume knob if [PRESET] is shown on the display.

PRESET
4 Turn the volume knob to choose a zone ([ALL ZONE], [ZONE 1], [ZONE 2]), then press the knob.

ALL ZONE


5 Turn the volume knob to choose a color, then press the knob.

- [COLOR 01] to [COLOR 49]
- [USER]: The color you have created for [DAY COLOR] or [NIGHT COLOR] is shown.
- [COLOR FLOW01] to [COLOR FLOW03]: Color changes at different speeds.
- [CRYSTAL]/[FLOWER]/[FOREST]/[GRADATION]/[OCEAN]/[RELAX]/[SUNSET]: The selected color pattern is shown. (Selectable only when [ALL ZONE] is selected in step 4.)
6 Repeat step 4 and step 5 to set color for other zones.
7 Press to exit.

Other Information
For playback operations of AUX, Spotify, Pandora®, SiriusXM® Radio,
AMAZON ALEXA sources, refer to the INSTRUCTION MANUAL on the following website: http://www.jvc.net/cs/car/
• The availability of each source vary depending on the model.
Note for specifications
Bluetooth Frequency Range:
2.402 GHz — 2.480 GHz
Bluetooth RF Output Power (E.I.R.P.):
+4 dBm (MAX), Power Class 2
Speaker Impedance:
4Ω - 8Ω
Operating Voltage:
12 V DC car battery
Bluetooth®
- Depending on the Bluetooth version, operating system and the firmware version of your mobile phone, Bluetooth features may not work with this unit.
- Be sure to turn on the Bluetooth function of the device to make the following operations. • Signal conditions vary depending on the surroundings.
Connect the microphone
Connect the supplied microphone to the microphone input jack on the rear panel.
Adjust the microphone angle

Secure using cord clamps (not supplied) if necessary.
Pair and connect a Bluetooth device for the first time
1 Press ⏻SRC to turn on the unit. 2 Search and select the name of your receiver ("KD-T915BTS"/ "KD-T910BTS"/"KD-TD91BTS"/"KD-T91MBS"/"KD-T711BT"/ "KD-T710BT"/"KD-TD71BT"/"KD-SR86BT") on the Bluetooth device. 3 Perform (A) or (B) depending on what appears on the display. For some Bluetooth devices, pairing sequence may vary from the steps described below. (A) "[Device Name]" → "XXXXXX" → "VOL - YES" → "BACK - NO" "XXXXXX" is a 6-digit passkey randomly generated during each pairing. Ensure that the passkeys appear on the unit and Bluetooth device are the same. Press the volume knob to confirm the passkey. Operate the Bluetooth device to confirm the passkey.
(B) "[Device Name]" → "VOL - YES" → "BACK - NO"
Press the volume knob to start pairing.
2 • If "PAIRING" → "PIN 0000" scrolls on the display, enter the PIN code "0000" into the Bluetooth device.
- If only "PAIRING" appears, operate the Bluetooth device to confirm pairing.
"PAIRING COMPLETED" appears when pairing is completed and "✗" will light up when the Bluetooth connection is established.
Answer a call
Press or the volume knob.
• To adjust the phone volume [00] to [35], turn the volume knob.
• To end a call, press and hold or tune volume knob.
Audio player via Bluetooth
1 Press ⏻ SRC repeatedly to select BT AUDIO. • For KD-T711BT: Pressing enters BT AUDIO directly. 2 Operate the audio player via Bluetooth to start playback.
To On the faceplate
| Play back/pause Press the volume knob. | |
| Select group or folder | Press 2 ▲/1 ▼. |
| Reverse skip/Forward skip | Press |◀◀/▶▶. |
| Reverse/Fast-forward | Press and hold |◀◀/▶▶. |
| Repeat play | Press 4 ⬇ repeatedly. |
| Random play | Press 3 ✕ repeatedly. |
- Microsoft and Windows Media are either registered trademarks or trademarks of Microsoft Corporation in the United States and/or other countries.
- Use of the Made for Apple badge means that an accessory has been designed to connect specifically to the Apple product(s) identified in the badge and has been certified by the developer to meet Apple performance standards. Apple is not responsible for the operation of this device or its compliance with safety and regulatory standards. Please note that the use of this accessory with an Apple product may affect wireless performance. • Apple, iPhone, iPod, iPod touch, and Lightning are trademarks of Apple Inc., registered in the U.S. and other countries. ©2019 Pandora Media, LLC. All rights reserved. PANDORA, the PANDORA logo, and the Pandora trade dress are trademarks or registered trademarks of Pandora Media, LLC. Used with permission.
- SPOTIFY and the Spotify logo are among the registered trademarks of Spotify AB.
- Sirius, XM and all related marks and logos are trademarks of Sirius XM Radio Inc. All rights reserved. • Android is a trademark of Google LLC.
- The Bluetooth® word mark and logos are registered trademarks owned by Bluetooth SIG, Inc. and any use of such marks by JVCKENWOOD Corporation is under license. Other trademarks and trade names are those of their respective owners.
- Amazon, Alexa and all related logos are trademarks of Amazon.com, Inc. or its affiliates.

alexa built-in

Bluetooth®
pandora®
Made for

iPhone
iPod

TECHNOLOGY

Spotify®
((SiriusXm))
READY
WHEN IT IS NOT REQUIRED TO DETACH THE FRONT CONTROL PANEL FROM THE MAIN UNIT, USE THE PROVIDED SCREW TO ATTACH THE CONTROL PANEL TO THE MAIN UNIT.

GE40401-001A
U.S.A.
JVCKENWOOD USA Corporation
TO OUR VALUED CUSTOMER
THANK YOU FOR PURCHASING THIS JVC PRODUCT. WE WANT TO HELP YOU ACHIEVE A PERFECT EXPERIENCE.
NEED HELP ON HOW TO HOOK UP? NEED ASSISTANCE ON HOW TO OPERATE? NEED TO LOCATE A JVC SERVICE CENTER? LIKE TO PURCHASE ACCESSORIES?
JVC IS HERE TO HELP! TOLL FREE: 1 (800)252-5722 http://www.us.jvckenwood.com
Remember to retain your Bill of Sale for Warranty Service. Do not attempt to service the product yourself
Caution
To prevent electrical shock, do not open the cabinet. There are no user serviceable parts inside. Please refer to qualified service personnel for repairs.
PRODUCT REGISTRATION
We suggest that you register your product since it will enable us to contact you directly if it is ever necessary to correct a safety related condition in your product. You can register at http://www.us.jvckenwood.com Please note that failure to register does not diminish any of your rights during the warranty period.

LIMITED WARRANTY
ONLY FOR PRODUCT PURCHASED IN U.S.A.
JVCKENWOOD USA Corporation warrants this product and all parts thereof, except as set forth below ONLY TO THE ORIGINAL RETAIL PURCHASER to be FREE FROM DEFECTIVE MATERIALS AND WORKMANSHIP from the date of original purchase for the period shown below. ("The Warranty Period")
PARTS 2 YRS / LABOR 2 YRS : Car audio ARSENAL series PARTS 1 YR / LABOR 1 YR : All other car audio products
THIS LIMITED WARRANTY IS VALID ONLY IN THE FIFTY (50) UNITED STATES, THE DISTRICT OF COLUMBIA AND IN THE COMMONWEALTH OF PUERTO RICO.
WHAT WE WILL DO:
If this product is found to be defective within the warranty period, JVC will repair or replace defective parts with new or rebuilt equivalents at no charge to the original owner. Such repair and replacement services shall be rendered by JVC during normal business hours at JVC authorized service centers. Parts used for replacement are warranted only for the remainder of the Warranty Period. All products may be brought to a JVC authorized service center on a carry-in basis.
WHAT YOU MUST DO FOR WARRANTY SERVICE:
Please do not return your product to the retailer. Instead, return your product to the JVC authorized service center nearest you. If shipping the product to the service center, please be sure to package it carefully, preferably in the original packaging, and include a brief description of the problem(s) and a copy of the proof of purchase to verify purchase date. Please call 1-800-252-5722 to locate the nearest JVC authorized service center. Service locations can also be obtained from our website http://www.us.jvckenwood.com. If you have any questions concerning your JVC Product, please contact our Customer Care Center at 800-252-5722
WHAT IS NOT COVERED:
This limited warranty provided by JVC does not cover: 1. Products which have been subject to abuse, accident, alteration, modification, tampering, negligence, misuse, faulty installation, lack of reasonable care, or if repaired or serviced by anyone other than a service facility authorized by JVC to render such service, or if affixed to any attachment not provided with the products, or if the model or serial number has been altered, tampered with, defaced or removed; 2. Initial installation, installation and removal from cabinets or mounting systems. 3. Operational adjustments covered in the Owner's Manual, normal maintenance, video and audio head cleaning. 4. Damage that occurs in shipment, due to act of God, and cosmetic damage; 5. Signal reception problems and failures due to line power surge; 6. User Removal Memory Devices/Video Pick-up Tubes/CCD Image Sensors are covered for 90 days from the date of purchase. 7. Accessories: 8. Batteries (except that Rechargeable Batteries are covered for 90 days from the date of purchase); 9. Products used for commercial purposes, including, but not limited to rental 10. Loss of data resultant from malfunction of hard drive or other data storage device;
There are no express warranties except as listed above.
THE DURATION OF ANY IMPLIED WARRANTIES, INCLUDING THE IMPLIED WARRANTY OF MERCHANTABILITY, IS LIMITED TO THE DURATION OF THE EXPRESS WARRANTY HEREIN. JVG SHALL NOT BE LIABLE FOR ANY LOSS OF USE OF THE PRODUCT, INCONVENIENCE, OR ANY OTHER DAMAGES, WHETHER DIRECT, INCIDENTAL OR CONSEQUENTIAL (INCLUDING, WITHOUT LIMITATION, DAMAGE TO TAPES, RECORDS OR DISCS) RESULTING FROM THE USE OF THIS PRODUCT, OR ARISING OUT OF ANY BREACH OF THIS WARRANTY. ALL EXPRESS AND IMPLIED WARRANTIES, INCLUDING THE WARRANTIES OF MERCHANTABILITY AND FITNESS FOR PARTICULAR PURPOSE, ARE LIMITED TO THE WARRANTY PERIOD SET FORTH ABOVE.
Some states do not allow the exclusion of incidental or consequential damages or limitations on how long an implied warranty lasts, so these limitations or exclusions may not apply to you. This warranty gives you specific legal rights and you may also have other rights which vary from state to state.
JVCKENWOOD USA Corporation
PO Box 22745, 2201 East Dominguez Street, Long Beach, CA 90801-5745 http://www.us.jvckenwood.com
REFURBISHED PRODUCTS CARRY A SEPARATE WARRANTY. THIS WARRANTY DOES NOT APPLY. FOR DETAIL OF REFURBISHED PRODUCT WARRANTY, PLEASE REFER TO THE REFURBISHED PRODUCT WARRANTY INFORMATION PACKAGED WITH EACH REFURBISHED PRODUCT
For customer use:
Enter below the Model No. and Serial No. which is located either on the rear, bottom or side of the cabinet. Retain this information for future reference.
Model No.
Purchase date
Serial No:
Name of dealer:
CANADA
JVCKENWOOD CANADA INC.

WARRANTY
Warranty applies only to PRODUCT distributed in Canada by JVCKENWOOD CANADA INC.
JVCKENWOOD CANADA INC. (hereafter called "JVC") gives the following express warranty for each new JVC product distributed in Canada by JVC and sold by an authorized JVC dealer. JVC warrants that this JVC product is free, under normal use and maintenance, from any defects in material and workmanship subject to the following terms and conditions:
- To Obtain Warranty Service:
(a) JVC product requiring service must be presented together with proof of purchase.
(b) The JVC product must be brought in for service to an authorized JVC Service Centre.
- Limitation:
This Warranty shall not apply to:
(a) Repair or replacement of any cabinets, batteries, plates, connection cords, antennas, dust covers, knobs, speaker grills, speaker cones, projection screens, projection screen savers, and all accessories.
(b) Any defects caused or repairs required as a result of misuse, abusive operation, negligence, improper use and/or insufficient care.
(c) Any defect caused or repairs required as a result of not following the instructions in the operation manual.
(d) Any JVC product tampered with, adjusted or repaired by any party other than JVC or authorized JVC Service Centre personnel.
(e) Any JVC products on which the serial number has been defaced, modified or removed.
(f) Maintenance, cleaning or periodic check-up
(g) Conversion to foreign or domestic voltage or frequency
(h) Any JVC product without the Canadian Electrical Safety Regulations ID.
(i) Any JVC products used for commercial or institutional rental, or display purposes. Parts .... 1 year (except video head - 90 days) Labour ... 90 days
(i) Any JVC product which has been resold and no longer owned by the original purchaser.
(k) Product purchased from "outside Canada", "bankruptcy" or "liquidator".
(i) Any defects caused by fire, flood, lightning, power surge, or other events beyond the control of JVC.
(m) FOR AUTO PRODUCTS
Warranty does not cover elimination of car static or electrical interferences, cleaning of head, adjustments, or labour cost for the removal or reinstallation of the unit for repair.
- Standards
If any defects should be found in a JVC product within the applicable terms, necessary repairs shall be made at no cost to the purchaser for parts or labour when JVC acknowledges that such defects are due to faulty material or workmanship.
- Exclusion of All Other Express Warranties:
This warranty constitutes the entire express warranty given by JVC for JVC products and no dealer or service centre personnel or his, its or their agent or employee is, or are authorized to extend or enlarge this warranty on behalf of JVC.
- Disclaimer of Consequential Damage:
To the extent the law permits JVC disclaims any responsibility for loss of time or use of its product, transportation costs, or any other indirect, incidental or consequential damage or inconvenience.
WARRANTY TERM (VALID FROM THE DATE OF PURCHASE)
| Product | Parts(Years) | Labour(Years) |
| Projection TV In-Home ServiceColour TV In-Home (25" and above)D-ILA Rear Projection In-Home ServiceLCD TV In-Home Service (25" and above) | 1 | 1 |
| * In-Home service to be provided where available.Where it is not available, the purchaser must assume the responsibility and expense for the proper packing, shipment and all costs associated with the delivery of the equipment to and from the closest JVC Authorized Service Centre. | ||
| Receivers and Home Speakers purchased separately. Front Projection and Car Audio "ARSENAL" Series | 2 | 2 |
| AC Adaplers, Remote controls, Headphones, Microphones and Projector lamps | 90 days | 90 days |
| Wood Cone Speakers | 5 | 5 |
| All Other Categories | 1 | 1 |
JVCKENWOOD CANADA INC.
6070 Kestrel Road, Mississauga, Ontario, L5T 1S8 Canada
TEL: (905) 670-3381 FAX: (905)670-7244 Service toll free #: 1-800-964-2650
http://www.jvc.ca E-mail: service@jvc.ca
Product Registration
We suggest that you register your product since it will enable us to contact you directly if it is ever necessary to correct a safety related condition in your product. You can register at http://www.jvc.ca/www/Support/Warranty.aspx
For customer use:
Enter below the Model No. and Serial No. which is located either on the rear, bottom or side of the cabinet. Retain this information for future reference.
Model No.
Purchase date:
Serial No.:
Name of dealer:
WARRANTY
(m) FOR AUTOMOTIVE PRODUCTS
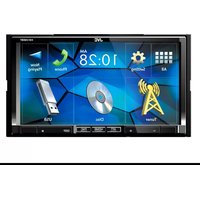

- KD-T915BTS / KD-T910BTS / KD-TD91BTS / KD-T91MBS / KD-T711BT / KD-T710BT / KD-TD71BT / KD-SR86BT
- CAUTION
- FCC CAUTION
- SUPPLIER'S DECLARATION OF CONFORMITY
- IC (INDUSTRY CANADA) CAUTION
- ATTENTION
- ARTICLE 1 GENERAL PROVISION
- ARTICLE 2 LICENSE
- ARTICLE 3 CONDITIONS FOR GRANT OF LICENSE
- ARTICLE 4 RIGHT PERTAINING TO THE LICENSED SOFTWARE
- ARTICLE 5 INDEMNIFICATION OF LICENSOR
- ARTICLE 6 LIABILITY TO THIRD PARTY
- ARTICLE 7 CONFIDENTIALITY
- ARTICLE 8 TERMINATION
- ARTICLE 9 DESTRUCTION OF THE LICENSED SOFTWARE
- ARTICLE 10 PROTECTION OF COPYRIGHT
- ARTICLE 11 EXPORT RESTRICTION
- ARTICLE 12 MISCELLANEOUS
- IMPORTANT NOTICE CONCERNING THE SOFTWARE
- CONTENTS
- HOW TO READ THIS MANUAL
- BEFOREUSE
- IMPORTANT
- WARNING
- VOLUME SETTING
- GENERAL
- REMOTE CONTROL (RM-RK52)
- BASICS
- FACEPLATE
- BASICS GETTINGSTARTED
- REMOTE CONTROL (RM-RK52) (SUPPLIED FOR KD-T711BT)
- TO TURN ON THE REMOTE CONTROL
- CANCEL THE DEMONSTRATION
- SET THE CLOCK AND DATE
- TO ADJUST THE CLOCK
- TO SET THE DATE
- GETTING STARTED
- PRESS TO EXIT
- SET THE BASIC SETTINGS
- RADIO
- SEARCH FOR A STATION
- SETTINGS IN MEMORY
- STORE A STATION
- SELECT A STORED STATION
- OTHER SETTINGS
- PTY CODE FOR FM RADIO BROADCAST DATA SYSTEM
- PTY CODE FOR FM RADIO DATA SYSTEM
- CD/USB/IPOD
- SELECTABLE SOURCE
- SELECT MUSIC DRIVE
- SELECT CONTROL MODE
- SELECT A FILE TO PLAY
- FROM A FOLDER OR LIST
- AUX
- PREPARATION
- START LISTENING
- PANDORA® (EXCEPT FOR KD-T711BT)
- CREATE AND STORE A NEW STATION
- SEARCH FOR A REGISTERED STATION
- BOOKMARK CURRENT SONG INFORMATION
- SPOTIFY
- SAVE FAVORITE SONG INFORMATION
- PRESS AND HOLD THE VOLUME KNOB
- SEARCH FOR A SONG OR STATION
- SIRIUSXM®RADIO
- SIRIUSXM® RADIO (FOR KD-T915BTS/KD-T910BTS/KD-TD91BTS/KD-T91MBS)
- STORE A CHANNEL
- SELECT A STORED CHANNEL
- SIRIUSXM REPLAY™
- SMARTFAVORITES AND TUNESTART™
- TUNESCAN™
- PRESS .Q
- SIRIUSXM SETTINGS
- [SIRIUS XM]
- USING OTHER APPLICATIONS
- JVC REMOTE APPLICATION
- START USING JVC REMOTE APPLICATION
- SETTINGS TO USE JVC REMOTE APPLICATION
- BLUETOOTH®
- BLUETOOTH — CONNECTION
- SUPPORTED BLUETOOTH PROFILES
- SUPPORTED BLUETOOTH CODECS
- PAIR AND CONNECT A BLUETOOTH DEVICE FOR THE FIRST TIME
- AUTO PAIRING
- BLUETOOTH — MOBILE PHONE
- RECEIVE A CALL
- IMPROVE THE VOICE QUALITY
- MAKE THE SETTINGS FOR RECEIVING A CALL
- MAKE A CALL
- PRESS TO ENTER BLUETOOTH MODE
- MAKE A CALL USING VOICE RECOGNITION
- STORE A CONTACT IN MEMORY
- MAKE A CALL TO A REGISTERED NUMBER
- BLUETOOTH MODE SETTINGS
- BLUETOOTH COMPATIBILITY CHECK MODE
- PRESS AND HOLD
- THE CONNECTIVITY RESULT FLASHES ON THE DISPLAY
- LISTEN TO THE AUDIO PLAYER VIA BLUETOOTH
- LISTEN TO IPOD/IPHONE VIA BLUETOOTH
- AMAZON ALEXA (EXCEPT FOR KD-T711BT)
- SETUP FOR THE FIRST TIME
- FOR ANDROID DEVICE
- FOR IPHONE/IPOD TOUCH
- BASIC OPERATIONS
- AUDIO SETTINGS
- SPEAKER OUTPUT SETTINGS [SPK/PRE OUT]
- (APPLICABLE ONLY IF [X' OVER TYPE] IS SET TO [2-WAY]) (PAGE 30)
- CONNECTION VIA LINEOUT TERMINALS
- CONNECTION VIA SPEAKER LEADS
- CROSSOVER SETTINGS
- SPEAKER SIZE
- X'OVER(CROSSOVER)
- DIGITAL TIME ALIGNMENT SETTINGS
- DETERMINING THE DELAY TIME AUTOMATICALLY
- DISPLAY SETTINGS
- LEARNING STEERING REMOTE CONTROL
- CONFIGURE THE CONTROL KEYS
- LEARNING STEERING REMOTE CONTROL (FOR KD-T711BT)
- REASSIGN THE CONTROL KEYS
- REFERENCES
- MAINTENANCE
- CLEANING THE UNIT
- CLEANING THE CONNECTOR
- HANDLING DISCS
- MORE INFORMATION
- PLAYABLEFILES
- UNPLAYABLE DISCS
- ABOUT USB DEVICES
- ABOUT IPOD/IPHONE
- ABOUT PANDORA
- ABOUT SPOTIFY
- ABOUT AMAZON ALEXA
- CHANGE THE DISPLAY INFORMATION
- IF YOU HAVE ANY TROUBLES, TRY THE FOLLOWING
- INSTALLATION/CONNECTION
- PART LIST FOR INSTALLATION
- BASIC PROCEDURE
- WIRING CONNECTION
- NO PART
- LIBFLAC
- ATTENTION DE 'IC (INDUSTRIE CANADA)
- ▲ WARNING
- INSTALLING THE UNIT (WITHOUT MOUNTING SLEEVE)
- PART LIST (SUPPLIED)
- BEFORE USE
- BASICS (ON FACEPLATE)
- ONE OF THE DISPLAY INFORMATION SUPPORTS MUSIC SYNCHRONIZATION EFFECT. THE ILLUMINATION COLOR OR BRIGHTNESS LEVEL OF THE BUTTONS CHANGES AND SYNCHRONIZES WITH THE MUSIC LEVEL
- START PLAYBACK
- MENU SETTINGS
- MENU ITEMS
- EXAMPLES OF SOME WELL-USED SETTINGS
- SUBWOOFER LEVEL SETTING
- NOTE
- ILLUMINATION COLOR SETTING
- OTHER INFORMATION
- NOTE FOR SPECIFICATIONS
- CONNECT THE MICROPHONE
- ANSWER A CALL
- AUDIO PLAYER VIA BLUETOOTH
- TO OUR VALUED CUSTOMER
- PRODUCT REGISTRATION
- LIMITED WARRANTY
- THIS LIMITED WARRANTY IS VALID ONLY IN THE FIFTY (50) UNITED STATES, THE DISTRICT OF COLUMBIA AND IN THE COMMONWEALTH OF PUERTO RICO
- WHAT WE WILL DO
- WHAT YOU MUST DO FOR WARRANTY SERVICE
- WHAT IS NOT COVERED
- JVCKENWOOD USA CORPORATION
- FOR CUSTOMER USE
- WARRANTY
- JVCKENWOOD CANADA INC
Brand : JVC
Model : KD-T915BTS
Category : Car radio