
SRP4010 - Remote control PHILIPS - Free user manual and instructions
Find the device manual for free SRP4010 PHILIPS in PDF.


| Product type | Universal remote control |
| Model | SRP4010 |
| Brand | Philips |
| Compatible devices | TV, DVD, satellite, cable box, audio systems |
| Number of devices supported | 4 |
| Control method | Infrared (IR) |
| Dimensions (H x W x D) | Approx. 2.5 x 5.0 x 1.0 inches (64 x 127 x 25 mm) |
| Weight | Approx. 4.2 oz (120 g) including batteries |
| Power source | 2 x AAA batteries (not included) |
| Battery life | Up to 12 months with normal use |
| Key functions | Power, volume, channel, input, menu, navigation, number pad, mute, sleep, favorites |
| Programming method | Auto-search, manual code entry, code learning |
| Code database | Pre-programmed with codes for thousands of brands |
| Learning capability | Yes, can learn commands from original remotes |
| Macro functions | Supports one-touch activity macros |
| Backlight | Yes, blue backlight on keypad |
| Material | ABS plastic |
| Color | Black |
| Care and cleaning | Wipe with a soft, dry cloth. Do not use liquids or abrasives. |
| Safety instructions | Keep away from water and extreme temperatures. Remove batteries if not used for long periods. |
| Spare parts / repairability | Batteries are replaceable. No other user-serviceable parts. Dispose of electronic waste properly. |
| Included in box | Remote control, user manual, code list |
| Warranty | 1 year limited warranty |
| Manufacturer | Philips |
Frequently Asked Questions - SRP4010 PHILIPS
User questions about SRP4010 PHILIPS
0 question about this device. Answer the ones you know or ask your own.
Ask a new question about this device
Download the instructions for your Remote control in PDF format for free! Find your manual SRP4010 - PHILIPS and take your electronic device back in hand. On this page are published all the documents necessary for the use of your device. SRP4010 by PHILIPS.
USER MANUAL SRP4010 PHILIPS
User manual
Register your product and get support at
www.philips.com/support
Contents
1 Your universal remote 2
Introduction 2
2 Get started 3
Insert batteries (not included) 3
Set up the universal remote 4
3 Use your universal remote control 6
Learning 6
4 Notice 7
Disposal of your old product and battery 7
5 Service and support 8
Frequently asked questions 8
Need help? 8
1 Your universal remote
Congratulations on your purchase, and welcome to Philips! To fully benefit from the support that Philips offers, register your product at www.philips.com/welcome
Introduction
With the universal remote, you can operate up to 3 different devices.
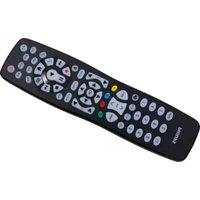
Overview of the universal remote
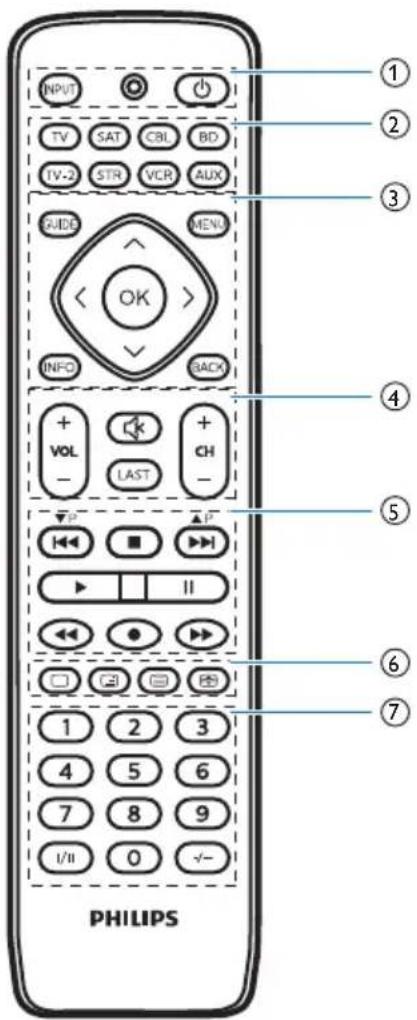
① INPUT: select available source inputs (antenna, cable, etc.).
● : LED indicator
(●): power on or off.
② Device selection buttons.
③ GUIDE: displays the program guide.
INFO: displays on-screen channel information.
MENU: menu on or off.
BACK: exit from the menu.
OK: confirm your selection.
^ / ∨ / <: up/down/left/right.
④ VOL+/-: adjust the volume.
CH+/-: go to the next/previous channel.
: mute
LAST: return to the previous tuned channel.
⑤ I: previous track
: stop
▶▶: next track
▶ : play
II: pause
◀: rewind
●: record
▶: fast forward
⑥ / / ☐ teletext off/teletext mix/
teletext on/teletext hold.
⑦ Digit buttons
I/II : select the audio channel.
-/-- : select between one and two-figure channel numbers.
Supported devices
Device name Description
TV/TV-2 TV, DTV
SAT/CBL Cable box, satellite receiver, IPTV, DVR, HDTV decoder and TiVo
BD DVD player/recorder, Blu-ray player
STR Streaming devices, Apple TV, Roku, Sony, WD TV, Netgear
VCR Video cassette player/recorder
AUX Auxiliary equipment, media center PC, others
2 Get started
Insert batteries (not included)


Warning
- Check the battery polarity when inserting in the battery compartment. Incorrect polarity may damage the product.

Caution
- Risk of explosion! Keep batteries away from heat, sunshine or fire. Never discard batteries in fire. - Risk of decreased battery life! Never mix different brands or types of batteries.

Note
- When you replace the batteries, all user settings will be retained in the memory of the universal remote for 5 minutes.
Set up the universal remote
You must first set up the universal remote before operating your devices.
Set up by code selection
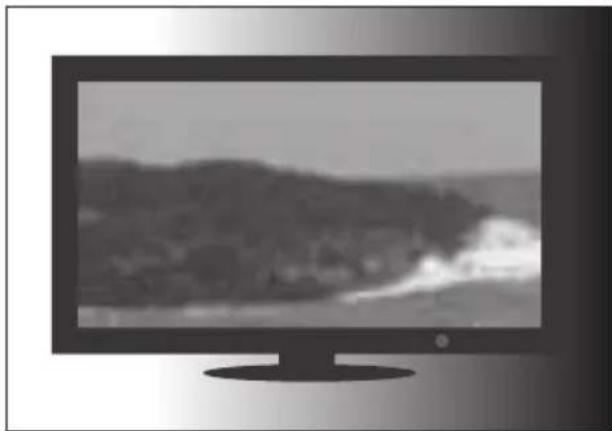
1 Switch on your device.
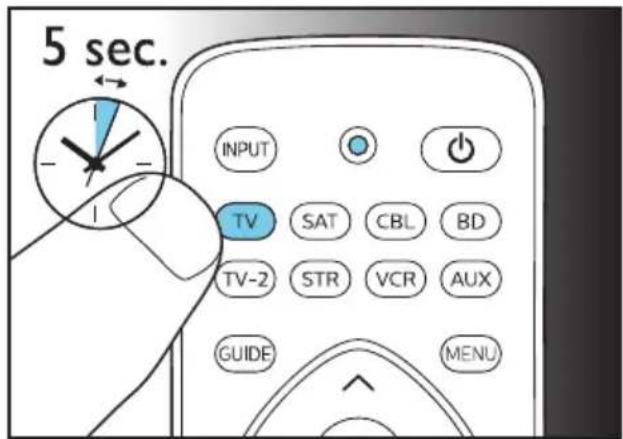
2 Press and hold the device selection button (e.g. TV) for 5 seconds until the red LED is on.
3 Look up the 5-digit code for your brand in the code list. Codes are listed by the device type and brand name. The most popular code is listed first
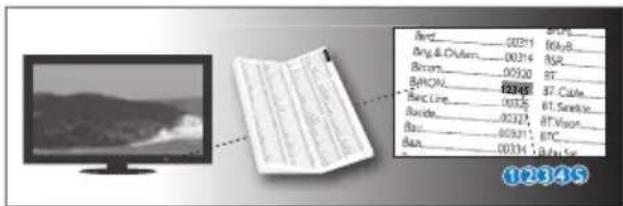
4 Enter the first 5-digit code using the digit buttons.
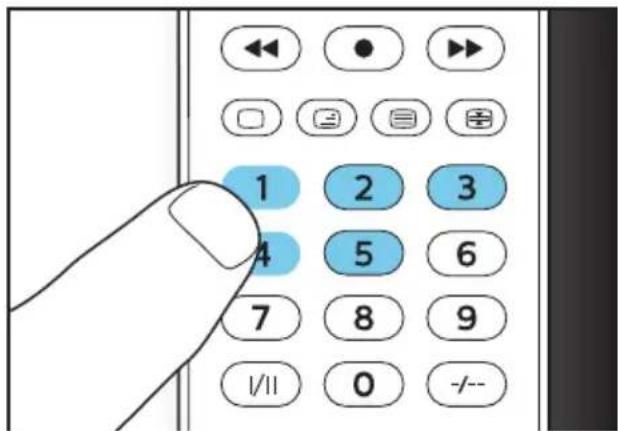
5 If the light is off, a valid code is saved. Otherwise, the light will flash six times, and then remains on for code re-entry.

6 Operate the device with the universal remote. If your device responds correctly, it means you have entered the right code. Otherwise, repeat from Step 2, and enter the second code on the list.

Note
- It is possible sometimes that your device only responds to some of the buttons. In such case, set up with the next code in the code list, and try operating your device again. If there spill problem on code or key, you can try to learn a key by learning faction if the remote support learning function.
• Each device button can be used to set up any device. E.g. you may setup a TV using the SAT device button. - Before you enter any digit in Step 4, you can press device buttem to exit from setup mode.
Auto registration
1 Switch on your device.
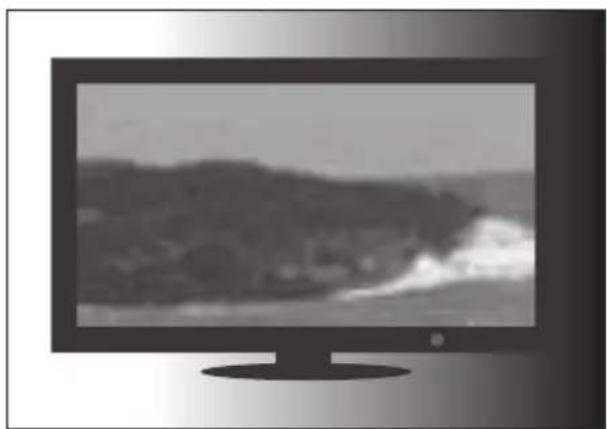
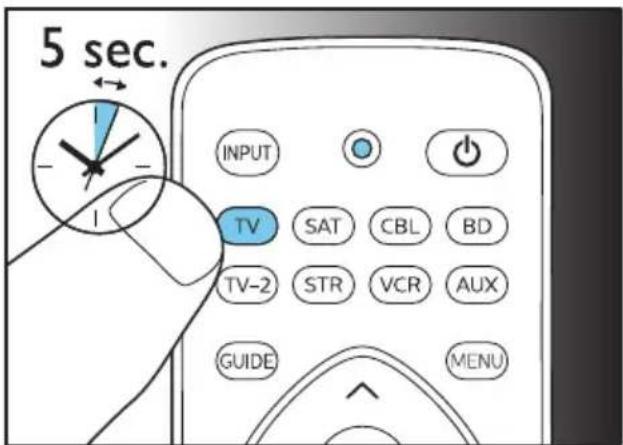
2 Press and hold the device selection button (e.g. TV) for 5 seconds until the red LED is on.
3 Point at your device with the universal remote. Then press and release to start searching the code for your brand. A different infrared signal is sent every 2
seconds as the universal remote searches, indicated by a blue flash.
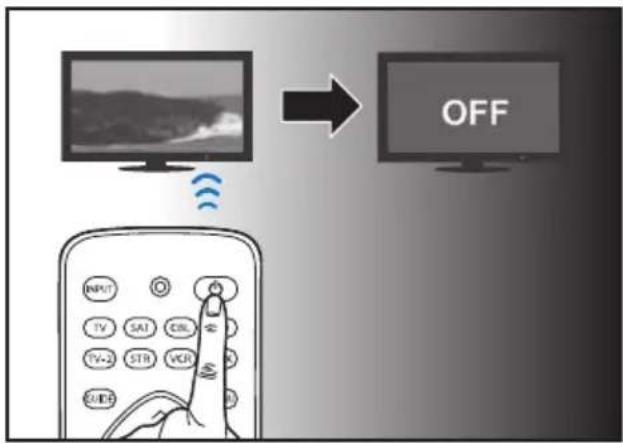
4 When the device is off, immediately press and release OK to save the code. The blue LED indicator will turn off.
![graph TD A["TV monitor"] --> B["OFF"] C["minutes clock"] --> D["remote controller"] D --> E["OK/Cancel按钮"] E --> F["Hand gesture pointing to screen"]](/content/2026/06/1344662/images/8ba96b0ad51d22923412314f305922892091549d1dd5333c16831b07770e0737.jpg)
5 Operate the device with the universal remote. If your device responds correctly, it means you have saved the right code.

Note
- Auto registration can be reversed, by pressing and releasing once more during the auto registration process. This is helpful if you missed out the chance to press OK within 2 seconds. Make sure that the device is first powered on again.
- It is possible sometimes that your device only responds to some of the buttons. In such case, set up with the next code in the code list, and try operating your device again.
3 Use your universal remote control
Learning
You must have an original remote for the Universal Remote Control (URC) to learn code from it.
Learn commands
1 Press and hold the device selection button (e.g. TV) for 5 seconds until the red LED is on.
2 Enter the learning code 99900. The red LED will flash once and then remain on.
3 Place the universal remote control and the remote control of your device on a flat surface, aiming at each other at a distance of 3 to 5 cm apart.
4 Press and release the desired key on the universal remote control which you want the command to be learned. The LED indicator will flash twice then remains on.
5 Press and hold the target key on the remote control of your device for a few seconds.
6 If the LED indicator light flashes once and then remains on, the command has been learned successfully. You can release the key on the remote control of your device. If the LED indicator light flashes six times quickly, it means there's an error in the learning process. Adjust the position of both remote controls and repeat from Step 4 again.
7 Repeat from step 3 to learn other key functions, or press and hold any key for 3 seconds to terminate the learning mode, the LED indicator will go out immediately.

Note
- On Step 4, if no key is selected for more than 15 seconds, the LED indicator will flash six times and the learning mode will exit automatically.
- On Step 5, if no other remote signal is received for more than 30 seconds, the LED indicator will flash six times and then remains on. You will need to select a desired key again for learning as in Step 4 on your universal remote control.
• Each function key will hold only one command, a new command to be learned will automatically replace the previous one.
Clear learned commands
Clear all codes learned for a particular device
1 Press and hold the device selection button (e.g.TV) for 5 seconds until the red LED light is on.
2 Enter the learning code 99910. The red LED light will flash once and then turns off.
All codes learned for the device will be cleared.
Clear all codes learned for the universal remote control
1 Press and hold the device selection button (e.g.TV) for 5 seconds until the red LED light is on.
2 Enter the learning code 99910. The red LED light will remain on briefly, flash twice and then turns off.
→ All codes learned for the universal remote control will be cleared.
4 Notice
Disposal of your old product and battery

Your product is designed and manufactured with high quality materials and components, which can be recycled and reused.
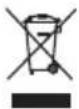
This symbol on a product means that the product is covered by European Directive 2012/19/EU.

This symbol means that the product contains batteries covered by European Directive 2013/56/EU which cannot be disposed of with normal household waste. Inform yourself about the local separate collection system for electrical and electronic products and batteries. Follow local rules and never dispose of the product and batteries with normal household waste. Correct disposal of old products and batteries helps prevent negative consequences for the environment and human health.
Removing the disposable batteries
To remove the disposable batteries, see section 'Insert batteries'.

When this logo is attached to a product, it means a financial contribution has been paid to the associated national recovery and recycling system.
Environmental information
All unnecessary packaging has been omitted. We have tried to make the packaging easy to separate into three materials: cardboard (box), polystyrene foam (buffer) and polyethylene (bags, protective foam sheet.) Your system consists of materials which can be recycled and reused if disassembled by a specialized company. Please observe the local regulations regarding the disposal of packaging materials, exhausted batteries and old equipment.
5 Service and support
You will find our contact details at the end of this user manual. For online support, visit www.philips.com/support
Frequently asked questions
My universal remote does not work at all.
- Check if you have correctly setup the device with the right code. Check if you have pressed the corresponding device key for your device.
- Check if the batteries are inserted properly. If the battery level is low, replace the batteries.
- Check if your device is powered on.
If several device codes are listed under the brand of my device, how can I select the correct device code?
To seek the correct device code, test the codes one by one. The codes are sorted by popularity, and the most popular code is listed first.
My device responds only to some of the commands.
You have set a code for which only some commands work properly but some do not. Try other codes until most keys work properly.
Need help?
We advise you to first read this user manual carefully. It helps you set up and use the universal remote.
If, however, you require extra information or have additional questions about setup, usage, warranty, etc of the SRP2018, you can always contact us.
When calling our helpline, make sure to have the SRP2018 at hand when you call, so that our operators can help you determine whether SRP2018 is working properly.

Specifications are subject to change without notice. Philips and the Philips Shield Emblem are registered trademarks of Koninklijke Philips N.V. and are used under license. This product has been manufactured by and is sold under the responsibility of MMD Hong Kong Holding Limited or one of its affiliates, and MMD Hong Kong Holding Limited is the warrantor in relation to this product.

- USER MANUAL
- CONTENTS
- 1 YOUR UNIVERSAL REMOTE 2
- 2 GET STARTED 3
- 3 USE YOUR UNIVERSAL REMOTE CONTROL 6
- 4 NOTICE 7
- 5 SERVICE AND SUPPORT 8
- 1 YOUR UNIVERSAL REMOTE
- INTRODUCTION
- OVERVIEW OF THE UNIVERSAL REMOTE
- SUPPORTED DEVICES
- DEVICE NAME DESCRIPTION
- 2 GET STARTED
- INSERT BATTERIES (NOT INCLUDED)
- WARNING
- CAUTION
- NOTE
- SET UP THE UNIVERSAL REMOTE
- SET UP BY CODE SELECTION
- AUTO REGISTRATION
- 3 USE YOUR UNIVERSAL REMOTE CONTROL
- LEARNING
- LEARN COMMANDS
- CLEAR LEARNED COMMANDS
- CLEAR ALL CODES LEARNED FOR A PARTICULAR DEVICE
- CLEAR ALL CODES LEARNED FOR THE UNIVERSAL REMOTE CONTROL
- 4 NOTICE
- DISPOSAL OF YOUR OLD PRODUCT AND BATTERY
- REMOVING THE DISPOSABLE BATTERIES
- ENVIRONMENTAL INFORMATION
- 5 SERVICE AND SUPPORT
- FREQUENTLY ASKED QUESTIONS
- NEED HELP
Brand : PHILIPS
Model : SRP4010
Category : Remote control