
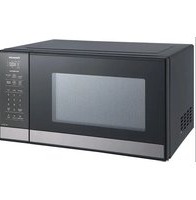
NN-ST34HB - Microwave PANASONIC - Free user manual and instructions
Find the device manual for free NN-ST34HB PANASONIC in PDF.


| Product Type | Microwave Oven |
| Brand | Panasonic |
| Model | NN-ST34HB |
| Capacity | 20 liters |
| Dimensions (W x D x H) | 458 x 365 x 286 mm |
| Weight | 10.2 kg |
| Power Supply | 230 V, 50 Hz |
| Power Consumption | 1200 W |
| Microwave Output Power | 1000 W |
| Inverter Technology | Yes |
| Turbo Defrost | Yes |
| Auto Cook Menus | 13 preset programs |
| Child Lock | Yes |
| Door Opening | Push-button |
| Interior Light | Yes |
| Turntable Diameter | 255 mm |
| Clock and Timer | Digital display |
| Cleaning | Wipe with damp cloth; avoid abrasives |
| Safety Features | Door interlock, auto shut-off |
| Spare Parts Availability | Contact Panasonic support |
| Repairability Index | 7.5/10 (estimated) |
Frequently Asked Questions - NN-ST34HB PANASONIC
User questions about NN-ST34HB PANASONIC
0 question about this device. Answer the ones you know or ask your own.
Ask a new question about this device
Download the instructions for your Microwave in PDF format for free! Find your manual NN-ST34HB - PANASONIC and take your electronic device back in hand. On this page are published all the documents necessary for the use of your device. NN-ST34HB by PANASONIC.
USER MANUAL NN-ST34HB PANASONIC
Operating Instructions
Operating Instructions
Operating Instructions
Microwave Oven
Microwave Oven
Microwave Oven
Household Use Only
Household Use Only
Model No. NN-SM33HM/W NN-SM32HM NN-ST34HM/W

NN-SM33HM

NN-ST34HM


Contents
Important safety instructions.... 2
General guidelines....7
Containers to use 9
Parts of your oven 11
NN-SM33HM/W, NN-SM32HM
Control panel 12
Microwave cooking and defrosting 13
NN-ST34HM/W
Control panel 14
Setting the clock 15
Child safety lock....15
Microwave cooking and defrosting 16
Multi-stage cooking....17
Quick 30 feature 18
Add time feature 18
Using the timer....19
Auto programmes 21
Turbo defrost....21
Autoreheat....22
Auto menu....23
Cooking and reheating guidelines 26
Questions and answers....27
Care of your oven....28
Specifications 29
Thank you for purchasing a Panasonic appliance.
Important Safety Instructions:
Before operating this oven, please read these instructions and precautions carefully and keep for future reference.
Important safety instructions
WARNING
- The door seals and seal areas should be cleaned with a damp cloth. The appliance should be inspected for damage to the door seals and door seal areas and if these areas are damaged the appliance should not be operated until it has been repaired by a service technician trained by the manufacturer.
- Liquids and other foods must not be heated in sealed containers since they are liable to explode.
- WHEN YOUR OVEN REQUIRES SERVICING, call your local Panasonic engineer (Customer Support). It is hazardous for anyone other than a competent person to carry out any service or repair operation which involves the removal of a cover which gives protection against exposure to microwave energy.
CAUTION
- Do not attempt to tamper with or make any adjustments or repairs to the door, control panel housing, safety interlock switches or any other part of the oven. Do not remove the outer panel from the oven which gives protection against exposure to microwave energy. Repairs should only be done by a qualified service person.
- Do not operate this appliance if it has a damaged CORD OR PLUG, if it is not working properly, or if it has been damaged or dropped. It is dangerous for anyone other than a service technician trained by the manufacturer to perform repair service.
- If the supply cord is damaged, it must be replaced by the manufacturer, its service agent or similarly qualified person in order to avoid a hazard.
- This appliance is not intended for use by persons (including children) with reduced physical, sensory or mental capabilities, or lack of experience and knowledge unless they have been given supervision or instruction concerning use of the appliance by a person responsible for their safety. Children should be supervised to ensure that they do not play with the appliance.
- The microwave oven is intended for heating food and beverages. Drying of food, newspaper or clothing and heating of warming pads, slippers, sponges, damp cloth and similar may lead to risk of injury, ignition or fire.
- Before use, check that utensils/containers are suitable for use in microwave ovens.
- The oven will only operate with the door closed.
- When the oven is not being used, do not store any objects other than oven accessories inside the oven in case it is accidentally turned on.
- The appliance shall not be operated WITHOUT FOOD IN THE OVEN. Operation in this manner may damage the appliance.
- If smoke or a fire occurs in the oven, press Stop/Reset and leave the door closed in order to stifle any flames. Disconnect the power cord, or shut off the power at the fuse or the circuit breaker panel.
- The oven lamp must be replaced by a service technician trained by the manufacturer. Do not attempt to remove the outer casing from the oven.
Installation
Examine your microwave oven
Unpack the oven, remove all packing material, and examine the oven for any damage such as dents, broken door latches or cracks in the door. If you find any damage, notify your dealer immediately. Do not install a damaged microwave oven.
Earthing Instructions
IMPORTANT: THIS UNIT HAS TO BE PROPERLY EARTHED FOR PERSONAL SAFETY.
If your AC outlet is not earthed, it is the personal responsibility of the customer to have it replaced with a properly earthed wall socket.
Operation Voltage
The voltage has to be the same as specified on the label on the oven. If a higher voltage than specified is used, it may cause a fire or other damages.
Placement of the oven
This appliance is intended to be used in household and similar applications such as:
- staff kitchen areas in shops, offices and other working environments;
- farm houses; • by clients in hotels, motels and other residential environments; • bed and breakfast type environments.
- Place the oven on a flat and stable surface, more than 85 cm above the floor. The appliance is freestanding type and shall not be placed in a cabinet.
- When this oven is installed, it should be easy to isolate the appliance from the electricity supply by pulling out the plug or operating a circuit breaker.
Important safety instructions
- For proper operation, ensure a sufficient air circulation for the oven.
Counter-top use:
a. Allow 15 cm of space on the top of the oven, 10 cm at the back and on 5 cm both sides. b. If one side of the oven is placed flush to a wall, the other side or top must not be blocked.

- Do not place this oven near an electric or gas cooker range.
- The feet should not be removed.
- This oven is only for household usage. Do not use outdoors.
- Avoid using the microwave oven in high humidity.
- The power cord should not touch the outside of the oven. Keep the cord away from hot surfaces. Do not let the cord hang over the edge of a table or work top. Do not immerse the cord, plug or oven in water.
- Do not block the air vents on the left side and back of the oven. If these openings are blocked during operation the oven may overheat. In this case the oven is protected by a thermal safety device and resumes operation only after cooling down.
- When it becomes necessary to replace the oven light, please consult your dealer.
Accessories
The oven comes equipped with a variety of accessories. Always follow the directions given for use of the accessories.
Roller ring
■ The roller ring and the oven floor should be cleaned frequently to prevent noise and build-up of remaining food. ■ The roller ring must always be used for cooking together with the glass tray.
Glass tray
■ Always operate the oven with the roller ring and glass tray in place. ■ Only use the glass tray specifically designed for this oven. Do not substitute with any other glass tray. ■ If the glass tray is hot, let it cool before cleaning or placing in water. ■ The glass tray can turn in either direction. ■ If the food or cooking vessel on the glass tray touches the oven walls and stops the tray rotating, the tray will automatically rotate in the opposite direction. This is normal. Open oven door, reposition the food and restart. ■ Do not cook foods directly on the glass tray. Always place food in a microwave safe dish. ■ While cooking, the glass tray may vibrate. This will not affect cooking performance.
Important
If the recommended cooking time is exceeded, the food will be spoiled and in extreme circumstances could catch fire and possibly damage the interior of the oven.
Short cooking time
As microwave cooking time is much shorter than other cooking methods, it is essential that recommended cooking time is not exceeded without first checking the food.
Factors that may affect cooking time are: preferred degree of cooking, starting temperature, altitude, volume, size and shape of foods and utensils used. As you become familiar with the oven, you will be able to adjust these factors.
It is better to undercook rather than overcook foods. If food is undercooked, it can always be returned to the oven for further cooking. If food is overcooked, nothing can be done. Always start with minimum cooking time.
Small quantities of food
Take care when heating small quantities of food as these can easily burn, dry out or catch fire if cooked too long. Always set short cooking time and check the food frequently.
Foods low in moisture
Take care when heating foods low in moisture, e.g. bread items, chocolate, popcorn, biscuits and pastries. These can easily burn, dry out or catch on fire if cooked too long. We do not recommend heating foods low in moisture such as popcorn or bread.
This oven has been developed for food use only.
We do not recommend to use for heating non food items such as wheat bags or hot water bottles.
Reheating
It is essential that reheated food is served "piping hot".
Remove the food from the oven and check that it is “piping hot”, i.e. steam is being emitted from all parts and all sauce is bubbling. (You may choose to check the food has reached 72 °C with a food thermometer – but remember do not use this thermometer inside the microwave.)
For foods that cannot be stirred, e.g. lasagne, shepherds pie, the centre should be cut with a knife to test it is well heated through. Even if a manufacturer's packet instructions have been followed always check the food is piping hot before serving and if in doubt return your food to the oven for further heating.
Standing time
Standing time refers to the period at the end of cooking or reheating when food is left before being eaten, i.e. it is a rest time which allows the heat in the food to continue to conduct to the centre, thus eliminating cold spots.
Important safety instructions
Lids
Always remove the lids of jars and containers and takeaway food containers before you microwave the food. If the lid remains, then steam and pressure might build up inside and cause an explosion even after the microwave cooking has stopped.
Babies bottles and food jars
When reheating babies bottles always remove top and teat. Liquid at the top of the bottle will be much hotter than that at the bottom and must be shaken thoroughly before checking the temperature. This should be carried out before consumption to avoid burns. See page 26.
Boiled eggs
Eggs in their shell and whole hard-boiled eggs should not be heated in microwave ovens since they may explode even after microwave heating has ended.
Foods with skins
Potatoes, apples, egg yolk, whole vegetables and sausages are examples of food with non porous skins. These must be pierced using a fork before cooking to prevent bursting.
Paper and plastic
When heating food in plastic or paper containers, keep an eye on the oven due to the possibility of ignition. Do not use wire twist-ties with roasting bags as arcing will occur.
Do not use re-cycled paper products, e.g. Kitchen roll unless they say they are specifically designed for use in a microwave oven. These products contain impurities which may cause sparks and/or fires when used.
Liquids
Microwave heating of beverages can result in delayed eruptive boiling, therefore care should be taken when handling the container. To prevent the possibility of sudden boil the following steps should be taken:
a) Avoid using straight-sided containers with narrow necks. b) Do not overheat. c) Stir the liquid before placing the container in the oven and again halfway through the heating time. d) After heating, allow to stand in the oven for a short time, stirring again before carefully removing the container.
Deep fat frying
Do not attempt to deep fat fry in your oven.
Arcing
Arcing may occur accidentally if a metal container has been used or the incorrect weight of food is used. Arcing is flashes of blue light seen in the microwave oven. If this occurs, stop the machine immediately. If the oven is left unattended and this continues it can damage the machine.
Meat thermometer
Use a meat thermometer to check the degree of cooking of joints and poultry only when meat has been removed from the microwave. If undercooked, return to the oven and cook for a few more minutes at the recommended power level. Do not leave a conventional meat thermometer in the oven when microwaving.
General guidelines
STANDING TIME
Dense foods e.g. meat, jacket potatoes and cakes, require standing time (inside or outside of the oven) after cooking, to allow heat to finish conducting to the centre of the food to cook through completely. Wrap meat joints and jacket potatoes in aluminium foil while standing. Meat joints need approx. 10–15 minutes, jacket potatoes 5 minutes. Other foods such as plated meals, vegetables, fish etc. require 2–5 minutes standing. If food is not cooked after standing time, return to the oven and cook for additional time. After defrosting food, standing time should also be allowed.
QUANTITY
Small quantities cook faster than large quantities, and small meals will reheat more quickly than large portions.
SPACING
Foods cook more quickly and evenly if spaced apart. NEVER pile foods on top of each other.
MOISTURE CONTENT
Many fresh foods e.g. vegetables and fruit, vary in their moisture content throughout the season. For this reason cooking time may have to be adjusted. Dry ingredients e.g. rice, pasta, can dry out during storage so cooking time may differ.
PIERCING
The skin or membrane on some foods will cause steam to build up during cooking.
These foods must be pierced or a strip of skin should be peeled off before cooking to allow the steam to escape. Eggs, potatoes, apples, sausages etc, will all need to be pierced before cooking. DO NOT ATTEMPT TO BOIL EGGS IN THEIR SHELLS.
COVERING
Cover foods with microwave cling film or a lid. Cover fish, vegetables, casseroles, soups. Do not cover cakes, sauces, jacket potatoes or pastry items.
DENSITY
Porous airy foods heat more quickly than dense heavy foods.
General guidelines
CLING FILM
Cling film helps keep the food moist and the trapped steam assists in speeding up cooking time. Pierce before cooking to allow excess steam to escape. Always take care when removing cling film from a dish as the build-up of steam will be very hot.
SHAPE

Even shapes cook evenly. Food cooks better by microwave when in a round container rather than square.
STARTING TEMPERATURE
The colder the food, the longer it takes to heat up. Food from a fridge takes longer to reheat than food at room temperature. Food temperature should be between 5 and 8 °C before cooking.
LIQUIDS

All liquids must be STIRRED BEFORE, DURING AND AFTER heating. Water must be stirred before and during heating, to avoid eruption. Do not heat liquids that have previously been boiled. DO NOT OVERHEAT.
TURNING AND STIRRING
Some foods require stirring during cooking. Meat and poultry should be turned after half of the cooking time.
ARRANGING
Individual foods, e.g. chicken portions or chops, should be placed on a dish so that the thicker parts are towards the outside.
CHECKING FOOD

It is essential that food is checked during and after a recommended cooking time, even if an AUTO PROGRAMME has been used (just as you would check food cooked in a conventional oven). Return the food to the oven for further cooking if necessary.
DISH SIZE

Follow the dish sizes given in the recipes, as these affect the cooking and reheating times.
A quantity of food spread in a bigger dish cooks and reheats faster.
CLEANING
As microwaves work on food particles, keep your oven clean at all times. Stubborn spots of food can be removed by using a microwave spray cleaner, sprayed onto a soft cloth. Always wipe the oven dry after cleaning.
Containers to use
Choosing the correct container is a very important factor in deciding the success or failure of your cooking.
OVEN GLASS
Glass that is heat resistant, e.g. Pyrex®, is ideal, and can be used.
Do not use glass which may crack due to the heat from the food. Do not use lead crystal which may crack or arc.

CHINA AND CERAMIC
Glazed china plates, saucers, bowls, mugs and cups can be used if they are heat resistant.
Porcelain and ceramic are also ideal. Fine bone china should only be used for reheating for short periods of time, otherwise the change in temperature may crack the dish or craze the finish. Do not use dishes with a metal rim or pattern. Do not use jugs or mugs with glued handles, since the glue can melt in a microwave.

POTTERY, EARTHENWARE, STONEWARE
Only use if completely glazed. Do not use if partially glazed or unglazed, as they are able to absorb water which will absorb microwave energy, making the container very hot and slowing down the cooking of food.

FOIL/METAL CONTAINERS
NEVER ATTEMPT TO COOK IN FOIL OR METAL containers – the microwaves cannot pass through and the food will not heat evenly – this may also damage your oven. Use wooden kebab sticks instead of metal skewers.

CLING FILM
Use microwave cling film to cover food that is to be reheated, or cooked, ON MICROWAVE ONLY taking care to avoid the film being in direct contact with the food.

Containers to use
PLASTIC
Many plastic containers are designed for microwave use. Only use containers if they are designed for microwave use. Do not use Melamine as it will scorch. Do not use plastic for cooking foods high in sugar or fat or foods that require long cooking time e.g. brown rice. Never cook in margarine containers or yogurt pots, as these will melt with the heat from the food.


PAPER
Plain white kitchen paper (kitchen towel) can be used for covering blind pastry cases and for covering sausage to prevent splattering ONLY USE FOR SHORT COOKING TIME. NEVER RE-USE A PIECE OF KITCHEN TOWEL. Avoid kitchen paper containing manmade fibers. Check that branded re-cycled kitchen towel is recommended for microwave use. Do not use waxed or plastic coated cups as the finish may melt in the oven. Greaseproof paper can be used to line the base of dishes and to cover fatty foods. White paper plates can be used for SHORT REHEATING TIMES, ON MICROWAVE ONLY.

WICKER, WOOD, STRAW BASKETS
Do not use these items in your microwave. With continued use and with prolonged exposure they will crack and could ignite.

ALUMINIUM FOIL
Small amounts of smooth aluminium foil can be used to SHIELD joints of meat during defrosting. As the microwaves cannot pass through the foil, this prevents the shielded parts from overcooking or overdefrosting. The foil must not touch the sides or roof of the oven, as this may cause arcing and damage your oven.

ROASTING BAGS
These are useful when slit up one side to tent a joint of meat when roasting by power and time. DO NOT USE THE METAL TWISTS SUPPLIED.
Parts of your oven
1. Door handle
Pull to open the door. Opening the door during cooking will stop the cooking process without cancelling the programme. It is quite safe to open the door at any time during a cooking programme and there is no risk of microwave exposure. For NN-SM33HM/W and NN-SM32HM, cooking resumes as soon as the door is closed. For NN-ST34HM/W, cooking resumes after the door is closed and Start is pressed.
- Oven window
- Air vent
- Microwave feed guide (Do not remove.)
- External air vents
- Control panel
- Power supply cord
- Plug
- Glass tray
- Roller ring
- Menu label (NN-ST34HM/W only)

For model with the earth wire
Earth Wire
Must be connected to earth terminal.
Identification and caution labels are attached on the oven.

Note
This illustration is for reference only.
NN-SM33HM/W, NN-SM32HM
Control panel

1 Cooking mode select dial 2 Defrost power 3 Microwave power 4 Time/weight select dial
- Your control panel may have differences in appearance, but the words on the pads and functionality will be the same.
NN-SM33HM/W, NN-SM32HM
Microwave cooking and defrosting
The glass tray must always be in position when using the oven.


Turn the dial to select the desired power level.
Turn the dial to set the cooking time for microwave cooking, or to set the weight of food for defrosting.
For short cooking times, turn the dial past 5 minutes and then adjust to the required time.
For weights less than 0.2 kg, turn the dial past 0.2 kg and then adjust to the required weight.
Power Level Example of Use
| High Boil water. Cook fresh fruit, vegetables, rice, pasta and noodles. | |
| Medium High Cook poultry, meat, cakes and desserts. Heat milk. | |
| Medium | Cook eggs, cheeses, fish, pot roasts, casseroles and meat loaves. Melt chocolate. |
| Defrost Thaw foods. | |
| Low Keep cooked foods warm, simmer slowly. | |
Notes
- If the door is already closed, the oven will start cooking/defrosting immediately.
- If you wish to check the food during cooking, simply open the door. The oven will automatically stop cooking. To continue cooking, close the door.
- To stop cooking, turn the Time/Weight Select dial to the zero position. Cooking time can be reset at any time during the cooking cycle by turning the dial.
- When food is removed from the oven after cooking is complete, check that the Time/Weight Select dial is in the zero position.
- Around half of the defrosting time, turn over the food, remove the defrosted part/food, or shield thin ends/fat/bones of roast with foil. Refer to the Defrosting guidelines on page 21 for details.
NN-ST34HM/W
Control panel

- Your control panel may have differences in appearance, but the words on the pads and functionality will be the same.
Beep sound
When a pad is pressed correctly a beep will be heard. If a pad is pressed and no beep is heard, the unit has not or cannot accept the instruction. The oven will beep twice between programmed stages. At the end of any complete programme, the oven will beep 5 times.
1 Display window
2 Micro Power pad
3 Turbo Defrost pad
4 Auto Reheat pad
5 Time pads
6 Auto Menu pad
7 Timer / Clock pad
8 Up / Down pads for weight setting
9 Add Time pad
10 Quick 30 pad
11 Stop / Reset pad Before Cooking
One press clears your instructions. During Cooking
One press temporarily stops the cooking process. Another press cancels all your instructions and a colon or the time of day will appear in the display.
12 Start pad
One press allows oven to begin operation. If door is opened or Stop/Reset is pressed once during oven operation, Start must be pressed again to restart oven.
Note
If Start is not pressed for 6 minutes after cooking programme setting, the oven will automatically cancel the cooking programme. The display will revert back to clock or colon.
NN-ST34HM/W
Setting the clock
When the oven is plugged in for the first time, "88.88" appears in display.
Example: To set 11:25am
![graph LR A["Timer/Clock"] --> B["Press 11 times. (to set hours)"] B --> C["10 min"] C --> D["Press twice. (to set 10 minutes)"] D --> E["1 min"] E --> F["Press 5 times. (to set 1 minute)"] F --> G["10 sec"] G --> H["Timer/Clock"]](/content/2026/06/1342635/images/8cb0f6becef2830cb9db5696f483684aaa67977978a5a09d033cadb910864eb2.jpg)
Press Timer/Clock twice.
A colon starts to blink.
Enter time of day.
Press Timer/Clock.
The colon stops blinking. Time of day is now locked into the display.
Notes
- To reset the clock, repeat step 1 through to step 3, as above.
- The clock will keep the time of day as long as the oven is plugged in and electricity is supplied.
- This is a 12 hour clock.
NN-ST34HM/W
Child safety lock
This feature will make the oven controls inoperable; however, the door can be opened. Child safety lock can be set when the display shows a colon or the time.
To Set:

Press Start 3 times within 10 seconds.
The clock will disappear. Actual time will not be lost. "Child" is indicated in the display.
To Cancel:

Press Stop/Reset 3 times within 10 seconds.
The clock will reappear in the display.
NN-ST34HM/W
Microwave cooking and defrosting
The glass tray must always be in position when using the oven.


Press Micro Power to select the desired power level.
Set the cooking time.
Your oven can be programmed for up to 99 minutes 50 seconds in Med-high, Medium, Defrost, and Low power. High power can be programmed for up to 30 minutes.
Press Start.
The time counts down in the display.
Press Power Level Example of Use
| once High | Boil water. Cook fresh fruit, vegetables, rice, pasta and noodles. |
| twice Med-high Cook poultry, meat, cakes and desserts. Heat milk. | |
| 3 times Medium | Cook eggs, cheeses, fish, pot roasts, casseroles and meat loaves. Melt chocolate. |
| 4 times Defrost Thaw foods. | |
| 5 times Low Keep cooked foods warm, simmer slowly. | |
Notes
- The oven will automatically work on High microwave power if a cooking time is entered without the power level previously being selected.
- While cooking, the glass tray may vibrate. This will not affect cooking performance.
- For MULTI-STAGE COOKING, refer to page 17.
- STANDING TIME can be programmed after microwave power and time setting. Refer to page 19.
- DO NOT cook with any metal accessory in the oven.
- Always check the food during defrosting by opening the door then restarting. It is not necessary to cover food during defrosting. To ensure an even result, stir, turn or separate several times during defrosting. For large joints and poultry, turn halfway through defrosting and protect ends and tips with foil. Refer to Defrosting guidelines on page 21 for details.
Multi-stage cooking
This feature allows you to programme up to 3 stages of cooking continuously.
Example: To continually set High power for 2 minutes, Medium power for 3 minutes and Low power for 2 minutes.
![graph TD A["Micro Power"] --> B["10 min"] B --> C["1 min"] C --> D["10 sec"] D --> E["Press twice."] F["Micro Power"] --> G["10 min"] G --> H["1 min"] H --> I["10 sec"] I --> J["Press 3 times."] K["Micro Power"] --> L["10 min"] L --> M["1 min"] M --> N["10 sec"] N --> O["Press twice."] P["Micro Powe…](/content/2026/06/1342635/images/8ab0375b85f277ec61da6ca194b49fdbb3752cd561cbdf2ec880888d7582536d.jpg)
![graph LR A["Micro Power"] --> B["10 min"] B --> C["1 min"] C --> D["10 sec"] D --> E["Press twice."]](/content/2026/06/1342635/images/f487cdfe0e1249ce16f6af42c2ebf0b599f7ee05467203fb3ae2dc8bb6b76bd7.jpg)
Press Micro Power once to select High power.
Set the cooking time.
![graph LR A["Press Micro"] --> B["Set the cooking time."] B --> C["Press 3 times."]](/content/2026/06/1342635/images/ca0d02b393a2a40607d3db1b20c0d2936c681fda950a816de6f3d201f11afaa1.jpg)
Press Micro Power twice to select Medium power.
![graph LR A["Micro Power"] --> B["Press twice."] B --> C["10 min"] C --> D["1 min"] D --> E["10 sec"] E --> F["Start"]](/content/2026/06/1342635/images/3a7627f7b30be26cf03c63f5d2fdf9b93961ce0a1e4465642fa9a4d9a43b2f99.jpg)
Press Micro Power 4 times to select Low power.
Set the cooking time.
Press Start. The time for the first stage counts down in the display.
Notes
- AUTO PROGRAMMES cannot be used with MULTI-STAGE COOKING.
- When operating, 2 beeps will sound between each stage, and 5 beeps will sound after all stages have finished.
NN-ST34HM/W
Quick 30 feature
This feature allows you to set cooking time in 30-second increments up to 5 minutes at High power.


Press Quick 30 until the desired cooking time appears in the display.
Press Start.
The time counts down in the display.
Notes
- You can select other power levels if needed. Select the desired power level before pressing Quick 30.
- This function will not operate for 1 minute after manual cooking.
NN-ST34HM/W
Add time feature
This feature allows you to add cooking time during and at the end of cooking.
Example: To add 5 minutes at the end of cooking.
![graph LR A["Add Time"] --> B["10 min"] B --> C["1 min"] C --> D["10 sec"] D --> E["Start"] F["Press 5 times."] --> C](/content/2026/06/1342635/images/aab5a2ece9af2d711f1ae1c958f412e2f99ecace2a3d1e8fc1df54a7e6dc9b85.jpg)
Press Add Time right after cooking.
Set the cooking time. Press Start.
The time counts down in the display.
Notes
- During cooking, set the additional cooking time (1 to 10 minutes) within 5 seconds after pressing Add Time. Time will be added without pressing Start.
- After cooking, ADD TIME can be set up to 30 minutes for High power and 99 minutes 50 seconds for other powers. It will be cancelled if you do not perform any operation for 1 minute after cooking.
- ADD TIME feature can be used after MULTI-STAGE COOKING. The power level is the same as the last stage. This function will not operate if the last stage was standing time.
- ADD TIME feature is not available for AUTO PROGRAMMES.
NN-ST34HM/W
Using the timer
This feature operates as a KITCHEN TIMER or allows you to programme the STANDING TIME/DELAY START.
Kitchen timer
Example: To count 5 minutes.
![graph LR A["Timer/Clock"] --> B["10 min"] B --> C["1 min"] C --> D["10 sec"] D --> E["Start"] F["Press 5 times."] --> C](/content/2026/06/1342635/images/380b7060ebcdc7acbbe2d7409d9ecb65ae10db81220454b5054fa7aaa62725af.jpg)
Press Timer/Clock. Set the desired time. (up to 99 minutes 50 seconds)
Press Start.
The time counts down without the oven operating.
Standing time
Example: To stand for 5 minutes after cooking at Medium power for 3 minutes.
![graph LR A["Micro Power"] --> B["10 min"] B --> C["1 min"] C --> D["10 sec"] D --> E["Press 3 times."]](/content/2026/06/1342635/images/b4291040a2a03579fab9885551b21be75341d287a1647875933ef8657e6cbd11.jpg)
Press Micro Power 3 times to select Medium power. Set the desired cooking time.
![graph LR A["Timer/Clock"] --> B["10 min"] B --> C["1 min"] C --> D["10 sec"] D --> E["Start"] F["Press 5 times."] --> C](/content/2026/06/1342635/images/838223583b8c9361591379c45b18b6d9fb2bed411e316cba8680a491dd4fbf17.jpg)
Press Timer/Clock. Set the desired standing time. (up to 99 minutes 50 seconds)
Press Start.
Cooking starts. After cooking, standing time will count down without operation.
NN-ST34HM/W
Using the timer
Delay start
Example: To start cooking at Medium power for 3 minutes after 5 minutes of standing time.
![graph TD A["Timer/Clock"] --> B["10 min"] B --> C["1 min"] C --> D["10 sec"] D --> E["Press 5 times."] F["Micro Power"] --> G["10 min"] G --> H["1 min"] H --> I["10 sec"] I --> J["Press Start. Delayed time down, then co will start."] K["Press Timer/Clock."] --> L["Set the desired delay time. (up to…](/content/2026/06/1342635/images/77a67aaf5fa7c98a1e11ff82d4a98cac79faf7da0301be781099a06c2c0b081f.jpg)
Notes
- MULTI-STAGE COOKING can be programmed including STANDING TIME and DELAY START.
- Even if the oven door is opened during KITCHEN TIMER, STANDING TIME or DELAY START, the time in the display window will continue to count down.
- STANDING TIME/DELAY START cannot be programmed before/after any AUTO PROGRAMME.
NN-ST34HM/W
Auto programmes
With this feature you can defrost/reheat/cook food according to the weight. Select the category and set the weight of the food. The weight is programmed in kilograms for TURBO DEFROST and in grams for AUTO REHEAT/MENU. The oven determines MICROWAVE power level and cooking time automatically. For quick selection, the weight starts from the most commonly used weight for each category. Do not include the weight of any added water or the container weight.
Notes
- Always operate the oven with the roller ring and glass tray in place.
- The AUTO PROGRAMMES must ONLY be used for foods described.
- Only defrost/cook foods within the weight ranges described.
- Always weigh the food rather than relying on the package information.
- Most foods benefit from a STANDING TIME. After cooking with an AUTO PROGRAMME, allow heat to continue conducting to the centre.
Turbo defrost

Press Turbo Defrost.


Set the weight of the frozen food.
The weight counts up/down in 0.1 kg increments.
Press Start.
The time counts down in the display.
| Food Maximum Weight | |
| Minced meat, chicken pieces, chops 2.0 kg | |
| Beef roast, lamb, whole chicken 2.0 kg | |
| Whole fish, scallops, prawns, fish fillets 1.0 kg | |
Note
The shape and size of the food determine the maximum weight the oven can accommodate.
Defrosting guidelines
For best results:
- Place foods in a suitable container. Meat joints and chicken should be placed on an upturned saucer.
- Check food during defrosting, as foods vary in their defrosting speed.
- It is not necessary to cover the whole food (see point 6).
- Always turn or stir the food especially when the oven "beeps". Shield if necessary (see point 6).
- Minced meat, chops and other small items should be broken up or separated and placed in a single layer.
NN-ST34HM/W
Auto programmes
- Shielding prevents food from cooking. It is essential when defrosting chicken and joints of meat.
The outside thaws out first, so protect wings/breast and fat with smooth pieces of aluminium foil secured with cocktail sticks.
- Allow standing time so that the centre of the food thaws out (minimum of 1 hour for joints of meat and whole chicken).

Arrange food in a single layer.

Turn or break up food as soon as possible.

Shield chicken and joints of meat.
Auto reheat
Press Auto Reheat.

Set the desired food weight.


Press Start.
The time counts down in the display.
Note
As some variations may occur in food, check that food is thoroughly cooked and piping hot before serving.
| Programme Instructions | |
1. AUTO REHEAT 1 press 1 press | Weight: 200/400/600/800 gPrecooked foods are reheated automatically by setting the food's weight. The foods should be at refrigerator temperature (5-8 °C). Use suitable size microwave safe casserole, add 1-4 tbsp of water if desired, and cover with lid. Place the casserole on glass tray. Press Auto Reheat once. Set the weight of the food and press Start. Stir at beeps.Note: When reheating items such as soups, stews, and casseroles, it is recommended that they are stirred at half of reheating time and at completion of reheating. |
Auto menu

Select the desired Auto Menu programme.
The AUTO
PROGRAMME number appears in the display.


Set the desired serving or food weight.

Press Start.
The time counts down in the display.
Note
As some variations may occur in food, check that food is thoroughly cooked and piping hot before serving.
| Programme Instructions | |||
2. CONGEE/PORRIDGE 1 press 1 press | Weight: 50/100/150 g | Rice | Recommended Water |
| 50 g250-4 | 00 ml | ||
| 100 g600-800 ml | |||
| 150 g800-1 | 1000 ml | ||
| Place the rice in a suitable size microwave safe casserole.Add recommended water listed above. Allow at least 1⁄2 depth of volume for evaporation to prevent boiling over.During cooking, partially cover with lid. Place the casserole on glass tray. Press Auto Menu once. Set the weight of the food and press Start. Stir at beeps. | |||
3. INSTANT NOODLE 2 presses 2 presses | Serving:1Serv./2 Serv. | Serving | Recommended Water |
| 1 Serv. 450 | ml | ||
| 2 Serv. 800 | ml | ||
| Place the instant noodle and seasonings in a suitable size microwave safe casserole. Add recommended water listed above. Allow at least 1⁄2 depth of volume for evaporation to prevent boiling over. Cover with lid. Place the casserole on glass tray. Press Auto Menu twice. Set the serving and press Start. Stir at beeps. Stand 1-2 minutes after cooking. | |||
4. DOUBLE BOIL 3 presses 3 presses | Serving:4-6Serv./1-3 Serv. | ServingRecommended Ingredients | |
| 4-6 Serv.400 g meat,300 g root vegetables,800 ml water | |||
| 1-3 Serv.200 g meat,150 g root vegetables,600 ml water | |||
| For cooking traditional soups; herbal soup, birdnest soup,etc., that requires slow simmer or “double boil”. This methodensures food remains tender without losing its shape. It alsoextracts and retains the aromatic flavour of the food. Placeall ingredients in a microwave safe casserole. Addrecommended ingredients listed above. Allow at least 1⁄2depth of volume for evaporation to prevent boiling over.Cover with lid. Place the casserole on glass tray. Press AutoMenu 3 times. Set the serving and press Start. Stir at beeps. | |||
5. VEGETABLES 4 presses 4 presses | Weight:120/180/250/370 gFor cooking all types of leaf, green and soft varieties,including broccoli, squash, cauliflower, cabbage, asparagus,beans, celery, zucchini, spinach, capsicum or a mixture ofthese. Cut all vegetables into the same size pieces. Placevegetables in a suitable size microwave safe casserole. Add2-4 tbsp of water if desired. Cover with lid. Place thecasserole on glass tray. Press Auto Menu 4 times. Set theweight of the food and press Start. Stir at beeps. | ||
6. POTATOES 5 presses 5 presses | Weight:200/400/600 gPierce the potatoes 6 times with a fork. Place in a suitablesize microwave safe casserole. Add 1-3 tbsp of water ifdesired. Cover with lid. Place the casserole on glass tray.Press Auto Menu 5 times. Set the weight of the food andpress Start. Turn over at beeps. | ||
7. CASSEROLE RICE 6 presses 6 presses | Weight:100/200/300 g | Rice Recommended Water | |
| 100 g150 ml | |||
| 200 g300 ml | |||
| 300 g450 ml | |||
| For cooking white rice including short grain, long grain,jasmine rice and basmati rice. Place rice in a suitable sizemicrowave safe casserole. Add recommended water listedabove. Allow at least 1⁄2 depth of volume for evaporation toprevent boiling over. Cover with lid. Place the casserole onglass tray. Press Auto Menu 6 times. Set the weight of thefood and press Start. Stand 5 minutes after cooking. | |||
| Programme Instructions | |||
| 8. FISH7 presses | Weight: 100/200/300/400 gFish R ecommended Water | ||
| 100 g2 tsps water or stock | |||
| 200 g2 tsps water or stock | |||
| 300 g3 tsps water or stock | |||
| 400 g3 tsps water or stock | |||
| For cooking whole fish and fish fillets.Put the prepared fish in a microwave safe dish. Add recommended water listed above. Cover dish securely with plastic wrap. Place the dish on glass tray. Press Auto Menu 7 times. Set the weight of the food and press Start. | |||
| 9. CHICKEN8 presses | Weight: 200/400/600/800 gFor cooking chicken pieces such as wings, drumsticks, thighs, half breasts etc. Pierce the chicken pieces before cooking. Put the prepared chicken pieces in a suitable size microwave safe dish. Add 1-5 tbsp oil if desired. Cover with lid. Place the dish on glass tray. Press Auto Menu 8 times. Set the weight of the food and press Start. Turn at beeps. | ||
Cooking and reheating guidelines
Most foods reheat very quickly in your oven by HIGH power. Meals can be brought back to serving temperature in just minutes.
Always check food is piping hot and return to oven if necessary.
As a general rule, always cover wet foods, e.g. soups, casseroles and plated meals.
Do not cover dry foods e.g. bread rolls, mince pies, sausage rolls, etc.
Remember when cooking or reheating any food that it should be stirred or turned wherever possible. This ensures even cooking or reheating on the outside and in the centre.
MINCE PIES - CAUTION
REMEMBER even if the pastry is cold to the touch, the filling will be piping hot and will warm the pastry through. Take care not to overheat otherwise burning can occur due to the high fat and sugar content of the filling. Check the temperature of the filling before consuming to avoid burning your mouth.
PUDDINGS AND LIQUIDS - CAUTION
Puddings and other foods high in fats or sugar, e.g. jam, mince pies, must not be over heated. These foods must never be left unattended as with over cooking these foods can ignite. Take great care when reheating these items.
Do not leave unattended.
BABIES BOTTLES - CAUTION
Milk or formula MUST be shaken thoroughly before heating and again at the end and tested carefully before feeding a baby.
For 7-8 fl. oz. of milk from fridge temperature, remove top and teat. Heat on HIGH power for 30-50 sec (50-90 sec for NN-SM32HM).
CHECK CAREFULLY BEFORE FEED.
For 3 fl. oz. of milk from fridge temperature, remove top and teat. Heat on HIGH power for 15-20 sec (20-30 sec for NN-SM32HM).
CHECK CAREFULLY BEFORE FEED.
N.B. Liquid at top of bottle will be much hotter than at bottom.
The bottle must be shaken thoroughly and tested before use.
WE DO NOT RECOMMEND THAT YOU USE YOUR MICROWAVE TO STERILISE BABIES' BOTTLES.
If you have a special microwave steriliser, we urge extreme caution, due to the low quantity of water involved. It is vital to follow the manufacturers instructions implicitly.
PLATED MEALS
Everyone's appetite varies and reheat times depend on meal contents. Dense items e.g. mashed potato, should be spread out well.
If a lot of gravy is added, extra time may be required.
Place denser items to the outside of the plate.
Between 2-4 min (3.5-6 min for NN-SM32HM) on HIGH power will reheat an average portion. Do not stack meals.
CANNED FOODS
Remove foods from can and place in a suitable dish before heating.
SOUPS
Use a bowl and stir before heating and at least once through reheat time and again at the end.
CASSEROLES
Stir halfway through and again at the end of heating.
Questions and answers
Q: Why won't my oven turn on?
A: When the oven does not turn on, check the following:
- Is the oven plugged in securely? Remove the plug from the outlet, wait 10 seconds and reinsert.
- Check the circuit breaker and the fuse. Reset the circuit breaker or replace the fuse if it is tripped or blown.
- If the circuit breaker or fuse is all right, plug another appliance into the outlet. If the other appliance works, there probably is a problem with the oven. If the other appliance does not work, there probably is a problem with the outlet. If it seems that there is a problem with the oven, contact an authorised Service Centre.
Q: My oven causes interference with my TV. Is this normal?
A: Some radio and TV interference might occur when you cook with the oven. This interference is similar to the interference caused by small appliances such as mixers, vacuums, blow dryers, etc. It does not indicate a problem with your oven.
Q: Sometimes warm air comes from the oven vents. Why?
A: The heat given off from the cooking food warms the air in the oven cavity. This warmed air is carried out of the oven by the air flow pattern in the oven. There are no microwaves in the air. The oven vents should never be blocked during cooking.
Q: Can I use a conventional oven thermometer in the oven?
A: The metal in some thermometers may cause arcing in your oven and should not be used in a microwave oven.
For NN-ST34HM/W only
Q: The oven won't accept my programme. Why?
A: The oven is designed not to accept an incorrect programme. For example, the oven will not accept a 4th stage.
Care of your oven
- The oven should be unplugged before cleaning.
- Clean the inside of the oven, door seals, and door seal areas regularly. When food splatters or spilled liquids adhere to the oven walls, door seals, and door seal areas, wipe off with a damp cloth. Mild detergent may be used if they get very dirty. The use of harsh detergent or abrasive is not recommended. Avoid cleaning the microwave feed guide area situated on the right-hand side of the cavity wall.
DO NOT USE COMMERCIAL OVEN CLEANERS.
- Do not use harsh, abrasive cleaners or sharp metal scrapers to clean the oven door glass since they can scratch the surface, which may result in shattering the glass.
- The outside oven surface should be cleaned with a damp cloth. To prevent damage to the operating parts inside the oven, water should not be allowed to seep into the ventilation openings.
- If the Control Panel becomes dirty, clean it with a soft cloth. Do not use harsh detergents or abrasives on the Control Panel. When cleaning the Control Panel, leave the oven door open to prevent the oven from accidentally turning on. After cleaning, press Stop/Reset to clear the display window or make sure the Time/Weight select dial is set to the zero position.
- If steam accumulates inside or around the outside of the oven door, wipe with a soft cloth. This may occur when the oven is operated under high humidity conditions and in no way indicates a malfunction of the unit.
- It is occasionally necessary to remove the glass tray for cleaning. Wash the tray in warm soapy water or in a dishwasher.
- The roller ring and oven cavity floor should be cleaned regularly to avoid excessive noise. Simply wipe the bottom surface of the oven with mild detergent and hot water, then dry with a clean cloth. The roller ring may be washed in mild soapy water. Cooking vapors collect during repeated use but in no way affect the bottom surface or roller ring wheels. After removing the roller ring from the cavity floor for cleaning, be sure to replace it in the proper position.
- A steam cleaner is not to be used for cleaning.
- This oven should only be serviced by qualified personnel. For maintenance and repair of the oven, contact the nearest authorized dealer.
- Failure to maintain the oven in a clean condition could lead to deterioration of surfaces that could affect the life of the appliance and possibly result in a hazardous situation.
- Keep air vents clean at all times. Check that no dust or other material is blocking any of the air vents on the top, bottom or rear of the oven. If air vents become blocked this could cause overheating which would affect the operation of the oven and possibly result in a hazardous situation.
Specifications
| Model No. NN-SM32HM NN-SM33HM/W | ||
| Power Source 220 V ~ 50 Hz 220 V ~ 50 Hz | 230-240 V ~ 50 Hz | |
| Power Consumption | 3.6 A 750 W 5.9 A 1270 W 5.5 A 1270 W | |
| Output | 450 W (IEC-60705) | 800 W (IEC-60705) |
| Outside Dimensions | 485 (W) × 400 (D) × 287 (H) mm | |
| Oven Cavity Dimensions | 315 (W) × 349 (D) × 227 (H) mm | |
| Overall Cavity Volume 25 L | ||
| Glass Tray Diameter 288 mm | ||
| Operating Frequency | 2450 MHz | |
| Net Weight 12.7 kg | ||
| Model No. NN-ST34HM/W | |||
| Power Source 220 V ~ 50 Hz | 220 V ~ 60 Hz230 V ~ 60 Hz | 230-240 V ~ 50 Hz | |
| Power Consumption | 5.9 A 1270 W 5.5 A 1270 W | ||
| Output 800 W (IEC-60705) | |||
| Outside Dimensions | 485 (W) × 400 (D) × 287 (H) mm | ||
| Oven Cavity Dimensions | 315 (W) × 349 (D) × 227 (H) mm | ||
| Overall Cavity Volume 25 L | |||
| Glass Tray Diameter 288 mm | |||
| Operating Frequency | 2450 MHz | ||
| Net Weight 12.7 kg | |||
- Weight and Dimensions shown are approximate.
- Specifications subject to change without notice.
- As for the voltage requirement, the production month, country and serial number, please refer to the identification label on the microwave oven.


Table of Contents
Important Safety Measures 2
Operating Instructions 7
Microwave Cooking Utensils 9
Microwave Oven Parts....11
NN-SM33HM/W, NN-SM32HM
Control Panel....12
Microwave Cooking and Defrosting....13
NN-ST34HM/W
Control Panel....14
Setting the clock....15
Child safety lock....15
Microwave cooking and defrosting....16
Multi-stage linked cooking....17
Quick 30-second function....18
Add time function....18
Using the timer....19
Automatic programs....21
Quick defrost....21
Automatic reheating....22
Automatic cooking 23
Cooking and reheating guide....26
Before requesting service....27
Microwave oven maintenance....28
Specifications 29
Thank you for purchasing a Panasonic product.
Important safety measures:
Cover food with microwave cling film or a lid. Can cover
Porcelain and ceramics
Foil/metal containers
Cling film
9
Microwave cooking utensils
Plastic

Paper products
Willow, wood, grass
Aluminum foil
Roasting bags
Ground wire
must be connected to the grounding terminal.
Identification and caution labels are affixed to the microwave oven.
Note
Illustrations are for reference only.
11
EN
NN-SM33HM/W, NN-SM32HM
Control panel

NN-SM33HM/W, NN-SM32HM
Microwave cooking and defrosting


Important safety instructions....2
General guidelines....7
NN-SM33HM/W, NN-SM32HM
Control panel....12
Microwave cooking and defrosting......13
NN-ST34HM/W
Control panel....14
Clock setting....15
IMPORTANT: THIS UNIT MUST BE PROPERLY GROUNDED FOR PERSONAL SAFETY.
Cover food with microwave cling film or a lid. Cover fish, vegetables, casseroles, soups. Do not cover cakes, sauces, jacket potatoes, or pastry items.
DENSITY
CHINA AND CERAMIC
EARTHENWARE, STONEWARE, STONEWARE
FOIL/METAL CONTAINERS
CLING FILM

PAPER
Plain white kitchen paper (kitchen towel) can be used to protect blind pastry cases and to protect sausages to prevent splattering. ONLY FOR SHORT COOKING TIMES. DO NOT REUSE KITCHEN TOWEL SHEETS.
WOVEN, WOOD, STRAW BASKETS
ALUMINIUM FOIL
BEG PANGGANG
Earth wire
Must be connected to the earth terminal.
NN-SM33HM/W, NN-SM32HM
Control panel

1 Cooking mode select dial 2 Defrost power 3 Microwave power 4 Time/Weight select dial
NN-SM33HM/W, NN-SM32HM
Protects poultry and meat joints.
Auto reheat
Auto Reheat 自動電熱
Press Auto Reheat.

© Panasonic Corporation 2017
PN:
F0617-20619
Printed in China
- CONTENTS
- NN-SM33HM/W, NN-SM32HM
- NN-ST34HM/W
- THANK YOU FOR PURCHASING A PANASONIC APPLIANCE
- IMPORTANT SAFETY INSTRUCTIONS
- WARNING
- CAUTION
- INSTALLATION
- EXAMINE YOUR MICROWAVE OVEN
- EARTHING INSTRUCTIONS
- OPERATION VOLTAGE
- PLACEMENT OF THE OVEN
- COUNTER-TOP USE
- ACCESSORIES
- ROLLER RING
- GLASS TRAY
- IMPORTANT
- SHORT COOKING TIME
- SMALL QUANTITIES OF FOOD
- FOODS LOW IN MOISTURE
- REHEATING
- STANDING TIME
- LIDS
- BABIES BOTTLES AND FOOD JARS
- BOILED EGGS
- FOODS WITH SKINS
- PAPER AND PLASTIC
- LIQUIDS
- DEEP FAT FRYING
- ARCING
- MEAT THERMOMETER
- GENERAL GUIDELINES
- MOISTURE CONTENT
- DENSITY
- CLING FILM
- SHAPE
- STARTING TEMPERATURE
- TURNING AND STIRRING
- ARRANGING
- CHECKING FOOD
- DISH SIZE
- CLEANING
- CONTAINERS TO USE
- OVEN GLASS
- CHINA AND CERAMIC
- POTTERY, EARTHENWARE, STONEWARE
- FOIL/METAL CONTAINERS
- PLASTIC
- PAPER
- WICKER, WOOD, STRAW BASKETS
- ALUMINIUM FOIL
- ROASTING BAGS
- PARTS OF YOUR OVEN
- DOOR HANDLE
- CONTROL PANEL
- MICROWAVE COOKING AND DEFROSTING
- NOTES
- BEEP SOUND
- NOTE
- SETTING THE CLOCK
- PRESS TIMER/CLOCK TWICE
- ENTER TIME OF DAY
- PRESS TIMER/CLOCK
- CHILD SAFETY LOCK
- TO SET
- PRESS START 3 TIMES WITHIN 10 SECONDS
- TO CANCEL
- PRESS STOP/RESET 3 TIMES WITHIN 10 SECONDS
- SET THE COOKING TIME
- PRESS START
- MULTI-STAGE COOKING
- QUICK 30 FEATURE
- ADD TIME FEATURE
- USING THE TIMER
- KITCHEN TIMER
- DELAY START
- AUTO PROGRAMMES
- TURBO DEFROST
- DEFROSTING GUIDELINES
- FOR BEST RESULTS
- AUTO REHEAT
- AUTO MENU
- COOKING AND REHEATING GUIDELINES
- MINCE PIES - CAUTION
- PUDDINGS AND LIQUIDS - CAUTION
- BABIES BOTTLES - CAUTION
- PLATED MEALS
- CANNED FOODS
- SOUPS
- CASSEROLES
- QUESTIONS AND ANSWERS
- FOR NN-ST34HM/W ONLY
- CARE OF YOUR OVEN
- TABLE OF CONTENTS
- THANK YOU FOR PURCHASING A PANASONIC PRODUCT
- IMPORTANT SAFETY MEASURES
- PORCELAIN AND CERAMICS
- MICROWAVE COOKING UTENSILS
- PAPER PRODUCTS
- WILLOW, WOOD, GRASS
- ALUMINUM FOIL
- IMPORTANT: THIS UNIT MUST BE PROPERLY GROUNDED FOR PERSONAL SAFETY
- EARTHENWARE, STONEWARE, STONEWARE
- WOVEN, WOOD, STRAW BASKETS
- BEG PANGGANG
Brand : PANASONIC
Model : NN-ST34HB
Category : Microwave