
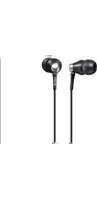
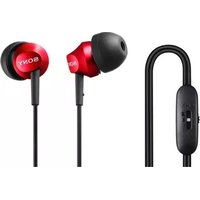
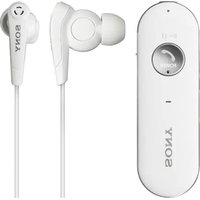
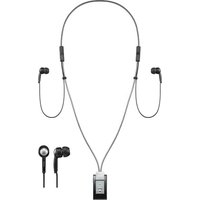
DRC-BT15 - Earphones SONY - Free user manual and instructions
Find the device manual for free DRC-BT15 SONY in PDF.


| Product Type | Bluetooth Earphones (In-Ear) |
| Brand | Sony |
| Model | DRC-BT15 |
| Wireless Technology | Bluetooth 4.0 |
| Dimensions (per earbud) | Approx. 1.5 × 1.5 × 2.0 cm |
| Weight (per earbud) | Approx. 5 g |
| Battery Type | Rechargeable Lithium-Ion |
| Talk Time | Up to 6 hours |
| Standby Time | Up to 100 hours |
| Charging Time | Approx. 2 hours |
| Microphone | Built-in, HD Voice |
| Functions | Music playback, Hands-free calling, Noise isolation |
| Controls | Multi-function button, Volume +/- |
| Compatible Devices | Smartphones, tablets, computers with Bluetooth |
| Cleaning | Wipe with soft dry cloth; avoid moisture |
| Safety Warnings | Do not disassemble; avoid prolonged high volume |
| Spare Parts | Ear tips (S, M, L), USB charging cable |
| Repairability | Battery replacement by service center only |
| Packaging Contents | Earphones, charging cable, silicone ear tips, manual |
Frequently Asked Questions - DRC-BT15 SONY
User questions about DRC-BT15 SONY
0 question about this device. Answer the ones you know or ask your own.
Ask a new question about this device
Download the instructions for your Earphones in PDF format for free! Find your manual DRC-BT15 - SONY and take your electronic device back in hand. On this page are published all the documents necessary for the use of your device. DRC-BT15 by SONY.
USER MANUAL DRC-BT15 SONY
Wireless Audio Receiver
Operating Instructions
To reduce the risk of fire or electric shock, do not expose this apparatus to rain or moisture.
To reduce the risk of electrical shock, do not open the cabinet. Refer servicing to qualified personnel only.
Do not install the appliance in a confined space, such as a bookcase or built-in cabinet.
To reduce the risk of fire, do not cover the ventilation of the apparatus with newspapers, tablecloths, curtains, etc. And do not place lighted candles on the apparatus.
To reduce the risk of fire or electric shock, do not place objects filled with liquids, such as vases, on the apparatus.
Connect the AC power adaptor to an easily accessible AC outlet. Should you notice an abnormality in the AC power adaptor, disconnect it from the AC outlet immediately.
Do not expose the batteries (battery pack or batteries installed) to excessive heat such as sunshine, fire or the like for a long time.
Excessive sound pressure from headphones can cause hearing loss.
Information
This device complies with Part 15 of FCC Rules and RSS-Gen of IC Rules. Operation is subject to the following two conditions: (1) this device may not cause harmful interference, and (2) this device must accept any interference received, including interference that may cause undesired operation of this device.
You are cautioned that any changes or modifications not expressly approved in this manual could void your authority to operate this equipment.
This equipment must not be co-located or operated in conjunction with any other antenna or transmitter.
This equipment complies with FCC/IC radiation exposure limits set forth for uncontrolled equipment and meets the FCC radio frequency (RF) Exposure Guidelines in Supplement C to OET65 and RSS-102 of the IC radio frequency (RF) Exposure rules. This equipment has very low levels of RF energy that it is deemed to comply without testing of specific absorption ratio (SAR).
Note
This equipment has been tested and found to comply with the limits for a Class B digital device, pursuant to Part 15 of the FCC Rules. These limits are designed to provide reasonable protection against harmful interference in a residential installation. This equipment generates, uses and can radiate radio frequency energy and, if not installed and used in accordance with the instructions, may cause harmful interference to radio or television reception, which can be determined by turning the equipment off and on, the user is encouraged to try to correct the interference by one or more of the following measures:
– Reorient or relocate the receiving antenna. – Increase the separation between the equipment and receiver. - Connect the equipment into an outlet on a circuit different from that to which the receiver is connected. - Consult the dealer or an experienced radio/TV technician for help.
The Bluetooth word mark and logos are owned by the Bluetooth SIG, Inc. and any use of such marks by Sony Corporation is under license.
Other trademarks and trade names are those of their respective owners.
MPEG Layer-3 audio coding technology and patents licensed from Fraunhofer IIS and Thomson.
For the customers in the USA
RECYCLING LITHIUM-ION BATTERIES
Lithium-Ion batteries are recyclable.
You can help preserve our environment by returning your used rechargeable batteries to the collection and recycling location nearest you.
For more information regarding recycling of rechargeable batteries, call toll free 1-800-822-8837, or visit http://www.rbrc.org/
Caution: Do not handle damaged or leaking Lithium-Ion batteries.

Informations
What is Bluetooth wireless technology? ...... 4
Welcome! 5
3 steps to Bluetooth function .... 6
Location and Function of Parts....7
Charging the unit ...... 8
Pairing 10
What is pairing? 10
Procedures of pairing .... 10
Wearing the unit ...... 12
Indications of Bluetooth function 14
Listening to music ...... 15
Controlling the audio device – AVRCP 16
Calling 17
Controlling the Bluetooth mobile phone – HFP, HSP ...... 19
Calling while playing back music .... 20
Disposing of the unit ..... 21
Precautions ...... 22
Troubleshooting ...... 24
Initializing the unit ..... 26
Specifications 27
What is Bluetooth wireless technology?
Bluetooth™ wireless technology is a short-range wireless technology that enables wireless data communication between digital devices, such as a computer or digital camera. Bluetooth wireless technology operates within a range of about 10 meters (about 30 feet). Connecting two devices as necessary is common, but some devices can be connected to multiple devices at the same time. You do not need to use a cable for connection, nor is it necessary for the devices to face one another, such is the case with infrared technology. For example, you can use such a device in a bag or pocket. Bluetooth standard is an international standard supported by thousands of companies all over the world, and employed by various companies worldwide.
Communication System and Compatible Bluetooth Profiles of this unit
Profile is standardization of the function for each Bluetooth device specification. This unit supports the following Bluetooth version and profiles:
Communication System : Bluetooth Specification version 2.0 + EDR *1
Compatible Bluetooth Profiles:
– A2DP (Advanced Audio Distribution Profile): Transmitting or receiving audio content of high-quality. - AVRCP (Audio Video Remote Control Profile): Controlling A/V equipment; pausing, stopping, starting playback, volume control, etc. - HSP (Headset Profile) *2 : Talking on the phone/Operating the phone. - HFP (Hands-free Profile)*2 : Talking on the phone/Operating the phone by hands-free.
*1 Enhanced Data Rate
*2 When you use a Bluetooth mobile phone supported by both HFP (Hands-free Profile) and HSP (Headset Profile), set to HFP.
Notes
- To be able to use the Bluetooth function, the Bluetooth device to be connected requires the same profile as the unit's. Note also that even if the same profile exists, devices may vary in function depending on their specifications.
- Due to the characteristic of Bluetooth wireless technology, the sound played on this unit is slightly delayed from the sound played on the Bluetooth device during talking on the telephone or listening to the music.
Welcome!
Thank you for purchasing this Sony Wireless Audio Receiver. This unit uses Bluetooth wireless technology.
- Enjoy music wirelessly from Bluetooth technology-enabled music players, or mobile phones.*1
- Connect your favorite headphones via stereo mini jack (headphones are sold separately).
- Talk hands-free with Bluetooth technology-enabled mobile phones. *2
- Do basic remote control operation (play, stop, etc.) of music player functions via Bluetooth connection. *3
- Bluetooth version 2.0 + EDR (Enhanced Data Rate) for higher quality audio with less interference and lower power consumption.
- Useful rechargeable function.
For details on Bluetooth wireless technology, see page 4.

*1 The connected Bluetooth device is required to support A2DP (Advanced Audio Distribution Profile). *2 The connected Bluetooth device is required to support HFP (Hands-free Profile) or HSP (Headset Profile). *3 The connected Bluetooth device is required to support AVRCP (Audio Video Remote Control Profile).
3 steps to Bluetooth function
Pairing
First, register (“pair”) a Bluetooth device (mobile phone, etc.) and this unit with each other. Once pairing is established, there is no need for pairing again.
Bluetooth mobile phone, etc.
![graph LR A["Device"] --> B["Heart Symbol"] B --> C["Device with Earphone"] C --> D["Wireless Earphone"]](/content/2026/06/1337426/images/1ba47effce856bfbbaabe6f1a88065858a90e1382f65622f7727d36a813a4e8c.jpg)
Pairing
Wireless Audio Receiver
→ Page 10 - 11
Listening to music
Bluetooth connection
Operate the Bluetooth device to make the Bluetooth connection.

Connection
A2DP AVRCP → Page 15
Calling
Bluetooth connection
When the unit is turned on, the unit starts making the Bluetooth connection to the recognized mobile phone automatically.

Connection
HFPHP
→ Page 17 - 18
Listening to music
You can listen to music played on the Bluetooth device.
Playback, stop, or pause is possible from this unit.

→ Page 15 - 16
Talking on the phone
You can make and receive a call by operating this unit.

→ Page 18 - 20
Location and Function of Parts

1 Headphones jack 2 Strap hole 3 Clip hole 4 Indicator (red)
Indicates the power status of the unit.
5 Microphone 6 Multi function button
Controls various call functions.
7 Indicator (blue)
Indicates the communication status of the unit.
8 Jog switch
Controls various functions when listening to music.
Adjust the volume of the unit when talking over the telephone.
9 RESET button 10 Contact point 11 POWER button
Charging the unit
The unit contains a rechargeable Lithium-Ion battery, which should be charged before using for the first time.
1 Connect the supplied AC power adaptor with the battery charging stand.
Battery charging stand (supplied)

2 Connect the supplied AC power adaptor to an AC outlet.
To an AC outlet

Battery charging stand (supplied)
3 Put the unit on the battery charging stand.

Rest the unit on the battery charging stand so that the unit's contact point meets the contact pin on the battery charging stand, and make sure that the indicator (red) lights up.
Charging is completed in about 2.5 hours* and the indicator (red) goes off automatically.
* Time required for empty battery to recharge.
Note
When you attach the strap to this unit, do not let the strap get caught between the unit and the battery charging stand.
Tips
- If the AC power adaptor is connected to an AC outlet while the unit is turned on, the unit will be turned off automatically.
- This unit cannot be turned on while charging.
Caution
If this unit detects a problem while charging, the indicator (red) may turn off, although charging is not complete.
Check for the following causes:
- Ambient temperature exceeds the range of 0°C - 40°C (32 °F - 104 °F). – There is a problem with the battery.
In this case, charge again within the above-mentioned temperature range. If the problem persists, consult your nearest Sony dealer.
Notes
- If the battery is not used for a long time, battery may be quickly depleted, however, after a few recharges, battery life will improve.
- If the life of the built-in rechargeable battery drops to half the normal length, the battery should be replaced. Consult your nearest Sony dealer for replacement of the rechargeable battery.
- Avoid exposure to temperature extremes, direct sunlight, moisture, sand, dust or mechanical shock. Never leave in a car parked in the sun.
- Use only the supplied AC power adaptor. Do not use any other AC power adaptor.
Usage hours*
| Status | Approx. usage hours |
| Communication time (including music playback time) (up to) | 6 hours |
| Standby time (up to) | 100 hours |
* Time stated above may vary, depending on ambient temperature or conditions of use.
Checking the remaining battery
When pressing the POWER button while the unit is turned on, the indicator (red) flashes. You can check the remaining battery by the number of times the indicator (red) flashes.
| Indicator (red) | Status |
| 3 times | Full |
| 2 times | Mid |
| 1 time | Low (needs to charge) |
Note
You cannot check the remaining battery immediately after the unit is turned on, or while pairing.
When the battery is almost empty
The indicator (red) flashes slowly automatically.
When the battery becomes empty, a beep sounds and the unit will turn off automatically.
Pairing
What is pairing?
Bluetooth devices need to be “paired” with each other beforehand.
Once Bluetooth devices are paired, there is no need for pairing again, except in the following cases:
- Pairing information is deleted after repair, etc.
- This unit is paired with 9 or more devices. This unit can be paired with up to 8 devices; if a new device is paired after 8 devices have been paired, the device whose latest connection time is the oldest among the 8 paired devices is replaced by the new one.
- When recognition of the unit by the device to be connected is deleted.
- This unit is initialized (page 26). All pairing information is deleted.
Procedures of pairing
1 Place the Bluetooth device within 1 m (3 ft) of this unit.
2 Press and hold the POWER button for 7 seconds or more to standby for pairing while the unit is turned off.

Notes
• After about 3 seconds, power is turned on and the indicator (blue) and indicator (red) flash together twice. Keep the POWER button pressed without releasing. The indicator (blue) starts flashing. When both indicators start flashing together again, release the button. This unit enters into pairing mode.
- If pairing is not established within about 5 minutes, pairing mode will be cancelled and this unit will turn off. In this case, start over from step 1.
3 Perform pairing procedure on the Bluetooth device to detect this unit.
The list of detected devices appears on the display of the Bluetooth device. This unit is displayed as “DRC-BT15.” If “DRC-BT15” is not displayed, repeat from step 1.
Notes
- For details, refer to the operating instructions supplied with the Bluetooth device.
- When pairing with a Bluetooth device that cannot display a list of detected devices or that has no display, you may pair the device by setting both this unit and the Bluetooth device to pairing mode. At this time, if passcode is set besides “0000” on the Bluetooth device, pairing cannot be done with this unit.
4 Select "DRC-BT15" on the display of the Bluetooth device.
5 If Passcode* input is required on the display of a Bluetooth device, input "0000."
Pairing is complete when the indicator (blue) flashes slowly. The message standing for “Pairing complete” appears on the display of some Bluetooth devices.
* Passcode may be called “Passkey,” “PIN code,” “PIN number,” or “Password.”
6 Start the Bluetooth connection from the Bluetooth device.
This unit memorizes the device as the last connected device. Some Bluetooth devices may connect with the unit automatically when pairing is complete.
Tips
• To pair with other Bluetooth devices, repeat steps 1 to 5 for each device. - To delete all pairing information, see “Initializing the unit” (page 26).
Wearing the unit
When using the clip
1 While pinching the lever at the end of the clip (supplied), hold the clip across the unit as shown, then insert the clip into the clip hole.

2 While pinching the lever, turn the unit counterclockwise.
When the lever is released, the clip is locked to prevent it from coming off.

3 Connect the headphones (not supplied) to this unit.

4 Clip this unit to a pocket, etc., of your clothes and then wear the headphones.
Wear the earphone marked Ⓗ in your left ear, and the one marked Ⓡ in your right ear.

When using the strap
1 Attach the strap (not supplied) to this unit through the strap hole.

2 Connect the headphones (not supplied) to the unit.

3 Place this unit around your neck and then wear the headphones.
Wear the earphone marked Ⓗ in your left ear, and the one marked Ⓡ in your right ear.

Indications of Bluetooth function
B: Indicator (blue)
R: Indicator (red)
| Status Flashing patterns | ||
| Pairing | Searching | B ●-●-●-●-●-●●●...R ●-●-●-●-●●●... |
| Connecting | Connectable | B ●-●-●-●-●-●-●●●...R - |
| Connecting | B ●-●-●-●-●-●-●●●...R ●-●-●-●-●-●●●... | |
| Connected | HFP/HSP or A2DP (standby for receiving audio signal) | B ●- - - - - - ●- - - - ...R - |
| HFP/HSP and A2DP (standby for receiving audio signal) | B ●-●- - - - - ●- ●- ...R - | |
| Music | Listening | B ●- - - - - - ●- - - - ...R - |
| Listening during standby for telephone call | B ●●●- - - - - ●●●- ...R - | |
| Phone | Incoming call | B ●●●●●●●...R - |
| Talking | B ●●- - - - - - ●- - - - ...R - | |
| Calling while playing back music | B ●●●- - - - - - ●●●- ...R - | |
Listening to music

Check the following before operating the unit.
- The Bluetooth device is turned on.
- Pairing of this unit and the Bluetooth device is complete.
- The Bluetooth device supports the transmitting music function (profile: A2DP*).
1 Press and hold the POWER button for about 3 seconds while the unit is turned off.
The indicator (blue) and indicator (red) flash together twice and the unit is turned on.
Notes
- Do not press and hold the POWER button for more than 7 seconds, otherwise pairing mode is entered. • After the unit is turned on, the unit attempts to connect to the last connected Bluetooth device automatically with HFP or HSP.
When not calling with this unit, do not make the last connected Bluetooth device ready for HFP or HSP connection. To make or receive a call while playing back music, see page 20.
2 Make the Bluetooth connection (A2DP) from a Bluetooth device to this unit.
Refer to the operating instructions supplied with the Bluetooth device on how to operate it.
3 Start playback on the Bluetooth device.
Tip
Bluetooth connection of A2DP (Advanced Audio Distribution Profile) can also be operated with the jog switch from this unit to the Bluetooth device except when making a call on this unit.
Notes
- When you play music by connecting the unit to a Bluetooth device using HSP (Headset Profile), sound quality will not be high. For better sound, change the Bluetooth connection to A2DP by operating the Bluetooth device.
- If this unit is turned off while an A2DP Bluetooth connection is established, operate the unit again from step 1 to make the A2DP Bluetooth connection again.
* For detail on profiles, see page 4.
To adjust the volume
Push the jog switch up or down while listening to music to adjust the volume.
Tips
- Depending on the connected device, it may be necessary to adjust the volume on the connected device as well. • Volume for calling and listening to music can be adjusted independently. Even if you change the volume while calling, the volume for music playback does not change.
To stop use
1 Terminate the Bluetooth connection by operating the Bluetooth device.
2 Press and hold the POWER button for about 3 seconds.
The indicator (blue) and indicator (red) light up together, and the unit turns off.
Tip
When you finish playing music, the Bluetooth connection may terminate automatically, depending on the Bluetooth device.
Controlling the audio device – AVRCP
If the Bluetooth audio device connected with this unit supports AVRCP (Audio Video Remote Control Profile), you can control it by using the unit buttons.
Refer to the operating instructions supplied with the Bluetooth device on how to operate it.
Note
Operation of the Bluetooth connecting device by this unit will vary depending on its specification.
Status: In stop or pause mode
| Short Press | Long Press | |
| ▶■ | 1 | 2 |
| |◀◀/▶▶| | 3 | 4 |
①Starts playback* 1 ②Stop ③Skip to next/previous ④Fast-forward/Fast-rewind* 2
Status: In play mode
| Short Press | Long Press | |
| ▶■ | 5 | 6 |
| |◀◀/▶▶| | 7 | 8 |
⑤Pause* 1 ⑥Stop ⑦Skip to next/previous ⑧Fast-forward/Fast-rewind* 2
*1 You may need to press the button twice depending on the Bluetooth device. *2 Some Bluetooth devices may not operate.
Note
You cannot adjust the volume of the Bluetooth device by pushing the jog switch of this unit up or down.
Calling

Multi function button
Check the following before operating the unit.
- The Bluetooth function is active on the mobile phone.
- Pairing of this unit and the Bluetooth mobile phone is complete.
1 Press and hold the POWER button for about 3 seconds while the unit is turned off.
The indicator (blue) and indicator (red) flash together twice, the unit turns on and then this unit tries to connect to the last Bluetooth mobile phone that was used.
Note
Do not press and hold the POWER button for more than 7 seconds, otherwise pairing mode is entered.
Tip
This unit will stop trying to connect to the Bluetooth mobile phone after 1 minute. In such a case, press the multi function button to try to connect again.
When this unit does not connect to a Bluetooth mobile phone automatically
You can make a connection by operating Bluetooth mobile phone or by operating this unit to connect the last connected Bluetooth device.
A To make a connection by operating Bluetooth mobile phone
1 Make the Bluetooth connection (HFP or HSP*) from the Bluetooth mobile phone to this unit.
Refer to the manual supplied with your Bluetooth mobile phone for operation details. The list of recognized devices appears on the display of the Bluetooth mobile phone. This unit is displayed as "DRC-BT15."
When you use the Bluetooth mobile phone features both HFP (Hands-free Profile) and HSP (Headset Profile), set to HFP.
Note
When connecting to a Bluetooth mobile phone which is different from the last connected one, make the connection following the above procedure.
* For details on profiles, see page 4.
BTo make a connection with the last connected Bluetooth device by operating this unit
1 Press the multi function button.
The indicator (blue) and indicator (red) start flashing at the same time, and the unit performs the connection operation for about 5 seconds.
Note
When listening to music with this unit, a Bluetooth connection cannot be made with the multi function button.
To call
1 Use the buttons on your mobile phone when making a call.
If no dial tone is heard on this unit, press and hold the multi function button for about 2 seconds.
Tip
You can call in the following way, depending on the Bluetooth mobile phone. Refer to the manual supplied with your mobile phone on operating details.
- When not communicating, you can make a call using the voice-dial function by pressing the multi function button.
- You can call the last dialed number by pressing the multi function button for about 2 seconds.
To receive a call
When an incoming call arrives, a ring tone will be heard from the unit.
1 Press the multi function button on the unit.
The ring tone differs in the following ways, depending on your mobile phone.
- ring tone set on the unit
- ring tone set on the mobile phone
- ring tone set on the mobile phone only for Bluetooth connection
Note
If you received a call by pressing the button on the Bluetooth mobile phone, some Bluetooth mobile phones may have handset use priority. In this case, set to talk with the unit by pressing and holding the multi function button for about 2 seconds, or by operating the Bluetooth mobile phone. For details, refer to the manual supplied with your Bluetooth mobile phone.
To adjust the volume
Push the jog switch up or down to adjust the volume.
Tips
- You cannot adjust the volume when not communicating. • Volume for calling and listening to music can be adjusted independently. Even if you change the volume while playing back the music, the volume of a call does not change.
To terminate a call
You can end a call by pressing the multi-function button on the unit.
To stop use
1. Terminate the Bluetooth connection from the Bluetooth mobile phone.
2. Press and hold the POWER button for about 3 seconds to turn off the power.
The indicator (blue) and indicator (red) light up together, and the unit turns off.
Controlling the Bluetooth mobile phone – HFP, HSP
The operation of the buttons on this unit varies depending on your mobile phone.
HFP (Hands-free Profile) or HSP (Headset Profile) is used for Bluetooth mobile phone. Refer to the operating instructions supplied with your Bluetooth mobile phone on supported Bluetooth profiles or how to operate.
HFP (Hands-free Profile)
| Status Multi | function button | |
| Short Press | Long Press | |
| Standby | Start Voice Dial*1 | Last number redial |
| Voice Dial active | Cancel Voice Dial*1 | - |
| Outgoing call | End outgoing call | - |
| Incoming call | Answer | Reject |
| During call | End call | Change call device |
HSP (Headset Profile)
| Status Multi | function button | |
| Short Press | Long Press | |
| Standby | - | Dial*1 |
| Outgoing call | End outgoing call*1 | End outgoing call or change call device to headset*2 |
| Incoming call | Answer | - |
| During call | End call*3 | Change call device to headset |
*1 Some functions may not be supported depending on the Bluetooth mobile phone. Refer to the operating instructions supplied with your mobile phone.
*2 This may vary, depending on the Bluetooth mobile phone.
*3 Some functions may not be supported when calling using the Bluetooth mobile phone.
Calling while playing back music
The Bluetooth connection using HFP or HSP as well as A2DP is necessary to make a call while playing back music. For example, to make a call using a Bluetooth mobile phone while listening to music on a Bluetooth compatible music player, this unit needs to be connected to the mobile phone using HFP or HSP.
Make a Bluetooth connection between this unit and the device in use following the procedures outlined below.
1 Make a Bluetooth connection between this unit and the mobile phone in use with HFP or HSP following the procedures outlined in “Calling” (see page 17). 2 Operate the Bluetooth device (music player or mobile phone) used for playing the music to make a Bluetooth connection to this unit using A2DP.
To make a call while playing back music
1 Press the multi function button while playing back music (page 19), or operate your Bluetooth mobile phone to make a telephone call.
If no dial tone is heard on this unit, press and hold the multi function button for about 2 seconds.
To receive a call while playing back music
When an incoming call arrives, the music pauses and the ring tone is heard from this unit.
1 Press the multi function button and talk.
After finishing the call, press the multi function button. This unit is switched back to music playback.
When no ring tone is heard even if an incoming call arrives
1 Stop music playback. 2 When ringing, press the multi function button and talk.
Disposing of the unit
A Lithium-Ion rechargeable battery is built into this unit.
For environmental conservation, be sure to remove the built-in rechargeable battery from the unit before disposing, and dispose of the battery appropriately.
1 Remove the screws (2 pieces) on the back of this unit.

2 Lift the side with the strap hole to remove the cover.

3 Pull out the connector.
Dispose of the rechargeable battery without removing it from the cover.

Rechargeable battery
Note
Do not remove the rechargeable battery from the cover, as the rechargeable battery could be destroyed.
Precautions
On Bluetooth communication
- Bluetooth wireless technology operates within a range of about 10 meters (about 30 feet).
Maximum communication range may vary depending on obstacles (human body, metal, wall, etc.) or electromagnetic environment.
- The antenna is built into the unit as illustrated in the dotted line. The sensitivity of the Bluetooth communication will improve by turning the direction of the built-in antenna to the connected Bluetooth device.
The communication distance shortens when obstacles are between the antenna of the connected device and this unit.
Location of built-in antenna
- The following conditions may affect the sensitivity of Bluetooth communication.
- There is an obstacle such as a human body, metal, or wall between this unit and the Bluetooth device.
- A device using the 2.4 GHz frequency, such as a wireless LAN device, cordless telephone, or microwave oven, is in use near this unit.
- Because Bluetooth devices and wireless LAN (IEEE802.11b/g) use the same frequency, microwave interference may occur, resulting in communication speed deterioration, noise, or invalid connection if this unit is used near a wireless LAN device. In such a case, perform the following.
- Use this unit at least 10 m (about 30 ft) away from the wireless LAN device.
- If this unit is used within 10 m (about 30 ft) of a wireless LAN device, turn off the wireless LAN device.
- Install this unit and the Bluetooth device as near to each other as possible.
- Microwaves emitting from a Bluetooth device may affect the operation of electronic medical devices. Turn off this unit and other Bluetooth devices in the following locations, as it may cause an accident.
- Where inflammable gas is present, in a hospital, train, airplane, or petrol station.
- Near automatic doors or a fire alarm.
- This unit supports security capabilities that comply with the Bluetooth standard to provide a secure connection when Bluetooth wireless technology is used, but security may not be sufficient depending on the settings. Be careful when communicating using Bluetooth wireless technology.
- We do not take any responsibility for the leakage of information during Bluetooth communication.
- Connection with all Bluetooth devices cannot be guaranteed.
- A device featuring Bluetooth function is required to conform to the Bluetooth standard specified by Bluetooth SIG, Inc. and be authenticated.
- Even if the connected device conforms to the above-mentioned Bluetooth standard, some devices may not be connected or work correctly, depending on the features or specifications of the device.
- While talking on the phone hands-free, noise may occur, depending on the device or communication environment.
- Depending on the device to be connected, it may require some time to start communication.
On the supplied AC power adaptor
- Use the AC power adaptor supplied with this unit. Do not use any other AC power adaptor since it may cause the unit to malfunction.

Polarity of the plug
- If you are not going to use this unit for a long time, unplug the AC power adaptor from the AC outlet. To remove the AC power adaptor from the wall outlet, grasp the adaptor plug itself; never pull the cord.
Others
- Do not place this unit in a place exposed to humidity, dust, soot or steam, subject to direct sunlight, or in a car waiting at a traffic signal. It may cause a malfunction.
- Do not use the strap in a place where the strap could be snagged, such as near a shredder or machine equipment.
- Using the Bluetooth device may not function on mobile phones, depending on radio wave conditions and location where the equipment is being used.
- If you experience discomfort after using the Bluetooth device, stop using the Bluetooth device immediately. Should any problem persist, consult your nearest Sony dealer.
- Listening with this unit at high volume may affect your hearing. For traffic safety, do not use this unit while driving or cycling.
- Do not put weight or pressure on this unit as it may cause the unit to deform during long storage.
- If you have any questions or problems concerning this unit that are not covered in this manual, please consult your nearest Sony dealer.
Troubleshooting
If you run into any problems using this unit, use the following checklist and read the product support information on our website.
Should any problem persist, consult your nearest Sony dealer.
Common
The unit is not turned on.
→Charge the battery of the unit. →The unit is not turned on while charging. Remove the unit from the battery charging stand and then turn on the unit.
Pairing cannot be done.
→Bring this unit and the Bluetooth device closer together.
Cannot make the Bluetooth connection.
→Check that this unit is turned on. →Check that the Bluetooth connecting device is turned on and the Bluetooth function is on. →Connection with the Bluetooth device may not be memorized on this unit. Make the Bluetooth connection from the Bluetooth device to this unit soon after pairing is complete. →This unit or Bluetooth connecting device is in sleep mode. →The Bluetooth connection is terminated. Make the Bluetooth connection again (when listening to music: see page 15, when calling: see page 17).
Distorted sound
→Ensure that this unit is not receiving interference from a wireless LAN, other 2.4 GHz wireless device, or microwave oven.
The correspondence distance is short. (Sound skips.)
→If a device that generates electromagnetic radiation, such as a wireless LAN, other Bluetooth device(s), or a microwave oven is nearby, move away from such sources. →Point the antenna of this unit (page 22) towards the Bluetooth device. Make sure no obstacles block the communication.
The unit does not operate properly.
→Reset the unit. Pairing information is not deleted by this operation. Insert a small pin, etc., into the hole, and push until you feel a click.

When listening to music
No sound
→Check that both this unit and the Bluetooth device are turned on. → A2DP Bluetooth connection is not made between this unit and the Bluetooth device. Make an A2DP Bluetooth connection (page 15).
→Check that music is being played back by the Bluetooth device.
→Check that the volume of the unit is not set too low. →Turn up the volume on the connected device if necessary. →Pair this unit and Bluetooth device again (page 10).
Low sound level
→Turn up the volume of this unit. →Turn up the volume on the connected device if necessary.
Low sound quality
→Switch the Bluetooth connection to A2DP (Advanced Audio Distribution Profile) when HSP (Headset Profile) is set.
Cannot make the Bluetooth connection from Bluetooth device to this unit.
→The Bluetooth device is not equipped with SCMS-T content protection*. With the unit turned off, press and hold POWER and ▶■ for about 7 seconds to deactivate the SCMS-T protection. The indicator (blue) flashes once.
* The SCMS-T content protection method is one of the methods to protect the contents transmitted on the Bluetooth wireless technology. This unit can receive the contents protected by this method. Press and hold the POWER button and ▶ again for about 7 seconds to reactivate the SCMS-T content protection method on this unit. The indicator (blue) flashes twice.
Sound skips frequently during playback.
→Reception condition of this unit may have become unstable due to improper matching of the bit-rate setting for the music transmitted from the Bluetooth device and the environment in which this unit is used. *1
Terminate A2DP Bluetooth connection by operating the Bluetooth device. While this unit is turned on, press and hold ▶■ for about 7 seconds to lower the setting of receivable bit rate. *2
*1 Bit rate is a numerical value which represents data transmission volume per second. The higher the bit rate, in general, the better quality the sound will be. This unit can receive high bit rate music but sound skipping may occur depending on the usage environment.
*2 When bit rate setting is completed, the indicator (blue) flashes once. The above operations may not reduce the sound skip depending on the usage environment. To reset to the original setting, press and hold
▶■ again for about 7 seconds. The indicator (blue) flashes twice.
When calling
The recipient's voice cannot be heard.
→Check that both this unit and the Bluetooth mobile phone are turned on. →Check the connection between this unit and the Bluetooth mobile phone. Make a Bluetooth connection (HFP or HSP) again (page 17). →Check that output of the Bluetooth mobile phone is set for this unit. →Check that the volume of the unit is not set too low. →Turn up the volume on the connected Bluetooth mobile phone if necessary. →If you are listening to music using this unit, stop playback, press the multi function button and talk.
Low sound from recipient
→Turn up the volume of this unit. →Turn up the volume on the connected Bluetooth mobile phone if necessary.
Initializing the unit
You can reset this unit to its default (such as volume setting) and delete all pairing information.
1 If this unit is turned on, press and hold the POWER button for about 3 seconds to turn off this unit. 2 Press and hold the POWER button and multi function button together for about 7 seconds.
The indicator (blue) and indicator (red) flash together four times, and this unit is reset to the default setting. All pairing information is deleted.
Specifications
General
Communication System
Bluetooth Specification version 2.0 + EDR (Enhanced Data Rate)
Output
Bluetooth Specification Power Class 2
Maximum communication range
Line of sight approx. 10 m (30 ft) *1
Frequency band
2.4 GHz band (2.4000 GHz - 2.4835 GHz)
Modulation method
FHSS
Compatible Bluetooth Profiles *2
A2DP (Advanced Audio Distribution Profile)
AVRCP (Audio Video Remote Control Profile)
HSP (Headset Profile)
HFP (Hands-free Profile)
Supported Codecs *3
SBC *4, MP3
Supported content protection method
SCMS-T
Transmission range (A2DP)
20 - 20,000 Hz (Sampling frequency 44.1 kHz)
Supplied accessory
AC power adaptor (1)
Battery charging stand (1)
Holding clip (1)
Operating instructions (this book) (1)
Recommended accessories
Headphones: MDR-EX90LP
(not supplied)
*1 The actual range will vary depending on factors such as obstacles between devices, magnetic fields around a microwave oven, static electricity, reception sensitivity, aerial's performance, operating system, software application, etc.
*2 Bluetooth standard profiles indicate the purpose of Bluetooth communication between devices.
*3 Codec: Audio signal compression and conversion format
*4 Subband Codec
Wireless Audio Receiver
Power source
DC 3.7 V: Built-in lithium-ion
rechargeable battery
Dimension (w/h/d) (excluding projection parts and controls)
Approx. 16.8 × 68.5 × 15.5 mm
(1 11/16 × 2 3/4 × 5/8 in.)
Mass (excluding accessories)
Approx. 15 g (0.5 oz)
Headphones output Output jack
Stereo mini jack
Maximum output
20 mW + 20 mW (16 Ω)
Microphone
Type
Electret condenser
Direction characteristic
Omnidirectional
Effective frequency range
100 - 4,000 Hz
Operating temperature
0°C to 45°C (32°F to 113°F)
Design and specifications are subject to change without notice.
WARNING
Index
Pairing
Connection
A2DP
AVRCP
→ Page 15
Making calls
Bluetooth connection
Connection
HFP H P
→ Pages 17 - 18
Listening to music
Notes
If you use the strap
HSP (Headset Profile)
3 Pull the connector.
Rechargeable battery
Note
When listening to music
No sound
A2DP (Advanced Audio Distribution Profile)
AVRCP (Audio Video Remote Control Profile)
HSP (Headset Profile)
HFP (Hands-free Profile)
Supported codecs *3
SBC *4, MP3

- WIRELESS AUDIO RECEIVER
- INFORMATION
- NOTE
- FOR THE CUSTOMERS IN THE USA
- RECYCLING LITHIUM-ION BATTERIES
- INFORMATIONS
- WHAT IS BLUETOOTH WIRELESS TECHNOLOGY
- COMMUNICATION SYSTEM AND COMPATIBLE BLUETOOTH PROFILES OF THIS UNIT
- NOTES
- WELCOME
- STEPS TO BLUETOOTH FUNCTION
- PAIRING
- LISTENING TO MUSIC
- BLUETOOTH CONNECTION
- CALLING
- TALKING ON THE PHONE
- LOCATION AND FUNCTION OF PARTS
- CHARGING THE UNIT
- CONNECT THE SUPPLIED AC POWER ADAPTOR WITH THE BATTERY CHARGING STAND
- CONNECT THE SUPPLIED AC POWER ADAPTOR TO AN AC OUTLET
- PUT THE UNIT ON THE BATTERY CHARGING STAND
- TIPS
- CAUTION
- CHECKING THE REMAINING BATTERY
- WHEN THE BATTERY IS ALMOST EMPTY
- WHAT IS PAIRING
- PROCEDURES OF PAIRING
- PERFORM PAIRING PROCEDURE ON THE BLUETOOTH DEVICE TO DETECT THIS UNIT
- SELECT "DRC-BT15" ON THE DISPLAY OF THE BLUETOOTH DEVICE
- IF PASSCODE* INPUT IS REQUIRED ON THE DISPLAY OF A BLUETOOTH DEVICE, INPUT
- START THE BLUETOOTH CONNECTION FROM THE BLUETOOTH DEVICE
- WEARING THE UNIT
- WHEN USING THE CLIP
- WHILE PINCHING THE LEVER, TURN THE UNIT COUNTERCLOCKWISE
- WHEN USING THE STRAP
- PLACE THIS UNIT AROUND YOUR NECK AND THEN WEAR THE HEADPHONES
- INDICATIONS OF BLUETOOTH FUNCTION
- PRESS AND HOLD THE POWER BUTTON FOR ABOUT 3 SECONDS WHILE THE UNIT IS TURNED OFF
- MAKE THE BLUETOOTH CONNECTION (A2DP) FROM A BLUETOOTH DEVICE TO THIS UNIT
- START PLAYBACK ON THE BLUETOOTH DEVICE
- TIP
- TO ADJUST THE VOLUME
- TO STOP USE
- TERMINATE THE BLUETOOTH CONNECTION BY OPERATING THE BLUETOOTH DEVICE
- PRESS AND HOLD THE POWER BUTTON FOR ABOUT 3 SECONDS
- CONTROLLING THE AUDIO DEVICE – AVRCP
- WHEN THIS UNIT DOES NOT CONNECT TO A BLUETOOTH MOBILE PHONE AUTOMATICALLY
- A TO MAKE A CONNECTION BY OPERATING BLUETOOTH MOBILE PHONE
- MAKE THE BLUETOOTH CONNECTION (HFP OR HSP*) FROM THE BLUETOOTH MOBILE PHONE TO THIS UNIT
- PRESS THE MULTI FUNCTION BUTTON
- TO CALL
- USE THE BUTTONS ON YOUR MOBILE PHONE WHEN MAKING A CALL
- TO RECEIVE A CALL
- PRESS THE MULTI FUNCTION BUTTON ON THE UNIT
- TO TERMINATE A CALL
- CONTROLLING THE BLUETOOTH MOBILE PHONE – HFP, HSP
- CALLING WHILE PLAYING BACK MUSIC
- MAKE A BLUETOOTH CONNECTION BETWEEN THIS UNIT AND THE DEVICE IN USE FOLLOWING THE PROCEDURES OUTLINED BELOW
- TO MAKE A CALL WHILE PLAYING BACK MUSIC
- TO RECEIVE A CALL WHILE PLAYING BACK MUSIC
- WHEN NO RING TONE IS HEARD EVEN IF AN INCOMING CALL ARRIVES
- DISPOSING OF THE UNIT
- PRECAUTIONS
- ON BLUETOOTH COMMUNICATION
- ON THE SUPPLIED AC POWER ADAPTOR
- OTHERS
- TROUBLESHOOTING
- COMMON
- THE UNIT IS NOT TURNED ON
- PAIRING CANNOT BE DONE
- CANNOT MAKE THE BLUETOOTH CONNECTION
- DISTORTED SOUND
- THE CORRESPONDENCE DISTANCE IS SHORT. (SOUND SKIPS.)
- THE UNIT DOES NOT OPERATE PROPERLY
- WHEN LISTENING TO MUSIC
- NO SOUND
- LOW SOUND LEVEL
- LOW SOUND QUALITY
- CANNOT MAKE THE BLUETOOTH CONNECTION FROM BLUETOOTH DEVICE TO THIS UNIT
- SOUND SKIPS FREQUENTLY DURING PLAYBACK
- WHEN CALLING
- THE RECIPIENT'S VOICE CANNOT BE HEARD
- LOW SOUND FROM RECIPIENT
- INITIALIZING THE UNIT
- SPECIFICATIONS
- GENERAL
- COMMUNICATION SYSTEM
- OUTPUT
- MAXIMUM COMMUNICATION RANGE
- FREQUENCY BAND
- MODULATION METHOD
- COMPATIBLE BLUETOOTH PROFILES
- SUPPORTED CODECS
- SUPPORTED CONTENT PROTECTION METHOD
- TRANSMISSION RANGE (A2DP)
- SUPPLIED ACCESSORY
- RECOMMENDED ACCESSORIES
- POWER SOURCE
- DIMENSION (W/H/D) (EXCLUDING PROJECTION PARTS AND CONTROLS)
- MASS (EXCLUDING ACCESSORIES)
- HEADPHONES OUTPUT OUTPUT JACK
- MAXIMUM OUTPUT
- MICROPHONE
- TYPE
- DIRECTION CHARACTERISTIC
- EFFECTIVE FREQUENCY RANGE
- OPERATING TEMPERATURE
- WARNING
- INDEX
- MAKING CALLS
- IF YOU USE THE STRAP
Brand : SONY
Model : DRC-BT15
Category : Earphones