
IAN 111022 - Thermometers AURIOL - Free user manual and instructions
Find the device manual for free IAN 111022 AURIOL in PDF.


| Product Type | Weather Station |
| Model | IAN 111022 |
| Brand | Auriol |
| Dimensions (approx.) | 12 x 8 x 2 cm (main unit) |
| Weight (approx.) | 200 g (main unit) |
| Power Supply | 2 x AAA batteries (not included) |
| Display Type | LCD screen |
| Main Functions | Indoor/outdoor temperature and humidity display, weather forecast, time/date, alarm |
| Outdoor Sensor | Wireless, up to 30 m range |
| Temperature Range | Indoor: 0°C to 50°C; Outdoor: -20°C to 60°C |
| Humidity Range | 20% to 95% RH |
| Maintenance | Clean with a soft dry cloth; avoid liquids |
| Safety | Keep away from heat sources; do not disassemble |
| Spare Parts | Outdoor sensor can be replaced; batteries standard |
| Repairability | Limited; contact customer service for issues |
| Included Accessories | Main unit, outdoor sensor, manual |
Frequently Asked Questions - IAN 111022 AURIOL
User questions about IAN 111022 AURIOL
0 question about this device. Answer the ones you know or ask your own.
Ask a new question about this device
Download the instructions for your Thermometers in PDF format for free! Find your manual IAN 111022 - AURIOL and take your electronic device back in hand. On this page are published all the documents necessary for the use of your device. IAN 111022 by AURIOL.
USER MANUAL IAN 111022 AURIOL
INDOOR AND OUTDOOR THERMOMETER / DIGITAL THERMOMETER
EN
INDOOR AND OUTDOOR THERMOMETER
Operation and Safety Notes

GB / MT Operation and Safety Notes Page 61


- Setting the time
Description of parts ...... Page 63
Technical data ...... Page 63
Scope of supply......Page 64
Safety notes ...... Page 65
Battery Safety Instructions......Page 66
Getting started......Page 68
Inserting / changing the battery...... Page 68
Positioning / installing the device...... Page 69
Mounting the device on a wall......Page 71
Temperature memory ...... Page 72
Setting the time ...... Page 72
Troubleshooting ...... Page 73
Cleaning and Care......Page 74
Indoor / outdoor thermometer
- Introduction
We congratulate you on the purchase of your new device. You have chosen a high quality product. The instructions for use are part of the product. They contain important information concerning safety, use and disposal.
Before using the product, please familiarise yourself with all of the safety information and instructions for use. Only use the unit as described and for the specified applications. If you pass the product on to anyone else, please ensure that you also pass on all the documentation with it.
- Intended use
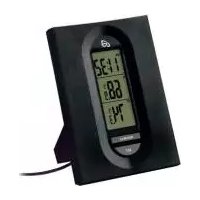
The thermometer measures the inside and outside temperature in Celsius (°C). The main unit is placed indoor, and sensor can be put outdoor. The thermometer also displays the highest and lowest measured temperature
and the time in 24-hour format. The device is not intended for commercial use.
● Description of parts
1 In/outdoor thermometer 2 "TIME" display 3 "IN" indoor temperature display 4 "OUT" outdoor temperature display 5 External sensor 6 "SET" button 7 MIN/MAX button 8 Stand 9 Battery compartment cover 10 Battery compartment 11 Hanger 12 Dowel 13 Screw 14 Self-adhesive pad
- Technical data
Operating voltage: 1.5V (DC)
Power supply: 1 x 1.5 V
AAA
battery (included)
Temperature range: Indoor: -10 °C to
+40 °C
Outdoor: -40 °C to
+60 °C
External sensor lead: approx. 2.8 m
Liquid crystal display: 21 x 50 mm
Scope of supply
Please check the supplied items immediately after unpacking the device to ensure that there is nothing missing and that the product and all of its parts are in perfect condition.
Do not under any circumstances install the product if the delivery scope is incomplete.
1 Indoor/outdoor thermometer, 1 1.5V AAA battery, 1 dowel, 1 screw, 1 self-adhesive pad, 1 operating manual

Safety notes
KEEP ALL THE SAFETY ADVICE AND INSTRUCTIONS IN A SAFE PLACE FOR FUTURE REFERENCE!
This appliance can be used by children aged 8 years and above and persons with reduced physical, sensory, or mental capabilities, or lack of experience and knowledge, if they have been given supervision or instruction concerning use of the appliance in a safe way and understand the hazards involved. Children shall not play with the appliance. Cleaning and user maintenance shall not be made by children without supervision.
Never dismantle the product. Improper repair can cause significant risks to the user. Repairs must always be carried out by a specialist only.
Do not use the device if it is damaged.
Damaged devices represent a danger of death from electric shock!
- Do not expose the device to an extremely high electromagnetic field. This may impair the correct functioning of the device.
- Prevent the housing of the device from rubbing too strongly against textiles. This may result in static charges and affect the results of the measurements. Please note that the guarantee does not cover damage caused by incorrect handling, non-compliance with the operating instructions, or interference with the device by unauthorized individuals.
- Install the external sensor 5 outdoors so that it is not exposed to direct sunlight. Take care that the mains lead is not damaged during installation.
Battery Safety Instructions

CAUTION! RISK OF EXPLOSION!
Never recharge the batteries. Have a spent battery removed from the instrument
immediately. There is an increased risk of leakage.
Batteries must not be disposed of in household waste.
Consumers are under a legal obligation to dispose of batteries in the proper way.
Keep the battery out of the reach of children, do not dispose of the battery in fire, do not short-circuit it, and do not take it apart.
Failure to observe these instructions may result in the battery discharging beyond its end voltage, which poses a risk of leakage. If the battery in your instrument has leaked, have it removed immediately to prevent damage to the instrument.
- Avoid contact with skin, eyes and mucous membrane. In the event of contact with battery acid, rinse the affected area with plenty of water and / or consult a doctor.

CAUTION! TAKE CARE NOT TO DAMAGE THE PRODUCT!
- Only use the stated type of battery. - Make sure that the polarity is correct. - Check the battery regularly for signs of leakage. - Remove the battery if the device is not in use for any length of time. - Do not under any circumstances short-circuit the terminals.
- Getting started
- Remove the protective foil before first use.
- Inserting / changing the battery
- See Fig. B.
- Positioning / installing the device
CAUTION! When choosing a position for the device, make sure that it is not exposed to direct sunlight, vibrations, heat, cold damp or dust. Do not install devices close to heat sources, e.g. radiators. There is otherwise a danger that the device will be damaged.
- Take care that the device is suspended properly if mounted on a wall. If the device falls, it could cause injury or damage to itself or other property. - Place the device on a flat, level surface. - Do not place the device on valuable or sensitive surfaces without suitable protection. The surfaces may otherwise be damaged.
Stand:
Open the stand 8 on the back of the device to support the device.
Wall mount:
Note: you will need a drill for this step.
CAUTION! DANGER TO LIFE, RISK OF INJURY AND DAMAGE TO
PROPERTY! Please read the operating and safety instructions for your drill carefully.
Hold the device on the wall to find a suitable position for installation.
Use a pencil if necessary to mark the required position.
DANGER OF ELECTRIC SHOCK! DANGER OF DAMAGE TO PROPERTY! DANGER OF INJURY! Ensure that
you do not strike electrical cables, gas or water pipes when you are drilling into the wall. If necessary, check the wall using a suitable detector before you drill.
Drill a suitable hole in the wall using an electric drill.
Push a suitable dowel 12 into the hole and screw a screw 13 into the dowel 12. Ensure that the screw 13 is not completely screwed into the dowel 12.
Hang the indoor / outdoor thermometer
from the screw 13. To do this hook the hanger 11 of the indoor / outdoor thermometer on to the screw 13.
- Mounting the device on a wall
Pull the protective foil from one of the sides of the self-adhesive pad 14. Stick the self-adhesive pad 14 on to the back of the device. Pull the protective foil from the other side of the self-adhesive pad 14. Take the device to the desired location and press it carefully on to a wall or other smooth surface.
Note: Wait 24 hours after installation until using the device. This is to allow the self-adhesive pad 14 to achieve an optimum level of adhesion. After installation, do not change the position of the self-adhesive pad 14, otherwise the level of adhesion achieved by the self-adhesive pad could be reduced.
● Temperature memory
Press the MIN / MAX button 7 to show the lowest temperature measured indoors, "IN" 3, and outdoors, "OUT" 4. Press the MIN / MAX button 7 again to display the highest measured temperature. Press the MIN / MAX button 7 again to return to the current temperature.
Note: if the MIN / MAX button is not pressed for 5 seconds, the display automatically reverts to the current temperature.
Note: the stored minimum and maximum temperature is deleted every day at 00:00 hours and measurement begins again.
- Setting the time
Press the "SET" button 6 briefly to begin setting the hour. The hours in the "TIME" display 2 flash. Press the MIN / MAX button 7 to set the hour.
Tip: keep the MIN / MAX button 7 pressed. This allows you to make the settings faster. If you do not press any button for 60 seconds, the LC display automatically reverts to the standard display.
Press the "SET" button 6 briefly again to begin setting the minutes. The minutes in the "TIME" display 2 flash. Press the MIN / MAX button 7 to set the minutes. Press the "SET" button 6 briefly again to confirm the set time.
Note: the set time is also confirmed if no button is pressed in a space of 60 seconds.
Note: the thermometer now displays the current time under "TIME" 2, the inside temperature "IN" 3 and the outside temperature "OUT" 4.
- Troubleshooting
Note: the device contains sensitive electronic components. It is therefore possible that radio
transmission devices in its immediate vicinity may cause interference.
Remove any such device from the vicinity of the indoor / outdoor thermometer if errors occur on the display.
Note: electrostatic discharge may interfere with operation.
In the event of any malfunction, briefly remove the battery and replace it as described under “Inserting / changing the battery”.
● Cleaning and Care
- Do not under any circumstances use corrosive or abrasive cleaning agents. Otherwise the surface of the product can be damaged.
Use a slightly dampened, non-fluffing cloth to clean the product.
- Disposal

The packaging is made entirely of recyclable materials, which you may dispose of at local recycling facilities.
Contact your local refuse disposal authority for more details of how to dispose of your worn-out product.

To help protect the environment, please dispose of the product properly when it has reached the end of its useful life and not in the household waste. Information on collection points and their opening hours can be obtained from your local authority.
Faulty or used batteries must be recycled in accordance with Directive 2006/66/EC and its amendments. Please return the batter-
ies and/or the device to the available collection points.

Environmental damage through incorrect disposal of the batteries!
Batteries may not be disposed of with the usual domestic waste. They may contain toxic heavy metals and are subject to hazardous waste treatment rules and regulations. The chemical symbols for heavy metals are as follows:
Cd = cadmium, Hg = mercury, Pb = lead. That is why you should dispose of used batteries at a local collection point.
- Warranty
The device has been manufactured to strict quality guidelines and meticulously examined before delivery. In the event of product defects you have legal rights against the retailer of this product. Your legal rights are not limited
in any way by our warranty detailed below. The warranty for this device is 3 years from the date of purchase. Should this device show any fault in materials or manufacture within three years from the date of purchase, we will repair or replace it - at our choice - free of charge to you.
The warranty period begins on the date of purchase. Please keep the original sales receipt in a safe location. This document is required as your proof of purchase. This warranty becomes void if the device has been damaged or improperly used or maintained. The warranty applies to faults in material or manufacture. This warranty does not cover product parts subject to normal wear, thus possibly considered consumables (e.g.
batteries) or for damage to fragile parts, e.g. switches, rechargeable batteries or glass parts.
CE
OWIM GmbH & Co. KG
Stiftsbergstraße 1
D-74167 Neckarsulm
Model-No.: Z31482A/Z31482B
Version: 04/2016


- INDOOR AND OUTDOOR THERMOMETER / DIGITAL THERMOMETER
- INDOOR AND OUTDOOR THERMOMETER
- SETTING THE TIME
- SAFETY NOTES ...... PAGE
- GETTING STARTED......PAGE
- CLEANING AND CARE......PAGE
- INDOOR / OUTDOOR THERMOMETER
- INTRODUCTION
- INTENDED USE
- ● DESCRIPTION OF PARTS
- TECHNICAL DATA
- SCOPE OF SUPPLY
- SAFETY NOTES
- KEEP ALL THE SAFETY ADVICE AND INSTRUCTIONS IN A SAFE PLACE FOR FUTURE REFERENCE
- BATTERY SAFETY INSTRUCTIONS
- CAUTION! RISK OF EXPLOSION
- CAUTION! TAKE CARE NOT TO DAMAGE THE PRODUCT
- GETTING STARTED
- POSITIONING / INSTALLING THE DEVICE
- STAND
- WALL MOUNT
- CAUTION! DANGER TO LIFE, RISK OF INJURY AND DAMAGE TO
- DANGER OF ELECTRIC SHOCK! DANGER OF DAMAGE TO PROPERTY! DANGER OF INJURY! ENSURE THAT
- MOUNTING THE DEVICE ON A WALL
- ● TEMPERATURE MEMORY
- TROUBLESHOOTING
- ● CLEANING AND CARE
- DISPOSAL
- ENVIRONMENTAL DAMAGE THROUGH INCORRECT DISPOSAL OF THE BATTERIES
- WARRANTY
- OWIM GMBH & CO. KG
Brand : AURIOL
Model : IAN 111022
Category : Thermometers