
BN1000W - Blender GORENJE - Free user manual and instructions
Find the device manual for free BN1000W GORENJE in PDF.


| Product Type | Blender |
| Brand | Gorenje |
| Model | BN1000W |
| Power Consumption | 1000 W |
| Capacity | 1.5 L |
| Speed Settings | Variable with pulse function |
| Blade Material | Stainless steel |
| Jug Material | Plastic (Tritan) |
| Safety Features | Safety lock, overload protection |
| Dishwasher Safe Parts | Yes (jug, lid, blades) |
| Cord Length | 1 m |
| Weight | 2.5 kg |
| Dimensions (H x W x D) | 400 x 200 x 180 mm |
| Voltage | 220-240 V |
| Frequency | 50/60 Hz |
| Color | White |
| Included Accessories | User manual |
| Warranty | 2 years |
Frequently Asked Questions - BN1000W GORENJE
User questions about BN1000W GORENJE
0 question about this device. Answer the ones you know or ask your own.
Ask a new question about this device
Download the instructions for your Blender in PDF format for free! Find your manual BN1000W - GORENJE and take your electronic device back in hand. On this page are published all the documents necessary for the use of your device. BN1000W by GORENJE.
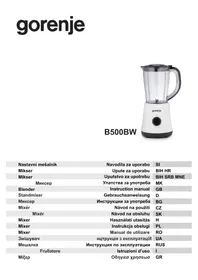
USER MANUAL BN1000W GORENJE
| Navodila za uporabo | SI |
| Uputstva za upotrebu | HR |
| Упутства за употребу | SRB MNE |
| Упатствата за употреба | MK |
| Instruction manual | EN |
| Használati útmutató | HU |
| Instrukcja obsługi | PL |
| Manual de utilizare | RO |
| Návod na obsluhu | SK |
| Návod k obsluze | CZ |
| Нструкція з експлуатації | UA |
| одство по эксплуатации | RU |
| Gebrauchsanweisung | DE |
| Инструкции за употреба | BG |
General description:

Dry grinding:
Add ingredients to the small jug (6). The weight of ingredients for dry grinding must not exceed 120 g. Screw the dry grinding blade (7) onto the jug. Make sure the blade is screwed on properly.

Place the jug with the blade onto the motor unit. The drive unit has a safety switch. If the container is not installed correctly, the appliance will not operate.
Connect the appliance to the electrical mains.


Press the ON/OFF switch. The white light above the switch will start flashing. The appliance is ready for use.
When you press the LOW HIGH switch, the light above the switch turns on, the appliance starts and operates at low speed. Pressing the LOW HIGH switch again increases the rotation speed.
Stop the rotation by pressing the ON/OFF switch.
When you press the PULSE switch, the light above the switch turns on, the appliance starts at high speed and operates for 2 seconds.
- Large jug
- NutriBlade blade
- Motor drive
- Control panel
- Rubber feet
- Small jug
- Dry grinding blade
- Lid latch
- Drinking lid
- Storage lid
Important:
Before using the appliance, read the user manual carefully and keep it for future reference.
Danger


Press the ON/OFF switch. The white light above the button will start blinking. The appliance is ready for use.
- Large pitcher
- NutriBlade blade
- Motor base
- Control panel
- Rubber feet
- Small pitcher
- Dry grinding blade
- Lid lock
- Drinking lid
- Storage lid
Important:
Dry grinding:
Place the required ingredients into the small jug (6). The weight of ingredients for dry grinding must not exceed 120g.
Place the jug with blades onto the drive unit.

Press the ON/OFF button. The white light above the button will start blinking. The appliance is ready for use.
Pressing the LOW HIGH button turns on the light above that button, and the appliance starts operating at a lower speed. Pressing the same LOW HIGH button again increases the blade speed.
Turn off the appliance by pressing the ON/OFF button.
Pressing the PULSE button turns on the light above the button, and the appliance starts operating at a higher speed for 2 seconds.
If you are mixing ingredients with added liquid, the maximum continuous operating time is 1 minute. After that time, wait 1 minute for the appliance to cool down. You may repeat this one-minute interval up to three times. After that, wait 3 minutes for the appliance to cool down!
Dry grinding:

General description:
- Large jug
- NutriBlade blade
- Motor unit
- Control panel
- Rubber feet
- Small jug
- Dry grinding blade
- Lid lock
- Lid with a drinking spout
- Storage lid
Important:
Before using the appliance for the first time, carefully read this instruction manual and save it for future reference.
Danger
Do not immerse the motor unit in water or any other liquid, and do not rinse it under running water, e.g. under a tap.
Warning
Before connecting the appliance to the power mains, make sure the voltage indicated on the bottom of the appliance matches the voltage of the power mains in your home.
Do not use the appliance if the plug, power cord, or any other component is damaged.
If the power cord is damaged, it may only be replaced by Gorenje,
Gorenje's authorized service and repair centre, or an adequately trained professional.
The appliance should not be used by children or persons with impaired physical or psychological skills, or persons with lacking experience and knowledge, unless such persons are supervised or advised by a person responsible for their safety.
Do not let children play with the appliance. Do not leave the appliance to operate unattended.
Never mix carbonated beverages in the appliance. The pressure inside the jug can damage it and cause serious injury.
Do not mix or process hot liquids in the appliance.
If you notice any signs of damage on the appliance, discontinue its use and contact the nearest Gorenje authorized service and repair centre.
Do not put your hands or accessories near the blades.
Do not clean with water hotter than 80°C.
Attention: The appliance is intended solely for personal household use.
Do not use attachments or spare parts by other manufacturers unless they are expressly recommended by Gorenje. In case of use of such attachments or accessories, the warranty shall be void.
Before switching on the appliance, make sure all components are correctly installed.
Make sure the motor unit is dry during appliance operation.
When there is water in the jug, the appliance should not be operated for longer than 1 minute.
When grinding dry ingredients, maximum operating time is 30 seconds.
If the motor stops, disconnect the appliance from the power mains and let it cool down before using it again (at least one hour).
The appliance is not suitable for outdoor use.
Attention: some seeds and stones may release cyanides in the body when ingested.
Before use, always remove the seeds and stones of apples, plums, peaches, cherries, and apricots!
This equipment is labelled in compliance with the European Directive 2012/19/EC on Waste Electric and Electronic Equipment — WEEE. The Directive specifies the requirements for collection and management of waste electric and electronic equipment effective in the entire European Union.
Preparing the appliance for use:
- Remove the packaging.
- Clean the appliance as instructed in the section "Cleaning".
Using the appliance:
Before juicing, thoroughly wash all ingredients.
Cut the ingredients into smaller chunks.
Remove any hard seeds or stones.
NutriMix:
Add the ingredients and liquid of your choice into the large (1) or small (6) jug, up to the MAX marking.
Attach the NutriBlade blade (2) by screwing it onto the jug. Make sure the blade is firmly attached/screwed on.

Dry grinding:
Add the ingredients in the small jug (6). The weight of the dry grinding ingredients should not exceed 120 g.
Attach the dry grinding blade (7) by screwing it onto the jug. Make sure the blade is firmly attached/screwed on.

Place the jug with the blade onto the motor unit.
There is a safety switch on the motor unit. If the jug is not correctly positioned on the motor unit, the appliance will not operate.
Connect the appliance to the power mains.


Press the ON/OFF switch. White light above the switch will start to flash. The appliance is ready for use.
When you press the LOW HIGH switch, the light above the switch will light up and the appliance will start operating at low speed. Press the LOW HIGH switch again to increase the rotation speed.
Switch off the rotation by pressing the ON/OFF switch.
When you press the PULSE switch, the light above the switch will light up and the appliance will operate at high speed for 2 seconds.
When mixing ingredients with liquid, maximum continuous operating time is 1 minute. After one minute, switch off the appliance and wait for 1 minute to let it cool down. Such 1-minute cycle can be repeated up to three times in a row. Then, wait for 3 minutes for the appliance to cool down.
In case of dry grinding (without added liquid), maximum continuous operating time is 30 seconds. After thirty seconds, switch off the appliance and wait for 5 minutes to let it cool down.
After use, switch off the appliance and disconnect it from the power plug.
Only handle the appliance with dry hands.
Tips:
If there are too many ingredients in the jug and you have not added enough liquid, the mixture may be too dense. In such case, the ingredients at the top of the jug cannot sink to the blades at the bottom. In such case, remove the jug with the blade attached from the motor unit and shake it vigorously. Then, replace the jug with the blade onto the motor unit.
Cleaning:
Do not clean the appliance with scouring pads, caustic or corrosive cleaners or aggressive liquids like alcohol, gasoline, or acetone.
Appliance is easier to clean if it is cleaned immediately after use.
Disassemble the appliance by observing the steps for assembly in the opposite order.
Do not immerse the motor unit in water or wash it under a tap. Only use a damp cloth to clean it.
The blades are not dishwasher-safe. Use warm water and detergent for cleaning. Do not remove the gaskets during cleaning. Removing the gasket can lead to damage and leaks.
The jugs can be washed in the upper dishwasher basket at lower temperatures (lower than 80 °C).
Do not clean with metal cleaning accessories as these may damage the appliance.
Environment:
After the expiry of its useful life, do not discard the appliance with common household waste. Take it to an authorized recycling centre. This will help preserve the environment.
Warranty and repair:
For more information or in case of problems, please visit Gorenje website at www.gorenje.com or contact Gorenje customer service in your country (phone numbers are listed in the International Warranty Sheet). If there is no such centre in your country, please contact the local Gorenje dealer or Gorenje's small and innovative domestic appliance department.
GORENJE WISHES YOU A LOT OF PLEASURE IN USING YOUR APPLIANCE.
We reserve the right to modifications.
General description:

Dry grinding:
Dry grinding:


Dry grinding:


Press the ON/OFF button. The white light above the button will start blinking. The appliance is then ready for use.
Dry crushing:

Dry grinding


- GENERAL DESCRIPTION
- DRY GRINDING
- IMPORTANT
- DANGER
- WARNING
- ATTENTION: THE APPLIANCE IS INTENDED SOLELY FOR PERSONAL HOUSEHOLD USE
- PREPARING THE APPLIANCE FOR USE
- USING THE APPLIANCE
- NUTRIMIX
- TIPS
- CLEANING
- ENVIRONMENT
- WARRANTY AND REPAIR
- GORENJE WISHES YOU A LOT OF PLEASURE IN USING YOUR APPLIANCE
- DRY CRUSHING
Brand : GORENJE
Model : BN1000W
Category : Blender