
SR-THB185 - Rice cooker PANASONIC - Free user manual and instructions
Find the device manual for free SR-THB185 PANASONIC in PDF.


User questions about SR-THB185 PANASONIC
0 question about this device. Answer the ones you know or ask your own.
Ask a new question about this device
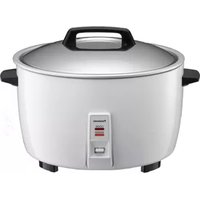
Download the instructions for your Rice cooker in PDF format for free! Find your manual SR-THB185 - PANASONIC and take your electronic device back in hand. On this page are published all the documents necessary for the use of your device. SR-THB185 by PANASONIC.
USER MANUAL SR-THB185 PANASONIC
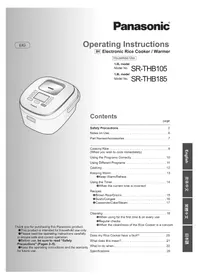
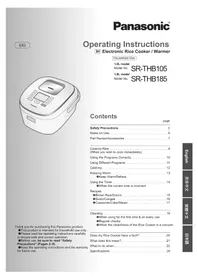
Panasonic®
Operating Instructions
IH Electronic Rice Cooker / Warmer
Household Use
1.0L model
Model No.
SR-THB105
1.8L model
Model No.
SR-THB185
Contents
page
Safety Precautions 2
Notes on Use....6
Part Names/Accessories....7
Cooking Rice....8
(When you wish to cook immediately)
Using the Programs Correctly 10
Using Different Programs 11
Cooking 12
Keeping Warm....13
- Keep Warm/Reheat
Using the Timer....14
●When the current time is incorrect
Recipes
●Brown Rice/Grains 15
●Sushi/Congee 16
●Casserole/Cake/Steam 17
Cleaning 18
●When using for the first time & on every use
● Regular checks
● When the cleanliness of the Rice Cooker is a concern
Does my Rice Cooker have a fault? 20
What does this mean? 21
What to do when.... 22
Specifications 26
Thank you for purchasing this Panasonic product.
● This product is intended for household use only.
- Please read the operating instructions carefully to ensure safe and correct operation.
● Before use, be sure to read "Safety
Precautions" (Pages 2–5).
- Keep the operating instructions and the warranty for future use.
Safety Precautions
Please make sure to follow these instructions
In order to prevent accidents or injuries to the user, other people, and damage to property, please follow the instructions below.
The following charts indicate the degree of damage caused by wrong operation.

WARNING: Indicates serious injury or death.

CAUTION: Indicates risk of injury or property damage.
The symbols are classified and explained as follows.

This symbol indicates prohibition.

This symbol indicates a requirement that must be followed.
WARNING

Do not use the appliance if the power cord or power plug is damaged or the power plug is loosely connected to the power outlet.
If the supply cord is damaged, it must be replaced by a special cord or assembly available from the manufacturer or its service agent.
Do not damage the power cord or power plug.
The following actions are strictly prohibited: damaging, modifying, touching or placing near heating elements, forcefully bending, twisting, pulling, pulling over sharp edges, putting heavy objects on top, bundling, pinching the power cord, and carrying the appliance by the power cord.
(It may cause a fire or electric shock due to damage to the power cord or power plug.)
Do not plug or unplug the power plug with wet hands.
Always ensure that hands are dry before handling the power plug or switching on the appliance. (It may cause an electric shock or injury.)
Do not insert any object into the vent or the gap.
- Especially metal objects such as pins or wires. (It may cause an electric shock, or injury caused by malfunction.)

—Exhaust Vent —Intake Vent
- Do not wash the main body with water, immerse the appliance in water or splash it with water.
(It may cause an electric shock, or fire caused by short circuit.) → Please contact an authorized service center (as described in the Warranty) if water gets inside the appliance.

- Do not modify, disassemble, or repair the appliance.
(It may cause a fire, electric shock or injury.) → Please contact an authorized service center (as described in the Warranty) for a repair.
WARNING

- Do not use the appliance for any purpose other than those described in these instructions.
(It may cause a fire, burn, injury or electric shock.) • Panasonic will not accept any liability if the appliance is subject to improper use, or failure to comply with these instructions.
- Do not get your face close to the Steam Vent or the Steam Cap or touch them with your hand while cooking or immediately after cooking.
- Pay an extra attention to infants. (It may cause a bum.)

Steam Vent
- Do not put anything in the Inner Pan to block the hole in the Inner Lid.
(Steam may leak or cooking contents may jet out, causing a burn or injury.)
• Cooking with the ingredients or seasoning in a plastic bag. • Cooking by using a baking sheet in place of the lid.
Hole in the Inner Lid
- Do not open the Outer Lid or carry the appliance while cooking. (Steam may leak or cooking contents may jet out, causing a burn or injury.)
- Do not let anyone lick the instrument plug. - Pay extra attention to infants. (It may cause an electric shock or injury.)


- This appliance is not intended for use by persons (including children) with reduced physical, sensory or mental capabilities, or lack of experience and knowledge, unless they have been given supervision or instruction concerning use of the appliance by a person responsible for their safety. Children should be supervised to ensure that they do not play with the appliance. (It may cause a burn, injury or electric shock.)
● Use only a power outlet rated at 10 amperes and alternating electric current at 220 volts.
(Plugging other devices into the same outlet may cause electric overheating, which may cause a fire.) • Use only an extended cord rated at 10 amperes at least.
- Insert the instrument plug and the power plug firmly. (It may cause smoking, a fire or electric shock.)
- Clean the power plug regularly. (A soiled power plug may cause insufficient insulation due to the moisture, and lint build-up, which may cause a fire.)
→ Unplug the power plug, and wipe with a dry cloth.
Safety Precautions
Please make sure to follow these instructions
WARNING

● Discontinue using the appliance immediately and unplug when abnormality or breaking down occurs.
(It may cause smoking, a fire or electric shock.) e.g. for abnormality or breaking down; • The power plug and the power cord become abnormally hot. - The power cord is damaged or power failure when is touched. • The main body is deformed or abnormally hot. - Smoke exudes from the main body or a burning odor is detected. • The main body is cracked, is loose or rattles. • The fan in the bottom is not rotating during cooking. → Please contact an authorized service center (as described in the Warranty) for a check or repair immediately.
- Close the Outer Lid firmly until it clicks.
To prevent a burn or injury caused by steam leaking or the opening of the Outer Lid. To ensure that the Outer Lid can be closed, remove foreign objects such as rice grains on the Clear Frame, Packing of Inner Lid, or inner surface of Outer Lid.
Inner surface of
Outer Lid Packing

Clear Frame
- Keep the power cord out of reach of children.
- Do not let the power cord hang over the edge of the table or worktop. (Pulling on the power cord may result in the appliance falling from the table or worktop, causing an injury.)
Always keep the children away from the appliance.
(It may cause a burn, injury or electric shock.)
Children do not realize dangers that are likely to occur because of improper use of electrical appliances.

Beware not to trip over or catch in the power cord while in use. (Otherwise it may result in an injury, or the damaged power cord causing a fire or electric shock.)
Use a power outlet which you are sure includes an earth.
The power plug of this appliance is designed for a power outlet with an earth. (Use of a power outlet without an earth may result in a malfunction or electric shock due to electrical leakage.)
CAUTION

Do not expose the power plug to steam.
- Do not expose the power plug to steam when it is plugged in. (It may cause an electric shock, or fire caused by short circuit.) → When using a cabinet with sliding table, use the appliance where the power plug cannot be exposed to steam.

- Do not use any inner pan other than the specified one, or a deformed inner pan.
(It may cause burns or injury due to overheating or malfunction.)
CAUTION

- Do not touch heating elements while the appliance is in use or after cooking.
- The steam cap, inner lid, and metal parts such as the clear frame near the inner pan may be hot. (It may cause burns.) Use a dry cloth or oven mitts when removing the inner pan while it is hot.
- Do not touch the hook button while moving the appliance.
(It may cause the outer lid to open, resulting in burns.)
- Do not use the appliance in the following places: - Where it may be splashed with water or near a heat source. (It may cause electric shock, electrical leakage, or fire.) - On an uneven surface or on non-heat-resistant carpet. (It may cause injury, burns, or fire.) - Near a wall or furniture. (It may cause discoloration, deformation, or damage.) Open the outer lid in an area where it will not come into contact with surrounding objects such as walls or furniture. - On aluminum sheet or electronic carpet. (Aluminum materials may generate heat and cause smoking or fire.)
- Do not turn on the appliance without rice and water inside. (It may cause burns.)
- Do not use a cord set (for an instrument plug and power plug) that is not specified for use with this appliance. Also, do not transfer it. (It may cause electric shock, electrical leakage, or fire.)

- Be sure to hold the power plug or the instrument plug when unplugging the power plug or the instrument plug.
(Otherwise, it may cause electric shock or fire caused by short circuit.)
● Always switch off and unplug the appliance from the power outlet when it is not in use or before taking out the inner pan. (Otherwise, it may cause burns, injury, electric shock, or fire caused by short circuit due to insulation deterioration.) ● Unplug and allow the appliance to cool down fully before cleaning and storing it. - Do not move the appliance while it is hot. (Touching hot elements may cause burns.) - If using the appliance on a kitchen shelf, etc., ensure that the steam is not confined within a closed space.
(It may cause discoloration or deformation.)
- If using a slide-out shelf, pull the shelf out fully to ensure that the shelf above is not exposed to steam.
- Please consult a doctor if you are using an implanted pacemaker.
• The operation of this appliance may affect your pacemaker.
If the power stops during use
This includes if the power plug is removed, or the power circuit breaker is tripped during use.
- If an instantaneous power cut occurs, the Rice Cooker will return to the state it was in before the power stopped.
- If the power stops for a long period of time, the Rice Cooker will return to the following state when power resumes. Cooking: Continues cooking. Keeping warm: Continues keeping the rice warm.
The rice may be cooked in an unsatisfactory way.
*It will start cooking immediately if the set time of the timer has passed. The rice may not be cooked by the set time. For further details on 'Timer Setting Restriction', see P. 26.
Notes on Use Part Names/Accessories
To keep the Rice Cooker in good condition over the long term, please observe the following.
About the Rice Cooker
■If placing the Rice Cooker on a
slide-out shelf, be sure to check
that it is strong enough to bear
the load.
(If it is not, the Rice Cooker may fall.)
●When adding water and rice to the
Rice Cooker
For 1.0L model, 7 kg approx.
For 1.8L model, 10 kg approx
■Do not cover the top of the Rice
Cooker when it is in use.
●Dishcloths etc.
/ Steam may be confined near the Rice Cooker,
causing deformations of the Outer Lid and buttons
or faults in the display.
■Do not use in a location subject to direct sunlight.
(Doing so may result in discoloration.)
■Do not use in a location (on a carpet, plastic bag,
aluminum foil, fabric etc.) where the bottom of the
Rice Cooker (the intake and exhaust vents) is
restricted.
(Doing so may damage the Rice Cooker.)
■ Periodically check the intake and exhaust vents at
the bottom of the Rice Cooker and then remove any dust etc. (P. 19)


About the Inner Pan
■ Do not use the Inner Pan except in the Rice Cooker.
● Do not use on a gas hob or
X IH hob, or in a microwave.

■ Do not use the Rice Cooker with foreign objects
such as rice grains or other dirt stuck to it
/ Doing so may result in an error message being
displayed, and the rice being burnt or otherwise
cooked in an unsatisfactory way
Brim part or bottom
(Inner Pan)
Pan Sensor
Inner Don

Inner Pan
Support Rubber
(3 places)
■Do not place the Rice Cooker near devices
vulnerable to magnetic fields.
●Radios, televisions, hearing aids etc.
(Noise may be heard or volume levels reduced.)
●IC cards/bank cards etc.
(Records held on the card may be lost or damaged.)
■Do not bring magnets close to the Rice Cooker.
(Doing so may result in faulty operation
■Do not use the Rice Cooker on an IH hob
(Doing so may damage the Rice Cooker or hob.)
Do not use the Rice Cooker outdoors.
Do not use the Rice Cooker outdoors. An unstable power supply may cause the
(An unstable power supply may cause the Rice Cooker to develop a fault
(Ride Deskar to develop E-buit.
Do not strike against hard objects.
(Doing so may scratch or)
dent the outer surface.

Observe the following to prevent peeling or scratching of the inner coating.
During preparation

Do not use a whisk or
other tool when washing the rice.
Do not allow a metal
strainer etc. to contact the internal coating.


When rice is cooked
- Do not mix vinegar with the rice while
it is in the Inner Pan (for sushi etc.).
Do not use a metal ladle (for some etc.)
(for congee etc.).
●Do not tap or hit the Inner Pan (when coming able)
(when serving etc.).
When cleaning (P. 18–19)

not use as a washing-up bowl.
Do not put spoons or other
cutlery into the Inner Pan.
●After cooking with seasoning, do not
leave the food in the Inner Pan.
→After cooking casserole rice etc.
remove it from the Inner Pan as soon as
possible and wash the In
not use a dish dryer or dishwasher/dryer.
●After washing, do not leave
on other crockery to dry.

●Do not wash or scrub with
an abrasive, a metal scourer,
a nylon scourer etc..
→ Wash using a soft sponge.
Do not wash using the scouring pad.
Note
●The following do not affect performance or human health,
[Outer surface] Shallow scratches, small dents or bumps.
[Inner surface] Peeling of inner coating.
→ A new Inner Pan can be purchased from an authorized service center (as described in the Warranty)
if the Inner Pan has changed shape or you are concerned about the condition of the Inner Pan.
■Before using the Rice Cooker for the first time, please wash the accessories, Inner Pan, Inner Lid and Steam Cap. (P. 18–19)
Inner Lid
●The Outer Lid cannot be
closed if the Inner Lid
has not been attached
Lid Sensor
Inner Lid Release Lever
Outer Lid
Steam Cap (Taste Catcher)
Display

Inner Pan

Hook Button
●Press the Hook Button to open the
Outer Lid
●If the protective film on the surface
starts to peel off, please remove it.

Instrument Plug
Cord Set
Accessories

Measuring Cup
(Approx. 180mL)

Steaming Basket Rice Scoop Holder
Holder

Rice Scoop Ladle

Attaching the Rice Scoop Holder
Attach the Rice
Scoop Holder to
the Indented
section of the
Handle
Insert the Rice
Scoop.

● It can be attached to the left or right side.
Note
● As an aid for the visually impaired, the "Start" and "Cancel/Off" buttons have raised parts: * ●* and * ■*.
Cooking Rice When you wish to cook immediately
Washing the rice and adding water Setting up
Cooking
Measure the rice
● Measure by levelling off in the supplied measuring cup. (Approx. 180 mL/cup)

Wash the rice
① First, add plenty of water, stir, and quickly throw away the water.
② Repeat this process 2 to 5 times, stirring gently to wash the rice each time.
(The water for cooking can be stayed a little white.)

Precaution
● Do not leave the rice in a strainer for any length of time.
The rice grains may break, causing the rice to stick or burn when cooked.

Add water
- Add water up to the mark (Water Level) for the desired cooking program. (P. 10)
Ensure that the Inner Pan is on a level surface and check the marks on both sides.

- Add the correct amount of water for the number of cups of rice. Adjust water by approximately 1 to 2 mm from the Water Level according to your preference.
(Adding too much water may prevent rice cooking properly.) - Use a little less water than indicated for new-crop rice.
- Use a little less water than indicated for firmer rice and a little more water than indicated for softer rice.
- Ensure the rice is even. - Soaking the rice is not required. (When the "Start" button is pressed, the water will be absorbed automatically.)
Using the "White Rice/Delicious" program with 3 cups of rice

The Inner Pan in the illustration is the 1.0L model.
4 Set the Inner Pan evenly
(Check that it is not tilted)
- Wipe away any water etc. on the outside of the Inner Pan. - Check that the Inner Lid and Steam Cap are set in place. (P. 18–19)

5 Insert the Power Plug
● Please connect the Instrument Plug to the body first and then connect the Power Plug. Make sure that both plugs are firmly connected.

6 Check the program and press the "Start" button
By default, rice is set as "White Rice" and menu is set as "Delicious" at the time of purchase. When changing (P. 11)

Cooking starts.
- When the buzzer sounds after cooking, the steaming stage has finished. Mix the rice immediately. (This is to allow excess moisture to evaporate.)

Measure out the water
and rice correctly.

Wash the rice gently.
Heavy-handed washing of the rice can result in the grains splitting, causing the rice to stick or burn.

Use suitable water.
We recommend the use of tap water or filtered tap water.
- Use of alkaline water (with a pH higher than 9) may result in sticky or yellow-colored rice. - Use of hard mineral water (with hardness of 100 or above) may result in dry or hard rice.

Things to look out!
- Where possible, choose recently processed rice. - After opening a bag of rice, use it promptly. - Keep rice in the fridge.
Using the Programs Correctly
![graph TD A["Program"] --> B["Rice Select"] A --> C["Menu Select"] A --> D["Water Level"] A --> E["Cooking time (approx.)"] B --> F["Best flavor"] B --> G["Regular cooking"] B --> H["Quick cooking"] B --> I["Cook small amount"] B --> J["Cook sushi rice"] B --> K["Cook congee"] B --> L["Cook casserole…](/content/2026/06/1330083/images/c6a6f617d0c368fcbb42e702c2572445f6f110e16e5eec3dc8c31986b1f48c00.jpg)
*Adjust the amount of water to suit kinds of grains or your taste. ●The rice cooking time may vary depending on the type and amount of rice being cooked.
●Do not mix brown and white rice. (The two kinds of rice will not cook properly.)
Using Different Programs
●For "Cake", "Steam" (P. 12)

● To cancel an operation
1 Select a type of rice
Press

The option is selected when it is flashing.

For "White Rice",
2 Select a menu Press
Set *▲* to a menu.

●To cook "Congee".
Set the cooking time.

Allowable timer setting Unit
1 h 00 min-4 h 00 min 30 min
3 Press the "Start" button Flashing
Cooking starts.

- When the buzzer sounds after cooking, the steaming stage has finished. Mix the rice immediately.
(This is to allow excess moisture to evaporate.)
Notes
● "White Rice" setting is stored. ("Delicious" and "Regular" menu settings will also be stored) ● "Clean" will be displayed after "Menu Select" has been pressed through a cycle. - To make it easier to distinguish between decision points (for instance, the "Menu Select" button being at "Delicious"), the beeping sound has been changed to "beep-beep". ●From the point that the cooking starts, the Rice Cooker displays the time until the rice is ready. Note that for the "Quick", "Brown Rice" and "Grains" settings, the Rice Cooker will display the current time until approximately 10 minutes before the rice is ready. It will then switch to show the time until the rice is ready.

●To redo an operation
Set "▼" to a cooking menu.
Bake a cake: "Cake"
Steam : "Steam"
2 Set the cooking time Press Cooking Time
| Menu Allowable timer setting Unit | |
| Cake 40 min-60 min 1 min | |
| Steam 1 min-60 min 1 min |
* Countdown of the steam setting time begins when the Rice Cooker starts releasing steam.
3 Press the "Start" button Flashing


- When cooking finishes, the Rice Cooker automatically switches to the keep warm function, so please turn off the Rice Cooker.

Note
Available capacity
| Menu | Model | |
| 1.0L 1.8L | ||
| Cake Dough Max 600 g Dough Max 900 g | ||
| Steam Quantity of water500 mL | Quantity of water600 mL | |
How to use the Steaming Basket
| Steaming Basket |
| Water |
Precautions
When steaming.
- Please do not block the hole in the Inner Lid with ingredients.
After cooking.
●Do not use the keep warm function.
(It may cause odor, rot or rusting the Inner Lid.)
●The inner surface of the Outer Lid and the vicinity of the Inner Pan will be hot after cooking, so please be careful when removing cooked food.
- When the Outer Lid is opened after cooking, water droplets may drop from the Inner Lid onto the Clear Frame.
→ Wipe these away with a well-wrung cloth. ●Always wash the Inner Lid and the Steam Cap. Wipe the inner surface of the Outer Lid, the attaching portion of the Steam Cap and the Packing. When cooking recipes with a high meat content, the fats and proteins of the meat can contaminate the Inner Lid and inner surface of the Outer Lid.
(It may cause odor, rot or rusting the Inner Lid.)
Keeping Warm
Keep Warm (Automatic)
- Once cooking finishes, programs automatically switch to the keep warm function. (Please mix the rice immediately after cooking ends.)

●To reheat from the keep warm state
●To return to the keep warm state
| ●Delicious●1-2 Person | ●Regular●Sushi | ●Quick | |
| The Rice Cooker will switch automatically to the keep warm function, but we do not recommend this. | ●CongooIf congee is kept warm, it may become very sticky. | ||
| ●CasseroleUse of the keep warm function can also cause the Inner Lid to rust, adversely affect the flavor of the rice. | |||
| ●Brown Rice●GrainsFlavor can be adversely affected. | |||
| ●Cake●SteamIt may cause odor, rot or rusting the Inner Lid. | |||
Precautions
●Do not use the keep warm function for more than 12 hours.
●To prevent odor and condensation during the keep warm state:
Do not cancel the keep warm function or remove the Power Plug while leaving the rice in the Rice Cooker.
● to prevent odor:
Do not use the keep warm function with the Rice Scoop still in the Rice Cooker.
Notes
- A keep warm time of up to 23 hours is displayed in 1 hour units ("0" is displayed for times of less than 1 hour). - After 24 hours, the display returns to the current time.
Reheat (Manual)
●Rice to be heated to high temperature from the keep warm state.

Notes
●Reheat cannot be used in the following situations. - When the rice is cold (buzzer beeps 4 times). - When the keep warm function is not in use.
●Reheating two or more times will adversely affect the flavor of the rice.
2 Press the "Reheat/Keep Warm" button Lighting


Flashing (Approx. 5 min–7 min)
Reheat starts

- When the buzzer sounds, mix the rice immediately. The rice is now ready to be eaten.
Using the Timer

Timer
● Two timers can be set. (These are stored until changed.) You may find it convenient to store often used times, using, for example, "Timer 1" for breakfast and "Timer 2" for your evening meal.
For example: Setting to 7:30 am
1 Check that the current time is correct - If the time is incorrect, set it by following the procedure on the right.
Check the program
(Set to desired program. Step 1–2 on P. 11)
Select "Timer 1" or "Timer 2"
3
Press
●Each press of the button changes the selection.

Flashing
4 Set the time at which the rice is to be ready

Forward (units of 10 min)

Back (units of 10 min)
●Hold down to cycle through time faster.
Flashing
5 Press the "Start" button Flashing


Setting ends.

- When the buzzer sounds after cooking, the steaming stage has finished. Mix the rice immediately. (This is to allow excess moisture to evaporate)
When the current time is incorrect
●The time is displayed in 24 hour clock format. 1 Insert the Power Plug
1
Hold down ▲ for 1 Broad corner
hold down all for 1 second or more
●Release your finger when you hear a "beep".
Flashing
Set the time
Δ-Forward (units of 1 min)

●Hold down to cycle through time faster.

When the flashing stops, the time is set.
●The time cannot be set in use such as cooking/the keep warm state/the timer setting. ●When the lithium battery runs down, removing the Power Plug will result in the loss of stored data such as the current time and timer settings. (P. 20) ●The lithium battery is fixed inside the main body and cannot be replaced by the user. For a replacement of lithium battery, please consult an authorized service center (as described in the Warranty).
■ To see the current time after setting the timer.
Lighting

●Press and hold to display.
Notes ● If there is insufficient time for the timer setting, the timer will not allow the setting, and cooking will start immediately. (See "Timer Setting Restriction" on P. 26.)
●The timer cannot be used with the "Quick", "Casserole", "Cake" or "Steam" program.
- If the timer setting is 13 hours or longer (8 hours or longer when the water temperature is high), the rice may ferment, then generate undesirable odor.
- When cooking with the timer, the time until the rice is ready is not displayed.
- When cooking with the timer, the rice may absorb excess water. This can result in the rice becoming soft or burnt.
→ Reduce the amount of water slightly if the rice is soft.
(Reduce water by approximately 1 to 2 mm from the Water Level.)
Brown Rice/Grains
Brown Rice
Ingredients (Serves 4 to 6): Brown rice .... 3 cups White sesame .... Small amount Black sesame .... Small amount
Method:
① Gently wash the brown rice and
remove debris and loose husk ② Add water up to "Water Level: Brown Rice 3" and close the Outer Lid
③ Select the program. Rice Select Brown Rice Menu Select —
④ Press the "Start" button. ⑤ When the rice is cooked, turn it over and mix to fluff.
a Put on a plate and sprinkle on some white and black sesame.
When cooking with other ingredients (meat, vegetables etc.)
●Measure the water level before adding the other ingredients.
●The rice takes a long time to cook so we recommend that you add firm ingredients such as beans etc.
If you wish to add dried ingredients, be sure to rehydrate them first.
●The quantity of other ingredients should not exceed 75 g per cup of rice.
(If too much other ingredients are added, the rice will not be cooked properly.)
● Cut the ingredients into small pieces and lay them on the rice without mixing
(If you mix the ingredients with the rice, the rice will not be cooked properly.)
Multigrain Rice
Ingredients (Serves 4 to 6): White rice....3 cups Multigrain....30 g
Method
① Wash the white rice and add water up to "Water Level: White Rice 3".
② Gently wash the multigrain and place on ①
③ Add another 30 mL of water and close the Outer Lid. * Adjust the amount of water to suit kinds of grains or your taste.
④ Select the program. Rice Select: Grains Menu Select: —
⑤ Press the "Start" button. ⑥ When the rice is cooked, turn it over and mix to fluff.
⑦ Arrange in a dish.
To cook multigrain rice..
- If you wish to add beans or dried ingredients such as cloud ear mushrooms, be sure to rehydrate them first. - The proportion of the other grain in the rice is 10% or below.
(If too much other grain is added, the rice will not be cooked properly.)
- If you wish to cook multigrain rice softer, you add some more water or soak it in water in advance.
Sushi/Congee
Sushi rolls
| Ingredients (Serves 4): | |
| White rice | 3 cups |
| Konbu | 5×5 cm |
| Nori sheets | As required |
Sushi vinegar:
| A | Vinegar | 90 ml |
| Sugar | 2 1/2 tbs | |
| Salt | 1 1/2 tsp |
Toppings:
Tuna, squid, shrimp, salmon, salmon roe, cucumber, eggs, leafy vegetables, avocado, and any other desired foods. As required
To cook sushi rice.
● To ensure that the flavor is fully absorbed, transfer the rice to the sushi rice bowl while it is still warm and mix in the sushi vinegar. (Do not mix in the sushi vinegar with the rice still in the Inner Pan.) - To preserve the sheen of the rice, cool quickly using a fan. - To prevent stickiness, set the Rice Scoop at a shallow angle and mix quickly with a chopping motion.
Pork and Century Egg Congee
| Ingredients (Serves 2 to 3): | |
| White rice | 1/2 cup |
| Meat broth (cooled) | 5 cups |
| Century egg | 1 pc |
| Cooked lean pork | 125 g |
| Seasoning: | |
| Salt | 5 g |
| Pepper | To taste |
| Sesame oil | To taste |
Method:
① Wash the white rice and add water up to "Water Level: Sushi 3", lay konbu on the rice and close the Outer Lid.
| Rice Select | White Rice |
| Menu Select | Sushi |
③ Press the "Start" button.
4 Put A in a pan and warm gently to make the sushi vinegar. Moisten the inside of the sushi rice bowl with water. When the buzzer sounds, remove the konbu and transfer the cooked rice to the sushi rice bowl. Pour the sushi vinegar evenly over the rice, then mix with a chopping motion. Next, cool with a fan. To ensure that the sushi rice does not dry out, cover it with a well-wrung cloth. ⑤ Spread sushi rice over a nori sheet. Put desired toppings and then roll.
Method:
① Marinate the cooked lean pork with the salt for 1 hour and then cut into thin strips. Dice the century egg and put aside for later use.
② Wash the white rice and then pour into the Inner Pan together with the meat broth and close the Outer Lid.
③ Select the program and set cooking time to 1 hour and 30 minutes.
| Rice Select | White Rice |
| Menu Select | Congee |
4 Press the "Start" button.
When the buzzer sounds, press the 'Cancel/Off' button, open the Outer Lid*. add the lean pork and century egg to the Inner Pan and close the Outer Lid. * When open the Outer Lid, please note that the cooked food gets hot.
Select the program and set
| Rice Select | White Rice |
| Menu Select | Congee |
7 Press the "Start" button
⑧ After the buzzer sounds, the congee may be served after it has been seasoned.
Casserole/Cake/Steam
Chicken and Taro Casserole Rice
Important Information:
- When placing ingredients they cannot go above the maximum Water Level of "White Rice". - Do not open the Outer Lid while cooking. (Cooking result may not be satisfactory.)
| Model A | amount of rice (Cup*) |
| 1.0L 1-3 | |
| 1.8L 2-6 |
* Measuring Cup provided as an accessory
| Ingredients (Serves 4 to 6): | |
| White rice | 3 cups |
| Chicken meat (diced) | 200 g |
| Dried mushrooms(soaked & sliced) | 5 pcs |
| Taro root (diced) | 100 g |
| Dried shrimps (soaked) | 40 g |
| Chinese black fungus(soaked & chopped) | Few pcs |
| (Soaked & chopped) .... Few pos |
| Heripede: |
| A | Light soy | 1 tsp |
| Dark soy | 1/2 tsp | |
| Sugar | 1 tsp | |
| Salt | 1/2 tsp | |
| Starch | 11/2 tsp |
Sauce:
| B | Light soy....1 tbs |
| Dark soy....1 tbs | |
| Sugar.... 1/2 tbs | |
| Sesame oil.... 1/2 tbs |
Soy Milk Cake
Ingredients (Serves 4 to 6): Butter or salad oil.... Small amount Pancake mixture.... 200 g Eggs.... 2 pcs Soy milk.... 100 mL Salad oil.... 3 lbs Raisins.... 70 g (May be substituted for other dry fruit.)
Method:
① Lightly smear the inside of the Inner Pan with butter or salad oil. ② Mix the ingredients until the texture is smooth. (Do not mix in the Inner Pan.) ③ Pour ② into the Inner Pan and close the Outer Lid.
with Chinese Cabbage
Ingredients (Serves 4 to 6): Chinese cabbage....100 g Salted meat (Chinese ham)....35 g
Method:
① Break the Chinese cabbage into individual pieces and wash these pieces. Slice the salted meat and place aside. ② Arrange the individual pieces of cabbage in layers on the plate and layer the sliced salted meat at the very top (try to use the fatty parts of the meat). ③ Pour 2.5 cups of water in the Inner Pan.
Precaution
● Please do not block the hole in the Inner Lid with ingredients.
Method:
① Season diced chicken meat with A. ② Deep fry diced taro root until
golden brown, drain and set aside. ③ Wash the white rice and add water up to "Water Level: White Rice 3".
Then place ①, ② and other ingredients evenly on the rice and close the Outer Lid. (Do not mix.)
④ Select the program.
Rice Select: White Rice Menu Select: Casserola
⑤ Press the "Start" button. ⑥ After the buzzer sounds, add B and stir the rice immediately to loosen it.
④ Select the program and set the cooking time to 40 minutes.
| Rice Select | — |
| Menu Select | Cake |
5 Press the "Start" button
⑧ When the buzzer sounds, remove the Inner Pan from the Rice Cooker and turn it upside down to remove the cake. Then allow to cool on plate or mesh.
Note
When using the 1.8L model, increasing the quantity of ingredients 1.5-fold and setting the cooking time to 60 minutes is recommended for a nice, fluffy cake.
④ Set the attached Steaming Basket, put "2" on it and close the Outer Lid.
⑤ Select the program and set the cooking time to 13 minutes.
| Rice Select | — |
| Menu Select | Steam |
⑧ Press the "Start" button.
Note
When Chinese cabbage is unavailable, the heart of the bok choy may be used instead.
Cleaning
For cleaning, remove the Power Plug and ensure that the main body has cooled down.
The Packing attached to both the main body and the Inner Lid cannot be removed.
Do not pull by using excessive force or puncture with sharp-pointed objects.
(This may cause defects, delamination and damage.)
●After washing, wipe with a dry cloth
When using for the first time & on every use
● After removing, wash with a soft sponge.

Inner Pan, Rice Scoop, Ladle, Inner Lid, Steam Cap, Steaming Basket, Inner Lid, Steam Cap, Steaming
Cap, Steaming
1
Rice Scoop
● After using seasoning, such as casserole rice, wash promptly
(Since this can cause odor, rot, or rust.)
Metal scourers, nylon
scourers etc.


Dishwasher/
dryer or dish
dryer

Inner Pan (P. 6) • Rice Scoop • Ladle •
Steaming Basket • Rice Scoop Holder
Wash with a mild washing-up liquid.
Precaution
●Do not use the Inner Pan as
a washing-up bowl.
/ Since this may result in
peeling of the inner coating.

Lid Sensor • Pan Sensor
Wipe with a well-wrung cloth.
- If the dirt is hard to remove, dab a mild washing-up
liquid on a nylon scourer and wipe gently.
Note
●Using the Lid Sensor or Pan Sensor while they are
dirty may result in the rice being burnt or cooked in
an unsatisfactory way.
Regular checks
●Check around once a month and clean if dirty!
Bottom of Rice Cooker
(intake/exhaust vents)
Remove dust and foreign
objects using a vacuum
cleaner etc..
When the cleanliness of the
Rice Cooker is a concern
Cleaning function
If odor is hard to remove or the dirt does not come off the Inner Lid or Steam Vent....
Preparation ① Pour water into the Inner Pan.
(1.0L model, "White Rice" Water Level: 3-4)
(1.8L model, "White Rice" Water Level: 6-8)
② Put the Inner Pan in the main body and
close the Outer Lid.
1 Display "Clean"


Steam Cap
Remove and rinse.
●Dew and dirt tend to remain
in the Steam Cap, so please
wash it after each use.
(This may cause)
odor or rot.

-Do not disassemble.
■Removing
①Pull up to remove.

②Open the lever while holding
down the tab.
Tab Lever
■ Attaching (In the reverse order to removing.)
① Insert the shaft
and close the
lever securely
until you hear a
'click'.
② Attach the
Outer Lid
/Ensure that it has
(been attached firmly.)
●Do not remove the Packing.
(This may cause steam to leak.)
- If the Packing came off, please
- If the packing came on, please surely fix it along the groove.
Packing

Clear Frame •
Inner Pan Support Rubber (3 places)
Wipe with a well-wrung cloth.
Precaution
● Do not wash by pouring in water etc.
Inner Surface of Outer Lid • Packing
Wipe with a well-wrung cloth.
- Remove the Steam Cap and wipe the inner surface
of the Outer Lid, the attaching portion of the Steam
Cap and the Packing.
Inner Lid
Remove and wash with a mild washing-up liquid. Inner Lid Release Lever
■ Removing

Inner Lid Release Lever

① Move the Inner Lid Release
Lever to the right.
(The Inner Lid tilts forward.)
② Pull out.
■ Attaching
① Insert the Inner Lid into
the grooves. (Both sides)
② Press into the Outer Lid
until you hear a "click"
Grooves

Precaution
●After cooking with seasoning (for casserole rice etc.)
please wash promptly
(Since this may cause odor, rot, or rust.)
2 Press the "Start" button
Flashing


Cleaning function starts.
2 When the buzzer sounds after
approximately 45 minutes, press the
"Cancel/off" button

●After the water has cooled, pour it away.
Notes
- It may be effective to cut a lemon into slices and add them to the water.
●It may not be possible to completely remove odor or dirt.
Does my Rice Cooker have a fault?
Check the following before asking for a service.
| Symptom | Check here! | Page | |
| Cooking | The cooking time is longer than expected. | ●If rice is cooked one after the other, the cooking time may lengthen (by up to around 45 minutes).●The Rice Cooker may stop the countdown of time remaining to make an adjustment.●Is the quantity of water in the Inner Pan too much?If the quantity of water is increased, the cooking time may lengthen (by up to around 15 minutes). | — |
| — | |||
| — | |||
| — | |||
| — | |||
| — | |||
| — | |||
| — | |||
| — | |||
| — | |||
| — | |||
| — | |||
| — | |||
| — | |||
| — | |||
| 19 | |||
| — | |||
| — | |||
| — | |||
| — | |||
| — | |||
| — | |||
| — | |||
| — | |||
| — | |||
| — | |||
| — | |||
| — | |||
| — | |||
| — |
If you mistakenly add water or rice to the main body, please unplug and contact an authorized service center (as described in the Warranty).
What does this mean?

●Is the Inner Pan set properly?
- After you turn off the error message by pressing the "Cancel/Off" button, set the provided Inner Pan to operate it again.
●Is the foreign object or dirt attached to the bottom part of the Inner Pan, the Inner Lid, the Lid Sensor or the Pan Sensor? (P. 6)
→ Remove the foreign object or dirt and press the "Cancel/Off" button.
●Is there too much water in the Inner Pan?
Press the "Cancel/Off" button.
(Upon next cooking, reduce the amount of water slightly.)
●Has the keep warm function been in use for more than 96 hours?
→ Press the "Cancel/Off" button.
●Is the Outer Lid open?
●Is the Steam Cap fitted? (P. 18)
→ If the Steam Cap has been lost, please purchase another one from an
authorized service center (as described in the Warranty).
Rice can be cooked or kept warm without the Steam Cap fitted, however
the rice may not taste good. (The rice will become dry if it is being kept warm.)
- Congee may not cook properly.
• Liquid may spill out.
• "U15" may be displayed again after the rice has been cooked.
●Is there a foreign object or dirt attached to the inside of the Steam Cap?
→ Remove the foreign object or dirt. (P. 18)
Is the intake or exhaust vent on the bottom of the Rice Cooker blocked by dust
etc.?
→ Remove the dust using the following procedure.
① Press the "Cancel/Off" button and then remove the Power Plug
② Once the body has cooled down, remove the Inner Pan.
③ Remove the dust from the intake/exhaust vents on the bottom of the
Rice Cooker. (P. 19)
●Is the Rice Cooker being used on a carpet etc.? (P. 6)
Do not use the Rice Cooker in a location where the bottom of the Rice
Cooker is restricted.
If none of the methods described above brings an improvement, please consult an authorized service center (as described in the Warranty) for a repair.

●Try removing the Power Plug and reinserting it.
If "Hoo" appears again, this is a malfunction.
Please consult an authorized service center (as described in the Warranty)
and inform them of the error message (the two-digit number after the "H").
scribed in the Warranty).
What to do when...
●The Rice Cooker does not have a fault. Check the following before asking for a service.
Too sticky (soft)
●Have you measured the quantities of rice and water correctly? (P. 8) ●Are there many broken grains in the rice?
●Have you been soaking the rice for long periods? (When using the timer, for example.)
→ When using the timer, try reducing the amount of water slightly. (Reduce water by approximately 1 to 2 mm from the Water Level.)
- Are you using hot water to wash the rice?
- Are you using more than the specified amount of rice with the "1-2 Person" program for small amounts? (1.0L model: 0.5–1.5 cups, 1.8L model: 1–2.5 cups)
- When the rice is cooked, are you mixing it immediately?
- When cooking new-crop rice, are you using less water than normal? (Reduce water by approximately 1 to 2 mm from the Water Level.)
- Are you leaving the rice in the strainer after washing? (P. 8 This may cause the rice grains to break, and the rice may be sticky when cooked.) • Do you prefer firmer rice?
- Reduce the amount of water slightly. (Reduce water by approximately 1 to 2 mm from the Water Level.)

Too hard (dry)
●Have you measured the quantities of rice and water correctly? (P. 8) ●Are you using the "Quick" program? (P. 10) - Do you prefer softer rice?
- Increase the amount of water slightly.
(Increase water by approximately 1 to 2 mm from the Water Level.)
- Try soaking the rice (for 30 minutes to 2 hours) before cooking.

Rice is burnt
●Has the rice been processed and washed properly?
●Is there dirt or foreign object stuck to the Lid Sensor, Pan Sensor, bottom of the Inner Pan or inside the main body?
●Are you using the timer? (Have you been soaking the rice for long periods?) - Are there many broken grains in the rice? - Are you leaving the rice in the strainer after washing? (P. 8 This may cause the rice grains to break, and the rice may burn when cooked.) - Cooking rice with seasoning such as casserole rice may be easily burnt. - A golden brown color on the rice at the bottom of the Inner Pan is not indicative of a fault. → If there is no improvement after following the above-described steps, see "If burning is a concern". (P. 25)

Symptom Check
Condensation appears.

●When the rice is cooked, are you mixing it immediately? ●During the keep warm state, did you turn the keep warm function off with rice still in the Rice Cooker, or remove the Power Plug and leave the rice in the Rice Cooker? ●A layer of mist may form depending on the cooking method.
Rice smells odor.
●During the keep warm state, did you turn the keep warm function off with rice still in the Rice Cooker, or remove the Power Plug and leave the rice in the Rice Cooker?
●Has the keep warm function been in operation for 12 hours or more?
●After cooking rice with seasoning such as casserole rice, an odor may remain.
● Did you add cold rice during the keep warm state?
● Has the rice been processed and washed properly?
● Are you using the keep warm function with the Rice Scoop still in the Rice Cooker?
- Are you cleaning and maintaining your Rice Cooker correctly each time you use it? Failure to correctly clean and maintain your Rice Cooker may spoil the aroma and flavor of your meals.
Continuing to use your Rice Cooker without cleaning it correctly will spoil your meals.
→ When the smell becomes noticeable, ① Carefully wash the Inner Pan, Inner Lid and Steam Cap. ② If this does not remove the odor, use the cleaning function. (P. 19)
Rice has a yellow color.

● Has the keep warm function been in operation for 12 hours or more? ● Has the rice been processed and washed properly? ● With certain types of rice, a yellow color will be left on the rice after cooking.
Rice is dry.

● Has the keep warm function been in operation for 12 hours or more? ● Have you reheated repeatedly? ● Is the Steam Cap attached correctly? If there is rice stuck to the Packings of the Outer Lid and Inner Lid or the edge of the Inner Pan, is the Inner Pan deformed, or was the Inner Pan tilted when it was set?
Congee is sticky.

● Have you been soaking the rice for long periods? (When using the timer, for example.) ● Have you used the keep warm function on the congee?
A thin film is formed.

● Are you washing the rice too much, causing the rice grains to break? ● Has the rice been washed properly? (Starch in the rice dissolves and reforms as a thin film on the surface. It is not harmful.)
Rice sticks to the Inner Pan

●Depending on the type of rice, soft rice or sticky rice may stick easily.
The surface of the cooked rice is uneven.

●Was the rice spread evenly before cooking? ●This may be caused by the strong heating power that is characteristic of IH (Induction Heating). This is not a malfunction. An uneven surface may be formed under the following conditions. ●The rice has not been washed properly ● There is a large quantity of broken rice grains. ● The rice grains have become broken due to heavy-handed washing of the rice ● The cooking quantity is too low.
What to do when...

- If the suggestions on P. 22–23 do not bring about any improvement, you can change the settings.
- Steps 2, 3 and 4 must each be completed within 16 seconds. When no operation is performed for 16 seconds, the display returns to the current time. (Setting cannot be made.) → Please restart the procedure. ●After the setting is completed, the display returns to the current time. ●To go back to the previous setting, follow the procedure again.
If you want to change the keep warm temperature. (74→76→72)

Specifications
| Program | Approximate cooking timeSR-THB105 | Keep Warm Function* | Timer Setting Restriction | Cooking Capacity (Cup)( ) is for when other ingredients are added. | ||
| Rice Select | Menu Select | |||||
| White Rice | Delicious 50 min | ○ | From 60 min before done | 0.5–5.5 1–10 | ||
| Regular 37 min | ○ | From 50 min before done | 0.5–5.5 1–10 | |||
| Quick 19 min–30 min | ○ | -0.5–5.5 1–10 | ||||
| 1–2 Person 50 min | ○ | From 60 min before done | 0.5–1.5 1–2.5 | |||
| Sushi 47 min | ○ | From 60 min before done | 1–5.5 2–10 | |||
| Congee | Setting time1 h 00 min–4 h 00 min | × | Cooking time + 1 min or more before done | 0.5–0.75 0.5–1.5 | ||
| Casserole | 50 min | × | - | 1–3 | 2–6 | |
| Brown Rice | —** | 1 h 40 min–1 h 55 min | × | From 2 h 10 min before done | 1–3 (1–2) | 1–7 (1–5) |
| Grains | —** | 50 min | × | From 60 min before done | 0.5–4 | 1–8 |
| - | Cake | Setting time40 min–60 min | × | - | Dough Max600 g | Dough Max900 g |
| - | Steam | Setting time1 min–60 min | × | - | Quantity of water500 mL | Quantity of water600 mL |
* With “×”, the Rice Cooker will switch automatically to the keep warm function, but we do not recommend this. (P. 13) **You cannot select menus (“Delicious”, “Congee”, etc.).
| SR-THB105 | SR-THB185 | ||
| Power source | 220 V ~ 50 Hz | ||
| Power consumption (approx.) | Cooking | 1200 W | 1400 W |
| Keeping warm | 700 W (32.0 Wh*1) | 600 W (40.3 Wh*1) | |
| Length of the Power Cord (approx.) | 1.5 m | ||
| Weight (approx.) | 4.6 kg | 5.5 kg | |
| Size (Width × Depth × Height) (approx.) | 25.0 cm × 32.1 cm × 20.1 cm (43.4 cm*2) | 27.9 cm × 34.8 cm × 23.2 cm (49.1 cm*2) | |
●Power consumption is the maximum instantaneous electric capacity. - When the power is "Off", the Rice Cooker consumes approximately 2.2 W (plugged in state). ● This product is not suitable for use in countries or regions of differing mains frequency or voltage. Moreover, after sales service is not available. ●(*1) is the power consumed per hour during the keep warm state. (Room temperature 20°C, maximum amount of rice.) ●(*2) is the height with the Outer Lid open.
| Checks | Check your well-usedIHElectronic Rice Cooker / Warmer | |
 | Have you noticed any of the following?●The power plug and the power cord become abnormally hot.●The power cord is damaged or power failure when is touched.●The main body is deformed or abnormally hot.●Smoke exudes from the main body or a burning odor is detected.●The main body is cracked, is loose or rattles.●The fan in the bottom is not rotating during cooking. | Stop using the Rice CookerTo prevent accidents, stop using the Rice Cooker, remove the power plug, and ask an authorized service center (as described in the Warranty) to perform a check. |
Panasonic Corporation
Web Site: http://www.panasonic.com
© Panasonic Corporation 2016
EIG

Cook rice
6 Check the program, then press the "Start" key.
| 材料(4~6人份): | |
| 娃娃菜 | 100g |
| 咸肉(金华火腿) | 35g |
Method:
Upper frame cover plate · inner pot support rubber (3 places)
Wipe with a wrung-out damp cloth.
Precautions
Do not pour water in for cleaning.
● Under "White Rice", select "Quick".
● Under "White Rice", select "Quick".
2 Press and hold
(approximately 5 seconds)

Operation will not turn off the key.
A When cooked rice has an odor

Set to "76".
When the rice changes color or becomes dry
Set to "72".
(Set to automatic completion.)


© Panasonic Corporation 2016
Printed in Japan
RZ19YH59
F0216T0
EIG

Thank you for purchasing the Panasonic product.
This product is intended for household use only.
Jinhua ham with baby bok choy
Upper frame · inner pot support rubber (3 pcs)
Wipe with a damp cloth that has been wrung dry.
Precautions
Do not pour water into the unit for cleaning.
Inner pan (page 6), rice spatula, porridge ladle, steaming basket, spatula holder
Wash with a mild detergent.
Precautions
Do not use the inner pan as a footrest.
(This may damage the inner pan coating.)

Inner lid sensor, inner pan sensor
Wipe with a damp cloth that has been wrung out.
© Panasonic Corporation 2016
Printed in Japan
RZ19YH59
F0216T0
EIG

● When restarting the operation
Notice
Cooking capacity

Method:
Steamed bacon and cabbage

Clear frame and inner pot support rubber (3 locations)
Wipe with a tightly wrung cloth.
Contact us
© Panasonic Corporation 2016


- PANASONIC®
- OPERATING INSTRUCTIONS
- CONTENTS
- RECIPES
- SAFETY PRECAUTIONS
- WARNING
- CAUTION
- IF THE POWER STOPS DURING USE
- NOTES ON USE PART NAMES/ACCESSORIES
- ABOUT THE RICE COOKER
- ABOUT THE INNER PAN
- ACCESSORIES
- ATTACHING THE RICE SCOOP HOLDER
- COOKING RICE WHEN YOU WISH TO COOK IMMEDIATELY
- WASHING THE RICE AND ADDING WATER SETTING UP
- COOKING
- MEASURE THE RICE
- WASH THE RICE
- PRECAUTION
- ADD WATER
- SET THE INNER PAN EVENLY
- INSERT THE POWER PLUG
- CHECK THE PROGRAM AND PRESS THE "START" BUTTON
- MEASURE OUT THE WATER
- WASH THE RICE GENTLY
- USE SUITABLE WATER
- THINGS TO LOOK OUT
- USING THE PROGRAMS CORRECTLY
- USING DIFFERENT PROGRAMS
- NOTES
- NOTE
- PRECAUTIONS
- KEEPING WARM
- KEEP WARM (AUTOMATIC)
- REHEAT (MANUAL)
- USING THE TIMER
- TIMER
- BROWN RICE/GRAINS
- SUSHI/CONGEE
- TOPPINGS
- TO COOK SUSHI RICE
- METHOD
- ③ PRESS THE "START" BUTTON
- PRESS THE "START" BUTTON
- SELECT THE PROGRAM AND SET
- CASSEROLE/CAKE/STEAM
- IMPORTANT INFORMATION
- WITH CHINESE CABBAGE
- ④ SELECT THE PROGRAM
- ⑧ PRESS THE "START" BUTTON
- CLEANING
- WHEN USING FOR THE FIRST TIME & ON EVERY USE
- INNER PAN (P. 6) • RICE SCOOP • LADLE
- STEAMING BASKET • RICE SCOOP HOLDER
- LID SENSOR • PAN SENSOR
- REGULAR CHECKS
- WHEN THE CLEANLINESS OF THE
- RICE COOKER IS A CONCERN
- CLEANING FUNCTION
- STEAM CAP
- CLEAR FRAME
- INNER PAN SUPPORT RUBBER (3 PLACES)
- INNER SURFACE OF OUTER LID • PACKING
- INNER LID
- DOES MY RICE COOKER HAVE A FAULT
- WHAT DOES THIS MEAN
- WHAT TO DO WHEN
- TOO STICKY (SOFT)
- TOO HARD (DRY)
- RICE IS BURNT
- SYMPTOM CHECK
- SPECIFICATIONS
- PANASONIC CORPORATION
- COOK RICE
- CHECK THE PROGRAM, THEN PRESS THE "START" KEY
- UPPER FRAME COVER PLATE · INNER POT SUPPORT RUBBER (3 PLACES)
- UPPER FRAME · INNER POT SUPPORT RUBBER (3 PCS)
- INNER PAN (PAGE 6), RICE SPATULA, PORRIDGE LADLE, STEAMING BASKET, SPATULA HOLDER
- INNER LID SENSOR, INNER PAN SENSOR
- NOTICE
- CLEAR FRAME AND INNER POT SUPPORT RUBBER (3 LOCATIONS)
Brand : PANASONIC
Model : SR-THB185
Category : Rice cooker