
SLS 2200 A1 - Phone charger SILVERCREST - Free user manual and instructions
Find the device manual for free SLS 2200 A1 SILVERCREST in PDF.


| Product Type | Phone Charger |
| Brand | SilverCrest |
| Model | SLS 2200 A1 |
| Input Voltage | 100-240 V AC, 50/60 Hz |
| Output Voltage | 5 V DC |
| Output Current | 2.1 A (max) |
| Number of USB Ports | 1 |
| Charging Technology | Standard USB charging |
| LED Indicator | Yes, blue LED when powered |
| Overcharge Protection | Yes |
| Short Circuit Protection | Yes |
| Overheat Protection | Yes |
| Dimensions (approx.) | 6.0 x 3.5 x 2.5 cm |
| Weight (approx.) | 50 g |
| Operating Temperature | 0°C to 40°C |
| Storage Temperature | -20°C to 60°C |
| Cable Length | 1.0 m (approx.) |
| Plug Type | Type A (US) / Type C (EU) depending on region |
| Color | White or Black |
| Material | ABS plastic |
| Certifications | CE, RoHS, FCC |
| Warranty | 2 years |
| Package Contents | Charger, user manual |
Frequently Asked Questions - SLS 2200 A1 SILVERCREST
User questions about SLS 2200 A1 SILVERCREST
0 question about this device. Answer the ones you know or ask your own.
Ask a new question about this device
Download the instructions for your Phone charger in PDF format for free! Find your manual SLS 2200 A1 - SILVERCREST and take your electronic device back in hand. On this page are published all the documents necessary for the use of your device. SLS 2200 A1 by SILVERCREST.
USER MANUAL SLS 2200 A1 SILVERCREST
User manual and service information
PL
Safety instructions 6
Maintenance / cleaning 8
Copyright 9
Overview of controls and button functions 10
Before you start 11
Fitting the suction pads....11
Charging using the solar panel 12
Charging via the USB cable 12
Getting started 13
Using the ON/OFF pushbutton....13
Viewing the battery level....13
Compatible devices....13
Charging devices....14
Troubleshooting 15
Environmental regulations and disposal information ...... 16
Conformity notes.... 16
Warranty and Service Information...... 17
Trademarks
Apple ® , iPhone ® , iPad ® and iPod ® are trademarks of Apple Inc., and are registered in the USA and in other countries.
USB is a registered trademark.
Other names and products can be the trademarks or registered trademarks of their respective owners.
Introduction
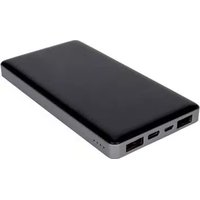
Thank you for choosing the SilverCrest SLS 2200 A1 Solar Battery Charger. The Solar Battery Charger can convert sunlight into electrical energy and store it. This allows you to charge a mobile phone, an MP3 player or a digital camera when you are on the move without access to a wall socket.
Intended use
This is an information technology product and has been designed to charge the batteries installed in mobile phones, MP3 players, digital cameras or other battery-powered devices. The Solar Battery Charger converts sunlight into electrical power and stores it into the built-in battery. The device may only be used for private purposes, not for industrial or commercial ones. The device may also not be used in tropical climates. The manufacturer is not liable for any damage or problems caused by unauthorised modifications. Only use accessories recommended by the manufacturer. Observe the regulations and laws in the country of use.
Package contents

A SilverCrest SLS 2200 A1 Solar Battery Charger
B USB cable
C Charger cable
D "USB socket" adapter [5V]
E Sony PSP* adapter [5V; compatible devices poss. 7.5V/9.5V]
F Nokia 6101* adapter [5V; compatible devices poss. 7.5V/9.5V]
G "Micro USB" adapter [5V]
H "Mini USB" adapter [5V]
I Samsung A288* adapter [5V]
J iPhone® / iPad® / iPod® adapter (30-pin)* [5V]
K Siemens S65* adapter [5V]
L Nokia 8210* adapter [5V; compatible devices poss. 7.5V/9.5V]
M LG K690 / Chocolate* adapter [5V]
N Sony Ericsson K750* adapter [5V]
○ Suction pads (4 units)
P These operating instructions (line-art illustration)
* and compatible devices with up to 500mA charging current
4 - English
Technical specifications
| Solar modulePowerDimensions (W x H) | 5.0V 100mAapprox. 6 x 10.6 cm |
| Rechargeable Li-Ion battery 3.7V | / 2200mAh |
| Input voltage/current (USB) 5.0V | / 0.5A |
| Output voltage/current | 5.0V +/- 5%, 0.5A7.5V +/- 5%, 0.5A9.5V +/- 5%, 0.5A |
| Charging time for built-in Li-Ion batteryVia solar panelPC adapter | approx. 16-24 hours*approx. 4-6 hours |
| Dimensions (W x H x D) approx. 70 x 129 x 20mm | |
| Weight (without accessories) approx. | 118g |
| Operating temperature | 5°C to 45°C |
| Operating humidity max. 85% rel. humidity(non-condensing) | |
| Storage conditions | -5°C to +50°Cmax. 85% rel. humidity(non-condensing) |
* The charging time varies greatly depending on the sun's radiation (intensity). This depends on the season, the cloud cover and the location. These factors may also increase the charging time.
The technical specifications and design can be changed without prior notice.
Safety instructions
Before you use this device for the first time, please read the following notes in this manual and heed all warnings, even if you are familiar with handling electronic devices. Keep this manual in a safe place for future reference. If you sell the device or pass it on, it is essential that you also hand over this manual, as it is part of the product.

WARNING! This symbol denotes important information for the safe operation of the product and user safety. Ignoring it can lead to material damage and/or personal injury or even death.

This symbol denotes further information on the topic.
Operating environment
The device is not designed for use in environments with high humidity (e.g. bathrooms) or excessive levels of dust. Operating temperature and operating humidity: 5 °C to 45 °C, max. 85 % RH. Please note that when using the product in a car, especially behind the windscreen, the temperature can reach above 45°C.

Always make sure that
- the device is not exposed to direct heat sources (e.g. radiators)
-
the device is not exposed to strong artificial light
-
contact with water spray and drops and aggressive fluids is avoided and the device is never operated near water, the device is never submerged (do not place any items containing liquids, such as drinks, vases, etc. on or near the device).
- the device is never placed near magnetic fields (e.g. speakers)
- no naked flames (e.g. burning candles) are placed on or near the device
- no foreign bodies can penetrate into the device
- the device is not subjected to any major temperature fluctuations as this can cause condensation and short-circuiting. If the device has been exposed to strong temperature fluctuations, wait for it to reach the ambient temperature before switching it on (about 2 hours).
- the device should not be subject to excessive shocks and vibrations
- the device or the optional USB power adapter is not used during thunderstorms and unplug the optional USB power adapter from the mains
- when using a USB power adapter the power socket used must be easily accessible at all times and cables are laid so they do not present a trip hazard
• the device is not covered
Failure to heed the warnings above may result in damage to the device or injury.

Caution – danger of explosion
Never throw the device onto a fire and do not invert the battery polarity or short-circuit the battery, as this could cause it to explode.
Please note the usage restrictions and regulations relating to battery-powered devices in dangerous places, such as petrol stations, aircraft, hospitals, etc.

Children and persons with disabilities
Electrical devices are not suitable for children. Also persons with reduced physical, sensory or mental capabilities should only use electrical devices in appropriate circumstances. Do not allow children or persons with disabilities to use electrical devices unsupervised, unless they are instructed accordingly and supervised by a competent person responsible for their safety. Children should always be supervised to ensure that they do not play with the product. Small parts can represent choking hazards. Keep the packaging away from children and persons with disabilities.

There is a risk of suffocation!

Cables
Unplug all cables by holding the plugs and never pull on the cables themselves. Never place pieces of furniture or other heavy objects on the cables and take care that they do not become damaged, especially at the plugs and sockets. Never tie knots in a cable and do not tie them to other cables. All cables must be laid so that nobody can trip obstructed by them.

Maintenance / cleaning
Repairs are required if this device has been damaged in any way, for example if the device housing is damaged, if liquids or objects have penetrated the
device or if the product has been exposed to rain or moisture. Repairs are also necessary if the product is not working properly or has been dropped. If you notice any smoke, unusual noises or strange smells, unplug all cables immediately and disconnect the optional USB power adapter from the power supply. If this occurs, do not continue to use the device and have it checked out by an expert. All repairs must be carried out by qualified service personnel. Never open the housing of the device. Only use a clean, dry cloth for cleaning. Never use aggressive liquids. Do not attempt to open the housing of the device, this will void your warranty.
Copyright
All the contents of this user manual are protected by copyright and provided to the reader for information only. Copying data and information without the prior explicit written consent of the author is strictly forbidden. This also applies to any commercial use of the contents and information. All texts and diagrams are up-to-date as of the date of printing.
Overview of controls and button functions
An illustration of the items and controls and their corresponding numbers can be found on the inside page of the fold-out cover of this user manual. You can keep this page folded out whilst reading the different chapters of this user manual. This allows you to refer to the relevant controls at any time.
1 Solar panel
2 Output voltage selector switch (5V, 7.5V or 9.5V)
3 Output voltage LEDs
4 DC-OUT socket (to connect the device to be charged)
5 Solar LED
6 ON/OFF pushbutton
7 Battery capacity LEDs
8 IN socket (to connect a PC or USB power adapter)
Before you start
Remove the solar battery charger and the accessories from the packaging.
Fitting the suction pads
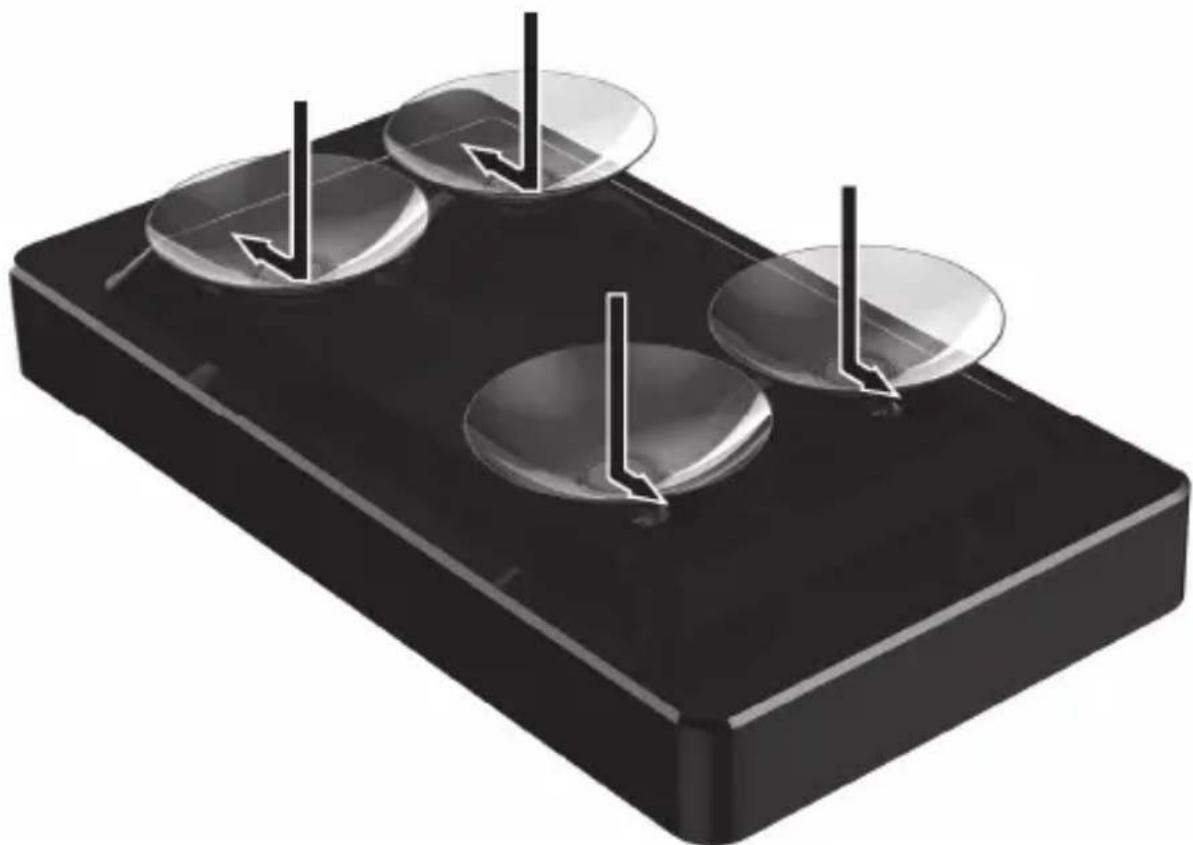
Fix the four suctions pads (O) to the bottom of the solar battery charger as shown in the diagram below. Insert the suction pads (O) into the hole. Next, fix the suction pads (O) by sliding them into the smaller hole.
natural_image
3D illustration of a black rectangular tray with three circular indentations and three downward-pointing arrows indicating direction (no text or symbols)You can now mount the solar battery charger to a flat, even surface using the suction pads.

The surface should be free of dust, oil and grease for the suction pads to stick well.
Charging using the solar panel

Make sure that the maximum ambient temperature of +45°C is not exceeded. This is especially important if you are using the product in a car.
You can charge the built-in battery of the solar charger using the solar panel (1). Make sure that the solar panel (1) receives sufficient sunlight. As soon as there is enough sunlight, the Solar LED (5) goes orange to indicate that the battery is being charged. If the Solar LED (5) does not light up, there is not enough sunlight. In this case, move the device to a different position or place it in direct sunlight. When the Solar LED (5) goes green, the battery is fully charged.
Charging via the USB cable
If there is no sunlight, you can also charge the built-in battery in your Solar Battery Charger using the USB cable (B). Insert the smaller plug of the USB cable (B) into the IN socket (8) of your Solar Battery Charger. Then insert the USB plug of the USB cable (B) into a USB port on your computer. You can monitor the charging process using the Battery capacity LEDs (7). One of the Battery capacity LEDs (7) flashes during charging and indicates the status of the battery charging process. When all four Battery capacity LEDs (7) are lit, the battery is fully charged.

Some computers do not supply USB power while they are turned off. If the battery of your Solar Battery Charger does not charge, make sure your computer is powered on.

Alternatively, you can use an external USB power adapter (not supplied) to charge the battery of your solar battery charger. To do this, you will need the USB cable (B) supplied. You can
purchase a suitable 5V USB power adapter with at least 500mA from any electronics retail outlet.

When using an external power adapter, it must be connected to an easily accessible wall outlet so that it can be disconnected quickly in case of an emergency.
Getting started
Using the ON/OFF pushbutton
Powering on
Briefly press the ON/OFF pushbutton (6) to switch the Solar Battery Charger on. The output voltage LEDs (3) and the battery capacity LEDs (7) light. After approx. 5 seconds the battery capacity LEDs (7) go off, and the output voltage LEDs (3) light while a connected device is being charged.
Auto power off
If no device to be charged is connected within 20 seconds, the device will power off to safe battery power.
Powering off
Keep the ON/OFF pushbutton (6) pressed for at least 3 seconds to switch the Solar Battery Charger off and to cancel the current charging process.
Viewing the battery level
Press the ON/OFF pushbutton (6) briefly to display the battery level for a few seconds. The Battery capacity LEDs (7) indicate the battery level as a percentage (25%, 50%, 75% and 100%).
Compatible devices
The Solar Battery Charger can be used to charge external devices with a max. charging current of 500mA.
If the charging current of your connected device exceeds 500mA, the Solar Battery Charger will automatically power off after you turn it on with the ON/OFF pushbutton (6). In this case, double-check the external device compatibility by reading its technical specifications (operating instructions).
Charging devices
First, select the correct output voltage. Slide the output voltage selector switch (2) to the desired position. You can set the following voltages: 5V, 7.5V and 9.5V. If you are not sure what voltage the device requires, read the manual for it.

Setting the wrong voltage could damage the device! Double-check the output voltage set before connecting the device! To do this, press the ON/OFF pushbutton (6) briefly. The voltage set is displayed for a few seconds. You can check the voltage set (5V, 7.5V or 9.5V) using the Output voltage LEDs (3). Wait until the Output voltage LEDs (3) go out.
After you have set and checked the proper output voltage, you can connect the external device using the charger cable (C) and the required adapter (D to N). Plug the adapter required (D to N) onto the charger cable (C). The "Package contents" chapter includes an overview of the adapters supplied. Next, connect the charger cable (C) to the DC-OUT socket (4) of the Solar Battery Charger and the adapter connected (D to N) to your external device.

Using the wrong voltage can damage your device!
Now press the ON/OFF pushbutton (6) briefly to start the charging process. Then the output voltage LEDs (3) light while the connected device is being charged. When your external device is fully charged, Charger switches off. To cancel the charging process at any time, simply disconnect the external device. If your external device is not fully charged but the Output voltage LEDs (3) go out during charging, the built-in battery of your
Solar Battery Charger is empty. You will need to recharge your Solar Battery Charger in order to charge external devices. You can recharge the built-in battery of your solar charger and charge the external device at the same time.
Troubleshooting
A connected device is not charging.
- Press the ON/OFF pushbutton (6) briefly to start the charging process.
- The battery of your solar charger is empty, recharge it.
- No connection to the external device, double-check the connection.
- The "Micro USB" adapter (G) you are using is not compatible with the device you want to charge. Use the original charging cable of your device together with the "USB socket" adapter (D).
- The Solar Battery Charger LEDs do not light up. Connect the Solar Battery Charger to a computer or an external power supply for approx. 2 seconds to reset the built-in overload protection.
- The Solar Battery Charger can be used to charge external devices with a max. charging current of 500mA. If the charging current of your connected device exceeds 500mA, the Solar Battery Charger will automatically power off after you turn it on with the ON/OFF pushbutton (6). In this case, double-check the external device compatibility by reading its technical specifications (operating instructions).
Cannot charge the battery of the solar charger using the solar panel.
- Make sure that the solar panel (1) is receiving enough sunlight.
Cannot charge the battery of the solar charger via the USB cable.
- Faulty connection, double-check the connection.
- Some computers do not supply USB power while they are turned off. If the battery of your Solar Battery Charger does not charge, make sure your computer is powered on.
Environmental regulations and disposal information

natural_image
Symbol of a trash bin crossed with diagonal lines, no text or numbers presentDevices marked with this symbol are subject to the European Directive 2012/19/EU. All electrical and electronic devices must be disposed of separately from household waste at official disposal centres. Proper disposal of old devices prevents damage to the environment or your health. For further information about proper disposal, contact your local council, recycling centre or the shop where you bought the device.
The built-in rechargeable battery cannot be removed for disposal.
Dispose of all packaging in an environmentally-friendly manner. Cardboard packaging can be taken to paper recycling centres or public collection points for recycling. Any film or plastic contained in the packaging should be taken to your public collection points for disposal.
Conformity notes

This device complies with the basic and other relevant requirements of EMC Directive 2004/108/EC and the RoHs Directive 2011/65/EU. The Declaration of Conformity can also be found at the end of this Manual.
Warranty and Service Information
Warranty of TARGA GmbH
This device is sold with three years warranty from the date of purchase. Please keep the original receipt in a safe place as proof of purchase. Before using your product for the first time, please read the enclosed documentation. Should any problems arise which cannot be solved in this way, please call our hotline. Please have the article number and, if available, the serial number to hand for all enquiries. If it is not possible to solve the problem on the phone, our hotline support staff will initiate further servicing procedures depending on the fault. Within the warranty period the product will be repaired or replaced free of charge as we deem appropriate. No new warranty period commences if the product is repaired or replaced. Consumables such as batteries, rechargeable batteries and lamps are not covered by the warranty.
Your statutory rights towards the seller are not affected or restricted by this warranty.
Service

Phone: 0207 - 36 50 744
E-Mail: service.GB@targa-online.com

Phone: 01 - 242 15 83
E-Mail: service.IE@targa-online.com

Phone: 800 - 62 175
E-Mail: service.MT@targa-online.com
Phone: 800 - 92 496
E-Mail: service.CY@targa-online.com
IAN: 94118

Manufacturer
TARGA GmbH
Coesterweg 45
59494 SOEST
GERMANY
Spis treści
Znaki towarowe 20
Wprowadzenie 20
Przeznaczenie 20
I Adapter Samsung A288* [5 V]
J 30-pinowy adapter /PilRané / iPod * [5 V]
K Adapter Siemens S65* [5 V]
natural_image
3D illustration of a black rectangular tray with three circular compartments and three vertical arrows pointing to the top (no text or symbols)natural_image
Symbol of a trash bin crossed with no text or numbers, representing environmental restriction (no text present)natural_image
3D illustration of a black rectangular tray with four circular compartments and three vertical arrows pointing downward (no text or symbols)natural_image
Symbol of a trash bin crossed with diagonal lines, no text or numbers presentA Solarni baterijski polnilnik SilverCrest SLS 2200 A1
B USB kabel
C Kabel polnilnika
natural_image
3D illustration of a black rectangular tray with three circular compartments and three vertical arrows pointing downward (no text or symbols)natural_image
Symbol of a trash bin crossed with no text or numbers, representing waste sorting or restriction (no text present)natural_image
3D illustration of a black rectangular tray with three circular indentations and three vertical arrows pointing downward (no text or symbols)natural_image
Symbol of a trash bin crossed with no text or numbers, representing waste sorting or disposal (no text present)A Solárna nabíjačka batérií SilverCrest SLS 2200 A1
B Kábel USB
C Kábel nabíjačky
D USB adaptér [5V]
E Adaptér Sony PSP* [5 V; kompatibilné zariadenia 7,5 V/9,5 V]
F Adaptér Nokia 6101* [5 V; kompatibilné zariadenia 7,5 V/9,5 V]
G Adaptér Micro USB [5V]
H Adaptér Mini USB [5V]
I Adaptér Samsung A288* [5V]
J Adaptér iPhonePad® / iPod® (30-kolíkový)* [5V]
K Adaptér Siemens S65* [5V]
L Adaptér Nokia 8210* [5 V; kompatibilné zariadenia 7,5 V/9,5 V]
M Adaptér LG K690 / Chocolate* [5V]
N Adaptér Sony Ericsson K750* [5V]
○ Prísavky (4 ks)
natural_image
3D illustration of a black rectangular tray with three circular indentations and three vertical arrows pointing downward (no text or symbols)natural_image
Symbol of a trash bin crossed with no text or numbers, representing waste sorting or restriction (no text present)A Solarladegerät SilverCrest SLS 2200 A1
B USB Kabel
C Ladekabel
I Adapter Samsung A288* [5V]
J Adapter iPhonePad® / iPod® (30-polig)* [5V]
K Adapter Siemens S65* [5V]
L Adapter Nokia 8210* [5V; kompatible Geräte ggf. 7,5V/9,5V]
M Adapter LG K690 / Chocolate* [5V]
N Adapter Sony Ericsson K750* [5V]
natural_image
3D illustration of a black rectangular tray with three circular compartments and three downward-pointing arrows indicating force or movement (no text or symbols)natural_image
Symbol of a trash bin crossed with no text or numbers, representing waste sorting or disposal (no text present)EC-Declaration of Conformity
Address:
Targa GmbH
Coesterweg 45
59494 Soest, Germany
Product:
Solar charger SLS 2200 A1
Model:
Identification number: IAN 94118
The product complies with the requirements of the following European directives:
2004/108/EC
Electromagnetic Compatibility
2011/65/EU
Restriction of the use of certain hazardous substances in electrical and electronic equipment
Compliance was proved by the application of the following standards:
EMC:
EN 55022 : 2010 limit class B
EN 55024:2010
Rohs:
EN 50581:2012
Year of CE marking: 2014

natural_image
Abstract curved line drawing with no text or symbolsSoest, 10 th April 2014
Matthias Klauke, Managing Director
- Trademarks
- Introduction
- Intended use
- Package contents
- - English
- Safety instructions
- Operating environment
- Caution – danger of explosion
- Children and persons with disabilities
- There is a risk of suffocation!
- Cables
- Maintenance / cleaning
- Copyright
- Overview of controls and button functions
- Before you start
- Fitting the suction pads
- Charging using the solar panel
- Charging via the USB cable
- Getting started
- Using the ON/OFF pushbutton
- Powering on
- Auto power off
- Powering off
- Viewing the battery level
- Compatible devices
- Charging devices
- Troubleshooting
- A connected device is not charging.
- Cannot charge the battery of the solar charger using the solar panel.
- Cannot charge the battery of the solar charger via the USB cable.
- Environmental regulations and disposal information
- The built-in rechargeable battery cannot be removed for disposal.
- Conformity notes
- Warranty and Service Information
- Warranty of TARGA GmbH
- Service
- IAN: 94118
- Manufacturer
- Spis treści
- EC-Declaration of Conformity
- Address:
- Product:
- Model:
- 2004/108/EC
- 2011/65/EU
- EMC:
- Rohs:
Brand : SILVERCREST
Model : SLS 2200 A1
Category : Phone charger