
GPS Navigation iOS - GPS Navigator Sygic - Free user manual and instructions
Find the device manual for free GPS Navigation iOS Sygic in PDF.


| Product Type | GPS Navigation App |
| Platform | iOS (iPhone, iPad, iPod Touch) |
| Requirements | iOS 12.0 or later, internet connection for initial download |
| File Size | Approximately 200 MB (app + offline maps) |
| Navigation Features | Voice-guided turn-by-turn, real-time traffic, speed limits, lane guidance |
| Offline Maps | Yes, download maps for offline use with free lifetime updates |
| Points of Interest (POI) | Extensive database: restaurants, gas stations, parking, etc. |
| Route Planning | Fast, eco, short, alternative routes; avoid tolls, ferries, etc. |
| Dashboard Features | Speed limit warnings, head-up display (HUD) mode, dashcam integration |
| Maintenance/Updates | Update via App Store; maps updated regularly (in-app) |
| Safety | Driver focus mode, speed camera warnings (where legal), night mode |
| Spare Parts / Repairability | Not applicable (software only); reinstalled via App Store |
| Languages | Multi-language interface and voice guidance (e.g., English, Spanish, French) |
| Developer | Sygic a.s. |
| Rating | 4.6+ stars on App Store (as of 2025) |
Frequently Asked Questions - GPS Navigation iOS Sygic
User questions about GPS Navigation iOS Sygic
0 question about this device. Answer the ones you know or ask your own.
Ask a new question about this device
Download the instructions for your GPS Navigator in PDF format for free! Find your manual GPS Navigation iOS - Sygic and take your electronic device back in hand. On this page are published all the documents necessary for the use of your device. GPS Navigation iOS by Sygic.
USER MANUAL GPS Navigation iOS Sygic
Sygic GPS Navigation iOS - Next Generation
Manual
1 — Last update: 2014/12/22
Sygic
Table of Contents
Prologue 2
Getting started.... 3
Voice/language 4
Map download....5
Dashboard – How to add/modify widgets.... 6
Sign In/Sygic Store 8
My account 9
Personalise your navi 10
Map 11
Sound and Notification 12
Route planning.... 13
Regional 14
Display.... 15
Battery management.... 17
Online 18
Favourite POI....19
Info 20
Reset to defaults.... 21
Set up your first route 22
Searching and entering a destination 23
Navigating via search bar 24
Map tap navigation 25
Navigating to a Favourite/History/Contact 26
Navigating home.... 27
Setting destination via Widget.... 28
Photo navigation 29
Adding location to Favourites 30
Route overview 31
Adding a viapoint 32
How to save a route 34
How to cancel a route 35
Travelbook 36
Create an account to boost your Sygic with special features 37
Troubleshooting 38
Inaccurate GPS signal for navigation 39
Problem downloading voice/map.... 40
Cannot start the application.... 41
Crash/Freeze of application 42
Cannot restore purchased license 43
Error message: No Items 44
List of our video tutorials 45
Prologue
Dear customer,
Thank you for choosing Sygic GPS Navigation iOS – Next Generation.
Sygic GPS Navigation software is a complete navigation system with realistic 3D maps, accurate search and precise route computing.
Sygic GPS Navigation goes beyond professional car navigation, supporting pedestrian navigation and basic level for outdoor activities.
We wish you a pleasant and safe journey.
Sygic | Bringing life to maps

Getting started
Sygic GPS Navigation is offline navigation software and does not require online connection to operate. Online connection is only necessary during initial installation and activation of the software and for installing maps and updates. Online connection is also necessary for optional add-on services such as Traffic information and crowd-sourced Police trap alerts.
Your safety and the safety of your passengers is of utmost importance, that is why you should always plan your route before the beginning of the journey. Also make sure that you have installed all maps and updates while in the comfort of your home or at a place with solid Wi-Fi connection. For longer trips make sure that you have a compatible charger to avoid draining the device battery.
In Navigation Mode (Pic.1), the software tracks your position for visual reference of the route and map around you. (Please note that it is necessary to have GPS Module enabled on your device during usage). If you want to explore other locations, tap the screen and click *Cancel route in right upper corner to switch to Map Browsing Mode (Pic.2). If you want to go to Menu (Pic.3), please tap Menu button in left upper corner(Pic.2).
| (Pic.1) Navigation mode | (Pic.2) Map browsing mode | (Pic.3) Menu screen |
Voice/language
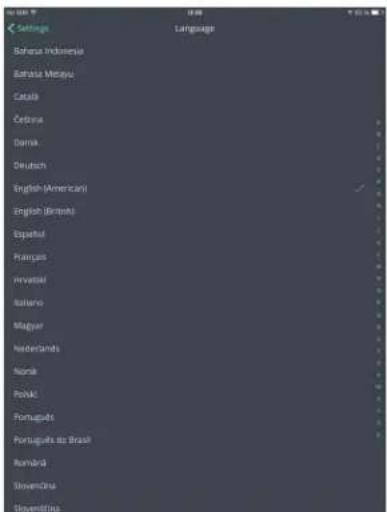
To set language of voice instructions, please go to:
Menu > Settings > Regional > Voice

If you want to set language of menu interface, please go to:
Menu > Settings > Regional > Language
Map download
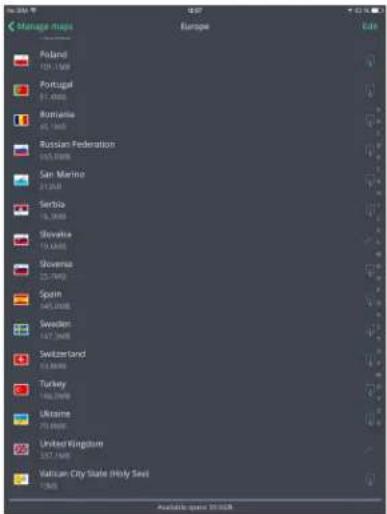
You are able to manage(download/update) your purchased map packages in Manage maps menu.
Menu > Settings > Map > Manage Maps
Dashboard – How to add/modify widgets
Main part of Menu panel is Dashboard. To easily access frequently used places, you can add multiple widgets onto a dashboard:
Free widgets:
- Home location
- Work location
- Location from Favourites list
- Location from History list
• SOS - Qibla Finder
- Photo navigation
Premium widgets:
• HUD
- Cockpit
- Blackbox
- Travelbook
Setting a widget will allow you to quickly access it without further searching.
- Tap Menu button.
- Tap Add widget.
- Pick place from history list/favourites which you would like to add as a widget to your dashboard.
- Once widget is added, you can be easily navigated via widget by tapping on it.
Step 1. Step 2. Step 3. Step 4.
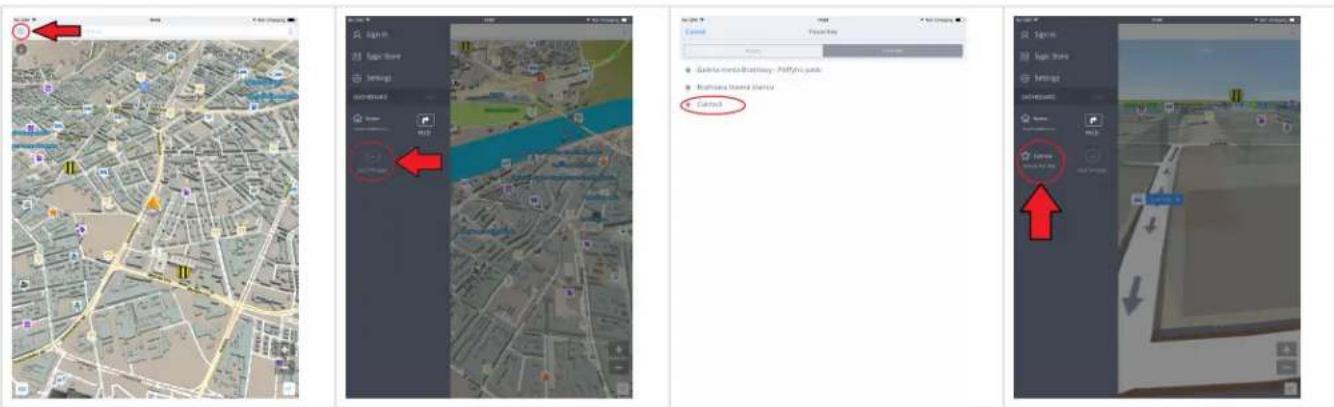
If you would like to edit(remove/replace) your widgets, tap Edit button on dashboard, Afterwards widgets start shaking and you will be able to remove/replace them. After that just tap Done button
Sign In/Sygic Store
The email used for making an in app license purchase becomes automatically your Sygic account.
You can log in to Sygic GPS Navigation with multiple types of accounts:
- Google
• Sygic (recommended)
To do so, it is enough to go to Menu > Sign In.
Menu > Sign In

Menu > Sygic Store

After successful login with your Sygic account, you will be able to use additional features through Sygic Store, such as Traffic, Head Up Display, Celebrity voices and Speed Cameras.
If you seek more information or support about Sygic online features, please see category Other available products on our help center page.
My account
If you are logged in successfully to Sygic with your account, you can modify following account settings in My account screen:
- Change password
• Sign me in automatically - Help Improve Traffic
- News & Updates
Menu > Account address
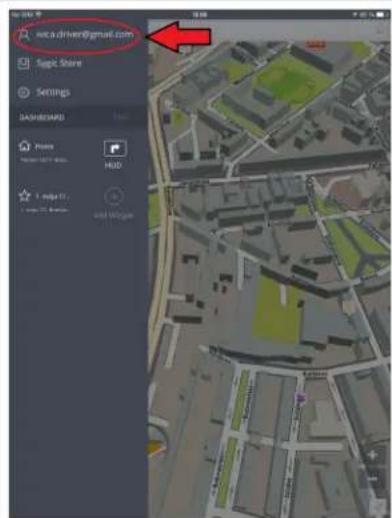
Menu > Account address > My account

Personalise your navi
If you want to personalise your settings, it is enough to go to Menu > Settings, and pick which setting you would like to modify.
Menu>Settings
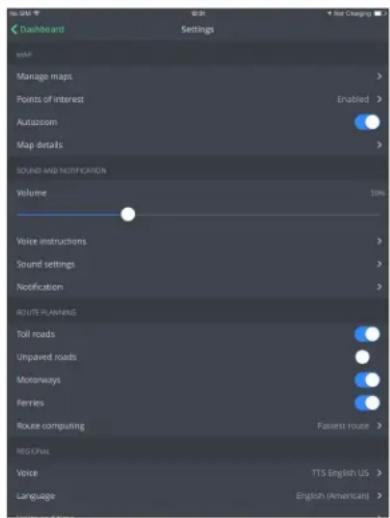
Please note, that you can easily use Sygic GPS Navigation without changing anything in Sygic settings.
Map
You can easily personalise your map settings by going to Menu > Settings > Map, and pick which setting you would like to modify:
- Manage maps
You are able to manage your purchased map packages in Manage maps menu
- Points of interest
Enable/disable showing all POIs, or certain categories of POIs on the map.
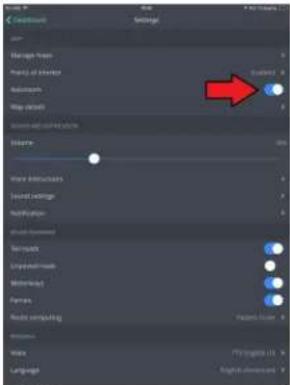
- Autozoom
Enable/disable autozooming
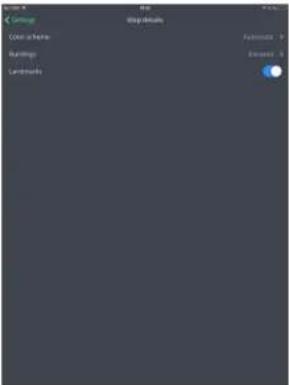
- Map details
Change color scheme of maps(day/night), modify style of displaying buildings, enable/disable landmarks showed on map.
| Menu > Settings > Map > Manage Maps | Menu > Settings > Map > Points of interest | Menu > Settings > Map > Autozoom | Menu > Settings > Map > Map details |
 |  |  |  |
Sound and Notification
• Volume
Regulate applications volume level.
• Voice instructions
Enable/Disable voice instructions.
Enable/Disable road numbers voicing.
- Sound settings
If you are listening to music while driving, you are able to easily set fading music to a certain volume level during Sygic sound notifications or voice instructions.
- Notification
Enable/Disable notifications about Speed Cameras, Speed limits, Traffic information and Sharp curve warning.
Menu > Settings > Sound and Notification > Notification
Menu > Settings > Sound and Notification > Volume
Menu > Settings > Sound and Notification > Voice instructions
Menu > Settings > : Notification > Soun


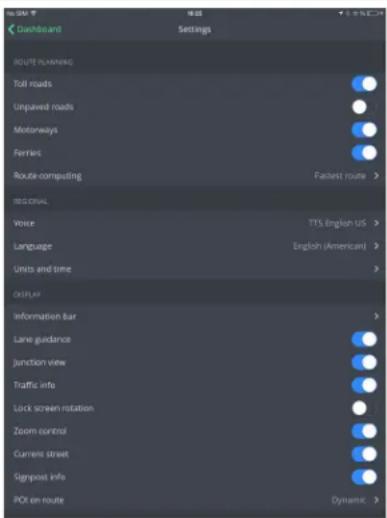
Route planning
- Avoid toll roads
Enable/disable avoiding toll roads - Avoid unpaved roads
Enable/disable avoiding unpaved roads - Avoid motorways
Enable/disable avoiding motorways - Avoid ferries
Enable/disable avoiding ferries
- Route computing
Choose between Fastest/ Shortest/Economic route
Menu > Settings > Route planning
Regional
• Voice
Set language of voice instructions.
- Language
Set language of user interface.
- Units and time
Change distance units, time format, temperature(celsius/fahrenheit), displaying of GPS coordinates(degrees/minutes/seconds).
Menu > Settings > Regional > Voice

Menu > Settings > Regional > Language

Menu > Settings > Regional > Units and time

Display
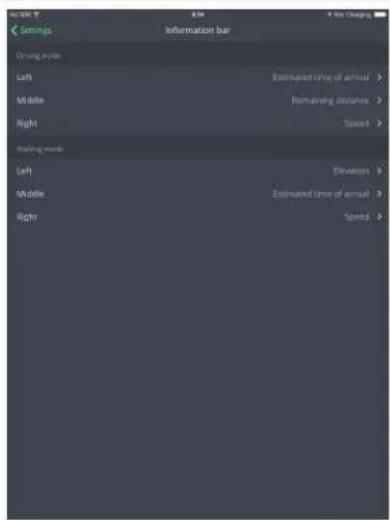
Set which information you want to see on Information bar in driving or walking mode.
• Estimated time of arrival
- Speed
- Elevation
- Remaining distance
- Time
- Signal level
- Route length
- Travelled distance
In Display menu you are able to enable/disable displaying of following functions:
- Lane guidance
- Junction view
- Traffic info
- Lock screen rotation(for bikers)
- Zoom control
- Current street
- Signpost info
Menu POI on route allows you to modify displaying of POIs(Points of interest) on route map screen.
- Dynamic Shows only POIs nearby your current position.
- Off Disables displaying of POIs.
• Always on Shows all POIs on map view screen.
- Select categories Pick which category of POIs you want to see on your route map screen.
Menu > Settings > Display > Information bar
Menu > Settings > Display

Menu > Settings > Display > POI on route

Battery management
- On external power
Choose High performance/Optimized/Power saver
- On battery
Choose High performance/Optimized/Power saver
Menu > Settings > Battery management

Online
Cloud service allows you to export your saved POIs (Points of interest) to your Dropbox or iCloud account, so you will be able to import them later to your new device.
Menu > Settings > Cloud service

Favourite POI
You can import your favourites POIs. Personalise the app with speed cameras, radars, restaurants, petrol stations, wifi hotspots and many other POIs from the internet for free. You can plan routes to these POIs, or be warned by the app when passing by.
Menu > Settings > Favourite POI

Info
- About
Information about version, device code and available application memory.
Please provide this information in communication with our Customer support.
• What's new
See what's new in latest version of Sygic application.
• Copyright
End user license agreement and Sygic copyright terms.
- Give us feedback
Provide us with information about your user experience with Sygic GPS Navigation.
• Help
Detailed online help about usage of Sygic GPS Navigation.
- Rate this application
Rate Sygic application in App Store.
| Menu > Settings > Info > About | Menu > Settings > Info > What's new | Menu > Settings > Info > Copyright | Menu > Settings > Info > Give us feedback | Menu > Settings > Info > Help | Menu > Ra |
Reset to defaults
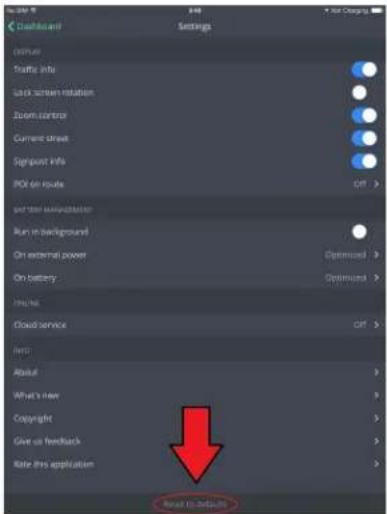
To get back to default state of Sygic application, reset it to its default settings.
Menu > Settings > Reset to defaults
Set up your first route
Dear customer,
this category contains information about how to set and modify route and all other routing possibilities. such as Quick search navigation, Map tap navigation, Widget navigation, Navigating to a Favourite/History/Contact and Navigating home.
Searching and entering a destination
There are several options available for searching and navigating to certain destination:
• Navigating via Quick search
- Map Tap navigation
• Navigating to a Favourite/History/Contacts
- Navigating Home
- Setting destination via Widget
- Photo navigation
Navigating via search bar
Quick search navigation:
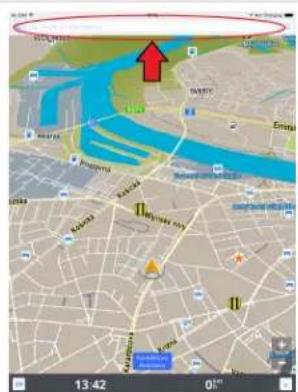
- Type state, city, street adress or GPS coordinates into search bar on the top of the screen in map browsing mode.
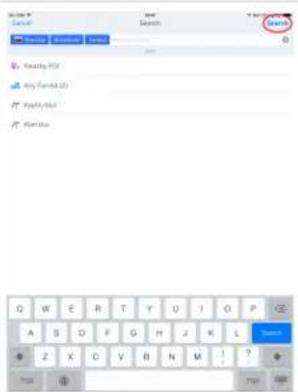
Please note: It is necessary to type GPS coordinates using decimal degrees format, for example: 48.15027 17.12561 - When your requested destination is found, tap Search button in right upper corner.
- After that, your destination will be shown on map browsing screen. If you want to set a route to this destination, just tap Route button in right upper corner.
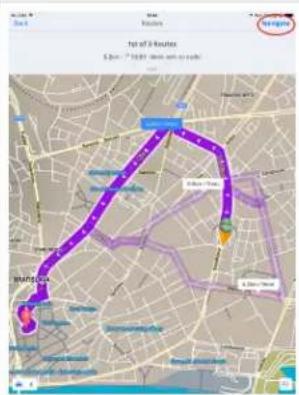
- Afterwards a route or multiple routes(max.3) will be calculated and shown in violet color. Choose a certain route by tapping on it. To navigate through your chosen route, just tap Navigate button in right upper corner.
Step 1. Step 2. Step 3. Step 4.


Map tap navigation
Map tap navigation:
- Tap a place on the map to which you would like to be navigated. Afterwards name or address of location will be highlighted in blue bar.
- Click on the blue bar to show Location options.
- If you tap Get directions, a route or multiple routes(max.3) will be calculated and shown in violet color. Choose a route by tapping on it.
- To navigate through your chosen route, just tap Navigate button in right upper corner.
Step 1. Step 2. Step 3. Step 4.


Navigating to a Favourite/History/Contact
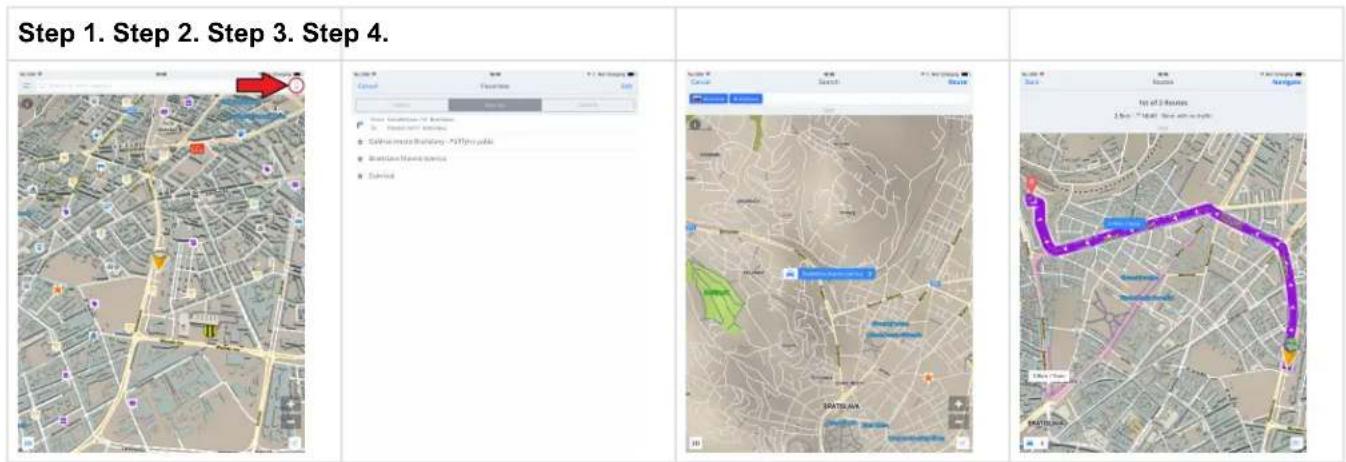
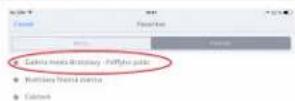
- For navigating to a place from your History list, Favourites or Contacts, just tap an icon in right upper corner in Map screen.
- Afterwards click on particular place from History/Favourites/Contacts and tap Route.
- Your destination will be shown in map browsing screen. If you want to set a route to this destination, just tap Route button in right upper corner.
- Route or multiple routes (max.3) will be calculated and shown in violet color. Choose a certain route by tapping it. To navigate through your chosen route, just tap Navigate button in right upper corner.
Navigating home
Firstly, you have to set your home location from favourites/history list.
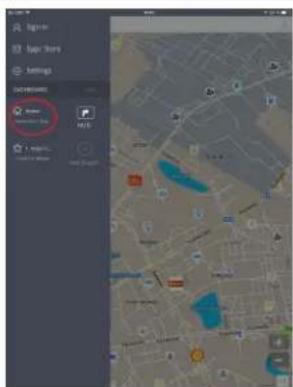
- Tap Menu button.
- Tap Home button on the dashboard to set your home adress.
- Pick your home location from history/favourites by tapping it.
- Once a home location is set, it is enough just to tap Home button again. After that a route to your home location will be calculated.
It is also possible to set Home widget of new desired home location by tapping home icon located in left upper corner of Location screen.
Step 1. Step 2. Step 3. Step 4.


Setting destination via Widget
Setting a widget will allow you to quickly access it without further searching.
- Tap Menu button.
- Tap Add widget.
- Pick a place from history list/favourites which you would like to add as a widget to your dashboard.
- Once widget is added, you can be easily navigated via widget by tapping on it.
Step 1. Step 2. Step 3. Step 4.


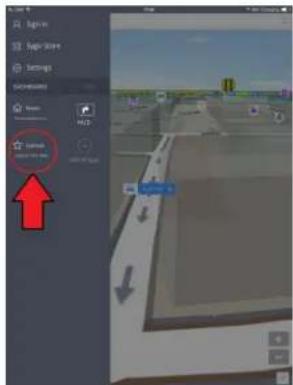
If you would like to edit(remove/replace) your widgets, just click Edit button on the dashboard, afterwards widgets will start shaking, so you will be able to modify them. To save current widgets positions, just tap Done button
Photo navigation
Sygic GPS Navigation provides you with the ability to navigate to a geotagged photo, which contains information about location of a place where picture was taken.
- Tap Photo navigation widget located on the dashboard panel and select desired photo from your device. If you have not set Photo navigation widget yet, please see article Dashboard – How to add/modify widgets, which contains detailed information about how to do so.
- After tapping on picture the route will be calculated instantly. To start navigation, simply tap Navigate button.
Step 1. Step 2.


Adding location to Favourites
To add a location to your Favourites list:
- Find desired location in map browsing mode or via Search bar.
- Tap on blue bar with name of location, so you will get to Location screen.
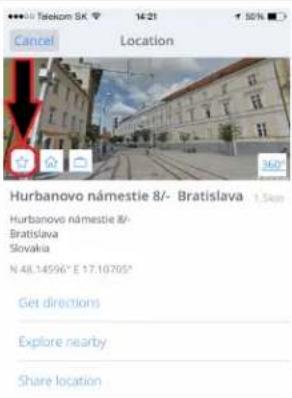
- To add this location to your Favourites, please tap star icon on the left upper corner of Location screen.
- Once place is added to Favourites, star button in Location screen will turn blue
For information about navigating to Favourite location, please see chapter Navigating to a Favourite/History/Contact from this user guide.
Step 2. Step 3. Step 4.


Route overview
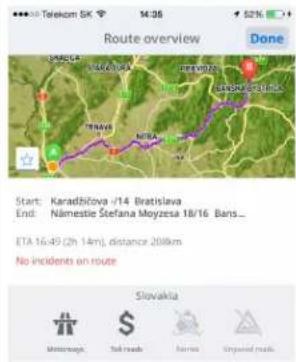
Each time when routes are being calculated, or you are already in navigation mode, tap Route overview button (Pic.1) in right bottom corner to access the Route overview screen (Pic.2) for detailed information about your route (distance, incidents on route, step-by-step route instructions).
(Pic.1) Route overview button

(Pic.2) Route overview screen

Adding a viapoint
Adding viapoint by Drag & Drop
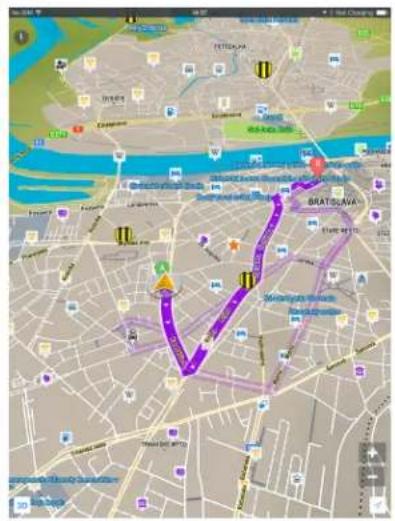
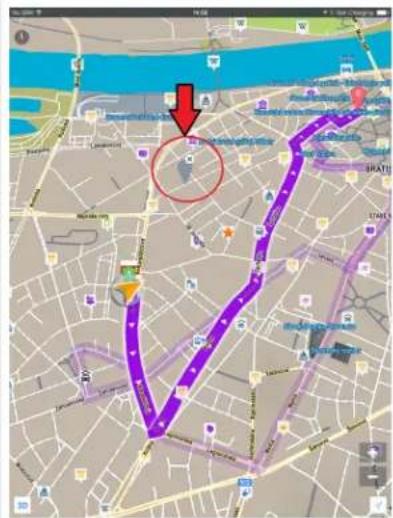
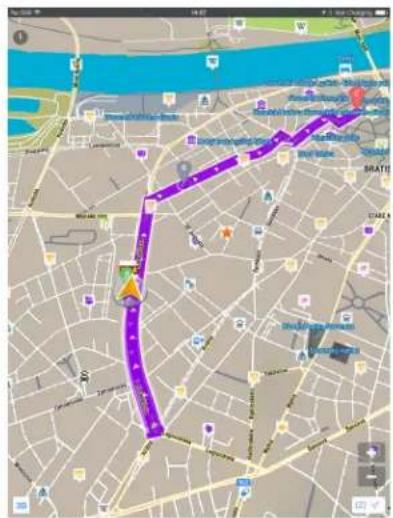
- In Map Browsing mode you can edit the route by holding your finger on the route a bit longer until gray flag appears.
- Drag the gray flag to a requested position of viapoint.
-
The route will be altered to pass through that place. With Drag & Drop function you can also change starting point or destination point of your route.
-
Route view 2. Adding waypoint 3. Added waypoint
Adding viapoint by Map Tap
- Tap on a place on the map which you would like to set as viapoint. After that, a place will be highlighted in blue bar.
- Click on the blue bar to show Location options.
-
If you tap Travel via, a route will be altered to pass through that place
-
Map Tap 2. Travel via button 3. Added viapoint


How to save a route
To save a calculated route, please follow these steps:
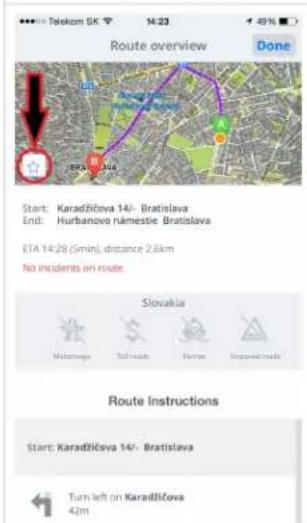
- Tap star button in Route overview screen screen.
- Star button will turn blue and route will be saved to Favourites list.
For information about navigation to previously saved route, please see chapter Navigating to a Favourite/History/Contact.
- Step 2. Step

How to cancel a route
To cancel calculated route, firstly tap the screen once in Navigation mode. Afterwards click on Cancel route button in upper right corner.
Cancel Route

Travelbook
Travelbook feature provides detailed statistics(time, date, distance, addresses, average speed etc.) of routes which you have so far completed using Sygic GPS Navigation.
Travelbook widget is located on the dashboard panel. If you have not set Travelbook widget yet, please see article Dashboard – How to add/modify widgets, which contains detailed information about how to do so.
Travelbook widget Travelbook screen


Create an account to boost your Sygic with special features
The email used for making an in app license purchase becomes your Sygic account.
You can log in to Sygic GPS Navigation with multiple types of accounts:
- Sygic (recommended)
To do so, it is enough to go to Menu > Sign In.
Menu > Sign In

Menu > Sygic Store

After successful login with your Sygic account, you will be able to use additional features through Sygic Store, such as Traffic, Head Up Display, Celebrity voices, Speed Cameras etc.
If you seek more information or support about Sygic online features, please see category Other available products on our help center page.
Troubleshooting
Dear customer,
if you are experiencing any issues with Sygic GPS Navigation, this category will help you solve it.
Please, choose your type of issue from the menu on the left side.
If you would not find proper solution in this User Guide, please contact our Customer support.
Inaccurate GPS signal for navigation
Please, make sure that location services are turned on iOS settings > Privacy > Location services, that you are outside and under the clear sky.
If problem continues. please contact our Customer support.
Problem downloading voice/map
Please, try to connect to another wireless network and make sure no firewall/antivirus is blocking the connection.
If problem continues please contact our Customer support. Please, send us screenshot from application's Menu > Settings > About with visible Device Name and describe your issue.
Cannot start the application
Please, uninstall the application and install it from AppStore again.
If problem continues. please contact our Customer support. Please, send us the exact name of the application you are using and model of your device.
Crash/Freeze of application
Please, uninstall the application and install it from AppStore again.
If problem continues. please contact our Customer support. Please, send us the exact name of the application you are using and model of your device.
Cannot restore purchased license
Please make sure that you have the newest version of the application. Visit the AppStore to see if you are updated. If you have the latest possible update, please, follow the steps bellow:
- Log in with your Sygic account in Menu > Sign In.
- Download some new map from your package via Menu > Setting > Manage maps, or delete and download some map you already have downloaded.
- You need to create route in the map of your purchased region to obtain GPS location. Otherwise the app will think you are not located in the area of purchased package.
If problem continues. please contact our Customer support.
Please send us following documents:
- screenshot from your iTunes purchase history where the purchase of our app is visible(whole purchase with package).
- screenshot from our app's Settings -> About screen with visible DeviceID.
- your Sygic account (the e-mail you are using to login in to our application).
Please note: You can make a screenshot by pressing the Home button and Power button together
Error message: No Items
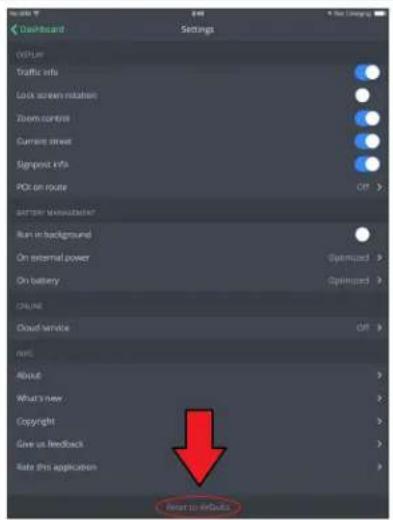
Please, uninstall the application and install it from AppStore again. If this does not help, please, go to application's Menu > Settings > Reset to the defaults.
Menu > Settings > Reset to defaults
If problem continues. please contact our Customer support. Please, send us screenshot from application's Menu > Settings > Info > About with visible Device Name and describe your issue.
List of our video tutorials
See our new step-by-step video guides about purchase and installation of Sygic GPS Navigation on iOS – Next Generation.
- Video Guide – How to buy Sygic GPS Navigation on iOS – Next Generation.
- Video Guide – How to install Sygic GPS Navigation on iOS – Next Generation.
Our video guides are available to see also via Sygic Youtube channel.


- SYGIC GPS NAVIGATION IOS - NEXT GENERATION
- TABLE OF CONTENTS
- PROLOGUE 2
- GETTING STARTED.... 3
- PERSONALISE YOUR NAVI 10
- SET UP YOUR FIRST ROUTE 22
- CREATE AN ACCOUNT TO BOOST YOUR SYGIC WITH SPECIAL FEATURES 37
- TROUBLESHOOTING 38
- PROLOGUE
- GETTING STARTED
- VOICE/LANGUAGE
- MAP DOWNLOAD
- DASHBOARD – HOW TO ADD/MODIFY WIDGETS
- FREE WIDGETS
- PREMIUM WIDGETS
- SIGN IN/SYGIC STORE
- MY ACCOUNT
- PERSONALISE YOUR NAVI
- MAP
- MANAGE MAPS
- POINTS OF INTEREST
- AUTOZOOM
- MAP DETAILS
- SOUND AND NOTIFICATION
- ROUTE PLANNING
- REGIONAL
- VOICE
- LANGUAGE
- UNITS AND TIME
- DISPLAY
- BATTERY MANAGEMENT
- ONLINE
- FAVOURITE POI
- INFO
- ABOUT
- WHAT'S NEW
- COPYRIGHT
- GIVE US FEEDBACK
- HELP
- RATE THIS APPLICATION
- RESET TO DEFAULTS
- SET UP YOUR FIRST ROUTE
- SEARCHING AND ENTERING A DESTINATION
- NAVIGATING VIA SEARCH BAR
- QUICK SEARCH NAVIGATION
- MAP TAP NAVIGATION
- NAVIGATING TO A FAVOURITE/HISTORY/CONTACT
- NAVIGATING HOME
- SETTING DESTINATION VIA WIDGET
- PHOTO NAVIGATION
- ADDING LOCATION TO FAVOURITES
- ROUTE OVERVIEW
- ADDING A VIAPOINT
- ADDING VIAPOINT BY DRAG & DROP
- ADDING VIAPOINT BY MAP TAP
- HOW TO SAVE A ROUTE
- HOW TO CANCEL A ROUTE
- TRAVELBOOK
- CREATE AN ACCOUNT TO BOOST YOUR SYGIC WITH SPECIAL FEATURES
- TROUBLESHOOTING
- INACCURATE GPS SIGNAL FOR NAVIGATION
- PROBLEM DOWNLOADING VOICE/MAP
- CANNOT START THE APPLICATION
- CRASH/FREEZE OF APPLICATION
- CANNOT RESTORE PURCHASED LICENSE
- ERROR MESSAGE: NO ITEMS
- LIST OF OUR VIDEO TUTORIALS
Brand : Sygic
Model : GPS Navigation iOS
Category : GPS Navigator