
UP-3300 - Cash register SHARP - Free user manual and instructions
Find the device manual for free UP-3300 SHARP in PDF.


| Product Type | Electronic Cash Register |
| Brand | Sharp |
| Model | UP-3300 |
| Dimensions (W x D x H) | Approx. 400 x 420 x 300 mm |
| Weight | Approx. 8 kg |
| Power Supply | AC 220-240V, 50/60 Hz |
| Display | Operator and customer LCD displays |
| Printer | Dot matrix receipt printer |
| Cash Drawer | Built-in lockable cash drawer |
| Keyboard | Programmable alphanumeric keyboard |
| Memory Backup | Battery backup for data retention |
| Main Functions | Sales, returns, discounts, tax calculation, reports |
| Programmable Keys | Up to 200 PLU keys |
| Connectivity | RS-232 port for PC or scanner |
| Maintenance | Clean exterior with soft dry cloth; avoid liquids |
| Safety | Keep away from water and extreme temperatures |
| Parts & Repairability | Spare parts available; consult service manual |
| General Information | Designed for retail and hospitality use |
Frequently Asked Questions - UP-3300 SHARP
User questions about UP-3300 SHARP
0 question about this device. Answer the ones you know or ask your own.
Ask a new question about this device
Download the instructions for your Cash register in PDF format for free! Find your manual UP-3300 - SHARP and take your electronic device back in hand. On this page are published all the documents necessary for the use of your device. UP-3300 by SHARP.
USER MANUAL UP-3300 SHARP
Thank you very much for your purchase of the SHARP POS Terminal Model UP-3300. Please read this Manual carefully before operating your machine in order to gain full understanding of functions and features. Please keep this manual for future reference. It will help you if you encounter any operational problems.
IMPORTANT
• Install your POS terminal in a location that is not subject to direct radiation, unusual temperature changes, high humidity or exposure to water sources. Installation in such locations could cause damage to the cabinet and the electrical components. - The POS terminal should not be operated by an individual with wet hands. The water could seep into the interior of the POS terminal and cause component failure. - Do not apply excessive pressure to the display. Do not use a sharp-pointed object on the display. The LCD display will be damaged easily. - When cleaning your POS terminal, use a dry, soft cloth. Never use solvents, such as benzine and/or thinner. The use of such chemicals will lead to discoloration or deterioration of the cabinet. - The POS terminal plugs into any standard wall outlet (official (nominal) voltage). Other electrical devices on the same electrical circuit could cause the POS terminal to malfunction. - If the POS terminal malfunctions, call your authorized SHARP dealer for service - do not try to repair the POS terminal yourself.
PRECAUTION
This POS terminal has a built-in memory protection circuit which is operated by a rechargeable battery pack. It should be known that all batteries will, in time, dissipate their charge even if not used. Therefore to insure an adequate initial charge in the protection circuit and to prevent any possible loss of memory upon installation, it is recommended that each unit be allowed to be recharged for a period of 24 to 48 hours prior to use by the customer.
In order to charge the battery pack, the machine must be plugged in and its power switch must be set to the "ON" position. This recharging precaution can prevent unnecessary initial service calls.
CONTENTS
INTRODUCTION ................. IMPORTANT ................. PRECAUTION .................
Correction of Incorrect Entries Not Handled by the Direct, Indirect or Subtotal Void Function ................. 96
Correction of drink dispenser articles in a drink dispenser misoperation file ................. 238
1 Part Names and Functions
This chapter describes the part names and functions of this POS terminal.
External View
■ Front view
■ Rear view
Display
This POS terminal is equipped with a color LCD operator display.
The operator display is a touch panel.
Operations can be performed by touching the screen (which shows keys or items in the receipt window) of the operator display.
■ Operator display (touch panel)
The display can be tilted to the best viewing angle by sliding the rear stand.
Be sure to push the button on the rear stand when sliding it.

↑ Screen example (REG mode)![Time Mode caption CLER80001 OOO1 MAIN-1(HUME) 20:43 REG 1 PL000001 1.10 MODE HENIO1 HENIO2 HENIO3 HENIO4 1 PL000003 1.75 1 PL000002 2.50 CASH 5.35 INPUTSFT MENUOS MENUOG [ J ] ***TITNL 5.35 CASH 5.35 L1 DPT.01 DPT.02 DPT.03 DPT.04 P1L01 L2 000001 000006 MGR FU 7 0 9 ENTER SUD 000002 000007 UID 4 5 6…](/content/2026/06/1310338/images/9152b252c4406b60faab387f9021d82994723bee8452e6bfc0ce59490c7914bb.jpg)
The size of a display area depends on the layout of a touch-panel keyboard (e.g., key size) or the function mode (e.g., drive-through function).
↑ Display example 1 (REG mode)
↑ Display example 2 (PGM mode)![CLE00001 0001 20:56 PGR Time Mode caption Clerk name Clerk code 01 PRICE 5.00 GROUP No. 01 DESCRIPTION DPT.0-1 KEY DESCRIPTION DPT.01 KEY COLOR CYMN ITEM UP NON-COMPULTRY TARE TABLE No. 0 SCALE ININIT SIF/SICS/MORMAL NORMAL RECEIPT TYPE SINGLE GNT.ENTRY TYPE OPEN A PRESET CHADS [→ 3] Window: In the…](/content/2026/06/1310338/images/e3bccc837d1c896abc9163a2bf82d78f480c76f0f4b4c6fee88ee4efb08e9184.jpg)
■ Screen save mode
To save electrical power or extend the display's life, your POS terminal is provided with the screen save function. This function can turn the LCD backlight off when the POS terminal is left idle for an extended period of time. You can program the time for which your POS terminal should keep the normal status (in which the backlight is "ON") before it goes into the screen save mode.
To exit the screen save mode, touch a key.
Clerk Keys
This POS terminal allows the operator to use the following four clerk identification systems:
• Real clerk keys (standard 6 clerks/max. 126 clerks) - Clerk code entry (max. 255 clerks) - Clerk entry keys (max. 10 clerks) • WMF clerk keys (max. 127 clerks)
The standard POS terminal has been shipped with the real clerk key system being programmed. If you want to change the clerk identification system, contact your authorized SHARP dealer.
Real clerk keys (1, 2, 3, 4, 5, and 6)

These keys serve to identify clerks. Put one of the 1 through 6 keys in the clerk switch.
Clerk code entry (1 through 9999)
Enter the clerk code by using the following procedure:

Clerk entry keys

These keys identify clerks. Touch any one of these keys.
WMF clerk keys
Put one of the WMF clerk keys in the WMF clerk switch.
2 Before Operating the POS Terminal
This chapter describes those steps required prior to using the POS terminal for the first time.
Display Adjustment
You can adjust the brightness and contrast of the display by using the corresponding controls.
↑ Brightness control
Turning the control backwards darkens the display and turning it forwards brightens the display.

↑ Contrast control
Turning the control backwards darkens the display and turning it forwards lightens the display.
The backlight in the display is a consumable part.
When the LCD display may no longer be adjusted and becomes darker, you should change the backlight.
Consult your authorized SHARP dealer for further details.
Connecting the Printer and Installing the Paper Rolls
This POS terminal may be configured with multiple types of printers offered in the market. For specific instructions related to the handling and care of the printer, please refer to the applicable printer instruction manual.

Selecting an Operating Mode
The POS terminal will display the following listing by touching the key.
Mode selection window

Operating Modes
You can select any mode other than REG from the list in the mode selection window. Your POS terminal supports the following 9 operating modes:
| REG mode | This mode allows you to enter various sales information. The mode selection window does not list this mode. To select this mode from the mode selection window, touch the key. |
| OPXZ mode | This mode allows clerks to take X or Z reports on their sales information. It can also be used for employee time function. |
| OFF mode | This mode locks all operations of the POS terminal. When you select this mode, the window will disappear. Touching any key turns the POS terminal ON. |
| X1/Z1 mode | This mode is used to take various daily reports (X1/Z1 reports). |
| X2/Z2 mode | This mode is used to take various weekly or monthly reports (X2/Z2 reports). |
| PRICE mode | This mode allows you to program unit price of PLUs. |
| PGM1 mode | This mode allows you to program those items which need to be changed often such as unit prices and discount percentages. |
| PGM2 mode | This mode allows you to program those items which can be programmed in the PGM1 mode and do not require frequent changes such as date, time, and terminal functions. |
| AUTO KEY mode | This mode allows you to program automatic sequencing keys. |
Mode Selection

■ Selecting a mode
Use one of the following three methods:
- Touch the desired option line in the window.
- Move the cursor to a desired option by using the or key. Then touch the key.
- Enter the desired option number by using a numeric key. Then touch the key.

When you want to enter the REG mode, simply touch the key.
■ Returning to the mode selection window

To return to the mode selection window, use the following procedure:
- Touch the or key with the menu screen of the selected mode displayed.
- You will enter the REG mode.
- Touch the key.
- You will return to the mode selection window.
4 Receipts
Type of Receipts
You can select one of the following 7 types of receipts. These types of receipts are available in the REG, MGR or VOID mode. By default, the addition receipt type is selected. If you want to change the type of receipts, contact your authorized SHARP dealer.
- Addition receipt type
- Addition without payment receipt type
- Single/double receipt type • Single/double + addition receipt type
- Addition + single receipt type • Double addition receipt type • Double (addition + single) receipt type
■ Addition receipt type
The addition receipt is a standard type. Several items can be printed on one receipt.
Addition receipt
| 15/12/99 | 123456 |
| 10:27 | |
| JACK | |
| PL000001 | *1.20 |
| PL000003 | *5.00 |
| CASH | *6.20 |
■ Addition without payment receipt type
Your POS terminal prints in the same manner as for the addition receipt type. However, it does not print the total part which shows payment methods such as "CASH" and "CHECK" with the total amount.
Addition without payment receipt
| 15/12/99 | 123456 |
| 10:40 | |
| JACK | |
| PL000001 | *1.20 |
| PL000003 | *5.00 |
| SUBTOTAL | *6.20 |
■ Single/double receipt type
When you select this type:
• One receipt is issued and the transaction is finalized each time you enter an item. - A single receipt or a double receipt is issued depending on the PGM2 programming for the department. • Each sales transaction is automatically handled as a cash deal. - Items specified as SICS or SIF are treated as a single type. - PBLU entry is allowed. (However, the receipt type is regarded as the single/double + addition mode receipt type.) - Only the top logo is printed on the first part of the double receipt and the single receipt. No logo is printed on the second part of the double receipt.
Double receipt Single receipt
| 15/12/99 | 123456 |
| 10:50 | |
| JACK | |
| PL000001 | *1.20 |
| 15/12/99 | 123456 |
| 10:50 | |
| JACK | |
| PL000001 | *1.20 |
| 15/12/99 | 123456 |
| 10:47 | |
| JACK | |
| PL000001 | *1.20 |
■ Single/double + addition receipt type
When you select this type:
• Each item receipt is issued in series after you finalize the transaction. - A single receipt or a double receipt is issued depending on the PGM2 programming for the department. - PBAL receipts and a total part of receipt are not issued in a PBLU entry. - Items specified as SICS or SIF are treated as single type. - Only the top logo is printed on the first part of the double receipt and the single receipt. No logo is printed on the second part of the double receipt.
Double receipt Single receipt
| 15/12/99 | 123456 |
| 10:53 | |
| JACK | |
| PL000001 | *1.20 |
| 15/12/99 | 123456 |
| 10:53 | |
| JACK | |
| PL000001 | *1.20 |
| 15/12/99 | 123456 |
| 10:53 | |
| JACK | |
| PL000001 | *1.20 |
■ Addition + single receipt type
When you select this type:
- An addition receipt and each single receipt are issued in series after you finalize the transaction.
- Footer logo message is printed at the end of the addition receipt part.
- PBAL receipts and a total part of receipt are not issued in a PBLU entry.
- The information on multiplication entry will be printed on a single receipt.
- Only the top logo is printed on each single receipt.

■ Double addition receipt type
The contents of this type of receipt is same as the addition receipt type.
However, the same receipt will be issued two times.
■ Double (addition + single) receipt type
The contents of this type of receipt is same as the (addition + single) receipt type.
However, the same receipt will be issued two times.
Sorted Receipt Function
When the sorted receipt function is programmed for your POS terminal, PLUs are printed in sorted form by PLU group regardless of the order that you entered items.
If you want to use this function, contact your authorized SHARP dealer.
NOTE
This function is ineffective when the single/double receipt type is selected.
Example
It is assumed that you enter the items in the following order:
Key Operation![graph LR A["Group 0"] --> B["2"] C["Group 1"] --> B D["Group 2"] --> B E["Group 1"] --> B B --> F["000001"] B --> G["PLU"] B --> H["000003"] B --> I["000004"] B --> J["CASHTL"]](/content/2026/06/1310338/images/7559032aab42b4920519834d64134f1b9624e78e0683d76dc2f01e5c8409cf4b.jpg)
The print format differs depending on the programmed receipt type as follows:
- Addition receipt type
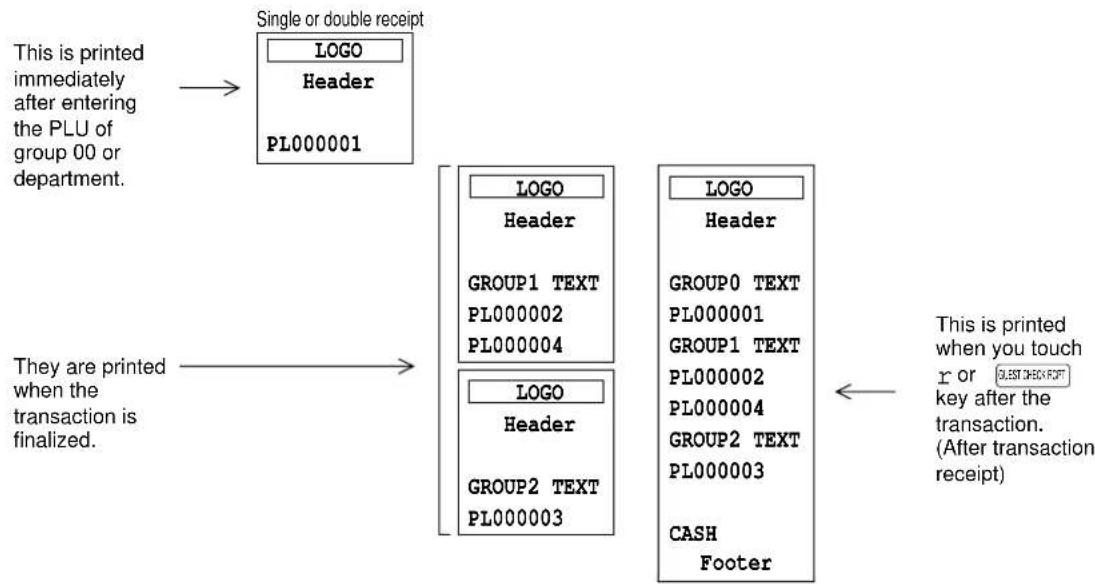
- Addition without payment receipt type

- Single/double + addition receipt type

- Addition + single receipt type

5 Prior to Entries
REG MODE
Preparations for Entries
- Select the REG mode from the mode selection menu by touching the key.
- Ensure that all printers in your system have adequate paper rolls prior to beginning entries. For more information, please refer to the applicable printer's manual.
Error Warning
In the following examples, your POS terminal will go into an error state accompanied with a warning beep and the error message on the display. Clear the error state by touching the key and take the proper action.
- When you exceed a 32-digit number (entry limit overflow): Cancel the entry and re-enter a correct number.
- When you make an error in key operation: Clear the error and try the entry again.
- When you make an entry beyond a programmed amount entry limit: Check to see if the entered amount is correct. If it is correct, it can be rung up in the MGR mode. Contact your manager.
- When an including-tax subtotal exceeds eight digits: Delete the subtotal by touching the key and touch a media key to finalize the transaction.
Sample Receipt

6 Entries
REG MODE
Function Key Description
■ Touch-panel keyboard
This POS terminal provides the following types of keyboards for various functions or modes.
- Main-1 (Home) keyboard · Function menu 1 keyboard (blank)
- Main-2 keyboard · Function menu 2 keyboard (blank) · Main-3 keyboard · Function menu 3 keyboard
- Sub-1 keyboard - Function menu 4 keyboard
- Sub-2 keyboard · Function menu 5 keyboard
- Sub-3 keyboard · Payment menu keyboard
- Condiment-1 keyboard · Bill separate/Bill total keyboard
- Condiment-2 keyboard - Drive thru keyboard
- Condiment-3 keyboard · PGM mode keyboard · Menu-1 keyboard · PGM COMMAND keyboard · Menu-2 keyboard · X/Z mode keyboard · Menu-3 keyboard · X/Z COMMAND keyboard
- Character keyboard
If you want to change the layout, consult your authorized SHARP dealer.
Transition of the keyboard![graph TD A["PGM/XZ mode keyboard"] --> B["Main-1 (Home) keyboard"] B --> C["Main-2 keyboard"] C --> D["Main-3 keyboard"] D --> B B --> E["Sub-1 keyboard"] E --> F["Sub-2 keyboard"] F --> G["Sub-3 keyboard"] G --> E E --> B B --> C C --> D D --> B B --> A](/content/2026/06/1310338/images/e8186ad39c2adf33c43836df85dfaee6e64e2cfa50c734a904372b091451cfd7.jpg)
Keyboard layout (default)
· Main-1 (Home) keyboard
This keyboard appears when you touch the key.
| MODE | MENU01 | MENU02 | MENU03 | MENU04 | |||||
| VATSFT | MENU05 | MENU06 | |||||||
| L1 | DPT.01 | DPT.02 D | DPT.03 D | DPT.04 | |||||
| L2 | 000001 000006 | ||||||||
| MGR FU | 7 | 8 | 9 | SENTER | 000002 000007 | ||||
| VOID | 4 | 5 | 6 | OPEN T | 000008 | 000008 | |||
| CANCEL | 1 | 2 | 3 | AURRAL | 000004 000009 | ||||
| CLEAR | 0 | ♦MORE | MORE∅ | NEXT C | PAYMEN | 000005 00001 | 0 | ||
· Main-2 keyboard
This keyboard appears when you touch the key on the Main-1 (Home) keyboard.
| HOME | MENU01 | MENU02 | MENU03 | MENU04 | |||||
| VATSFT | MENU05 | MENU06 | |||||||
| L1 | DPT.01 | DPT.02 D | PT.03 DPT.04 | ||||||
| L2 | 000011 0000 | 6 | |||||||
| MGR FU | 7 | 8 | 9 | TEXNTER | 000012 000017 | ||||
| VOID | 4 | 5 | 6 | OPEN T | 000018 | 000018 | |||
| CANCEL | 1 | 2 | 3 | AUNREAL | 000014 000019 | ||||
| CLEAR | 0 | ♦MORE | MORE∅ | NEXT C | PAYMEN | 000015 0000 | 20 | ||
· Main-3 keyboard
This keyboard appears when you touch the key on the Main-2 keyboard.
| HOME | MENU01 | MENU02 | MENU03 | MENU04 | |||||
| VATSFT | MENU05 | MENU06 | |||||||
| L1 | DPT.01 | DPT.02 D | DPT.03 D | DPT.04 | |||||
| L2 | 000021 000026 | ||||||||
| MGR FU | 7 | 8 | 9 | TENTER | 000022 000027 | ||||
| VOID | 4 | 5 | 6 | OPEN T | 000028 000028 | ||||
| CANCEL | 1 | 2 | 3 | AUNEDAL | 000024 000029 | ||||
| CLEAR | 0 | ♦MORE | MORE∅ | NEXT C | PAYMEN | 000025 000030 | |||
The Sub-1 keyboard appears when you touch the key.
The Sub-2 keyboard appears when you touch the key on the Sub-1 keyboard.
The Sub-3 keyboard appears when you touch the key on the Sub-2 keyboard.
| HOME | MENU10 | MENU11 | MENU12 | MENU13 |
| VATSFT | MENU14 | MENU15 | ||
| AUTO2 | 000031 | 000037 | ||
| TEXT2 | 000032 000038 | |||
| TEXTTER | 000033 000039 | |||
| 000034 000040 | ||||
| AUNIBAL | 000035 000041 | |||
| PAYMEN | 000036 000042 | |||
| MGR FU | 7 | 8 | 9 | TEENTER 000033 000039 | ||
| VOID | 4 | 5 | 6 | OPEN T | 000034 000040 | |
| CANCEL | 1 | 2 | 3 | AINBIAL 000035 000041 | ||
| CLEAR | 0 | ♦MORE | MORE∅ | NEXT C | PAYMEN 000036 000042 | |
- Condiment-1 keyboard
This keyboard appears when you touch the MENU key in a condiment PLU entry.
| HOME | MENU10 | MENU11 | MENU12 | MENU13 |
| VATSFT | MENU14 | MENU15 | ||
| KEY001 KEY004 | ||||
| TEXT2 | ||||
| TEENTER | KEY002 KEY005 | |||
| SUB | ||||
| AUNBAL | KEY003 KEY006 | |||
| PAYMEN | ||||
| MGR FU | 7 | 8 | 9 | TEENTER | KEY002 KEY005 | ||
| VOID | 4 | 5 | 6 | OPEN T | SUB | ||
| CANCEL | 1 | 2 | 3 | AUNIBAL | KEY003 KEY006 | ||
| CLEAR | 0 | ♦MORE | MORE∅ | NEXT C | PAYMEN |
- Condiment-2 keyboard
The Condiment-2 keyboard appears when you touch the key on the Condiment-1 keyboard.
| HOME | MENU10 | MENU11 | MENU12 | MENU13 |
| VATSFT | MENU14 | MENU15 | ||
| KEY007 | KEY013 | |||
| TEXT2 | KEY008 KEY0 | 14 | ||
| TEXTER | KEY009 KEY015 | |||
| SUB KEY010 KEY016 | ||||
| AUNRAL | KEY011 KEY017 | |||
| PAYMEN | KEY012 KEY0 | 18 | ||
| MGR FU | 7 | 8 | 9 | TEXTIER KEY009 KEY015 | ||
| VOID | 4 | 5 | 6 | OPEN T | SUB KEY010 KEY016 | |
| CANCEL | 1 | 2 | 3 | AINDAL KEY011 KEY017 | ||
| CLEAR | 0 | ♦MORE | MORE∅ | NEXT C | PAYMEN | KEY012 KEY018 |
- Condiment-3 keyboard
The Condiment-3 keyboard appears when you touch the key on the Condiment-2 keyboard.
| HOME | MENU10 | MENU11 | MENU12 | MENU13 |
| VATSFT | MENU14 | MENU15 | ||
| KEY019 | KEY025 | |||
| TEXT2 | KEY020 KEY026 | |||
| TEENTER | KEY021 KEY027 | |||
| SUB KEY022 | KEY028 | |||
| AUNRAL | KEY023 KEY029 | |||
| PAYMEN | KEY024 KEY030 | |||
| MGR FU | 7 | 8 | 9 | TEENTER | KEY021 KEY027 | ||
| VOID | 4 | 5 | 6 | OPEN T | SUB KEY | 022 KEY028 | |
| CANCEL | 1 | 2 | 3 | AUNRAL | KEY023 KEY029 | ||
| CLEAR | 0 | •MORE | MORE∅ | NEXT C | PAYMEN | KEY024 KEY030 | |
- Menu-1/Menu-2/Menu-3 keyboard
The Menu-1 keyboard appears when you touch the thru key.
The Menu-2 keyboard appears when you touch the key on the Menu-1 keyboard.
The Menu-3 keyboard appears when you touch the key on the Menu-2 keyboard.
| HOME | MENU10 | MENU11 | MENU12 | MENU13 |
| VATSFT | MENU14 | MENU15 | ||
| KEY001 | KEY007 | |||
| TEXT2 | KEY002 KEY008 | |||
| TERNTER | KEY003 KEY009 | |||
| SUB KEY004 | KEY010 | |||
| AUNRAL | KEY005 KEY011 | |||
| PAYMEN | KEY006 KEY012 | |||
| MGR FU | 7 | 8 | 9 | TERNTER | KEY003 KEY009 | ||
| VOID | 4 | 5 | 6 | OPEN T | SUB KEY | 004 KEY010 | |
| CANCEL | 1 | 2 | 3 | AUNRAL | KEY005 KEY011 | ||
| CLEAR | 0 | ♦MORE | MORE∅ | NEXT C | PAYMEN | KEY006 KEY012 | |
- Function menu 3 (MGR FUNCTION) keyboard
This keyboard appears when you touch the key.
| HOME | EMPL# | RCP.SW |
| VATSFT | CLK# | GCCOPY |
| BILL S | TIME-IN | MISC FUNCTIONS |
| BILL T | TIME-OUT TRANS IN | |
| TER | BREAK | TRANS OUT |
| THE TABLESTE VIP | ||
| BAL | RA | PO |
| D-THRU | RA2 | PO2 |
| P1 | 7 | 8 | 9 | ENTER | BREAK | TRANS OUT | |
| P2 4 | 5 | 6 | OPEN THE TAUSTE VIP | ||||
| CANCEL | 1 | 2 | 3 NBAL | RA | PO | ||
| CLEAR | 0 | 00 | • | MGR# | D-THRU | RA2 | PO2 |
- Bill separate/Bill total keyboard
This keyboard appears when you touch the or key.
| 7 | 8 | 9 | 0 | CLEAR ENTERCR1 | CR2 CR3 CHK | |||
| 4 | 5 | 6 | BILL S | OPEN T | AUTO | EXCHAN EXCHAN | SUB TO | |
| 1 | 2 | 3 | BILL | TNBAL | NON CA CASH T | CASH/TEN | ||
- Function menu 4 (TEXT1) keyboard
This keyboard appears when you touch the function menu key.
| BOARD appears when you touch thection menu key. | HOME | VOID | TEXT14 | ||
| TEXT8 | TEXT15 | ||||
| TEXT9 | TEXT16 | ||||
| TEXT10 | TEXT17 | ||||
| TEXT1 | TEXT5 | TEXT11 | TEXT18 | ||
| TEXT2 | TEXT6 | TEXT12 | TEXT19 | ||
| TEXT3 | TEXT7 | TEXT13 | TEXT20 | ||
| TEXT4 | 000001 | 000002 | 000003 | 000004 | |
- Function menu 5 (TEXT2) keyboard
This keyboard appears when you touch the function menu key.
| BOARD APPEARS WHEN YOU TOUCH THE action menu key. | HOME | VOID | TEXT32 | |||
| TEXT25 TEXT33 | ||||||
| TEXT26 TEXT34 | ||||||
| TEXT27 TEXT35 | ||||||
| TEXT23TEXT21 | TEXT28 TEXT36 | |||||
| TEXT29 TEXT37 | ||||||
| TEXT24TEXT22 | TEXT30 TEXT38 | |||||
| TEXT31 TEXT39 | ||||||
· PGM COMMAND keyboard
This keyboard appears when you touch the PGM COMMAND key on the PGM mode keyboard.
| AUTO10 | ||
| AUTO11 | ||
| CANCEL | AUTO12 | |
| CLEAR | AUTO13 | |
| AUTO14 | ||
| AUTO15 | ||
| AUTO16 | ||
| AUTO17 |
· X/Z COMMAND keyboard
This keyboard appears when you touch the X/Z COMMAND key on the X/Z mode keyboard.
| AUTO18 | ||
| AUTO19 | ||
| CANCEL | AUTO20 | |
| CLEAR | AUTO21 | |
| AUTO22 | ||
| AUTO23 | ||
| AUTO24 | ||
| AUTO25 |
- Payment menu (PAYMENT) keyboard
This keyboard appears when you touch the PAYMENT key.
| HOME RA PODEPO | |||||||
| VATSFT | DEP.RF EXCHANGE2 | ||||||
| BILL S | %1 EXCHANGE1 | ||||||
| BILL T | (-)1 CR3 | ||||||
| MGR FU | 7 | 8 | 9 | ENTER | H.T. | CR2 | |
| VOID 4 | 5 | 6 | OPEN THE TABLEN | ON CASH TIP CR1 | |||
| CANCEL | 1 | 2 | N8AL | AUTO | CASH TIP CHK | ||
| CLEAR | 0 | 0 | 0 | ST VOI | BUTT | AL CASH/TL | |
- PGM mode keyboard
This keyboard appears when you select the PGM mode.
| P UP | CLK# MGR# AUTO21 | |||||||
| P DOWN | EMPL# AUTO22 | |||||||
| CANCEL | LIST | AUTO23 | ||||||
| CLEAR | MODE AUTO24 | |||||||
| 7 | 8 | 9 | X/QTY | AUTO25 | ||||
| PREVIOUS | NEXT 4 5 | 6 | PGM COMMAND | |||||
| 1 | 2 | 3 | ENTER | |||||
| DELETE | CALL 0 0 | 0 | • | CASH/TL | ||||
- X/Z mode keyboard
This keyboard appears when you select the X/Z mode.
| P UP | CLK# M | GR# AUTO21 | ||
| P DOWN | EMPL# | VOID | AUTO22 | |
| CANCEL | LIST | AUTO23 | ||
| CLEAR | MODE AUTO24 | |||
| 7 | 8 | 9 | X/QTY | AUTO25 |
| 4 | 5 | 6 | XZ COMMAND | |
| 1 | 2 | 3 | ENTE | |
| 0 | 00 | · | CASH/TL | |
- Drive thru (D-THRU) keyboard
This keyboard appears when you touch the key.
| HOME | CANCEL | CLEAR | WAIT NEW | CAR ENTRY | |
| SUB | P UP | RECALL | OPEN THE CAR | ||
| P DOWN | VATSFT ENTER |
- Character keyboard
This keyboard is used when you need to enter text data during PGM2 mode entries.


■ Function keys list (default keyboard and labels)
| Caption (default) | Function |
| HOME Used to return to | HOME keyboard. |
| CANCEL Used to cancel | your current operation or menu or return to previous menu. |
| CLEAR | Used to clear the entered data (amounts/rates/parameters, etc.) and the error state. |
| MODE Used to go to MODE selection window or to return to HOME keyboard. | |
| Used to control the cursor (up arrow). | |
| Used to control the cursor (down arrow). | |
| ♦ MORE Used to change the keyboard. | |
| MORE∅ | Used to change the keyboard. |
| ENTER Used to select item/menu or entered data. | |
| SUB Used to go to the sub-keyboard. | |
| CASH/TL | Used to enter the direct cash/amount tendered operation, or to finalize the PGM job. |
| 0 thru 9 Used to enter a numeric data (0 thru 9). | |
| 00 Used to enter a numeric data (00). | |
| 000 Used to enter a numeric data (000). | |
| • Used to enter a fractional part, or to toggle between two or more options. | |
| X/QTY Used to enter a quantity or times. | |
| SUB TOTAL Used to display subtotals. | |
| P UP Used to scroll page up. | |
| P DOWN Used to scroll page down. | |
| BKSPC | Used to backs up the cursor for deleting the character or figure at the left of the cursor. |
| DELETE Used to delete a character or figure in the cursor position. | |
| DIF ST Used to calculate the difference subtotal. | |
| # Used to enter a non-add code. | |
| NS Used to execute a no-sale function. | |
| SCALE | Used to enter a weight for the item entry. |
| OPN TR | Used to enter the open tare. |
| PLU | Used to enter a PLU/subdepartment from the list by using a code. |
| GCCOPY | Used to take a copy of guest check. |
| VP | Used to perform the validation print. |
| SLIP | Used to print the slip. |
| RCPT | Used to print the receipt after transaction. |
| VOID | Used to void a last item, or used for the cursor void function. |
| ST VOID | Used to void an entire transaction (subtotal void). |
| REFUND | Used to enter the refund item. |
| RETURN | Used to enter the returned item |
| OPEN THE TABLE | Used to lookup the guest check. |
| OPEN THE CAR | Used to lookup the guest check (for drive-thru function). |
| NEW CAR ENTRY | Used to open a new guest check (for drive-thru function). |
| NBAL | Used to calculate a new balance. |
| FINAL Used to finalize the guest check temporarily (with the tax calculation). | |
| H.T. Used to perform the hotell transfer function. | |
| RA and RA2 Used to enter the received-on-account (RA 1 and 2). | |
| PO and PO2 Used to enter the paid-out (PO 1 and 2). | |
| 1/2 Used to enter half penny. | |
| AMOUNT Used to enter an item amount. | |
| PINT Used to perform the pint entry. | |
| VATSFT Used to perform the VAT shift entry. | |
| VIP Used to enter the vip sale. | |
| GUEST# Used to enter the guest number. | |
| DEPO Used to enter the deposit. | |
| DEP.RF Used to refund the deposit. | |
| BILL TRANS/TOTAL Used to perform the bill transfer/bill totalizing function. | |
| BILL SEPARATE Used to perform the bill separate function. | |
| TRANS OUT Used to enter the transfer-out function. | |
| TRANS IN Used to enter the transfer-in function. | |
| C.BILL | Used to print the bill. |
| GUEST CHECK RCPT | Used to print the details of the guest check on the receipt. |
| CASH TIP | Used to enter the cash tip. |
| NON CASH TIP | Used to enter the non-cash tip. |
| TIP PAID | Used to execute the tip paid function. |
| WITH | Used to add a PLU to the set PLU. |
| W/O | Used to delete a linked PLU from the set PLU. |
| CHK PR | Used to print the check. |
| MGR# | Used to enter the manager code. |
| EMPL# | Used to enter the employee code. |
| REPEAT Used to repeat a last item entry. | |
| PERSN# Used to enter the person number. | |
| I.PAY | Individual payment key |
| MISC FUNCTIONS | Used to display the miscellaneous function menu. |
| RCP.SW Used to switch the receipt printing state (ON/OFF). | |
| TIME-IN | Used to enter time-in operation. |
| TIME-OUT | Used to enter time-out operation. |
| BREAK | Break key |
| D.SFT1 thru D.SFT4 | Used to change the department code for a PLU (department shift 1 thru 4). |
| L1 thru L10 | Used to shift the direct PLU key level (level 1 thru 10). |
| P1 thru P7 | Used to shift the PLU price level (level 1 thru 7). |
| FUNCTION MENU1 | Used to go to the function menu 1 keyboard. |
| FUNCTION MENU2 | Used to go to the function menu 2 keyboard. |
| MGR FUNCTION | Used to go to the function menu 3 keyboard (the manager function keyboard). |
| TEXT1 | Used to go to the function menu 4 keyboard (text entry). |
| TEXT2 | Used to go to the function menu 5 keyboard (text entry). |
| PAYMENT Used to go to the payment menu keyboard. | |
| WAIT Used to shift the corresponding guest check to the wait mode (for drive-thru). | |
| RECALL | Used to re-call the corresponding guest check to the registration mode (for drive-thru). |
| WASTE Used to enter/release the WASTE mode. | |
| NEXT CONDIMENT Used to skip the next table of condiments. | |
| D-THRU Used to go to the drive-thru menu keyboard (guest check entry for drive-thru). | |
| ENTERTAINMENT Used to print the entertainment bill. | |
| CASH2 Used to enter the cash 2 payment. | |
| CHK thru CHK4 Used to enter the check payment (check 1 thru 4). | |
| CR1 thru CR8 Used to enter the credit sale (credit 1 thru 8). | |
| EXCHANGE1 to EXCHANGE9 | Used to creates a subtotal in foreign currency (exchange 1 thru 9). |
| %1 thru %9 Used to enter the percent calculation (percent 1 thru 9). | |
| (-)1 thru (-)9 Used to execute the discount entry (discount 1 thru 9). | |
| VAT Used to enter the manual VAT. | |
| CLK# Used to enter the clerk code. | |
| CLK01 thru CLK10 Used to assign the clerk. | |
| AUTO to AUTO25 Used to ente the automatic sequencing (auto 1 thru auto 25). | |
| MENU01 to MENU50 Used to go to the direct PLU menu (menu 1 thru 50). | |
| TEXT# | Used to enter the text number to print the free text. |
| TEXT1 thru TEXT40 | Used to print the free text (free text 1 thru 40). |
How to Use the Touch Panel
Operations can be performed by touching corresponding key(s) and/or selecting option(s) or item(s) in the window.
Do not use extreme force when touching the display or the keyboard.
Do not use any sharp or pointed objects, and avoid using your fingernails to touch them.
Cursor control by touching option(s) or item(s) in the window
You can select an option or item by using the arrow keys.
To move the cursor, touch the up or down arrow key. To select an option or item, touch the Enter key.
You can also select option(s) or item(s) by touching corresponding line(s) in the window as follows:
In the PGM/XZ mode
![SETTING 1 ARTICLE 2 DIRECT KEY 3 FUNCTION 4 MEDIA 5 CURRENCY 6 TEXT 7 PERSONNEL 8 TERMINAL 9 DATE/TIME 10 OPTIONAL 11 REPORT CANCEL ENTER [▼ ]](/content/2026/06/1310338/images/93966ce51d6cdf39507a1c5c6a07be58915525c1ffe518845127c8bc7cf744f2.jpg)
- To select an option, touch a corresponding line.
(When you release the touch panel, the option will be selected.)

- To scroll up or down the window, touch the bottom or top of the frame (▼ or ▲).
To scroll down the window
In the REG mode![| PL00001 | 1 | 2 | 3 | 4 | 5 | 6 | 7 | 8 | 9 | 10 | 11 | 12 | | :--- | :--- | :--- | :--- | :--- | :--- | :--- | :--- | :--- | :--- | :--- | :--- | :--- | | P1L01 | 1.10 | 2.50 | 1.75 | 3.50 | 2.00 | 1.80 | 5.50 | [J] [▼] | 51.70 | 6.20 | 51.70 | 51.70 | ***TOTAL 1 PL000012 ***TOTAL P1L01](/content/2026/06/1310338/images/cf9868e1f2341ce24460cc3202f28537226f1e75db3d1870514f4bba4f5fb254.jpg)
- To select item(s), touch corresponding line(s). (If you touch a selected item again, it will be deselected.)
To select items
![| PL000005 | 1 | 2.80 | |---|---|---| | PL000006 | 1 | 7.20 | | PL000007 | 1 | 1.25 | | PL000008 | 1 | 5.20 | | PL000009 | 1 | 2.20 | | PL000010 | 1 | 3.10 | | PL000011 | 1 | 5.60 | | [▲] | CLERK0001 | [▲] | | [J] [▼] | P1L01 | [J] [▼] | | ***TOTAL | 51.70 | 51.70 | | 1 PL000012 | 6.20 | | P1L01](/content/2026/06/1310338/images/e4c660925c20cc1ff865fae6b4b721d6ccc2b99ec492aa6cd51dfaa52083d7e7.jpg)
- Dragging: Touch a corresponding line, and drag the cursor to a target line. (The touched item will be selected.)
Dragging
![CLERK0001 [▲] 1 PL000003 1 PL000004 1 PL000010 1 PL000009 1 PL000008 1 PL000005 1 PL000006 [J][▼] ***TOTAL 51.70 1 PL000012 6.20 P1L01](/content/2026/06/1310338/images/dab24c5f2a8a7112203326c528cb7fecfa9bafae37ddb8508e55d67e095ef796.jpg)
- To scroll up or down the window, touch the bottom or top of the frame (▼ or ▲). (The selected item will remain unchanged.) To scroll down the window
To scroll up the window
To deselect all selected items, touch the key. To deselect a selected item, touch the corresponding line again. To display the journal image during the transaction, touch [J].
![1 PL000009 1 PL000010 1 PL000011 2.20 3.10 5.60 [J][▼] ***TOTAL 51.70 1 PL000012 6.20 P1L01](/content/2026/06/1310338/images/f88410a3320a7a6a943f9d3da558ed9bd7bc782e3476117be758d64a8e77a9f1.jpg)
Clerk Assignment
Clerks can be assigned using four systems: real clerk key, clerk code entry, clerk entry key, and WMF clerk key systems. Contact your authorized SHARP dealer to select one.
1. Real clerk key system (factory-set)
If you select this system, clerks can be assigned by inserting corresponding real clerk keys. No registration can be performed unless a real clerk key is inserted.
2. Clerk code entry system
If you select this system, clerks can be assigned by entering their clerk code in advance.
Procedure

The pop-up window for entering a secret code will appear after touching the key.
If an item entry is made when the clerk has been signed off, the clerk entry pad will open in the window and clerk entry will be required.
The sign-off operation can be performed using the following procedure in REG or MGR mode:
To sign off a clerk:
3. Clerk entry key system
If you select this system, clerks can be assigned by touching corresponding clerk keys on the keyboard.
④ WMF clerk key system
If you select this system, clerks can be assigned by inserting WMF clerk keys.
NOTE
If another clerk is signed on while a clerk is signed on, the latter will automatically be signed off.
Item Selection from the Menu Window
Your POS terminal allows you to select functions from a menu window. For example, if you want to enter an item for Paid-out 1, select the option "PO" from the "MISC FUNCTIONS" menu instead of touching the key.
The menu window can be opened as follows:
↑ Miscellaneous menu window
![01 RCP SW. 02 INTERMED. 03 NAME CONSOLE 04 ***:B0 05 ***:B02 06 ***:P0 07 ***:P02 CON: 01 [▼] [ ] [ ] [ ] [ ] [ ] [ ] [ ] [ ] [ ] [ ] [ ] [ ] [ ] [ ] [ ] [ ] [ ] [ ] [ ] [ ] [ ] [ ] [ ] [ ] [ ] [ ] [ ] [ ] [ ] [ ] [ ] [ ] [ ] [ ] [P]1.01](/content/2026/06/1310338/images/b8279a254f9e12c4f3e3f7df364c20dbfd3bfd55ef8e6a5bd3fd8870650fc127.jpg)
Starting Cash Memory Entry
If you enter the amount of the cash for the change due (starting cash) in the drawer before starting entry operations, you can discriminate that amount from the sales amount when reports are generated.
Your POS terminal can be programmed to enforce the entry of starting cash into memory. For details, contact your authorized SHARP dealer.
Procedure
Select the OP X/Z mode and perform the following operation:
![graph LR A["Select SCM(+) or SCM(-)"] --> B["XXXXXXXX Amount (max. 8 digits)"] B --> C["ENTER"]](/content/2026/06/1310338/images/3a8fa6c38d9a6f49f5ca7908ca1212637c5f05f56f521064f603f1a76f0f0ceb.jpg)
![15/12/99 [0001] 123456 #1032 11:09 JACK CLK#0001 JACK *0.00 SCM (+) *33.00 SCM TTL *33.00](/content/2026/06/1310338/images/63b2c932d0218dfdc8ec39c1a84a60daa70c68c0fd7033b57ddb4dea53fff864.jpg)
Item Entries
■ Single item entries
Department entries
Enter a unit price and touch a department key.
If you use a programmed unit price, touch a department key only.
Procedure
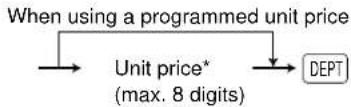
*Less than the programmed upper limit amount
Example
Key Operation
1200
Display

NOTE
When those departments for which the unit price has been programmed as zero (0) are entered with the preset unit price, only the sales quantity is added.
Direct PLU entries (PLU entries and subdepartment entries) Follow this procedure:
Procedure
![graph LR A["Direct PLU"] --> B{When using a programmed unit price} B --> C["*Open price\n(for subdept. entries)"] C --> D["ENTER"]](/content/2026/06/1310338/images/750baf125ce5376ec139a0b44e5dcc93025372c185c55d9e7ada5b3aaf5348bf.jpg)
*Less than the programmed upper limit amount
Example
Key Operation
Display
![CLERK0001 1 PL000010 CASH 12.75 12.75 [1] ===TOTAL CASH 12.75 P1L01](/content/2026/06/1310338/images/fbfbbe04064e2a0355a320f22ee9d19b58ace60d9814c51b70228f70fbda657d.jpg)
PLU menu-based entries (PLU entries and subdepartment entries)
Follow this procedure:
Procedure![graph LR A["thru MENU50MENUC"] --> B["Item selection from the menu keyboard"] B --> C["*Open price (for subdept. entries)"] C --> D["ENTER"] E["When using a programmed unit price"] --> C](/content/2026/06/1310338/images/83db3e93095c0f2ccb0123a2306380055ec9a2f42584ab5dab2ceae981bd82aa.jpg)
*Less than the programmed upper limit amount
Example
Key Operation
[Select PLU code 15 from the menu keyboard.]
Display![CLERK0001 1 PL000015 CASH 3.45 3.45 [2] ----TOTAL CASH 3.45 P1L01](/content/2026/06/1310338/images/19e45f79692917335803b3493f18f8e6a6b762bf2b1cdd75e634ad381921c4a4.jpg)
PLU code entries (PLU entries and subdepartment entries)
Follow this procedure:
Procedure![graph LR A["PLU code"] --> B["PLU"] B --> C["*Open price\n(for subdept. entries)"] C --> D["ENTER"] E["When using a programmed unit price"] --> B](/content/2026/06/1310338/images/ece015c8b02f5a61991146b8c0b2640b11f591840a72e112577da5b7155d7ea4.jpg)
*Less than the programmed upper limit amount
Example
Key Operation
2 60 750
Display![CLERK0001 1 PL000002 1 PL000060 CASH 1.50 7.50 9.00 [1, 1] ***TOTAL 9.00 CASH 9.00 P1L01](/content/2026/06/1310338/images/ad766782c272bdcfd6cddb8a316d52c5e807f07444eb5520b063c541529aba44.jpg)
NOTE
When those PLUs for which the unit price has been programmed as zero (0) are entered, only the sales quantity is added.
■ Repeat entries
You can use this function for repetitive entries of the same items.
Example
Key Operation
| Repeated department entry | 200 |
| Repeated PLU entry (indirect) | 10 |
| Repeated PLU entry (direct) | |
| Repeated subdepartment entry | 60500 |
Display
| CLER0001 | OO | |
| 3 DPT.OB | 6.00 | |
| 3 PL000010 | 38.25 | |
| 2 PL000021 | 11.00 | |
| 2 PL000060 | 10.00 | |
| CASH | 65.25 | |
| IJ 1 | ||
| ***TOTAL | 65.25 | |
| CASH | 65.25 | |
| PIL01 |
NOTE
You can use the key for repeat entries instead of the department key, key, or direct PLU key.
■ Multiplication entries
Use this feature when you need to enter two or more the same items.
This feature helps you when you sell a large quantity of items or need to enter quantities that contain decimals.
Procedure
FF method (for speedy entries in the fast food restaurants) Normal method
![graph TD A["Q'ty"] --> B["X'TY"] B --> C["Unit price"] C --> D["Dept."] C --> E["PLU code"] E --> F["PLU"] F --> G["Unit priceDirect FLUTBR"] G --> H["PLU/subdept. entry (direct)"] G --> I["PLU code"] I --> J["PLU"] J --> K["Unit price"] K --> L["ENTER"] L --> M["Subdept. entry (indirect)"] I --> N[…](/content/2026/06/1310338/images/8e40d028a996f4da0de95546344a4e750d212b88cbd4cebb078815e76e8976a6.jpg)
↑ Q'ty: Up to four-digit integer + three-digit decimal ↑ Unit price: Less than a programmed upper limit ↑ Q'ty x unit price: Up to seven digits
Example
Key Operation
| 7 | 5 |
| 15 | |
| 13 | |
| 8 | 25 |
| 3 | |
| 60 | |
| 100 | |
| 1 | 8 |
| [ Select PLU code 25 from the menu keyboard. ] | |
Display
| CLER0001 | OD | |
| [▲] | ||
| 15 PL000013 | 7.50 | |
| 8.250x 0.80 | ||
| PL000018 | 6.60 | |
| 3 PL000060 | 3.00 | |
| 1.000x 0.60 | ||
| PL000025 | 1.00 | |
| CASH | 23.43 | |
| [2 1] | ||
| ***TOTAL | 23.43 | |
| CASH | 23.43 | |
| PIL01 | ||
■ Split-pricing entries
You will use this function when your customer wants to purchase more or less than the base quantity of a loose item.
Procedure
FF method![graph TD A["Selling q'ty"] --> B["X/QTY"] B --> C["Block"] C --> D["Direct PLU Base q'ty"] E["When you use a base q'ty programmed for PLU code"] --> C](/content/2026/06/1310338/images/8e8069e2f34a61cc3daaf7e61fcbeaa6ee7b4a4324fcd2f35062aa3e5ab85164.jpg)
Normal method![graph TD A["Selling q'ty"] --> B["XQTY xQTY"] B --> C["Base q'ty"] C --> D[" "] D --> E["Unit price per base q'ty"] E --> F["Dept."] E --> G["PLU code"] G --> H["PLU"] E --> I["Direct PLU"] I --> J["Unit price per base q'ty"] J --> K["ENTER"] I --> L["PLU code"] L --> M["PLU"] M --> N["Unit price pe…](/content/2026/06/1310338/images/a0d087358005a97d05809e2337ddd9a149614a979e7e355f3923b35f783c45b3.jpg)
↑ Selling quantity: Up to four-digit integer + three-digit decimal
↑ Base quantity: (Programmed)
Example
Key Operation
| 10 | 7 | |
| 7 | ||
| 600 | ||
| 5 | 8 | |
| 35 | ||
| 3 | 5 |
Display
| CLER0001 | OO | |
| 10x 7/ 6.00PL000007 | 8.50 | |
| 5x 8/ 2.00PL000035 | 1.25 | |
| 3x 5/ 8.00PL000050 | 4.00 | |
| CASH | 14.63[J ] | |
| ---TOTAL | 14.63 | |
| CASH | 14.63 | |
| P1L01 |
■ Single item cash sale (SICS)/single item finalize (SIF) entries
The operation is the same as that for normal department/PLU entries. The SICS and SIF functions can be available only when the receipt type is "addition receipt type."
SICS entries
- This function is useful when a sale is for only one item and is for cash; such as a pack of cigarettes. This function is applicable only to those departments that have been set for SICS or to their associated PLUs or subdepartments.
- The transaction is finalized and the drawer opens as soon as you touch the department key, key or the direct PLU key.
Example
Key Operation
| 250 | |
| For finishing the transaction |
Display
| CLER0001 | 00 | |
| 1 DPT.09 | 2.50 | |
| CASH | 2.50 | |
| [4] | ||
| TOTAL | 2.50 | |
| CASH | 2.50 | |
| P1101 |
NOTE
If a ring-up to a department or PLU/subdepartment set for SICS follows the ones to departments or PLUs/subdepartments not set for SICS, it does not finalize and results in a normal sale.
SIF entries
- If a ring-up to a department or PLU/subdepartment set for SIF follows the ones to departments or PLUs/subdepartments not set for SIF, the transaction is finalized immediately as a cash sale.
- Like the SICS function, this function is available for single-item cash settlement.
Example
Key Operation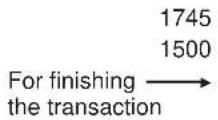
Display
■ Scale entries
You have a choice of either the manual or automatic method for scale entry.
If the first method is chosen, the clerk needs to enter the reading of the scale manually. If the second one is chosen, the weight is automatically read from the connected scale (option) and appears in the POS terminal display. If you need auto scale entries, contact your authorized SHARP dealer.
Manual scale entries
Procedure
FF method![graph LR A["Net weight"] --> B["SCALE"] B --> C["Programmed"] C --> D["Direct PLU Base wt."] C --> E["When you use a base wt. programmed for PLU code"]](/content/2026/06/1310338/images/5c6da6608c6fc940a50f18605680de2e9894fe37787afd86d8de044ccd24cc48.jpg)
Normal method![graph TD A[" "] --> B["SCALE"] B --> C["Base wt. Net weight"] C --> D["Unit price per base wt."] D --> E["Dept."] C --> F["Unit price per base wt."] F --> G[" "] C --> H["PLU code"] H --> I["PLU"] C --> J["Direct PLU"] J --> K["Unit price per base wt."] K --> L["ENTER"] C --> M["PLU code"] M --> N["…](/content/2026/06/1310338/images/c7535ea4089104749fb60f62972b97f154c70102c4d2913d5d2d1969bdcab111.jpg)
- Net weight: Up to 5 digits (integer + decimal)
- Base weight: Up to 2 digits (integer)
NOTE
The net weight is automatically calculated using the programmed tare weight.
Example
Key Operation
3
Display
![CLERB0001 00 3.000kg x 12.75 /kg PL000010 38.25 CASH 38.25 [ ] 1 TOTAL 38.25 CASH 38.25 PIL01](/content/2026/06/1310338/images/62f6a7e816ec94fb51180aeeb9780f83173f6b46edd36335e584a172a302ad34.jpg)
Auto scale entries
Procedure
FF method![graph TD A["CPK TR"] --> B["Tare weight"] B --> C["Scale table number"] C --> D["SCALE"] D --> E["Base wt."] E --> F["Direct PLU"] G["When you use a programmed scale table no."] --> C H["When you use a base wt. programmed for PLU code"] --> E](/content/2026/06/1310338/images/aeab4808439519a307bbcafac7d110d20b497a126194642d50f47873393f6c3b.jpg)
Normal method![graph TD A["CFN TR"] --> B["Tare weight"] B --> C["Scale table number"] C --> D["SCALE"] D --> E["Base wt. Dep(ORY)"] E --> F["Unit price per base wt."] F --> G["Dept."] E --> H["PLU code"] H --> I["PLU"] I --> J["Unit price per base wt."] J --> K["ENTER"] E --> L["PLU code"] L --> M["PLU"] M --> N[…](/content/2026/06/1310338/images/b0e6b80bf7ba707e16bcd6aa77699b9196d058945d0a20b0944287557130a166.jpg)
• Tare weight: Up to 4 digits (integer + decimal) - Net weight: Up to 5 digits (integer + decimal) - Base weight: Up to 2 digits (integer) • Scale table number: 1 to 9
NOTE
- The POS terminal can be programmed with up to nine scale tables and allows different tares to be assigned to them.
- When the key is touched, the net weight is automatically read from the connected scale (option) and appears in the POS terminal display.
- When the PLU is programmed for "Compulsory scale entry," it is not necessary to touch the key. • To issue a receipt which shows only a tare weight, touch , enter a tare weight, then touch and
Example
Key Operation
8
200
Display

■ Non-turnover sales
This function is used to perform transactions other than ordinary sales (turnover), as is the case when cigarettes or bouquets are ordered in a restaurant and the like. In this case, a clerk once pays the bill and demands together with other payment.
It is performed by entering a department belonging to the non-turnover group or PLU belonging to the department. If you need this function, contact your authorized SHARP dealer.
Example
Key Operation
2700
Non-turnover sale → 200
Display

Special Entries for PLUs
■ Promotion (normal selling) function
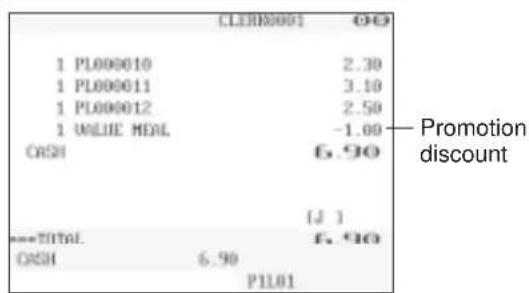
This function is convenient for matching several PLU items and selling them in a lump (e.g. value meal, etc.). Operation is the same as for normal PLUs. The promotion table consists of the discount amount, the trip level for discount (satisfying count of entered item), and the text for a table. One table can be assigned max. 5 kind of items. If the transaction that the promotion item is registered is finalized, the sales amount may be discounted as follows:
Promotion items of table no. 1: Item-A (*2.30), Item-B (*3.10), Item-C (*2.50)
Trip level for discount: 3
Discount amount: *1.00
| Item-A | *2.30 | Item-C | *2.50 |
| Item-B | *3.10 | Item-C | *2.50 |
| Item-C | *2.50 | Item-C | *2.50 |
| Subtotal | *7.90 | Subtotal | *7.50 |
| Discount | -1.00 | Discount | -1.00 |
| Total | *6.90 | Total | *6.50 |
Example
In the case of above
Key Operation
Treated as *2.30 item
Treated as *3.10 item
Treated as *2.50 item
Display
■ Promotion (set selling) function
This function is convenient for matching several PLU items and selling them in a lump (e.g. value meal etc.). Operation is the same as for normal PLUs. The promotion table consists of the text for a table, the discount amount, and the trip level for discount (satisfying count of entered item) for each PLU. One table can be assigned max. 5 kind of items. If the transaction is finalized under the following condition, the sales amount may be discounted as follows:
- The total quantity of the sales meet the trip level which is programmed in the promotion table.
- Items of the sales are programmed in the promotion table.
Promotion items of table no. 2: Item-A (*3.00), Item-B (*2.50), Item-C (*2.10)
Trip level for each item: Item-A (1), Item-B (1), Item-C (2)
Discount amount: *4.00
| <Sale 1> | |
| Item-A | *3.00 |
| Item-B | *2.50 |
| Item-C | *2.10 |
| Item-C | *2.10 |
| Subtotal | *9.70 |
| Discount | -4.00 |
| Total | *5.70 |
| <Sale 2> | |
| Item-A | *3.00 |
| Item-A | *3.00 |
| Item-B | *2.50 |
| Item-C | *2.10 |
| Subtotal | *10.60 |
| Discount | -0.00 |
| Total | *10.60 |
Example
In the case of above
Key Operation
Treated as *3.00 item
Treated as *2.50 item
Treated as *2.10 item
Treated as *2.10 item
Display

■ Link PLU entries
Operation is the same as that for normal PLU entries. When a link PLU is entered, the linked PLU's amount is included and the linked PLU's label is printed automatically. Only the 1st-ranking PLU is affected by the VAT shift key. The percent calculation is in effect for the amount of the 1st-ranking PLU.
Example
Key Operation
Display

■ Combo meal entries
Operation is the same as that for normal PLU entries.
When a combo meal is entered with the Combo PLU, the labels of those PLUs linked to the Combo PLU are printed automatically. The sum of all adjusted prices (of those PLUs linked to the Combo PLU) becomes the "combo meal" price setting.
Example
Key Operation
Display

NOTE
When combo meal is registered, q'ty totalizer of the combo PLU and amount totalizer of each PLU are updated.
■ With/without entries
A maximum of 20 linked PLUs of the combo PLU can be modified (added or deleted) temporarily by using and keys.
With: To add a PLU to the combo PLU.
Without: To delete a linked PLU from the combo PLU.
Procedure
![graph TD A["With:"] --> B["WITH"] B --> C["PLU code to be added"] C --> D["PLU"] D --> E["Combo PLU code"] E --> F["PLU"] F --> G["Direct PLU (Combo PLU)"] G --> H["PLU"] H --> I["PLU"] I --> J["PLU"] J --> K["PLU"] K --> L["PLU"] L --> M["PLU"] M --> N["PLU"] N --> O["PLU"] O --> P["PLU"] P --> Q["…](/content/2026/06/1310338/images/20baff197aaea9e486c1db52391cf83d73dff642cda371139c9cd2c9b20943cb.jpg)
NOTE
The "with" and "without" operation is allowed a total of 20 times.
Example
Key Operation
| 16 |
| 17 |
| 22 |
Display
| CLER0001 | OD | |
| 1 PL000022 | 2.45 | |
| PL000007 | ||
| PL000017 | ||
| CASH | 2.45 | |
| (↓) | ||
| =TOTAL | 2.45 | |
| CASH | 2.45 | |
| PIL01 |
PLU level shift (for direct PLUs)
This shift can double or triple the number of direct PLUs on your POS terminal without adding additional direct PLU keys. You can use direct PLUs in ten levels by utilizing the PLU level shift keys.
Level key shifts the PLU level from the other nine to the required level. (The normal level is level 1.) You must program your machine in the PGM mode to select one of the two PLU level shift modes — automatic return mode* and lock shift mode** — and decide whether to allow PLU level shift in both the REG and MGR modes or in the MGR mode alone.
* The automatic return mode automatically shifts the PLU level back to level 1 after touching a direct PLU key or finalizing each transaction. ** The lock shift mode holds the current PLU level until a PLU level shift key is touched.
Automatic return mode (for PLU levels)
If your terminal has been programmed for PLU level in the automatic return mode, touch a desired PLU level shift key before a numeric entry.
Procedure
(Returning every item entry)
![graph TD A["L2"] --> B["L10"] B --> C["Numeric entry (Q'ty, X/QTY)"] C --> D["Direct PLU Return to level-1"] D --> E["Finalization"] F["L1"] --> G["L10"] G --> H["Numeric entry (Q'ty, X/QTY)"] H --> I["Direct PLU Finalization"] I --> J["Finalization"] style A fill:#f9f,stroke:#333 style B fill:#f9f,…](/content/2026/06/1310338/images/be4a4b3a3074b2d15040e6d90d9b0d5e56f192acef2cccd3f4d4296336bc22aa.jpg)
NOTE
When you use the FF method, you need not touch the key for multiplication entries.
Lock shift mode (for PLU levels)
If your terminal has been programmed for PLU level in the lock shift mode, touch a desired PLU level shift key before a numeric entry.
Procedure
![graph TD A["L1"] --> C["Numeric entry (Q'ty, X/QTY)"] B["L10"] --> C C --> D["Direct PLU"] D --> E["Stay in the current level"] E --> A](/content/2026/06/1310338/images/cc9a053021a499d4a9761f4729dd55f89c2c2faf27c9456b6b79f8d1525e733e.jpg)
NOTE
- If you select the automatic return mode (Returning every item entry), it is not necessary to use the key on the keyboard.
- When you use the FF method, you need not touch the key for multiplication entries.
Example
Level 1: PLU code 1, PLU code 2
Level 2: PLU code 101, PLU code 102
- When your POS terminal has been programmed for the automatic return mode:
Key Operation
Display

- When your POS terminal has been programmed for the lock shift mode:
Key Operation
Display

■ PLU price level shift
Seven different price levels can be programmed for each PLU.
The price levels can be changed for PLU registrations.
You can shift the PLU price level (level 1 thru 7) by utilizing the PLU price shift keys thru .
You must program a PLU price level shift mode (i.e. automatic return mode* or lock shift mode**) and the operating modes to be used for PLU price level shift (i.e. both RED and MGR modes or MGR mode alone).
* The automatic return mode automatically shifts the PLU price level back to level 1 after a PLU entry. You can select whether the PLU price level should return each time you enter one item or each time you finalize one transaction.
** The lock shift mode holds the current PLU price level until touching a price level shift key.
Automatic return mode (for price shifts)
If your terminal has been programmed for PLU price level in the automatic return mode, touch a desired price level shift key before a numeric entry.
Procedure
![graph TD A["(each item)"] --> B["P2"] A --> C["P7"] B --> D["Numeric entry\n(Q'ty, XQTY, etc.)"] C --> D D --> E["PLU code"] E --> F["PLU"] F --> G["Return to price level 1"] H["(each transaction)"] --> I["P2"] H --> J["P7"] I --> K["Numeric entry\n(Q'ty, XQTY, etc.)"] J --> K K --> L["PLU code [Pay…](/content/2026/06/1310338/images/396d7c4963b40766e0f2c0fca2881c574590ee26aa75ba1e5a28b3a9e57259f7.jpg)
NOTE
When you use the FF method, you need not touch the key for multiplication entries.
Lock shift mode (for price shifts)
If your terminal has been programmed for PLU price level in the lock shift mode, touch a desired price level shift key before a numeric entry.
Procedure
![graph TD A["To shift the price level of another PLU"] --> B["P1"] A --> C["P7"] B --> D["Numeric entry (Q'ty, X/QTY, etc.)"] C --> D D --> E["PLU code"] E --> F["PLU"] F --> G["Stay in the current price level"] E --> H["Direct PLU"] H --> G](/content/2026/06/1310338/images/fc705bf03e416f4b2d2e93517f5d05aeb700cd561f9564bd7e39f0c80c945b61.jpg)
NOTE
- If you select the automatic return mode, it is not necessary to use the key on the keyboard, but if you select the lock shift mode, it is necessary to use the key.
- When you use the FF method, you need not touch the key for multiplication entries.
Example
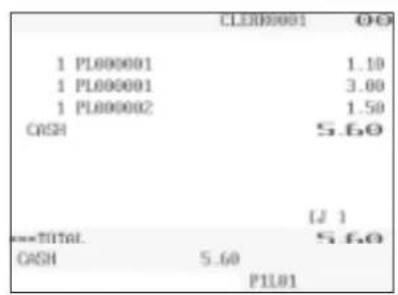
PLU price level 1: PLU code 1 (@1.10), PLU code 2 (@1.50)
PLU price level 2: PLU code 1 (@3.00), PLU code 2 (@2.40)
- When your POS terminal has been programmed for the automatic return mode:
Key Operation
Display
- When your POS terminal has been programmed for the lock shift mode:
Key Operation
Display

■ Condiment entries
Your terminal may be programmed for prompting condiment and preparatory instructions for a menu-item PLU.
Example:
When you enter a menu-item PLU, a prompting message such as "HOWCOOK?" and a list of the "Following PLUs" will appear. You must specify one of the "Following PLUs" such as "without mustard" to meet a special order of the guest. In an example of the condiment table shown below, it is assumed that the condiment table no.1 is assigned to PLU code 21 (programmed text "STEAK") and table no. 4 is assigned to table no. 1 as the next table no. When you enter the PLU code 21, the message "HOWCOOK?" will appear to prompt you to specify one of "RARE," "MED.RARE," and "WELLDONE." If the guest chooses "RARE," select it from the list. Then the next message "POTATO?" will appear to prompt you to specify one of "P.CHIPS," "MASHED.P," and "BAKED.P." If the guest chooses "MASHED.P", select it. Then touch the key to end this entry.
Here is an example of how to perform a condiment entry when your condiment table is as shown below.
| Table number | PLU codes for condiment entry (programmed text, price) Next table no. | |||
| 1 | (HOWCOOK?) (RARE 0.00) (MED.RARE 0.00) (WELLDONE 0.00) | 4 | ||
| 4 | (POTATO?) (P.CHIPS 0.60) (MASHED.P 0.60) (BAKED.P 0.50) | ____ | ||
Example
Key Operation
[Select "RARE" from the key list.] [Select "MASHED.P" from the key list.]
Display


![CLERB0001 00 1 PL000021 10.00 1 BASE 1 MASHED.P 0.60 CASH 10.50 [J] ===TOTAL 10.50 CASH 10.60 P1L01](/content/2026/06/1310338/images/25990ed687ef2fbc3a46a053e90eab291852234c013ba7714a0516fdc982be2e.jpg)
NOTE
- Your POS terminal will continue to operate for the condiment entry until you finish the entire condiment entry programmed for the PLU. During the condiment entry, if you enter a normal PLU, which is not in the condiment table, an error message will appear.
- When REPEAT TIMES of the condiment table is programmed either of 2 thru 9, its table shows repeatedly until accomplishment of a programmed times, then the next table will show.
- When the key is touched, the entry skips to the next table which is programmed.
- When the key is touched, its condiment entry is canceled in the programmed mode (REG/MGR or MGR).
- When you enter a PLU priced at "0.00," only the text will be printed on the receipt.
- No multiplication entry is possible for any condiment entries.
- No refund entry is possible for any condiment entries. When you perform a refund entry with a menu-item PLU and the condiment PLUs assigned to the menu-item PLU are automatically registered as a refund entry.
- You may omit the compulsory condiment entry by touching the key.
- The cursor void entry is allowed for those PLUs that are entered as condiments (menu and condiment).
- The multiplication entry can be made for each condiment item independently. However, sum of the entered quantity per condiment table have to be same or below as menu PLU registration. When no multiplication entry is made, the quantity is decided automatically to reach number of menu PLU registration.
■ Happy hour
If a time range is programmed for a price level, the price corresponding to the price level is automatically registered within the time range. When the entry time becomes to be out of the time range, the price level returns to the following levels:
Shift by price level shift key
The price level returns to the level before the time range.
Shift by clerk
The price level returns to the level which is programmed for an assigned clerk.
The following examples show that between 9:00 AM and 11:00 AM are programmed for price level 2.
Example
• Between 9:00 AM and 11:00 AM
Key Operation
Display

- Excepting the time range from 9:00 AM to 11:00 AM
Key Operation
Display
![CLERB0001 1 PL000001 CASH 1.10 1.10 [J] <=TOTAL. CASH 1.10 PIL01](/content/2026/06/1310338/images/10b99939dfbd3f9851b3784242eca9b8cbaf642b59bc27d0dbf68b855021f9d6.jpg)
■ Department shift
This shift can change the preset department to which a PLU belongs temporarily. When the through key is entered at the start of a transaction, the department codes to which all PLUs used in the transaction belong are changed to those which have been assigned to the through key used.
The following example shows that the PLU code 1 belongs to the department 1 and the key is programmed for the department 10.
Example
Key Operation
Display
![CLER0001 1 PL000001 CASH 1.10 1.10 [J] <=TOTAL CASH 1.10 PIL01](/content/2026/06/1310338/images/337ef3b0c31b197728f62a50e9c27d0ebfbd4fa06114fa7115f47fbd4c543c9c.jpg)
Dept. 10 totalizers are updated. (Original preset (dept. 1) is ignored.)
■ Pint entries
Using this function, you can sell an item with the desired quantity such as a half and a double. To perform this function, touch the key and enter an item assigned a PLU code for which you have programmed a pint price and a pint quantity. The price for the pint quantity will appear on the receipt. For details, contact your authorized SHARP dealer.
Procedure
FF method Normal method
![graph TD A["PINT"] --> B["PLU code"] B --> C["PLU"] C -.-> D["PLU entry (indirect)"] A --> E["Direct PLU"] E --> F["Unit price"] F --> G["ENTER"] G --> H["PLU/subdept. entry (direct)"] A --> I["PLU code"] I --> J["PLU"] J --> K["Unit price"] K --> L["ENTER"] L --> M["Subdept. entry (indirect)"] A --…](/content/2026/06/1310338/images/43c83c3fd22c7fb77c4f1dde34386c70fea3910213fdd4533ded6f9a691adbc2.jpg)
- Unit price: Less than a programmed upper limit
Example
Key Operation
2
Display
![CLEHR0001 00 2 PL000001 1.60 1 PL000002 1.00 CASH 2.60 [1] ***TOTAL 2.60 CASH 2.60 P1L01](/content/2026/06/1310338/images/ab29e8a9260e113e73d35c469291368fadcbc143604ef4caee85624734960100.jpg)
Display of Subtotals
Your POS terminal provides the following types of subtotals:
■ Subtotal
Touch the key at any point during a transaction. The sales subtotal including tax will appear in the display.
■ Difference subtotal (Differ ST)
Touch the key at any point during a transaction. When you touch it first, the subtotal of all entries which have been made is displayed and printed. If you touch it second, you will get the subtotal of entries which have been made after you got the first subtotal. Taxes are calculated each time you touch the key, and taxes and taxable subtotals are displayed and printed on the receipt.
Example
Key Operation
Display

Finalization of Transaction
■ Cash or check tendering
Touch the key to get an including-tax subtotal, enter the amount tendered by your customer, then touch the or key if it is a cash tender or touch the thru key if it is a check tender. When the amount tendered is greater than the amount of the sale, your POS terminal will show the change due amount and the symbol "CHANGE." Otherwise your POS terminal will show the symbol "DUE" and a deficit. Make a correct tender entry.
NOTE
- Touch the key and select a pertinent medium key
Example
Cash tendering
| Key Operation |
| 2 |
| 1000 |
Display
| CLEHH0001 | 00 | |
| 1 PL000001 | 1.10 | |
| 1 PL000002 | 1.50 | |
| CASH | 10.00 | |
| CHANGE | 7.40 | |
| [1] 1 | ||
| ---TOTAL | 2.60 | |
| CHANGE | 7.40 | |
| P1L01 | ||
Check tendering
| Key Operation |
| 2 |
| 1000 |
Display
| CLED0001 | 00 | |
| 1 PL000001 | 1.10 | |
| 1 PL000002 | 1.50 | |
| CHECK | 10.00 | |
| CHANGE | 7.40 | |
| [J] | ||
| ===TOTAL | 2.60 | |
| CHANGE | 7.40 | |
| P1L01 | ||
■ Mixed tendering (check + cash)
Example
Key Operation
| 2 |
| 1000 |
| 500 |
Display
| CLER0001 | OO | |
| 1 PL000005 | 10.00 | |
| 1 PL000006 | 1.00 | |
| 2 PL000002 | 3.00 | |
| CHECK | 10.00 | |
| CASH | 5.00 | |
| CHANGE | 1.00 | |
| (L) | ||
| ===TOTAL | 14.00 | |
| CHANGE | 1.00 | |
| PIL01 | ||
■ Cash or check sale that does not need any tender entry
Enter items and touch the or key if it is a cash sale or touch the thru keys if it is a check sale. Your POS terminal will display the total sales amount.
Example
Key Operation 10 Display
| CLER0001 | 00 | |
| 1 PL000006 | 7.20 | |
| 1 PL000010 | 2.30 | |
| CASH | 9.50 | |
| [1, 1] | ||
| ===TOTAL | 9.50 | |
| CASH | 9.50 | |
| PIL01 |
In the case of check sale
| CLER0001 | 00 | |
| 1 PL000006 | 7.20 | |
| 1 PL000010 | 2.30 | |
| CHECK | 9.50 | |
| [J] | ||
| ***TOTAL | 9.50 | |
| CHECK | 9.50 | |
| P1L01 | ||
■ Credit sale
Enter items and touch the corresponding credit keys ( thru ).
Example
Key Operation
Display
![CLERH0001 OQ 1 PL000006 7.20 1 PL000007 5.00 CREDIT1 12.20 [1] ---TOTAL 12.20 CREDIT1 12.20 PIL01](/content/2026/06/1310338/images/dfcd0643dc146a7aafad53a35dbb90ba3bf9a0b0bbb062b1df2272b30626549b.jpg)
NOTE
- Amount tendering operations (i.e., change calculations) can be achieved by the thru key when PGM2-mode programming allows them.
- Touch the key and select a pertinent credit key.
■ Mixed-tender sale (cash or check tendering + credit tendering)
Example
Key Operation
2
950
Display
![CLHN0001 10 PL000001 1 PL000003 CROB CREDIT2 11.00 1.75 9.50 3.25 [1] <=TOTAL 12.75 CREDIT2 3.25 PIL01](/content/2026/06/1310338/images/f82ab3ffd2b2a2818f13124a8f316f71d2e33d94270bd4d1ad9a26d8ef14f4c2.jpg)
NOTE
Touch the thru keys or the thru keys in place of the key when your customer makes payment by checks or by credit account.
Computation of VAT (Value Added Tax)/Tax
■ VAT/tax system
The POS terminal may be programmed for the following six tax systems by your authorized SHARP dealer.
Automatic VAT 1 through 6 system (Automatic operation method using programmed percentages) This system, at settlement, calculates VAT for taxable 1, taxable 2, taxable 3, taxable 4, taxable 5, and taxable 6 subtotals by using the corresponding programmed percentages.
Automatic tax 1 through 6 system (automatic operation method using programmed percentages). This system, at settlement, calculates taxes for taxable 1, taxable 2, taxable 3, taxable 4, taxable 5, and taxable 6 subtotals by using the corresponding programmed percentages, and also adds the calculated taxes to those subtotals, respectively.
Manual VAT 1 through 6 system (manual entry method using programmed percentages).
Procedure

This system provides the VAT calculation for taxable 1, taxable 2, taxable 3, taxable 4, taxable 5, and taxable 6 subtotals. This calculation is performed using the corresponding programmed percentages when the key is touched just after the key.
Manual VAT 1 system (manual entry method for subtotals that uses VAT 1 preset percentages).
Procedure

This system enables the VAT calculation for the then subtotal. This calculation is performed using the VAT 1 preset percentages when the key is touched just after the key. For this system, the keyed-in tax rate can be used.
Manual tax 1 through 6 system (manual entry method using programmed percentages).
Procedure

This system provides the tax calculation for taxable 1, taxable 2, taxable 3, taxable 4, taxable 5, and taxable 6 subtotals. This calculation is performed using the corresponding programmed percentages when the key is touched just after the key. After this calculation, you must finalize the transaction.
Automatic VAT 1 through 3 and tax 4 through 6 system.
This system enables the calculation in combination with automatic VAT 1 through 3 and tax 4 through 6. This combination can be any of VAT 1 through 3 and tax 4 through 6. The tax amount is calculated automatically with the percentages previously programmed for these taxes.
NOTE
VAT/tax assignment is printed at the fixed right position of the amount on the receipt and bill as follows:
| VAT1/tax1 | →A |
| VAT2/tax2 | →B |
| VAT3/tax3 | →C |
| VAT4/tax4 | →D |
| VAT5/tax5 | →E |
| VAT6/tax6 | →F |
When multiple VAT/tax is assigned to a department or a PLU, a smaller number of the VAT/tax will be printed. For details, contact your authorized SHARP dealer.
Example
Key Operation
(When the manual VAT 1 through 6 system is selected)
Display
![CLERNO001 1 PL000008 SUBTOTAL TAX1 ST UNIT 1 NET 1 CASH 5.20 [1, 1] ***TOTAL CASH 5.20 P1101](/content/2026/06/1310338/images/d950cadddd921dcd9f2b12f2452571190eafc3cdbc5b2bab2639a06b009e0d7d.jpg)
■ VAT shift entries
This feature is intended to shift the tax status of a particular department (or PLU) programmed for taxable 1 or taxable 1 and taxable 3.
- When the VAT shift entry is made for a particular department or PLU programmed for taxable 1, their tax status shifts to taxable 2.
- When this entry is made for a particular department (or PLU) programmed for taxable 1 and taxable 3, the tax status "taxable 1" remains unchanged, but the other, "taxable 3" is ignored.
Procedure
Press the key to activate the VAT shift prior to entering department(s) or PLU(s) concerned. It is also possible to activate the VAT shift at the end of a transaction.
Example
Key Operation
Display

Guest Check (GLU/PBLU)
Two different guest check entry systems are available: the guest lookup (GLU) and previous balance lookup (PBLU) systems. It depends on how your POS terminal has been programmed which of these is used. (Contact your authorized SHARP dealer for this selection.)
GLU system: If this system is selected, the balance due and the details of the order are placed in the guest check file. The information can be automatically recalled by entering a guest check code (= a GLU code) when additional ordering occurs.
PBLU system: If this system is selected, the previous balance is stored in the previous balance lookup file (PB lookup file). The information can be automatically recalled by entering a previous balance lookup code (= a PBLU code) when additional ordering occurs.
GLU/PBLU system
New guest
For a new guest, open a new guest check and assign a GLU/PBLU code.
Procedure
![graph TD A["For automatic GLU/PBLU code generation"] --> B["GLU/PBLU code (1 to 99999999)"] B --> C["OPEN THE TABLE"] C --> D["No. of guest (max. 2 digits)"] D --> E["ENTER"] E --> F["Person no. (max. 2 digits)"] F --> G["PERSN#"] G --> H["[Item entries"]] H --> I["GUEST CHECK RCPT"] I --> J["SLIP"]…](/content/2026/06/1310338/images/99d9a38c619951f426d2666323131bc3ffaeb5be93f95feda3c012fd4096e341.jpg)
NOTE
- The GLU/PBLU code refers to a code that will be used whenever the guest check must be accessed for reordering or final payment.
- The person number is assigned to each person. When you make registration by each person, the person number has to be entered.
- Your POS terminal can be programmed GLU/PBLU codes in a sequential fashion. If your POS terminal has not been programmed to do so, each GLU/PBLU code can be entered manually.
*1 This is the optional function (Temporary finalization).
You can temporarily finalize a guest check by touching the key. This prints out a guest check to show the current balance, including tax. The guest check, however, is still "open." This means you can still make additional orders to it. The tax is calculated but is not added to the tax totalizer.
*2 The tax is not calculated. *3 The tax is calculated and is added to the tax totalizer.
Example
Key Operation
11 No. of guests 2
Display
Additional ordering
For making additional guest check entries, enter the GLU/PBLU code first for automatic guest lookup.
Procedure![graph TD A["GLU/PBLU code (1 to 99999999)"] --> B["OPEN THE TABLE"] B --> C["Person no. (max. 2 digits)"] C --> D["PERSX#"] D --> E["[Item entries"]] E --> F["GUEST CHECK RCPT"] F --> G["SLIP"] F --> H["VP"] G --> I["When paid in full."] H --> I I --> J["FINAL"] I --> K["NBAL"] J --> L["XXXXXXXX"] K…](/content/2026/06/1310338/images/8b66b76d0d330d4f852d375d07b2a2514533602a9a9cbc72525364623ea96308.jpg)
Example
Key Operation
11
Display


Settlement
Use the following procedure:
Procedure![graph TD A["GLU/PBLU code (1 to 99999999)"] --> B["OPEN THE TABLE"] B --> C["[Item entries"]] C --> D["Person no."] D --> E["PERSW"] E --> F["[Payment operation"] (Cash, Check, Credit, Exchange)] F --> G["GUEST CHECK RCPT"] G --> H["SLIP"] G --> I["VP"] D --> J["I.PAY"] J --> K["Person no."]](/content/2026/06/1310338/images/ce5d9f3fa6648ce19be5bd1aa6a8130cd3f28df3f95d18386e5224f6be4f9be2.jpg)
Example Key Operation
11
2000
400
Display![GUEST 1 PL000002 1 PL000003 2 PL000007 CHECK CROSS CHANGE ***TOTAL CHANGE CLEN8001 2.00 5.00 13.20 20.00 4.00 3.00 [1] 21.00 3.00 PIL01](/content/2026/06/1310338/images/878052d726f211a7aba389dbef94eefcfb3b9aa276b65d2e4d533731b80f5f97.jpg)
■ Drive-through function
A second GLU/PBLU function can be used as the drive-through function. This system looks up drive-through codes automatically (First In/First Out).
This drive-through system provides three types of POS terminal functions (Order taker, cashier station and counter).
Drive-through screen
The drive-through screen can be displayed by touching the key or by finalizing the drive-through registration (refer to PGM: FUNC.SELECTING).
When the HOME, SUB or Function menu key is touched, the screen is changed to the ordinary screen from the drive-through screen. The screen can also be changed to the ordinary screen by beginning the drive-through registration with touching the key.
Order taker machine
For the current code For the previous code

The drive-through codes in the WAIT state Waiting time count
![Counter machine For the previous code CODE 16 CLEBR0001 OOO1 DRIVE THU 11:37 RED For the current code 1 PL000005 5.20 1 PL000001 1.10 1 PL000002 1.50 [ J ] TOTAL 7.80](/content/2026/06/1310338/images/d8a900368442b6dea8c85a002a530bcba8340151cf45b4ac4b7308e88380088a.jpg)
The order entry and settlement operation can be performed only for the current code.
The window of desired drive-through code is saved to the wait state by using the key.

The window of desired drive-through code is released from the wait state by using the key.

![Select the drive-through code. CAB27 CLER0001 OO 2 PL000001 2.28 1 PL000002 1.50 1 PL000005 5.28 [J] ===TOTAL 8.96 ===PBAL2 8.90 P1101](/content/2026/06/1310338/images/65a5d2533bc011e41d1c46fe0bb06b5db397288c5d5d8709c5526f1fe8d43cda.jpg)
New car
For a new car, open a new drive-through balance (the code is automatically generated).
Procedure
![graph TD A["NEW CAR ENTRY"] --> B["[Item entries"]] B --> C["NBAL"] B --> D["FINAL"] C --> E["GUEST CHECK RCPT"] D --> E E --> F["SLIP"] E --> G["VP"] C --> H["*1"] D --> I["*2"]](/content/2026/06/1310338/images/b4635f0d1af75309476ae6f27c66e0e50daf5b30ca6db90e297af1e1b931347a.jpg)
NOTE
The drive-through code refers to a code that will be used whenever the guest check must be accessed for re-ordering or final payment.
*1 The tax is not calculated. *2 This is the optional function (Temporary finalization).
You can temporarily finalize a guest check by touching the key. This prints out a guest check to show the current balance, including tax. The guest check, however, is still "open." This means you can still make additional orders to it. The tax is calculated but is not added to the tax totalizer.
Example
Key Operation
Display
![CABLES 1 PL000002 1 PL000003 CLEBR0001 1.50 2.30 [2] ===TOTAL ===HDL2 3.80 P1L61](/content/2026/06/1310338/images/fee576d9b5e1381b6d9a62ee1938ff16aa169784d24d0517c9ac2a510404160a.jpg)
Additional ordering
For making additional drive-through entries, use the following procedure:
Procedure![graph TD A["OPEN THE CAR"] --> B["[Item entries"]] B --> C["NBAL"] B --> D["FINAL"] C --> E["GUEST CHECK ROPT"] D --> E E --> F["SLIP"] E --> G["VP"]](/content/2026/06/1310338/images/d22bd5f400fe5ad64ce0e5efe6ffe9856b6aeba455974652175ef13baf8f87f5.jpg)
Example Key Operation
Display
Settlement
Use the following procedure:
Procedure![graph LR A["OPEN THE CAR"] --> B["[Item entries"]] B --> C["CASH1, CASH2"] B --> D["CHK ~ CHK4"] B --> E["CR1 ~ CR8"] B --> F["EXCHANGE1 ~ EXCHANGE8"] C --> G["GUEST CHECK RCPT"] D --> G E --> G F --> G G --> H["SLIP"] G --> I["VP"]](/content/2026/06/1310338/images/40fd2e4459c03a881fe17f792efc2c4e80a529d3af32a1c9b076453994973bd1.jpg)
Example Key Operation
1000
600
Display![PIN35 CLIN0001 00 1 PL000002 1.50 1 PL000003 2.30 1 PL000007 6.20 1 PL000008 5.00 CHECK 19.00 CASH 6.00 CHANGE 1.00 [J] ***TOTAL 15.00 CHANGE 1.00 PIL01](/content/2026/06/1310338/images/36f2832257e8e862d7935c2fdbf3acb4cd067eec625bcd80fb7c3b70a6d53922.jpg)
■ Deposit entries
Deposit refers to a prepayment on a guest check. It can be received in cash, by check or credit.
You can make a deposit entry only when entering a guest check. It cannot be done during handling of a tendered amount.
A received deposit can be refunded by touching the key. You cannot attempt to refund an amount larger than the deposit balance.
Procedure![graph LR A["Deposit amount (max. 7 digits)"] --> B["DEPO"] A --> C["DEP.RF"] B --> D["CHK through CHK4"] C --> E["CASHTL or CA2"] C --> F["CR1 through CR8"]](/content/2026/06/1310338/images/36dc90542496b85e32ed69d804d2d73f64ae6ab7ba4096f1b74f0ec2e8e4c2f4.jpg)
Example
Key Operation
| 11 |
| 5000 |
Display![CLIM 1 1 CASH DEPOSIT 50.00 [ ] [ ] ===TOTAL -50.00 ===FINAL -50.00 P1L01](/content/2026/06/1310338/images/da372e4bfb8fc7b175c61c52ef4ce5219bf7692d03d467d5f4b5c068ad9c0d4a.jpg)
Example Key Operation
| 11 |
| 5000 |
Display
■ Transferring guest checks out or in (Transfer-in/out)
Transferring guest checks out
At the end of a clerk shift or whenever a clerk is relieved, one or more open guest checks can be transferred from the clerk to the open check file until the responsibility for the check(s) is assigned to another clerk. Also, all open guest checks of this clerk can be transferred at one time.
Procedure![graph TD A["TRANS OUT"] --> B["XXXXXXX"] B --> C["OPEN THE TABLE"] C --> D["TRANS OUT"] style A fill:#f9f,stroke:#333 style D fill:#f9f,stroke:#333 note right of B: "When all open GLU codes of the active clerk are transferred." note right of C: "For the next guest check"](/content/2026/06/1310338/images/53b5b9d7cc755b95201f5cabceefe2f1aa550a1a65dc836cc07d8fe84bef54fd.jpg)
Example Key Operation
11
Display
Transferring guest checks in
When the second clerk is assigned to be responsible for guest checks that have been transferred out:
Procedure
When all guest checks which are transferred out from a clerk are transferred.
![graph TD A["TRANS IN"] --> B["CLerk code"] B --> C["CLK#"] C --> D["OPEN THE TABLE"] D --> E["TRANS IN"] F["XXXXXXX"] --> D G["GLU/PBLU code"] --> F H["For the next guest check"] --> F](/content/2026/06/1310338/images/49a60be74e57666930f08ec9d18b0b58b8b42473733ec75ed96ac9662b13d173.jpg)
Example Key Operation
11
Display![CLERN0001 G L U #1 1 ***PML 22.39 [J ] ***TOTAL 0.00 FROM: IN P1161](/content/2026/06/1310338/images/bd5212005b4ea17ff00f0db021bc5a9634098fd4dbc60d8d4203812ee55e91e1.jpg)
■ Bill printing
This function is used for issuing the bill to the guest. Your POS terminal can print the bill (normal bill or cumulated bill) on the slip, receipt, or journal printer. For selecting these printers, contact your authorized SHARP dealer.
Procedure![graph TD A["C.BILL"] --> B["Normal bill"] B --> C["XX"] C --> D["SLIP"] C --> E["No. of lines of slip feed"] E --> F["Bill on the receipt"] F --> G["GUEST CHECK RCPT"] H["Cumulated bill"] --> A I["Slip on the slip (auto feed)"] --> C](/content/2026/06/1310338/images/730287faa09274874cf8ebc6f90adc361194bff3ee8a7ffa1ae1531b657babe5.jpg)
NOTE
This function is available immediately after the finalization of transaction (including after touching the or the key).
Example
- When you select normal bill printing:
Key Operation
![15/12/99 [0001] 123456 #1033 11:24 JACK BILL NUMBER 0001 *BILL* PL000001 *1.20 PL000002 *2.80 CASH *4.00](/content/2026/06/1310338/images/4896c861522927d32ee4038c029a3803afa5d376e92c17404bcb24ef8dcfd8b1.jpg)
- When you select cumulated bill printing:
Key Operation
![15/12/99 [0001] 123456 #1035 11:27 JACK BILL NUMBER 0003 *BILL* ALL FOODS & DRINKS *4.00 CASH *4.00](/content/2026/06/1310338/images/c1e450868e88846c3ca5ce569bf834260bb6a2bdf720f64ac5aa8be23b9ccf66.jpg)
■ Intermediate GLU reading (only for GLU system)
This function is used for temporary inspection of the guest check. The details of the guest check can be printed on the receipt or the slip. For selecting these printers, contact your authorized SHARP dealer.
Procedure
![graph LR A["MISC FUNCTIONS"] --> B["02 INTERMED."] B --> C["GLU code"] C --> D["ENTER"] D --> E["OUTPUT"] E --> F["RECEIPT"] E --> G["SLIP"] F --> H["ENTER"] G --> I["ENTER"]](/content/2026/06/1310338/images/f662bdfae143e38f2d31b2aac291f0376712f934aec377e34cba77bafa6cf812.jpg)
NOTE
This function is available after finishing the guest check entry.
Example
Key Operation
[Select "02 INTERMED."] 21
15/12/99 123456
11:37
JACK
*INTERMED.*
GLU#21
| ***PBAL | *0.00 |
| PL000003 | *5.00 |
| PL000002 | *2.80 |
| PL000005 | *7.20 |
| ***NBAL | *15.00 |
■ Bill totalizing/bill transfer
Bill totalizing
The bill totalizing function is used to totalize multiple bills when, for example, a particular guest pays not only his or her bill, but also the bills of other guests.
Procedure
When more bills are added
![graph TD A["BILL T"] --> B["GLU/PBLU code (1 to 99999999)"] B --> C["OPEN THE TABLE"] C --> D["GLU/PBLU code (1 to 99999999)"] D --> E["SUB TOTAL"] E --> F["NBAL"] F --> G["[Payment operations"]] B -->|#1| B D -->|#2| D](/content/2026/06/1310338/images/3ae99d0b35e4bb919eb6310abb13f597ab942ec7e257cd2a0e48552af923b426.jpg)
NOTE
- All #1 bills are added to a #2 bill. A maximum of 5 bills is available for #1.
- The GLU/PBLU code of #1 must be in use. If the guest check(s) of #1 or #2 has already been handled by another clerk, the guest check(s) must have been made "Transferring out." • After the bill totalizing operation, the individual payment is not allowed.
Example
Key Operation
| 12 |
| 13 |
| 11 |
Display
| SLW 1 1 | CLSH0001 | OOO1 | RESHT | 11:54 | 8.7. |
| 1 PL000005 | 7.20 | ||||
| 1 PL000007 | 6.60 | ||||
| 1 PL000002 | 2.00 | ||||
| (d) | |||||
| ---TOTAL | 16.60 | ||||
| ENTER MBAL KEY | |||||
| PIL01 | |||||
Bill transfer
This function is used to change the GLU/PBLU code of a particular bill.
Procedure
![graph LR A["BILL T"] --> B["GLU/PBLU code (1 to 99999999)"] B --> C["OPEN THE TABLE"] C --> D["GLU/PBLU code (1 to 99999999)"] D --> E["SUB TOTAL"] E --> F["NBAL"] B -->|#1| B D -->|#2| D](/content/2026/06/1310338/images/7b00991cca81f5ec17d401db11e12b5ff82c874a0e79eb4ac2922d4e9107316b.jpg)
NOTE
- This function requires that the current GLU/PBLU code be entered for #1 and a new GLU/PBLU code be entered for #2.
- A #1 bill is transferred to a #2 bill. The #1 bill is then cleared and set free.
Example
Key Operation
| 11 |
| 12 |
Display
| SLW12 | CLEN0001 | OOO1 | RSAB1 | 11:57 | 8.7. |
| 1 PL000005 | 7.20 | ||||
| 1 PL000007 | 6.60 | ||||
| 1 PL000002 | 2.80 | ||||
| (j) | |||||
| ---TOTAL | 16,6,0 | ||||
| ENTER MDAL KEY | |||||
| PIL01 | |||||
■ Bill separating
This function is used when each guest of a group pays his or her own order. With this function, you can select some items from a guest check and make an entry for the payment. Also, you can transfer the items you have selected to other guest checks. This function is available only in the GLU system.
![graph TD A["BILLS"] --> B["GLU code (Original GLU code)"] B --> C["OPEN THE TABLE"] C --> D["For the payment operation"] D --> E["For automatic GLU code generation"] E --> F["GLU code (For receiving)"] F --> G["OPEN THE TABLE"] G --> H["[Item selection by touching operation"]] H --> I["NBAL"] H -->…](/content/2026/06/1310338/images/86e4e3d035aef6427f0e0df3454b1c3d944be1328e3877235753a0f4d145b2f8.jpg)
NOTE
- The items can be transferred from the original windows to the destination (receiving) window.
- The items which are refunded or discounted cannot be separated.
- If the receiving GLU code is not entered during the bill separating operation, it is considered that the payment function has been made by touching the CASH/TL or other payment key.
- You cannot specify the quantity of an item for selection when the stored quantity has decimal fraction.
Example
In this example, it is assumed that you receive payment from a group for two "MEAT"s and five "EGG"s stored in a guest check (GLU code 22).
Key Operation![graph TD A["Select "3 MEAT" from the original window."] --> B["Select "6 EGG" from the original window."] B --> C{Decision} C -->|Yes| D["OK"] C -->|No| E["Set"] D --> F["OR: 12.11 8.5."] E --> G["OR: 0.00***TOTAL 71.50"] F --> H["OR: 12.13 8.5."] G --> I["OR: 47.60"] H --> J["OR…](/content/2026/06/1310338/images/f583c379398d352893f5e723337f62f99ee9d0840105c2280d0315dd84b432df.jpg)
Example
In this example, it is assumed that you transferred three "MEAT"s and five "EGG"s stored in a guest check (GLU code 25) to a new guest check (GLU code 31).
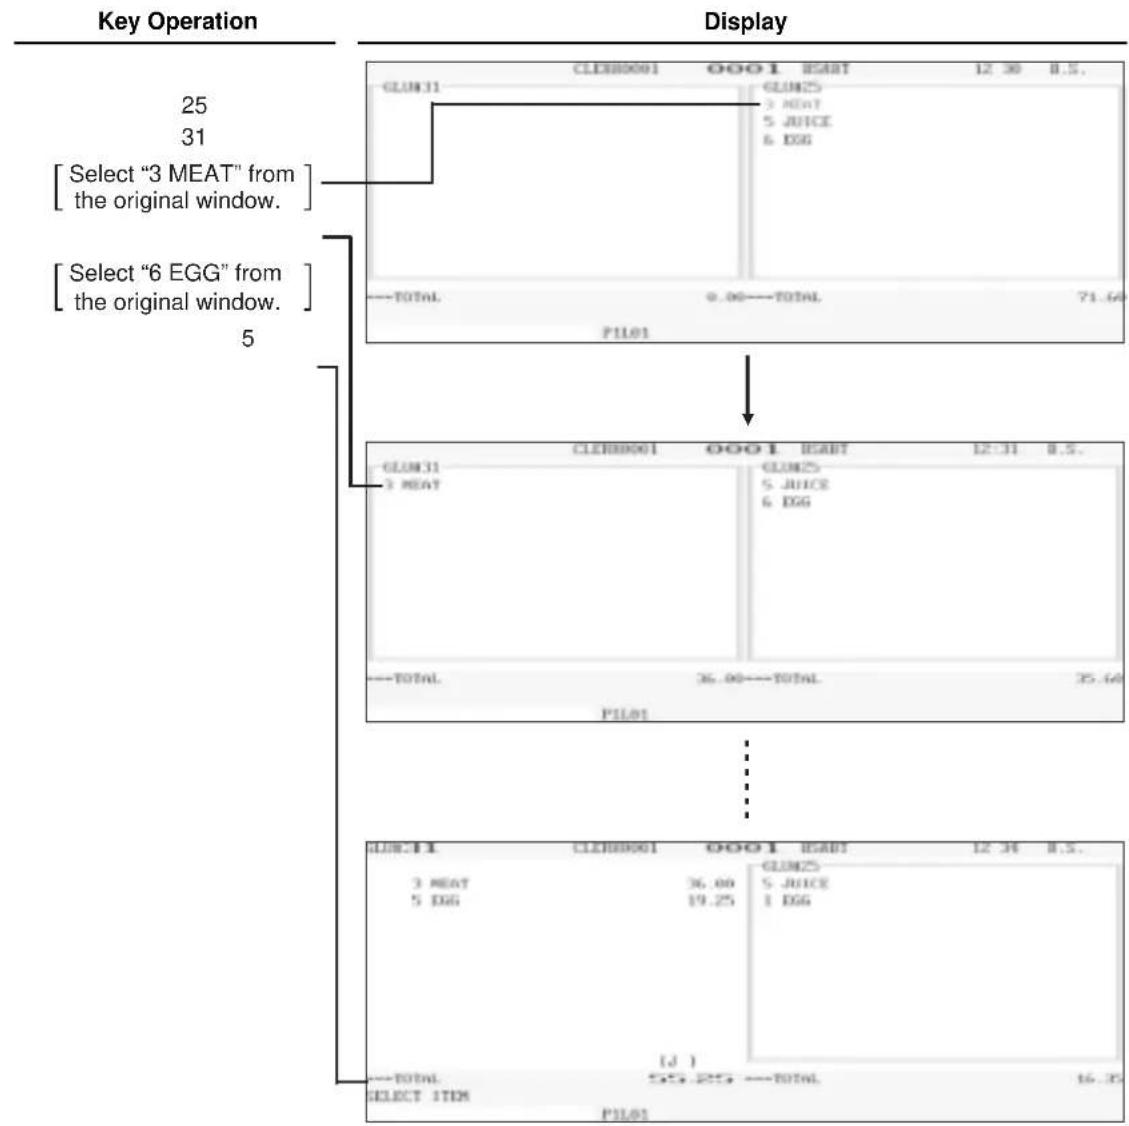
■ Transaction migration
This POS terminal allows you to migrate the transaction of non-GLU type to the GLU file.
Procedure![graph TD A["Item entries"] --> B["GLU/PBLU code (1 to 99999999)"] B --> C["OPEN THE TABLE"] C --> D["No. of guest (max. 2 digits)"] D --> E["GUEST#"] E --> F["Item entries"] G["FINAL"] --> H["XXXXXX"] I["NBAL"] --> H J["When paid in full."] --> K["RA1 or RA2"] L["For automatic GLU/PBLU code generati…](/content/2026/06/1310338/images/57d33af8e379ee256aa7e6ccae5ee279ff417cc9db50f81ca01663c4bdb115db.jpg)
Example
Key Operation
35
Display![PL0035 CLEN8001 1 PL000001 1.20 [ ] ===TOTAL ===HDL 1.20 P1L01](/content/2026/06/1310338/images/a82729a31eab997fdf975003ad87c81f1229dff473c97dd745b79e994ebac5ac.jpg)
NOTE
- The transaction migration can be operated before payment operation was made.
- This function can not be used when individual payment system is selected.
- This function can be made for GLU entry, not for drive-through entry.
Auxiliary Entries
■ Percent calculations (premium or discount)
- Your POS terminal provides percent calculations for a subtotal or each item entry. You need to specify in advance for which of a subtotal and each item entry your POS terminal should perform a percent calculation.
- For percent calculations (premium, discount, subtotal or individual), you may use the through key. • Percentage: 0.01 to 100.00%
Percent calculation for a subtotal
Example
Key Operation
Display
| CLEBR0001 | OO | |
| 4 PL000003 | 5.60 | |
| 2 PL000005 | 4.50 | |
| SUBTOTAL | 10.10 | |
| -10.00× | ||
| ×1 | -1.01 | |
| CASH | 9.09 | |
| LJ 1 | ||
| ---TOTAL | 9.09 | |
| CASH | 9.09 | |
| PIL01 |
Percent calculation for item entries
Example
Key Operation
Display
■ Discount entries
Your POS terminal allows you to deduct a certain amount less than a programmed upper limit after the entry of an item or the computation of a subtotal.
Discount for a subtotal
Example
| Key Operation |
| 80 |
| 100 |
Display
| CLER0001 | 00 | |
| 1 PL000006 | 2.80 | |
| 1 PL000000 | 7.50 | |
| (-)2 | -1.00 | |
| CASH | 9.30 | |
| (J) | ||
| ***TOTAL | 9.30 | |
| CASH | 9.30 | |
| P1101 |
Discount for item entries
Example
| Key Operation |
| 7 |
| 75 |
Display
| CLER0001 | 00 | |
| 1 PL000007 | 6.60 | |
| (-)1 | -0.75 | |
| CASH | 5.85 | |
| ( ) | ||
| ---TOTAL | 5.05 | |
| CASH | 5.05 | |
| PIL01 | ||
■ Refund entries
If a returned item is the one entered into a department, enter the amount of the return, then touch the key and a corresponding department key in this order; and if an item entered into a PLU is returned, enter a corresponding PLU code, then touch the and keys, or touch the and direct PLU keys in this order without entering any PLU code.
Example
Key Operation
| 7 | |
| 7 |
Display
| CLER0001 | 00 | |
| -1 PL000003 | R-5.00 | |
| -7 PL000007 | R-46.29 | |
| CHANGE | 51.20 | |
| LJ 1 | ||
| ---TOTAL | -51.20 | |
| CHANGE | 51.20 | |
| PIL01 | ||
■ Return entries
If a refunded item is to be entered into a department, enter the amount of the refund, then touch the key and a corresponding department key in this order; and if an item entered into a PLU is returned, enter a corresponding PLU code, then touch the and keys, or touch the and direct PLU keys in this order without entering any PLU code.
Example
Key Operation
| 7 | |
| 7 |
Display
| CLER0001 | 00 | |
| 1 PL00005 | 7.20 | |
| -1 PL00004 | RT-1.25 | |
| -7 PL00007 | RT-46.20 | |
| CHANGE | 40.25 | |
| (J) | ||
| =TOTAL | -40.25 | |
| CHANGE | 40.25 | |
| PIL01 | ||
■ Printing of non-add code numbers
Enter a non-add code number such as a guest code number and credit card number within a maximum of 16 digits and touch the key at any point during the entry of a sale.
Example
Key Operation
1230
Display

■ Printing of free text
Free text programmed in the PGM mode can be printed out by entering the corresponding text code and touching the key or by touching a corresponding direct text key. You can describe your item together with departments and PLUs.
Procedure
![graph TD A["Text code (1 to 99)"] --> B["TEXT#"] C["Direct text keys"] --> B B --> D["Dept. entry\nPLU/subdept. entry"]](/content/2026/06/1310338/images/4f8d0cfe48c87b6bfa193ef7c93f5a0e3042518af8cd53a05737572a81d6ee08.jpg)
Example
Key Operation
1
Display

■ Entertainment bill
This function is used to print sales data on guest checks (Entertainment bill) on a receipt printer.
Procedure
ENTERTAINMENT
Print sample
YOUR RECEIPT THANK YOU
15/12/99 [0001] 123456
0324 13:14 CLERK0001
Payment Treatment
■ Tip-in entries
Your POS terminal allows the entry of tips that your guests give to clerks in cash or other media (check or credit). The tip-in entry assumes that it is carried out in the following system:
- Tip paid by a guest to a clerk is entered in the POS terminal by tip entry, and the restaurant pays the tip amount to the clerk later in cash.
- Tip amount entry to the POS terminal is normally performed by a clerk.
The entry is allowed before payment operation is performed. After the tip entry is performed, item entry is not allowed. The transaction operation must be finalized by payment operation. Two types of tip, cash tip and non-cash tip, are not allowed to be mixed in entry during one transaction operation. Tip entry only in either of them is allowed.
Cash tip entry: In a transaction in which cash tip entry is made, when payment operation is started, the process is as follows:
Cash tender (which may be foreign money) is compulsory until total cash tender exceeds or equals to cash tip amount. Then, check (or credit) tender operation is allowed.
Non-cash tip entry: In a transaction in which a non-cash tip entry is made, when the payment operation is started, the process is as follows:
Check (or credit) tender is compulsory until the total check (or credit) tender exceeds or equals the non-cash tip amount. Then, cash tender operation is allowed.
Procedure
Cash tip entry

Non-cash tip entry

Example
Key Operation
| 11 |
| 300 |
| 300 |
| 1380 |
Display
| ILMN 1 1 | CLERH0001 | OO |
| 1 PL000003 | 10.00 | |
| 1 PL000002 | 3.00 | |
| CASH TIP | 3.00 | |
| CASH | 3.00 | |
| CHECK | 13.00 | |
| CHANGE | 0.00 | |
| LJ 1 | ||
| ***TOTAL | 16.80 | |
| CHANGE | 0.00 | |
| PIL01 | ||
■ Currency exchange
Your POS terminal allows payment entries in foreign currency. Touching the through key creates a subtotal in foreign currency. Cash alone can be handled after currency exchange.
Procedure
![graph TD A["After an entry is completed or after the amount tendered is found smaller than the sales amount in a sales entry"] --> B{*Preset rate} B --> C["EXCHANGE1"] B --> D["EXCHANGE9"] C --> E["Amount tendered (max. 8 digits)"] D --> F["CLEAR"] E --> G["CASHTL"] F --> H["CA2"] G --> I["Next regi…](/content/2026/06/1310338/images/48cbee7f1d1160afdd9eb662e093d1f45b9377189a76e87caf92c9410d12adef.jpg)
* Preset rate: 0.000000 to 999.999999
NOTE
- When the amount tendered is short, its equivalent in deficit is shown in domestic currency.
- Change amount will be displayed in domestic currency.
Example
Preset rate: 0.6068
Currency exchange key used: EXCHANGE1
Key Operation
Display
Currency descriptor
NOTE
Case of opening foreign currency drawer:
- At the timing of issuing receipt after tendering exchange amount.
- At the timing of issuing X/Z report (included CCD) • The Exchange drawer open function is executed.
When the EXCHANGE(n) key is touched simply out of transaction, the foreign currency drawer is opened.

■ Received-on-account entries
Procedure
Direct key entries![graph TD A["RA amount (max. 8 digits)"] --> B["RA or RA2"] B --> C{Discount rate} C --> D["%1 % through"] C --> E["or"] E --> F["Discount amount"] F --> G["(-1) through (-9)"] G --> H["Output"] I["Amount tendered"] --> J["CA3+TL or CA2"] I --> K["CHK through CHK4"] I --> L["CR1 through CR8 *"] M["To…](/content/2026/06/1310338/images/b64b42d96b2707f0b259a9c042fe15fa554985e0c7cc480acdcaaf0d65fde2d5.jpg)
When split or mixed tendering is made
Menu-based entries![graph TD A["MISC FUNCTIONS"] --> B["RA or RA2 from the window"] B --> C["ENTER"] C --> D["RA amount (max. 8 digits)"] D --> E["ENTER"] E --> F["or"] F --> G["Discount rate"] F --> H["Discount amount"] G --> I["%1 % through "] H --> J["(-1) through (-9)"] I --> K["VOID"] J --> K K --> L["Amount tende…](/content/2026/06/1310338/images/e5592b367aa1174749dc7ba3eef41f4dd05cad8fd8c339199db6ec4460c4de87.jpg)
When split or mixed tendering is made
NOTE
• Of the through amounts tendered.
keys, you may use only the one that is programmed to be capable of entering
Example
Key Operation
| 12345 | |
| 4800 | |
| 4000 | |
| 800 |
Display
| CLER0001 | OO | |
| #0000000000012345 | ||
| ***Ba | 48.00 | |
| CHECK | 40.00 | |
| CASH | 8.00 | |
| CHANGE | 0.00 | |
| [ ] | ||
| ***TOTAL | 48.00 | |
| CHANGE | 0.00 | |
| PIL01 | ||
NOTE
You may also choose the RA procedure instead of the above procedure only for cash payment. Contact your authorized SHARP dealer to change the procedure.
Procedure
Direct key entries (cash-only entry)

Menu-based entries (cash-only entry)
![graph LR A["MISC FUNCTIONS"] --> B["RA or RA2 from the window"] B --> C["ENTER"] C --> D["RA amount (max. 8 digits)"] D --> E["ENTER"]](/content/2026/06/1310338/images/96327b2a6e0f85acf6073a5bc8373f897b5e83d0f74fb551ca9f58d5556779c0.jpg)
■ Paid-out entries
Procedure
Direct key entries
![graph TD A["PO or PO2"] --> B["Amount (max. 8 digits)"] B --> C["CASHTL or CA2"] B --> D["CHK through CHK4"] B --> E["CR1 through CR8 *"] C --> F["PO or PO2"] D --> F E --> F F --> G["To cancel"]](/content/2026/06/1310338/images/5f39839898ae9cbda72c92dafab1466a20806f879517fa043e9a8ec7ab2bd32a.jpg)
Menu-based entries
![graph LR A["MISC FUNCTIONS"] --> B["PO or PO2 from the window"] B --> C["ENTER"] C --> D["Amount (max. 8 digits)"] D --> E["CASHTL or CA2"] D --> F["CHK through CHK4"] D --> G["CR1 through CR8*"] E --> H["MISC FUNCTIONS"] F --> H G --> H H --> I["To cancel"]](/content/2026/06/1310338/images/9567508108ad8084683a6452ae221250cc85d03a8dd0c1968f53d218c5e4658b.jpg)
NOTE
• Of the through amounts tendered.
keys, you may use only the one that is programmed to be capable of entering
Example
Key Operation
| 6789 |
| 3000 |
Display
| CLER0001 | OO | |
| #00000000000057F3 | ||
| ===PO | ||
| CHECK | 30.00 | |
| ===PO | 30.00 | |
| [J] | ||
| ===TOTAL | 30.00 | |
| ===PO | 30.00 | |
| P1L01 | ||
NOTE
You may also choose the PO procedure instead of the above procedure only for cash payment.
Contact your authorized SHARP dealer to change the procedure.
Procedure
Direct key entries (cash-only entry)

Menu-based entries (cash-only entry)
![graph LR A["MISC FUNCTIONS"] --> B["PO or PO2 from the window"] B --> C["ENTER"] C --> D["Amount (max. 8 digits)"] D --> E["ENTER"]](/content/2026/06/1310338/images/3ff499c80f9a3b63cf54e6e2f1dcbbbf7c3660311bf920b278445002d0fd03dc.jpg)
■ No-sale (exchange)
Simply touch the key without any entry. The drawer will open and the printer will print the caption "NO SALE." If you let your POS terminal print a non-add code number before touching the key, a no-sale entry will be achieved with a non-add code number printed.
Display
NOTE
You can also enter "No-sale" from the miscellaneous menu window. Touching the "08 NO SALE" from the window.
key and select
■ Transferring cash
This function is used to change cash sales amount for credit or check sales amount. For example, you can use this function when your guest asks you to credit the payment or to receive payment with check after entering the payment as cash.
Procedure


Example
Key Operation
2000
Display
![CLERH0001 00 TRANSFER CHECK 29.00 [ ] ***TOTAL 20.00 CHECK 20.00 PIL01](/content/2026/06/1310338/images/e155164fca32bfa55c94702ee5f1779e4d6ee2e0e5fe1dda14cb35c246d63b72.jpg)
■ Cashing a check
Enter the check amount, then touch the through keys. You cannot use this function when your POS terminal is set for "cash transferring is available." For selecting cash transfer or check cashing, contact your authorized SHARP dealer.
Procedure

Example
Key Operation
6789
3000
Display
![C18B001 00 #000000000006789 CA/CHR 30.00 [1] ***TOTAL 30.00 CA/CHR 30.00 P1181](/content/2026/06/1310338/images/710eba0cfb9d231331be4a86c0af8268874f3ead3d8f6aa643d59287d74ffdb4.jpg)
■ Service charge
When the payment operation is made for sales registrations, the service charge amount is calculated and printed. You can program a percent rate for calculating the service charge. If the percent rate is programmed as 0%, the POS terminal does not print any service charge. Service charge is available in automatic VAT 1-6, automatic tax 1-6, automatic VAT 1-3 and automatic tax 4-6 system.
Example
Key Operation
Display
![CLERH0001 1 PL000002 1 PL000003 COSH 2.80 5.00 8.50 [1] <=TOTAL COSH 8.50 P1L01](/content/2026/06/1310338/images/68b7c431e0d251f7e5b6ae3c65cc5896f5e70df49538fc992fd79cfec31e0cc2.jpg)
■ VIP sales
This function is used for transaction for the important guest who is free of charge. In this mode, any unit price is not counted.
Procedure

Example
Key Operation
Unit price programmed for PLU1: 1.15 Unit price programmed for PLU2: 15.00
3
Display

WASTE mode
This mode is used to throw away an article which has already been prepared and is no longer serviceable.
Procedure
![graph LR A["WASTE"] --> B["[Item registration"]] B --> C["WASTE"] D["WASTE mode"] --> B](/content/2026/06/1310338/images/2e7808ac5875d157174ddaef972e0da4a15b9b42f6b57517257c2de0d0c85472.jpg)
NOTE
- PLU entries are only allowed in the WASTE mode, and direct and indirect void operations are also allowed in this mode.
- When a WASTE-mode transaction is finalized, the drawer does not open.
- The consecutive number is incremented every WASTE-mode transaction.
- When the WASTE mode is activated by touching the key, the mode caption "WASTE" is displayed.
Example
Key Operation
Display
![CLEB0001 0001 MAIN-2 19 10 MODE 1 PL000010 2.60 1 PL000011 1.00 [ ] [ ] ---TOTAL 3.60 1 PL000011 1.00 PIL01 Mode caption](/content/2026/06/1310338/images/88d21662795f5915b18278b36bcd187a80429326ea7f4eb3759f32f8782eb1c2.jpg)
![CLED0001 OGG1 SUB-1 19:13 HDG 1 PL000010 2.60 1 PL000011 1.00 [J 1] ***TOTAL 3.60 1 PL000011 1.00 PIL01](/content/2026/06/1310338/images/cb417bad0fc8606ea26b0ccb03d5811c11d1092a6e509dd85a2a2513bbd93ea5.jpg)
Employee Function
You can use the following functions by using employee codes:
■ Clerk/manager sign-on
Clerks or managers can be signed on by entering employee codes, or they can be signed on by using employee cards. To use an employee card, you need a magnetic card reader (MCR). Contact your authorized SHARP dealer.
Use the following procedures:
- Clerk sign-on
![graph LR A["Reading an employee card"] --> B["XXXXXX Secret code (max. 4 digits)"] C["XXXXXXXXX Employee code (max. 10 digits)"] --> D["EMPL#"] D --> B B --> E["ENTER"]](/content/2026/06/1310338/images/cff805f0f19f2c19609ade0370af7b38deadceac549654b6865c816e5fd1e358.jpg)
NOTE
In the case of "real clerk key system," sign-on cannot be done by this procedure.
- Manager sign-on
![graph LR A["Reading an employee card"] --> B["XXXXXX Employee code (max. 10 digits)"] B --> C["XX Manager code (max. 2 digits)"] C --> D["EMPL#"] D --> E["XXXX Secret code (max. 4 digits)"] E --> F["ENTER"] C --> G["MGR#"] G --> E](/content/2026/06/1310338/images/23655d76d2695718767d477c2e81869933b6b449af665a2aabf8763b5a098de8.jpg)
■ Employee's working time recording
You can manage the number of hours for which employees work.
The working time can be recorded by the following operations:
Time-in/out and break-in/out operations
![graph TD A["Select the "REG" mode"] --> B["TIME-IN"] A --> C["BREAK"] B --> D["Employee code (max. 10 digits) XXXXXXXXXXXXX"] C --> E["Reading an employee card"] D --> F["ENTER"] E --> G["Secret code XXXX"] G --> H["ENTER"] I["Select the "REG" mode"] --> J["TIME-OUT"] I --> K["BR…](/content/2026/06/1310338/images/1cb89d057fb782918db0293de17f1ed7eafedd1a9b0e45d1c083e8498f87c183.jpg)
NOTE
- You can select a job location by using the key or list the selections by touching the key.
- The POS terminal allows a clerk to sign-on or off without checking the clerk's time-in or out.
Example
Key Operation

Display![graph TD A["TIME-IN"] --> B["ENTER EMPLOYEE: 1000000000"] B --> C["ORCLER-INTER"] C --> D{J : 0.00} D -->|YES| E["P1L01"] D -->|NO| F["ORDER"] F --> G["ENTER SECRETB: ENTER SECRETB"] G --> H{J : 0.00} H -->|YES| I["ORCLER-INTER"] H -->|NO| J["P1L01"] G --> K{J : 0.00} K -->|YES| L["ORDER"] K -->|NO|…](/content/2026/06/1310338/images/1754e24fce5f2e3be76cb5f83cfaad7a70207025e23e9d555a099b33dc0cb9e0.jpg)
Time-edit operation: A manager can edit employee's time-in/out data to record his or her time correctly.
![graph TD A["Select the "OP X/Z" mode"] --> B["3 EMPLOYEE"] B --> C["1 TIME EDIT"] C --> D["XX Manager code"] D --> E["ENTER"] E --> F["XXXX Manager secret code"] F --> G["ENTER"] G --> H["When editing today's data"] H --> I["XXXX Date"] I --> J["ENTER"] J --> K["Time-edit window will appea…](/content/2026/06/1310338/images/a8b65159d6d0fd843f606f42302de321d575598ecf9f7758de16d8e891dc49e8.jpg)
TRAINING Mode
The training mode is used when the operator or the manager practices POS terminal operations.
When a clerk set in training is selected, the POS terminal automatically enters the training mode. When a clerk not set in training is selected, the POS terminal automatically enters the ordinary REG mode. A training text and a maximum of two training clerks can be programmed. For programming of training clerk, contact your authorized SHARP dealer.
The training operations are valid in all modes.
A mark which identifies a training receipt is printed on the receipt issued in the training mode.
The journal report completely stops in the training mode. The consecutive number is not updated. The preceding number is repeated in printing.
The memory in clerk is updated in the training mode. Other memories are not updated.
The GLU codes which are opened in the training mode are also printed on the GLU report. In this case, those GLU codes are distinguished from others by the character of "T." The data of training GLU codes are not added to the total.
The reading and resetting of training clerks is printed on the clerk reports. However, the sales total of training clerks is not included in the clerk total on the full clerk report.
![Key Operation [Selecting the clerk set in training] 3 15/12/99 123456 11:40 TOM TRAINING PL000005 *7.20 3x 5.00 PL000003 *15.00 CASH *22.20](/content/2026/06/1310338/images/08f924f2ed040a68d66110f463b784e4e5fce9ecfdb42df5e87e63c63e40261f.jpg)
Supervisor Clerk
This function is used to substitute a supervisor clerk for an ordinary clerk. The supervisor clerk can make entry as an ordinary clerk by assigning the ordinary clerk code. You can use the supervisor clerk function only for substituting for an ordinary clerk. This function is available only in the real clerk key system.
To use this function, insert a real clerk key assigned to a supervisor clerk, enter the ordinary clerk code, and touch the key. When you insert a supervisor clerk key and open an existing guest check, the original clerk who usually controls the guest check will automatically be assigned.
NOTE
This function is unavailable when the "overlapped clerk function" is enabled.
Procedure
![graph TD A["Inserting a supervisor clerk key"] --> B["Clerk code (4 digits)"] B --> C["CLK#"] C --> D["To open an existing guest check"]](/content/2026/06/1310338/images/ef45b290a90be0812c20787041d0933a716eba732730a7898e5a5f73d31c93ac.jpg)
When working outside a guest check or opening a new guest check
Example
- When opening a new guest check (GLU code 11) with this function:
Key Operation
Inserting a supervisor clerk key
1
11
Display
![CLERB0001 1 PL000001 1.20 [1] ===TOTAL. ===HNL. 1.20 PIL01](/content/2026/06/1310338/images/5338964cefb6497e1ebd0899c54e5780c33c19170a82d01d016652f1955ca3a9.jpg)
- When receiving payment for the order stored in the GLU code 11:
Key Operation
Inserting a supervisor clerk key
11
120
Display

Overlapped Clerk Entry
This function allows switching from one clerk to another and interrupting the first clerk's entry. The second clerk can then perform their entry in this mode. Interrupt handling is possible only in the overlapped clerk entry. For actual use of this function, contact your authorized SHARP dealer.
NOTE
- The overlapped clerk entry is not effective while the tendering sale is in progress.
- If any clerk is still making an entry (or has not finalized the transaction yet), the POS terminal does not run in any mode other than REG and MGR, and no X/Z reports can be printed. The message "CLERK REMAINED" is displayed at this time.
Example
① The entry by clerk1 is started. ② Clerk change (1 to 2), interrupt initiated. ③ The transaction by clerk2 is finished. ④ Clerk change (2 to 1), entry restarted, transaction finished.
![graph TD A["Key Operation"] --> B["Clerk 1 is assigned. (Clerk key 1 is inserted.)"] A --> C["Clerk 2 is assigned. (Clerk key 2 is inserted.)"] A --> D["Clerk 1 is assigned. (Clerk key 1 is inserted.)"] E["Display"] --> F["CLERB0001"] F --> G["1 PL000001"] F --> H["2 PL000003"] G --> I["1.20"] H -->…](/content/2026/06/1310338/images/08685eb99c21eadb404ef42c9fd609b517ce40e2c3712cb6b03caaab4232acd6.jpg)

Correction
REG MODE
MGR MODE
Correction of the Last Entry (Direct Void)
If you make an incorrect entry relating to a department, PLU/subdepartment, percentage (through), discount (through), item refund, or tip, you can void this entry by touching the key immediately.
Example
![graph TD A["Key Operation"] --> B["Display"] B --> C["28"] B --> D["2"] B --> E["CLER0001 OO"] B --> F["1 PL000006 2.00"] B --> G["...TOTAL 2.80"] B --> H["1 PL000006 2.00 P1L01"] B --> I["CLER0001 OO"] I --> J["...TOTAL 0.00"] I --> K["1 PL000006 U-2.00 P1L01"] J --> L["..."] K --> M["CLER0001 OO"]…](/content/2026/06/1310338/images/bc8912f5d20e01cf59dc0d7218c4b1642d65d3519d92f014245401a5585769c5.jpg)
Correction of the Next-to-Last or Earlier Entries (Indirect Void)
With the key you can void any incorrect plus department, plus PLU/subdepartment, or item refund entry made during a transaction if you find it before finalizing the transaction (e.g. before touching the key). This function is applicable to plus department, PLU/subdepartment, and item refund entries only.
Example
Indirect void by cursor control (Cursor Void)
![| Key Operation | Display | | ------------- | ------- | | 10 | 2.00 | | 58 | 13.20 | | 1 | 2.60 | | 2 | 7.10 | | 3 | 5.00 | | 4 | [J] | | 5 | 30.70 | | 6 | 6.60 | | 7 | P1L01 | | Selection by touch operation | Selected items (Selected items) | | 1 | 2.00 | | 2 | 13.20 | | 3 | 2.60 | | 4 | 7.10 | | 5…](/content/2026/06/1310338/images/f3d502330fcf1869a7d0fcd8f4471972c97216dd734784f9a1653098c9146cb3.jpg)
NOTE
The amount discount/premium entry and percent entry can be voided by cursor void operation.
Subtotal Void
You can void an entire transaction. Once subtotal void is executed, the transaction is aborted and the POS terminal issues a receipt.
Example
Key Operation
10 35
Subtotal void "
Display
![CLEHN0001 1 PL000001 1.20 1 PL000006 2.80 1 PL000010 2.60 1 PL000035 2.00 SBTL UP -0.60 ---TOTAL 0.00 [J] ---TOTAL 0.00 ---TOTAL 0.80 P1L01](/content/2026/06/1310338/images/3a6d9a7f5b57617fbcb06b98b73db4c0514ae0005fef964c41012dc01588357c.jpg)
Correction of Incorrect Entries Not Handled by the Direct, Indirect or Subtotal Void Function
Any errors found after the entry of a transaction has been completed or during an amount tendered entry cannot be voided. These errors must be handled by the manager. The following steps should be taken.
- If you are making an amount tendered entry, finalize the transaction.
- Hand the incorrect receipt to your manager for its cancellation.
8 Special Printing Function
REG MODE
Copy Receipt Printing
If your customer wants a receipt after you have finalized a transaction with the receipt ON-OFF function in the "OFF" status (no receipting), touch the key for receipting. Your POS terminal can also print a copy receipt when the receipt ON-OFF function is in the "ON" status.
NOTE
To toggle the receipt ON-OFF status, use one of the following procedures:
- Select "01 RCP SW." from the window which is opened by touching the key.
- Touch the key to open the "RCP SW." window.
Example
Printing a receipt after making the entries shown below with the receipt ON-OFF function "OFF" status

"COPY" is printed on the copy receipt.
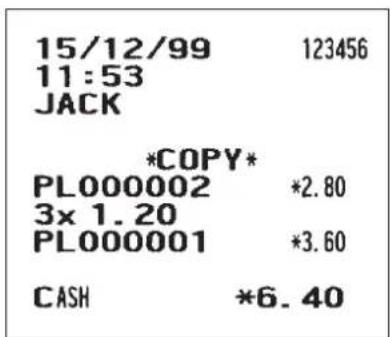
Guest Check Copy
You can use this function when you want to take a copy of guest check.
Touch the key and make a desired entry.
Procedure
![graph LR A["GCOPY"] --> B["Item entries"] B --> C["Finalization"] C --> D["SLIP"] D --> E["To print on the slip paper"] E --> F["When the receipt "OFF" status"] F --> G["RCPT"]](/content/2026/06/1310338/images/ca7426eaa64061d5b172ecbbdaf8705fdc656d0537af3340167044a7876a1d5f.jpg)
NOTE
- The guest check copy has nothing to do with the memory.
- The operation is the same as normal entry. But the validation printing is disabled and the drawer does not open.
Example
Key Operation

Validation Printing Function
The POS terminal can perform validation printing when it is connected with the slip printer. For the details of slip printer, contact your authorized SHARP dealer.
- Set a validation slip to the slip printer.
- Touch the key. The validation printing will start.
NOTE
Programmed compulsory validation printing can be overridden by performing the following operation. If you need this function, contact your authorized SHARP dealer.
- Touch the key in the special window.
- Enter the manager code and touch the key, then enter the secret code and touch the key if applicable.
9 Manager Mode
MGR MODE
The manager mode is used when managerial decisions must be made concerning POS terminal entries, for example, for overriding limitations and for other various non-programming managerial tasks.
NOTE
Normal POS terminal operations may also be performed in this mode.
Entering the Manager Mode
To enter the manager mode, select the REG mode from the mode selection menu, then use the following procedure:
Procedure
![graph LR A["XX Manager code"] --> B["MGR#"] B --> C["XXXX Secret code"] C --> D["ENTER"] E["When "0" is programmed for the secret code"] --> C F["The display shown at right will appear."] --> E](/content/2026/06/1310338/images/e86bc957395ff982d69bfab74d73f7a81eaca1f36e8321be98d15142fa5dc877.jpg)
The manager code is stored in the manager file in advance. If the code entered is not found in this file, an error occurs. If the code is correct, it is printed on the journal and the POS terminal enters the manager mode.
Display
Override Entries
Programmed limits (such as maximum amounts) for functions can be overridden by placing the POS terminal in the manager mode.
Example
This example presumes that the POS terminal has been programmed not to allow coupon entries over 2.00.
Key Operation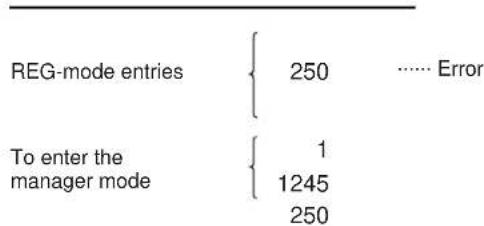
Return to the REG mode.
Display![CLERB0001 1 PL000002 (-)22 CASH 2.00 -2.50 0.30 [1] =TOTAL CASH 0.30 P1L01](/content/2026/06/1310338/images/07fd21b0616669b50bf6c97bd668632952a4f9ef5b89b0d96d1e4a23ae1ef01e.jpg)
Tip Paid Entries
This operation is used when tips that guests have paid by using media other than cash (check or credit) are paid to respective clerks in cash.
You can make tip paid entries in the MGR mode only. The tips are paid to corresponding clerks according to their portions.
Procedure

Example
Key Operation
(The clerk key is inserted.)
Display
![CLERB0001 TIP PAID 6.00 [1, 1] =TOTAL 5.00 TIP PAID 6.00 PIL01](/content/2026/06/1310338/images/c1a101e36b390d5d6b34e195517e7a09182599e2ed50057cbac83fcaf8c048b5.jpg)
Bill recording/Bill void
This bill information has to be recorded when BILL REPORT FILE was created (Bill recording). Each record contains "bill consecutive number", "clerk number", "issued date", and "amount".
The bill record can be voided from BILL REPORT FILE (Bill void). The voided bill number will be used on newly issuing bill to fill bill report completely.
Procedure
![graph LR A["Bill number"] --> B["VOID"] B --> C["GUEST CHECK RCPT"] B --> D["SLIP"]](/content/2026/06/1310338/images/f74b36f446642f5963b90872e6fc35248618ef43d51f3398b481d1b670f3083a.jpg)
Example
Key Operation
5
Print on the journal

10 Correction after Finalizing a Transaction
MGR MODE
MGR MODE
When you need to void incorrect entries that clerks cannot correct (incorrect entries that are found after finalizing a transaction or cannot be corrected by direct, indirect or subtotal void), follow this procedure in the MGR mode.
- Enter the manager code and touch the key, then enter the secret code if applicable.
- Touch the key to put your POS terminal in the VOID mode. (Note the indication on the display.)
- Repeat the entries that are recorded on an incorrect receipt. (All data in the incorrect receipt is removed from POS terminal memory; the voided amounts are added to the void mode totalizer.)
Incorrect receipt Cancellation receipt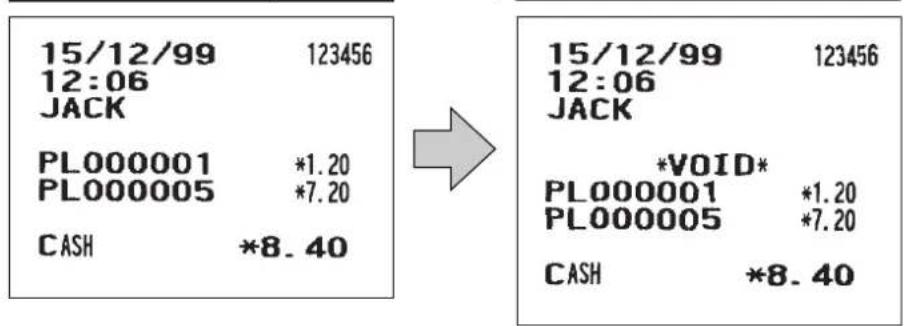
NOTE
Your POS terminal leaves the VOID mode whenever a transaction is canceled (i.e. finalized in the VOID mode). To void additional transactions, repeat steps 2. and 3. above.
11
Reading (X) and Resetting (Z)
of Sales Totals
X1/Z1 MODE
X2/Z2 MODE
OPXZ MODE
- Use the reading function (X) when you need to take the reading of sales information entered after the last resetting. You can take this reading any number of times. It does not affect the POS terminal's memory.
- Use the resetting function (Z) when you need to clear the POS terminal's memory. Resetting prints all sales information and clears the entire memory except for the GT1 through GT3, reset count, and consecutive number. • X1 and Z1 reports show daily sales information. You can take these reports in the X1/Z1 mode.
- X2 and Z2 reports show periodic (monthly) consolidation information. You can take these reports in the X2/Z2 mode.
- If your POS terminal is set "X1/Z1 report in the X2/Z2 mode" is "ENABLE," you can select the X1/Z1 report from the X2/Z2 mode. For details, contact your authorized SHARP dealer.
■ How to take a X1/Z1 or X2/Z2 report
[To take a X1 or X2 report:]
- Select "1 READING" in the X1/Z1 or X2/Z2 mode menu window to display the items list.
- Select an item listed in the table shown later.
- If needed, enter corresponding values described in the "Data to be entered" column on the table shown later.
- Select a device ("DISPLAY" or "REPORT PRINTER") to receive the output.
[To take a Z1 or Z2 report:]
- Select "2 RESETTING" in the X1/Z1 or X2/Z2 mode menu window to display the items list.
- Select an item listed in the table shown later.
- If needed, enter corresponding values described in the "Data to be entered" column on the table shown later.
- Select a device ("DISPLAY" or "REPORT PRINTER") to receive the output.
- After the report has been taken, the message "ARE YOU SURE?" will appear.
Select one of the following actions:
- Select "YES" to reset the sales information.
- Select "NO" to save the sales information.
| Item | Description | Available report type in each mode | Data to be entered | |
| X1/Z1 X2/Z2 | ||||
| 1 GENERAL General | X1, Z1 X2, Z2 | |||
| 2 DEPT./GROUP Department by designated X1 X2 range ending department code | Starting de | Department code/ | ||
| 3 DEPT.IND. Individual group total of X1 X2 Depart | ment group no. | |||
| 4 DEPT.GROUP Full group total of X1 X2 TOTAL departments | ||||
| 5 PLU | PLU by designated range | X1, Z1 | X2, Z2 | Starting PLU code/ending PLU code |
| 6 COMBO SALES | Combo sales | X1 X2 | Starting PLU code/ending PLU code | |
| 7 PLU BY DEPT | PLU by associated dept. | X1, Z1 | X2, Z2 | Department code |
| 8 PLU IND. GROUP | Individual group of PLUs | X1 X2 | PLU group no. | |
| 9 PLU GROUP TOTAL | Full group total of PLUs | X1 X2 | ||
| 10 PLU STOCK | PLU stock | X1 | Starting PLU code/ending PLU code | |
| 11 PLU COST | PLU cost | X1 | X2 | Starting PLU code/ending PLU code |
| 12 PLU TOP 20 | PLU top 20 | X1 | X2 | Amount or q'ty |
| 13 PLU ZERO SALES | PLU zero sales | X1 X2 | All | |
| PLU zero sales by department | X1 X2 | Department code | ||
| 14 PLU MIN. STOCK | PLU minimum stock | X1 | Starting PLU code/ending PLU code | |
| 15 PLU HOURLY GROUP | PLU group by hour | X1, Z1 | Start time/ending time | |
| 16 TRANSACTION | Transaction | X1 X2 | ||
| 17 TL-ID | Total in drawer | X1 | ||
| 18 COMMISSION SALES | Commission sales | X1 X2 | ||
| 19 TAX | Tax | X1 X2 | ||
| 20 CHIEF Chief | X1 | |||
| 21 ALL CLERK | Full clerk | X1, Z1 X2, Z2 | ||
| 22 IND. CLERK | Individual clerk | X1, Z1 | X2, Z2 | |
| (OP X/Z mode) | X, Z | |||
| 23 DD ERROR Drink | dispenser error X1, Z1 reading | |||
| 24 DD RESET Drink | dispenser resetting Z1 | |||
| 25 EMPLOYEE Employee | employee X2, Z2 Start employee code/ | ending employee code | ||
| 26 EMP. Employee time adjustment X2 Start employee code/ADJUSTMENT ending employee code | ||||
| 27 EMP. ACTIVE Employee active status X2 Start employee code/STS. ending employee code | ||||
| 28 HOURLY | Hourly (full) | X1, Z1 | ||
| Hourly (by range) | X1 | Start time/ending time | ||
| 29 LABOR COST% | Labor cost % | X1 | ||
| 30 OVER TIME Over time | X2, Z2 Start employee code/ending employee code | |||
| 31 DAILY NET Daily net | X2, Z2 | |||
| 32 INGREDIENT STOCK | Ingredient stock | X1 | Ingredient no. | |
| 33 GLU | GLU/PBLU | X1, Z1 | Start GLU/PBLU code/ending GLU/PBLU code | |
| 34 GLU BY CLERK | GLU/PBLU by clerk | X1, Z1 | ||
| 35 BILL | Bill report | X1, Z1 | ||
| 36 DRIVE THRU | Drive-through | X1, Z1 | Start drive-through code/ending drive-through code | |
| 37 D-THRU BY CLERK | Drive-through by clerk | X1, Z1 | ||
| 38 SERVICE TIME | Drive-through service time | X1, Z1 | ||
| 39 BALANCE | Balance | X1 | X2 | |
| 40 STACKED REPORT | Stacked report 1 | X1, Z1 | X2, Z2 | |
| Stacked report 2 | X1, Z1 | X2, Z2 | ||
Daily Sales Totals
■ General report • Sample X report • Sample Z report
![16/12/99 [0001] 123456 #2094 23:30 CLERK0001 *Z1* GENERAL Z1 0006 GT1 *00000004995.61 GT2 *00000011859.22 GT3 -00000006863.61 BAL *00000000180.55 TR *00000000071.20 The subsequent printout occurs in the same format as in the sample X1 report. Reset counter Net grand total (GT2-GT3) Grand total of pl…](/content/2026/06/1310338/images/5441dcac9deed0d1a467f5177d0bd47017d075f87d7793bbc4bcbb3c12c63e3c.jpg)




■ Department report - Sample X report
■ Individual group total report on departments

■ Full group total report on departments
![| Category | Value | |---|---| | *X1* DEPT. GROUP TOTAL | | | GROUP1 | 538.000 Q | | GROUP2 | 97.000 Q | | GROUP9 | 4.000 Q | | *DEPT TL | 639.000 Q | | DEPT (-) | 4.000 Q | | *HASH TL | 1.000 Q | | HASH (-) | 2.000 Q | | *NT TL1 | 2.000 Q | | *NT TL2 | 3.000 Q | | *NT TL3 | 2.000 Q | | [0001] CLERK…](/content/2026/06/1310338/images/a4bb8190b1a8b20ad2399bb032ad6232a3c9ac6b6794e944b1303d116808cbf8.jpg)
■ PLU report by designated range
- Sample X report - Sample Z report

![16/12/99 [0001] 123456 #2095 23:31 CLERK0001 *Z1* PLU](/content/2026/06/1310338/images/bc5bc8ae21197fcb0a51fdb32419411df1ba4e38a7e36eb109046ee3cb9c9225.jpg)
The subsequent printout occurs in the same format as in the sample X report.


■ Combo sales report - Sample X report

■ PLU report by associated department • Sample X report • Sample Z report
| 16/12/99 [0001] 123456#2027 21:53 CLERK0001 | ||
| *X1*PLU BY DEPT | ||
| DPT.03 | D03 | |
| P000003 | ||
| PL000003 | 58.000 Q | *289.65 |
| WASTE | -1.000 Q | -5.00 |
| PL000003 | 1.000 Q | *3.10 |
| P000006 | ||
| PL000006 | 18.000 Q | *50.40 |
| P000007 | ||
| PL000007 | 16.000 Q | *105.60 |
| ***TOTAL | ||
| L1 | 92.000 Q | *445.65 |
| WASTE | -1.000 Q | -5.00 |
| COMBO | 0.000 Q | *0.00 |
| COMBO WASTE | 0.000 Q | *0.00 |
| L2 | 1.000 Q | *3.10 |
| WASTE | 0.000 Q | *0.00 |
| COMBO | 0.000 Q | *0.00 |
| COMBO WASTE | 0.000 Q | *0.00 |
| L3 | 0.000 Q | *0.00 |
| WASTE | 0.000 Q | *0.00 |
| COMBO | 0.000 Q | *0.00 |
| COMBO WASTE | 0.000 Q | *0.00 |
| L4 | 0.000 Q | *0.00 |
| WASTE | 0.000 Q | *0.00 |
| COMBO | 0.000 Q | *0.00 |
| COMBO WASTE | 0.000 Q | *0.00 |
| L5 | 0.000 Q | *0.00 |
| WASTE | 0.000 Q | *0.00 |
| COMBO | 0.000 Q | *0.00 |
| COMBO WASTE | 0.000 Q | *0.00 |
| L6 | 0.000 Q | *0.00 |
| WASTE | 0.000 Q | *0.00 |
| COMBO | 0.000 Q | *0.00 |
| COMBO WASTE | 0.000 Q | *0.00 |
| L7 | 0.000 Q | *0.00 |
| WASTE | 0.000 Q | *0.00 |
| COMBO | 0.000 Q | *0.00 |
| COMBO WASTE | 0.000 Q | *0.00 |
| 16/12/99 | [0001] 123456 |
| #2097 23:33 | CLERK0001 |
| *Z1* | |
| PLU BY DEPT | |
The subsequent printout occurs in the same format as in the sample X report.
■ Individual group report on PLUs
■ PLU stock report![16/12/99 [0001] 123456 #2036 22:03 CLERK0001 *X1* PLU STOCK P000001 PL000001 P000002 PL000002 P000003 PL000003 000001-000020 Range PLU code Stock q'ty Description P000020 PL000020 18.000 S 18.000 S](/content/2026/06/1310338/images/08c846705339dd66111c21211b24a808eebb4e845cacdccc7d61a71b751da69d.jpg)
■ Full group total report on PLUs

■ PLU cost report


■ PLU top 20 report
- By amount • By q'ty

![| Category | Value | |---|---| | 16/12/99 #2039 | [0001] 123456 CLERK0001 | | *X1* PLU TOP 20 QUANTITY | | | *O1* P000001 | | | PL000001 | 175.000 Q | | PL000001 | 10.000 Q | | PL000001 | 8.000 Q | | PL000001 | 12.000 Q | | PL000001 | 12.000 Q | | PL000001 | 12.000 Q | | *O2* P000002 | | | PL000002…](/content/2026/06/1310338/images/bd8f491add7d521d9ec5aa9a065e48117949dea68777074ae9c1fc7405d0ebad.jpg)
■ PLU zero sales report (full)![16/12/99 [0001] 123456 #2040 22:16 CLERK0001 *X1* PLU ZERO SALES P000010 PL000010 P000011 PL000011 P000012 PL000012 P000013 PL000013 PLU code Description](/content/2026/06/1310338/images/6a469ef7bc6525ce7b587883ee747b592ca0f709c1cb328d705322f1d3efe93a.jpg)
■ PLU minimum stock report![16/12/99 [0001] 123456 #2042 22:19 CLERK0001 *X1* PLU MIN. STOCK P000003 PL000003 P000008 PL000008 P000010 PL000010 P000011 PL000011 P000012 PL000012 P000014 PL000014 P000015 PL000015 Range PLU code Stock q'ty Description 000001-000020 4.000 S 3.000 S 7.000 S 11.000 S 16.000 S 15.000 S 16.000 S](/content/2026/06/1310338/images/b212df85aa782bb51f7ef7ab426eadea7344428b6f65e4e5112db7992cf56a06.jpg)
■ PLU zero sales report (by dept.)![16/12/99 [0001]123456 #2041 22:17 CLERK0001 *X1* PLU ZERO SALES OPT.01 D01 Description of dept. P000010 PL000010 Associated dept. code P000011 PL000011 PLU code](/content/2026/06/1310338/images/9d83ff8991115cb5c71c6da8728257ccf741b17a266acf5ab02370f613f4eac1.jpg)
■ PLU group total report by hour
■ Total in drawer report
- Sample X report - Sample X report


■ Transaction report
- Sample X report
![16/12/99 [0001] 123456 #2047 22:25 CLERK0001 *X1* TRANSACTION *DEPT TL 639.000 Q *1758.69 DEPT (-) 4.000 Q -15.71 *HASH TL 1.000 Q *4.25 HASH (-) 2.000 Q -2.66 *NT TL1 2.000 Q -0.29 *NT TL2 3.000 Q *4.27 *NT TL3 2.000 Q *4.20 Plus dept. total Minus dept. total Hash dept. total Hash minus total Non-t…](/content/2026/06/1310338/images/fedc9fd356c72fafc9c6aa3acf6fd18cb6bb6ce172f8f2efc2d0b51118d4769b.jpg)
- Sample Z report
![16/12/99 [0001] 123456 #2098 23:35 CLERK0001 *Z1* PLU HOURLY GROUP The subsequent printout occurs in the same format as in the sample X report.](/content/2026/06/1310338/images/eeceff4bdffee8d915ec2c8fd16d394f7fff1d928b2be758a315421e521a636b.jpg)
■ Commission sales report
■ Chief report
■ Tax report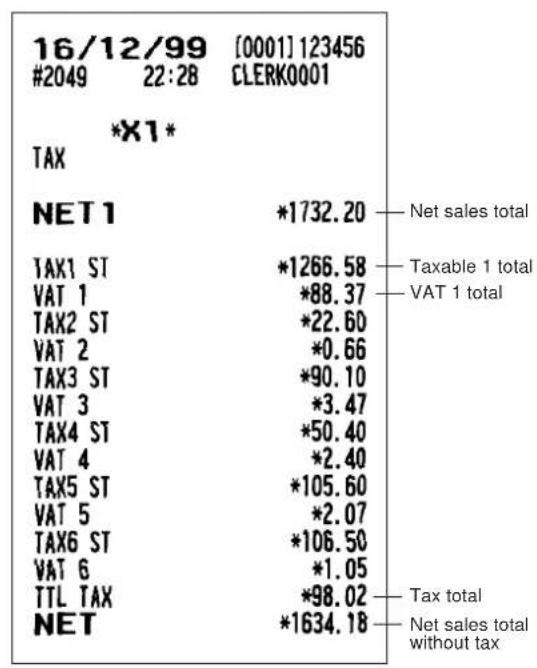



■ Full clerk report • Sample X report • Sample Z report



■ Individual clerk report - Sample X report - Sample Z report
16/12/99
2107 23:44

The subsequent printout occurs in the same format as in the sample X report.

■ Clerk report (Drink dispenser misoperation) report
■ Drink dispenser error reading
![16/12/99 [0001] 123456 #2057 22:45 CLERK0001 *X1* DD ERROR CLK#?001 ?????? GLU#00001234 3x 5.00 COFFEE *15.00 2x 4.50 CHOCOLATE *9.00 GLU#00009999 1x 5.00 COFFEE *5.00 MISOP TL 6.000 Q *29.00 GLU code relating to misoperation Contents of misoperation Q'ty total and amount for a clerk](/content/2026/06/1310338/images/302999ac5a722ddd36d433791de6296f805d48ced82713cddbfc61057b5de27e.jpg)
■ Drink dispenser resetting report
![16/12/99 [0001] 123456 #2058 22:45 CLERK0001 *Z1* DD RESET CLK#0001 CLERK0001 GLU#00001234 3x 5.00 COFFEE *15.00 2x 4.50 CHOCOLATE *9.00 RST SBTL 5.000 Q *24.00 CLK#0003 CLERK0003 GLU#00009999 2x 4.50 CHOCOLATE *9.00 RST SBTL 2.000 Q *9.00 RESET TL 7.000 Q *33.00 Contents of misoperation Q'ty total…](/content/2026/06/1310338/images/eb185695a2d0a2edaedfeb2f20579bb4a8e7fd1337ef2cff095937fa1fbc01da.jpg)
■ Employee active status report![16/12/99 [0001] 123456 #2072 22:57 CLERK0001 *X2* EMP. ACTIVE STS. #000000001 - #9999999999 #000000001 CLERK0001 TIME-IN 17:13 #000000002 CLERK0003 TIME-IN 22:56 * #000000003 CLERK0002 TIME-IN --:-- *indicates that the employee is under break. Indicates that the employee is](/content/2026/06/1310338/images/7627a912d7b69eaa2bac56b6ed40e3b56c5bba576ae8483b381d48c4ebcfa9f5.jpg)
■ Hourly report - Sample X report
■ Drive-through service time report![16/12/99 [0001] 123456 #2073 22:59 CLERK0001 *X1* SERVICE TIME 17:00 1Q 93:41 Transaction counter AVE. 93:41 Total time 18:00 1Q 70:32 Service average per 1 hour AVE. 70:32 hour](/content/2026/06/1310338/images/f0eb7a77d4169a3e380839f88bb773187b59c6b0ba19d9248822a9a3a14cb6d6.jpg)
- Sample X report

The subsequent printout occurs in the same format as in the sample X report.
■ Labor cost % report
■ Ingredient stock report![16/12/99 [0001] 123456 #2081 23:12 CLERK0001 *X1* INGREDIENT STOCK I 001 EGG I 002 CARROT 001-999 Range 73.000 S Ingredient no. 230.000 S Stock q'ty Description of ingredient I 022 BEEF 26.000 S](/content/2026/06/1310338/images/53606f21f32f12a315353bd6a4173042286f2f62f9e82aa0f1b9e837171bb207.jpg)
■ GLU/PBLU report
• Sample X report • Sample Z report
![16/12/99 [0001] 123456 #2084 23:15 CLERK0001 *X1* GLU 1000# ***PBAL DEPOSIT DEPO. (-) 1003# ***PBAL DEPOSIT DEPO. (-) 2000T ***PBAL DEPOSIT DEPO. (-) *FREE GLU* 1002# ***PBAL DEPOSIT DEPO. (-) ***TOTAL ***PBAL DEPOSIT DEPO. (-) 1-99999999 Range 0001 *1.20 *0.00 *0.00 *9.00 *0.00 *10.20 *0.00 *15.40…](/content/2026/06/1310338/images/8b6a47209d70d2be7714f280b1e29e0b3b07de9f1ed63cdd33dc143fd44e5e38.jpg)
■ GLU/PBLU report by clerk
• Sample X report • Sample Z report
![16/12/99 [0001] 123456 #2083 23:13 CLERK0001 *X1* GLU BY CLERK CLK#0001 CLERK0001 1000# ***PBAL *1.20 DEPOSIT *0.00 DEPO. (-) *0.00 1003# ***PBAL *9.00 DEPOSIT *0.00 DEPO. (-) *0.00 *FREE GLU* 1002# ***PBAL *5.20 DEPOSIT *0.00 DEPO. (-) *0.00 ***TOTAL ***PBAL *15.40 DEPOSIT *0.00 DEPO. (-) *0.00 Cle…](/content/2026/06/1310338/images/7cf46ac491627a84fe74cff727233a69213b7164e91795f14ac21616b19a01f6.jpg)
■ Drive-through report
• Sample X report • Sample Z report
![16/12/99 [0001] 123456 #2086 23:19 CLERK0001 *X1* DRIVE THRU 1# ***PBAL2 DEPOSIT DEPO. (-) 2T ***PBAL2 DEPOSIT DEPO. (-) ***TOTAL ***PBAL2 DEPOSIT DEPO. (-) 1-99999999 Range 0001 *13.00 *0.00 *0.00 *0.00 0004 *9.00 *0.00 *0.00 *13.00 *0.00 *0.00 Drive-through code P BAL Deposit (+) total Deposit (−)…](/content/2026/06/1310338/images/1452f91afd0dd227c9e57623f1e4ddc97941761257129849310071454f45ffca.jpg)
■ Drive-through report by clerk - Sample X report - Sample Z report
![16/12/99 [0001] 123456 #2087 23:20 CLERK0001 *X1* D-THRU BY CLERK CLK#0001 CLERK0001 1# ***PBAL2 *13.00 DEPOSIT *0.00 DEPO. (-) *0.00 ***TOTAL ***PBAL2 *13.00 DEPOSIT *0.00 DEPO. (-) *0.00 Clerk code Clerk name Drive-through code PBAL Deposit (+) total Deposit (-) total Total](/content/2026/06/1310338/images/8b3c9a3bd7a79b928c4f69ec9884d5d83be7ba87f863cced023bf3fff7c18141.jpg)
![16/12/99 [0001] 123456 #2112 23:53 CLERK0001 *Z1* D-THRU BY CLERK](/content/2026/06/1310338/images/94544a0de6b5577f1d442ebeb87aed479c32fce69a2e1ad1f8b9dd1cd5f83740.jpg)
The subsequent printout occurs in the same format as in the sample X report.
■ Balance report ■ Bill report
![16/12/99 [0001] 123456 #2088 23:21 CLERK0001 *X1* BALANCE OLD BAL. *144.45 Grand total balance ORDER TL *1744.26 of the previous day PAID TL *1708.16 Order total BALANCE *180.55 Paid total Old balance + today's balance](/content/2026/06/1310338/images/9f04f790a360b4823f80705735e10734146809197c363112962293b98d0cbf52.jpg)
- Sample X report
![16/12/99 [0001] 123456 #2089 23:22 CLERK0001 *BILL *X1* #0006 0001 16/12/99 *9.00 Clerk number #0007 0001 16/12/99 *4.00 Amount](/content/2026/06/1310338/images/fd1adb64d01e71461de0d626c69fdeb283e67e6d9a1eadb65f362dc60bdf1ce6.jpg)
■ X1/Z1 stacked reports
You can print multiple X1/Z1 reports in sequence under a single transaction. In this case, you need to program in advance which X1/Z1 reports should be printed. Refer to "Stacked report" under Section "Report Programming" in Chapter 13 "Programming."
Periodic Consolidation
Your POS terminal allows you to take consolidation X and Z reports of a chosen period (the period is usually one week or month).
■ General information
The periodic reading or resetting reports are the same in format as those in the X1/Z1 report for daily sales information except mode indication ("X2" or "Z2").
• Sample X report • Sample Z report
![17/12/99 [0001] 123456 #2116 0:13 CLERK0001 *X2* Read symbol DEPT./GROUP Report title 17/12/99 [0001] 123456 #2117 0:14 CLERK0001 *Z2* Reset symbol GENERAL Z1 0005 GENERAL Z2 0004 GT1 *00000004995.61 GT2 *00000011859.22 GT3 -00000006863.61 BAL *00000000152.15 TR *00000000071.20 DEPT./GROUP Report ti…](/content/2026/06/1310338/images/f7721edab6c886d3b018b4911cbe45c97b2ef5827f6f1061ec9063fa41c76670.jpg)
The subsequent printouts are the same in format as those in the X/Z report on daily totals.


■ Employee report - Sample X report - Sample Z report
![17/12/99 [0001] 123456 #2150 6:40 CLERK0001 *Z2* EMPLOYEE](/content/2026/06/1310338/images/0ebb869cdb54983dfb9791f4cef25a899b8a647e44290e5ea2c7462eded216f3.jpg)
The subsequent printout occurs in the same format as in the sample X2 report.
■ Over time report
- Sample X report
![16/12/99 [0002] 000000 #2078 23:10 CLERK0002 *X2* OVER TIME #000000001 - #9999999999 Range #000000001 Employee code 15/12/99 Date OVR TIME 1:08H Over time (Hour) OVR COST *16.32 Over time cost](/content/2026/06/1310338/images/ae30c1c70f3100b1998790fd65c9425ddf01f8484431e31c8d53aea322872fe2.jpg)
- Sample Z report
![16/12/99 [0002] 000000 #2079 23:11 CLERK0002 *Z2* OVER TIME](/content/2026/06/1310338/images/04a0a5d0c3c67f71dc06db22871d0f87d88266bd24de3332f72b42f804dab1e7.jpg)
The subsequent printout occurs in the same format as in the sample X2 report.
■ Employee time adjustment report![17/12/99 [0001] 123456 #2151 6:41 CLERK0001 *X2* EMP. ADJUSTMENT #0000000001 - #9999999999 Range #0000000001 CLERK0001 16/12/99 TIME-IN 17:13 Date Operation BREAK-IN 0:18 Operation time before time editing BREAK-OUT 2:30 BREAK-IN 2:38 - 2:35 Edited time 17/12/99 6:35 BREAK-OUT 4:30 BREAK-IN 6:32 TIM…](/content/2026/06/1310338/images/495657af0d55a41f039f25259f02141d474c89543e3186c0620725af15da504f.jpg)
■ Daily net report - Sample X report![| Date | Value | | :--- | :--- | | 30/11/99 #0852 | *X2* | | 21:10 | | | [0001] 123456 CLERK0001 | | | 01/11 | 17 Q | | 02/11 | 23 Q | | 03/11 | 33 Q | | *236.00 Sales total | | | *350.40 Sales total | | | *496.40 Sales total | | | 29/11 | 23 Q | | 30/11 | 30 Q | | *326.80 Sales total | | | *420.00…](/content/2026/06/1310338/images/0997852cbcb71494b17c5661f58cad9d6c47c5005316d5ce5398a2f32a7f5c70.jpg)
- Sample Z report

The subsequent printout occurs in the same format as in the sample X2 report.
■ X2/Z2 stacked report
You can print multiple X2/Z2 reports in sequence under a single transaction. In this case you need to program in advance which X2/Z2 reports should be printed. Refer to "Stacked report" under Section "Report Programming" in Chapter 13 "Programming."
Compulsory Cash/Check Declaration
If your POS terminal has been programmed for compulsory cash/check declaration, you must declare cash/check in drawer in advance according to the type of the declaration when you take clerk Z reports.
Use the procedure shown in "Key operation" below for this declaration.
Types of compulsory cash/check declaration
• Compulsory when individual clerk resetting is taken - Compulsory when full clerk resetting is taken
NOTE
Compulsory cash/check declaration is available in the above two types. You can choose either of these. Contact your authorized SHARP dealer for details.
Key operation
• Individual clerk Z report
OP X/Z mode
![graph TD A["2 RESETTING"] --> B["ENTER"] B --> C["1 IND.CLERK"] C --> D["ENTER"] D --> E["XXXX Clerk code entry"] F["2 RESETTING"] --> G["ENTER"] G --> H["6 IND.CLERK"] H --> I["ENTER"] I --> E J["1 DISPLAY"] --> K["CCD entry menu"] L["2 REPORT PRINTER"] --> K K --> M["CASHTL"] M --> N["1 YES"] M --…](/content/2026/06/1310338/images/14870620a60a2c801d8ede8f160040d9751986fd2cfde217c583650fc6a8de41.jpg)
| DEPOSIT | 1 Q | *12.00 |
| DEPO. (-) | 1 Q | -10.00 |
| SCM (+) | *805.00 | |
| SCM (-) | -400.00 | |
| SCM TTL | *405.00 | |
| SER.CHRG | *0.23 | |
| CASH | 79 Q | *1274.81 |
| CHECK | 7 Q | *83.40 |
| CHECK2 | 1 Q | *15.00 |
| CHECK3 | 2 Q | *17.00 |
| CHECK4 | 1 Q | *9.00 |
| CREDIT1 | 1 Q | *78.42 |
| CREDIT2 | 1 Q | *27.21 |
| CREDIT8 | 1 Q | *16.00 |
| EXCH1 | 2 Q | 24.15 |
| EXCH1 IS | 24.15 | |
| CCD DIF. | 0.00 | |
| DOM.CUR1 | *39.80 | |
| EX1CH+CR | 1 Q | 21.37 |
| DOM.CHK/CR 1 | *35.21 | |
| EXCH9 | 1 Q | 12.00 |
| EXCH9 IS | 12.00 | |
| CCD DIF. | 0.00 | |
| DOM.CUR9 | *14.80 | |
| ****CID | *1853.18 | |
| *CH ID | *159.90 | |
| CA/CK ID | *2013.08 | |
| CA/CK IS | *2013.08 | |
| CHK/CG | *9.60 |
12 How to Use the Programming Keyboard
When the PGM1 or PGM2 mode is selected, the programming keyboard will appear.
Programming Keyboard Layout
| P UP | CLK# MGR# AUTO21 | |||||||
| P DOWN | EMPL# AUTO22 | |||||||
| CANCEL | LIST | AUTO23 | ||||||
| CLEAR | MODE AUTO24 | |||||||
| 7 | 8 | 9 | X/QTY AUTO25 | |||||
| PREVIOUS | NEXT 4 5 | 6 | PGM COMMAND | |||||
| 1 | 2 | 3 | ENTER | |||||
| DELETE | CALL 0 0 | 0 | • | CASH/TL | ||||
: Deletes a character or figure in the cursor position.
□— Used to move the cursor.
: Used to call up a desired code.
: Used to go back to the previous record, e.g., from the department 2 programming window back to the department 1 programming window.
: Used to go to the next record, for example, in order to program unit prices for sequential departments.
: Used to program each setting.
: Used to clear the last setting you have programmed or clear the error state.
: Used to cancel programming and to get back to the previous screen.
: Used to scroll the window to go back to the previous page.
: Used to scroll the window to go to the next page.
: Used to go back to the MODE screen.
: Used to toggle between two or more options.
: Used to list those options which you can toggle by the key.
: Used to go to the PGM COMMAND keyboard.
: Used to finalize programming.
Numeric keys: Used for entering figures.
For more information about using these keys, see the "Basic Instructions" selection in Chapter 13 "Programming."
How to Program Alphanumeric Characters
This section discusses how to program alphanumeric characters such as "DESCRIPTION," "NAME" and "TEXT."
Character Keyboard
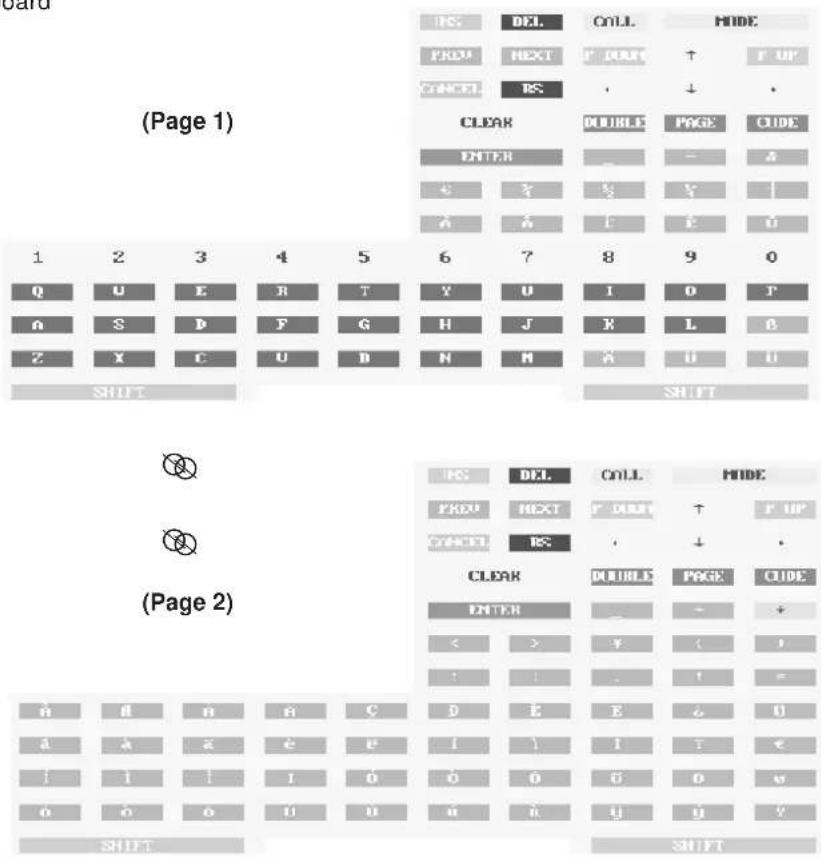
■ Using character keys on the keyboard
Entering alphanumeric characters
To enter a character, simply touch a corresponding character key on the character keyboard.
Entering upper-case letters
: You can enter an upper-case letter by using this key. Touch this key just before you enter the upper-case letter. You should touch this key each time you enter an upper-case letter.
Entering double-size characters
: This key toggles the double-size character mode and the normal-size character mode. The default is the normal-size character mode. When the double-size character mode is selected, the letter "W" appears at the bottom of the display.
Editing text
You can edit the text you have entered by deleting and/or inserting characters.
To select a text editing mode: Use the key. (Editing mode: the insert mode (“_”) and the overwrite mode (“■”))
To move the cursor: Use the or key.
To delete a character or figure: Use the (Delete) or (Back space) key.


■ Entering character codes
Numerals, letters and symbols are programmable by touching the key and character codes. Use the following procedure with the cursor placed at the position where you want to enter characters:
This chapter explains how to program various items.
Before you start programming, select the PRICE, PGM1, PGM2, or AUTO KEY mode from the mode selection window depending on the item you are going to program.
PRICE MODE
PGM1 MODE
PGM2 MODE
AUTO KEY MODE
Basic Instructions
This section illustrates the basic programming by using an example of programming for departments.
Procedure


![SETTING menu: 1 ARTICLE, 2 DIRECT KEY, 3 FUNCTION, 4 MEDIA, 5 CURRENCY, 6 TEXT, 7 PERCOMMEL, 8 TERMINAL, 9 DATE/TIME, 10 OPTIONAL, 11 REPORT. Label: DIRECT INPUT [v].](/content/2026/06/1310338/images/f5c8b1ffd49e59f13d908df04bd4a4f12a91bd954485992af52b3cd8d6eabaa9.jpg)


■ Programming example
The following example shows how to program 2.00 for the unit price, "ABCDE" for the description, and the scale entry to be enabled for department 1.
- In the PGM2 MODE window, select "2 SETTING" by using the or key and touch the key.
• The SETTING window will appear.
NOTE
- You can also select "2 SETTING" simply by touching a corresponding line in the window.
- You can also select "2 SETTING" by touching the and keys.
- If you return to the previous screen, touch the key.
- Select "1 ARTICLE."
• The ARTICLE window will appear.
NOTE
The mark (▼) in the lower-right corner of the window shows that the window contains more options than are now on the screen. To scroll the window, touch the key.
To return to the previous page, touch the key.
- Select "1 DEPT."
- The DEPT window will appear, listing programmable departments.


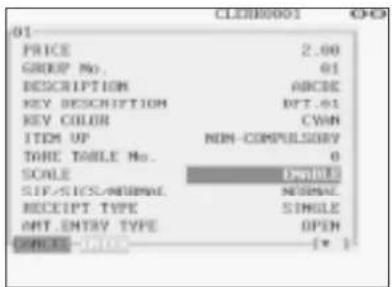
4. Select "01" to program for department 1.
• The "01" window will appear.
5. On the first page of the "01" window, program the unit price and description as follows:
NOTE
There are three entry patterns for the programming: the numeric entry, character entry, and selective entry.
- Move the cursor to "PRICE," enter "200" by using numeric keys, then touch the key. Numeric entry
- Move the cursor to "DESCRIPTION," enter "ABCDE" by using character keys, then touch the key. Character entry
If you want to clear the setting, touch the key before you touch the key.
6. On the first page of the "01" window, program the machine to enable the scale entry as follows:
- Move the cursor to "SCALE," touch the key until "ENABLE" appears, then touch the key. Selective entry
NOTE
The key toggles between three options as follows: INHIBIT ENABLE COMPULSORY INHIBIT .... Touching the key displays all pertinent options.
7. Select one of the following actions:
- To cancel the programming, touch the key. Select "YES" in the "ARE YOU SURE?" window.
- To finalize the programming, touch the key, then touch the key. You will return to the "DEPT" window.
- To program for the following department, touch the key. The "02" window will appear. To return to the "01" window, touch the key.
The following sections describe how to program each item which is contained in a programming group.
Article Programming
Use the following procedure to select any option included in the article programming group.
Procedure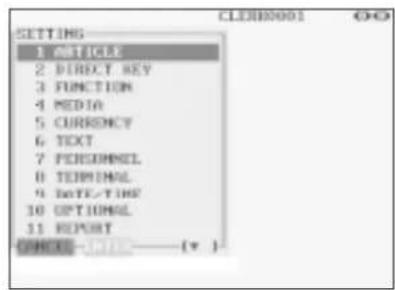

![ARTICLE menu: 1 DEPT, 2 PLU, 3 PLU RANGE, 4 PLU STOCK, 5 INGREDIENT, 6 INGREDIENT STOCK, 7 PLU MEMS KEY, 8 COMBO MEAL, 9 LINE PLU TABLE, 10 COMBIMENT TABLE, 11 PROPOSITION TABLE. Label: CLOSED DATE: [√].](/content/2026/06/1310338/images/cb3f0bf93a52ff935372946b4997f72be9b3debfe1901de9ecd763e75241532e.jpg)


- In the SETTING window, select "1 ARTICLE."
• The ARTICLE window will appear.
- Select any option from the following options list:
1 DEPT: Departments 2 PLU: PLUs 3 PLU RANGE: A range of PLUs 4 PLU STOCK: PLU stock quantity 5 INGREDIENT: Ingredients of PLUs 6 INGREDIENT STOCK: Ingredient stock quantity 7 PLU MENU KEY: PLU menu key 8 COMBO MEAL: Combo meal 9 LINK PLU TABLE: Link PLU table 10 CONDIMENT TABLE: Condiment table 11 PROMOTION TABLE: Promotion table 12 RECIPE TABLE: Recipe table 13 SCALE TABLE: Scale table 14 DEPT. SHIFT: Department shift 15 HAPPY HOUR: Happy hour
The following illustration shows those options included in the article programming group.
1 ARTICLE
1 DEPT
2 PLU
3 PLU RANGE
4 PLU STOCK
5 INGREDIENT
6 INGREDIENT STOCK
7 PLU MENU KEY
8 COMBO MEAL
9 LINK PLU TABLE
0 CONDIMENT TABLE
1 PROMOTION TABLE
2 RECIPE TABLE
3 SCALE TABLE
4 DEPT. SHIFT
5 HAPPY HOUR
② See “■ Department” on page 137. ② See "■ PLU" on page 139. ② See "■ PLU range" on page 142. ② See "■ PLU stock" on page 143. ② See "■ Ingredient" on page 144. ② See "■ Ingredient stock" on page 145. ② See "■ PLU menu key" on page 146. ② See "■ Combo meal" on page 147. ② See "■ Link PLU table" on page 148. ② See "■ Condiment table" on page 149. ② See "■ Promotion table" on page 151. ② See "■ Recipe table" on page 153. ② See "■ Scale table" on page 154. ② See "■ Department shift" on page 155. ② See "■ Happy hour" on page 155.
■ Department
Your POS terminal is equipped with 10 standard departments.
Use the following procedure to program for departments.
Procedure
Select a pertinent dept. code from the departments list.

The screen continues.
Program each item as follows:
NOTE
For more information about the entry patterns, see the "Basic Instructions" section.
• PRICE (Use the numeric entry) Unit price (max. 6 digits) • GROUP No. (Use the numeric entry)
01-09: Plus department
10: Minus department
11: Plus hash department
12: Minus hash department
15-17: Non-turnover 1-3
- If the "Hash" and "non-turnover" functions are disabled, you are not allowed to select any hash or non-turnover department.
- DESCRIPTION (Use the character entry) Description for a department. Up to 16 characters can be entered.
- KEY DESCRIPTION (Use the character entry) Description of the key label for a department. Up to 16 characters can be entered.
- KEY COLOR (Use the selective entry) Select a key color from the colors list (16 different colors). BLACK/BLUE/LIGHT BLUE/MAGENTA/LIGHT MAGENTA/GREEN/LIGHT GREEN/RED/LIGHT RED/CYAN/LIGHT CYAN/GRAY/LIGHT GRAY/YELLOW/BROWN/WHITE
- ITEM VP (Use the selective entry) COMPULSORY: Makes item validation printing compulsory. NON-COMPULSORY: Makes item validation printing non-compulsory. • TARE TABLE No. (Use the numeric entry) Scale table number associated with scale entry (1 through 9).
- SCALE (Use the selective entry) COMPULSORY: Makes a scale entry compulsory. ENABLE: Enables a scale entry. INHIBIT: Inhibits a scale entry.
■ Department (continued)
• SIF/SICS/NORMAL (Use the selective entry)
Department type selection
SIF: SIF department
SICS: SICS department
NORMAL: Department other than SIF or SICS department
- RECEIPT TYPE (Use the selective entry)
Receipt type selection (When the receipt type is "single/double" or "single/double + addition.")
DOUBLE: Double receipt type
SINGLE: Single receipt type
- AMT. ENTRY TYPE (Use the selective entry)
Type of unit price entry for departments
OPEN & PRESET: Open & preset
PRESET: Preset only
OPEN: Open only
INHIBIT: Inhibited
• TAXABLE 1 through 6 (Use the selective entry)
Tax status
YES : Taxable
NO : Non-taxable
NOTE
- The tax system of your POS terminal has been factory-set to automatic VAT1 - 6. If you desire to select any of automatic tax 1 - 6, manual VAT1 - 6, manual VAT1, manual tax 1 - 6, and the combination of the automatic VAT 1 - 3 and the automatic tax 4 - 6, contact your authorized SHARP dealer.
- When the combination of the automatic VAT1 - 3 and automatic tax 4 - 6 system is selected, one of the taxable 1 - 3 can be selected in combination with taxable 4 - 6. • HALO (Use the numeric entry)
- You can set an upper limit amount (HALO) for each department. The limit is effective for the REG-mode operations and can be overridden in the MGR mode.
- AB is the same as A × 10B
A: Significant digit for HALO (1 through 9)
B: Number of zeros to follow the significant digit for HALO (0 through 8)
• COMMIS. Gr. No. (Use the numeric entry)
Commission group number (1 through 3)
If the number "0" is entered, no commission group number will be assigned to a department.
You can assign each department to a commission group.
• OUTPUT KP No. 1 and No. 2 (Use the numeric entry)
ID number of the network remote printer 1 or 2 (1 through 9)
If the number "0" is entered, no remote printer will operate.
- RECEIPT PRINT (Use the selective entry)
YES: Prints the department sales information on the receipt.
NO: Prints nothing on the receipt.
- PRNT ON CLK REPO (Use the selective entry)
YES: Prints the department sales information on the clerk report.
NO: Skip the department sales information on the clerk report.
■ PLU
Procedure
Select a pertinent PLU code from the PLUs list.

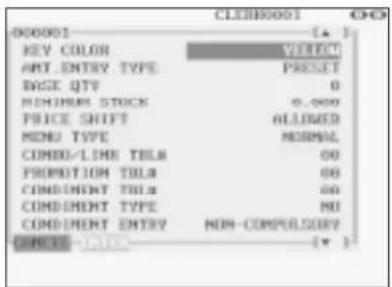
![CLEBR0001 000001 RECIPE THLA1 RECIPE THLA2 RECIPE THLA3 RECIPE THLA4 RECIPE THLA5 RECIPE THLA6 RECIPE THLA7 TOBE TABLE No. SCALE TOTAL TABLE 1 TOTAL TABLE 2 CANDLES TABLE [▲] [▼]](/content/2026/06/1310338/images/a9a1227ee009121901f101bcb24462e6b23978d306f0f6d603bb3c46bb47a1b8.jpg)
The screen continues.
Program each item as follows:
• ASSOCIATION DEPT. (Use the numeric entry)
Department code to be associated with the entered PLU (01 through 99)
When a PLU is associated with a department, the following functions of the PLU depend on the programming for the department.
• Grouping (group 1 through 17) - Item validation print compulsory/non-compulsory - Single item cash sale/Single item finalize - Single receipt/double receipt • HALO (only for subdepartments)
• SIGN (Use the selective entry)
+: Plus PLU/subdepartment
-: Minus PLU/subdepartment
The function of every PLU/subdepartment varies according to the combination of its sign and the sign of its associated department as follows:
Department: +
PLU/subdept.: +

Serves as a normal plus
PLU/subdepartment.
Department: -
PLU/subdept.: -

Serves as a normal minus
PLU/subdepartment.
Department: +
PLU/subdept.: -

Accepts store coupon entries, but
not split-pricing entries.
Department: -
PLU/subdept.: +

Not valid; not accepted
• PRICE 1 through 7 (Use the numeric entry)
Unit price of each price level (max. 6 digits).
By default, only a price for PRICE 1 can be entered. If you want to enter a price for PRICE 2 through 7, contact your authorized SHARP dealer.
- DESCRIPTION 1 through 7 (Use the character entry)
Description of a PLU for each price level. Up to 16 characters can be entered.
• KEY DESCRIPTION 1 thru 7 (Use the character entry)
Description of the key label for each price level.
Up to 16 characters can be entered.
- KEY COLOR (Use the selective entry)
Select a key color from the colors list (16 different colors).
- AMT. ENTRY TYPE (Use the selective entry) Mode parameter OPEN & PRESET: PLU/subdepartment mode PRESET: PLU mode OPEN: Subdepartment mode INHIBIT: Inhibit mode
- BASE QTY (Use the numeric entry) Base quantity for each PLU/subdepartment that should be applied only to split-pricing entries (max. 2 digits: 0.0 to 9.9)
• MINIMUM STOCK (Use the numeric entry)
Minimum stock quantity for a PLU (max. 7 digits)
• PRICE SHIFT (Use the selective entry)
COMPULSORY: Makes PLU price level shift compulsory.
INHIBIT: Inhibits PLU price level shift.
ALLOWED: Allows PLU price level shift.
- MENU TYPE (Use the selective entry)
PLU menu type selection
COMBO: Combo PLU
LINK: Link PLU
NORMAL: Normal PLU
• COMBO/LINK TBL# (Use the numeric entry) Table number for combo PLUs/link PLUs (1 through 99)
- PROMOTION TBL# (Use the numeric entry)
Table number for promotion (1 through 99)
• CONDIMENT TBL# (Use the numeric entry)
Table number for condiment entry (1 through 99)
• CONDIMENT TYPE (Use the selective entry)
YES: Condiment type
NO: Non-condiment type
- CONDIMENT ENTRY (Use the selective entry) COMPULSORY: Makes a condiment entry compulsory. NON-COMPULSORY: Makes a condiment entry non-compulsory.
- RECIPE TBL#1 through #7 (Use the numeric entry)
Table number for recipe (1 through 999)
• TARE TABLE No. (Use the numeric entry) Scale table number associated with scale entry (1 through 9)
- SCALE (Use the selective entry) COMPULSORY: Makes a scale entry compulsory. ENABLE: Enables a scale entry. INHIBIT: Inhibits a scale entry.
■ PLU (continued)
• TAXABLE 1 through 6 (Use the selective entry) YES: Makes the PLU taxable. NO: Makes the PLU non-taxable.
NOTE
- The tax system of your POS terminal has been factory-set to automatic VAT1 - 6. If you desire to select any of automatic tax 1 - 6, manual VAT1 - 6, manual VAT1, manual tax 1 - 6, and the combination of the automatic VAT1 - 3 and the automatic tax 4 - 6, contact your authorized SHARP dealer.
- When the combination of the automatic VAT1 - 3 and automatic tax 4 - 6 system is selected, one of the taxable 1 - 3 can be selected in combination with taxable 4 - 6.
- A PLU not programmed for any of these tax status is registered depending on the tax status of the department which the PLU belongs to.
- HOURLY Gr.#1 through #3 (Use the numeric entry) PLU hourly group number to classify PLUs for PLU hourly group reports (1 through 9)
• GROUP (Use the numeric entry) PLU group number (00 through 99)
- COMMIS. Gr. No. (Use the numeric entry) You can assign a PLU to a commission group (1 through 3). If the number "0" is entered, no commission group number will be assigned to a PLU.
- OUTPUT KP No.1 and No.2 (Use the numeric entry) ID number of the network remote printer 1 or 2 (1 through 9) If the number "0" is entered, no remote printer will operate.
- RECEIPT PRINT (Use the selective entry) YES: Prints the PLU sales information on the receipt. NO: Prints nothing on the receipt.
- PINT PRICE1 through 7 (Use the numeric entry) Pint price of each price level (max. 6 digits)
- PINT BASE QTY (Use the numeric entry) Base quantity for each PLU/subdepartment that should be applied only to half/double pint entries (max. 2 digits: 0.0 to 9.9)
PLU range
You can program PLUs by range as follows:
Procedure![PLU NAME START END OPERATION MAINTENANCE COMMENTS CLEBR0001 000001-000020 ASSOCIATION DEPT. SIGN PRICE 1 PRICE 2 PRICE 3 PRICE 4 PRICE 5 PRICE 6 PRICE 7 DESCRIPTION1 KEY DESCRIPTION1 COMMENTS - COMMENTS [√]](/content/2026/06/1310338/images/341b996c751e37c87487cac74eccb67fcf33236be7c7d2e28936be1884125573.jpg)
The screen continues in the same format as screens shown in section "PLU."
Enter a value or select an option for each item as follows:
- START (Use the numeric entry) Starting PLU code (max. 6 digits)
- END (Use the numeric entry) Ending PLU code (max. 6 digits)
- OPERATION (Use the selective entry) MAINTENANCE: Enables you to change the setting you have programmed. NEW & MAINTENANCE: Enables you to change the current setting when the specified codes have already been created or to create new codes when the specified codes have not been created yet.
DEL: Enables you to delete a specified range of PLUs.
PLU stock
You can assign a stock quantity to each PLU code.
Shown below is an example of selecting "1 OVER WRITE."
Procedure![graph TD A["PLU STICK\n1 ORDER WRITE\n2 ADD\n3 SUB\nGREEN DATA"] --> B["Select a pertinent PLU code from the PLUs list."] B --> C["000001\nCURRENT STOCK 0.000\nNEW STOCK 0.000\nGREEN DATA"]](/content/2026/06/1310338/images/5e7526feea470d59e0cfd241ade7e70980c50a8e8d5afb4c6f4acd688939ea8b.jpg)
After selecting "1 OVER WRITE," select a pertinent PLU code. Then the next screen will appear to show the following items:
- CURRENT STOCK The current stock is displayed.
- NEW STOCK (Use the numeric entry) Enter a new stock quantity (max. 7 digits: 1 to 9999.999(9999999))
NOTE
- If you need to add or subtract a stock quantity to or from the current stock quantity, select "2 ADD" or "3 SUB" and enter a value to be added or subtracted.
- You cannot enter any values for the item marked with "!".
- The entry of a new stock value will update to the PLU stock counter.
- Ingredient
You can program an ingredient number, description and cost for the ingredients of each PLU.
The ingredient numbers can be assigned to each recipe table. The cost needs to be programmed to analyze the food cost of each item.
Procedure![graph TD A["INGREDIENT\nNUTHING"] --> B["Selected\ningredient no."] B --> C["001\nDESCRIPTION\nCOST 0.00\nGRENCE"]](/content/2026/06/1310338/images/1cf46a25c1e1ebb8c34fe44ce1e357ec9b412e572ff3d435d99c5f921c6bff6d.jpg)
Program each item as follows:
- INGREDIENT (Use the numeric entry) Ingredient number (1 through 999)
NOTE
- When you create a new number, enter the number, then touch the key.
- If the key is touched on the ingredient number selection menu, the ingredient in the cursor position will be deleted.
- DESCRIPTOR (Use the character entry) Description for each ingredient. Up to 12 characters can be entered.
- COST (Use the numeric entry) Cost for each ingredient (max. 6 digits)
NOTE
Food cost is calculated by the following equations:
Food cost (PLU cost) = Y(Ingredient cost x Usage)
Food cost% = (Sales q'ty x Food cost) / (Sales amount - *VAT amount - **Service charge)
* The VAT amount is calculated by using a VAT rate which is programmed for each PLU.
VAT amount = Sales amount x r/(1+r)
**The service charge is calculated by using a service charge rate which is preset in the PGM2 mode. The service charge rate is shared by all PLUs.
Service charge = Sales amount x Service charge rate
■ Ingredient stock
You can assign a stock quantity to each ingredient.
Shown below is an example of selecting "2 ADD."
Procedure![graph TD A["INGREDIENT STOCK\n1 EACH WRITE\n2 ADD\n3 SUB\nCLOSES OUTPUT"] --> B["Selected ingredient no."] B --> C["OUTPUT\nCURRENT STOCK\nADD VALUE\nCLOSES OUTPUT\nCLOSES OUTPUT\n0.000\n0.000"]](/content/2026/06/1310338/images/c7432986f0ee8d64ef96077eab6d8c9737a9a629f20385c4e84279330daea5db.jpg)
Program each item as follows:
- CURRENT STOCK The current stock is displayed.
- ADD VALUE (Use the numeric entry) Enter a value to be added (max. 7 digits: 1 to 9999.999(9999999)).
NOTE
- If you need to overwrite or subtract a stock quantity to or from the current stock quantity, select "1 OVER WRITE" or "3 SUB" and enter a value to be overwritten or subtracted.
- You cannot enter any values for the item marked with "!".
■ PLU menu key
When you enter PLUs, using the PLU menu key makes it easy to find categorized PLU items from the menu list.
Your POS terminal allows you to program a max. of 50 PLU menu keys. You can program a max. of 36 PLUs/sub-menus for each PLU menu key.
Procedure


Selected PLU menu key no.

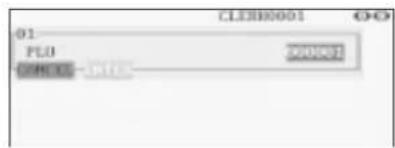
Use the following procedure to program a PLU menu key:
In the ARTICLE window, select "7 PLU MENU KEY" and program each item as follows:
- PLU MENU KEY (Use the numeric entry) PLU menu key number (1 thru 50) 1 thru 50 : For the direct PLU menu key.
- MENU TITLE (Use the character entry) Description for the PLU menu key. Up to 16 characters can be entered.
- TYPE (Use the selective entry) PLU: Selects to program a PLU. MENU: Selects to program a sub-menu.
- PLU or MENU (Use the numeric entry) Select a menu PLU or sub-menu from the list.
NOTE
When selecting a sub-menu, the screen on which a sub-menu number is to be entered (the message "MENU") will appear.
NOTE
- PLU code should be defined before programming a PLU menu key.
- If the key is touched on the menu key number selection menu, the menu list will be canceled.
- If the key is touched on the menu PLU code selection menu, the menu in the cursor position will be deleted.
■ Combo meal (Combo PLU)
When two or more menu items, consisting of PLUs related to a special offered, are to be programmed together, combo PLUs should be specified. Up to 25 PLUs can be linked to each combo PLU.
Procedure![graph TD A["COMBO MEAL"] --> B["Selected combo meal no."] B --> C["COMBO PLUS"]](/content/2026/06/1310338/images/e14899e3147b64b2df70b749cae5b99e4525d40f099ac3a87d4eabcb9b11a192.jpg)
The screen continues.
Program each item as follows:
• COMBO MEAL (Use the numeric entry) Combo meal number (1 through 99) • COMBO PLUXX Enter tied PLU codes (max. 25 PLUs). - PRICE (Use the numeric entry) Enter the unit price of each combo menu (max. 6 digits)
NOTE
- PLU codes should be defined before programming a combo PLU.
- If the key is touched on the meal number selection menu, the combo PLU in the cursor position will be deleted.
■ Link PLU table
It is possible to link PLUs together so that all PLUs linked together are rung up upon a single key touch. However, the number of links is a maximum of five. Even if more than five PLUs are linked, the sixth or higher link is not actualized.
Procedure
Program each item as follows:
- LINK PLU TABLE (Use the numeric entry) Link PLU table number (1 through 99)
- LINK PLU #X Enter linked PLU codes (max. 5 PLUs).
NOTE
- PLU codes should be defined before programming a link PLU table.
- If the key is touched on the table number selection menu, the selected table will be deleted.
■ Condiment table
The “condiment entry” is intended to guide the operator in making menu entries which require special cooking instructions. For example, a clerk can make such entries as “garnishing potato,” “with salad,” and “grilling steak rate.” When a clerk enters a menu-item PLU to which PLUs for the condiment entry have been assigned, these orders (such as “garnishing potato”) will be printed on the receipt and conveyed to the kitchen.
Before you program for the condiment entry, prepare a condiment table. The following shows an example of a condiment table:
Condiment table
| Table number | PLU codes for condiment entry (programmed text) | |||||
| 01 | Message text (HOWCOOK?) | 23 (RARE) | 25 (MED.RARE) | 27 (WELLDONE) | ...... | 02 |
| 02 | Message text (WITH?) | 44 (SALAD) | 45 (FRUITS) | |||
| ... | ... | ... | ... | ... | ...... | ... |
| 04 | Message text (POTATO?) | 33 (P.CHIPS) | 37 (MASHED.P) | 38 (BAKED.P) | 99 | |
| 99 | Message text (DRINK?) | 63 (TEA) | 65 (MILK) | 67 (A.JUICE) | ...... | |
The condiment table should contain the following:
Condiment table: The condiment table is a group of condiment PLUs, which is assigned to each menu-item PLU. A table consists of a message text and up to 20 PLUs. Also, you can assign the next condiment table number to a condiment table to link them.
The message text is used for displaying a prompting message. The PLU is used for the special order setting. For example, when a clerk enters a menu-item PLU, a display message programmed for the message text such as "HOWCOOK?" will appear. Then specify one of the PLU programmed for text such as "RARE."
Table number: The table number is intended to identify each condiment table.
NOTE
The condiment PLU programmed in a condiment table can be linked with condiment table (Item link method).
For example, if PLU 44 (SALAD) in a table of the above is linked with condiment table 10 (SAUCE), when the condiment PLU 44 (SALAD) is registered, items of the condiment table 10 (SAUCE) will be appeared.
| Table number | PLU codes for condiment entry (programmed text) | ||||
| 10 | Message text (SAUCE) | 51 (ITALIAN) | 53 (FRENCH) | 12 | |
Next condiment table number
![graph TD A["CONDIRECT TABLE"] --> B["Selected condiment table number"] B --> C["01"]](/content/2026/06/1310338/images/a7338bf2d237ecf0dd500cc8c778f57b53e5085ef9591041134c955da6627af5.jpg)
The screen continues.
Program each item as follows:
• CONDIMENT TABLE (Use the numeric key) Condiment table number (1 through 99) - MESSAGE (Use the character entry) Description for a condiment menu. Up to 16 characters can be entered. - NEXT LINK TBL# (Use the numeric key) Enter the next condiment table number (max. 2 digits). • CONDIMENT PLUXX Enter condiment PLU codes (max. 60 PLUs).
NOTE
- The message text is used as the display prompt.
- PLU codes should be defined before programming a condiment table.
- If the key is touched on the table number selection menu, the table in the cursor position will be deleted.
■ Promotion table (normal selling)
There are two types of promotion tables: a normal selling type and a set selling type. If you want to change the type, please contact your authorized SHARP dealer.
Procedure![graph TD A["PROMOTION TABLE"] --> B["Selected promotion table number"] B --> C["01 TEXT DISCOUNT AMOUNT 0.00 THIP LEVEL 0 PROOTION FLOW1 000000 PROOTION FLOW2 000000 PROOTION FLOW3 000000 PROOTION FLOW4 000000 PROOTION FLOW5 000000 CLOSE DATE"]](/content/2026/06/1310338/images/a3a72887f7ae1e7ebfe225c67c2d4f7fbd73c5df6c52e11bd4f20de9d3f60fce.jpg)
Program each item as follows:
- PROMOTION TABLE (Use the numeric entry) Promotion table number (1 through 99)
- TEXT (Use the character entry) Description for each promotion table (max. 12 characters)
- DISCOUNT AMOUNT (Use the numeric entry) Discount amount for each promotion table (max. 6 digits)
- TRIP LEVEL (Use the numeric entry) Trip level for discount (satisfying count of entered item)
- PROMOTION PLU #1 through #5 (Use the numeric entry) Enter promotion PLU codes.
NOTE
- PLU codes should be defined before programming a promotion table.
- If the key is touched on the table number selection menu, the table in the cursor position will be deleted.
■ Promotion table (set selling)
![graph TD A["PROMOTION TABLE\nNOTING"] --> B["Selected promotion table number"] B --> C["OK"]](/content/2026/06/1310338/images/3a23830a77422262c11e798c5b46070b9ec2462e7bde72f85b23b27c3b9bfd25.jpg)
The screen continues.
Program each item as follows:
- PROMOTION TABLE (Use the numeric entry) Promotion table number (1 through 99)
- TEXT (Use the character entry) Description for a promotion PLU (max. 12 characters)
- DISCOUNT AMOUNT (Use the numeric entry) Discount amount for a promotion table (max. 6 digits)
- PROMOTION PLU#1 through #5 (Use the numeric entry) Enter promotion PLU codes.
- PLU#1 through #5 TRIP LEVEL (Use the numeric entry) Trip level for discount (satisfying count of entered item) for each promotion PLU (max. 2 digits)
NOTE
- PLU codes should be defined before programming a promotion table.
- If the key is touched on the table number selection menu, the table in the cursor position will be deleted.
■ Recipe table
You can make a recipe table which contains up to ten ingredients.
![graph TD A["NOTHING"] --> B["Selected recipe table number"] B --> C["OK1\nCHILD NAME\n001\nINGREDIENT 001\nQTY 0.000\nINGREDIENT 002\nQTY 0.000\nINGREDIENT 003\nQTY 0.000\nINGREDIENT 004\nQTY 0.000\nINGREDIENT 005\nQTY 0.000\nINGREDIENT 006\nCANCEL: 0.000\n(*)"]](/content/2026/06/1310338/images/2443c5f6e1dc3baabdc87e67b618ffb9e4ad53796f115ecc2b0b411162775702.jpg)
The screen continues.
Program each item as follows:
- RECIPE TABLE (Use the numeric entry) Recipe table number (1 through 999)
- INGREDIENT #XX (Use the numeric entry) Enter ingredient numbers (max. 10 ingredients). • QTY (Use the numeric entry) Enter the usage of each ingredient. (max. 7 digits: 0 to 9999.999 (9999999)).
NOTE
- Ingredient numbers should be defined before programming a recipe table.
- If the key is touched on the table number selection menu, the table in the cursor position will be deleted.
■ Scale table
You can program up to nine scale tables and allows different tares to be assigned to them.
![graph TD A["SCALE TABLE\n1\n2\n3\n4\n5\n6\n7\n8\n9\n0\n0\n0\n0\n0\n0\n0\n0\n0\n0\n0\n0\n0\n0\n0\n0\n0\n0\n0\n0\n0\n0\n0\n0\n0\n0\n0\n0\n0\n0\n0\n0\n0\n0\n0\n0\n0\n0\n0\n0\n0\n0\n0\n0\n0\n0\n0\n0\n0\n0\n1\nWEIGHT 2.0mmHg\nORGE-DATE 1\nCLDN3001 OCP\nProcedure"] A --> B["Selected scale table number"] B…](/content/2026/06/1310338/images/6427c07d24025fb5b86c3455172b1731012dc9f923a1d98c57b51c533a7640aa.jpg)
Program each item as follows:
• SCALE TABLE (Use the numeric entry) Scale table number (1 through 9) - WEIGHT (Use the numeric entry) Enter a tare weight for the scale table number (max. 4 digits: 1 to 9.999 kg (1 to 99.99 lbs.)).
NOTE
Your POS terminal may also be set to accommodate 1-integer +3-decimal weights. For more details, please contact your authorized SHARP dealer.
■ Department shift
Procedure
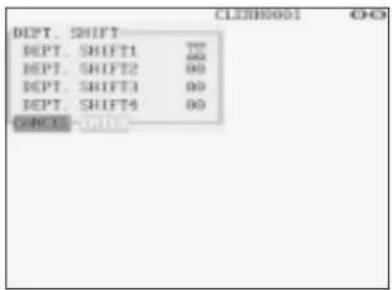
Program the item as follows:
- DEPT. SHIFT 1 through 4 (Use the numeric entry) Enter an associated department code for each department shift key (max. 2 digits).
NOTE
If an associated department code which was changed by the through keys is "00," it will not change. In this case, an error will occur.
■ Happy hour
You can program a time range for each price level. When a clerk enters a PLU code, the price level for which you have programmed a time range will be automatically entered. For example, if you program the time range 9:00 AM to 11:00 AM for price level 2, only the price programmed for price level 2 is entered from 9:00 AM to 11:00 AM.
Procedure

Program the item as follows:
- SFT1 through SFT7 START TIME and END TIME (Use the numeric entry)
Enter the starting and ending times for each price level (time range: 0000 to 2359).
NOTE
When the starting and ending times are set at "0000," the "Happy hour" function is not available.
The screen continues.
Direct Key Programming
Use the following procedure to select direct-key programming:
Procedure
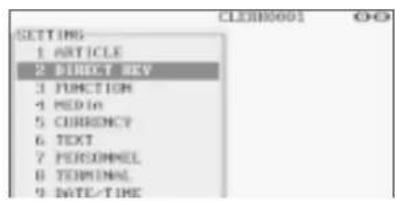
- In the SETTING window, select "2 DIRECT KEY."
• The DIRECT KEY window will appear.
- Select the desired keyboard to program from the keyboard list.

- Select SETTING or COPY. If SETTING is selected, the programming can be performed.
When COPY is selected, the key layout data can be copied from the keyboard list.
Select the copied key layout from the list.
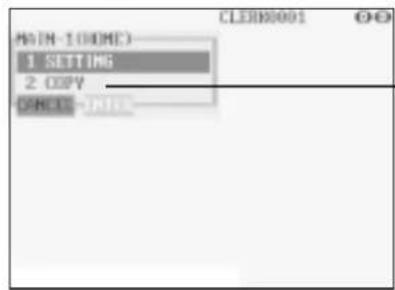

Leads to the programming for each key
■ Direct PLU/dept. key
You can assign PLUs and departments directly to the keyboard. In the case of PLUs, you may assign up to 10 levels to be accessed directly on the keyboard.
Procedure
In the case of setting "000001 DIRECT PLU"
Take STEP 1 through STEP 3 shown above to open the window for programming each direct key.
![graph TD A["Touch a pertinent key."] --> B["OK1\nTYPE\nFUI"] B --> C["CLERB0001\nOCP"] C --> D["CLERB0001\nOCP"] D --> E["LEVEL1\nLEVEL1.1\nLEVEL1.2\nLEVEL1.3\nLEVEL1.4\nLEVEL1.5\nLEVEL1.6\nLEVEL1.7\nLEVEL1.8\nLEVEL1.9\nLEVEL1.10\nORCEE"]](/content/2026/06/1310338/images/482b702d6703ddc823bd77fffe7a511a67cd8eb55549ca4edab4ea70f24558ed.jpg)
- TYPE (Use the selective entry)
PLU: Assigns the key as a direct PLU key.
DEPT: Assigns the key as a direct department key.
NOTE
- When selecting a department, the screen on which a department code is to be entered (the message "DEPT.CODE") will appear.
- When selecting a PLU, the screen on which a PLU code is to be entered ("PLU CODE") will appear.
- LEVEL1 through 10 (Use the numeric entry) Enter a PLU code for each level. For example, if you want to use this key as PLU code1 (level 1) and PLU code101 (level 2), enter 1 for the "LEVEL1" and 101 for the "LEVEL2."
NOTE
- You cannot assign a PLU or a department to the position to which a function key has been assigned.
Functional Programming
Use the following procedure to select any option included in the functional programming group:
Procedure

- In the SETTING window, select "3 FUNCTION."
• The FUNCTION window will appear.

- Select any option from the following options list:
1 (−): Discount key 2 %: Percent key 3 COMMISSION: Commission 4 SERVICE CHARGE: Service charge 5 TIP: Tip 6 DEPOSIT: Deposit 7 RA: Received on account 8 PO: Paid out
The following illustration shows those options included in the functional programming group.

② See "■ Discount key" on page 159. ② See "■ Percent key" on page 160. ② See "■ Commission" on page 160. ② See "■ Service charge" on page 161. ② See "■ Tip" on page 161. ② See "■ Deposit" on page 162. ② See "■ RA" on page 162. ② See "■ PO" on page 163.
■ Discount key (through)
Procedure
Select a pertinent discount key from the discount keys list.
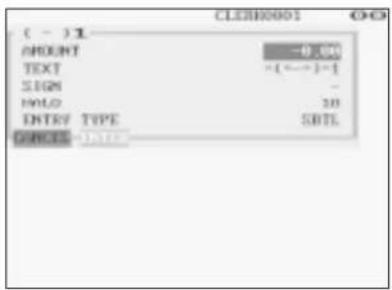
Program each item as follows:
• AMOUNT (Use the numeric entry) Discount amount (max. 6 digits) - TEXT (Use the character entry) Description for the discount key. Up to 12 characters can be entered. - SIGN (Use the selective entry) Programming of the + or - sign assigns the premium or discount function to each discount key. -: Minus amount (discount) +: Plus amount (premium) - HALO (High Amount Lockout) (Use the numeric entry) A: Significant digit for HALO (1 through 9) B: Number of zeros to follow the significant digit for HALO (0 through 8) AB is the same as A x 10^B. - ENTRY TYPE (Use the selective entry) RA: Received on account (–) ITEM: Item (–) SBTL: Subtotal (–)
■ Percent key (through)
Procedure
Select a pertinent percent key from the percent keys list.

Program each item as follows:
• RATE (Use the numeric entry) Percent rate (0.00 to 100.00) - TEXT (Use the character entry) Description for the percent key. Up to 12 characters can be entered. - SIGN (Use the selective entry) Programming of the + or - sign assigns the premium or discount function to each percent key. -: Minus (discount) +: Plus (premium) - %HALO (High Amount Lockout) (Use the numeric entry) HALO (High Amount Lockout) for the percent key (0.00 to 100.00) - ENTRY TYPE (Use the selective entry) RA: Received on account % ITEM: Item % SBTL: Subtotal %
■ Commission
Procedure
Select a pertinent commission no. from the commission list.

Program each item as follows:
• RATE (Use the numeric entry) Percent rate (0.00 to 99.999) - TEXT (Use the character entry) Description for the commission. Up to 12 characters can be entered.
■ Service charge
Procedure

Program each item as follows:
• RATE (Use the numeric entry) Percent rate (0.00 to 100.00) - TEXT (Use the character entry) Description for the service charge. Up to 12 characters can be entered.
Tip
Procedure
Select a pertinent tip key from the tip keys list.

Program each item as follows:
• HALO (High Amount Lockout) (Use the numeric entry) A: Significant digit for HALO (1 through 9) B: Number of zeros to follow the significant digit for HALO (0 through 8) AB is the same as A x 10^B.
- TEXT (Use the character entry) Description for the tip. Up to 12 characters can be entered.
■ Deposit
Procedure
Select a pertinent deposit key from the deposit keys list.

Program each item as follows:
• HALO (High Amount Lockout) (Use the numeric entry) A: Significant digit for HALO (1 through 9) B: Number of zeros to follow the significant digit for HALO (0 through 8) AB is the same as A x 10^B. - TEXT (Use the character entry) Description for the deposit. Up to 12 characters can be entered.
RA
You can program an upper limit amount and description for each received-on-account key.
Procedure
Select a pertinent received-on-account key from the RA keys list.

Program each item as follows:
• HALO (High Amount Lockout) (Use the numeric entry) A: Significant digit for HALO (1 through 9) B: Number of zeros to follow the significant digit for HALO (0 through 8) AB is the same as A x 10^B.
- TEXT (Use the character entry)
Description for the received-on-account key. Up to 12 characters can be entered.
■ PO
You can program an upper limit amount and description for each paid-out key.
Procedure
Select a pertinent paid-out key from the PO keys list.

Program each item as follows:
• HALO (High Amount Lockout) (Use the numeric entry) A: Significant digit for HALO (1 through 9) B: Number of zeros to follow the significant digit for HALO (0 through 8) AB is the same as A x 10^B.
- TEXT (Use the character entry)
Description for the paid-out key. Up to 12 characters can be entered.
Media Key Programming
Use the following procedure to select any option included in the media group:
Procedure

- In the SETTING window, select "4 MEDIA."
• The MEDIA window will appear.

- Select any option from the following options list:
1 CASH: Cash key 2 CHECK: Check key 3 CREDIT: Credit key 4 HOTEL TRANSFER: Hotel transfer key 5 CID: Cash in drawer 6 CH/CG: Check change 7 CA/CHK: Check cashing
The following illustration shows those options included in the media key programming group.
4 MEDIA
1 CASH 2 CHECK 3 CREDIT 4 HOTEL TRANSFER 5 CID 6 CH/CG 7 CA/CHK
② See "■ Cash key" on page 165. ② See "■ Check key" on page 166. ② See "■ Credit key" on page 167. ② See "■ Hotel transfer key" on page 168. ② See "■ Cash in drawer" on page 169. ② See "■ Check change" on page 169. ② See "■ Check cashing" on page 170.
■ Cash key
Procedure
Select a pertinent cash key from the cash keys list.

Program each item as follows:
- TEXT (Use the character entry) Description for the cash key. Up to 12 characters can be entered.
- HALO (High Amount Lockout) (Use the numeric entry) AB is the same as A x 10 B .
A: Significant digit (1 through 9)
B: Number of zeros to follow the significant digit (0 through 8)
You can set AB at 18 for no limitation.
- BILL PRINT (Use the selective entry) COMPULSORY: Makes bill printing compulsory. NON-COMPULSORY: Makes bill printing non-compulsory.
- FOOTER PRINT (Use the selective entry) This item decides whether or not your POS terminal should print a message at the foot of a receipt when a specified cash key is used. YES: Enables footer printing on the receipt. NO: Disables footer printing on the receipt.
- NON-ADD # ENTRY (Use the selective entry) You can enforce the non-add code entry when a cash entry is accepted. COMPULSORY: Compulsory non-add code entry NON-COMPULSORY: Non-compulsory non-add code entry
- VP (Use the selective entry) COMPULSORY: Compulsory validation printing NON-COMPULSORY: Non-compulsory validation printing
- DRAWER OPENING (Use the selective entry) You can program each cash key to open the drawer. YES: Opens the drawer. NO: Disables the drawer opening.
- AMOUNT ENTRY (Use the selective entry) You may select compulsory or non-compulsory amount tender. COMPULSORY: Compulsory amount tendered entry NON-COMPULSORY: Non-compulsory amount tendered entry
■ Check key (through)
Procedure
Select a pertinent check key from the check keys list.

Program each item as follows:
- TEXT (Use the character entry) Description for the check key. Up to 12 characters can be entered.
- HALO (High Amount Lockout) (Use the numeric entry) AB is the same as A x 10^B.
A: Significant digit (1 through 9)
B: Number of zeros to follow the significant digit (0 through 8)
You can set AB at 18 for no limitation.
- EFT FUNCTION (Use the selective entry) COMPULSORY: Makes EFT function compulsory. NON-COMPULSORY: Makes EFT function non-compulsory.
- BILL PRINT (Use the selective entry) COMPULSORY: Compulsory bill printing NON-COMPULSORY: Non-compulsory bill printing
- FOOTER PRINT (Use the selective entry) YES: Enables footer printing on the receipt. NO: Disables footer printing on the receipt.
- NON-ADD # ENTRY (Use the selective entry) COMPULSORY: Compulsory non-add code entry NON-COMPULSORY: Non-compulsory non-add code entry
- CHANGE DUE (Use the selective entry) Either change enable or disable can be selected for each check key. DISABLE: Disables change calculation. ENABLE: Enables change calculation.
- VP (Use the selective entry) COMPULSORY: Compulsory validation printing NON-COMPULSORY: Non-compulsory validation printing
- DRAWER OPENING (Use the selective entry) YES: Opens the drawer. NO: Disables the drawer opening.
- AMOUNT ENTRY (Use the selective entry) COMPULSORY: Compulsory amount tendered entry NON-COMPULSORY: Non-compulsory amount tendered entry
■ Credit key (through)
Procedure
Select a pertinent credit key from the credit keys list.
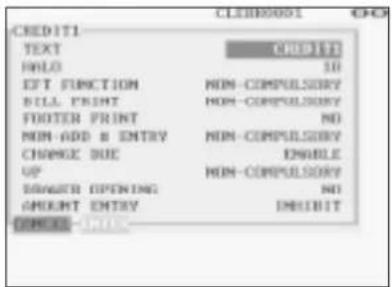
Program each item as follows:
- TEXT (Use the character entry) Description for the credit key. Up to 12 characters can be entered.
- HALO (High Amount Lockout) (Use the numeric entry) AB is the same as A x 10 B .
A: Significant digit (1 through 9)
B: Number of zeros to follow the significant digit (0 through 8)
You can set AB at 18 for no limitation.
- EFT FUNCTION (Use the selective entry) COMPULSORY: Makes EFT function compulsory. NON-COMPULSORY: Makes EFT function non-compulsory.
- BILL PRINT (Use the selective entry) COMPULSORY: Compulsory bill printing NON-COMPULSORY: Non-compulsory bill printing
- FOOTER PRINT (Use the selective entry) This item decides whether or not your POS terminal should print a message at the foot of a receipt when a specified credit key is used. YES: Enables footer printing on the receipt. NO: Disables footer printing on the receipt.
- NON-ADD # ENTRY (Use the selective entry) COMPULSORY: Compulsory non-add code entry NON-COMPULSORY: Non-compulsory non-add code entry
- CHANGE DUE (Use the selective entry) DISABLE: Disables change calculation. ENABLE: Enables change calculation.
- VP (Use the selective entry) COMPULSORY: Compulsory validation printing NON-COMPULSORY: Non-compulsory validation printing
- DRAWER OPENING (Use the selective entry) YES: Opens the drawer. NO: Disables the drawer opening.
- AMOUNT ENTRY (Use the selective entry) COMPULSORY: Makes amount tendered entry compulsory. INHIBIT: Inhibits amount tendered entry.
■ Hotel transfer key
Procedure
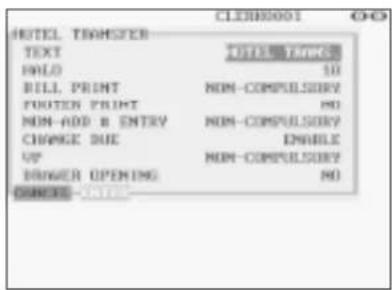
Program each item as follows:
- TEXT (Use the character entry) Description for the hotel transfer key. Up to 12 characters can be entered.
- HALO (High Amount Lockout) (Use the numeric entry) AB is the same as A x 10^B. A: Significant digit for HALO (1 through 9) B: Number of zeros to follow the significant digit for HALO (0 through 8) You can set AB at 18 for no limitation.
- BILL PRINT (Use the selective entry) COMPULSORY: Compulsory bill printing NON-COMPULSORY: Non-compulsory bill printing
- FOOTER PRINT (Use the selective entry) YES: Enables footer printing on the receipt. NO: Disables footer printing on the receipt.
- NON-ADD # ENTRY (Use the selective entry) COMPULSORY: Compulsory non-add code entry NON-COMPULSORY: Non-compulsory non-add code entry
- CHANGE DUE (Use the selective entry) DISABLE: Disables change due. ENABLE: Enables change due.
- VP (Use the selective entry) COMPULSORY: Compulsory validation printing NON-COMPULSORY: Non-compulsory validation printing
- DRAWER OPENING (Use the selective entry) YES: Opens the drawer. NO: Disables the drawer opening.
■ Cash in drawer
You can program the description and the upper limit amounts for cash in drawer (sentinel).
Procedure
Program each item as follows:
- TEXT (Use the character entry) Description for the cash in drawer. Up to 12 characters can be entered.
- HALO (High Amount Lockout) (Use the numeric entry) Limit amount: 0 to 9999999.99
■ Check change
You can program the description and the upper limit amounts for check change.
Procedure
Program each item as follows:
- TEXT (Use the character entry) Description for check change. Up to 12 characters can be entered.
- HALO (High Amount Lockout) (Use the numeric entry) Limit amount: 0 to 999999.99
■ Check cashing
You can program the description and the upper limit amounts for check cashing.
Procedure
Select a pertinent check cashing no. from the check cashing numbers list.

Program each item as follows:
- TEXT (Use the character entry) Description for check cashing. Up to 12 characters can be entered.
- HALO (High Amount Lockout) (Use the numeric entry) Limit amount: 0 to 999999.99
Currency Programming
In the SETTING window, select "5 CURRENCY", and take the following procedure.
■ Currency exchange key (through)
Procedure
Select a pertinent currency exchange key from the currency exchange keys list.

Program each item as follows:
- RATE (Use the numeric entry) Currency exchange rate (0.000000 to 999.999999)
- TEXT (Use the character entry) Description for the currency exchange key. Up to 12 characters can be entered. • TAB (Use the numeric entry) Tabulation (0 to 3)
- DESCRIPTOR (Use the character entry) Currency descriptor. Up to 4 characters can be entered.
■ Foreign drawer
Procedure

Program each item as follows:
- FOREIGN DRAWER# (Use the selective entry) DRAWER2/DRAWER1/NONE
Text Programming
Use the following procedure to select any option included in the text group:
Procedure

- In the SETTING window, select "6 TEXT."
• The TEXT window will appear.
- Select any option from the following options list:
1 FUNCTION TEXT: Function text 2 DEPT. GROUP: Department group text 3 PLU GROUP: PLU group text 4 PLU HOURLY GR: PLU hourly group text
The following illustration shows those options included in the text programming group.
6 TEXT
1 FUNCTION TEXT 2 DEPT. GROUP 3 PLU GROUP 4 PLU HOURLY GR
② See "■ Function text" on page 173. ② See "■ Department group text" on page 176. ② See "■ PLU group text" on page 176. ② See "■ PLU hourly group text" on page 177.
■ Function text
You can program a maximum of 12 characters for each function by using the following table:
Procedure
![FUNCTION TEXT 001 DISCRATE 002 DIFFER 003 TAX1 ST 004 TAX2 ST 005 TAX3 ST 006 TAX4 ST 007 TAX5 ST 008 TAX6 ST 009 WNT 1 010 WNT 2 011 WNT 3 C:\WINDOWS\2015 - [▼]](/content/2026/06/1310338/images/9aa852feffff983e050d02c9be9859f0e60d3ef6c152d8e87969f29570aa335c.jpg)
The screen continues.
| No. | Function | Default text |
| 001 Promotion discount DISCOUNT | ||
| 002 Difference DIFFER | ||
| 003 Taxable 1 subtotal TAX1 ST | ||
| 004 Taxable 2 subtotal TAX2 ST | ||
| 005 Taxable 3 subtotal TAX3 ST | ||
| 006 Taxable 4 subtotal TAX4 ST | ||
| 007 Taxable 5 subtotal TAX5 ST | ||
| 008 Taxable 6 subtotal TAX6 ST | ||
| 009 VAT/tax 1 VAT 1 | ||
| 010 VAT/tax 2 VAT 2 | ||
| 011 VAT/tax 3 VAT 3 | ||
| 012 VAT/tax 4 VAT 4 | ||
| 013 VAT/tax 5 VAT 5 | ||
| 014 VAT/tax 6 VAT 6 | ||
| 015 Net 1 | NET 1 | |
| 016 Net 2 | NET 2 | |
| 017 Coupon-like PLU CP PLU | ||
| 018* Void issued order-receipt VD | ||
| 019 Subtotal void SBTL VD | ||
| 020 MGR void MGR VD | ||
| 021 Void | VOID | |
| 022 Refund REFUND | ||
| 023 Return RETURN | ||
| 024* | Hash void issued order-receipt | HASH VD |
| 025 Hash refund HASH RF | ||
| 026 Hash return HASH RT | ||
| 027* Non-turnover void NOTURNVD | ||
* This void is applied to PBAL.
| No. | Function | Default text |
| 028 Non-turnover refund | NOTURNRF | |
| 029 Non-turnover return | NOTURNRT | |
| 030 VAT shift | VAT SFT | |
| 031 VAT/tax delete | TAX DELE | |
| 032 VP counter | VP CNT | |
| 033 Bill counter | BILL CNT | |
| 034 No sale | NO SALE | |
| 035 Guest check counter | G.C. CNT | |
| 036 PBAL (for GLU) | ***PBAL | |
| 037 PBAL (for drive-through) | ***PBAL2 | |
| 038 NBAL (for GLU) | ***NBAL | |
| 039 NBAL (for drive-through) | ***NBAL2 | |
| 040 Starting cash memory (+) | SCM (+) | |
| 041 Starting cash memory (−) | SCM (−) | |
| 042 Exchange 1 is | EXCH1 IS | |
| 043 Exchange 2 is | EXCH2 IS | |
| 044 Exchange 3 is | EXCH3 IS | |
| 045 Exchange 4 is | EXCH4 IS | |
| 046 Exchange 5 is | EXCH5 IS | |
| 047 Exchange 6 is | EXCH6 IS | |
| 048 Exchange 7 is | EXCH7 IS | |
| 049 Exchange 8 is | EXCH8 IS | |
| 050 Exchange 9 is | EXCH9 IS | |
| 051 Cash/check is | CA/CK IS | |
| 052 Cash/check in drawer | CA/CK ID | |
| 053 Guest | GUEST | |
| 054 Non-commission sale | NON COM. | |
| 055 VIP sale VIP SALE | ||
| 056 Waste total WASTE TL | ||
| 057 Order total ORDER TL | ||
| 058 Paid total PAID TL | ||
| 059 Transfer out TRAN.OUT | ||
| 060 Transfer in TRAN.IN | ||
| 061 Tip paid TIP PAID | ||
| 062 Domestic currency 1 DOM.CUR1 | ||
| 063 Domestic currency 2 DOM.CUR2 | ||
| 064 Domestic currency 3 DOM.CUR3 | ||
| 065 Domestic currency 4 DOM.CUR4 | ||
| 066 Domestic currency 5 DOM.CUR5 | ||
| 067 Domestic currency 6 DOM.CUR6 | ||
| 068 Domestic currency 7 DOM.CUR7 | ||
| 069 Domestic currency 8 DOM.CUR8 | ||
| 070 Domestic currency 9 DOM.CUR9 | ||
| 071 Non-turnover total 1 | *NT TL1 | |
| 072 Non-turnover total 2 | *NT TL2 | |
| 073 Non-turnover total 3 | *NT TL3 | |
| 074 Check in drawer | *CH ID | |
| 075 (+) dept. total | *DEPT TL | |
| 076 (−) dept. total DEPT(−) | ||
| 077 Hash(+) total | *HASH TL | |
| 078 Hash(−) total HASH(−) | ||
| 079 Net 1 (Taxable 1 - VAT/tax 1) NET | 1 | |
| 080 Net 2 (Taxable 2 - VAT/tax 2) NET | 2 | |
| 081 Net 3 (Taxable 3 - VAT/tax 3) NET | 3 | |
| 082 Net 4 (Taxable 4 - VAT/tax 4) NET | 4 | |
| 083 Net 5 (Taxable 5 - VAT/tax 5) NET | 5 | |
| 084 Net 6 (Taxable 6 - VAT/tax 6) NET | 6 | |
| 085 Subtotal SUBTOTAL | ||
| 086 Merchandise subtotal MDSE ST | ||
| 087 Total | ***TOTAL | |
| 088 Difference subtotal DIFF ST | ||
| 089 Non-turnover subtotal NON-TURN | ||
| 090 Change | CHANGE | |
| 091 English check print | CHECK PR | |
| 092 Due | DUE | |
| 093 Tip due | TIP DUE | |
| 094 Balance | BALANCE | |
| 095 Sales q'ty | ITEMS | |
| 096 PLU subtotal PLU ST | ||
| No. | Function | Default text |
| 097 Copy receipt title | COPY | |
| 098 Guest check copy title | G.C COPY | |
| 099 Bill totalize/transfer title | B.T. | |
| 100 Bill separation title | B.S. | |
| 101 Intermediate GLU reading title | INTERMED. | |
| 102 Bill on receipt title | BILL | |
| 103 Cumulated bill title | C.BILL | |
| 104 VIP sale title | VIP SALE | |
| 105 WASTE mode title | WASTE | |
| 106 Slip print journal message | SLIP PR. | |
| 107 Slip next page | NEXT P. | |
| 108 Average AVE. | ||
| 109 CCD | CCD | |
| 110 CCD difference | CCD DIF. | |
| 111 CCD difference total | DIF.TL | |
| 112 Order total - Paid total | O-P | |
| 113 Commission amount 1 | COM.AMT1 | |
| 114 Commission amount 2 | COM.AMT2 | |
| 115 Commission amount 3 | COM.AMT3 | |
| 116 Commission amount total | COM.TTL | |
| 117 Bill balance | BILL BAL | |
| 118 Free GLU | FREE GLU | |
| 119 Old balance | OLD BAL. | |
| 120 New balance | BALANCE | |
| 121 Starting cash memory total | SCM TTL | |
| 122 Turnover per table | T.TABLE | |
| 123 Turnover per guest | T.GUEST | |
| 124 Turnover per bill | T.BILL | |
| 125 Item per guest | I.GUEST | |
| 126 Item per bill | I.BILL | |
| 127 Average price per item | AVE.ITEM | |
| 128 Cost | COST | |
| 129 Cost % | COST% | |
| 130 Total cost | TTL COST | |
| 131 Job location number | LOC# | |
| 132 Job location cost | L.COST | |
| 133 Total hour | TTL HOUR | |
| 134 Overtime | OVR TIME | |
| 135 Over cost | OVR COST | |
| 136 Time-in | TIME-IN | |
| 137 Time-out | TIME-OUT | |
| 138 Break-in BREAK-IN | ||
| 139 Break-out | BREAK-OUT | |
| 140 Break total BREAK TL | ||
| 141 Labor % LABOR% | ||
| 142 Person number PERSON# | ||
| 143 Total tax TTL TAX | ||
| 144 Net without tax | NET | |
| 145 Town name 1 | TOWNNAME | |
| 146 Town name 2 | TOWNNAME | |
| 147 Cash transfer TRANSFER | ||
| 148 GLU code* | GLU # | |
| 149 Drive-through code* | CAR # | |
| 150 Pint sale PINT SAL | ||
| 151 Cumulated bill text (left half) | ALL FOODS & | |
| 152 Cumulated bill text (right half) DRINKS | ||
| 153 Independent payment IND.PAY | ||
| 154 Tare weight TARE WT. | ||
| 155 Receipt switch RCP SW. | ||
| 156 Subtotal of an individual clerk RST (drink dispenser reset) | SBTL | |
| 157 Total of all clerks RESET TL (drink dispenser reset) | ||
| 158 Total of an individual clerk MISOP in a drink dispenser misoperation file | TL | |
| 159 Bill void text BILL VOID | ||
| 160 WASTE on PLU report WASTE | ||
| 161 COMBO on PLU report COMBO | ||
| 162 | COMBO WASTE on PLU report | COMBO WASTE |
| 163 Check/credit payment for EX1CH+exchange 1 | CR | |
| 164 Domestic currency 1 for check/credit | DOM.CHK/CR 1 | |
■ Department group text
You can program a maximum of twelve characters for each department group (1 \~ 9).
Procedure
Select a pertinent department group number from the department groups list.
Program the item as follows:
- TEXT (Use the character entry) Description for the department group. Up to 12 characters can be entered.
PLU group text
You can program a maximum of twelve characters for each PLU group (1~99).
Procedure
Select a pertinent PLU group number from the PLU groups list.
Program the item as follows:
- TEXT (Use the character entry) Description for the PLU group. Up to 12 characters can be entered.

PLU hourly group text
You can program a maximum of twelve characters for each PLU hourly group (1~9).
Procedure
Select a pertinent PLU hourly group no. from the hourly groups list.
Program the item as follows:
- TEXT (Use the character entry) Description for the PLU hourly group. Up to 12 characters can be entered.

Personnel Programming
Use the following procedure to select any option included in the personnel group:
Procedure
- In the SETTING window, select "7 PERSONNEL."
The PERSONNEL window will appear.

- Select any option from the following options list:
1 CLERK: Clerk 2 MANAGER: Manager 3 EMPLOYEE: Employee 4 JOB LOCATE TBL: Job location table
The following illustration shows those options included in the personnel programming group.
7 PERSONNEL
1 CLERK 2 MANAGER 3 EMPLOYEE 4 JOB LOCATE TBL
See "Clerk" on page 179. See "Manager" on page 181. See "Employee" on page 182. See "Job location table" on page 183.
Clerk
Procedure

The screen continues.
Program each item as follows:
- SECRET CODE (Use the numeric entry) Secret code (max. 4 digits: 0001 to 9999/0000)
- NAME (Use the character entry) Name for the clerk. Up to 12 characters can be entered.
- KEY No. (Use the numeric entry) Key number (0 through 255) The entry of "0" disables the use of real clerk keys.
- SUPERVISOR CLERK (Use the selective entry) YES: Enables supervisor clerk. NO: Disables supervisor clerk.
- VIP SALE (Use the selective entry) DISABLE: Disables VIP sale. ENABLE: Enables VIP sale.
- GLU SYSTEM (Use the selective entry) GLU (PBLU): Makes GLU (PBLU) system compulsory. DRIVE THRU: Makes drive-through compulsory. NON-COMPULSORY: Makes GLU (PBLU)/drive-through system non-compulsory. G.C. COPY (Use the selective entry) DISABLE: Disables guest check copy. ENABLE: Enables guest check copy.
- VAT SHIFT (Use the selective entry) STATE: Enables VAT shift entry. NOT: Disables VAT shift entry. PRICE LEVEL (Use the selective entry) Selected price level (PRICE1 through PRICE7)
- DRAWER No. (Use the selective entry) DRAWER2/DRAWER1/NONE
- START CODE(GLU) (Use the numeric entry) Starting GLU/PBLU code (1 to 99999999) END CODE(GLU) (Use the numeric entry) Ending GLU/PBLU code (1 to 99999999)
■ Clerk (continued)
- DEPT SHIFT 1 through 4 (Use the selective entry) YES: Enables department shift entry. NO: Disables department shift entry.
- PGM2 MODE (Use the selective entry) DISABLE: Disables operation in the PGM2 mode. ENABLE: Enables operation in the PGM2 mode.
- PGM1 MODE (Use the selective entry) DISABLE: Disables operation in the PGM1 mode. ENABLE: Enables operation in the PGM1 mode.
- PRICE MODE (Use the selective entry) DISABLE: Disables operation in the PRICE mode. ENABLE: Enables operation in the PRICE mode.
- X1/Z1 MODE (Use the selective entry) DISABLE: Disables operation in the X1/Z1 mode. ENABLE: Enables operation in the X1/Z1 mode.
- X2/Z2 MODE (Use the selective entry) DISABLE: Disables operation in the X2/Z2 mode. ENABLE: Enables operation in the X2/Z2 mode.
- AUTO KEY PROG. (Use the selective entry) DISABLE: Disables auto key programming operation. ENABLE: Enables auto key programming operation.
- Z1 IN OPX/Z (Use the selective entry) DISABLE: Disables resetting operation in OPX/Z mode. ENABLE: Enables resetting operation in OPX/Z mode.
■ Manager
You can program a secret code for each manager.
Procedure![graph TD A["MUNYCER"] --> B["Pertinent manager code"] B --> C["01 SECRET CODE YODI\nCANCEL FREE"]](/content/2026/06/1310338/images/9692a20ef2dd330129079dba65051cc5b516c384cd0725814d5a725647a07234.jpg)
Program the item as follows:
- MANAGER (Use the numeric entry) Manager code (max. 2 digits: 01 to 99)
- SECRET CODE (Use the numeric entry) Secret code (max. 4 digits: 0000 to 9999)
■ Employee
You can program various items for each employee.
Procedure![graph TD A["EMPLOYEE\n---- NUTNING ----"] --> B["Pertinent employee code"] B --> C["000000001\nSECRET CODE 0000\nNAME 00000"] C --> D["CLEBR0001 0000\nCLOSE CODE 0000\nPOMAGER CODE 00\nDAILY WORK TIME 0.0\nLOCATIONS1 00\nLOCATIONS2 00\nLOCATIONS3 00\nLOCATIONS4 00\nCLOSED DATE5"]](/content/2026/06/1310338/images/44dd22242535f274e452623280ab79c8c7900e2cfd88ddf38f81a83def825fea.jpg)
Program each item as follows:
- EMPLOYEE (Use the numeric entry) Employee code (max. 10 digits: 0000000001 to 9999999999)
- SECRET CODE (Use the numeric entry) Secret code (max. 4 digits: 0001 to 9999) • NAME (Use the character entry) Name for the employee. Up to 12 characters can be entered.
- *1 CLERK CODE (Use the numeric entry) Clerk code (max. 4 digits: 0001 to 9999)
- MANAGER CODE (Use the numeric entry) Manager code (max. 2 digits: 01 to 99) The manager who is responsible or capable for adjustments to the employee's hours.
- DAILY WORK TIME (Use the numeric entry) Standard number of hours for which the employee should work a day (max. 3 digits: 0 to 99.9)
- *2 LOCATION#1 through #4 (Use the numeric entry) Job location table number (max. 2 digits: 01 to 99)
NOTE
*1 The clerk whom an employee code has been assigned cannot time in unless the corresponding employee times in. *2 If no job location table number is programmed for an employee time-in operation, the location no. 1 will be assigned. Therefore, make sure to program a job location table number for "LOCATION#1.
■ Job location table
You can program three functions for each job location table number which is assigned to employees.
Procedure
Program each item as follows:
• JOB LOCATE TBL (Use the numeric entry) Job location table number (1 to 99) - TEXT (Use the character entry) Description for the job location table. Up to 12 characters can be entered. • SALARY AMOUNT (Use the numeric entry) Salary amount paid for the employee (max. 5 digits: 0 to 999.99) • * OVER-TIME RATE (Use the numeric entry) Rate for overtime work (max. 4 digits: 0.01 to 99.99)
NOTE
* Overtime pay = SALARY AMOUNT x OVER-TIME RATE
Terminal Programming
Use the following procedure to select any option included in the terminal group:
Procedure

- In the SETTING window, select "8 TERMINAL."
• The TERMINAL window will appear.
- Select any option from the following options list:
- MACHINE# (Use the numeric entry) Machine number (max. 6 digits: 0 to 999999)
- CONSECUTIVE# (Use the numeric entry) Enter a number (max. 4 digits: 0 to 9999) that is one less than the desired starting number.
• BILL NUMBER (Use the numeric entry)
Enter a number (max. 4 digits: 0 to 9999) that is the desired starting number.
- DRAWER ALARM (Use the numeric entry)
Alarm length of time with drawer opening (0 to 255 seconds)
- Your POS terminal starts to monitor how long the drawer is kept open the moment the drawer is opened at the end of a transaction in the REG/VOID mode. It stops the time monitoring when a valid key (except the , , and keys) is touched for the next transaction. It restarts the time monitoring after that transaction is ended. You can stop the buzzer alarm by closing the drawer. No key entries can be made while the buzzer is sounding. If the number "0" is entered, this function will be unavailable.
• SCREEN SAVE (Use the numeric entry)
Screen save mode timer (max. 2 digits: 0 to 99 minutes) If the number "0" is entered, the POS terminal will turn the display off after 100 min., if it remains idle.
Date/Time Setting
Use the following procedure to select the menu option "9 DATE/TIME":
■ Date/time
You can set the date and time for the POS terminal.
Procedure
Set each item as follows:
- DATE (Use the numeric entry) Enter the day (2 digits), month (2 digits), and year (2 digits) in this sequence.
- TIME (Use the numeric entry) Set the time (max. 4 digits) on the 24-hour system. For example, when the time is set to 2:30 AM, enter 0230; and when it is set to 2:30 PM, enter 1430. The time will be printed and displayed. Once you set the time, the internal clock unit will continue to run as long as the built-in battery pack is charged and also update the date (day, month, year) properly.

Optional Feature Selection
Use the following procedure to select any option included in the optional group:
Procedure

- In the SETTING window, select "10 OPTIONAL."
• The OPTIONAL window will appear.

- Select any option from the following options list:
1 FUNC.PROHIBIT.: Function prohibition 2 FUNC.SELECTING: Function selection 3 PRINTING SELECT: Printing selection
The following illustration shows those options included in the optional feature programming group.
10 OPTIONAL
1 FUNC.PROHIBIT. 2 FUNC.SELECTING 3 PRINTING SELECT
② See “■ Function prohibition” on page 187. ② See "■ Function selection" on page 188. ② See "■ Printing selection" on page 190.
■ Function prohibition
Your POS terminal allows you to select whether to enable or disable various functions.
Procedure
Program each item as follows:
- OP X/Z REPORT (Use the selective entry) DISABLE: Disables clerk report printing in the OP X/Z mode. ENABLE: Enables clerk report printing in the OP X/Z mode.
- PAID OUT (Use the selective entry) LIMITED: Allowed only for managers or supervisor. PUBLIC: Allowed for all clerks.
- REFUND/RETURN (Use the selective entry) LIMITED: Allowed only for managers or supervisor. PUBLIC: Allowed for all clerks.
- ISSUED ITM VD (Use the selective entry) LIMITED: Allowed only for managers or supervisor. PUBLIC: Allowed for all clerks.
- NO ISSUED ITM VD (Use the selective entry) LIMITED: Allowed only for managers or supervisor. PUBLIC: Allowed for all clerks.
- SUB-TOTAL VOID (Use the selective entry) LIMITED: Allowed only for managers or supervisor. PUBLIC: Allowed for all clerks.
- ITEM VP (Use the selective entry) DISABLE: Disables item validation printing. ENABLE: Enables item validation printing. • INTERMEDIATE GLU (Use the selective entry) LIMITED: Allowed only for managers or supervisor. PUBLIC: Allowed for all clerks.
- VIP SALES (Use the selective entry) LIMITED: Allowed only for managers or supervisor. PUBLIC: Allowed for all clerks.
- GLU FINALIZE (Use the selective entry) DISABLE: Disables GLU finalization after ordering. ENABLE: Enables GLU finalization after ordering.
- WASTE MODE (Use the selective entry) LIMITED: Allowed only for managers or supervisor. PUBLIC: Allowed for all clerks.
■ Function selection
Your POS terminal enables you to select various functional selections.
Procedure

The screen continues.
Program each item as follows:
- REFUND VP (Use the selective entry) COMPULSORY: Compulsory refund validation printing NON-COMPULSORY: Non-compulsory refund validation printing
- (-) VP (Use the selective entry) COMPULSORY: Compulsory minus validation printing NON-COMPULSORY: Non-compulsory minus validation printing
- DOUBLE RCPT HEAD (Use the selective entry) 1 LINE: Prints a one-line header on a double receipt. NORMAL: Prints a normal header on a double receipt.
- VAT SHIFT SYSTEM (Use the selective entry) BY SHIFT KEY: Allows VAT shift to be accomplished by the shift key. BY CLERK: Allows VAT shift to be accomplished by a clerk.
- LEVEL SFT METHOD (Use the selective entry) MANUAL: Lock shift mode AUTO: Automatic return mode
- LEVEL SHIFT (Use the selective entry) LIMITED: Allowed only for managers or supervisor. PUBLIC: Allowed for all clerks.
- RETURN TO LEVEL1 (Use the selective entry) When the PLU level shift system is set to "AUTO," the PLU level can be returned to level 1 by one of the following methods: BY ONE RECEIPT: Returns the PLU level to level 1 by one receipt. BY ONE ITEM: Returns the PLU level to level 1 by one item.
- PRICE SFT SYSTEM (Use the selective entry) BY CLERK: Allows PLU price level shift to be accomplished by a clerk. BY SHIFT KEY: Allows PLU price level shift to be accomplished by the shift key.
- PRICE SFT METHOD (Use the selective entry) MANUAL: Lock shift mode AUTO: Automatic return mode
- PRICE SHIFT (Use the selective entry) LIMITED: Allowed only for managers or supervisor. PUBLIC: Allowed for all clerks.
■ Function selection (continued)
- RETURN TO PRICE1 (Use the selective entry)
When the PLU price level shift method is set to "AUTO," the price level can be returned to price 1 by one of the following methods:
BY ONE RECEIPT: Returns the price level to price 1 by one receipt.
BY ONE ITEM: Returns the price level to price 1 by one item.
• QTY IN VIP SALES (Use the selective entry)
UPDATE: Updates the sales quantity of VIP sale.
NOT UPDATE: Does not update the sales quantity of VIP sale.
• NON-TURNOVER (Use the selective entry)
INCLUDE VAT: Enables non-turnover including VAT.
EXCLUDE VAT: Disables non-turnover including VAT.
• CREDIT IN RA/PO (Use the selective entry)
TOTALIZER UPDATE: Updates a credit totalizer when finalizing a received-on-account or a paid-out entry by a credit key.
NOT UPDATE: Does not update a credit totalizer when finalizing a received-on-account or a paid-out entry by a credit key.
- SHIFT KEY ACTION (Use the selective entry)
CAPS LOCK: Locks the upper-case letter mode once the shift key is touched.
SHIFT: Shifts the upper-case letter mode to the lower-case letter mode after a letter is entered.
- DRIVE SCREEN (Use the selective entry)
MANUAL: Only when the function key for the drive-through screen is touched, the drive-through screen appears.
AUTO: When the drive-through registration is made, the drive-through screen becomes the default screen automatically. If the function key for the drive-through screen is touched, also the drive-through screen appears.
- WHEN T-LOG FULL (Use the selective entry)
Programming whether or not to lock item entry when the T-LOG file is full.
CONTINUE:
LOCK:
- WHEN E.J. FULL (Use the selective entry)
Programming whether or not to lock item entry when the Electronic Journal file is full.
CONTINUE:
LOCK:
• PAYMENT FOR EX1 (Use the selective entry)
Payment for exchange1 amount
CASH ONLY:
ALL MEDIA:
- EX1 CALCULATION (Use the selective entry)
Exchange1 calculation method
DIVISION:
MULTIPLICATION:
■ Printing selection
You can program various printing functions.
Procedure

The screen continues.
Program each item as follows:
- OF PURCHASE (Use the selective entry) PRINT: Prints the number of purchases. NOT PRINT: Does not print the number of purchases.
• TIME (Use the selective entry) NOT PRINT: Does not print the time on the receipt and journal. PRINT: Prints the time on the receipt and journal.
• JOURNAL SELECT (Use the selective entry) PARTIAL PRINT: Prints the information on all entries other than normal department entries (entries into "+" departments and their associated "+" PLUs) on the journal.
FULL PRINT: Prints the detailed information on the journal.
• JOURNAL LETTER (Use the selective entry) NORMAL SIZE: Prints the normal-size letters on the journal. SMALL SIZE: Prints the compressed-size letters on the journal.
• VAT/TAX ON R/J (Use the selective entry) NOT PRINT: Does not print VAT or tax amounts on the receipt and journal. PRINT: Prints VAT or tax amounts on the receipt and journal.
• TAXABLE ON R/J (Use the selective entry) NOT PRINT: Does not print taxable amounts on the receipt and journal. PRINT: Prints taxable amounts on the receipt and journal.
• NET ON R/J (Use the selective entry) NOT PRINT: Does not print net amounts on the receipt and journal. PRINT: Prints net amounts on the receipt and journal.
• VAT/TAX ON BILL (Use the selective entry) NOT PRINT: Does not print VAT or tax amounts on the bill. PRINT: Prints VAT or tax amounts on the bill.
• TAXABLE ON BILL (Use the selective entry) NOT PRINT: Does not print taxable amounts on the bill. PRINT: Prints taxable amounts on the bill.
■ Printing selection (continued)
- NET ON BILL (Use the selective entry) NOT PRINT: Does not print net amounts on the bill. PRINT: Prints net amounts on the bill. • TIME ON BILL (Use the selective entry) NOT PRINT: Does not print the time on the bill. PRINT: Prints the time on the bill.
- BILL ON SLIP (Use the selective entry) NOT PRINT: Does not print the bill on the slip. PRINT: Prints the bill on the slip.
- BILL ON RECEIPT (Use the selective entry) NOT PRINT: Does not print the bill on the receipt. PRINT: Prints the bill on the receipt.
- INTERMED ON SLIP (Use the selective entry) NOT PRINT: Does not print the details of intermediate GLU reading on the slip. PRINT: Prints the details of intermediate GLU reading on the slip.
- INTERMED ON RCPT (Use the selective entry) NOT PRINT: Does not print the details of intermediate GLU reading on the receipt. PRINT: Prints the details of intermediate GLU reading on the receipt.
- SEPARATOR LINE (Use the selective entry) SEPARATOR LINE: Prints separator lines in the report. 1 LINE: Creates one-line space instead of printing separator lines in the report.
- LINK PLU TEXT (Use the selective entry) ONLY PARENT: Prints parent PLU text of linked PLUs with totalizer. PRINT EACH PLU: Prints each PLU text of linked PLUs.
- FREE TEXT ON KP (Use the selective entry) Free text print on KP PRINT: NOT PRINT:
- ITEM CODE ON KP (Use the selective entry) Item code print on KP PRINT: NOT PRINT:
- UNIT PRICE ON KP (Use the selective entry) Unit price print on KP PRINT: NOT PRINT:
- AMOUNT ON KP (Use the selective entry) Amount print on KP PRINT: NOT PRINT:
■ Printing selection (continued)
- GUEST# ON KP (Use the selective entry) Guest# print on KP PRINT: NOT PRINT:
- QTY1 PRINT ON KP (Use the selective entry) Qty1 print on KP PRINT: NOT PRINT:
- TOTAL & CHANGE PRT (Use the selective entry) Exchange1 amount print for total and change DOMESTIC ONLY: WITH FOREIGN:
- PAYMENT VP (Use the selective entry) Exchange1 amount print for payment VP DOMESTIC ONLY: WITH FOREIGN: • MAXIMUM TICKET (Use the numeric entry) Maximum number of ticket issuing (1 to 99)
Report Programming
Use the following procedure to select any option included in the report group:
Procedure
- In the SETTING window, select "11 REPORT."
• The REPORT window will appear.
- Select any option from the following options list:
1 0 SKIP: Zero skip 2 GNR RPT FORMAT: General report format 3 HOURLY RPT: Hourly report 4 STACKED RPT: Stacked report
The following illustration shows those options included in the report programming group.
11 REPORT
1 0 SKIP ② See "■ Zero skip" on page 194. 2 GNR RPT FORMAT ② See "■ General report format" on page 195. 3 HOURLY RPT ② See "■ Hourly report" on page 195. 4 STACKED RPT ② See "■ Stacked report" on page 196.
■ Zero skip
You can program whether or not to skip "0" in each report.
Procedure
Program each item as follows:
- CLERK (Use the selective entry) SKIP: Skips those data that are "0" in the clerk report. NOT SKIP: Does not skip those data that are "0" in the clerk report. • TRANSACTION (Use the selective entry) SKIP: Skips those data that are "0" in the transaction report. NOT SKIP: Does not skip those data that are "0" in the transaction report.
• DEPARTMENT (Use the selective entry)
SKIP: Skips those data that are "0" in the department report.
NOT SKIP: Does not skip those data that are "0" in the department report.
- PLU (Use the selective entry)
SKIP: Skips those data that are "0" in the PLU report.
NOT SKIP: Does not skip those data that are "0" in the PLU report.
• HOURLY (Use the selective entry)
SKIP: Skips those data that are "0" in the hourly report.
NOT SKIP: Does not skip those data that are "0" in the hourly report.
• DAILY NET (Use the selective entry)
SKIP: Skips those data that are "0" in the daily net report.
NOT SKIP: Does not skip those data that are "0" in the daily net report.
■ General report format
You can program whether or not to skip the following items in the general report.
Procedure
Program each item as follows:
- DEPARTMENT (Use the selective entry) SKIP: Skips department data in the general report. NOT SKIP: Does not skip department data in the general report.
- TRANSACTION (Use the selective entry) SKIP: Skips transaction data in the general report. NOT SKIP: Does not skip transaction data in the general report.
- TAX SALE (Use the selective entry) SKIP: Skips tax data in the general report. NOT SKIP: Does not skip tax data in the general report.
- CID (Use the selective entry) SKIP: Skips cash-in-drawer data in the general report. NOT SKIP: Does not skip cash-in-drawer data in the general report.
■ Hourly report
You can program the memory type and the starting time for the hourly report.
Procedure

Program each item as follows:
- MEMORY TYPE (Use the selective entry) 15MIN: Selects the 15-minute type. 30MIN: Selects the 30-minute type. 60MIN: Selects the 60-minute type.
- STARTING TIME (Use the numeric entry) Starting time entry (max. 2 digits: 0 to 23)
■ Stacked report
Your POS terminal is equipped with the stacked report printing function that enables multiple X/Z reports to be printed in sequence with a single request.
Procedure
Select a stacked report no. from the stacked reports list.

The screen continues.
The screen continues.
When you are allowed to set the parameter of a report, the following pop-up window will appear.

You can select a maximum of twenty reports from the stacked reports list. Some reports can be set their parameters such as "START CODE" and "END CODE."
• 01 GENERAL General report
• 02 BALANCE Balance report
- 03 DEPT./GROUP (Use the numeric entry) Full department report Parameter: Starting department code/ending department code (1 through 99)
- 04 DEPT.IND.GROUP (Use the numeric entry) Individual group report on departments Parameter: Department group no. (1 through 17)
• 05 DEPT.GROUP TOTAL Full group total report on departments
- 06 PLU (Use the numeric entry) PLU report by designated range Parameter: Starting PLU code/ending PLU code (1 through 999999)
- 07 COMBO SALES (Use the numeric entry) Combo sales report Parameter: Starting PLU code/ending PLU code (1 through 999999)
- 08 PLU BY DEPT (Use the numeric entry) PLU report by associated department Parameter: Department code (1 through 99)
- 09 PLU IND. GROUP (Use the numeric entry) PLU report by individual group Parameter: PLU group no. (00 through 99)
• 10 PLU GROUP TOTAL Full group total report on PLUs
• 11 PLU STOCK (Use the numeric entry) PLU stock report Parameter: Starting PLU code/ending PLU code (1 through 999999)
- 12 PLU COST (Use the numeric entry) PLU cost report Parameter: Starting PLU code/ending PLU code (1 through 999999)
■ Stacked report (continued)
• 13 PLU TOP 20 (Use the selective entry)
PLU top 20 report
Parameter: AMOUNT/QUANTITY
• 14 PLU ZERO SALES (Use the selective/numeric entry)
PLU zero sales report
Parameter: 1 ALL/2 BY DEPT.
When "2 BY DEPT." is selected, enter a department code (1 through 99).
• 15 PLU MIN. STOCK (Use the numeric entry)
PLU minimum stock report
Parameter: Starting PLU code/ending PLU code (1 through 999999)
• 16 PLU HOURLY GROUP (Use the numeric entry)
PLU hourly group report
Parameter: Starting time/ending time (0 through 2345)
• 17 TRANSACTION
Transaction report
• 18 TL-ID
Total in drawer report
• 19 COMMISSION SALES
Commission sales report
• 20 TAX
Tax report
• 21 CHIEF
Chief report
• 22 ALL CLERK
Full clerk report
• 23 IND. CLERK
Individual clerk report
- 24 DD ERROR
Drink dispenser error reading report
- 25 DD RESET
Drink dispenser resetting report
• 26 EMPLOYEE (Use the numeric entry)
Employee report
Parameter: Starting employee code/ending employee code (1 through 9999999999)
• 27 EMP. ADJUSTMENT (Use the numeric entry)
Employee adjustment report
Parameter: Starting employee code/ending employee code (1 through 9999999999)
■ Stacked report (continued)
• 28 EMP. ACTIVE STS. (Use the numeric entry)
Employee active status report
Parameter: Starting employee code/ending employee code (1 through 9999999999)
• 29 HOURLY (Use the numeric entry)
Hourly report
Parameter: Starting time/ending time (0 through 2345)
NOTE
To take the hourly Z report, you have to specify the full-range hourly report.
• 30 LABOR COST%
Labor cost percent report
• 31 OVER TIME (Use the numeric entry)
Over time report
Parameter: Starting employee code/ending employee code (max. 10 digits: 0000000001 to 9999999999)
• 32 DAILY NET
Daily net report
• 33 INGREDIENT STOCK (Use the numeric entry)
Ingredient stock report
Parameter: Starting ingredient no./ending ingredient no. (1 through 999)
• 34 GLU (Use the numeric entry)
GLU/PBLU report
Parameter: Starting GLU code/ending GLU code (1 through 99999999)
• 35 GLU BY CLERK
GLU/PBLU report by clerk
• 36 DRIVE THRU (Use the numeric entry)
Drive-through report
Parameter: Starting drive-through code/ending drive-through code (1 through 99999999)
• 37 D-THRU BY CLERK
Drive-through report by clerk
• 38 BILL
Bill report
• 39 SERVICE TIME (Use the numeric entry)
Drive-through service time
Parameter: Starting time/ending time (0 through 2300)
Message Programming
Use the following procedure to select any option included in the message group:
Procedure
- In the SETTING window, select "12 MESSAGE."
• The MESSAGE window will appear.
- Select any option from the following options list:
1 RECEIPT LOGO: Receipt logo 2 FREE TEXT: Free text 3 VP TEXT: Validation printing text 4 SLIP TEXT: Slip text 5 SLIP FOOTER: Slip footer 6 E.BILL MESSAGE: Entertainment bill message 7 PAYEE NAME: Payee name (for English check)
The following illustration shows those options included in the text programming group.
12 MESSAGE
RECEIPT LOGO 2 FREE TEXT B VP TEXT 4 SLIP TEXT 5 SLIP FOOTER 6 E.BILL MESSAGE 7 PAYEE NAME
② See "■ Receipt logo" on page 200.
② See "■ Free text" on page 200.
② See "■ Validation printing text" on page 201.
② See "■ Slip text" on page 201.
② See "■ Slip footer" on page 201.
② See "■ Entertainment bill message" on page 202.
② See "■ Payee name" on page 202.
■ Receipt logo
Your POS terminal can print programmed messages for customers on every receipt.
Procedure
Program the item as follows:
- RECEIPT LOGO (Use the character entry)
Logo text for the receipt (max. 40 characters x 6 lines). Entering sequential characters "=" will print the corresponding clerk name in the footer logo message. Enter four to eight characters "=."
NOTE
The programmable number of lines for a message varies according to the following message types:
• 3-line header message type • Graphical logo only type • Graphical logo and 3-line footer message type • 6-line header message type • 3-line header and 3-line footer messages type • 3-line header message, graphical logo, and 3-line footer message type • Graphical logo and 3-line header and 3-line footer messages type
Please contact your authorized SHARP dealer.
■ Free text
Your POS terminal can print programmed texts for departments and PLUs on every receipt.
Procedure
Program the item as follows:
- FREE TEXT (Use the character entry)
Free texts for departments and PLUs (max. 99 texts/30 characters per text)
■ Validation printing text
Your POS terminal can print programmed messages for customers on the validation slip.
Procedure

Program the item as follows:
- VP TEXT (Use the character entry) Texts for the validation slip (3 lines/max. 30 characters per line)
■ Slip text
Your POS terminal can print programmed messages for customers on the slip.
Procedure
Program the item as follows:
- SLIP TEXT (Use the character entry) Texts for the slip (3 lines/max. 30 characters per line)
■ Slip footer
Your POS terminal can print programmed footer messages for customers on the slip.
Procedure

Program the item as follows:
- SLIP FOOTER (Use the character entry) Texts for the footer (3 lines/max. 30 characters per line)
■ Entertainment bill message
Your POS terminal can print programmed entertainment bill messages on the receipt.
Procedure
Program the item as follows:
• E.BILL MESSAGE (Use the character entry) Texts for the message (max. 30 characters)
■ Payee name
Your POS terminal can print programmed payee names for English checks.
Procedure
Program the item as follows:
- PAYEE NAME (Use the character entry) Name for the payee for English check (2 lines/max. 30 characters per line)
Function Key Programming
Use the following procedure to program a text (key label) or a color for the function key:
Procedure
![graph TD A["SETTING"] --> B["15 FUNCTION KEY"] B --> C["14 DEVICE CONFIG"] C --> D["15 DRIVE THRU"] D --> E["16 TAX"] E --> F["17 UR DATA SIND"] F --> G["18 UR DATA RECEIVE"] G --> H["19 ONLINE DISPONER"] H --> I["20 ONLINE CONFIG"] I --> J["21 ONLINE CONFIG"]](/content/2026/06/1310338/images/ccd822900236802c023c902dc19ee5a9f05ce591835d5f9e6987a032c284caa0.jpg)
- In the SETTING window, select "13 FUNCTION KEY." • The FUNCTION KEY window will appear.
- Select any function key from the key list.
- Program a text or a color for the corresponding function key.
- KEY TEXT (Use the character entry) Enter a text for the function key. The terminal is provided with various text-length in compliance with each key size. (max. 16 characters)
- KEY COLOR (Use the selective entry) Select a key color from the colors list (16 different colors). BLACK/BLUE/LIGHT BLUE/MAGENTA/LIGHT MAGENTA/GREEN/LIGHT GREEN/RED/LIGHT RED/ CYAN/LIGHT CYAN/GRAY/LIGHT GRAY/YELLOW/ BROWN/WHITE
Device Configuration Programming
Use the following procedure to select a device configuration programming:
Procedure

- In the SETTING window, select "14 DEVICE CONFIG."
• The DEVICE CONFIG window will appear.

The screen continues.
- Select any option from the following options list:
01 JOURNAL PRINTER: Journal printer
02 RECEIPT PRINTER: Receipt printer
03 SLIP PRINTER: Slip printer
04 REPORT PRINTER: Report printer
05 KP#1: Remote printer #1
06 KP#2: Remote printer #2
07 KP#3: Remote printer #3
08 KP#4: Remote printer #4
09 KP#5: Remote printer #5
10 KP#6: Remote printer #6
11 KP#7: Remote printer #7
12 KP#8: Remote printer #8
13 KP#9: Remote printer #9
14 SCALE: Scale
15 DRINK DISPENSER: Drink dispenser
16 ONLINE: On-line
The following illustration shows those options included in the device configuration programming group.
14 DEVICE CONFIG
01 JOURNAL PRINTER
02 RECEIPT PRINTER
03 SLIP PRINTER
04 REPORT PRINTER
05 KP#1
06 KP#2
07 KP#3
08 KP#4
09 KP#5
10 KP#6
11 KP#7
12 KP#8
13 KP#9
14 SCALE
15 DRINK DISPENSER
16 ONLINE
② See "■ Journal printer" on page 205 ② See "■ Receipt printer" on page 205. ② See "■ Slip printer" on page 206. ② See "■ Report printer" on page 207.
② See "■ Remote printer" on page 207.
See "■ Scale/Drink dispenser/On-line" on page 208.
■ Journal printer
You can program various printing functions for the journal printer.
Procedure

Program each item as follows:
- TERMINAL# (Use the numeric entry) Terminal number (1 through 254: Enter "0" for local device.)
- CHANNEL# (Use the numeric entry) Channel number (1 through 7) When you program as "0", no RS-232 channel is assigned.
- PRINTER NAME (Use the selective entry) Select the printer to be used. SHARP ER-01PU SHARP UP-T80BP SHARP ER-03/04RP EPSON TM-300 EPSON TM-T88/85 EPSON TM-U950 EJ FILE (Electronic journal file)
- AUTO CUTTER (Use the selective entry) Auto cutter function YES: Enables auto cutter function. NO: Disables auto cutter function.
NOTE
When "ER-03RP" is connected, select "NO." When "EJ FILE" is used, select "NO".
- PAPER SHEET (Use the selective entry) Select a paper type. TWO OR MORE: Uses two or more sheets. ONE SHEET: Uses one sheet.
NOTE
This option is available when the "TM-300" is selected.
■ Receipt printer
You can program various printing functions for each printer.
Procedure

Program each item as follows:
- TERMINAL# (Use the numeric entry) Terminal number (1 through 254 : Enter "0" for local device.)
- CHANNEL# (Use the numeric entry) Channel number (1 through 7) When you program as "0", no RS-232 channel is assigned.
- PRINTER NAME (Use the selective entry) Select the printer to be used. SHARP ER-01PU SHARP UP-T80BP SHARP ER-03/04RP EPSON TM-300 EPSON TM-T88/85 EPSON TM-U950
■ Receipt printer (continued)
• AUTO CUTTER (Use the selective entry) Auto cutter function YES: Enables auto cutter function. NO: Disables auto cutter function.
NOTE When "ER-03RP" is connected, select "NO."
• PAPER SHEET (Use the selective entry) Select a paper type. TWO OR MORE: Uses two or more sheets. ONE SHEET: Uses one sheet.
NOTE This option is available when the "TM-300" is selected.
• HEAD LOGO PRINT (Use the selective entry) Select a header logo print timing. EACH ISSUE: The logo will be printed before printing transaction on each receipt. PRE-PRINT: The logo will be printed beforehand printing transaction for a next receipt.
- RCPT LENGTH (Use the numeric entry) Minimum length of the bill to be printed paper on the receipt paper
• PRINT TYPE (Use the selective entry) Select the type of receipt print formats. ADDITION SINGLE/DOUBLE S/D + ADDITION ADDITION+SINGLE ADD WITHOUT TL DOUBLE ADDITION DOUBLE ADD+SNGL
- Slip printer
Procedure

Program each item as follows:
• TERMINAL# (Use the numeric entry) Terminal number (1 through 254 : Enter "0" for local device.)
- CHANNEL# (Use the numeric entry)
Channel number (1 through 7)
When you program as "0", no RS-232 channel is assigned.
• PRINTER NAME (Use the selective entry)
Select the printer to be used.
SHARP ER-FBP40
EPSON TM-295
EPSON TM-U950
EPSON TM-T85
■ Slip printer (continued)
- INITIAL FEED# (Use the numeric entry) Initial line feed for a slip (0 to 64 lines)
- SLIP MAX LINE (Use the numeric entry) Maximum number of lines printable on a slip (0 to 99) • VP PRINT TIMES (Use the numeric entry) Number of times of validation printing (0 to 9)
■ Report printer
Procedure

Program each item as follows:
- TERMINAL# (Use the numeric entry) Terminal number (1 through 254: Enter "0" for local device.)
- CHANNEL# (Use the numeric entry) Channel number (1 through 7) When you program as "0", no RS-232 channel is assigned.
- PRINTER NAME (Use the selective entry) Select the printer to be used. SHARP ER-01PU SHARP UP-T80BP SHARP ER-03/04RP EPSON TM-300 EPSON TM-T88/85 EPSON TM-U950
- AUTO CUTTER (Use the selective entry) Auto cutter function YES: Enables auto cutter function. NO: Disables auto cutter function.
NOTE: When "ER-03RP" is connected, select "NO."
- PAPER SHEET (Use the selective entry) Select a paper type. TWO OR MORE: Uses two or more sheets. ONE SHEET: Uses one sheet.
NOTE: This option is available when the "TM-300" is selected.
■ Remote printer (KP#1 through KP#9)
Procedure

Program each item as follows:
- TERMINAL# (Use the numeric entry) Terminal number (1 through 254: Enter "0" for local device.)
- CHANNEL# (Use the numeric entry) Channel number (1 through 7) When you program as "0", no RS-232 channel is assigned.
- PRINTER NAME (Use the selective entry) Select the printer to be used. SHARP ER-01PU SHARP UP-T80BP SHARP ER-03/04RP EPSON TM-300 EPSON TM-T88/85 EPSON TM-U950
■ Remote printer (continued)
• AUTO CUTTER (Use the selective entry)
Auto cutter function
YES: Enables auto cutter function.
NO: Disables auto cutter function.
NOTE When "ER-03RP" is connected, select "NO."
• PAPER SHEET (Use the selective entry)
Select a paper type.
TWO OR MORE: Uses two or more sheets.
ONE SHEET: Uses one sheet.
NOTE This option is available when the "TM-300" is selected.
• PRINT TYPE (Use the selective entry)
Select the type of receipt print formats.
ADDITION SINGLE/DOUBLE
ADDITION + SINGLE/DOUBLE ADDITION
DOUBLE ADD + SINGLE
• SECOND KP (Use the numeric entry)
You can assign a second remote printer to which data should be output when the first remote printer encounters an error during transmission of the data.
Second remote printer number (0 to 9)
• NAME (Use the character entry)
Description for the remote printer (max. 12 characters)
■ Scale/Drink dispenser/On-line
Procedure
Select a pertinent device from the "DEVICE CONFIG" window.

Program each item as follows:
- CHANNEL# (Use the numeric entry)
Channel number (1 through 7)
When you program as "0", no RS-232 channel is assigned.
Drive-through Code Programming
Use the following procedure to select the menu option "15 DRIVE THRU":
■ Drive-through code
You can program the range of available drive-through codes.
Procedure

Program each item as follows:
- START CODE (Use the numeric entry) Starting drive-through code (max. 8 digits: 1 to 99999999)
• END CODE (Use the numeric entry) Ending drive-through code (max. 8 digits: 1 to 99999999)
- TIME (Use the numeric entry) Drive-through target time: Enter the minute (2 digits) and the second (2 digits) in this sequence.
NOTE
When the customer's waiting time is over the programmed target time, the terminal will display a warning.

Tax Programming
Use the following procedure to select any option included in the tax group:
Procedure
- In the SETTING window, select "16 TAX."
• The TAX window will appear.
- Select any option from the following options list:
1 TAX1: Tax1 2 TAX2: Tax2 3 TAX3: Tax3 4 TAX4: Tax4 5 TAX5: Tax5 6 TAX6: Tax6
NOTE
If the key is touched on the tax number selection menu, the tax in the cursor position will be deleted.
- Program each item as follows:
• RATE SIGN (Use the selective entry) -: Minus rate +: Plus rate
• TAX RATE (Use the numeric entry) Tax rate (max. 7 digits: 0.0000 to 999.9999%)
- LOWER TAX LIMIT (Use the numeric entry) Lowest taxable amount (max. 5 digits: 0.01 to 999.99)
- This option is not available in the VAT system.
IR Data Send Programming
Use the following procedure to select the menu option "17 IR DATA SEND":
■ IR data send
Your POS terminal can send data to another device by infrared rays.
Procedure


Program the item as follows:
• TO (Use the selective entry)
Select one of the following options to send data to another device:
ECR (IrDA): Selects "IrDA" for the communication system to communicate with another POS terminal.
ECR (ASK): Selects "ASK" for the communication system to communicate with another POS terminal.
ER-02FD (ASK): Selects "ASK" for the communication system to communicate with the ER-02FD.
- SEND DATA (Use the selective entry)
Select one of the following options (data sources):
ALL RAM STANDARD RAM(1)
STANDARD RAM(2) UP-P02MB2(1)
UP-P02MB2(2) UP-P02MB2(3)
UP-P02MB2(4) SSP
RESERVED 1 RESERVED 2
RESERVED 3 RESERVED 4
- SPEED (Use the selective entry)
Select one of the following options (data transmission speeds):
PROGRAMMED SPEED: Sends data at a programmed speed.
115200 bps: Sends data at 115200 bps (for "IrDA" only).
57600 bps: Sends data at 57600 bps.
38400 bps: Sends data at 38400 bps.
19200 bps: Sends data at 19200 bps.
9600 bps: Sends data at 9600 bps.
4800 bps: Sends data at 4800 bps.
2400 bps: Sends data at 2400 bps.
IR Data Receive Programming
Use the following procedure to select the menu option "18 IR DATA RECEIVE":
■ IR data receive
Your POS terminal can receive data from another device by infrared rays.
Procedure


Program each item as follows:
• FROM (Use the selective entry)
Select one of the following options to receive data from another device:
ECR (IrDA): Selects "IrDA" for the communication system to communicate with another POS terminal.
ECR (ASK): Selects "ASK" for the communication system to communicate with another POS terminal.
ER-02FD (ASK): Selects "ASK" for the communication system to communicate with the ER-02FD.
- SPEED (Use the selective entry)
Select one of the following options (data transmission speeds):
PROGRAMMED SPEED: Receives data at a programmed speed.
115200bps: Receives data at 115200 bps.
57600bps: Receives data at 57600 bps.
38400bps: Receives data at 38400 bps.
19200bps: Receives data at 19200 bps.
9600bps: Receives data at 9600 bps.
4800bps: Receives data at 4800 bps.
2400bps: Receives data at 2400 bps.
Drink Dispenser Programming
Use the following procedure to select any option included in the drink dispenser programming group:
Procedure
![CEREM001 SETTING——[4, 1] 11 REPORT 12 MESSAGE 13 FUNCTION KEY 14 DEVICE CONFIG 15 DRIVE TWO 16 TAX 17 18 DATA SIND 18 19 DATA RECEIVE 19 EDITING RESPONSE 20 ONLINE CONFIG 21 ONLINE CONFIG CANCEL — FREE](/content/2026/06/1310338/images/2202d010c7b26e1d76dbbb63657f74d261fee19739258807d3c935307bf3697f.jpg)
- In the SETTING window, select "19 DRINK DISPENSER."

- Select any option from the following options list:
1 DD PRESET: Drink dispenser preset 2 DD OPERATOR: Drink dispenser operator 3 DOWN LOADING: Downloading 4 LOCAL DD: Local drink dispenser
NOTE
"4 LOCAL DD" is available only when your POS terminal is used in an inline system.
The following illustration shows those options included in the drink dispenser programming group.
19 DRINK DISPENSER
1 DD PRESET → See "■ Drink dispenser preset" on page 214. 2 DD OPERATOR → See "■ Drink dispenser operator" on page 215. 3 DOWNLOADING → See "■ Downloading" on page 215. 4 LOCAL DD → See inline manual.
■ Drink dispenser preset
Procedure
Program each item as follows:
- VALUE NUMBER (Use the numeric entry) - You can set the link of sort number of drink dispenser and PLU code. AAA: Value in the hundred thousand's and ten thousand's and thousand's place of a PLU code (0 through 999)
- You can set the link of sort number of drink dispenser and PLU code. AAA: Value in the hundred thousand's, ten thousand's, and thousand's place of a PLU code (0 through 999)
- The conversion of a sort number to a PLU code is made as follows:
Sort number = xxx (max. 3 digits) PLU code = AAAxxx (max. 6 digits)
NOTE
You cannot change the setting by this option while the received data on drink dispenser sales is stored in the buffer. In this case, a lock error will occur and the message "ENTRY ERROR" will be displayed.
- SEPARATE CODE (Use the numeric entry)
Enter a GLU/PBLU or drive-through separate code (1 through 999999).
For example, if you program "10" for the separate code, GLU/drive-through codes "1" through "10" are used for drive-through codes, and "11" through "999999" are used for GLU codes.
• CONNECTION (Use the selective entry)
OFF-LINE: Makes drink dispenser off-line.
ON-LINE: Makes drink dispenser on-line.
If "OFF-LINE" is selected, data reception from the drink dispenser is disabled. If "ON-LINE" is selected, the manual entry of PLU assigned to the drink dispenser sales article results in error correction of drink dispenser misoperation.
• PRINT FORMAT (Use the selective entry)
NOT PRINT: Does not print a drink dispenser misoperation item when reading a drink dispenser misoperation file (in the clerk report).
PRINT: Prints a drink dispenser misoperation item when reading a drink dispenser misoperation file (in the clerk report).
■ Drink dispenser operator
Procedure
![graph TD A["DD OPERATOR\nMUTHING"] --> B["Pertinent clerk code"] B --> C["0001\nGLU START CODE\nEMB CODE\n00000"]](/content/2026/06/1310338/images/ad3db44e8c937424f8271d875e65561cbc8dc1f073797031b155066f558b6da3.jpg)
Program each item as follows:
- CLERK CODE (Use the numeric entry) Enter a clerk code to be assigned to a drink dispenser operator.
- GLU START CODE (Use the numeric entry) Starting GLU code to be assigned to a drink dispenser operator (1 through 999999)
- GLU END CODE (Use the numeric entry) Ending GLU code to be assigned to a drink dispenser operator (1 through 999999)
NOTE
If the key is touched without setting the range after entering a clerk code, the drink dispenser sales by the entered clerk will be unavailable.
■ Downloading
This option is used to download drink dispenser clerk assignment information to drink dispenser. To transfer this information, the drink dispenser must be initialized and set to on-line mode in advance. Initialization can be performed from the drink dispenser or from your POS terminal. To initialize from POS terminal, use X1/Z1 mode job.
Procedure

On-line Configuration Programming
Use the following procedure to select the on-line configuration programming.
Please consult your dealer for more details.
Procedure

- In the SETTING window, select "20 ONLINE CONFIG".
• The ONLINE CONFIG window will appear.

- Program each item as follows:
• TERMINAL No. (Use the numeric entry) Terminal number (0 to 999999).
• CI SIGNAL (Use the selective entry) Sensing of the CI signal NON SENSING
• LINE FORM (Use the selective entry) Programming of the modem control FULL: Full duplex system HALF: Half duplex system
• BAUD RATE (Use the selective entry) Transmission data rate 38400 bps 19200 bps 9600 bps 4800 bps 2400 bps 1200 bps 600 bps 300 bps
• START CODE (Use the numeric entry) Start code (0 to 127)
• END CODE (Use the numeric entry) End code (0 to 127)
• TIME OUT (Use the numeric entry) Programming of the time-out time (1 to 255 sec.)
Price Mode Programming
The PRICE mode programming is chiefly used for daily changes of the PLU's unit price by supervisor or manager.
Procedure
To program a unit price of the PLU as follows:
- Select "5 PRICE MODE" from the mode selection window. • The PLU list will appear.
- Select any PLU code from the list.
- Program a unit price for the corresponding price level.
- PRICE1 through 7 (use numeric entry) Unit price of each price level (max. 6 digits) By default, only a price for PRICE1 can be entered. If you want to enter a price for PRICE2 through 7, contact your authorized SHARP dealer.
Automatic Sequencing Key Programming
If you program frequently performed key operations for the AUTO keys, you can enter those key operations simply by touching the corresponding AUTO keys in key operations.
![graph TD A["Procedure"] --> B["Select "8 AUTO KEY MODE" from the mode selection window."] B --> C["Select the keyboard from the keyboard list."] C --> D["CLERK0001"] D --> E["AUTO KEY\nPUSH AUTO KEY"] E --> F["CLERK0001"] F --> G["EXIT"] G --> H["CLERK0001"] H --> I["EXIT"] I --> J["01\n02…](/content/2026/06/1310338/images/b7387ef33fc4847af08c7880a941bec4312d55a009eed37442244de94c6de5e5.jpg)
To program an automatic sequencing key as follows:
- Touch a pertinent automatic sequencing key which you want to program.
- Enter the desired sequence to use the automatic sequencing key in the programmed sequence.
700
- Touch the automatic sequencing key again.
- Touch the EXIT to finalize the programming.
Reading of Stored Programs
You can read programs stored in the PGM1 or PGM2 mode.
■ Program reading sequence
To read those programs stored in the PGM1 or PGM2 mode, use the following procedure:
- Select "1 READING" in the PGM1 or PGM2 mode menu window to display the items list.
- Select an item listed in the table shown later.
- If needed, enter starting and ending codes to specify the range of the selected item.
- Select a device ("DISPLAY" or "REPORT PRINTER") to receive the output.
| Item: Description: Available mode: | ||
| 1 DEPT * Department PGM1 or PGM2 | ||
| 2 PLU * PLU PGM1 or PGM2 | ||
| 3 LINK PLU TABLE * Link PLU table PGM2 | ||
| 4 COMBO MEAL Combo meal PGM2 | ||
| 5 CONDIMENT TABLE * Condiment table PGM2 | ||
| 6 PROMOTION TABLE Promotion table | PGM2 | |
| 7 RECIPE TABLE * | Recipe table | PGM2 |
| 8 INGREDIENT * | Ingredient table | PGM1 or PGM2 |
| 9 PLU MENU KEY | PLU menu key | PGM2 |
| 10 SCALE TABLE | Scale table | PGM2 |
| 11 DEPT. SHIFT | Department shift | PGM2 |
| 12 HAPPY HOUR | Happy hour | PGM2 |
| 13 FUNCTION | Function | PGM1 or PGM2 |
| 14 MEDIA | Media key | PGM2 |
| 15 CLERK Clerk | PGM1 or PGM2 | |
| 16 MANAGER | Manager | PGM2 |
| 17 EMPLOYEE * | Employee | PGM2 |
| 18 JOB LOCATE TBL | Job location table | PGM2 |
| 19 OPTIONAL | Optional feature | PGM2 |
| 20 FUNCTION TEXT | Function text | PGM2 |
| 21 FUNCTION KEY | Function key PGM2 | |
| 22 DEPT. GROUP | Department group | PGM2 |
| 23 PLU GROUP | PLU group | PGM2 |
| 24 PLU HOURLY GR | PLU hourly group | PGM2 |
| 25 MESSAGE Message PGM2 | ||
| 26 TAX Tax PGM2 | ||
| 27 DRIVE THRU Drive through code PGM2 | ||
| 28 AUTO KEY Automatic sequencing key PGM2 | ||
| 29 DEVICE CONFIG Device configuration PGM2 | ||
| 30 DIRECT KEY Direct key PGM2 | ||
| 31 DRINK DISPENSER Drink dispenser | PGM2 | |
| 32 ONLINE CONFIG On-line configuration | PGM2 | |
| 33 INLINE CONFIG | In-line configuration | PGM2 |
| 34 ROM VERSION | ROM version PGM2 | |
NOTE
You can read those programmed items marked with “*” by range.


■ Sample printouts • Departments (PGM1 or PGM2 mode)
* When you take this report in the PGM1 mode, the PGM2 indication is replaced by a "PGM1."

- PLUs (PGM1 or PGM2 mode)


- PLUs (continued) • Link PLU table (PGM2 mode)
![15/12/99 [0001] 123456 #1113 15:31 CLERK0001 *PGM2* LINK PLU TABLE #01 P000015 P000016 P000017 P000018 P000019 P000010 P000011 #02 Report type Link PLU table no. Assigned PLU codes](/content/2026/06/1310338/images/2dd23c4f7276076fdff5798180c57ab7f484df2618b41ad9e47a73ce7a9099c4.jpg)
- Combo meal (PGM2 mode)
![15/12/99 [0001] 123456 #115 15:35 CLERK0001 *PGM2* COMBO MEAL #01 — P000001 1.10 P000002 1.25 P000003 2.20 P000004 1.20 P000005 1.75 #02 — P000006 1.00 P000007 2.10 Report type Combo meal no. Assigned PLU codes and prices](/content/2026/06/1310338/images/54257daeeaf66cf8800761481ad9fdbb9ad1d6e72bbe2424c2a450dc8b250e3d.jpg)
- Promotion table (Normal selling) (PGM2 mode)
![15/12/99 [0001] 123456 #1117 15:39 CLERK0001 *PGM2* PROMOTION TABLE #01 VALUE MEAL / 3 #02 1.00 P000010 P000011 P000012 P000020 2.10 P000007 P000008 P000009 Report type Promotion table no. Discount amount Trip level Text](/content/2026/06/1310338/images/1f8b1e2822c505b42d65ad0fd44bc2a02e98f4393573fb5e33a3d6dc1d0514aa.jpg)
• Condiment table (PGM2 mode)
![15/12/99 [0001] 123456 #1123 16:01 CLERK0001 *PGM2* CONDIMENT TABLE #01 —— P000015 P000013 P000017 P000018 Text for #01 #04 #02 —— P000007 P000008 P000009 Text for #02 —— P000002 #04 —— P000003 Text for #04 Message text Report type Condiment table no. Assigned PLU codes Linked condiment table no.](/content/2026/06/1310338/images/5b2b7a419aa71dd51c94b8fbfa97faf0d50cad7696727b92113886854a63b65f.jpg)
- Promotion table (Set selling) (PGM2 mode)
![15/12/99 [0001] 123456 #1120 15:42 CLERK0001 *PGM2* PROMOTION TABLE #01 VALUE MEAL 1.00 / 1 P000010 / 1 P000011 / 2 P000012 / 1 P000020 #02 2.10 / 1 P000007 / 1 P000008 / 2 P000009 Report type Promotion table no. Discount amount Trip level Text](/content/2026/06/1310338/images/ab67d0aad736999d04ac5c5f98f0b49ff25a16465225614ae5c4a377660fe911.jpg)
- Recipe table (PGM2 mode)
![15/12/99 [0001] 123456 #1128 16:07 CLERK0001 *PGM2* RECIPE TABLE #001 Report type Ingredient no. Q'ty Recipe table no. 001 / 1.000 003 / 3.000 014 / 2.000 022 / 5.000](/content/2026/06/1310338/images/3005e13acde8ef1531a118845392e910b18dd8a57039d4188af02e561050a061.jpg)
- Ingredient (PGM1 or PGM2 mode) • Scale table (PGM2 mode)
![15/12/99 [0001] 123456 #1131 16:11 CLERK0001 *PGM2* INGREDIENT Report type Ingredient no. Ingredient descriptor Stock Cost I 001 BREAD 0.35 S 100.000 I 002 EGG 0.10 S 250.000 I 003 TOMATO 0.85 S 50.000 I 004 SOUP 1.00 S 200.000 I 014 0.00 S 0.000 I 022 0.00 S 0.000](/content/2026/06/1310338/images/444c1a43b312c3d9f6dcf011823e94c8936edc6211ded5e5b485490f0569fa88.jpg)
![15/12/99 [0001]123456 #1137 16:16 CLERK0001 *PGM2* SCALE TABLE #1 ———— 0.752 #2 ———— 1.350 #3 ———— 1.235 #4 ———— 0.000 #5 ———— 0.000 #6 ———— 0.000 #7 ———— 0.000 #8 ———— 0.000 #9 ———— 0.000 Report type Scale table no. Tare weight](/content/2026/06/1310338/images/6ccf7223e02a0c2f2c15b998e26b24d37689e06d81c9a4eff9864d72ba3af549.jpg)
• Department shift (PGM2 mode)
![15/12/99 [0001] 123456 #1133 16:13 CLERK0001 *PGM2* DEPT. SHIFT Report type Department code DEPT. SHIFT1 01 DEPT. SHIFT2 02 DEPT. SHIFT3 03 DEPT. SHIFT4 04](/content/2026/06/1310338/images/e35e8abe57ee207443b54769e678427676932d16ef9132b4a996fd0a3a482118.jpg)
- PLU menu key (PGM2 mode)
![15/12/99 [0001] 123456 #1140 16:19 CLERK0001 *PGM2* PLU MENU KEY #01 Report type Menu key no. Menu item P000001 P000002 P000003 P000004 P000005 P000006 P000007 P000008 P000009 P000010 P000011 P000012 P000013 P000014 P000015 P000016 P000017 P000018 P000019 P000020](/content/2026/06/1310338/images/b350c93c133840851c13392ce8e903638e9180aaeefbb27096bfb7a948dcdc18.jpg)
• Happy hour (PGM2 mode)
![15/12/99 [0001] 123456 #1135 16:14 CLERK0001 *PGM2* HAPPY HOUR Report type Time range SFT1 START TIME 7:00 END TIME 9:00 SFT2 START TIME 12:00 END TIME 13:00 SFT3 START TIME 17:00 END TIME 18:00 SFT4 START TIME 0:00 END TIME 0:00 SFT5 START TIME 0:00 END TIME 0:00 SFT6 START TIME 0:00 END TIME 0:00…](/content/2026/06/1310338/images/6dcb96805de652172d70aac25e1aec16639f28ba8b215efa6e5dfc99c0d46a9e.jpg)



- Functions (PGM1 or PGM2 mode) • Media (PGM2 mode)
- Clerk (PGM1 or PGM2 mode) - Employee (PGM2 mode)
![15/12/99 [0001] 123456 #1153 16:49 CLERK0001 *PGM2* EMPLOYEE EMP#0000000003 MEYER CLK#0002 MGR#03 7.5 (1357) L01 L03 L05 L02 Report type Employee code Employee name Standard number of working hours Linked manager code Job location nos. Linked clerk code Secret code](/content/2026/06/1310338/images/aa43f300f744d15e0b0ed254c9296ab6950945a188bf56c8ef62dd372ec4352c.jpg)
- Manager (PGM2 mode) - Job location table (PGM2 mode)
![15/12/99 [0001] 123456 #1150 16:45 CLERK0001 *PGM2* MANAGER Report type Manager code Secret code MGR#01 1234 MGR#02 0780 MGR#03 3300](/content/2026/06/1310338/images/84deeb74468c90970873c5698f9e71fe71dcb2d5422f113e855877e24e4cd9ad.jpg)
![15/12/99 [0001] 123456 #1156 16:51 CLERK0001 *PGM2* JOB LOCATE TBL #01 SA 600.00 CASHIER OT 1.50 #02 SA 750.00 KITCHEN OT 2.00 Report type Job location table no. Text Overtime pay rate Salary pay amount](/content/2026/06/1310338/images/d5594bc163c4b2fce24669d495acd6c283cf7eb8e275c0be8aedc0409115b29d.jpg)

- Optional features (PGM2 mode)


- Optional features (continued) • Function text (PGM2 mode)



- Department group text (PGM2 mode) • PLU hourly group text (PGM2 mode)
![15/12/99 [0001] 123456 #1167 17:44 CLERK0001 *PGM2* DEPT. GROUP GROUP1 GROUP1 GROUP2 GROUP2 GROUP3 GROUP3 GROUP4 GROUP4 GROUP5 GROUP5 GROUP6 GROUP6 GROUP7 GROUP7 GROUP8 GROUP8 GROUP9 GROUP9 Report type Function text (default) Text (preset)](/content/2026/06/1310338/images/11b632e9ee3c190ad114321bf26fe04f26e0a71927aafdd7c0a3bd027df76003.jpg)
![15/12/99 [0001] 123456 #1169 17:45 CLERK0001 *PGM2* PLU HOURLY GR Report type Function text (default) Text (preset) HOUR GR1 HOUR GR1 HOUR GR2 HOUR GR2 HOUR GR3 HOUR GR3 HOUR GR4 HOUR GR4 HOUR GR5 HOUR GR5 HOUR GR6 HOUR GR6 HOUR GR7 HOUR GR7 HOUR GR8 HOUR GR8 HOUR GR9 HOUR GR9](/content/2026/06/1310338/images/21eef69101a8b32603969280b4e08fd5df067ae6fa884e1aa26b8da9908fb8ce.jpg)
- PLU group text (PGM2 mode)
![15/12/99 [0001] 123456 #1168 17:45 CLERK0001 *PGM2* PLU GROUP Report type Function text (default) Text (preset) PLU GR00 PLU GR00 PLU GR01 PLU GR01 PLU GR02 PLU GR02 PLU GR03 PLU GR03 PLU GR96 PLU GR96 PLU GR97 PLU GR97 PLU GR98 PLU GR98 PLU GR99 PLU GR99](/content/2026/06/1310338/images/592a2e5e0d23869e4972ad38588379d7aa1e196cd766a8a3be7d42e76eb22537.jpg)
- Message (PGM2 mode) • Tax rate (PGM2 mode)
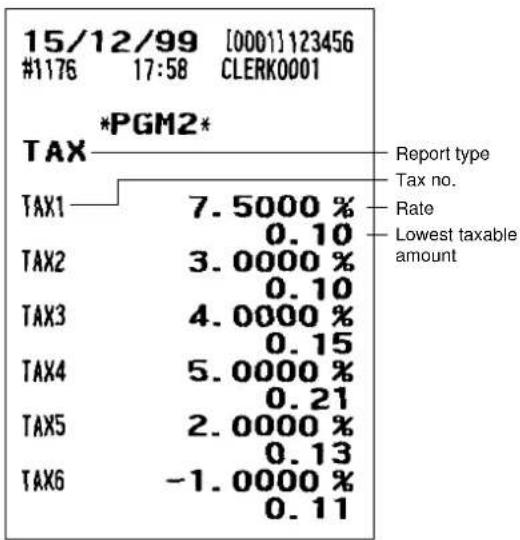
• Function key (PGM2 mode)
- Drive-through code (PGM2 mode)
![15/12/99 [0001] 123456 #1173 17:55 CLERK0001 *PGM2* DRIVE THRU Report type Starting code Ending code 1-99999999 0100](/content/2026/06/1310338/images/3ae5589b558436404973b919c00a23cd38eda79da6c9dcd68f60ac8a61308529.jpg)
![15/12/99 [0001] 123456 #1177 17:58 CLERK0001 *PGM2* FUNCTION KEY 001 HOME BLUE 002 CANCEL LIGHT MAGENTA 003 CLEAR LIGHT MAGENTA 004 MODE LIGHT CYAN Report type Key name Key color 254 WASTE RED 255 NEXT CONDIMENT LIGHT BLUE 256 D-THRU BLUE 257 ENTERTAINMENT YELLOW](/content/2026/06/1310338/images/91a0b74973e678669555c9a243efb27a02f4aba6ee753d0bbe6d8c354d39a6cc.jpg)
- AUTO key (PGM2 mode) • Direct key (PGM2 mode)
![15/12/99 [0001] 123456 #1180 18:07 CLERK0001 *PGM2* AUTO KEY #01 MAIN1 (HOME) P 000001 MAIN1 (HOME) P 000003 MAIN1 (HOME) P 000007 MAIN1 (HOME) PAYMENT TL PAYMENT #02 ---- #24 #25 PGM MODE MODE PGM MODE 1 KEY PGM MODE ENTER](/content/2026/06/1310338/images/4b7388e839137dc3be953f3ca90c23aad4403c33f32dd165e734d92b4402cf63.jpg)
![15/12/99 [0001] 123456 #1186 18:18 CLERK0001 *PGM2* DIRECT KEY Report type MAIN1 (HOME) 001 ---- 002 ---- Key no. 065 L 1 P000021 PLU level L 2 ---- L 3 ---- L 4 ---- L 5 ---- L 6 ---- L 7 ---- L 8 ---- L 9 ---- L10 ---- 021 L 1 P000005 L 2 ---- L 3 ---- L 4 ---- L 5 ---- L 6 ---- L 7 ---- L 8 ----…](/content/2026/06/1310338/images/f2b3aedeeef1a3fb73b15d43aa3b5fa2cacadbef66d9f8abd4fe25fde520259b.jpg)
• Device configuration (PGM2 mode)
![15/12/99 [0001] 123456 #1183 18:12 CLERK0001 *PGM2* DEVICE CONFIG JOURNAL PRINTER SHARP ER-01PU T#000-C#1 NO ONE SHEET T#000-C#1 0/ YES ONE SHEET PRE-PRINT SLIP PRINTER EPSON TM-295 REPORT PRINTER SHARP ER-01PU T#000-C#2 00 99 1 T#000-C#1 YES ONE SHEET KP#1 KP#9 SCALE DRINK DISPENSER ONLINE --- C#6…](/content/2026/06/1310338/images/54ec01ed66e9d57114f7dc9d46488fbc6db9aece79e6252c78f17f90b89026dc.jpg)
- Drink dispenser (PGM2 mode)
![15/12/99 [0001] 123456 #1193 18:25 CLERK0001 DD PRESET VALUE NUMBER DD NO. 1 SEPARATE CODE 000000-000999 CONNECTION ON-LINE PRINT FORMAT PRINT DD OPERATOR CLK#0001 1- 50 CLK#0002 100- 200 LOCAL DD 1 000000-000999 ON-LINE 2 000000-000999 OFF-LINE 3 000000-000999 OFF-LINE 4 000000-000999 OFF-LINE 5 00…](/content/2026/06/1310338/images/1a83008781ac9379f6e8065ca72c6d943113973e1f4fa7489328494cebc5b48d.jpg)
- ROM version (PGM2)
15/12/99 [0001] 123456
1197 18:28 CLERK0001
*PGM2* VERSION
IPL Version
00 UP-3300
PROGRAM Version 27801RAF00 UP-3300 27801RAG00 UP-3300
BLOCK Version 20=00, 21=00, 22=00, 23=00 24=00, 25=00, 26=00, 27=00 28=00, 29=00, 2A=00, 2B=00 2C=00, 2D=00, 2E=00, 2F=00 30=00, 31=00, 32=00, 33=00 34=00, 35=00, 36=00, 37=00 38=00, 39=00, 3A=00, 3B=00 3C=00, 3D=00, 3E=00, 3F=00
Installed SSP
- On-line configuration (PGM2)
| 15/12/99 | [0001] 123456 |
| #1194 18:27 | CLERK0001 |
| *PGM2*ONLINE PRESET | |
| TERMINAL No. | 000001 |
| MODEM CONTROL | 00 |
| BPS | 5 |
| START CODE | 002 |
| END CODE | 013 |
| TIME OUT | 007 |
14 Drink Dispenser
Your POS terminal can be connected with a drink dispenser.
The summary of drink dispenser operations is shown below.
![graph LR A["Drink dispenser UP-3300"] --> B[" "] B --> C["Received data is overwritten to an applicable GLU code."] note1["The data such as GLU codes, clerk codes, sort numbers and so on which are entered at a drink dispenser is sent to the POS terminal."] -.-> B](/content/2026/06/1310338/images/6b13fed0114074ad81c8313775ea721a07a7bf103e07d24ec41da5a375e9d71d.jpg)
When an entry error is found, perform the following steps:
- Check the error by the drink dispenser misoperation file reading or drink dispenser error reading.
Drink dispenser misoperation file reading → REG or MGR mode
Clerk report → OP X/Z or X1/Z1 mode
If there is misoperation data when you take an individual or full clerk X/Z report, the machine waits for selection of one of the following three commands (RETRY, ABORT and IGNORE) through the keyboard.
1 RETRY: attempts to retry the report issuing job. 2 ABORT: cancels the report issuing job. 3 IGNORE: issues the report, disregarding that there is misoperation data. In the case of the Z report, misoperation data is also reset.
Drink dispenser error reading → X1/Z1 mode
- Correct the error with the drink dispenser correction in the REG or MGR mode.
The error which relates to GLU codes can be corrected. However, the error which relates to PLU codes or clerk codes cannot be corrected with the drink dispenser correction.
Procedure to return from Off-line to On-line mode
Case 1:
The drink dispenser was set to Off-line only for a short term and there have been no changes in GLU occupations (same guests at the same table).
The data-buffer of the drink dispenser can be emptied by using the DD reset function (Z1 mode). The POS terminal - drink dispenser line is automatically set to On-line by this function.
Case 2:
The drink dispenser was set to Off-line for a long term. Therefore, the use of the DD reset function is not applicable because GLU occupations have been changed, meanwhile. Empty the drink dispenser data-buffer at the drink dispenser directly and set the POS terminal - drink dispenser line to On-line manually.
■ Drink dispenser misoperation and misoperation file
The error caused by misoperation during drink dispenser sales registration or missetting is recorded in the drink dispenser misoperation file.
■ Causes of drink dispenser misoperation
| Causes Processing Error | message | ||
| For PLU Department | No PLU/department code 2 NO RECORD | ||
| Inhibited PLU code 2 INHIBIT PLU | |||
| Preset price entry is inhibited. 2 ENTRY INHIBIT | |||
| It's combo PLU, link PLU, condiment PLU, promotion PLU, minus PLU, or 2 ENTRY INHIBIT scale compulsory PLU. | |||
| Amount overflow 2 TRANS. OVERFLOW | |||
| For GLU | No GLU code 1 ENTRY ERROR | ||
| GLU code is out of the range. 1 ENTRY ERROR | |||
| Lacking memory of GLU file 1 LACKING MEMORY | |||
| GLU code is assigned to other clerk. 1 NO AUTHORITY | |||
| GLU code is transferred out. 1 NO AUTHORITY | |||
| VIP sale, VIOD mode or Training mode 1 ENTRY ERROR | |||
| For clerk | Clerk code is not defined. 2 UNDEFINE CODE | ||
| Supervisor clerk is inhibited. 2 ENTRY ERROR | |||
| Starting cash memory entry is compulsory. | 2 ENTRY ERROR | ||
| Others | Buffer full | 1 MEMORY FULL | |
| Transaction amount overflow | 1 TRANS. OVERFLOW |
NOTE
Processing 1 or 2 discriminates the processing type explained on the following pages.
■ Description of misoperation
The following two types of misoperation disposal are possible:
Type 1: Misoperation in the case when there is established clerk code which has been defined by the POS terminal based on the clerk code inputted from the drink dispenser and the PLU assigned by using the sort number of drink dispenser sales, but the GLU code is wrong. (The GLU code is out of the range for the clerk or has already been used by another clerk.)
Such a misoperation is recorded in the drink dispenser misoperation file. At this time the following data is updated:
• Totalizer for the associated department • Totalizer for each PLU • Stock counter (if controlled) (Data of pertinent clerk) - Order total • Commission sales amount • Non-commission sales amount
Type 2: Fatal error in the case when the clerk code and PLU code of information (clerk code, sort number) sent from the drink dispenser cannot be identified and the totalizers for clerk or PLUs cannot be updated.
Such an error is recorded in the drink dispenser misoperation file without updating of totalizers. Accordingly, these errors are not registered in the POS terminal. They are recorded only in the drink dispenser misoperation file. These errors cannot be corrected with the correction operation.
These errors are roughly classified into the following two groups:
- Errors which make it impossible to identify the PLU code.
- Errors which make it impossible to identify the clerk code.
The former error is printed out with correction disabled mark when reading the drink dispenser misoperation or reading the drink dispenser misoperation of clerk report. If the clerk code cannot be identified, the error cannot be read by drink dispenser misoperation read operation but read/reset is possible in the X/Z mode. However, if the clerk code corresponding to the clerk code is defined in the POS terminal system after occurrence of error whose clerk code cannot be identified, it cannot be corrected with the correction operation. Accordingly, it is printed out as drink dispenser error read list, being distinguished from the ordinary misoperation read.
■ Misoperation file reading
Each clerk can display out only his/her misoperation data in the misoperation file in the REG or MGR mode.
![graph LR A["MISC FUNCTIONS\n(REG or MGR mode)"] --> B["Select "MOP READ" from the window"] B --> C["ENTER"]](/content/2026/06/1310338/images/6b987b8fc6718c4e0111401a5f859fbd629248d8165b8e437c228fef3501e4f0.jpg)
NOTE
The data of the drink dispenser misoperation file can be printed or displayed out as well in the OP X/Z and X1/Z1 modes.
■ Correction of drink dispenser articles in a drink dispenser misoperation file When a clerk recognizes that a drink dispenser misoperation file has a record, the clerk can correct the drink dispenser operation by selecting of the drink dispenser article on the screen.
Procedure
![graph TD A["(REG or MGR mode)"] --> B["Select "DD CORRECT" from the window."] B --> C["ENTER"] C --> D["GLU code (Destination GLU code)"] D --> E["OPEN THE TABLE"] E --> F["To end"] F --> G["CEL"] G --> H["CEL"] H --> I["FINAL"] I --> J["NBAL"] J --> K["CASHTL or another payment key"] K --…](/content/2026/06/1310338/images/e7ffe12dd169cebe1680b9b0eea1eb6bf3d8641038adfcf374d1b3359ef4c6c0.jpg)
NOTE
- The contents of the first GLU code in the misoperation file are displayed in the left window.
- The picked-up items from the left window are displayed in the right window. These items are stored in the destination GLU code when the key is touched.
- The item which is moved is selected by the cursor ( and ) keys.
- When the key is touched, the cursor is moved to the right window. When the key is touched, the cursor is moved to the left window.
- When the key is touched, the contents of the next GLU code in the misoperation file are displayed.
- When the , , or key or another payment key is touched, the items in the right window are stored in the destination GLU code. And the contents are printed on receipt/journal printer. Then the entry of the next destination GLU code is displayed. If the key is touched at this time, the correction operation is finished.
Function
Subtotal and taxable subtotals of corresponding GLU/PBLU are updated, but in the other totalizers are not updated. (Because they are already updated when misoperation has occurred.)
15 Electronic Journal/Data Clear
■ Electronic journal
This function is intended to record the journal data in the electronic journal file (memory) instead of journal paper. For details, contact your authorized SHARP dealer.
- Recording data
The POS terminal records the printing output to the journal printer in REG, PGM1, PGM2, X1/Z1, and X2/Z2 modes into the electronic journal file.
• Reporting (X report)
The POS terminal reports the journal data (same as normal journal formats) in the electronic journal file by the report printer or the display.
Operation: Select the reading operation "E.JOURNAL" in X1/Z1 mode.
It is possible to take filter functions (consecutive no./date/clerk code).
Consecutive no.: ALL or RANGE (designate start no./end no.)
Date: ALL or RANGE (designate start date/end date)
Clerk code: ALL or INDIVIDUAL (designate clerk code)
- Resetting (Z report)
It is possible to take the resetting report of the journal data (same as normal journal formats) in the electronic journal file by the report printer.
Operation: Select the resetting operation "E.JOURNAL" in X1/Z1 mode.
The filter function (consecutive no./date/clerk code) cannot be used (always "ALL").
■ Data clear
Use the following procedure to perform the data clear operation.
Procedure

- In the PGM2 MODE window, select "3 DATA CLEAR".
• The DATA CLEAR window will appear.
- Select the pertinent operation.
16 EURO Migration Function
Basically your POS terminal can be automatically modified to correspond to the introduction of EURO by executing the operation "EURO STATUS" in X2/Z2 mode. However, there are several options you must set depending on your need. So, please carefully conduct necessary settings. For details, contact your authorized SHARP dealer.
EURO status:
You can select status from following 4 types ((A), (B), (C), or (D)). And the selectable type is decided as follows for each status. Type (A) is the base status (initial status).
From type (A) ____ selectable —Type (B), (C), or (D)
From type (B) —— selectable —Type(C), (D)
From type (C) ____ selectable —Type(D)
| Items Type (B) Type (C) Type (D) | |||
| General Z1 report ISSUE ISSUE ISSUE | |||
| General Z2 report ISSUE ISSUE ISSUE | |||
| GT1/GT2/GT3 memory — CLEAR CLEAR | |||
| Exchange1 amount printing for total and change YES | YES NO | ||
| Exchange1 amount printing for total validation print | YES YES NO | ||
| Exchange1 calculation method DIVISION | MULTI MULTI | ||
| Domestic currency symbol | — | [EURO] [EURO] | |
| Domestic TAB | — | 2 | 2 |
| Exchange1 currency descriptor | [EURO] | The current domestic currency symbol | — |
| Exchanger1 TAB | 2 | The current domestic TAB | — |
The marked items "—" are remaining the current data.
Procedure
Select X2/Z2 mode 6-EURO STATUS → LIST → Select B, C, or D → ENTER
NOTE
It is executed some of following jobs which is needed for each status.
(1) Issue general Z1 report. (2) Issue general Z2 report. (3) Clear GT1/GT2/GT3. (4) Change PGM function "Total and change amount printing — With foreign/Domestic only". (5) Change PGM function "Exchange1 amount printing for total validation print — YES/NO" and "Total validation print amount printing — With foreign/Domestic only". (6) Change PGM function "Exchange1 calculation method — Division/Multiplication". (7) Set "Domestic currency symbol" as EURO symbol. (8) Set "Domestic TAB" as 2. (9) Set "Exchange1 currency descriptor" as the suitable data. (10) Set "Exchange1 TAB as the suitable
NOTE
This job cannot set below additional EURO function. Below items must be set by each PGM job after this job.
(1) Exchange1 rate, (2) "Check, Credit operation for Exchange1 — YES/NO"
17 Operator Maintenance
Replacing the Backup Battery Pack
The memory backup battery pack has an expected life of approximately three years under normal conditions (temperature extremes can shorten the life of the battery). Replace the memory backup battery pack every three years.
The battery pack is not available on the market, so please contact your dealer and ask him or her for replacement when you need a new one. Be sure to use a battery pack specified by SHARP.
Use of other battery packs could damage your POS terminal.
Caution: When you replace the battery pack, keep the POS terminal turned on. If you replace the battery pack with the power switch off, all the data in memory will be lost.
- Remove the screw in front of the battery compartment cover located at the bottom of the terminal and slide the cover in the direction of the arrow to detach it.
Battery compartment cover

- Take out the battery pack.

- Disconnect the connector.


- Connect the connector of a new battery pack.

- Install the pack, placing the wires in the slit as shown in the figure at right.

- Replace the battery compartment cover, and tighten the screw removed earlier in step 1.

In Case of Power Failure
When power is lost, the POS terminal retains its memory contents and all information on sales entries.
- When power failure is encountered in POS terminal idle state or during an entry, the POS terminal returns to the normal state of operation after power recovery.
Before Calling for Service
The malfunctions shown in the left-hand column below, labeled "Fault," do not necessarily indicate functional faults of the machine. It is therefore advisable to refer to the "Checking" shown in the right-hand column before calling for service.
| Fault Checking | |
| • The display does not illuminate. • Is power supplied | to the electric outlet?• Is the power cord plug out or loosely connected to the electrical outlet?• Is the power switch in the “ON” position?• Are the brightness control and the contrast control adjusted correctly?• Is the terminal in screen-save mode? |
| • The display is illuminated, but the whole • See the machine refuses entries. | printer manual. |
| • No receipt is issued. • See the printer manual. | |
| • No journal paper is taken up. | |
| • Printing is unusual. |
18 Options
List of Options
For your UP-3300 POS terminal, the following options are available:
For details, contact your authorized SHARP dealer. Do not try to install any options yourself.
- RAM memory board model UP-P02MB2
- External printer model ER-01PU
- Remote printer model ER-03RP or ER-04RP
- Slip printer model ER-FBP40
- Remote drawer model ER-03DW or ER-04DW or ER-05DW
- Remote coin case model ER-48CC3, ER-48CC2 or ER-58CC
- Remote coin case cover model ER-02CV1-5, 01CV1-5 or ER-03CV
- Magnetic card reader model UP-E12MR2
- Built-in printer model UP-T80BP
- Remote display model UP-P16DP (Pole type)
- EFT terminal I/F model ER-02EF
- Two-port RS-232 interface model ER-A7RS
19 Specifications
| Model: UP-3300 |
| External dimensions: 295(W) x 414.5(D) x 320(H) mm |
| Weight: 6.5 kg |
| Power source: Official (nominal) voltage and frequency |
| Power consumption: Stand-by: 42WOperating: 59W (max.) |
| Working temperatures: 0 to 40 °C |
| Electronics: LSI (CPU) etc. |
| Built-in battery: Rechargeable battery pack, memory holding time of about 1 month (with fully charged built-in battery pack, at room temperature) |
| Display: Operator display: Color LCD module and Touch panel 640(W) x 480(H)(dots) |
| Accessories: Instruction manual 1 copyInstruction manual for inline system 1 copyClerk keys (for 6 clerks) 12 (2 keys for each clerk)Ferrite cores 2 |
* Specifications and appearance subject to change without notice for improvement.

- IMPORTANT
- PRECAUTION
- CONTENTS
- PART NAMES AND FUNCTIONS
- EXTERNAL VIEW
- DISPLAY
- OPERATOR DISPLAY (TOUCH PANEL)
- SCREEN SAVE MODE
- CLERK KEYS
- BEFORE OPERATING THE POS TERMINAL
- DISPLAY ADJUSTMENT
- ↑ BRIGHTNESS CONTROL
- ↑ CONTRAST CONTROL
- CONNECTING THE PRINTER AND INSTALLING THE PAPER ROLLS
- SELECTING AN OPERATING MODE
- OPERATING MODES
- MODE SELECTION
- SELECTING A MODE
- RETURNING TO THE MODE SELECTION WINDOW
- RECEIPTS
- TYPE OF RECEIPTS
- ADDITION RECEIPT TYPE
- ADDITION WITHOUT PAYMENT RECEIPT TYPE
- SINGLE/DOUBLE RECEIPT TYPE
- SINGLE/DOUBLE + ADDITION RECEIPT TYPE
- ADDITION + SINGLE RECEIPT TYPE
- DOUBLE ADDITION RECEIPT TYPE
- DOUBLE (ADDITION + SINGLE) RECEIPT TYPE
- SORTED RECEIPT FUNCTION
- NOTE
- EXAMPLE
- PRIOR TO ENTRIES
- PREPARATIONS FOR ENTRIES
- ERROR WARNING
- SAMPLE RECEIPT
- ENTRIES
- FUNCTION KEY DESCRIPTION
- TOUCH-PANEL KEYBOARD
- MAIN-1 (HOME) KEYBOARD
- MAIN-2 KEYBOARD
- MAIN-3 KEYBOARD
- CONDIMENT-1 KEYBOARD
- CONDIMENT-2 KEYBOARD
- CONDIMENT-3 KEYBOARD
- MENU-1/MENU-2/MENU-3 KEYBOARD
- FUNCTION MENU 3 (MGR FUNCTION) KEYBOARD
- BILL SEPARATE/BILL TOTAL KEYBOARD
- FUNCTION MENU 4 (TEXT1) KEYBOARD
- FUNCTION MENU 5 (TEXT2) KEYBOARD
- PGM COMMAND KEYBOARD
- X/Z COMMAND KEYBOARD
- PAYMENT MENU (PAYMENT) KEYBOARD
- PGM MODE KEYBOARD
- X/Z MODE KEYBOARD
- DRIVE THRU (D-THRU) KEYBOARD
- CHARACTER KEYBOARD
- HOW TO USE THE TOUCH PANEL
- CURSOR CONTROL BY TOUCHING OPTION(S) OR ITEM(S) IN THE WINDOW
- IN THE PGM/XZ MODE
- CLERK ASSIGNMENT
- REAL CLERK KEY SYSTEM (FACTORY-SET)
- CLERK CODE ENTRY SYSTEM
- PROCEDURE
- CLERK ENTRY KEY SYSTEM
- ④ WMF CLERK KEY SYSTEM
- ITEM SELECTION FROM THE MENU WINDOW
- ↑ MISCELLANEOUS MENU WINDOW
- STARTING CASH MEMORY ENTRY
- ITEM ENTRIES
- SINGLE ITEM ENTRIES
- KEY OPERATION
- REPEAT ENTRIES
- MULTIPLICATION ENTRIES
- SPLIT-PRICING ENTRIES
- SINGLE ITEM CASH SALE (SICS)/SINGLE ITEM FINALIZE (SIF) ENTRIES
- SICS ENTRIES
- SIF ENTRIES
- SCALE ENTRIES
- NON-TURNOVER SALES
- SPECIAL ENTRIES FOR PLUS
- PROMOTION (NORMAL SELLING) FUNCTION
- PROMOTION (SET SELLING) FUNCTION
- LINK PLU ENTRIES
- COMBO MEAL ENTRIES
- WITH/WITHOUT ENTRIES
- PLU LEVEL SHIFT (FOR DIRECT PLUS)
- PLU PRICE LEVEL SHIFT
- LOCK SHIFT MODE (FOR PRICE SHIFTS)
- CONDIMENT ENTRIES
- HAPPY HOUR
- SHIFT BY PRICE LEVEL SHIFT KEY
- SHIFT BY CLERK
- DEPARTMENT SHIFT
- PINT ENTRIES
- DISPLAY OF SUBTOTALS
- SUBTOTAL
- DIFFERENCE SUBTOTAL (DIFFER ST)
- FINALIZATION OF TRANSACTION
- CASH OR CHECK TENDERING
- CREDIT SALE
- MIXED-TENDER SALE (CASH OR CHECK TENDERING + CREDIT TENDERING)
- COMPUTATION OF VAT (VALUE ADDED TAX)/TAX
- VAT/TAX SYSTEM
- AUTOMATIC VAT 1 THROUGH 3 AND TAX 4 THROUGH 6 SYSTEM
- VAT SHIFT ENTRIES
- GUEST CHECK (GLU/PBLU)
- GLU/PBLU SYSTEM
- DRIVE-THROUGH FUNCTION
- DEPOSIT ENTRIES
- TRANSFERRING GUEST CHECKS OUT OR IN (TRANSFER-IN/OUT)
- BILL PRINTING
- INTERMEDIATE GLU READING (ONLY FOR GLU SYSTEM)
- BILL TOTALIZING/BILL TRANSFER
- BILL TOTALIZING
- BILL SEPARATING
- TRANSACTION MIGRATION
- AUXILIARY ENTRIES
- PERCENT CALCULATIONS (PREMIUM OR DISCOUNT)
- DISCOUNT ENTRIES
- REFUND ENTRIES
- RETURN ENTRIES
- PRINTING OF NON-ADD CODE NUMBERS
- PRINTING OF FREE TEXT
- ENTERTAINMENT BILL
- PRINT SAMPLE
- YOUR RECEIPT THANK YOU
- CLERK
- PAYMENT TREATMENT
- TIP-IN ENTRIES
- CURRENCY EXCHANGE
- CASE OF OPENING FOREIGN CURRENCY DRAWER
- RECEIVED-ON-ACCOUNT ENTRIES
- PAID-OUT ENTRIES
- NO-SALE (EXCHANGE)
- TRANSFERRING CASH
- CASHING A CHECK
- SERVICE CHARGE
- VIP SALES
- WASTE MODE
- EMPLOYEE FUNCTION
- CLERK/MANAGER SIGN-ON
- EMPLOYEE'S WORKING TIME RECORDING
- TRAINING MODE
- SUPERVISOR CLERK
- OVERLAPPED CLERK ENTRY
- CORRECTION
- CORRECTION OF THE LAST ENTRY (DIRECT VOID)
- CORRECTION OF THE NEXT-TO-LAST OR EARLIER ENTRIES (INDIRECT VOID)
- SUBTOTAL VOID
- CORRECTION OF INCORRECT ENTRIES NOT HANDLED BY THE DIRECT, INDIRECT OR SUBTOTAL VOID FUNCTION
- SPECIAL PRINTING FUNCTION
- COPY RECEIPT PRINTING
- GUEST CHECK COPY
- VALIDATION PRINTING FUNCTION
- MANAGER MODE
- ENTERING THE MANAGER MODE
- OVERRIDE ENTRIES
- TIP PAID ENTRIES
- BILL RECORDING/BILL VOID
- PRINT ON THE JOURNAL
- CORRECTION AFTER FINALIZING A TRANSACTION
- MGR MODE
- READING (X) AND RESETTING (Z)
- OF SALES TOTALS
- HOW TO TAKE A X1/Z1 OR X2/Z2 REPORT
- DAILY SALES TOTALS
- PLU REPORT BY DESIGNATED RANGE
- GLU/PBLU REPORT
- GLU/PBLU REPORT BY CLERK
- DRIVE-THROUGH REPORT
- PERIODIC CONSOLIDATION
- GENERAL INFORMATION
- X2/Z2 STACKED REPORT
- COMPULSORY CASH/CHECK DECLARATION
- TYPES OF COMPULSORY CASH/CHECK DECLARATION
- HOW TO USE THE PROGRAMMING KEYBOARD
- PROGRAMMING KEYBOARD LAYOUT
- HOW TO PROGRAM ALPHANUMERIC CHARACTERS
- USING CHARACTER KEYS ON THE KEYBOARD
- ENTERING CHARACTER CODES
- BASIC INSTRUCTIONS
- PROGRAMMING EXAMPLE
- SELECT "01" TO PROGRAM FOR DEPARTMENT
- ON THE FIRST PAGE OF THE "01" WINDOW, PROGRAM THE UNIT PRICE AND DESCRIPTION AS FOLLOWS
- ON THE FIRST PAGE OF THE "01" WINDOW, PROGRAM THE MACHINE TO ENABLE THE SCALE ENTRY AS FOLLOWS
- SELECT ONE OF THE FOLLOWING ACTIONS
- ARTICLE PROGRAMMING
- ARTICLE
- DEPARTMENT
- DEPARTMENT (CONTINUED)
- PLU
- PLU (CONTINUED)
- PLU RANGE
- PLU STOCK
- INGREDIENT
- INGREDIENT STOCK
- PLU MENU KEY
- COMBO MEAL (COMBO PLU)
- LINK PLU TABLE
- CONDIMENT TABLE
- PROMOTION TABLE (NORMAL SELLING)
- PROMOTION TABLE (SET SELLING)
- RECIPE TABLE
- SCALE TABLE
- DIRECT KEY PROGRAMMING
- DIRECT PLU/DEPT. KEY
- FUNCTIONAL PROGRAMMING
- DISCOUNT KEY (THROUGH)
- PERCENT KEY (THROUGH)
- COMMISSION
- TIP
- DEPOSIT
- RA
- PO
- MEDIA KEY PROGRAMMING
- MEDIA
- CASH KEY
- CHECK KEY (THROUGH)
- CREDIT KEY (THROUGH)
- HOTEL TRANSFER KEY
- CASH IN DRAWER
- CHECK CHANGE
- CHECK CASHING
- CURRENCY PROGRAMMING
- CURRENCY EXCHANGE KEY (THROUGH)
- FOREIGN DRAWER
- TEXT PROGRAMMING
- TEXT
- FUNCTION TEXT
- DEPARTMENT GROUP TEXT
- PLU GROUP TEXT
- PLU HOURLY GROUP TEXT
- PERSONNEL PROGRAMMING
- PERSONNEL
- CLERK (CONTINUED)
- MANAGER
- EMPLOYEE
- JOB LOCATION TABLE
- TERMINAL PROGRAMMING
- DATE/TIME SETTING
- DATE/TIME
- OPTIONAL FEATURE SELECTION
- OPTIONAL
- FUNCTION PROHIBITION
- FUNCTION SELECTION
- FUNCTION SELECTION (CONTINUED)
- PRINTING SELECTION
- PRINTING SELECTION (CONTINUED)
- REPORT PROGRAMMING
- ZERO SKIP
- GENERAL REPORT FORMAT
- HOURLY REPORT
- STACKED REPORT
- STACKED REPORT (CONTINUED)
- MESSAGE PROGRAMMING
- MESSAGE
- RECEIPT LOGO
- FREE TEXT
- VALIDATION PRINTING TEXT
- SLIP TEXT
- SLIP FOOTER
- ENTERTAINMENT BILL MESSAGE
- PAYEE NAME
- FUNCTION KEY PROGRAMMING
- DEVICE CONFIGURATION PROGRAMMING
- JOURNAL PRINTER
- RECEIPT PRINTER
- RECEIPT PRINTER (CONTINUED)
- NOTE WHEN "ER-03RP" IS CONNECTED, SELECT "NO
- NOTE THIS OPTION IS AVAILABLE WHEN THE "TM-300" IS SELECTED
- SLIP PRINTER
- SLIP PRINTER (CONTINUED)
- REPORT PRINTER
- REMOTE PRINTER (KP#1 THROUGH KP#9)
- REMOTE PRINTER (CONTINUED)
- SCALE/DRINK DISPENSER/ON-LINE
- DRIVE-THROUGH CODE PROGRAMMING
- DRIVE-THROUGH CODE
- TAX PROGRAMMING
- IR DATA SEND PROGRAMMING
- IR DATA SEND
- IR DATA RECEIVE PROGRAMMING
- IR DATA RECEIVE
- DRINK DISPENSER PROGRAMMING
- DRINK DISPENSER PRESET
- DRINK DISPENSER OPERATOR
- DOWNLOADING
- ON-LINE CONFIGURATION PROGRAMMING
- PRICE MODE PROGRAMMING
- AUTOMATIC SEQUENCING KEY PROGRAMMING
- READING OF STORED PROGRAMS
- PROGRAM READING SEQUENCE
- DRINK DISPENSER
- WHEN AN ENTRY ERROR IS FOUND, PERFORM THE FOLLOWING STEPS
- PROCEDURE TO RETURN FROM OFF-LINE TO ON-LINE MODE
- CASE
- DRINK DISPENSER MISOPERATION AND MISOPERATION FILE
- CAUSES OF DRINK DISPENSER MISOPERATION
- DESCRIPTION OF MISOPERATION
- MISOPERATION FILE READING
- FUNCTION
- ELECTRONIC JOURNAL/DATA CLEAR
- ELECTRONIC JOURNAL
- RECORDING DATA
- REPORTING (X REPORT)
- RESETTING (Z REPORT)
- DATA CLEAR
- EURO MIGRATION FUNCTION
- EURO STATUS
- OPERATOR MAINTENANCE
- REPLACING THE BACKUP BATTERY PACK
- IN CASE OF POWER FAILURE
- BEFORE CALLING FOR SERVICE
- OPTIONS
- LIST OF OPTIONS
- SPECIFICATIONS
Brand : SHARP
Model : UP-3300
Category : Cash register