
GR-20 - Synthesizer ROLAND - Free user manual and instructions
Find the device manual for free GR-20 ROLAND in PDF.


User questions about GR-20 ROLAND
0 question about this device. Answer the ones you know or ask your own.
Ask a new question about this device
Download the instructions for your Synthesizer in PDF format for free! Find your manual GR-20 - ROLAND and take your electronic device back in hand. On this page are published all the documents necessary for the use of your device. GR-20 by ROLAND.
USER MANUAL GR-20 ROLAND
Before using this unit, carefully read the sections entitled: "USING THE UNIT SAFELY" and "IMPORTANT NOTES" (p. 2-3, p. 4). These sections provide important information concerning the proper operation of the unit. Additionally, in order to feel assured that you have gained a good grasp of every feature provided by your new unit, Owner's manual should be read in its entirety. The manual should be saved and kept on hand as a convenient reference.
USING THE UNIT SAFELY
INSTRUCTIONS FOR THE PREVENTION OF FIRE, ELECTRIC SHOCK, OR INJURY TO PERSONS
About WARNING and CAUTION Notices
| ▲WARNING | Used for instructions intended to alert the user to the risk of death or severe injury should the unit be used improperly. |
| ▲CAUTION | Used for instructions intended to alert the user to the risk of injury or material damage should the unit be used improperly. * Material damage refers to damage or other adverse effects caused with respect to the home and all its furnishings, as well to domestic animals or pets. |
About the Symbols
| ▲ | The △ symbol alerts the user to important instructions or warnings. The specific meaning of the symbol is determined by the design contained within the triangle. In the case of the symbol at left, it is used for general cautions, warnings, or alerts to danger. |
| ◎ | The ⊙ symbol alerts the user to items that must never be carried out (are forbidden). The specific thing that must not be done is indicated by the design contained within the circle. In the case of the symbol at left, it means that the unit must never be disassembled. |
| ◆ | The ● symbol alerts the user to things that must be carried out. The specific thing that must be done is indicated by the design contained within the circle. In the case of the symbol at left, it means that the power-cord plug must be unplugged from the outlet. |
ALWAYS OBSERVE THE FOLLOWING
WARNING
- Before using this unit, make sure to read the instructions below, and the Owner's Manual.

- Do not open (or modify in any way) the unit or its AC adaptor.

- Do not attempt to repair the unit, or replace parts within it (except when this manual provides specific instructions directing you to do so). Refer all servicing to your retailer, the nearest Roland Service Center, or an authorized Roland distributor, as listed on the "Information" page.

-
Never use or store the unit in places that are:
-
Subject to temperature extremes (e.g., direct sunlight in an enclosed vehicle, near a heating duct, on top of heat-generating equipment); or are
- Damp (e.g., baths, washrooms, on wet floors); or are
- Humid; or are
- Exposed to rain; or are
- Dusty; or are
-
Subject to high levels of vibration.
-
Make sure you always have the unit placed so it is level and sure to remain stable. Never place it on stands that could wobble, or on inclined surfaces.

- Be sure to use only the AC adaptor supplied with the unit. Also, make sure the line voltage at the installation matches the input voltage specified on the AC adaptor's body. Other AC adaptors may use a different polarity, or be designed for a different voltage, so their use could result in damage, malfunction, or electric shock.


WARNING
- Do not excessively twist or bend the power cord, nor place heavy objects on it. Doing so can damage the cord, producing severed elements and short circuits. Damaged cords are fire and shock hazards!

- This unit, either alone or in combination with an amplifier and headphones or speakers, may be capable of producing sound levels that could cause permanent hearing loss. Do not operate for a long period of time at a high volume level, or at a level that is uncomfortable. If you experience any hearing loss or ringing in the ears, you should immediately stop using the unit, and consult an audiologist.

- Do not allow any objects (e.g., flammable material, coins, pins); or liquids of any kind (water, soft drinks, etc.) to penetrate the unit.


- Immediately turn the power off, remove the AC adaptor from the outlet, and request servicing by your retailer, the nearest Roland Service Center, or an authorized Roland distributor, as listed on the "Information" page when:

- The AC adaptor, the power-supply cord, or the plug has been damaged; or
- If smoke or unusual odor occurs
- Objects have fallen into, or liquid has been spilled onto the unit; or
- The unit has been exposed to rain (or otherwise has become wet); or
- The unit does not appear to operate normally or exhibits a marked change in performance.
WARNING
- In households with small children, an adult should provide supervision until the child is capable of following all the rules essential for the safe operation of the unit.

- Protect the unit from strong impact. (Do not drop it!)

- Do not force the unit's power-supply cord to share an outlet with an unreasonable number of other devices. Be especially careful when using extension cords—the total power used by all devices you have connected to the extension cord's outlet must never exceed the power rating (watts/amperes) for the extension cord. Excessive loads can cause the insulation on the cord to heat up and eventually melt through.

- Before using the unit in a foreign country, consult with your retailer, the nearest Roland Service Center, or an authorized Roland distributor, as listed on the "Information" page.

CAUTION
- The unit and the AC adaptor should be located so their location or position does not interfere with their proper ventilation.

- Always grasp only the plug on the AC adaptor cord when plugging into, or unplugging from, an outlet or this unit.

- At regular intervals, you should unplug the AC adaptor and clean it by using a dry cloth to wipe all dust and other accumulations away from its prongs. Also, disconnect the power plug from the power outlet whenever the unit is to remain unused for an extended period of time. Any accumulation of dust between the power plug and the power outlet can result in poor insulation and lead to fire.

- Try to prevent cords and cables from becoming entangled. Also, all cords and cables should be placed so they are out of the reach of children.

- Never climb on top of, nor place heavy objects on the unit.

- Never handle the AC adaptor or its plugs with wet hands when plugging into, or unplugging from, an outlet or this unit.

- Before moving the unit, disconnect the AC adaptor and all cords coming from external devices.

- Before cleaning the unit, turn off the power and unplug the AC adaptor from the outlet (p. 10).

- Whenever you suspect the possibility of lightning in your area, disconnect the AC adaptor from the outlet.

IMPORTANT NOTES
In addition to the items listed under "USING THE UNIT SAFELY" on page 2-3, please read and observe the following:
Power Supply
- Do not use this unit on the same power circuit with any device that will generate line noise (such as an electric motor or variable lighting system).
- The AC adaptor will begin to generate heat after long hours of consecutive use. This is normal, and is not a cause for concern.
- Before connecting this unit to other devices, turn off the power to all units. This will help prevent malfunctions and/or damage to speakers or other devices.
Placement
- Using the unit near power amplifiers (or other equipment containing large power transformers) may induce hum. To alleviate the problem, change the orientation of this unit; or move it farther away from the source of interference.
- This device may interfere with radio and television reception. Do not use this device in the vicinity of such receivers.
- Noise may be produced if wireless communications devices, such as cell phones, are operated in the vicinity of this unit. Such noise could occur when receiving or initiating a call, or while conversing. Should you experience such problems, you should relocate such wireless devices so they are at a greater distance from this unit, or switch them off.
- Do not expose the unit to direct sunlight, place it near devices that radiate heat, leave it inside an enclosed vehicle, or otherwise subject it to temperature extremes. Excessive heat can deform or discolor the unit.
- When moved from one location to another where the temperature and/or humidity is very different, water droplets (condensation) may form inside the unit. Damage or malfunction may result if you attempt to use the unit in this condition. Therefore, before using the unit, you must allow it to stand for several hours, until the condensation has completely evaporated.
Maintenance
- For everyday cleaning wipe the unit with a soft, dry cloth or one that has been slightly dampened with water. To remove stubborn dirt, use a cloth impregnated with a mild, non-abrasive detergent. Afterwards, be sure to wipe the unit thoroughly with a soft, dry cloth.
- Never use benzine, thinners, alcohol or solvents of any kind, to avoid the possibility of discoloration and/or deformation.
Repairs and Data
- Please be aware that all data contained in the unit's memory may be lost when the unit is sent for repairs. Important data should always be backed up in another MIDI device (e.g., a sequencer), or written down on paper (when possible). During repairs, due care is taken to avoid the loss of data. However, in certain cases (such as when circuitry related to memory itself is out of order), we regret that it may not be possible to restore the data, and Roland assumes no liability concerning such loss of data.
Additional Precautions
- Please be aware that the contents of memory can be irretrievably lost as a result of a malfunction, or the improper operation of the unit. To protect yourself against the risk of losing important data, we recommend that you periodically save a backup copy of important data you have stored in the unit's memory in another MIDI device (e.g., a sequencer).
- Unfortunately, it may be impossible to restore the contents of data that was stored in another MIDI device (e.g., a sequencer) once it has been lost. Roland Corporation assumes no liability concerning such loss of data.
- Use a reasonable amount of care when using the unit's buttons, sliders, or other controls; and when using its jacks and connectors. Rough handling can lead to malfunctions
- When connecting / disconnecting all cables, grasp the connector itself—never pull on the cable. This way you will avoid causing shorts, or damage to the cable's internal elements.
- To avoid disturbing your neighbors, try to keep the unit's volume at reasonable levels. You may prefer to use headphones, so you do not need to be concerned about those around you (especially when it is late at night).
- When you need to transport the unit, package it in the box (including padding) that it came in, if possible. Otherwise, you will need to use equivalent packaging materials.
-
Use a cable from Roland to make the connection. If using some other make of connection cable, please note the following precautions.
-
Some connection cables contain resistors. Do not use cables that incorporate resistors for connecting to this unit. The use of such cables can cause the sound level to be extremely low, or impossible to hear. For information on cable specifications, contact the manufacturer of the cable.
-
All product names mentioned in this document are trademarks or registered trademarks of their respective owners.
Introduction
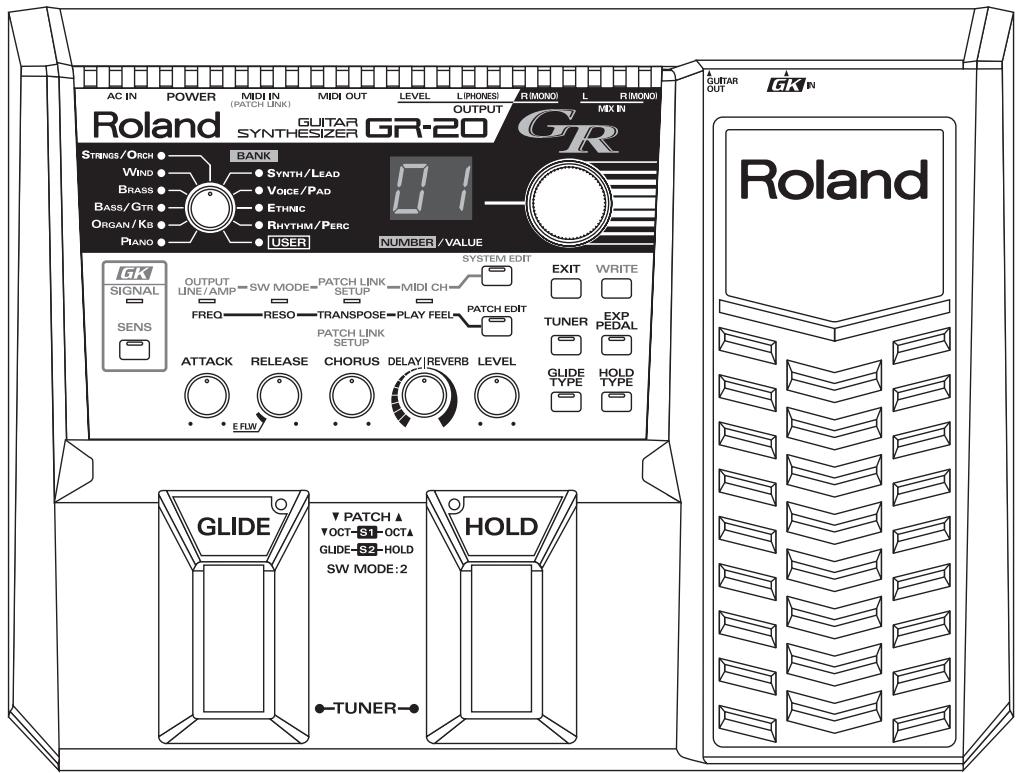
The GR-20 is a guitar synthesizer (guitar synth) which contains a high-quality sound generator and is designed for easy operation.
The GR-20 carefully analyses the pitch and volume of each string as it tracks the signals being output by the divided pickup (a pickup installed on your guitar which outputs a separate signal for each string), and uses this information to trigger its built-in sound generator. At the same time, a data stream interpreting your guitar performance can also be transmitted via the MIDI OUT connector, and used to play an external MIDI device, such as a sound module.
Main Features
- You can play more than 450 different types of synth sounds in the same way as when playing your guitar conventionally.
- In addition to playing the synth sounds by themselves, you can combine the normal guitar sound with the synth sound.
- When applying an external effects unit to the normal guitar sound, you can use the Mix In jack to mix the processed sound with the synth sound.
- The GR-20 can be used with any steel-string guitar on which a GK-3 or GK-2A (divided pickup; sold separately) can be correctly installed.
- The GR-20 can also be used with a bass guitar on which a GK-3B or GK-2B (divided pickup for bass guitar; sold separately) is installed.
- Built-in effects (reverb, delay, chorus) are provided for the synth sound, creating a rich and spacious ambiance. (p. 20)
- You can adjust and store settings such as attack and decay time, and effect depth. (p. 20)
- You can use the GR-20's two foot pedals to apply a Hold effect or Glide effect. (p. 15)
- Use the built-in expression pedal to control parameters such as volume or filter. (p. 16)
- Since your guitar performance is output as MIDI data, you can use your guitar to play an external sound module or as an input device for your MIDI sequencer. (p. 28)
- A guitar tuner is built-in for quick and accurate tuning. (p. 13)
Contents
USING THE UNIT SAFELY 2
IMPORTANT NOTES 4
Introduction 5
Main Features. 5
Names of Things and What They Do. 8
Front Panel. 8
Rear Panel. 10
Chapter 1 Play the Sounds! 11
Preparing Your Guitar 11
Connections 11
Turning the Power On 12
Adjusting the Output Level 12
Adjusting the Input Sensitivity (GK SENS) 12
Tuning Your Guitar (Tuner Function) 13
Specifying the Output Device (OUTPUT SELECT) 14
Selecting a Sound (Patch) 14
Using the Knob to Select Patches 14
Using the Switches of the GK Pickup to Select Patches 15
Using the Foot Pedals to Select Patches 15
Using an External Device Via MIDI to Select Patches 15
Play the GR-20! 15
Using the Foot Pedal to Change the Pitch (GLIDE) 15
Using the Foot Pedal to Sustain the Sound (HOLD) 16
Using the Expression Pedal to Modify the Sound (EXP PEDAL) 16
Turning the Power Off 16
Chapter 2 Using the GR-20 with Guitar Effects. 17
Connections 17
Switching between the Synth Sound and Guitar Sound 18
Using the GR-20 with a Multi-effects Unit 18
Channel (CH) 18
Patch Link Setup (PATCH LINK SETUP) 19
Chapter 3 Editing The Sounds. 20
Selecting a Sound to Start From 20
Use the Knobs to Adjust the Sound 20
Adjusting the Attack-ATTACK 20
Adjusting the Release-RELEASE 20
Adjusting the Spaciousness of the Sound—CHORUS 20
Adjusting the Reverberation—DELAY/REVERB 20
Adjusting the Volume—LEVEL 20
Editing Other Parameters 21
Adjusting the Brightness of the Sound—FREQ. 21
Adding a Distinctive Character to the Tone—RESO 21
Adjusting the Pitch-TRANSPOSE 21
Adjusting the Playing Feel—PLAY FEEL 21
Selecting the Type of Glide Effect—GLIDE TYPE 22
Selecting the Type of Hold Effect—HOLD TYPE 23
Selecting the Effect Controlled by the Expression Pedal—EXP PEDAL 23
Storing the Sounds You Create (WRITE) 24
Chapter 4 Other Functions. 25
Copying Patches 25
Exchanging Patches 25
Changing the function of the foot pedals (SW MODE) 26
Switch Mode 1 26
Switch Mode 2 26
Saving Patches and System Parameter Settings on an External Device (BULK DUMP) 26
Loading Patches and System Parameter Settings From an External Device (BULK LOAD) 27
Chapter 5 Connecting an External Sound Module or Sequencer............28
Connecting an External Sound Module or Sequencer 28
Setting the Transmission Mode 28
Setting the MIDI Channel (BASIC CHANNEL) 29
Specifying the Bend Range 29
MIDI Messages Transmitted by the GR-20 29
Local Control Off 30
Chapter 6 Appendices 31
Restoring the Factory Settings (Factory Reset) 31
Calibrating the Expression Pedal 31
Regarding GR-20 bass guitar support 32
Switching the GR-20 between bass guitar and guitar operation 32
How the Bass Guitar and Guitar settings differ 32
Troubleshooting 33
During Normal Performance Using the GR-20 Alone 33
When Using the GR-20 with other MIDI devices 33
Other 34
Patch List 35
User Patch List 40
MIDI Implementation 41
MIDI Implementation Chart 48
Main Specifications 49
INDEX 50
Names of Things and What They Do
Front Panel
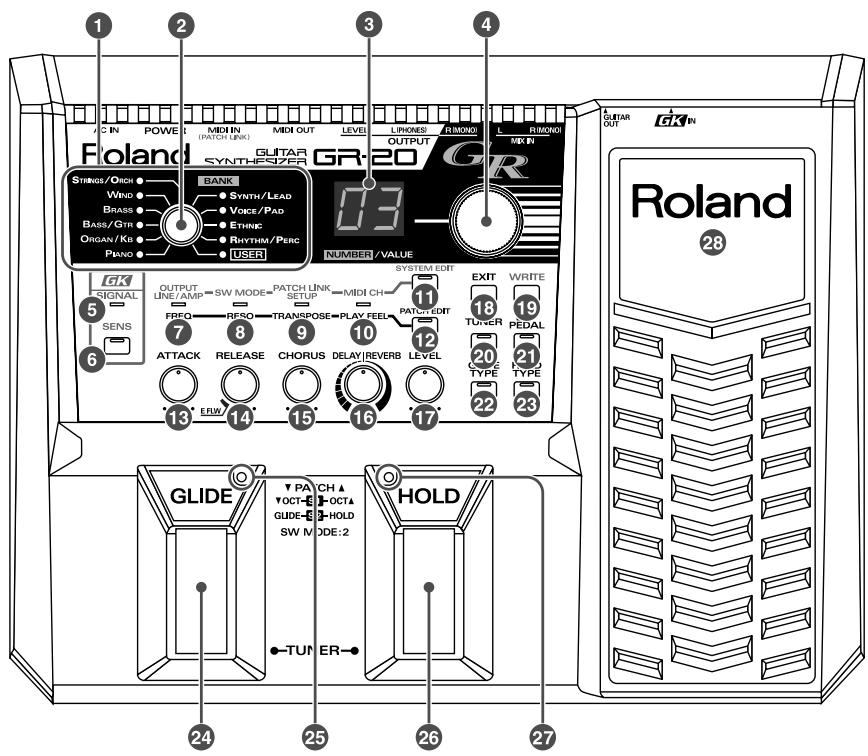
1. BANK indicators
These indicators light to indicate the currently selected sound bank. If the bank has been switched from an external device (such as via MIDI or by the switches of your GK pickup), the indicator for the selected bank will light regardless of the position of the BANK knob.
2. [BANK] knob
Selects the sound bank. The banks are organized into ten categories of sound. Sounds you edit can be stored in the User bank (p. 24).
3. Display
Indicates the currently selected sound number. When you're editing a parameter, the display indicates the value.
If you've edited the sound, the dot will light (p. 20).
4. [NUMBER/VALUE] knob
Use this to select the number of the sound you want to play. Use the [BANK] knob (2) to select a category of sounds, and use this knob to select a sound within that category.
This knob is also used to change the values of other parameters.
5. GK SIGNAL indicator
This indicator lights when a signal is received from the divided pickup.
6. [GK SENS] button
Press this button when you want to adjust the sensitivity to match the output of the divided pickup. The system may malfunction if this adjustment is not made correctly. Please adjust this setting accurately to match your guitar (p. 12).
7. OUTPUT/FREQ indicator
This indicator lights when you edit the System parameter OUTPUT Select or the Patch parameter FREQ (p. 14, p. 21).
8. SW MODE/RESO indicator
This indicator lights when you edit the System parameter SW MODE or the Patch parameter RESO (p. 14, p. 21).
9. PATCH LINK SETUP/TRANSPOSE indicator
This indicator lights when you edit the System parameter PATCH LINK SETUP or the Patch parameter TRANSPOSE (p. 19, p. 21).
10.MIDI CH/PLAY FEEL indicator
This indicator lights when you edit the System parameter MIDICH or the Patch parameter PLAY FEEL (p. 18, p. 21).
11.[SYSTEMEDIT]button
Press this when you want to edit System parameters (p. 14, p. 18, p. 19, p. 26, p. 27).
12. [PATCH EDIT] button
Press this when you want to edit Patch parameters (p. 21).
13.[ATTACK] knob
Adjusts the speed of the attack (p. 20).
14. [RELEASE] knob
Adjusts the length of the release (p. 20).
15. [CHORUS] knob
Adjusts the chorus depth (p. 20).
16. [DELAY/REVERB] knob
Adjusts the delay or reverb depth (p. 20).
17. [LEVEL] knob
Adjusts the volume of the synth sound for each patch (p. 20).
18. [EXIT] button
Press this to cancel an operation, or to return to a previous state.
19. [WRITE] button
Press this button to write (store) or copy a patch (p. 24, p. 25).
20. [TUNER] button
Press this button when you want to use the Tuner function (p. 13).
21.[EXP PEDAL] button
Press this button to select the function of the expression pedal (p. 23).
22. [GLIDE TYPE] button
Press this button to select the function of the Glide pedal (p. 22).
23. [HOLD TYPE] button
Press this button to select the function of the Hold pedal (p. 23).
24.GLIDE pedal
Press this pedal to apply the Glide effect to the sound (p. 15).
25.GLIDE indicator
This indicator will light or blink according to how you operate the GLIDE pedal.
26.HOLD pedal
Press this pedal to apply the Hold effect to the sound (p. 16).
27.HOLD indicator
This indicator will light or blink according to how you operate the HOLD pedal.
28. Expression pedal
Use this pedal to adjust the volume or to apply continuous change to the sound (p. 16).

When you operate the expression pedal, please be careful not to get your fingers pinched between the movable part and the panel.

In households with small children, an adult should provide supervision until the child is capable of following all the rules essential for the safe operation of the unit.
Rear Panel
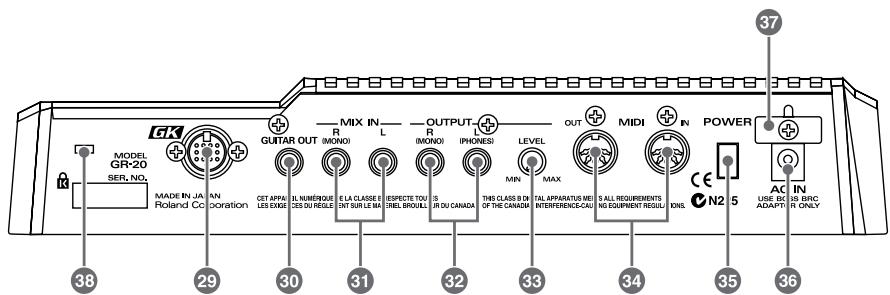
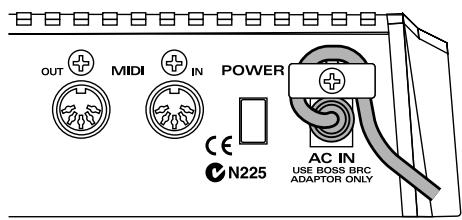
29.GK IN connector
Use the included GK cable (or GKC-3/5/10 (sold separately) to connect this connector to your divided pickup.
- For details on connections to a commercially available GK-compatible guitar, refer to the guitar manufacturer or your dealer.
30. GUITAR OUT jack
This jack outputs the sound from the normal pickup of your guitar. Connect this jack to your guitar amp or guitar effects unit.
31.MIX IN R (MONO)/L jacks
The sound that is input to these jacks is mixed with the synth sound of the GR-20 and sent from the OUTPUT jacks (32).
If you have connected the GUITAR OUT jack (30) to an external effects unit, connect the output of your effects unit to this jack; the synth sound and the sound processed by the effects unit will be output together from the OUTPUT jacks (32) (p. 17).
32. OUTPUT R (MONO)/L (PHONES) jacks
These jacks output the GR-20's synth sound combined with the sound that is input to the MIX IN jacks (31). If you're making connections to a monaural amp, use R (MONO) jack.
The L (PHONES) jack can also be used as a headphone jack (stereo). (However, if headphones are connected to L (PHONES) jack, you cannot simultaneously use R (MONO) jack as an output.)
If nothing is connected to the GUITAR OUT jack (30) or MIX IN jacks (31), the guitar's normal pickup sound will also be mixed into this output.
- This is available only if the output of your guitar is connected to the normal pickup input jack of the divided pickup.
33.[OUTPUT LEVEL] knob
Adjusts the volume that is sent from the output jacks.
34. MIDI IN/OUT connectors
These can be connected to external MIDI devices, allowing the GR-20 to send and receive MIDI data.
35. [POWER] switch
Turns the power on/off.
36.AC Adaptor jack
Connect the included AC adaptor (BRC-series) here.

Use only the attached power-supply cord. Also, the supplied power cord must not be used with any other device.
37. Cable hook
Loop the AC adaptor cable around this hook to prevent the cable from being accidentally disconnected.
38. Security Slot (R)
http://www.kensington.com/
Chapter 1 Play the Sounds!
Preparing Your Guitar
- In order to use the GR-20 you will need a guitar that has a divided pickup (GK pickup) such as the Roland GK-3 or GK-2A, or a bass guitar that has a bass guitar divided pickup such as the Roland GK-3B/GK-2B, which can independently output a separate signal for each string.
- For details on installing the GK pickup, refer to the manual that came with your GK pickup.
- Notes may be sounded incorrectly if there are string buzzes due to improper neck curvature or buzzing frets, or if the octave adjustment (intonation) is incorrect.

Various guitar manufacturers sell GK-Compatible guitars that have a pre-installed GK pickup or contain equivalent functionality. For details, contact your guitar dealer or a guitar manufacturer.

In order to use the GR-20 with a bass guitar, follow the procedure described in Chapter 6 Appendices "Switching the GR-20 between bass guitar and guitar operation (p. 32)" to switch the GR-20 to bass guitar operation.
Connections
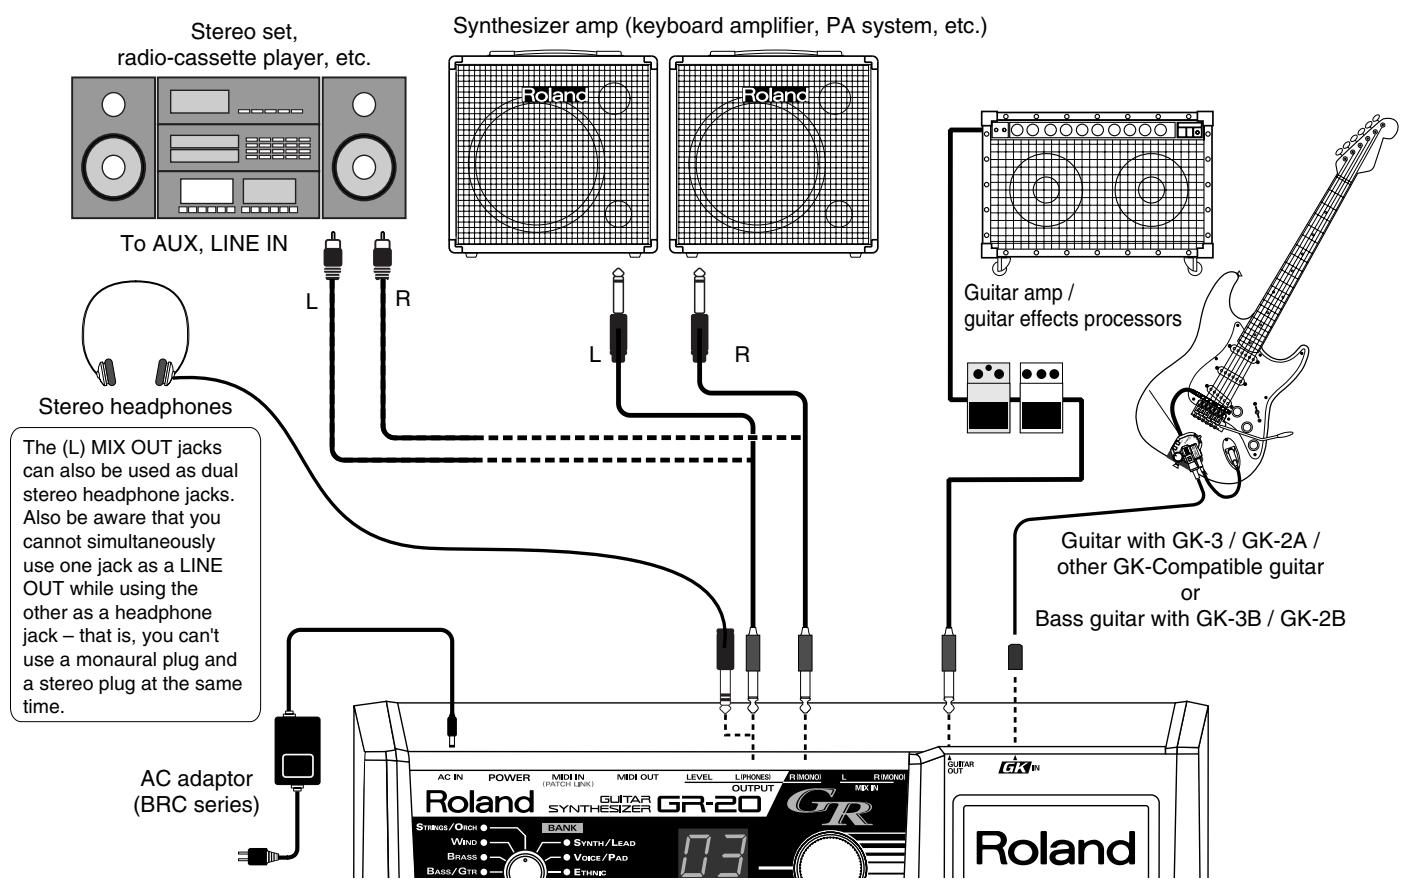
- To prevent malfunction and/or damage to speakers or other devices, always turn down the volume, and turn off the power on all devices before making any connections
- The volume of your amp should be raised only after you have turned on the power of all your other equipment.
-
If you're outputting in monaural, connect the cable to the R (MONO) OUTPUT jack.
-
To prevent the inadvertent disruption of power to your unit (should the plug be pulled out accidentally), and to avoid applying undue stress to the AC adaptor jack, anchor the power cord using the cord hook, as shown in the illustration.
Turning the Power On
Once the connections have been completed, turn on power to your various devices in the order specified. By turning on devices in the wrong order, you risk causing malfunction and/or damage to speakers and other devices.
- If you've connected a device to MIX IN, turn on the power of that device.
- Turn on the power of the GR-20.

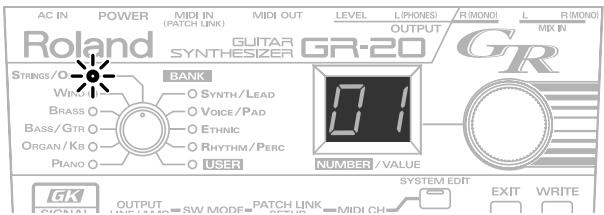
After you've turned on the power, you'll be ready to play when the panel indicators and the display reach the state shown in the illustration. This state is called "Play mode."

Before the GR-20 enters Play mode, it will indicate whether it is currently in guitar mode or bass guitar mode.
Guitar mode: "E"
- Bass guitar mode: " b G "
For details on how to switch between guitar mode and bass guitar mode, refer to p. 32.
This unit is equipped with a protection circuit. A brief interval (a few seconds) after power up is required before the unit will operate normally.
- Turn on the power of your amp.
Adjusting the Output Level
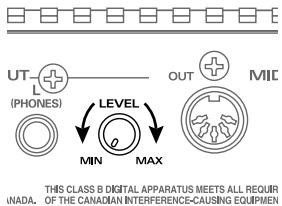
Use the [OUTPUT LEVEL] knob on the rear panel to adjust the output level of the GR-20.
Turning the knob toward the right (toward MAX) will increase the volume. With the knob turned all the way to the left (toward MIN), the volume will be zero.
- Normally, you should set this near the middle of the range.
Adjusting the Input Sensitivity (GK SENS)
You'll need to adjust the input sensitivity of each string according to your picking strength and how the divided pickup is installed.

If this adjustment is not made correctly, the system won't work properly. You must perform this adjustment to ensure that you're taking full advantage of the GR-20's capabilities.
- Once you make this adjustment, it's stored within the GR-20; you won't need to make it again. However, you should perform the adjustment again after changing the strings or adjusting the action of your guitar, or before using a different GK guitar.
- If you're using a bass guitar, you can use the following table to convert the string names and indications you see in the display while performing the procedure below.
6th string B string
5th string E string (4th string on a conventional four-string bass)
4th string A string (3rd string on a conventional four-string bass)
3rd string D string (2nd string on a conventional four-string bass)
2nd string G string (1st string on a conventional four-string bass)
1st string C string
- Press the [GK SENS] button.
- Play only the 6th string.
The left side of the display will show "6," indicating that you played the 6th string.
The right digit will show the GK SENS setting. The BANK indicators will function as a level meter and show the strength of the guitar signal.
- If the left digit of the display does not show the number of the string you played, press the HOLD pedal or GLIDE pedal several times to make the desired string number appear.
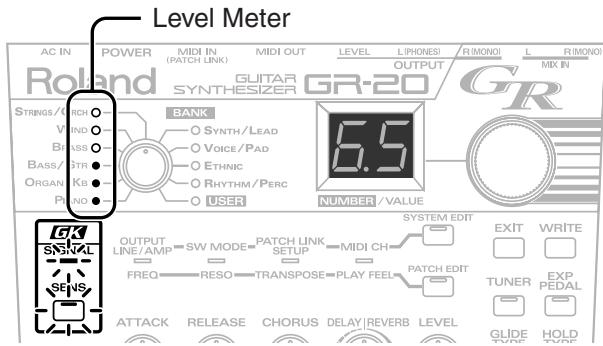
- Adjust the sensitivity.
Turn the [NUMBER/VALUE] knob to adjust the sensitivity. The sensitivity will increase as the number in the right of the display increases. Adjust the sensitivity so that all of the level meter indicators light briefly when you pick a note strongly.
- You can also use your GK pickup's UP/S2 button and DOWN/S1 button to adjust the sensitivity in the same way.
- Perform steps 2-3 for strings 5-1 to adjust the sensitivity of all strings.
- Press the [GK SENS] button or [EXIT] button.
The GK SENS settings you made are stored in the GR20k, and you will return to Play mode.
- The decimal point in the display will blink while the setting is being stored. Don't turn off the power during this time.
- If you turn off the power before returning to Play mode, the settings you made will not be stored.

If you're using a bass guitar, the number shown at the left side of the display will be as shown in the following table.
| Displayed No. | 1 | 2 | 3 | 4 | 5 | 6 |
| 4-string bass | 1G string | 2D string | 3A string | 4E string | ||
| 5-string bass | 1G string | 2D string | 3A string | 4E string | 5B string | |
| 6-string bass | 1C string | 2G string | 3D string | 4A string | 5E string | 6B string |
Tuning Your Guitar (Tuner Function)
Since the GR-20 analyzes the pitch of each string in order to determine the sound it should produce, you must tune your guitar accurately.
-
If your guitar is mistuned, the sound produced will be out of tune, and the system will not operate correctly.
-
Press the [TUNER] button.
The [TUNER] button will light, and the Tuner function will be on. The lower two digits of the current reference pitch will be shown for approximately two seconds in the display. Then you will be able to tune your guitar.
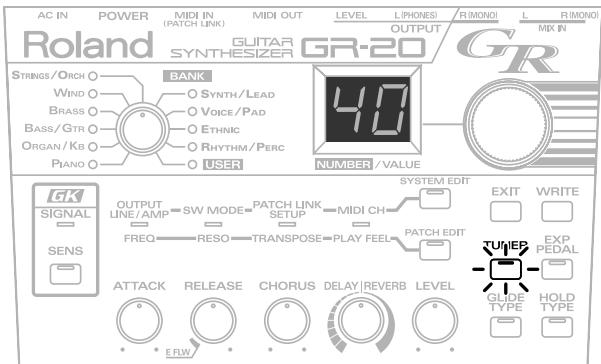
Example: When the pitch is set to 440Hz
-
You can also turn on the Tuner function by pressing the HOLD pedal and GLIDE pedal simultaneously.
-
Use the [NUMBER/VALUE] knob to adjust the reference pitch.
If you turn the [NUMBER/VALUE] knob slightly, the current reference pitch will be displayed for several seconds. By turning the [NUMBER/VALUE] knob during this time, you can adjust the reference pitch.
- You can adjust the reference pitch in a range of 427Hz - 452Hz . When the GR-20 is shipped from the factory, this is set to 440Hz .
-
The reference pitch you specify will be stored when you exit the Tuner function. Be aware that the setting will not be stored if you turn off the power before doing so.
-
Cleanly play an unfretted note on the string that you want to tune.
The display will indicate the note name.
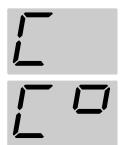
C
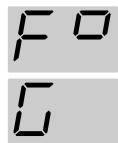
F#
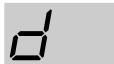
D
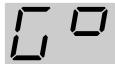
G#
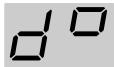
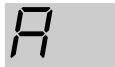
A
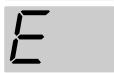
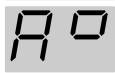
A#
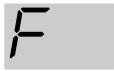
F

B
- Tune your guitar.
Watch the indicator in the panel, and tune your guitar so that only the green indicator in the middle is lit.
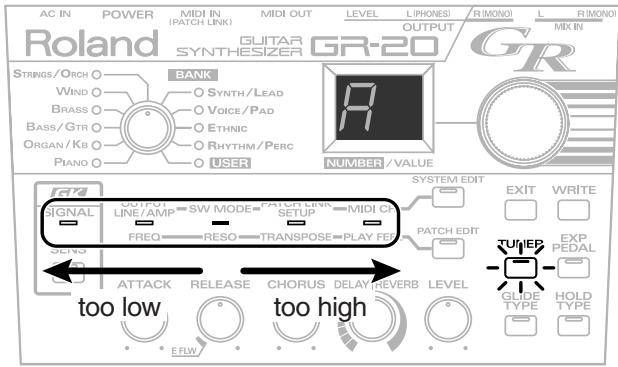
- Repeat steps 3-4 to tune each string of your guitar.
- Press the [TUNER] or [EXIT] button to exit the Tuner function.
The reference pitch you specified will be stored, and you will return to Play mode.
- The decimal point in the display will blink while the reference pitch is being stored. Don't turn off the power during this time.
Specifying the Output Device (OUTPUT SELECT)
Here you can specify the type of system connected to the OUTPUT jacks. This setting allows the GR-20 to internally optimize its sound for the type of playback system you are using.
-
This does not affect the sound that is input to MIX IN.
-
Press the [SYSTEM EDIT] button a number of times until the OUTPUT/FREQ indicator lights.
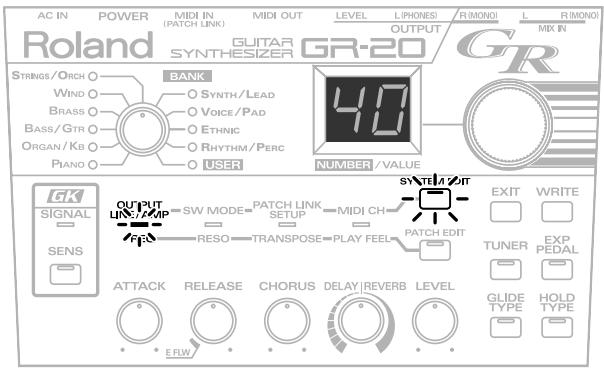
- Use the [NUMBER/VALUE] knob to change the setting. Guitar amp
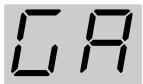
Use this setting if you've connected the GR-20 to a guitar amp.
Line
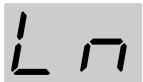
Use this setting if you've connected the GR-20 to a keyboard amp, mixer, headphones, or recorder.
-
If you're using a bass amp, use the Line setting.
-
Press the [EXIT] button.
The setting will be stored, and you will return to Play mode.
- The decimal point in the display will blink while the setting is being stored. Don't turn off the power during this time.
- If you turn off the power before returning to Play mode, the setting you made will not be stored.
Selecting a Sound (Patch)

What is a Patch
A "patch" is a sound you play on the GR-20; in addition to the type of sound, a patch also contains settings for effects such as reverb and chorus.
The GR-20's patches are organized into ten banks by type, with the patches numbered within each bank.
In Play mode, the BANK indicator and the display show the patch that is currently selected.
You can edit the settings of a patch to your taste, and store edited patches in the USER bank (p. 24).
You can use any of the following ways to select a patch.
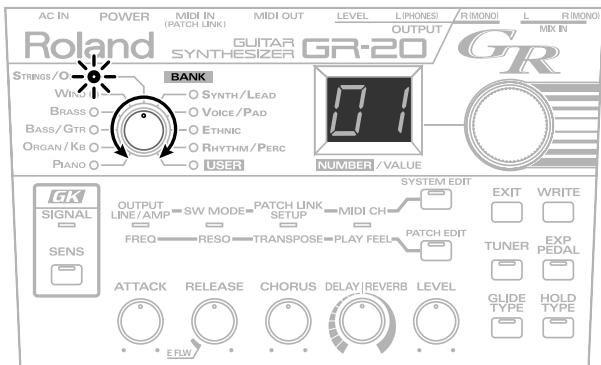
Using the Knob to Select Patches
- Use the [BANK] knob to select the type of sound you want.
From the ten sound banks and the user bank, select the bank that contains the sound you want to use.
- Use the [NUMBER/VALUE] knob to select a sound within the bank.
Turning the [NUMBER/VALUE] knob will change the number shown in the display, letting you choose from various sounds within the selected bank.
Using the Switches of the GK Pickup to Select Patches
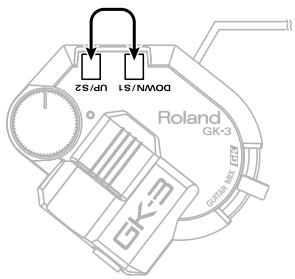
In Play mode, you can use the UP/S2 button and DOWN/S1 button of the GK pickup to select the next or previous number.
When you reach the upper or lower limit within a bank, you will move to the next bank.
Using the Foot Pedals to Select Patches
When shipped from the factory, the GR-20's two foot pedals are assigned to the Hold function and Glide (Pitch Bend) function respectively. You can change these assignments so that the foot pedals will select patches.
For details, refer to Changing the function of the foot.
pedals (SW MODE) (p. 26).
Using an External Device Via MIDI to Select Patches
You can connect an external device (e.g., multi-effects unit) to the MIDI IN connector, and select patches on the GR-20 by operating the external MIDI device.
For details, refer to Using the GR-20 with a Multi-effects Unit (p. 18).
Play the GR-20!
Let's get started playing the GR-20. Check the following points.
- Make sure that the GR-20 is in Play mode (the state it's normally in immediately following power up).
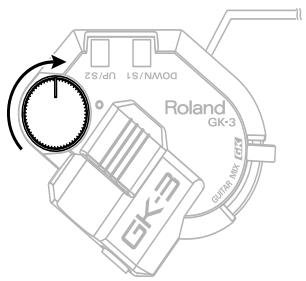
In some cases, you won't hear any sound if the GR-20 is not in Play mode. - Set the select switch of your GK pickup to the "GK" position (on the GK-2A, the "SYNTH" position). If this switch is set to "GUITAR," the normal pickup sound will be output. If this switch is set to "MIX," the synth sound and the guitar normal pickup sound will be mixed and output.
- Turn the volume of the GK pickup to the right. This volume controls the synth sounds of the GR-20.
Using the Foot Pedal to Change the Pitch (GLIDE)
You can press the GLIDE pedal to change the pitch of the currently playing synth sound smoothly.
The type of change will depend on the sound, and you can also adjust the change to your taste (p. 22).
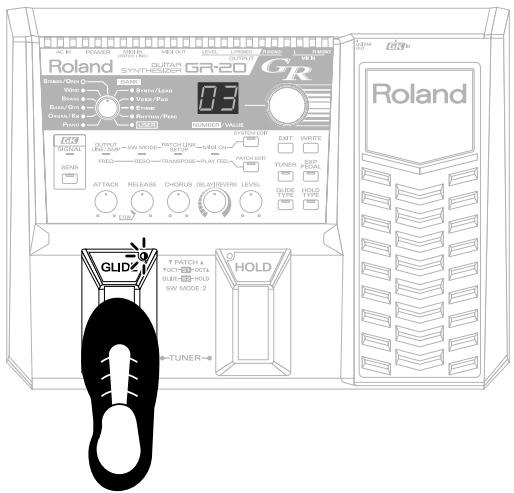
- The GLIDE indicator will blink while you are pressing the pedal.
Using the Foot Pedal to Sustain the Sound (HOLD)
You can press the HOLD pedal to sustain the synth sound you're playing. The effect will depend on the sound, and you can also adjust the effect to your taste (p. 23).
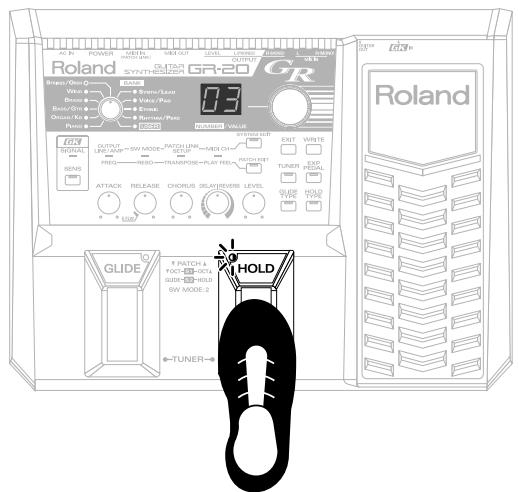
* The HOLD indicator will blink while you are pressing the pedal.
Using the Expression Pedal to Modify the Sound (EXP PEDAL)
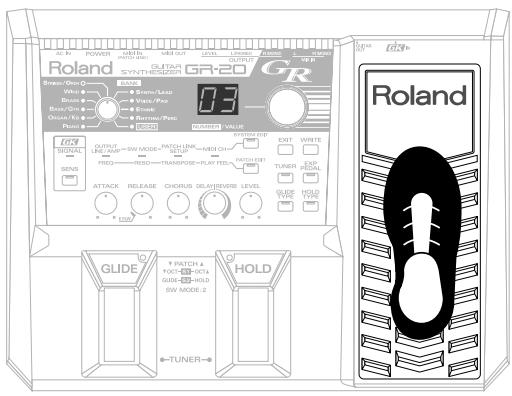
You can use the expression pedal to continuously vary the volume or tone of the synth sound.
The effect will depend on the sound, and you can also adjust the effect to your taste (p. 23).
Turning the Power Off
When you're ready to turn off the power, be sure to do so in the following order.
- Turn off the power of your amp.
- Turn off the power of the GR-20.
- Turn off the power of the device connected to MIX IN.
Chapter 2 Using the GR-20 with Guitar Effects
Here's how you can use your own effects unit and combine the sound of the guitar with the synth sound to create an even more interesting range of possibilities.
The sound of the guitar's normal pickups will pass through the GK cable and be output from the GR-20's GUITAR OUT jack. The sound that is processed by your effects unit can be connected to the GR-20's MIX IN, and internally mixed with the GR-20's synth sound.
- Connect the output of your guitar to the normal pickup input jack of the GK pickup.
Connections
Using a compact effect device or a multi-effects unit that has no MIDI connector
Guitar amp
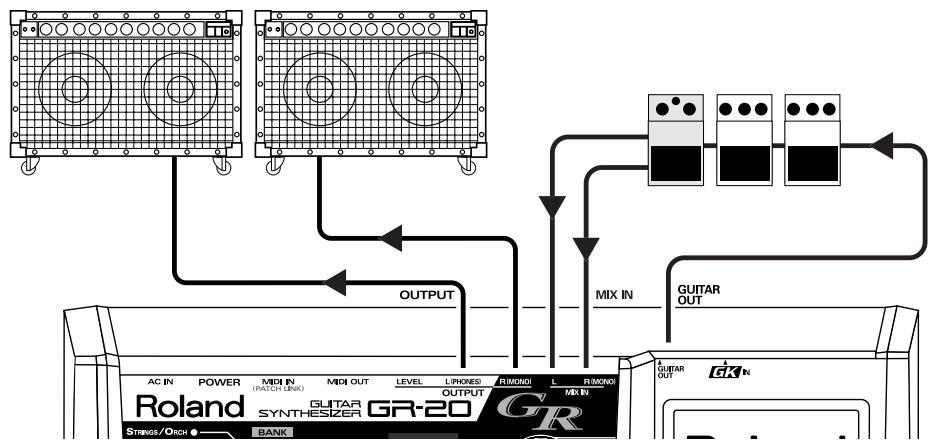
* Set the GR-20's OUTPUT SELECT to "Guitar Amp" (p. 14).
Using a multi-effects unit that has a MIDI connector
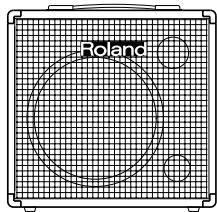
Keyboard amplifier, PA system, etc.
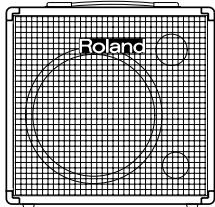
* If you're using a multi-effects unit, set the GR-20 as follows:
Guitar Amp Simulation: on
Output Select: line

- Set the GR-20's OUTPUT SELECT to "Line" (p. 14).
- If your multi-effects device does not have a amp simulator, set the GR-20's OUTPUT SELECT to "Guitar Amp," and connect the output to a guitar amp.
Switching between the Synth Sound and Guitar Sound
To switch between the synth sound and guitar sound, use the selector switch provided on your GK pickup.
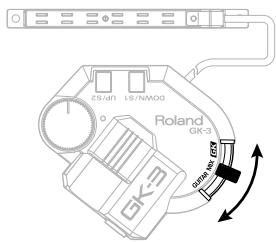
If the selector of your GK pickup (e.g., GK-3, GK-2A) is set to the GK position (labeled SYNTH on the GK-2A), the synth sound will be output. If set to the GUITAR position, the guitar sound will be output. If the selector is set to MIX, both sounds will be mixed and output.
- To adjust the volume balance between the synth sound and guitar sound, use the volume (p. 20) of each patch to adjust the synth sound, and the volume of the guitar or the connected effects device to adjust the volume of the guitar sound.
Using the GR-20 with a Multi-effects Unit
By connecting your multi-effects unit via MIDI, you can automatically change sounds (patches) on the GR-20 by selecting sounds (patches) on your multi-effects unit.
Channel (CH)
MIDI uses "channels" to send independent streams of data over a single cable. In order for data to be received, the receiving device must be set to receive the channel that the transmitting device is sending on. This means you must set the transmit channel of your multi-effects unit to match the receive channel of the GR-20.
- Check the MIDI transmit channel of your multi-effects unit. For details, refer to the manual of your multi-effects unit.
- Press the [SYSTEM EDIT] button a number of times until the MIDI CH/PLAY FEEL indicator lights.
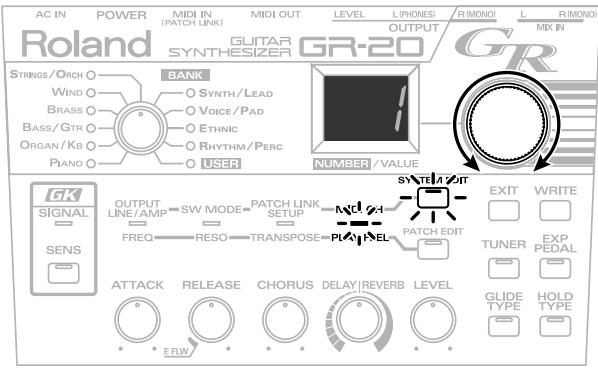
- Use the [NUMBER/VALUE] knob to change the setting. Set the channel so it's the same as the MIDI transmit channel of your multi-effects unit.
- Press the [EXIT] button.
The setting will be stored, and you will return to Play mode.
- The decimal point in the display will blink while the setting is being stored. Don't turn off the power during this time.
- If you turn off the power before returning to Play mode, the setting you made will not be stored.
Patch Link Setup (PATCH LINK SETUP)
Here's how to link the patches (sounds) of your multi-effects unit with the patches (sounds) of the GR-20. This will cause the GR-20 to automatically switch to the specified sound (patch) when you change patches on your multi-effects unit.
- Use a MIDI cable to connect the MIDI OUT of your multi-effects unit to the GR-20's MIDI IN.
- Make sure that the MIDI transmit channel of your multi-effects unit is the same as the MIDI channel of the GR-20 (p. 18).
- Press the [SYSTEM EDIT] button a number of times until the PATCH LINK SETUP/TRANSPOSE indicator lights.
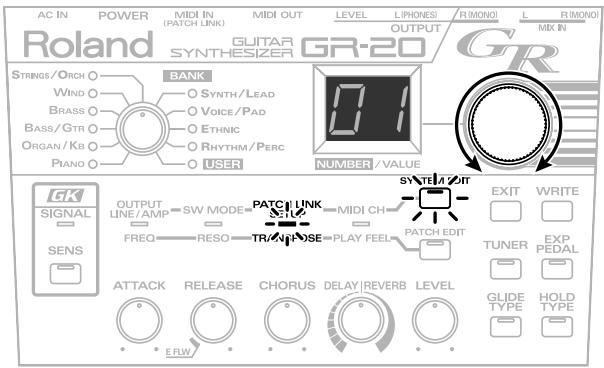
-
On your multi-effects unit, select the patch for which you want to specify a link.
-
When you select a patch on your multi-effects unit, it will send a "MIDI Program Change" message to the GR-20. The GR-20 will remember the content of this message, and will be ready for you to specify the patch link setting.
-
If two or more consecutive patch changes occur when you are selecting a patch on your multi-effects unit, the GR-20 will remember only the last-received MIDI program change.
-
Use the [BANK] knob and [NUMBER/VALUE] knob to select the synth sound in the GR-20 that you want to use with the effect you chose in step 4.
- Repeat steps 4-5 to set as many links as you need.
- Press the [EXIT] button.
You will return to Play mode, and the settings you made will be stored.
- The decimal point in the display will blink while the setting is being stored. Don't turn off the power during this time.
- If you turn off the power before returning to Play mode, your settings will not be stored.
Chapter 3 Editing The Sounds
The GR-20 lets you modify the sound to your taste. This process is called "editing."
When you edit the settings, the decimal point in the display will light, indicating that the sound has been modified from the original settings.
Selecting a Sound to Start From
Use the [BANK] knob and [NUMBER/VALUE] knob to select the sound (patch) from which you want to start editing (p. 14).
Use the Knobs to Adjust the Sound
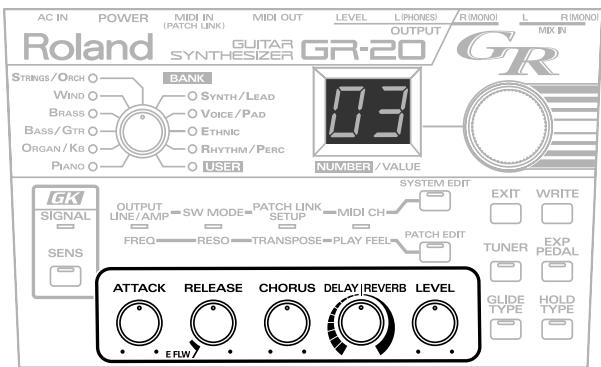
* Immediately after a patch change, the sound you'll hear will reflect the settings stored in the patch, regardless of the positions of the knobs.
Adjusting the Attack—ATTACK
This adjusts the attack time of the sound. Turning the knob toward the right will lengthen the time, producing a more gradual attack. Turning the knob toward the left will shorten the time, producing a sharper attack.
- You will hear the original sound when the knob is at the center position.
- For some sounds, moving the knob may not make any difference.
Adjusting the Release—RELEASE
This adjusts the release, from when you mute a string until it decays to silence. Turning the knob toward the right will lengthen the release, and turning it toward the left will shorten the release.
- You will hear the original sound when the knob is at the center position.
- For some sounds, moving the knob may not make any difference.
With the knob turned all the way to the left, it activates the envelope follower function.
Envelope Follower (E FLW) function
The guitar synth analyzes the vibration of your guitar string to detect the pitch, and then plays the appropriate synth sound. This means that if the string vibration is less than a certain level, it will not be possible to detect the pitch, and the synth sound will be silenced at that point. For some patches, the way in which the sound is silenced at this time may produce an unnatural result.
The envelope follower function causes the volume of the synth sound to always follow the string vibration of the guitar, making the synth sound decay naturally along with the decay of the string vibration.
- For some patches, the effect may be slight.
- Using the envelope follower function on a decay-type synth sound such as piano or guitar may have the opposite effect, producing an unnatural-sounding decay.
Adjusting the Spaciousness of the Sound—CHORUS
This adjusts the depth of the chorus effect, which gives the sound a spacious feel. Turning the knob toward the right will deepen the effect, and turning it toward the left will lessen the effect.
- You will hear the original sound when the knob is at the center position.
- For some sounds, moving the knob may not make any difference.
Adjusting the Reverberation —DELAY/REVERB
This controls two types of reverberation effect.
Delay is an effect that produces echo-like effects, while Reverb is an effect that simulates the way in which sound reflects from the walls of a hall or tunnel. The left half of the knob's range applies a delay effect, and the right half applies reverb. In either case, turning the knob farther will deepen the effect.
Adjusting the Volume—LEVEL
This adjusts the volume of the patch.
- If you want to keep your edited sound, execute Write (p. 24) to write your settings into a USER patch.
Editing Other Parameters
You will use the [PACKED] button and [NUMBER/ VALUE] knob to edit these parameters.
- Press the [PACKEDIT] button a number of times until the indicator of the parameter you want to edit is lit.
- Use the [NUMBER/VALUE] knob to edit the value.
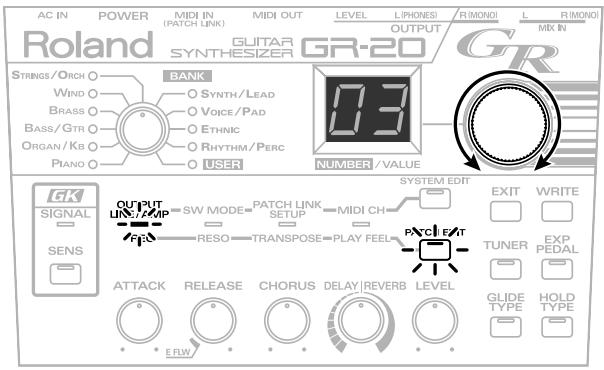
Adjusting the Brightness of the Sound—FREQ
This controls the cutoff frequency of the filter within the sound generator.
Increasing this setting will raise the frequency, producing a brighter tone. Conversely, decreasing this setting will lower the frequency, producing a softer tone.
Adding a Distinctive Character to the Tone—RESO
This controls the resonance of the filter within the sound generator. Increasing this setting will produce a more distinctive tone, while decreasing the setting will produce a milder tone.
Adjusting the Pitch—TRANSPOSE
The pitch of the synth sound produced by the GR-20 can be raised or lowered in one-octave steps relative to the pitch you play on your guitar.
$$ (- 2, - 1, 0, + 1, + 2) $$
Adjusting the Playing Feel —PLAY FEEL
You can select the way in which the synth sound will respond to your picking dynamics. You can more naturally express your playing dynamics by changing this setting to suit a particular playing style or sound.
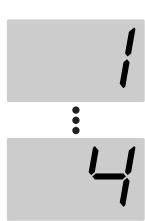
1-4:
The "1" setting gives you the widest range of volume change in response to your picking dynamics. With higher-numbered settings, even softly picked notes will sound at a high volume, making the volume more consistent even when you use tapping techniques or if your picking is not consistent.
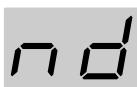
No dynamics:
With this setting, notes will be sounded at a fixed volume regardless of your picking dynamics.
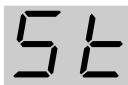
Strum:
This setting suppresses softly picked notes. Use this setting if unwanted notes are triggered when you strum or when your finger contacts a string unintentionally.
-
Press the [EXIT] button to return to Play mode.
-
If you want to keep your edited sound, execute Write (p. 24) to write your settings into a USER patch.
Selecting the Type of Glide Effect—GLIDE TYPE
You can select how the pitch changes when you press the GLIDE pedal.
- Press the [GLIDE TYPE] button.
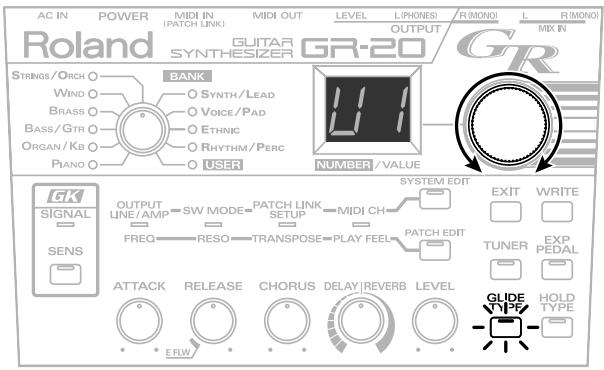
- Use the [NUMBER/VALUE] knob to change the setting.
u1:GLIDE UP 1
d1:GLIDEDOWN1
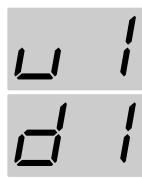
The pitch will change one semitone (up/ down) when you press the GLIDE pedal, and will return to normal when you release the pedal.
u2:GLIDE UP 2
d2:GLIDEDOWN2
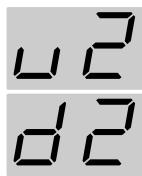
The pitch will change a whole step (up/ down) when you press the GLIDE pedal, and will return to normal when you release the pedal.
u3:GLIDE UP 3
d3:GLIDEDOWN3
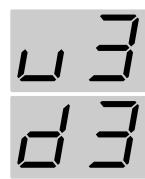
The pitch will change a perfect fourth (up/down) when you press the GLIDE pedal, and will return to normal when you release the pedal.
u4:GLIDEUP4
d4:GLIDEDOWN4
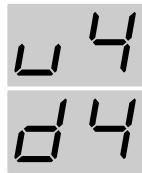
The pitch will change a perfect fifth (up/ down) when you press the GLIDE pedal, and will return to normal when you release the pedal.
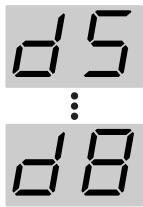
u5-u8:GLIDE UP 5-8
d5-d8:GLIDEDOWN5-8
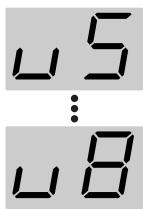
The pitch will change one octave (up/ down) when you press the GLIDE pedal, and will return to normal when you release the pedal. Higher settings will shorten the time over which the pitch changes.
V1-V4: VIBRATO 1-4

Pressing the pedal applies vibrato (an effect that changes the pitch cyclically). The effect quickens as the value is increased
-
Press the [GLIDE TYPE] button or [EXIT] button to return to Play mode.
-
If you want to keep your edited sound, execute Write (p. 24) to write your settings into a USER patch.
Selecting the Type of Hold Effect—HOLD TYPE
You can select the type of hold effect you'll get when you press the HOLD pedal.
- Press the [HOLD TYPE] button.
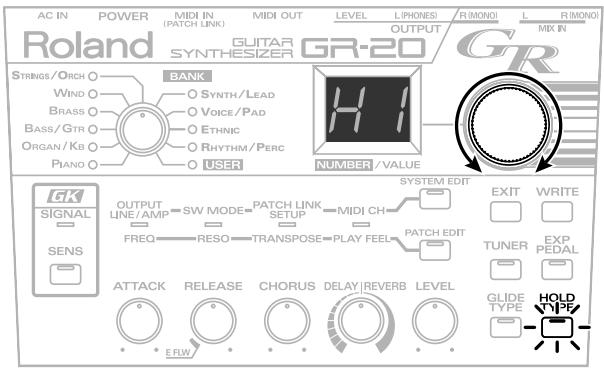
- Use the [NUMBER/VALUE] knob to change the setting.
H1: HOLD 1
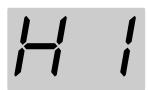
The notes that were sounding when you pressed the pedal will be held, and any notes you play while continuing to press the pedal will also be held. However, if you play any notes on a string that was already sounding, the previous note will disappear and be replaced by the newly played note. This lets you smoothly play notes located at different fret positions.
H2: HOLD 2
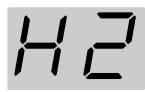
The notes that were sounding when you pressed the pedal will be held as long as you continue pressing the pedal. Subsequent notes that you play while holding the pedal will not be heard. This lets you hold a chord using the synth sound, and play a melody using the guitar sound.
H3: HOLD 3
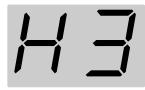
The notes that were sounding when you pressed the pedal will be held as long as you continue pressing the pedal. Subsequent notes that you play while holding the pedal will sound but will not be held. (The notes that you can play afterward are limited to strings other than those that are being held.) This lets you hold a chord using the synth sound on the low notes, and play a melody on the high notes.
H4: HOLD 4
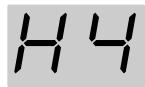
The notes that were sounding when you pressed the pedal will be held, and any subsequent notes you play while continuing to press the pedal will also be held. This is the same behavior as the damper pedal of a piano.
- Press the [HOLD TYPE] button or [EXIT] button to return to Play mode.
- If you want to keep your edited sound, execute Write (p. 24) to write your settings into a USER patch.
Selecting the Effect Controlled by the Expression Pedal—EXP PEDAL
You can select one of the following as the effect controlled by the expression pedal.
- Press the [EXP TYPE] button.
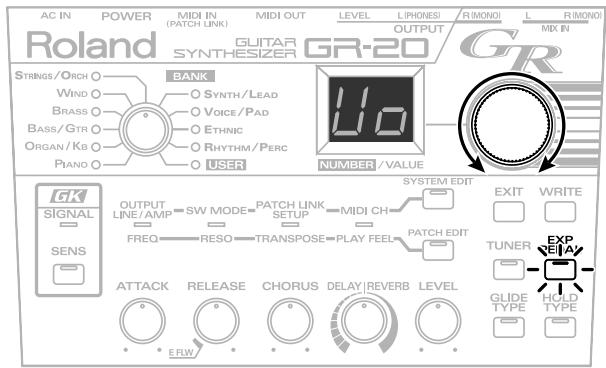
- Use the [NUMBER/VALUE] knob to change the setting.
VO: VOLUME

The pedal will adjust the overall volume of the synth sound.
FL: FILTER

The pedal will adjust the filter cutoff frequency of the sound generator, varying the tone.
b1: PITCH BEND 1
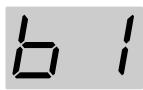
When the pedal is pressed, the pitch changes up to a perfect fourth (max.).
b2: PITCH BEND 2
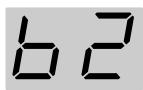
When the pedal is pressed, the pitch changes up to a perfect fifth (max.).
b3: PITCH BEND 3
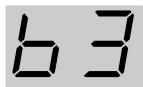
When the pedal is pressed, the pitch changes up to one octave (max.).
b4: PITCH BEND 4
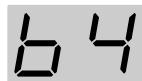
When the pedal is pressed, the pitch changes down to a semi tone (max.).
b5: PITCH BEND 5
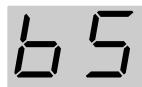
When the pedal is pressed, the pitch changes down to a whole tone (max.).
b6: PITCH BEND 6
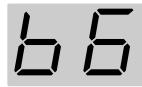
When the pedal is pressed, the pitch changes down to one octave (max.).
EF: Effect
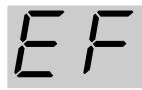
The pedal will adjust the effect used within each patch.
- The result will differ for each patch.
-
For some patches, there will be no effect.
-
Press the [EXP TYPE] button or [EXIT] button to return to Play mode.
- If you want to keep your edited sound, execute Write (p. 24) to write your settings into a USER patch.
Storing the Sounds You Create (WRITE)
The sounds you create will be lost if you change the patch or simply turn off the power. If you want to keep the modifications you've made, you must perform the Write procedure.
- Press the [WRITE] button.
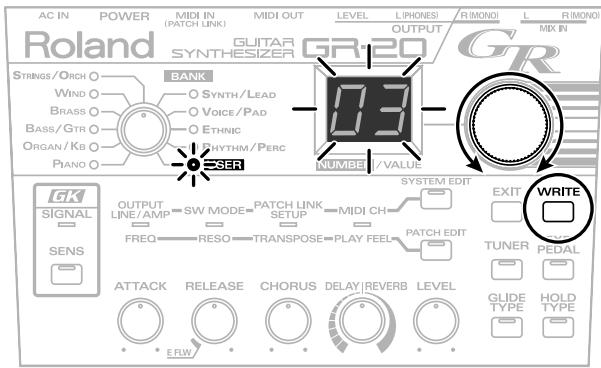
The BANK indicators will indicate USER, and the display will blink.
- Use the [NUMBER/VALUE] knob to select the patch number into which you want to write your settings.
- If you decide to abort the Write operation at this point, press the [EXIT] button.
- Press the [WRITE] button once again.
Your settings will be written into the patch you selected.
- Use caution, since the settings previously stored in that patch will be overwritten and lost.
- The decimal point in the display will blink while the setting is being stored. Don't turn off the power during this time.
Chapter 4 Other Functions
Copying Patches
Here's how you can copy patch settings. You can copy only to the USER bank.
- Select the copy-source patch (the patch you want to copy from).
- Press the [WRITE] button.
The BANK indicator will change to USER, and the display will blink.
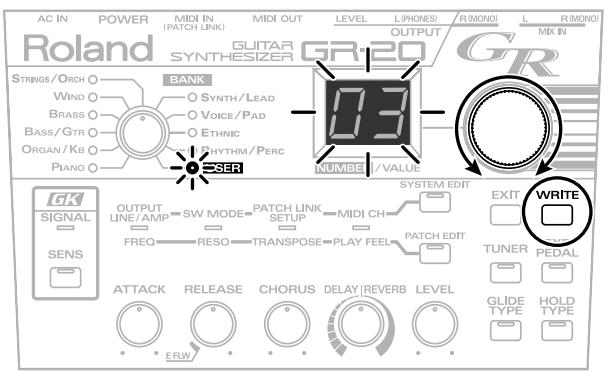
- Use the [NUMBER/VALUE] knob to select the copy-destination patch number (patch number you want to copy to).
- Press the [WRITE] button once again.
The setting will be copied to the copy-destination patch.
- The decimal point in the display will blink while copying the setting.
- Use caution, since the settings previously stored in the copy-destination patch will be overwritten and lost.
Exchanging Patches
Here's how you can exchange (swap) patches within the USER bank. This is a convenient way to arrange USER bank patches in the desired order.
-
This will not work if the selected patch is not in the USER bank.
-
Select one of the patches that you want to exchange.
- Hold down the [EXIT] button and press the [WRITE] button.
The indication in the display starts blinking.
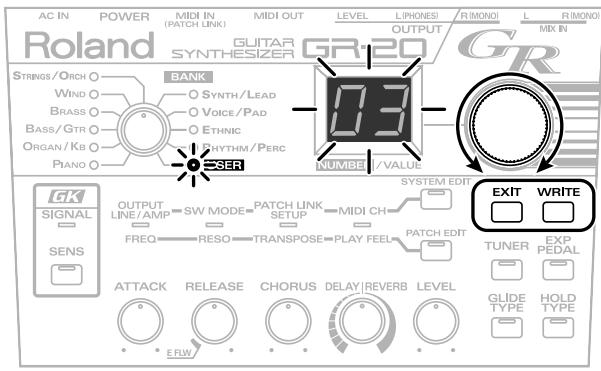
- Use the [NUMBER/VALUE] knob to select the other patch that you want to exchange.
- Press the [WRITE] button once again.
The patches will be exchanged.
- The decimal point in the display will blink while the patches is being exchanged.
Changing the function of the foot pedals (SW MODE)
You can change the function of the GLIDE pedal and the HOLD pedal by changing the switch mode. This setting also changes the function of your GK pickup's DOWN/S1 screen and UP/S2 switch.
Switch Mode 1
The GLIDE pedal operates the Glide function, and the HOLD pedal operates the Hold function.
Your GK pickup's UP/S2 switch and DOWN/S1 switch will move up/down through the patches.
- This mode is selected when the GR-20 is shipped from the factory.
Switch Mode 2
The HOLD pedal and GLIDE pedal will move up/down through the patches.
You can use your GK pickup's DOWN/S1 switch and UP/S1 switch in conjunction with the pedals to perform the following operations.
- When you press the DOWN/S1 switch, the GLIDE pedal will function as Octave Down and the HOLD pedal will function as Octave Up (TRANSPOSE).
When you press DOWN/S1 (or UP/S2) once again, the pedals will revert to the patch up/down function.
- When you press the UP/S2 switch, the GLIDE pedal will function as Glide and the HOLD pedal will function as Hold.
When you press UP/S2 (or DOWN/S1) once again, the pedals will revert to the patch up/down function.
- Press the [SYSTEM EDIT] button enough times to get the SW MODE indicator to light.
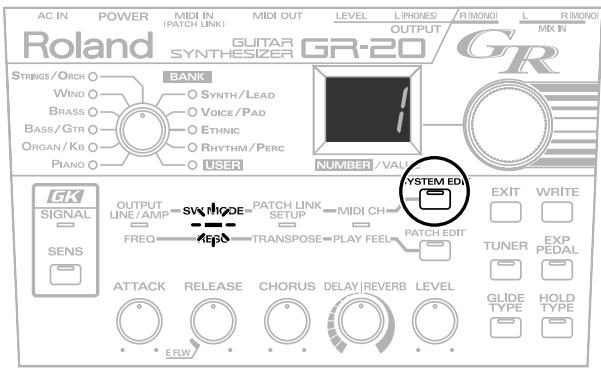
- Use the NUMBER/VALUE knob to change the setting.
- The actual mode of operation will not change until you store the setting and return to Play mode.
- Press the [EXIT] button.
You will return to Play mode, and the setting will be stored.
- The decimal point in the display will blink while the setting is being stored. Don't turn off the power during this time.
- The setting will not be stored if you turn off the power without returning to Play mode.
- In Switch Mode 1, the GLIDE indicator and HOLD indicator will normally be lit; they will blink only while you press the pedal.
- In Switch Mode 2, the GLIDE indicator and HOLD indicator will normally be unlit; however, when the function of each pedal is being changed by pressing the DOWN/S1 switch or UP/S2 switch, the indicators will behave the same way as they do in Switch Mode 1.
Saving Patches and System Parameter Settings on an External Device (BULK DUMP)
Here's how you can save the user bank patches and the system parameter settings via MIDI on an external device or computer (sequencer).
You can also transfer data via a MIDI cable directly between two GR-20 units.
MEMO
Sending GR-20 data in this way is called "bulk dump," and receiving this data is called "bulk load."

What are System Parameters?
Parameters that apply to the entire GR-20 (such as SW MODE and MIDI CH) are called "system parameters."
-
Connect the GR-20's MIDI OUT to your external device's MIDI IN.
-
Turn off the power of the GR-20, and then hold down the [PATCH EDIT] button while you turn the power on again.
The display will indicate "dP."
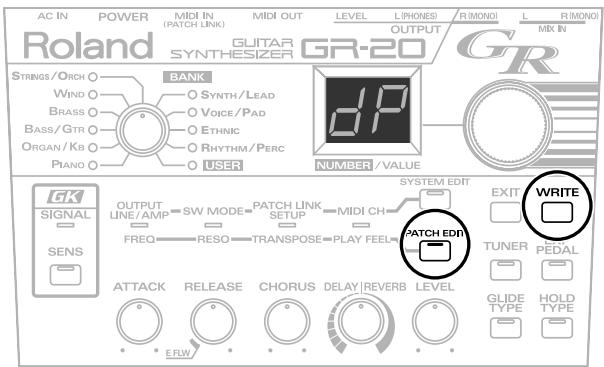
- Begin recording on the external device that will receive the data.
If you want to transfer data between two GR-20 units, put the receiving GR-20 in the Bulk Load (p. 27) Ready state.
- Press the [WRITE] button.
The data will be transmitted from MIDI OUT to the external device.
During transmission, the display will show the following.
When the display returns to "dP," transmission has been completed.
- Stop recording on the receiving device.
- Turn off the power.
Loading Patches and System Parameter Settings From an External Device (BULK LOAD)
Here's how GR-20 settings saved via Bulk Dump on an external device can be loaded back into the GR-20 via MIDI.

Performing the BULK LOAD operation will rewrite all the data in the GR-20. Be aware that all currently existing data will be lost.
- Connect your external device's MIDI OUT to the GR-20's MIDI IN.
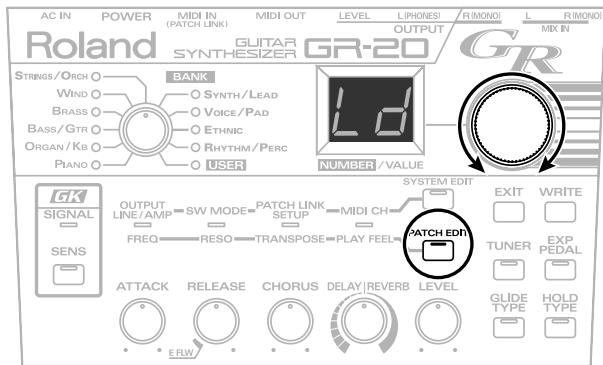
- Turn off the power of the GR-20, and then hold down the [PATCH EDIT] button and turn the power back on again. The display will indicate "dP."
- Using the [NUMBER/VALUE] knob, get "Ld" to appear in the display.
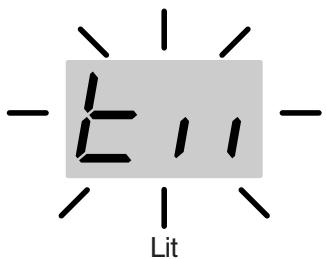
- Transmit the data from your external device. During transmission, the display will show the following, and the decimal point of the display will blink.
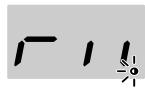
When the decimal point of the display stops blinking, and the display again shows "Ld," reception has been completed.
- Press the [WRITE] button.
- If the power of the GR-20 was turned off while the data was being received, the transmitted data will not be written into the GR-20. If necessary, perform the Bulk Load operation once again.
- Press the [EXIT] button to return to Play mode.
Chapter 5 Connecting an External Sound Module or Sequencer
You can use the GR-20 to play an external sound module via MIDI, or use it as an input tool for your sequencer.
Connecting an External Sound Module or Sequencer
Connect the GR-20 to your external sound module or computer (sequencer) as shown in the diagram.
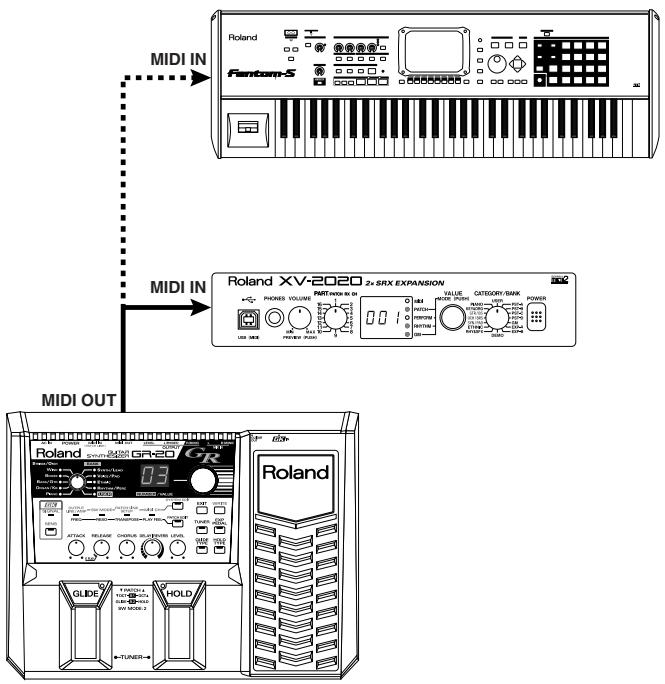
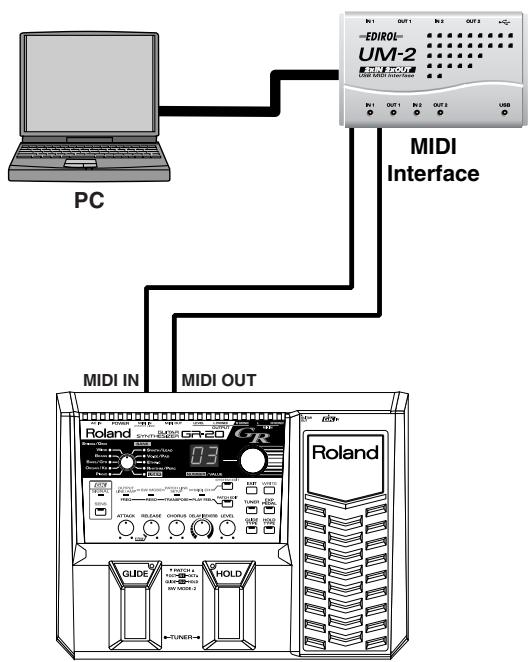
* If you are connecting the GR-20 to a sequencer, turn "Local Control Off" (p. 30).
Setting the Transmission Mode
The GR-20 lets you select either "Mono Mode transmission" or "Poly Mode transmission" as the method it uses when transmitting MIDI messages.
Mono Mode transmission
Performance data for each string will be transmitted individually, with each using its own separate MIDI channel. Starting with the selected MIDI CH, six consecutive MIDI channels will be selected automatically. For example, if MIDI CH is set to 3, the six channels 3-8 will transmit MIDI data for strings 1-6, respectively.
Since continuous pitch change data (MIDI Pitch Bend messages) can be transmitted independently for each string, this allows you to use performance techniques typical of a guitar, such as use of the whammy bar and string bending.
- The connected sound module must be a multitimbral sound module with at least six parts.
Poly Mode transmission
Performance data for all strings will be transmitted on a single MIDI channel. The selected MIDI CH will be used. Since the entire guitar will use only one channel, this lets you conserve MIDI channels. This also lets you control a sound module that is not able to receive six channels simultaneously.
-
However, if two or more strings are sounding, bend data will not be transmitted; pitch change will occur only in semitone steps. This means that the pitch actually being played by the guitar will not be completely reflected by the synth sound.
-
Turn off the power of the GR-20, and hold down the [EXIT] button while you turn the power on again.
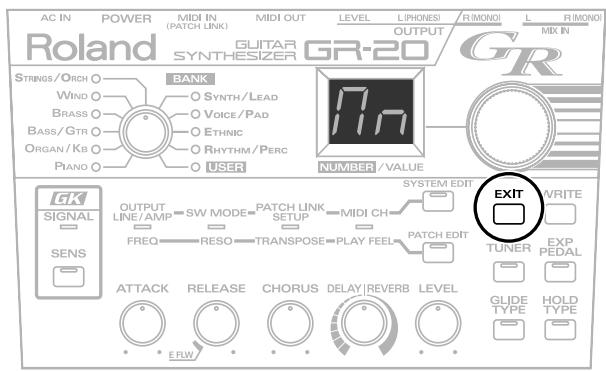
- Use the [NUMBER/VALUE] knob to select the mode.
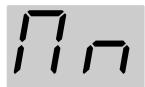
:MONO MODE
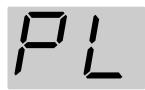
: POLY MODE
- Press the [EXIT] button.
The setting will be stored, and you will return to Play mode.
- The decimal point in the display will blink while the setting is being stored. Don't turn off the power during this time.
- If you turn off the power before returning to Play mode, the setting you made will not be stored.
Setting the MIDI Channel (BASIC CHANNEL)
- You can select only channels 1-11. Channels 12-16 are not available.
-
If the output mode is set to "Mono Mode," the GR-20 will use six channels starting with the channel you specify here.
-
Press the [SYSTEM EDIT] button a number of times until the MIDI CH/PLAY FEEL indicator lights.
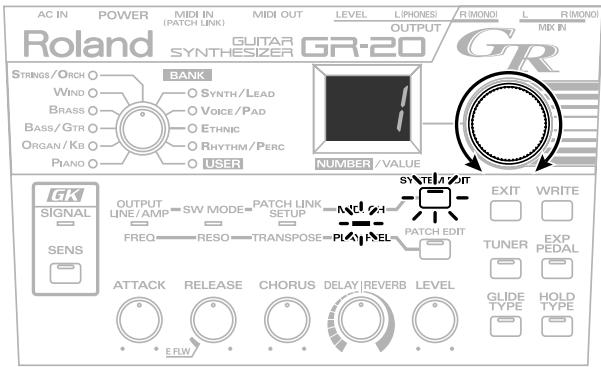
- Use the [NUMBER/VALUE] knob to change the setting. Set the channel so it's the same as the MIDI transmit channel of your multi-effects unit.
- Press the [EXIT] button.
The setting will be stored, and you will return to Play mode.
- The decimal point in the display will blink while the setting is being stored. Don't turn off the power during this time.
- If you turn off the power before returning to Play mode, the setting you made will not be stored.
Specifying the Bend Range
Since the GR-20 transmits Pitch Bend data based on a bend range of 24, you must set your sound module to a bend range of ± 24 . For details on making this setting, refer to the manual for your sound module.
MIDI Messages Transmitted by the GR-20
As performance data, the GR-20 transmits a note-on message when you play a note, a note-off message when a note stops, and pitch bend messages when you bend a note.
In addition to these messages, the GR-20 also transmits the following MIDI messages so that your performance can be faithfully reproduced when recorded and played back by a sequencer.
OENVELOPE FOLLOW
If the RELEASE setting is E FLW (p. 20), MIDI control change number 18 (general purpose controller 3) will be transmitted according to the amplitude of the guitar string's vibration.
OGLIDE pedal
MIDI pitch bend messages will be transmitted according to the change in pitch.
OHOLD pedal
If the HOLD MODE is H1, H2, or H3
Outputting of MIDI note-off messages will be suspended as long as you continue pressing the pedal.
If the HOLD MODE is H4
Control change number 64 will be transmitted.
- In the case of Poly Mode transmission (p. 28), the Hold effect cannot be conveyed entirely because it cannot be processed independently for identical pitches played on different strings.
Expression pedal
Control change number 7 (Volume) or number 4 (Foot Type) is transmitted according to movements of the pedal.
Program change
This message is transmitted when you switch patches.
The sound bank is transmitted by MIDI Bank Select (CC#0), and the sound number is transmitted as a Program Change (PC).
Local Control Off
The state in which the GR-20's guitar control section is internally connected to the sound generator is referred to as "Local Control On." In contrast, the Local Control Off setting internally disconnects the GR-20's sound generator from the guitar control section, so that the sound generator will produce sound only in response to MIDI messages from MIDI IN. The guitar performance will be transmitted only from MIDI OUT.
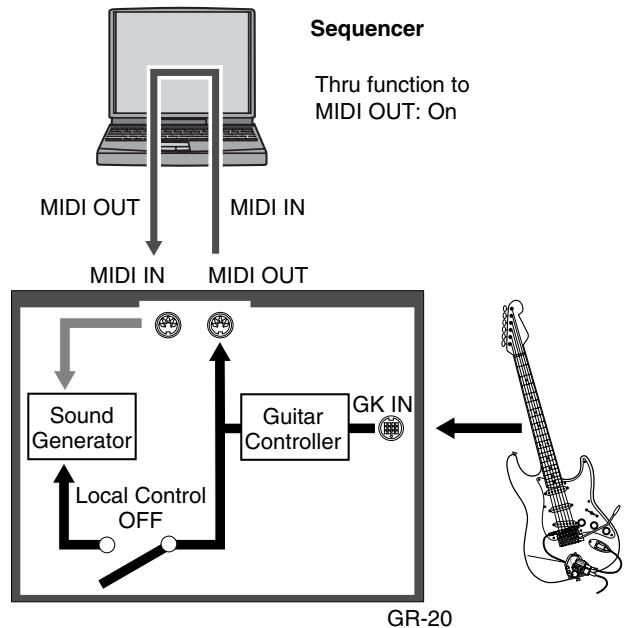
By selecting the Local Control Off setting and enabling the "Soft Thru" setting on your externally connected sequencer, you can avoid conflicts from occurring between the performance data from your guitar and from the sequencer.
- Turn off the GR-20, and then hold down the [SYSTEM EDIT] button while turning the power on again. The display will indicate "Lo" for approximately one second, and the GR-20 will then enter Play mode.
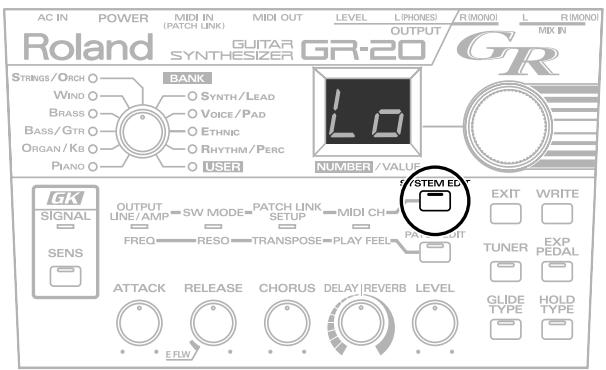
- The Local Control Off setting cannot be stored.
-
If the connections between the GR-20 and your external MIDI device form a loop, you must use the Local Control Off setting. If you make connections with this setting On, switches will not function, and the system will not operate correctly.
-
To turn Local Control on, turn the power of the GR-20 off, then on again.
Chapter 6 Appendices
Restoring the Factory Settings (Factory Reset)
If you want, you can get back all the settings and patches that the GR-20 had when you first took it out of the box; this process is called "Factory Reset."
You can restore the entire GR-20 to the factory-set state, or restore an individual user patch to its factory-set state.
HINT
Calibration settings for the expression pedal (p. 31) will not be returned to the factory-set condition. This means that even if you execute Factory Reset, you don't need to calibrate the expression pedal again.
NOTE
When you execute Factory Reset, all data you currently have stored in the unit will be overwritten by the factory-default data. If the GR-20 contains important data that you want to keep, use Bulk Dump (p. 26) to save it on an external MIDI device before you execute a Factory Reset.
- Turn off the GR-20, and then hold down the [WRITE] button while turning the power on again.
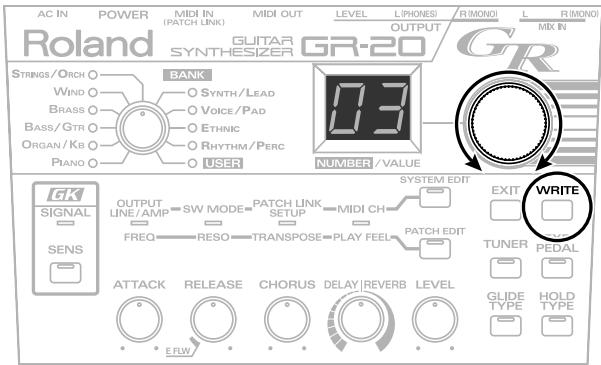
- Use the [NUMBER/VALUE] knob to select the range of data that you want to restore to the factory settings.
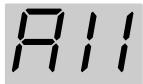
: The entire GR-20 will be returned to the factory settings.
NOTE
When you perform this operation, the guitar/bass setting will return to guitar mode (the default setting). If you want to use the GR-20 with a bass guitar, you'll need to follow the procedure described in "Switching the GR-20 between bass guitar and guitar operation (p. 32)" to switch the GR-20 back to bass guitar mode.
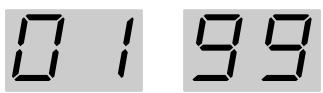
: Only the specified patch will be returned to the factory settings.
- Press the [WRITE] button.
The decimal point in the display will blink, the Factory Reset operation will be executed. Then you will return to Play mode.
- Do not turn off the power while the decimal point is blinking.
Calibrating the Expression Pedal
When the GR-20 is shipped from the factory, the expression pedal is calibrated for optimum performance. However, with extended use, or depending on the conditions of use, this calibration may drift. If you experience problems, such as being unable to use the volume pedal to silence the sound entirely, or if the pitch does not rise or fall through the full range specified, you can use the following procedure to recalibrate the expression pedal.
- Turn off the power of the GR-20. Then hold down [EXP PEDAL] while you turn the power on again. The display will indicate "Pu."
- Fully release the pedal (applying pressure at the heel), and press the [WRITE] button. The display will indicate "Pd."
- Depress the pedal completely (applying pressure at the toe), and press the [WRITE] button. The setting will be stored, and you will return to Play mode.
- The decimal point in the display will blink while the setting is being stored. Don't turn off the power during this time.
- If you turn off the power before returning to Play mode, the setting you made will not be stored.
Regarding GR-20 bass guitar support
The GR-20 you purchased includes system program version 2, which allows the bass guitar range to be supported as well. By connecting a bass guitar that has a separately sold GK-2B or GK-3B divided pickup (for bass) installed, you can play the GR-20 from your bass guitar.
When shipped from the factory, the GR-20 is set for use with a guitar. The procedure described below lets you switch the GR-20 between guitar and bass operation.
- You may repeat this procedure as many times as you like. Furthermore, this procedure will not affect the user patch data.
Switching the GR-20 between bass guitar and guitar operation......
- Switch off the GR-20. Then while holding down the [GK SENS] button, turn on the power.
Shortly afterwards, the display will indicate "E" or "B".
-
Use the [NUMBER/VALUE] knob to select bass guitar or guitar operation.
-
Bass guitar operation: Turn the [NUMBER/VALUE] knob toward the right (clockwise) to make the display read "B L ."
-
Guitar operation: Turn the [NUMBER/VALUE] knob toward the left (counterclockwise) to make the display read "E."
-
Press the [EXIT] button.
The setting will be stored, and you will be in Play mode.
- The decimal point of the display will blink while the setting is being stored. Do not switch off the GR-20's power while this takes place.
- Please note that the setting will not be stored if you neglect to return to Play mode before you switch off the unit.
- The setting is preserved until you repeat this procedure again.
How the Bass Guitar and Guitar settings differ
- The range of pitches produced by the GR-20 is switched between guitar and bass guitar ranges.
- In some of the preset patches, this setting causes the actual pitch produced by the synthesizer to be one or more octaves above or below the pitch that is input. The same applies to user patches that you create based on these preset patches.
(Example) BANK= BASS/GTR No= "Wood Bass"
| Bass Guitar operation | The synthesizer will sound at the same pitch as the input. |
| Guitar operation | The synthesizer will sound one octave lower than the input. |
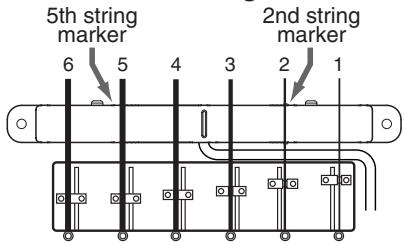
- When setting the input sensitivity (GK SENS), the numbers shown in the left of the display correspond to strings as shown in the diagram below.

You must install the GK-2B/3B pickup on your bass guitar as shown below. The system will not operate correctly if you install the pickup any other way.
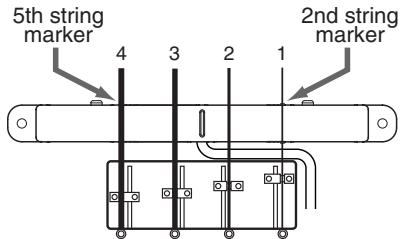
For a four-string bass:
GK SENS Display


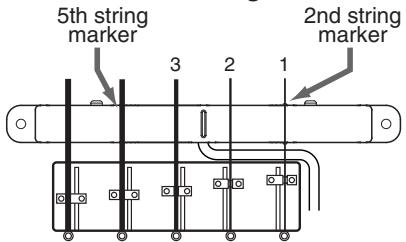
For a five-string bass:


For a six-string bass:


Troubleshooting
During Normal Performance Using the GR-20 Alone
- Playing your guitar does not produce a synth sound
Could the OUTPUT LEVEL have been lowered?
Use the rear panel [OUTPUT LEVEL] knob to raise the level appropriately (p. 12).
Could the volume of the GK pickup be turned down?
Raise the volume of the GK pickup to an appropriate level.
Could the select switch of the GK pickup be set to GUITAR?
Set the switch of the GK pickup to GK (or SYNTH) or MIX.
Could the expression pedal be released?
Depress the expression pedal.
Could the LEVEL be turned down?
Try turning the [LEVEL] knob (p. 20).
Volume is uneven among the strings
Was the "GK SENS" setting adjusted correctly for each string?
Perform the adjustment (p. 12). - When using Pitch Glide (or the pitch function of the expression pedal), the pitch does not rise all the way
Depending on the tone or the region of pitch, the range of upward change may be restricted for functions that modify the pitch continuously.
Use a narrower range of change (p. 22, p. 23). -
When using the GR-20's pedal effects or expression pedal, the result is different for each patch
The effect produced using the expression pedal is different for each sound (patch).
Check the effect of each patch beforehand. -
Internal effects not applied to the guitar sound
The GR-20's internal effects can only be applied to the synth sound. They cannot be applied to the normal guitar sound.
By using the guitar out jack you can apply an external guitar effects processor only to the guitar sound. (If you want the synth sound and guitar sound to share a single amp, use the MIX IN jacks as well.) (p. 17)
The pitch of the synth sound does not change in the same way as the pitch of the guitar
The pitch of some tones (such as percussion instruments and sound effects) will change in a different way than the pitch of your guitar; it does not indicate a malfunction. - You sometimes hear a thin, modulated noise in an extremely high frequency range
This is a phenomenon known as "aliasing noise," unique to digital sound generators. You may hear this when playing a slide or when using the glide function. This does not indicate a malfunction.
The pitch changes in half-steps when bending or etc.
On some sounds (patches) such as piano or organ, the pitch will not change smoothly, but change only in semitone steps. This is done intentionally in order to make the instrument sound more realistic; it does not indicate a malfunction. - Synth sound is delayed when you play from a bass guitar
The GR-20 analyzes the output of the divided pickups, and produces the synth sound after the pitch and loudness have been detected.
Due to the laws of physics, lower pitches take more time to analyze. This means that with a bass guitar, and its inherently lower pitches, you should expect that it may take longer for the synth sound to begin.
When Using the GR-20 with other MIDI devices
-
The external sound module connected to the MIDI OUT connector does not sound
Do the MIDI channels of the transmitting and receiving devices match?
Match the MIDI channels (p. 29).
Could you have turned down the volume using the volume control of the GK pickup or the expression pedal?
Raise the controller or volume. -
Only one string sounds on the external sound module (some strings do not sound)
Could you be using Mono mode to transmit from the GR20 to a sound module that is unable to receive six MIDI channels simultaneously?
Use a sound module that supports multitimbral operation (p. 28).
Use the GR-20 in Poly mode.
- Pitch is incorrect (different than the guitar pitch)
Is the Bend Range of your external sound module set to + - 24?
Set the Bend Range of your external sound module to + - 24
Is your guitar tuned accurately?
Use the GR-20's Tuner function to tune your guitar accurately. You must also adjust your guitar so that accurate pitches are sounded even on the high frets.
- Pitch does not change smoothly
On the GR-20, could you have selected a patch such as piano or organ for which the pitch changes in semitone steps?
Select a patch on the GR-20 whose pitch will change smoothly.
- When you view the note messages recorded in your sequencer, the pitches differ from what is actually sounded
In order to convey the beginning of a note as quickly as possible, and to allow the pitch to change flexibly, the GR-20 transmits the pitch as a combination of note messages and pitch bend messages. This means that when you view only the note data using the event list ("microscope") screen of your sequencer, the data may appear to be different than the pitch that is actually sounded.
Other
The volume level of the instrument connected to MIX IN jack is too low.
Could you be using a connection cable that contains a resistor?
Use a connection cable that does not contain a resistor.
Patch List
| BANK | No | NAME |
| PIANO | 1 | Grand E.P |
| 2 | Rock Piano | |
| 3 | Piano / Bass | |
| 4 | 4-Hand Piano | |
| 5 | Honky Tonk | |
| 6 | Piano & Strings | |
| 7 | Piano & Orchestra | |
| 8 | Piano & Choir Oohs | |
| 9 | Piano & Choir Aahs | |
| 10 | West Coast | |
| 11 | Ac.Piano | |
| 12 | Hard Rhodes | |
| 13 | Rhodes | |
| 14 | Phaser Rhodes | |
| 15 | Touch Sense E.P | |
| 16 | Soft Rhodes | |
| 17 | Smooth Rhodes | |
| 18 | Love E.P | |
| 19 | E.P / Bass | |
| 20 | Wide E.P | |
| 21 | Crystal Piano 1 | |
| 22 | Crystal Piano 2 | |
| 23 | Fantasy Piano | |
| 24 | Silky E.P Pad | |
| 25 | Detuned E.P Pad | |
| 26 | Chorus E.P Pad | |
| 27 | E.P & Strings | |
| 28 | E.P & Choir | |
| 29 | Great Rhodes | |
| 30 | GR Ballad | |
| 31 | Pulse E.P | |
| 32 | Shattering | |
| 33 | Dynamic Piano | |
| 34 | Minor Mood | |
| 35 | House | |
| ORGAN/ KB | 1 | Rock Organ 1 |
| 2 | Rock Organ 2 | |
| 3 | Rock Organ & Pedal Organ | |
| 4 | Rock Organ & Wood Bass | |
| 5 | Rock Organ & E.Bass | |
| 6 | Purple Organ | |
| 7 | Rock Organ 3 | |
| 8 | Jazz Organ 1 | |
| 9 | Jazz Organ 2 | |
| 10 | Jazz Organ & Pedal Organ | |
| 11 | Jazz Organ & Wood Bass | |
| 12 | Jazz Organ & E.Bass | |
| 13 | Jazz Organ 3 | |
| 14 | Jazz Organ 4 | |
| 15 | Gospel Organ | |
| 16 | 60's Organ |
| BANK | No | NAME |
| ORGAN/KB | 17 | Glide Organ |
| 18 | Cathedral | |
| 19 | Church Choir | |
| 20 | Rotary Choir Organ | |
| 21 | 3 Tone Stack | |
| 22 | Organ & Synth Strings | |
| 23 | Ice Organ | |
| 24 | Clavi | |
| 25 | Retro Clavi | |
| 26 | Phase Clavi | |
| 27 | JUNO Clavi | |
| 28 | JUNO Keys | |
| 29 | Harpsichord | |
| 30 | Baroque Piano | |
| 31 | Harpsichord & Strings | |
| 32 | New Harpsichord | |
| 33 | Accordion | |
| 34 | Asian Trance | |
| 35 | Bell | |
| 36 | Twinkle | |
| 37 | Milky Way | |
| 38 | D-50 Stack | |
| 39 | Dream Bell | |
| 40 | Drama Stack | |
| 41 | Staccato Heaven | |
| 42 | Heaven Choir | |
| 43 | Hybrid Synth | |
| 44 | Archimedes | |
| BASS/GTR | 1 | Wood Bass |
| 2 | Wood Pick Bass | |
| 3 | Electric Bass | |
| 4 | Phased Bass | |
| 5 | Fretless Bass 1 | |
| 6 | Fretless Bass 2 | |
| 7 | Slap Bass | |
| 8 | Touch Wah Slap Bass | |
| 9 | FM Bass | |
| 10 | FM Bass + Low | |
| 11 | Flat Bass | |
| 12 | Synth Bass | |
| 13 | 2020 Bass | |
| 14 | Soft Reso Bass | |
| 15 | 101 Bass | |
| 16 | TB-303 | |
| 17 | Acid TB | |
| 18 | Wonder Bass | |
| 19 | Res Bass 1 | |
| 20 | Res Bass 2 | |
| 21 | Heavy | |
| 22 | System Bass | |
| 23 | Love Parade Bass | |
| 24 | Mix Bass | |
| 25 | MG Reso Bass | |
| 26 | Body Bass | |
| BASS/GTR | 27 | In Sync |
| 28 | Throw up | |
| 29 | Bass distortion | |
| 30 | Nylon Guitar | |
| 31 | Nylon Duet | |
| 32 | Nylon & Strings | |
| 33 | Nylon & Choir | |
| 34 | Ac.Guitar | |
| 35 | Ac.Guitar Oct | |
| 36 | Ac.Guitar + Low | |
| 37 | 12 Str Guitar | |
| 38 | 12 Str & Synth Strings | |
| 39 | 12 Str Heaven | |
| 40 | Guitar & Pad | |
| 41 | Feedback | |
| 42 | Whammy | |
| 43 | OD-Paradise | |
| 44 | Small Amp Dist Vib | |
| 45 | Digital Rock Guitar | |
| 46 | Orgguitar | |
| BRASS | 1 | Trumpet |
| 2 | Trumpet Split | |
| 3 | Mute Trumpet | |
| 4 | Trombone | |
| 5 | Trombone Vib | |
| 6 | Tuba | |
| 7 | Horn | |
| 8 | Flugelhorn | |
| 9 | Tp Section | |
| 10 | Brass Section | |
| 11 | NewYork Brass | |
| 12 | Brass & Sax 1 | |
| 13 | Brass & Sax 2 | |
| 14 | French Horns | |
| 15 | 5th French Horns | |
| 16 | French Heaven | |
| 17 | Pat Brass | |
| 18 | Brassy Saws | |
| 19 | Poly Brass 1 | |
| 20 | Synth Brass 1 | |
| 21 | Xpensive Synth Brass | |
| 22 | Synth Brass 2 | |
| 23 | Synth Brass 3 | |
| 24 | Poly Brass 2 | |
| 25 | MG Brass | |
| 26 | Fat Synth Brass | |
| 27 | Breathy Brass | |
| 28 | Lee Brass | |
| 29 | Soft D-50 Brass | |
| 30 | Confident Lead | |
| 31 | Bright Synth Brass | |
| 32 | Brass It ! | |
| 33 | Synth Brass Chord | |
| 34 | Wacky Brass |
| BANK | No | NAME |
| WIND | 1 | Fat Tenor Sax |
| 2 | Bright Tenor Sax | |
| 3 | Moody Sax | |
| 4 | Alto Sax | |
| 5 | Alto Sax Vib | |
| 6 | Soprano Sax | |
| 7 | Baritone Sax | |
| 8 | Sax Ensemble | |
| 9 | Sax Section & Baritone Sax | |
| 10 | Brass Section & Baritone Sax | |
| 11 | Sax Section Oct | |
| 12 | Harmonica | |
| 13 | Blues Harp OD | |
| 14 | Blues Harp Dist | |
| 15 | Piccolo | |
| 16 | Flute | |
| 17 | Attack Flute | |
| 18 | Piccolo & Glocken | |
| 19 | Flute & Glocken | |
| 20 | Piccolo & Flute | |
| 21 | Flute & Clarinet | |
| 22 | Growl Flute | |
| 23 | Synth Flutes | |
| 24 | Playback Flute | |
| 25 | Clarinet | |
| 26 | Clarinet Duet | |
| 27 | Oboe | |
| 28 | Bassoon | |
| 29 | Oboe & Bassoon | |
| 30 | Wind Ensemble Cresc. | |
| 31 | Wind Ensemble | |
| STRINGS /ORCH | 1 | Strings |
| 2 | Hybrid Strings | |
| 3 | Dolce Strings | |
| 4 | Strings & Horns 1 | |
| 5 | Warm Strings | |
| 6 | Tremolo Strings | |
| 7 | Strings Oct | |
| 8 | Strings & Timpani | |
| 9 | Nashville Strings | |
| 10 | Good Old Strings Pad | |
| 11 | Silicon Strings | |
| 12 | Lo-Bows | |
| 13 | Marcato Strings | |
| 14 | Pizzicato | |
| 15 | Violin Vib | |
| 16 | Violin | |
| 17 | Cello | |
| 18 | Cello Vib | |
| 19 | Synth Cello | |
| 20 | Gang Strings | |
| 21 | Retro Synth Strings | |
| 22 | Retro Synth Strings Oct | |
| 23 | Playback Strings 1 | |
| STRINGS/ORCH | 24 | Playback Strings 2 |
| 25 | Moving Strings | |
| 26 | Clustered | |
| 27 | Farewell | |
| 28 | Wind & Strings | |
| 29 | Orchestra & Choir | |
| 30 | Ending Scene | |
| 31 | Strings & Warm Brass | |
| 32 | Strings & Bright Brass | |
| 33 | Strings & Horns 2 | |
| 34 | Synth Brass & Strings | |
| SYNTH/LEAD | 1 | Guitar Attack Soft Lead |
| 2 | Digi Lead | |
| 3 | Attack Digi Lead | |
| 4 | Creamer | |
| 5 | GR-300 Saw 1 | |
| 6 | Brass Lead | |
| 7 | Simple Synth Lead | |
| 8 | Loud Synth Lead | |
| 9 | Synth Pad & Saws | |
| 10 | Heavy Saws Lead | |
| 11 | Saw & Square Lead | |
| 12 | Poly Pulse | |
| 13 | Daft Lead | |
| 14 | Razor Lead | |
| 15 | Blister Lead | |
| 16 | Sharp Attack Lead | |
| 17 | Square Lead 1 | |
| 18 | Square Lead 2 | |
| 19 | Square Lead 3 | |
| 20 | Reso Lead 1 | |
| 21 | Square Lead 4 | |
| 22 | Basic | |
| 23 | OB Lead | |
| 24 | Sine Lead | |
| 25 | 70's Lead | |
| 26 | SH-2000 | |
| 27 | Simple Soft Lead | |
| 28 | Soft Lead 1 | |
| 29 | Soft Lead 2 | |
| 30 | Reso Lead 2 | |
| 31 | Reso Lead 3 | |
| 32 | Saw Lead 1 | |
| 33 | Saw Lead 2 | |
| 34 | Bright Saw Lead | |
| 35 | Bright Moving Lead | |
| 36 | Saw Lead Vib | |
| 37 | Qwak Lead | |
| 38 | Flanger Ana Lead | |
| 39 | Porta Wah | |
| 40 | Wet Reso Lead | |
| 41 | GR-300 Saw 2 | |
| 42 | The Machine | |
| 43 | Big BPF |
| BANK | No | NAME |
| SYNTH/LEAD | 44 | Haze Lead |
| 45 | Vocoder | |
| 46 | Sweep Reso Lead | |
| 47 | Heavy Boost Lead | |
| 48 | Morph | |
| 49 | Sweep Lead | |
| 50 | Sync Sweep | |
| 51 | Vibro Sweep | |
| 52 | Rotary Lead | |
| 53 | Step Saws | |
| 54 | Touch Filter | |
| 55 | Trade Mark Lead | |
| 56 | Retro Synth | |
| 57 | No Bob No Hope | |
| 58 | House Of Phase | |
| 59 | Attack Organ Lead | |
| 60 | Minor Incid. | |
| 61 | Heavy Oct Lead | |
| 62 | Mental Chord | |
| 63 | House Chord 1 | |
| 64 | House Chord 2 | |
| 65 | Flack | |
| 66 | Waves | |
| 67 | Enterprise | |
| 68 | Chasing VOC | |
| 69 | Key In Sync | |
| 70 | Gated | |
| 71 | Delay Gate | |
| 72 | Acid Shuffle | |
| 73 | Didgeridoo Dance | |
| 74 | Phobia | |
| 75 | Deep | |
| 76 | Atmosphere | |
| 77 | Big Pipe Noise | |
| 78 | Sequencer | |
| 79 | Poly Key | |
| 80 | Sandy Synth Attack | |
| 81 | Detune Synth Attack | |
| 82 | For Synth Arpeggio | |
| 83 | Reso Synth Attack | |
| 84 | Trancy | |
| 85 | Fat Ana Lead 1 | |
| 86 | Fat Ana Lead 2 | |
| 87 | Wire Key | |
| 88 | Pulse Key | |
| 89 | Belly Keys | |
| 90 | Velo Sense | |
| 91 | Sugar Key | |
| 92 | Phobo Tron | |
| 93 | Sentimental | |
| VOICE/PAD | 1 | Jazz Doos |
| 2 | Jazz Scot Bop | |
| 3 | Jazz Scot Doos & Bop | |
| 4 | Male Aahs | |
| VOICE/PAD | 5 | Choir Aahs Soft |
| 6 | Choir Aahs | |
| 7 | Female Aahs | |
| 8 | Choir Oohs | |
| 9 | Pop Chorus | |
| 10 | Pop Voice | |
| 11 | Arpeggio Choir | |
| 12 | Melancholia | |
| 13 | Spaced Voxx | |
| 14 | Voice Pad 909 | |
| 15 | Choir & Sweep | |
| 16 | Wide Vox | |
| 17 | Choir & Pad 1 | |
| 18 | Choir & Pad 2 | |
| 19 | Chorus Vox Pad | |
| 20 | Heavenly Pad | |
| 21 | S&H Layer | |
| 22 | Wide Pad | |
| 23 | Lost On Mars | |
| 24 | Miaow Pad | |
| 25 | JUNO Polaris | |
| 26 | Darkshine 1 | |
| 27 | Darkshine 2 | |
| 28 | Digi Saw Pad | |
| 29 | Analog Drama 1 | |
| 30 | Saws Sweep 1 | |
| 31 | Saws Sweep 2 | |
| 32 | Xpensive Synth Pad | |
| 33 | Wall of Sand | |
| 34 | Super Bright Pad 1 | |
| 35 | Super Bright Pad 2 | |
| 36 | Pivotal Pad | |
| 37 | Pulsify | |
| 38 | Vintage Orchestra | |
| 39 | Cosmos Pad | |
| 40 | Analog Drama 2 | |
| 41 | Soft Pad Oct | |
| 42 | Soft Pad | |
| 43 | Pad / Bass | |
| 44 | Silky Way | |
| 45 | JP-8 Haunting | |
| 46 | Shifted Glass | |
| 47 | Glass Voices | |
| 48 | 2.2 Warm Dream | |
| 49 | Moving Fine Wine | |
| 50 | 2.2 Bright Dream | |
| 51 | Wine Pad | |
| 52 | Glassy Pad | |
| 53 | Darkshine 3 | |
| 54 | Soundtrack Seal | |
| 55 | Warm Pad | |
| 56 | Changes | |
| ETHNIC | 1 | Sitar |
| 2 | Sitar & Morocco Phrase |
| BANK | No | NAME |
| ETHNIC | 3 | Sitar+Tampura |
| 4 | Sitar & Drone | |
| 5 | E.Sitar | |
| 6 | Sitar & Tabla | |
| 7 | Sitar & Tabla Phrase | |
| 8 | Sitar Pad | |
| 9 | Banjo | |
| 10 | 5str Banjo | |
| 11 | Fiddle | |
| 12 | Flat Mandolin | |
| 13 | Flat Mandolin Tremolo | |
| 14 | Guitar & Morocco Phrase | |
| 15 | Koto | |
| 16 | Koto Heaven | |
| 17 | Shamisen | |
| 18 | Shamisen Ensemble | |
| 19 | Synth Shamisen | |
| 20 | Sanshin | |
| 21 | Sanshin Soft | |
| 22 | Kayakeum | |
| 23 | Erhu | |
| 24 | Erhu Vib Soft | |
| 25 | Erhu Vib Hard | |
| 26 | Erhu & China Phrase | |
| 27 | Ocarina | |
| 28 | Didgeridoo & Ocarina | |
| 29 | India Flute | |
| 30 | Andes | |
| 31 | Pan Pipes | |
| 32 | Pan Pipes Soft | |
| 33 | Zampona Soft | |
| 34 | Zampona Hard | |
| 35 | Shakuhachi | |
| 36 | Shakuhachi & Drum Phrase | |
| 37 | Katmandu | |
| 38 | Legato Bamboo | |
| 39 | Culture Flute | |
| 40 | Peru Lead | |
| 41 | Mizmar | |
| 42 | Mizmar Pad | |
| 43 | Shanai | |
| 44 | Dazin Shanai | |
| 45 | Gamelan Breathy | |
| 46 | Vox & Sitar & Tabla | |
| RHYTHM /PERC | 1 | Vibraphone |
| 2 | Glockenspiel | |
| 3 | Xylophone | |
| 4 | Marimba | |
| 5 | Steel Drum | |
| 6 | Timpani | |
| 7 | Impact | |
| 8 | Orchestra Hit | |
| 9 | Philly Hit | |
| 10 | Kalimba | |
| RHYTHM /PERC | 11 | Agogo Bell |
| 12 | Jublag | |
| 13 | Gamelan Set | |
| 14 | Kajar | |
| 15 | Asian Gong | |
| 16 | Finger Bell | |
| 17 | Balaphone | |
| 18 | Angklung | |
| 19 | Dragon | |
| 20 | Vox Set | |
| 21 | Vox & Perc. Kit | |
| 22 | Drum & Perc. Kit | |
| 23 | Drum Kit | |
| 24 | Machine & Perc. Kit | |
| 25 | Machine Kit | |
| 26 | Guiro & Cowbell Pattern | |
| 27 | Latin Perc. Set | |
| 28 | Conga Pattern | |
| 29 | Tabla & Conga Set | |
| 30 | Perc. & Morocco Phrase | |
| 31 | Bell & Morocco Phrase | |
| 32 | Vox & China Phrase | |
| 33 | Cuica & Drum Phrase | |
| 34 | Cuica & Samba Phrase | |
| 35 | Steel Drum & Samba Phrase | |
| 36 | Brass & Samba Phrase | |
| 37 | Tambourine &Tabla Phrase | |
| 38 | Synth Pulse &Tabla Phrase | |
| 39 | Drum Kit Pattern 1 | |
| 40 | Drum Kit Pattern 2 | |
| 41 | Playmate | |
| 42 | Delay Voice | |
| 43 | Tribal Drums | |
| 44 | Street Noise | |
| 45 | FX Tom Hit | |
| 46 | Perc. Heaven | |
| 47 | Analog Snare | |
| 48 | 5th Gong | |
| 49 | Back Noise | |
| 50 | Oxygen |
User Patch List
| No | BANK | BANK No | NAME |
| 1 | BRASS | 9 | Tp Section |
| 2 | BASS/GTR | 1 | Wood Bass |
| 3 | PIANO | 13 | Rhodes |
| 4 | WIND | 1 | Fat Tenor Sax |
| 5 | STRINGS/ORCH | 1 | Strings |
| 6 | ORGAN/KB | 1 | Rock Organ 1 |
| 7 | ETHNIC | 2 | Sitar & Morocco Phrase |
| 8 | VOICE/PAD | 8 | Choir Oohs |
| 9 | RHYTHM/PERC | 5 | Steel Drum |
| 10 | PIANO | 1 | Grand E.P |
| 11 | BASS/GTR | 6 | Fretless Bass 2 |
| 12 | SYNTH/LEAD | 5 | GR-300 Saw 1 |
| 13 | VOICE/PAD | 51 | Wine Pad |
| 14 | BRASS | 3 | Mute Trumpet |
| 15 | WIND | 15 | Piccolo |
| 16 | ORGAN/KB | 25 | Retro Clavi |
| 17 | STRINGS/ORCH | 7 | Strings Oct |
| 18 | SYNTH/LEAD | 48 | Morph |
| 19 | RHYTHM/PERC | 33 | Cuica & Drum Phrase |
| 20 | ETHNIC | 17 | Shamisen |
| 21 | VOICE/PAD | 10 | Pop Voice |
| 22 | PIANO | 24 | Silky E.P Pad |
| 23 | WIND | 4 | Alto Sax |
| 24 | ORGAN/KB | 6 | Purple Organ |
| 25 | BASS/GTR | 12 | Synth Bass |
| 26 | ETHNIC | 30 | Andes |
| 27 | RHYTHM/PERC | 1 | Vibraphone |
| 28 | RHYTHM/PERC | 8 | Orchestra Hit |
| 29 | VOICE/PAD | 45 | JP-8 Haunting |
| 30 | ORGAN/KB | 33 | Accordion |
| 31 | ORGAN/KB | 35 | Bell |
| 32 | WIND | 14 | Blues Harp Dist |
| 33 | BASS/GTR | 7 | Slap Bass |
| 34 | PIANO | 6 | Piano & Strings |
| 35 | BRASS | 17 | Pat Brass |
| 36 | ORGAN/KB | 18 | Cathedral |
| 37 | RHYTHM/PERC | 36 | Brass & Samba Phrase |
| 38 | STRINGS/ORCH | 15 | Violin Vib |
| 39 | BASS/GTR | 32 | Nylon & Strings |
| 40 | BASS/GTR | 19 | Res Bass 1 |
| 41 | ORGAN/KB | 41 | Staccato Heaven |
| 42 | ETHNIC | 9 | Banjo |
| 43 | VOICE/PAD | 16 | Wide Vox |
| 44 | BRASS | 1 | Trumpet |
| 45 | PIANO | 27 | E.P & Strings |
| 46 | SYNTH/LEAD | 62 | Mental Chord |
| 47 | WIND | 10 | Brass Section & Baritone Sax |
| 48 | BASS/GTR | 37 | 12 Str Guitar |
| 49 | BRASS | 26 | Fat Synth Brass |
| 50 | ETHNIC | 16 | Koto Heaven |
| 51 | PIANO | 35 | House |
| 52 | VOICE/PAD | 26 | Darkshine 1 |
| 53 | RHYTHM/PERC | 46 | Perc. Heaven |
| 54 | BRASS | 11 | NewYork Brass |
| 55 | WIND | 7 | Baritone Sax |
| 56 | ORGAN/KB | 15 | Gospel Organ |
| 57 | BRASS | 14 | French Horns |
| 58 | SYNTH/LEAD | 37 | Qwak Lead |
| 59 | STRINGS/ORCH | 18 | Cello Vib |
| 60 | ETHNIC | 3 | Sitar + Tampura |
| 61 | VOICE/PAD | 3 | Jazz Scot Doos & Bop |
| 62 | RHYTHM/PERC | 19 | Dragon |
| 63 | PIANO | 10 | West Coast |
| 64 | WIND | 18 | Piccolo & Glocken |
| 65 | SYNTH/LEAD | 10 | Heavy Saws Lead |
| 66 | STRINGS/ORCH | 24 | Playback Strings 2 |
| 67 | RHYTHM/PERC | 35 | Steel Drum & Samba Phrase |
| 68 | ETHNIC | 24 | Erhu Vib Soft |
| 69 | ORGAN/KB | 29 | Harpsichord |
| 70 | SYNTH/LEAD | 29 | Soft Lead 2 |
| 71 | ORGAN/KB | 37 | Milky Way |
| No | BANK | BANK No | NAME |
| 72 | ETHNIC | 36 | Shakuhachi & Drum Phrase |
| 73 | SYNTH/LEAD | 53 | Step Saws |
| 74 | STRINGS/ORCH | 32 | Strings & Bright Brass |
| 75 | BRASS | 32 | Brass It ! |
| 76 | SYNTH/LEAD | 20 | Reso Lead 1 |
| 77 | SYNTH/LEAD | 74 | Phobia |
| 78 | RHYTHM/PERC | 3 | Xylophone |
| 79 | VOICE/PAD | 39 | Cosmos Pad |
| 80 | SYNTH/LEAD | 82 | For Synth Arpeggio |
| 81 | PIANO | 17 | Smooth Rhodes |
| 82 | BASS/GTR | 23 | Love Parade Bass |
| 83 | WIND | 27 | Oboe |
| 84 | SYNTH/LEAD | 71 | Delay Gate |
| 85 | VOICE/PAD | 6 | Choir Aahs |
| 86 | RHYTHM/PERC | 48 | 5th Gong |
| 87 | SYNTH/LEAD | 13 | Daft Lead |
| 88 | ORGAN/KB | 7 | Rock Organ 3 |
| 89 | VOICE/PAD | 33 | Wall of Sand |
| 90 | SYNTH/LEAD | 65 | Flack |
| 91 | BRASS | 21 | Xpensive Synth Brass |
| 92 | RHYTHM/PERC | 12 | Jublag |
| 93 | SYNTH/LEAD | 91 | Sugar Key |
| 94 | ETHNIC | 20 | Sanshin |
| 95 | VOICE/PAD | 49 | Moving Fine Wine |
| 96 | SYNTH/LEAD | 1 | Guitar Attack Soft Lead |
| 97 | STRINGS/ORCH | 3 | Dolce Strings |
| 98 | SYNTH/LEAD | 41 | GR-300 Saw 2 |
| 99 | VOICE/PAD | 20 | Heavenly Pad |
MIDI Implementation
Model: GR-20
Date: Dec. 18 2003
Version: 1.00
1. Recognized Receive Data
■Channel Voice Message
Note Off
| STATUS | SECOND | THIRD |
| 8nH | kkH | vvH |
| 9nH | kkH | 00H |
n=MIDI Channel Number: 0H-FH (ch.1-ch.16)
kk=Note Number: 00H-7FH(0-127)
vv=Velocity: 00H-7FH(0-127)
- Velocity is ignored.
Note On
| STATUS | SECOND | THIRD |
| 9nH | kkH | vvH |
n=MIDI Channel Number: 0H-FH (ch.1-ch.16)
kk=Note Number: 00H-7FH(0-127)
vv=Velocity: 01H-7FH(1-127)
- vv=00H is received as Note-off
Control Change
Bank Select
| STATUS | SECOND | THIRD |
| BnH | 00H | mmH |
| n=MIDI Channel Number: | 0H-BH (ch.1 - ch.12) |
| mm=Bank Number: | 00H-0AH |
-
The LSB of Bank Select is ignored.
-
Can be received only through the Basic channel.
OFoot Type
| STATUS | SECOND | THIRD |
| BnH | 04H | vvH |
| n=MIDI Channel Number: | 0H-BH (ch.1 - ch.12) |
| vv=Control Value: | 00H-7FH (0 - 127) |
-
Can be received only through the Basic channel.
-
Received when EXP PEDAL TYPE = "FL", "EF".
Volume
| STATUS | SECOND | THIRD |
| BnH | 07H | vvH |
| n=MIDI Channel Number: | 0H-BH (ch.1 - ch.12) |
| vv=Volume: | 00H-7FH (0 - 127) |
- Can be received only through the Basic channel.
General Purpose #3
| STATUS | SECOND | THIRD |
| BnH | 12H | vvH |
| n=MIDI Channel Number: | 0H - FH (ch.1 - ch.16) |
| vv=Control Value: | 00H - 7FH (0 - 127) |
- When E FLW is on, and recognized as the string envelope follow values.
OHold1
| STATUS | SECOND | THIRD |
| BnH | 40H | vvH |
| n=MIDI Channel Number: | 0H-BH(ch.1-ch.12) |
| vv=Control Value: | 00H-7FH(0-127) |
| 00H-3FH=OFF, 40H-7FH=ON |
- Can be received only through the Basic channel.
Program Change
| STATUS | SECOND |
| CnH | ppH |
| n=MIDI Channel Number: | 0H-BH (ch.1 - ch.12) |
| pp=Program Number: | 00H-7FH (0 - 127) 0=prg.1 127=prg.128 |
- Can be received only through the Basic channel.
- The recognized Program Change Number corresponds to each patch as follows.
| BANK MSB | PROGRAM NUMBER | PATCH |
| 0 | 0 | USER1 |
| 0 | 1 | USER2 |
| 0 | 2 | USER3 |
| 0 | 3 | USER4 |
| 0 | : | : |
| 0 | 97 | USER98 |
| 0 | 98 | USER99 |
| 1 | 0 | PIANO1 |
| 1 | 1 | PIANO2 |
| 1 | 3 | PIANO3 |
| : | : | |
| 2 | 0 | ORGAN/KB1 |
| 2 | 1 | ORGAN/KB2 |
| 2 | 3 | ORGAN/KB3 |
| : | : | |
| 3 | 0 | BASS/GTR1 |
| 3 | 1 | BASS/GTR2 |
| 3 | 3 | BASS/GTR3 |
| : | : | |
| 4 | 0 | BRASS1 |
| 4 | 1 | BRASS2 |
| 4 | 3 | BRASS3 |
| : | : | |
| 5 | 0 | WIND1 |
| 5 | 1 | WIND2 |
| 5 | 3 | WIND3 |
| : | : | |
| 6 | 0 | STRING/ORCH1 |
| 6 | 1 | STRING/ORCH2 |
| 6 | 3 | STRING/ORCH3 |
| : | : | |
| 7 | 0 | SYNTH/LEAD1 |
| 7 | 1 | SYNTH/LEAD2 |
| 7 | 3 | SYNTH/LEAD3 |
| : | : | |
| 8 | 0 | VOICE/PAD1 |
| 8 | 1 | VOICE/PAD2 |
| 8 | 3 | VOICE/PAD3 |
| : | : | |
| 9 | 0 | ETHNIC1 |
| 9 | 1 | ETHNIC2 |
| 9 | 3 | ETHNIC3 |
| : | : | |
| 10 | 0 | RYTHM/PERC1 |
| 10 | 1 | RYTHM/PERC2 |
| 10 | 3 | RYTHM/PERC3 |
| : | : |
Pitch Bend Change
STATUS
EnH
SECOND
IIH
THIRD
mmH
n=MIDI Channel Number:
mm,ll=Value:
0H-FH (ch.1-ch.16)
00H, 00H - 7FH, 7FH (-8192 - +8191)
■Channel Mode Message
All Note Off
STATUS
SECOND
7BH
THIRD
00H
n=MIDI Channel Number:
0H-BH (ch.1-ch.12)
- Can be received only through the Basic channel
- Turn off all notes that are now on.
OMNI OFF
STATUS
SECOND
7CH
THIRD
00H
n=MIDI Channel Number:
0H-BH (ch.1-ch.12)
- Can be received only through the Basic channel.
- Will act the same as All Note Off.
- OMNI ON
STATUS
SECOND
7DH
THIRD
00H
n=MIDI Channel Number:
0H-BH (ch.1-ch.12)
- Can be received only through the Basic channel.
- Will act the same as All Note Off.
MONO
STATUS
SECOND
7EH
THIRD
mmH
n=MIDI Channel Number:
0H-BH (ch.1-ch.12)
mm=Number of Individual Channels:
00H-10H(0-16)
- Can be received only through the Basic channel.
- Will act the same as All Note Off.
POLY
STATUS
SECOND
7FH
THIRD
00H
n=MIDI Channel Number:
0H-BH (ch.1-ch.12)
- Can be received only through the Basic channel.
- Will act the same as All Note Off.
System Realtime Message
Active Sensing
STATUS
FEH
- Having received this message, the GR-20 expects to receive information of any status of data during about 420msec. If the GR-20 doesn't receive any message during that time, it acts as if the All Note Off message is received, and returns to normal operation (will not check interval of messages).
System Exclusive Message
STATUS
SECOND
THIRD
FOH
iiH ddH
eeH F7H
FOH:
System Exclusive
ii = Manufacturer ID:
41H (65)
dd.....ee = Data:
00H-7FH(0-127)
F7H:
EOX (End Of Exclusive)
- For more details, refer to the page of "Roland Exclusive message" and Section 3 or after.
2. Transmitted Data
■Channel voice messages
Note Off
STATUS
SECOND
THIRD
9nH
kkH
00H
n = MIDI channel Number:
0H-FH (ch.1-ch.16)
kk=Note Number:
00H-7FH(0-127)
Note On
STATUS
SECOND
THIRD
9nH
kkH
vvH
n=MIDI Channel Number:
0H-FH (ch.1-ch.16)
kk=Note Number:
00H-7FH(0-127)
vv = Velocity
01H-7FH(1-127)
Control Change
Bank Select
STATUS
SECOND
THIRD
BnH
00H
mmH
BnH
20H
HH
n=MIDI Channel Number:
0H-FH (ch.1-ch.16)
mm,ll=Bank Number:
00H, 00H - 0AH, 00H
OFoot Type
STATUS
SECOND
THIRD
BnH
04H
vvH
n=MIDI Channel Number:
0H-BH (ch.1-ch.12)
vv=Control Value:
00H-7FH(0-127)
- When the Expression pedal is operated with EXP TYPE = "FL", "EF", the GR-20 sends this as the operation.
Data Entry
STATUS
SECOND
THIRD
BnH
06H
mmH
BnH
26H
11H
n=MIDI Channel Number:
0H-FH (ch.1-ch.16)
mm,II=the value of the parameter specified by RPN
Volume
STATUS
SECOND
THIRD
BnH
07H
vvH
n=MIDI Channel Number:
0H-FH (ch.1-ch.16)
vv=Volume:
00H-7FH(0-127)
- Transmitted the total volume fixed with expression pedal and GK PU operation.
General Purpose #3
| STATUS | SECOND |
| BnH | 12H |
THIRD
vH
n=MIDI Channel Number: 0H-FH (ch.1-ch.16)
vv=Control Value: 00H-7FH(0-127)
- Transmitted the envelope data of the strings when "E FLW" is on.
- Data is sent only in Mono mode. Transmission doesn't take place in Poly mode.
OHold1
| STATUS | SECOND |
| BnH | 40H |
THIRD
vvH
n=MIDI Channel Number: 0H-FH (ch.1-ch.16)
vv=Control value: 00H-7FH(0-127)
01H-3FH=OFF, 40H-7FH=ON
- Transmitted the operation of HOLD TYPE = "H4".
ORPN MSB/LSB
| STATUS | SECOND |
| BnH | 65H |
| BnH | 64H |
THIRD
mmH
n=MIDI Channel Number: 0H-FH (ch.1-ch.16)
mm=Upper byte of the parameter data designated by RPN
ll=Lower byte of the parameter data designated by RPN
<
Control change includes RPN(registered parameter number), function which are defined by
the MIDI standard.
The GR-20 can transmit only one RPN: pitch bend sensitivity(RPN#0).
RPN Data entry
MSB LSB MSB LSB
00H 00H 18H 00H
Function
pitch bend sensitivity
Program change
| STATUS | SECOND |
| CnH | ppH |
n=MIDI Channel Number: 0H-FH (ch.1 - ch.16)
pp=Program Number:
00H-7FH (prg.1-prg.128)
- The recognized Program Change Number corresponds to each patch as follows.
| BANK MSB | PROGRAM NUMBER | PATCH |
| 0 | 0 | USER 1 |
| 0 | 1 | USER 2 |
| 0 | 2 | USER 3 |
| 0 | 3 | USER 4 |
| 0 | : | : |
| 0 | 97 | USER 98 |
| 0 | 98 | USER 99 |
| 1 | 0 | PIANO |
| 1 | 1 | PIANO |
| 1 | 2 | PIANO |
| : | : | |
| 2 | 0 | ORGAN |
| 2 | 1 | ORGAN |
| 2 | 2 | ORGAN |
| : | : | |
| 3 | 0 | BASS/C |
| 3 | 1 | BASS/C |
| 3 | 2 | BASS/C |
| : | : | |
| 4 | 0 | BRASS 3 |
| 4 | 1 | BRASS 2 |
| 4 | 2 | BRASS 3 |
| : | : | |
| 5 | 0 | WIND 1 |
| 5 | 1 | WIND 2 |
| 5 | 2 | WIND 3 |
| : | : | |
| 6 | 0 | STRING/ORCH 1 |
| 6 | 1 | STRING/ORCH 2 |
| 6 | 2 | STRING/ORCH 3 |
| : | : | |
| 7 | 0 | SYNTH/LEAD 1 |
| 7 | 1 | SYNTH/LEAD 2 |
| 7 | 2 | SYNTH/LEAD 3 |
| : | : | |
| 8 | 0 | VOICE/PAD 1 |
| 8 | 1 | VOICE/PAD 2 |
| 8 | 2 | VOICE/PAD 3 |
| : | : | |
| 9 | 0 | ETHNIC 1 |
| 9 | 1 | ETHNIC 2 |
| 9 | 2 | ETHNIC 3 |
| : | : | |
| 10 | 0 | RHYTHM/PERC 1 |
| 10 | 1 | RHYTHM/PERC 2 |
| 10 | 2 | RHYTHM/PERC 3 |
| : | : |
Pitch Bend Change
| STATUS | SECOND | THIRD |
EnH 11H mmH
n=MIDI Channel Number:
mm,ll=Value:
0H-FH (ch.1-ch.16)
00H, 00H - 7FH, 7FH (-8192 - +8191)
System Realtime Message
Active Sensing
STATUS
FEH
- This message is always transmitted at about 270msec' interval.
System Exclusive message
STATUS SECOND THIRD
F0H iiH,ddH,...eeH F7H
FOH:
ii=ID Number:
dd,...,ee=Data:
F7H:
System Exclusive
41H (65)
00H-7FH (0-127)
EOX (End of Exclusive/System Common
Message)
- For more details, refer to the page "Roland exclusive message" and Section3 or after.
3. Exclusive Communications
The GR-20 can transmit or receive system and patches parameters using system exclusive messages. Model ID of exclusive message available on the GR-20 is 00H 72H. Device ID is fixed at 10H.
When the GR-20 receives an Identify Request inquiry message, it will transmit an Identity Reply.
Request Data1 RQ1 (11H)
THis message is to request the GR-20 to transmit its parameters.
The address and size indicate the type and amount of parameters requested.
The GR-20 itself does not send this message.
When the GR-20 receives this message, it responds with appropriate parameters if the following conditions are satisfied:
- The address indicated with RQ1 matches with one of the parameter base address of the GR-20
- When the Bulk Load standby mode.
With these conditions provided, the GR-20 transmits specified parameters in Data Set 1 (DT1) message.
| Byte | Comments |
| F0H | System Exclusive Status |
| 41H | Manufacturer ID (Roland) |
| 10H | Device ID (Dev=10H) |
| 00H | Model ID MSB (GR-20) |
| 72H | Model ID LSB (GR-20) |
| 11H | Command ID (RQ1) |
| aaH | Address MSB |
| bbH | Address |
| ccH | Address |
| ddH | Address LSB |
| ssH | Size MSB |
| ssH | Size |
| ssH | Size |
| ssH | Size LSB |
| sum | Check sum |
| F7H | EOX (End Of Exclusive) |
-Data Set 1:DT1 (12H)
The GR-20 transmits this message in the following conditions. If the address matches with one of the parameter base addresses of the GR-20, the received data is stored at the specified address of the memory.
The GR-20 transmits this message in the following conditions.
When data request (RQ1) is received with the Bulk Load mode, and the specified parameters are transmitted.
or you executes Bulk Dump function.
Regarding details of the parameter transmitted/received, please refer to the Parameter Address Map.
| Byte | Comments |
| F0H | System Exclusive Status |
| 41H | Manufacturer ID (Roland) |
| 10H | Device ID (Dev=10H) |
| 00H | Model ID MSB (GR-20) |
| 72H | Model ID LSB (GR-20) |
| 12H | Command ID (DT1) |
| aaH | Address MSB |
| bbH | Address |
| ccH | Address |
| ddH | Address LSB |
| eeH | Data |
| ffH | Data |
| sum | Check Sum |
| F7H | EOX (End of Exclusive) |
Model ID The Model ID of the GR-20 is 00H 72H. Device ID Device ID of the GR-20 is fixed at 10H.
/Example of creating the exclusive message/
If you want to set as the following the parameter LEVEL/FREQ/RESO TRANSPOSE of USER BANK 01 Patch, create data as the following and send it to your GR-20.
| Reverb setting: |
| LEVEL: 90 |
| FREQ: 50 |
| RESO: 60 |
| TRANSPOSE: +1oct |
Transmitted data:
| F0H | 41H | 10H | 00H | 72H | 12H | 01H | 00H | 00H | 06H | 5AH | 32H | 3CH | 03H | 2EH | F7H |
| 1 | 2 | 3 | 4 | 5 | 6 | 7 | 8 | 9 |
- Exclusive status is F0H.
- Roland's Manufacturer ID is 41H.
- This is the device ID.(Fixed at 10H for GR-20)
- Model ID of the GR-20 is 00H 72H.
- DT1 (Data Set1) Command ID is 12H.
- These are the parameter addresses. Please find the start address of the USER BANK 01 Patch from the table of the start address. You can find the address as 01H 00H 00H 00H. Next, please find the offset address of the LEVEL Parameter from the table 4-2. That is 00H 00H 06H. The result will be 01H 00H 00H 06H.
01H 00H 00H 00H (the start address of the USER patch)
+) 00H 00H 06H (the offset address of the LEVEL)
01H 00H 00H 06H
- The settings value for LEVEL is 90. This is expressed as 5AH in hexadecimal notation with two digits. (Refer to the attached Chart A-1)
The settings value for FREQ is 115. This is expressed as 32H in hexadecimal notation with two digits.
The settings value for RESO is 60. This is expressed as 3CH in hexadecimal notation with two digits.
The settings value for TRANSPOSE is +1oct. This is expressed as 03H in hexadecimal notation with two digits from Table 4-4.
- This is the check sum byte.The error checking process uses a Checksum and provides a pattern where the last significant 7 bits are zero when values for address, data(or size) and the Checksum are summed.
If the address of the exclusive message that you wish to send is aa bb cc ddH and the data(or size) is ee ff hh iiH,
aa + bb + cc + dd + ee + ff + hh + ii = sum
sum / 128 = quotient ...remainder
128 - remainder = checksum
- However, when sum=0, then the checksum also results in 0.
In case of this example,
F0H 41H 10H 00H 72H 12H 01H 00H 00H 06H 5AH 32H 3CH 03H ??H F7H
address data checksum
Using the above formula, Checksum will be as follows.
01H + 00H + 00H + 06H + 5AH + 32H + 3CH + 03H = 1 + 0 + 0 + 6 + 90 + 50 + 60 + 3 = 210 (sum)
210 (sum) / 128 = 1 (quotient) ...82 (remainder)
[ \text{checksum} = 128 - 82 ] (remainder) = 46 = 2EH
If you calculate with hexadecimal,
aa + bb + cc + dd + ee + ff = sum (xxH)
sum (xxH) / 80H = quotient...remainder
80H - remainder = checksum
Checksum will be as follows.
01H + 00H + 00H + 06H + 5AH + 32H + 3CH + 03H = D2H
D2H / 80H = 01H (quotient) ...52H (remainder)
[ \text{checksum} = 80\mathrm{H} - 52\mathrm{H} ] (remainder) = 2EH
- F7H is the mark of the end of exclusive.
Inquiry Message
Identity Request
| Byte | Comments |
| F0H | Exclusive Status |
| 7EH | ID number (Universal Non-realtime Message) |
| 10H | Device ID |
| 06H | SubID#1 |
| 01H | SubID#2 |
| F7H | EOX (End of Exclusive) |
- The 7FH (Broadcast) device ID is also supported.
- Identity request can be received when Bulk Load is standby in System mode.
- When an Identity Request is received, the GR-20 will transmit the following Identity Reply.
Oldentity Reply
| Byte | Comments |
| F0H | Exclusive Status |
| 7EH | ID number (Universal Non-realtime Message) |
| 10H | Device ID (fixed at 10H) |
| 06H | SubID#1 |
| 02H | SubID#2 |
| 41H | ID number(Roland) |
| 72H 01H | Device Family Code |
| 00H 00H | Device Family Number Code |
| 00H 00H 00H 00H | Software Revision Level |
| F7H | EOX (End of Exclusive) |
- When an Identity Request is received, the GR-20 will transmit the above Identity Reply.
4. Parameter Address Map
Addresses and sizes are expressed in 7-bit hexadecimal values.
| Address | MSB | LSB | |
| Binary | 0aaa aaaa | 0bbb bbbb 0ccc cccc | 0ddd dddd |
| 7 bit Hex | AA | BB CC | DD |
| Size | MSB | LSB | |
| Binary | 0sss ssss | 0ttt tttt 0uuu uuuu | 0vvv vvvv |
| 7 bit Hex | SS | TT UU | VV |
Table 4-1. Start Address
| Start Address | Contents and Remarks | Table | ||
| 00 00 00 00 | System | *4-2 | ||
| 00 01 00 00 | System | Patch Link Map | *4-3 | |
| 01 00 00 00 | Patch | USER | 1 | *4-4 |
| 01 00 01 00 | Patch | USER | 2 | *4-4 |
| 01 00 02 00 | Patch | USER | 3 | *4-4 |
| 01 00 03 00 | Patch | USER | 4 | *4-4 |
| 01 00 04 00 | Patch | USER | 5 | *4-4 |
| 01 00 05 00 | Patch | USER | 6 | *4-4 |
| 01 00 06 00 | Patch | USER | 7 | *4-4 |
| 01 00 07 00 | Patch | USER | 8 | *4-4 |
| 01 00 08 00 | Patch | USER | 9 | *4-4 |
| 01 00 09 00 | Patch | USER | 10 | *4-4 |
| 01 00 0A 00 | Patch | USER | 11 | *4-4 |
| 01 00 0B 00 | Patch | USER | 12 | *4-4 |
| 01 00 0C 00 | Patch | USER | 13 | *4-4 |
| 01 00 0D 00 | Patch | USER | 14 | *4-4 |
| 01 00 0E 00 | Patch | USER | 15 | *4-4 |
| 01 00 0F 00 | Patch | USER | 16 | *4-4 |
| 01 00 10 00 | Patch | USER | 17 | *4-4 |
| 01 00 11 00 | Patch | USER | 18 | *4-4 |
| 01 00 12 00 | Patch | USER | 19 | *4-4 |
| 01 00 13 00 | Patch | USER | 20 | *4-4 |
| 01 00 14 00 | Patch | USER | 21 | *4-4 |
| 01 00 15 00 | Patch | USER | 22 | *4-4 |
| 01 00 16 00 | Patch | USER | 23 | *4-4 |
| 01 00 17 00 | Patch | USER | 24 | *4-4 |
| 01 00 18 00 | Patch | USER | 25 | *4-4 |
| 01 00 19 00 | Patch | USER | 26 | *4-4 |
| 01 00 1A 00 | Patch | USER | 27 | *4-4 |
| 01 00 1B 00 | Patch | USER | 28 | *4-4 |
| 01 00 1C 00 | Patch | USER | 29 | *4-4 |
| 01 00 1D 00 | Patch | USER | 30 | *4-4 |
| Start Address | Contents and Remarks | Table | ||
| 01 00 1E 00 | Patch | USER | 31 | *4-4 |
| 01 00 1F 00 | Patch | USER | 32 | *4-4 |
| 01 00 20 00 | Patch | USER | 33 | *4-4 |
| 01 00 21 00 | Patch | USER | 34 | *4-4 |
| 01 00 22 00 | Patch | USER | 35 | *4-4 |
| 01 00 23 00 | Patch | USER | 36 | *4-4 |
| 01 00 24 00 | Patch | USER | 37 | *4-4 |
| 01 00 25 00 | Patch | USER | 38 | *4-4 |
| 01 00 26 00 | Patch | USER | 39 | *4-4 |
| 01 00 27 00 | Patch | USER | 40 | *4-4 |
| 01 00 28 00 | Patch | USER | 41 | *4-4 |
| 01 00 29 00 | Patch | USER | 42 | *4-4 |
| 01 00 2A 00 | Patch | USER | 43 | *4-4 |
| 01 00 2B 00 | Patch | USER | 44 | *4-4 |
| 01 00 2C 00 | Patch | USER | 45 | *4-4 |
| 01 00 2D 00 | Patch | USER | 46 | *4-4 |
| 01 00 2E 00 | Patch | USER | 47 | *4-4 |
| 01 00 2F 00 | Patch | USER | 48 | *4-4 |
| 01 00 30 00 | Patch | USER | 49 | *4-4 |
| 01 00 31 00 | Patch | USER | 50 | *4-4 |
| 01 00 32 00 | Patch | USER | 51 | *4-4 |
| 01 00 33 00 | Patch | USER | 52 | *4-4 |
| 01 00 34 00 | Patch | USER | 53 | *4-4 |
| 01 00 35 00 | Patch | USER | 54 | *4-4 |
| 01 00 36 00 | Patch | USER | 55 | *4-4 |
| 01 00 37 00 | Patch | USER | 56 | *4-4 |
| 01 00 38 00 | Patch | USER | 57 | *4-4 |
| 01 00 39 00 | Patch | USER | 58 | *4-4 |
| 01 00 3A 00 | Patch | USER | 59 | *4-4 |
| 01 00 3B 00 | Patch | USER | 60 | *4-4 |
| 01 00 3C 00 | Patch | USER | 61 | *4-4 |
| 01 00 3D 00 | Patch | USER | 62 | *4-4 |
| 01 00 3E 00 | Patch | USER | 63 | *4-4 |
| 01 00 3F 00 | Patch | USER | 64 | *4-4 |
| 01 00 40 00 | Patch | USER | 65 | *4-4 |
| 01 00 41 00 | Patch | USER | 66 | *4-4 |
| 01 00 42 00 | Patch | USER | 67 | *4-4 |
| 01 00 43 00 | Patch | USER | 68 | *4-4 |
| 01 00 44 00 | Patch | USER | 69 | *4-4 |
| 01 00 45 00 | Patch | USER | 70 | *4-4 |
| 01 00 46 00 | Patch | USER | 71 | *4-4 |
| 01 00 47 00 | Patch | USER | 72 | *4-4 |
| 01 00 48 00 | Patch | USER | 73 | *4-4 |
| 01 00 49 00 | Patch | USER | 74 | *4-4 |
| 01 00 4A 00 | Patch | USER | 75 | *4-4 |
| 01 00 4B 00 | Patch | USER | 76 | *4-4 |
| 01 00 4C 00 | Patch | USER | 77 | *4-4 |
| 01 00 4D 00 | Patch | USER | 78 | *4-4 |
| 01 00 4E 00 | Patch | USER | 79 | *4-4 |
| 01 00 4F 00 | Patch | USER | 80 | *4-4 |
| 01 00 50 00 | Patch | USER | 81 | *4-4 |
| 01 00 51 00 | Patch | USER | 82 | *4-4 |
| 01 00 52 00 | Patch | USER | 83 | *4-4 |
| 01 00 53 00 | Patch | USER | 84 | *4-4 |
| 01 00 54 00 | Patch | USER | 85 | *4-4 |
| 01 00 55 00 | Patch | USER | 86 | *4-4 |
| 01 00 56 00 | Patch | USER | 87 | *4-4 |
| 01 00 57 00 | Patch | USER | 88 | *4-4 |
| 01 00 58 00 | Patch | USER | 89 | *4-4 |
| 01 00 59 00 | Patch | USER | 90 | *4-4 |
| 01 00 5A 00 | Patch | USER | 91 | *4-4 |
| 01 00 5B 00 | Patch | USER | 92 | *4-4 |
| 01 00 5C 00 | Patch | USER | 93 | *4-4 |
| 01 00 5D 00 | Patch | USER | 94 | *4-4 |
| 01 00 5E 00 | Patch | USER | 95 | *4-4 |
| 01 00 5F 00 | Patch | USER | 96 | *4-4 |
| 01 00 60 00 | Patch | USER | 97 | *4-4 |
| 01 00 61 00 | Patch | USER | 98 | *4-4 |
| 01 00 62 00 | Patch | USER | 99 | *4-4 |
Chapter 6 Appendices
Table 4-2. System
| offset | ID | min | max (dec) | max (hex) | |
| 00 | GK SENS 1 | 0 | 8 | 08 | 0="1" - 8="9" |
| 01 | GK SENS 2 | 0 | 8 | 08 | 0="1" - 8="9" |
| 02 | GK SENS 3 | 0 | 8 | 08 | 0="1" - 8="9" |
| 03 | GK SENS 4 | 0 | 8 | 08 | 0="1" - 8="9" |
| 04 | GK SENS 5 | 0 | 8 | 08 | 0="1" - 8="9" |
| 05 | GK SENS 6 | 0 | 8 | 08 | 0="1" - 8="9" |
| 06 | OUTPUT LINE/AMP | 0 | 1 | 01 | 0="Ln", 1="GA" |
| 07 | SW MODE | 0 | 1 | 01 | 0="1", 1="2" |
| 08 | MIDI CH | 0 | 10 | 0A | 00H="1ch" - 0aH="11ch" |
| 09 | MIDI MONO/POLY | 0 | 1 | 01 | 0="MONO", 1="POLY" |
| 0A | MASTER TUNE | 0 | 127 | 7F | 3fH="440.0Hz" |
| 0B | reserve | 7 | 7 | 07 | |
| 0C | GUITAR/BASS GUITAR | 0 | 1 | 01 | 0="GUITAR", 1="BASS GUITAR" |
| 0D | reserve | 0 | 0 | 00 | |
| 0E | reserve | 0 | 0 | 00 | |
| 0F | reserve | 0 | 0 | 00 |
Table 4-3. Patch Link Map
| offset | MIDI bank select MSB | MIDI Program Change Number | GR-20 Patch Number | |
| 00 | 00 | 0 | 0 | MSB |
| 00 | 01 | LSB | ||
| 00 | 02 | 0 | 1 | MSB |
| 00 | 03 | LSB | ||
| 01 | 7E | 0 | 127 | MSB |
| 01 | 7F | LSB | ||
| 02 | 00 | 1 | 0 | MSB |
| 02 | 01 | LSB | ||
| 02 | 02 | 1 | 1 | MSB |
| 02 | 03 | LSB | ||
| 03 | 7E | 1 | 127 | MSB |
| 03 | 7F | LSB | ||
| 04 | 00 | 2 | 0 | MSB |
| 04 | 01 | LSB | ||
| 04 | 02 | 2 | 1 | MSB |
| 04 | 03 | LSB | ||
| 05 | 7E | 2 | 127 | MSB |
| 05 | 7F | LSB | ||
| 06 | 00 | 3 | 0 | MSB |
| 06 | 01 | LSB | ||
| 06 | 02 | 3 | 1 | MSB |
| 06 | 03 | LSB | ||
| 07 | 7E | 3 | 127 | MSB |
| 07 | 7F | LSB | ||
| 08 | 00 | 4 | 0 | MSB |
| 08 | 01 | LSB | ||
| 08 | 02 | 4 | 1 | MSB |
| 08 | 03 | LSB | ||
| 09 | 7E | 4 | 127 | MSB |
| 09 | 7F | LSB | ||
| 0A | 00 | 5 | 0 | MSB |
| 0A | 01 | LSB | ||
| 0A | 02 | 5 | 1 | MSB |
| 0A | 03 | LSB | ||
| 0B | 7E | 5 | 127 | MSB |
| 0B | 7F | LSB | ||
| 0C | 00 | 6 | 0 | MSB |
| 0C | 01 | LSB | ||
| offset | MIDI bank select MSB | MIDI Program Change Number | GR-20 Patch Number | |
| 0C | 02 | 6 | 1 | MSB |
| 0C | 03 | LSB | ||
| : | ||||
| : | ||||
| 0D | 7E | 6 | 127 | MSB |
| 0D | 7F | LSB | ||
| 0E | 00 | 7 | 0 | MSB |
| 0E | 01 | LSB | ||
| 0E | 02 | 7 | 1 | MSB |
| 0E | 03 | LSB | ||
| : | ||||
| : | ||||
| 0F | 7E | 7 | 127 | MSB |
| 0F | 7F | LSB | ||
| 10 | 00 | 8 | 0 | MSB |
| 10 | 01 | LSB | ||
| 10 | 02 | 8 | 1 | MSB |
| 10 | 03 | LSB | ||
| : | ||||
| : | ||||
| 11 | 7E | 8 | 127 | MSB |
| 11 | 7F | LSB | ||
| 12 | 00 | 9 | 0 | MSB |
| 12 | 01 | LSB | ||
| 12 | 02 | 9 | 1 | MSB |
| 12 | 03 | LSB | ||
| : | ||||
| : | ||||
| 13 | 7E | 9 | 127 | MSB |
| 13 | 7F | LSB | ||
| 14 | 00 | 10 | 0 | MSB |
| 14 | 01 | LSB | ||
| 14 | 02 | 10 | 1 | MSB |
| 14 | 03 | LSB | ||
| : | ||||
| : | ||||
| 15 | 7E | 10 | 127 | MSB |
| 15 | 7F | LSB | ||
/Example using RQ1/
To extract the all system parameters, send the following message to the GR-20.
F0411000721100000000000001070F7
/Example using DT1/
To change OUTPUT LINE/AMP to GA and SW MODE to "2", send the following message to the GR-20.
F0411000721200000006010178F7
Table 4-4. Patch
| offset (Hex) | ID | min | max (dec) | max (hex) | Description |
| 00 | Preset PATCH Number MSB | 0 | 3 | 03 | |
| 01 | Preset PATCH Number LSB | 0 | 127 | 7F | |
| 02 | ATTACK | 0 | 99 | 63 | |
| 03 | RELEASE | 0 | 99 | 63 | |
| 04 | CHORUS | 0 | 99 | 63 | |
| 05 | DELAY/RE- VERB | 0 | 99 | 63 | |
| 06 | LEVEL | 0 | 99 | 63 | |
| 07 | FREQ | 0 | 99 | 63 | |
| 08 | RESO | 0 | 99 | 63 | |
| 09 | TRANSPOSE | 0 | 4 | 04 | 0=-2oct", 1=-1oct", 2="0", 3="+1oct", 4="+2Oct" |
| 0A | PLAYFEEL | 0 | 4 | 04 | 0-3="1"-4", 5="nd", 6="St" |
| 0B | EXP PEDAL | 0 | 8 | 08 | 0=FV", 1=FL", 2=b1", 3=b2", 4=b3", 5=b4", 6=b5", 7=b6", 8=EF" |
| 0C | HOLD TYPE | 0 | 3 | 03 | 0"H1", 1="H2", 2="H3", 3="H4" |
| 0D | GLIDE TYPE | 0 | 19 | 13 | 00H="d8", 01H="d7", 02H="d6", 03H="d5", 04H="d4", 05H="d3", 06H="d2", 07H="d1", 08H="u1", 09H="u2", 0aH="u3", 0bH="u4", 0cH="u5", 0dH="u6", 0eH="u7", 0fH="u8", 10H="v1", 11H="v2", 12H="v3", 13H="v4" |
| 0E | DELAY | 0 | 99 | 63 | |
| 0F | Reserve | 0 | 0 | 00 |
/Example using RQ1/
To extract all the data of patch USER BANK 50, send the following message to the GR-20.
F041100072110100310000000103DF7
/Example using DT1/
If you want to set as the following the EXP PEDAL parameter of patch USER BANK 10 is
"FL", create data as the following and send it to your GR-20.
F041100072120100090B016AF7
A-1. Decimal VS Hexadecimal
With a MIDI System, the data value, the address, or size in an exclusive message is expressed in 7-bit hexadecimal values. The table below shows decimal value and their hexadecimal counterparts.
| Decimal | Hex | Decimal | Hex | Decimal | Hex | Decimal | Hex |
| 0 | 00H | 32 | 20H | 64 | 40H | 96 | 60H |
| 1 | 01H | 33 | 21H | 65 | 41H | 97 | 61H |
| 2 | 02H | 34 | 22H | 66 | 42H | 98 | 62H |
| 3 | 03H | 35 | 23H | 67 | 43H | 99 | 63H |
| 4 | 04H | 36 | 24H | 68 | 44H | 100 | 64H |
| 5 | 05H | 37 | 25H | 69 | 45H | 101 | 65H |
| 6 | 06H | 38 | 26H | 70 | 46H | 102 | 66H |
| 7 | 07H | 39 | 27H | 71 | 47H | 103 | 67H |
| 8 | 08H | 40 | 28H | 72 | 48H | 104 | 68H |
| 9 | 09H | 41 | 29H | 73 | 49H | 105 | 69H |
| 10 | 0AH | 42 | 2AH | 74 | 4AH | 106 | 6AH |
| 11 | 0BH | 43 | 2BH | 75 | 4BH | 107 | 6BH |
| 12 | 0CH | 44 | 2CH | 76 | 4CH | 108 | 6CH |
| 13 | 0DH | 45 | 2DH | 77 | 4DH | 109 | 6DH |
| 14 | 0EH | 46 | 2EH | 78 | 4EH | 110 | 6EH |
| 15 | 0FH | 47 | 2FH | 79 | 4FH | 111 | 6FH |
| 16 | 10H | 48 | 30H | 80 | 50H | 112 | 70H |
| 17 | 11H | 49 | 31H | 81 | 51H | 113 | 71H |
| 18 | 12H | 50 | 32H | 82 | 52H | 114 | 72H |
| 19 | 13H | 51 | 33H | 83 | 53H | 115 | 73H |
| 20 | 14H | 52 | 34H | 84 | 54H | 116 | 74H |
| 21 | 15H | 53 | 35H | 85 | 55H | 117 | 75H |
| 22 | 16H | 54 | 36H | 86 | 56H | 118 | 76H |
| 23 | 17H | 55 | 37H | 87 | 57H | 119 | 77H |
| 24 | 18H | 56 | 38H | 88 | 58H | 120 | 78H |
| 25 | 19H | 57 | 39H | 89 | 59H | 121 | 79H |
| 26 | 1AH | 58 | 3AH | 90 | 5AH | 122 | 7AH |
| 27 | 1BH | 59 | 3BH | 91 | 5BH | 123 | 7BH |
| 28 | 1CH | 60 | 3CH | 92 | 5CH | 124 | 7CH |
| 29 | 1DH | 61 | 3DH | 93 | 5DH | 125 | 7DH |
| 30 | 1EH | 62 | 3EH | 94 | 5EH | 126 | 7EH |
| 31 | 1FH | 63 | 3FH | 95 | 5FH | 127 | 7FH |
When expressing a MIDI channel number or a program change number, please notice that the values are less by one. For example, MIDI channel is expressed as 0 through 15 instead of 1 through 16.
The range of 7 bit can express 128 steps from 0 to 127. To express broader range, use several data bytes.
GUITAR SYNTHESIZER
Model GR-20
Date:Dec.18,2003
Version : 1.00
MIDI Implementation Chart
| Function... | Transmitted | Recognized | Remarks | |
| Basic Channel | Default Changed | 1-16 * 11-16 | 1-16 * 11-16 | Memorized |
| Mode | Default Messages Altered | Mode 3, 4 (M=6) * 1X********** | Mode 3, 4 (M=6)X | Memorized |
| Note Number: | True Voice | 0-127********** | 0-127 | |
| Velocity | Note ON Note OFF | O 9n V=1-127 * 2O 9n V=0 | O X | |
| After Touch | Key's Ch's | X X | X X | |
| Pitch Bend | O | O | ||
| Control Change | 0, 3246, 3871864100, 101 | O O O O O O O O O O | O (MSB only) * 3O * 3X O * 3O O * 3X | Bank Select Foot Type Data Entry Volume General Purpose 3 (Envelope Follower) Hold 1 RPN LSB, MSB (Pitch Bend Sensitivity only) |
| Prog Change : True # | O 0-127********** | O 0-127 * 3 | ||
| System Exclusive | O | O * 4 | System Parameters, User Patch Parameters | |
| System Common | : Song Pos : Song Sel : Tune | X X X | X X X | |
| System Real Time | : Clock : Command | X X | X X | |
| Aux Message | : All sound off : Reset all controllers : Local ON/OFF : All Notes OFF : Active Sense : System Reset | X X X X X O (123-127) O X | X X X O (123-127) O X | |
| Notes | * 1 Can be memorized after powering off. * 2 When PLAY FEEL="nd," v=100. * 3 Can be received only through the Basic channel. * 4 Can be received when Bulk Load is standby in System mode. | |||
Mode 1: OMNI ON, POLY
Mode 2:OMNI ON, MONO
O:Yes
Mode 3:OMNI OFF,POLY
Mode 4: OMNI OFF, MONO
X:No
Main Specifications
GR-20: GUITAR SYNTHESIZER
Sound Generator
1 part
Maximum Polyphony
48 voices
- Patches
User: 99
Preset: 469
- Display
7 segments, 2 characters (LED)
Effects
MULTI-FX (included in the patches)
Chorus
Delay/Reverb
- Connectors/Jacks
GK IN
GUITAR OUT
MIX IN L
MIX IN R (MONO)
OUTPUT L (PHONES)
OUTPUT R (MONO)
MIDI IN
MIDI OUT
AC IN
Power Supply
AC 14 V (AC Adaptor)
- Current Draw
600mA
- Dimensions
313.8 (W) x 244.9 (D) x 63.1 (H) mm
12-3/8 (W) x 9-11/16 (D) x 2-1/2 (H) inches
Maximum height:
313.8 (W) x 244.9 (D) x 97.5 (H) mm
12-3/8 (W) x 9-11/16 (D) x 3-7/8 (H) inches
Weight
1.7kg
3 lbs 12 oz (excluding the AC Adaptor)
- Accessories
Owner's Manual
AC Adaptor BRC series
GK Cable (5m)
Divided Pickup (GK-3) * not included with the GR-20S
- Options
GK Cable: GKC-3 (3 m), GKC-5 (5 m), GKC-10 (10 m)
Unit Selector: US-20
GK Parallel Box: GKP-4
Divided Pickup: GK-3 (for guitar)
Divided Pickup: GK-3B (for bass guitar)
- In the interest of product improvement, the specifications and/or contents of this package are subject to change without prior notice.
INDEX
A ATTACK 9,20
B
BANK 8
Bank Select 29
BASIC CHANNEL 29
Bend Range 29
BULK DUMP 26
BULK LOAD 27
C
Channel 18
CHORUS 9,20
Control change 29
CUTOFF FREQUCY 21
D DELAY 9 Display 8
E
E FLW 20
Envelope Follower 20
EXIT 9
EXP PEDAL 9,16
Expression Pedal 16,23
Expression pedal 9
F Factory Reset 31 FREQ 8,21
G
GK 8
GK IN 10
GLIDE 9, 15
Glide 9
GLIDE pedal 9
GLIDE TYPE 22
GUITAR OUT 10
H
HOLD 9,16
HOLD pedal 9
HOLD TYPE 23
LEVEL 9 Local Control Off 28,30
M
MIDI CH 9
MIDI Channel 29
MIX IN 10
Mono Mode 28
N NUMBER 8
O
OUTPUT 8,10
OUTPUT LEVEL 10
OUTPUT SELECT 14
P
Patch 14
PATCH EDIT 9
PATCH LINK SETUP 9, 19
PLAY FEEL 9, 21
Play mode 12
Poly 28
Poly Mode 28
Program Change 29
R
reference pitch 13
RELEASE .9,20
RESO .8
RESONANCE .21
REVERB 9
SW MODE 8
SYSTEM EDIT .9
system parameter 26
T
TRANSPOSE 9,21
TUNER 9
Tuner 13
V
VALUE 8
W
WRITE 9,24
For EU Countries

This symbol indicates that in EU countries, this product must be collected separately from household waste, as defined in each region. Products bearing this symbol must not be discarded together with household waste.
DE Dieses Symbol beweet, dass cesds Produkt in EU-Landern getrennt vom Hausmull gesammelt werden muss gemaal den regionalen Bestimmungen. Mit thisem Symbol gekennzeichne Produkte durren nicht zusammen mit den Hausmull entsorgt werden.
FRC Ce symbole indique que dans les pays de l'Union europeenne, ce produit doit être collecté séparément des ordures menagères selon les directives en vigueur dans chacunde ces pays. Les produits portant ce symbole ne doivent pas été mis au rebut avec les ordures menagères.
Questo symbolo indica che nei paesi della Comunita europea quello prodotto devesse smalitto separamente dai normali rifiuti domestici, seconda la legislazione in vigore in ciascun paese. I prodotti che riportano quello symbolog non devono essere smaliti insieme ai rifiuti domestici. Ai sensi dell'art. 13 del D.Lgs. 25 luglio 2005 n. 151.
Es Este symbolo indica que en los pañes de la Unión Europea este producto dele recogerse aparte de los residuos domesticos, tal como estregulado en cada zona. Los productos con este symbolo no se deben depositar con los residuos domesticos.
This意味o indica que nos paises da UE, a recolha deste produits deperse ser feita separadamente do lixo domestico, de accordo com os regulamentos de cada regiao. Os produits que aparecem este意味o nãodeferao sereliminadosjuntamente com o lixo domestico.
NL Dit symbol Goes aft aan dat in landen van de EU dit product gescheiden van huishoudelijk afval moet worden aangeboden, zaals bepaald per gemeente of regio. Producten die van dit symbool voorzoien, mogen Niet samen met huishoudelijk afval worden verwijderd.
Dette symbol angiver, at i EU-lande skal dette produit opsamples adskilt fra hushholdningsaffald, som defineret i herself enkelt region. Produktker med dette symbol mä参加会议 ud sammen med hushholdningsaffald.
NO Dette symbolet indikerer at produit mag behandles som spesialavfall i EU-land, ith. til retningsliner for den enkelte regionen, og ikke kastesammen med vanlig husholdningsavfall. Produkter som er merket med dette symbolet, mag违法犯罪.
SE Symbolen anger att i EU-länder maste den har Produkten kasseras separat fran hushallsavfall, i enlighet med varje regions bestammelser. Produktmer den har symbolen fär inte kasseras tillsammans med hushallsavfall.
Fäma keminkä timaise, cetta tuote on EU-maiska kerättäva erillän kotialousjäteista kunkin aluen ovo massa olevien märäysten mukaisesti. Tälla merkinnalla varustetutja tuotteita eis sahviittaa kotialousjäteiden mukana.
HU Ez a szimbóolum azt jelenti, hogy a Európá Uniobán ez t a termeket a házartásii hulladékól elkūlònfve, az adod rigoiban érvényes szabáyózs szerint kell gývőfát. Az ezzel a szimbolmull ellattont termeketem szne sadbaz a házartásii hulladékól köze doñnb.
Symbol oznaca, ze zgodnie z regulacjami w odpwiednim regionie, w krajach UE produktu ne现代农业 ywurzuc z odpadami domwyomi. Produktow opatronychym symbolem ne moins utlizowacrazem z odpadami domwyomi.
Tento symbol udáva, ze v zemich EU musi bét y tento vyrobek abrán oddelené odomácsi odapo, je ja urçeno pro každý region. Vyrokby nesouc fentysymbol se nésmi vyhazovat spolu s domacím odapdem.
SK Tento symboly vjaadrue, zv krajinach EU sa musi zerbe toto produktu vykonávat' oddelene o domového odypad, podf'a nariadién platnych v konkréntej krajime. Produktysymtvo syma nesmuy vhyadzovat spolu s domovym odypad.
EE See sibmol naitab, et EL-maadaes tuleb see toode olemprugist eraldi koguda, n ni nagu on igas pirkkonnas maraletud. Selle sibmoliga margitud tooteid ei tohi ara visata koos olmeprugica.
Sis simbolis rodo, kad ES salyse sis produktas turi buti surenkanas atskirai nuo buitiniu atleiuq, kaip nastutyata kiekname regione. Siuo simboliu pazenklinti Produktai teturi buti ismetami katu su buitinemis atliekomis.
Sis symbils norada, ka ES valstis so produktu jaievac atseviški no majsaimnecibas atkritumitium, ka NOTEkts katra regiona. Produktus ar so simbolu nedrifikz izmest kopar majsaimnecibas atkritumitium.
Ta simulb označujc, je de treba proizvod v državah EUZ brizati loćeno od gospodjinskih odpadkov, takoto je doloceno v vsaki regiji. Proizvod s tem znakom ni dovoljeno odlagati szupaj 2 gospodjinskimi odpadki.
To ouboloo auto votodnokovl eoi otu qoeig Tg E.E. to ovayekepveo yoiov 0e iva ouyelaevo zouqutao ato ta votadova ouzakia ootogmuoka, ouhovaa ooa obaletovra o xaleooy. Ta oqovataov tpoevov to ovayekepveo ouyolao dev nqote a oatogotnvta uocjic ta ozaikai ootogmuoka.
For the U.K.
IMPORTANT: THE WIRES IN THIS MAINS LEAD ARE COLOURED IN ACCORDANCE WITH THE FOLLOWING CODE.
BLUE: NEUTRAL
BROWN: LIVE
As the colours of the wires in the mains lead of this apparatus may not correspond with the coloured markings identifying the terminals in your plug, proceed as follows:
The wire which is coloured BLUE must be connected to the terminal which is marked with the letter N or coloured BLACK.
The wire which is coloured BROWN must be connected to the terminal which is marked with the letter L or coloured RED.
Under no circumstances must either of the above wires be connected to the earth terminal of a three pin plug.

For EU Countries
This product complies with the requirements of European Directive 89/336/EEC.
For the USA
FEDERAL COMMUNICATIONS COMMISSION RADIO FREQUENCY INTERFERENCE STATEMENT
This equipment has been tested and found to comply with the limits for a Class B digital device, pursuant to Part 15 of the FCC Rules. These limits are designed to provide reasonable protection against harmful interference in a residential installation. This equipment generates, uses, and can radiate radio frequency energy and, if not installed and used in accordance with the instructions, may cause harmful interference to radio communications. However, there is no guarantee that interference will not occur in a particular installation. If this equipment does cause harmful interference to radio or television reception, which can be determined by turning the equipment off and on, the user is encouraged to try to correct the interference by one or more of the following measures:
Reorient or relocate the receiving antenna.
- Increase the separation between the equipment and receiver.
-
Connect the equipment into an outlet on a circuit different from that to which the receiver is connected.
-
Consult the dealer or an experienced radio/TV technician for help.
This device complies with Part 15 of the FCC Rules. Operation is subject to the following two conditions:
(1) This device may not cause harmful interference, and
(2) This device must accept any interference received, including interference that may cause undesired operation.
Unauthorized changes or modification to this system can void the users authority to operate this equipment.
This equipment requires shielded interface cables in order to meet FCC class B Limit.
For Canada
NOTICE
This Class B digital apparatus meets all requirements of the Canadian Interference-Caising Equipment Regulations.
AVIS
When you need repair service, call your nearest Roland Service Center or authorized Roland distributor in your country as shown below.
AFRICA
EGYPT
Al Fanny Trading Office
9, EBN Hagar Al Askalany Street
ARD E1 Golf, Heliopolis,
Cairo 11341,EGYPT TEL:20-2-417-1036
TEL:20-2-417-1828
REUNION
Royal Cape Park, Unit 24
Leith, South, R. J. O. 7000
Londonderry Road, Ottery 7800 Cape Town SOUTH ABERICA
Cape Town, 50011 APKICA TEL: (021) 7994900
ASIA
CHINA
Roland Shanghai Electronics
Co.,Ltd
5F. No.1500 Pingliang Road
Shanghai 200090, CHINA
TEL: (021) 5580-0800
Roland Shanghai Electronics
Co., Ltd.
(BEIJING OFFICE)
10F. No.18 3 Section Anhuaxili
Chaoyang District Beijing 10001 CHIN
00011 CHINA TEL:(010)6426
TEL: (010) 042
HONG KO
Tom Lee Music Co., Ltd.
Service Division
22-32 Pun Shan Street, Tsuen
Wan, New Territories,
HONG KONG
TEF 2415 0911
Parsons Music Ltd.
8th Floor, Railway Plaza, 39
Chatham Road South, T.S.T., Xinyang 100026
Kowloon,HONG KONG, TEL:2323-1863
TEL:23331683
INDIA
Rivera Digitec (India) Pvt. Ltd.
411, Nirman Kendra
Mahalaxmi Flats Compound Off: Edinns Mouni, India
Off. Dr. Edwin Moses Road, Mumbai-400011, INDIA
TEL: (022) 2493 9051
INDONESIA
PT Citra IntiRama
Suoi Nhac Company, Ltd
370 Cach Mang Thang Tam St.
Dist.3, Ho Chi Minh City,
VIET NAMTEL 2016
TEL: 9316540
PHILIPPINES
G.A. Yupangco & Co. Inc.
339 Gil J. Puyat
Makati, Metro Manila 1200, PHILIPPINES
THEFTIES
TEL: (02) 899 9801
SINGAPORE
SWEE LEE MUSIC
COMPANY PTE. LTD.
150 Sims Drive,
SINGAPORE 387381
TEL: 6846-3676
TAIWAN
ROLAND TAIWAN
ENTERPRISE CO., LTD.
Room 5,9fL.No.112 Chung CHen, N.P. 16, 2 Thei
Shan N.Road Sec.2, Taipei, TAIWAN B.O.C.
TAIWAN, R.O.C.
TEI: (02) 2561 333
THAILAND
Theera Music Co., Ltd.
330 Soi Verng NakornKasem,
New Road, Sumpantawongse, 100000, Thailand
Bangkok 10100,TH
TEL: (852) 234-9921
TEL: (02) 224-8821
AUSTRALIA/ NEW ZEALAND
AUSTRALIA/
NEW ZEALAND
Roland Corporation
Australia Pty.,Ltd.
38 Campbell Avenue
Dee Why West. NSW 2099
AUSTRALIA
For Australia
Tel: (02) 9982 8266
For New Zealand
Tel: (09) 3098/715
CENTRAL/LATIN AMERICA
ARGENTINA
Instrumentos Musicales S.A.
Av.Santa Fe 2055
(1123) Buenos Aires
ARGENTINA TEL.(911)478
TEL: (011) 4508-2700
BARBADOS
A&B Music Supplies LTD
12 Webster Industrial Park
Wildey, St. Michael, Barbados
TEL: (246) 130-1190
TEL: (246)430-1100
BRAZIL
Roland Brasil Ltda.
Rua San Jose, 780 Sala B
Parque Industrial San Jose
Cotia - Sao Paulo - SP, BRAZIL
TEL: (011) 4615 5666
CHILE
Comercial Fancy II S.A.
Rut.: 96.919.420-1
Nataniel Cox #739, 4th Floor
Santiago - Centro, CHILE
TEL: (02) 688.9540
COLOMBIA
Centro Musical Ltda.
Cra 43 B No 25 A 41 Bododega 9
Medellin, Colombia
TEL: (574)3812529
COSTA RICA
JUAN Bansbach Instrumentos
Musicales
Boulevard Andrews, Albrook,
Panama City, REP. DE
PANAMA
TEL: 315-0101
PARAGUAY
Distribuidora De
Instrumentos Musicales
J.E. Olear y ESQ. Manduvira
Asuncion PARAGUAY
TEL: (595) 21 492147
PERU
Audionet
155, New National Road
Patras 26442, GREECE
TEL: 2610 435400
HUNGARY
Roland East Europe Ltd.
Warehouse Area DEPO' Pf.83
H-2046 Torokbalint,
HUNGARY
TEL: (23) 511011
IRELAND
Roland Ireland
G2 Calmount Park, Calmunt
Avenue, Dublin 12
Republic of IRELAND
TEL: (01) 4294444
ITALY
Roland Italy S. p. A.
Danvik Center 28, 2 tr.
S-131 30 Nacka SWEDEN
TEL: (0)8 702 00 20
SWITZERI
Roland (Switzerland) AG
Atlantic Close, Swansea
Enterprise Park, SWANSEA
SA7 9FJ,
UNITED KINGDOM
TEL: (01792) 702701
JORDAN
Abdullah Salem Street,
Safat, KUWAIT
TEL:243-6399
LEBANON
Chahine S.A.L.
George Zeidan St., Chahine
Bldg., Achrafieh, I 5057
5857
Bir: LEBANON
Beirut,LEBANON TEL: (01) 20-1441
OMAN
TALENTZ CENTRE L.L.C.
Malatan House No.1
Al Noor Street, Ruwi
SULTANATE OF OMAN
TEL:24783443
QATAR
Al Emadi Co. (Badie Studio &
Stores)
P.O.Box 62Doha,QATAR
TEL: 4423-554
SAUDI ARABIA
aDaw利亚h Universal
Electronics APL
Corniche Road, Aldossary
Bldg., 1st Floor, Alkhobar,
31952 SAUDI ARABIA
P.O.Box 2154, Alkhobar 31952
SAUDI ARABIA
TEL: (03) 898 2081
SYRIA
Technical Light & Sound
Center
Rawda, Abdul Qader Jazairi St.
Bldg. No. 21, P.O.BOX 13520
Damascus, SYRIA
TEL: (011) 223-5384
TURKEY
ZUHAL DIS TICARET A.S.
Galip Dede Cad. No.37
Beyoglu - Istanbul / TURKEY
TEL: (0212) 249 85 10
U.A.E.
Zak Electronics & Musical
Instruments Co. L.L.C.
Zabeel Road, Al Sherooq Bldg.,
No. 14, Ground Floor, Dubai,
U.A.E.
TEL: (04) 3360715
NORTH AMERICA
CANADA
Roland Canada Ltd.
(Head Office)
5480 Parkwood Way
Richmond B.C.,V6V2M4
CANADA
TEL: (604) 270 6626
Roland Canada Ltd.
(Toronto Office)
170 Admiral Boulevard
Mississauga On L5T 2N6
CANADA
TEL: (905) 362 9707
U.S.A.
Roland Corporation U.S.
5100 S. Eastern Avenue
Los Angeles, CA 90040-2938,
U.S.A.
TEL: (323) 890 3700