
BK-3-BK - Synthesizer ROLAND - Free user manual and instructions
Find the device manual for free BK-3-BK ROLAND in PDF.


| Product Type | Backing Keyboard (Synthesizer) |
| Model | BK-3-BK |
| Keyboard | 61 velocity-sensitive keys, Key Touch: High, Medium, Low, Fixed |
| Keyboard Modes | Whole, Split, Dual |
| Max Polyphony | 128 voices (GM2/G5/XG Lite compatible) |
| Tones | 851 tones, 53 drum sets |
| Effects | Reverb, Chorus, 84 MFX macros, EQ |
| Rhythms | 250 rhythms in 5 families |
| Built-in Recordable Audio | WAV (44.1 kHz, 16-bit) to USB flash memory |
| MIDI | MIDI IN, MIDI OUT, USB MIDI (Type B) |
| USB Memory | Type A for storage, supports up to 2 TB FAT |
| Speakers | 2 x 10 cm, 2 x 7.5 W |
| Auto Off | Off, 10 min, 30 min, 240 min |
| Power Supply | AC adaptor PSB-1U, 1200 mA |
| Dimensions (without music rest) | 1044 (W) x 317 (D) x 129 (H) mm |
| Dimensions (with music rest) | 1044 (W) x 408 (D) x 318 (H) mm |
| Weight | 7.5 kg (excluding AC adaptor and music rest) |
| Maintenance | Clean with soft, dry cloth; mild detergent if needed; avoid benzine, thinners, alcohol |
| Safety | Use only supplied AC adaptor; avoid moisture, extreme temps; unplug during storms; keep away from children |
| Spare Parts & Reparability | Contact Roland Service Center or authorized distributor; do not disassemble |
| Accessories Included | Owner's Manual, PSB-1U AC adaptor, power cord, music rest |
| Options | Roland M-UF USB flash memory, WNA1100-RL wireless USB adapter, DP-series pedal, BOSS FS-5U footswitch |
Frequently Asked Questions - BK-3-BK ROLAND
User questions about BK-3-BK ROLAND
0 question about this device. Answer the ones you know or ask your own.
Ask a new question about this device
Download the instructions for your Synthesizer in PDF format for free! Find your manual BK-3-BK - ROLAND and take your electronic device back in hand. On this page are published all the documents necessary for the use of your device. BK-3-BK by ROLAND.
USER MANUAL BK-3-BK ROLAND
This equipment has been tested and found to comply with the limits for a Class B digital device, pursuant to Part 15 of the FCC Rules. These limits are designed to provide reasonable protection against harmful interference in a residential installation. This equipment generates, uses, and can radiate radio frequency energy and, if not installed and used in accordance with the instructions, may cause harmful interference to radio communications. However, there is no guarantee that interference will not occur in a particular installation. If this equipment does cause harmful interference to radio or television reception, which can be determined by turning the equipment off and on, the user is encouraged to try to correct the interference by one or more of the following measures:
Reorient or relocate the receiving antenna.
– Increase the separation between the equipment and receiver.
- Connect the equipment into an outlet on a circuit different from that to which the receiver is connected.
- Consult the dealer or an experienced radio/TV technician for help.
This device complies with Part 15 of the FCC Rules. Operation is subject to the following two conditions:
(1) this device may not cause harmful interference, and
(2) this device must accept any interference received, including interference that may cause undesired operation.
This equipment requires shielded interface cables in order to meet FCC class B limit.
Any unauthorized changes or modifications not expressly approved by the party responsible for compliance could void the user's authority to operate the equipment.
For Canada
NOTICE
This Class B digital apparatus meets all requirements of the Canadian Interference-Causing Equipment Regulations.
AVIS
This product contains chemicals known to cause cancer, birth defects and other reproductive harm, including lead.
For the U.K.
IMPORTANT: THE WIRES IN THIS MAINS LEAD ARE COLOURED IN ACCORDANCE WITH THE FOLLOWING CODE.
BLUE: NEUTRAL
BROWN: LIVE
As the colours of the wires in the mains lead of this apparatus may not correspond with the coloured markings identifying the terminals in your plug, proceed as follows:
The wire which is coloured BLUE must be connected to the terminal which is marked with the letter N or coloured BLACK.
The wire which is coloured BROWN must be connected to the terminal which is marked with the letter L or coloured RED.
Under no circumstances must either of the above wires be connected to the earth terminal of a three pin plug.
-For the USA
DECLARATION OF CONFORMITY Compliance Information Statement
Model Name : BK-3
Type of Equipment : Backing Keyboard
Responsible Party : Roland Corporation U.S.
Address: 5100 S. Eastern Avenue, Los Angeles, CA 90040-2938
Telephone : (323) 890-3700
Roland
BK-3
BACKING KEYBOARD
Owner's Manual
Thank you and congratulations on your choice of the Roland BK-3 Backing Keyboard.
To ensure that you obtain the maximum enjoyment and take full advantage of the BK-3's functionality, please read this owner's manual carefully.
About This Manual
You should first read the chapter "Before you start using the BK-3" (p. 14). It explains how to connect the AC adaptor and turn on the power. This Owner's Manual explains everything, from the BK-3's basic operations to more advanced functions.
Conventions Used in This Manual
Text enclosed in square brackets [] indicates the name of a button or knob. Example: the [MENU] button.
Reference pages are indicated by (p. **).
The following symbols are used.
NOTE
This indicates an important note; be sure to read it.
MEMO
This indicates a memo regarding the setting or function; read it as desired.
TIPS
This indicates a useful hint for operation; read it as necessary.
*The explanations in this manual include illustrations that depict what should typically be shown by the display. Note, however, that your unit may incorporate a newer, enhanced version of the system (e.g., include newer sounds), so what you actually see in the display may not always match what appears in the manual.
Before using this instrument, carefully read "Using the Unit Safely" (p. 4) and "Important Notes" (p. 6).
Those sections provide information concerning the proper operation of the BK-3. Additionally, in order to feel assured that you have gained a good grasp of every feature provided by your new unit, the manual should be read in its entirety. The manual should be saved and kept on hand as a convenient reference
INSTRUCTIONS FOR THE PREVENTION OF FIRE, ELECTRIC SHOCK, OR INJURY TO PERSONS
About ⚠ WARNING and ⚠ CAUTION Notices
 | Used for instructions intended to alert the user to the risk of death or severe injury should the unit be used improperly. |
 | Used for instructions intended to alert the user to the risk of injury or material damage should the unit be used improperly.* Material damage refers to damage or other adverse effects caused with respect to the home and all its furnishings, as well to domestic animals or pets. |
About the Symbols
 | The △symbol alerts the user to important instructions or warnings. The specific meaning of the symbol is determined by the design contained within the triangle. In the case of the symbol at left, it is used for general cautions, warnings, or alerts to danger. |
| [AA27] | The ⚙symbol alerts the user to items that must never be carried out (are forbidden). The specific thing that must not be done is indicated by the design contained within the circle. In the case of the symbol at left, it means that the unit must never be disassembled. |
| [4791] | The ●symbol alerts the user to things that must be carried out. The specific thing that must be done is indicated by the design contained within the circle. In the case of the symbol at left, it means that the power-cord plug must be unplugged from the outlet. |
ALWAYS OBSERVE THE FOLLOWING
WARNING
Do not disassemble or modify by yourself
Do not open (or modify in any way) the unit or its AC adaptor.

Do not repair or replace parts by yourself
Do not attempt to repair the unit, or replace parts within it (except when this manual provides specific instructions directing you to do so). Refer all servicing to your retailer, the nearest Roland Service Center, or an authorized Roland distributor, as listed on the "Information" page.

Do not use or store in the following types of locations
- Subject to temperature extremes (e.g., direct sunlight in an enclosed vehicle, near a heating duct, on top of heat-generating equipment); or are
- Damp (e.g., baths, washrooms, on wet floors); or are
- Exposed to steam or smoke; or are
- Subject to salt exposure; or are
- Humid; or are
- Exposed to rain; or are
• Dusty or sandy; or are - Subject to high levels of vibration and shakiness.


Do not place in an unstable location
Make sure you always have the unit placed so it is level and sure to remain stable. Never place it on stands that could wobble, or on inclined surfaces.

Use only the included AC adaptor and the correct voltage
Be sure to use only the AC adaptor included with the unit. Also, make sure the line voltage at the installation matches the input voltage specified on the AC adaptor's body. Other AC adaptors may use a different polarity, or be designed for a different voltage, so their use could result in damage, malfunction, or electric shock.

WARNING
Use only the included power cord
Use only the attached power-supply cord. Also, the included power cord must not be used with any other device.

Do not bend the power cord or place heavy objects on it
Do not excessively twist or bend the power cord, nor place heavy objects on it. Doing so can damage the cord, producing severed elements and short circuits. Damaged cords are fire and shock hazards!

Avoid extended use at high volume
This unit, either alone or in combination with an amplifier and headphones or speakers, may be capable of producing sound levels that could cause permanent hearing loss. Do not operate for a long period of time at a high volume level, or at a level that is uncomfortable. If you experience any hearing loss or ringing in the ears, you should immediately stop using the unit, and consult an audiologist

Don't allow foreign objects or liquids to enter unit; never place containers with liquid on unit
Do not place containers containing liquid (e.g., a glass of water) on this product. Never allow foreign objects (e.g., flammable objects, coins, wires) or liquids (e.g., water or juice) to enter this product. Doing so may cause short circuits, faulty operation, or other malfunctions.

Adults must provide supervision in places where children are present
When using the unit in locations where children are present, be careful so no mishandling of the unit can take place. An adult should always be on hand to provide supervision and guidance.

Do not drop or subject to strong impact
Protect the unit from strong impact. (Do not drop it!)


WARNING
Turn off the unit if an abnormality or malfunction occurs
Immediately turn the unit off, remove the AC adaptor from the outlet, and request servicing by your retailer, the nearest Roland Service Center, or an authorized Roland distributor, as listed on the "Information" page when:

• The AC adaptor, the power-supply cord, or the plug has been damaged; or
• If smoke or unusual odor occurs; or
- Objects have fallen into, or liquid has been spilled onto the unit; or
• The unit has been exposed to rain (or otherwise has become wet); or
- The unit does not appear to operate normally or exhibits a marked change in performance.
Do not share an outlet with an unreasonable number of other devices
Do not force the unit's power-supply cord to share an outlet with an unreasonable number of other devices. Be especially careful when using extension cords—the total power used by all devices you have connected to the extension cord's outlet must never exceed the power rating (watts/amperes) for the extension cord. Excessive loads can cause the insulation on the cord to heat up and eventually melt through.

Do not use overseas
Before using the unit in a foreign country, consult with your retailer, the nearest Roland Service Center, or an authorized Roland distributor, as listed on the "Information" page.


CAUTION
Place in a well ventilated location
The unit and the AC adaptor should be located so their location or position does not interfere with their proper ventilation

Grasp the plug when connecting or disconnecting the AC adaptor
Always grasp only the plug on the AC adaptor cord when plugging into, or unplugging from, an outlet or this unit.

Periodically clean the AC adaptor's plug
At regular intervals, you should unplug the AC adaptor and clean it by using a dry cloth to wipe all dust and other accumulations away from its prongs. Also, disconnect the power plug from the power outlet whenever the unit is to remain unused for an extended period of time. Any accumulation of dust between the power plug and the power outlet can result in poor insulation and lead to fire.

Manage cables for safety
Try to prevent cords and cables from becoming entangled. Also, all cords and cables should be placed so they are out of the reach of children.

Avoid climbing on top of the unit, or placing heavy objects on it
Never climb on top of, nor place heavy objects on the unit.

Do not connect or disconnect the AC adaptor with wet hands
Never handle the AC adaptor or its plugs with wet hands when plugging into, or unplugging from, an outlet or this unit.

Disconnect everything before moving the unit
Before moving the unit, disconnect the AC adaptor and all cords coming from external devices.

Unplug the AC adaptor from the outlet before cleaning
Before cleaning the unit, turn it off and unplug the AC adaptor from the outlet (p. 16).

If there is a possibility of lightning strike, disconnect the AC adaptor from the outlet
Whenever you suspect the possibility of lightning in your area, disconnect the AC adaptor from the outlet.

2. Important Notes
In addition to the items listed under "Using the unit safely" on p. 4, please read and observe the following:
Power Supply
- Do not connect this unit to same electrical outlet that is being used by an electrical appliance that is controlled by an inverter or a motor (such as a refrigerator, washing machine, microwave oven, or air conditioner). Depending on the way in which the electrical appliance is used, power supply noise may cause this unit to malfunction or may produce audible noise. If it is not practical to use a separate electrical outlet, connect a power supply noise filter between this unit and the electrical outlet.
- The AC adaptor will begin to generate heat after long hours of consecutive use. This is normal, and is not a cause for concern.
• To prevent malfunction and equipment failure, always make sure to turn off the power on all your equipment before you make any connections. - With the factory settings, the BK-3 will automatically be switched off 30 minutes after you stop playing or operating the unit. If you don't want the unit to turn off automatically, change the "AUTO OFF" setting to "OFF" as described on p. 52.
NOTE
The settings you were editing will be lost when the unit is turned off. If you want to keep your settings, you must save your settings before turning the unit off.
Placement
- Using the unit near power amplifiers (or other equipment containing large power transformers) may induce hum. To alleviate the problem, change the orientation of this unit; or move it farther away from the source of interference.
- This device may interfere with radio and television reception. Do not use this device in the vicinity of such receivers.
- Noise may be produced if wireless communications devices, such as cell phones, are operated in the vicinity of this unit. Such noise could occur when receiving or initiating a call, or while conversing. Should you experience such problems, you should relocate such wireless devices so they are at a greater distance from this unit, or switch them off.
- Do not expose the unit to direct sunlight, place it near devices that radiate heat, leave it inside an enclosed vehicle, or otherwise subject it to temperature extremes. Excessive heat can deform or discolor the unit.
- When moved from one location to another where the temperature and/or humidity is very different, water droplets (condensation) may form inside the unit. Damage or malfunction may result if you attempt to use the unit in this condition. Therefore, before using the unit, you must allow it to stand for several hours, until the condensation has completely evaporated.
- Do not allow objects to remain on top of the keyboard. This can be the cause of malfunction, such as keys ceasing to produce sound.
- Depending on the material and temperature of the surface on which you place the unit, its rubber feet may discolor or mar the surface. You can place a piece of felt or cloth under the rubber feet to prevent this from happening. If you do so, please make sure that the unit will not slip or move accidentally.
- Do not put anything that contains water on this unit. Also, avoid the use of insecticides, perfumes, alcohol, nail polish, spray cans, etc., near the unit. Swiftly wipe away any liquid that spills on the unit using a dry, soft cloth.
Maintenance
- For everyday cleaning wipe the unit with a soft, dry cloth or one that has been slightly dampened with water. To remove stubborn dirt, use a cloth impregnated with a mild, non-abrasive detergent. Afterwards, be sure to wipe the unit thoroughly with a soft, dry cloth.
- Never use benzine, thinners, alcohol or solvents of any kind, to avoid the possibility of discoloration and/or deformation.
Additional Precautions
- Unfortunately, it may be impossible to restore the contents of data that was stored on a USB memory once it has been lost. Roland Europe assumes no liability concerning such loss of data.
- Use a reasonable amount of care when using the unit's buttons, sliders, or other controls; and when using its jacks and connectors. Rough handling can lead to malfunctions.
- Never strike or apply strong pressure to the display.
- When disconnecting all cables, grasp the connector itself—never pull on the cable. This way you will avoid causing shorts, or damage to the cable's internal elements.
- To avoid disturbing others nearby, try to keep the unit's volume at reasonable levels. You may prefer to use headphones, so you do not need to be concerned about those around you.
- When you need to transport the unit, package it in the box (including padding) that it came in, if possible. Otherwise, you will need to use equivalent packaging materials.
- Do not apply undue force to the music stand while it is in use.
Storage devices that can be connected to the BK-3's USB MEMORY port
- The BK-3 allows you to connect commercially available USB Flash memory. You can purchase such devices at a computer store, a digital camera dealer, etc.
- Though external hard disks with a capacity in excess of 2TB can be used, please bear in mind that the BK-3 can manage a maximum of 2TB. (FAT-32 formatted storage devices can be used right away.)
- Use USB memory sold by Roland (M-UF-series). We cannot guarantee operation if any other USB memory is used.
Before using external USB storage devices
- Carefully insert the USB memory all the way in—until it is firmly in place.
-
USB memories are constructed using precision components; handle the storage devices carefully, paying particular note to the following.
-
To prevent damage to the USB memory from static electricity, be sure to discharge any static electricity from your own body before handling the cards.
- Do not touch or allow metal to come into contact with the contact portion of the USB memory.
- Do not bend, drop, or subject cards to strong shock or vibration.
- Do not keep cards in direct sunlight, in closed vehicles, or other such locations.
- Do not allow USB memories to become wet.
-
Do not disassemble or modify the USB memory.
-
Never touch the terminals of the USB memory. Also, avoid getting the terminals dirty.
- When connecting a USB memory, position it horizontally with the BK-3's USB MEMORY port and insert it without using excessive force. The USB MEMORY port may be damaged if you use excessive force when inserting a USB memory.
- Do not connect or disconnect a USB drive while it is being rear from, or written to (i.e., while the USB flash access indicator blinks).
- Do not insert anything other than a USB memory (e.g., wire, coins, other types of device) into the USB MEMORY port. Doing so will damage the BK-3's USB MEMORY port.
- Never connect your USB memory to the BK-3 via a USB hub.
- Do not connect or disconnect a USB drive while it is being rear from, or written to (i.e., while the USB flash access indicator blinks).
Liability and copyright
- Recording, duplication, distribution, sale, lease, performance, or broadcast of copyrighted material (musical works, visual works, broadcasts, live performances, etc.) belonging to a third party in part or in whole without the permission of the copyright owner is forbidden by law.
-
Do not use this unit for purposes that could infringe on a copyright held by a third party. Roland assumes no responsibility whatsoever with regard to any infringements of third-party copyrights arising through your use of this unit.
-
Company names and product names mentioned in this document are trademarks or registered trademarks of their respective owners.
- MPEG Layer-3 audio compression technology is licensed from Fraunhofer IIS Corporation and THOMSON Multimedia Corporation.
• Copyright © 2003 by Bitstream, Inc. All rights reserved. Bitstream Vera is a trademark of Bitstream, Inc. - MMP (Moore Microprocessor Portfolio) refers to a patent portfolio concerned with microprocessor architecture, which was developed by Technology Properties Limited (TPL). Roland has licensed this technology from the TPL group.
3. Look at What you Can Do!
Play the Keyboard
Play using various sounds
p. 19
This keyboard contains a wide variety tones (sounds). You can freely select and perform using these tones.
Play with accompaniment
p. 22
The BK-3 can supply a wide variety of accompaniments (rhythm) for the music you play. You can also play back rhythms located in your USB memory.
Select tones that match the atmosphere of the current rhythm (One Touch) p. 26
p. 26
There are four One Touch memories per rhythm.
Favorite tones
Using this function, you can create a list of 10 frequently used sounds and recall them instantly.
Play Songs
Play a song
p. 28
This unit can play songs in audio (wave or mp3) and SMF format directly by your USB memory.
Mute tracks or cancel the melody
p. 30
You can mute tracks of songs (SMF) and rhythms and attenuate the vocal part at the center of stereo image ("Center Cancel") of an audio file (WAV or mp3).
Sing a song with the lyrics
p. 43
BK-3's display can show the lyrics of Standard MIDI Files or mp3 songs you load.
Record Songs
Record your performance
p. 41
You can record your performance as audio data.
Energy-Efficient Design
The power will turn off after a specified time has elapsed
Organize your performance
Create your performance list
p. 36
To prepare sets of Performance memories for any event like weddings, parties, anniversaries, etc.
Convenient Functions
Working with the Music Assistant
p. 36
It is a collection of registrations for given songs that select the most appropriate rhythm and sounds for the Keyboard parts.
Transpose the key of the keyboard, Rhythm or Song p. 34
This function allows you to transpose BK-3's pitch in semi-tone steps.
Change the octave
p. 34
This function allows you to transpose the Upper and Lower (UPP, LWR) real-time parts up or down in octave steps.
To practice in keeping a consistent tempo (Metronome) p. 3
p. 35
You can perform while the metronome sounds.
You can set the Volume, Tempo, Time Signature and Count In.
Smf/Rhythm edit Functions
Makeup Tools for Rhythm or Song
p. 53
To edit the selected rhythm or SMF song (Standard MIDI File) without paying too much attention to the underlying parameters.
Wireless LAN Functions
Ad-Hoc and WPS connection
p. 62
By inserting the wireless USB Adapter (WNA1100-RL; sold separately) into the BK-3's USB MEMORY port, you'll be able to use wireless compatible applications (such as the "Air Recorder" iPhone app).
p. 16
When thirty minutes have elapsed since you last played or operated the BK-3, the power will turn off automatically.
* If you don't want the power to turn off automatically, change the "Auto Off" setting (p. 52).
Contents
-
Using the Unit Safely....4
-
Important Notes....6
-
Look at What you Can Do! 7
-
Panel Description....10
Left Front Panel 10
Right Front Panel....11
Rear Panel 12
-
Shortcut List....13
-
Before You Start Using BK-3 ..... 14
Connecting the AC Adaptor ....14
Connecting Headphones and External Audio Equipment ..... 14
Connecting a MIDI Device 15
Connecting the BK-3 to Your Computer ....15
Connecting an Optional Footswitch or Hold Pedal....15
Installing the Music Rest....16
Turning the Power On/Off ....16
Turning the Power On....16
Turning the Power Off....16
Adjusting the Sound Volume .....17
Volume balance between the backing and the real-time parts 17
Demo of the BK-3 17
- Basic Operation of the BK-3 ..... 18
About the Display and Cursor Operation ....18
Main page 18
Moving Between Windows and Setting Parameter Values 18
- Playing the BK-3's Real-Time Parts ..... 19
Selecting Tones and Playing the Keyboard (Upper Part).....19
Selecting Tones and Play Two Voices Simultaneously (Dual) ...19
Play Different Voices with the Left and Right Hands (Split)....19
Using the 'Numeric' function to Select Tones, Rhythms and
Performances....20
Setting the volume of the real-time parts (Upper and Lower) .20
Recalling a Favorite Tone ....21
Viewing the List of Favorite Tones .....21
Creating the List of Favorite Tones....21
-
Favorite Tones ...... 21
-
Playing with Automatic Accompaniments....22
About the Rhythms 22
Structure of the Rhythm Accompaniments....22
Using Rhythms....22
[START/STOP] / [▶/II]....22
[SYNC START] / [■] 22
VARIATION [1], [2], [3], [4]....23
[INTRO] / [◀◀]....23
[ENDING] / [▶▶] ......23
[BASS INV]....23
[AUTO FILL IN]....24
Selecting Rhythms 24
Playing Back Rhythms....24
- One Touch Memories: Why using them? 26
Select a 'One Touch' 26
Deselect 'One Touch'......26
How Can You Tell Whether the ONE TOUCH Function is On
or Off? 26
Programming Your Own ONE TOUCH Settings (One Touch
Edit) 27
What a One Touch memory saves 27
- Using the BK-3 as a USB player 28
Getting Ready to Use the BK-3 as a USB Player....28
File types the BK-3 can read and play back ..... 28
Selecting a Song or Rhythm on a USB Memory .....28
Playing Back a Song or Rhythm from a USB Memory.....28
Activating the 'Play All Songs' parameter for the USB memory 29
Activating the 'Play All Songs' function 29
Deactivating the 'Play All Songs' function....30
Loop function (MARK A/B) 30
Setting and using the loop positions....30
Using 'Track Mute' and 'Center Cancel'. 30
Selecting the Track(s) to Mute for Rhythms or SMF Songs .....31
Changing the Name of a File or Folder ....32
Deleting the Name of a File or Folder ....32
Using the 'Search' Function to Locate Songs or Rhythms .....32
-
Operations on USB Memory....32
-
Other important functions....34
Transposing to a Different Key 34
Changing the Octave....34
Using the 'Melody Intell(igent)' Function .....34
Using the Metronome....35
Metronome Settings 35
- Performance Lists ....36
Performance/Music Assistant/Factory Songs Info....36
Loading a Performance/“Music Assistant”/“Factory Songs’ List .36
Recalling a Performance/“Music Assistant”/“Factory Songs”
ory 36
Quickly Locating Performance Memories....37
Saving your Settings as a Performance....37
Other Performance List Functions....37
Rename a Performance List....38
Delete a Performance List 38
Create a New Performance List....38
Editing Performance Memories ....38
Delete a Performance memory ....38
Move a Performance 39
Saving the edited Performance List....39
Filtering Performance Memories Settings (Lock function)....39
Why is it Convenient to Use Filters (Lock Function)?.....39
Which Parameter Can you Filter?....39
How to Switch Filters On/Off Directly by Panel....39
- Recording your performance as audio data .....41
Recording....41
Listening to your recording....42
- Menu options ......43
General procedure 43
Internal Lyrics....43
'Performance Edit' parameters 43
'Tone Part View' parameters....43
Tone....43
Volume....44
Reverb Send....44
Chorus Send....44
Panpot....44
Key Touch (velocity sensitivity) 44
Eq Part Edit....44
Mfx....45
Hold Pedal....45
Octave Shift 45
Coarse Tune 45
Fine Tune....45
Portamento Mode....45
Portamento Time 45
Bender Assign 45
Bender Range 45
Modulation Assign....45
Cut Off 45
Resonance....46
Attack (only for Tones) 46
Decay....46
Release....46
Vibrato Rate 46
Vibrato Depth 46
Vibrato Delay 46
C1....46
'Tone Part Mfx' parameters....46
Mfx Switch....46
Mfx Type 46
Mfx Edit....47
'Rhythm Parts' parameters 47
Mute....47
Solo 47
Volume....47
Split 47
Split Point 47
Lower Hold 47
Scale Tune Switch 47
Scale Tune 48
Key 48
Key....48
Mode....48
'Arranger Setting' parameters 48
Arranger....48
Zone 48
Type....48
Arranger Hold 49
Tempo....49
Fill In Half Bar....49
Fill Ritardando 49
TempoCh Acc/Rit, TempoCh CPT, TempoCh Fill
Rit....49
Using the Ritardando/Accelerando functions .. 50
'Melody Intelligent' parameters 50
Switch....50
Type....50
2nd Tone 50
Intell Threshold 50
Level....50
Hold Pedal....50
Save As Default 50
'Global' parameters....50
Display Contrast....50
Tuning....51
Rhythm/SMF Track Mute....51
One Touch Hold 51
Performance Hold....51
Metronome 51
Favorite....51
Utility....51
Pedal Switch 52
Language....53
Save Global 53
One Touch Edit....53
Makeup Tools (rhythms and SMF)....53
Using the Makeup Tools 53
Common....53
Reverb Type 54
Chorus Type 54
Reverb Level & Chorus Level....54
Rhythm Volume/Song Volume .....54
Rhythm Tempo/Song Tempo....54
Key....54
Undo Changes....54
Instrument....54
Tone (♂), Drum (♂) .....54
Mute (♂)/Drum Mute (♂) 55
Solo....55
Perc Mute (5) 55
Volume....55
Reverb 55
Chorus 55
Panpot....55
Octave (♂)....55
Velocity....55
Cut Off 55
Resonance....55
Attack (♂)....56
Decay (♂)....56
Release (♂) 56
Vibrato Rate (♂)....56
Vibrato Depth (♂)....56
Vibrato Delay (♂)....56
Mfx....56
Mfx Type 56
Mfx Edit 56
Equalizer....56
Edit EQ....56
Drum Instrument (5)....57
Freeze Data 57
Saving Your New Rhythm or Song (SMF) Version in USB
Memory 57
Preventing Double Notes when Working with a
Sequencer (Local Control) 58
MIDI 58
MIDI Channels 58
MIDI Parameters....58
Local 58
MIDI Tx/Rx....59
Sync Rx....59
Rhythm Pc (Tx/Rx Channel)....59
NTA (Note-to-Arranger channel Rx)....59
Pitch Bender....59
Modulation....59
Program Change....59
Rx Velocity....59
Clock Tx 59
Start Stop Tx....59
SMF Position Tx 59
Visual Control Tx 60
Checking a Tone's or Rhythm's MIDI Address....60
Factory Reset 60
Formatting a USB memory....60
- Controlling Video Equipment (Visual Control) .....61
How to Connect a Video Equipment 61
How to Enable/Disable the Video Control Function ..... 61
Selecting clips and banks on an optional MIDI Visual
Control/V-LINK device....61
What is MIDI Visual Control?......61
- Wireless LAN Function 62
What is Wireless LAN Function? 62
Basic Connection Method (Connect by WPS) .....62
Wireless LAN Function Settings 63
"Status" Indication....63
"Access Point" Indication....63
"Wireless Info" Page 63
"Wireless Option" Page 63
Connecting to a Wireless LAN Access Point That You Select . . .63
Other Settings (Wireless Option)....63
Connecting in Ad-Hoc mode 64
Checking the IP Address and MAC Address (WIRELESS
INFO)....64
-
Troubleshooting....65
-
Specifications 67
-
MIDI Implementation Chart....69
-
Chord Intelligence Table 70
-
Index 72
4. Panel Description
Left Front Panel
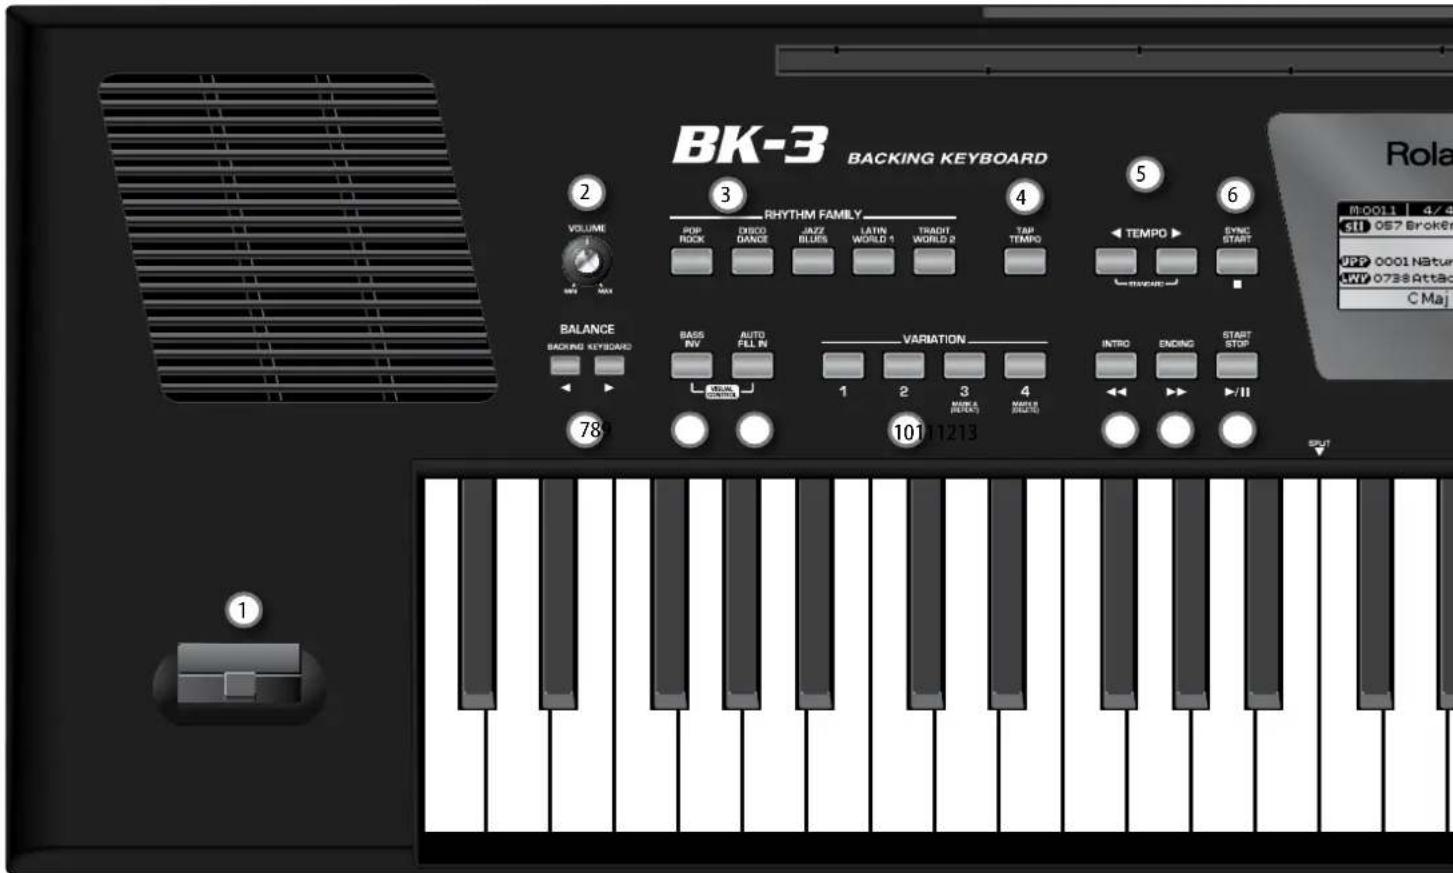
1 Pitch Bend/Modulation lever
You can raise or lower the pitch by moving this lever to the left or right. Push the lever away from yourself to apply modulation (normally vibrato) to the sound.
② VOLUME knob
Use this knob to set BK-3's global output volume (all signals transmitted to the speakers and PHONES/OUTPUT sockets).
3 RHYTHM FAMILY buttons
These buttons are used to select the family of the next rhythm you want to use. Pressing one of these buttons calls up a list of all rhythms contained in the selected family. Pressing and holding this button locks the currently selected rhythm (p. 39).
4 TAP TEMPO button
Pressing this button several times allows you to change the current rhythm or song tempo to the value calculated from the speed at which the button is pressed.
5 TEMPO buttons
These buttons can be used to decrease or increase the tempo of the currently selected rhythm or song. Pressing them together recalls the rhythm or song stored tempo value.
MEMO
You can also use the [TAP TEMPO] button to set the desired tempo
6 SYNC START button
This button is used to activate or switch off the BK-3's Sync Start or Sync Stop function. If it is on, rhythm playback can be started or stopped by simply playing a note or chord on the keyboard. (p. 22). While a song file is selected, this button stops playback.
7 BALANCE buttons
These buttons allow you to set the balance between the rhythms and songs (BACKING) and the real-time parts (KEYBOARD).
8 BASS INV button
This button is used to switch the Bass Inversion function on and off (p.23). Press and hold it while pressing the [AUTO FILL IN] button you will activate/deactivate the Visual Control (p. 61).
9 AUTO FILL IN button
This button is used to activate the Auto Fill-In function, which causes a transition to be played before selecting the new rhythm variation (which is selected with the VARIATION buttons). Press and hold it while pressing the [BASS INV] button you will activate/deactivate the Visual Control (p.61).
10 VARIATION 1/2/3/4 buttons
These buttons are used to select a rhythm "Variation", i.e. a simpler or more complex arrangement of the selected rhythm. When a song is selected the MARK buttons (Variation3/4) allow you to set and use playback loops. See "Loop function (MARK A/B)" (p. 30).
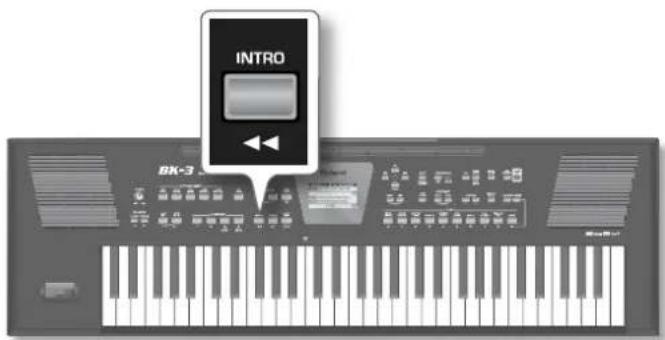
11 INTRO button
When you activate this button, rhythm playback starts with a musical introduction whose complexity depends on which VARIATION button currently lights (there are four different introductions per rhythm). After selecting a song file, this button allows you to rewind.
12 ENDING button
When you activate this button, rhythm playback stops with a musical ending whose complexity depends on which VARIATION button currently lights (there are four different ending phrases per rhythm). After selecting a song file, this button allows you to fast-forward.
13 START/STOP button
This button allows you to start and stop rhythm playback. If you select a song, it starts and temporarily stops (pause) song playback.
Right Front Panel
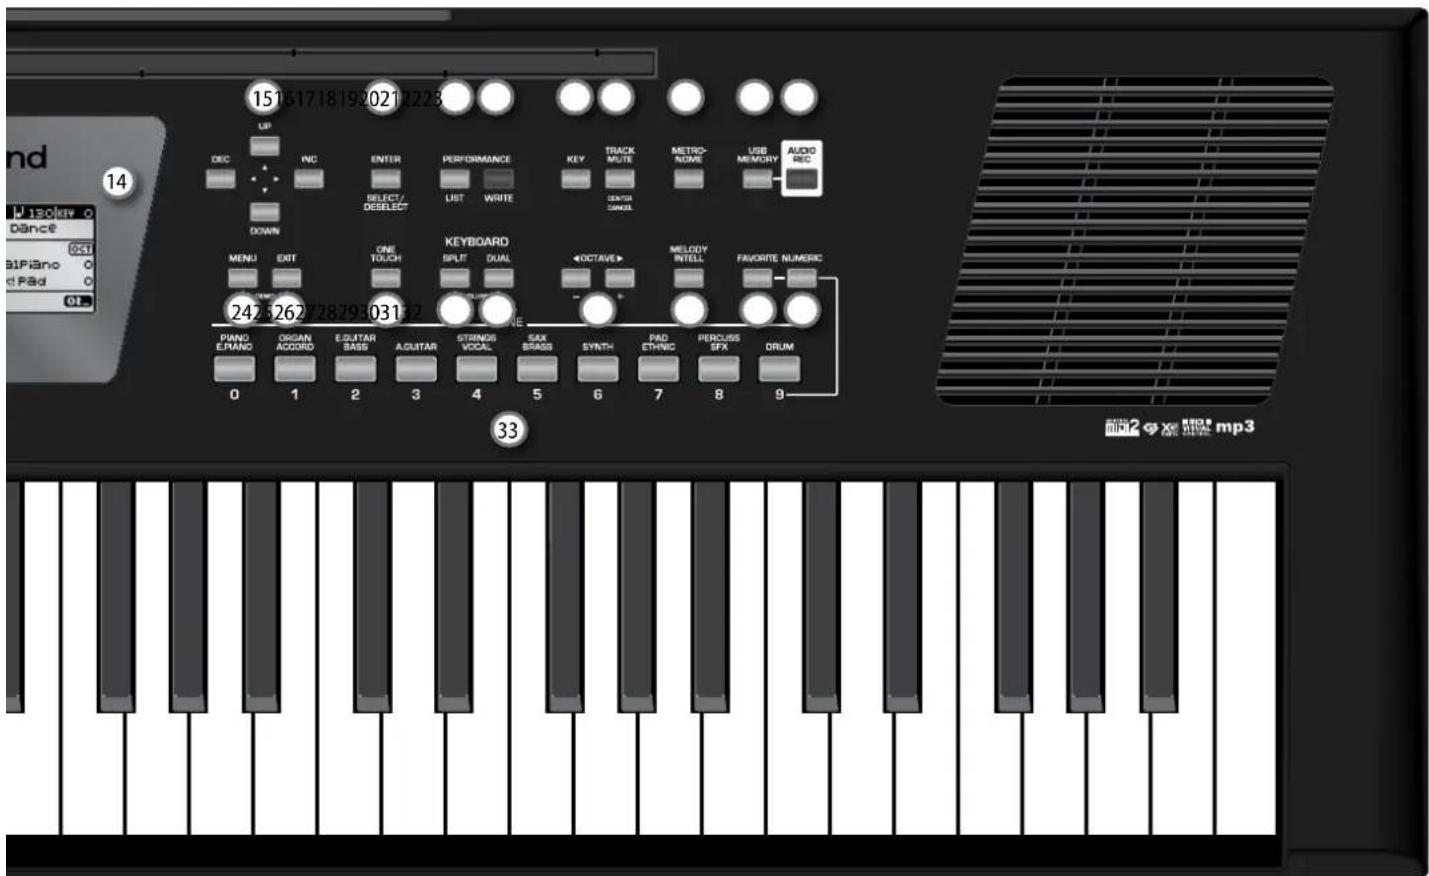

Display
This display shows information related to your operation.

Cursor and value buttons
These buttons can be used to move the cursor in the display, to select parameters and to set values.

ENTER/SELECT/DESELECT button
Press this button to confirm your selection or deselection of the display item where the cursor is.

PERFORMANCE LIST button
This button calls up the Performance List (p. 36).

PERFORMANCE WRITE button
The main function of this button is to save Performance settings. Depending on the selected display page, it can also be used to save Rhythms, Songs and One Touch.

KEY button
This button calls up BK-3's transposition function. Its settings can be applied to rhythms, Songs and the 2 real-time parts (UPP, LWR). If the button indicator doesn't light, the rhythm, Songs and the 2 real-time parts use their normal pitch.
Pressing and holding this button locks the key (p. 39).

TRACK MUTE/CENTER CANCEL button
This button lets you mute the accompaniment parts of the selected rhythm, so that only the bass and drum parts are played back. It also lets you mute the melody part of the selected MIDI File, or attenuate the vocal part at the center of an audio file (WAV or mp3), allowing you to sing or play that part yourself.
Pressing and holding this button calls up a display page where you can select the Standard MIDI File or rhythm part(s) that you don't want to hear.

METRONOME button
Switches the metronome on/off. If you hold down this button, a screen will appear in which you can make settings, such as the time signature and volume of the metronome (p. 35).

USB MEMORY button
Press this button to call up a list of the files stored in the USB memory connected to BK-3's USB MEMORY port.

AUDIO REC button
This button is used to start audio recording of your performance. This function records everything the BK-3 transmits to its PHONES/OUTPUT sockets (audio signals you play back and audio versions of the MIDI parts you control) (p. 41).

MENU button
This button allows you to open BK-3's menu page where you can view and select all available functions.
Press it together with the [EXIT] button to listen to BK-3's demo songs.

EXIT button
This button is used to return to a higher menu level.
Press and hold it to return to BK-3's main display page.

ONE TOUCH button
This button is used to enable the recall of One Touch memories. Pressing and holding it calls up a display page where you can edit and save One Touch memories.
MEMO
Use the TONE buttons [1]\~[4] to select or deselect a One Touch memory (p. 26).
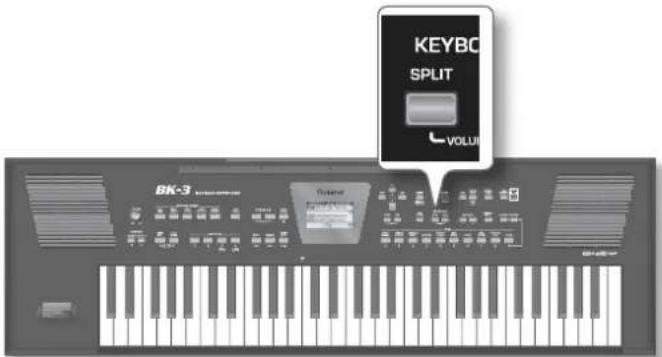
27 KEYBOARD SPLIT button
This button allows you to split the keyboard in two halves: the left half is then used to provide the Rhythm function with chord information, while the right half allows you to play melodies with Upper (UPP) part (p.19). If the dual function is active ([DUAL] button lights) the left half of the keyboard plays the Lower (LWR) part too.
Pressing and holding this button calls up a display page where you can select the split parameters.
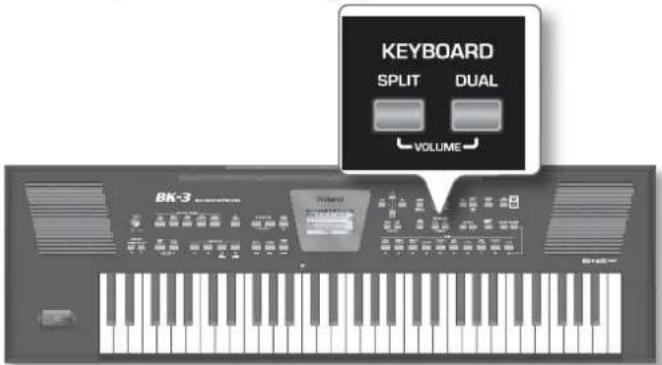
Simultaneously pressing this button and [KEYBOARD DUAL] button (without holding them) opens the display page where you can set the volume of the Upper and Lower parts.
28 KEYBOARD DUAL button
Lets you play the Upper (UPP) and Lower (LWR) part simultaneously. (p. 19)
Pressing and holding this button calls up a display page where you can change the tone of the Lower part.
Simultaneously pressing this button and [KEYBOARD SPLIT] button (without holding them) opens the display page where you can set the volume of the Upper and Lower parts.
29 OCTAVE buttons
These buttons allow you to transpose the current selected part (UPP, LWR) up or down in octave steps.
30 MELODY INTELL button
This buttons is used to add an automatic countermelody (second or third voice) to your solos or melodies.
Pressing and holding it calls up a display page where you can view the "Melody Intelligent" parameter.
31 FAVORITE button
Press this button if you want to use the [TONE] buttons to recall your favorite sounds (p. 21).
32 NUMERIC button
Press this button if you want to use the [TONE] buttons to enter numeric values (p. 20).
33 TONE buttons (Tone selection)/[0]\~[9] (numeric buttons)
These buttons allow you to select Tones by category (p. 19).
You can also use them to input numeric values. To do so, first activate the [NUMERIC] button.
Pressing and holding any of these buttons locks the Tone (p. 39).
Rear Panel

1 POWER switch
Turns the power on/off (p. 16).
With the factory settings BK-3's power will automatically be switched off 30 minutes after you stop playing or operating the BK-3.
If BK-3's power has been turned off automatically, you can use the [POWER] switch to turn the BK-3 back on. If you don't want the power to turn off automatically, set the "Auto Off" parameter to "OFF" (p. 52).
2 DC IN socket
Connect the supplied PSB-1U AC adapter here (p. 14).
3 PEDAL HOLD/SWITCH
Connect a separately available pedal switch (Roland DP-series), a separately available foot switch (BOSS FS-5U).
4 MIDI IN & OUT sockets
You can connect MIDI devices to these sockets (p. 15).
5 PHONE/OUTPUT
This socket allows you to connect an optional headphone (Roland RH-series) or connect the BK-3 to an external audio equipment. For more information see "Connecting Headphones and External Audio Equipment" (p. 14).
NOTE
When you use the PHONES/OUTPUT jack to connect keyboard amplifier, stereo system, or other stereo audio device, you can activate the internal speakers by "Speaker Mode" parameter (p. 51).
6 USB COMPUTER port
Use a USB cable to connect the BK-3 to your computer via this connector (p. 15).
7 USB MEMORY port
Connect an optional USB memory here.
NOTE
* Carefully insert the USB memory all the way in-until it is firmly in place.
* Use USB memory sold by Roland. We cannot guarantee operation if any another USB memory is used.
* Roland does not recommend using USB hubs, irrespective of whether they are active or passive. Please connect only one USB memory to this port.
5. Shortcut List
Pressing and holding the following buttons (or button combinations) allows you to directly jump to a related parameter page, which is faster than selecting the page in question via BK-3's menu. Some of these buttons activate a lock function (p. 39).
Press an hold Function
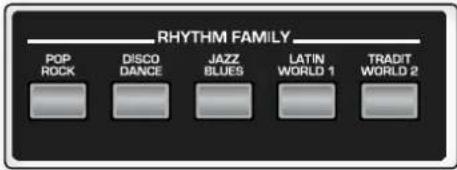
Pressing and holding one of the RHYTHM FAMILY buttons locks the rhythm so as to keep it from changing when you select another Performance memory or Music Assistant.
Pressing and holding one of the TONE buttons locks the Tone so as to keep it from changing when you select another Performance memory or Music Assistant.
Locks the tempo or Key setting to keep it from changing when you select another Performance memory or Music Assistant.
Open the "Metronome" page allowing you to specify when and how the metronome should sound.
Opens the "Rhythm Track Mute" or "Song Track Mute" page.
After activating record standby mode (the indicator flashes), pressing and holding this button will cancel that mode (use it if you don't want to record after all).
Takes you back to the main page, no matter where you currently are.
Opens the "One Touch Edit" page.
- [SPLIT] button opens the "Split page.
- [DUAL] button opens the display page that shows which the current Tone for the lower part is.
- [SPLIT] + [DUAL] buttons: simultaneously pressing them (without holding them) opens the display page where you can set the volume of the Upper and Lower parts.
Opens the "Melody Intelligence" page.
Open the list of Favorite Tones.
NOTE
Press these buttons simultaneously, without holding them.
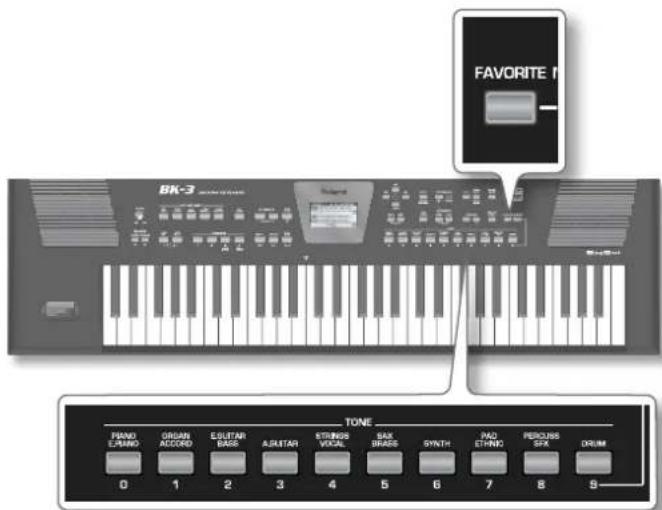
To memorize the sound selected to the associated favorite memory number [0]\~[9], press and hold the [Favorite] button and one of the TONE buttons [0]\~[9].
6. Before You Start Using BK-3
Connecting the AC Adaptor
- Turn the [VOLUME] knob all the way to the left to minimize the volume.
- Connect the included power cord to the AC adapter.
The indicator will light once you plug the AC adaptor into a wall outlet.
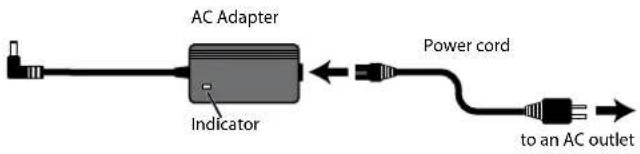
flowchart
graph LR
    A["AC Adapter"] --> B["Power cord"]
    B --> C["to an AC outlet"]
    D["Indicator"] --> A
Place the AC adapter so that the side with the indicator (see illustration) faces upwards and the side with textual information faces downwards.
NOTE
Depending on your region, the included power cord may differ from the one shown above.
- Connect the AC adaptor to BK-3's DC IN jack.
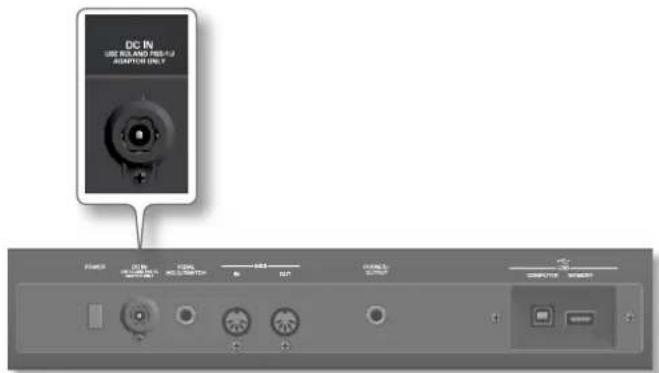
- Plug the power cord into a power outlet.
The indicator will light once you plug the AC adaptor into a wall outlet
NOTE
Be sure to use only the AC adaptor supplied with the unit (PSB-1U). Also, make sure the line voltage at the installation matches the input voltage specified on the AC adapter body. Other AC adapters may use a different polarity, or be designed for a different voltage, so their use could result in damage, malfunction, or electric shock.
NOTE
If you won't be using the BK-3 for an extended period of time, disconnect the power cord from the electrical outlet.
Connecting Headphones and External Audio Equipment
You can connect the PHONES/OUTPUT jack to a set of Headphones as well as keyboard amplifier, stereo system, or other stereo audio device.
The internal speakers are automatically shut off when a plug is inserted into this jack.
NOTE
When you use the PHONES/OUTPUT jack to connect keyboard amplifier, stereo system, or other stereo audio device, you can activate the internal speakers by "Speaker Mode" parameter (p. 51).
- Turn the [VOLUME] knob all the way to the left to minimize the volume.
- Connect the BK-3's PHONES/OUTPUT jack to the set of headphones or to the inputs of your external audio device.
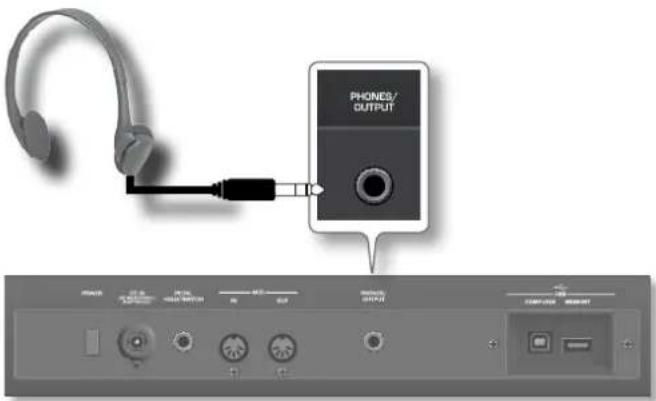
- Use the BK-3s [VOLUME] knob to adjust the volume.
Cautions when using headphones
- To prevent damage to the cord's internal conductors, avoid rough handling. When using headphones, mainly try to handle either the plug or the headset.
- Your headphones may be damaged if the volume of a device is already turned up when you plug them in. Minimize the volume before you plug in the headphones.
- Excessive input will not only damage your hearing, but may also strain the headphones. Please enjoy music at a reasonable volume.
NOTE
To prevent malfunction and equipment failure, always turn down the volume and turn off all units before making any connections.
Connecting a MIDI Device
The BK-3 can transmit and receive performance data when connected to an external MIDI device, which enables the two devices to control each other's performance.
What is MIDI?
MIDI, short for "Musical Instrument Digital Interface," was developed as a universal standard for the exchange of performance data among electronic musical instruments and computers.
The BK-3 is equipped with MIDI connectors to let it exchange performance data with external devices. These connectors can be used to connect the unit to an external device for even greater versatility.
Connection example
If you use a MIDI cable to connect this unit's MIDI OUT connector to the MIDI IN connector of your external MIDI sound module, you'll be able to produce sound on the external MIDI sound module by playing this unit's keyboard. As necessary, set the external MIDI sound module's receive channel to match this unit's MIDI transmit channel.
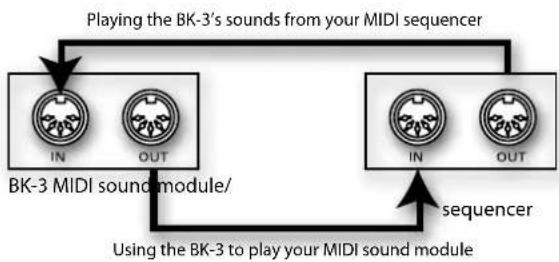
flowchart
graph TD
    A["IN"] --> B["BK-3 MIDI sound module"]
    C["OUT"] --> B
    B --> D["Playing the BK-3's sounds from your MIDI sequencer"]
    D --> E["IN"]
    D --> F["OUT"]
    E --> G["Using the BK-3 to play your MIDI sound module"]
    F --> G
    G --> H["sequencer"]
MIDI channels
MIDI provides sixteen channels, numbered 1\~16. Even if two MIDI devices are connected, you won't be able to select or play sounds on the other device unless both devices are set to the same MIDI channel.
The BK-3 is capable of receiving on all channels, 1\~16.
NOTE
Before making connections with other devices, you must turn down the volume of all devices and turn off the power to avoid malfunctions or speaker damage.
Connecting the BK-3 to Your Computer
If you use a USB cable (commercially available) to connect the COMPUTER port located on the BK-3's rear panel to the USB port of your computer, you'll be able to do the following things:
- Use the BK-3 as a sound module.
-
By transferring MIDI data between the BK-3 and your sequencer software, you'll be able to enjoy a wide range of possibilities for music production and editing.
-
Use a standard USB cable (A→B-type connectors, commercially available) to connect the BK-3 to your computer as shown below.
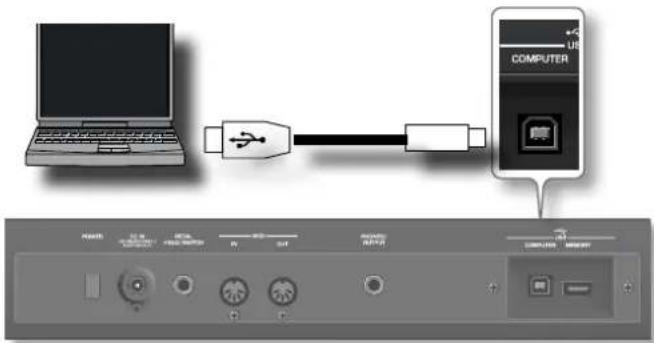
- Refer to the Roland website for system requirements. Roland website: http://www.roland.com/ As an alternative, you can connect the BK-3s MIDI OUT and MIDI IN sockets to a MIDI interface and connect the latter to your computer.
If the computer doesn't 'see' the BK-3
Normally, you don't need to install a driver in order to connect the BK-3 to your computer. However, if some problem occurs, or if the performance is poor, using the Roland original driver may solve the problem.
For details on downloading and installing the Roland original driver, refer to the Roland website:
http://www.roland.com/
Specify the USB driver you want to use, and then install the driver. For details, refer to "USB Driver" (p. 52).
NOTE
- To avoid the risk of malfunction and/or damage to external speakers, always turn the volume all the way down and switch off the power on all devices before you make any connections.
- Only MIDI data can be transmitted and received via USB. Audio data for a song recorded on the BK-3 cannot be transmitted or received.
- Switch on the power to the BK-3 before you start up the MIDI application on your computer. Never turn the BK-3's power on/off while your MIDI application is running.
Connecting an Optional Footswitch or Hold Pedal
The BK-3 provides a PEDAL HOLD/SWITCH jack to which you can connect an optional footswitch (Roland DP-series or BOSS FS-5U).
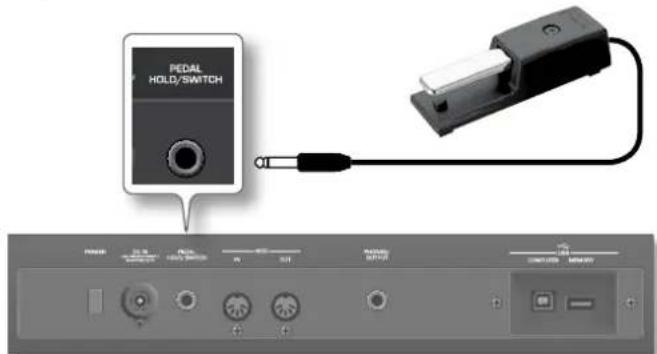
You can select the function that the footswitch should perform (p. 52). By default, the footswitch will control the "Hold" function.
Installing the Music Rest
1. Install the music rest as shown in the illustration.
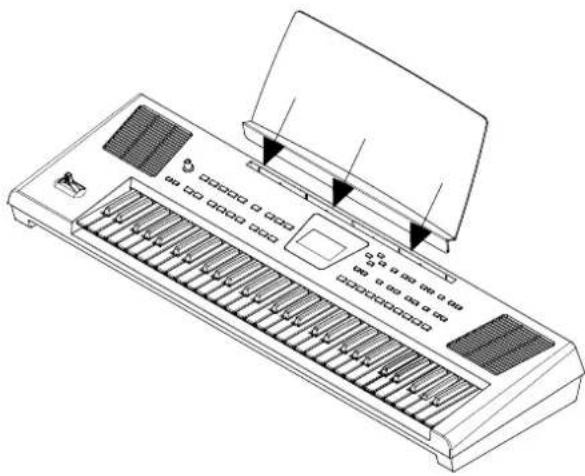
NOTE
When moving the BK-3, be sure to remove the music rest as a safety precaution.
NOTE
Do not apply excessive force to the music rest.
NOTE
The music rest is not designed to accept the placement of laptops or other heavy objects.
Turning the Power On/Off
Once everything is properly connected, be sure to follow the procedure below to turn on their power. See "6. Before You Start Using BK-3" (p. 14). If you turn on equipment in the wrong order, you risk causing malfunction or equipment failure.
Turning the Power On
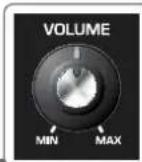
1. Turn the [VOLUME] knob all the way to the left to minimize the volume
![ROLAND BK-3-BK - Turn the [VOLUME] knob all the way to the left to minimize the volume - 1](/content/2026/05/847823/images/12ebd0a01176bf8a94e65616748a1d5a9ddd21ce1f07cb3f33d61938eb77646f.jpg)
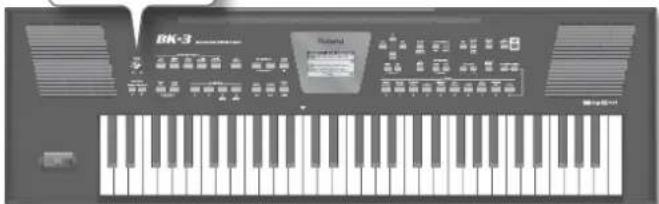
NOTE
Before turning the BK-3 on/off, always be sure to turn the volume down. Even with the volume turned down, you might hear some sound when switching the BK-3 on/off.
However, this is normal and does not indicate a malfunction.
2. Press the [POWER] switch to turn on the power.
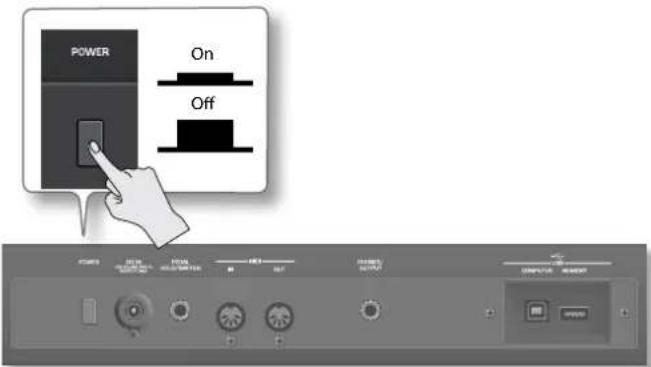
The power will turn on, an opening message will appear in the BK-3's screen, and then the main page will appear.
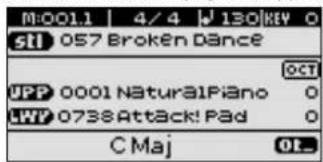
After a brief interval, the BK-3 will be ready to produce sound.
3. Use the [VOLUME] knob to adjust the volume.
NOTE
This unit is equipped with a protection circuit. A brief interval (a few seconds) after power up is required before the unit will operate normally.
Turning the Power Off
1. Turn the [VOLUME] knob all the way to the left to minimize the volume.
NOTE
Never switch off the BK-3 while playback or recording is running or while data are being read from, or written to, an external USB memory.
2. Press the BK-3's [POWER] switch.
The display will go dark and the power will turn off.
NOTE
If you need to turn off the power completely, first turn off the [POWER] switch, then unplug the power cord from the power outlet. Refer to "Connecting the AC Adaptor" (p. 14).
If you don't want the power to turn off automatically, turn the "Auto Off" setting off!
With the factory settings, the unit's power will automatically be switched off 30 minutes after you stop playing or operating the unit.
Shortly before the BK-3 shuts down automatically, the display starts counting down the seconds. If you want to keep using the BK-3 at this stage, press any button. When the BK-3 is turned off by the "Auto Off" function, the [POWER] button's position doesn't change, which means that you need to press it once, wait a few seconds, then press it again to switch the BK-3 back on.
If you don't want the power to turn off automatically, change the "Auto Off" setting to "OFF" as described on p. 52.
NOTE
When the BK-3 has been switched off by "Auto Off", you need to press the [POWER] button, wait a few seconds, then press the button again to switch the BK-3 back on. (Do not switch it on too quickly.)
Adjusting the Sound Volume
Here's how to adjust the volume of your keyboard playing or the playback volume of an internal song.
If headphones are connected, use the [Volume] knob to adjust the headphone volume.
1. Turn the [Volume] knob to adjust the overall volume.
Adjust the volume while you play the keyboard to produce sound. Turning the knob toward the right will increase the volume, and turning it toward the left will decrease the volume.
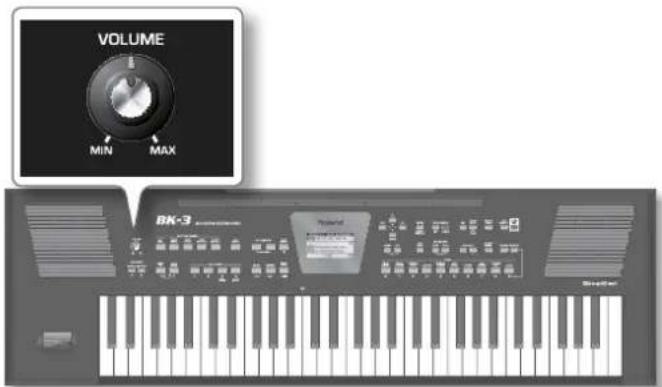
Volume balance between the backing and the real-time parts
If the rhythm accompaniment or song is too loud or too soft with respect to the real-time parts you are using, you can change the balance with the [BACKING] and [KEYBOARD] buttons:
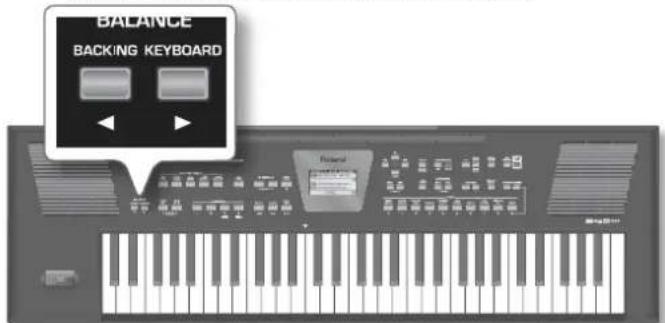
When the [BACKING] or [KEYBOARD] button is pressed, the "BALANCE" pop-up window appears, showing the current setting:
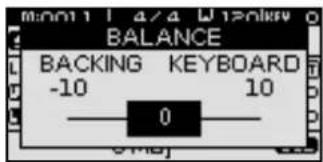
After about 3 seconds, the pop-up window disappears again.
Press the [BACKING] and [KEYBOARD] buttons together to center the volume balance.
Demo of the BK-3
Your BK-3 contains a demo that introduces all of its highlights. It might be a good idea to try it out now. The demo is self-explanatory, so we'll just show you how to start and stop it.
1. Simultaneously press the [MENU] and [EXIT] buttons.
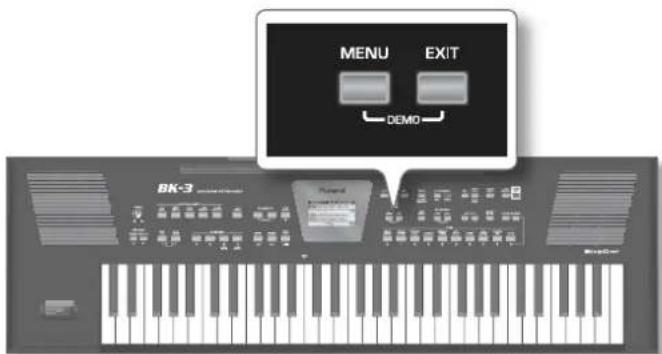
Playback starts automatically with the demo song.
2. Press the [EXIT] button to leave the demo function.
NOTE
No data for the music that is played back will be output from MIDI OUT.
NOTE
All rights reserved. Unauthorized use of this material for purposes other than private, personal enjoyment is a violation of applicable laws.
7. Basic Operation of the BK-3
About the Display and Cursor Operation
This section introduces the information that appear on the main page in BK-3's display and how to navigate the menu.
Main page
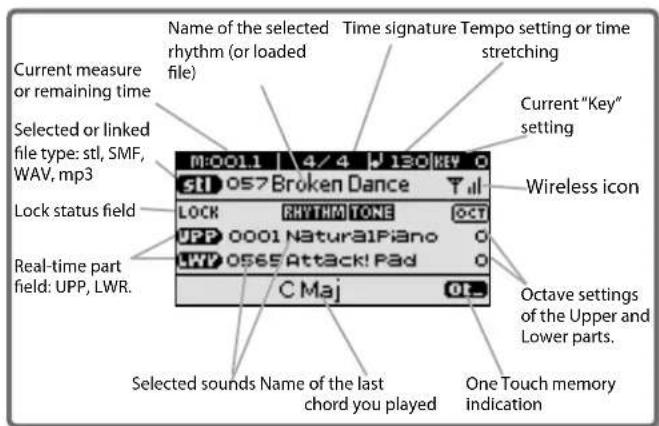
Moving Between Windows and Setting Parameter Values
Using the following buttons you can navigate the menu, select the setting you want to change and change it:
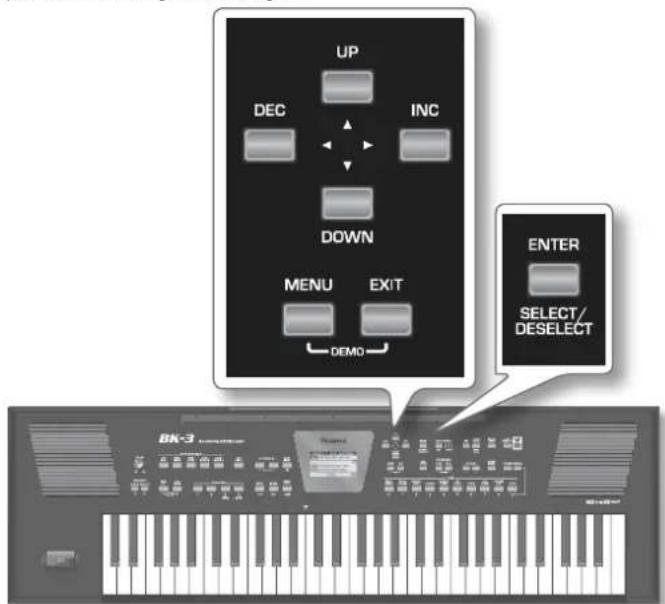
Here is an example of how to do it.
1. Press [MENU] button.
The display changes to:
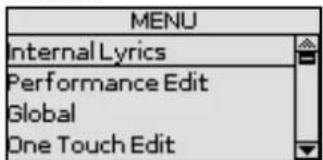
This page allows you to select the function group that contains the setting you want to change.
NOTE
In some cases, the [MENU] button may recall a special edit menu window instead of a main menu page.
2. Press the [UP] or [DOWN] button to select the entry of the desired function group.
For this example, we will select "Global".
3. Press the [ENTER] button to go to the "Global" function group.
The display changes to:
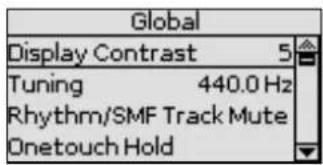
On this display page, "Display Contrast", "Tuning" and other entries can be changed directly. Other entries provide access to additional display pages.
4. Press the [UP] or [DOWN] button to move the cursor to the parameter whose value you want to change. For example "Display Contrast".
5. Press the [ENTER] button to select the parameter.
The setting field of the selected parameter is displayed in reverse.
TIPS
You can change value without selecting or deselecting the parameter ([ENTER] button) but using the [INC] or [DEC] buttons directly.
6. Use the [INC] or [DEC] button to change the value.
7. Press the [ENTER] button again to deselect the field.
8. Playing the BK-3's Real-Time Parts
Your BK-3 contains two real-time parts: Upper (UPP) and Lower (LWR). You can assign the desired sounds (or "Tones") to each part.
Selecting Tones and Playing the Keyboard (Upper Part)
In BK-3 the sounds you can assign to the parts are called "Tones". The BK-3 allows you to assign any of the available Tones to any of the two real-time parts. Tone selection always applies to the part (UPP or LWR) whose field is currently displayed in reverse. The BK-3 has ten tone buttons.
- Press a TONE buttons [0]\~[9] to select the instrumental sound that you want to play.
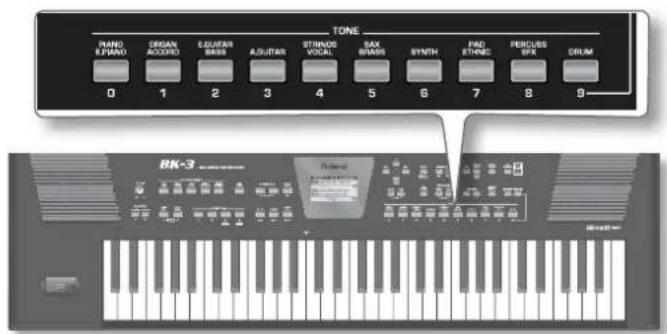
The following screen appears.
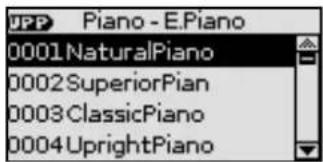
The sound selected is displayed in reverse.
MEMO
You can also select one of the favorite sounds. See "9. Favorite Tones" (p. 21).
- Play the keyboard.
You'll hear the sound of the selected instrument.
- Press the [INC] or [DEC] button to select another desired Tone in the list.
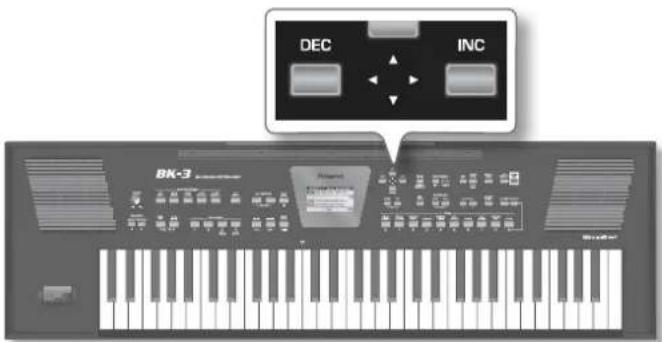
MEMO
Tones can also be selected by simply pressing the [NUMERIC] key and entering their number (p. 20).
-
You can also use the [UP] or [DOWN] button to move the cursor in the list and then press [ENTER] to select the Tone. In this case the Tone is recalled when you press the [ENTER] button.
-
If you need select a Tone of another family, press another Tone button and repeat the step 3.
-
Press [EXIT] to leave the Tone selection page.
Selecting Tones and Play Two Voices Simultaneously (Dual)
- Press and hold the [DUAL] button.
The following screen appears.
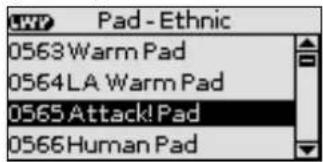
The sound selected for the Lower part is displayed in reverse.
- Press the [INC] or [DEC] button to select the desired Tone in the list.
MEMO
Tones can also be selected by simply pressing the [NUMERIC] key and entering their number (p. 20).
-
You can also use the [UP] or [DOWN] button to move the cursor in the list and then press [ENTER] to select the Tone
-
If you need select a Tone of another family, press another Tone button and repeat the step 2.
-
Press the [DUAL] button to activate the Lower part.
The [DUAL] button lights and Lower part plays full keyboard.
- Play the keyboard.
You'll hear the sound of Lower and Upper part simultaneously.
- Press [EXIT] to leave the Tone selection page.
MEMO
If the Split function is active ([SPLIT] button lights) the notes to the left of split point are played back by Lower part (p.19).
Play Different Voices with the Left and Right Hands (Split)
- Press the [SPLIT] button
The [SPLIT] button lights.
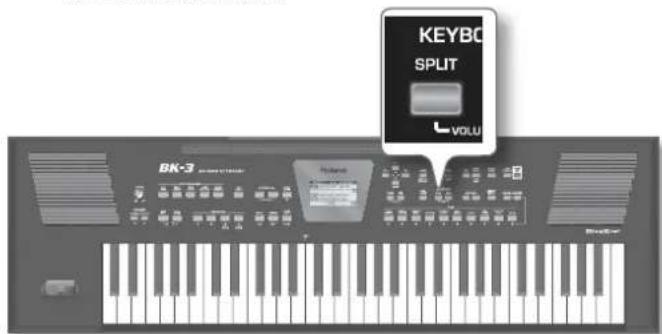
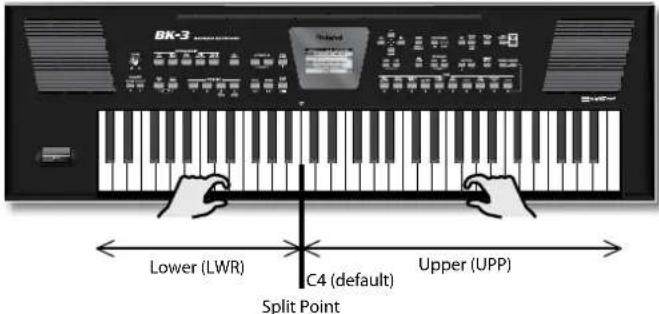
The BK-3 is now in Split mode: note numbers below the split point are used to transpose rhythm playback in real-time and to play the Lower part (if it is active). Note numbers above the split point can be used to play melodies using the Upper part.
- Press the [DUAL] button to activate the Lower part.
The [DUAL] button lights.
- Play the keyboard.
The notes you play with your left hand sound the Lower part (LWR), while the notes you play with your right sound the Upper part.
MEMO
The default setting for the split point is note number 60 (C4). You can change the split point to a different note ("Split Point" (p. 47).
Using the 'Numeric' function to Select Tones, Rhythms and Performances
The "Numeric" function can be used to enter the number of the Tone, Rhythm or Performance memory you want to use, which is faster than scrolling with the [UP] and [DOWN] buttons.
Below please find an example that shows you how to use the "NUMERIC" function for selecting Tones.
In the following example, we will assign a different sound to the Upper part.
- Press the TONE button that contains the instrumental sound that you want to play.
MEMO
By pressing and holding one of these buttons, you activate the lock function for Tone selection, which means that Tones no longer change when you select Performance memories. See "Filtering Performance Memories Settings (Lock function)" (p. 39).
- Press the [NUMERIC] button to open the following window:
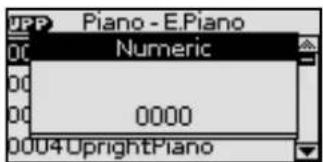
The TONE buttons flash.
- Press the TONE buttons that correspond to the figures you want to enter ([0]\~[9]).
For Tones, you can enter up to 4 digits. To select Tone 6, for instance, simply pressing the [6] button is enough (the display will show "0006").
NOTE
If you make a mistake, the quickest way to correct it is by pressing the [0] button four times (to enter "0000") and then restarting.
For Rhythms and Performance memories, up to 3 digits can be entered.
NOTE
If you try to enter a higher number than possible for the current item, a warning is displayed ("Tone doesn't exist").
- Press the [ENTER] button to confirm your entry.
The "Numeric" pop-up disappears and the display jumps to the Tone (and family) you selected.
- Press the [EXIT] button to return to the main page.
Setting the volume of the real-time parts (Upper and Lower)
The BK-3 provides an easy way to change the volume balance of the Upper and Lower parts.
- Simultaneously press the [SPLIT] and [DUAL] buttons to call up the "Parts Volume" page.
| Parts Volume | |
| UPP Volume | 127 |
| LWR Volume | 50 |
-
Use the [UP] or [DOWN] button to select the UPP or LWR volume field.
-
Use the [INC] or [DEC] button to select the desired volume.
9. Favorite Tones
This function allows you to create a list of 10 frequently used sounds and recall them instantly.
Recalling a Favorite Tone
- Press the [FAVORITE] button, so it's lit.
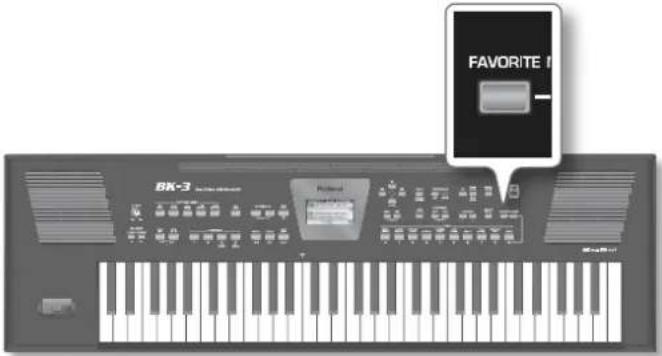
- Press a TONE buttons [0]\~[9] to select the favorite tone that you want to play on the Upper part.
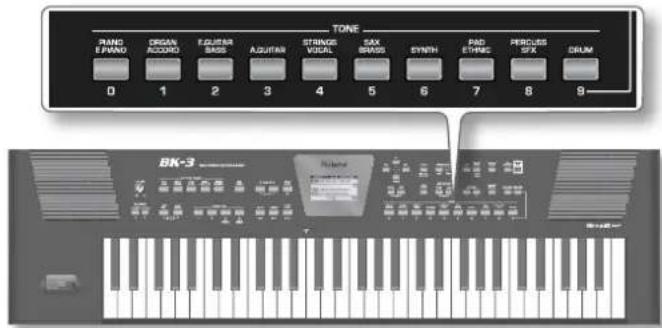
The selected sound will be recalled immediately.
NOTE
The list of 10 Favorite Tones available for the Upper part is also available for the Lower part. To assign the Favorite Tones to the Lower part: Press and hold [DUAL] and select one of the TONE buttons [0]\~[9]. Make sure that the [FAVORITE] button is lights.
- Press the [FAVORITE] button again to exit from selection of Favorite tones.
Viewing the List of Favorite Tones
- Press the [FAVORITE] and [NUMERIC] buttons simultaneously (without holding them)
The "Favorite" window appears:
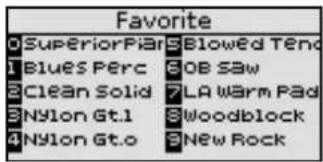
The Favorite sound list can be also selected using [MENU] button → "Global" → "Favorite".
Creating the List of Favorite Tones
You can make a list of 10 sounds that you frequently use in live
performance, and recall these sounds instantly.
-
While the [FAVORITE] button is dark, select the sound that you want to memorize. See "Selecting Tones and Playing the Keyboard (Upper Part)" (p. 19).
-
Press and hold [FAVORITE] and press a TONE buttons [0]\~[9] to memorize the previous sound selected to the associated favorite memory number [0]\~[9].
-
If you want to memorize another tone, select the tone and repeat from steps (2).
-
See "Recalling a Favorite Tone" to recall a favorite tone.
NOTE
The list of Favorite Tone is automatically saved to the BK-3's global memory.
10. Playing with Automatic Accompaniments
The BK-3 contains a function that plays back automatic accompaniments called "rhythms". This section explains how to take advantage of the BK-3's accompaniments
About the Rhythms
The BK-3 can generate interactive accompaniments based on the rhythm you select. Each rhythm is a typical accompaniment for a given musical genre. The BK-3 comes with 250 internal rhythms divided over 5 families (see the RHYTHM FAMILY section on the front panel).
Unlike a drum machine, a BK-3 Rhythm not only contains the rhythm part (drums & percussion) but also a melodic accompaniment, such as piano, guitar, bass and strings lines. The melodic accompaniment parts of the selected Rhythms follow the chords you play on the keyboard.
You can also record both your playing and the accompaniment "16. Recording your performance as audio data" (p. 41).
Structure of the Rhythm Accompaniments
Each Rhythm comprises several patterns that you can play back using the following buttons:
| Button Explanation | |
| VARIATION [1], [2], [3], [4] | If the VARIATION [1] button lights, the rhythm function plays a simple accompaniment (usually with fewer instruments).The other VARIATION's become gradually more complex up to the VARIATION [4], that plays the most complex accompaniments. |
| INTRO | If you switch on this button (indicator lights) and press [START/STOP]/[▶/II] button the rhythm playback begins with an introduction.Depending on the type of VARIATION button lighted you will have either a simpler or a more complex introduction. |
| ENDING | If you press this button while a Rhythm is being played back ([START/STOP]/[▶/II] button flashes), the BK-3 starts playing a closing phrase ("Ending") on the next downbeat. At the end of this phrase, playback stops.Depending on the type of VARIATION button lighted you will have either a simpler or a more complex closing phrase. |
The available Rhythm patterns could be used as follows:
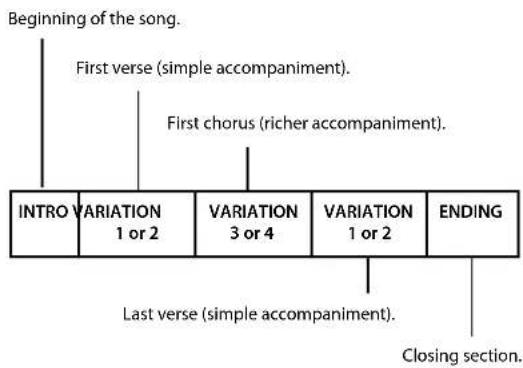
flowchart
graph TD
    A["Beginning of the song."] --> B["INTRO VARIATION 1 or 2"]
    B --> C["VARIATION 3 or 4"]
    C --> D["VARIATION 1 or 2"]
    D --> E["ENDING"]
    F["First verse (simple accompaniment)."] --> B
    G["First chorus (richer accompaniment)."] --> C
    H["Last verse (simple accompaniment)."] --> D
    I["Closing section."] --> E
If the [AUTO FILL IN] button lights, the BK-3 plays a transition before switching to the newly selected VARIATION pattern. Example: if the VARIATION [1] pattern is running, pressing the [4] button will not switch to that pattern right away. The BK-3 first plays a fill-in to announce the new song section.
NOTE
While the four Variation patterns are repeated indefinitely until you stop Rhythm playback, the Intro and Ending phrases are played only once.
Using Rhythms
The "interactive" aspect about the rhythms is that you can change the key of the accompaniment simply by playing different notes or chords. Additionally, you can select different variations (more or less complex arrangements) for the active rhythm. The BK-3 provides several buttons for this.
[START/STOP] / [▶/II]
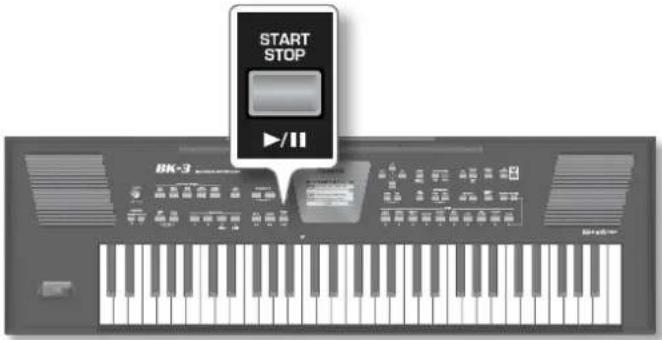
This button is used to start and stop rhythm playback. While a rhythm is running, the button's indicator flashes red on the first beat of each bar, and green on the remaining beats.
MEMO
You can also start (and stop) rhythm playback simply by playing on the keyboard. See the next function. (The Start/Stop function can also be assigned to an optional footswitch.)
[SYNC START] / [■]
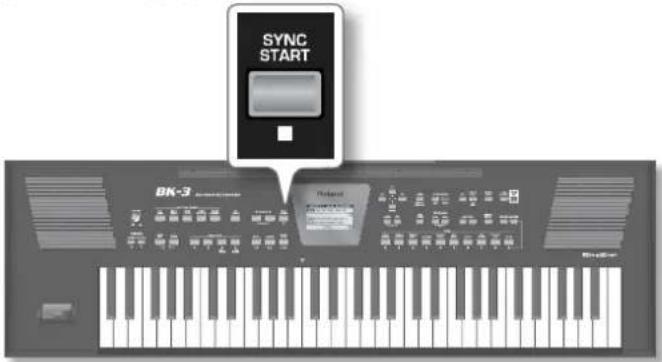
This button activates and switches off the "Sync Start" or "Sync Start/Stop" function. Pressing it several times allows you to select one of the following options:
| Function | [SYNC START] indicator | Explanation |
| Sync Start Lights red | Rhythm playback can be started by playing a note or chord. Press [START/STOP]/[▶/II] to stop rhythm playback. | |
| Sync Start/Stop Lights green | Rhythm playback can be started by playing a note or chord. Playback will stop when you release all keys. | |
| — Dark | Rhythm playback needs to be started and stopped using the [START/STOP]/[▶/II]button (or the assigned optional footswitch). |
VARIATION [1], [2], [3], [4]
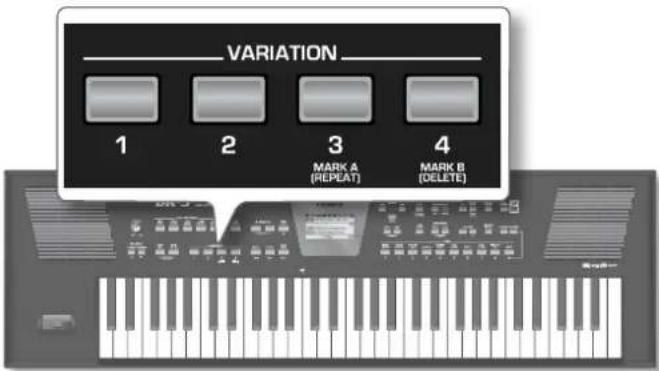
These buttons are used to select the complexity (number of parts) of the rhythm arrangement:
| [VARIATION] Explanation | |
| [1] | The simplest accompaniment pattern. A good choice for the first of the songs you play. |
| [2] | A slightly more complex pattern you may want to use for subsequent verses. |
| [3] This pattern would be a good choice for the first chorus | |
| [4] | This is the most complex arrangement. Consider selecting it for the bridge or the final chorus sections of a song. |
MEMO
The VARIATION patterns are repeated (played back in a loop) until a different pattern is selected or rhythm playback is stopped.
[INTRO] / [◀◀]
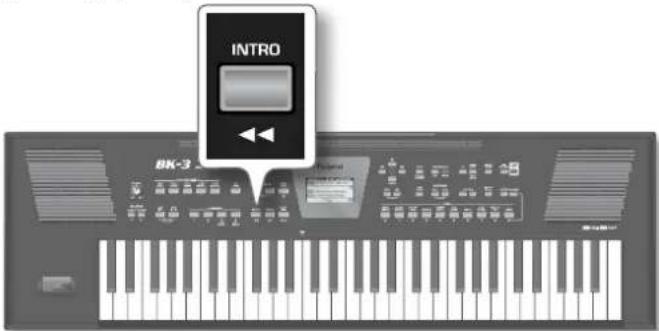
Selects an introduction, which is usually used at the beginning of a song. You can, however, also select this pattern for other song sections. The behavior of the Intro pattern depends on when you press the [INTRO] button:
| [INTRO] Explanation | |
| Pressed before starting rhythm playback | The indicator lights.When you start rhythm playback, the BK-3 first plays a musical introduction. (This pattern is played back only once). |
| Pressed during rhythm playback | The indicator flashes to signal that the INTRO pattern will begin on the next downbeat.When the intro is finished, the BK-3 returns to the previously selected VARIATION pattern. |
There are, in fact, four different INTRO patterns, that can be selected using the VARIATION [1], [2], [3] and [4] buttons. Again, the VARIATION buttons determine the complexity of the intro
arrangement.
[ENDING] / [▶▶]
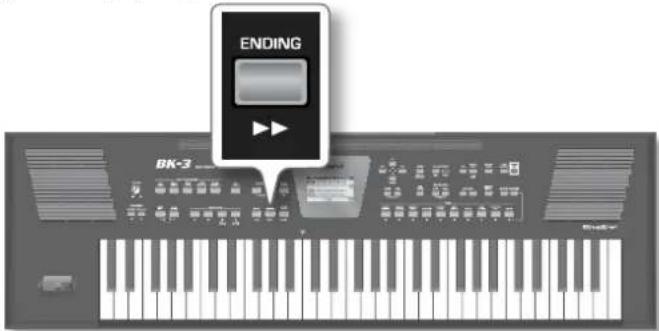
This button allows you to end your songs with a suitable closing section if you don't want to simply stop playback. The behavior of the Ending pattern depends on when you press the [ENDING] button:
| [ENDING] Explanation | |
| Pressed before starting rhythm playback | The indicator lights.When you start rhythm playback, the BK-3 plays a musical ending. At the end of the phrase, playback stops. |
| Pressed during rhythm playback | The indicator flashes to signal that the ENDING pattern will begin on the next downbeat.When the ending is finished, rhythm playback stops. |
There are four different ENDING patterns, that can be selected using the VARIATION [1], [2], [3] and [4] buttons.
Again, the VARIATION buttons determine the complexity of the arrangement
[BASS INV]
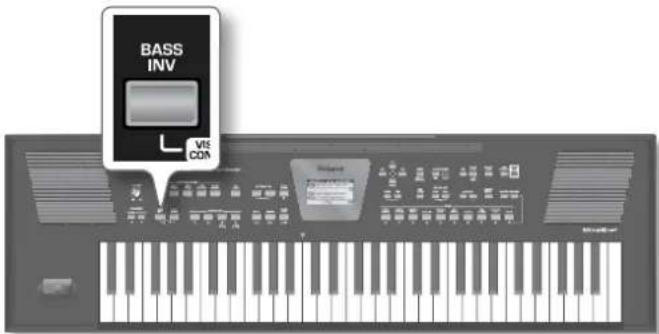
This button is used to switch the "Bass Inversion" function on or off. While the button is dark, the rhythm bass part always plays the fundamental of your notes or chords. Example: if you play a chord consisting of the notes C, E and G (which is recognized as a C major chord), the bass part plays a C.
If the [BASS INV] button lights, the rhythm bass part uses the lowest notes of the chords you play.
Example: if you play a chord consisting of the notes E, G and C (still a C major chord), the bass part plays an E. This function therefore gives you more artistic licence.
[AUTO FILL IN]
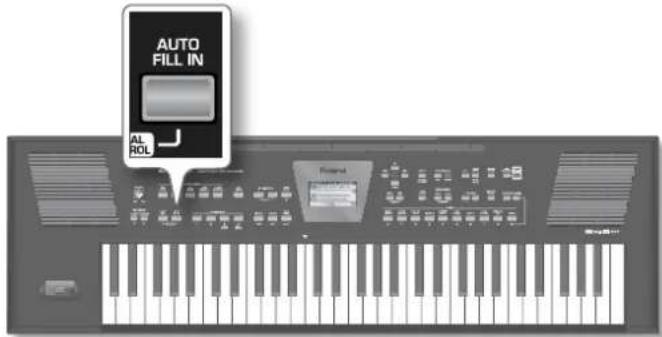
When this button lights, the BK-3 plays a transition before switching to the newly selected VARIATION pattern. Example: if the VARIATION [1] pattern is running, pressing the [4] button will not switch to that pattern right away—the BK-3 first plays a fill-in to announce the new song section.
NOTE
The duration of the fill-ins (transitions) can be halved if you like. See "Fill In Half Bar" (p. 49). You can also speed up or slow down playback during a fill-in. See "Fill Ritardando" (p. 49).
Selecting Rhythms
- Press a RHYTHM FAMILY button to select the rhythm family.
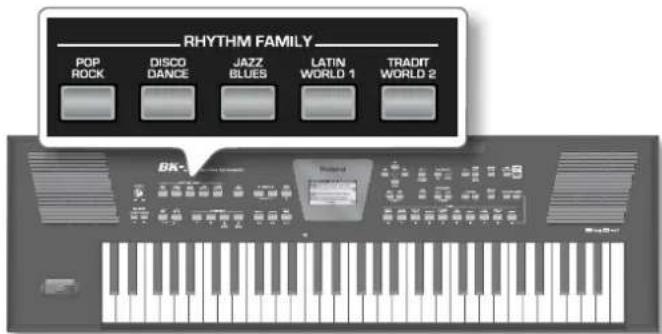
By pressing and holding one of these buttons, you activate the lock function for rhythm selection, which means that rhythms no longer change when you select Performance memories (p. 39).
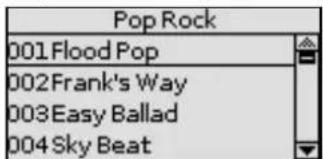
The display shows a list of the rhythms that belong to this family. If the currently selected rhythms belongs to the family whose button you pressed, its name is displayed in reverse and the indicator of the button you pressed lights:
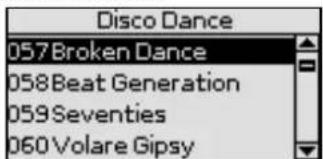
If you press a different RHYTHM FAMILY button, the display shows the beginning of the associated list (but the indicator of the associated family button doesn't light):
- Press the [INC] or [DEC] button to select another desired Rhythm in the list.
The name of selected Rhythm is displayed in reverse.
- You can also use the [UP] or [DOWN] button to move the cursor in the list and then press [ENTER] to select the Rhythm.
In this case the Rhythm is recalled when you press the [ENTER] button.
-
If you need select a Rhythm of another family, press another Rhythm button and repeat the step 2.
-
Press [EXIT] to leave the Rhythm selection page.
MEMO
Rhythms can also be selected by simply pressing the [NUMERIC] key and entering their number (p. 20).
Playing Back Rhythms
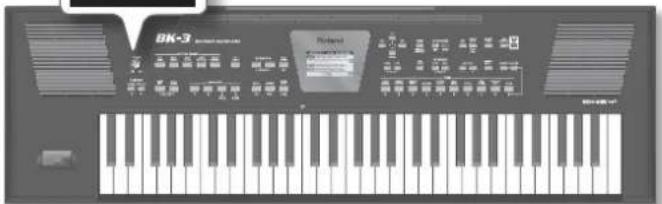
- Set the BK-3's [VOLUME] knob to a reasonable level (about 1/4).
- Press the [SPLIT] button if you want to play in Split mode.
MEMO
The default setting for the split point is note number 60 (C4). You can change the split point to a different note. See "Split Point" (p. 47).
-
Select the rhythm you want to use.
-
Press the VARIATION [1], [2], [3] or [4] button to select the complexity of the verse pattern.
For example press the VARIATION [2].
- Press the [INTRO] / [▶▶] button (it lights) to start rhythm playback with an introduction.
- Press the VARIATION [1], [2], [3] or [4] button to select the complexity of the INTRO pattern.
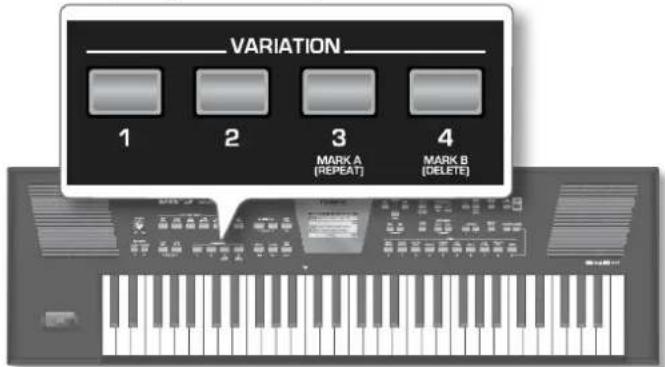
For example press the VARIATION [3].
The VARIATION button pressed at the step 6. lights and the VARIATION button pressed at the step 4. flashes to indicate the verse complexity that will be played back at the end of the Intro pattern.
- Play a chord on the keyboard.
- The main page displays the name of the last chord the BK-3 recognized:
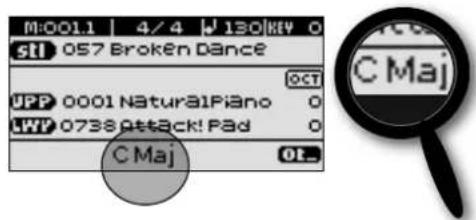
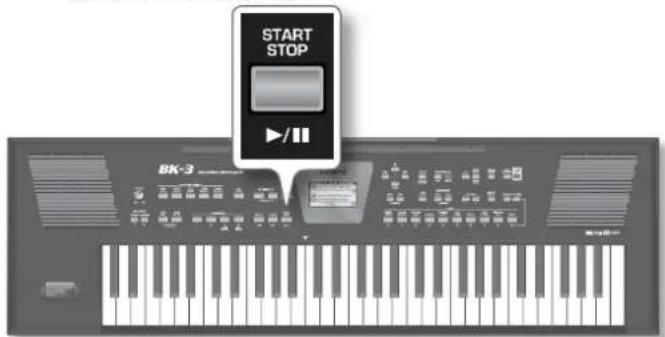
- Press the [START/STOP]/[▶/II] button to start rhythm playback.
The [START/STOP]/[▶/II] indicator lights and the BK-3 starts playing back the introductory phrase.
- Play different chords on the keyboard and listen to the effect this has on the rhythm.
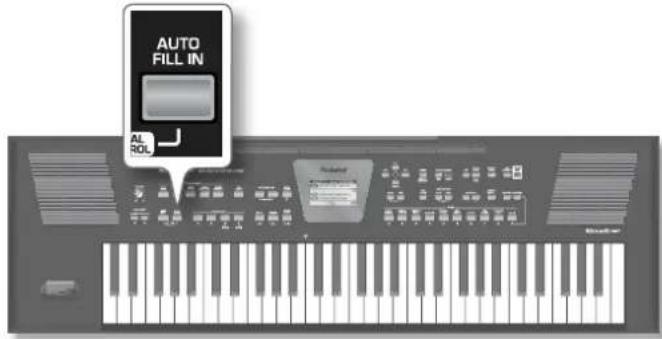
- Switch on the [AUTO FILL IN] button (it lights).
This means that when you select a different VARIATION pattern, the BK-3 will play a transition (fill-in) before switching to the new pattern.
12. Press a VARIATION [1], [2], [3] or [4] button to select a more complex or a simpler accompaniment.
- If you press it before the last beat of the current measure, the fill-in starts immediately and lasts until the end of the current measure, then the newly selected VARIATION pattern is played back.
- If you press the desired VARIATION button on the last beat of a bar, the fill-in starts at the next downbeat and lasts an entire bar. Only then will the BK-3 switch to the newly selected VARIATION pattern.
13. If necessary, you can change the rhythm's tempo:
- Press the TEMPO [◀] or [▶] button to decrease or increase the tempo
- Press the [TAP TEMPO] button at least three times at the desired tempo.
The BK-3 calculates the intervals between your presses and sets the corresponding tempo value.
MEMO
Simultaneously press the TEMPO [◀] and [▶] buttons ("STANDARD") to return to the rhythm's preset tempo.
TIPS
You can press and hold the [TAP TEMPO] button to lock the tempo setting (p. 39).
14. Press the [ENDING] / [▶▶] button to end rhythm playback with a suitable closing section.
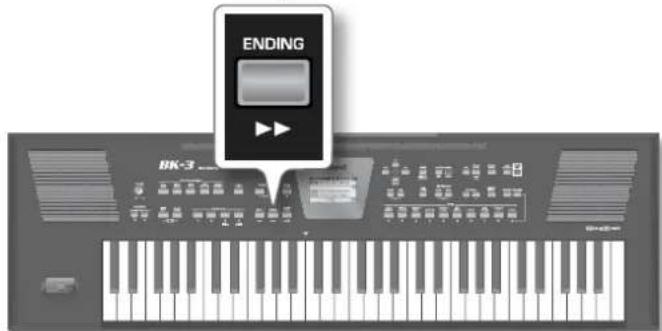
You could also stop playback simply by pressing the [START/STOP]/[▶/II] button or by releasing all keys on the keyboard. See "[SYNC START]/[+]” (p. 22).
While rhythm or SMF song playback is stopped, the [TAP TEMPO] button flashes to indicate the selected tempo.
11. One Touch Memories: Why using them?
The ONE TOUCH memories help you to select Tones for the real-time parts that match the atmosphere of the current rhythm. There are four such ONE TOUCH memories per rhythm.
Select a 'One Touch'
-
Select the desired rhythm. See "Selecting Rhythms" (p. 24)
-
Switch on the [ONE TOUCH] button (its indicator lights).
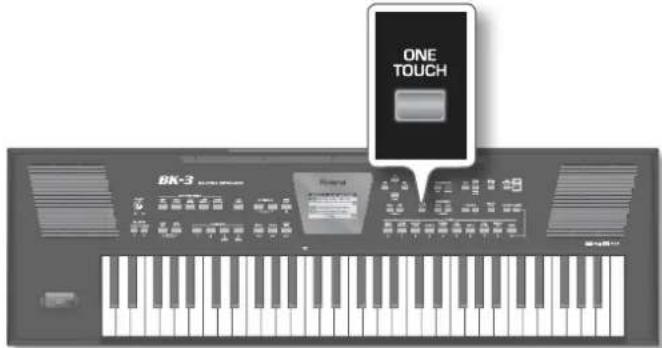
If you haven't selected any ONE TOUCH memory since switching on the BK-3, the indicators of TONE buttons [1], [2], [3] and [4] flash. Otherwise, the BK-3 automatically recalls the last ONE TOUCH memory you selected.
The main page displays "OT --" (or the number of the last ONE TOUCH memory).
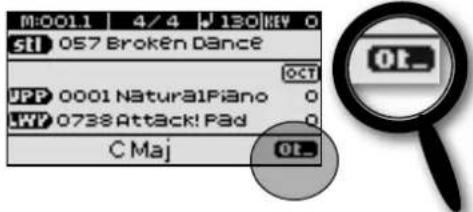
The indicators of TONE buttons [1]\~[4] flash.
- Press the flashing TONE button assigned to the desired ONE TOUCH memory ([1]\~[4]).
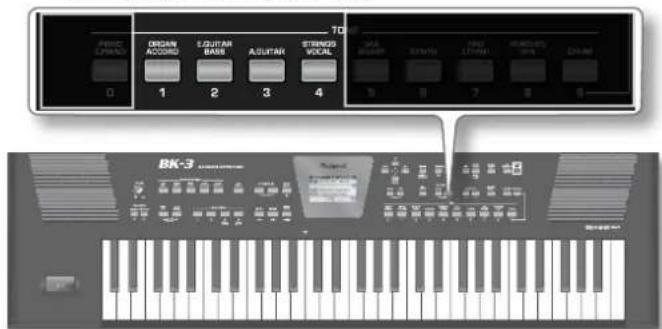
The indicator of the button you press lights, while the indicators of the remaining three buttons still flash.
-
Start playback of the rhythm. See "Playing Back Rhythms" (p. 24).
-
Play a melody on the keyboard.
-
Now press another TONE ([1]\~[4]) button than the one that is currently active.
-
Again play a melody on the keyboard. The newly selected ONE TOUCH memory has recalled a different sound for the melody part. Note that the ONE TOUCH function also
recalls other settings, like the tempo, INTRO/ENDING, etc.
MEMO
The BK-3 has a function that allows you to exclude certain settings when a new ONE TOUCH memory is selected. See "One Touch Hold" (p. 51).
- Press a different TONE [1]\~[4] button to recall the associated ONE TOUCH memory.
Tone selection for the real-time part as well as other settings change in accordance with the newly selected ONE TOUCH memory.
Deselect 'One Touch'
- To switch off the ONE TOUCH function and return to the Tones that were selected before you activated the ONE TOUCH function, press the TONE [1]\~[4] button whose indicator lights steadily.
Its indicator flashes along with the other three TONE buttons.
- Press the [ONE TOUCH] button to leave ONE TOUCH memory selection mode.
The TONE buttons stop flashing. (Only the indicator corresponding to the last Tone family you selected lights steadily.) You can now select different Tones for real-time part without actually leaving the ONE TOUCH function (if it is still on).
How Can You Tell Whether the ONE TOUCH Function is On or Off?
If the "ONE TOUCH" field on the main page is followed by a number (1\~4), the ONE TOUCH function is currently on. If the "ONE TOUCH" field is followed by a dash ("−"), the ONE TOUCH function is off.
One Touch (1) ON
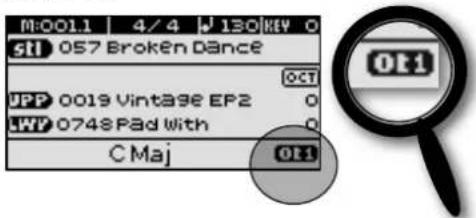
One Touch OFF
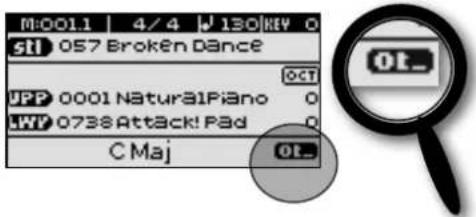
Programming Your Own ONE TOUCH Settings (One Touch Edit)
The BK-3 allows you to save your own ONE TOUCH settings, which may come in handy for CUSTOM rhythms for which there are no "presets". The following operation saves the rhythm and its (new) ONE TOUCH settings to the "My Rhythms" folder on the USB memory connected to the USB MEMORY port.
NOTE
Never remove a USB memory while this unit is turned on. Doing so may corrupt the unit's data or the data on the USB memory.
NOTE
Carefully insert the optional USB memory all the way into the port until it is firmly in place.
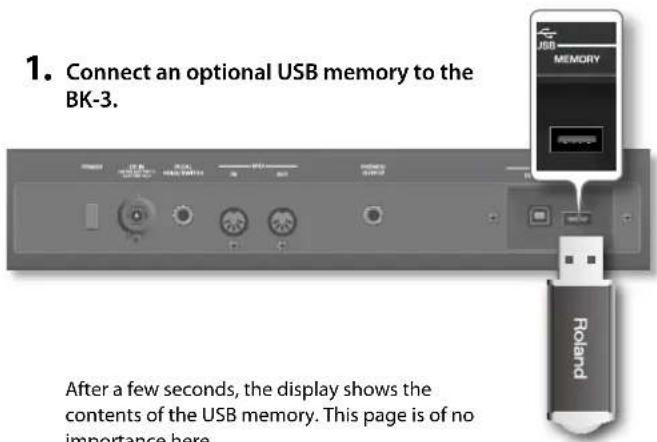
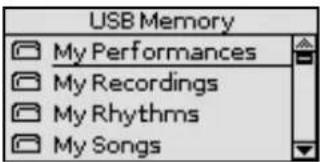
- Press and hold the [ONE TOUCH] button. The display changes to:
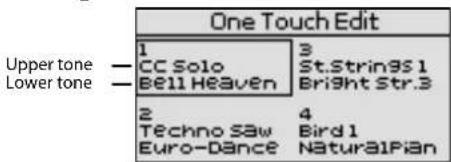
This "One Touch Edit" page can also be selected via the BK-3's menu.
- Use the [UP], [DOWN], [INC] and [DEC] buttons to select the ONE TOUCH memory you want to change, and confirm with the [ENTER] button.
The display changes to:
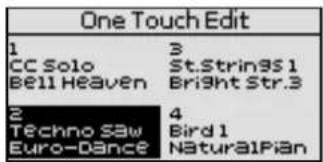
(Here, ONE TOUCH memory 2 has been selected for editing.)
TIPS
You can also select the desired ONE TOUCH memory by first pressing the [ONE TOUCH] button and then one of the flashing
TONE buttons [1]\~[4].
- Change the required settings.
As soon as you change any setting, the display alerts you to the fact that the contents of the selected memory no longer corresponds to the current settings ("EDITED"):
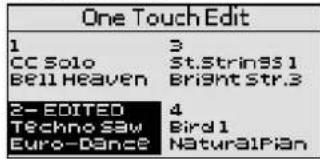
-
Use the [UP] and [DOWN] button to select the memory where you want to save your new settings.
-
Press the [WRITE] button.
The display changes to:
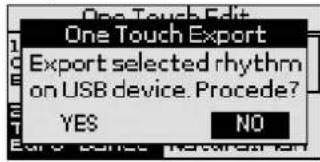
NOTE
The above message is only displayed the first time you press [WRITE] after editing a ONE TOUCH memory.
- To save your ONE TOUCH changes, use the [INC] and [DEC] button to select "Yes" and press [ENTER].
The display shows the "Executing" message and then "Operation Complete".
Select "No" and press [ENTER] if you don't want to save your changes after all.
If the "My Rhythms" folder on the USB memory already contains a rhythm file of the same name...
In that case, the display shows the following message when you select "Yes" and press [ENTER] (see above):
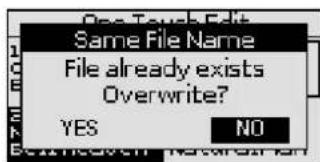
What a One Touch memory saves
| Group Parameters Parameter | |
| Front Panel (button status) | VARIATION [1], [2], [3], [4][AUTO FILL IN][INTRO/ENDING][SYNC START][SPLIT][DUAL][MELODY INTELL] |
| ‘Performance Edit’ → ‘Tone Part View’ (p. 43). | All except for “Key Touch” |
| ‘Performance Edit’ → ‘Tone Part Mfx’ (p. 46). | All |
| ‘Performance Edit’ → ‘Split’ (p. 47). | All |
| ‘Performance Edit’ → ‘Arranger Setting’ (p. 48). | ArrangerZoneType |
| ‘Performance Edit’ → ‘Melody Intelligent’ (p. 50). | All |
12. Using the BK-3 as a USB player
This section explains how to playback MIDI (SMF) and audio songs stored on an optional USB memory. Note that it is also possible to select rhythms on that device and to use them in the same way as the internal rhythms. New song and rhythm files can be copied to the USB memory using your computer as you purchase them.
Getting Ready to Use the BK-3 as a USB Player
- On your computer, copy the new song and rhythm files to an optional USB memory (memory stick).
NOTE
Use USB memory sold by Roland (M-UF-series). We cannot guarantee operation if any other USB memory is used.
- Connect the USB memory to your BK-3.
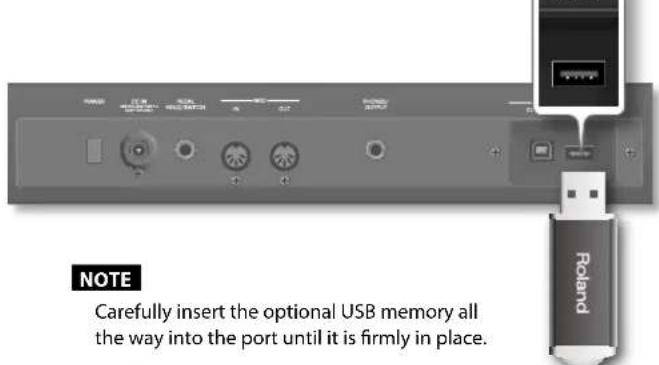
NOTE
Never remove a USB memory while this unit is turned on. Doing so may corrupt the unit's data or the data on the USB memory.
NOTE
The BK-3 supports USB memories with a capacity of up to 2 TB.
File types the BK-3 can read and play back
| Extension Format | ||
| Rhythms.stl | ||
| Standard MIDI Files (SMF) | .mid 0 or 1 | |
| .kar | ||
| Audio files | .mp3 | ·MPEG-1 Audio Layer 3·Sampling frequency: 44.1kHz·Bit rate: 32/40/48/56/64/80/96/112/128/160/192/224/256/320 kbps,VBR (variable bit rate) |
| .wav | ·16-bit linear·Sampling frequency: 44.1 kHz·Stereo/mono | |
Selecting a Song or Rhythm on a USB Memory
- Connect an optional USB memory to the BK-3 or, if it was already inserted, press the [USB MEMORY] button
After a few seconds, the display shows the contents of the USB memory.
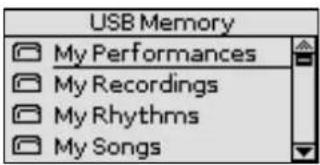
The icons to the left of the file names indicate the file type:
| Icon Explanation | |
| stl | Rhythm file |
| smf | SMF file |
| mp3 | Audio mp3 file |
| wav | Audio WAV file |
| Folder |
- Use the [UP] or [DOWN] button to select the file you want to play back or display.
- Press the [ENTER] button to load the file.
The [USB MEMORY] button now lights to indicate that you selected a file on the USB memory.
If the file you need is located inside a folder, you must first select that folder, press the [ENTER] button to see its contents and then select the file. If you opened a folder by mistake, press the [EXIT] button to return to a higher level.
MEMO
Press and hold the [EXIT] button to return to the main page.
Playing Back a Song or Rhythm from a USB Memory
If you selected a rhythm, see "Playing Back Rhythms" (p. 24), because operation is the same as for internal rhythms.
In the following, we will therefore only show you how to play back song files located on a USB memory.
NOTE
The BK-3 has no internal memory where you could store SMF or audio files.
- Select a song (SMF or audio file) on the USB memory.
See "Selecting a Song or Rhythm on a USB Memory" (p. 28). - Press the [START/STOP] /[▶/II] button to start playback.
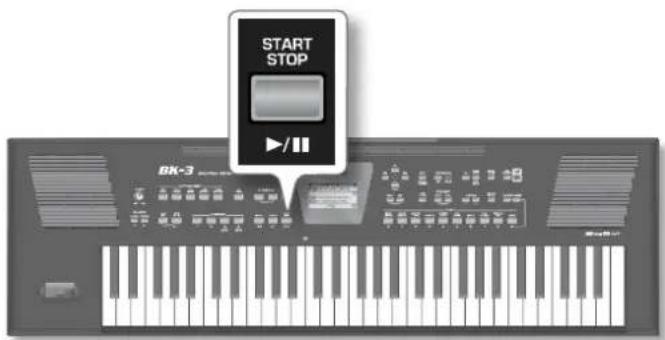
The [▶/II] button's indicator lights and song playback starts.
3. If necessary, you can change the song's playback tempo:
- Press the TEMPO [◀] or [▶] button to decrease or increase the tempo.
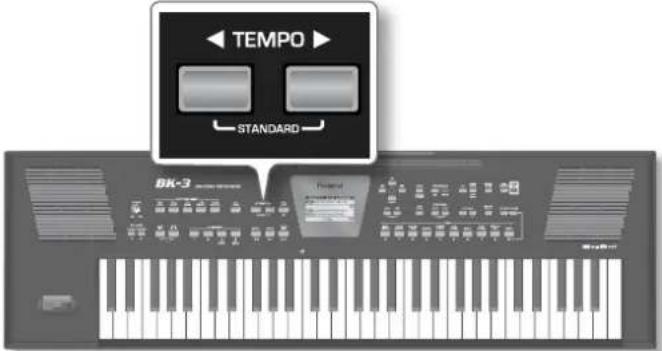
NOTE
If you set a tempo value close to the upper or lower limit for an mp3 or WAV file, playback may sound a little strange.
- Press the [TAP TEMPO] button at least three times at the desired tempo. (This function is not available if you selected an audio file (WAV or mp3).)
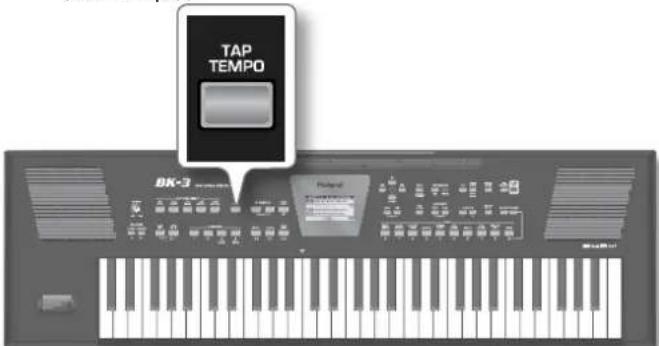
TheBK-3 calculates the intervals between your presses and sets the corresponding tempo value.
MEMO
Simultaneously press the TEMPO [◀] and [▶] buttons ("STANDARD") to return to the rhythm's preset tempo.
- Press the [START/STOP]/[▶/II] button again to pause song playback.
The [START/STOP]/[▶/II] button goes dark.
- Press [START/STOP]/[▶/II] button yet again to resume playback.
- Press the [SYNC START] /[■] button to stop playback
The Playback stops and the playback position return to the beginning of the song.
You can use the following buttons to control song playback (see the gray legends):
| Button Explanation | |
 | Starts or pauses song playback. |
 | Stops song playback and allows you to return to the beginning of the current song. |
 | Rewinds the song. |
 | Fast-forwards the song. |
Activating the 'Play All Songs' parameter for the USB memory
Activating the 'Play All Songs' function
- Connect an optional USB memory to the BK-3 or, if it was already inserted, press the [USB MEMORY] button. After a few seconds, the display shows the contents of the USB memory.
- Use the [UP] or [DOWN] button to select the folder that contains the songs you want to listen to.
- Press the [ENTER] button to open the folder.
- Use the [UP] or [DOWN] button to select the song where you want playback to start.
- Press [ENTER] to confirm your selection.
- Press the [USB MEMORY] button to activate the playback function of the selected and all subsequent songs. The following message appears:
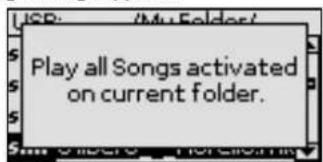
NOTE
STL files contained in the selected folder will be ignored when you start playback (see below).
- Press the [START/STOP]/[▶/II] button to start playback of all songs.
NOTE
While playback of all songs is running, you can navigate the USB memory (to check its contents, for example). The "Play All Songs" function continues to play back the files of the folder you selected in step (2) above.
If you select a different file while navigating (by pressing [ENTER]), the "Play All Songs" function is switched off.
- Press the [SYNC START] /[■] button to stop sequential playback.
Deactivating the 'Play All Songs' function
The "Play All Songs" function needs to be deactivated if you no longer need it. To do so, proceed as follows:
- If the display doesn't currently show the contents of the connected USB memory, press the [USB MEMORY] button
- Press the [USB MEMORY] button (again) to deactivate 'Play All Song' function.
Pressing the [START/STOP]/[▶/II] button now will only start playback of the selected song.
Loop function (MARK A/B)
The Loop function can be used to specify a passage, such as the chorus of a song, that will be repeated several times. This function is available for both audio and SMF songs. You can also use it to practise difficult song passages.
Setting and using the loop positions
- Select the song you want to play back. See "Selecting a Song or Rhythm on a USB Memory" (p. 28).
- Press the [START/STOP]/[▶/II] button to start playback.
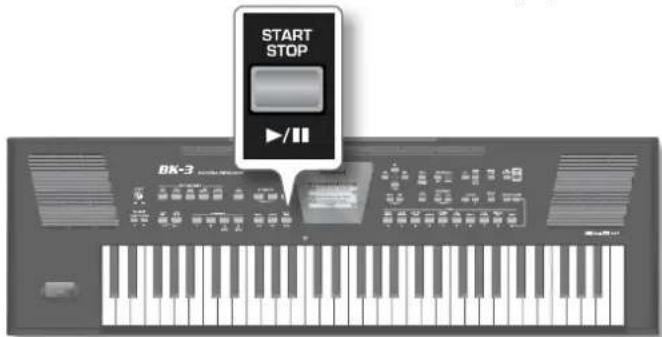
- When the BK-3 reaches the beginning of the passage you want to play back in a loop, press the VARIATION [3] button.
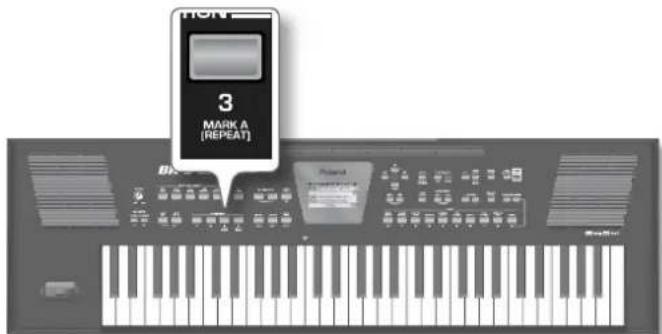
The VARIATION [3] button flashes to indicate that the position has been set.
- Wait until you reach the end of the passage to be played back in a loop, then press the VARIATION [4] button.
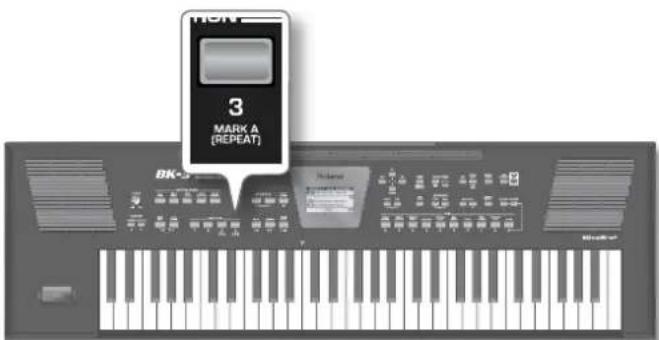
The VARIATION [4] button lights, while VARIATION [3] keeps flashing. The loop's start and end positions have been set and can be used. Here is what you have set so far (this is only an example):
![Flashes Lights [3][4]](/content/2026/05/847823/images/ea22711b7673f5741061f15f3bc841c16dff7df73c92b6090cdc75132610548f.jpg)
- Press the VARIATION [3] button (it lights) to activate the loop.
The passage selected above is now played back over and over.
![Lights [3]](/content/2026/05/847823/images/d2cf3e8455d5883f70baf92b5e754b4ae942817b2a631587f808a731dc41691d.jpg)
- Press the VARIATION [3] button again (it flashes) to deactivate loop playback.
This does not delete the loop positions. The song is once again played back in the usual way (i.e. until the end).
- Press VARIATION [3] yet again (it lights) to return to the loop start position and activate the loop.
- To delete the first and second marker positions, press the VARIATION [4] button.
The VARIATION [3] and [4] buttons go dark and your loop setting is deleted.
NOTE
The marker positions are deleted when you start playback of another song or switch off the BK-3.
Using 'Track Mute' and 'Center Cancel'
You can use this function to mute tracks of rhythms or the melody part of the selected Standard MIDI File (SMF). After selecting a WAV or mp3 audio file, you can attenuate the vocal part at the center of the stereo image ("Center Cancel"). The Mute function behavior depends on the selected file type.
- Select a song (SMF or audio) or a rhythm. See "Selecting a Song or Rhythm on a USB Memory" (p. 28).
- Press the [START/STOP] / [▶/II] button to start playback.
- Press the [TRACK MUTE] (CENTER CANCEL) button (its indicator lights).
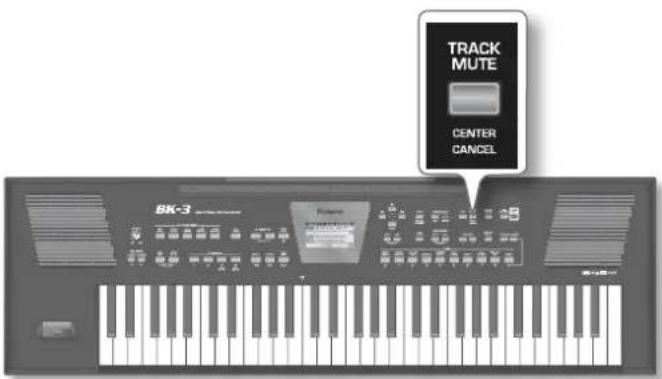
The "Track Mute" or "Center Cancel" function will turn on. This depends on the file type you selected:
| File Type Function Explanation | |
| Rhythm Track Mute | The specified rhythm track(s) is muted (Default: AC1~AC6). |
| SMF Track Mute | The specified Standard MIDI file track is muted (Default: channel 4). |
| Audio (mp3, Wav) Center Cancel | Sounds in the center (the melodic portion of the sound) will be minimized. |
NOTE
For some audio songs, the vocal sound may not be eliminated completely.
3. Press the [TRACK MUTE] (CENTER CANCEL) button again to make its indicator go dark.
This switches the "Track Mute" or "Center Cancel" function back off.
Selecting the Track(s) to Mute for Rhythms or SMF Songs
The following procedure allows you to specify the track of the selected Standard MIDI File that should be muted when you switch on the [TRACK MUTE] button.
NOTE
This function is not available for audio files.
- Select a rhythm or an SMF song.
- Press and hold the [TRACK MUTE] (CENTER CANCEL) button.
This function can also be selected using [MENU] button → "Global" → "Rhythm/SMF Track Mute".
Depending on the file type, the display changes to...
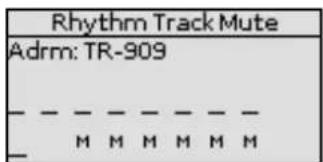
... or:
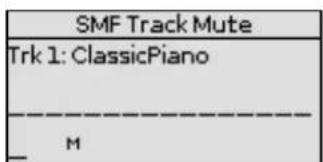
When you start playback, you will notice that active parts are indicated by moving bar graphs that simulate level meters. If [TRACK MUTE] (CENTER CANCEL) button lights the bar graphs of muted parts do not move.
- Use the [UP] or [DOWN] button to move the cursor to the track you want to mute.
The name of the Tone assigned to that track appears in the upper left corner. - Press the [ENTER] button to highlight the corresponding parameter.
- Use the [INC] or [DEC] button to change the setting.
The possibilities are:
| Display Indication Explanation | |
| The associated track is played back. | |
| M | The associated track is no longer played back (muted). |
If you want to save your selection of the track(s) that should be muted for any Rhythm or SMF file you play back, see "Save Global" (p. 53).
When you start playback, you will notice that active parts are indicated by moving bar graphs that simulate level meters. The bar graphs of muted parts do not move.
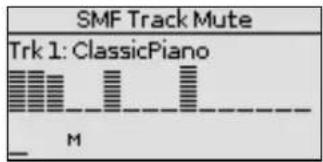
- If there is no need to save your settings, press and hold the [EXIT] button to return to the main page.
13. Operations on USB Memory
Changing the Name of a File or Folder
- Connect an optional USB memory to the BK-3 or, if it was already inserted, press the [USB MEMORY] button.
After a few seconds, the display shows the contents of the USB memory. - Use the [UP] or [DOWN] button to select the file or folder you want to rename.
- Press the [MENU] button to jump to the "USB Memory Edit" page.
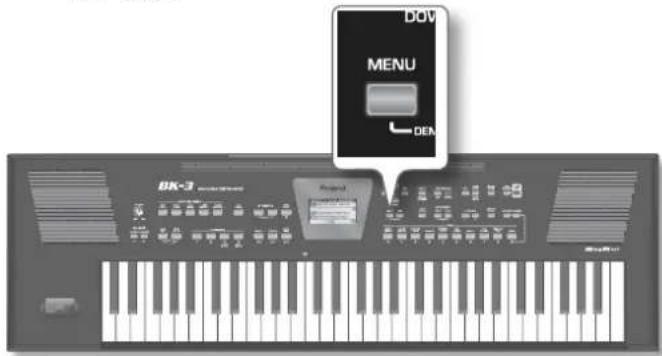
The display changes to:
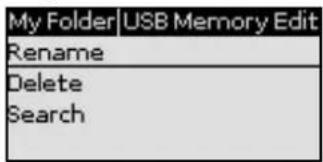
To return to the BK-3's menu, press and hold the [EXIT] button.
MEMO
While the contents of the connected USB memory is displayed, pressing [MENU] takes you to the "USB Memory Edit" page where you can select "Rename", "Delete" or "Search".
- Use the [UP] or [DOWN] button to select "Rename" and press [ENTER] button.
The display shows the following page:
![Rename My Folder [Write]:Ok [Split]:Del [Dual]:Ins](/content/2026/05/847823/images/d4835a0a1e92b08fa79e5bfe12f3de3a8a27ff000c385cd4b099875254afef56.jpg)
- Use the [UP] or [DOWN] button to select the desired character, then use the [INC] or [DEC] button to change the character.
The buttons below allow you the following operations:
| Button Explanation | |
| Press this button to switch between upper- and lower-case characters. | |
| Press this button to delete the selected character. | |
| Button Explanation | |
| Press this button to insert a character. | |
-
Repeat steps (5) above to complete the name.
-
Press the flashing [WRITE] button to confirm.
Deleting the Name of a File or Folder
-
Connect an optional USB memory to the BK-3 or, if it was already inserted, press the [USB MEMORY] button. After a few seconds, the display shows the contents of the USB memory.
-
Use the [UP] or [DOWN] button to select the file or folder you want to delete.
-
Press the [MENU] button to jump to the "USB Memory Edit" page.
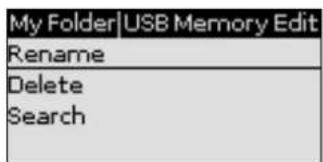
- Use the [UP] or [DOWN] button to select "Delete" and press [ENTER] button.
The display shows the following page:
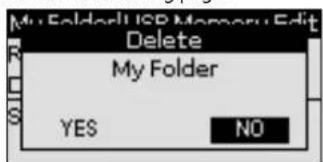
-
Use the [INC] or [DEC] button to select "YES" (delete) or "NO" (don't delete).
-
Press the [ENTER] button to confirm your selection.
If you selected a folder in step (2) above, the BK-3 asks you for a confirmation:
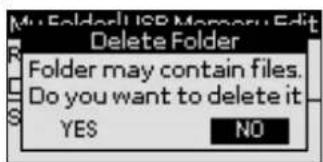
Choose "YES" to confirm or "NO" to abort the operation.
Using the 'Search' Function to Locate Songs or Rhythms
The BK-3 provides a "Search" function that allows you to search the connected USB storage device for the files you need. This function is available even while the BK-3 is playing back a song or rhythm, allowing you to prepare the next song without keeping your audience waiting.
- Connect an optional USB memory to the BK-3 or, if it was
already inserted, press the [USB MEMORY] button.
After a few seconds, the display shows the contents of the USB memory.
- If you know the folder where the file is located, select it using the [UP] or [DOWN] button and then pressing the [ENTER] button.
If you are not sure about the location, do not select a folder to avoid that the "Finder" function only looks in that folder.
- Press the [MENU] button to jump to the "USB Memory Edit" page.
- Use the [UP] or [DOWN] button to select "Search" and press [ENTER] button.
The display shows the following page:
![Insert words to search A [Write]:Ok [Split]:Del [Dual]:Ins](/content/2026/05/847823/images/924815b728a93ee1f633f390ea91b625883729a01a57ce9db1dbe8dfa5f80a26.jpg)
The first character position is already selected ("A").
- Use the [UP] or [DOWN] button to select the previous or next character position you want to change.
- Use the [INC] and [DEC] button to select a character.
The buttons below allow you the following operations:
| Button Explanation | |
| Press this button to switch between upper- and lower-case characters. | |
| Press this button to delete the selected character. | |
| Press this button to insert a character. | |
| Button Explanation | |
| Press this button to switch between upper- and lower-case characters. | |
| Press this button to delete the selected character. | |
| Press this button to insert a character. | |
- Repeat steps (5) and (6) above to complete the character string you are looking for.
- Press the [WRITE] button to start the search.
The BK-3 searches the USB storage device for files whose names match the character string you entered and displays them. The title bar shows the path of the folder that contains the selected files.
NOTE
The "Search" function can find and display 100 files at a time.
- Use the [UP] or [DOWN] button to select the song or rhythm you want to play back, then press the [ENTER] button to confirm your selection.
- Press the [EXIT] button to close the list.
- Press the [START/STOP] / [▶/II] button to start playback of the selected song or rhythm.
14. Other important functions
This section presents other important functions you may need regularly.
Transposing to a Different Key
This function allows you to transpose the BK-3's pitch in semi-tone steps. Depending on the mode setting, this transposition applies to all sections or just a specific setting (p. 48).
1. Press [KEY] button.
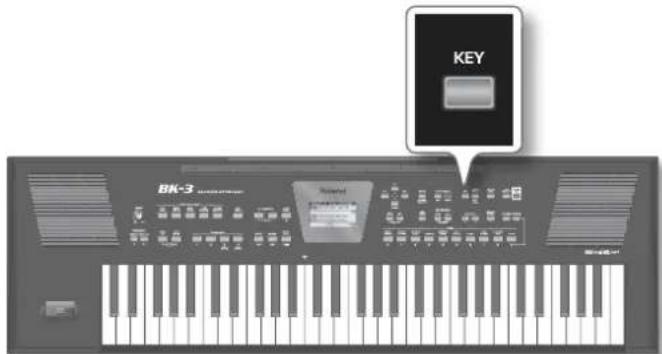
The display changes to:
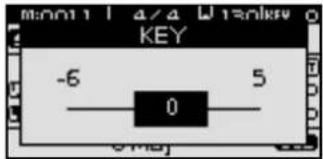
The current "KEY" setting (transposition interval) is displayed and already selected.
MEMO
Pressing and holding the [KEY] button locks the "Key" setting.
2. Use the [INC] or [DEC] button to select the desired "Key" setting.
"Key" setting
-6 \~ 0 \~ +5 (semitone units)
If the "Key" setting differs from "0", the [KEY] indicator lights.
After a few seconds, the "KEY" pop-up window disappears. Press the [EXIT] button to close it immediately.
NOTE
If you choose to transpose the real-time parts, rhythm playback is also transposed.
You can also change the key setting using [MENU] button→ "Performance Edit"→ "Key" (p. 48).
Changing the Octave
This function allows you to transpose the real-time parts (Upper and Lower)1 up or down in octave steps.
1. Press OCTAVE [-]/[+] button
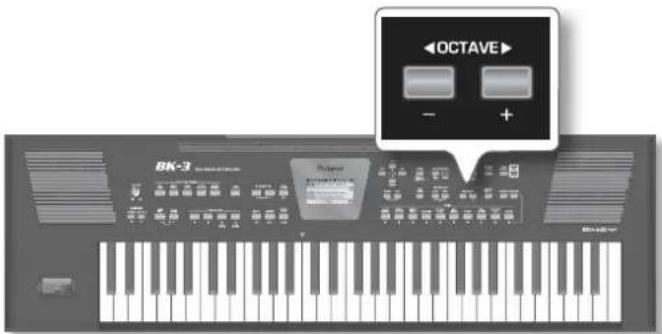
The display changes to:
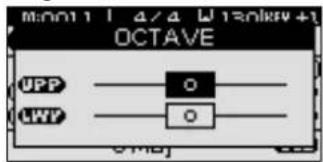
- Use the [UP] or [DOWN] button to select the desired real-time part Upper (UPP) or Lower (LWR).
- Use the OCTAVE[-] or [+] button to select the desired "Octave" setting.
"Octave" setting
-4 \~ 0 \~ +4 (semitone units)
MEMO
You can also change the octave setting using [MENU] button→"Performance Edit"→"Tone Part View"→"Octave Shift"(p. 45).
Using the 'Melody Intell(igent)' Function
The automatic accompaniment can add a counter-melody to the notes you play with the Upper part (UPP). Those automatic harmonies are based on the chords you play in the chord recognition area.
The counter-melody is played by the Melody Intelligent part. There are 18 harmony types to choose from. See "Melody Intelligent" settings" (p. 50).
1. Press the [MELODY INTELL] button (so that it lights).
This adds a harmony to the notes you play.
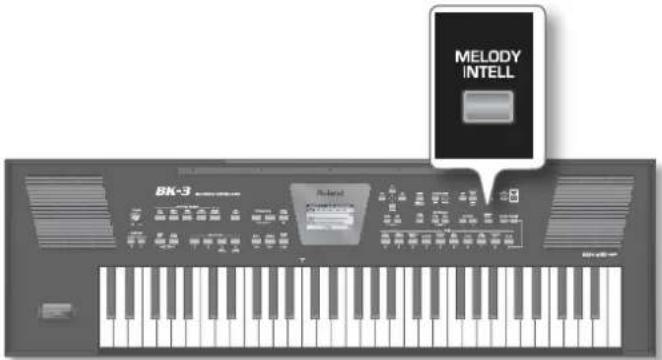
If you want you can change the Melody Intelligent Parameters:
2. Press [MENU] button → "Performance Edit" → "Melody Intelligent"
For more information about Melody Intelligent Parameters see p. 50.
TIPS
You can also select the Melody Intelligent Parameters page by pressing and holding [MELODY INTELL]
3. Press the [MELODY INTELL] button again (its indicator goes dark) to switch off the counter-melody.
Using the Metronome
You can perform while the metronome sounds. You can adjust the tempo or beat of the metronome. If an SMF song or Rhythm is playing, the metronome will sound at the tempo and beat of that song.
1. Press the [Metronome] button so it's lit.
The metronome will begin sounding
To stop the metronome, press the [Metronome] button once again.
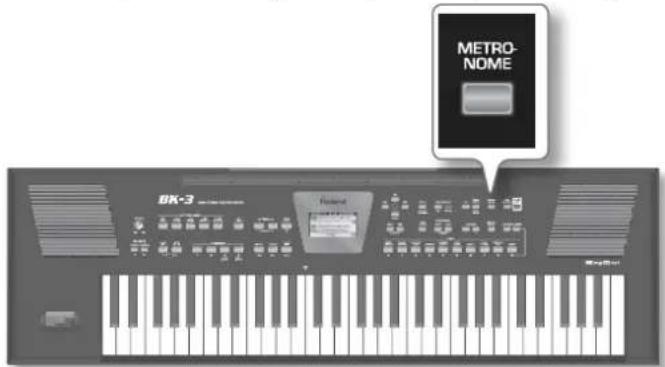
NOTE
The metronome is not available while an audio song file (mp3 or WAV) is selected.
MEMO
While rhythm or SMF song playback is stopped, the [TAP
TEMPO] button flashes in red to indicate the selected tempo
Metronome Settings
The BK-3 also allows you to specify when and how the metronome should sound:
1. Press and hold the [METRONOME] button.
The metronome settings can be also selected using [MENU] button → "Global" → "Metronome".
The display now looks as follows:
| Metronome | |
| Volume | 64 |
| Time Signature | 4/4 |
| Mode | Always |
| Count In | Off |
The metronome parameters you can set are:
| Parameter Setting | Explanation | |
| Volume 0~127 Sets | the metronome's level. | |
| Time Signature | 1/16 ~ 32/16,1/8 ~ 32/8,,1/4 ~ 32/4,1/2 ~32/2 | Specifies the metronome's time signature. |
| Parameter Setting | Explanation | |
| Mode Always, Play | • “Always”: The metronome even counts when playback is stopped.• “Play”: The metronome only sounds while the rhythm or song is playing. | |
| Count In | Off, 1 bar, 2 bar | This parameter allows you to switch the Count-In function on (“1 bar” or “2 bar”) or off. When on, the metronome will count in the specified number of measures (bars) before the rhythm or SMF song starts playing.(This setting is not available for audio songs.) |
The settings can be saved to the BK-3s global memory. If you don't save them, your changes are lost when you switch off the BK-3. See "Save Global" (p. 53).
15. Performance Lists
Performance/Music Assistant/Factory Songs Info
The "Performance List" is a list of up to 999 Performance memories. Each Performance memory contains a reference to the desired rhythm or song and all settings you want to load along with that rhythm or song, including settings like INTRO/ENDING status, selected VARIATION, etc. See "Performance Edit' parameters" (p. 43).
The Performance memories you create are saved to the selected "Performance List". This allows you to prepare one set of Performance memories for weddings, another for corporate events, a third for anniversaries, etc. Performance Lists always reside on a USB memory.
It is perfectly possible to program several Performance memories for one song. Selecting a Performance memory is a lot faster than calling up one of the BK-3's functions, modifying the settings, etc., while playing. You could program one Performance memory for the first part of a song, another for the bridge and a third one for the closing section. Doing so allows you to "play" with the effect settings of the various processors, for example.
NOTE
The BK-3 is supplied with one Performance List called "Music Assistant" and a second called "Factory Songs" that contains 5 SMF files. These lists cannot be deleted or edited.
Loading a Performance/'Music Assistant'/'Factory Songs' List
- Connect an optional USB memory to the BK-3.
This step is unnecessary if you want to use the "Music Assistant" or "Factory Songs" list, because these lists reside in the BK-3s internal memory.
- Press the PERFORMANCE [LIST] button.
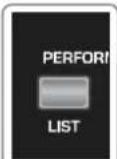
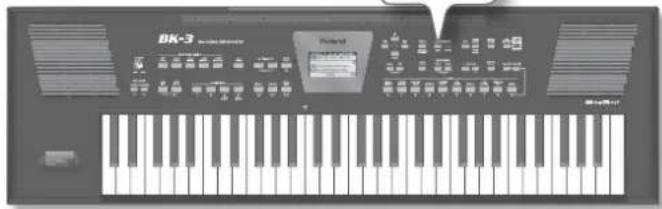
natural_image
Front view of a black electronic guitar keyboard with control panel and keyboard layout (no visible text or symbols)If you have not loaded a Performance List yet:
The display now shows all Performance Lists it can find in the USB memory. (The internal "Music Assistant" and "Factory Songs" lists are always displayed in the top line.)
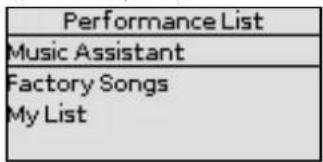
If you have already loaded a Performance List:
The display immediately shows the Performance memories it contains.
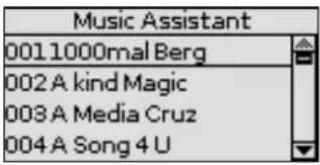
To load a different Performance List from the USB memory, press the PERFORMANCE [LIST] button again and proceed with step (3) below.
MEMO
The [LIST] button alternates between the overall list of Performance List files and the contents of the currently selected list.
NOTE
If the USB memory contains no Performance List files, or if the memory is not connected (properly), the BK-3 only displays the "Music Assistant" and "Factory Songs" list.
- Use the [UP] or [DOWN] button to select the Performance List you want to use.
- Press the [ENTER/] button to confirm your selection.
(In our example, we selected the "Music Assistant" list.) The display changes to:
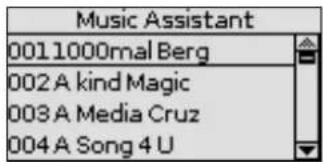
You can now select a Performance memory (see below).
If you need to load another Performance List, press the PERFORMANCE [LIST] button again.
Recalling a Performance/‘Music Assistant’/‘Factory Songs’ memory
Here is how to select a Performance/ "Music Assistant"/ "Factory Songs" memory from the last list you loaded.
- If the display doesn't yet show a list of Performance/"Music Assistant"/"Factory Songs" memories, press the PERFORMANCE [LIST] button.
In this example, we loaded the "Music Assistant" List.
- Use the [UP] or [DOWN] button to select the memory whose settings you want to use, then press the [ENTER] button to confirm your selection.
The PERFORMANCE [LIST] button lights to signal that the BK-3 is now using the settings of the selected Performance memory. The name of that memory is highlighted.
The selected memory also refers to a rhythm or song, which can be started in the usual ways ([START/STOP] button, [SYNC START], etc.).
During playback of that rhythm or song, you can already select a new Performance/"Music Assistant"/"Factory Songs" memory.
3. If you need to return to the main page, press the [EXIT] button.
To return to the page that lists the memories, press PERFORMANCE [LIST] again.
Quickly Locating Performance Memories
Performance memories can also be loaded using the BK-3's "Numeric" function. See "Using the 'Numeric' function to Select Tones, Rhythms and Performances" (p. 20) for details.
Saving your Settings as a Performance
- Select a rhythm or song.
- Select all settings you would like to use for this rhythm or song.
You can, for instance, assign the desired Tones to the real-time parts, switch on the [INTRO] button, modify the "Performance Edit" settings, etc.
- Press the [WRITE] button to jump to the "Write Performance" page.
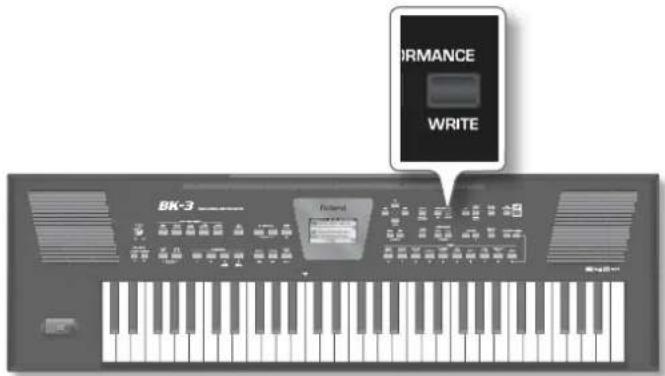
The [WRITE] indicator flashes and the display changes to:
![Write Performance Broken Dance [Write]:Ok [Split]:Del [Dual]:Ins](/content/2026/05/847823/images/6228be16af5fc06ade4e432ba45110425ad9583c08691385bc4a3ea43f3ae651.jpg)
By default, the BK-3 assigns the name of the selected rhythm, song or of the last Performance you loaded to the Performance settings you are about to save. If you agree with that name, proceed with step (6) below.
4. Use the [UP] or [DOWN] button to select the desired character, then use the [INC] or [DEC] button to change the character.
The buttons below allow you the following operations:
| Button Explanation | |
| Press this button to switch between upper- and lower-case characters. | |
| Press this button to delete the selected character. | |
| Press this button to insert a character. | |
- Repeat steps (4) above to enter the remaining characters.
- Press the [WRITE] button to save your settings, thereby creating a new Performance memory.
This memory is added at the end of the currently selected Performance List. See "Loading a Performance/Music Assistant/Factory Songs' List" (p. 36).
NOTE
If you haven't loaded any Performance List since switching on the BK-3, a new Performance List is created, and your Performance memory becomes its first entry.
Other Performance List Functions
- Connect a USB memory with at least one Performance List to the BK-3.
- Press the PERFORMANCE [LIST] button.
The display now shows all Performance Lists on the connected USB memory
| Performance List |
| Music Assistant |
| Factory Songs |
| My List |
- Use the [UP] or [DOWN] button to select the desired Performance List.
- Press the [MENU] button.
The display now changes to a page with the following options:
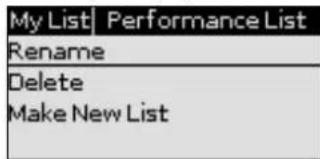
| Function Explanation |
| Rename* Allows you to rename the selected Performance List. |
| Delete* Deletes the selected Performance List. |
| Make New Allows you to create a new (empty) Performance List. |
[*] Not available if you selected the "Music Assistant" or "Factory Songs" list in step (3) above.
- Use the [UP] or [DOWN] button to select the desired option, then press the [ENTER] button.
Rename a Performance List
If in the step (4) of "Other Performance List Functions" you selected 'Rename', the display changes to:
![Rename My List [Write]:Ok [Split]:Del [Dual]:Ins](/content/2026/05/847823/images/6daad49f58d0a464229d6f22f755787c69948181204bc63df6ebaf17a54f5f58.jpg)
- Use the [UP] or [DOWN] button to select the desired character, then use the [INC] or [DEC] button to change the character.
The buttons below allow you the following operations:
| Button Explanation | |
 | Press this button to switch between upper- and lower-case characters. |
 | Press this button to delete the selected character. |
 | Press this button to insert a character. |
- Repeat steps (1) above to enter the remaining characters.
- Press the [WRITE] button to save the Performance List under the new name.
The display briefly confirms the operation and the returns to the page with all Performance List files on your USB memory. If you specify a file name that already exists, the BK-3 displays the following message: "Please enter a different name"
Delete a Performance List
If in the step (4) of "Other Performance List Functions" (p. 37) you selected 'Delete', the display changes to:
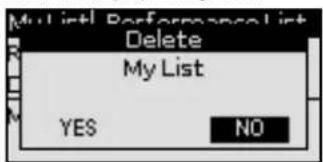
- Use the [INC] or [DEC] button to select "YES", then press the [ENTER] button to delete the Performance List.
Select "NO" if you do not want to delete the Performance List after all.
The display briefly confirms that the selected Performance List has been deleted and then returns to the page with all Performance List files on your USB memory.
MEMO
To select "YES or "NO" you can also use the [UP] or [DOWN] button
Create a New Performance List
If in the step (4) of "Other Performance List Functions" (p. 37) you selected 'Make New List', the display changes to:
![Make New List My List [Write]:Ok [Split]:Del [Dual]:Ins](/content/2026/05/847823/images/c28f884217b12e3c3deb65b4f412be191d06f965532bf7aed15324f8ad7374f4.jpg)
This page allows you to create a new Performance List whose name is selected automatically by the BK-3. If you are happy with that name, proceed with step (4) below. Otherwise...
Press the [WRITE] button to create the new Performance List, which is currently empty.
If the USB memory already contains a file of the name you have entered, the display asks you whether it is OK to overwrite the other Performance List file.
In that case, select "YES" to replace the other Performance List file with the one whose name you changed. (Select "NO" to return to the page where you can change the name.) Then, press the [ENTER] button.
Editing Performance Memories
The "Edit" option allows you to do the following:
| Function Explanation | |
| Delete Performance | Deletes the selected Performance memory from the active list. |
| Move Performance | Allows you to change the order in which the Performance memories appear in the selected Performance List. |
| Save Performance List | Allows you to save the edited list. |
Delete a Performance memory
- Select the Performance memory you want to remove from the list.
- Press the [MENU] button to enter in Edit Mode.
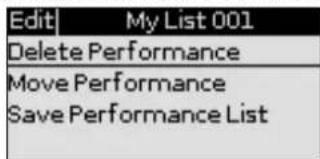
- If necessary, use the [UP] or [DOWN] button to select "Delete Performance", then press the [ENTER] button.
The display changes to:
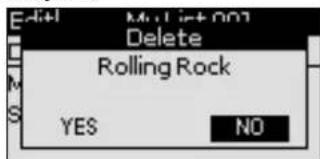
- Use the [INC] or [DEC] button to select "YES", to delete the Performance memory (or "NO" if you wish to keep it)..
MEMO
To select "YES or "NO" you can also use the [UP] or [DOWN] button
- Press the [ENTER] button to confirm your selection.
The display briefly confirms that the Performance memory has been deleted.
A "*" is shown in the first row, to the left of the Performance List name to indicate that the list has been edited.
If you like, you can now select another Performance memory you want to delete, repeat from step (2).
To save your edited Performance List see "Saving the edited Performance List" (p. 39).
Move a Performance
-
Use the [UP] or [DOWN] button to select the Performance memory you want to move to a different position inside the list.
-
Press the [MENU] button.
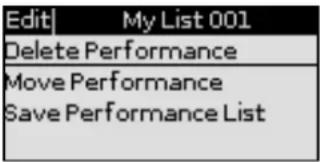
- Use the [UP] or [DOWN] button to select "Move Performance", then press the [ENTER] button.
The display changes to:
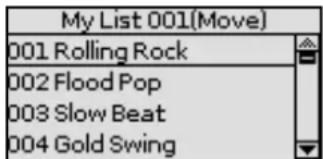
- Use the [UP] or [DOWN] button to move the selected Performance memory to the desired position, then press the [ENTER] button.
A “*” is shown in the first row, to the left of the Performance List name to indicate that the list has been edited.
You can now select another Performance memory you want to move, press the [MENU] button to confirm and repeat from step (3).
Saving the edited Performance List
Whenever the display shows all Performance memories to which the selected List refers, you can:
-
Press the [MENU] button
-
Use the [UP] or [DOWN] button to select "Save Performance List", then press the [ENTER] button.
A message confirms that the data have been saved.
- Press the [EXIT] button.
If you did not save the Performance List edited, the BK-3 now signals that you need to save it to preserve your changes.
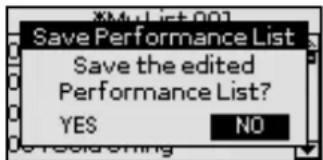
- Use the [INC] or [DEC] button to select "YES" to save your changes to the USB memory (or "NO" if you wish to keep the previous version).
MEMO
To select "YES or "NO" you can also use the [UP] or [DOWN] button
- Press the [ENTER] button to confirm your selection.
Filtering Performance Memories Settings (Lock function)
The BK-3 allows you to lock (protect) several settings to ensure that they no longer change when you select a different Performance memory.
Why is it Convenient to Use Filters (Lock Function)?
The BK-3's locks are data filters that allow you to use your Performance memories more efficiently, because you can ignore settings that may be fine for one song (the one you prepared the Performance memory for), but not for another.
Here is an example:
Suppose you select a Performance memory that assigns some tones which you want to keep for the entire song (or set). In this case lock (i.e. protect) the "Tone" after selecting this memory to ensure that the subsequent Performance memories you recall modify all of the BK-3's eligible settings except for the tones.
Which Parameter Can you Filter?
Below is a list of parameters that can be filtered:
| Parameter Explanation |
| Rhythm* Lock the Rhythm when changing performances. |
| Tempo* Lock the Tempo when changing performances. |
| Tone* Lock the Tone when changing performances. |
| Tone Part Lock the Tone Part when changing performances. |
| Split Lock the Split when changing performances. |
| Lower Octave Lock the Lower Octave when changing performances. |
| Arr Type Lock the Arr Type when changing performances. |
| Key* Lock the Key when changing performances. |
| Bass Inversion Lock the Bass Inversion when changing performances. |
| Scale Tune Lock the Scale Tune when changing performances. |
[*] These parameters can also be switched on/off by pressing and holding the assigned buttons on the front panel. (See "How to Switch Filters On/Off Directly by Panel")
For information on how to filter these parameters see "Performance Hold" (p.51).
NOTE
Unlike the other lock parameters, the protection of the tempo setting also applies to rhythm selection.
See [MENU] button→“Performance Edit”→“Arranger Setting”→“Tempo” (p. 49)
Each rhythm has a preset tempo value that is recalled when you select it. While the tempo setting is locked, the tempo no longer changes when you select a different rhythm.
MEMO
The "Save Global" parameter (p. 53) also saves the lock (and hence the "Performance Hold") settings.
How to Switch Filters On/Off Directly by Panel
Some useful filters can be also switched on/off by pressing and holding the assigned buttons on the front panel.
MEMO
All filters can be switched on/off by "Performance Hold" (p. 51).
In the example shown here, you will learn how to exclude rhythm changes from Performance selections.
The same procedure (albeit with different buttons) also applies to the tempo (press and hold [TAP TEMPO]) and "Key" (press and hold [KEY]) settings as well as to Tone selection (for each of the real-time parts individually).
- Connect the USB memory and load a Performance memory (p. 36) or a rhythm (p. 24).
- Press and hold one of the RHYTHM FAMILY buttons.
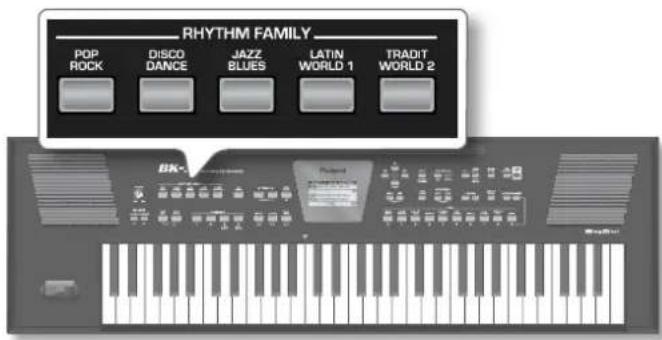
A "Rhythm" pop-up window appears with a closed lock (see left). (If you repeat step (2), the pop-up window will display an open lock to inform you that the lock function has been cancelled.)
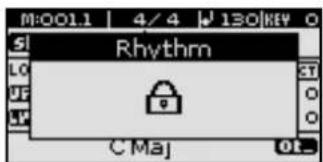
The Main window shows the Lock status:
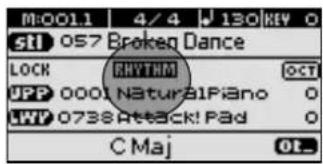

- Start playback of the selected rhythm.
- Select a different Performance memory.
- If the status lock shows "RHYTHM" on the main page, recalling another Performance does not change the rhythm.
- Again press and hold any RHYTHM FAMILY button to unlock the "RHYTHM" function.
The following pop-up windows appears to indicate that the lock function has been cancelled.:
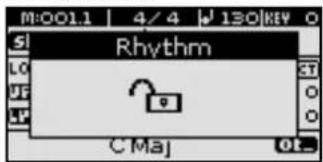
16. Recording your performance as audio data
Your BK-3 allows you to record your performance on the optional USB memory.
The resulting audio file is stored in the "My Recordings" folder.
The recording format is WAV (not mp3), which allows you to burn your recordings onto a CD using your computer.
NOTE
You will need a USB memory to record your performance.
NOTE
Use USB memory sold by Roland (M-UF-series). We cannot guarantee operation if any other USB memory is used.
Recording
The following procedure applies when the "Rec Audio Sync" parameter is "On" (Default). For more information about this parameter see "Rec Audio Sync" (p. 52).
- Connect the USB memory to which you wish to save the audio data.
-
Prepare everything you want to record:
-
Select the rhythm or song you want to use as accompaniment
-
Set the levels and effects, etc.
-
Set the desired balance between the rhythm/song and the real-time parts using the BALANCE buttons.
-
Press the [AUDIO REC] button (its indicator flashes).
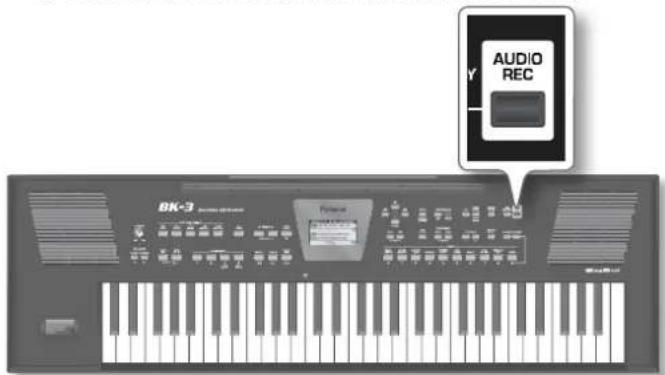
NOTE
If you pressed the [AUDIO REC] button by accident, press and hold it until its indicator goes dark again.
- Press the [START/STOP] / [▶/II]button.
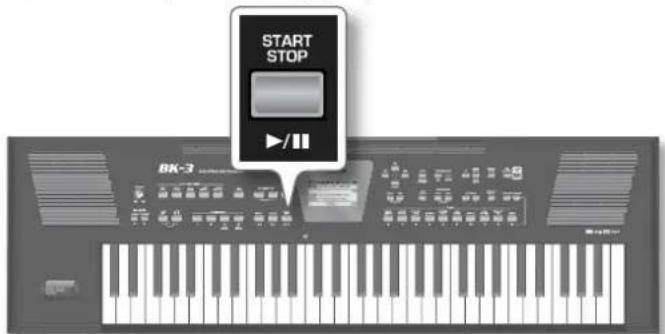
The indicators of the [AUDIO REC] and [START/STOP] buttons light and the BK-3 starts playing back the selected rhythm or song and recording. Everything you play on the keyboard is recorded. The Main page shows the recording time is running:
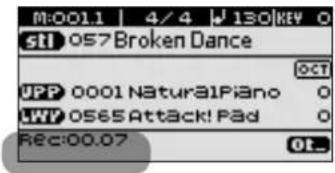
- At the end of the song recording, press the [AUDIO REC] or [START/STOP] / [▶/II] button to stop recording in case you selected a rhythm. Otherwise press the [SYNC START]/[■] button if you selected a song.
Rhythm or song playback and recording stop. The following message appears:
![Save My Recording 001 [Write]:Ok [Split]:Del [Dual]:Ins](/content/2026/05/847823/images/9b7c2fdbfaa8dd85deae03595dc6a331ee51367f5338e2a900688b249c8b2014.jpg)
MEMO
The name suggestion displayed here depends on the first recording. It will, however, be followed by an incremental number
You can now...
Save the song under a new name.
a. Use the [UP] or [DOWN] button to select the desired character, then use the [INC] or [DEC] button to change the character.
The buttons below allow you the following operations:
| Button Explanation | |
 | Press this button to switch between upper- and lower-case characters. |
 | Press this button to delete the selected character. |
 | Press this button to insert a character. |
b. Repeat steps (a) above to enter the remaining characters.
C. Press the [WRITE] button (its indicator flashes) to save your recording under the new name and to return to the main page.
If the USB memory already contains a file of that name, you will be asked whether you want to overwrite it:
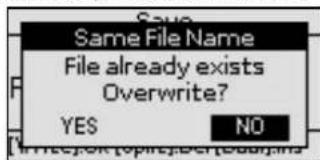
In this case, select "YES" and then pressing the [ENTER] button to replace the old file with the new one (the old file will be lost). Otherwise, select "NO" and press [ENTER] to return to the page where you can change the name, and enter a different name, then press the [WRITE] button.
MEMO
The audio files are saved to the "My Recordings" folder in the USB memory.
Save the song under the name suggested by the BK-3
The name suggestion depends on the first recording. It will, however, be followed by an incremental number
a. Press the [WRITE] button.
After a few seconds, the display will return to the main page. In this case, your audio file is saved in the "My Recordings" folder.
Decide to discard your recording
If you are unhappy with your recording you can discard it.
a. Press the [EXIT] button. The display changes to:
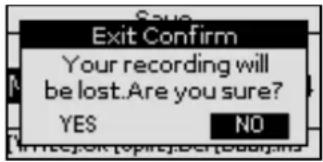
b. Use the [INC] or [DEC] button to select "YES", then press [ENTER] to erase your recording.
Selecting "NO" here takes you back to the state where you can choose between options (a) and (b).
Listening to your recording
1. Press the [START/STOP] / [▶/II] button to start playback of your recording.
If your recording seems too loud or too soft, you may want to change the setting of the "Rec Audio Level" parameter.
[MENU] button → "Global" → "Utility" → "Rec Audio Level" (p. 52).
NOTE
The BK-3 provides a second recording mode that allows you to start recording before the song you selected.
[MENU] button → "Global" → "Utility" → "Rec Audio Sync" (p. 52)
17. Menu options
The BK-3's [MENU] button provides access to the available parameters and functions.
General procedure
1. Press the [MENU] button (its indicator lights).
The display changes to:
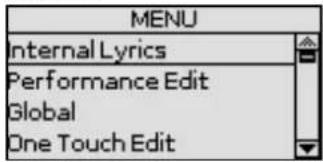
2. Use the [UP] or [DOWN] button to select the desired function group.
The following function groups are available:
| Function group Explanation | |
| Internal Lyrics | Allows you to activate the display of lyrics data on the BK-3 itself. (Only for SMF and mp3 files for which there are lyrics data.) |
| Performance Edit | This function group allows you to select different Tones and effects settings for the keyboard parts, the selected rhythm, to set the Arranger's behavior, the split point, etc. All settings of this group can be saved to a Performance memory. See “‘Performance Edit’ parameters” (p. 43). |
| Global | This function group contains parameters that apply to all sections of the BK-3. See “‘Global’ parameters” (p. 50). |
| One Touch Edit | This functions allows you to edit the ONE TOUCH memories (and to save your changes). See “Programming Your Own ONE TOUCH Settings (One Touch Edit)” (p. 27). |
| Makeup Tools | These functions allow you to edit the selected rhythm or SMF song in an intuitive way, without caring too much about the underlying MIDI parameters (p. 53). |
| MIDI | This function group allows you to edit the BK-3's MIDI parameters (p. 58). |
| Wireless | By inserting the wireless USB Adapter (WNA1100-RL; sold separately) into the BK-3's USB MEMORY port, you'll be able to use wireless compatible applications (such as the “Air Recorder” iPhone app) (p. 62). |
| Factory Reset | This command allows you to load the BK-3's factory settings (p. 60). |
| Format USB Device | This command allows you to format an optional USB memory (p. 60). |
3. Press the [ENTER] button to go to the display page where you can edit the parameters of the selected group, or to execute the selected command.
Internal Lyrics
The BK-3's display can show the lyrics of Standard MIDI Files or mp3 songs you load.
- Load a song with lyrics data. See "Selecting a Song or Rhythm on a USB Memory" (p. 28).
- Select the "Internal Lyrics" group (see "General procedure" above).
- Press the [ENTER] button.
The internal display now shows the lyrics of the selected song (4 lines at a time).
4. At the end of the song, press and hold the [EXIT] button to return to the main page.
'Performance Edit' parameters
The following parameters can be set for each Performance memory:
| Function group Explanation | |
| Tone Part View | This is where you can edit settings related to Tones (p. 43). |
| Tone Part Mfx | Contains the effects parameters for the keyboard parts (LWR, UPP) (p. 46). |
| Rhythm Parts | This group contains all parameters of the rhythm parts (p. 47). |
| Split | This parameter allows you to change the split point, i.e. the separation between the lower and upper keyboard zones. (p. 47). |
| Scale Tune Switch | This parameter allows you to specify which parts should be affected by the “Scale Tune” setting “Scale Tune Switch” (p. 47). |
| Scale Tune | Use these parameter to change the tuning system (“Scale Tune” (p. 48). |
| Key | Allows you to transpose the BK-3 in semi-tone steps up or down (p. 48). |
| Arranger Setting | This function group allows you to specify where and how the selected rhythm should scan the note messages generated by your playing for chord information (p. 48). |
| Melody Intelligent | Allows you to set the “Melody Intelligence” function (p. 50). This page can also be selected by pressing and holding the [MELODY INTELL] button. |
| Save As Default | This function allows you to save all “Performance Edit” settings as the new defaults that will be loaded each time you switch on the BK-3. |
'Tone Part View' parameters
This function group can be selected using [MENU] button→"Performance Edit"→"Tone Part View".
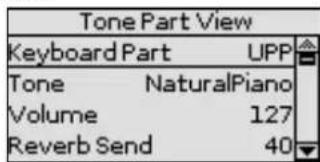
- Use the [INC] or [DEC] button to select the keyboard part you want to edit (UPP (Upper), LWR (Lower).
The display shows the settings for the selected keyboard part.
- Select and set the desired parameter(s). See "Moving Between Windows and Setting Parameter Values" (p. 18).
The following parameters are available:
Tone
Allows you to select a different Tone. While selecting a Tone, you can press a Tone selection button to select a different family.
Parameter Explanation
Tone The number of Tones depends on the selected family
Volume
Adjusts the volume of the selected keyboard part.
Selecting "0" means that the part is question is no longer audible.
| Parameter Setting | |
| Volume 0~127 |
Reverb Send
Use this parameter to set the reverb send level (i.e. the amount of effect that should be added).
| Parameter Setting | |
| Reverb Send 0~127 |
Chorus Send
Use this parameter to set the chorus send level (i.e. the amount of effect that should be added).
| Parameter Setting | |
| Chorus Send 0~127 | |
Panpot
Use this parameter to change the stereo placement of the selected keyboard part. "L63" means "hard left" and "R63" represents "hard right". Choose "0" if the sound should be at the center of the stereo image.
| Parameter Setting |
| Panpot L63~0~R63 |
Key Touch (velocity sensitivity)
The BK-3's keyboard is velocity sensitive, allowing you to control the timbre and volume of the keyboard parts by varying the strength with which you strike the keys.
- If you want to edit this setting, you have to press the [ENTER] button to select the "Key Touch" page.
| Key Touch | |
| Curve | Medium |
| Min Value | 1 |
| Max Value | 127 |
- Select and set the desired parameter(s). See "Moving Between Windows and Setting Parameter Values" (p. 18).
The following parameters are available:
| Parameter Setting Explanation | ||
| Curve | High, Medium, Low, Fixed* | · "High":Select this setting for maximum expressiveness. Even small variations of the force with which you strike a key produce audible changes. The trade-off is, however, that you have to strike the keys forcefully to reach the maximum volume.· "Medium":Medium velocity sensitivity. The keyboard responds to velocity changes, but the maximum volume can be obtained more easily than with "high". (This is the default setting.)· "Low":Select this setting if you are used to playing on an electronic organ or if you do not want velocity changes to bring about major volume changes.· "Fixed":Select this setting if all notes you play on the keyboard should have the same velocity value. When you set this parameter, the "Fixed value" field can be edited. |
| Min Value 1~127 | This parameter allows you to set the smallest velocity value with which you can trigger the selected part. | |
| Max Value 1~127 | This parameter allows you to set the highest velocity value with which you can trigger the selected part. | |
| Fixed value* | 1~127 | Allows you to set the value when "Curve" is set to "Fixed". |
[*] This parameter can only be edited if the "Curve" parameter is set to "Fixed".
Eq Part Edit
- If you want to edit the parameters of the equalizer, you have to press the [ENTER] button to select the "Eq Edit Part" page.
| Eq Part Edit | |
| Switch | On |
| High Freq | 3000 Hz |
| High Gain | -4 dB |
| Mid Freq | 2000 Hz |
- Use the [UP] or [DOWN] button to select the desired parameter.
- Use the [INC] or [DEC] button to set the desired value.
The following parameters are available:
| Parameter Setting | Explanation | |
| Switch | Off, On | This parameter allows you to switch the equalizer on and off. |
| High Freq | 1500 Hz, 2000 Hz,3000 Hz, 4000 Hz,6000 Hz, 8000 Hz,12000 Hz | Allows you to set the cutoff frequency of the high band (this is a shelving filter). |
| High Gain -1 | 5~+15 dB | Use this parameter to set the level of the selected "High" frequency.Positive values boost (increase the volume of) that frequency band,negative values cut (attenuate) it. |
| Mid Freq | 200~8000 Hz | Allows you to set the cutoff frequency of the middle band (this is a peaking filter). |
| Mid Gain | -15~+15dB | Use this parameter to set the level of the selected "Mid" frequency. |
| Parameter Setting Explanation | ||
| Mid Q 0.5, 1.0, 2.0, 4.0, 8.0 | Use this parameter to specify the width of the “Mid Frequency” band that you want to boost or cut. Smaller values mean that neighboring frequencies above/below that value are also affected. | |
| Low Freq | 90 Hz, 150 Hz, 180 Hz, 300 Hz, 360 Hz, 600 Hz | Allows you to set the cutoff frequency of the low band (this is a shelving filter). |
| Low Gain -15~+15 dB | Use this parameter to set the level of the selected “Low” frequency. | |
4. Press the [EXIT] button to leave the "Eq Part Edit" page.
Mfx
The BK-3 contains one multi-effects processor ("Mfx") that can be used to process the desired keyboard part(s). Select "Off" for parts that don't need to be processed by this Mfx.
| Parameter Setting | |
| Mfx Off, On |
Hold Pedal
This parameter allows you to specify whether and how a hold damper pedal you connect to the "PEDAL HOLD/SWITCH" socket should respond to Hold messages (CC64).
| Parameter Setting |
| Hold Pedal Auto, On, Off |
- "Auto" means that the part in question only responds to Hold messages if it is assigned to the right half (Split) or the entire keyboard.
- "On" means that the part in question always responds to Hold messages, even if it is assigned to the left half of the keyboard.
- "Off", finally, means that the part does not respond to Hold messages.
Octave Shift
Allows you to transpose the selected keyboard part in octave steps
| Parameter Setting | |
| Octave Shift -4~0~+4 | |
Coarse Tune
Changes the pitch of the selected keyboard part in semi-tone steps.
| Parameter Setting | |
| Coarse Tune -24~0~+24 | |
Fine Tune
Changes the pitch of the selected part in steps of 1 cent (1/100 semi-tone).
| Parameter Setting |
| Fine Tune -100~0~+100 |
Portamento Mode
You can set the selected part to mono(phonic) mode.
| Parameter Setting | |
| Portamento Mode | Poly, Mono |
- "Poly", on the other hand, means that you can play chords using the selected part
- "Mono" means that you can only play one note at a time. You could select this mode to play a trumpet or woodwind part in a more natural way.
Portamento Time
"Portamento" means that the pitch doesn't change in clearly defined steps: it produces glides from one note to the next. Use the this parameter to specify the speed at which those glides are carried out. The higher the value, the slower the transitions.
| Parameter Setting | |
| Portamento Time 0 | 127 |
Bender Assign
This parameter allows you to specify for each keyboard part how it should respond to Pitch Bend messages.
| Parameter Setting | |
| Bender Assign | Auto, On, Off |
- "Auto": The keyboard part only responds to left/right movements of the BENDER/MODULATION lever when no split setting causes it to be to the left of other keyboard parts. In other words: parts you can play with your left hand after selecting a split no longer respond to pitch bend messages. But they will while the keyboard is not split.
- "On": The keyboard part always responds to left/right movements of the BENDER/MODULATION lever.
- "Off": The part in question does not respond to left/right movements of the BENDER/MODULATION lever.
Bender Range
This parameter sets the pitch interval, i.e. the value that will be used when the BENDER/MODULATION lever is pushed all the way to the left or right.
| Parameter | Setting |
| Bender Range | 0~+24 |
Modulation Assign
This parameter allows you to specify for each keyboard part how it should respond to Modulation messages (CC01).
| Parameter | Setting |
| Modulation Assign | Auto, On, Off |
- "Auto": The keyboard part only responds to backward movements of the BENDER/MODULATION lever when no split setting causes it to be to the left of other keyboard parts. In other words: parts you can play with your left hand after selecting a split no longer respond to modulation messages. But they will while the keyboard is not split.
- "On": The keyboard part always responds to backward movements of the BENDER/MODULATION lever.
- "Off": The part in question does not respond to backward movements of the BENDER/MODULATION lever.
Cut Off
This filter parameter allows you to make the selected sound darker or brighter. Positive settings mean that more overtones will be allowed to pass, so that the sound becomes brighter. The further this value is set in the negative direction, the fewer overtones will be allowed to pass and the sound will become softer (darker).
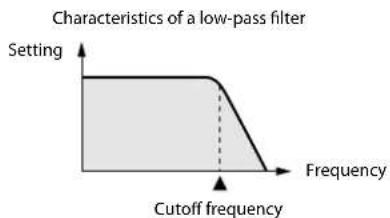
line
| Setting | Frequency | | ------- | --------- | | Low-pass filter | 0 | | Cutoff frequency | 0 |NOTE
For some sounds, positive (+) Cutoff settings will cause no noticeable change because the pre-programmed Cutoff parameter is already set to its maximum value
| Parameter Setting | |
| Cut Off -64~+63 |
Resonance
When the Resonance value is increased, the overtones in the area of the cutoff frequency will be emphasized, creating a sound with a strong character.
| Parameter Setting | |
| Resonance -64~+63 | |
NOTE
For some sounds, negative (−) "Resonance" settings may produce no noticeable change because the Resonance is already set to the minimum value.
Attack (only for Tones)
This parameter adjusts the onset of the sound. Negative values speed up the attack, so that the sound becomes more aggressive.
| Parameter Setting | |
| Attack -64~+63 |
Decay
This parameter adjusts the time over which the sound's volume and cutoff frequency fall from the highest point of the attack down to the sustain level.
| Parameter Setting | |
| Decay -64~+63 |
NOTE
Percussive sounds usually have a sustain level of "0". Piano and guitar sounds are in this category. Holding the keys for a long time will have little effect on the duration of the notes you are playing, even if you select a high value here
Release
This parameter adjusts the time over which the sound will decay after the note is released until it is no longer heard. The cutoff frequency will also fall according to this setting.
| Parameter Setting | |
| Release -64~+63 |
Vibrato Rate
This parameter adjusts the speed of the pitch modulation. Positive (+) settings make the preset pitch modulation faster and negative (−) settings make it slower.
| Parameter Setting | |
| Vibrato Rate -64~+63 | |
Vibrato Depth
This parameter adjusts the intensity of the pitch modulation. Positive (+) settings mean that the "wobble" becomes more prominent, while negative (−) settings make it shallower.
| Parameter Setting | |
| Vibrato Depth -64-+63 | |
Vibrato Delay
This parameter adjusts the time required for the vibrato effect to begin. Positive (+) settings increase the time before vibrato will begin and negative settings shorten the time
| Parameter Setting | |
| Vibrato Delay -64~+63 | |
C1
The function of this parameter depends on the sound you assigned to the selected part. It may influence the filter and resonance setting, switch between the organ samples with the fast and slow Rotary modulation, etc.
| Parameter Setting | |
| C1 0~127 |
'Tone Part Mfx' parameters
This function group can be selected using [MENU] button → "Performance Edit" → "Tone Part Mfx". Your BK-3 contains a multi-effects processor that can be used for processing any keyboard part you like. See "Mfx" (p. 45). (There are also 2 Mfx processors for the rhythm/ song parts).
Mfx Switch
Select "Off" if you don't need the Mfx processor.
| Parameter Setting | |
| Mfx Switch | Off, On |
Mfx Type
The BK-3 provides 84 different multi-effect types, some of which are combinations of two effects for added flexibility. This parameter allows you to select the desired type. The available types are:
| N. | Mfx Type | N. | Mfx Type | N. | Mfx Type |
| 1 | Thru 29 | OD→ Delay | 57 | VK Rotary | |
| 2 | Stereo EQ 30 | DST→ Chorus | 58 | 3D Chorus | |
| 3 | Overdrive 31 | DST→ Flanger | 59 | 3D Flanger | |
| 4 | Distortion | 32 | DST→ Delay | 60 | 3D Step Flgr |
| 5 | Phaser | 33 | EH→ Chorus | 61 | Band Chorus |
| 6 | Spectrum | 34 | EH→ Flanger | 62 | Band Flanger |
| 7 | Enhancer | 35 | EH→ Delay | 63 | Band Step Flg |
| 8 | Auto Wah | 36. | Chorus→ DLY | 64 | VS Overdrive |
| 9 | Rotary | 37 | Flanger→ DLY | 65 | VS Distortion |
| 10 | Compressor | 38 | CHO→ Flanger | 66 | GT Amp Simul |
| 11 | Limiter | 39 | CHO/DLY | 67 | Gate |
| 12 | Hexa-Chorus | 40 | Flanger/DLY | 68 | Long Delay |
| 13 | Trem Chorus | 41 | CHO/Flange | 69 | Serial Delay |
| 14 | Space-D | 42 | Isolator | 70 | MLT Tap DLY |
| 15 | St. Chorus | 43 | Low Boost | 71 | Reverse DLY |
| 16. | St. Flanger | 44 | Super Filter | 72 | Shuffle DLY |
| 17 | Step Flanger | 45 | Step Filter | 73 | 3D Delay |
| 18 | St. Delay | 46 | Humanizer | 74 | Long DLY |
| N. Mfx Type N. Mfx Type N. Mfx Type | |||||
| 19 | Mod. Delay 47 | Speaker | Sim 75 | Tape Echo | |
| 20 | 3 Tap Delay | 48 | Step Phaser | 76 | LoFi Noise |
| 21 | 4 Tap Delay | 49 | MLT Phaser | 77 | LoFi Comp |
| 22 | Time Delay | 50 | Inf Phaser | 78 | LoFi Radio |
| 23 | 2 Pitch Shifter | 51 | Ring Modul | 79 | Telephone |
| 24 | FBK Pitch | 52 | Step Ring | 80 | Phonograph |
| 25 | Reverb | 53 | Tremolo | 81 | Step Pitch |
| 26 | Gate Reverb | 54 | Auto Pan | 82 | Sympa Reso |
| 27 | OD→Chorus | 55 | Step Pan 83 Vip-Od-Rotary | ||
| 28 | OD→Flanger | 56 | Slicer | 84 | Center Canc |
NOTE
Some of the names shown above may be abbreviated in the display.
Mfx Edit
- If you want to edit the parameters of the selected effect type, you have to press the [ENTER] button to select the "Mfx Edit" page.
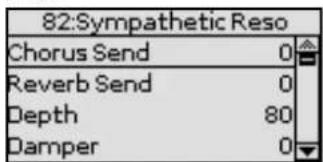
- Use the [UP] or [DOWN] button to select the desired parameter.
- Use the [INC] or [DEC] button to set the desired value.
The first two parameters for each Mfx type are "Chorus Send" (0\~127) and "Reverb Send" (0\~127).
They allow you to specify whether—and to what extent—the Mfx signal should be processed by the Chorus and/or Reverb effect.
The other parameters in the page depend on the Mfx type that you selected.
'Rhythm Parts' parameters
This function group can be selected using [MENU] button → "Performance Edit" → "Rhythm Parts".
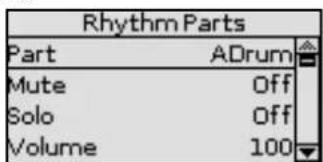
The parameters of this function group apply to the eight Automatic Accompaniment parts (i.e. the parts used to play back the selected rhythm).
- Use the [INC] or [DEC] button to select the rhythm part you want to edit (ADrum, ABass, Acc1, Acc2, Acc3, Acc4, Acc4, Acc5, Acc6).
The display shows the settings for the selected part.
- Use the [UP] or [DOWN] button to select the desired parameter.
- Use the [INC] or [DEC] button to set the desired value.
The following parameters are available:
Mute
Allows you to mute the selected part, so that it is no longer audible.
| Parameter | Setting |
| Mute | Off, On |
Solo
Allows you to solo the selected part, which means that all other rhythm parts are switched off.
| Parameter | Setting |
| Solo | Off, On |
Volume
Adjusts the volume of the selected rhythm part.
Selecting "0" means that the part is question is no longer audible.
| Parameter | Setting |
| Volume | 0~127 |
Split
This page allows you to set two keyboard-related parameters. It can be selected using [MENU] button → "Performance Edit" → "Split".
| Split | |
| Split Point | C 4 |
| Lower Hold | Off |
MEMO
This page can also be selected by pressing and holding the [SPLIT] button.
Split Point
The "Split Point" parameter allows you to set the split point.
| Parameter | Setting |
| Split Point | C#2~B6 |
TIPS
Selecting the "Split Point" field and after pressing the [ENTER] button, you can set the split point by simply pressing the corresponding key on the keyboard.
Lower Hold
This parameter allows you to set the Hold function for the LWR part.
| Parameter | Setting |
| Lower Hold | Off, On |
If you set this parameter to "On", the notes of the LWR part go on sounding until you play other notes in the left keyboard area. (This function is only available while the [SPLIT] button lights.)
If you select "Off", the LWR part stops sounding as soon as you release all keys in the left area.
Scale Tune Switch
This parameter can be selected using [MENU] button → "Performance Edit" → "Scale Tune Switch".
| Scale Tune Switch | |
| Upper | Off |
| Lower | Off |
| Rhythm | Off |
| Parameter Setting | Explanation | |
| Upper Off, On | Select “On” if the "Scale Tune" settings (see below) should apply to the Upper and Melody Intell parts. | |
| Lower Off, On | Select “On” if the “Scale Tune” settings (see below) should apply to the Lower part. | |
| Rhythm Off, On | Select “On” if the “Scale Tune” settings (see below) should apply to the rhythm parts. |
Scale Tune
This parameter can be selected using [MENU] button → "Performance Edit" → "Scale Tune".
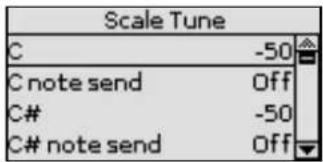
This parameter allows you to change the tuning of all notes of one octave, which may come in handy to create oriental tunings.
| Parameter Setting Explanation | ||
| C ~ B(each note can be set individually) | -64~0~+63 | Changes the pitch of the notes C~B in steps of 1 cent. The value that you specify is applied to all notes of the same name. If you change the tuning of the "C", that value is added to, or subtracted from, all Cs (C1, C2, C3, etc.). ("-50" means that the note in question is tuned a quarter tone down.) |
| C note send ~ B note send Off, On | • "Off":The note is not detuned.• "On":The corresponding note is detuned at the value you specified (-64~0~+63) | |
Key
This function allows you to transpose the BK-3's pitch in semi-tone steps. Depending on the mode setting, this transposition applies to all sections or just a specific section.
It can be selected using [MENU] button → "Performance Edit" → "Key" or by pressing the [KEY] button. See "Transposing to a Different Key" (p. 34).
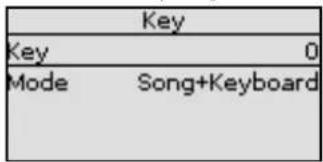
TIPS
Pressing and holding the [KEY] button locks this parameter and keeps it from changing when you select Performance memories.
Key
Allows you to set the desired transposition interval.
Each value represents a semi-tone step. Select "0" if no transposition
is required.
| Parameter Setting | |
| Key -6~+5 |
Mode
Allows you to specify which sections should be transposed by the "Key" parameter.
| Parameter Setting | |
| Mode Song, Keyboard, Song+Keyboard | |
- "Song": Only song playback is transposed.
- "Keyboard": Only the notes you play on the keyboard are transposed. (This also affects the chord information transmitted to the Arranger.)
- "Song+Keyboard": Both song playback and the keyboard parts are transposed. Rhythm playback is also transposed.
'Arranger Setting' parameters
This function group can be selected using [MENU] button → "Performance Edit" → "Arranger Setting".
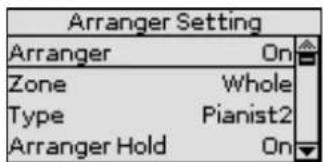
The parameters of this function group apply to the Arranger as a whole and allow you to fine-tune its behavior.
Arranger
Select "Off" if you only need the drum part of the selected rhythm and no melodic accompaniment parts (ABass, ACC1\~6).
| Parameter Setting | |
| Arranger | Off, On |
Zone
When you press the [SPLIT] button, the selected rhythm pattern is controlled by the chords you play in the left half of the keyboard.
You can also tell the Arranger to scan another part of the keyboard for usable chords. Though "Left" is probably the most popular setting, you could select "Right" to have the Arranger scan the right half of the keyboard.
Switch off the [SPLIT] button if the Arranger should scan the entire keyboard ("Whole").
The range of the left and right keyboard areas depends on the "Split Point" setting (p. 47).
| Parameter Setting | |
| Zone | Off, Right, Left, Whole |
Type
Another important choice is how you want to transmit note information to the Arranger.
| Parameter Setting | |
| Type | Standard, Pianist1, Pianist2, Intelligent, Easy |
- "Standard": This is the normal chord recognition mode.
-
"Pianist1": In this mode, the BK-3 only recognizes chords that consist of at least three notes. Playing only two notes will not cause the rhythm's key to change.
-
"Pianist2": Same as "Pianist1" while the Hold pedal is not pressed. If you press the Hold pedal, the BK-3 even recognizes "chords" when you press only one note. If the hold pedal is still pressed, chord recognition continues up to a maximum of 5 played keys.
- "Intelligent": Select this option when you want the chord recognition function to supply the missing notes of the chords you play.
- "Easy": This is another "intelligent" chord fingering system. It works as follows:
| Chord Type Action | |
| Major chords | Press the key that corresponds to the chord's fundamental. |
| Minor chords | Fundamental + any black key to the left of the fundamental. |
| Seventh chords | Fundamental + any white key to the left of the fundamental. |
| Minor seventh chords | Fundamental + any black key to the left + any white key to the left. |
Arranger Hold
This function sustains the notes you play in the chord recognition area ("Zone"). Select "Off" if you want the accompaniment to stop as soon as the keys in that zone are released. This parameter is switched "On" by default.
| Parameter Setting | |
| Arranger Hold Off, On | |
Tempo
Each rhythm has a preset tempo that is recalled when a rhythm is selected. This parameter allows you to specify if and when the BK-3 should ignore the preset tempo and go on using the tempo of the previously selected rhythm.
| Parameter Setting | |
| Tempo Preset, Auto, Lock | |
Here is what these three options mean:
| Setting | Selecting a new rhythm | |
| Playback is stopped | Playback is running | |
| Preset The rhythm's preset tempo is loaded. | ||
| The BK-3 loads the preset tempo of the new rhythm | The BK-3 doesn't load the preset tempo of the new rhythm.The new rhythm is played at the current tempo. | |
| AutoLock | The BK-3 doesn't load the preset tempo of the new rhythm. It is played at the current tempo. | |
NOTE
The setting of this parameter is neither saved to the Performance memories, nor to the Global area. See "Save Global" (p. 53). The "Lock" setting can also be activated by pressing and holding the [TAP TEMPO] button.
Fill In Half Bar
When this parameter is "On", the length of the Fill-Ins, which are played when the [AUTO FILL IN] button lights, is halved.
| Parameter Setting | |
| Fill In Half Bar Off, On | |
Certain pop songs in 4/4 contain bars that only last two beats. The usual place for such a bar is between the first and the second
verse. Another favorite position for "halved" bars is at the end of a chorus or the bridge. Your BK-3 allows you to faithfully reproduce these "anomalies" using this function. This does not change rhythm playback right away. Only when another VARIATION pattern starts will the "Fillin Half Bar" function be activated and play half the number of beats of the accompaniment pattern you selected.
Fill Ritardando
This function is suitable for ballads. It causes the next Fill-In to slow down ("ritardando"). See "Tempo Change Fill Rit" below for how to set how strongly the tempo should be decreased.
| Parameter Setting | |
| Fill Ritardando Off, On | |
As the name implies, it is only available while the [AUTO FILL-IN] button lights.
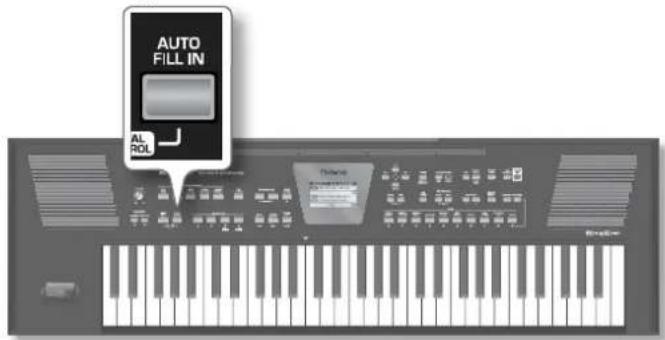
a. Set "Fill Ritardando" to "On".
b. Press the [START/STOP] / [▶/II] button to start rhythm playback.
C. Press a VARIATION [1]\~[4] button.
The BK-3 plays a Fill-In. The tempo slows down while the fill is being played. At the end of the fill, the rhythm returns to the previously set tempo (this is called "a tempo").
d. Press and hold the [EXIT] button to return to the main page.
TempoCh Acc/Rit, TempoCh CPT, TempoCh Fill Rit
The "TempoCh Acc/Rit" parameter allows you to speed up or slow down the rhythm tempo by the amount you set here. To use these functions, you must assign them to an optional footswitch (p. 52). There are three Ritardando functions: one for all rhythm patterns, one for Ending patterns and one for fill-ins (see "Fill Ritardando" above). They all use the "Tempo Change" settings on the following page.
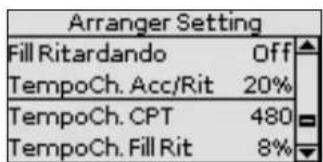
| Parameter Setting | |
| TempoCh Acc/Rit 5%~92% | |
| TempoCh CPT | 0~3825 |
| TempoCh Fill Rit | 5%~92% |
"TempoCh Acc/Rit": Allows you to set the degree (ratio) by which the tempo changes when the "Acceler" or "Ritard" function is triggered. Example: if the tempo is currently = 100 , the value "20%" means that the tempo drops to = = 80 or rises to = = 120
"TempoCh CPT": Use this parameter to specify how long a ritardando/accelerando should take. In most cases, 480 CPT (i.e. one measure) is probably the most musical choice.
"TempoCh Fill Rit": This parameter allows you to specify to what extent fill-in playback should be slowed down when the "Fill Ritardando" function is on.
Using the Ritardando/Accelerando functions
For general applications (any rhythm division) proceed as follows:
a. Assign the "Arr Rit" or "Arr Acc" function to an optional footswitch (p. 52).
b. Press the [START/STOP] / [▶/II] button to start rhythm playback.
C. Press the assigned footswitch.
For Ritardandos that apply to Ending patterns proceed as follows:
a. Press the [START/STOP] / [▶/II] button to start playback.
b. Press the [ENDING] button twice in succession ("double-click").
'Melody Intelligent' parameters
This function group can be selected using [MENU] button → "Performance Edit" → "Melody Intelligent" or by pressing and holding the [MELODY INTELL] button.
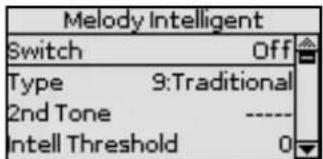
The following parameters are available:
Switch
Select "On" if you want to add a MELODY INTELL part.
This part is triggered by the chord recognition of the BK-3's Automatic Accompaniment and plays automatic harmonies that are added to the melody that you are playing using the UPP part. You can choose from among 18 harmony types (see below).
| Parameter Setting | |
| Switch Off, On |
MEMO
This "Switch" parameter can also be assigned to an optional footswitch. See "Pedal Switch" (p. 52).
Type
Allows you to select one of the 18 harmony types:
| Parameter Setting | |
| Type | 1:Duet, 2:Organ 3:Combo, 4:Strings, 5:Choir, 6:Block, 7:Big Band, 8:Country, 9:Traditional, 10:Brodway, 11:Gospel, 12:Romance, 13:Latin, 14:Country Guitar, 15:Country Ballad, 16:Waltz Organ, 17:Octave Type1, 18:Octave Type2 |
2nd Tone
Depending on the selected "Type" setting, a second harmony is added to the "Melody Intelligent" part. If you like, you can select the desired Tone for the second harmony voice using this parameter.
| Parameter Setting | |
| 2nd The Tone of the selected family | |
Intell Threshold
This value represents the lowest velocity value (between "0" and "127") of the UPP part that triggers the "Melody Intelligent" part. If you don't need this switching function, select "0".
| Parameter Setting | |
| Intell Threshold 0~1 | 27 |
Level
Allows you to set the level of the "Melody Intelligent" part to ensure that the harmonies blend in with the rest.
| Parameter Setting | |
| Level 0~127 |
Hold Pedal
This parameter allows you to specify whether or not the "Melody Intelligent" part's notes can be held with the footswitch connected to the PEDAL HOLD/SWITCH socket.
| Parameter Setting | |
| Hold Pedal Auto, On, Off | |
See "Using the 'Melody Intell(igent)' Function" (p. 34).
Save As Default
This function allows you to save the current "Performance Edit" settings as default settings. These settings are loaded each time you switch on the BK-3.
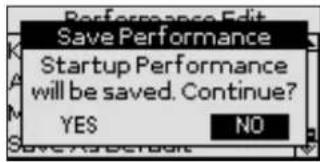
1. Use the [INC] or [DEC] button to select "YES", then press the [ENTER] button to define the current settings as the default state.
The display shows a confirmation message.
If you don't want to define the current settings as the default state, use the [INC] or [DEC] button to select "NO", then press the [ENTER] button.
The BK-3 then returns to the "Performance Edit" page.
'Global' parameters
The settings of the "Global" parameters can be saved to the BK-3s global memory. If you don't save them, your changes are lost when you switch off the BK-3.
See "Save Global" (p. 53) for how to save these settings.
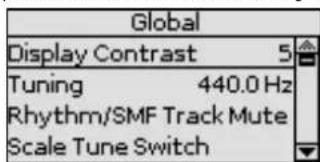
Display Contrast
This parameter can be selected using [MENU] button → "Global" → "Display Contrast".
It is used to change the contrast of the BK-3's display in case you
find it difficult to read.
| Parameter Setting | |
| Display Contrast 1~10 | |
Tuning
This parameter can be selected using [MENU] button → "Global" → "Tuning".
This parameter allows you to tune your BK-3 to acoustic instruments that cannot be tuned. The default is 440.0Hz.
| Parameter Setting | |
| Tuning 415.3~466.2Hz | |
Rhythm/SMF Track Mute
See "Using Track Mute" and "Center Cancel" (p. 30).
One Touch Hold
This parameter can be selected using [MENU] button → "Global" → "One Touch Hold".
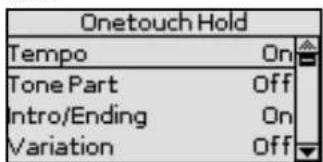
The parameters on this page allow you to filter certain "One Touch" settings. Select "On" for the settings you do not want to load along with the remaining One Touch settings when you press a ONE TOUCH button.
| Parameter Setting | |
| Tempo Off, On | |
| Tone Part Off, On | |
| Intro/Ending Off, On | |
| Variation Off, On | |
| Scale Tune Off, On |
Performance Hold
This page can be selected using [MENU] button → "Global" → "Performance Hold".
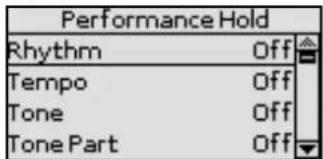
The parameters on this page allow you to filter certain Performance settings. Select "On" for the settings you do not want to load along with the remaining settings when you select a Performance memory.
| Parameter Setting | |
| Rhythm* Off, On | |
| Tempo* Off, On | |
| Tone* | Off, On |
| Tone Part Off, On |
| Parameter Setting | |
| Split | Off, On |
| Lower Octave | Off, On |
| Arr Type | Off, On |
| Key* | Off, On |
| Bass Inversion | Off, On |
| Scale Tune Off, On |
[*] These parameters can also be switched by pressing and holding the assigned buttons on the front panel. (See the "Hold to LOCK" legends on the frontal panel.
Metronome
These parameters can be selected using [MENU] button → "Global" → "Metronome".
| Metronome | |
| Volume | 64 |
| Time Signature | 4/4 |
| Mode | Always |
| Count In | Off |
The BK-3 is equipped with a metronome that can be used in various situations.
For more information on these parameters see "Using the Metronome" (p. 35).
Favorite
The Favorite sound list is displayed.
For more information see "9. Favorite Tones" (p. 21).
Utility
The "Utility" parameters are found on the display page that can be selected using [MENU] button → "Global" → "Utility".
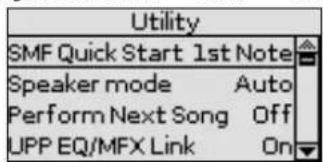
The following table shows the utility parameters.
| Parameter Setting | Explanation | |
| SMF Quick Start | Off, 2nd Bar, 1st Note | • "Off": Playback starts at the very beginning of the song file (which may contain a few silent bars).• "2nd Bar": Causes playback to start from measure 2 of the selected Standard MIDI File.• "1st Note": This is basically the same as the above, except that playback starts on the first note of the selected song. |
| Speaker Mode | Auto, On | • "Auto": The internal speakers are automatically shut off when a plug is inserted into PHONES/OUTPUT jack (default).• "On": The internal speakers are always active. |
| Parameter Setting | Explanation | |
| Perform Next Song | Off, On | At the end of the current song, the next song in the Performance List starts automatically.If the Performance List step refers to a rhythm, the rhythm in question is loaded, but you will need to start manually by pressing the [START/ STOP] button. |
| UPP EQ/MFX Link Off, On | If you select "on", theBK-3 selects suitable Mfx and equalizer settings for each Tone you assign to the Upper part. | |
| Rec Audio Level | -24, -18, -12, -6, +0 dB | Allows you to set the recording level for your own performances. See "16. Recording your performance as audio data" (p. 41). The setting of the [VOLUME] knob does not affect the recording level. (Default setting: +0 dB) |
| Rec Audio Sync Off | On | • "Off": Choose this setting when you want to start recording before starting rhythm or song playback.• "On": Choose this setting when you want to be able to start recording simultaneously with rhythm/song playback. When you choose this setting, pressing the [AUDIO REC] button will stop both playback and the recorder. |
| USB Driver | Generic, Original | • "Generic": Choose this if you want to use the standard USB driver that was included with your computer. Normally, you should use this mode.• "Original": Choose this if you want to use a USB driver downloaded from the Roland website (www.roland. com). |
| Recall MIDI Set | Kbd, Rhythm, kbd/Rhythm, Song, PK Series, Off | This parameter selects the MIDI Set whose settings are loaded when the BK-3 is switched on. See "MIDI Tx/Rx" (p. 59). |
| Auto Off* | Off, 10 (5)30 (15)240 (30) | This parameter allows you to cause the BK-3 to switch itself off after the selected number of minutes has elapsed if you are not using it.The default setting is "30".Select "Off" if you prefer not to use this function.The values in parentheses indicate when the pop-up countdown appears. |
| Visual Ctrl Mode MVC, V-LINK | This parameter allows you to select the visual control mode. The option to select depends on the messages supported by the external device: MIDI Visual Control (MVC) or V-LINK. | |
| Version Info n.nn | Shows the version number of the BK-3's operating system | |
[*] When the BK-3 has been switched off by this function, you need to press the [POWER] button, wait a few seconds, then press the button again to switch the BK-3 back on. (Do not switch it on too quickly.)
Pedal Switch
The "Pedal Switch" setting is found on the display page that can be selected using [MENU] button → "Global" → "Pedal Switch".
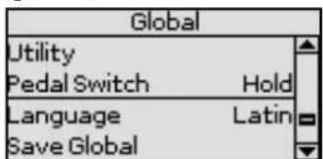
If you do not change the factory setting, the footswitch is assigned to the "Hold" function.
The following table shows the functions you can assign to the footswitch.
| Function Expanation | |
| Start/Stop | Starts and stops rhythm or song playback. Same function as the [START/STOP] button. |
| Intro | Same functions as the [INTRO], [ENDING], [VARIATION1], [VARIATION2], [VARIATION3], [VARIATION4], [BASS INV] buttons.See "Using Rhythms" (p. 22). |
| Ending | |
| Variat1 | |
| Variat2 | |
| Variat3 | |
| Variat4 | |
| Bass Invers. | |
| Arr. Hold | Allows you to switch the Arranger Hold function on and off. See "Arranger Hold" (p. 49). |
| ArrChordOff | Allows you to switch the Arranger's chord recognition off, in which case only the drum/percussion part is played. |
| HBarOnFillIn | Allows you to switch the "Fill In Half Bar" function on and off. See "Fill In Half Bar" (p. 49). |
| Break Mute | When you press the footswitch, rhythm playback is muted for the remainder of the current measure. |
| Reset/Start | This function allows you to have theBK-3 start on the first beat of the currently selected rhythm pattern when you press the assigned footswitch.Use it when you are accompanying a singer or soloist whose timing is a little shaky and suddenly notice that the playback lags one or two beats behind the singer/ soloist. |
| Split | You can alternate between "Intelligent" and "Pianist2" modes. When the former is selected, the chord recogni-tion area is automatically set to "Left". See "Zone" (p. 48). When you switch to "Pianist1" or "Pianist2", the chord recognition area is automatically set to "Whole". |
| Scale Upper | Allows you to assign the selected Scale Tune setting to the Upper part. See "One Touch Hold" (p. 51). |
| Scale Lower | |
| Perf. Next | Allows you to select the next or previous Performance. |
| Perf. Prev | |
| Portamento | Pressing the footswitch activates the "Portamento Time" setting. When the footswitch is released, the "Portamento Time" setting is not used. To hear this effect, you need to set a "Portamento Time" value (p. 45). |
| Hold | The assigned footswitch can be used as a Soft,Sostenuto or Sustain (Hold pedal). |
| Soft | |
| Sostenuto | |
| Lower Hold | The footswitch is assigned to the "Lower Hold" function. See "Lower Hold" (p. 47). |
| Track Mute Same function as the [TRACK MUTE] button. | |
| Audio XFade | The footswitch can be used to activate a crossfade between two files.To make this work, select a different song while the current song is being played back and press the footswitch.The BK-3 creates a brief blend between the current and the next song. (This function is only available between two audio songs.) |
| Fade Out | This function gradually decreases the volume until it reaches zero. At that time, song or rhythm playback stops automatically. |
| Melody Int. | Allows you to control the "Switch" parameter of the "Melody Intelligent" function. See "'Melody Intelligent' parameters" (p. 50). |
| MFX On/Off | Allows you to switch the Mfx for the keyboard parts on and off. |
| Arr. Rit | Allows you to activate the Arranger's "Tempo Change Ritard" function. See "TempoCh Acc/Rit, TempoCh CPT, TempoCh Fill Rit" (p. 49). |
| Arr.Acc | Allows you to activate the Arranger's "Tempo Change Accel" function. See "TempoCh Acc/Rit, TempoCh CPT, TempoCh Fill Rit" (p. 49). |
Language
This parameter allows you to choose the character set to be used for the following:
• Lyrics display (for files that contain lyrics)
- "Search" functions. See "Using the 'Search' Function to Locate Songs or Rhythms" (p. 32).
- "Rename" functions. See "Rename a Performance List" (p. 38).
| Parameter Setting | |
| Language Latin, Cyrillic, East Europe | |
Save Global
This function allows you to save all "Global" parameter settings to ensure that they are loaded automatically each time you switch the BK-3 on.
You can select this function using [MENU] button → "Global" → "Save Global".
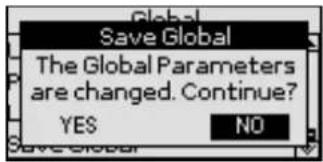
- Use the [INC] or [DEC] button to select "YES", then press the [ENTER] button to define the current settings as the default state.
The display shows a confirmation message.
If you don't want to define the current "Global" settings as the default state, use the [INC] or [DEC] button to select "NO", then press the [ENTER] button. The BK-3 then returns to the "Performance Edit" page.
One Touch Edit
See "Programming Your Own ONE TOUCH Settings (One Touch Edit)" (p. 27).
Makeup Tools (rhythms and SMF)
These functions allow you to actually edit the selected rhythm or SMF song (Standard MIDI File) without paying too much attention to the underlying parameters.
NOTE
The "Rhythm Makeup Tools" and "SMF Makeup Tools" functions cannot be used to edit Standard MIDI Files that use the XG format.
Using the Makeup Tools
- Select the rhythm or SMF song you wish to modify on the connected USB memory. See "Selecting Rhythms" (p. 24) and "Selecting a Song or Rhythm on a USB Memory" (p. 28).
- Press the [START/STOP] / [▶/II] button to start playback of the song or rhythm.
This allows you to listen to the song or rhythm before you start editing it.
Press the [START/STOP] / [▶/II] button again to halt playback.
NOTE
If you selected a rhythm or SMF song on the connected USB memory, press and hold the [EXIT] button to return to the main page.
- Press the [MENU] button.
- Use the [UP] or [DOWN] button to select "Makeup Tools", then press the [ENTER] button.
If you selected a rhythm in step (1), the display changes to:
| Rhythm Makeup Tools |
| Common |
| Instrument |
| Freeze Data |
| Save |
If you selected an SMF song in step (1), the display changes to:
| SMF Makeup Tools |
| Common |
| Instrument |
| Freeze Data |
| Save |
This menu allows you to select the following entries:
| Menu Option Explanation | |
| Common | Select this entry to change common parameters that affect the rhythm or song as a whole, like the reverb or chorus effect, the tempo, etc. |
| Instrument | Select this entry to change the instruments used in the rhythm or song and their parameters (p. 54). |
| Freeze Data | Select this entry to "burn" your new settings into the file. Doing so will allow you to use your new version with any sequencer (software) or compatible Roland backing instrument (p. 57). |
| Save | Select this entry to save your song or rhythm with the "Makeup Tools" settings you have made (p. 57). |
Common
To edit the Common parameters, use [MENU] button → "Makeup Tools" → "Common".
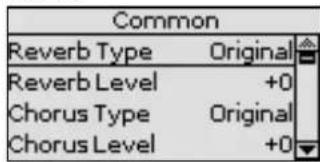
The "Common" parameters on this page apply to the entire song or rhythm.
- Use the [UP] or [DOWN] button to select the desired "Common" parameter.
- Use the [INC] or [DEC] button to change the parameter value.
- If you are satisfied with your changes and wish to preserve them, save your rhythm/ song to the USB memory.
See "Saving Your New Rhythm or Song (SMF) Version in USB Memory" (p. 57).
NOTE
The changes you make using the procedure described above can be "burned" into the rhythm/song file using the "Freeze Data" command (p. 57). Doing so will allow you to hear those
changes on any sequencer (software) you use. Changes you don't "freeze" are nevertheless stored when you save the edited rhythm/song file—but only the BK-3 can read them.
The following parameters are available:
Reverb Type
This parameter allows you to specify what kind of reverb effect you need. The available reverb types are:
| Setting Meaning | |
| Original | Original This setting means that the song uses its own(programmed) reverb settings. |
| Room1, Room2, Room3 | These types simulate the reverb characteristics of a room. The higher the number (1, 2 or 3), the bigger the "room" becomes. |
| Hall1, Hall2 | These types simulate the reverb of a small (1) or large (2) concert hall and thus sound much "bigger" than the Room types above. |
| Plate This algorithm | simulates the acoustics of a concert hall. |
| Delay | A delay effect (no reverb). Works a lot like an echo effect and thus repeats the sounds |
| Pan Delay | This is a stereo version of the above delay effect. It creates repetitions that alternate between the left and right channels. |
Chorus Type
Chorus broadens the spatial image of the sound and creates a stereo impression. You can choose from 8 types of chorus.
| Setting Meaning | |
| Original The song uses its own (programmed) chorus settings. | |
| Chorus1~4 | These are conventional chorus effects that add spaciousness and depth to the sound. |
| Fbk Chorus | This is a chorus with a flanger-like effect and a soft sound. |
| Flanger | This is an effect that sounds somewhat like a jet airplane taking off and landing |
| ShortDly | This is a full-fledged delay effect that can be used instead of a chorus or flanger. As you will see, there are a lot of parameters you can program |
| ShortDlyFb This is a short delay with many repeats | |
Reverb Level & Chorus Level
These parameters allow you to modify the output level of the Reverb (or Chorus) processor.
Rhythm Volume/Song Volume
This parameter allows you to set the overall volume of the selected rhythm or song if you think it is too loud/soft.
Rhythm Tempo/Song Tempo
Allows you to change the rhythm's or song's tempo (q=20\~250).
Key
This parameter allows you to transpose all song parts (except the drums) up to 12 semitones (1 octave) up or down. This value is written to the song data and used every time you play back this song.
NOTE
This parameter is not available for rhythms.
Undo Changes
Select this entry to cancel all "Rhythm/SMF Makeup Tools" settings you have made and to revert to the previously saved version.
Instrument
To edit the Instrument parameters, use [MENU] button → "Makeup Tools" → "Instrument".
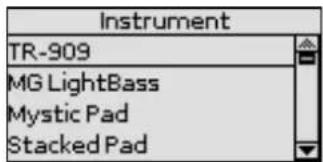
The display now shows all instruments used by the selected rhythm or SMF song.
1. Use the [UP] or [DOWN] button to select the instrument you want to change, then press the [ENTER] button.
The display changes to:
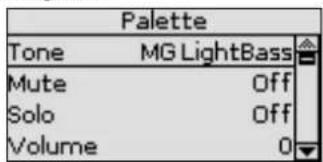
The [MENU] button's indicator flashes.
2. Press the [MENU] button to jump to the location where the instrument is used.
Playback starts automatically from that point.
3. Use the [UP] or [DOWN] button to select the parameter you wish to edit.
4. Use the [INC] or [DEC] button change the parameter.
5. If you are satisfied with your changes and wish to preserve them, save your rhythm/ song to the USB memory. See "Saving Your New Rhythm or Song (SMF) Version in USB Memory" (p. 57).
MEMO
If you select a Drum Set in step (1) above, the parameter list looks slightly different than for instruments that do not use a Drum Set. "Drum Sets" are special "Tones" that assign different sounds to most keys/note numbers, allowing you (and the BK-3) to play realistic drum and percussion parts.
NOTE
The changes you make using the procedure described above can be "burned" into the rhythm/song file using the "Freeze Data" (p. 57). Doing so will allow you to hear those changes on any sequencer (software) you use. Changes you don't "freeze" are nevertheless stored when you save the edited rhythm/song file—but only the BK-3 can read them.
Icon legend
The following icons refer to parameters that are respectively available for:

Tones of regular instruments only

Drum Sets only
The following parameters are available:
Tone ( musical), Drum ( music)
Allows you to select a different Tone within the active Tone family.
While selecting a Tone, you can press a TONE button to select a different family.
| Parameter Setting | |
| Tone or Drum | The number of Tones depends on the selected family. |
Mute ( musical)/Drum Mute ( musical)
Switches the selected instrument off. The corresponding part is no longer played back. (This setting only applies to the selected instrument and thus not necessarily to the entire track.)
NOTE
In the case of the drums, you can mute two instrument groups ("Drum Mute" and "Perc Mute", see below) separately.
| Parameter Setting | |
| Mute or Drum Mute | Off, On |
Solo
Switches off all instruments except the selected instrument.
| Parameter Setting | |
| Solo Off, On |
Perc Mute (1)
Suppresses (or adds) the percussion sounds used by the drum part.
| Parameter Setting | |
| Perc Mute Off, On |
Volume
Adjusts the volume of the selected instrument. Negative values decrease the current volume, positive values increase it. (This is a relative setting that is added to, or subtracted from, the original setting.)
| Parameter Setting | |
| Volume -127~0~+127 | |
Reverb
Use this parameter to set the reverb send level. Negative values decrease the current reverb send level, positive values increase it. (This is a relative setting that is added to, or subtracted from, the original setting.)
| Parameter Setting | |
| Reverb -127~0~+127 | |
Chorus
Use this parameter to set the chorus send level. Negative values decrease the current chorus send level, positive values increase it. (This is a relative setting that is added to, or subtracted from, the original setting.)
| Parameter Setting | |
| Chorus -127~0~+127 | |
Panpot
Use this parameter to change the stereo placement of the selected instrument. "0" means "no change", negative (−) values shift the instrument towards the left and positive (+) values shift it towards the right.
| Parameter Setting | |
| Panpot -127~0~+127 | |
NOTE
In the case of Drum Sets, this setting applies to all drum/percussion instruments. There is also a parameter that can be set for specific drum instruments (p. 57).
Octave (♪)
Use this parameter to transpose the selected instrument up or down by up to 4 octaves.
| Parameter Setting | |
| Octave -4~0~+4 |
Velocity
This parameter allows you to modify the velocity range of the instrument in question. "0" means that the recorded velocity values are left untouched, negative values reduce all velocity values by the same amount (leaving differences between notes intact), while positive settings increase all velocity values.
| Parameter Setting | |
| Velocity -127~0~+1 | 27 |
Cut Off
This filter parameter allows you to make the selected sound darker or brighter. Positive settings mean that more overtones are allowed to pass, so that the sound becomes brighter. The further this value is set in the negative direction, the fewer overtones will be allowed to pass and the sound will become softer (darker).
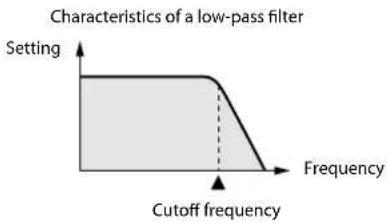
line
| Frequency | Settings | | --------- | -------- | | Low | High | | High | Low || Parameter Setting | |
| Cut Off -127~0~+127 | |
NOTE
For some sounds, positive (+) "Cut Off" settings will cause no noticeable change because the preprogrammed "Cut Off" parameter is already set to its maximum value.
Resonance
This is a parameter one invariably associates with a synthesizer. When the "Resonance" value is increased, the overtones in the area of the cutoff frequency will be emphasized, creating a sound with a strong character.
| Parameter Setting | |
| Resonance -127~0 | +127 |
NOTE
For some sounds, negative (−) "Resonance" settings may produce no noticeable change because the resonance is already set to the minimum value.
The following parameters allow you to set the sound's "envelope". The envelope parameters affect both the volume (TVA) and the filter (TVF). The cutoff frequency will rise as the envelope rises and fall as the envelope falls.
Attack ( musical)
This parameter adjusts the onset of the sound. Negative values speed up the attack, so that the sound becomes more aggressive.
| Parameter Setting | |
| Attack -127~0~+127 | |
Decay ( musical)
This parameter adjusts the time over which the sound's volume and cutoff frequency fall from the highest point of the attack down to the sustain level.
| Parameter Setting | |
| Decay -127~0~+127 |
NOTE
Percussive sounds usually have a sustain level of "0". Piano and guitar sounds are in this category. Holding the keys for a long time will have little effect on the duration of the notes you are playing, even if you select a high value here.
Release ( musical)
This parameter adjusts the time over which the sound will decay after the note is released until it is no longer heard. The cutoff frequency will also fall according to this setting.
| Parameter Setting | |
| Release -127~0~+1 | 27 |
NOTE
Some sounds already contain natural (sampled) vibrato whose depth or speed cannot be changed.
Use the following three parameters if you think the instrument in question has too much (or could use a little more) vibrato.
Vibrato Rate ( musical)
This parameter adjusts the speed of the pitch modulation. Positive (+) settings make the preset pitch modulation faster, and negative (−) settings make it slower.
| Parameter Setting | |
| Vibrato Rate -127~0~+127 | |
Vibrato Depth ( musical)
This parameter adjusts the intensity of the pitch modulation. Positive (+) settings mean that the "wobble" becomes more prominent, while negative (−) settings make it shallower.
| Parameter Setting | |
| Vibrato Depth -127 | -0~+127 |
Vibrato Delay ( musical)
This parameter adjusts the time required for the vibrato effect to begin. Positive (+) settings increase the time before vibrato will begin and negative settings (−) shorten the time.
| Parameter Setting | |
| Vibrato Delay -127 | +0~+127 |
Mfx
The BK-3 contains 2 multi-effects processors ("Mfx"), one reverb processor and one chorus processor that can be used to process rhythms or Standard MIDI Files.
Select "Off" for instruments that don't need to be processed by any Mfx.
| Parameter Setting | |
| Mfx Off, A, B |
MEMO
If you select "A" or "B", additional parameters can be edited (see below).
Mfx Type
Allows you to select the desired Mfx type, i.e. the kind of effect you need. Each Mfx ("A" and "B") can be assigned to as many instruments as you like. Be aware, however, that selecting a different type will affect all instruments that use this Mfx processor. For a list of the available Mfx types see p.. 45.
NOTE
Each Mfx can be assigned to as many instruments as you like. Be aware, however, that selecting a different type will affect all instruments that use this Mfx processor.
NOTE
While the "Mfx" parameter is set to "Off", you cannot select a different type. In that case, the display will show the message "---".
Mfx Edit
If you also want to edit the parameters of the selected effect type, press the [ENTER] button to jump to the "Mfx Edit" page. You can then edit the available parameters.
Equalizer
Activate this setting if you want to change the timbre of the selected instrument.
| Parameter Setting | |
| Equalizer Off, On |
Edit EQ
To edit the equalizer parameters, press the [ENTER/] button to jump to the "Edit EQ" page. You can then edit the available parameters:
| Parameter Setting Explanation | ||
| Equalizer | Off, On | Activate this setting if you want to change the timbre of the selected instrument.This parameter duplicates the "Equalizer" above and was added for your convenience. |
| High Freq | 1500 Hz, 2000 Hz, 3000 Hz, 4000 Hz, 6000 Hz, 8000 Hz, 12000 Hz | Allows you to set the cutoff frequency of the high band (this is a shelving filter). |
| High Gain | -15~+15 dB | Use this parameter to set the level of the selected "High" frequency. Positive values boost (increase the volume of) that frequency, negative values cut (attenuate) it. |
| Mid Freq | 200~8000 Hz | Allows you to set the cutoff frequency of the middle band (this is a peaking filter). |
| Mid Q 0.5, 1, 2, 4, 8 | Use this parameter to specify the width of the "Mid Freq" band that you want to boost or cut. Smaller values mean that neighboring frequencies above/ below that value are also affected. | |
| Mid Gain -15~+15 dB | Use this parameter to set the level of the selected "Mid Freq".Positive values boost (increase the volume of) that frequency, negative values cut (attenuate) it. | |
| Low Freq | 90 Hz, 150 Hz, 180 Hz, 300 Hz, 360 Hz, 600 Hz | Allows you to set the cutoff frequency of the low band (this is a shelving filter). |
| Low Gain -15~+15 dB | Use this parameter to set the level of the selected "Low" frequency. | |
Drum Instrument ( )
If you want to edit the settings for specific instruments of the selected Drum Set, press the [ENTER] button to jump to the "Drum Instrument" page.
| Drum Instrument | |
| 5: TR-707 Kick1 | |
| 8: 808 BassDrum | |
| 10: Dance Kick 2 | |
| 13: HipHop Kick2 | |
All instruments of the Drum Set being used are displayed.
Use the [UP] or [DOWN][button to select the instrument you want to change, then press the [ENTER] button.
You can then use the [UP] or [DOWN][button and the [INC] or [DEC] button to edit the available parameters.
| Parameter Setting Explanation | ||
| Instr. | All Drum Set Instruments | Select the drum instrument you want to edit. |
Parameters for the selected instrument
| Mute Off, On | Suppress (or add) the selected instrument. | |
| Solo Off, On | Switch off all instruments except the selected instrument. | |
| Volume -127~0~+127 | Use this parameter to set the volume of the selected drum instrument. | |
| Reverb -127~0~+127 | Use this parameter to set the reverb send level of the selected drum instrument. The effect itself can be changed on the "Common" page. | |
| Chorus -127~0~+127 | Use this parameter to set the chorus send level of the selected drum instrument. The effect itself can be changed on the "Common" page. | |
| Panpot -127~0~+127 | Use this parameter to set the stereo placement of the selected drum instrument. "0" means "no change", negative values shift the instrument towards the left and positive values shift it towards the right. | |
| Velocity -127~0~+127 | This parameter allows you to modify the velocity range of the drum instrument in question. "0" means that the recorded values are left untouched, a negative setting reduces all velocity values by the same amount (leaving variations intact). A positive setting shifts all velocity values in a positive direction. | |
| Pitch | -127~0~+127 | Use this parameter to tune the selected drum instrument higher or lower. "0" means that the pitch is left unchanged. |
| Instr Equalizer | Global, Instr, Off | Global: The drum instrument uses the equalizer settings of the Drum Set it belongs to.Instr: The drum instrument uses its own equalizer settings (see below).Off: The drum instrument is not equalized. |
| Edit EQ | (Press the [ENTER] button) | Provides access to the EQ parameters of the currently selected drum instrument (if "Instr. Equalizer" is set to "Int"). See "Edit EQ" (p. 56) for a description of the available parameters. |
| Undo Changes | (Press the [ENTER] button) | This function allows you to cancel the "Drum Instrument" settings of the currently selected instrument and to revert to the previously saved version. |
Freeze Data
To commit your settings, use [MENU] button → "Makeup Tools" → "Freeze Data".
Before saving your "made-up" song to a USB memory, you can (but you don't have to) "commit" your changes, thereby turning them into "regular" rhythm or song data.
This may come in handy if you also want to play back your new rhythm/song version on another backing instrument, sequencer or your computer. This operation is unnecessary for files you only want to use with the BK-3 or one of the models mentioned above.
Saving Your New Rhythm or Song (SMF) Version in USB Memory
MEMO
You will need an optional USB memory to save your new rhythm or song (SMF).
NOTE
Use USB memory sold by Roland (M-UF-series). We cannot guarantee operation if any other USB memory is used.
- If you are happy with your changes and wish to preserve them, select the "Save" parameter and press the [ENTER] button.
The BK-3 displays the contents of the USB memory.
NOTE
Even rhythms or songs for which you did not perform the "Freeze Data" command need to be saved using this procedure if you want to keep the changes.
-
Use the [UP] or [DOWN] button and the [ENTER] button to select a different location if you do not want to overwrite the original version.
-
Press the [WRITE] button (it flashes).
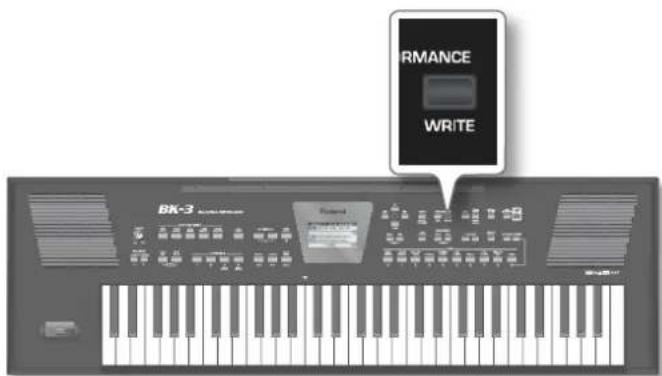
The BK-3 automatically adopts the name of the selected rhythm or song. If you want to save the new version under that name (and overwrite the previous version), skip to step (6) below.
4. Use the [UP] or [DOWN] button to select the desired character, then use the [INC] or [DEC] button to change the character.
The buttons below allow you the following operations:
| Button Explanation | |
![ROLAND BK-3-BK - Use the [UP] or [DOWN] button to select the desired character, then use the [INC] or [DEC] button to change the character. - 1](/content/2026/05/847823/images/b35a0733cf79e5040b207b2f91ef3fa4cac72b31cddb88705e663f3e8f4a4e95.jpg) | Press this button to switch between upper- and lower-case characters. |
![ROLAND BK-3-BK - Use the [UP] or [DOWN] button to select the desired character, then use the [INC] or [DEC] button to change the character. - 2](/content/2026/05/847823/images/a5eacbefbd82b02cb50276335755a88269121ae1583dde9f059d30de99d9ee26.jpg) | Press this button to delete the selected character. |
![ROLAND BK-3-BK - Use the [UP] or [DOWN] button to select the desired character, then use the [INC] or [DEC] button to change the character. - 3](/content/2026/05/847823/images/61390c8b61ffc4384aa24b72ef3be388906849bd133bdc482453f5fecbb6e1c0.jpg) | Press this button to insert a character. |
5. Repeat steps (4) above to enter the remaining characters.
6. Press the [WRITE] button to confirm your desire to save the rhythm or song.
If the USB memory already contains a rhythm or song file of that name, you will be asked whether you want to overwrite it:
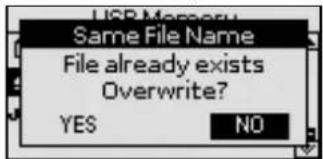
In this case, select "YES" using the [INC] or [DEC] button and press [ENTER] to replace the old file with the new one (the old file will be lost).
Otherwise, select "NO" and press the [ENTER] button to return to the "Save" page and enter a different name.
MIDI
This section discusses the BK-3's MIDI parameters.
MIDI Channels
MIDI can simultaneously transmit and receive messages on 16 channels, so that up to 16 instruments can be controlled.
NOTE
All BK-3 parts are set to receive MIDI messages. If they do not seem to respond to the messages you send from the external
controller, you should check whether the external controller's MIDI OUT is connected to the MIDI IN of your BK-3.
The MIDI channels are fixed and you cannot change them.
| Ch Part Ch Part | |||
| 1 | vthm Accomp. 1 / (Song 1) : Rhy | ass / (Song 2) | |
| 3 | vthm Accomp. 2 / (Song 3) : Upper (UPP) / (Song 4) | ||
| 5 | vthm Accomp. 3 / (Song 5) : 6 (Song 6) | ||
| 7 | vthm Accomp. 4 / (Song 7) : Rhy | ccomp. 5 / (Song 8) | |
| 9 | vthm Accomp. 6 / (Song 9) : 10 Rh | Drum / (Song 10) | |
| 11 | Lower (LWR) / (Song 11) : 12 (Song 12) | ||
| 13 | (Song 13) : 14 (Song 14) | ||
| 15 | Melody Intell. / (Song 15) : 16 (Song 16) | ||
MIDI Parameters
The MIDI parameters can be selected using [MENU] button → "MIDI"
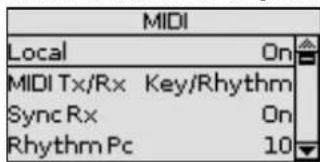
The BK-3's MIDI environment contains the following options:
Local
The Local parameter allows you to establish or remove the connection between the BK-3's keyboard and the internal tone generator.
| Parameter Setting | |
| Local Off, On |
When set to "On" (default), the keyboard and internal sound generator are connected.
If you select "Off", the keyboard and internal sound generator are disconnected but the note are still transmitted to the MIDI OUT or USB port and hence to external MIDI instruments.
Preventing Double Notes when Working with a Sequencer (Local Control)
When you have a MIDI sequencer connected, set this parameter to "OFF".
Since most sequencers have their Thru function turned on, notes you play on the keyboard may be sounded in duplicate, or get dropped. To prevent this, select "OFF" so that the keyboard and internal sound generator will be disconnected.
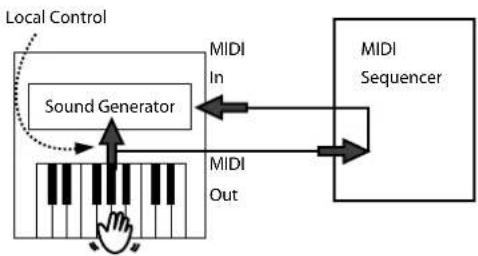
flowchart
graph TD
    A["Local Control"] --> B["Sound Generator"]
    B --> C["MIDI In"]
    C --> D["MIDI Out"]
    D --> E["MIDI Sequencer"]
NOTE
The setting of this parameter is not memorized when you switch off the BK-3.
MIDI Tx/Rx
The BK-3 has 6 MIDI preset settings. All you need to do is to select the MIDI preset to your need.
| Parameter Setting | |
| MIDI Tx/Rx Kbd, Rhythm, Kbd/Rhythm, Song, PK Series, Off | |
NOTE
This parameter applies to both reception (RX) and transmission (TX).
- "Kbd": This option recalls the MIDI settings for the keyboard parts (UPP, LWR, MELODY INT)
- "Rhythm": This option recalls the MIDI settings for the rhythm parts (Drum, Bass, Accomp. 1\~6).
- "Kbd/Rhythm" (Default): This option recalls the MIDI settings for the keyboard parts (UPP, LWR, MELODY INT) and the rhythm parts (Drum, Bass, Accomp. 1\~6). The most important (and practical) use for this field is resetting the MIDI transmit/receive channels of the real-time and rhythm parts and to switch off MIDI transmission/reception of the song parts.
- "PK Series": This option prepares the BK-3 for MIDI control using a PK-series MIDI pedalboard.
- "Song": This option recall the settings for the BK-3's SMF song parts and switches off the MIDI transmission and reception of the real-time and rhythm parts.
- "Off": The MIDI transmission and reception are disabled.
Sync Rx
This parameter is used to specify whether rhythm and song playback should be synchronized by an external MIDI device.
| Parameter Setting | |
| Sync Rx Off, On (Default setting: On) | |
- "Off": In this case, the BK-3 is not synchronized with other MIDI devices. It is thus impossible to start/stop it via MIDI.
- "On": Rhythm playback and Song playback are synchronized if the BK-3 receives MIDI Start and Stop messages followed by MIDI Clock signals. If the BK-3 receives only a Start message, it will wait a moment to see if there are also MIDI Clock messages coming. If there are, it will synchronize to them. If there are no MIDI Clock messages, it will follow its own tempo. In either case, you can stop playback or recording with a MIDI Stop message
Rhythm Pc (Tx/Rx Channel)
The Rhythm Pc channel is used to receive and transmit program changes that cause the BK-3 or the external instrument to select another rhythm.
| Parameter Setting | |
| Rhythm Pc Off, 1~16 (Default setting: 10) | |
NTA (Note-to-Arranger channel Rx)
NTA is short for "Note-to-Arranger".
These parameters allow you to specify on which MIDI channels the BK-3 should receive chord information used to change the rhythm's key in real-time.
If you want to use the Rhythm without playing on the BK-3's keyboard, you must transmit these notes on NTA MIDI channel (from your computer or external MIDI instrument to the BK-3).
| Parameter Setting | |
| NTA Off, Ch 13, Ch 14, Ch 16 (Default setting: Ch 14) | |
- "Off": The NTA MIDI channel is disabled.
- "CH13, CH14, Ch16": Allows you to select the MIDI channel (13,
14, or 16) on which the BK-3 should receive NTA messages.
Pitch Bender
This filter allows you to enable (On) or disable (Off) the transmission and reception of Pitch Bend messages. These messages are used to temporarily increase or decrease the pitch of the Keyboard-part notes.
| Parameter Setting | |
| Pitch Bender Off, On (Default setting: On) | |
Modulation
This filter allows you to enable (On) or disable (Off) the transmission and reception of Modulation messages. These messages are used to add vibrato to the notes you play (control change CC01).
| Parameter Setting | |
| Modulation Off, On | (Default setting: On) |
Program Change
This filter allows you to enable (On) or disable (Off) the transmission and reception of Program Change messages. These messages are used to select Tones, Styles, or Performance.
| Parameter Setting | |
| Program Change Off, On (Default setting: On) | |
Rx Velocity
This filter allows you to enable (On) or disable the reception of velocity messages. This only applies to note messages received via MIDI. Choose the velocity value to be substituted for the actual values the BK-3 receives (1\~127), or select "On" to use the velocity values as is.
| Parameter Setting | |
| Program Change On, 1~127 (Default setting: On) | |
Clock Tx
This parameter allows you to determine whether (On) or not (Off) the Rhythm and Song send MIDI Clock messages when you start them. These messages are necessary for synchronizing external MIDI instruments/sequencers/software to the BK-3.
| Parameter Setting | |
| Clock Tx Off, On (Default setting: On) | |
Start Stop Tx
This option allows you to specify whether or not the Rhythm and Song send Start/Stop/Continue messages when you start or stop them. Select "Off" when you wish to control the tone generator of a MIDI organ, etc., without starting or stopping its automatic accompaniment.
| Parameter Setting | |
| Start Stop Tx Off, On | (Default setting: On) |
SMF Position Tx
The BK-3's Song player also sends and receives Song Position Pointer messages that indicate the exact location of the notes that are being played back.
Select "OFF" if you don't want to send or receive these messages.
| Parameter Setting | |
| SMF Position Tx Off | On (Default setting: Off) |
Visual Control Tx
Allows you to set the MIDI transmit channel for the Visual Control function. (The BK-3 does not receive Visual Control messages.)
| Parameter Setting | |
| Visual Control Tx 1~16 (Default setting: 16) | |
See "18. Controlling Video Equipment (Visual Control)" (p. 61).
Checking a Tone's or Rhythm's MIDI Address
Tones and rhythms can also be selected via MIDI. To this effect, they use an "internal" address, which is not usually displayed. For MIDI applications involving sequencers or external controllers, knowing the "official" address may come in handy. The BK-3 has a handy system that provides this information instantly—there is thus no need to look up the MIDI address in the tables at the end of this manual.
- Select the Tone or Rhythm whose MIDI address you need to know.
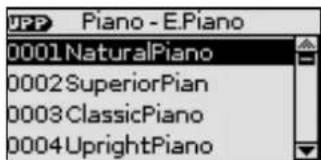
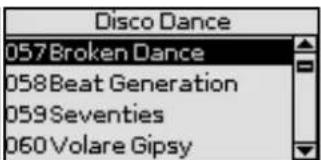
(Tone selection window) (Rhythm selection window)
- Press and hold the [NUMERIC] button to call up a pop-up window.
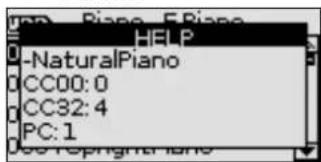
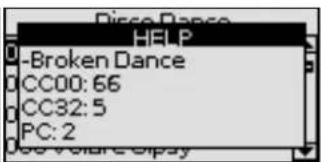
(Tone selection window) (Rhythm selection window)
- Press the [EXIT] button (or press [NUMERIC] again) to return to the previous page.
Factory Reset
The following function allows you to recall the BK-3's original factory settings. This has no effect on the data stored on a USB memory
- Press the [MENU] button.
The display changes to:
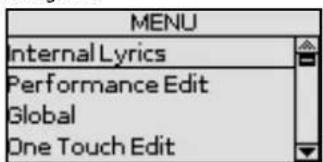
- Use the [UP] or [DOWN] button to select the "Factory Reset" entry, then press the [ENTER] button.
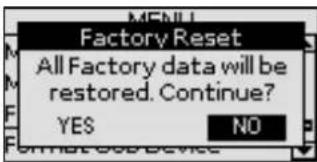
- Use the [INC] or [DEC] button to select "YES", then press the [ENTER] button to load the factory settings.
Select "NO" to return to the previous display page without loading the factory settings.
A confirmation message informs you that the BK-3 has been initialized.
Formatting a USB memory
This function allows you to format the connected USB memory. USB memories using the FAT-32 file system may not need to be formatted. We nevertheless recommend formatting all new USB storage devices with the BK-3.
IMPORTANT NOTE
Formatting a USB memory means that all files (songs, rhythms, etc.) it contains are lost.
Always check the contents of the memory before deciding to format it.
-
Connect the a USB storage you want to format device to the USB MEMORY port on the BK-3's rear panel.
-
Press the [MENU] button.
-
Use the [UP] or [DOWN] button to select the "Format USB Device" entry, then press the [ENTER] button.
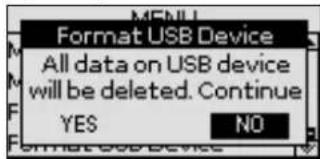
- Use the [INC] or [DEC] button to select "YES", then press the [ENTER] button to format the USB memory.
A confirmation message informs you that the USB memory has been formatted.
The following folders are created on the USB memory
| Folder Name Description | |
| My Performances | This folder is used to save Performance Lists. (The contents of this folder cannot be viewed by pressing the [USB MEMORY] button. You need to press the PERFORMANCE [LIST] button gain access to the files it contains. The contents can be viewed on a computer, however.) |
| My Recordings | This folder is used to store your audio recordings. See “16. Recording your performance as audio data” (p. 41). |
| My Rhythms | This folder can be used to save rhythms you edited with the “Makeup Tools” functions. See “Makeup Tools (rhythms and SMF)” (p. 53). |
| My Songs | This folder can be used to save SMF songs you edited with the “Makeup Tools” functions. See “Makeup Tools (rhythms and SMF)” (p. 53). |
NOTE
We recommend copying the contents of your USB memory to your computer before formatting it.
18. Controlling Video Equipment (Visual Control)
The BK-3 has a powerful interface for realtime audio-and-video integration.
What is MIDI Visual Control?

MIDI Visual Control is an internationally-used recommended practice that was added to the MIDI specification so that visual expression could be linked with musical performance. Video equipment that is compatible with MIDI Visual Control can be connected to electronic musical
instruments via MIDI in order to control video equipment in tandem with a performance.
How to Connect a Video Equipment
When MIDI Visual Control- or V-LINK compatible devices are connected via MIDI, you'll be able to easily enjoy a variety of visual effects that are linked to the expressive elements of your performance.
For example, if you use the BK-3 with the EDIROL P-10, you'll be able to use the various controls on the BK-3's keyboard to switch and control images on the EDIROL P-10.
In order to enjoy the Visual Control function with the BK-3 and the EDIROL P-10, you'll need to make connections using a MIDI cable (sold separately)
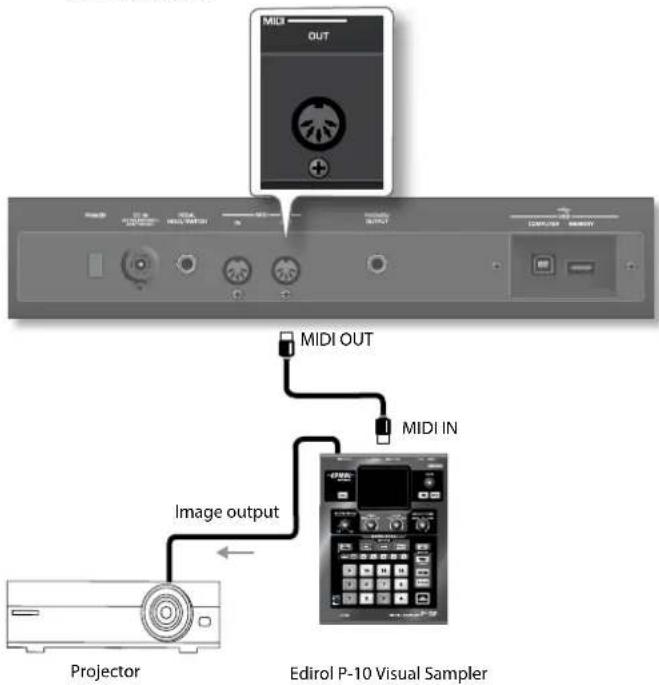
NOTE
To prevent malfunction and speaker damage, you must minimize the volume on all equipment and turn off their power before you make any connections.
- Connect the BK-3's MIDI OUT socket to the MIDI IN socket of the optional MIDI Visual Control/V-LINK device.
How to Enable/Disable the Video Control Function
- Press and hold the [BASS INV] button while pressing the
[AUTO FILL IN] button.
The following confirmation appears:
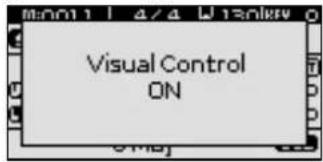
Repeat this step to switch the Visual Control function back off. The following message briefly confirms this operation:
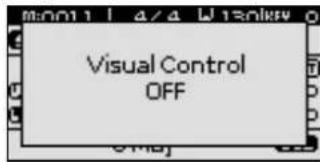
Selecting clips and banks on an optional MIDI Visual Control/ V-LINK device
- Switch on the "Visual Control" function.
- Press a key in the highest octave (C#6\~C7) to select the desired clips on the external MIDI Visual Control/V-LINK-compatible device.
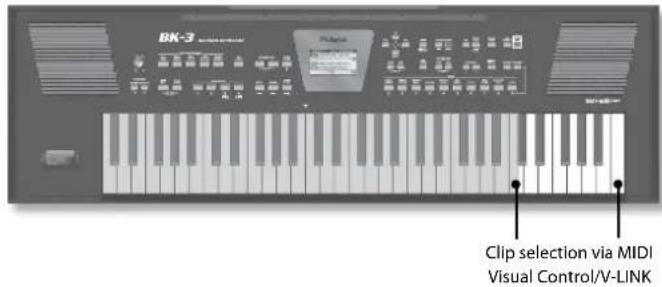
| Key Description MIDI message | |
| C#6 Control the image bank (Bank Select) BF 00 00 | |
| D6 Switch images (Clip 1) CF 00 | |
| D#6 Control the image bank (Bank Select) BF 00 01 | |
| E6 Switch images (Clip 2) CF 01 | |
| F6 Switch images (Clip 3) CF 02 | |
| F#6 Control the image bank (Bank Select) BF 00 02 | |
| G6 Switch images (Clip 4) CF 03 | |
| G#6 Control the image bank (Bank Select) BF 00 03 | |
| A6 Switch images (Clip 5) CF 04 | |
| A#6 Control the image bank (Bank Select) BF 00 04 | |
| B6 Switch images (Clip 6) CF 05 | |
| C7 Switch images (Clip 7) CF 06 |
Using the black keys (Bank Select) and white keys (PC), 5 x 7 = 35 clips can be selected.
NOTE
While the Visual Control function is active, the C#6\~C7 keys are temporarily unavailable for playing notes.
What is Wireless LAN Function?
By inserting the wireless USB Adapter (WNA1100-RL; sold separately) into the BK-3's USB MEMORY port, you'll be able to use wireless compatible applications (such as the "Air Recorder" iPhone app).
iPhone etc. Wireless LAN access point
(e.g., wireless LAN router)
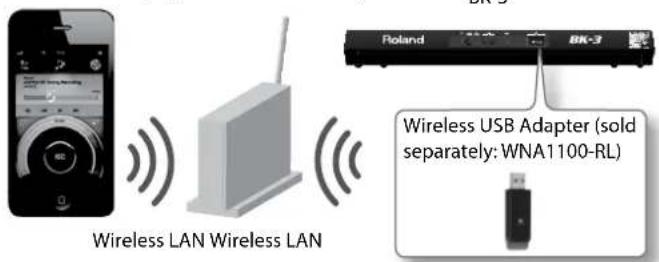
Items required to use the wireless LAN function
☐ Wireless USB Adapter (sold separately: WNA1100-RL)
☐ Wireless LAN access point (e.g., wireless LAN router) *1*2*3
☐ Phone or iPod touch etc.
*1 The wireless LAN access point you use must support WPS. If your wireless LAN access point does not support WPS, you can connect using the procedure described in "Connecting to a Wireless LAN Access Point That You Select" (p. 63).
*2 The ability to connect with all kinds of wireless LAN access points is not guaranteed.
*3 If you're unable to connect to the wireless LAN access point, try connecting using Ad-Hoc mode (p. 64).
Basic Connection Method (Connect by WPS)
The first time you connect the BK-3 to a wireless network, you'll need to perform the following procedure (WPS) to join the wireless network. This procedure is required only the first time. (Once you've joined the network, this procedure will no longer be necessary.)
What is WPS?
This is a standard that makes it easy to make security settings when connecting to a wireless LAN access point. We recommend that you use WPS when connecting to a wireless LAN access point.
- Turn on the power of the BK-3.
- Insert the wireless USB Adapter (WNA1100-RL; sold separately) into the BK-3's USB MEMORY port.
- Press and hold the WPS button for three seconds while taking care to hold it firmly with two fingers at least, to prevent it from bending.
The indicator of the wireless USB Adapter flashes.
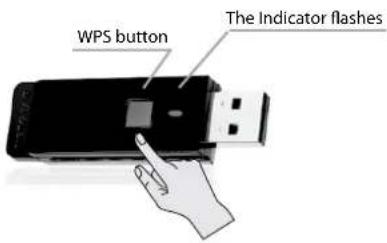
NOTE
If you apply excessive force to the USB adapter when pressing the button, you may damage it.
4. Perform the WPS operation on your wireless LAN access point (e.g., press and hold the WPS button on your wireless LAN access point).
For details on WPS operation of your wireless LAN access point, refer to the documentation for your wireless LAN access point. Once successfully connected the indicator of the wireless USB adapter lights steadily.
NOTE
The device (e.g., iPhone) running the application must be connected to the same network.
MEMO
- The connection data is stored in memory when you perform the WPS procedure; the device will automatically connect to the wireless network next time.
- All connection data will be erased if you perform a factory reset.
- Connection data is not included in a backup.
Icons in the display
The wireless LAN status is shown in the main page and in the wireless menu when the wireless USB adapter is inserted.
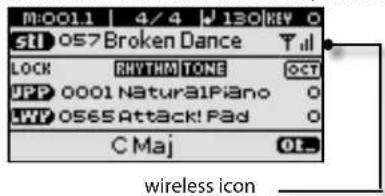
| Icon Explanation | |
| Currently connected to the wireless LAN access point. Three bars are used to indicate the signal level (the strength of the connected wireless LAN access point's radio signal). | |
| The wireless USB adapter is inserted, but not connected with a wireless LAN access point. | |
| Ad-Hoc mode (p. 64). | |
Wireless LAN Function Settings
You can view or edit the wireless settings.
- Select the MENU] button → "Wireless".
The Wireless page will appear.
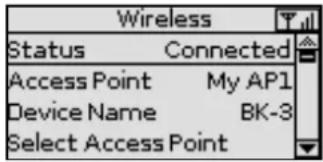
- Use the [UP] or [Down] to move the cursor to select the desired parameter.
- Press the [ENTER] button to enter to move in the new page.
"Status" Indication
The first row of the Wireless page shows the wireless LAN status.
| Status Indication Explanation | |
| Connected | Currently connected to the wireless LAN access point. The identifier (name) of the connected wireless LAN access point is shown |
| Now Connecting | A connection with the wireless LAN access point is being established. |
| Not Connected | The wireless USB adapter is inserted, but not connected to a wireless LAN access point. |
| Not Available The wireless USB adapter is not inserted. | |
| Ad-Hoc | Ad-Hoc mode (p. 64). The Ad-Hoc SSID and Ad-Hoc Key are shown. For details, refer to "Connecting in Ad-Hoc mode" (p. 64). |
"Access Point" Indication
The second row of the Wireless page shows the Access Point connected. To select an Access Point see "Connecting to a Wireless LAN Access Point That You Select" (p. 63).
"Device Name" Indication
The third row of the Wireless page shows the Device Name.
The Device Name is BK-3 (Default). See "Wireless ID" (p. 64).
"Select Access Point" Page
Move to a screen where you can choose a wireless LAN access point and connect to it.
"Wireless Info" Page
Move to the screen to view the IP address and MAC address.
"Wireless Option" Page
Make settings for Wireless ID or Ad-Hoc mode (Ad-Hoc Mode).
See "Other Settings (Wireless Option)" (p. 63).
Connecting to a Wireless LAN Access Point That You Select
This method lets you connect by choosing a wireless LAN access point from the list that is displayed.
* Wireless standards 802.11g/n (2.4 GHz) and authentication
methods WPA/WPA2 are supported.
- Select the [MENU] button → "Wireless" → "Select Access Point"
After a short scan the Select Access Point list will appear.
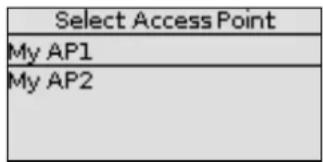
MEMO
* The currently-connected wireless LAN access point is shown in reverse.
* To refresh the list, exit and then reenter this screen.
-
Choose the wireless LAN access point to which you want to connect, and press the [ENTER] button.
-
You will be connected to the selected wireless LAN access point.
- If you're using this wireless LAN access point for the first time, you'll proceed to the authorization (AUTHORIZATION) screen.
- If this is a wireless LAN access point to which you have connected in the past, just press the [ENTER] button and you'll be connected. Once successfully connected, you'll be returned to the status (WIRELESS) screen.
Authorization screen (Enter Passphrase)
- Use the [UP] or [DOWN] button to select the desired character, then use the [INC] or [DEC] button to change the character.
The buttons below allow you the following operations:
| Button Explanation | |
| Press this button to switch between upper- and lower-case characters. | |
 | Press this button to delete the selected character. |
 | Press this button to insert a character. |
- Repeat steps (3) above to enter the security code (passphrase) of your wireless LAN access point.
- Press the [WRITE] button.
* You cannot enter a space at the end of the passphrase.
Once successfully connected, you'll be returned to the status "Wireless" screen.
Other Settings (Wireless Option)
- Select the MENU] button → "Wireless" → "Wireless Option".
The Wireless Option screen will appear.
| Wireless Options | |
| Wireless ID | 0 |
| Ad-Hoc Mode | Off |
| Ad-Hoc Channel | 1 |
| Parameter | Explanation |
| Wireless ID | Specifies the final digits of the BK-3's device name and Ad-Hoc SSID (BK-3) that will be shown as the instrument in the wirelessly connected app.Normally, you should specify "0," but if you have more than one of the same instrument, you can set the Wireless ID in the range of 1–99 to change the device name and Ad-Hoc SSID for each instrument, as follows.If Wireless ID=0 "BK-3" (default value)If Wireless ID=1, "BK-3_1":If Wireless ID=99, "BK-3_99" |
| Ad-Hoc Mode | Turns Ad-Hoc mode on/off (default = "Off").The Ad-Hoc Mode ON → OFF setting will take effect after you've turned the unit off, then back on again. |
| Ad-Hoc Channel | Specifies the channel (1–11) for Ad-Hoc mode (default = 1). |
NOTE
* The Wireless Options settings are confirmed and saved when exiting from the Wireless Options screen.
* The Ad-Hoc Mode ON → OFF setting will take effect after you've turned the unit off, then back on again.
Connecting in Ad-Hoc mode
Here's how to connect in Ad-Hoc mode.
What is Ad-Hoc mode?
Ad-Hoc mode lets you connect the BK-3 directly to an iPhone or other wireless device without using a wireless LAN access point. This is a convenient way to use the BK-3 with an iPhone or other wireless device if you're in a location where the wireless LAN access point you normally use is unavailable, such as when you're away from home.
iPhone etc.

BK-3
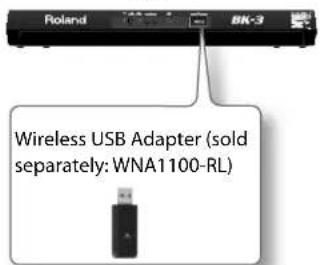
Limitations
The iPod touch or other wireless device connected in Ad-Hoc mode will be unable to communicate with the Internet or with another wireless device. However, an iPhone or other wireless device that has cellular capability will be able to connect to the Internet via the cellular connection.
Please be aware that if you use a cellular connection for Internet connectivity, you may incur costs depending on your rate plan.
1. Select the [MENU] button → "Wireless" → "Wireless Options"
The Wireless Options screen will appear.
2. Turn the Ad-Hoc Mode "On".
You can use Channel to specify a channel (1–11) for Ad-Hoc mode. Normally, you won't need to change the channel. Try changing the channel only if you have problems connecting.
3. Press the [EXIT] button to return to the Wireless screen.
The Ad-Hoc SSID (BK-3) and the Ad-Hoc Key (a five-character text string) will be displayed in the Wireless screen.
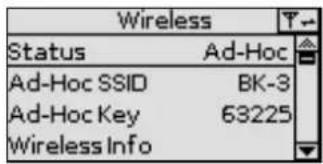
4. On the iPhone or other wireless device that you want to connect, select the Ad-Hoc SSID to make the connection. (For example, on an iPhone, choose [Settings] → [Wi-Fi] → [Choose a Network] to select the above Ad-Hoc SSID. A password entry screen will appear; enter the above Ad-Hoc key.)
For details on how to connect to a wireless LAN from an iPhone or other device, refer to the owner's manual of that device.
5. When you want to end the Ad-Hoc mode connection, restore the iPhone settings in [Settings] → [Wi-Fi] → [Choose a Network] to their previous state.
NOTE
The Ad-Hoc Mode ON → OFF setting will take effect after you've turned the unit off, then back on again.
Checking the IP Address and MAC Address (WIRELESS INFO)
Here's how to check the IP address and MAC address.
1. Select the [MENU] button → "Wireless" → "Wireless Info".
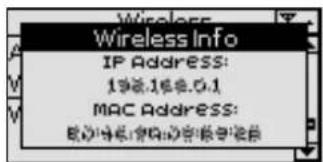
MEMO
The MAC address shows the value indicated on the bottom of the wireless USB adapter (WNA1100-RL; sold separately).
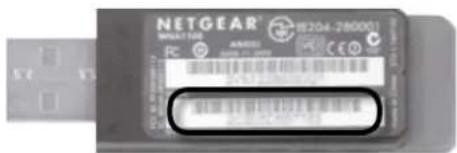
20. Troubleshooting
| Symptom Action Page | ||
| Power does not turn on. | Is the included AC adaptor/power cord correctly connected to an AC outlet and to the BK-3?Do not use any AC adaptor or power cord other than the ones included. Doing so will cause malfunctions. | 14 |
| No sound from the BK-3 | Did you switch the BK-3 on? 16 | |
| Could the [VOLUME] knob be turned down? Select a higher setting.- | ||
| Can you hear sound through headphones?If you can hear sound through headphones, it may be that the connection cables are broken, or that your amp or speaker has malfunctioned. Check the cables and your equipment once again. | - | |
| Could the part volume settings have been minimized?Check the "Volume" setting of each part. | 44, 47 | |
| Could a MIDI message received from an external MIDI device (volume message or exclusive message) have lowered the volume? | - | |
| The volume level of the instrument is too low when it is connected to an amplifier | Could you be using a connection cable that contains a resistor?Use a connection cable that doesn't contain a resistor | - |
| The pitch of the selected rhythm/song is incorrect | Is the "Tuning" setting appropriate?Did you transpose the rhythm/song? Also check the "Rhythm Scale Tune" parameter. | 51 |
| Can't hear the vocal of an audio file (mp3 or WAV). Can't hear the melody of SMF files. | If the [TRACK MUTE] (CENTER CANCEL) button is lit, the vocal sound will be attenuated.If the [TRACK MUTE] button is lit, the melody of the MIDI files will be muted. Switch it off. | 51 |
| A "buzz" is heard from the external amplifier | Is the external amplifier or other device used with the BK-3 connected to a different AC power outlet?Connect the amplifier or other device to the same AC outlet as the BK-3. | - |
| Can't play an audio/mp3-format song Is the song in a format that the BK-3 is able to read? 28 | ||
| After connecting theBK-3's USB COMPUTER port to your computer, the BK-3 doesn't receive MIDI messages. | The BK-3 may be receiving on a MIDI channel on which the MIDI controller doesn't transmit. Correct the MIDI controller's transmit channel. | 58 |
| Unable to read from/write to USB memory. | Are you using an (optional) Roland USB memory (M-UF series)?Reliable performance cannot be guaranteed if you use non Roland USB memory products. | - |
| Check the format of your USB memory. The BK-3 can use USB memory that has been formatted as FAT. If your USB memory was formatted using any other method, please re-format it using the BK-3. | 60 | |
| Can't save to USB memory. | Could the USB memory be write protected?- | |
| Is there sufficient free space on the USB memory?- | ||
| Audio recording won't start or stops unexpectedly. | Are you using an (optional) Roland USB memory (M-UF-series)?Reliable performance cannot be guaranteed if you use non Roland USB memory products. | - |
| Is there sufficient free space on the USB memory?- | ||
| The songs won't play. | The file type of the song is not one of the file types that the BK-3 can play. 28 | |
| It may be that the song data is damaged.- | ||
| No Performance Lists are displayed. | The USB memory doesn't contain any Performance List files.- | |
| For some reason the USB memory is not recognized.- | ||
| Can't connect to a wireless LAN access point | Make sure that your wireless LAN access point supports WPS.If your wireless LAN access point does not support WPS, you can connect using the procedure described in "Connecting to a Wireless LAN Access Point That You Select" (p. 63).Have you entered the correct password in the iPhone or other wireless device?Disconnect and reconnect the wireless device and then enter the right BK-3 Ad-Hoc Key. (For example, on an iPhone, to disconnect, choose [Settings] → [Wi-Fi], press the arrow icon on the right of the network name and then press "Forget this Network".The 802.11a/b wireless standard is not supported. Please use the 802.11g/n (2.4 GHz) wireless standard.The WEP authentication method is not supported. Please use the WPA or WPA2 authentication method.Make sure that DHCP is enabled for your wireless LAN access point.If you don't get connected to the previously-connected wireless LAN access point when you turn on the power, check and make sure the setting described in "Connecting in Ad-Hoc mode" (p. 64) is OFF.There is a limit to the connection data that can be remembered. Making a new connection may cause older connection data to be deleted.All connection data will be deleted if you execute a factory reset.If the connection data has been deleted, please re-connect to the wireless LAN access point. | |
| The display indicates "Access Point Not Supported," and can't connect to the wireless LAN access point | This Access Point is not supported. Please use the WPA or WPA2 authentication method. | |
| Communication is unstable | Communication may be unstable depending on the usage of the radio frequency spectrum.If communication is unstable, the response may be sluggish, or if using audio communication, there may be dropouts in the audio.The following actions may improve the situation.Move the wireless LAN access point and the BK-3 closer to each other.Change the channel setting of the wireless LAN access point. | |
| The BK-3 is not found in the instrument connections of the app (such as the iPhone app Air Recorder) | Is the BK-3 powered up?Is the wireless USB adapter (WNA1100-RL) inserted to the BK-3?Is the BK-3 connected to the wireless LAN?Are the BK-3 and the iPhone connected to the same network (the same wireless LAN access point)?Is the wireless LAN access point set to allow communication between wireless LAN devices?For details on settings, refer to the owner's manual of your wireless LAN access point. | |
| Your iPhone or iPod touch won't connect to the Internet | Is the wireless LAN access point connected to the Internet?Could you be connected in Ad-Hoc mode?The iPod touch or other wireless device connected in Ad-Hoc mode will be unable to communicate with the Internet or with another wireless device. However, an iPhone or other wireless device that has cellular capability will be able to connect to the Internet via the cellular connection. Please be aware that if you use a cellular connection for Internet connectivity, you may incur costs depending on your rate plan.A wireless device such as an iPod touch that does not have cellular capability will become unable to connect to the Internet in this case. | |
21. Specifications
| DISPLAY TYPE | |
| Display | 132 x 64 pixels, graphic monochrome LCD (backlit) |
| KEYBOARD | |
| Keyboard type | 61 velocity sensitive keys Key Touch: High, Medium, Low, Fixed |
| Keyboard Modes | Whole, Split, Dual |
| SOUND GENERATOR | |
| Max. Polyphony | 128 voices (GM2/G5/XG Lite compatible) |
| Tones | 851 (Possibility to create a list of 10 frequently used sounds and recall them instantly) |
| Drum Sets 53 | |
| Multitimbral parts | 2 keyboard parts (UPP, LWR) + 16 song parts |
| Master Tuning | 415.3~466.2 Hz |
| Key Control (Transpose) | -6~+5 in semitones (for rhythm, smf, mp3/wav) |
| EFFECTS | |
| Real Time Parts (UPP, LWR) | Reverb and Chorus: depending on Rhythm/SMF Reverb Chorus Macro1 Mfx (84 Mfx Editable Macro) (selectable via Tone Part Mfx)EQ |
| Rhythms/SMF section | Reverb: 8 types (selectable via Makeup Tools)Chorus: 8 types (selectable via Makeup Tools)2 Mfx (84 Mfx Editable Macro) (selectable via Makeup Tools)EQ |
| BACKING SECTION | |
| Rhythms | 250 in 5 "Rhythm" families (localized rhythms for specific areas are included in the WORLD 1 and WORLD 2 families) |
| Real-time player | Rhythms (STL), SMF (Format 0/1), KAR, mp3, WAV |
| Tempo Change | 20~250 BPM for SMF and rhythms |
| Time Stretch | 75~125% for mp3 and WAV |
| One Touch memories | 4 suitable tones for each rhythm (Programmable). |
| Rhythm and SMF Makeup Tools | Instrument-oriented editing |
| Track Mute | For Rhythms/SMF |
| Center Cancel | For mp3/WAV |
| AUDIO RECORDING | |
| Media | USB Flash memory |
| Save format | Audio files: WAV (44.1 kHz, 16-bit linear) |
| METRONOME | |
| Time Signature | 1~32/16, 1~32/8, 1~32/4, 1~32/2 |
| Mode | Always, Play |
| Count In | Off, 1 bar, 2 bars |
| PERFORMANCE MEMORIES | |
| Performance Lists | Unlimited number (storage on USB memory)Over 500 "Music Assistant" memories (internal memory)5 "Factory Song" memories (internal memory) |
| Performance memories per List | Max. 999 |
| SEARCH FUNCTION | |
| Quick location of Rhythms, and Songs on the connected USB memory | |
| DEMO | |
| Demo | Yes |
| LYRICS ON INTERNAL DISPLAY | |
| Lyrics | SMF, mp3/WAV |
| PANEL CONTROLS | |
| Volume | 1 Knob |
| Balance (Backing/Keyboard) | 2 Buttons |
| Pitch Bend/Modulation Lever | 1 |
| CONNECTORS | |
| PHONE/OUTPUT jack | 1/4" phone type (TRS connector) |
| Foot pedal jack | PEDAL HOLD/SWITCH (assignable) |
| MIDI connectors MIDI IN, MIDI OUT (Visual Control function) | |
| USB ports | USB COMPUTER connector (Type B, reception and transmission of MIDI data)USB MEMORY (Type A, data storage devices) |
| GENERAL SPECIFICATION | |
| Speakers | 2 x 10 cm |
| Rated power output | 2 x 7.5 W |
| Power supply | AC adaptor (PSB-1U adaptor) |
| Current Draw | 1200 mA |
| Auto Off function | Off, 10min, 30min, 240min |
| Dimensions | Without music rest:1044 (W) x 317 (D) x 129 (H) mm41-1/8 (W) x 12-1/2 (D) x 5-1/8 (H) inchesIncluding music rest:1044 (W) x 408 (D) x 318 (H) mm41-1/8 (W) x 16-1/16 (D) x 12-9/16 (H) inches |
| Weight | 7.5 kg (excluding AC adaptor and music rest)16 lbs 9 oz (excluding AC adaptor and music rest) |
| SUPPLIED ACCESSORIES | |
| Owner's ManualPSB-1U AC adaptor,Power cord (for connecting the AC adaptor)Music rest | |
| OPTIONS | |
| USB | USB flash memory (M-UF-series)Wireless USB Adaptor (WNA1100-RL) |
| Pedals | DP-series/BOSS FS-5U foot switch |
NOTE
In the interest of product improvement, the specifications and/or appearance of this unit are subject to change without prior notice.
22. MIDI Implementation Chart
Backing Keyboard
Model: BK-3
| Function... Transmitted Recognized Remarks | ||||
| Basic Channel | DefaultChanged | 1-161-16, Off | 1-161-16, Off | |
| Mode | DefaultMessagesAltered | Mode 3Mode 3, 4 (M=1)********** | Mode 3Mode 3, 4 (M = 1) | *2 |
| NoteNumber : | True Voice | 0~127********** | 0-1270-127 | |
| Velocity | Note OnNote Off | O X | O *1O *1 | |
| AfterTouch | Key'sChannel's | O O | O | |
| Pitch Bend O O | *1 | |||
| ControlChange | 0, 32156, 3871011166465666769717273747576777884919398, 99100, 101 | OOOOOOOOOOOOOOOOOOOOOOOOOOOOOOOOOOOOOOOOOOOOOOOOOOOOOOOOOOOOOOOOOOOOOOOOOOOOOOOOOOOOOOOOOOOOOOOOOOOOOOOOOOOOOOOOOOOOOOOOOOOOOOOOOOOOOOOOOOOOOOOOOOOOOOOOOOOOOOOOOOOOOOOOOOOOOOOOOOOOOOOOOOOOOOOOOOOOOOOOOOOO | OOO *1OOOOOOOOOOOOOOOOOOOOOOOOOOOOOOOOOOOOOOOOOOOOOOOOOOOOOOOOOOOOOOOOOOOOOOOOOOOOOOOOOOOOOOOOOOOOOOOOOOOOOOOOOOOOOOOOOOOOOOOOOOOOOOOOOOOOOOOOOOOOOOOOOOOOOOOOOOOOOOOOOOOOOOOOOOOOOOOOOOOOOOOOOOOOOOOOOOOOOOoo | Bank SelectModulationPortamento TimeData EntryVolumePanpotExpressionC1Hold 1PortamentoSostenutoSoftHold 2ResonanceRealease TimeAttack TimeCutoffDecay TimeVibrato RateVibrato DepthVibrato DelayPortamento ControlEffect 1 DepthEffect 3 DepthNRPN LSB, MSBRPN LSB, MSB |
| ProgramChange : True Number | 0-127********** *1 *1 | O0-127 Program No. 1-128 | ||
| System Exclusive O O | ||||
| SystemCommon | : Song Position: Song Select:Tune Request | O XX | OXX | |
| SystemReal Time | : Clock: Commands | O O | O | |
| AuxMessages | : All Sound Off: Reset All Controllers: Local On/Off: All Notes Off: Active Sensing: System Reset | XXO XOX | O (120, 126, 127)O (121)O (Song parts)O (123-125)O | |
| Notes | *1 O X is selectable*2 Recognized as M = 1 even if M ≠ 1. | |||
Mode 1: OMNI ON, POLY Mode 2: OMNI ON, MONO
Mode 3: OMNI OFF, POLY Mode 4: OMNI OFF, MONO
O: Yes
X: No
23. Chord Intelligence Table
C C# D E EF

CM7 C#M7 DM7 E M7 EM7 FM7

C7 C#7 D7 E 7 E7 F7

Cm C#m Dm E m Em Fm

Cm7 C#m7 Dm7 E m7 Em7 Fm7

CmM7

Cdim C#dim Ddim E dim Edim Fdim

Cm7 (b5)

Caug

Csus4

C7sus4

C7/13 C#7/13

F# GA AB B
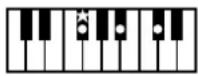
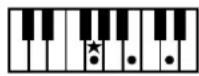
b
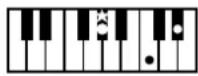
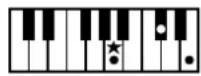
b
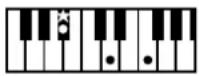
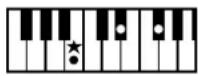
F#M7 GM7 A M7 AM7 B M7 BM7
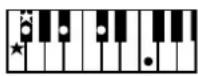
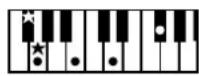
b
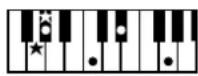
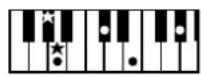
b
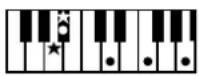
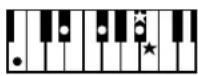
F#7 G7 A 7 A7 B 7 B7
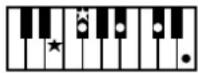
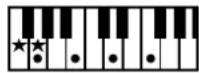
b
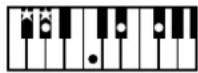
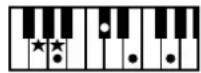
b
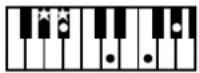
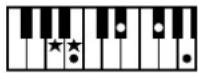
F#m Gm A m Am B m Bm
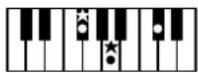
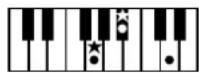
b
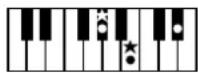
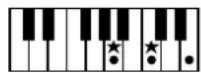
b
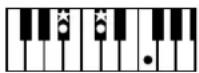
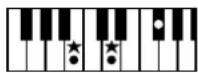
F#m7 Gm7 A m7 Am7 B m7 Bm7
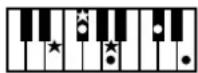
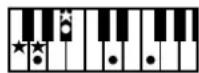
b
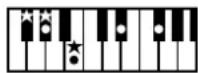
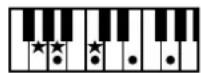
b
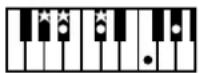
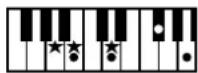
F#mM7
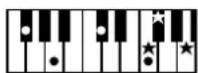
GmM7
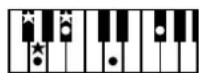
AbmM7
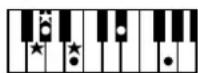
AmM7
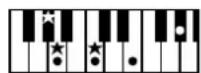
Bb mM7
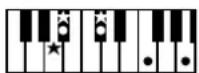
BmM7
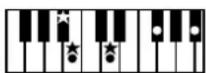
F#dim
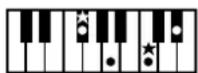
Gdim
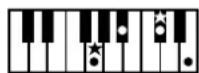
Abdim
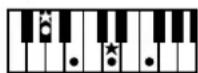
Adim
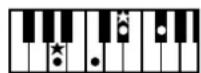
Bb dim
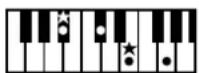
Bdim
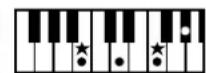
F#m7 (b5)
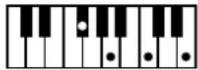
Gm7 (b5)
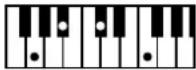
Abm7 (b5)
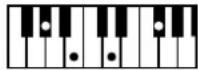
Am7 (b5)
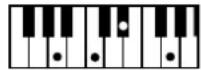
Bb m7 (b5)
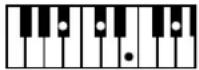
Bm7 (b5)
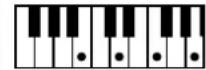
F#aug
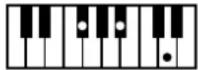
Gaug
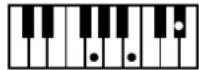
Abaug
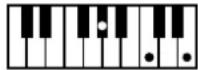
Aaug
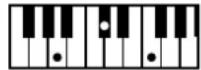
Bb aug
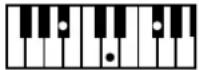
Baug
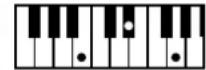
F#sus4
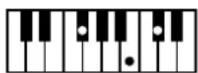
Gsus4
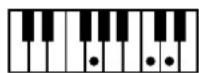
Absus4
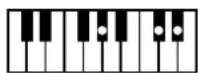
Asus4
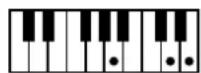
Bb sus4
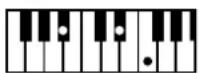
Bsus4
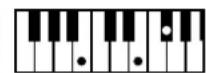
F#7sus4
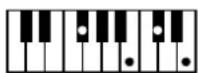
G7sus4
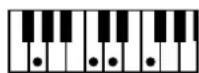
Ab7sus4
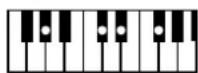
A7sus4
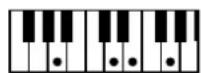
Bb 7sus4
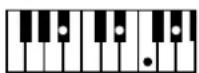
B7sus4
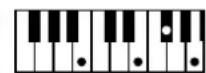
F#7/13
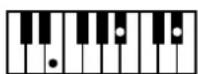
G7/13
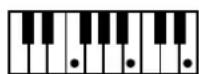
Ab7/13
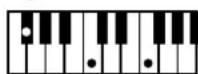
A7/13
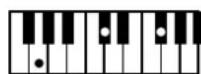
Bb 7/13
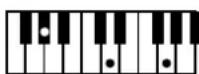
B7/13
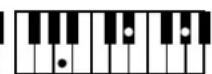
Symbols
1st Note 51
2nd Bar 51
2nd Tone 50
A
AC Adaptor 14
Access Point 63
Acc/Rit 49
Ad-Hoc 64
Arranger Hold 49
Arranger Setting 48
Attack 46,56
AUDIO REC button ..... 11
[AUTO FILL IN] 24
AUTO FILL IN button ..... 10
Automatic Accompaniments 22
Auto Off 12,16,52
B
backing 17
BACKING 67
balance 17
BALANCE buttons .... 10
[BASS INV] 23
BASS INV button 10
beat 22,23,25
Bender Assign 45
Bender Range 45
C
C1 46
Center Cancel 30
Chord Intelligence ..... 70
Chorus 55
Chorus Send 44
Chorus Type 54
Clock Tx 59
Coarse Tune 45
Common 53
Create 38
Cursor 18
Cursor and value buttons .... 11
Cut Off 45,55
D
DC IN jack 14
DC IN socket 12
Decay 46,56
Delete 38
Deleting 32
Demo 17
Device Name 63
Display 11,18
Display Contrast .... 50
Drum Instrument 57
Dual 19
E
Edit EQ 56
[ENDING] 23
ENDING button 10
ENTER/SELECT/DESELECT button 11
Eq Part Edit 44
Equalizer 56
EXIT button 11
F
Factory Reset 60
Favorite 51
FAVORITE button 12
Favorite Tones 21
Fill Ritardando 49
Filter 39
Filtering Performance ..... 39
Filters On/Off 39
Fine Tune 45
Folder 32
Formatting a USB memory .. 60
Freeze Data 57
G
Global 50
H
Headphones 14
Hold Pedal 45,50
|
Instrument 54
Intell Threshold 50
[INTRO] 23
INTRO button 10
IP Address 64
J
K
Key 34,48,54
KEYBOARD DUAL button .... 12
KEYBOARD SPLIT button .... 12
KEY button 11
Key Touch 44
L
LAN 62
Language 53
Level 50
Listening 42
Local 58
Lower Hold 47
Lyrics 43
M
MAC Address 64
Main page 18
Makeup Tools 53
MARK A/B 30
Master Tuning 67
Tuning 51
Melody Intell 34
Melody Intelligent 50
Menu 43
MENU button 11
Metronome 35,51
METRONOME button ..... 11
Metronome Settings ..... 35
Mfx 45,56
Mfx Edit 47,56
Mfx Switch 46
Mfx Type 46,56
MIDI 58
MIDI Channels 58
MIDI Implementation Chart . 69
MIDI IN & OUT sockets ..... 12
MIDI Parameters 58
MIDI Tx/Rx 58
MIDI Visual Control .... 61
Mode 48
Modulation 59
Modulation Assign 45
Move 39
Music Assistant 36
Music Rest 16
Mute 47
N
Name of a File 32
Note-to-Arranger channel Rx 59
NTA 59
Numeric 20
NUMERIC button 12
O
Octave 55
OCTAVE buttons 12
Octave Shift 45
One Touch 26
ONE TOUCH button ..... 11
One Touch Edit 27,53
One Touch Hold 51
One Touch memory ..... 27
P
Panpot 44,55
PEDAL HOLD/SWITCH ..... 12
Pedal Switch 52
Perc Mute 55
Performance 36
Performance Edit 43
Performance Hold ....51
PERFORMANCE LIST button . 11
Performance Lists 36
PERFORMANCE WRITE button 11
PHONE/OUTPUT 12
Pitch Bender 59
Pitch Bend/Modulation lever 10
Play All Songs 29
Playing Back Rhythms ..... 24
Portamento Mode 45
Portamento Time 45
Power On/Off 16
POWER switch 12
Program Change 59
Q
R
Recording 41
Release 46,56
Rename 38
Resonance 46,55
Reverb 55
Reverb Level & Chorus Level . 54
Reverb Send 44
Reverb Type 54
RHYTHM FAMILY buttons .... 10
Rhythm Parts 47
Rhythm Pc 59
Rhythms 22,24
Rhythm/SMF Track Mute .... 51
Rhythm's MIDI Address ..... 60
Rhythm Tempo/Song Tempo 54
Rhythm Volume/Song Volume 54
Select Access Point 63
SMF Position Tx 59
Solo 47,55
Specifications 67
Split 19,47
Split Point 47
START/STOP] 22
START/STOP button 10
Start Stop Tx 59
Switch 50
Sync Rx 59
SYNC START] 22
SYNC START button ..... 10
T
TAP TEMPO button 10
Tempo 49
TEMPO buttons 10
TempoCh 49
TempoCh Acc/Rit 49
TempoCh CPT 49
TempoCh Fill Rit 49
TONE buttons 12
Tone Part MFX 46
Tone Part View 43
Tones 19
Track Mute 30
TRACK MUTE/CENTER CANCEL butto 11
Troubleshooting 65
Tuning 51
Type 48
U
Undo Changes 54
USB COMPUTER port ..... 12
USB Memory 28
USB MEMORY button ..... 11
USB MEMORY port 12
USB Player 28
Utility 51
V
VARIATION [1], [2], [3], [4] .... 23
VARIATION 1/2/3/4 buttons .. 10
Velocity 55
Vibrato Delay 46,56
Vibrato Depth 46,56
Vibrato Rate 46,56
Video Equipment 61
Visual Control 61
Visual Control Tx 60
V-LINK 61
Volume 44,47,55
VOLUME knob 10
volume of the real-time parts 20
W
Wireless 62
Wireless Info 63
Wireless Option 63
WPS 62
X
Y
Z
Zone 48
Information
When you need repair service, call your nearest Roland Service Center or authorized Roland distributor in your country as shown below.
AFRICA
EGYPT
Al Fanny Trading Office
9, EBN Hagar Al Askalany Street,
ARD E1 Golf, Heliopolis,
Cairo 11341, EGYPT
TEL: (022)-417-1828
REUNION
MARCEL FO-YAM Sarl
Royal Cape Park, Unit 24
Londonderry Road, Ottery 7800
Cape Town, SOUTH AFRICA
TEL: (021) 799 4900
ASIA
CHINA
Roland Shanghai Electronics
Co.,Ltd.
5F. No.1500 Pingliang Road
Shanghai 200090, CHINA
TEL: (021) 5580-0800
Roland Shanghai Electronics
Co., Ltd. (BEIJING OFFICE)
3F, Soluxe Fortune Building
63 West Dawang Road, Chaoyang
District, Beijing, CHINA
TEL: (010) 5960-2565
HONG KONG
Tom Lee Music
11/F Silvercord Tower 1
30 Canton Rd
Tsimshatsui, K
HONG KONG
TEL: 852-2737-7688
Parsons Music Ltd.
8th Floor, Railway Plaza, 39
Chatham Road South, T.S.T,
Kowloon, HONG KONG
TEL: 852-2333-1863
INDIA
Rivera Digitec (India) Pvt. Ltd.
- Nirman Kendra Mahalaxmi
Flats Compound Off. Dr. Edwin
Moses Road, Mumbai-400011.
INDIA
TEL: (022) 2493 9051
INDONESIA
PT. Citra Intirama
Ruko Garden Shopping Arcade
Unit B CR, Podomoro City
JI.Letjend. S.Parman Kav.28
Jakarta Barat 11470, INDONESIA
TEL: (021) 5698-5519/5520
KOREA
Cosmos Corporation
1461-9, Seocho-Dong,
Seocho Ku, Seoul, KOREA
TEL: (02) 3486-8855
MALAYSIA/
SINGAPORE
Roland Asia Pacific Sdn. Bhd.
45-1, Block C2, Jalan PJU 1/39,
Dataran Prima, 47301 Petaling
Jaya, Selangor, MALAYSIA
TEL: (03) 7805-3263
PHILIPPINES
G.A. Yupangco & Co. Inc.
339 Gil J. Puyat Avenue
Makati, Metro Manila 1200,
PHILIPPINES
TEL: (02) 899 9801
TAIWAN
ROLAND TAIWAN ENTERPRISE
CO., LTD.
9F-5, No. 112 Chung Shan
North Road Sec. 2 Taipei 104,
TAIWAN R.O.C.
TEL:(02) 2561 3339
THAILAND
Theera Music Co., Ltd.
100-108 Soi Verng Nakornkasem,
New Road, Sumpantawong,
Bangkok 10100, THAILAND
TEL:(02) 224-8821
VIET NAM
VIET THUONG CORPORATION
386 CACH MANG THANG TAM ST.
DIST.3, HO CHI MINH CITY,
VIET NAM
TEL:(08)9316540
OCEANIA
AUSTRALIA/
NEW ZEALAND
Roland Corporation
Australia Pty., Ltd.
38 Campbell Avenue
Dee Why West. NSW 2099,
AUSTRALIA
For Australia
TEL: (02) 9982 8266
For New Zealand
TEL: (09) 3098 715
CENTRAL/LATIN AMERICA
ARGENTINA
Instrumentos Musicales S.A.
Av.Santa Fe 2055
(1123) Buenos Aires, ARGENTINA
TEL:(011)4508-2700
BARBADOS
A&B Music Supplies LTD
12 Webster Industrial Park
Wildey, St. Michael, BARBADOS
TEL: (246) 430-1100
BRAZIL
Roland Brasil Ltda.
Rua San Jose,
Parque Industrial San Jose
Cotia - Sao Paulo - SP, BRAZIL
TEL:(011)4615 5666
CHILE
Comercial Fancy II S.A.
Rut.: 96.919.420-1
Nataniel Cox #739, 4th Floor
Santiago - Centro, CHILE
TEL: (02) 688-9540
COLOMBIA
Centro Musical Ltda.
Cra 43 B No 25 A 41 Bododega 9
Medellin, COLOMBIA
TEL:(574)3812529
COSTA RICA
JUAN Bansbach Instrumentos
Musicales
Ave.1. Calle 11, Apartado 10237,
San Jose, COSTA RICA
TEL: 258-0211
CURACAO
Zeelandia Music Center Inc.
Orionweg 30
Curacao, Netherland Antilles
TEL: (305) 5926866
DOMINICAN REPUBLIC
Instrumentos Fernando Giraldez
Panama City, REP. DE PANAMA
TEL: 315-0101
PARAGUAY
155, New National Road
Patras 26442, GREECE
TEL: 2610 435400
HUNGARY
Roland East Europe Ltd.
E2 Calmount Park, Calmount
Avenue, Dublin 12,
Republic of IRELAND
TEL: (01) 4294444
ITALY
Roland Italy S. p. A.
| Press an hold Function | |||
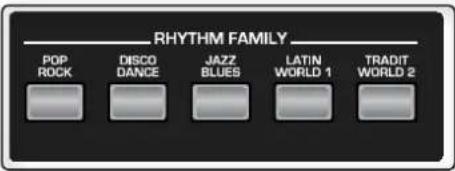 | Pressing and holding one of the RHYTHM FAMILY buttons locks the rhythm so as to keep it from changing when you select another Performance memory or Music Assistant. | ||
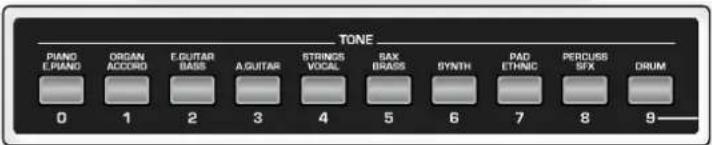 | Pressing and holding one of the TONE buttons locks the Tone so as to keep it from changing when you select another Performance memory or Music Assistant. | ||
  | Locks the tempo or Key setting to keep it from changing when you select another Performance memory or Music Assistant. | ||
 | Open the "Metronome" page allowing you to specify when and how the metronome should sound. | ||
 | Opens the "Rhythm Track Mute" or "Song Track Mute" page. | ||
 | After activating record standby mode (the indicator flashes), pressing and holding this button will cancel that mode (use it if you don't want to record after all). | ||
 | Takes you back to the main page, no matter where you currently are. | ||
 | Opens the "One Touch Edit" page. | ||
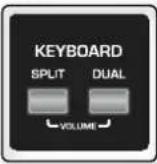 | • [SPLIT] button opens the "Split page.• [DUAL] button opens the display page that shows which the current Tone for the lower part is.• [SPLIT] + [DUAL] buttons: simultaneously pressing them (without holding them) opens the display page where you can set the volume of the Upper and Lower parts. | ||
 | Opens the "Melody Intelligence" page. | ||
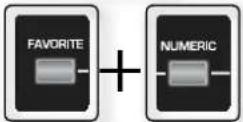 | Open the list of Favorite Tones.NOTEPress these buttons simultaneously, without holding them. | ||
 | To memorize the sound selected to the associated favorite memory number [0]~[9], press and hold the [Favorite] button and one of the TONE buttons [0]~[9]. | ||

- NOTICE
- AVIS
- DECLARATION OF CONFORMITY Compliance Information Statement
- Roland
- BK-3
- BACKING KEYBOARD
- About This Manual
- Conventions Used in This Manual
- INSTRUCTIONS FOR THE PREVENTION OF FIRE, ELECTRIC SHOCK, OR INJURY TO PERSONS
- ALWAYS OBSERVE THE FOLLOWING
- WARNING
- CAUTION
- Place in a well ventilated location
- Grasp the plug when connecting or disconnecting the AC adaptor
- Periodically clean the AC adaptor's plug
- Manage cables for safety
- Avoid climbing on top of the unit, or placing heavy objects on it
- Do not connect or disconnect the AC adaptor with wet hands
- Disconnect everything before moving the unit
- Unplug the AC adaptor from the outlet before cleaning
- If there is a possibility of lightning strike, disconnect the AC adaptor from the outlet
- Important Notes
- Power Supply
- NOTE
- Placement
- Maintenance
- Additional Precautions
- Storage devices that can be connected to the BK-3's USB MEMORY port
- Before using external USB storage devices
- Liability and copyright
- Look at What you Can Do!
- Play the Keyboard
- Play using various sounds
- Play with accompaniment
- Select tones that match the atmosphere of the current rhythm (One Touch) p. 26
- Favorite tones
- Play Songs
- Play a song
- Mute tracks or cancel the melody
- Sing a song with the lyrics
- Record Songs
- Record your performance
- Energy-Efficient Design
- The power will turn off after a specified time has elapsed
- Organize your performance
- Create your performance list
- Convenient Functions
- Working with the Music Assistant
- Transpose the key of the keyboard, Rhythm or Song p. 34
- Change the octave
- To practice in keeping a consistent tempo (Metronome) p. 3
- Smf/Rhythm edit Functions
- Makeup Tools for Rhythm or Song
- Wireless LAN Functions
- Ad-Hoc and WPS connection
- Contents
- Panel Description
- Left Front Panel
- Pitch Bend/Modulation lever
- ② VOLUME knob
- RHYTHM FAMILY buttons
- TAP TEMPO button
- TEMPO buttons
- MEMO
- SYNC START button
- BALANCE buttons
- BASS INV button
- AUTO FILL IN button
- VARIATION 1/2/3/4 buttons
- INTRO button
- ENDING button
- START/STOP button
- Right Front Panel
- Display
- Cursor and value buttons
- ENTER/SELECT/DESELECT button
- PERFORMANCE LIST button
- PERFORMANCE WRITE button
- KEY button
- TRACK MUTE/CENTER CANCEL button
- METRONOME button
- USB MEMORY button
- AUDIO REC button
- MENU button
- EXIT button
- ONE TOUCH button
- KEYBOARD SPLIT button
- KEYBOARD DUAL button
- OCTAVE buttons
- MELODY INTELL button
- FAVORITE button
- NUMERIC button
- TONE buttons (Tone selection)/[0]\~[9] (numeric buttons)
- Rear Panel
- POWER switch
- DC IN socket
- PEDAL HOLD/SWITCH
- MIDI IN & OUT sockets
- PHONE/OUTPUT
- USB COMPUTER port
- USB MEMORY port
- Shortcut List
- Before You Start Using BK-3
- Connecting the AC Adaptor
- Connecting Headphones and External Audio Equipment
- Cautions when using headphones
- Connecting a MIDI Device
- What is MIDI?
- Connection example
- MIDI channels
- Connecting the BK-3 to Your Computer
- If the computer doesn't 'see' the BK-3
- Connecting an Optional Footswitch or Hold Pedal
- Installing the Music Rest
- Install the music rest as shown in the illustration.
- Turning the Power On/Off
- Turning the Power On
- Turn the [VOLUME] knob all the way to the left to minimize the volume
- Press the [POWER] switch to turn on the power.
- Use the [VOLUME] knob to adjust the volume.
- Turning the Power Off
- Turn the [VOLUME] knob all the way to the left to minimize the volume.
- Press the BK-3's [POWER] switch.
- If you don't want the power to turn off automatically, turn the "Auto Off" setting off!
- Adjusting the Sound Volume
- Turn the [Volume] knob to adjust the overall volume.
- Volume balance between the backing and the real-time parts
- Demo of the BK-3
- Simultaneously press the [MENU] and [EXIT] buttons.
- Press the [EXIT] button to leave the demo function.
- Basic Operation of the BK-3
- About the Display and Cursor Operation
- Moving Between Windows and Setting Parameter Values
- Press [MENU] button.
- Press the [UP] or [DOWN] button to select the entry of the desired function group.
- Press the [ENTER] button to go to the "Global" function group.
- Press the [UP] or [DOWN] button to move the cursor to the parameter whose value you want to change. For example "Display Contrast".
- Press the [ENTER] button to select the parameter.
- TIPS
- Use the [INC] or [DEC] button to change the value.
- Press the [ENTER] button again to deselect the field.
- Playing the BK-3's Real-Time Parts
- Selecting Tones and Playing the Keyboard (Upper Part)
- Selecting Tones and Play Two Voices Simultaneously (Dual)
- Play Different Voices with the Left and Right Hands (Split)
- Using the 'Numeric' function to Select Tones, Rhythms and Performances
- Setting the volume of the real-time parts (Upper and Lower)
- Favorite Tones
- Recalling a Favorite Tone
- Viewing the List of Favorite Tones
- Creating the List of Favorite Tones
- Playing with Automatic Accompaniments
- About the Rhythms
- Structure of the Rhythm Accompaniments
- Using Rhythms
- [START/STOP] / [▶/II]
- [SYNC START] / [■]
- VARIATION [1], [2], [3], [4]
- [INTRO] / [◀◀]
- [ENDING] / [▶▶]
- [BASS INV]
- Selecting Rhythms
- Playing Back Rhythms
- Press a VARIATION [1], [2], [3] or [4] button to select a more complex or a simpler accompaniment.
- If necessary, you can change the rhythm's tempo:
- Press the [ENDING] / [▶▶] button to end rhythm playback with a suitable closing section.
- One Touch Memories: Why using them?
- Select a 'One Touch'
- Deselect 'One Touch'
- How Can You Tell Whether the ONE TOUCH Function is On or Off?
- One Touch (1) ON
- One Touch OFF
- Programming Your Own ONE TOUCH Settings (One Touch Edit)
- Using the BK-3 as a USB player
- Getting Ready to Use the BK-3 as a USB Player
- Selecting a Song or Rhythm on a USB Memory
- Playing Back a Song or Rhythm from a USB Memory
- If necessary, you can change the song's playback tempo:
- Activating the 'Play All Songs' parameter for the USB memory
- Activating the 'Play All Songs' function
- Deactivating the 'Play All Songs' function
- Loop function (MARK A/B)
- Setting and using the loop positions
- Using 'Track Mute' and 'Center Cancel'
- Press the [TRACK MUTE] (CENTER CANCEL) button again to make its indicator go dark.
- Selecting the Track(s) to Mute for Rhythms or SMF Songs
- Operations on USB Memory
- Changing the Name of a File or Folder
- Deleting the Name of a File or Folder
- Using the 'Search' Function to Locate Songs or Rhythms
- Other important functions
- Transposing to a Different Key
- Press [KEY] button.
- Use the [INC] or [DEC] button to select the desired "Key" setting.
- "Key" setting
- Changing the Octave
- Press OCTAVE [-]/[+] button
- Using the 'Melody Intell(igent)' Function
- Press the [MELODY INTELL] button (so that it lights).
- Press [MENU] button → "Performance Edit" → "Melody Intelligent"
- Press the [MELODY INTELL] button again (its indicator goes dark) to switch off the counter-melody.
- Using the Metronome
- Press the [Metronome] button so it's lit.
- Metronome Settings
- Press and hold the [METRONOME] button.
- Performance Lists
- Performance/Music Assistant/Factory Songs Info
- Loading a Performance/'Music Assistant'/'Factory Songs' List
- If you have not loaded a Performance List yet:
- If you have already loaded a Performance List:
- Recalling a Performance/‘Music Assistant’/‘Factory Songs’ memory
- If you need to return to the main page, press the [EXIT] button.
- Quickly Locating Performance Memories
- Saving your Settings as a Performance
- Use the [UP] or [DOWN] button to select the desired character, then use the [INC] or [DEC] button to change the character.
- Other Performance List Functions
- Rename a Performance List
- Delete a Performance List
- Create a New Performance List
- Editing Performance Memories
- Delete a Performance memory
- Move a Performance
- Saving the edited Performance List
- Filtering Performance Memories Settings (Lock function)
- Why is it Convenient to Use Filters (Lock Function)?
- Which Parameter Can you Filter?
- How to Switch Filters On/Off Directly by Panel
- Recording your performance as audio data
- Recording
- Save the song under a new name.
- Save the song under the name suggested by the BK-3
- Decide to discard your recording
- Listening to your recording
- Press the [START/STOP] / [▶/II] button to start playback of your recording.
- Menu options
- General procedure
- Press the [MENU] button (its indicator lights).
- Use the [UP] or [DOWN] button to select the desired function group.
- Press the [ENTER] button to go to the display page where you can edit the parameters of the selected group, or to execute the selected command.
- Internal Lyrics
- At the end of the song, press and hold the [EXIT] button to return to the main page.
- 'Performance Edit' parameters
- 'Tone Part View' parameters
- Tone
- Volume
- Reverb Send
- Chorus Send
- Panpot
- Key Touch (velocity sensitivity)
- Eq Part Edit
- Press the [EXIT] button to leave the "Eq Part Edit" page.
- Mfx
- Hold Pedal
- Octave Shift
- Coarse Tune
- Fine Tune
- Portamento Mode
- Portamento Time
- Bender Assign
- Bender Range
- Modulation Assign
- Cut Off
- Resonance
- Attack (only for Tones)
- Decay
- Release
- Vibrato Rate
- Vibrato Depth
- Vibrato Delay
- C1
- 'Tone Part Mfx' parameters
- Mfx Switch
- Mfx Type
- Mfx Edit
- 'Rhythm Parts' parameters
- Mute
- Solo
- Split
- Split Point
- Lower Hold
- Scale Tune Switch
- Scale Tune
- Key
- Mode
- 'Arranger Setting' parameters
- Arranger
- Zone
- Type
- Arranger Hold
- Tempo
- Fill In Half Bar
- Fill Ritardando
- TempoCh Acc/Rit, TempoCh CPT, TempoCh Fill Rit
- Using the Ritardando/Accelerando functions
- 'Melody Intelligent' parameters
- Switch
- 2nd Tone
- Intell Threshold
- Level
- Save As Default
- Use the [INC] or [DEC] button to select "YES", then press the [ENTER] button to define the current settings as the default state.
- 'Global' parameters
- Display Contrast
- Tuning
- Rhythm/SMF Track Mute
- One Touch Hold
- Performance Hold
- Metronome
- Favorite
- Utility
- Pedal Switch
- Language
- Save Global
- One Touch Edit
- Makeup Tools (rhythms and SMF)
- Using the Makeup Tools
- Common
- Reverb Type
- Chorus Type
- Reverb Level & Chorus Level
- Rhythm Volume/Song Volume
- Rhythm Tempo/Song Tempo
- Undo Changes
- Instrument
- Use the [UP] or [DOWN] button to select the instrument you want to change, then press the [ENTER] button.
- Press the [MENU] button to jump to the location where the instrument is used.
- Use the [UP] or [DOWN] button to select the parameter you wish to edit.
- Use the [INC] or [DEC] button change the parameter.
- If you are satisfied with your changes and wish to preserve them, save your rhythm/ song to the USB memory. See "Saving Your New Rhythm or Song (SMF) Version in USB Memory" (p. 57).
- Icon legend
- Tone ( musical), Drum ( music)
- Mute ( musical)/Drum Mute ( musical)
- Perc Mute (1)
- Reverb
- Chorus
- Octave (♪)
- Velocity
- Attack ( musical)
- Decay ( musical)
- Release ( musical)
- Vibrato Rate ( musical)
- Vibrato Depth ( musical)
- Vibrato Delay ( musical)
- Equalizer
- Edit EQ
- Drum Instrument ( )
- Freeze Data
- Saving Your New Rhythm or Song (SMF) Version in USB Memory
- Repeat steps (4) above to enter the remaining characters.
- Press the [WRITE] button to confirm your desire to save the rhythm or song.
- MIDI
- MIDI Parameters
- Local
- Preventing Double Notes when Working with a Sequencer (Local Control)
- MIDI Tx/Rx
- Sync Rx
- Rhythm Pc (Tx/Rx Channel)
- NTA (Note-to-Arranger channel Rx)
- Pitch Bender
- Modulation
- Program Change
- Rx Velocity
- Clock Tx
- Start Stop Tx
- SMF Position Tx
- Visual Control Tx
- Checking a Tone's or Rhythm's MIDI Address
- Factory Reset
- Formatting a USB memory
- IMPORTANT NOTE
- Controlling Video Equipment (Visual Control)
- What is MIDI Visual Control?
- How to Connect a Video Equipment
- How to Enable/Disable the Video Control Function
- Selecting clips and banks on an optional MIDI Visual Control/ V-LINK device
- What is Wireless LAN Function?
- Items required to use the wireless LAN function
- Basic Connection Method (Connect by WPS)
- What is WPS?
- Perform the WPS operation on your wireless LAN access point (e.g., press and hold the WPS button on your wireless LAN access point).
- Icons in the display
- Wireless LAN Function Settings
- "Status" Indication
- "Access Point" Indication
- "Device Name" Indication
- "Select Access Point" Page
- "Wireless Info" Page
- "Wireless Option" Page
- Connecting to a Wireless LAN Access Point That You Select
- Authorization screen (Enter Passphrase)
- Other Settings (Wireless Option)
- Connecting in Ad-Hoc mode
- What is Ad-Hoc mode?
- Limitations
- Select the [MENU] button → "Wireless" → "Wireless Options"
- Turn the Ad-Hoc Mode "On".
- Press the [EXIT] button to return to the Wireless screen.
- On the iPhone or other wireless device that you want to connect, select the Ad-Hoc SSID to make the connection. (For example, on an iPhone, choose [Settings] → [Wi-Fi] → [Choose a Network] to select the above Ad-Hoc SSID. A password entry screen will appear; enter the above Ad-Hoc key.)
- When you want to end the Ad-Hoc mode connection, restore the iPhone settings in [Settings] → [Wi-Fi] → [Choose a Network] to their previous state.
- Checking the IP Address and MAC Address (WIRELESS INFO)
- Select the [MENU] button → "Wireless" → "Wireless Info".
- Troubleshooting
- Specifications
- MIDI Implementation Chart
- Chord Intelligence Table
- Symbols
- A
- B
- C
- D
- E
- F
- G
- H
- |
- J
- K
- L
- M
- N
- O
- P
- Q
- R
- T
- U
- V
- W
- X
- Y
- Z
- Information
- AFRICA
- EGYPT
- REUNION
- ASIA
- CHINA
- Roland Shanghai Electronics
- HONG KONG
- Parsons Music Ltd.
- INDIA
- INDONESIA
- KOREA
- MALAYSIA/
- SINGAPORE
- PHILIPPINES
- TAIWAN
- THAILAND
- VIET NAM
- OCEANIA
- AUSTRALIA/
- NEW ZEALAND
- CENTRAL/LATIN AMERICA
- ARGENTINA
- BARBADOS
- BRAZIL
- CHILE
- COLOMBIA
- COSTA RICA
- CURACAO
- DOMINICAN REPUBLIC
- PARAGUAY
- HUNGARY
- ITALY
Brand : ROLAND
Model : BK-3-BK
Category : Synthesizer