
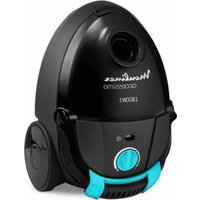
Boogy 1600 CEGA - Vacuum Cleaner MOULINEX - Free user manual and instructions
Find the device manual for free Boogy 1600 CEGA MOULINEX in PDF.
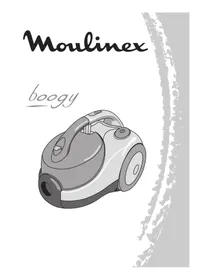


| Product type | Canister vacuum cleaner |
| Brand | Moulinex |
| Model | Boogy 1600 CEGA |
| Power | 1600 W |
| Filtration technology | Bagless cyclonic |
| Tank capacity | 1.5 L |
| Weight | 4.5 kg |
| Dimensions (L x W x H) | 40 x 25 x 25 cm |
| Power supply | Mains (220-240 V) |
| Cable length | 8 m |
| Operating radius | 10 m |
| Noise level | 78 dB(A) |
| Floor types | Hard floors and carpets |
| Included accessories | Crevice tool, upholstery brush, fabric nozzle |
| Filter | Washable HEPA filter |
| Filter maintenance | Washable with water |
| Bag capacity | Bagless, transparent container |
| Safety | Thermal protection with automatic shutdown |
| Repairability index | 8.0 / 10 |
| Warranty | 2 years |
| Spare parts available | Filters, brushes, nozzles |
Frequently Asked Questions - Boogy 1600 CEGA MOULINEX
User questions about Boogy 1600 CEGA MOULINEX
0 question about this device. Answer the ones you know or ask your own.
Ask a new question about this device
Download the instructions for your Vacuum Cleaner in PDF format for free! Find your manual Boogy 1600 CEGA - MOULINEX and take your electronic device back in hand. On this page are published all the documents necessary for the use of your device. Boogy 1600 CEGA by MOULINEX.
USER MANUAL Boogy 1600 CEGA MOULINEX
| Français 5 |
| English 8 |
| Español 11 |
| Italiano 14 |
| Nederlands 17 |
| Русский 20 |
| ٢٣ عربي |


We thank you for having chosen an appliance from the Moulinex range.
Description
- Suction opening
- Retaining slides
- Electronic power control (Depending on model*)
- Automatic cable rewind pedal
- Cover with dust bag support
- Bag eject button
- Cover handle
- Bag clips
- Engine foam grill protection
- Engine foam protection
- On/Off pedal
- Warning light for full dust bag (depending on model*)
- Bag compartment
- Vertical storage position of tubes
- Vacuum cleaner carrying handle
- Storage position of tubes
- Air exit grill
a. Filter cartridge b. Micro-active filter (depending on model*) c. Foam filter
- Storage accessories 1 and 2 Standard or optional accessories (depending on model*)
- Flexible tube with extra-long handle and manual suction power regulator
- Tubes
- Telescopic tube
- Automatically adjusting floor head
- Nozzle 2 in 1
- Furniture nozzle
- Floor nozzle
- Paper bags ref. A26B09
- Carrying strap
*Depending on model: it means special equipment for some models or optional accessories.
Safety Recommendations
Read the instructions for use carefully before using your appliance for the first time: any use which does not conform to these instructions will absolve Moulinex from any liability.
Your vacuum cleaner is an electrical
appliance: it must only be used under normal operating conditions. The appliance should be used and stored out of the reach of children. Never leave the appliance unattended when it is switched on.
The appliance is not intended for use by young children or infirm persons without supervision.
Young children should be supervised to ensure that they do not play with the appliance.
Always keep nozzles and tube ends well away from eyes and ears.
Make sure that the operating voltage of your vacuum cleaner is the same as your supply voltage - 230-240V.
Unplug the appliance by removing the plug from the power outlet:
- immediately after use,
- before changing accessories, - before maintenance, cleaning or changing the dustbag.
Do not vacuum wet surfaces, any water or any kind of liquids, hot substances, ultra-fine substances (plaster, cement, ash, etc.), large sharp debris (glass), dangerous products (solvents, stripping compounds, etc.), chemical products (acids, cleaners, etc.), inflammable or explosive products (petrol- or alcohol-based).
Do not immerse the appliance in water, project water on the appliance or store it outdoors.
Do not use the appliance:
- if it has been dropped and shows signs of damage or functions abnormally, - if the supply cord is defective.
In this case do not open the appliance and call our helpline (overleaf).
Repairs should only be carried out by specialists using original replacement parts. It is dangerous to try to repair an appliance by yourself.
Vacuum cleaner supply cords and winding systems must, in all cases, be replaced by our approved Service Centre. In accordance with current regulations, before disposing of an appliance no longer needed, the appliance should be made non-operational (by unplugging it and cutting off the electricity supply cord).
This product has been designed for domestic use only. Any professional use, inappropriate use or failure to comply with the instructions, the manufacturer accepts no responsibility and the guarantee will not apply.
Your appliance conforms to the 73/23 EEC and 89/336 EEC directives.
Using the appliance
Attaching the flexible hose to the vacuum cleaner.
A1 Push the flexible hose (19) into the opening (1) until you hear a clicking sound. A2 To remove the flexible hose from the vacuum cleaner, press the button on the nozzle and pull.
Assembling the tubes.
B1 Assemble the 2 tubes (20) by turning slightly. B2 If your appliance is equipped with a metal telescopic tube (21): push the slide switch down, adjust to the required length, then release the slide switch to lock in place.
Fitting the accessories.
Fit the accessory at the end of the tube.
C1 For rugs and wall-to-wall carpeting: use the head (22) with brushes lifted. C2 For floors and floorboards: use the head (22) in the lowered position, or directly use the floor nozzle. C4 To vacuum next to skirting boards and awkward corners: use the dual accessory tool (23) in the crevice nozzle position. C5 For furniture: use the dusting brush of the dual accessory tool (23) or the furniture nozzle (24).
Installing the carrying strap (depending on model*).
(D) Your appliance is equipped with a strap (27) that allows you to carry it on your shoulder.
To attach the strap, clip the hooks into the slots.
Plugging in the electrical power cord and using the vacuum cleaner.
E Completely unwind the power cord, plug in your vacuum cleaner, and push the on/off pedal (11).
Adjusting the suction power.
F1 With the electronic power selector (3) (depending on model*)
Push the power selector to select the vacuuming power: position maxi for floors and position mini for furniture and delicate materials.
F2 With the variable power selector (depending on model*)
Open the selector switch flap to manually reduce suction power, e.g., for fragile surfaces...
Storage.
G After use, stop your appliance by pressing the on/off pedal (11) and unplug it. G1 Replace the cable by pressing the automatic cable rewind pedal. G2 Place the tubes in their storage position (16). Place the dual accessory tool (23) in its storage area (18). G3 In vertical position, place the tubes in their storage position under the appliance (14).
Maintenance and cleaning
Important!
Always stop and unplug your appliance before maintenance or cleaning.
Changing the bag.
H1 The bag full indicator (12) indicates (depending on model*) that the bag is full or saturated.
If you notice that your vacuum cleaner is less efficient, select the maximum power and, by lifting the floor head off the floor, if the indicator stays on, change the bag.
H2 Lift the cover by its handle (7). To throw away the bag, place the cleaner above a rubbish bin and press the automatic eject button (6). H3 Place the bottom of a new dustbag cardboard in the bag clip, then push on the top of the cardboard (8).
Warning!
Check that the bag is in place before closing the cover.
Replace the cover by letting the bag holder slide along the retaining slides (2), then press firmly on the handle (7) to close the cover.
NB: Never try to carry the vacuum cleaner (7) by the cover handle; always use the carrying handle (15).
Cleaning the motor foam protection.
Warning!
The motor foam protection must always be in place when in use.
Remove the cover (5), the grid (9), then remove the foam (10). Shake it
and clean it every five dustbag changes with tepid soapy water. Rinse, dry, and put it back in place.
Warning!
Leave the foam to dry thoroughly before putting it back in place.
Cleaning the air outlet filter.
Remove the air exit grill (17) to remove the filter cartridge (17a). Remove the foam filter, shake it, and clean it every 5 dustbag changes with tepid soapy water. Rinse, dry, and put it back in place.
Warning!
Let the foam dry completely before putting it back in place.
Changing the micro-active filter (Ref. A26B09) (depending on model*).
Change the micro-active filter (17b) every 5 bag changes; it is under the air exit foam filter (17c).
Cleaning the vacuum cleaner.
Clean the housing of the vacuum cleaner with a soft and humid rag and let dry. Clean the cover with a dry rag. Do not use abrasive or aggressive products.
If your appliance does not work or has a problem
Your vacuum cleaner does not start.
- The appliance is not plugged in. Check that the appliance is correctly plugged in.
There is no suction.
- An accessory or the tube is clogged. Unclog the accessory or flexible hose. - The lid is not closed properly. Reposition the lid by sliding the bag support along the support slides and by pressing firmly on the handle to close the lid.
The suction of your vacuum cleaner has dropped, it makes a noise and whistles.
- An accessory or the flexible hose is partially clogged. Unclog the accessory or flexible hose.
- The bag is full or saturated with fine dust. Put a new bag in or empty the fabric dust bag. - The foam filter and/or the microactive filter are saturated. Clean the foam filter and change the microactive filter (depending on the model*). - The electronic variable suction power selector is in the minimum position. Increase the power with the help of the electronic variable suction power selector (except if you are vacuuming delicate fabrics).
The bag full indicator remains on.
- The bag is full. Put a new one in or empty the fabric bag.
The floor head is hard to move around.
- Open the suction regulator on the handle or reduce power.
The power cable does not rewind completely.
-The power cable is slow in reentering its housing. Pull the cable back out and press the button again.
If the problem remains, contact and give your vacuum cleaner to the nearest Moulinex Approved Service Centre. Refer to the list of Approved Service Centres or contact the Moulinex Customer Service - See enclosed After Sales Service leaflet.

- DESCRIPTION
- SAFETY RECOMMENDATIONS
- USING THE APPLIANCE
- ATTACHING THE FLEXIBLE HOSE TO THE VACUUM CLEANER
- ASSEMBLING THE TUBES
- FITTING THE ACCESSORIES
- INSTALLING THE CARRYING STRAP (DEPENDING ON MODEL*)
- PLUGGING IN THE ELECTRICAL POWER CORD AND USING THE VACUUM CLEANER
- ADJUSTING THE SUCTION POWER
- STORAGE
- MAINTENANCE AND CLEANING
- IMPORTANT
- ALWAYS STOP AND UNPLUG YOUR APPLIANCE BEFORE MAINTENANCE OR CLEANING
- CHANGING THE BAG
- WARNING
- CHECK THAT THE BAG IS IN PLACE BEFORE CLOSING THE COVER
- CLEANING THE MOTOR FOAM PROTECTION
- THE MOTOR FOAM PROTECTION MUST ALWAYS BE IN PLACE WHEN IN USE
- LEAVE THE FOAM TO DRY THOROUGHLY BEFORE PUTTING IT BACK IN PLACE
- CLEANING THE AIR OUTLET FILTER
- LET THE FOAM DRY COMPLETELY BEFORE PUTTING IT BACK IN PLACE
- CHANGING THE MICRO-ACTIVE FILTER (REF. A26B09) (DEPENDING ON MODEL*)
- CLEANING THE VACUUM CLEANER
- IF YOUR APPLIANCE DOES NOT WORK OR HAS A PROBLEM
- YOUR VACUUM CLEANER DOES NOT START
- THERE IS NO SUCTION
- THE SUCTION OF YOUR VACUUM CLEANER HAS DROPPED, IT MAKES A NOISE AND WHISTLES
- THE BAG FULL INDICATOR REMAINS ON
- THE FLOOR HEAD IS HARD TO MOVE AROUND
- THE POWER CABLE DOES NOT REWIND COMPLETELY
Brand : MOULINEX
Model : Boogy 1600 CEGA
Category : Vacuum Cleaner