
PCL755TNL - Cooker BOSCH - Free user manual and instructions
Find the device manual for free PCL755TNL BOSCH in PDF.


| Product type | Electric cooker |
| Brand | Bosch |
| Model | PCL755TNL |
| Dimensions (W x D x H) | 90 x 60 x 85 cm |
| Net weight | 55 kg |
| Electrical supply | 230 V, 50 Hz |
| Total power | 10.5 kW |
| Oven function | Fan-assisted, grill, interior light, timer |
| Cooking zones | 4 radiant burners, 1 rapid cooking zone |
| Care and cleaning | Clean with a soft cloth and non-abrasive products |
| Safety | Child lock, automatic shut-off safety, emergency stop |
| Spare parts | Available from Bosch after-sales service |
| Repairability | Repairability index: 8.2/10 |
| Country of manufacture | Germany |
| Energy class | A+ |
Frequently Asked Questions - PCL755TNL BOSCH
User questions about PCL755TNL BOSCH
0 question about this device. Answer the ones you know or ask your own.
Ask a new question about this device
Download the instructions for your Cooker in PDF format for free! Find your manual PCL755TNL - BOSCH and take your electronic device back in hand. On this page are published all the documents necessary for the use of your device. PCL755TNL by BOSCH.
USER MANUAL PCL755TNL BOSCH

Operating instructions de Gebrauchsanweisung fr Mode d'emploi it Avvertenze per l'uso es Instrucciones de funcionamiento pt Manual de utilização nl Gebruiksaanwijzing tr Kullanma Kilavuzu

BOSCH
We thank you and congratulate you on your choice.
This practical appliance, modern and functional, is manufactured using materials of the highest quality which are subject to strict Quality Control throughout the entire manufacturing process. The appliance is meticulously tested to ensure that it meets your demands for perfect cooking.
We strongly advise you to read through and follow these simple instructions, to ensure that you get perfect results from the moment you first use this appliance. This book contains important information, not only on how to use the appliance, but also on maintenance and safety.
When our products are being transported, they need suitable protective packaging. However, we have reduced our packaging to the bare essentials, and all materials are all completely recyclable. You too can contribute to the conservation of the environment by depositing the packaging in the nearest recycling container. Used oil should not be poured down the sink as this causes serious damage to the environment. Place it in a sealed container and take it to an appropriate collection point, or if this is not possible place it in the rubbish bin, (it will end up in a controlled dump, which is not the best option but here it will not contaminate ground water). Both you and your children will be grateful.
Before you get rid of an old appliance, make sure you disable it, and then take it to a centre for recovering recyclable materials. Ask your local authorities for details of the centre nearest your home.
Packaging and old appliances
If the symbol appears on the specifications plate, follow these instructions:
Disposing in an environmentally-responsible manner
Unpack the appliance and dispose of the packaging in an environmentally-responsible manner.

This appliance is labelled in accordance with the European Directive 2002/96/EC concerning used electrical and electronic appliances (waste electrical and electronic equipment - WEEE).
The guideline determines the framework for the return and recycling of used appliances as applicable.
CONTENTS
Safety warnings 3
Introducing your new hob 5
Gas burners 6
Recommended diameters of cookware 7
Cooking guidelines 8
Timer operation 9
Programming 10
Other functions 11
The digital display 13
Tips on how to use this appliance 14
Cooking suggestions 14
Cleaning and care 15
Home troubleshooting 16
Warranty conditions 17
Safety warnings
Read this user's manual carefully to ensure that you use this appliance as effectively and safely as possible. In accordance with current regulations, installation of the appliance and changing of gas type may only be carried out by an officially authorized technician. Before installing your new cooking hob, check that the measurements are correct. The following instructions are only valid in countries whose symbol appears on the appliance. To adapt the appliance to conditions of use in your country, always follow the technical instructions. It is of the utmost importance that the place in which the appliance is to be installed should have suitable, fully-functioning ventilation. Make sure that the appliance is not subjected to strong draughts, as they might blow out the burners. This appliance leaves the factory set to the type of gas that is indicated on the specification plate. If any change needs to be made, call our technical assistance service. Do not make any adjustments to the interior of the appliance. If this should be necessary, call our technical assistance service. Make sure you keep these instructions for use and assembly, so that you can hand them on with the appliance if ownership ever changes. If your hob has a glass panel, do not exert excessive force on it. If the glass on the cooking hob is unstuck, call the technical assistance service immediately, so that they can repair or replace it. Never use a malfunctioning appliance. The heating and cooking surfaces of the appliance become hot when they are in use, take all due precautions. Always keep children well away.
☐ Only use the appliance for preparing food; never use it as a heater. ☐ Very hot fat or oil can easily catch fire, so food preparation using fat or oil, such as making chips, must be closely watched at all times. ☐ Never pour water on burning fat or oil. DANGER! Cover the pan with a damp cloth to extinguish the fire and disconnect the cooking appliance. In the event of a malfunction, turn off the appliance's gas and electricity supply, before calling our technical assistance service. ☐ Never place unstable pans or containers on the cooking hob or the burners, as they may accidentally tip over. ☐ If a gas tap gets stuck, do not force it. Phone our technical services department immediately, so that they can repair or replace it. ☐ Do not use steam cleaning machines to clean the hotplate, as there is risk of electrocution. ☐ This appliance is not intended for use by persons (including children) with reduced physical, sensory or mental capabilities, or lack of experience and knowledge, unless they have been given supervision or instruction concerning use of the appliance by a person responsible for their safety. ☐ Never leave the appliance unattended during operation. ☐ The diagrams contained in this instruction book are for orientation purposes only.
IF THESE INSTRUCTIONS ARE NOT FOLLOWED, THE MANUFACTURER ACCEPTS NO RESPONSIBILITY.
This is what your new cooking hob looks like.

The gas burners.

There are indications to show which burner each control knob operates.
To ignite a burner, press down the control knob for the burner you wish to use and turn it to the left, to the ignition position, and hold it there for a few seconds at most until the burner ignites, then let go, and set it to the position you want. If the burner does not light, repeat the process.
If the igniters are dirty, this makes the burner harder to light, so you should keep them as clean as possible. Do this with a small brush and make sure that the ignition sparker is not hit or knocked violently.
If the burners on your cooking hob are fitted with safety valves (which stop the flow of gas if one of the burners accidentally goes out), light the burners in the same way, though you should continue to hold in the control knob for a few seconds after the flame lights. If the burner does not light, repeat the process, this time keeping the control knob pressed in for 10 seconds.
The appliance switches off automatically after 6 hours of operation. Turn all the control knobs to the ● position and then you can turn the appliance on again.
To turn off the burner, turn the control knob to the right, to setting ●.
With the modern and functional cooking hob you have purchased, you can have progressive taps fitted which allow you to adjust the flame to the desired heat.
Depending on the model, your cooking hob may have a triple-flame burner, which is very practical if you wish to cook with cookware such as paella pans or Chinese woks (to create all kinds of Asian dishes).
When using this gas appliance, the kitchen will become hot and humid, so you must ensure it is well ventilated. Either keep the natural ventilation openings open or install an extractor hood. If you use the appliance for a long period, you may need additional ventilation – either open a window (though be careful of drafts) or increase the power of the extractor hood, if possible.
An orange-colored flame is normal and occurs in the presence of dust in the atmosphere, spillages, etc.
Recommended diameter of cookware (in cm)
Depending on the model:
| BURNER | MINIMUM ∅ PAN | MAXIMUM ∅ PAN |
| Triple-flame burner | 22 cm | |
| Rapid burner | 22 cm | 26 cm |
| Semi-rapid burner | 12 cm | 20 cm |
| Auxiliary burner | 10 cm | 12 cm |
Additional pan supports
Fig. 1
Depending on the model, your hob may come with an essential supplementary pan support, for the triple flame burner, for pans with a diameter of more than 26 cm, roasting dishes, clay pots, and all sorts of concave pans (woks, etc.). See Fig. 1. If you do not have this additional cradle support, the manufacturer's technical service can supply you with one (code no. 363300).
Pan support for coffee pot: depending on the model, your cooking hob may include an additional coffee pot support, which is exclusively for use on the auxiliary burner with cookware of a diameter smaller than 10 cm. If you do not have this additional pot support, the manufacturer's technical service can supply you with one (code no. 184200).
The manufacturer declines all responsibility if these additional pan supports are not used or are used incorrectly.
Cooking guidelines Here are some cooking guidelines:
| Very high | High | Medium | Low | |
| Triple flame burner | Boiling, grilling, browning, paellas and Asian food (woks). | Reheating and keeping things hot: cooked and pre-cooked dishes. | ||
| Rapid burner | Scallops, steaks, omelettes, frying. | Rice, white sauce and ragout. | Steaming: fish and vegetables. | |
| Semi-rapid burner | Steaming potatoes, fresh vegetables, stews and pasta. | Reheating, keeping things hot and making tasty casseroles. | ||
| Auxiliary burner | Cooking: casseroles, rice pudding and caramels. | Defrosting and slow cooking: vegetables, fruits and frozen products. | Melting: butter, chocolate and jelly. | |
Timer Function

The timer is an electronic clock to set a kitchen timer and two cooking timers for the burners.
The kitchen timer runs independently of all the other settings. This means that it can still be set when the hob is locked.
The cooking timers can be used to switch off the burners automatically.
Kitchen timer
You can use the kitchen timer to set a time up to 99 minutes. It runs independently of all the other settings. THE KITCHEN TIMER DOES NOT SWITCH OFF ANY BURNER.
Setting procedure
- Touch the symbol Ⓛ. The display will show the following image 00°.
- Touch the symbol - or + within next 5 seconds to set the time
The time begins to count down after a few seconds. If more than one timer (kitchen or cooking timer) is set, the timer with the shortest time is displayed.
When the cooking time has elapsed
A signal sounds for 30 seconds, ° is shown in the display.
Touch any symbol. The display goes out and the audible signal ceases.
Changing the time
Touch the symbol Ⓛ and change the time using the symbol - or + within next 5 seconds. The new time begins to count down after a few seconds.
Cancelling prematurely
Touch the symbol ⏻ and change the time to 00° using the symbol - or +.
The indicator disappears after a few seconds or if more than one timer is set, the timer with the shortest time is displayed.
Notes
The kitchen timer is no longer in operation after a power cut.
You can set a time up to 99 minutes.
Setting a burner to switch off automatically. The cooking timer.

Enter a specific duration for the desired burner. When the duration has elapsed, the burner switches off automatically.
The burner must be switched on.
- Touch the symbol Ⓛ. The display will show the following image 00°.
- Touch once more the symbol Ⓛ. The display will show during 1 second the layout of the appliance ∴ 00. Now, touch the symbol ⏻ to select the desired burner.
- Once the desired burner is selected, touch the symbol - or - + with in next5 secondsto setth e desired time.
You can set, in this way, any burner of the hob. YOU CAN ONLY HAVE 2 COOKING TIMERS SET AT THE SAME TIME.
The time begins to count down after a few seconds or when we select another burner.
If more than one timer is set, the timer with the shortest time is displayed.
When the duration has elapsed
When the duration has elapsed, the burner switches off, a signal sounds for 30 seconds, ☐ is shown on the right of the display and on the left ☑ the dots will rotate.
Touch any symbol. The display goes out and the audible signal ceases.
TURN THE CONTROL KNOB TO THE "0" POSITION FOR THE BURNERS WHICH HAVE BEEN SWITCHED OFF BY THE TIMER.
Changing the duration
Touch the symbol ⏻, select the burner and change the time using the symbol - or + within the next 5 seconds. The new time begins to count down after a few seconds.
Cancelling prematurely
Touch the symbol Ⓛ, select the burner and change the time to ☐ using the symbol - or +. The indicator disappears after a few seconds, or if another timer is set, the timer with the shortest time is displayed.
Notes
The timer function is no longer active after a power cut. You can set duration up to 99 minutes. If you would like to call up the remaining duration of the set times, touching the symbol ⏻ you will see them.
Other functions
Timer button lock

Press and hold the ⏻ symbol for at least 4 seconds. A whistle will sound and the display will show the following message PL. Then the display will show the programme information again. If any symbol is touched when this function is being used, a whistle will sound and PL will appear on the display. To deactivate the button lock, press the ⏻ symbol again for at least 4 seconds.
Protection against excess temperatures

Your hob has a protection system for the electronics of the timer.
Where there is high temperature in the electronics of the timer, the message H and the information of the set times are alternatively displayed, and the burners will stay switched on. If the temperature drops down to an acceptable level, the H message disappears. If the temperature reaches the maximum allowed limit, the timer switches off all the burners of your appliance as
a safety action, the message H and the remaining time of the set burners which have been switched off are alternatively displayed. The controls are blocked until the temperature drops down to an acceptable level. Wait a few minutes and use again your appliance.
Protection against power supply failure

If there is a power cut, as a safety action, the set burners are switched off.
As soon as the electricity is restored, the message PO is displayed. In order to use the timer again, touch any of the symbols, the display will go out and your hob will be ready to be set.
The message PO is also displayed the first time the appliance is plugged in. In order to use the timer again, touch any of the symbols, the display will go out and your hob will be ready to be set.
Notes
When water falls on any of the sensors, the system sends out an alarm.
The system will not work if it is handled with wet hands.
The digital display

Messages in the digital display
| H | Excess temperatures (See Protection against excess temperatures). |
| PL | Timer button lock (See Timer button lock). |
| PO | Connecting the appliance to the power supply/Power failure (See Protection against power supply failure). |
Warnings when in use for cooking
NO

Do not use small diameter cookware on large burners. The flame should never come up the sides of the cookware.
YES
Always use cookware that is suitable for each burner, so as to avoid wasting gas and discolouring the cookware.

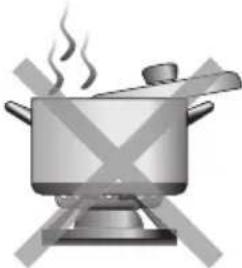
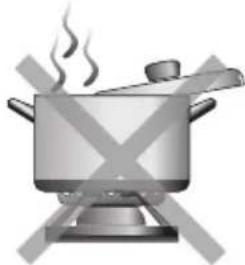
Never cook without a lid or with the lid half off – you are wasting energy.
Always place the lid on the cookware.


Never cook without a lid or with the lid half off - you are wasting energy.
Only use pots, saucepans and frying pans with thick, flat bottoms.


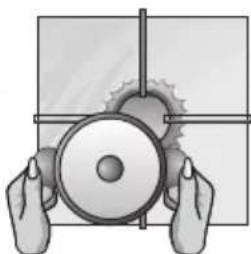
Do not place cookware on one side of a burner, as it could tip over. Do not use cookware with a large diameter on the burners near the controls, which when placed on the middle of the burner may touch the controls or be so close to them that they increase the temperature in this area and may cause damage.
Always place the cookware right over the burner, not to one side.


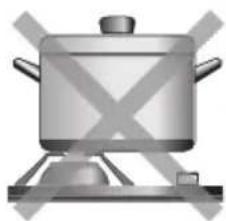
Never place cookware directly on top of the burners.
Place the cookware on top of the pan support.

Do not use excessive weight and do not hit the hob with heavy objects.
Handle cookware carefully when they are on the hob.
Cleaning and care
NO

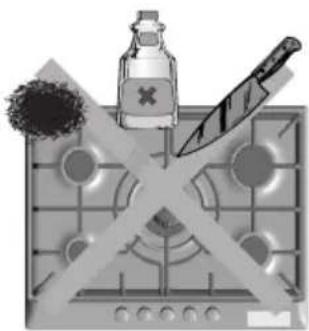
NEVER use abrasive products, sharp instruments, steel scourers, knives, etc... to remove bits of hardened food that have stuck to the hob, pan supports, burns or electric hotplates. If your hob has got a glass or aluminium panel. Do not use knives, scrapers or similar implements for cleaning the joins with the metal.
DO NOT use steam cleaning machines to clean the hob, this could damage it.

Avoid spilling acidic liquids (such as lemon juice or vinegar) on your cooking hob.
YES
Once the appliance is cool, use a sponge, water and soap. Wipe away all spilled liquids as soon as spillage occurs to save unnecessary effort at a later stage.
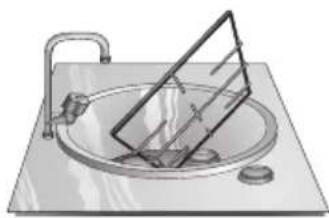
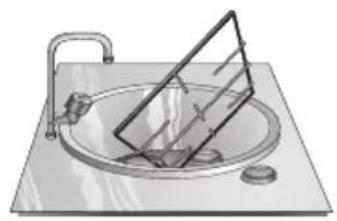
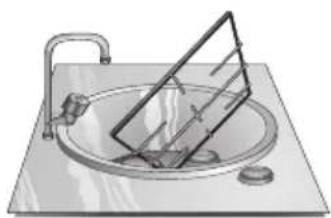
In order to keep the burners and the pan supports clean they should be periodically cleaned by submerging them in soapy water and scrubbing them with a non-metallic brush so that all holes and grooves are perfectly clean and free from dirt. This will ensure correct flames. Always dry the burner covers and the pan supports if they have become wet.
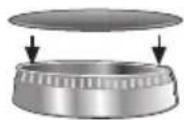
After cleaning and drying the burners, make sure the burner covers are correctly placed on the burner's flame diffuser.


The ring cover of the triple-flame burner and stainless steel parts such as grease pans and the area around the burners may become discoloured over time. This is NORMAL because of the high temperatures. Each time the appliance is used these parts should be cleaned with a product that is suitable for stainless steel.
After washing the pan supports, dry them completely before cooking with them again. Drops of water or damp patches on the surfaces when you begin cooking may cause deterioration of the enamel.
If the pan supports on your cooking hob are fitted with rubber rests, take care when you clean them, as they might come off, leaving your pan support without protection, and it may scratch the cooking hob.
The stainless steel cleaner must not be used in the area around the controls. The (printed) symbols may be wiped off.
Home troubleshooting
You don't always need to call the technical assistance service. Very often you can solve the problem on your own. The following table contains a few pieces of advice. Important note:
Only authorised personnel from our Technical Services Department can carry out work on the gas and electrical supply systems.
| Problem | Probable cause | Solution |
| ... if the general electrical system is malfunctioning? | - Defective fuse.- The automatic safety switch has tripped or a fuse has blown. | - Check the fuse in the main fuse box and change it if it is damaged.- Check the main fuse box to see whether the automatic trip switch or a differential switch has tripped. |
| ... if the igniter doesn't work? | - There is waste from food or cleaning products between the ignition sparker and the burner.- The burners are wet.- The burner covers are not positioned correctly. | - Carefully clean the spaces between the igniter and the burners.- Dry the burner covers carefully.- Make sure that the burner covers are correctly positioned. |
| ... if the flames on the burners are not uniform? | - The different parts of the burner have been improperly assembled.- The grooves on the burner's gas outlets are dirty. | - Replace all the different pieces correctly.- Clean the grooves on the burner's gas outlets. |
| ...if the gas flow does not appear to be normal or no gas comes out? | - The gas main is turned off.- If the gas is coming from a gas bottle, it may be empty. | - Turn on all stop cocks.- Replace the gas bottle with a full one. |
| ... if there is a smell of gas in the kitchen area? | - A gas tap has been left on.- There may be a leak between the coupling and the gas bottle. | - Check to see if any gas taps are on.- Make sure that the connection is airtight. |
| ...the safety devices on the different burners don't work? | - The control knob was not held down for long enough.- The grooves are dirty | - Once the burner is lit, hold the control knob down a few seconds longer.- Clean the grooves on the burner's gas outlets. |
If you call the Technical Services Department, please be sure to indicate:
| E - NR | FD |
This code can be found on the specifications plate of your appliance, located on the underside of your cooking hob.
Warranty conditions
The conditions of the guarantee which apply to this appliance are those that are set by our company's representatives in the country where it was bought. If you so require, the salesman from whom you bought the appliance will always be able to provide you with more details on this subject. However, the warranty is only valid if it is submitted together with the purchase document.
We reserve the right to make any changes.


JA


NO


NO






Cleaning and maintenance
NO


- PACKAGING AND OLD APPLIANCES
- CONTENTS
- SAFETY WARNINGS
- THIS IS WHAT YOUR NEW COOKING HOB LOOKS LIKE
- THE GAS BURNERS
- RECOMMENDED DIAMETER OF COOKWARE (IN CM)
- ADDITIONAL PAN SUPPORTS
- TIMER FUNCTION
- KITCHEN TIMER
- SETTING PROCEDURE
- WHEN THE COOKING TIME HAS ELAPSED
- CHANGING THE TIME
- CANCELLING PREMATURELY
- NOTES
- SETTING A BURNER TO SWITCH OFF AUTOMATICALLY. THE COOKING TIMER
- WHEN THE DURATION HAS ELAPSED
- CHANGING THE DURATION
- OTHER FUNCTIONS
- TIMER BUTTON LOCK
- PROTECTION AGAINST EXCESS TEMPERATURES
- PROTECTION AGAINST POWER SUPPLY FAILURE
- THE DIGITAL DISPLAY
- MESSAGES IN THE DIGITAL DISPLAY
- WARNINGS WHEN IN USE FOR COOKING
- NO
- YES
- CLEANING AND CARE
- HOME TROUBLESHOOTING
- WARRANTY CONDITIONS
- JA
- CLEANING AND MAINTENANCE
Brand : BOSCH
Model : PCL755TNL
Category : Cooker