Super SX VS01G800 - Vacuum Cleaner SIEMENS - Free user manual and instructions
Find the device manual for free Super SX VS01G800 SIEMENS in PDF.


| Product type | Canister vacuum cleaner |
| Brand | Siemens |
| Model | Super SX VS01G800 |
| Nominal power | 700 W |
| Power supply | 230 V ~ 50 Hz |
| Power cord length | 7.5 m |
| Dust container capacity | 3.5 L |
| Bag type | Disposable bag |
| Filtration | Washable high-performance filter |
| Noise level | 76 dB(A) |
| Operating range | 9 m |
| Weight | 6.2 kg |
| Dimensions (L x W x H) | 400 x 250 x 250 mm |
| Main functions | Electronic power adjustment, automatic cord rewinder, bag change indicator |
| Included accessories | Floor nozzle, upholstery nozzle, crevice tool |
| Maintenance and cleaning | Clean the filter and dust container regularly |
| Safety | Double electrical insulation, automatic shut-off in case of overheating |
| Spare parts and repairability | Bags, filters and accessories available online |
Frequently Asked Questions - Super SX VS01G800 SIEMENS
User questions about Super SX VS01G800 SIEMENS
0 question about this device. Answer the ones you know or ask your own.
Ask a new question about this device
Download the instructions for your Vacuum Cleaner in PDF format for free! Find your manual Super SX VS01G800 - SIEMENS and take your electronic device back in hand. On this page are published all the documents necessary for the use of your device. Super SX VS01G800 by SIEMENS.
USER MANUAL Super SX VS01G800 SIEMENS


GA 8000 247 677 A


1 Adjustable floor tool / "autofloor" tool*
2 Adjustable floor tool with locking collar *
3 Hard-floor brush*
4 Pet hair tool
5 Telescopic tube*
6 Sliding button*
7 Fixed tubes*
8 Handle*
9 Flexible hose
10 Upholstery nozzle*
11 Crevice nozzle*
12 Multi-purpose nozzle * (crevice nozzle + hard furnishings brush)
13 Parking aid
14 Power cord
15 Exhaust filter cover
16 Carrying handle
17 Twin cylinder release button
18 Emptying button
19 Dust container
20 Maximum level mark
21 Dust container flap
22 Particulate filter with fluff filter
23 On/off button with electronic suction regulator
24 Exhaust filter*
25 Twin cylinder lid
26 Twin cylinders
*Dependent on model
optional accessories
A HEPA filter VZ153HFB
Additional filter for cleaner exhaust air.
Recommended for allergy sufferers. Replace once a year.
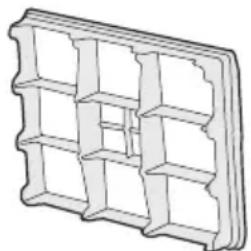
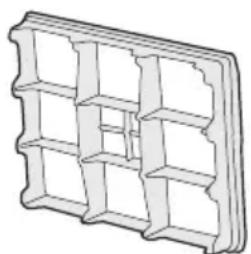
B Micro active carbon filter VZ192MAF
Combination of micro filter and active carbon filter.
Combats unpleasant odours.
Replace twice a year. Replace carbon filter frame with micro filter frame.
Please note
It is not possible to combine a HEPA filter and a micro active carbon filter.
C TURBO-UNIVERSAL® brush for upholstery VZ46001
All in one brushing and vacuuming of upholstered furniture, mattresses, car seats, etc. Especially suitable for picking up pet hair. The brush roller is driven by the air flow through the vacuum cleaner.
No separate electrical connection is needed.
D Hard-floor brush VZ123HD
For vacuuming hard floors (parquet flooring, tiles, laminate, etc.)
Replacement parts
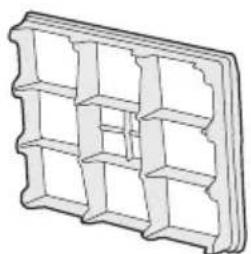
Particulate filter cartridge
Product code 499986
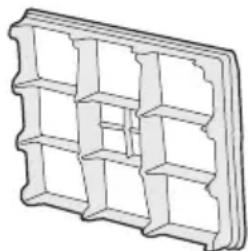
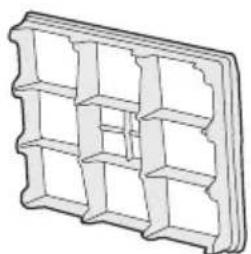
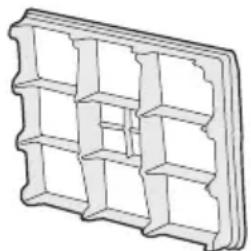
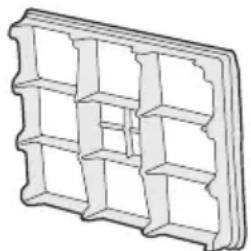
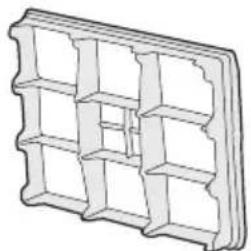
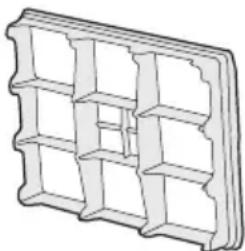
Micro filter
Product code 427226
Motor protection filter
Product code 608784



Please keep this instruction manual.
Please pass on this instruction manual if you pass this vacuum cleaner on to a new owner.
Intended use
This vacuum cleaner is intended for household use and is not intended for commercial purposes.
This vacuum cleaner should only be used in accordance with these instructions for use.
The manufacturer will not accept any responsibility for damage caused by improper use or incorrect operation.
Therefore, please note the following points.
The vacuum cleaner must only be operated with:
■ manufacturer's replacement parts, -accessories and -optional accessories
The vacuum cleaner is not to be used for:
■ vacuuming persons or animals
■ vacuuming up:
- insects (e.g. flies, spiders, etc.).
– hazardous, sharp-edged,
– hot or burning substances - damp or liquid substances
– highly flammable or explosive substances and gases - Ash, soot from tiled stoves and central heating systems
Safety information
This vacuum cleaner complies with the recognised rules of technology and the relevant safety regulations. We confirm that it complies with the following European directives: 89/336/EEC (amended by Directives 91/263/EEC, 92/31/EEC and 93/68/EEC). 73/23/EEC (amended by Directive 93/68/EEC).
■ Always observe the information on the rating plate when using the vacuum cleaner and connecting to the power supply.
■ Never vacuum without the dust container and particle filter fitted.
=> This can damage the vacuum cleaner!
■ Only allow children to use the vacuum cleaner under supervision.
- Keep the vacuum cleaner away from the face when using nozzles and tubes.
=> This could cause injury!
■ Never carry the vacuum cleaner by the power cord or hose.
■ Fully extend the power cord when using the vacuum cleaner continuously for several hours.
■ When disconnecting the appliance from the mains, pull the plug, not the power cord.
■ Do not pull the power cord around sharp corners or allow it to become trapped.
■ Unplug the vacuum cleaner from the mains before carrying out any work on it.
■ Do not use the vacuum cleaner if it is damaged. Unplug the power cord from the mains if a fault is detected.
■ For safety reasons, only authorised after-sales service personnel are permitted to carry out repairs and fit replacement parts to the vacuum cleaner.
■ The vacuum cleaner should be protected from outside weather conditions, moisture and sources of heat.
■ The vacuum cleaner is not suitable for use on building sites.
=>Vacuuming up building rubble could damage the vacuum cleaner.
■ Switch off the vacuum cleaner when it is not in use.
■ At the end of its life, the vacuum cleaner should be disposed of in an appropriate manner.
Disposal information
■ Packaging
The packaging is designed to protect the vacuum cleaner from being damaged during transportation.
It is made of environment-friendly materials and can be recycled.
Dispose of packaging that is no longer required at an appropriate recycling point.
■ Used vacuum cleaner
Used vacuum cleaners still contain many recyclable materials.
Therefore, please take used vacuum cleaners to your retailer or recycling centre so that they can be recycled.
For current disposal methods, please enquire at your appliance dealership or local council.
Please note
- Only connect the appliance to a socket that is protected by at least a 16 amp circuit breaker.
If a circuit breaker should trip when you switch on the vacuum cleaner, this may be because other electrical appliances which have a high current draw are connected to the same power circuit.
To prevent the circuit breaker from tripping, select the lowest power setting before switching the vacuum cleaner on, and increase the power only once it is running.
Fold out picture pages.

Before using for the first time
Figure 1*
Push the handle onto the flexible hose until it engages.
Figure 2*
Push the crevice nozzle and upholstery nozzle back into the accessories holder as illustrated.
Setting up
Figure 3
a) Push the flexible hose into the opening at the front of the twin cylinders.
b) To remove the flexible hose, turn it to release the catch and pull the hose out.
Figure 4*
Push the handle into the fixed / telescopic tube. To remove it, turn the handle slightly and pull it off the tube.
Figure 5*
a) Insert the fixed / telescopic tube into the adapter of the floor tool.
b) To remove it, turn the tube slightly and pull it out of the floor tool.
c) Push the telescopic tube straight into the connecting piece of the floor tool until it engages.
To release the connection, squeeze the locking collar and pull the telescopic tube out.
Figure 6*
a) Connect the fixed tubes together, or
b) Unlock the telescopic tube to adjust its length by moving the sliding button in the direction of the arrow.
Figure 7
Holding the power cord by the plug, pull out the required length and plug it into the mains socket.
Figure 8
Press the on/off button in the direction of the arrow to switch your vacuum cleaner on/off.
Figure 9
Adjust the suction by turning the on/off button in the direction of the arrow.
Set the power setting to maximum for the best results when vacuuming.
Vacuuming
Figure 10*
Adjust the adjustable floor tool:
■ Rugs and carpets =>

■ Hard/parquet floors =>

Figure 11*
Adjust the "autofloor" floor tool:
■ Hard floor setting =>

Fixed position for vacuuming hard/parquet floors
■ Automatic setting => auto
The floor tool adjusts automatically to the floor covering and switches from hard/parquet floors to carpeted floors
■ Carpet setting =>

Fixed position for vacuuming rugs and carpets
If you are vacuuming varying types of floor coverings (hard floors <-> carpets), we recommend that you use the automatic setting so that the floor tool adjusts automatically to the floor and you do not need to switch over the nozzle setting.
Figure 12*
To clean the "autofloor" tool, switch it to the hard floor setting and simply vacuum it using the fixed / telescopic tube.
Figure 13*
Remove the upholstery nozzle and crevice nozzle from the accessories holder as illustrated.
Figure 14*uuming with accessories
Attach the nozzles to the tube or handle as required:
a) Crevice nozzle for vacuuming crevices and corners, etc. b) Upholstery nozzle for vacuuming upholstered furniture, curtains, etc.
After use, push the crevice nozzle and upholstery nozzle back into the accessories holder as indicated. (see Figure 2)
c) Hard furnishings brush
For cleaning window frames, cabinets, mouldings, etc.
d) Hard-floor brush
For vacuuming hard floor coverings (tiles, parquet flooring, etc.)
Figure 15*
Pet hair tool
Floor tool for easy, thorough removal of pet hair
To clean the nozzle, simply vacuum it using the fixed / telescopic tube
Figure 16
Once you have switched off the vacuum cleaner, slide the catch on the floor too into the groove at the rear of the appliance.
Once you have switched off the vacuum cleaner, slide the catch on the floor tool into the groove on the rear of the appliance.
■ Attention: Do not operate in an upright/vertical
position.
Figure 17
The appliance can also be carried using the carrying handle when vacuuming steps, for example.
When the work is done
Figure 18
Unplug the vacuum cleaner.
Tug the power cord briefly and let go. The cable then rewinds automatically.
Figure 19*
Unlock the telescopic tube by moving the sliding button in the direction of the arrow and slide one tube into the other.
Emptying the dust container
To achieve optimum vacuuming results, the dust container should be emptied each time the vacuum cleaner is used or, at the latest, when the maximum fill level is reached. After each use, check the fluff filter, particulate filter and motor protection filter. Clean the filters by tapping out the dust or rinsing them, as necessary.
Figure 20
Use the release button to unlatch the twin cylinders and open them forwards.
Figure 21
Remove the dust container from the appliance.
Figure 22
Press the button to release the dust container flap and empty the container into the rubbish bin. The flap engages when tilted backwards.
Figure 23
■ Fold the flap back and close the dust container.
■ Insert the dust container into the appliance.
■ Fold the dual separator back into position making sure that it engages.
Cleaning the particle filter
Figure 24
■ Release the dual separator and fold it forwards. (See fig. 20)
■ Remove the particulate filter with fluff filter and clean by knocking out the dirt.
To do so, take off the fluff filter then release and open the flap on the particulate filter cartridge.
■ The components of the particulate filter system should be rinsed at least once every quarter. The fluff filter and particulate filter can be cleaned in the washing machine at 30° C on a delicates cycle.
■ After cleaning, close the flap on the particulate filter cartridge and engage at the side. Place the fluff filter on the particulate filter cartridge.
■ Attention: The twin cylinders can only be engaged
- when the particle filter is fitted. The filter must be completely dry before it is refitted in order to ensure that it functions correctly and to prevent the formation of odours or bacteria.
Cleaning the motor protection filter
The motor protection filter should be cleaned regularly and at least once every 3 months by knocking out the dirt and rinsing.
Figure 25
■ Unlatch the twin cylinders and open them forwards. (See fig. 20)
■ Remove the dust container from the appliance (see fig. 21).
■ Pull out the motor protection filter in the direction of the arrow.
■ Clean the motor protection filter by tapping it.
If it is very dirty, the motor protection filter should be rinsed. The motor protection filter can even be cleaned in the washing machine at 30 °C on a delicates cycle.
The filter must then be left to dry for at least 24 hours. After cleaning, slide the motor protection filter into the vacuum cleaner.
- Insert the dust container into the appliance. Fold the dual separator back into position making sure that it engages.
Attention: The filter must be completely dry before it is refitted in order to ensure that it functions correctly and to prevent the formation of odours or bacteria.
The motor protection filter may be ordered from the after-sales service. Replacement part number: Please add part number 608784
Cleaning the washable micro filter*
Figure 26
■ Unlatch the twin cylinders and open them forwards. (See fig. 20)
■ Remove the dust container from the appliance (see fig. 21).
■ Open the exhaust filter cover as far as possible in the direction of the arrow. The cover engages in this position.
■ Remove the micro filter.
Figure 27
■ Clean the micro filter by knocking out the dirt.
■ If the micro filter is very dirty, it should be washed (by hand or in the washing machine at 40° C).
■ Replace the micro filter.
- Close the exhaust filter cover.
Insert the dust container into the appliance.
Fold the dual separator back into position making sure that it engages.(See fig. 23)
! Attention: The filter must be completely dry before it is refitted in order to ensure that it functions correctly and to prevent the formation of odours or bacteria.
A replacement washable micro filter can be ordered from After Sales.
Replacement part number: 427226
Replacing the micro active carbon filter*
Figure 28
■ Unlatch the twin cylinders and open them forwards. (See fig. 20)
■ Remove the dust container from the appliance. (see fig. 21)
■ Open the exhaust filter cover as far as possible in the direction of the arrow. The cover engages in this position. (See fig. 24)
■ Remove and dispose of the micro active carbon filter.
■ Fit a new filter (VZ192MAF)
- Close the exhaust filter cover.
Insert the dust container into the appliance.
Fold the dual separator back into position making sure that it engages. (See fig. 23)
Replacing the HEPA filter*
Figure 29
■ Unlatch the twin cylinders and open them forwards. (See fig. 20)
■ Remove the dust container from the appliance. (see fig. 21).
■ Open the exhaust filter cover as far as possible in the direction of the arrow. The cover engages in this position (see fig. 24).
■ Remove and dispose of the HEPA filter.
■ Fit a new filter (VZ153HFB).
- Close the exhaust filter cover.
Insert the dust container into the appliance.
Fold the dual separator back into position making sure that it engages. (see fig. 23).
Cleaning the twin cylinders
Figure 30
■ Use the release button (1) to unlatch the twin cylinders and open them forwards (see fig. 20).
■ Turn the cylinder cover as shown to remove from the appliance.
■ Clean the cylinder and cover.
Figure 31
- Replace the cylinder cover and lock it into place by turning in the direction of the arrow (please make sure that you replace the one marked with an "L" on the left hand side and the one marked with an "R" on the right hand side).
■ Push the twin cylinders back into position (effectively closing the vacuum cleaner), making sure that they engage (you will here a positive click) (see fig. 23).
■ Attention: The inside of the twin cylinders may
become scratched with use and start to look opaque. This does not, however, affect the performance of the vacuum cleaner in any way, i.e. it will continue to function as normal.
Care
Always switch off the vacuum cleaner and disconnect the power cord from the mains before cleaning the appliance. The vacuum cleaner and plastic accessories can be cleaned with a commercial plastic cleaner.
Do not use a scourer, glass-cleaning agent or all-
- purpose cleaning product. Never immerse the vacuum cleaner in water.
The dust compartment can, if necessary, be cleaned with a second vacuum cleaner or simply wiped with a dry cloth or dusting brush.
Subject to technical modifications.
Frequently asked questions
What kind of dirt can be vacuumed up using the vacuum cleaner?
All kinds of household dirt can be vacuumed up using the SX3. When vacuuming fine particles, note that the particulate filter cartridge and fluff filter must be cleaned at regular intervals to guarantee the optimum function of the appliance.
Should the dust container be emptied after each use of the vacuum cleaner?
The dust container should be emptied after each use for hygienic reasons, or at the latest when the maximum level (see the mark) is reached.
How often should the particle filter be cleaned/rinsed?
Ideally, the particle filter should be cleaned after each use, especially after vacuuming fine particles, either by tapping it or rinsing it, depending on how dirty it is.
The particulate filter cartridge and fluff filter must be cleaned once the maximum level (see the mark) has been reached, if not before.
How often should the washable micro-exhaust filter/motor protection filter be cleaned/rinsed through?
If your vacuum cleaner is equipped with a washable micro-exhaust filter/motor protection filter, it should be cleaned regularly for hygienic reasons by tapping it, and must be rinsed through at least once every three months.
How often should I replace the HEPA filter?
If your vacuum cleaner is equipped with a HEPA exhaust filter, this should be replaced if it is very dirty and at least once a year.
What is the best way to transport my vacuum cleaner?
The SX3 can be transported easily using the ergonomic carrying handle, e.g. for vacuuming the stairs. It is best to hold/carry the tube with the floor tool in the other hand.
Troubleshooting small problems
| Problem | Cause | Solution |
| Suction power becomes noticeably weaker | The particulate filter / motor protection filter is very dirty | Clean the particulate filter cartridge, motor protection filter and fluff filter by tapping out the dust or rinsing. Caution: after rinsing, only reinsert the particulate filter cartridge, motor protection filter and fluff filter back into the appliance once they are completely dry. |
| The HEPA filter is very dirty | Replace the HEPA filter. | |
| The floor tool is blocked | Clean the nozzle, e.g. using a crevice nozzle | |
| The telescopic tube is blocked | Push the telescopic tube together, loosen and remove the blockage | |
| The hose/hand grip is blocked | Separate the hose from the vacuum cleaner and hand grip Loosen and remove the blockage | |
| One or both of the twin cylinders are blocked | Take off the relevant cylinder cover, remove the blockage, clean with a dry or damp cloth if necessary | |
| Bottom flap of the dust container does not close | The bottom flap is soiled | Clean the bottom flap, e.g. with a damp or dry cloth |


Frequently asked questions (domande frequenti)


da
Opbevar brugsanvisningen.
Ta godt vare på bruksanvisningen.
Bruksanvisningen må følge med når støvsugeren skifter eier.
Tiltenkt bruk
Støvsugeren er kun beregnet for bruk i


Spara bruksanvisningen.


Primera utilización
Figura 1*


pt



tr


hu

bg


uk
الغلتر الدقيق
427226 رقم التمييز

Fallersleber Straße 50
40227 Düsseldorf
Oberbilker Allee 270 A
44287 Dortmund
Rodenbergstraße 47
45141 Essen
Bamlerstraße 1 A
47805 Krefeld
Jebel Ali Free Zone – Dubai
Tel.:04 881 4401
Fax:04 881 4805
www.siemens-home.ae
CLAYTON, Victoria 3168
Tel.: 1300 368 339
Fax: 1300 306 818
valid only in AUS
mailto:bshau-as@bshg.com
BA Bosnia-Herzegovina, Bosna i Hercegovina
"HIGH" d.o.o.
Odobašina 57
71000 Sarajewo
Info-Line: 061 10 09 05
Fax: 033 21 35 13
mailto:delicnanda@hotmail.com
www.bshappliancecare.co.uk/
Siemens
Service Requests (nationwide)
Tel.:08702 413382
mailto:mks-servicerequest@
bshg.com
Spares, Accessories and Central
Warehouse
Tel.:08705 543210
mailto:mks-spares@bshg.com
Customer Liaison
Fax:01908 328660
mailto:mks-customerliaison@
bshg.com
Head office
Tel.:08705 222777
Fax:01908 328670
GR Greece, Ελλάς
BSH Ikiakes Siskeves A.B.E.
Kentriko Ipokatastima Service
17 km E.O. Athinon-Lamias &
Potamou 20
145 64 Kifisia
Unit 1&2B, 3th Floor
North Block, Skyway House
3 Sham Mong Road
Tai Kok Tsui, Kowloon
Hongkong
Tel.:2565 6151
Fax:2565 6252
mailto:
bshhkg.service@bshg.com
HR Hrvatska, Croatia
Gemma B&D d.o.o.
Prisavlje 2
10000 Zagreb
Tel.:01 6195 582
Fax:01 6195 582
mailto:servis@gemma.hr
IE Republic of Ireland
BSH Home Appliances Ltd.
BSH Appliance Care,
Service Division
Unit F4, Ballymount Drive
Ballymount Industrial Estate
Walkinstown
Dublin 12
www.bshappliancecare.ie/
Siemens
Service Requests
Tel.:01450 2655
Fax: 01450 2520
Spares and Accessories
Tel.:01450 2655
Fax:01450 2520
IL Israel,
C/S/B Home Appliance Ltd.
Uliel Building
2, Hamelacha St.
Industrial Park North
71293 Lod
Tel.:08 9777 222
Fax: 08 9777 245
mailto:csb-serv@zahav.net.il
IS Iceland
Smith & Norland hf.
Noatuni 4
105 Reykjavik
Tel.:0520 3000
Fax: 0520 3011
www.sminor.is
IT Italia, Italy
LT Lietuva, Lithuania
UAB Ogmios pulsas
P. Luksio Str. 23
09132 Vilnius
Tel.: 05 274 1788
Fax: 05 274 1760
mailto:servisotarnyba-bt@
ogmios.lt
www.ogmios.lt
LU Luxembourg
Building C, 39-43 Apollo Drive
Mairangi Bay, Auckland 1310
Tel.:09 478 6158
Fax:09 478 2914
PL Polska, Poland
BSH Home Appliances (SEA)
Pte. Ltd
15 th Rd., Randjespark
Private Bag X36, Randjespark
1685 Midrand – Johannesburg
Tel.:086 002 6724
Fax: 011 265 7852
mailto:service@bsh.co.za
www.siemensappliances.co.za
DE Garantie
GB Conditions of guarantee
For this appliance the guarantee conditions as set out by our representatives in the country of sale apply. Details regarding same may be obtained from the dealer from whom the appliance was purchased. For claims under guarantee the sales receipt must be produced.
FR Conditions de garantie

de
This appliance is labelled in accordance with European Directive 2002/96/EG concerning used electrical and electronic appliances (waste electrical and electronic equipment - WEEE). The guideline determines the framework for the return and recycling of used appliances as applicable throughout the EU
fr


- OPTIONAL ACCESSORIES
- REPLACEMENT PARTS
- INTENDED USE
- SAFETY INFORMATION
- DISPOSAL INFORMATION
- PACKAGING
- USED VACUUM CLEANER
- PLEASE NOTE
- BEFORE USING FOR THE FIRST TIME
- FIGURE 1
- FIGURE 2
- SETTING UP
- FIGURE 3
- FIGURE 4
- FIGURE 5
- FIGURE 6
- FIGURE 7
- FIGURE 8
- FIGURE 9
- VACUUMING
- FIGURE 10
- FIGURE 11
- FIGURE 12
- FIGURE 13
- FIGURE 14*UUMING WITH ACCESSORIES
- FIGURE 15
- FIGURE 16
- FIGURE 17
- WHEN THE WORK IS DONE
- FIGURE 18
- FIGURE 19
- EMPTYING THE DUST CONTAINER
- FIGURE 20
- FIGURE 21
- FIGURE 22
- FIGURE 23
- CLEANING THE PARTICLE FILTER
- FIGURE 24
- CLEANING THE MOTOR PROTECTION FILTER
- FIGURE 25
- CLEANING THE WASHABLE MICRO FILTER
- FIGURE 26
- FIGURE 27
- REPLACING THE MICRO ACTIVE CARBON FILTER
- FIGURE 28
- REPLACING THE HEPA FILTER
- FIGURE 29
- CLEANING THE TWIN CYLINDERS
- FIGURE 30
- FIGURE 31
- CARE
- SUBJECT TO TECHNICAL MODIFICATIONS
- FREQUENTLY ASKED QUESTIONS
- WHAT KIND OF DIRT CAN BE VACUUMED UP USING THE VACUUM CLEANER
- SHOULD THE DUST CONTAINER BE EMPTIED AFTER EACH USE OF THE VACUUM CLEANER
- HOW OFTEN SHOULD THE PARTICLE FILTER BE CLEANED/RINSED
- HOW OFTEN SHOULD THE WASHABLE MICRO-EXHAUST FILTER/MOTOR PROTECTION FILTER BE CLEANED/RINSED THROUGH
- HOW OFTEN SHOULD I REPLACE THE HEPA FILTER
- WHAT IS THE BEST WAY TO TRANSPORT MY VACUUM CLEANER
- FREQUENTLY ASKED QUESTIONS (DOMANDE FREQUENTI)
- DA
- TILTENKT BRUK
- PRIMERA UTILIZACIÓN
- FIGURA 1
- PT
- TR
- HU
- BG
- UK
- 40227 DÜSSELDORF
- 44287 DORTMUND
- 45141 ESSEN
- 47805 KREFELD
- GR GREECE, ΕΛΛΆΣ
- HR HRVATSKA, CROATIA
- IE REPUBLIC OF IRELAND
- IL ISRAEL
- IS ICELAND
- IT ITALIA, ITALY
- LT LIETUVA, LITHUANIA
- LU LUXEMBOURG
- PL POLSKA, POLAND
- DE GARANTIE
- GB CONDITIONS OF GUARANTEE
- FR CONDITIONS DE GARANTIE
- DE
- FR
Brand : SIEMENS
Model : Super SX VS01G800
Category : Vacuum Cleaner