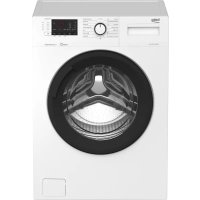
WMD 25100 TBL - Washing machine BEKO - Free user manual and instructions
Find the device manual for free WMD 25100 TBL BEKO in PDF.
User questions about WMD 25100 TBL BEKO
0 question about this device. Answer the ones you know or ask your own.
Ask a new question about this device
Download the instructions for your Washing machine in PDF format for free! Find your manual WMD 25100 TBL - BEKO and take your electronic device back in hand. On this page are published all the documents necessary for the use of your device. WMD 25100 TBL by BEKO.
USER MANUAL WMD 25100 TBL BEKO
natural_image
Illustration of a hand pressing down on a mechanical component with a black downward arrow (no text or symbols)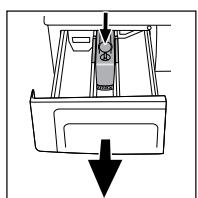
natural_image
Diagram of a car interior with a downward arrow indicating motion or force (no text or symbols)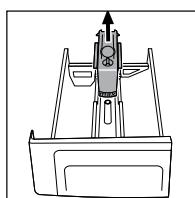
natural_image
Technical line drawing of a mechanical component with an upward arrow indicating motion or force (no text or symbols)Фильтры подачи воды
natural_image
Illustration of a hand using a tool to adjust or install a component, no text or symbols present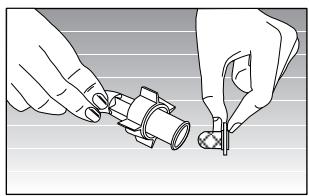
natural_image
Illustration of hands assembling a mechanical component (no text or symbols visible)natural_image
Simple line drawing of a hand pressing down on a surface with a wavy line underneath (no text or symbols)
natural_image
Line drawing of a car interior showing hand positioning and wheel assembly (no text or symbols)natural_image
Hand operating a mechanical component with a curved arrow indicating rotation (no text or symbols present)
natural_image
Line drawing of a hand pressing a button on a device (no text or symbols)Внимание!
text_image
▶ II expressZrušení programu
natural_image
Illustration of a hand pressing down on a mechanical component with a downward arrow (no text or symbols)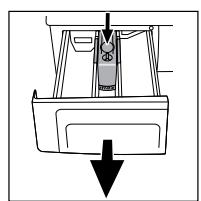
natural_image
Simple line drawing of a boat's side view with a downward arrow indicating flow or movement (no text or symbols)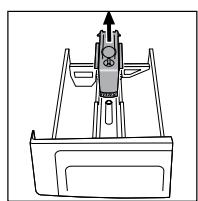
natural_image
Technical line drawing of a mechanical component with no visible text or symbolsnatural_image
Illustration of hands installing a mechanical component with a tool (no text or symbols visible)Nebezpečí horké vody: There might be 15 lt., 90°C hot water in the drum. Open the filter carefully.
natural_image
Simple line drawing of a hand pressing down on a surface with a downward arrow (no text or symbols)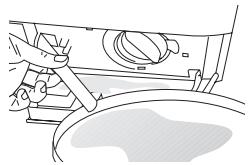
natural_image
Line drawing of a car wheel assembly with lever and wheel (no text or symbols)natural_image
Line drawing of a hand operating a mechanical component with a curved arrow indicating rotation (no text or symbols)
natural_image
Line drawing of a hand pressing a button on a rectangular object (no text or symbols)Výstraha!
natural_image
Illustration of a hand pressing down on a mechanical component with a downward arrow (no text or symbols)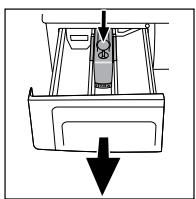
natural_image
Diagram of a car interior showing a seat, dashboard, and exhaust pipe (no text or labels)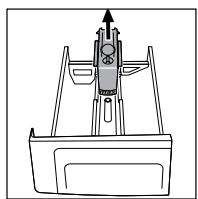
natural_image
Technical line drawing of a mechanical component with no visible text or symbolstext_image
Diagram showing finger pressing a button with icons and labels 'express' and directional arrowsOtkazivanje programa
Da bi otkazali program, pritiskajte dugme "Start/Pause/Cancel" u trajanju od tri sekunde. Nakon ovog vremena, lampica "Start/Pause/Cancel" i sve ostale lampice će se ugasiti. Možete birati novi program i započeti pranje.
Ukoliko izvršite otkazivanje zadatka za
natural_image
Illustration of a hand using a tool to adjust or install a component, no text or symbols present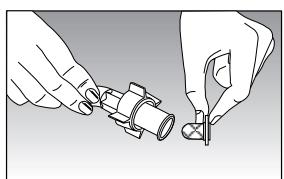
natural_image
Illustration of hands fastening a mechanical component with a tool (no text or symbols)Čišćenje pumpnog filtera
Postoji sistem filtriranja koji, za vreme ispuštanja vode od pranja, blokira ulazak stranih tela, kao dugmadi, vlakana tkanine u pumpu i time održava dugi radni vek pumpe. Poželjno je očistiti filter kada je prljav.
Da bi to uradili:
Izvucite utikač mašine. Pritiskanjem na označeno mesto na poklopcu otvorite filter koji se nalazi u donjem desnom uglu.
natural_image
Simple line drawing of a hand holding a small object above a curved surface (no text or symbols)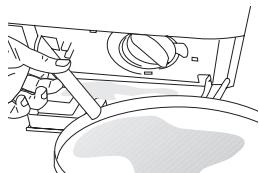
natural_image
Line drawing of a mechanical assembly with no visible text or symbolsPre otvaranja filtera ispraznite vodu pomoću creva za pražnjenje. Izvucite crevo za pražnjenje iz svog mesta. Pripremite odgovarajući sud i otvorite odvojak creva. Nakon pražnjenja vode propisno vratite odvojak na svoje mesto. Okretanjem otvorite filter i ispraznite preostalu vodu (maks 30ml) preko filtra na odvojku. Uklonite preostala strana tela iz filtra. Kada ste gotovi, okrenite u smeru kazaljki i zatvorite. Zatvorite odvojak filtera pritiskanjem.
natural_image
Hand turning a mechanical component with a curved arrow indicating rotation (no text or symbols)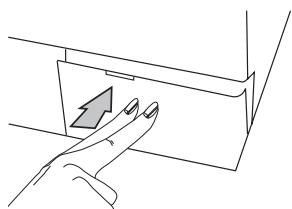
natural_image
Line drawing of a hand pressing a button on a mechanical component (no text or symbols)Pažnja!
natural_image
Illustration of a hand holding a tool with a circular component, no text or symbols present2. Niveliranje nogara
Da bi Vaša mašina radila bešumno i bez vibracija, mora biti propisno balansirana. Četiri nogare koje se nalaze na Vašoj mašini mogu se podešavati. Prvo olabavite plastičnu glavu zavrtnja. Nakon podešavanja nogara za nive-liranje mašine, ponovo zategnite glavu zavrtnja.
natural_image
Hand holding a pipe fitting with a valve, no text or symbols visiblenatural_image
Illustration of a hand pressing down on a mechanical component with a downward arrow (no text or symbols)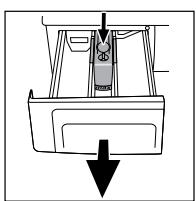
natural_image
Diagram of a vehicle interior with a downward arrow indicating motion or force (no text or symbols)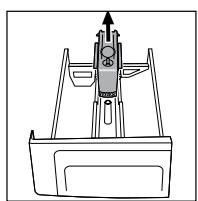
natural_image
Technical line drawing of a mechanical component with no visible text or symbolsPoništavanje programa)
Odabrane pomoćne funkcije moraju biti u skladu s programom pranja.
Dodavanje rublja
text_image
PLUS ● 3h ● 6h ● 9hnećete moći dodati još rublja. Za nastavak programa možete pritisnuti "Start/Pauza/Poništavanje".
Vrijeme zadrške za početak programa
Pomoću tipke za vrijeme zadrške možete odgoditi početak odabranog programa na 3, 6 ili 9 sati.
Ako tipku za vremensku zadršku pritisnete jednom, podešava se odgađanje na 3 sata i upali se žaruljica. Ako istu tipku pritisnete još jednom, podešava se odgađanje na 6 sati, a još jednim pritiskom podešava se odgađanje na 9 sati. Još jednim pritiskom na istu tipku, odgađanje početka se poništava. Nakon odabira vremena zadrške, kada se pritisne tipka "Start/Pauza/Poništavanje", program se može pokrenuti s odgađanjem. Tijekom trajanja vremena zadrške, možete otvoriti vrata i dodati rublja.
Nakon pokretanja vremena zadrške pritiskom na tipku "Start/Pauza/Poništavanje" perilicu možete prebaciti u režim rada Pauza i promijeniti vrijeme zadrške.
text_image
Diagram showing finger pressing a button with icons and labels 'express' and directional arrowsPoništavanje programa
Za poništavanje programa pritisnite tipku, 'Start/Pauza/Poništavanje" na tri sekunde. Nakon tog vremena, žaruljica "Start/Pauza/Poništavanje" i sve druge će se ugasiti. Možete odabrati novi program i početi s pranjem.
Ako se poništavanje izvodi tijekom pranja na displeju se upali žaruljica “Centrifuga”, stroj pumpa i kad se žaruljica, ‘Centrifuga’ ugasi, upali se žaruljica, ‘vrata“, nakon čega možete otvoriti vrata i odabrati novi program.
Nakon što perilica počne s radom, čak i ako se promijeni brzina centrifuge ili temperatura pranja, i dalje vrijede početna brzina i temperatura. Kako biste promijenili brzinu centrifuge ili temperature nakon pritiska "Start/Pauza/Poništavanje" možete odabrati novi ciklus ili temperaturu.
Završetak programa
natural_image
Illustration of a hand inserting a plug into a device (no text or symbols visible)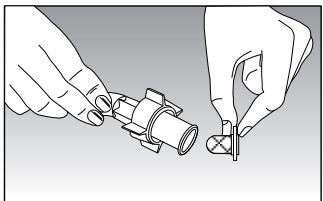
natural_image
Illustration of two hands holding a mechanical component, no text or symbols presentnatural_image
Simple line drawing of a hand pressing down on a surface with a downward arrow (no text or symbols)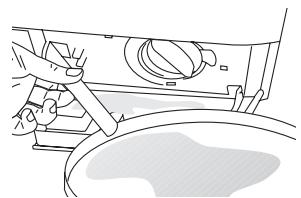
natural_image
Line drawing of a hand operating a mechanical device with a handle and lever (no text or symbols)Prije otvaranja filtra ispustite vodu crijevom za odvod. Izvadite crijevo za odvod iz njegovog ležišta. Pripremite odgovarajuću posudu i otvorite pipac crijeva. Nakon što voda iscuri, vratite pipac na pravilan način. Otvorite filtar okrećući ga i ispustite preostalu vodu (maks. 30ml) u filtar. Očistite preostale strane predmete u filtru. Kada ste gotovi, okrenite u smjeru kazaljke na satu i zatvorite. Zatvorite pipac za filtar tako da ga pogurnete.
natural_image
Hand operating a mechanical component with a curved arrow indicating rotation (no text or symbols present)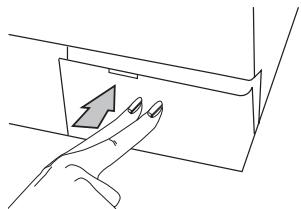
natural_image
Line drawing of a hand pressing a button on a device panel (no text or symbols)Oprez!
natural_image
Simple line drawing of a hand holding a small object near a window (no text or symbols)natural_image
Close-up of hands adjusting a mechanical component with an arrow indicating direction (no text or symbols visible)text_image
Diagram illustrating nine steps of a car door handle and seat assembly, labeled 1 to 9 with icons for use, zoom, and component placement.text_image
Diagram showing finger pressing a button with icons and labels 'express' and directional arrowsProgram leállítása
natural_image
Illustration of a hand pressing down on a mechanical component with a downward arrow (no text or symbols)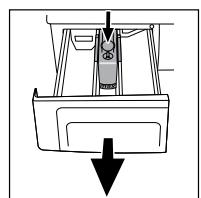
natural_image
Diagram of a car interior with a downward arrow indicating motion or force (no text or symbols)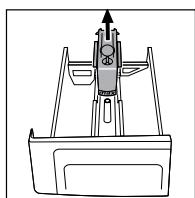
natural_image
Technical line drawing of a mechanical component with no visible text or symbolsnatural_image
Illustration of hands holding a mechanical component with a screw and pin (no text or symbols)natural_image
Simple line drawing of a hand pressing down on a surface with a wavy line underneath (no text or symbols)
natural_image
Line drawing of a mechanical assembly with no visible text or symbolsnatural_image
Hand operating a mechanical component with a curved arrow indicating rotation (no text or symbols present)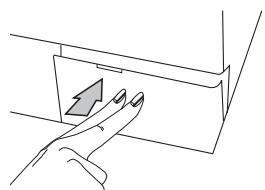
natural_image
Line drawing of a hand pressing a button on a device (no text or symbols)Figyelmeztetés!
natural_image
Close-up of a hand adjusting a pipe fitting with directional arrows (no text or symbols)text_image
Diagram showing finger pressing a button with icons for function keys and express controlnatural_image
Illustration of a hand pressing down on a mechanical component with a downward arrow (no text or symbols)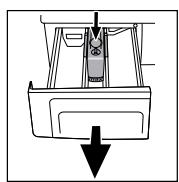
natural_image
Illustration of hands installing a pipe fitting into a valve (no text or symbols present)natural_image
Line drawing of a hand pressing a button on a mechanical component (no text or symbols)Προσοχή!
natural_image
Illustration of a hand pressing down on a mechanical component with a downward arrow (no text or symbols)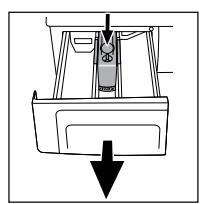
natural_image
Diagram of a mechanical component with a downward arrow indicating force or direction (no text or symbols)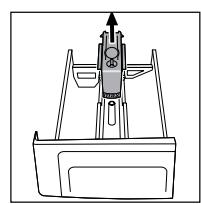
natural_image
Line drawing of a mechanical device with an upward arrow and control panel (no text or symbols)Входни филтри за вода
natural_image
Diagram of a hand inserting a plug into a device (no text or symbols visible)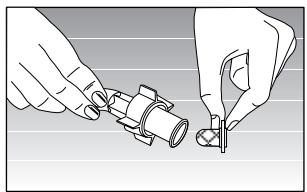
natural_image
Illustration of hands assembling a mechanical component (no text or symbols visible)natural_image
Simple line drawing of a hand pressing down on a surface with a wavy line underneath (no text or symbols)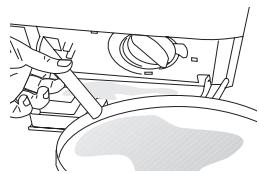
natural_image
Line drawing of a mechanical component with no visible text or symbolsnatural_image
Hand turning a mechanical component with a curved arrow indicating rotation (no text or symbols)
natural_image
Line drawing of a hand pressing a button on a surface, no text or symbols presentВнимание!
natural_image
Illustration of a hand holding a circular object, possibly a tool or component, against a plain background (no text or symbols)natural_image
Hand holding a valve component with a threaded inlet, showing a directional arrow (no text or symbols)text_image
Diagram showing finger pressing a button with various icons and labels including 'express' and directional indicatorsnatural_image
Hand pressing a component with a black downward arrow (no text or symbols)
natural_image
Illustration of hands holding a mechanical component with a tool (no text or symbols visible)A mangueira
natural_image
Simple line drawing of a hand pressing down on a surface with a wavy line underneath (no text or symbols)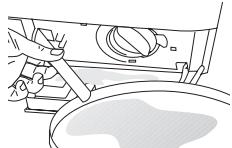
natural_image
Hand holding a tool interacting with a pipe fitting (no text or symbols visible)3. Ligações da água
natural_image
Simple line drawing of a hand pressing down on a surface with a wavy line underneath (no text or symbols)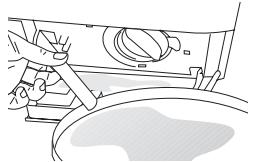
natural_image
Line drawing of a car interior with hand using tool to adjust or install (no text or symbols)natural_image
Mechanical assembly diagram showing a rotating component with a curved arrow indicating motion (no text or symbols)
natural_image
Line drawing of a hand pressing a button on a rectangular panel (no text or symbols)Atención!
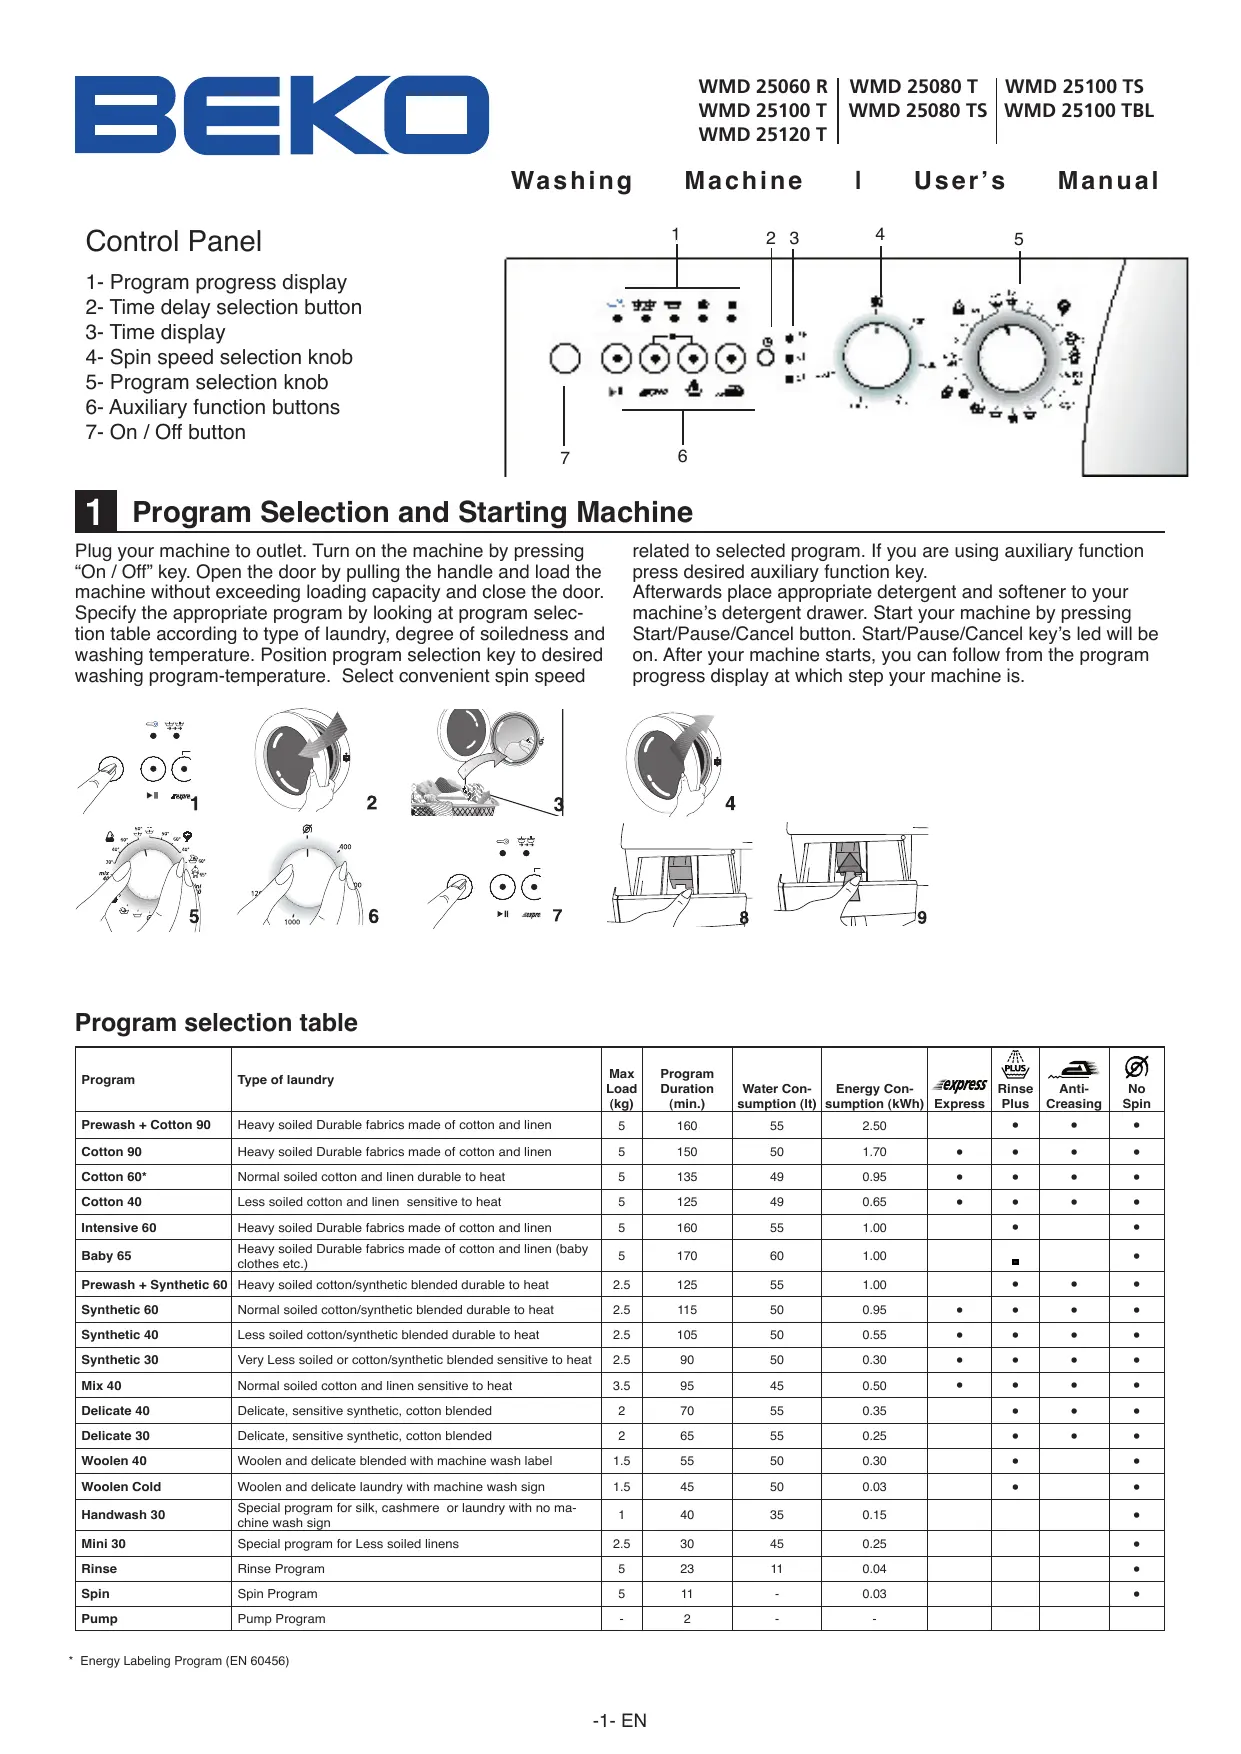
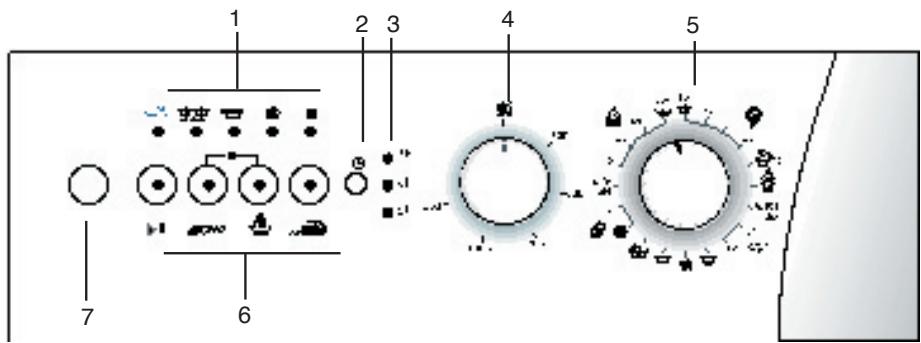
Washing Machine I User's Manual
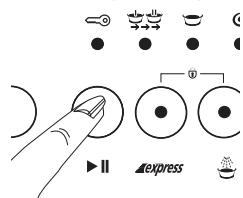
Control Panel
1- Program progress display
2- Time delay selection button
3- Time display
4- Spin speed selection knob
5- Program selection knob
6- Auxiliary function buttons
7- On / Off button
text_image
1 2 3 4 5 6 71 Program Selection and Starting Machine
Plug your machine to outlet. Turn on the machine by pressing "On / Off" key. Open the door by pulling the handle and load the machine without exceeding loading capacity and close the door. Specify the appropriate program by looking at program selection table according to type of laundry, degree of soiledness and washing temperature. Position program selection key to desired washing program-temperature. Select convenient spin speed
related to selected program. If you are using auxiliary function press desired auxiliary function key.
Afterwards place appropriate detergent and softener to your machine's detergent drawer. Start your machine by pressing Start/Pause/Cancel button. Start/Pause/Cancel key's led will be on. After your machine starts, you can follow from the program progress display at which step your machine is.
Program selection table
| Program | Type of laundry | Max Load (kg) | Program Duration (min.) | Water Consumption (lt) | Energy Consumption (kWh) | Express | Rinse Plus | Anti-Creasing | No Spin |
| Prewash + Cotton 90 | Heavy soiled Durable fabrics made of cotton and linen | 5 | 160 | 55 | 2.50 | ● | ● | ● | |
| Cotton 90 | Heavy soiled Durable fabrics made of cotton and linen | 5 | 150 | 50 | 1.70 | ● | ● | ● | ● |
| Cotton 60* | Normal soiled cotton and linen durable to heat | 5 | 135 | 49 | 0.95 | ● | ● | ● | ● |
| Cotton 40 | Less soiled cotton and linen sensitive to heat | 5 | 125 | 49 | 0.65 | ● | ● | ● | ● |
| Intensive 60 | Heavy soiled Durable fabrics made of cotton and linen | 5 | 160 | 55 | 1.00 | ● | ● | ||
| Baby 65 | Heavy soiled Durable fabrics made of cotton and linen (baby clothes etc.) | 5 | 170 | 60 | 1.00 | ■ | ● | ||
| Prewash + Synthetic 60 | Heavy soiled cotton/synthetic blended durable to heat | 2.5 | 125 | 55 | 1.00 | ● | ● | ● | |
| Synthetic 60 | Normal soiled cotton/synthetic blended durable to heat | 2.5 | 115 | 50 | 0.95 | ● | ● | ● | ● |
| Synthetic 40 | Less soiled cotton/synthetic blended durable to heat | 2.5 | 105 | 50 | 0.55 | ● | ● | ● | ● |
| Synthetic 30 | Very Less soiled or cotton/synthetic blended sensitive to heat | 2.5 | 90 | 50 | 0.30 | ● | ● | ● | ● |
| Mix 40 | Normal soiled cotton and linen sensitive to heat | 3.5 | 95 | 45 | 0.50 | ● | ● | ● | ● |
| Delicate 40 | Delicate, sensitive synthetic, cotton blended | 2 | 70 | 55 | 0.35 | ● | ● | ● | |
| Delicate 30 | Delicate, sensitive synthetic, cotton blended | 2 | 65 | 55 | 0.25 | ● | ● | ● | |
| Woolen 40 | Woolen and delicate blended with machine wash label | 1.5 | 55 | 50 | 0.30 | ● | ● | ||
| Woolen Cold | Woolen and delicate laundry with machine wash sign | 1.5 | 45 | 50 | 0.03 | ● | ● | ||
| Handwash 30 | Special program for silk, cashmere or laundry with no machine wash sign | 1 | 40 | 35 | 0.15 | ● | |||
| Mini 30 | Special program for Less soiled linens | 2.5 | 30 | 45 | 0.25 | ● | |||
| Rinse | Rinse Program | 5 | 23 | 11 | 0.04 | ● | |||
| Spin | Spin Program | 5 | 11 | - | 0.03 | ● | |||
| Pump | Pump Program | - | 2 | - | - |
* Energy Labeling Program (EN 60456)
2 Technical Features of Your Washing Machine
| Models | WMD 25060 R | WMD 25080 T WMD 25080 TS | WMD 25100 T WMD 25100 TS WMD 25100 TBL | WMD 25120 T |
| Maximum dry laundry capacity (kg.) | 5 | 5 | 5 | 5 |
| Height x Width x Depth (cm.) | 84 x 60 x 54 | 84 x 60 x 54 | 84 x 60 x 54 | 84 x 60 x 54 |
| Net Weight (kg.) | 63 | 64 | 64 | 67 |
| Electricity (V/Hz.) | 230/50 | 230/50 | 230/50 | 230/50 |
| Total Current (A) | 10 | 10 | 10 | 10 |
| Total Power (W) | 2300 | 2300 | 2300 | 2300 |
| Washing -rinsing cycle (cyc/min) | 52 | 52 | 52 | 52 |
| Spinning cycle (max cyc/min) | 600 | 800 | 1000 | 1200 |
3 Warning
• This product is designed for home use.
- If the fuse in your house is less than 16A than have a certified electrician deploy an 16A fuse.
- In case of transformer or non-transformer use, grounding installation must be performed with a licensed electrician. Any use before grounding is not our responsibility.
- Please call certified service for a failure of electric plug / cable.
• Never place your machine over a carpet covered floor.
- At first use, washing must be performed at Cotton 90°C program without loading with laundry for getting your machine ready for washing.
- Performance of your washing machine depends on the quality of water and hygiene compound used. If low quality and unfitting cleaning material is used the stains will be fixed.
- Because of quality control procedures there might be little amount of water in your machine. This does not have any damage to your machine.
- Your machine is programmed for starting operation again when electricity is off and on afterwards. You can not press On / Off button to cancel program. Machine will go on program when electricity is on. To CANCEL the program press >Start/Pause/Cancel< button for three seconds. (See. Cancelling a program)
- After your machine starts operation, if Start/Pause/Cancel key starts blinking than door is not locked. Open and close the door again begin washing program again.
- If the “washing” led on the program progress display is blinking either there is no water or tap is off. Check your taps. Turn your machine off and on. If the problem persists unplug your machine, turn off tap water and call authorized service.
- If program is started and program selection can not be performed your machine might be in protection mode due to infrastructure problem (voltage, water pressure, etc.) Press and hold the > Start/Pause/Cancel < button for 3 seconds in order to switch machine to factory settings.
4 Preparation
Before starting your machine please beware of below mentioned points:
Did you plug the cable?
Did you connect draining hose correctly?
Did you close front door?
Did you open tap water?
Sorting the Laundry
Sort laundry according to type of fabric, color, level of dirtiness and allowed washing temperature. Do not wash white laundry together with colored ones. Remove hard parts like belt, wrist button, curtain buttons, etc. or place laundry in a cloth bag. Empty pockets. Zip up and button up. Very tiny laundry like baby clothes may get into inside of drum, midst of bellow, pump filter, hose, etc. in order to prevent this it is advised to place
such laundry in a special laundry string bag or large laundry. Your machine can wash “Machine Wash” or “No-matting” labeled woolen with special woolen program. Delicate laundry with “Do not wash” or “hand wash” label (silk, cashmere, pure wool, etc.) can be washed in the special hand-wash program.
Opening front door
Pull the handle to open the front door. Your machine's front door is designed for opening during only machine is not operating. If the led displays "door" than door can open.
Loading machine with laundry
Fill the machine by unfolding and not squeezing laundry. Place hand-woven garments inside-out to the machine. Make sure there is no laundry jammed between bellow and front-door. Close the loading door by pushing. If loading door is not properly closed machine will not start.
Selection of detergent and softener
Quantity of the detergent used depends on hardness of water and how soiled laundry is. Recommended values are indicated on the package. If your laundry is low soiled and/or hardness of water is low use less detergent as indicated on the package. Otherwise it may result in excessive foam.
You should use detergent specially designed for automatic washing machines. Avoid using bleach product containing sulfur or chlorine. Place powder detergent and softener in appropriate drawer compartment and close detergent dispenser.
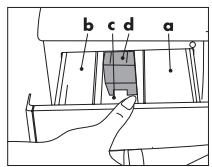
a. powder detergent drawer for pre-wash.
b. powder detergent drawer for main wash.
c. Softener dispenser
d. Siphon
Fill the softener as indicated (usually <100ml; 1 tea bag) on package. Never fill more than “MAX” level. Excess amount will drain to suction cup and be wasted. You might need to fill softener again. If softener is thickened over time add some water for thinning. Softener may obstruct siphon and block flow.
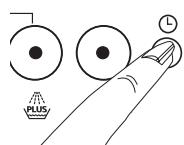
Auxiliary Functions
Express: Shortens washing time for lightly soiled fabrics. This function can be used for cotton and synthetic programs for temperatures below 60°C.
Rinse plus: By using this function your machine will add another rinse process to the three rinse processes that it has already done. This additional rinse will reduce any affects on sensitive skin by washing leftover detergent.
Easy-iron: To avoid wrinkling of your clothes, select this function. When Easy-iron is chosen please load less cloth, this way a special washing and spinning profile will reduce the wrinkles and your clothes will be easy to iron.
Spin speed selection knob: You can spin the laundry up to 1000 cycle / min. with the models having cycle selection button.
Your machine will spin not more than 800 cycle / min. for synthetic programs and 600-400 cycle/min. for woollen programs. In addition if you do not want to spin your laundry you may choose “No Spin” position.
Pressing "On/Off"
By pressing “On/Off” button you can make your machine ready for selecting program. When “On/Off” key is pressed “door” led will light on meaning “door can open”. Press “On/Off” key again for turning your machine off.
Pressing "On/Off" does not mean program started operation.
You must press "Start/Pause/Cancel" for starting the program.
Child-proof lock
During washing laundry in order to maintain that program progress is not affected by pressing keys by children there is child-proof lock. To enable child-proof lock, after washing begins, press Express and Rinse Plus function buttons together simultaneously for three seconds. Pre-wash additional function led will
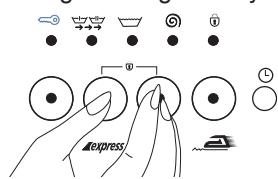
text_image
expressalways blink.
After program ends in order to start a new program or alter the program you have to disable child-proof lock. To do this press same buttons for three seconds and Child-proof lock led will be off.
Function Selection
Additional functions selectable according to selected program can be selected by pressing related key. Led of selected function will be on.
If not selected together some additional functions go off when it is not selected with other one. For example; when using cotton program, express and rinse plus auxiliary functions can not be selected together. After selecting express program, if rinse plus key is pressed fast program will be on and express function led will go off.
Program Progress
After machine starts operation relevant program led on program progress display will be on. When a step is completed that step's led is off and next step's led is on. When program is completed "Door" led will be on again.
During machine operation you can press “Start/Pause/Cancel” key for getting machine to “Pause” position. In this case “Start/Pause/Cancel” led will blink.
Changing Program
You can use this feature for washing laundry in the same textile group for washing at lower or higher temperatures. For example, instead of Cotton60, Cotton40 can be used. For selecting Cotton40 instead of Cotton60 by pressing “Start/Pause/Cancel” key machine is switched to pause position. Program knob is turned for selecting Cotton40 program.
Even when the program selection knob is changed during the program initially selected program will be executed. For changing washing program continuing program must be cancelled. Although selected auxiliary functions must be compatible with washing program.

Care and maintenance
Detergent Dispenser
Powder detergent residue may accumulate in drawer after a while. In order to clean detergent drawer press the marked point of the siphon on softener compartment and push the drawer towards yourself. Wash the drawer with water
Siphon
Do not neglect cleaning suction cup when it becomes soiled. In order take suction cup out first take detergent drawer out. Clean
Adding laundry
If you want to add laundry to your machine after program begins press Start/Pause key for switching machine to pause mode. If water level in the machine is appropriate “door” led on program progress display is on and laundry can be added to the machine. If “door” led is not on after one minute than water level in the machine is not appropriate and laundry can not be added. You can press “Start/Pause/Cancel” key for continuing program.
Time delay for program start
- 3h Using time delay key you can delay the starting of the selected program for 3 hours, 6 hours or 9 hours. - 6h When time delay key is pressed once 3 hours delay is adjusted and led will light on. If same key is pressed once more
delay is 6 hours, and if it is pressed once more 9 hours delay is selected. If time delay key is pressed again delay is cancelled. After the selection of time delay when “Start/Pause/Cancel” is pressed program can be started with delay. During delay period door can be opened or laundry can be added
After time delay is initiated by pressing “Start/Pause/Cancel” you can switch machine to “Pause” mode and change delay time.
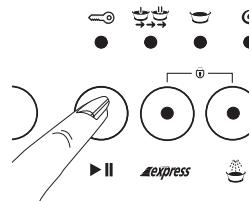
Canceling a Program
text_image
Diagram showing finger pressing a button with control buttons and directional indicators labeled 'express' and 'II'For canceling a program “Start/Pause/Cancel” key is pressed for three seconds. After this period “Start/Pause/Cancel” and all other leds will be off. You can select a new program and start washing.
If cancel task is performed during washing "Spin" led on display will light on,
machine will pump and when “Spin” led is off “door” led will be on, door can be opened and new program can be selected. After machine starts operation even if spin speed or washing temperature is changed, initial speed and temperature is valid. In order to change spin speed or temperature after pressing “Start/Pause/Cancel” new cycle or temperature can be selected.
End of Program
When program ends “door” led will light on and door can be opened and machine is ready for next washing. Press “On/Off” for turning machine off.
Emptying Laundry
After program ends machine automatically stops. Turn off tap water. Pull the handle and open loading door. Turn off your machine by pressing "On/Off". After taking laundry out keep the loading door open and let the drum ventilate. Check the bellow and clean.
it in order to eliminate blocking by softener residue. After cleaning place suction cup to its place and make sure it is placed properly.
natural_image
Illustration of a hand pressing down on a mechanical component with a downward arrow (no text or symbols)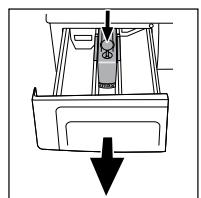
natural_image
Simple line drawing of a boat's side panel with a downward arrow indicating flow or movement (no text or symbols)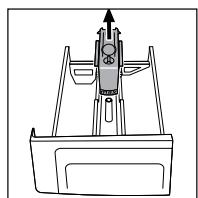
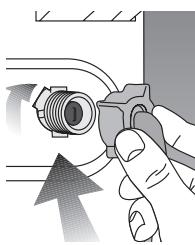
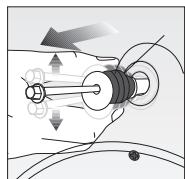
Water Inlet Filters
There is a filter at each flat end where water inlet hose is connected to tap and at each of water inlet valve placed behind the machine. These filters blocks entrance of foreign objects and dirt to the machine. Filters must be cleaned regularly to avoid clogging. For doing this, turn off tap water. Pull out water inlet hoses. Clean the top of the water inlet valve filter with a brush. If filters are extremely clogged you can pull it out with a pincer. You can take out the flat side of water inlet hoses with its seal and clean with tap water.
Hose
There is risk of freezing in cold region, if your machine is placed in a cold place remaining water in hoses must be drained with pump filter when machine is not used. Water inlet hoses can be drained by taking it out from tap.
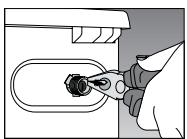
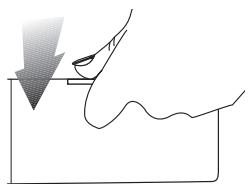
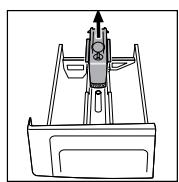
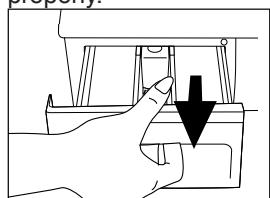
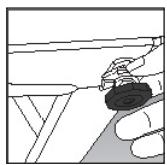
Cleaning Pump Filter
There is filter system maintaining long lifetime of pump by blocking foreign objects like button, cloth fiber enter to the pump during drain of washing water. It is useful to clean the filter when it is soiled. In order to do this:
Unplug your machine. Open the filter at bottom right corner by pressing marked space on the lid. Hot water risk: There might be 15 lt., 90°C hot water in the drum. Open the filter carefully.

natural_image
Simple line drawing of a hand pressing down on a surface with a wavy line underneath (no text or symbols)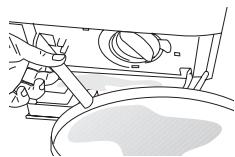
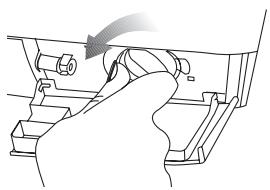
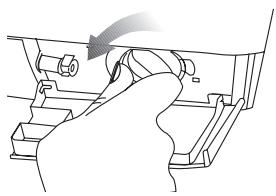
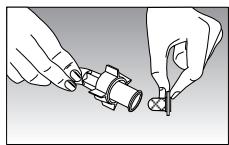
Before opening the filter drain the water with drain hose. Pull out the drain hose from its place. Prepare a suitable container and open the tap of hose. After water is drained place the tap properly. Open the filter by turning and drain the remaining water (max30ml) to filter tap. Clean remaining foreign object in the filter. When finished turn in clockwise direction and close. Close the filter tap by pushing.
natural_image
Hand turning a mechanical component with a curved arrow indicating rotation (no text or symbols)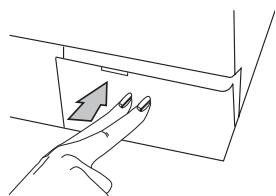
natural_image
Line drawing of a hand pressing a button on a device (no text or symbols)If the filter and hose tap does not fit, it leaks water.
6 Installation
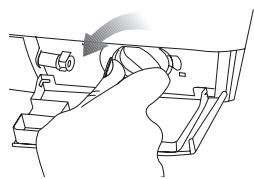
- Removing the transportation safety bolts Before the washing machine is operated, the transit bars must be removed! In order to do this:
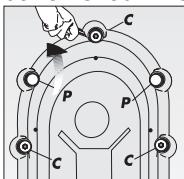
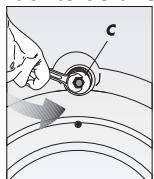
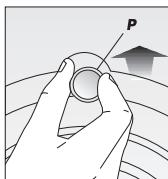
- Loosen "C" bolts by rotating them counter clockwise with a suitable spanner
- Remove transportation safety bolts by turning.
- Place "P" plastic covers onto the openings of transportation locks by rotating in direction of arrow and pushing.
Attention please! Keep the transit safety bolts for using when machine is to be transported again. Always transport your ma-
chine with transportation locks.
2. Leveling the feet
In order to operate your machine without noise and vibration it must be properly on balance. Four feet of your machine can be adjusted. First loosen the plastic counter bolt. Tighten the counter bolt after adjusting the feet for leveling your machine.
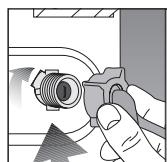
3. Water Connections
a) Water Inlet Hose: Your machine is connected to water supply by special hoses supplied by the machine. There are plastic seals on hose or plastic bag for eliminating any leakage in connections points. These seals must be used on each side
of the connection. Seals on machine side must be connected filter cannal.
After connecting the hose, check all connections for leaks In order to eliminate any risk due to water leakage keep the taps off when machine is not used.
Your machine will operate efficiently if the water from tap is minimum 1 and maximum 10 bars. Practically 1 bar means 8 liters of water in one minute when tap is fully on.
Connect hose to the machine. Tighten bolts with hand power, do not use spanner.
Do not connect single inlet machine to hot water. If machine is connected with Y part to a double inlet and over 40^ C for single inlet machines, machine may switch to protection mode.
b) Water drain hose: Water drain hose could be placed either at the side of the bath tub, or directly to the drain. The hose should not be bent. Water drain hose should be secured with the holder so that it would not fall down on the ground.
The hose should be placed between 40 and 100 cm. from the ground. Water drain hose could be placed directly to the drain water inlet.
4. Electrical connection
Connect the power cord to the appropriate electrical system which is being supported by the maximum voltage and current rating indicated on the rating plate placed on the washing machine.
Look! Page 1, Steps before operating Fullautomatic Washing Machine and safety precautions. Make sure that you have grounded power outlet.
7 Before calling service
You turned the machine on, but the leds are off on the panel.
Check the grounding on the power cable or a blown fuse. Check the front door proper closure.
Machine does not take water.
Check the front door for proper closure. Either taps are closed or water intake filters are clogged.
Taken water is directly discharged.
Check if the discharge hose placed as described in the users manual or not.
Water coming from beneath the machine.
Check the water intake and drain hoses. Tighten the connections. The washers of the hoses may be worn out. If non of the both, the pump filter is not closed properly.
Foam coming out of the detergent dispenser.
Check whether your detergent is suitable for automatic machines. Next time use less detergent.
Pump does not drain water.
Clean the pump filter. Check whether the drain hose is bent or not. If there is need to clean the pump filter, refer to the pump filter cleaning section of the manual.
text_image
Diagram showing finger pressing a button with plus symbol and clock, alongside icons for lock, lock, and reset.text_image
Diagram showing finger pressing a button with icons for navigation, refresh, and express functionsAnnuler un programme
natural_image
Simple line drawing of a hand pressing down on a surface with a wavy line underneath (no text or symbols)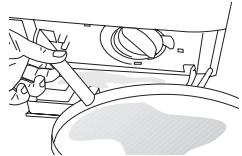
natural_image
Line drawing of a hand pressing a button on a surface (no text or symbols)Attention!
text_image
Diagram showing finger pressing a button with control icons and text labels 'express' and directional arrowsZrušenie programu
natural_image
Hand pressing a downward arrow on a mechanical component (no text or symbols visible)
natural_image
Simple line drawing of a boat with a downward arrow indicating flow or movement (no text or symbols)
natural_image
Technical line drawing of a mechanical assembly with no visible text or symbolsFiltre prítoku vody
natural_image
Simple line drawing of a hand holding a small object above a curved surface (no text or symbols)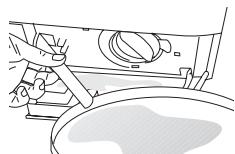
natural_image
Line drawing of a hand pressing down on a mechanical component (no text or symbols)
natural_image
Line drawing of a hand pressing a button on a device (no text or symbols)Ak nesedí zátka filtra a hadice, tak cez ňu presakuje voda.