
Azur Excel Plus HI558 - Iron PHILIPS - Free user manual and instructions
Find the device manual for free Azur Excel Plus HI558 PHILIPS in PDF.
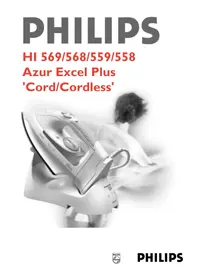


| Product Type | Steam Iron |
| Model | Azur Excel Plus HI558 |
| Brand | Philips |
| Dimensions (W x D x H) | Approx. 31 x 15 x 15 cm |
| Weight | Approx. 1.6 kg |
| Power Supply | 220-240 V, 50-60 Hz |
| Power Consumption | 2400 W |
| Soleplate Material | OptimalTemp Glide |
| Steam Output (Continuous) | Up to 50 g/min |
| Steam Boost | Up to 230 g/min |
| Water Tank Capacity | 350 ml |
| Anti-Calc System | Yes, integrated |
| Auto Shut-Off | Yes (after 30 sec on soleplate, 8 min upright) |
| Variable Temperature Settings | Yes, includes Smart Temperature Control |
| Spray Function | Yes, fine spray |
| Vertical Steaming | Yes |
| Cord Length | 2.5 m |
| Swivel Cord | Yes, 360° |
| Self-Cleaning Function | Yes |
| Overheat Protection | Yes |
| Included Accessories | Measuring cup, anti-scale collector |
| Repairability | Spare parts available for DIY repair |
| Warranty | 2 years |
Frequently Asked Questions - Azur Excel Plus HI558 PHILIPS
User questions about Azur Excel Plus HI558 PHILIPS
0 question about this device. Answer the ones you know or ask your own.
Ask a new question about this device
Download the instructions for your Iron in PDF format for free! Find your manual Azur Excel Plus HI558 - PHILIPS and take your electronic device back in hand. On this page are published all the documents necessary for the use of your device. Azur Excel Plus HI558 by PHILIPS.
USER MANUAL Azur Excel Plus HI558 PHILIPS
Keep page 3 open when reading these operating instructions.
- Please read these instructions in conjunction with the illustrations before using the appliance.
- Before using for the first time, check if the voltage rating on the typeplate corresponds to the mains voltage in your home.
- Never use the appliance if it is damaged in any way.
- Before using for the first time remove any sticker or protective foil from the soleplate. Clean the soleplate with a soft cloth.
- When you have finished ironing, and also when leaving the iron even for a short while:
- set the steam control to position O;
- place the iron on the stand;
- remove the mains plug from the wall socket. • Take care that children cannot touch the iron when hot and that they cannot pull the mains cord.
- Remove the mains plug from the wall socket before filling the iron with water or pouring out the remaining water after use.
- Never immerse the iron or the stand in water.
- Some parts of the iron have been slightly greased and as a result the iron may slightly smoke when switched on for the first time. This (harmless) phenomenon will cease after a short while.
- Do not put vinegar or other descaling agents into the water reservoir.
- Do not use chemically descaled water.
- The cordset should not be allowed to touch the soleplate when it is hot.
- The ejected steam is hot and therefore hazardous. Never direct the steam towards people.
- Regularly check if the mains cord is still in a good and safe condition.
- If the mains cord of this appliance is damaged, it must only be replaced by Philips or their service representative, as special tools and/or parts are required.
- This appliance is not intended for use by young children or infirm persons without supervision.
- Young children should be supervised to ensure that they do not play with the appliance.
General description (fig. 1)
A Temperature control (rotate)
B Steam control (slide)
0 = no steam
1 = minimum steam output
6 = maximum steam output
C Spray button (press)
D Spray nozzle
E Shot of Steam button (press)
F Turbo Steam button (press) (types HI 568/69)
Filling funnel for filling with water without spillage
H Temperature pilot light (amber)
I "Self clean" button for automatic cleaning / descaling (press)
J Water window
K Type plate
L Measuring beaker
M Sole plate
N Soft hand grip (types HI 568/69)
O "Auto Stop" pilot light (red) (types HI 568/69)
P Power unit
Q Stand
R 3-positions switch
S Cordless ironing
- = storage position
= corded ironing
Stand clamp
Cord clip
Carry case (types HI 559 and HI 569 only)
Making ready for use


- (Types HI 559 and HI 569 only:) Release (fig. 2) and take off (fig. 3) the carry case.
Fabric table
| Instructions on label | Fabric Temperature control | Steam control Shot of steam Turbo steam Spray | ||||
 |  |  |  |  |  |  |
| B | Synthetic fibres, e.g. acryl, viscose, polyamide (nylon), polyesterSilk | MINAA1AAAAAAA2AAAA3MAX | 0 | T | ||
| C | Wool | 1 - 2 | T | |||
| D | Cotton Linen | 3 - 6 | T | |||
| Z | Please note that Z on the label means: “This article cannot be ironed!” | |||||


- Unwind the mains cord completely (fig. 4 and 5).
- Fix the stand clamp to the ironing board (or other suitable surface) (fig. 6, 7, 8). It is also possible to just place the stand on e.g. a table top. The clamp can remain folded. The rubber feet on the bottom of the stand prevent slipping.
However, we advise you not to place the stand close to the table edge, as the stand could accidentally be knocked over.

Filling with water (for steam-ironing and spraying)
- You can fill this iron with normal tap water.
- Remove the mains plug from the wall socket before filling the iron with water.
- Set the steam control (B) to position O (= no steam).
- Set the 3-position switch to position (fig. 9) and take the cordless iron from the stand (fig. 10).
- Stand the iron upright and open the filling funnel. Pour water into the filling funnel to a maximum of 230 ml (fig. 11). Use the measuring beaker with spout for this purpose.
- Close the filling funnel.


Ironing temperature
• Always check first to see whether a label with ironing instructions is attached to the article to be ironed. (See table.)
Follow these ironing instructions in all cases.
- If ironing instructions are missing but you know the kind of fabric, then refer to the fabric table.
- The fabric table is valid for the materials only and is not applicable to any applied finish, gloss etc.
Fabric to which some kind of finish has been applied (gloss, wrinkle, relief etc.) can best be ironed at lower temperatures.
- Sort the laundry out according to ironing temperature first: wool with wool, cotton with cotton, etc.
- The iron heats up quicker than it cools down. Therefore, start ironing the articles requiring the lowest temperature such as those made of synthetic fibres.
- If the fabric consists of various kinds of fibres, you must always select the lowest ironing temperature for the composition of those fibres. (E.g. an article consisting of "60% polyester
and 40% cotton" should be ironed at the temperature indicated for polyester (●) and without steam.)
If you do not know the kind(s) of fabric(s) the article has been made from, find a spot which will be invisible when wearing or using the article. Try out the ironing temperature which is most suitable there. (Start at a relatively low temperature.)
- Pure woollen fabrics (100% wool) may be pressed with the iron set to a steam position. Preferably set the steam control to maximum position and use a dry pressing cloth. When steam-ironing woollen fabrics, shining of the fabric may occur. This can be prevented by turning the article inside out and ironing the reverse side.
- Velvet and other textures which rapidly acquire shiny spots should be ironed in one direction only (with the nap) applying light pressure. Always keep the iron moving.
- Silk and other fabrics likely to become shiny should be ironed on the reverse side. To prevent staining do not use the spray on silk or other delicate fabrics.
Setting the temperature


- Place the iron on the stand (fig. 12).
- Set the appropriate ironing temperature indicated in the ironing instructions or in the fabric table by means of the temperature dial (fig. 13).
- Insert the mains plug into the wall socket. Pilot light (H) will now come on (fig. 14).
- When the amber pilot light (H) has gone out and has come on again you can start ironing. • The amber pilot light (H) will come on from time to time during corded ironing.
- If you set the temperature control to a lower

setting after ironing at a high temperature, do not recommence ironing before the amber pilot light (H) first has come on and then has gone out again.
Corded ironing


- Set the 3-positions switch to position (fig. 15).
- Take the iron (with power unit) from the stand (fig. 16).
- Either place iron (with power unit) on heel rest or on the stand when you interrupt ironing.
Cordless ironing


- Set the 3-positions switch in position (fig. 17).
- Take the iron (without power unit) from the stand (fig. 18).
- Always replace the iron on the stand when you interrupt ironing.
- (Types HI 565/66 only) The user may continue ironing as long as there is no lamp indication. However, if the pilot light (H) starts to flash, it indicates that the iron has cooled down below the set temperature. For optimal ironing performance the iron should be replaced to the stand for heating up to the set temperature. As soon as the soleplate has regained the set temperature, the pilot light (H) will go out.
- When cordless steam-ironing for a considerable time and when applying a number of "shots of steam" or "turbo steam" the soleplate might cool down more than required. For that reason we advise you to always use the iron in the corded mode if you intend to
steam iron for a considerable time.
Spraying
At any temperature by pushing on the spray button (C) a couple of times the laundry can be damped down (fig. 19).
Ensure that there is enough water in the water reservoir.
Steam-ironing
- As indicated on the temperature control (A) and the table, steam-ironing is only possible at higher ironing temperatures:
●● or ●●● for moderate steam
●●● for maximum steam.
- With conventional steam irons, water may leak from the soleplate if a too low temperature has been selected. This will then cause stains.
However, your new steam iron features "Drip Stop" steam shut-off:
the iron will automatically stop steaming at too low temperatures.
When this happens, you can hear "Click".
Set the temperature control (A) to the advised position.
Steaming will recommence as soon as the appropriate (higher) temperature has been reached.
- Ensure that there is enough water in the water reservoir.
- Put the iron on its stand.
- Set the temperature control (A) at the required position within the "steam area" (●● or ●●●) (fig. 20).
- Insert the mains plug into the wall socket.
- After the amber temperature pilot light (H) first has gone out and has come on again, you may start ironing.
- Slide the steam control (B) to the required position (fig. 21).


Turbo steam ⚙ (types HI 568/69 only)

This feature provides extra steam to remove stubborn creases. The extra steam works as long as the Turbo steam button ⚙ (F) is kept pressed-in.
- Press and hold the Turbo steam button ⚙ (F) for a couple of seconds (fig. 22). Then release the button.
- Do not keep the button pressed-in for more than 10 seconds without interruption. Allow at least one minute interval before applying Turbo Steam again. If the amber temperature pilot light (H) comes on, this indicates that the iron is heating up again.
- Wait for the amber pilot light to go out. Then you can recommence ironing.
Shot of steam

By pressing button ⚙ (E), an intense "shot" of steam is emitted from the soleplate (fig. 23). This can be very useful, e.g., when removing stubborn creases.
The "shot" of steam facility can be used only while ironing with high ironing temperature (●● or ●●●).
Vertical position
"Shot of steam" can also be applied when holding the iron in a vertical position (fig. 24). This is useful for removing creases from hanging clothes, curtains, etc.

Ironing without steam
For ironing without steam, proceed as described for steam-ironing. However, the steam control (B) should remain in position O (= no steam).
"Auto stop" (automatic safety shut-off) (types HI 568/69 only)
If (only in the corded mode) the iron is left motionless for more than 30 seconds, the heating
element will switch off automatically.
To indicate that the iron has shut off, the red
"Auto Stop" pilot light (O) will start blinking and a sound signal will be audible (fig. 25).
In a horizontal position, this will happen after 30 seconds.
In a vertical position, this will happen after 8 minutes.

- When picking up the iron again, the red "Auto Stop" pilot light (O) will go out. The amber temperature pilot light (H) will come on. This indicates that the iron is heating up again.
- Wait for the amber pilot light to go out. Then you can recommence ironing.
Maintenance
- It is important to apply "self-cleaning" at least every two weeks to remove scale etc.
- The harder the water the more the iron should be self-cleaned.
- Set the steam control (B) to position O.
- Open the filling funnel and fill the water reservoir up to the MAX indication.
- Close the filling funnel.
- Put the iron on its stand.
- Set the temperature control (A) to MAX.
- Insert the mains plug into the wall socket.
- Allow the iron to heat up until the amber temperature pilot light (H) first goes out and then comes on again.
- Set the 3-positions switch in position (fig. 17) and remove the iron (without power unit) from the stand (fig. 18).
- Hold the iron horizontally over the sink.
- Press button "Self clean" (I) (fig. 26) Boiling water and steam will now be ejected from the holes in the soleplate.
Impurities and scale (if any) are washed away with it.

- Move the iron forwards and backwards while this happens.
- Release button "Self clean" after one minute or when the water reservoir has become empty.
- Repeat self-cleaning if you notice that much
impurity and/or scale has been washed out.
- Put the iron back on its stand. Let it heat up again until the amber pilot light goes out.
- Remove the iron from the stand and move it over a (preferably) old piece of cloth. This is to ensure that the soleplate will be dry during storage.
- Unplug and allow the iron to cool down before storing it on the stand.
Cleaning
- Before cleaning remove the mains plug from the wall socket and allow the iron to cool down sufficiently.
- Scale and other setting can be wiped off the soleplate with a damp cloth and some non-scratching (fluid) abrasive.
Keep the soleplate smooth: avoid hard contact with metal objects.
- The upper part of the appliance can be cleaned with a damp cloth.
- From time to time clean the inside of the water reservoir by filling with water and shaking. Then pour the water back out.
Storage
• Always store the iron on the stand to prevent damage to the soleplate. - Remove the mains plug from the wall socket.


- Set the steam control (B) to position O (= no steam).
- Set the 3-positions switch to position (fig. 27).
- Take the iron from the stand. Open the filling funnel and pour the remainder of the water
- Place the iron back on the stand to cool down (fig. 29).


- Set the 3-positions switch to the storage position - (fig. 30). The iron, the power unit and the stand are then locked together.
- You can wind the cord around the stand. With the cord clip you can fix the end of the cord (fig. 31).


- Unlock the stand clamp (S) (fig. 32).
- Screw in the fixing screw completely (fig. 33).


- Fold the stand clamp into the stand (fig. 34).
- (Types HI 559/69 only:) First allow the iron to cool down. Then place the carry case over the stand. Press onto the case to lock it to the stand ("Click!") (fig. 35).


Spray opening
Steam burst button 📋 (press)
F Turbo steam button ⚙ (press) (type HI 568/69)


- Unroll the power cord completely (fig. 4 and 5).
Water filling for steam ironing or spraying (moistening).

Ironing temperature.


- Release the screw clamp (S) (fig. 32).
- Tighten the screw completely (fig. 33).
- Turn the clamp under the stand (fig. 34).
- Only type HI 559/69:


- Unroll the entire power cord (fig. 4 and 5).
Table


Ironing without steam


Ironing with cord
Cordless ironing
Dry wiping

- Loosen the screw fastener (S), fig 32.


Silityslämpötila


- GENERAL DESCRIPTION (FIG. 1)
- MAKING READY FOR USE
- FABRIC TABLE
- FILLING WITH WATER (FOR STEAM-IRONING AND SPRAYING)
- IRONING TEMPERATURE
- SETTING THE TEMPERATURE
- CORDED IRONING
- CORDLESS IRONING
- SPRAYING
- STEAM-IRONING
- TURBO STEAM ⚙ (TYPES HI 568/69 ONLY)
- SHOT OF STEAM
- VERTICAL POSITION
- IRONING WITHOUT STEAM
- MAINTENANCE
- CLEANING
- KEEP THE SOLEPLATE SMOOTH: AVOID HARD CONTACT WITH METAL OBJECTS
- STORAGE
- IRONING WITH CORD
- DRY WIPING
- SILITYSLÄMPÖTILA
Brand : PHILIPS
Model : Azur Excel Plus HI558
Category : Iron