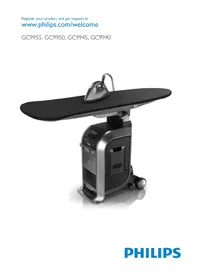
WardrobeCare GC9955 - Iron PHILIPS - Free user manual and instructions
Find the device manual for free WardrobeCare GC9955 PHILIPS in PDF.


| Product type | Iron |
| Brand | Philips |
| Model | WardrobeCare GC9955 |
| Dimensions (L x W x H) | 30 x 15 x 20 cm |
| Weight | 1.5 kg |
| Power supply | 220-240 V, 50-60 Hz, 2400 W |
| Soleplate type | Ceramic soleplate |
| Water tank capacity | 300 ml |
| Continuous steam output | 50 g/min |
| Steam boost output | 200 g/min |
| Vertical steam function | Yes |
| Anti-drip function | Yes |
| Anti-calc system | Integrated, with rod |
| Auto shut-off | Yes, after 30 seconds in horizontal position |
| Power cord | Length 2.5 m, retractable |
| Soleplate maintenance | Clean with a damp cloth |
| Tank cleaning | Empty after each use |
| Available spare parts | Soleplate, tank, buttons, anti-calc rod |
| Repairability | Repairability index 8.2/10 |
| Color | White and blue |
| Warranty | 2 years |
Frequently Asked Questions - WardrobeCare GC9955 PHILIPS
User questions about WardrobeCare GC9955 PHILIPS
0 question about this device. Answer the ones you know or ask your own.
Ask a new question about this device
Download the instructions for your Iron in PDF format for free! Find your manual WardrobeCare GC9955 - PHILIPS and take your electronic device back in hand. On this page are published all the documents necessary for the use of your device. WardrobeCare GC9955 by PHILIPS.
USER MANUAL WardrobeCare GC9955 PHILIPS


ENGLISH 6
DANSK 22
DEUTSCH 38
ΕΛΛΗΝΙΚΑ 54
ESPAÑOL 71
SUOMI 87
FRANÇAIS 103
ITALIANO 120
NEDERLANDS 137
NORSK 153
PORTUGUÊS 169
SVENSKA 185
TÜRKÇE 201
Table of contents
| Introduction 6 |
| General description 6 |
| Important 7 |
| Ironing 9 |
| Steaming (GC9955 only) 12 |
| Refreshing (GC9955 only) 14 |
| Dual Protect Anti-calc system 15 |
| Automatic shut-off 17 |
| Storage 18 |
| Environment 18 |
| Guarantee 18 |
| Premium service 19 |
| Frequently asked questions 19 |
Introduction
Congratulations on your purchase of the Wardrobe Care System and welcome to Philips! We hope you will enjoy the use of this system.
Register your purchase now at www.philips.com/welcome and enjoy a range of benefits, including full support regarding your product (including maintenance reminders), privileged access to information about new products, exclusive offers and discounts, and participation in special surveys about new releases.
General description (Fig. 1)
| 1 | Package with new anti-calc cartridges |
| 2 | Steamer (GC9955 only) |
| 3 | Steamer storage compartment (GC9955 only) / Anti-calc cartridge storage compartment |
| 4 | System power-on light |
| 5 | AUTO CALC CLEAN light |
| 6 | REPLACE CARTRIDGE light |
| 7 | Water tank release button |
| 8 | Water tank |
| 9 | Anti-calc cartridge |
| 10 | Rinse tray |
| 11 | Hanger hook (GC9955 only) |
| 12 | Refreshing button (GC9955 only) |
| 13 | Ironing board cover |
| 14 | Fan |
| 15 | Board handle |
| 16 | Board tilting button |
| 17 | Height adjustment lever |
| 18 | Locking strap |
| 19 | Iron compartment |
| 20 | Iron |
| 21 | Iron power-on button |
| 22 | Blowing button |
| 23 | Suction button |
| 24 | Soleplate |
| 25 | Steam trigger |
| 26 | 'Iron ready' light |
| 27 | Mains plug |
Important
Read this user manual carefully before you use the appliance and save it for future reference.
Tip: You can save the user manual in the iron compartment.
Danger
- Never immerse the iron, the steamer or the appliance in water.
Warning
- Check if the voltage indicated on the appliance corresponds to the local mains voltage before you connect the appliance. - Do not use the appliance if the plug, the mains cord, one of the supply hoses or the appliance itself shows visible damage, or if the appliance has been dropped or is leaking.
- If the mains cord or one of the supply hoses of this appliance is damaged, you must have it replaced by Philips, a service centre authorised by Philips or similarly qualified persons in order to avoid a hazard.
- Never leave the appliance unattended when it is connected to the mains.
- This appliance can be used by children aged 8 or above and by persons with reduced physical, sensory or mental capabilities or lack of experience and knowledge if they have been given instructions in safe use of the appliance or supervision to establish safe use and if they have been made aware of the hazards involved.
- Do not allow children to play with the appliance.
- Keep the iron, the steamer, the mains cord and the supply hoses out of the reach of children aged 8 or under when the appliance is switched on or cooling down.
- Never let the mains cord and supply hoses come into contact with the hot soleplate of the iron.
- If steam escapes from the rinse tray during use, switch off the appliance and contact a service centre authorised by Philips.
Caution
- Only connect the appliance to an earthed wall socket.
- Check the cord and the supply hoses regularly for possible damage.
- Never remove the ironing board cover while ironing or immediately after use. Always let the appliance cool down sufficiently before you remove the cover.
- The soleplate of the iron can become extremely hot and may cause burns if touched.
- When you have finished ironing or steaming, when you clean the appliance and also when you leave the appliance even for a short while, remove the mains plug from the wall socket.
- Do not move the appliance while it is in use.
- Do not use the appliance with very wet fabrics.
- Always place and use the appliance on a stable, level and horizontal surface.
- Do not put a cloth, sheet or any other cover over the appliance immediately after use.
- Always transport the appliance in storage position with the ironing board folded and the locking strap properly secured.
- This appliance is intended for household use only. Do not expose the appliance to atmospheric agents (e.g. rain, sun, cold).

Anti-calc cartridge Anti-calc cartridge
- The fluid in the anti-calc cartridge is not intended for drinking.

- Keep the anti-calc cartridge out of the reach of children
- Do not use the anti-calc cartridge if it is damaged.

- Throw away the used anti-calc cartridge with the normal household waste at the end of its life.
Type of water to be used
- You can use normal tap water or de-mineralised water for your Wardrobe Care system.
- Do not put perfume, vinegar, starch, descaling agents, ironing aids or other chemicals in the water tank.
Electromagnetic fields (EMF)
This Philips appliance complies with all standards regarding electromagnetic fields (EMF). If handled properly and according to the instructions in this user manual, the appliance is safe to use based on scientific evidence available today.
Certification of quality

This product has been tested and approved by independent textile experts. Woolmark, IWTO and DWI.
- The Woolmark logo is the most recognised textile symbol in the world. It represents a long-term commitment to quality in wool and wool apparel care products spanning more than 45 years.

The iron has been approved by The Woolmark Company Pty Ltd for the ironing of wool-only products, provided that the garments are ironed according to the instructions on the garment label and those issued by the manufacturer of this iron. R1101
In the United Kingdom, Eire, Hong Kong and India, the Woolmark trademark is a certification trademark.
- The International Wool Textile Organisation (IWTO) is a World-leading association specialising in animal fabrics like sheep wool, cashmere, mohair, alpaca and angora.
"The Philips Wardrobe Care system is the ideal all in one ironing solution for perfectionists. It is fitted with the OptimalTemp technology which delivers excellent ironing results, no risk of burns and it is so easy to use. It is an amazing breakthrough, an ironing revolution." - IWTO
- DWI is one of the world's leading independent research institutes on textiles and is affiliated to RWTH Aachen University.

Ironing

The steam generator of the Philips Wardrobe Care System is equipped with the OptimalTemp technology which enables you to iron all types of ironable fabrics without adjusting the iron temperature or steam setting.
- Fabrics with these symbols are ironable, for example linen, cotton, polyester, silk, wool, viscose, rayon.

- Fabrics with this symbol are not ironable. These fabrics include synthetic fabrics such as Spandex or elastane, Spandex-mixed fabrics and polyolefins (e.g. polypropylene), but also prints on garments.

1 Put the mains plug in an earthed wall socket.


The system power-on light goes on.
2 Press the water tank release button (1) and remove the water tank (2).
3 Fill the water tank with normal tap water and place the water tank back into the appliance.
4 Undo the locking strap and unfold the ironing board to vertical position.
5 Push the board tilting button and tilt the board to horizontal position.

6 Set the ironing board to the appropriate height with the height adjustment lever.

7 Take the iron out of the iron compartment, either from the left or the right side.

8 Press the iron power-on button to activate the steam generator.
The 'iron ready' light starts to flash.
After approx. 2 minutes the 'iron ready' light stops flashing and lights up continuously to indicate that the steam generator is ready for use.

9 Press the steam trigger to start steam ironing.
Never direct the steam at people.

10 If you want to iron in the board blowing mode, press the blowing button on the iron.
- The blowing mode provides a cushion of air that prevents shine and seam imprints.
- The blowing mode cannot be switched off.
- The large ironing board is equipped with heating elements that heat up in the ironing board. This allows easier, faster and more convenient ironing.


11 If you want to iron in the board suction mode, press the suction button on the iron.
- The suction mode cannot be switched off.
- The suction mode holds the garment flat and neat on the board, and makes perfect pleats on trousers.
- The large ironing board is equipped with heating elements that heat up in the ironing board. This allows easier, faster and more convenient ironing.
12 For the best result, you can use the shoulder-shaped end of the ironing board when you iron a shirt. This special feature enables easy ironing with less rearranging.
13 You can store the hot iron in the heat-resistant storage compartment immediately after you have switched off the iron.
Steaming (GC9955 only)
The steamer enables you to remove creases with only a few strokes. It is easy to use, safe for all garments and is a great solution to delicate fabrics like silk.
1 Put the mains plug in an earthed wall socket.
The system power-on light goes on.


2 Press the water tank release button (1) and remove the water tank (2).

3 Fill the water tank with normal tap water and place the water tank back into the appliance.

4 Undo the locking strap and unfold the ironing board to vertical position.
5 Hang your garment for steaming on the hanger hook at the top of your ironing board.

6 Take the steamer out of the steamer compartment.
7 Switch on the steamer by pressing the steamer power-on button. The power-on light goes on.

8 Position the steamer head close and facing your garment, then press the steam activator.
Never direct the steam at people.
Note: Move the steamer head up and down quickly for the best result.
9 If you want to steam in the blowing mode, press the rounded side of the blowing/suction button. If you want to steam in the suction mode, press the hollow side of the blowing/suction button.

10 You can easily hang the steamer on the board handle when necessary.
11 You can store the hot steamer in the heat-resistant storage compartment immediately after you have switched off the steamer.
Refreshing (GC9955 only)

1 Put the mains plug in an earthed wall socket.

The system power-on light goes on.

2 Undo the locking strap and unfold the ironing board to vertical position.

3 Press the refreshing button on the back of the ironing board. ▶The appliance starts refreshing your garment.

Note: This process takes 10 minutes and automatically stops.
Dual Protect Anti-calc system
The Philips Wardrobe Care System is equipped with a Dual Protect Anti-Calc system that on the one hand prevents any possible scale from building up inside the system and on the other hand removes scale particles from the system. The Dual Protect Anti-Calc system consists of an anti-calc cartridge and an automatic Auto Calc Clean process.
Anti-calc cartridge replacement
The anti-calc cartridge prevents scale from accumulating in the steam generator.
During use, the granules of the anti-calc cartridge change colour. When the granules have completely changed colour, you have to replace the anti-calc cartridge.
The red REPLACE CARTRIDGE light starts flashing and you hear beeps to indicate that the anti-calc cartridge needs to be replaced.
The Dual Protect Anti-Calc system automatically switches off the appliance after 15 minutes and it cannot be switched on again until the anti-calc cartridge has been replaced.

Replacing the anti-calc cartridge
1 Press the water tank release button and remove the water tank. Open the lid of the water tank (1) and remove the water tank cover (2).

2 Take the anti-calc cartridge out of the water tank and discard it.

3 Open the lid of the steamer storage compartment (1) and take out the new anti-calc cartridge (2).
Note: The steamer compartment is designed to store one new anti-calc cartridge.
Note: To maximise the lifetime of the anti-calc cartridge, leave it packed until you use it.

4 Remove the packaging and place the new anti-calc cartridge in the water tank.
Note: To purchase more anti-calc cartridges, go to the Philips online shop at www.philips.com/shop, or visit Philips online support and search for GC019.
Automatic Calc Clean

Note: The Auto Calc Clean process is automatically activated the first time you use the iron after you replaced the anti-calc cartridge.
The appliance cannot be used during the Auto Calc Clean process. Do not interrupt the Auto Calc Clean process, otherwise the process restarts.

1 When the Auto Calc Clean process is in progress, the blue AUTO CALC CLEAN light ashes and the appliance beeps.
This process lasts approximately 3 minutes.
During this process it is normal for the system to produce pumping and clicking sounds.
2 After approximately 3 minutes, rinsing water ows into the rinse tray below. The beeping becomes faster and the red light on the rinse tray ashes.

3 Pull out the rinse tray.

4 Empty the water into the sink.
The rinse tray overflows if you do not empty it before the next Auto Calc Clean session.

5 Slide the rinse tray back into the appliance.
The appliance stops beeping and the red light goes out.

6 The 'iron ready' light starts flashing to indicate that the appliance is heating up.
After approximately 2 minutes, the 'iron ready' light stops flashing to indicate that the appliance is ready for use again.
Automatic shut-off

- This appliance is equipped with an automatic shut-off function. When the steam trigger is not used for more than 10 minutes, the appliance automatically shuts off and goes into the standby mode. You hear a few beeps and the light on the iron or steamer goes out.

1 To deactivate the automatic shut-off function, press the iron or steamer power-on button once.
The light on the iron or steamer flashes to indicate that the appliance is heating up.
2 Wait for the light to stop flashing. When the light lights up continuously, the appliance is ready for use again.
Storage

1 Fold the ironing board to storage position and lock the board with the locking strap.

2 To store the cord, briefly pull it towards you and then let it go. The cord is wound up automatically.

3 You can now easily move the appliance by pulling it along by the board handle.
Tip: After a long ironing session, it is advised to keep the ironing board folded out to let it dry before you store it.
Environment

- Do not throw away the appliance with the normal household waste at the end of its life, but hand it in at an official collection point for recycling. By doing this, you help to preserve the environment.
Guarantee
Philips Consumer Lifestyle guarantees the Philips Wardrobe Care System for a period of two years after the date of purchase. If any defect due to faulty materials and workmanship occurs within this two-year guarantee period, Philips Consumer Lifestyle repairs or replaces the product at its expense. Philips Consumer Lifestyle will only pay for repair or replacement if convincing proof is provided, for instance by means of a receipt that shows that the day on which service is claimed is within the guarantee period.
Guarantee restrictions
- The guarantee does not cover products and/or product parts that are subject to wear or that can be considered consumable parts by their nature, such as anti-calc cartridges and ironing board covers.
- If the appliance is used improperly or for professional or semi-professional purposes or if it is not used according to the instructions in this user manual, the guarantee becomes invalid and Philips refuses liability for any damage caused.
- The guarantee is not valid if a defect is due to damage caused by incorrect use, poor maintenance or if alterations or repairs have been carried out by persons not authorised by Philips Consumer Lifestyle.
Note: These guarantee restrictions do not affect your statutory rights.
Premium service
We want to ensure that you remain satisfied with your Philips WardrobeCare System. We would like to remind you to register your purchase on www.philips.com/welcome so that we can stay in contact with you and send you maintenance reminders.
If you have questions about your Wardrobe Care system, e.g. about its use, maintenance or descaling, or if you need new anti-calc cartridges, please go to www.philips.com/support or call the free local Philips hotline. You find its phone number in the separate guarantee leaflet.
We have put maximum effort in designing, developing and testing this high-quality product. In the unfortunate case that your Wardrobe Care system needs repair, please contact the nearest authorised Philips service centre or call the free local Philips hotline. They will help you arrange the repair in minimum time.
Frequently asked questions
This chapter lists the questions most frequently asked about the appliance. If you cannot find the answer to your question, contact the Consumer Care Centre in your country.
Question Answer
| Why does the system keep beeping and flashing? | When the red REPLACE CARTRIDGE light flashes, the anti-calc cartridge has lost its effectiveness and needs to be replaced. If you do not replace the used anti-calc cartridge, the red REPLACE CARTRIDGE light stops flashing and the appliance stops beeping. The Dual Protect Anti-Calc system automatically switches off the appliance and it cannot be switched on again until the anti-calc cartridge has been replaced. |
| When the blue AUTO CALC CLEAN light flashes, the system is performing the Auto Calc Clean process. | |
| When the red light on the water tank flashes, there is not enough water or the water tank is not placed in the water tank compartment properly. Fill the water tank and put it back into the water tank compartment properly. | |
| If the red light on the rinse tray flashes, the Auto Calc Clean process is finished. Empty the rinse tray and place it back before you switch on the iron again. |
Question Answer
| Why does the iron or steamer remain cold? | The iron or steamer is not switched on. Press the iron or steamer power-on button. |
| The Auto Calc Clean process may be in progress. Wait for the Auto Calc Clean process to finish and then switch on the appliance again. | |
| The automatic shut-off function may have been activated. The appliance is switched off automatically when the steam generator has not been used for 10 minutes. Press the iron or steamer power-on switch once to restart the appliance. It is ready for use when the light on the iron or steamer stops flashing and lights up continuously. | |
| Why doesn't the iron or steamer produce any steam? | There may not be enough water in the water tank or the water tank is not placed in the water tank compartment properly. Fill the water tank and put it back into the water tank compartment properly. |
| The appliance may not be hot enough to produce steam. Heating up takes two minutes.Wait until the light on the iron or steamer stops flashing and lights up continuously.Then press the steam trigger to start steam ironing or press the steam activator to start steaming. | |
| You may not have pressed the steam trigger on the iron or the steam activator on the steamer. Press the steam trigger to start steam ironing or press the steam activator to start steaming. | |
| The automatic shut-off function may have been activated. The appliance is switched off automatically when the steam generator has not been used for 10 minutes. Press the power-on light of the iron or steamer. It is ready for use when the light on the iron or steamer stops flashing and lights up continuously. | |
| Why does the appliance produce noise? | It is normal to hear a pumping sound. When you hear an intermittent noise, water is intermittently pumped from the water tank into the boiler. |
| When you hear a long pumping noise, the Auto Calc Clean process is in progress. This is normal. | |
| The noise you hear may be the sound of the fan. The appliance is equipped with a fan that runs continuously during use.This fan optimises the performance of the appliance and cannot be switched off. | |
| If the pumping noises do not stop, first check if the water tank is placed in the water tank compartment properly. If this is the case but the noises still persist, switch off the appliance and contact the Philips Consumer Care Centre or your Philips dealer. | |
| Why are there water droplets/wet spots on the ironing board? | After a long ironing session, steam condenses inside the ironing board, causing wet spots on the cover. After use, leave the ironing board folded out for some time to let it dry. |
| Why do water droplets come out of the iron? | Water collects inside the supply hose of the iron or steamer and this water comes out of the iron or steamer as water droplets during the first few seconds of steaming at the start of an ironing or steaming session and after an interruption during the session. |
| How do I know that I have to replace the anti-calc cartridge? | The anti-calc cartridge contains granules that gradually change colour during use. When the colour has changed completely, the anti-calc cartridge is no longer effective and you have to replace it. When the anti-calc cartridge needs to be replaced, the red REPLACE CARTRIDGE light starts flashing and the system beeps. |
Question Answer
Where can I buy new anti-calc cartridges?
Can I wash the ironing board cover and the felt underlay?
To purchase new anti-calc cartridges, go to the Philips online shop at www.philips.com/shop, or visit Philips online support and search for GC019.
You can wash the ironing board cover in a washing machine, using the delicate cycle. Do not wash the felt underlay in a washing machine. You can hand wash the underlay gently.
Indholdsfortegnelse
Introduktion 22


Anti-kalk-patron
- Væsken i anti-kalk-patronen bør ikke drikkes.


3 Åbn låget til damperens opbevaringsrum (1), og tag den nye anti-kalkpatron (2) ud.
4 Fjern emballagen, og placer den nye anti-kalk-patronen i vandtanken.
6 Lysindikatoren for "strygejernet er klar" begynder at blinke for at indikere, at apparatet varmer op.


Aireado (solo modelo GC9955)


5 Spia AUTO CALC CLEAN
6 Spia REPLACE CARTRIDGE


3 Estraete la vaschetta.

6 REPLACE CARTRIDGE-lampje
7 Ontgrendelknop waterreservoir
8 Waterreservoir
9 Antikalkpatroon
10 Spoelwaterbak
11 Kleerhangerhaak (alleen GC9955)
12 Verfrissingsknop (alleen GC9955)
13 Strijkplankhoes
14 Ventilator


- Kast den oppbrukte antikalkpatronen i vanlig restavfall.
1 Sett støpselet i en jordet stikkontakt.


11 Hvis du vil bruke strykejernet i sugemodus, trykker du på sugeknappen på strykejernet.


8 Plasser dampenheten mot plagget før du trykker på dampaktivatoren.
10 Du kan enkelt henge dampenheten på håndtaket til brettet när det blir nødvendig.
11 Du kan oppbevare den varme dampenheten i det varmebestandige oppbevaringsrommet umiddelbart etter at du har slått den av.
Friskhet (kun GC9955)

1 Sett støpselet i en jordet stikkontakt.

Skifte ut antikalkpatronen
2 Etter ca. tre minutter spyles rensevannet ut i tømmekaret nedenfor. Apparatet piper raskere og den røde lampen på tømmekaret blinker.

3 Dra ut tømmekaret.

4 Hell ut vannet i vasken.
5 Luz AUTO CALC CLEAN
6 Luz REPLACE CARTRIDGE
6 Regule a tábua de engomar para a altura adequada com a alavanca de ajuste da altura.


Arejamento (apenas no modelo GC9955)

6 REPLACE CARTRIDGE-lampa


Uppfräschning (endast GC9955)

Dual Protect Anti-calc-system
Byta avkalkningspatron


3 Ta ur droppbrickan.



- INTRODUCTION
- IMPORTANT
- DANGER
- WARNING
- CAUTION
- ANTI-CALC CARTRIDGE ANTI-CALC CARTRIDGE
- TYPE OF WATER TO BE USED
- ELECTROMAGNETIC FIELDS (EMF)
- CERTIFICATION OF QUALITY
- IRONING
- STEAMING (GC9955 ONLY)
- REFRESHING (GC9955 ONLY)
- DUAL PROTECT ANTI-CALC SYSTEM
- ANTI-CALC CARTRIDGE REPLACEMENT
- REPLACING THE ANTI-CALC CARTRIDGE
- AUTOMATIC CALC CLEAN
- AUTOMATIC SHUT-OFF
- STORAGE
- ENVIRONMENT
- GUARANTEE
- GUARANTEE RESTRICTIONS
- PREMIUM SERVICE
- FREQUENTLY ASKED QUESTIONS
- QUESTION ANSWER
- INDHOLDSFORTEGNELSE
- ANTI-KALK-PATRON
- AIREADO (SOLO MODELO GC9955)
- FRISKHET (KUN GC9955)
- SKIFTE UT ANTIKALKPATRONEN
- AREJAMENTO (APENAS NO MODELO GC9955)
- UPPFRÄSCHNING (ENDAST GC9955)
- DUAL PROTECT ANTI-CALC-SYSTEM
- BYTA AVKALKNINGSPATRON
Brand : PHILIPS
Model : WardrobeCare GC9955
Category : Iron