
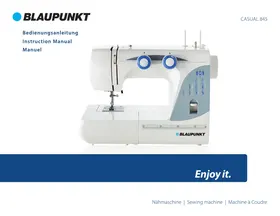
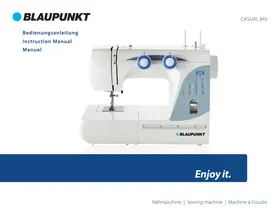
152765 - Sewing machine BLAUPUNKT - Free user manual and instructions
Find the device manual for free 152765 BLAUPUNKT in PDF.


| Product type | Sewing machine |
| Brand | Blaupunkt |
| Model | 152765 |
| Dimensions (L x W x H) | 40 x 20 x 30 cm |
| Weight | 7 kg |
| Power supply | 220-240 V, 50 Hz |
| Power | 70 W |
| Number of stitches | 12 sewing stitches |
| Basic stitches | Straight stitch, zigzag stitch, backstitch |
| Buttonhole | 4-step buttonhole |
| Needle threader | Automatic needle threader |
| Sewing speed | Up to 800 stitches per minute |
| Maintenance and cleaning | Clean the bobbin area after each use, oil as instructed |
| Safety | Automatic stop in case of overload, child safety lock |
| Spare parts and repairability | Standard needles, bobbins, presser feet available |
| Included accessories | Universal presser foot, buttonhole foot, needles, bobbins, screwdriver |
| Warranty | 2 years |
Frequently Asked Questions - 152765 BLAUPUNKT
User questions about 152765 BLAUPUNKT
0 question about this device. Answer the ones you know or ask your own.
Ask a new question about this device
Download the instructions for your Sewing machine in PDF format for free! Find your manual 152765 - BLAUPUNKT and take your electronic device back in hand. On this page are published all the documents necessary for the use of your device. 152765 by BLAUPUNKT.
USER MANUAL 152765 BLAUPUNKT
WINDING THE BOBBIN


THREADING THE BOBBIN


THREADING THE UPPER THREAD


PULLING UP THE BOBBIN THREAD
NEEDLE, THREAD, AND FABRIC TABLE


ZIGZAG STITCH


SEWING ON A BUTTON


DECORATIVE AND ELASTIC STITCHES


STRETCH ZIGZAG STITCH


LADDER STITCH


DIAGONAL OVERLOCK STITCH


THORN STITCH

HERRINGBONE STITCH

CHEVRON STITCH

More Decorative Stitches


AUTOMATIC BUTTONHOLE SEWING
NEEDLE POSITION FOR STRAIGHT STITCH
2
3
4
5
4. TROUBLESHOOTING
GENERAL PROBLEMS
IMPORTANT SAFETY INSTRUCTIONS
When using an electrical appliance, basic safety precautions should always be followed, including the following. Read all instructions before using this sewing machine.
DANGER--To reduce the risk of electric shock:
- Do not allow to be used as a toy. Close attention is necessary when this sewing machine is used by or near children.
- This appliance can be used by children aged from 8 years and above and persons with reduced physical, sensory or mental capabilities or lack of experience and knowledge if they have been given supervision or instruction concerning use of the appliance in a safe way and understand the hazards involved. Children shall not play with the appliance. Cleaning and user maintenance shall not be made by children without supervision.
- Use this sewing machine only for its intended use as described in this manual. Use only attachments recommended by the manufacturer as contained in this manual.
- Never operate this sewing machine if it has a damaged cord or plug, if it is not working properly, if it has been dropped or damaged, or dropped into water. Return the sewing machine to the nearest authorized dealer or service center for examination, repair, electrical or mechanical adjustment.
- Never operate the sewing machine with any air openings blocked. Keep ventilation openings of the sewing machine and foot control free from the accumulation of lint, dust, and loose cloth.
- Never drop or insert any object into any opening.
- Do not use outdoors.
- Do not operate where aerosol (spray) products are being used or where oxygen is being administered.
- To disconnect, turn switch to the off ("O") position, then remove plug from outlet.
- Do not unplug by pulling on cord. To unplug, grasp the plug, not the cord.
- Keep fingers away from all moving parts. Special care is required around the sewing machine needle.
- Never sew with a damaged needle plate as this can cause the needle to break.
- Do not use bent needles.
- Do not pull or push fabric while stitching. It may deflect the needle causing it to break.
- Switch the sewing machine off ("O") when making any adjustments in the needle area, such as threading the needle, changing the needle, threading the bobbin, or changing the presser foot, etc.
- Always unplug sewing machine from the electrical outlet when removing covers, lubricating, or when making any other user servicing adjustments mentioned in the instruction manual.
- Please pay attention to the following to avoid injury:
--switch off or unplug the appliance when leaving it unattended;
Unplug the appliance before carrying out maintenance or replacing lamps.
CAUTION: moving parts
To reduce the risk of injury, switch off before servicing.
Close cover before operating machine.
SAVE THESE INSTRUCTIONS
This product is for household use, or equivalent.
This appliance complies with EEC Directive 2004/108/EC covering the electromagnetic compatibility.

Please note that on disposal, this product must be safely recycled in accordance with relevant National legislation relating to electrical/electronic products. If in doubt please contact your retailer for guidance.
TABLE OF CONTENTS
1. KNOWING YOUR SEWING MACHINE
Machine identification 2
Accessories 3
Setting up your machine 3
Spool pins, Presser foot lifter 4
Feed dogs control 4
Converting to free-arm sewing 5
Winding the bobbin 5
Threading the bobbin thread 6
Threading the top thread 7
Using automatic needle threader 8
Picking up bobbin thread 9
Needle, thread and fabric chart 10
Changing the needle 10
Adjusting top thread tension 11
Changing presser foot 11
Functions of control panel 12
Operation buttons 13
Helpful messages 14
2. STARTING TO SEW
Straight stitching 15
Inserting zippers and piping 16
Hand-look quilt stitch 16
Zigzag stitching 17
Adjusting stitch width and length, Satin stitch
Placement of patterns
Blindhem stitch 18
Multi-stitch zigzag, Shell stitch 19
Sewing on a button 19
Decorative and stretch stitches 20
Straight stretch stitch, Honeycomb stitch,
Overedge stitch, Feather stitch, Ric-rac stitch,
Double overlock stitch, Criss-cross stitch,
Entredeux stitch, Ladder stitch, Pin stitch,
Blanket stitch, Slant pin stitch, Slant overedge stitch,
Crossed stitch, Greek key stitch, Edge-joining stitch,
Wizard stitch, Thorn stitch, Fishbone stitch,
Chevron stitch
More decorative stitches 25
Letter pattern sewing ---- 26
Buttonhole making 27
Automatic buttonhole, Corded buttonholes
Twin needle 29
Straight stitch needle position 30
3. CARING FOR YOUR MACHINE
Cleaning hook area and feed dogs ---- 31
- PERFORMANCE CHECKLIST ---- 32
1. KNOWING YOUR SEWING MACHINE
MACHINE IDENTIFICATION
- Thread guide
- Thread take-up lever
- Thread tension control
- Face cover
- Thread cutter
- Buttonhole lever
- Extension table (Accessory box)
- Bobbin winder shaft
- Bobbin winder stop
- Stitch length adjustment button
- Twin needle mode switch
- Letter mode switch
- Stitch width adjustment button
- Pattern selection button
- LCD display
- Needle position button
- Reverse stitch button
- Horizontal spool pin
- Hand wheel
- Power/light switch
- Cord socket
- Handle
- Feed dog control
- Presser foot lifter
- Automatic needle threader
- Needle threader Thread Guide
- Thread guide
- Presser foot screw
- Needle
- Bobbin cover plate
- Needle bar
- Foot release button
- Needle clamp screw
- Presser foot (J)
- Feed dogs
- Needle plate
- Bobbin cover release button
- Power line cord
- Foot control
- Instruction manual
- Letter pattern plate

ACCESSORIES
- Needles
- Twin needle
- Buttonhole opener
- Small screw driver
- Screw driver for needle plate
- Oiler
- Bobbins (4 total - 1 in machine)
- Spool pin cap
- Brush
- Auxiliary spool pin
- Zipper foot
- Satin stitch foot (Z)
- Button fitting foot (O)
- Blind stitch foot (H)
- Buttonhole foot (B)
The foot that comes on your sewing machine is called the general purpose foot (J) and will be used for the majority of your sewing.
The satin foot (Z) is another very useful foot and should be used for most decorative sewing.
SETTING UP YOUR MACHINE
Be sure to wipe off any surplus oil from needle plate area before using your machine the first time.
POWER LINE CORD/FOOT CONTROL
Make sure that the sewing machine is turned off (the power switch is set to "O"), and then connect the plug of the power line cord into the cord socket (1) and your wall outlet (2) as illustrated.
Connect the foot control plug (3) into the machine socket.
| NOTE: | When foot control is disconnected, the machine will not operate. |

Always disconnect the machine from power supply by removing the plug from the wall-outlet.
POWER/LIGHT SWITCH
Your machine will not operate until the power/light switch is turned on. The same switch controls both the power and the light.
When servicing the machine, or changing needles, etc., machine must be disconnected from the power supply.


SPOOL PINS
HORIZONTAL SPOOL PIN for normal thread spool
Place thread spool on the pin and secure with a spool cap to ensure smooth flow of thread. If the thread spool has a thread retaining slit, it should be placed to the right.
VERTICAL SPOOL PIN for large thread Spool
Attach the spool pin. Place a spool of thread on the spool pin.

PRESSER FOOT LIFTER
There are three positions for your presser foot.
- Lower the presser foot to sew
- Raise the lifter to the middle position to insert or remove fabric.
- Lift it to its highest position to change the presser foot or to remove thick fabric.

FEED DOG CONTROL
The feed dogs control the movement of the fabric that is being sewn. They should be raised for all general sewing purposes and lowered for darning, freehand embroidery and monogramming so that you, not the feed dogs, are guiding the fabric.

CONVERTING TO FREE-ARM SEWING
Your machine can be used either as a flat-bed or as a free-arm model.
With the extension table in position, it provides a large working surface as a standard flat-bed model.
To remove the extension table, hold it firmly with both hands and pull it off to the left as shown. To replace, slide the extension table back into place until it clicks.

With the extension table removed the machine converts into a slim free-arm model for sewing children's clothes, cuffs, trouser legs, and other awkward places.
WINDING THE BOBBIN
- Place a spool of thread on the spool pin, and secure it with the spool pin cap. Pull the thread out from the spool and place it through the thread guides as shown in the illustration.
- Put the end of the thread through the hole in the bobbin as shown.
- Push the bobbin winder shaft to the far left position, if it is not already there. Place the bobbin onto the shaft with the end of the thread coming from the top of the bobbin. Push the bobbin winder shaft to the right until it clicks. Hold onto the end of the thread.
- Start the machine. The bobbin will automatically stop
turning when completely filled. Push the shaft to the left to remove the bobbin and then cut the thread.


THREADING
THE BOBBIN THREAD
- Raise the needle to its highest position by rotating the hand wheel toward you.
- Remove the bobbin cover plate by pushing the release button to the right. The bobbin cover will pop up sufficiently to allow you to remove the cover.
- Insert the bobbin making sure the bobbin rotates counter-clockwise when you pull the thread.
NOTE: This is a very important step as the bobbin can become unthreaded and cause sewing problems if it rotates clockwise.
- Pull thread through the slot (A) and then to the left.
- With a finger held gently on top of the bobbin, pull the thread until it stops in slot (B). Then pull about 6" (15 cm) of thread and lead it towards back of the machine under the presser foot.
NOTE: This is also a very important step to assure the bobbin thread does not slip out of position.
- Replace the bobbin cover plate onto the needle plate.
①
②
③
4
5
6
THREADING THE TOP THREAD
A. Raise the presser foot lifter. Always be sure to raise the presser foot lifter before threading the top thread. (If the presser foot lifter is not raised, correct thread tension cannot be obtained.) B. Turn the hand wheel toward you until the needle is in its highest position and the thread take-up is visible. C. Thread the machine with your left hand while firmly gripping the thread with your right hand in the following order as illustrated.
* Guide the thread through thread guide <1>. * Pull the thread into the tension discs <2> (which are located on the machine). Then guide the thread to the bottom of the groove. * Do a U-turn around the inside of the tab (3). * Pass the thread through the thread take-up (4) from right to left. * Pull the thread into the inside of the take-up lever until it reaches the eye of the lever. * Guide the thread into the thread guide (5). * Pass the thread through the eye of the needle (6) from front to back. (See following page for instructions on operation of the Automatic Needle Threader.)
IMPORTANT:
To verify that the machine is threaded properly in the tension discs, do this simple check:
1.) With the presser foot raised, pull the thread towards the back of the machine. You should detect only a slight resistance and little or no deflection of the needle. 2). Now lower the presser foot and again pull the thread towards the back of the machine. This time you should detect a considerable amount of resistance and much more deflection of the needle. If you do not detect the resistance you have miss-threaded the machine and need to re-thread it.


USING AUTOMATIC NEEDLE THREADER
Raise the needle to its highest position by rotating the hand wheel towards you.
- Hook the thread to the thread guide as illustrated.
- Pull down the lever while holding the end of the thread.
- Rotate the lever to the rear of the machine.
- Guide the thread into the hooked end and pull the thread upward.
- Return the lever and the needle will be threaded automatically.
- Release the lever and pull the thread away from you.
NOTE: For smooth threading it is recommended you select straight stitching when using the needle threader.


PICKING UP BOBBIN THREAD
- Raise the presser foot lifter.
2. Holding the needle thread loosely with your left hand, turn the hand wheel toward you with your right hand, first lowering the needle and continuing until the needle comes to its highest position.
NOTE: A quick way to pick up the bobbin thread is, with straight stitch selected, touch and release the reverse switch.
Your machine will perform one down-up cycle and stop with the needle up. Always stopping with the needle "fully up" is one of the features of your computer sewing machine.
- Lightly pull up the top thread, and pick up the bobbin thread, which will appear through the needle plate slot.
- Pull both top and bobbin threads together toward the back of the machine under the presser foot, leaving about 6" (15 cm) clear.


NEEDLE, THREAD AND FABRIC CHART
Your fabric will determine the choice of a needle and thread. The following table is a practical guide to needle and thread selection.
Always refer to it before a new sewing project. And be sure to use the same size and type of thread in the bobbin as in the top thread supply.
| WEIGHT | FABRIC | TYPE of NEEDLE | NEEDLE SIZE |
| Very Light | Chiffon, Georgette, Fine Lace, Organdy Net, Tulle | Universal Ball Point | 9 (65) 9 (65) |
| Light | Batiste, Voile, Lawn, Pure Silk, Crepe de Chine, Sheer Crepe, Chambray, Handkerchief Linen, Gingham, Challis, Percale, Wool Crepe, Peau de Soie, Taffeta, Satin, Silk Surah, Satin-backed Crepe, Qiana | Blue Tipped Needle Universal | 11 (75) 11 (75) 12 (80) |
| Single Knits, Jersey, Swimwear, and Tricot | Blue Tipped Needle Ball Point | 11 (75) 11 (75) | |
| Leather Suede | Wedge Point Leather Needle | 11 (75) | |
| Medium | Flannel, Velour, Velvet, Muslin, Velveteen, Poplin, Corduroy, Broadcloth, Linen, Chintz, Gabardine, Felt, Terry, Burlap, Quilted Fabrics | Universal | 14 (90) |
| Double Knits, (synthetic and natural) Stretch Velour, Stretch Terry, Sweater Knits | Ball Point | 14 (90) | |
| Leather, Vinyl, Suede | Wedge Point Leather Needle | 14 (90) | |
| Heavy | Denim, Sailcloth, Ticking | Denim Needle | 16 (100) |
| Double Faced Wool, Heavy Coating, Fake Fur, Drapery Fabrics | Universal | 16 (100) | |
| Leather, Suede | Wedge Point Leather Needle | 16 (100) 18 (110) | |
| Very Heavy | Canvas, Duck, Upholstery Fabrics | Universal | 16 (100) |
| Topstitching for Special Finishes | Topstitching Needle | 14 (90) | |

Always disconnect the machine from power supply by removing the plug from the wall-outlet.
- Raise the needle bar to its highest position by turning the hand wheel toward you.
- Loosen the needle clamp screw by turning it toward you.
- Remove the needle by pulling it downward.
- Insert the new needle into the needle clamp with the flat side toward the back.
- Push the needle up as far as it can go.
- Tighten the needle clamp screw with the screw driver.
NOTE: Tighten snugly, but do not over tighten.
Helpful Hint: Placing a scrap of fabric under the presser foot and lowering the presser foot makes it easier to change the needle and will preclude dropping the needle into the needle plate slot.

ADJUSTING TOP THREAD TENSION
90% of your sewing will be done with the tension control set at "4".
Helpful Hint: A slight adjustment to a higher number or a lower number may improve sewing appearance.
STRAIGHT STITCHING
The good looking appearance of your stitching is largely determined by the balanced tension of both top and bobbin threads. The tension is well balanced when these two threads 'lock' in the middle of layers of the fabric you are sewing.
If, when you start to sew, you find that the stitching is irregular, you will need to adjust the tension control.
Make any adjustments with presser foot 'down'.
A balanced tension (identical stitches both top and bottom) is usually only desirable for straight stitch sewing.
ZIG ZAG and DECORATIVE SEWING
For zigzag sewing and decorative stitch functions, thread tension should be less than for straight stitch sewing.
You will always obtain a nicer stitch and less puckering when the upper thread appears on the bottom side of your fabric.
BOBBIN TENSION
The bobbin tension has been correctly set at the factory, so you do not need to adjust it.
CHANGING PRESSER FOOT
Be sure the needle is in the up position. Raise presser foot lifter.
- Push presser foot release button to remove the foot.
- Place the desired foot on the needle plate aligning the presser foot pin with the foot holder.
- Lower the presser foot lifter so that the foot holder snaps on the foot.


Decrease tension
Increase tension


FUNCTIONS OF CONTROL PANEL
CONTROL PANEL FUNCTIONS
PATTERN NUMBER SELECTION BUTTONS
When the machine is turned on, straight stitch is selected and a pop-up screen for individual preference settings appears on the LCD display.
By pressing the ▼ or button you can increase or reduce the number by one.
By holding the or button you can increase or reduce the number by ten.

NOTE: The presser foot to be used is indicated by the letter (B, J, Z, H, O) to the right of the stitch number.
STITCH LENGTH AND STITCH WIDTH/NEEDLE POSITION ADJUSTMENT BUTTONS
Your sewing machine will produce your stitching requirements at an Auto/Default stitch Length and Width.
You can manually change the length, width or needle position for straight stitch according to your preference by pushing manual adjustment buttons.
When the stitch length or stitch width is changed from the default setting, the indicator around ⑨ or ⑦ disappears from the LCD.
When the stitch length or stitch width is reset back to the default setting, the indicator reappears around the corresponding symbol in the LCD.


OPERATION BUTTONS
The operation buttons help you to easily perform various basic sewing machine operations.
NEEDLE POSITION BUTTON (17)
Press the needle position button to raise or lower the needle. Pressing the button twice sews one stitch.
DUAL
PURPOSE
TACKING STITCH BUTTON

REVERSE/
Reverse stitch function for straight and zigzag stitches. Reverse sewing is carried out while the reverse stitch button is pushed.
The machine will continue to sew in reverse as long as the reverse button is pressed.

Tacking stitch function for tie-off of other stitches
The sewing machine makes 4 tiny tacking stitches to tie off the sewing on all patterns except straight, zigzag and buttonhole stitches. The position of the tacking stitches will be at the exact spot in the pattern where the reverse/tacking stitch button is pushed.

NOTE: This function is very useful for tying off the sewing pattern to avoid raveling at the start and end of sewing.

HELPFUL MESSAGES
If an incorrect operation is made, a helpful message will be displayed. When a helpful message is displayed, fix the problem following the instructions below.
The bobbin winder is moved to the right.
Move bobbin winder to left when it is not used.
Buttonhole lever is not lowered or raised.
Lower buttonhole lever when sewing buttonholes. Raise buttonhole lever when sewing stitch patterns.
Machine is locked up due to thread entangled with bobbin case or rotation interrupted forcibly.
Turn off power switch and eliminate the problem that caused the machine to stop.
| Audible signal | The buzzer sounds when |
| Beep | Normal operation |
| Beep – Beep | Invalid operation |
| Beep - Beep - Beep | Invalid machine setting |
| Beep - Beep - Beep - Beep - Beep | The machine is jammed |
2. STARTING TO SEW STRAIGHT STITCHING
Straight stitch is most frequently used for every aspect of sewing. Let's learn how to sew following the steps below.
- SETTINGS
Presser foot - General Purpose Foot
Thread tension control - 4
NOTE: Based upon the weight of the fabric, slight "fine tuning" of the tension may be desired.
A. Thread tension control B. Needle position button C. Reverse stitch button D. Presser foot lifter
- Pull both threads under the presser foot toward the back of the machine, leaving about 6" (15 cm) clear.
- Place the fabric under the presser foot and lower the presser foot lifter.
- Turn the hand wheel toward you until the needle enters the fabric.
- Start the machine. Guide the fabric gently with your hands. When reaching the edge of the material, stop the sewing machine.
NOTE: The needle plate has both metric and inch
markings as an aid for guiding your fabric when sewing a seam.
- First turn the handwheel toward you until the needle is at its highest position, then raise the presser foot, draw materials to the rear, and cut off excess thread with the thread cutter located on the bottom of the face cover as shown.
NOTE: To secure the stitching and avoid raveling, press the reverse stitch switch and sew a few stitches at the start and end of the seam.
KEEPING SEAMS STRAIGHT
To keep the seam straight, use one of the numbered guide lines on the needle plate. The numbers indicate distance from the needle at its center position.
The guide line on the bobbin cover plate is a 1/4" (6 mm) seam guide line which is used for piecing quilt blocks and also for narrow seams.


INSERTING ZIPPERS AND PIPING
Use the zipper foot to sew to the right or left of the zipper or close to the cord.
INSERTING ZIPPERS
To sew down the right side, attach the left side of the zipper foot to the presser foot holder so that the needle passes through the opening on the left side of the foot.
To sew down the left side, attach the right side of the foot to the footholder.
PIPING
To pipe soft furnishings, cover the cord with a bias strip of fabric and pin or tack it to the main piece of fabric.
Attach the right side of the zipper foot to the foot holder so that the needle passes through the opening on the right side of the foot.
Helpful Hint: Slight adjusting of the needle position to sew closer to the piping may be accomplished with the Stitch Width Control.

HAND-LOOK QUILT STITCH
This stitch is designed to look like hand sewing for topstitching and quilting.
- Thread the bobbin with desired top stitching color. When sewing, the machine will pull this thread to the top.
- Thread the machine with an invisible or lightweight thread, using the color that matches your fabric. This thread should not show.
- Increase thread tension a little bit at a time until you achieve the desired appearance.
- Start to sew
NOTE: For a dramatic appearance, experiment with different tension and stitch length combinations.

ZIGZAG STITCHING

SETTINGS: Presser foot - General Purpose Foot
Thread tension control - 4
The top thread may appear on the bottom depending on the thread, fabric, type of stitch and sewing speed, but the bobbin thread must never appear on the top of the fabric.
If bobbin thread is pulling to the top or you are experiencing puckering, slightly reduce the tension with the Thread Tension Control.
ADJUSTING STITCH WIDTH AND LENGTH

A dark grey box indicates the Auto/default value is set automatically when the pattern is selected. For the Zigzag Pattern the stitch length is 2 mm and the stitch width is 5 mm.

The light grey boxes indicate all the possible personal preference options available to set manually.
NOTE: The values shown in the chart are actual sewing lengths and widths and do not correspond to the scale and number markings on the sewing machine.
SATIN STITCH
This is a closely spaced attractive stitch for applique, bar-tacking, etc. Slightly loosen the top thread tension and manually adjust the stitch length between 0.5 and 1.5 for satin stitching. Use a backing of stabilizer or interfacing for sheer materials to avoid puckering.
NOTE: When sewing a dense (closely spaced) Satin Stitch, the Satin Stitch Foot MUST be used.
PLACEMENT OF PATTERNS
Stitch width of pattern increases from center needle position as illustrated.


BLINDHEM STITCH

The blindhem stitch is primarily used for hemming curtains, trousers, skirts, etc.
Settings: Presser foot - Blind stitch foot (H)
Thread Tension Control: 4

Regular blind stitch for normal firm fabrics
Elastic blind stitch for soft, stretchable fabrics
- First finish the raw edge. Do this by turning it under on fine fabrics or overcasting it on medium to heavyweight fabrics. Then turn the hem up the required depth, press and pin in place.
- Now fold the fabric as illustrated with the wrong side up.
- Place the fabric under the foot. Turn the handwheel towards you by hand until the needle swings fully to the left. It should just pierce the fold of the fabric. If it does not, adjust the guide (B) on the Blindhem Foot (A) so that the needle just pierces the fabric fold and the guide just rests against the fold.
NOTE: For a narrower or wider blindhem, first manually adjust the length and width controls to your desired length and width. Then adjust the guide on the foot.
Sew slowly, guiding the fabric carefully along the edge of the guide.
- When completed, the stitching is almost invisible on the right side of the fabric.
NOTE: It takes practice to sew blind hems. Always make a sewing test first.


Medium to heavyweight fabric


MULTI-STITCH ZIGZAG

SETTINGS: Presser foot - General Purpose Foot (J)
Thread tension control - 4
This is a strong stitch, because as its name implies, it makes three short stitches where the normal zig-zag makes only one. For this reason it is highly recommended for overcasting all types of fabrics.
It is also ideal for bartacks, mending tears, patching, sewing towelling, patch-work and attaching flat elastic.
NOTE: Mending a tear or overedging as shown in the illustration requires manual adjustment of the length control.
SHELL STITCH

SETTINGS: Presser foot - General Purpose Foot (J); Thread tension control - 4.
Turn under the raw edge and press. Place the fabric right side up so that the zigzag part of the stitch sews just over the folded edge, pulling the fabric in to form a shell hem. Trim away excess fabric close to the stitching line.
Helpful Hint: For a pleasing appearance, experiment with different width, length, and tension settings.
SEWING ON A BUTTON
SETTINGS: Presser foot - Button fitting foot (O); Feed dog control.
Push the lever in the direction of the arrow to drop the feed dog and attach button fitting foot (O).
Position your fabric and button under the presser foot. Lower presser foot. Turn the handwheel to make sure the needle clears both the left and right openings of the button. Adjust width if required. Sew 10 stitches across.
When attaching four-hole buttons, first sew the two holes closest to you. Then, slide the button so that the needle goes into the two holes toward the rear of the sewing machine, and then sew them in the same way.
Helpful Hint: To secure the thread, pull both threads to the backside of the fabric and tie them together.


DECORATIVE AND STRETCH STITCHES
SETTINGS: Presser foot - General Purpose Foot (J) or Satin Stitch Foot (Z); Thread tension control - 4.
Stretch stitches are mainly for use on knit, or stretchable fabrics, but can also be used on woven materials.
STRAIGHT STRETCH STITCH

Straight stretch stitch is far stronger than an ordinary straight stitch, because it locks three times - forwards, backwards and forwards.
It is particularly suitable for reinforcing the seams of sportswear in stretch and non-stretch fabrics, and for curved seams which take a lot of strain. Use this stitch also to top-stitch labels, collars and cuffs to give a professional finish to your garments.
HONEYCOMB STITCH

The Honeycomb stitch is ideal for smocking and useful for overcasting and attaching elastic and stretch lace.
- For smocking, first make several rows of gathers across the fabric that you wish to smock.
- Cut an underlay fabric (such as organdy) and place it under the shirring.
- Sew the honeycomb stitch over the gathered rows, securing them in place.
OVEREDGE STITCH

This is the same type stitch used by the garment industry in making sportswear - it forms and finishes the seam in one operation.
It's very effective for use in repairing raw or worn seams of garments.
FEATHER STITCH

The pleasing appearance of this stitch enables it to be used for decorative topstitching or for attaching laces and trims.
It is also ideal for quilting applications and edge-joining.


RIC-RAC STITCH
The Ric-rac stitch is primarily used for a decorative topstitch. It is ideal for edging neck-bands, armholes, sleeves and hems. When manually adjusted to a very narrow width, it also can be used for sewing high stress seams.
DOUBLE OVERLOCK STITCH

The Double overlock stitch has three main uses. It is perfect for attaching flat elastic, for overcasting, and for seaming and overcasting in one operation. It is primarily used on slightly stretch fabrics and non-stretch fabrics such as linen, tweed, and medium to heavy-weight cotton.
CRISS-CROSS STITCH

Useful for decorative stitching on borders and for use in heirloom sewing. The Entredeux stitch is most often sewn with a wing needle to create holes in the stitch pattern.
Helpful Hint: A slight + adjustment of the tension will increase the size of the hole when using a wing needle.


LADDER STITCH

The Ladder stitch is primarily used for drawn thread hemstitching. It can also be used for sewing over thin tape in a contrasting or same color. Place the stitch in the center and a special effect will be obtained for decoration. Another use for the ladder stitch is couching over narrow ribbon, yarn or elastic.
For drawn thread work, choose a coarse linen type fabric and after sewing draw the thread out within the ladder for an open airy appearance.
PIN STITCH


The Pin stitch is a traditional stitch pattern used for picot-like edges and for applique work.
BLANKET STITCH

The Blanket stitch is traditionally a hand sewn stitch used to put bindings on blankets. This multi-purpose stitch can also be used for couching, applique, drawn thread hemstitching and creating fringe.
SLANT PIN STITCH

Excellent for hemstitching projects like table linens. Picotlike stitch can also be made on sheer materials. Sew along the raw edge of fabric and trim close to the outside of the stitching.


SLANT OVEREDGE STITCH

Seams and overcasts in one operation to produce a narrow, supple seam, particularly suited to swimwear, sportswear, T-shirts, babywear in stretch nylon, jersey and cotton jersey.
CROSSED STITCH

Use to sew and finish elastic fabrics or for decorative work.
GREEK KEY STITCH

A traditional pattern suited for decorative borders and edge finishings.
EDGE-JOINING STITCH

This is a popular decorative stitch. It can also be used for joining two separate pieces of fabric, leaving a little space in between. To attach two separate pieces of fabric together, leave a little space in between. To prepare the fabric:
Fold under the seam allowances on the cut edges, and press.
Baste folded edges to tissue paper with about 1/8" (0.3 cm) space between. Stitch over the 1/8" (0.3 cm) allowance, just catching the fabric fold on both sides with the needle.
Remove bastings and paper; press.


WIZARD STITCH

Used mainly for decorative machine stitching.

THORN STITCH

It is a versatile stitch used for joining fabric pieces and as a decorative touch.

FISHBONE STITCH

Use to create decorative borders and for embroidery.

CHEVRON STITCH

Use to create decorative borders and for embroidery.

MORE DECORATIVE STITCHES
SETTINGS: Presser foot - General Purpose Foot (J)
or Satin Stitch Foot (Z)
Thread tension control - 4 or 3
Following are examples of how to use and sew these stitches. You can use some other decorative stitches in the same way. You should carry out a test sewing on an extra piece of the fabric being sewn to check the decorative pattern to be used. Before starting to sew, check that there is enough thread wound onto the bobbin to ensure that the thread will not run out during sewing.
For best results, stabilize fabric with a tear-away or washaway stabilizer underneath when stitching.
Helpful Hint: Bobbin thread should not appear on the top side of the fabric, so it may be necessary to slightly lower the tension setting.


LETTER PATTERN SEWING
ATTACHING THE LETTER PATTERN PLATE
The letter pattern plate shows the letters and letter numbers.
Attach the letter pattern plate to the handle of the sewing machine as shown in the illustration on the right side.

LETTER PATTERN NUMBER SELECTION
While pressing the button, Ⓐ will appear on the LCD, pattern "0" is selected and a pop-up screen for individual preference settings appears on the LCD display.
By pressing the ▼ or ▲ button you can increase or reduce the number by one.
By holding the ▼ or ▲ button you can increase or reduce the number by ten.
ADJUST THE SPACING BETWEEN LETTERS
Your sewing machine will produce your stitching requirements at an Auto/Default stitch Length and Width.
You can manually change the spacing between letters according to your preference by pushing manual adjustment buttons.
When the spacing is changed from the default setting, 0 disappears from around ⑧ on the LCD.
When the spacing is reset back to the default setting, 0 reappears around ! on the LCD.
The machine sews automatically one complete cycle of pattern strings and stops.


BUTTONHOLE MAKING
AUTOMATIC BUTTONHOLE
USING BUTTONHOLE FOOT
Your machine offers you two different widths of bartack, keyhole and round end buttonholes sewn by a system that measures the size of the button and calculates the size of buttonhole required. All of this is done in one easy step.
PROCEDURE
Use an interfacing in the area of the garment where buttonholes are placed. Stabilizer or regular interfacing can be used.
Make a practice buttonhole on a scrap of the fabric you are using. Then try the buttonhole with the selected button.
- Select one of the buttonhole patterns.
- Replace the presser foot with the buttonhole foot. (Refer to "Changing presser foot" on page 11.)
- Insert the button into the buttonhole foot. (Refer to "Using buttonhole foot" above.)
- Lower the buttonhole lever (C) so that it drops down vertically between the stoppers (A) and (B).


- Carefully mark the position of buttonhole on your garment.
- Place the fabric under the foot. Pull out the bobbin thread underneath the fabric to a length of about 4 inches to the rear
- Align the buttonhole mark on the fabric with the mark on the buttonhole foot, and then lower the buttonhole foot.
- While holding the top thread, start the machine.

* Sewing will be completed automatically in the following order.

- When sewing is finished, use a buttonhole opener/seam ripper to open up the fabric in the center of the buttonhole. Be careful not to cut any of the stitching.

CORDED BUTTONHOLES
Hook filler cord (such as crochet thread or buttonhole twist) over the spur and pull both ends of the cord forward under the foot and tie off the cord as shown in the illustration. Sew buttonholes so that zigzag stitches cover the cord. When completed, release the cord from foot and snip off the extra length.
TWIN NEEDLE
IMPORTANT: When using a twin-needle, set stitch width at 3.5 or less, or otherwise needle may brake.
A twin-needle produces two rows of parallel stitches for pin tucks, double top stitching and decorative sewing.
THREADING THE TWIN NEEDLE
- Insert the second spool pin. Place a spool on each spool pin. Thread the two threads as one. Draw one thread through each needle from front to back.
- Pick up bobbin thread as for single needle sewing. Pull the three threads together under the presser foot to the back of the machine, leaving about 6" (15 cm) of thread.
NOTE: Needle threader cannot be used to thread the twin needle.


The position of the needle when sewing straight stitch may be adjusted to anyone of 13 different positions with the Stitch Width Control as illustrated:

3.5

Toward left

Stitch width adjustment button
3. CARING FOR YOUR MACHINE
CLEANING HOOK AREA AND FEED DOGS
Always disconnect the machine from power supply by removing the plug from the wall-outlet.
To ensure the best possible operation of your machine, it is necessary to keep the essential parts clean at all times.
- Raise the needle to its highest position.
- Remove the needle plate (1).
- Remove the bobbin case (2).
- Clean the feed dogs and hook area with the lint brush. Put one drop of sewing machine oil on the hook race as indicated by the arrows (A, B).
- Replace the bobbin case with the projection (3) positioned against the spring (4). Replace the needle plate.
1
2
3
4
5
4. PERFORMANCE CHECKLIST
GENERAL PROBLEMS
Machine does not sew.
* Power switch is turned off. - Turn on the switch. * Buttonhole lever is not raised when sewing stitch patterns. – Raise buttonhole lever. * Buttonhole lever is not lowered when sewing buttonhole. – Lower buttonhole lever. * Bobbin winder is engaged. – Disengage bobbin winder (see page 5).
Machine jams/knocks.
* Thread is caught in hook. - Clean hook (see page 32).
* Needle is damaged. - Replace needle (see page 10).
Fabric does not move.
* Presser foot is not lowered - Lower presser foot. * Stitch length is too short - Lengthen stitch length.
STITCHING PROBLEMS
Machine skips stitches.
* Needle is not all the way up into needle clamp (see page 10). * Needle is bent or blunt. - Replace needle (see page 10). * Machine is not threaded correctly (see page 7). * Thread is caught in hook. - Clean hook (see page 32).
Stitches are irregular.
* Needle size is not correct for thread and fabric (see page 10). * Machine is not threaded correctly (see page 7). * Top thread tension is too loose (see page 11). * Fabric is being pulled or pushed against machine feeding action. - Guide it gently. * Bobbin has not been wound evenly. - Rewind bobbin.
Needle breaks.
* Fabric is being pulled or pushed against machine feeding action. - Guide it gently. * Needle size is not correct for thread and fabric (see page 10). * Needle is not all the way up into the needle clamp (see page 10). * Twin needle is being used but stitch width is set too wide (see page 30). * Too much thread appears on the underside of stitching. * Upper thread is not correctly thread (see page 7).
THREAD PROBLEMS
Thread bunches.
* Top and bobbin threads are not drawn back under presser foot before starting seam. - Draw both threads back under presser foot about 6 inches (10 cm) and hold until a few stitches are formed.
Needle thread breaks.
* Machine is not threaded correctly (see page 7). * Top thread tension is too tight (see page 11). * Needle is bent. - Replace needle (see page 10). * Needle size is not correct for thread and fabric (see page 10).
Bobbin thread breaks.
* Bobbin case is not threaded correctly (see page 6). * Lint accumulates in bobbin case or hook. - Remove lint (see page 32).
Fabric puckers.
* Top thread tension is too tight. - Adjust thread tension (see page 11). * Stitch length is too long for sheer or soft fabric. - Shorten stitch length.
Environment
Meaning of crossed out wheeled dustbin:
Do not dispose of electrical appliances as unsorted municipal waste, use separate collection facilities.
Contact your local government for information regarding the collection systems available.

If electrical appliances are disposed of in landfills or dumps, hazardous substances can leak into the groundwater and get into the food chain, damaging your health and well-being.
When replacing old appliances with new ones, the retailer is legally obligated to take back your old appliances for disposals at least free of charge.
This appliance is not intended for use by persons (including children) with reduced physical, sensory or mental capabilities, or lack of experience and knowledge, unless they have been given supervision or instruction concerning use of appliance by a person responsible for their safety.
Children should be supervised to ensure that they do not play with the appliance.
Importer:
ITrade Handels GmbH & Co. KG
Wörth 19
94034 Passau - GERMANY
GLN: 42 6015287 000 5
All rights reserved. All brand names are registered trademarks of their respective owners. Specifications are subject to change without prior notice.
IMPORTANT SAFETY INSTRUCTIONS
ACCESSORIES
INSTALLING YOUR MACHINE

ADJUSTING FREE ARM OPERATION
WINDING THE BOBBIN


THREADING THE BOBBIN THREAD


THREADING THE UPPER THREAD


RAISING THE BOBBIN THREAD
TABLE OF NEEDLES, THREADS AND FABRICS
USEFUL MESSAGES
Presser foot - Universal foot (J)


ZIGZAG STITCH

PARAMETERS
Presser foot – Universal foot (J)

BLIND STITCH


STRETCH ZIGZAG STITCH


HIDDEN STITCH


BIAS OVERLOCK STITCH


MANDREL STITCH
HERRINGBONE STITCH
CHEVRON STITCH


SLIT BUTTONHOLE
NEEDLE POSITION FOR STRAIGHT STITCH
2
3
4

4. CHECKLIST
GENERAL PROBLEMS
All rights reserved. All brand names are registered trademarks of their respective owners. Specifications are subject to change without prior notice.
Notes / Notes / Remarks
Notes / Notes / Remarks


- WINDING THE BOBBIN
- THREADING THE BOBBIN
- THREADING THE UPPER THREAD
- PULLING UP THE BOBBIN THREAD
- NEEDLE, THREAD, AND FABRIC TABLE
- ZIGZAG STITCH
- SEWING ON A BUTTON
- DECORATIVE AND ELASTIC STITCHES
- STRETCH ZIGZAG STITCH
- LADDER STITCH
- DIAGONAL OVERLOCK STITCH
- THORN STITCH
- HERRINGBONE STITCH
- CHEVRON STITCH
- MORE DECORATIVE STITCHES
- AUTOMATIC BUTTONHOLE SEWING
- NEEDLE POSITION FOR STRAIGHT STITCH
- TROUBLESHOOTING
- GENERAL PROBLEMS
- IMPORTANT SAFETY INSTRUCTIONS
- DANGER--TO REDUCE THE RISK OF ELECTRIC SHOCK
- CAUTION: MOVING PARTS
- SAVE THESE INSTRUCTIONS
- TABLE OF CONTENTS
- KNOWING YOUR SEWING MACHINE
- STARTING TO SEW
- CARING FOR YOUR MACHINE
- MACHINE IDENTIFICATION
- ACCESSORIES
- SETTING UP YOUR MACHINE
- POWER LINE CORD/FOOT CONTROL
- POWER/LIGHT SWITCH
- SPOOL PINS
- HORIZONTAL SPOOL PIN FOR NORMAL THREAD SPOOL
- VERTICAL SPOOL PIN FOR LARGE THREAD SPOOL
- PRESSER FOOT LIFTER
- FEED DOG CONTROL
- CONVERTING TO FREE-ARM SEWING
- THE BOBBIN THREAD
- THREADING THE TOP THREAD
- IMPORTANT
- USING AUTOMATIC NEEDLE THREADER
- PICKING UP BOBBIN THREAD
- NEEDLE, THREAD AND FABRIC CHART
- ADJUSTING TOP THREAD TENSION
- STRAIGHT STITCHING
- ZIG ZAG AND DECORATIVE SEWING
- BOBBIN TENSION
- CHANGING PRESSER FOOT
- CONTROL PANEL FUNCTIONS
- PATTERN NUMBER SELECTION BUTTONS
- NOTE: THE PRESSER FOOT TO BE USED IS INDICATED BY THE LETTER (B, J, Z, H, O) TO THE RIGHT OF THE STITCH NUMBER
- STITCH LENGTH AND STITCH WIDTH/NEEDLE POSITION ADJUSTMENT BUTTONS
- OPERATION BUTTONS
- NEEDLE POSITION BUTTON (17)
- TACKING STITCH FUNCTION FOR TIE-OFF OF OTHER STITCHES
- HELPFUL MESSAGES
- STARTING TO SEW STRAIGHT STITCHING
- KEEPING SEAMS STRAIGHT
- INSERTING ZIPPERS AND PIPING
- INSERTING ZIPPERS
- PIPING
- HAND-LOOK QUILT STITCH
- ZIGZAG STITCHING
- ADJUSTING STITCH WIDTH AND LENGTH
- SATIN STITCH
- PLACEMENT OF PATTERNS
- BLINDHEM STITCH
- MULTI-STITCH ZIGZAG
- NOTE: MENDING A TEAR OR OVEREDGING AS SHOWN IN THE ILLUSTRATION REQUIRES MANUAL ADJUSTMENT OF THE LENGTH CONTROL
- SHELL STITCH
- HELPFUL HINT: FOR A PLEASING APPEARANCE, EXPERIMENT WITH DIFFERENT WIDTH, LENGTH, AND TENSION SETTINGS
- HELPFUL HINT: TO SECURE THE THREAD, PULL BOTH THREADS TO THE BACKSIDE OF THE FABRIC AND TIE THEM TOGETHER
- DECORATIVE AND STRETCH STITCHES
- STRAIGHT STRETCH STITCH
- HONEYCOMB STITCH
- OVEREDGE STITCH
- FEATHER STITCH
- RIC-RAC STITCH
- DOUBLE OVERLOCK STITCH
- CRISS-CROSS STITCH
- PIN STITCH
- BLANKET STITCH
- SLANT PIN STITCH
- SLANT OVEREDGE STITCH
- CROSSED STITCH
- GREEK KEY STITCH
- EDGE-JOINING STITCH
- WIZARD STITCH
- FISHBONE STITCH
- LETTER PATTERN SEWING
- LETTER PATTERN NUMBER SELECTION
- ADJUST THE SPACING BETWEEN LETTERS
- BUTTONHOLE MAKING
- AUTOMATIC BUTTONHOLE
- USING BUTTONHOLE FOOT
- PROCEDURE
- CORDED BUTTONHOLES
- TWIN NEEDLE
- THREADING THE TWIN NEEDLE
- CLEANING HOOK AREA AND FEED DOGS
- PERFORMANCE CHECKLIST
- MACHINE DOES NOT SEW
- MACHINE JAMS/KNOCKS
- FABRIC DOES NOT MOVE
- STITCHING PROBLEMS
- MACHINE SKIPS STITCHES
- STITCHES ARE IRREGULAR
- NEEDLE BREAKS
- THREAD PROBLEMS
- THREAD BUNCHES
- NEEDLE THREAD BREAKS
- BOBBIN THREAD BREAKS
- FABRIC PUCKERS
- ENVIRONMENT
- IMPORTER
- INSTALLING YOUR MACHINE
- ADJUSTING FREE ARM OPERATION
- THREADING THE BOBBIN THREAD
- RAISING THE BOBBIN THREAD
- TABLE OF NEEDLES, THREADS AND FABRICS
- USEFUL MESSAGES
- BLIND STITCH
- HIDDEN STITCH
- BIAS OVERLOCK STITCH
- MANDREL STITCH
- SLIT BUTTONHOLE
- CHECKLIST
- NOTES / NOTES / REMARKS
Brand : BLAUPUNKT
Model : 152765
Category : Sewing machine