
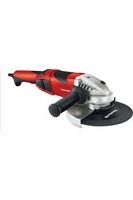
TC-BG 200 - Grinder EINHELL - Free user manual and instructions
Find the device manual for free TC-BG 200 EINHELL in PDF.


| Product type | Electric garden shredder |
| Brand | Einhell |
| Model | TC-BG 200 |
| Rated power | 2000 W |
| Power supply | 230 V ~ 50 Hz |
| Motor type | Induction electric motor |
| Cutting system | Steel blade rotor |
| Maximum branch diameter | 40 mm |
| Collection bin capacity | 50 L |
| Cutting capacity | Approximately 80 kg/h |
| Noise level | 94 dB (A) |
| Net weight | 12 kg |
| Dimensions (L x W x H) | 50 x 35 x 70 cm |
| On/Off function | Switch with protection against accidental restart |
| Safety | Safety switch, motor thermal protection, protective cover |
| Routine maintenance | Cleaning after use, checking screws, lubricating bearings |
| Bin cleaning | Wash with clean water, dry before reassembly |
| Blade sharpening | Professional sharpening recommended every 2-3 years |
| Available spare parts | Blades, rotor, collection bin, guard, belt (if applicable) |
| Repairability | Repairability index: 7.4/10 (according to manufacturer) |
| Warranty | 2 years (with possible extension) |
| Usage | Shredding of branches, hedges, garden vegetation |
| Included accessories | Collection bin, pusher, assembly key |
Frequently Asked Questions - TC-BG 200 EINHELL
User questions about TC-BG 200 EINHELL
0 question about this device. Answer the ones you know or ask your own.
Ask a new question about this device
Download the instructions for your Grinder in PDF format for free! Find your manual TC-BG 200 - EINHELL and take your electronic device back in hand. On this page are published all the documents necessary for the use of your device. TC-BG 200 by EINHELL.
USER MANUAL TC-BG 200 EINHELL


Danger! - Read the operating instructions to reduce the risk of injury.

Caution! Wear ear-muffs. The impact of noise can cause damage to hearing.

Caution! Wear a breathing mask. Harmful dust can be generated when working on metal and other materials. Never use the tool to work on any materials containing asbestos!

Caution! Always wear safety goggles. Sparks generated during work or splinters, chips and dust emitted by the equipment can cause loss of sight.

Warning! Do not use a damaged grinding/sanding wheel. Damaged plug-in tools may break into pieces that are catapulted into the surroundings.

Caution! Wear gloves.

Direction of rotation of the grinding/sanding wheel.

Caution! Do not use with hand-held machines. These grinding/sanding tools are allowed to be used only on machines that are not held in your hand.

Caution! Do not use for wet grinding/sanding and wet abrasive cutting. These grinding tools are suitable only for dry grinding/sanding.

Caution! Permitted only for a fully enclosed work area. These grinding/sanding tools are allowed to be used only on stationary grinding/sanding machines whose guards and safety devices are deemed to be a fully enclosed work area.
Danger!
When using the equipment, a few safety precautions must be observed to avoid injuries and damage. Please read the complete operating instructions and safety regulations with due care. Keep this manual in a safe place, so that the information is available at all times. If you give the equipment to any other person, hand over these operating instructions and safety regulations as well. We cannot accept any liability for damage or accidents which arise due to a failure to follow these instructions and the safety instructions.
1. Safety regulations
The corresponding safety information can be found in the enclosed booklet.
Warning!
Read all the safety information, instructions, illustrations and technical data provided on or with this power tool. Failure to adhere to the following instructions may result in electric shock, fire and/or serious injury.
Keep all the safety information and instructions in a safe place for future use.
2. Layout and items supplied
2.1 Layout (Fig. 1/2a- 2c)
- On/Off switch
- Safety window
- Spark deflector
- Cover
- Coarse grinding/sanding wheel
- Fine grinding/sanding wheel
- Workpiece support
- Mounting holes
- Base plate
- Lamp with flexible shaft
- Socket head screw
- Small washer
- Small spring washer
- Nut
- Long lock bolt
- Small locking button
- Short lock bolt
- Large washer
- Large spring washer
- Large locking button
2.2 Items supplied
Please check that the article is complete as specified in the scope of delivery. If parts are missing, please contact our service center or the sales outlet where you made your purchase at the latest within 5 working days after purchasing the product and upon presentation of a valid bill of purchase. Also, refer to the warranty table in the service information at the end of the operating instructions.
- Open the packaging and take out the equipment with care.
- Remove the packaging material and any packaging and/or transportation braces (if available).
- Check to see if all items are supplied.
- Inspect the equipment and accessories for transport damage.
- If possible, please keep the packaging until the end of the guarantee period.
Danger!
The equipment and packaging material are not toys. Do not let children play with plastic bags, foils or small parts. There is a danger of swallowing or suffocating!
• Double wheel grinder • Safety window (2x) - Spark deflector (2x) • Workpiece support (2x) - Socket head screw (4x) • Small washer (6x) • Small spring washer (6x) - Nut (4x) • Long lock bolt (2x) • Small locking button (2x) • Short lock bolt (2x) • Large washer (2x) • Large spring washer (2x) • Large locking button (2x) • Original operating instructions • Safety information
3. Proper use
The double wheel grinder is a combination tool for the coarse and fine grinding of metals, plastics and other materials using the appropriate grinding wheels.
The machine is allowed to be used only for its intended purpose! Even when the equipment is
GB
used as prescribed it is still impossible to eliminate certain residual risk factors. The following hazards may arise in connection with the machine's construction and layout:
- Contact with the grinding wheel where it is not covered.
- Catapulting of parts from out of damaged grinding wheels.
- Catapulting of workpieces and parts of workpieces.
- Damage to hearing if essential ear-muffs are not used.
The equipment is allowed to be used only for its prescribed purpose. Any other use is deemed to be a case of misuse. The user/operator and not the manufacturer will be liable for any damage or injuries of any kind resulting from such misuse.
Please note that our equipment has not been designed for use in commercial, trade or industrial applications. Our warranty will be voided if the equipment is used in commercial, trade or industrial businesses or for equivalent purposes.
4. Technical data
Mains voltage: .....220-240 V ~ 50 Hz Power rating: ..... S1 185 W | S2 30 min 400 W Idle speed n₀: .....2980 min⁻¹ Grinding/sanding wheel ø max.: ..... 207 mm Grinding/sanding wheel ø min.: ..... 173 mm Grinding/sanding wheel ø: ..... 200 mm Grinding/sanding wheel thickness: ..... 25 mm Grinding/sanding wheel hole ø: ..... 32 mm Peripheral speed: .....31.2 m/s Grinding/sanding wheel grit size (coarse): ....K36 Grinding/sanding wheel grit size (fine): .....K60 Protection class : ..... I Weight: ..... approx. 12 kg
Load factor:
A load factor of S2 30 min (intermittent periodic duty) means that you may operate the motor continuously at its nominal power level (400 W) for no longer than the time stipulated on the specifications label (30 minutes ON period). If you fail to observe this time limit the motor will overheat. During the OFF period the motor will cool again to its starting temperature.
Danger!
Noise
The noise emission values were measured in accordance with EN 62841.
Operation
L_pA sound pressure level 88.6 dB(A), K_pA uncertainty 3 dB(A), L_WA sound power level 101.6 dB(A), K_WA uncertainty 3 dB(A)
Wear ear-muffs.
The impact of noise can cause damage to hearing.
The stated noise emission values were measured in accordance with a set of standardized criteria and can be used to compare one power tool with another.
The stated noise emission values can also be used to make an initial assessment of exposure.
Warning:
The noise emission levels may vary from the level specified during actual use, depending on the way in which the power tool is used, especially the type of workpiece it is used for.
Keep the noise emissions and vibrations to a minimum.
- Only use appliances which are in perfect working order. • Service and clean the appliance regularly. • Adapt your working style to suit the appliance. • Do not overload the appliance.
- Have the appliance serviced whenever necessary.
- Switch the appliance off when it is not in use.
Limit the operating time!
All stages of the operating cycle must be considered (for example, times in which the electric tools are switched off and times in which the tool is switched on but operates without load).
Caution!
Residual risks
Even if you use this electric power tool in accordance with instructions, certain residual risks cannot be rules out. The following hazards may arise in connection with the equipment's construction and layout:
- Lung damage if no suitable protective dust mask is used.
- Damage to hearing if no suitable ear protection is used.
- Health damage caused by hand-arm vibrations if the equipment is used over a prolonged period or is not properly guided and maintained.
5. Before starting the equipment
Before you connect the equipment to the mains supply, make sure that the data on the rating plate are identical to the mains data.
Warning!
Always pull the power plug before making adjustments to the equipment.
Pull the power plug before doing any maintenance or assembly work on the equipment.
- The equipment has to be set up where it can stand securely.
- Before starting work, firmly screw the grinding/sanding machine to the workbench or equivalent using the 4 mounting holes (8) in the base plate (9).
- All covers and safety devices have to be properly fitted before the equipment is switched on.
- It must be possible for the grinding/sanding wheel to run freely.
- Check that the voltage on the rating plate is the same as your supply voltage before you connect the equipment to the power supply.
5.1 Assembling the spark deflector / safety window (Fig. 3/4)
- Fasten the spark deflector (3) to the machine (Fig. 3).
- To do this, use the socket head screws (11), washers (12), spring washers (13) and nuts (14).
- Tighten the screw connection using a 4 mm hex key and an 8 mm wrench. Note! Not supplied.
- Fit the safety window (2) to the spark deflector (3) using a lock screw (15), a washer (12), a spring washer (13) and a locking button (16) (Fig. 4).
5.2 Adjusting the spark deflector (Fig. 5)
- With the help of the slots in the spark deflector (3) you can adjust it in vertical direction.
- To do so, slacken the socket head screws (11) and push the spark deflector as close as possible to the grinding/sanding wheel (5, 6).
- Warning! The distance between the grinding/sanding wheel (5, 6) and the spark deflector (3) must be set as small as possible and under no circumstances should it exceed 2 mm. • Then secure the spark deflector (3) again.
- Warning! Adjust the spark deflector (3) periodically to compensate for wear on the grinding/sanding wheel (5, 6).
5.3 Fitting the workpiece support (Fig. 6)
• Fit the workpiece support (7) to the machine.
- Warning! The angled face of the workpiece support must point away from the grinding/sanding wheel (5, 6)!
- To achieve this, use the lock screw (17), the washer (18), the spring washer (19) and the locking button (20).
5.4 Setting the workpiece support (Fig. 7)
- With the help of the slot in the workpiece support (7) you can adjust it in horizontal direction.
- To do so, slacken the locking button (20) and push the workpiece support (7) as close as possible to the grinding/sanding wheel (5, 6).
- Warning! The distance between the grinding/sanding wheel (5, 6) and the workpiece support (7) must be set as small as possible and under no circumstances should it exceed 2 mm.
- Then secure the workpiece support (7) again with the locking button (20).
- Warning! Adjust the workpiece support (7) periodically to compensate for wear on the grinding/sanding wheel (5, 6).
5.5 Changing the grinding/sanding wheel (Fig. 8-12)
- Before replacing the grinding/sanding wheel: Pull out the power plug!
- Undo the 3 screws (A) on the cover (4) using the 4 mm hex key. Pull out the screws (A) as far as they will go.
- Now turn the left-hand cover (4) counterclockwise to the point where the cover (4) can be removed past the spark deflector (3). Turn the right-hand cover (4) clockwise.
- Remove the cover (4). • Slacken the socket head screws (11) as de-
GB
scribed in 5.2 in order to push up the spark deflector (3). Position the spark deflector (3) at the maximum height.
- Note! Use a rag, cloth or similar to secure the grinding/sanding wheel (5, 6) against rotation.
- Undo the nut (B) by applying a 19 mm wrench and holding the grinding/sanding wheel (5, 6) securely with a rag, cloth or similar. • Note! 19 mm wrench not supplied. Note! Turn the nut (B) in the direction of rotation of the grinding/sanding wheel (5, 6).
- Remove the nut (B), the flange (C) and the old grinding/sanding wheel.
- Before you fit the new grinding/sanding wheel, carefully clean all the parts that rotate during operation.
- Fit the new grinding/sanding wheel (5, 6), flange (C) and nut (B) in reverse order and tighten.
- Note! Tighten the nut (B) moderately - the screw connection is designed to promote the clamping of the grinding/sanding wheel during operation.
- Then refit the cover (4) using the 3 screws (A).
- Adjust the spark deflector (3) as described in 5.2.
- Warning! Check that the safety devices are in good working condition before you work with the equipment again.
- Warning! Always use the grinding/sanding machine with a grinding/sanding wheel fitted on each side. This will reduce the risk of touching a rotating spindle.
6. Operation
6.1 ON/OFF switch (1)
To switch on the equipment set the On/Off switch (1) to position I.
Move the ON/OFF switch (1) to position 0 to switch off the equipment.
After switching on the equipment wait for the equipment to reach its maximum speed of rotation before commencing with the sanding/grinding work.
6.2 Operating the lamp (Fig. 1)
- The lamp (10) will switch on automatically as soon as the On/Off switch (1) is set to position I. Using the flexible shaft you can move the
lamp (10) to the required position.
The lamp (10) will switch off automatically as soon as the On/Off switch (1) is set to position 0.
6.3 Grinding/sanding
- We recommend that you use the fine-grained grinding/sanding wheel (6) for fine grinding/sanding work and the coarse-grained grinding/sanding wheel (5) for coarse grinding/sanding work.
- Place the workpiece onto the workpiece support (7) and slowly guide the workpiece towards the grinding wheel (5, 6) at the desired angle to the point where workpiece and grinding wheel make contact.
- Move the workpiece slightly back and forth to produce an optimal grinding result. This way the grinding wheel (5, 6) is evenly worn. Allow the workpiece to cool every now and then.
Caution!
If the grinding/sanding wheel becomes jammed during operation, remove the workpiece and wait until the tool reaches its top speed again. If necessary, use less force when moving the workpiece against the grinding/sanding wheel.
7. Replacing the power cable
Danger!
If the power cable for this equipment is damaged, it must be replaced by the manufacturer or its after-sales service or similarly trained personnel to avoid danger.
8. Cleaning, maintenance and ordering of spare parts
Danger!
Always pull out the mains power plug before starting any cleaning work.
8.1 Cleaning
- Keep all safety devices, air vents and the motor housing free of dirt and dust as far as possible. Wipe the equipment with a clean cloth or blow it with compressed air at low pressure.
- We recommend that you clean the device immediately each time you have finished using it.
- Clean the equipment regularly with a moist cloth and some soft soap. Do not use cleaning agents or solvents; these could attack the plastic parts of the equipment. Ensure that no water can seep into the device. The ingress of water into an electric tool increases the risk of an electric shock.
8.2 Maintenance
There are no parts inside the equipment which require additional maintenance.
8.3 Ordering replacement parts:
Please quote the following data when ordering replacement parts:
• Type of machine • Article number of the machine • Identification number of the machine • Replacement part number of the part required
For our latest prices and information please go to www.isc-gmbh.info
8.4 Transport
Transport the machine only by lifting it by the motor housing or by the base plate (9). Never use safety devices such as the safety window (2), the spark deflector (3) or the workpiece support (7) for handling or transporting purposes.
9. Disposal and recycling
The equipment is supplied in packaging to prevent it from being damaged in transit. The raw materials in this packaging can be reused or recycled. The equipment and its accessories are made of various types of material, such as metal and plastic. Never place defective equipment in your household refuse. The equipment should be taken to a suitable collection center for proper disposal. If you do not know the whereabouts of such a collection point, you should ask in your local council offices.
10. Storage
Store the equipment and accessories in a dark and dry place at above freezing temperature. The ideal storage temperature is between 5 and 30 °C. Store the electric tool in its original packaging.

For EU countries only
Never place any electric power tools in your household refuse.
To comply with European Directive 2012/19/EC concerning old electric and electronic equipment and its implementation in national laws, old electric power tools have to be separated from other waste and disposed of in an environment-friendly fashion, e.g. by taking to a recycling depot.
Recycling alternative to the return request:
As an alternative to returning the equipment to the manufacturer, the owner of the electrical equipment must make sure that the equipment is properly disposed of if he no longer wants to keep the equipment. The old equipment can be returned to a suitable collection point that will dispose of the equipment in accordance with the national recycling and waste disposal regulations. This does not apply to any accessories or aids without electrical components supplied with the old equipment.
The reprinting or reproduction by any other means, in whole or in part, of documentation and papers accompanying products is permitted only with the express consent of the iSC GmbH.
Subject to technical changes
GB
Service information
We have competent service partners in all countries named on the guarantee certificate whose contact details can also be found on the guarantee certificate. These partners will help you with all service requests such as repairs, spare and wearing part orders or the purchase of consumables.
Please note that the following parts of this product are subject to normal or natural wear and that the following parts are therefore also required for use as consumables.
| Category Example | |
| Wear parts* | |
| Consumables* Grinding/sanding disks | |
| Missing parts |
* Not necessarily included in the scope of delivery!
In the effect of defects or faults, please register the problem on the internet at www.isc-gmbh.info. Please ensure that you provide a precise description of the problem and answer the following questions in all cases:
• Did the equipment work at all or was it defective from the beginning? • Did you notice anything (symptom or defect) prior to the failure? • What malfunction does the equipment have in your opinion (main symptom)? Describe this malfunction.
GB
Warranty certificate
Dear Customer,
All of our products undergo strict quality checks to ensure that they reach you in perfect condition. In the unlikely event that your device develops a fault, please contact our service department at the address shown on this guarantee card. You can also contact us by telephone using the service number shown. Please note the following terms under which guarantee claims can be made:
- These guarantee terms apply to consumers only, i.e. natural persons intending to use this product neither for their commercial activities nor for any other self-employed activities. These warranty terms regulate additional warranty services, which the manufacturer mentioned below promises to buyers of its new products in addition to their statutory rights of guarantee. Your statutory guarantee claims are not affected by this guarantee. Our guarantee is free of charge to you.
- The warranty services cover only defects due to material or manufacturing faults on a product which you have bought from the manufacturer mentioned below and are limited to either the rectification of said defects on the product or the replacement of the product, whichever we prefer. Please note that our devices are not designed for use in commercial, trade or professional applications. A guarantee contract will not be created if the device has been used by commercial, trade or industrial business or has been exposed to similar stresses during the guarantee period.
- The following are not covered by our guarantee:
- Damage to the device caused by a failure to follow the assembly instructions or due to incorrect installation, a failure to follow the operating instructions (for example connecting it to an incorrect mains voltage or current type) or a failure to follow the maintenance and safety instructions or by exposing the device to abnormal environmental conditions or by lack of care and maintenance.
- Damage to the device caused by abuse or incorrect use (for example overloading the device or the use or unapproved tools or accessories), ingress of foreign bodies into the device (such as sand, stones or dust, transport damage), the use of force or damage caused by external forces (for example by dropping it).
- Damage to the device or parts of the device caused by normal or natural wear or tear or by normal use of the device.
- The guarantee is valid for a period of 24 months starting from the purchase date of the device. Guarantee claims should be submitted before the end of the guarantee period within two weeks of the defect being noticed. No guarantee claims will be accepted after the end of the guarantee period. The original guarantee period remains applicable to the device even if repairs are carried out or parts are replaced. In such cases, the work performed or parts fitted will not result in an extension of the guarantee period, and no new guarantee will become active for the work performed or parts fitted. This also applies if an on-site service is used.
- To make a claim under the guarantee, please register the defective device at: www.isc-gmbh.info. Please keep your bill of purchase or other proof of purchase for the new device. Devices that are returned without proof of purchase or without a rating plate shall not be covered by the guarantee, because appropriate identification will not be possible. If the defect is covered by our guarantee, then the item in question will either be repaired immediately and returned to you or we will send you a new replacement.
Of course, we are also happy to offer a chargeable repair service for any defects which are not covered by the scope of this guarantee or for units which are no longer covered. To take advantage of this service, please send the device to our service address.
Also refer to the restrictions of this warranty concerning wear parts, consumables and missing parts as set out in the service information in these operating instructions.

6.1 ON/OFF switch (1)
Uncertainty KWA 3 dB (A)
X 2006/42/EC □ Annex IV Notified Body: Reg. No.:
□2000/14/EC_2005/88/EC □Annex V
Annex VI
Noise: measured LWA = dB (A); guaranteed LWA = dB (A) P = KW; L/∅ = cm
Notified Body:
2012/46/EU_(EU)2016/1628 Emission No.:
Standard references: EN 62841-1; EN 62841-3-4; EN 55014-1; EN 55014-2; EN 61000-3-2; EN 61000-3-3



- DANGER
- SAFETY REGULATIONS
- WARNING
- LAYOUT AND ITEMS SUPPLIED
- LAYOUT (FIG. 1/2A- 2C)
- ITEMS SUPPLIED
- PROPER USE
- GB
- TECHNICAL DATA
- LOAD FACTOR
- NOISE
- OPERATION
- WEAR EAR-MUFFS
- KEEP THE NOISE EMISSIONS AND VIBRATIONS TO A MINIMUM
- LIMIT THE OPERATING TIME
- CAUTION
- RESIDUAL RISKS
- BEFORE STARTING THE EQUIPMENT
- ASSEMBLING THE SPARK DEFLECTOR / SAFETY WINDOW (FIG. 3/4)
- ADJUSTING THE SPARK DEFLECTOR (FIG. 5)
- FITTING THE WORKPIECE SUPPORT (FIG. 6)
- SETTING THE WORKPIECE SUPPORT (FIG. 7)
- CHANGING THE GRINDING/SANDING WHEEL (FIG. 8-12)
- ON/OFF SWITCH (1)
- OPERATING THE LAMP (FIG. 1)
- GRINDING/SANDING
- REPLACING THE POWER CABLE
- CLEANING, MAINTENANCE AND ORDERING OF SPARE PARTS
- CLEANING
- MAINTENANCE
- ORDERING REPLACEMENT PARTS
- TRANSPORT
- DISPOSAL AND RECYCLING
- STORAGE
- SERVICE INFORMATION
- WARRANTY CERTIFICATE
- STANDARD REFERENCES: EN 62841-1; EN 62841-3-4; EN 55014-1; EN 55014-2; EN 61000-3-2; EN
Brand : EINHELL
Model : TC-BG 200
Category : Grinder