
24LED9112CSW - Television SALORA - Free user manual and instructions
Find the device manual for free 24LED9112CSW SALORA in PDF.


| Product type | LED TV |
| Screen size | 24 inches (60 cm) |
| Resolution | HD Ready (1366 x 768 pixels) |
| Refresh rate | 60 Hz |
| Power supply | 100-240 V, 50/60 Hz |
| Power consumption (standby) | 0.5 W |
| Weight (with stand) | 3.5 kg |
| Dimensions without stand (W x H x D) | 55 x 33 x 7 cm |
| Connectivity | 1 x HDMI, 1 x USB, 1 x VGA, 1 x antenna input, 1 x audio input, 1 x headphone output |
| Digital tuner | DVB-T/T2 |
| Main features | Remote control, multilingual OSD menu, parental control, timer |
| Wall mounting | VESA 100 x 100 mm compatible |
| Maintenance and cleaning | Soft dry cloth, do not use abrasive products |
| Safety | Do not block ventilation slots, do not expose to moisture |
| Spare parts and repairability | Parts available, repairability index can be consulted online |
| Included accessories | Remote control, batteries, stand, quick start guide |
Frequently Asked Questions - 24LED9112CSW SALORA
User questions about 24LED9112CSW SALORA
0 question about this device. Answer the ones you know or ask your own.
Ask a new question about this device
Download the instructions for your Television in PDF format for free! Find your manual 24LED9112CSW - SALORA and take your electronic device back in hand. On this page are published all the documents necessary for the use of your device. 24LED9112CSW by SALORA.
USER MANUAL 24LED9112CSW SALORA
Sluit de stroom aan
Melding
ERKENNING VAN HANDELSMERK
Opmerking over PIP-venster
Security instructions 48

Please read all the instructions before
installation or operation. 49
Getting started 50
Notifications & Characteristics & Accessories .....50
Functions....50
Connecting the power cord ....51
Remote control ....53
Connections....54
Turning the TV on/off....55
First time installation....55
Reading media through the USB input 55
Media browser menu....56
Quick Menu 56
Options and functions of the TV menu ....57
Channel list 60
Use of the channel list 60
Setting of parental control settings 60
Electronic Program Guide (EPG) 60
Connectivity Functions ....60
Connectivity Troubleshooting 62
WIRELESS DISPLAY 63
Software update 63
Troubleshooting and tips 64
Typical PC Input Display Modes 66
AV and HDMI Signal Compatibility 66
Security instructions

CAUTION
RISK OF ELECTRIC SHOCK DO NOT OPEN

WARNING : TO AVOID THE RISK OF ELECTRIC SHOCK DO NOT REMOVE COVER. NO USER-SERVICEABLE PARTS INSIDE REFER SERVICING TO QUALIFIED SERVICE PERSONNEL.
To operate your TV in extreme ambient conditions may cause the damage of the device.

In case of storm or lightening, or if you are not going to use the TV for some time, (during holidays for example) disconnect the power cord from the wall outlet. The electricity plug is used to disconnect the television from the main power and should therefore always be easy to operate.

The exclamation mark inside the equilateral triangle is used in the documentation provided with this device, to indicate to users instructions that are important for the proper operation and maintenance of the device.
Note : Please follow the instructions that appear on your screen concerning the activation of related functionalities.

Please read all the instructions pre installation or operation.

WARNING: Never let people (including dren) with reduced physical, sensory or tal capabilities or lack of experience and / or wledge use electrical devices unsupervised.
- For ventilation purposes, leave a free space of at least 10 cm all around the set.
- Do not block ventilation holes.
- Do not place the TV on sloping or unstable surfaces, the TV may tip over.
- Use this device in moderate climates.
- The power cord plug should be easily accessible. Do not place the TV, furniture, etc. on the power cord. A damaged power cord/plug can cause fire or give you an electric shock. Handle the power cord by the plug, do not unplug the TV by pulling the power cord. Never touch the power cord/plug with wet hands as this could cause a short circuit or electric shock. Never make a knot in the power cord or tie it with other cords. When damaged it must be replaced, this should only be done by qualified personnel.
- Do not use this TV in a humid or damp environment. Do not expose the TV to liquids. In case the cabinet contacts any liquids unplug the TV immediately and have it checked by qualified personnel before operating it any further.
- Do not expose the TV to direct sunlight, open flames or place it near intense heat sources such as electric heaters.
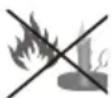
- Listening in excessive volumes from earphones and headphones may cause hearing loss.
- Ensure that no open flame sources, such as lit candles, are placed on top of the TV.
- To prevent injuries, this TV must be securely attached to a wall by carefully following the instructions (if the option is available).

- Occasionally, a few non-active pixels may appear on the screen as a fixed blue, green or red point. Please note that this does not affect the performance of your product. Take care not to scratch the screen with fingernails or other hard objects. - Before cleaning, unplug the TV from the wall socket. Only use a soft, dry cloth while cleaning.
 | Warning | Serious injury or death risk |
 | Risk of electric shock | Dangerous voltage risk |
 | Caution | Injury or property damage risk |
 | Important | Operating the system correctly |
 | Notice | Additional notes marked |
Notifications & Characteristics & Accessories
Information relating to the environment
This television is designed to consume less power in a bid to protect the environment. In order to effectively reduce your electric energy consumption, you have to follow the steps below:
You can use the Power Save Mode setting, located in the Picture menu. If you set the Power Save Mode as Eco, the TV will switch to energy-saving mode and the luminance level of TV set will be decreased to the optimum level. Note that some picture settings will be unavailable to be changed when the TV is in Power Save Mode.
If pressed Right button, “Screen will be off in 15 seconds.” message will be displayed on the screen. Select PEED and press OK to turn the screen of immediately. If you don’t press any button, the screen will be off in 15 seconds. Press any button on the remote or on the TV to turn the screen on again. If you disable Power Save Mode, picture mode will be automatically set to Dynamic.
Turn the television of and disconnect it when not in use. This good practice will also help you to economise energy.
Standby notifications
- If the television does not receive any incoming signal (an antenna or an HDMI source for example) for 5 minutes, it will go on standby. The next time it is turned on, the following message will appear: "TV switched to stand-by mode automatically because there was no signal for a long time". Press OK to continue.
- If the television stays inactive for 4 hours, it will enter standby mode. The next time it is turned on, the following message will appear: "TV switched to stand-by mode automatically because no operation was made for a long time". Press OK to continue.
Functions
- Colour television with remote control.
- Digital tuner cable and High definition TNT (DVB-T/C)
- Fully integrated digital terrestrial-cable TV(DVB-T-C)
- The HDMI ports are meant for devices with HDMI plugs.
- USB ports.(with digital video tape function)
- OSD Settings Menu.
- Jack socket for external devices (video camera, video game, audio player, etc.)
-
Stereo sound system.
-
Teletext.
- Headphone jack.
• Automatic settings system. - Manual setting.
- Automatic shutdown which can be set between 2 to 6 hours maximum without using the remote control.
- Programmable shutdown.
- Parental control lock
- Automatic sound-off when there's no transmission.
- NTSC Video.
• AVL (Automatic Volume Limitation) - PLL Tuner (Frequency scanning).
• PC port with Plug & Play function.
- Instant Plug&Play for Windows 98,) ME, 2000, XP, Vista.
• Gaming mode (optional)
- Ethernet (LAN) for Internet connectivity and service
• 802.11n WIFI Support (Optional)
• DLNA
Accessories included
- Remote control
- User manual
- Batteries:2 x AAA
- Side AV connection Cable
TV Control Switch & Operation
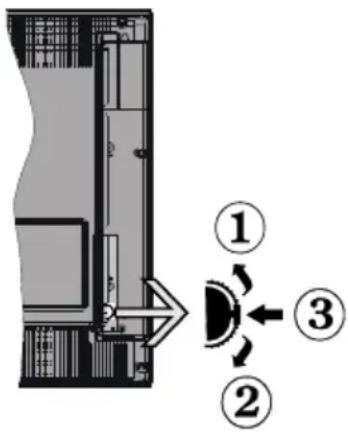
- Up direction
- Down direction
- Volume / Info / Sources List selection and Standby-On switch
The Control button allows you to control the Volume / Programme / Source and Standby-On functions of the TV.
To change volume: Increase the volume by pushing the button up. Decrease the volume by pushing the button down.
To change channel: Press the middle of the button, the information banner will appear on the screen. Scroll through the stored channels by pushing the button up or down.
To change source: Press the middle of the button twice (for the second time in total), the source list will appear on the screen. Scroll through the available sources by pushing the button up or down.
To turn the TV off: Press the middle of the button down and hold it down for a few seconds, the TV will turn into standby mode.
Notes:
- If you turn the TV off, this circle starts again beginning with the volume setting.
- Main menu OSD cannot be displayed via control buttons.
Operation with the Remote Control
Press the Menu button on your remote control to display the main menu screen. Use the Left or Right button to select a menu tab and press the OK to enter. Use Left / Right / Up / Down buttons to select or set an item. Press Return/Back or Menu button to quit a menu screen.
Input Selection
Once you have connected external systems to your TV, you can switch to different input sources. Press the Source button on your remote control consecutively to select the different inputs.
Changing Channels and Volume
You can change the channel and adjust the volume by using the Volume +/- and Programme +/- buttons on the remote.
Putting batteries in the remote control
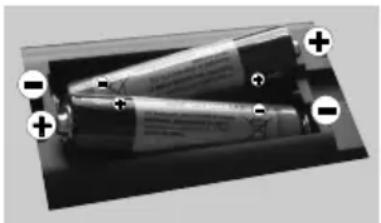
Lift the cover at the back of the remote control Insert two AAAsize batteries. Make sure that the + and - ends of the batteries match the in the battery compartment (respect the right polarity). Put the cover back in place.
Connecting the power cord
IMPORTANT: This television is designed to operate solely with a 220-240V \~ 50 Hz. power supply. After taking the television out of its package, wait a bit for the TV to reach ambient temperature before connecting it to the electricity plug. Connect the power cord to the main plug.
Connecting the antenna/Cable
Connect the aerial or cable TV plug to AERIAL INPUT (ANT-TV) socket located on the rear bottom side of the TV.

Notification
Manufactured under licence from Dolby Laboratories MANUFACTURED UNDER LICENCE
"Dolby" and the double D symbol are trademarks of Dolby Laboratories.

HDMI, the HDMI logo and the high definition multimedia interface are marks or registered trademarks of HDMI Licensing LLC.

“DLNA®, the DLNA Logo and DLNA CERTIFIED® are trademarks, service marks, or certification marks of the Digital Living Network Alliance.”

Information applicable to users in relation to disposal of old devices and batteries
[European Union only]
This symbol indicates that the equipment should not be disposed of as household waste. If you have to discard the TV set or the batteries, consider using collection systems or infrastructure for appropriate recycling.
Note: The Pb sign inscribed on the batteries indicates
that the battery contains lead.
![SALORA 24LED9112CSW - [European Union only] - 1](/content/2026/06/1292542/images/23330871cf9ac9d031aa1198ac071fa2894b5f663aa2a507bffc06784998187e.jpg)
![SALORA 24LED9112CSW - [European Union only] - 2](/content/2026/06/1292542/images/18f92a9351870a3e5ffab8d7b402869b72c1cd9d7101ba3a672bbc9e82f2ca88.jpg)
Products
![SALORA 24LED9112CSW - [European Union only] - 3](/content/2026/06/1292542/images/23058d39c07b4ad7e8d196e9551086406540d44b3d8c4f6c3ce1f362bb57b32e.jpg)
Battery
Technical details
| TV Frequency (tuner) | VHF (BAND I/III) - UHF (BAND U) - HYPERBAND |
| Number of memorable channels | 1000 |
| Audio standard German | +Nicam Stereo |
| On screen display On Screen Display | |
| RF Input Socket 75 Ohms (unbalanced) | |
| Operating voltage: 220-240V ~, 50HZ | |
| AUDIO OUTPUT POWER (WRMS.) (10% THD) | 2 x 2,5 WRMS |
| Power consumption 50W (max) | |
| TV Dimensions DxLxH (with foot) | 134 x 554 x 370 mm |
| TV Dimensions DxLxH (without foot) | 35/61 x 554 x 339 mm |
| Display | 24" |
| Operating temperature and humidity | 0°C up to 40°C, 85% humidity max |
Remote control
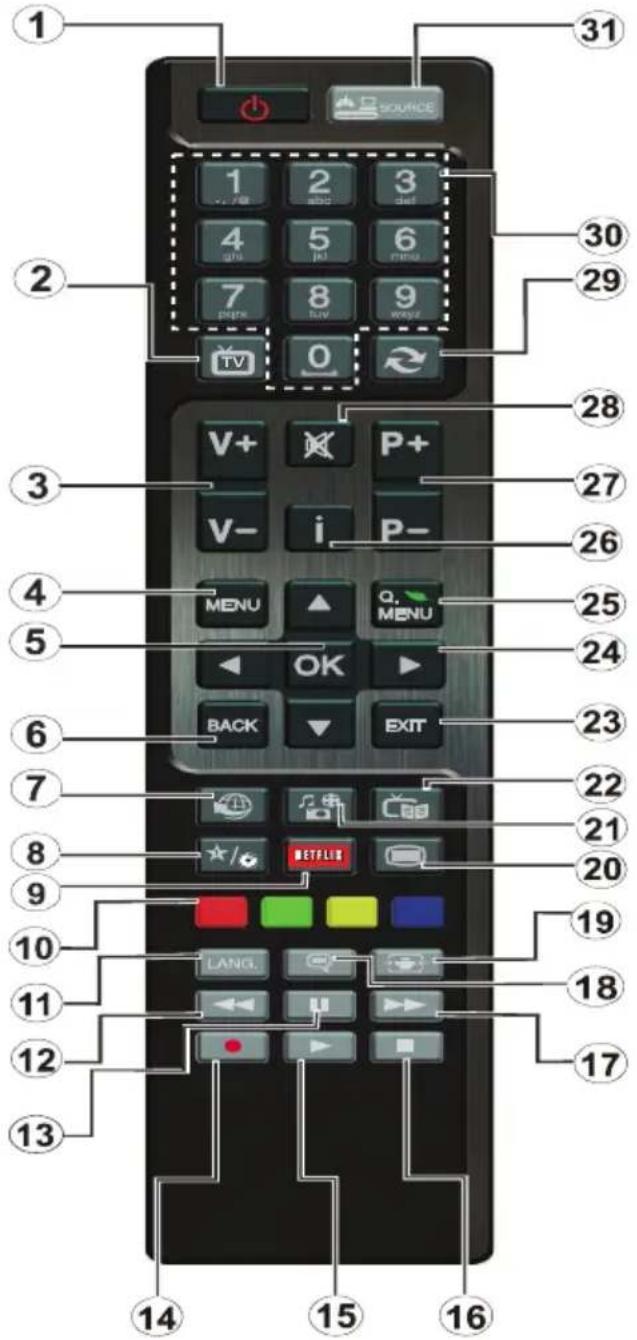
How to use My button 1
This button's main function is to run Youtube link. However, if you want to change this function, you can press MY BUTTON 1 for five seconds when on a desired source, channel or link, until the "MY BUTTON IS SET" message is displayed on the screen. This confirms that the selected MY BUTTON is now associated with the selected function. Note that if you perform first time installation, MY BUTTON 1 will return to its default function
How to use My button 2
Browse to the desired source, channel, or link, press and hold MY BUTTON 2 for five seconds, until this message "MY BUTTON HAS BEEN SET" appears on the screen. This message confirms that the MY BUTTON option selected is now associated to the selected function.
- Standby: Switches On / Off the TV
- TV: Displays channel list / Switches among broadcast types / Switches to TV Source
- Volume +/-
- Menu: Displays TV menu
- OK: Confirms user selections, holds the page (in TXT mode), views channel list (DTV mode)
- Back/Back: Returns to previous screen, opens index page (in TXT mode)
- Internet: Opens the portal page, where you can reach many web based applications
- My button (*)
- Netflix: Launches the Netflix application.
- Coloured Buttons: Follow the on-screen instructions for coloured button functions
- Language: Switches between sound modes (analogue TV), displays and changes audio/subtitle language (digital TV, where available)
- Rapid reverse: Moves frames backwards in media such as movies
- Pause: Pauses the media being played
- No function
- Play: Starts to play selected media
- Stop: Stops the media being played
- Rapid advance: Moves frames forward in media such as movies
- Subtitles: Turns subtitles on and off (where available)
- Screen: Changes the aspect ratio of the screen
- Text: Displays teletext (where available), press again to superimpose the teletext over a normal broadcast picture (mix)
- Media browser: Opens the media browsing screen
- EPG (Electronic programme guide): Displays the electronic programme guide
- Exit: Closes and exits from displayed menus or returns to previous screen
- Navigation buttons: Helps navigate menus, content etc. and displays the subpages in TXT mode when pressed Right or Left
- Quick Menu: Displays a list of menus for quick access
- Info: Displays information about on-screen content, shows hidden information (reveal - in TXT mode)
- Programme +/-
- Mute: Completely turns off the volume of the TV
- Swap: Quickly cycles between previous and current channels or sources
- Numeric buttons: Switches the channel, enters a number or a letter in the text box on the screen.
- Source: Shows all available broadcast and content sources
Connections
| Connector Type Cables Device | |||
 | ScartConnection(back) |  |  |
 | VGACconnection(back) |  |  |
SIDE AV | PC/YPbPrAudioConnection(side) | 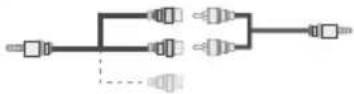 Side Audio/VideoConnection Cable (Supplied) PC Audio Cable (Not supplied) Side Audio/VideoConnection Cable (Supplied) PC Audio Cable (Not supplied) |  |
 | HDMICconnection(back) |  |  |
 SPDIF SPDIF | SPDIF(Coaxial Out)Connection(back) |  |  |
SIDE AV | Side AV(Audio/Video)Connection(side) |  AV Connection Cable(supplied) AV Connection Cable(supplied) |  |
HEADPHONE | HeadphoneConnection(side) |  | |
 YPBPR YPBPR | YPbPr VideoConnection(side) |  YPbPr ConnectionCable YPbPr ConnectionCable |  |
 | USBConnection(side) |  | 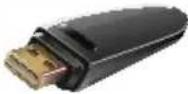 |
 | CIConnection(side) |  |  |
LAN | ConnectionEthernet(back) |  Câble LAN / Ethernet Câble LAN / Ethernet |  |

You may use a VGA-compatible YPbPr cable (not provided) to enable the YPbPr signal via the VGA port. |You will no longer be able to use the VGA and YPbPr simultaneously. | For the YPBR or PC port, you have to connect the audio output of your device to the television's audio AV input. |When an external device is connected to the jack socket of your TV, the TV will enter AV mode automatically when you turn on the external device. |When you are in digital mode (tuner, usb, hdmi) you will not have audio-video signal output through the jack socket. |If you use a wall-mounted kit, un , it is advisable to connect all your cables before fixing your TV to the kit. |Insert or delete the CI module CI only when the television is off. Consult the module's instruction manual for more information on its settings. | Each USB input of your TV supports devices up to 500mA. Connecting devices that have current value above 500mA may damage your TV. By connecting an HDMI cable to your Sharp LCD TV, you have to use only a shielded HDMI cable to guarantee a sufficient immunity against parasitic frequency radiation.

If you want to connect a device to the TV, make sure that both the TV and the are turned off before making connection. After the connection you can turn on the units them.
First time installation - USB connections
Turning the TV on/off
To Switch the TV On
Connect the power cord to a power source such as a wall socket (220-240V AC, 50 Hz).
To switch on the TV from standby mode either:
Press the Standby button, Programme +/- or a numeric button on the remote control.
Press the side function switch on the TV until the TV comes on from standby.
To Switch the TV Off
Press the Standby button on the remote control or press the side function switch on the TV until the TV switches into standby mode.
To power down the TV completely, unplug the power cord from the mains socket.
Note: When the TV is switched into standby mode, the standby LED can blink to indicate that features such as Standby Search, Over Air Download or Timer is active. The LED can also blink when you switch on the TV from standby mode.
First time installation
When you turn on the television for the first time, the language selection menu appears. Select the language you want and press OK.
The First time installation (FTI) screen appears during first installation. Set your preferences using the browsing buttons. When you are through, press OK to continue.
IMPORTANT : If you chose France or Italy as an alternative, the PIN code menu will appear and you will have to enter 4-digit code. You will not be able to use 0000 as code (you are advised to write down this code on your instruction manual so that you can remember it when you need to use it). Enter a PIN code and confirm by entering it again. Press the OK button to continue.
WARNING : When prompted to enter a PIN code to access a menu item, you have to use the code you set during first installation. If you forget the said code, use the main code 4725.
Demo Mode
If you want to use your television inside a home, you are advised to select the home mode.
If you choose the shop mode, you will have to confirm your choice.
Choosing TV receiver mode
You will have to choose your reception mode, antenna or cable. If you choose the ANTENNA option from the Type of search screen, the digital television will search for digital terrestrial broadcasts.

NOTE: You can press the MENU button to cancel.
Once all the available channels have been saved, the list of the channels will appear on the screen. If you find the said channels interesting, depending on the LCN(*) , select Yes, then press OK.
Press the MENU button to exit the list of channels and watch the television.
(*) LCN Channel number system which displays channels in the order established by government agencies.
Installing the cable
If you choose the CABLE option and press the OK button on the remote control. You can set the frequencies manually or press OK to start an automatic search.
Note: The duration of the search will depend on the search zone selected.
Reading media through the USB input
You can connect external hard drives (hard drives with or without external power cables, depending on their voltage) or a USB port to your TV through your TV's USB ports.
IMPORTANT! Backup your files before making any connection to the TV. Note that the manufacturer shall not be held accountable if files are damaged or data lost. Some types of USB devices (MP3 players for example) or USB “hard drives / memory cards” “may be incompatible with this television. However, you will not be able to record with NTFS formatted disks.
If your hard drive's capacity is above 1TO, you may experience some issues with formatting. Avoid disconnecting your reader quickly after inserting it in the television's USB port. This can physically damage the USB reader and the USB device itself. Never remove the USB while a file is being read.
Media browser menu
You can view picture, music and video files stored in a USB device by connecting this device to your TV set. Connect a USB stick to one of the USB ports located on the side of the TV set. For video, photo and music files, you can access a settings sub menu (image, sound and others) by pressing the MENU button. This function does not work with recordings done on the TV set. By pressing the MENU button again the display disappears. You can set the preferences of your media browser through your settings menu.
| Functioning of the Random / Repeat mode | |
| Launch playback with ▶ and enable 📄 | The TV set reads the next file and closes the list. |
| Launch playback with ▶ and enable 📄 | The same folder will be read repeatedly. |
| Launch playback with OK ▶ and enable 📄 | The folders concerned will be read randomly. |
Quick Menu
The Quick Settings menu allows you to access some options quickly. This menu includes Power Save Mode, Picture Mode, Favourites, Sleep Timer, FollowMe TV to DMR, CEC RC Passthrough, FollowMe TV (optional) and Information booklet options. Press Q.MENU button on the remote control to view the quick menu. See the following chapters for details of the listed features.
FollowMe TV (optional)
With your tablet you can stream the current broadcast from your smart TV using the FollowMe TV feature. Install the appropriate application to your tablet PC. Start the application.
For further information on using this feature refer to the instructions of the application you use.
FollowMe TV to DMR (optional)
This feature allows video streaming from your TV to another TV or mobile devices, using proper applications (e.g. UPnP - Universal Plug and Play - applications like BubbleUPnP). Activate FollowMe TV to DMR and timeshifting starts. Press the red button and device selection menu will be displayed. Choose your device and press OK.
Note: FollowMeTV and FollowMe TV to DMR features work correlated with the PVR feature and requires a connected USB storage device with FAT32 format and enough space in it. HD channels are not supported and both of the devices must be connected to the same network.
E-Manual
You can find instructions for your TV's features in the E-Manual.
To use E-Manual, press to the Info button while main menu is displayed on the screen.
By using the navigation buttons select a desired category. Every category includes a different topics.
Select a topic and press OK to read instructions.
To close the E-Manual screen press the Exit button.
Note: The contents of the E-Manual may vary according to model.
CEC and CEC RC Passthrough
This function allows to control the CEC-enabled devices, that are connected through HDMI ports by using the remote control of the TV.
The CEC option in the Other Settings menu under Settings menu should be set as Enabled at first. Press the Source button and select the HDMI input of the connected CEC device from the Source List menu. When new CEC source device is connected, it will be listed in source menu with its own name instead of the connected HDMI ports name(DVD Player, Recorder 1 etc.).
The TV remote is automatically able to perform the main functions after the connected HDMI source has been selected.
To terminate this operation and control the TV via the remote again, press and hold the "0-Zero" button on the remote control for 3 seconds. Or press Q.Menu button on the remote, highlight the CEC RC Passthrough and set as Off by pressing Left or Right button. This feature can also be enabled or disabled under the Settings/Other Settings menu.
The TV supports also ARC(Audio Return Channel) feature. This feature is an audio link meant to replace other cables between the TV and the audio system (A/V receiver or speaker system).
When ARC is active, TV does not mute its other audio outputs automatically. So you need to decrease TV volume to zero manually, if you want to hear audio from connected audio device only (same as other optical or co-axial digital audio outputs). If you want to change connected device's volume level, you should select that device from the source list. In that case volume control keys are directed to connected audio device.
Options and functions of the TV menu
| Content of the image menu | |
| Mode | You can edit the image mode according to your preferences and demands. The Image mode can be set on one of these options : Cinema , Game, Sport, Dynamic and Natural. |
| Contrast | Adjusts the brightness and darkness of the screen. |
| Brightness | Adjusts the brightness of the screen. |
| Sharpness | Defines the sharpness of objects displayed on the screen. |
| Colour | Adjusts the colour value, adjusts colours. |
| Power Saving Mode | If you choose the Power saving mode set to Eco, you can enable or disable the screen . (When the mode is Dynamic, the Power saving mode set to Eco is automatically disabled.) |
| Back-lighting (optional) | This parameter controls the back-light level. The back-light function will be inactive if the Power saving mode is set to Eco. The Back-light mode cannot be enabled in VGA mode Multimedia navigator or when Image mode is defined on the Game. |
| Noise reduction | If the broadcasting signal is weak and the image noisy, use the noise reduction functionality to reduce the intensity of the noise. |
| Advanced settings | |
| Dynamic contrast | You can adjust the dynamic contrast ratio at your convenience. |
| Colour temperature | Adjusts the desired colour tone. |
| Image zoom | Adjusts the size of images in the images zoom menu.Note: Auto (Available only in Scart mode with SCART PIN8 high/low voltage switch) |
| HDMI True Black (optional) | When you watch the television from the HDMI source, this option is visible in the Image setting menu. You can use this option to increase image darkness. |
| Film Mode | Films are recorded at a number of frames per second different from normal television programs. Enable this function when you are watching films so as to better visualize the accelerated images. |
| Skin tone | The skin tone function can be edited between -5 and 5. |
| Colour editing | Adjusts the desired colour tone. |
| RGB gain | You can configure the colour temperature values using the RGB Gain functionality. |
| Reset | Resets the image settings to the default values (except Game mode). |
| Auto-position (in PC mode) | Automatically optimises display. Press OK to optimise. |
| Position H (in PC mode) | This section changes the image horizontally towards the right or left side of the screen. |
| Position V (in PC mode) | This element moves the image vertically towards the upper or lower part of the screen. |
| Frequency guide (in PC mode) | The pilot frequency settings correct interferences which appear as vertical lines in the image for displays such as worksheets, paragraphs or texts in smaller font sizes. |
| Phase (in PC mode) | Depending on the resolution and the scanning frequency you enter for the television, you can see a fogged or sound image on the screen. In such a case you can use this element to get a clear image through trial and error. |
| In VGA mode (PC), certain elements of the image menu will be unavailable. On the contrary, the parameters of the VGA mode will be added to the Image parameters in PC mode. | |
Options and functions of the TV menu
| Content of Sound menu | |
| Volume | Adjusts the volume level. |
| Equaliser | You can choose from 4 pre-set modes or make your own settings by selecting the user mode. |
| Balance | This parameter is used to highlight the balance of the left or right loudspeakers. |
| Headphone | Adjusts the volume of the headphone. |
| Sound mode | You can choose stereo or select language in dual -I or dual -II mode if the transmission includes this option. . |
| AVL (Automatic Volume Limitation) | This function is used to limit the volume differences between programmes. |
| Headphone/Lineout | When you connect an external amplifier to your TV using the headphone jack, you can select this option as Lineout. If you have connected headphones to the TV, set this option as Headphone. |
| Dynamic Bass Enables | or disables the Dynamic Bass. |
| Surround Sound (optional) | Surround sound mode can be changed as On or Off. |
| Digital output | To be adjusted depending on the type of appliance attached to this plug. |
| Content of the Settings menu | |
| Conditional access | Controls the conditional access modules when they are available. |
| Language | Configures language parameters (can vary depending on the country chosen). The favourite parameters and current ones will be available. The current settings can only be edited if the broadcaster takes charge of them. |
| Parental control | Enter the correct password to edit parental control settings. You can easily adjust menu lock and parental control from this menu. You can also enter a new pin code |
| Timer | This function is used to set sleep mode and to program recordings made on your USB device. |
| Date/Time | Selects the date and time. |
| Sources | Enables or disables selected Source options. |
| Network Settings Displays network settings. | |
| Other settings: Displays other television setting options: | |
| OSD display time | Defines the menu display time. |
| Encoded channels search | When this parameter is enabled, the search process locates scrambled channels as well. |
| Blue Screen | In Active mode, it displays a blue screen when there is no signal. |
| Software update | Updates the software package of your television. |
| Application version: | Displays the software version of your television. |
| Hearing-impaired | Enables specific functions for the hearing-impaired broadcast by the channels. |
| Audio description | Audio description refers to an extra narration path reserved for the visually and hearing impaired. You can only use this option if the broadcaster takes it in charge. |
| TV Automatic shutdown | When this function is enabled, it defines the time at which your television automatically stops (between one and six hours). |
Options and functions of the TV menu
| Standby search mode (optional) | If the Standby search mode is enabled, available channels will be searched when the television is on standby. If the television finds missing or new channels, a menu screen is displayed, asking if you wish to apply these changes or not. The channels list is updated and edited after this process. |
| Storage Mode (optional) | Enables or disables the Demo mode.. |
| DLNA Renderer | DLNA renderer feature allows you to share files stored on your smartphone. If you have a DLNA renderer compatible smartphone and software installed, you can share/play photos with your TV. See instructions of your sharing software for more information. DLNA renderer mode will not be available with internet portal feature. |
| Power Up Mode This setting configures the power up mode preference. | |
| Netflix | You can view your ESN(*) number and deactivate Netflix. (*) ESN number is an unique ID number for Netflix, created especially to identify your TV. |
| Virtual Remote (optional) | Enables or disables the virtual remote feature. |
| CEC | With this setting you can enable and disable CEC functionality completely. Press Left or Right button to enable or disable the feature. |
| Turn on mode | This parameter configures preferences of the power on mode. Always enabled: the television comes on when the main power on/off button is pressed. Standby: the television always comes on in standby mode. / Last view: the television comes on on the last channel/source selected. |
| Installation | |
| Automatic channel search | If you wish to install or update new channels, you can use this menu. It displays automatic setting options. Digital antenna: Searches and stores DVB channels. Digital cable: Searches and stores DVB cable television channels Analogue: Searches and stores analogue stations. Analogue and digital antenna: Search and store DVB and analogue channels. Analogue and digital cable: Search and store analogue and DVB stations.. |
| Manual channel search | Used to search or directly store a channel if the frequency is known. |
| Network channel search | Searches channels related to the transmission system. |
| Fine tune (analogue) | You can use this option to fine-tune analogue channels. It is only available if analogue channels are stored. |
| Initial Installation | Deletes all television settings and takes you back to the first installation. |
Channel list
Use of the channel list
You can configure the channel list by moving, deleting, renaming and locking them to your liking.
Setting of parental control settings
To prevent certain programs from being watched, channels and menus can be locked through the parental control system.
To display lock menu option, enter the PIN code. By default, the set factory code is 0000. After entering the appropriate PIN code, the Parental control settings menu will be displayed :
Menu lock : The Menu lock option enables or disables access to the menu.
Maturity lock: After installation, this option searches information related to parental programs and if this parental level has been disabled, access to broadcast is not enabled.
Parental control lock: When the Parental lock option is selected, the television can only be controlled with a remote control. In this case, the control panel buttons will not be active.
PIN code setting: Defines a new PIN code.
The default PIN code can change depending on the country selected.
If a PIN code is required to display a menu option, enter one of the following codes: 0000 or 1234.
Electronic Program Guide (EPG)
Some channels, not all, display information concerning the on-going program and the next one. Press the button to get access to the EPG menu.
Up/Down/Left/Right: Navigate EPG.
OK: Displays programme options.
INFO: Displays, in detailed, information on the programme selected.
GREEN: Switches to List Schedule EPG.
YELLOW: Switches to Timeline Schedule EPG.
BLUE: Displays filtering options.
Programme Options
In EPG menu, press the OK button to enter the Event Options menu.
Select Channel
In EPG menu, using this option, you can switch to the selected channel.
Connectivity Functions
Connecting to a Wired Network
- Connect broadband ISP connection ethernet cable to the ETHERNET INPUT of your modem.
- Ensure that Nero Media Home software is installed to your PC.(for DLNA function). See Appendix A.
- Connect your PC to the one of your modem's LAN connectors (e.g. LAN 1) by using a proper LAN cable.
- Use another LAN output of your modem (e.g. LAN 2) to enable the connection to your TV.

- To access and play shared files, you must Select Media Browser. Press Menu button and select Media Browser. Press OK to continue. Select the desired file type and press OK. You must always use the Media Browser screen to access and play shared network files.
- PC/HDD/Media Player or any other devices that are DLNA 1.5 compatible should be used with wired connection for higher playback quality.
To configure wired settings please refer Network Settings section in Settings menu.
- You might be able to connect your TV to your LAN network depending on your network's configuration. In such a case, use an ethernet cable to connect your TV directly to the network wall outlet.
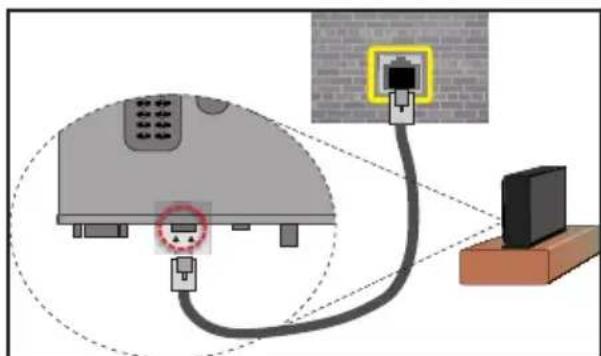
Connecting to a Wireless Network
IMPORTANT: "Veezy 200" USB dongle is required to use wireless network feature.
- To make your modem's SSID visible, you should change your SSID settings via modem's software. The TV cannot connect to the networks with hidden SSID.
For connecting to a wireless LAN network, you should perform the following steps:
- Connect broadband ISP connection ethernet cable to the ETHERNET INPUT of your modem.
- Ensure that Nero Media Home software is installed to your PC (for DLNA function).
- Afterwards, you should connect wireless adaptor to one of the USB inputs of the TV.
- To configure wireless settings please refer Network Settings section in the following sections.

- A Wireless-N router (IEEE 802.11a/b/g/n) with simultaneous 2.4 and 5 GHz bands designed to increase bandwidth. Optimized for smoother and faster HD video streaming, file transfers, and wireless gaming.
- Use LAN connection for quicker file sharing between other devices like computers.
- The frequency and channel differ depending on the area.
- The transmission speed differs depending on the distance and number of obstructions between the transmission products, the configuration of these products, the radio wave conditions, the line traffic, and the products that you use. The transmission may also be cut off or get disconnected depending on the radio wave conditions DECT phones, or any other WiFi 11b appliances. The standard values of the transmission speed are the theoretical maximum values for the wireless standards. They are not the actual speeds of data transmission.
- The location where the transmission is most effective differs depending on the usage environment.
- Wireless LAN adaptor should be connected directly to the TV's USB port. USB hubs are not supported.
- Wireless LAN adaptor supports 802.11 a,b,g & n type modems. It is highly recommended that you should use IEEE 802.11n communication protocol in order to avoid any possible problems while watching videos.
- Use the other usb input, if you experience problems with audio/video performance.
- You must change your modem's SSID when there are any other modems around with the same SSID.
Configuring Network Settings
Your TV's Network Settings include Wired and Wireless Connection options. However, if your TV does not have USB Wi-Fi dongle, you should use Wired Connection type. If you try to connect via Wireless Connection when your TV does not have a USB Wi-Fi dongle, a warning screen will appear and the TV will not get an IP address. Try connecting the LAN cable after this and then the TV will be able to get an IP address.
Configuring Wired Device Settings
If you are connecting the TV via ETHERNET INPUT, select Network Type as Wired Device to configure.
Network Type
Network type can be selected as Wired or Wireless device, in accordance with the active connection to the TV set. Select this as Wired if you have connected to the TV a LAN cable. Select as Wireless if you connect via the wireless USB dongle.
Configuration Status
This section displays the status of the connection.
IP Address
If an active connection is available, the IP address will be displayed on this section. If you want to configure IP address preferences, press GREEN button and switch to the advanced mode.
Configuring Wired Network Settings in Advanced Mode
While in Advanced Mode, press RED button to edit settings. When finished, press OK to save, Press RETURN/BACK to cancel.
IMPORTANT: "Veezy 200" USB dongle is required to use wireless network feature.
Wi-Fi feature can be used for a wireless network connection. If you have the Veezy 200 Wifi Dongle, select Network Type as Wireless Device to start connection process.
To enable Wi-Fi feature, profiles should be configured properly. Please plug in the Wi-Fi dongle to one of the USB ports.
Press YELLOW button to scan wireless network. Afterwards, available network list will be displayed. Please select your desired network from the list.
If the selected network is protected with a password, please enter the correct key by using the virtual keyboard. You can use this keyboard via navigation buttons and OK button on the remote control.
Wait until the IP the address is shown on the screen.
This means that the connection is now established. To disconnect from a wireless network, you should highlight Configuration Status and press OK.
You can navigate between menu tabs by pressing left/right buttons. The help bar on the bottom of the dialog shows features that you may use. Press BLUE button to check your internet connection speed.
You can check the signal strength by using the network settings menu for the wireless device mode.
Information
Configuration Status: Displays wi-fi status as connected or not connected.
IP Address: Displays the current IP address.
Network Name: Connected networks' name will be displayed.
Press GREEN button to switch to advanced mode and then press OK button to edit settings.
Delete Saved Wifi Profiles
Saved profiles will be deleted if you press red button while wireless device selection osd is on the screen.
Connecting to your Cell Phone via WiFi (Optional)
- If your cell phone has WiFi feature, you can connect your cell phone to your TV by using WiFi connection via a router, in order to play content from your phone. For this, your cell phone must have an appropriate sharing software.
- Connect to your router following the steps stated above in the Wireless Connection section.
- Afterwards, engage your cell phone with the router and then activate sharing software on your cell phone. Then, select files that you would like to share with your TV.
- If the connection is established correctly, you should now access the shared files of your cell phone via the Media Browser of your TV.
- Enter Media Browser menu and playback device selection OSD will be displayed. Select your cell phone's ident and press OK to continue.
Note: This feature may not be supported by some cell phones.
Connectivity Troubleshooting
Wireless Network Not Available
Ensure that the firewalls of your network allows the TV wireless connection. "Veezy 200" usb wifi dongle should be plugged properly (if available). If the wireless network does not function properly, try using the wired network in your home. Refer to the Wired Connection section for more information on the process.
Check the modem (router) first. If the router does not have a problem, check the internet connection of your modem. Try searching for wireless networks again, using the Network Settings menu screen.
Connection is Slow
See the instruction book of your wireless modem to get information on the internal service area, connection speed, signal quality and other settings. You need to have a high speed connection for your modem.
Distruption during playback or slow reactions
You could try the following in such a case:
Keep at least three meters distance from microwave ovens, mobile telephones, bluetooth devices or any other Wi-Fi compatible devices. Try changing the active channel on the WLAN router.
Using DLNA Network Service
DLNA (Digital Living Network Alliance) is a standard that eases viewing process of digital electronics and makes them more convenient to use on a home network. For further information, visit www.dlna.org.
DLNA standard allows you to view and play photos, music and videos stored in the DLNA media server connected to your home network.
Step 1: Nero Media Home
DLNA function cannot be used if the server program is not install to your PC. Please prepare your PC with the provided Nero Media Home programme.
For more information about the installation, please refer to Nero Media Home Installation section
Step 2: Connect to a Wired or Wireless Network
See the chapter Network Settings for detailed configuration information.
Step 3: Play Shared Files via Media Browser
Select Media Browser by using Left or Right button from the main menu and press OK button. Media browser will be then displayed.
DLNA support is available only with Media Browser folder mode. To enable folder mode, go to Settings tab in the main media browser screen and press OK. In the settings options, highlight View Style and change to Folder using Left or Right button.
Please select desired media type and press OK.
If sharing configurations are set properly, an OSD message will be displayed after selecting the desired media type. Select OK to display the selected network or USB memory content. If you want to refresh the device list, press GREEN button. You can press MENU to exit.
If available networks are found, they will be listed on this screen. Select media server or network that you want to connect by using "or" buttons and press OK button.
If you select media type as Video and choose a device from the selection menu, a new menu screen will appear on the screen.
Select Videos from this screen to list all the available video files from the selected network.
To play other media types from this screen, you must go back to main Media Browser screen and select media type as desired and then perform the network selection
again. Refer to Media Browser USB Playback section for further information on file playback.
Subtitle files do not work if you watch video from network through DLNA.
You can connect only one television with DLNA to same network. If a problem occurs with DLNA network, please switch on/off your television. Trick mode and jump are not supported with DLNA function.
CAUTION:
There may be some PC's which may not be able to utilize the DLNA function due to administrator and security settings. (such as business PC's).
For best home network streaming with this set, the supplied Nero software should be installed.
WIRELESS DISPLAY
Wireless Display is a standard for streaming video and sound content by Wi-Fi Alliance. This feature provides the ability to use your TV as wireless display device.
Using with mobile devices
There are different standards which enable sharing of screens including graphical, video and audio content between your mobile device and TV.
Plug the wireless USB dongle to TV first, if the TV doesn't have internal WiFi feature.
Then press the Source button on the remote and switch to Wireless Display source.
A screen appears stating that the TV is ready for connection.
Open the sharing application on your mobile device. These applications are named differently for each brand, please refer to the instruction manual of your mobile device for detailed information.
Scan for devices. After you select your TV and connect, the screen of your device will be displayed on your TV.
Note: This feature can be used only if the mobile device supports this feature. Scanning and connecting processes differ according to the programme you use. Android based mobile devices should have the software version V4.2 and above.
Internet Portal
You can access PORTAL mode using your TV. To do this, an active internet connection is required. Follow the steps on Connecting to a Wired/Wireless(optional) Network section to connect your TV to internet. After the connection is established, you can select or view portal options.
Note: Broadband internet connection is required for high quality viewing. Ensure that the internet connection is made properly. You must set the Country and Language data correctly in the
First Time Installation for the proper operation of internet portal.
Press "button on your remote control and portal application options will be displayed. Application options will be displayed as the template below. Available applications' contents may change depending on the application content provider.

Note on PIP Window
If you switch to portal mode while watching TV channels, current programme will be displayed on the PIP window. You can change channels using P+/P- buttons.
Current HDMI content will be displayed on the PIP window, if you switch to portal mode while watching HDMI source.
Use the “◀ or “”, “” or “” to navigate between the items on Portal screen. Press the OK button to confirm your selection. Press the BACK button to go to the previous screen.
Press the EXIT button to quit the Internet portal mode.
Software update
Your television can, through the antenna or cable, search and provide updates.
Software update search via the user interface
Simply go through the main menu. Choose Settings and select other settings menu. In the Other settingsmenu, select Software update and press the OK button to open the Update options menu.
3 Search and update mode
When the TV set receives signal from the antenna. If the Automatic search option in the Update options menu is active, the television automatically turns on at 3:00 a.m. and launches the search for broadcasting channels in order to update the new software. If new software is found and downloaded successfully, the television begins to work with the new software version when next it is turned on.
Note: If the television does not come on after the update, disconnect it for two minutes, then connect it again.
Troubleshooting and tips
The TV is not coming on
Check to ensure that the electricity plug is safely connected to the wall socket or that the batteries of the remote control are functional.
Poor picture quality
- Check if your antenna is properly connected. A poor signal level can negatively affect image quality.
- If you carried out manual settings, verify that you entered the right channel frequency.
- Image quality may be affected negatively when two devices are connected to the television set at the same time. If such is the case, disconnect one of the devices.
No image
- No image indicates that your TV is not receiving a signal. Have you selected the correct buttons on the remote control? Try once more. Also make sure that you have selected the right input source.
• Is the antenna connected properly?
• Is the antenna cable damaged? - Are suitable plugs used to connect the antenna?
- If you are not sure, please consult your supplier.
No sound
- Has the mute button been pressed? If that is the case, press the "button, or increase the volume.
- Only one speaker is producing sound. Is the balance well placed in the middle? Consult the Sound menu.
The remote control is not working
- The batteries may be down. Replace the batteries.
Input sources cannot be selected.
- If you cannot select an input source, it is possible that no device is connected.
- Check the AV cables and connections if you have tried to connect a device.
Nero MediaHome Installation
To install Nero MediaHome, please proceed as follows:
Note: To use DLNA function, this software should be installed to your PC.
-
Enter the link below completely in the adress-bar of your web browser.
http://www.nero.com/mediahome-tv -
Click the Download button on the opening page. The installation file will be downloaded onto your PC.
-
After the download is completed, double click on the installation file to start the installation. The
installation wizard will guide you through the installation process.
-
The prerequisites screen will be displayed first. The installation wizard checks the availability of required third-party software on your PC. If applications are missing they are listed and must be installed before continuing installation.
-
Click the Install button. The integrated serial will be displayed. Please do not change the displayed serial.
-
Click the Next button. The License Conditions (EULA) screen will be displayed. Please read the license agreement carefully and select the appropriate check box if you agree to the terms of the agreement. Installation is not possible without this agreement.
-
Click the Next button. On the next screen you can set your installation preferences.
-
Click the Install button. The installation begins and finishes automatically. A progress bar will indicate the state of the installation process.
-
Click the Finish button. The installation is completed. You will be directed to the web site of the nero software.
-
A shortcut is now placed on your desktop.
Congratulations! You successfully installed Nero MediaHome on your PC.
Run Nero MediaHome by double clicking on the shortcut icon.
Internet Browser
To use the internet browser, please select the internet browser logo from the portal section.
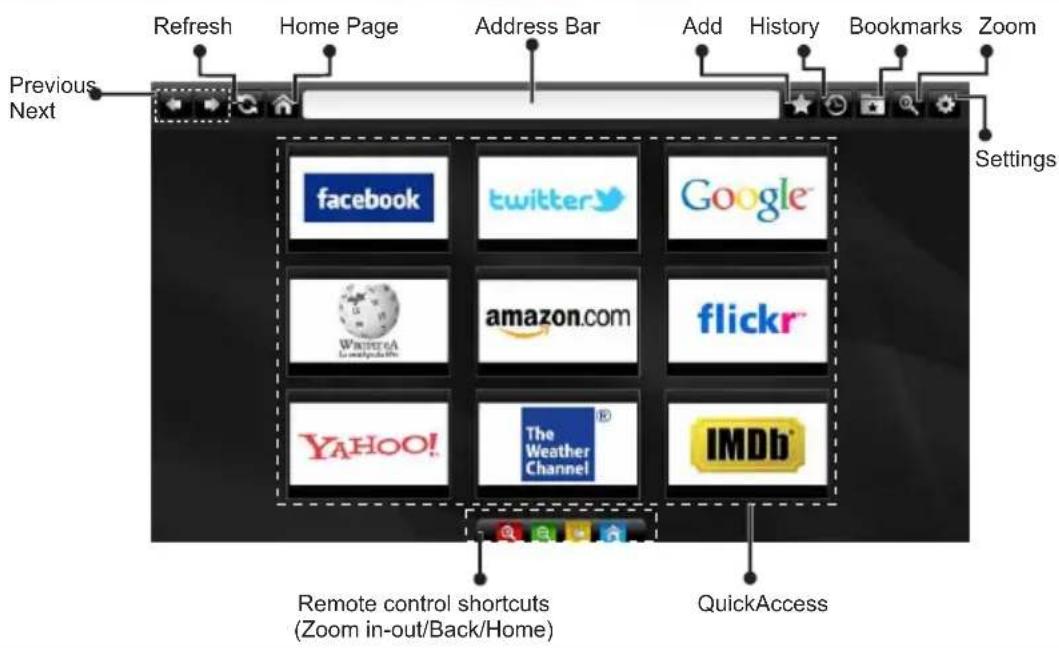
- To navigate the web browser, use the arrow buttons on the remote control. Press OK to continue.
- After First time installation, predefined web sites and logos will be displayed on the browser's access page (see image above). To add a desired web page to the quick access page, whilst on the website you wish to add, select the "Add" menu and select "Quick Access" button.
- If you want to add bookmarks, select this item while the desired web page is on the screen.

- You can navigate the web browser in three ways. First, enter any URL in the address bar.
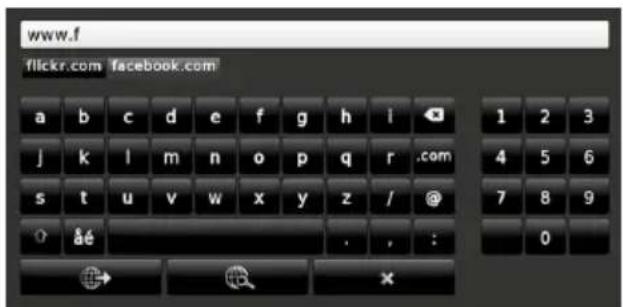
- You can search keywords by clicking the search button in the address dialog box or another way to navigate to pages is by clicking on links on web
pages and these will take you to the appropriate pages.
- When you scroll the pointer down to the middle of the screen, the remote control's shortcuts will be shown.
- Use the zoom shortcut buttons or the zoom menu to zoom in or zoom out.
- You can clear cookies or clear all browser data from the settings menu.
- Your TV is compatible with USB mice. Plug your mouse or wireless mouse adaptor to the USB input of your TV.
- To view your browsing history, click the history button. You can also clear your browsing history from here.

- The browser does not support multiple tabs.
- Some internet pages include flash content. These are not supported by the browser.
- Your TV does not support any download processes from the web browser.
Typical PC Input Display Modes
The following table is an illustration of some of the typical video display modes. Your TV cannot support all resolutions.
| Index | Resolution | Frequency |
| 1 | 0x350 85Hz | |
| 2 | 0x400 70Hz | |
| 3 | 0x400 85Hz | |
| 4 | 0x480 60Hz | |
| 5 | 0x480 66Hz | |
| 6 | 0x480 72Hz | |
| 7 | 0x480 75Hz | |
| 8 | 0x480 85Hz | |
| 9 | 0x600 56Hz | |
| 10 | 00x600 60Hz | |
| 11 | 00x600 70Hz | |
| 12 | 00x600 72Hz | |
| 13 | 00x600 75Hz | |
| 14 | 00x600 85Hz | |
| 15 | 32x624 75Hz | |
| 16 | 024x768 60Hz | |
| 17 | 024x768 66Hz | |
| 18 | 024x768 70Hz | |
| 19 | 024x768 72Hz | |
| 20 | 024x768 75Hz | |
| 21 | 024x768 85Hz | |
| 22 | 152x864 60Hz | |
| 23 | 152x864 70Hz | |
| 24 | 152x864 75Hz | |
| 25 | 152x864 85Hz | |
| 26 | 152x870 75Hz | |
| 27 | 280x768 60Hz | |
| 28 | 360x768 60Hz | |
| 29 | 280x768 75Hz | |
| 30 | 280x768 85Hz | |
| 31 | 280x960 60Hz | |
| 32 | 280x960 75Hz | |
| 33 | 280x960 85Hz | |
| 34 | 280x1024 60Hz | |
| 35 | 280x1024 75Hz | |
| 36 | 280x1024 85Hz | |
| 37 | 400x1050 60Hz | |
| 38 | 400x1050 75Hz | |
| 39 | 400x1050 85Hz | |
| 40 | 440x900 60Hz | |
| 41 | 440x900 75Hz | |
| 42 | 600x1200 60Hz | |
| 43 | 680x1050 60Hz | |
| 44 | 920x1080 60Hz | |
| 45 | 920x1200 60Hz |
| AV and HDMI Signal Compatibility | |||
| Source Supported Signals Available | |||
| EXT(SCART) | PAL O | ||
| NTSC 60 O | |||
| RGB 50/60 O | |||
| SECAM | O | ||
| Side AV | PAL 50/60 | O | |
| NTSC 60 O | |||
| SECAM | |||
| YPbPr | 480I, 480P | 60Hz | O |
| 576I, 576P | 50Hz | O | |
| 720P | 50Hz,60Hz | O | |
| 1080I | 50Hz,60Hz | O | |
| HDMI1HDMI2 | 480I | 60Hz | O |
| 480P | 60Hz | O | |
| 576I, 576P | 50Hz | O | |
| 720P | 50Hz,60Hz | O | |
| 1080I | 50Hz,60Hz | O | |
| 1080P | 24Hz,25Hz,30Hz,50Hz,60Hz | O | |
(X: Not Available, O: Available)
In some cases a signal on the LCD TV may not be displayed properly. The problem may be an inconsistency with standards from the source equipment (DVD, Set-top box, etc.). If you do experience such a problem please contact your dealer and also the manufacturer of the source equipment.
Supported File Formats for USB Mode
| Media Extension Format Notes | |||
| Video | .mpg,mpeg | Mpeg1-2 1080P@30fps, 50Mbit/sec | |
| .ts, .trp,tp, .m2ts | MPEG2 , H.264,VC1, AVS, MVC | H.264:1080Px2@25fps, 1080P@50fps MVC:1080P@ 24fps Other: 1080P@30fps -50Mbit/sec | |
| .vob MPEG2 | 1080P@30fps 50Mbit/sec | ||
| .mkv MPEG | 1-2-4,H.264 | H.264:1080Px2@25fps, 1080P@ 50fps, 1080P@30fps, 50Mbit/sec | |
| .mp4 MPEG | 4, XviD,H.264 | H.264:1080Px2@25fps, 1080P@ 50fps, 1080P@30fps, 50Mbit/sec | |
| .avi MPEG2 | 4, Xvid,H.264 | H.264:1080Px2@25fps, 1080P@ 50fps, 1080P@30fps, 50Mbit/sec | |
| .fla, .flv H.26 | 4, SorensonH.263 | H.264:1080Px2@25fps, 1080P@50fps, 1080P@30fps, 40Mbit/sec | |
| .3gp MPEG | 4, H.264 1920x1080 | @30P 20Mbit/sec | |
| .asf, .wmv | VC1 | 1080P@30fps, 50Mbit/sec | |
| Audio | 3 MPEG1/2 L | layer1/2/3 (MP3) | Layer1: 32Kbps ~ 448Kbps (Bit rate) / 16KHz ~ 48KHz (Sampling rate)Layer2: 8Kbps ~ 384Kbps (Bit rate) / 16KHz ~ 48KHz (Sampling rate)Layer3: 8Kbps ~ 320Kbps (Bit rate) / 16KHz ~ 48KHz (Sampling rate) |
| .wav | LPCM | ||
| .WMA/ASF | WMA, WMA Pro | WMA: 128bps ~ 320Kbps (Bit rate) / 8KHz ~ 48Khz (Sampling rate)WMA Pro: < 768kbps (Bit rate) / ~ 96KHz (Sampling rate) | |
| .m4a/.aac | AAC, HEAAC | Free Format (Bit rate) / 8KHz ~ 48KHz (Sampling rate) | |
| .pcm | PCM | 8Kbps ~ 320Kbps (Bit rate) / 16KHz ~ 48KHz (Sampling rate) | |
| (worksonly withvideofiles) | AC3 | 32Kbps ~ 640Kbps (Bit rate) / 32KHz, 44.1KHz, 48KHz (Sampling rate) | |
| EAC3 | 32Kbps ~ 6 Mbps (Bit rate) / 32KHz, 44.1KHz, 48KHz (Sampling rate) | ||
| LPCM | 64Kbps ~ 1.5Mbps (Bit rate) / 8KHz ~ 48Khz (Sampling rate) | ||
| IMA-ADPCM/MS-ADPCM | 384Kbps (Bit rate) / 8KHz ~ 48Khz (Sampling rate) | ||
| G711 A/mu-law | 64~128Kbps (Bit rate) / 8KHz (Sampling rate) | ||
| Picture | .jpeg | Baseline | Resolution(WxH): 15360x8640, 4147200 bytes |
| Progressive Resolution(WxH): 1024x768, 6291456 bytes | |||
| .png | non-interlace | Resolution(WxH): 9600x6400, 3840000 bytes | |
| interlace | Resolution(WxH): 1200x800, 3840000 bytes | ||
| .bmp | Resolution(WxH): 9600x6400, 3840000 bytes | ||
| Subtitle | .sub - | Sub1, | Sub2, Sub3 |
| .srt | - | ||
Table des matières
RISQUE D'ELECTROCUTION NE PAS OUVRIR

ATTENTION: POUR EVITER TOUT RISQUE D'ELECTROCUTION, NE RETIREZ PAS LE COUVERCLE. (OU LE ARRIÈRE).L'ENTRETIEN DES PIÈCES INTERNES EST INTERDIT AUX UTILISATEURS. VEUILLEZ CONFIER L'ENTRETIEN A UN PERSONNEL QUALIFIE.
| A | Product Fiche | ||
| B | Commercial Brand: SALORA | ||
| C | Product No. | 10095045 | |
| D | Model No. | 24LED9112CSW | |
| E | Energy efficiency class | A | |
| F | Visible screen size (diagonal, approx.) (inch/cm) | 24 inches | 61 cm |
| G | On mode average power consumption (Watt) | 25 | |
| H | Annual energy consumption (kWh/annum) | 36 | |
| I | Standby power consumption (Watt) | 0,5 | |
| J | Off mode power consumption (Watt) | 0 | |
| K | Display resolution (px) | 1366x768 | |
| A B C D E F | ||||||
| English | Product Fiche Commercial Brand Product No. Model No. Energy efficiency class | Visible screen size (diagonal, approx.) (inch/cm) | ||||
| Deutsch | Produkt-Datenblatt Markenzeichen Produkt-Nr. Modell-Nr. Energieeffizienzklasse | Sichtbare Bildschirmgröße (diagonal,ca.) (Zoll /cm) | ||||
| عربي | قيىس انتج | minimizing الجارية: تيويّوّكى | رقم انتج | قيم الموديل | فظة قمالية الطالعène | Tourism مثانه المربئية (قترى) وصّ Resource (م) |
| Български | Справочен лист с техническите данни | Търовска марка | Продукт No | Модел No | Клас на енергийна ефективност | Видим размер на екрана (диагонал,прибл.) (инча /см ) |
| čeština | Informační list | Značka výrobce | Čísло produktu | Model č. | Energetická třída | Viditelná velikost obrazovky (úhlopřicka,přibl).(palců /cm) |
| Dansk | Produktoplysningsskema | Varemærke | Produktnr. | Model nr. | Energieffektivtetsklasse | Synlig skærmstørrelse (diagonalt,ca.) (HK/cm) |
| Suomi | Tuote fiche | Kaupallinen merkki | Tuote nro. | Malli nro. | Virran tehokkuusluokka | Nákyván kuvaruudun koko (diagonaalinen.n.) (tuumaa/cm) |
| Français | Fiche du produit | Marque commerciale | Produit N° | Modèle N° | Classe d'efficacité énergétique | Taille d'écran visible (diagonale,approx. (pouces/cm) |
| Hrvatski | SAŽETAK PROIZVODA | Trgovačka marka | Br. proizvoda | Br. modela | Klasa energetske učinkovitosti | Vidljiva veličina ekrana (dijagonalna,približno) (inča/cm) |
| Nederlands | Productliche | Commercieel merk. | Productnr. | Modelnr. | Energie efficiëntie klasse | Zichtbare schermgrootle (diagonaal,ca.) (inches/cm) |
| Español | Ficha del Producto | Marca Comercial | No de Producto | No de Modelo | Clasificación Energética | Tamaño de pantalla visible (diagonal,aprox.) (pulgadas/cm) |
| Svenska | Produktspecifikation | Varumárke | Produktnr. | Modellnr. | Energiklass | Synlig skärmstorlek (diagonal,ungefärlig) (tum/cm) |
| Italiano | Scheda prodotto | Marchio commerciale | Numero prodotto | Numero modello | Classe di efficienza energetica | Dimensioni visibili dello schermo (diagonale,circa)(pollicí/cm) |
| Polski | KARTA PRODUKTU | Marka produktu Nr produktu | Nr modelu | Klasa efektywności energetycznej | Widoczny obraz ekranu (przekątna,okolo)(calí/cm) | |
| Magyar | Termékismertető adatlap | Kereskedelmi márka | Termékszám | Modellszám | Energiahatékonysági osztály | Latható képtartomány (diagonális,kb.) (inches/cm) |
| Norsk | Produktinformasjon | Kommersiell merkevare | Produkt nr. | Modell nr. | Energieffektivitet klasse | Synlig skjermstørrelse (diagonal, ca.) (tommer/cm) |
| Português | Ficha do produto | Marca Comercial | Produto N° | Modelo N° | Classificação eficiência energética | Tamanho ecrá visivel (diagonal, aprox.) (polegadas/cm) |
| Română | Fişă produs | Marcă comercială | Nr. Produs | Nr. Model | Clasa de eficiență energetică | Dimensiunea ecranului vizibil (diagonală, aprox.) (inch/cm) |
| Русский | Справочный листок технических данных изделия | Торговая марка | Номер изделия | Номер модели | Класс энергопотребления | Видимый размер экрана (по диагонали. Около) (дюймов/см) |
| беларуская | Справочный листок технических данных изделия | Торговая марка | Номер изделия | Номер модели | Класс энергопотребления | Видимый размер экрана (по диагонали.Около)(дюймов/см) |
| македонски | Технички податоци | Комерцијална марка | Производ бр. | Модел бр. | Класа на енергетска ефикасност | Големина на видлив екран (дијагонала, окопу) (инчи/cm) |
| український | Технічні дані | Кормеційна марка | Артикул | Модель | Клас енергоспоживання | Видимий розмір екрана (диагональ, Приблизно) (дюймів/cm) |
| Srpski | Tehničke odlike | Komercijalna marka | Proizvod br. | Model br. | Klasa energetske efikasnosti | Veiličina vidljivog ekrana (diagonala, tokom) (inča/cm) |
| Slovenčina | Informačný lat | Značka výrobcu | Čísло produktu | Model č. | Energetická trieda | Viditelná velikost'obrazovky (uhlopriečka, zhruba) (palcov/cm) |
| Slovenščina | Opis izdelka | Komercialna znamka | Št. Izdelka | Št. Modela | Razred energetske učinkovitosti | Vidna velikost zaslona (diagonala, pribl.) (palcev/cm) |
| Еллянік | Делію проїóvtos | Емпорікό σήμα | Ар. Проїóvtos | Ар. Movtélou | Катногорія евруYEIAKÍS ато́бооо́нς | Орато мүүЕВОБ ово́новÇ (diayùwios, терр.) (iviσες/cm) |
| Bosanski | Tehnički podaci | Komercijalna marka | Produkt br. | Model br. | Klasa energetske efikasnosti | Vidljiva veličina ekrana (diagonala, približno.) (inča/cm) |
| TÜRKçe | Ürün fisi | Ticari Marka | Ürün No. | Model No. | Enerji verimiliği sınıfı | Görülen ekran boyutu (çapraz, yakışk.) (inc/cm) |
| Shqip | Tê dhēnat e produktit | Marka tregtare | Nr. i produktit. | Nr. i modelit. | Klasa e eficiencès sê energjisê | Magnesia e ekranit te duksnem (diagonal, afërisht) (inc/cm) |
| Lietuviu | Gaminio etiketė | Gamintojas | Gaminio Nr. | Modelio Nr. | Energetinio efektyvumo klasé | Matomas ekran o dydis (istrižainé, approx.) (coliy/cm) |
| Latviešu | Produkta apraksts | Marka | Produkta nr. | Modela nr. | Energoefektivitätes klase | Ekrána izmërs (pa diognăli, apmçram) (collas/cm) |
| Eesti | TOOTEKIRJELDUS | Tootja firma | Toote nr. | Mudeli nr. | Energiaklass | Vaadatava ekraani suurus (diagonaal, umbes) (tolli/cm) |
| فارسي | مشخصات محصول | مارک تجاری | 朦اء محصول | 朦اء مدل | گرو Oman ۶ارایی اترزی | /النازوس Pricesch q fell مشاهده (هندستا تقریبا) /نingsانق متر) |
| GHIJ | K | ||||
| English | On mode average power consumption (Watt) | Annual energy consumption (kWh/annum) | Standby power consumption (Watt) | Off mode power consumption (Watt) | Display resolution (px) |
| Deutsch | Durchschnittlicher Stromverbrauch im eingeschaltetem Zustand (Watt) | Jährlicher Energieverbrauch (kWh/Jahr) Standby-Stromverbrauch (Watt) | Stromverbrauch im ausgeschaltetem Zustand (Watt) Display-Aulösung (px) | ||
| عربية | (متوسط استهلاك الطاقة ع-top الشعاب (فولام) | (لاستهلاك السئوي للطاقاتّةً كيل ورطابالشقّة) | (ستهلاك الطاقة في وضع الاستعداد (فولاب) | (ستهلاك الطاقة في وضع الابنفّة (فولاب) | ( stringsح الشاشناً(ککس) |
| Български | Средна консумация на електроенергия във включено състояние(Watt) | Годишна консумация на електроенергия (kWh/Годишна) | Консумация на електроенергия в режим на готовност (Watt) | Консумация на електроенергия в изключено състояние (Watt) | Разделителна способност на дисплея(пиксела) |
| čeština | Pruměrná spotřeba elektrické energie v zapnutém režimu (Wattú) | Roční spotřeba energie (kWh/Roční) | Spotřeba elektrické energie v pohotovostním režimu (Wattú) | Spotřeba elektrické energie ve vypnutém režimu (Wattú) Rozlišení disp | Peje (px) |
| Dansk | Gennemsnitligt stromforbrug i taëndt tiistand (Watt) | Ärligt energiforbrug (kWh/Ärligt) | Stromforbrug (standby)(Watt) | Stromforbrug i slukket tilstand (Watt) | Skærmoplösning (px) |
| Suomi | Păällă-tilan keskimăäräinen virrankulutus (Wattia) | Vuosittainen sähkönkulutu (kWh/Vuosittainen) | Vakiovirran kulutus (Wattia) | Pois-tilan virrankulutus (Wattia) | Näytön erottelukyky (pikselia) |
| Français | Consommation énergétique moyenne en mode "marche" (Watt) | Consommation énergétique annuelle (kWh/annuel) | Consommation d'énergie en veille (Watt) | Consommation d'énergie en mode "arrêt" (Watt) | Résolution de l'écran (px) |
| Hrvatski | Prosječna potrošnja el. energije kada je proizvod uključen (Watta) | Godišnja potrošnja el. Energije (kWh/Godišnja) | Potrošnja el. energije u modu pripravnosti (Watta) | Potrošnja el. energije kada je proizvod isključen (Watta) | Rezolucija zaslona (piksela) |
| Nederlands | Aan-modus gemiddeld stroomverbruik (Watt) | Jaarlijks energieverbruik(kWh/Jaarlijks ) | Stand-by stroomverbruik (Watt) | Uit-modus stroomverbruik (Watt) | Schemresolutie (px) |
| Español | Consumo eléctrico medio, en funcionamiento (Vatio) | Consumo eléctrico anual (kWh/anuai) | Consumo en modo en espera (Vatio) | Consumo eléctrico modo apagado (Vatio) | Resolución de pantalla (px) |
| Svenska | Strömkonsumtion i PÅ-läge (Watt) | Energioksumtion per ár (kWh/Ärlig) | Strömkonsumtion i viloläge (Watt) | Strömkonsumtion i AV-läge (Watt) | Skärmupplösning (pixlar) |
| Italiano | Consumo di corrente medio da accesa (Watt) | Consumo annuale di energia (kWh/annuo) | Consumo di corrente in modalità standby (Watt) | Consumo di corrente da spenta (Watt) | Risoluzione del display (px) |
| Polski | Średnie zuzycie energii w trybie wiączonym (Watów) | Roczne zużycie energii (kWh/Roczne) | Średnie zużycie energii w trybie oczekiwania (Watów) | Zużycie energii w trybie wyłączonym (Watów) | Rozdzielczość obrazu (pikseli) |
| Magyar | Energiafogyasztás bekapcsolva hagyott lüzemmódban (Watt) Éves energiafogyasztás (kWh/Éves) | Energiafogyasztás standby lüzemmódban (Watt) | Energiafogyasztás standby lüzemmódban (Watt) | Energiafogyasztás kikapcsolt lüzemmódban (Watt) | Képernyőfelbontás (px) |
| Norsk | Pámodus gjennomsnittlig strømforbruk (Watt) | Ärlig strømforbruk (kWh/Ärlig) | Hvilemodus strømforbruk (Watt) | Av-modus strømforbruk (Watt) | Skjermopplösning (piksel) |
| Português | Consumo energia em modo médio (Watt) | Consumo annual energia (kWh/anuai) | Consumo energia em stand-by (Watt) | Consumo energia em modo alimentação (Watt) | Resolução do visor (pixel) |
| Română | Consum electric mediu in modul pomit (Watj) | Consum anual de energie (kWh/anuai) | Consum electric in stare de repaus (Waj) | Consum electric in modul oprit (Waj) | Rezolutja ecranului (pixeli) |
| Русский | Средний расход энергии в режиме включения (ватт) | Ежегодный расход энергии (kВтч!Годовое) | Расход энергии в режиме ожидания (ватт) | Расход энергии в режиме выключения (ватт) | Разрешение экрана (пикселей) |
| беларуская | Средний расход энергии в режиме включения (ватт) | Ежегодный расход энергии (kWh/радавое) | Расход энергии в режиме ожидания (ватт) | Расход энергии в режиме выключения (ватт) | Разрешение экрана (пикселей) |
| македонски | Просечна потрошувачка кога в включен | Годишна потрошувачка на енергіпа (kWh/Годишна) | Потрошувачка во мирување (вати) | Потрошувачка кога е исклучен (вати) | Резолуција на екран (пиксели) |
| український | Середня сложивана потужність у робочому режимі (Вт) | Середньорична споживана потужність (kWh/Річне) | Сложивана потужність у режимі очікування (Вт) | Сложивана потужність у вимкненому стані (Вт) | Роздільна здатність екрана (пикселів) |
| Srpski | Prosečna potrošnja kada je uključeni (Vati) | Godišnja potrošnja energije (kWh/Godišnja) | Potrošnja tokom mirovanja (Vati) | Potrošnja kada je isključeni (Vati) | Rezolucija displeja (piks.) |
| Slovenčina | Priemernă spotreba elektrickej energie v zapnutom režime (Wattov) | Ročnă spotreba energie (kWh/Ročnă) | Spotreba elektrickej energie v pohotovostnom režime (Wattov) | Spotreba elektrickej energie vo vypnutom režime (Wattov) | Rezlišenie displeja (pixl.) |
| Slovenščina | Poraba električne energije v povprečnem načinu (Wattov) | Letna poraba energije (kWh/Letna) | Poraba energije v stanju pripravljenosti (Wattov) | Poraba energije načinu izklopa (Wattov) | Resolucija zaslona (piks.) |
| Еллянік | Меоң катавóлшоң ресуратос лепoursуғас (Watt) | Етініода катавóлшоң evėрүсіа (kWh/Eтініода) | Катавóлшоң ресуратос стітн авақовн (Watt) | Катавóлшоң ресуратос оте телеруотоліған (Watt) | Аvvілшоң овбөнг (Пізёл) |
| Bosanski | Prosječna potrošnja kada je uključen (Watt) | Godišnja potrošnja energije (kWh/Godišnja) | Potrošnja tokom mirovanja (Watt) | Potrošnja kada je isključen (Watt) | Rezolucija ekrana (piks.) |
| нады | (оки) ́нады отады тунки отады тунки | (нады отады тунки отады тунки | (нады отады тунки отады тунки | (нады отады тунки отады тунки | (нады отады тунки отады тунки |
| Türkçe | Açık moddaki ortalama güç tükelimi (Watt) | Yıllık enerji tüketimi (kWh/yıllık) | Bekleme durumunda enerji tüketimi (Watt) | Kapali moddaki güç tüketimi (Watt) | Ekran çözünürlüğü (piks.) |
| Shqlp | Konsumi mesatar i energijse si i ndezur (Watt) | Konsumi vjetor i energijse (kWh/vjetor) | Konsumi i energijse si ne gatishmēri (Watt) | Konsumi i energijse si i fikur (Watt) | Rezolucioni i ekranił (piks.) |
| Lietuvlu | Vidutinés energijos şаңaudos jungus (Vatai) | Metinés energijos şаңaudos (kWh/Metinés) | Energijos şаңaudos budėjimo režimu (Vatai) | Energijos şаңaudos išjungus (Vatai) | Ekranо skiriamoji geba (pikseliq) |
| Latviešu | Energijas patériņš aktivă režimă (Vati) | Gada energijas patériņš (kWh/gada) | Energijas patériņš gaidišanas režimă (Vati) | Energijas patériņš izslēgtă stavokli (Vati) | Displeja rezolúcija (pikseïtem) |
| Eesti | Keskmine energiakulu töörežimil (Vatti) | Aastane energiakulu (kWh/aastane) | Energiakulu ooterežimil (Vatti) | Energiakulu väljalūlitatud olekus (Vatti) | Ekraani resolutsioon (pikslit) |
| فارمسی | мыزان متوسط مصرف برق در حالت ف Novel (و」とان | (زامان نارزی مصرفی در سالکیکلیروات (ساستعتاندار سال) | ( Smصرف برق restrictive اماده به کار (و」とان | ( موزان مصرف برق در حالت غیر Oman (و」とان | ( ضرود نماین(جندکار) |
Inhalt
⚠ Sicherheitsinformationen ...... 25
Nero MediaHome Installation
- SLUIT DE STROOM AAN
- MELDING
- ERKENNING VAN HANDELSMERK
- OPMERKING OVER PIP-VENSTER
- SECURITY INSTRUCTIONS
- TO OPERATE YOUR TV IN EXTREME AMBIENT CONDITIONS MAY CAUSE THE DAMAGE OF THE DEVICE
- PLEASE READ ALL THE INSTRUCTIONS PRE INSTALLATION OR OPERATION
- NOTIFICATIONS & CHARACTERISTICS & ACCESSORIES
- INFORMATION RELATING TO THE ENVIRONMENT
- STANDBY NOTIFICATIONS
- FUNCTIONS
- ACCESSORIES INCLUDED
- TV CONTROL SWITCH & OPERATION
- NOTES
- OPERATION WITH THE REMOTE CONTROL
- INPUT SELECTION
- CHANGING CHANNELS AND VOLUME
- PUTTING BATTERIES IN THE REMOTE CONTROL
- CONNECTING THE POWER CORD
- CONNECTING THE ANTENNA/CABLE
- NOTIFICATION
- [EUROPEAN UNION ONLY]
- REMOTE CONTROL
- HOW TO USE MY BUTTON 1
- HOW TO USE MY BUTTON 2
- FIRST TIME INSTALLATION - USB CONNECTIONS
- TURNING THE TV ON/OFF
- TO SWITCH THE TV ON
- TO SWITCH THE TV OFF
- TO POWER DOWN THE TV COMPLETELY, UNPLUG THE POWER CORD FROM THE MAINS SOCKET
- FIRST TIME INSTALLATION
- DEMO MODE
- CHOOSING TV RECEIVER MODE
- INSTALLING THE CABLE
- READING MEDIA THROUGH THE USB INPUT
- MEDIA BROWSER MENU
- QUICK MENU
- FOLLOWME TV (OPTIONAL)
- FOLLOWME TV TO DMR (OPTIONAL)
- E-MANUAL
- CEC AND CEC RC PASSTHROUGH
- CHANNEL LIST
- USE OF THE CHANNEL LIST
- SETTING OF PARENTAL CONTROL SETTINGS
- ELECTRONIC PROGRAM GUIDE (EPG)
- PROGRAMME OPTIONS
- SELECT CHANNEL
- CONNECTIVITY FUNCTIONS
- CONNECTING TO A WIRED NETWORK
- TO CONFIGURE WIRED SETTINGS PLEASE REFER NETWORK SETTINGS SECTION IN SETTINGS MENU
- CONNECTING TO A WIRELESS NETWORK
- FOR CONNECTING TO A WIRELESS LAN NETWORK, YOU SHOULD PERFORM THE FOLLOWING STEPS
- CONFIGURING NETWORK SETTINGS
- CONFIGURING WIRED DEVICE SETTINGS
- NETWORK TYPE
- CONFIGURATION STATUS
- IP ADDRESS
- CONFIGURING WIRED NETWORK SETTINGS IN ADVANCED MODE
- INFORMATION
- DELETE SAVED WIFI PROFILES
- CONNECTING TO YOUR CELL PHONE VIA WIFI (OPTIONAL)
- CONNECTIVITY TROUBLESHOOTING
- WIRELESS NETWORK NOT AVAILABLE
- CONNECTION IS SLOW
- DISTRUPTION DURING PLAYBACK OR SLOW REACTIONS
- USING DLNA NETWORK SERVICE
- STEP 1: NERO MEDIA HOME
- STEP 2: CONNECT TO A WIRED OR WIRELESS NETWORK
- STEP 3: PLAY SHARED FILES VIA MEDIA BROWSER
- CAUTION
- WIRELESS DISPLAY
- INTERNET PORTAL
- NOTE ON PIP WINDOW
- SOFTWARE UPDATE
- SOFTWARE UPDATE SEARCH VIA THE USER INTERFACE
- 3 SEARCH AND UPDATE MODE
- TROUBLESHOOTING AND TIPS
- THE TV IS NOT COMING ON
- POOR PICTURE QUALITY
- NO IMAGE
- NO SOUND
- THE REMOTE CONTROL IS NOT WORKING
- INPUT SOURCES CANNOT BE SELECTED
- NERO MEDIAHOME INSTALLATION
- TO INSTALL NERO MEDIAHOME, PLEASE PROCEED AS FOLLOWS
- CONGRATULATIONS! YOU SUCCESSFULLY INSTALLED NERO MEDIAHOME ON YOUR PC
- INTERNET BROWSER
- TYPICAL PC INPUT DISPLAY MODES
- TABLE DES MATIÈRES
- RISQUE D'ELECTROCUTION NE PAS OUVRIR
- INHALT
Brand : SALORA
Model : 24LED9112CSW
Category : Television