
CSM1041P - Saw Ferm - Free user manual and instructions
Find the device manual for free CSM1041P Ferm in PDF.


| Product type | Circular saw |
| Brand | Ferm |
| Model | CSM1041P |
| Power supply | 220-240 V ~ 50 Hz |
| Power | 1200 W |
| No-load speed | 5000 rpm |
| Blade diameter | 184 mm |
| Max cutting depth (90°) | 65 mm |
| Cutting angle | 0° - 45° |
| Dimensions (L x W x H) | 400 x 250 x 300 mm |
| Weight | 4.5 kg |
| Main functions | Longitudinal, cross and bevel cutting |
| Safety | Blade brake, double safety switch, blade guard |
| Maintenance | Clean with damp cloth, lubricate moving parts |
| Spare parts | Blade, carbon brushes, switch |
| Repairability | Repairability index: 8.1 / 10 |
| Warranty | 2 years |
| Package contents | Circular saw, 184 mm blade, hex key, parallel guide |
Frequently Asked Questions - CSM1041P Ferm
User questions about CSM1041P Ferm
0 question about this device. Answer the ones you know or ask your own.
Ask a new question about this device
Download the instructions for your Saw in PDF format for free! Find your manual CSM1041P - Ferm and take your electronic device back in hand. On this page are published all the documents necessary for the use of your device. CSM1041P by Ferm.
USER MANUAL CSM1041P Ferm

natural_image
Close-up of a FERM CNC cutter blade with visible teeth and blade, no text or symbols on the blade itself.CSM1041P
EN Original instructions 03
DE Übersetzung der Originalbetriebsanleitung 09
NL Vertaling van de oorspronkelijke gebruiksaanwijzing 15
FR Traduction de la notice originale 21
ES Traducción del manual original 27
PT Tradução do manual original 33
IT Traduzione delle istruzioni originali 39
SV Översättning av bruksanvisning i original 45
FI Alkuperäisten ohjeiden käännös 51
NO Oversatt fra orginal veiledning 56
DA Oversættelse af den originale brugsanvisning 62


Fig. 1
CIRCULAR SAW
Thank you for buying this Ferm product.
By doing so you now have an excellent product, delivered by one of Europe's leading suppliers. All products delivered to you by Ferm are manufactured according to the highest standards of performance and safety. As part of our philosophy we also provide an excellent customer service, backed by our comprehensive warranty. We hope you will enjoy using this product for many years to come.
The pictures mentioned in the text are corresponding with the pictures at page 2

For your own safety and for the safety of others, please read these instructions carefully before using this appliance. It will help you understand your product more easily and avoid unnecessary risks. Keep this instruction manual in a safe place for future use.
Contents
- Machine data
- Safety instructions
- Assembly and adjusting instructions
- Operation
- Maintenance
1. MACHINE DATA
Technical specifications
| Voltage 220-240 V | |
| Frequency 50 Hz | |
| Power input 1050 W | |
| No load speed 4900/min | |
| Saw blade dimensions ∅185 *20*1.0-1.6mm | |
| ∅190*30*1,2-1,6mm | |
| Max sawing depth 90° 68 mm | |
| Max sawing depth 45° 46 mm | |
| IP Class IP 20 | |
| Weight 4.19 kg | |
| Lpa (sound pressure level) 84.54+3 dB(A) | |
| Lwa (sound power level) | 95.53+3 dB(A) |
| aw(vibration value) | 1.995+1.5 m/s2 |
Vibration level
The vibration emission level stated in this instruction manual has been measured in accordance with a standardised test given in EN 60745; it may be used to compare one tool with another and as a preliminary assessment of exposure to vibration when using the tool for the applications mentioned
- using the tool for different applications, or with different or poorly maintained accessories, may significantly increase the exposure level
- the times when the tool is switched off or when it is running but not actually doing the job, may significantly reduce the exposure level
Protect yourself against the effects of vibration by maintaining the tool and its accessories, keeping your hands warm, and organizing your work patterns
Product information
Fig. A
- Handgrip
- On/off switch
- Cut depth clamping knob
- Power cord
- Saw blade safety guard
- Hexagon screw
- Soleplate
- Retaining ring
-
Saw blade
-
Parallel guide
-
Parallel guideclamping knob
- Sawing angle clamping knob
- Shaft locking knob
- Angle indicator
- Knob
- Safety switch
- Carbon brush screw
Contents of packing
1 Circular handsaw
1 Parallel guide
1 Allen key
Check first whether or not the delivery has been damaged by transport and/or whether all the parts are present.
2. SAFETY INSTRUCTIONS
Explanation of the symbols

Denotes risk of personal injury, loss of life or damage to the tool in case of non-observance of the instructions in this manual.

Indicates electrical shock hazard.
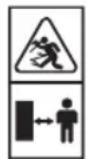
Keep bystanders away

Wear ear and eye protection

Wear a dust mask. Working with wood, metals and other materials may produce dust that is harmful to health. Do not work with material containing asbestos
Danger
a) Keep hands away from cutting area and the blade. Keep your second hand on auxiliary handle, or motor housing. If both hands are holding the saw, they cannot be cut by the blade.
b) Do not reach underneath the workpiece. The guard cannot protect you from the blade below the workpiece.
c) Adjust the cutting depth to the thickness of the workpiece. Less than a full tooth of the blade teeth should be visible below the workpiece.
d) Never hold piece being cut in your hands or across your leg. Secure the workpiece to a stable platform. It is important to support the work properly to minimize body exposure, blade binding, or loss of control.
e) Hold power tool by insulated gripping surfaces when performing an operation where the cutting tool may contact hidden wiring or its own cord. Contact with a “live” wire will also make exposed metal parts of the power tool “live” and shock the operator.
f) When ripping always use a rip fence or straight edge guide. This improves the accuracy of cut and reduces the chance of blade binding.
g) Always use blades with correct size and shape (diamond versus round) of arbour holes. Blades that do not match the mounting
hardware of the saw will run eccentrically, causing loss of control.
h) Never use damaged or incorrect blade washers or bolt. The blade washers and bolt were specially designed for your saw, for optimum performance and safety of operation.
Causes and operator prevention of kickback
- Kickback is a sudden reaction to a pinched, bound or misaligned saw blade, causing an uncontrolled saw to lift up and out of the workpiece toward the operator;
- When the blade is pinched or bound tightly by the kerf closing down, the blade stalls and the motor reaction drives the unit rapidly back toward the operator;
- If the blade becomes twisted or misaligned in the cut, the teeth at the back edge of the blade can dig into the top surface of the wood causing the blade to climb out of the kerf and jump back toward the operator.
Kickback is the result of saw misuse and/or incorrect operating procedures or conditions and can be avoided by taking proper precautions as given below.
a) Maintain a firm grip with both hands on the saw and position your arms to resist kickback forces. Position your body to either side of the blade, but not in line with the blade. Kickback could cause the saw to jump backwards, but kickback forces can be controlled by the operator, if proper precautions are taken.
b) When blade is binding, or when interrupting a cut for any reason, release the trigger and hold the saw motionless in the material until the blade comes to a complete stop. Never attempt to remove the saw from the work or pull the saw backward while the blade is in motion or kickback may occur. Investigate and take corrective actions to eliminate the cause of blade binding.
c) When restarting a saw in the workpiece, centre the saw blade in the kerf and check that saw teeth are not engaged into the material. If saw blade is binding, it may walk up or kickback from the workpiece as the saw is restarted.
d) Support large panels to minimise the risk of blade pinching and kickback. Large panels tend to sag under their own weight. Supports must
be placed under the panel on both sides, near the line of cut and near the edge of the panel.
e) Do not use dull or damaged blades. Unsharpened or improperly set blades produce narrow kerf causing excessive friction, blade binding and kickback.
f) Blade depth and bevel adjusting locking levers must be tight and secure before making cut. If blade adjustment shifts while cutting, it may cause binding and kickback.
g) Use extra caution when making a "plunge cut" into existing walls or other blind areas. The protruding blade may cut objects that can cause kickback.
Safety instructions lower guard
a) Check lower guard for proper closing before each use. Do not operate the saw if lower guard does not move freely and close instantly. Never clamp or tie the lower guard into the open position. If saw is accidentally dropped, lower guard may be bent. Raise the lower guard with the retracting handle and make sure it moves freely and does not touch the blade or any other part, in all angles and depths of cut.
b) Check the operation of the lower guard spring. If the guard and the spring are not operating properly, they must be serviced before use. Lower guard may operate sluggishly due to damaged parts, gummy deposits, or a build-up of debris.
c) Lower guard should be retracted manually only for special cuts such as "plunge cuts" and "compound cuts." Raise lower guard by retracting handle and as soon as blade enters the material, the lower guard must be released. For all other sawing, the lower guard should operate automatically.
d) Always observe that the lower guard is covering the blade before placing saw down on bench or floor. An unprotected, coasting blade will cause the saw to walk backwards, cutting whatever is in its path. Be aware of the time it takes for the blade to stop after switch is released.
Before using the circular saw
Check the following points:
- Does the voltage of the motor correspond with the mains voltage (appliances for a mains voltage of 220-240 V
- Are the mains lead and the mains plug in a good condition: solid, without any loose ends or damage;
- Is the saw blade missing any teeth or showing any cracks, it so must be replaced immediately.
• Make sure the blade is secure.
• Use this circular saw to saw only wood, wood-like products. - Do not use circular saw blades wich are deformed or damaged.
• Do not use HSS blades. - Only use blades meeting the required dimensions, as well as data and descriptions;
- Never apply any blades of which the thickness is greater than that of the riving knife.
- Do not stop the blade of a circular saw by pressing the blade from the side.
- Check that the blade guard can freely move and fully closes.
• Never lock-up the guard in the open position. - Never put sideward pressure on the blade. This may cause the blade to break.
- Be careful when cutting wood with knots, nails or cracks in it and/or dirt on it, as these can cause the blade to get stuck.
• Never leave the circular saw unattended. - Use this circular saw to saw only wood or wood-like products.
Using the machine
• Use clamps or a vice to hold the work.
- Never remove wood chips and saw dust that is close to the saw blade with your hands. If there are small pieces of wood left between the fixed and the movable parts, the circular saw will have to be stopped. The plug needs to be removed from the socket, before any left piece can be removed.
- Check that the blade is suitable for the spindle speed of the circular saw. Do not attempt to cut before the circular saw has reached full speed. Make sure the circular saw runs without load (i.e. is not in contact with the work) when you switch it on. The circular saw must have reached its full speed first.
- Never cut wood that is thicker than the depth of the saw blade.
- When cutting in wooden walls or floors, check there is no wiring or piping where you intend to cut.
- Switch off the tool and wait until the blade has stopped completely before moving the saw away from the work or putting it down. Hearing protection should be worn when using circular saw.
Switch off the machine immediately when you discover:
• A defective mains plug or mains lead;
• A defective switch.
• Overheating of the circular saw.
- Smoke or odeur caused by scorched insulation.
Electrical safety
When using electric machines always observe the safety regulations applicable in your country to reduce the risk of fire, electric shock and personal injury. Read the following safety instructions and also the enclosed safety instructions. Keep these instructions in a safe place!

Always check that the power supply corresponds to the voltage on the rating plate.

Class II machine – Double insulation – You don't need any earthed plug.
Replacing cables or plugs
If the mains cable becomes damaged, it must be replaced with a special mains cable available from the manufacturer or the manufacturer's customer service. Dispose of old cables or plugs immediately after replacing them with new ones. It is dangerous to connect the plug of a loose cable to a socket.
Using extension cables
Only use an approved extension cable suitable for the power input of the machine. The minimum conductor size is 1.5 mm2. When using a cable reel always unwind the reel completely.
3. ASSEMBLY AND ADJUSTING INSTRUCTIONS

Before adjusting the saw, make sure the plug is removed from the socket.
Setting the sawing angle (bevel)
• Loosen both knobs (12).
- Rotate the soleplate to the correct position (0° - 45°), and tighten the knobs. The sawing angle (bevel) can be read on the angle indicator (14).
Fitting the parallel guide
- Loosen knob (11).
- Insert the parallel guide into the slots provided.
- Set the correct cut width and tighten the knob (11).
Setting the cutting depth
- Loosen knob (3).
- Move the soleplate (7) downwards.
- Tighten the clamping knob (3) once the correct depth is set.
Exchanging or cleaning the saw blade
- Use the shaft locking knob (13) to prevent the shaft from rotating.
- Next loosen the hexagon screw (6) in the centre of the saw blade, using the Allen key provided.
- Turn the safety guard to the rear, and hold it there with the aid of the knob (15).
- Withdraw the retaining ring and the saw blade, and clean the saw blade, or replace it with a new one.
• Again place the saw blade back on the shaft. - Allow the safety guard to return over the saw blade by releasing the knob (15).
- Press the shaft locking knob (13) back in, refit the retaining ring (8) and tighten the hexagon screw (6) firmly once more.
4. OPERATION

Use of hearing protection is recommended while operating the circular saw.
Switching On/Off
- Press knob (16) with your right-hand thumb and keep it depressed.
• Press knob (2) to start the saw.
• Release knob (2) to stop the saw.
Operation
- Hold the work using clamps or a vice to have both hands free to operate the saw.
- Switch on the saw and place the bottom plate on the work.
- Slowly move the saw towards the previously drawn cutting line and slowly press the tool forward.
- Firmly press the bottom plate on the work, otherwise the circular saw may start to vibrate, causing the blade to break more easily.

Let the saw do the job. Do not put undue pressure on the circular saw.
5. MAINTENANCE

Make sure that the machine is not live when carrying out maintenance work on the motor.
The machines have been designed to operate over a long period of time with a minimum of maintenance. Continuous satisfactory operation depends upon proper machine care and regular cleaning.
Troubleshooting
Below we have listed a few probable causes and solutions to which you can refer if your circular saw does not function properly.
1. The temperature of the electric motor exceeds 70^ C.
- The motor has been overloaded by working it too hard.
- Cut more slowly and allow the motor to cool down.
• The motor is defective.
- Please contact the service address on the warranty card.
2. The tool does not work when switched on.
• Damaged cord and/or plug.
• Check cord and/or plug.
Defective switch.
- Please contact the service address on the warranty card.
3. When cutting it is very difficult to move the work forward in a straight line and the cut is not clean.
• The blade is bent or blunt.
- Replace the blade.
4. The circular saw makes a lot of noise and/or does not run smoothly.
• The carbon brushes are worn.
- Please contact the service address on the warranty card.
Cleaning
Keep the ventilation slots of the machine clean to prevent overheating of the engine.
Regularly clean the machine housing with a soft cloth, preferably after each use. Keep the ventilation slots free from dust and dirt.
If the dirt does not come off use a soft cloth moistened with soapy water. Never use solvents such as petrol, alcohol, ammonia water, etc.
These solvents may damage the plastic parts.
Replacing hte carbon brushes
- Remove the screws (17).
- Withdraw the carbon brushes (18) from the circular handsaw and inspect them for wear.
- Place the carbon brushes back in the brush holders provided.
- Check that the copper contact on the carbon brushes makes good contact with the copper part in the brush holder.
- Replace the screws (17) and tighten them firmly.

If the brushes have worn down to less than 4 mm, replace.
Lubrication
The machine requires no additional lubrication.
Faults
Should a fault occur, e.g. after wear of a part, please contact the service address on the warranty card. In the back of this manual you find an exploded view showing the parts that can be ordered.
ENVIRONMENT
To prevent damage during transport, the appliance is delivered in a solid packaging which consists largely of reusable material. Therefore please make use of options for recycling the packaging.

Faulty and/or discarded electrical or electronic apparatus have to be collected at the appropriate recycling locations.
WARRANTY
The warranty conditions can be found on the separately enclosed warranty card.
KREISSÄGE
Interruptor Marcha/Parada
CE
DECLARATION OF CONFORMITY CSM1041P - CIRCULAR SAW
(EN) We declare under our sole responsibility that this product is in conformity with directive 2011/65/EU of the European parliament and of the council of 9 June on the restriction of the use of certain hazardous substances in electrical and electronic equipment is in conformity and accordance with the following standards and regulations:
(DE) Der Hersteller erklärt eigenverantwortlich, dass dieses Produkt der Direktive 2011/65/EU des Europäischen Parlaments und des Rats vom 8. Juni 2011 über die Einschränkung der Anwendung von bestimmten gefährlichen Stoffen in elektrischen und elektronischen Geräten entspricht. den folgenden Standards und Vorschriften entspricht:
(NL) Wij verklaren onder onze volledige verantwoordelijkheid dat dit product voldoet aan de conform Richtlijn 2011/65/EU van het Europees Parlement en de Raad van 8 juni 2011 betreffende beperking van het gebruik van bepaalde gevaarlijke stoffen in elektrische en elektronische apparatuur en in overeenstemming is met de volgende standaarden en reguleringen:
(FR) Nous déclarons sous notre seule responsabilité que ce produit est conforme aux standards et directives suivants: est conforme à la Directive 2011/65/EU du Parlement Européen et du Conseil du 8 juin 2011 concernant la limitation d'usage de certaines substances dangereuses dans l'équipement électrique et électronique.
(ES) Declaramos bajo nuestra exclusiva responsabilidad que este producto cumple con las siguientes normas y estándares de funcionamiento: se encuentra conforme con la Directiva 2011/65/UE del Parlamento Europeo y del Consejo de 8 de junio de 2011 sobre la restricción del uso de determinadas sustancias peligrosas en los equipos eléctricos y electrónicos.
(PT) Declaramos por nossa total responsabilidade-de que este produto está em conformidade e cumpre as normas e regulamentações que se seguem: está em conformidade com a Directiva 2011/65/EU do Parlamento Europeu e com o Conselho de 8 de Junho de 2011 no que respeita à restrição de utilização de determinadas substâncias perigosas existentes em equipamento eléctrico e electrónico.
(IT) Dichiariamo, sotto la nostra responsabilità, che questo prodotto è conforme alle normative e ai regolamenti seguenti: è conforme alla Direttiva 2011/65/UE del Parlamento Europeo e del Consiglio dell'8 giugno 2011 sulla limitazione dell'uso di determinate sostanze pericolose nelle apparecchiature elettriche ed elettroniche.
(SV) Vi garanterar på eget ansvar att denna produkt uppfyller och följer följande standarder och bestämmelser: uppfyller direktiv 2011/65/EU från Europeiska parlamentet och EG-rådet från den 8 juni 2011 om begränsningen av användning av farliga substanser i elektrisk och elektronisk utrustning.
(FI) Vakuutamme yksinomaan omalla vastuullamme, että tämä tuote täyttää seuraavat standardit ja säädökset: täyttää Euroopan parlamentin ja neuvoston 8. kesäkuuta 2011 päytätyn direktiivin 2011/65/EU vaatimukset koskien vaarallisten aineiden käytön rajoitusta sähkö- ja elektronisissa laitteissa.
(NO) Vi erklærer under vårt eget ansvar at dette produktet er i samsvar med følgende standarder og regler: er i samsvar med EU-direktivet 2011/65/EU fra Europa-parlamentet og Europa-rådel, pr. 8 juni 2011, om begrensning i bruken av visse farlige stoffer i elektrisk og elektronisk utstyr.
(DA) Vi erklærer under eget ansvar, at dette produkt er i overensstemmelse med følgende standarder og bestemmelser: er i overensstemmelse med direktiv 2011/65/EU fra Europa-Parlamentet og Rådet af 8. juni 2011 om begrænsning af anvendelsen af visse farlige stoffer i elektrisk og elektronisk udstyr.
(HU) Felelősségünk teljes tudatában kijelentjük, hogy ez a termék teljes mértékben megfelel az alábbi szabványoknak és előírásoknak: je v souladu se směrnící 2011/65/EU Evropského parlamentu a Rady EU ze dne 8. června 2011, která se týká omezení použití určitých nebezpečných látek v elektrických a elektronických zařízeních.
(CS) Na naši vlastní zodpovědnost prohlášujeme, že je tento výrobek v souladu s následujícími standardy a normami: Je v súlade s normou 2011/65/EÚ Európskeho parlamentu a Rady z 8. júna 2011 týkajúcej sa obmedzenia používania určitých nebezpečných látok v elektrickom a elektronickom vybavení.


- CSM1041P
- CIRCULAR SAW
- Thank you for buying this Ferm product.
- The pictures mentioned in the text are corresponding with the pictures at page 2
- Contents
- MACHINE DATA
- Vibration level
- Protect yourself against the effects of vibration by maintaining the tool and its accessories, keeping your hands warm, and organizing your work patterns
- Product information
- Fig. A
- Contents of packing
- SAFETY INSTRUCTIONS
- Explanation of the symbols
- Danger
- Causes and operator prevention of kickback
- Safety instructions lower guard
- Before using the circular saw
- Using the machine
- Electrical safety
- Replacing cables or plugs
- Using extension cables
- ASSEMBLY AND ADJUSTING INSTRUCTIONS
- Setting the sawing angle (bevel)
- Fitting the parallel guide
- Setting the cutting depth
- Exchanging or cleaning the saw blade
- OPERATION
- Switching On/Off
- Operation
- MAINTENANCE
- Troubleshooting
- The temperature of the electric motor exceeds 70° C.
- The tool does not work when switched on.
- When cutting it is very difficult to move the work forward in a straight line and the cut is not clean.
- The circular saw makes a lot of noise and/or does not run smoothly.
- Cleaning
- Replacing hte carbon brushes
- Lubrication
- Faults
- ENVIRONMENT
- WARRANTY
- KREISSÄGE
- Interruptor Marcha/Parada
- CE
- DECLARATION OF CONFORMITY CSM1041P - CIRCULAR SAW
Brand : Ferm
Model : CSM1041P
Category : Saw