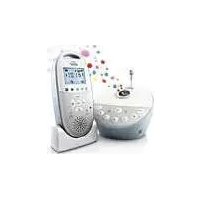
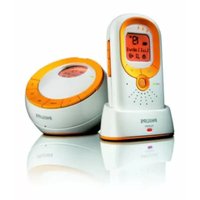
AVENT Audio Monitors SCD585 - Baby monitor PHILIPS - Free user manual and instructions
Find the device manual for free AVENT Audio Monitors SCD585 PHILIPS in PDF.


| Product Type | Baby Audio Monitor |
| Brand | Philips |
| Model | AVENT Audio Monitors SCD585 |
| Technology | DECT (digital, interference-free) |
| Indoor range | Up to 50 meters |
| Outdoor range | Up to 300 meters |
| Parent unit power supply | Power adapter (included) / 4 AA batteries (not included) |
| Baby unit power supply | Power adapter (included) |
| Parent unit battery life (batteries) | Approximately 8 hours |
| Parent unit screen | No (audio only) |
| Night light function | Yes, with remote activation |
| Sound level indicator | 5-level LED |
| Talk-back function | Yes, to reassure baby |
| Out-of-range alarm | Yes, with audible and visual signal |
| Low battery alarm | Yes, on parent unit |
| Energy saving mode | Yes, ECO mode |
| Cleaning | Soft, dry cloth; do not use abrasive products |
| Baby unit weight | Approximately 120 g |
| Parent unit weight | Approximately 150 g (without batteries) |
| Baby unit dimensions | Approximately 10 x 7 x 5 cm |
| Parent unit dimensions | Approximately 12 x 5 x 3 cm |
| Manufacturer warranty | 2 years |
Frequently Asked Questions - AVENT Audio Monitors SCD585 PHILIPS
User questions about AVENT Audio Monitors SCD585 PHILIPS
0 question about this device. Answer the ones you know or ask your own.
Ask a new question about this device
Download the instructions for your Baby monitor in PDF format for free! Find your manual AVENT Audio Monitors SCD585 - PHILIPS and take your electronic device back in hand. On this page are published all the documents necessary for the use of your device. AVENT Audio Monitors SCD585 by PHILIPS.
USER MANUAL AVENT Audio Monitors SCD585 PHILIPS
natural_image
Two Philips AVENT devices, one with a dial indicator and antenna, the other displaying a digital temperature display (no readable text or symbols on main device)
natural_image
Diagram of three open panels with grid patterns and curved arrows indicating rotation or movement (no text or symbols)
flowchart
graph TD
    A["1"] --> B["ECO MAX"]
    C["2"] --> B
    D["3"] --> E["Sun"]
    F["4"] --> G["Light Bulb"]
    H["5"] --> I["Speaker"]
    J["6"] --> K["Monitor"]
    L["7"] --> M["Water"]
    N["8"] --> O["Sound"]
    P["9"] --> Q["Thermostat"]
    R["10"] --> S["Emotion Icon"]
    T["11"] --> U["Light Hour Marker"]
    V["12"] --> W["Music Note"]
    X["13"] --> Y["Light Star"]
    Z["14"] --> AA["Laptop Icon"]

ENGLISH 6
DANSK 15
DEUTSCH 24
ΕΛΛΗΝΙΚΑ 34
ESPAÑOL 45
SUOMI 55
FRANÇAIS 64
ITALIANO 74
NEDERLANDS 84
NORSK 94
PORTUGUÊS 103
SVENSKA 113
TÜRKÇE 122

139
Introduction
Go to www.philips.com/welcome to register your product and to read the detailed user manual.
Display of the parent unit (Fig. 1)
1 Signal strength indicator
2 Eco Max indicator
3 Night dim mode symbol
4 Cry alert indicator
5 Mute symbol
6 Battery status indicator
7 Humidity alert symbol
8 Navigation arrow
9 Temperature symbol
10 Microphone sensitivity indicator
11 Nightlight symbol
12 Lullaby symbol
13 Projector symbol
14 Timer or timer repeat symbol
15 Soothing menu screen
Preparing for use
IMPORTANT: Read the safety instructions carefully before you use the baby monitor and keep them for future reference.
Baby unit
We advise you to use the baby unit from the mains. To guarantee automatic power backup in case of mains failure, you can insert four 1.5V AA alkaline batteries (not included).
Do not use rechargeable batteries. The baby unit does not have a charging function and rechargeable batteries discharge slowly when they are not in use.
Parent unit
The parent unit runs on two rechargeable batteries that are supplied with the baby monitor. Charge the parent unit before you use it for the first time and when the batteries are low.
Please note that you have to charge the parent unit for the full 14 hours to have a cordless operating time of 25 hours.
Note: When you start using the baby monitor, it takes four charge and discharge cycles before the rechargeable batteries reach their full capacity.
Using the baby monitor
Positioning the baby monitor
Keep the baby unit out of the reach of the baby. Never place the baby unit inside the baby's bed or playpen.
- Because the cord of the baby unit presents a potential strangulation hazard, make sure that the baby unit and its cord are at least 1 metre/3.5 feet away from your baby.
- To prevent a high-pitched sound from one or both units, make sure the parent unit is at least 1 metre/3.5 feet away from the baby unit.
Linking parent unit and baby unit
1 Press and hold the ⏻ button on the baby unit for 2 seconds until the power-on light goes on.
2 Press and hold the ⏻ button on the parent unit for 2 seconds until the display lights up. The 'link' light on the parent unit starts flashing red and the message 'I AM LINKING' appears on the display.
When the parent unit and baby unit are linked, the 'link' light turns solid green. The signal strength indicator and the message 'LINKED' appear on the display.
If no connection is established, the message NOT LINKED is displayed and the parent unit starts to beep.
What to do if no link is established
- If the parent unit is out of range, place it closer to the baby unit, but not closer than 1 metre/3.5 feet.
- If the baby or parent unit is too close to another DECT appliance (e.g. a cordless phone), switch off this appliance or move the unit away from this appliance.
- If the baby unit is switched off, switch it on.
Operating range
- The operating range is 330 metres/1000 feet outdoors and up to 50 metres/150 feet indoors.
- The operating range of the baby monitor varies depending on the surroundings and factors that cause interference. Wet and moist materials cause so much interference that the range loss is up to 100%. For interference from dry materials, see table below
Dry materials Material thickness Loss of range
| Wood, plaster, cardboard, glass (without metal, wires or lead) | < 30cm (12in) 0-10% |
| Brick, plywood < 30cm (12in) 5-35% |
| Reinforced concrete < 30cm (12in) 30-100% |
| Metal grilles or bars < 1cm (0.4in) 90-100% |
| Metal or aluminium sheets | < 1cm (0.4in) 100% |
Functions and feedback on the baby unit
Nightlight
The nightlight produces a soft glow that comforts your baby.
1 Press the ⚙ button on the baby unit to switch the nightlight on or off.
Lullaby function
1 Press the ♪ button on the baby unit to play the last selected lullaby. The selected lullaby repeats for the set time. (Fig. 2)
2 Press the ▶I button to select another lullaby from the list. (Fig. 3)
3 To adjust the sound level of the lullaby, press the volume + or the volume - button on the baby unit (Fig. 4).
Note: You can only set the loudspeaker volume on the baby unit when a lullaby is playing. If you set the volume for the lullaby higher, the sound will also be louder when you use the talk function on the parent unit.
4 To stop lullaby playing, press the ♪ button on the baby unit.
Projector
You can soothe your baby with coloured light patterns projected on the ceiling by switching on the projector.
ENGLISH8
1 Press the projector on/off button to switch on the projector. The projector symbol appears on the display of the parent unit (Fig. 5).
, There are six different patterns. The first pattern fades in to full intensity in 2 seconds. It is projected for 8 seconds and then fades out for 2 seconds while the next pattern fades in. Each pattern is projected for 10 seconds. The patterns are repeated for the set time (Fig. 6).
2 To switch off the projector, press the projector on/off button again.
Paging the parent unit
If you have lost the parent unit, you can use the FIND button on the baby unit to locate the parent unit. This function only works when the parent unit is switched on.
1 Press FIND on the baby unit and the parent unit produces a paging alert tone (Fig. 7).
2 To stop the paging alert tone, press FIND on the baby unit again or press any button on the parent unit. The paging alert tone stops automatically after 2 minutes.
Battery status light
1 The battery status light is solid green when the baby unit runs on battery power and the batteries contain enough energy.
2 The battery status light — ashes red quickly when the batteries run low while the baby unit runs on battery power. Replace the batteries when they run low.
Functions and feedback on the parent unit
Soothing menu
The parent unit has a separate soothing menu for all soothing features: nightlight, lullaby and projector. To open it, press the soothing button. This screen allows you to operate the nightlight, the lullabies and the projector on the baby unit remotely.
1 To open the soothing menu, press the soothing button (Fig. 8).
2 Use the + and - buttons to point the arrow to a soothing feature (Fig. 9).
3 To switch on a soothing feature when it is off or to switch it off when it is on, press OK. When the feature is on, there is a tick above the symbol of the feature. When the feature is off, there is a cross above the symbol of the feature (Fig. 10).
4 To open the menu with options for the feature, move the arrow over the options eld and press OK. Use the - and + buttons to select items in the options eld (Fig. 11).
5 To leave the soothing menu, press the soothing button.
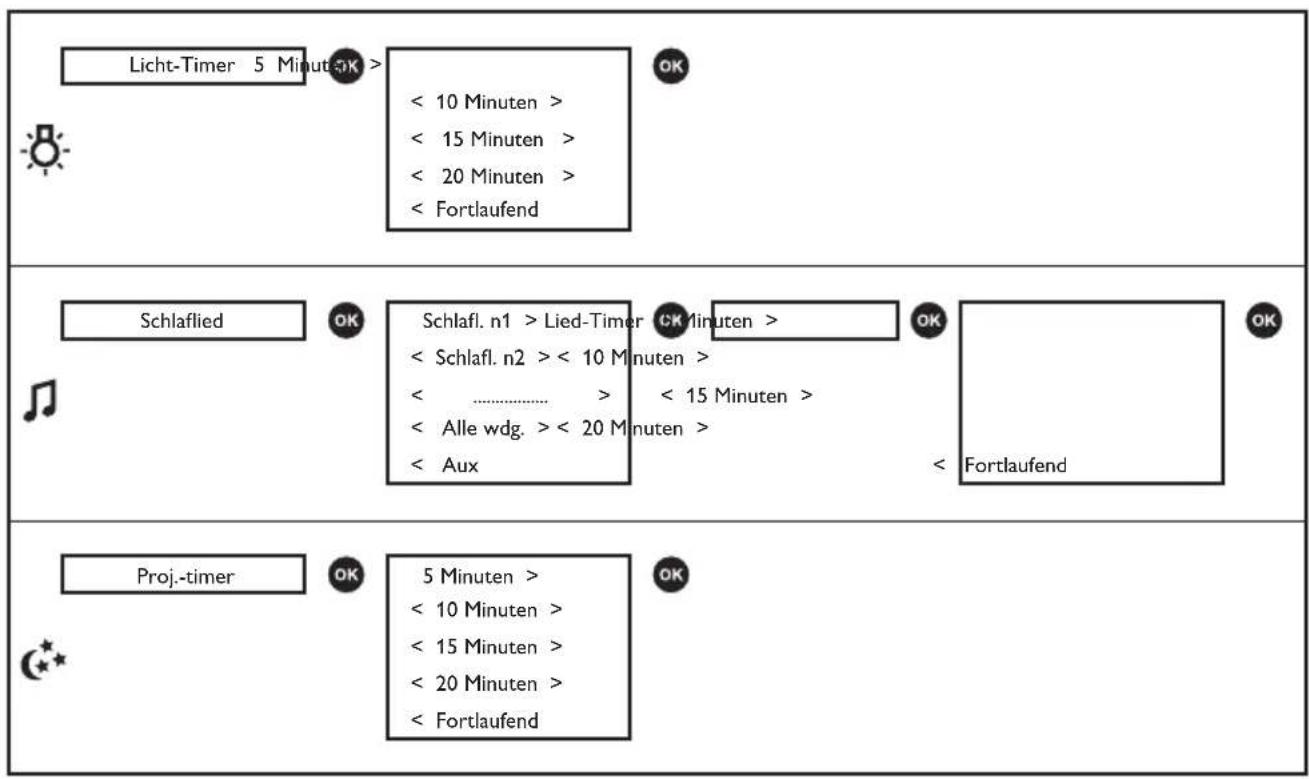
Nightlight
This soothing feature allows you to switch the nightlight on or off and to set the nightlight timer.
1 Select the nightlight feature and open the menu with nightlight options (Fig. 12).
2 You can set the nightlight timer for 5 to 20 minutes or you can switch the nightlight on continuously. Press OK to confirm. The nightlight symbol appears on the display (Fig. 13). If you set the nightlight timer, the nightlight switches off automatically. If you switch on the nightlight continuously, switch it off in the soothing menu or by pressing the Q button on the baby unit.
Lullaby
This soothing feature allows you to select the lullaby playing options and set the lullaby timer.
1 Select the lullaby feature and open the menu with lullaby options (Fig. 14).
2 In the lullaby options menu, you can select a lullaby from the list of pre-stored lullabies. You can also select 'Play all' to play all pre-stored lullabies. With an audio appliance connected to the baby unit, you can also choose 'Aux' and select a track.
3 You can set the lullaby timer for 5 to 20 minutes or you can choose to play lullabies continuously. Press OK to confirm the timer setting. The lullaby symbol and the lullaby played are shown on the display.
If you set the timer, the lullaby function switches off after the time set. If you choose play continuously, switch off the lullaby function in the soothing menu or by pressing the 🎯 button on the baby unit.
Projector
This soothing feature allows you to switch on the projector on the baby unit and program the duration of projection.
1 Select the projector feature and open the menu with projector options. (Fig. 15)
2 To access the projector options, point the arrow at the options field and press OK.
3 You can set the projector timer for 5 to 20 minutes or you can switch the projector on continuously. Press OK to confirm. The projector symbol appears on the display (Fig. 16).
If you set the projector timer, the projector switches off automatically. If you switch on the projector continuously, switch off the projector in the soothing menu or by pressing the projector button on the baby unit.
Volume
The volume can be set if the menu is not active. There are seven volume levels and a 'volume off' setting.
Setting the volume level
1 Press the + button or the - button once.
The current volume level appears on the display.
2 Press the + button to increase the volume or press the - button to decrease the volume.
If no button is pressed for more than 2 seconds, the volume level indication disappears and the volume setting is saved.
Volume off
Below the lowest volume setting, there is a 'volume off' setting.
1 Press the + button or the - button once.
The current volume level appears on the display.
2 Press and hold the - button for more than 2 seconds to set the volume to off.
The message 'MUTE' and the mute symbol appear on the display. Only the sound level lights show that the baby produces sounds (Fig. 17).
Talk function
1 If you want to comfort your baby, press TALK on the parent unit and talk clearly into the microphone on the front from a distance of 15-30cm (0.5-1ft) (Fig. 18).
Note: If you have set the volume of the lullaby higher on the baby unit, the sound will also be louder when you use the talk function on the parent unit.
2 Release TALK when you have finished talking.
Night dim mode
In night dim mode, the light intensity of the lights and the display is reduced and the volume of alert sounds is decreased.
1 Press the night dim button, to switch on the night dim mode (Fig. 19).
2 Press the night dim button again, to switch back to normal operating mode.
Baby unit battery low alert
1 When the baby unit runs on battery power and its batteries are low, the parent unit beeps and the text 'Baby unit Change batteries' appears on the display.
2 If you do not replace the batteries in time, the link with the baby unit will be lost.
Battery status indications
Battery low
When the rechargeable batteries are low, 'BATTERY LOW' appears on the display, the status indicator is empty and flashes, and the parent unit beeps. The remaining operating time is at least 30 minutes.
Battery empty
1 If the rechargeable batteries are almost empty, the battery status light flashes red quickly (Fig. 20).
2 If you do not connect the parent unit to the mains, it switches off.
Menu of the parent unit
Navigating the menu
Note: Some menu functions only work when the baby unit and the parent unit are linked.
1 Press the MENU button to open the menu and to make the first menu option appear (Fig. 21).
2 Use the + button to go to the next option or the - button to go to the previous option. The arrow on the display indicates in which direction you can navigate (Fig. 22).
3 Press OK to confirm your selection (Fig. 23).
Note: Press the MENU button if you want to leave the menu without making any changes. If there is no input in the menu for more than 20 seconds, the menu closes automatically.
Sensitivity
This option in the parent unit menu allows you to set the microphone sensitivity of the baby unit. The microphone sensitivity determines what noise level the baby unit picks up, e.g. you will want to hear when your baby cries, but you may be less interested in its babbling.
1 Select 'Sensitivity' in the menu with the + and - buttons and press OK to confirm.
2 Use the + and - buttons to increase or decrease the microphone sensitivity. The number of filled segments shows the sensitivity level selected. Press OK to confirm the setting.
Sensitivity levels and indications
Icon Sensitivity Description

highest Hear everything from your baby. The speaker of the parent unit is continuously on.

high Hear all sounds from soft babbling and louder. If your baby does not make any sound, the speaker of the parent unit is off.

medium Hear sounds from soft cries and louder. If your baby makes softer sounds, the speaker of the parent unit does not go on.

low The speaker of the parent unit only goes on if the baby makes loud sounds, for instance because it is crying.
Eco Max mode
Smart Eco is a standard feature on this baby monitor. It automatically reduces the DECT signal from the baby unit to save energy. To save even more energy, activate the Eco Max mode. In this mode, the DECT signal of the baby unit is switched off as long as the baby does not make a sound.
Caution: In Eco Max mode, the parent unit receives feedback from the baby unit with a delay. When your baby makes a sound, the baby unit first has to reactivate radio transmission before it can send feedback to the parent unit.
Please note the following:
- In Eco Max mode you do not receive feedback when the parent unit is out of range of the baby unit. You can check the link by pressing any button on the parent unit.
- The Eco Max mode cannot be activated if the microphone sensitivity is set to level 4.
Activating Eco Max mode
1 Select 'Eco Max' in the menu with the + and - buttons and press OK to confirm.
2 When the display shows 'Turn On', press OK to switch on the Eco Max mode.
3 The warning message 'No alert if out of range, OK?' appears on the display. Press OK to confirm.
Note: The warning message scrolls across the display twice. If you do not press OK, the parent unit leaves the menu and the Eco Max mode remains off.
The Eco Max indication flashes on the display. The 'link' light flashes green slowly when the baby unit does not transmit any signals to the parent unit (Fig. 24).
When the parent unit receives a signal from the baby unit because radio transmission has been reactivated, the 'link' light turns solid green.
Deactivating Eco Max mode
1 Press the MENU button
2 Use the + and - buttons to select 'Eco Max' and press OK to confirm.
3 When the display shows 'Turn Off', press OK to confirm.
Feed timer
You can set the feed timer to alert you that it is time to feed your baby. The timer can be set from 1 minute to 23 hours and 59 minutes.
1 To open the feed timer submenu, select 'Feed Timer' in the menu. Press OK to confirm.
2 Select 'Set Timer' in the feed timer submenu. Press OK to start setting the timer.
3 Set the hour and the minutes and press OK to confirm.
4 To start the feed timer, select 'xx:xx Start' in the feed timer submenu. Press OK to confirm. The timer symbol appears on the display and the timer starts counting down (Fig. 25).
5 When the timer has reached 00:00, the feed timer alert goes off, the timer symbol starts flashing on the display and the message 'TIMER END' scrolls across the display (Fig. 26).
6 To stop the timer, select 'Stop & Reset' in the feed timer submenu and press OK to confirm.
Setting the feed timer repeat
1 To make the feed timer go off after the same set time, select 'Timer repeat' in the feed timer submenu after you have set the timer. Press OK to confirm.
2 Choose 'Repeat ON' or 'Repeat OFF' and press OK to confirm. The timer repeat symbol appears on the display.
3 If 'Repeat ON' is set, the feed timer starts counting down again after you stop the alert.
Setting a feed timer alert
1 To set an alert, select 'Timer Alert' in the feed timer submenu. Press OK to confirm.
2 Choose one of the alert options. The options available are sound only, sound and vibration and vibration only.
3 Press any key to stop the alert or the alert stops automatically after 2 minutes.
4 To stop the timer, select 'Stop & Reset' in the feed timer submenu and press OK to confirm.
Temperature
A baby sleeps comfortably at a temperature between 16irc C/ 61irc F and 20irc C/ 68irc F. You can set a minimum and a maximum temperature range and an alert.
1 To open the temperature submenu, select 'Temperature' in the menu. Press OK to confirm.
2 Select 'Temp Range' in the temperature submenu and press OK to confirm.
3 Use the + and - buttons to set the minimum temperature range between 10°C/50°F and 19°C/66°F and the maximum temperature range between 22°C/72°F and 37°C/99°F. Press OK to confirm.
4 Select 'Alert' in the temperature submenu. Press OK to confirm.
5 Choose one of the alert options. The options available are sound only, sound and vibration, vibration only and display only. Press OK to confirm. The temperature alert symbol appears on the display.
6 Select 'Temp Scale' in the temperature submenu. Press OK to confirm.
7 Select 'Celsius' or 'Fahrenheit' and press OK to confirm. The temperature in the set scale appears on the display. If the temperature is within the set range, the temperature alert symbol has two segments.
If the temperature is below or above the set range, the temperature alert symbol on the display has only one segment and flashes. The message ‘TOO COLD’ or ‘TOO HOT’ appears on the display (Fig. 27).
Humidity
Maintaining a healthy humidity level for your baby is important. The optimal humidity level is between 40% and 60%. You can set a humidity range and an alert.
1 To open the humidity submenu, select 'Humidity' in the menu. Press OK to confirm.
2 Select 'Hum Range' in the humidity submenu and press OK to confirm.
3 Use the + and - buttons to set the minimum humidity range between 20% and 50% and the maximum humidity range between 51% and 70%. Press OK to confirm.
4 Select 'Alert' in the humidity submenu. Press OK to confirm.
5 Choose one of the alert options. The options available are sound only, sound and vibration, vibration only and display only. Press OK to confirm. The humidity alert symbol appears on the display.
If the humidity is below or above the set range, the humidity alert symbol and the humidity measured flash on the display. The message 'TOO DRY' or 'TOO HUMID' appears on the display (Fig. 28).
Cry alert
You can set a cry alert to warn you that the baby is crying.
1 Select 'Cry alert' in the menu with the + and - buttons. Press OK to confirm.
2 When the display shows 'Vibration ON', press OK to confirm. The cry alert indicator appears on the display.
The cry alert goes off when the sound in the baby room is loud enough to make the fourth sound level light go on. The parent unit vibrates and the message 'Cry alert' appears on the display for 4 seconds. The cry alert repeats every 8 seconds until the sound becomes less loud or you deactivate the cry alert (Fig. 29).
3 To deactivate the cry alert, select 'Cry alert' in the menu. When the display shows 'Vibration OFF', press OK to confirm.
Clock
The default setting for the clock is hidden. You can choose to show the clock and set the clock time in the menu of the parent unit.
1 Select 'Set clock' in the menu with the + and - buttons. Press OK to confirm.
2 Select 'Show Time' and press OK to confirm.
3 Select 'Set the time' and press OK to confirm.
4 Set the hour and the minutes and press OK to confirm.
The clock time alternates with other indications in the message field of the display.
Language
You can use this menu option to change the language setting.
1 Select 'Set language' in the menu with the + and - buttons. Press OK to confirm.
2 Use the + and - buttons to select your language and press OK to confirm.
Key lock
You can activate the key lock to prevent the buttons from being pressed accidentally while you carry the parent unit around.
1 To activate the key lock, press OK.
2 Press the + button within 2 seconds.
Note: If you do not press the + button within 2 seconds, the instruction remains on the display.
After you have pressed the + button, the message 'Keys locked' appears on the display (Fig. 30).
3 To deactivate the key lock, press OK. When the display shows the instruction message, press the + button within 2 seconds.
Notes
- When you press a button other than OK while the key lock is active, the display goes on and the second line on the display tells you how to deactivate the key lock.
- When you press OK while the key lock is active, the second line on the display tells you what second step is necessary to unlock the buttons.
Guarantee and support
If you need information or support, please visit the Philips website at www.philips.com/support or contact the Philips Consumer Care Centre in your country (see the worldwide guarantee leaflet for contact details). If there is no Consumer Care Centre in your country, go to your local Philips dealer or a Philips service centre.
Introduktion
| Steen, triplex < 30 cm 5-35% |
| Gewapend beton < 30 cm 30-100% |
| Metalen roosters of stangen < 1 cm 90-100% |
| Metaal- of aluminiumplaten | < 1 cm 100% |
Função "Talk" (Conversar)
The image is too blurry to recognize any text content.
4
Press OK = OK
< = ●
=
SCD585 (DE)

OK drücken = OK
< = ●
=
SCD585 (ES)

natural_image
Diagram of three open panels with grid patterns and directional arrows indicating rotation (no text or symbols)www.philips.com/avent
Philips Consumer Lifestyle BV
Tussendiepen 4, 9206 AD Drachten, Netherlands
Trademarks owned by the Philips Group.
©2016 Koninklijke Philips N.V. All rights reserved


- Introduction
- Display of the parent unit (Fig. 1)
- Preparing for use
- Baby unit
- Parent unit
- Using the baby monitor
- Positioning the baby monitor
- Linking parent unit and baby unit
- What to do if no link is established
- Operating range
- Functions and feedback on the baby unit
- Nightlight
- Lullaby function
- Projector
- ENGLISH8
- Functions and feedback on the parent unit
- Volume
- Setting the volume level
- Volume off
- Talk function
- Night dim mode
- Baby unit battery low alert
- Battery status indications
- Battery low
- Battery empty
- Menu of the parent unit
- Navigating the menu
- Sensitivity
- Sensitivity levels and indications
- Icon Sensitivity Description
- Eco Max mode
- Please note the following:
- Activating Eco Max mode
- Deactivating Eco Max mode
- Feed timer
- Setting the feed timer repeat
- Setting a feed timer alert
- Temperature
- Humidity
- Cry alert
- Clock
- Language
- Key lock
- Notes
- Guarantee and support
- Introduktion
- Função "Talk" (Conversar)
Brand : PHILIPS
Model : AVENT Audio Monitors SCD585
Category : Baby monitor