
FRD30UBL - Radio Sunstech - Free user manual and instructions
Find the device manual for free FRD30UBL Sunstech in PDF.


| Product type | Portable FM radio |
| Model | FRD30UBL |
| Brand | Sunstech |
| Dimensions (approx.) | 150 x 80 x 30 mm |
| Weight (approx.) | 200 g |
| Power supply | 3 AA batteries (not included) or 5V USB port |
| FM frequency band | 87.5 – 108 MHz |
| Main functions | FM radio, USB playback, Bluetooth, auxiliary input, built-in speaker |
| Ports | USB (MP3 playback), AUX 3.5mm, headphone jack |
| Bluetooth | Version 5.0, range 10m |
| Battery life (approx.) | 6 hours (depending on usage) |
| Care and cleaning | Clean with a soft dry cloth. Do not use abrasive products. |
| Safety | Do not expose to moisture, extreme temperatures, or shocks. |
| Spare parts and repairability | Not provided. Contact Sunstech after-sales service. |
| General information | Portable FM radio with Bluetooth and USB player. Ideal for indoor or outdoor use. |
Frequently Asked Questions - FRD30UBL Sunstech
User questions about FRD30UBL Sunstech
0 question about this device. Answer the ones you know or ask your own.
Ask a new question about this device
Download the instructions for your Radio in PDF format for free! Find your manual FRD30UBL - Sunstech and take your electronic device back in hand. On this page are published all the documents necessary for the use of your device. FRD30UBL by Sunstech.
USER MANUAL FRD30UBL Sunstech
FRD30U Operating instructions
sunstech ^12
Power connection
● Dual power supply: DC 5V/1A DC adaptor or AAA x 3pcs battery
- Insert DC plug into the DC jack
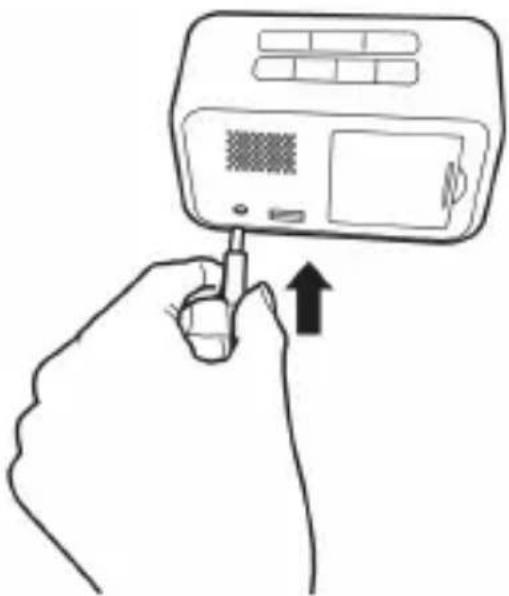
natural_image
Line drawing of a hand holding a digital payment terminal with an upward arrow indicating uptake (no text or symbols present)- Connect USB cable with computer or connect DC adaptor with AC socket

natural_image
Line drawing of a wall-mounted power plug connected to an open electrical socket (no text or symbols)- Charge your digital device
When use DC 5V/1A adaptor to supply power to the unit, the unit can charge your mobile or other devices via USB port at back of the unit.
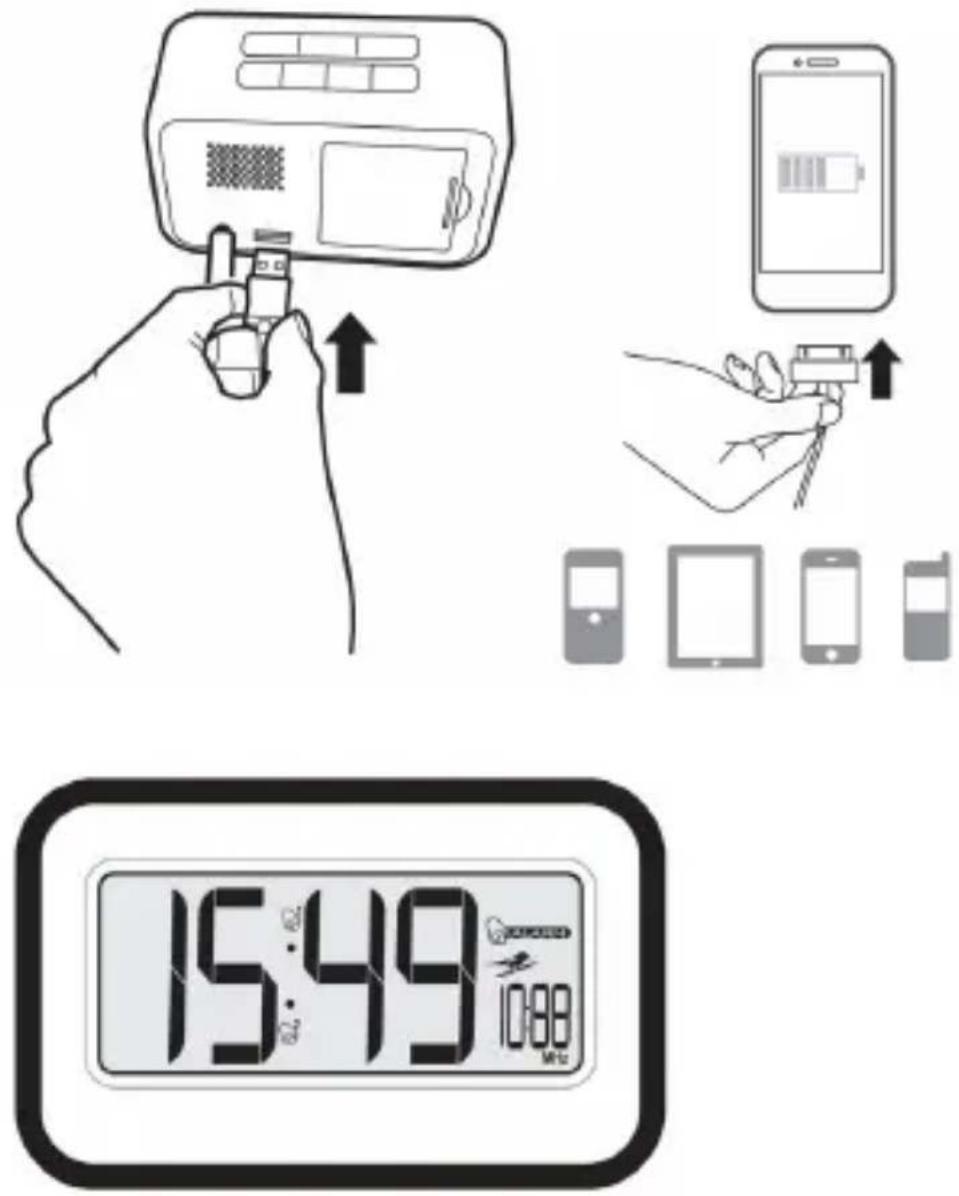
Main features
● Clock: big digit display hour and minute
● 12/24-hour time format convertible
● Current time and alarm time on the same screen display
- Dual alarms and snooze function
● FM radio with frequency display and activate/ deactivate FM radio at pre-set time
● Nature sound demonstration
● Temperature display, Centigrade and Fahrenheit convertible
- USB port charge digital devices
● Dual power supply, AAA battery or DC 5V/1A, 2pcs AG13 backup battery
- LCD backlight
Replace battery as below photo:

natural_image
Diagram of a device with internal components and an inset showing two electronic devices (no text or symbols present)Notes:
- When the display becomes dim and begins to fade, you should replace the batteries as soon as possible or use DC adaptor. If weak or exhausted batteries are left in the battery compartment they will eventually leak and cause damage to the unit and possible damage to the surface below the unit as well.
- When you enjoy nature sound or listen to the radio, please don't pull out DC adaptor or draw out AAA batteries, you have to return it to normal time display mode first if necessary.
● To be eco-friendly, suggest to use DC adaptor, avoid to replace batteries.
- 2pcs AG13 batteries as back up power, when replacing AAA batteries or DC adaptor stops working for a short time, no need to adjust time again.

natural_image
Line drawing of a computer monitor with an open case and a circular inset showing a camera (no text or symbols)Notes
- When the power off, the clock can't work well, it means AG13 batteries power is not enough, please replace AG13 batteries in time.
Please don't disassemble the unit by yourself, place the unit away from sources of direct sunlight or excessive heat or water.
Buttons:

Operating instructions
1). Normal time mode.
When the batteries are installed, the LCD full display will be kept for 2 seconds, the clock will "beep" once, and get into normal time mode. The starting time AM12:00, and display ALM1 time and show "ALM" mark.
- At normal time display mode, press SET key to start hour, minute, 12/24h setting, and press UP, DOWN key to finish setting.
Hour → minute → 12/24H → exit
● Setting range: hour: 1-12 or 0-23, minute: 0-59
● At 12h format, it has PM mark in the afternoon
- At time mode, press UP key to adjust upwards, press DOWN key to adjust downwards, press it long to increase or decrease rapidly.
- At time mode, press SET key three times to enter into 12/24-hour time format setting, press UP or DOWN key to realize 12/24-hour format shift.
- At time mode, press MODE key or no press within 20 seconds, then it will exit setting, and come back to the set time mode.

2). Nature sound demonstration
At normal time mode, press MODE key one time to enter into nature sound demonstration mode,

mark will appear on the LCD display, it will play the first nature sound as default, total 6 kinds. (the first piece: animal sound in the farm, the second piece: cuckoo call, the third is flowing water and bird call, the fourth is frog's sound, the fifth is flowing water, the sixth is the cycling of the before five pieces).
- At nature sound demonstration mode, press SET key to pause playing the current sound, press SET again to begin playing the next sound. Repeat this process until you hear the desired sound. Press the UP or DOWN button to adjust the volume level of the nature sound. If no press SET key, it will keep playing the current sound and shut off automatically 5 minutes later, and the display returns to current time.
- If pause to play the sound, press MODE key two times or no press within 20 seconds, the display will return to current time.
- At nature sound demonstration mode, back light will be lit up until the sound stops playing.
3). Alarm mode
At normal time mode, press MODE key two times to enter into alarm mode, the default first alarm time AM12:00, ALM mark and will be displayed, 7 kinds of alarm sound available (6 kinds of nature sound and one DIDI sound) for first set alarm. The second alarm sound is the current playing FM radio.
- At alarm mode, press SET key to enter into alarm setting mode, press UP key to select ALM 1/ ALM 2; press DOWN key to activate or deactivate alarm function. Press SET key again to start setting in sequence as below, press UP, DOWN keys to finish setting
ALM1: Hour → minute → snooze interval → sound selection → exit
ALM2: Hour → minute → FM radio playing time length → exit
● ALM1 snooze interval setting range: 5-60 minutes
● ALM2 playing time length setting range: 5-60 minutes
- Press UP/DOWN key to select alarm sound
- When the current time reach the alarm time, the sound will play 1 minute (ALM2 will keep the preset time length), the alarm mark 📋 or 🌐 will flash, if snooze mark Z ^zz is activated, when reach the snooze interval time, the sound will play 1 minute again, alarm mark and snooze mark flash together. Back light will be on all the time. The alarm volume is same as the current nature sound volume or current FM radio volume. Press any key to pause sound (except SET key)
- When playing alarm sound, press SET key to exit the current alarm mode.
- Alarm and snooze function are not activated as default, only when alarm and snooze marks are activated, then the functions will be activated.
- At alarm setting mode (non playing mode), press MODE key or no press within 20 seconds to exit setting, and returns to normal time mode.
- At normal time mode, press DOWN key to finish: activate ALM1 – activate ALM1 snooze – activate ALM2 – deactivate ALM1 and snooze – deactivate ALM2
- If two sets of alarm time are same, it will play FM radio alarm prior.
4). FM radio mode
At any mode, press RADIO key to enter into FM radio mode, when install batteries, the default station is 87.5MHZ, "mark will be lit up. FM radio can be activated at preset time and set the playing time length."
- At FM radio mode, press CH+/CH- to adjust station by hand (the speed is 0.1MHZ), press CH+/CH- for 2 seconds to adjust station automatically, it will stop auto adjusting once receive station, and play the station, press any key to stop auto adjusting during auto adjust process.
● Frequency range: 87.5-108MHZ (76-96MHZ for Japan) - At FM radio mode, press UP/DOWN key to adjust volume, total 15 levels, press it long to increase or decrease rapidly.
● Activate FM radio at preset time (activate ALM2), set the play time length:5-60 minutes - At FM radio mode, press RADIO key to deactivate FM radio and return to normal time display mode.
5). Temperature display
At normal time mode, press UP key to show Centigrade – Fahrenheit – alarm, repeat like this.
● Temperature detection range: 0°C\~50°C (32°F\~122°F)
● The information of the temperature is only guidance.
Shortcut key
- At normal time mode, press UP key to shift alarm time, Centigrade and Fahrenheit.
- At normal time mode, press DOWN key to activate/ deactivate ALM1, snooze and ALM2
- At any mode (non alarm playing), press RADIO to activate / deactivate FM radio.
Made in China

-
DO NOT place objects on top of the device, as objects may scratch the device.
-
DO NOT expose the device to dirty or dusty environments.
-
DO NOT place the device on an uneven or unstable surface.
-
DO NOT insert any foreign objects into the device.
-
DO NOT expose the device to strong magnetic or electrical field.
-
DO NOT expose the device to direct sunlight as it can damage the device. Keep it away from heat sources.
-
DO NOT store your device in temperatures higher than 40°C(104°F). The internal operating temperature for this device is from 20°C(68°F) to 60°C(140°F).


natural_image
Simple graphic with a black X and a sunburst shape (no text or symbols)60°C(140°F)


-
DO NOT use the device in the rain.
-
Please check with your Local Authority or retailer for proper disposal of electronic products.
-
The device and adaptor may product some heat during normal operation of charging. To prevent discomfort or injury from heat exposure, DO NOT leave the device on your lap.
-
POWER INPUT RATING: Refer to the rating label on the device and be sure that the power adaptor complies with the rating. Only use accessories specified by the manufacturer.
-
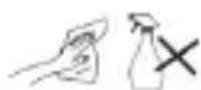
Clean the device with a soft cloth. If needed, dampen the cloth slightly before cleaning. Never use abrasives or cleaning solutions.
-
Always power off the device to install or remove external devices that do not support hot-plug.
-
Disconnect the device from an electrical outlet and power off before cleaning the device.
-
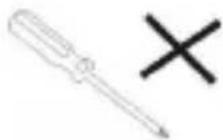
DO NOT disassemble the device. Only a certified service technician should perform repair.
-
The device has apertures to disperse heat. DO NOT block the device ventilation, the device may become hot and malfunction as a result.
-
Risk of explosion if battery replaced by an incorrect type. Dispose of used batteries according to the instruction.
-
PLUGGABLE EQUIPMENT: the socket-outlet shall be installed near the equipment and shall be easily accessible.
Warranty conditions
- The warranty of this product is for 2 years since the purchase date.
- The warranty will exclude breakdowns caused by bad use of the product, wrong installation or installation in not desirable places for a proper maintenance of the product, rips, updates of the products
that are not the supplied by the brand, pieces wore away for its use or for not domestic or inappropriate use. Also are excluded breakdowns caused for manipulations of the products by people or companies alien to our company.
- For any request regarding the warranty terms, the purchase receipt must be attached.
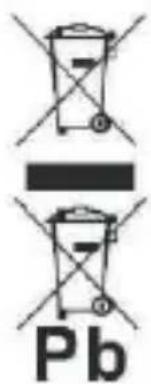
Correct disposal of this Product
(Waste Electrical & Electronic Equipment(WEEE)
Your product is designed and manufactured with high quality materials and components which can be recycled and reused.
This symbol means that electrical and electronic equipment, at their endof-life should be disposed of separately from your household waste.
Please dispose of this equipment at your local community waste collection/recycling centre.
In the European Union there are separate collection systems for used electrical and electronic products. Please help us to conserve the environment we live in!
Manual de instrucciones FRD30U
sunstech ^12
Conexión a la red
natural_image
Line drawing of a hand holding a digital payment terminal with an upward arrow indicating uptake (no text or symbols present)natural_image
Illustration of a wall-mounted power plug connected to an open electrical socket (no text or symbols)- Cargue su dispositivo digital
natural_image
Diagram of a device with internal components and an inset showing two electronic devices (no text or symbols present)Notas:
natural_image
Line drawing of a device with a circular inset showing a magnified view of the screen (no text or symbols)Notas
natural_image
Line drawing of a hand holding a digital device with an upward arrow indicating positive change (no text or symbols present)natural_image
Simple line drawing of a wall-mounted electrical outlet with a plug and socket (no text or symbols)
Remarque :
natural_image
Diagram of a computer monitor with an open button and a circular inset showing a camera (no text or symbols)Remarque:
Mode d'emploi

natural_image
Black and white soccer ball with a cross symbol and downward arrow, no text or labels presentnatural_image
Simple graphic with a black X and a sunburst shape (no text or symbols)60°C(140°F)


20°C(68°F)


natural_image
Illustration of a hand holding a mobile phone inside a circle (no text or symbols)
natural_image
Symbol of a person sitting on a chair with an 'X' mark and a downward arrow, indicating no text or numbers present.



chemical
Chemical symbol for lead (Pb) with crossed and unmarked representationsnatural_image
Line drawing of a hand holding a digital payment terminal with an upward arrow indicating uptake (no text or symbols present)- Conecte o cabo USB ao computador ou conecte o adaptador DC à tomada AC

natural_image
Line drawing of a wall-mounted electrical outlet with a plug and socket (no text or symbols)natural_image
Diagram of a device with internal components and an inset showing two electronic devices (no text or symbols present)Notas:
natural_image
Line drawing of a device with a circular inset showing a magnified view of the screen (no text or symbols present)Notas
natural_image
Simple diagram with a cross and downward arrow, no text or symbols presentnatural_image
Black and white soccer ball with a cross symbol and downward arrow, no text or labels presentnatural_image
Simple graphic with a black X and a sunburst shape (no text or symbols)natural_image
Simple line drawing of a hand holding a mobile phone inside a circle (no text or symbols)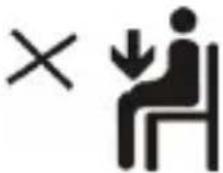






- FRD30U Operating instructions
- sunstech 12
- Power connection
- Main features
- Notes:
- Notes
- Buttons:
- Operating instructions
- 1). Normal time mode.
- 2). Nature sound demonstration
- 3). Alarm mode
- 4). FM radio mode
- 5). Temperature display
- Shortcut key
- Made in China
- Warranty conditions
- Correct disposal of this Product
- Manual de instrucciones FRD30U
- Conexión a la red
- Notas:
- Notas
- Remarque :
- Remarque:
- Mode d'emploi
Brand : Sunstech
Model : FRD30UBL
Category : Radio