
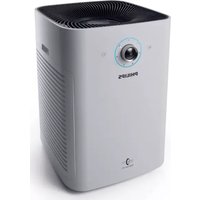
TY5080 - Air purifier PHILIPS - Free user manual and instructions
Find the device manual for free TY5080 PHILIPS in PDF.


| Product Type | Air Purifier |
| Model | TY5080 |
| Dimensions (W x D x H) | 363 x 363 x 574 mm |
| Weight | 8.5 kg |
| Power Supply | 220-240 V, 50 Hz |
| Power Consumption | 50 W (maximum) |
| Noise Level | 20 - 50 dB (depending on speed) |
| CADR (Dust) | 320 m³/h |
| Coverage Area | Up to 49 m² |
| Filter Type | HEPA H13 + Activated Carbon |
| Filter Replacement Interval | Approximately 1 year |
| Pre-Filter | Washable |
| Air Quality Sensor | PM2.5 Laser Sensor |
| Auto Mode | Yes |
| Sleep Mode | Yes |
| Timer | 1 - 8 hours |
| Fan Speeds | 3 (Sleep, Auto, Turbo) |
| Display | Digital PM2.5 and color ring |
| Security | Overheat protection, safety lock on front cover |
| Maintenance | Clean pre-filter every 2 weeks |
| Spare Parts | Replacement filter: FY5180 |
| Warranty | 2 years |
Frequently Asked Questions - TY5080 PHILIPS
User questions about TY5080 PHILIPS
0 question about this device. Answer the ones you know or ask your own.
Ask a new question about this device
Download the instructions for your Air purifier in PDF format for free! Find your manual TY5080 - PHILIPS and take your electronic device back in hand. On this page are published all the documents necessary for the use of your device. TY5080 by PHILIPS.
USER MANUAL TY5080 PHILIPS
Always there to help you
始终如一地为您提供帮助
TY5080

EN User manual 3 ZHS
用户手册 23
Read this user manual carefully before you use the appliance.
Save it for future reference.
使用产品前请仔细阅读本使用说明书
保留备用
PHILIPS


Contents
1 Important 4
Safety 4
2 Your air purifier 6
Product Overview 6
Controls overview 7
3 Getting started 8
Install filters 8
4 Using the appliance 10
Understand the air quality light 10
Switch on 10
Cleaning schedule 13
Clean the body of the appliance 13
Clean the air outlet cover 13
Clean the air quality sensor 14
Clean the pre-filter 15
6 Replacing the air purification filter 16
Understand the healthy air protect lock 16
Replace the air purification filter 16
7 Resetting the filter lifetime
counter 17
8 Troubleshooting 18
9 Guarantee and service 20
Order parts or accessories 20
10 Notices 20
Electromagnetic fields (EMF) 20
Recycling 20
1 Important
Safety
Read this user manual carefully before you use the appliance, and save it for future reference.
Danger
- Do not let water or any other liquid or flammable detergent enter the appliance to avoid electric shock and/or a fire hazard.
- Do not clean the appliance with water, any other liquid, or a (flammable) detergent to avoid electric shock and/or a fire hazard.
- Do not spray any flammable materials such as insecticides or fragrance around the appliance.
Warning
- Check if the voltage indicated on the appliance corresponds to the local power voltage before you connect the appliance.
- If the power cord is damaged, you must have it replaced by Philips, a service center authorized by Philips, or similarly qualified persons in order to avoid a hazard.
- Do not use the appliance if the plug, the power cord, or the appliance itself is damaged.
- This appliance can be used by children aged from 8 years and above and persons with reduced physical, sensory or mental capabilities or lack of experience and knowledge if they have been given supervision or instruction concerning use of the appliance in a
safe way and understand the hazards involved. Child shall not play with the appliance. Cleaning and maintenance shall not be made by children without supervision.
- Do not block the air inlet and outlet, e.g. by placing items on the air outlet or in front of the air inlet.
• Make sure that foreign objects do not fall into the appliance through the air outlet.
Caution
- This appliance is not a substitute for proper ventilation or regular vacuum cleaning.
- If the power socket used to power the appliance has poor connections, the plug of the appliance becomes hot. Make sure that you plug the appliance into a properly connected power socket.
• Always place and use the appliance on a dry, stable, level, and horizontal surface. - Leave at least 20cm free space behind and on both sides of the appliance and leave at least 30cm free space above the appliance.
- Do not place anything on top of the appliance.
- Do not sit or stand on the appliance. The appliance is equipped with omni wheels. Sitting or standing on the appliance may lead to potential injury.
- Do not place the appliance directly below an air conditioner to prevent condensation from dripping onto the appliance.
- Make sure all filters are properly installed before you switch on the appliance.
- Only use the original Philips filters specially intended for this appliance. Do not use any other filters.
- Avoid knocking against the appliance (the air inlet and outlet in particular) with hard objects.
• Always lift or move the appliance by both handles at the sides of the appliance.
- Do not insert your fingers or objects into the air outlet or the air inlet to prevent physical injury or malfunctioning of the appliance.
- Do not use this appliance when you have used indoor smoke-type insect repellents or in places with oily residues, burning incense, or chemical fumes.
- Do not use the appliance near gas appliances, heating devices or fireplaces.
• Always unplug the appliance after use and before cleaning or carrying out other maintenance.
- Do not use the appliance in a room with major temperature changes, as this may cause condensation inside the appliance.
- To prevent interference, place the appliance at least 2m away from electrical appliances that use airborne radio waves such as TVs, radios, and radio-controlled clocks.
- This appliance is only intended to be used indoor under normal operating conditions.
- Do not use the appliance in wet surroundings or in surroundings with high ambient temperatures.
- The appliance does not remove carbon monoxide (CO) or radon (Rn). It cannot be used as a safety device in case of accidents with combustion processes and hazardous chemicals.
- If you need to move the appliance, disconnect the appliance from the power supply first. The appliance is equipped with omni wheels and is easy to move.
- When moving the appliance, do it slowly and do not push it rapidly.
- Do not move the appliance by pulling its power cord.
2 Your air purifier
Read this user manual carefully before you use the appliance, and save it for future reference.
Product Overview

| Type number Filter | |
| TY5089 Integrated Filter for Tai series* | |
*Hereinafter referred to as "air purification filter".
Controls overview

![graph TD A["Start"] --> B["Node 1"] B --> C["Node 2"] C --> D["Node 3"] D --> E["Node 4"] E --> F["Node 5"] F --> G["Node 6"] G --> H["Node 7"] H --> I["Node 8"] I --> J["Node 9"] J --> K["Node 10"] K --> L["Node 11"] L --> M["Node 12"] M --> N["Node 13"] N --> O["Node 14"] O --> P["Node 15"] P -->…](/content/2026/06/1286829/images/6ddbdc6dba2fb0ba658069a76034e2bd855c8bbc3c90af587e6615ec3e0f7b11.jpg)

| ◎: On/Off button : Turbo speed | |
| ◀: Silent speed : Pre-filter cleaning alert | |
| ~: Speed 1 : Air purification filter replacement alert | |
| ≈: Speed 2 : Air quality light button | |
| ≈: Speed 3 : Auto button |
3 Getting started
Install filters
Remove the packaging of the filters before using the appliance. Unpack them and place them back into the appliance described as follows:

Note
• There is one set of filters on each side of the appliance. Each side is equipped with one pre-filter and one air purification filter.
- Insert the filters in the correct position.
• Make sure that you place the air purification filter in the appliance first and then the pre-filter.
• Make sure that the side with the tag is pointing towards you.
1 Unlock the side panel from the appliance, and then gently pull the bottom of the side panel towards you.

2 To take out the pre-filter, press the two clips down and pull the filter towards you.

3 Take out the air purification filter from the appliance.

4 Remove the packaging materials of the air purification filter.

5 Put the unpacked air purification filter back into the appliance.

6 Put the pre-filter back into the appliance.


Note
• Make sure that the side with the two clips is pointing towards you, and that all hooks of the pre-filter are properly attached to the purifier.
7 To reattach the side panel, mount the panel onto the bottom of the appliance first (1). Then, gently push the panel against the body of the appliance (2).

8 Repeat all steps for the other side of the appliance.
4 Using the appliance
Understand the air quality light
| Color of the air quality light | Air quality level |
| Blue Good | |
| Dark purple Fair | |
| Pink Unhealthy | |
| Red Very unhealthy |
The air quality light automatically goes on when the appliance is switched on, and lights up all colors in sequence. In a short while the air quality sensor selects the color that corresponds to the ambient air quality.

Note
- The built-in air quality sensor measures the air quality and automatically selects the appropriate color of the air quality light. When the air is clean, the color of the air quality light is in blue. When the air quality deteriorates, the color of the air quality light changes to dark purple, purple or red.
Switch on
1 Put the plug of the appliance into the wall socket.
→The appliance beeps.
→All lights go on once and then go out again.
2 Press to switch on the appliance.

→After measuring the air quality for a short time, the air quality sensor automatically selects the appropriate color of the air quality light.
→ The default fan speed is (AUTO).
3 Press again to switch off the appliance.
In auto mode, the appliance selects theappropriate fan speed in accordance withthe ambient air quality.
1 Press to select the auto mode.
and one of the fan speed indicators light up.

2 Press 📄 again to deactivate the auto mode.
→The appliance operates in manual mode.
Note
- You can also turn the speed knob and select another fan speed to switch from auto mode to manual mode.
Manual
You can manually select the fan speed you need.
1 Turn the speed knob to select the fan speed:
\~ (Speed 1)
≈ (Speed 2)
≈ (Speed 3)
(Silent speed)
(Turbo speed)

Tip
- If the air quality light lights up blue, the air quality is good, and you can select a lower fan speed. On the other hand, if the air quality light lights up pink or red, the air quality is unhealthy, and you can select a higher fan speed to purify the air more quickly.
Set the sensitivity of the air quality sensor
This appliance allows you to adjust the sensitivity of the air quality sensor. There are three sensitivity levels:
• Extra sensitive (default setting)
- Sensitive
- Standard
You can adjust the sensitivity of the air quality sensor in the following way:

Note
- At higher sensitivity level, the purifier is more sensitive to air pollutants.
When the purifier is in auto mode, it is more likely to choose a higher fan speed. The air quality sensor selects the appropriate color of the air quality light in accordance with the higher sensitivity.
1
Unplug the appliance first, plug it in again and switch it on. Within 5 to 30 seconds from the appliance is switched on, press and hold and for 3 seconds.
→The corresponding fan speed light flashes to show the current sensitivity level of the air quality sensor.

| Fan speed light Sensitivity level | |
| ~ | Extra sensitive |
| ≈ | Sensitive |
| ≈ | Standard |
2 Turn the speed knob to adjust the sensitivity level of the air quality sensor.

3 When the desired sensitivity level is selected, press and hold 📂 and for 3 seconds again to save the setting.

Note
- When you are changing the sensitivity level, if you do not change any setting within 10 seconds, or do not press and hold 🔒 and 🔒 for 3 seconds after you have changed the sensitivity level, the appliance will resume normal work without saving any changes.
• After the sensitivity level is changed and saved, the appliance operates at the latest setting of the sensitivity level whenever you switch on the appliance.
5 Cleaning

Note
• Always unplug the appliance before you clean it.
- Never immerse the appliance in water or any other liquid.
- Never use abrasive, aggressive, or flammable cleaning agents such as bleach or alcohol to clean any part of the appliance.
- Only the pre-filter is washable. The air purifier filter is not washable nor vacuum cleanable.
Cleaning schedule
| Frequency Cleaning method | |
| When necessary W | Wipe the surface of the appliance with a soft dry cloth. |
| Clean the air outlet cover | |
| Every two months | Clean the air quality sensor with a dry cotton swab. |
| When the filter cleaning indicator lights up | Clean the pre-filter. |
| When the filter replacement indicator starts flashing | Replace the air purification filter. |
Clean the body of the appliance
Regularly clean the inside and outside of the appliance to prevent dusts from collecting.
1 Wipe away dust with a soft dry cloth from the body of the appliance.
2 Clean the air inlet and the air outlet with a soft dry cloth.
Clean the air outlet cover
1 To unlock the air outlet cover, turn the cover knob clockwise, and pull up the cover to remove.

2 Clean the cover with a brush.

3 To reattach the cover, mount it onto the top of the appliance first, and then turn the cover knob anti-clockwise to lock the cover.

Clean the air quality sensor
Clean the air quality sensor every two months for optimal functioning of the appliance. Clean it more frequently if you use the appliance in a dusty environment.
1 Clean the inlet and outlet of the air quality sensor with a soft brush.

2 Open the cover of the air quality sensor.

3 Clean the sensor, the dust inlet and outlet with a lightly moistened cotton swab, and finish with a dry cotton swab.

4 Close the sensor cover.

Clean the pre-filter
| Filter alert light status Follow this | |
| Clean the pre-filter | |

Note
- Filter light lights up approximately once a month.

1 Call the Philips Consumer Care Center (4009200180) immediately to clean the pre-filter.
6 Replacing the air purification filter
Understand the healthy air protect lock
This appliance is equipped with the healthy air protect lock to make sure that the filters are in optimal condition when the appliance is operating. When the filter is almost full and has to be replaced, the air purification filter replacement light (E) starts to flash.
When you do not replace the filter in time:
→The air purification filter replacement light (12) remains on.
→The appliance stops operating and is locked. Call the Philips Consumer Care Center (4009200180) immediately to replace the filter.

Replace the air purification filter
| Filter alert light status | Follow this |
| Replace the air purification filter. |

Note
- The air purification filter is not washable nor vacuum cleanable.

1 Take out the pre-filters on both sides of the appliance.
2 Take out the air purification filter on both sides of the appliance using the tag on the filter and gently put them into the trash bin.


Note
- Do not touch the pleated filter surface, or smell the filter as it has collected pollutants from the air.
- Wash your hands after disposing of the used filters.
3 Remove all packaging material of the new filters.

4 Put the new filters into the appliance on both sides.

5 After the pre-filters are properly put back in the appliance, reset the filter lifetime counter. (Refer to chapter 7 "Resetting the filter lifetime counter".)
7 Resetting the filter lifetime counter
When you replace the filters, it is important that you also reset the filter lifetime counter afterwards. This allows the appliance to be in sync with the filter lifetime.
1 Press and hold for 3 seconds.
→The filter light goes out, and the appliance resumes working automatically.

8 Troubleshooting
This chapter summarizes the most common problems you could encounter with the appliance. If you are unable to solve the problem with the information below, contact the Consumer Care Center in your country.
| Problem Possible solution | |
| The appliance does not work even though it is plugged in. | · The filter replacement light has been on continuously but you did not replace the corresponding filter, it is now locked. In this case, replace the filter and reset the filter time. |
| No air comes out of the air outlet. | Put the plug of the appliance into the power socket and switch on. |
| The airflow that comes out of the air outlet is significantly weaker than before. | · The pre-filter is dirty. Clean the pre-filter (see the chapter "Cleaning").· Make sure that you have removed all packaging material from the filters. |
| The air quality does not improve, even though the appliance has been operating for a long time. | · One of the filters has not been placed in the appliance. Make sure that all filters are properly installed in the following order, starting with the innermost filter: 1) air purification filter; 2) prefilter.· The air quality sensor is wet. The humidity level in your room is high and causes condensation. Make sure that the air quality sensor is clean and dry (see the chapter "Cleaning"). |
| The color of the air quality light always stays the same. | The air quality sensor is dirty. Clean the air quality sensor (see the chapter "Cleaning"). |
| The appliance produces a strange smell. | The first few times you use the appliance, it may produce a plastic smell. This is normal. However, if the appliance produces a burnt smell, contact your Philips dealer or an authorized Philips service centre. The appliance may also produce an unpleasant smell when one of the filters is dirty. In this case, clean or replace the filter concerned. |
Problem Possible solution
| I need cleaner air because I have an allergy. | You can change the air quality sensor sensitivity (see the chapter "Use the appliance, section "Set the sensitivity of the air quality sensor") to make the appliance clean the air even better. |
| The appliance is extra loud. | Please check if you have removed all the packaging material from the filters.If the appliance is still too loud, you can change the fan speed to a lower fan speed level. |
| The appliance still indicates that I need to replace a filter, but I already did. | Perhaps you did not reset the filter lifetime counter. Switch on the appliance. Then press and hold for 3 seconds. |
9 Guarantee and service
If you need information or if you have a question, please contact the Philips Consumer Care Center in your country (4009200180). If there is no Consumer Care Center in your country, go to your local Philips dealer.
Order parts or accessories
If you have to replace a part or want to purchase an additional part, please contact the Philips Consumer Care Center in your country (4009200180).
10 Notices
Electromagnetic fields (EMF)
This Philips appliance complies with all applicable standards and regulations regarding exposure to electromagnetic fields.
Compliance with EMF
Koninklijke Philips N.V. manufactures and sells many products targeted at consumers, which, like any electronic apparatus, in general have the ability to emit and receive electromagnetic signals.
One of Philips' leading Business Principles is to take all necessary health and safety measures for our products, to comply with all applicable legal requirements and to stay
well within the EMF standards applicable at the time of producing the products.
Philips is committed to develop, produce and market products that cause no adverse health effects. Philips confirms that if its products are handled properly for their intended use, they are safe to use according to scientific evidence available today.
Philips plays an active role in the development of international EMF and safety standards, enabling Philips to anticipate further developments in standardization for early integration in its products.
Recycling
Do not throw away the product with the normal household waste at the end of its life, but hand it in at an official collection point for recycling. By doing this, you help to preserve the environment.


目录
1 重要事项 24
安全 24
2 您的空气净化器 26
产品概览 26
控制面板概览 27
3 使用入门 28
安装过滤网 28
4 使用产品 30
了解空气质量指示灯 30
打开 30
更改风速 31
5 清洁 33
清洁计划 33
清洁产品机身 33
清洁出风口盖 33
清洁空气质量传感器 34
清洁预过滤网 35
6 更换空气净化过滤网 36
了解健康空气智能锁 36
更换空气净化过滤网 36
7 重置滤网使用寿命计数器 37
8 故障排除 38
9 保修与服务 39
订购部件或附件 39
10 注意事项 39
电磁场 (EMF) 39
回收 39
1 重要事项
安全
3 从产品中取出空气净化过滤网。

4 拆掉空气净化过滤网的包装材料。

6 将预过滤网放回产品内部。


注意
8 在产品的另一侧重复执行所有步骤。
4 使用产品
了解空气质量指示灯
2 用软刷除去盖子上的灰尘。

清洁空气质量传感器
2 打开空气质量传感器的盖子。

4 关闭传感器盖。

34 简体中文
清洁预过滤网
| 滤网提示灯状态 按此操作 | |
| 清洁预过滤网 | |

注意
滤网清洁指示灯 大约每月亮起一次。

更换空气净化过滤网
注意
36 简体中文
4 将新滤网放入产品两侧。


- ALWAYS THERE TO HELP YOU
- 始终如一地为您提供帮助
- CONTENTS
- IMPORTANT
- YOUR AIR PURIFIER
- GETTING STARTED
- USING THE APPLIANCE
- REPLACING THE AIR PURIFICATION FILTER
- RESETTING THE FILTER LIFETIME
- TROUBLESHOOTING
- GUARANTEE AND SERVICE
- NOTICES
- SAFETY
- DANGER
- WARNING
- CAUTION
- CONTROLS OVERVIEW
- INSTALL FILTERS
- NOTE
- SWITCH ON
- MANUAL
- TIP
- SET THE SENSITIVITY OF THE AIR QUALITY SENSOR
- CLEANING
- CLEAN THE BODY OF THE APPLIANCE
- CLEAN THE AIR OUTLET COVER
- CLEAN THE AIR QUALITY SENSOR
- CLEAN THE PRE-FILTER
- UNDERSTAND THE HEALTHY AIR PROTECT LOCK
- REPLACE THE AIR PURIFICATION FILTER
- RESETTING THE FILTER LIFETIME COUNTER
- ORDER PARTS OR ACCESSORIES
- ELECTROMAGNETIC FIELDS (EMF)
- COMPLIANCE WITH EMF
- RECYCLING
- 目录
- 重要事项
- 您的空气净化器
- 使用入门
- 使用产品
- 清洁
- 更换空气净化过滤网
- 重置滤网使用寿命计数器
- 故障排除
- 保修与服务
- 注意事项
- 安全
- 注意
- 清洁空气质量传感器
- 清洁预过滤网
- 简体中文
Brand : PHILIPS
Model : TY5080
Category : Air purifier