
DV457EVGSWR - Tumble dryer SAMSUNG - Free user manual and instructions
Find the device manual for free DV457EVGSWR SAMSUNG in PDF.


| Product type | Tumble dryer |
| Brand | Samsung |
| Model | DV457EVGSWR |
| Drying capacity | 7.5 kg |
| Dimensions (W x D x H) | 686 x 686 x 1092 mm |
| Net weight | 55 kg |
| Power supply | 230 V, 50 Hz |
| Energy class | A++ |
| Annual energy consumption | 235 kWh |
| Ventilation type | Condensation with heat pump |
| Noise level | 65 dB(A) |
| Number of programs | 14 |
| Drum material | Stainless steel |
| Filtration system | Removable lint filter |
| Main functions | Heat pump, humidity sensor, delayed start, anti-crease, steam cycle, quick dry |
| Maintenance | Clean filter after each cycle, empty water tank |
| Safety | Child lock, overload detection, overheat protection |
| Repairability index | 8.0/10 |
| Spare parts | Available from manufacturer |
| Warranty | 2 years |
Frequently Asked Questions - DV457EVGSWR SAMSUNG
User questions about DV457EVGSWR SAMSUNG
0 question about this device. Answer the ones you know or ask your own.
Ask a new question about this device
Download the instructions for your Tumble dryer in PDF format for free! Find your manual DV457EVGSWR - SAMSUNG and take your electronic device back in hand. On this page are published all the documents necessary for the use of your device. DV457EVGSWR by SAMSUNG.
USER MANUAL DV457EVGSWR SAMSUNG
Gas and Electric Dryer user manual

100% Recycled Paper
This manual is made with 100% recycled paper.
imagine the possibilities
Thank you for purchasing this Samsung product. To receive more complete service or accessory parts, please register your product at or contact

www.samsung.com/register 1-800-SAMSUNG (726-7864)
Features
Your new dryer will change the way you feel about drying laundry. From its specialized 8" LCD touch screen, and its innovative Smart Control technology to its time and energy efficiency, your new Samsung dryer has all the benefits to make drying laundry as easy and pleasant as possible.
• Extra Large Capacity
Ultra drying capabilities at your fi ngertips! Now you can dry extra-large loads. Our ultra large 7.5 cu.ft. capacity dryer circulates more air through your clothes, drying them faster, for a wrinkle-free result.
- 8" LCD Touch Screen Display
The brilliant 8" Color LCD Touch Screen displays cycle information, settings, options, and more. The easy-to-use interface allows you to scroll through all the drying cycles with the slightest touch.
• Smart Control (Elec. Model Only)
Samsung's innovative Smart Control technology enables you to control your dryer through personal technology devices such as smart phones. You don't have to be on standby until the cycle ends. The Smart Control allows you to monitor the drying process and lets you know when the cycle is complete.
• Smart Monitor (Gas Model Only)
Samsung's innovative Smart Monitor technology enables you to monitor your dryer through personal technologies such as smart phones. You don't have to be on standby until the cycle ends. Smart Monitor allows you to monitor the drying process and let you know when the cycle is complete.
- Smart Care
Samsung's Smart Care, an automatic error-monitoring system, detects and diagnoses problems at an early stage and provides quick and easy solutions through the LCD navigation. With the innovative Smart Control technology, you can also be alerted via your smart phone when a problem occurs.
- Steam Cycle
This cycle sprays a small amount of water into the drum of the dryer after several minutes of tumbling with heat. It reduces bad odors from clothing that are difficult to remove when washing with water, and also reduces wrinkles.
- Sanitize Cycle
This cycle sanitizes garments by infusing high temperature heat deep into the fabric during the drying cycle and eliminating 99.9% of certain bacteria. Use this cycle for clothing, bedding, towels, or other items needing sanitization. The Sanitize cycle is certified by NSF International, an independent third-party testing and certification organization.

NSF Protocol P154 Sanitization Performance of Residential Clothes Dryers
- Vent Sensor
Your Samsung dryer is equipped with a Vent Sensor which detects and notifies you when it is time to clean the ducts. Keep your dryer safe and efficient!
2_Features

- Time Saving
Our cycles are designed with you in mind. All our dryers are designed to dry your clothes quickly... just 42 minutes! Giving you time for more important things in life.
- Energy Saving
Your Samsung dryer is super energy efficient. You can dry up to 3.31 pounds of laundry with 1 kWh. Also, it saves energy by automatically drying your clothes the most efficient way.
- Easy Reversible Door
Your Samsung dryer will fit just about anywhere and without a door issues. The direction of its easy reversible door can be changed quickly and easily.
- Pedestal with Storage Drawers
An optional 15" pedestal is available to raise the dryer for easier loading and unloading. It also offers a built-in storage drawer that can hold a 100 oz. bottle of detergent.

We strongly recommend that you DO NOT stack Samsung washers and dryers. (it might be hard to control dryer LCD because of the viewing angle.)
natural_image
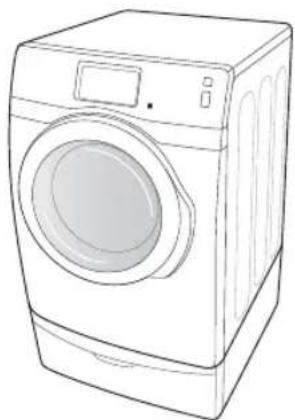
Line drawing of a washing machine with front panel and side door (no text or symbols)• 4-way Vent (Electric models only: DV457E\*)
You can install the exhaust vent in the following four (4) positions: back, either side or at the bottom.
Features _3
Safety instructions
Congratulations on your new Samsung Dryer. This manual contains important information on the installation, use, and care of your appliance. Please take the time to read this manual to take full advantage of your dryer's many benefits and features.
WHAT YOU NEED TO KNOW ABOUT SAFETY INSTRUCTIONS
Please read this manual thoroughly to ensure that you know how to operate the extensive features and functions of your new appliance safely and efficiently. Retain the manual in a safe place near the appliance for future reference. Use this appliance only for its intended purpose as described in this instruction manual. The Warnings and Important Safety Instructions in this manual do not cover all possible conditions and situations that may occur. It is your responsibility to use common sense, caution, and care when installing, maintaining, or operating your dryer.
Always contact your manufacturer about problems or conditions you do not understand.
IMPORTANT SAFETY SYMBOLS AND PRECAUTIONS
What the icons and signs in this user manual mean:
| WARNING | Hazards or unsafe practices that may result in severe personal injury, death and/or property damage. Follow the information in this manual to minimize the risk of fi re or explosion or to prevent property damage, personal injury, or death.Do not store or use gasoline or other fl ammable vapors and liquids near this or any other appliance. |
| CAUTION | Hazards or unsafe practices that may result in personal injury and/or property damage. |
| Do NOT attempt. | |
| Do NOT disassemble. | |
| Do NOT touch. | |
| Follow directions explicitly. | |
| Unplug the power plug from the wall socket. | |
| Make sure the machine is grounded to prevent electric shock. | |
| Call the service center for help. | |
| Note |
These warning signs are here to prevent injury to you and others.
Please follow them explicitly.
After reading this section, keep it in a safe place for future reference.
SAVE THESE INSTRUCTIONS
4_Safety instructions

WARNING - Risk of Fire
- Clothes dryer installation must be performed by a qualified installer.
• Install the clothes dryer according to the manufacturer's instructions and local codes. - Do not install a clothes dryer with fl exible plastic venting materials. If fl exible metal (foil type) duct is installed, it must be of a specific type identified by the appliance manufacturer as suitable for use with clothes dryers. Flexible venting materials are known to collapse, be easily crushed, and trap lint. These conditions will obstruct the clothes dryer's airflow and increase the risk of fire.
- To reduce the risk of severe injury or death, follow all installation instructions.

TO REDUCE THE RISK OF FIRE OR EXPLOSION:
- Do not dry items that have been previously cleaned, washed, soaked, or spotted with gasoline, dry cleaning solvents, or other fl ammable or explosive substances. They emit vapors that could ignite or explode. Any material that has been in contact with a cleaning solvent or fl ammable liquids or solids should not be placed in the dryer until all traces of these fl ammable liquids or solids and their fumes have been removed.
There are many highly fl ammable items used in homes, such as acetone, denatured alcohol, gasoline, kerosene, some liquid household cleaners, some spot removers, turpentine, waxes, and wax removers - Do not dry items containing foam rubber (may be labeled latex foam) or similarly textured rubber-like materials on a heat setting. Heated foam rubber materials can, under certain circumstances, produce fi re by spontaneous combustion.

WHAT TO DO IF YOU SMELL GAS:
- Do not try to light any appliance.
- Do not turn on the appliance.
- Do not touch any electrical switch.
- Do not use any phone in your building.
- Clear the room, building or area of all occupants.
- Immediately call your gas supplier from a neighbor's phone. Follow the gas supplier's instructions.
- If you cannot reach your gas supplier, call the fire department.
- Installation and service must be performed by a qualified installer, service agency, or the gas supplier.
SAVE THESE INSTRUCTIONS
Safety instructions _5
Safety instructions

WARNING
To reduce the risk of fi re, electric shock, or injury to persons when using your appliance, follow basic precautions, including the following:
- Read all instructions before using this appliance.
- Do not dry articles that have been previously cleaned in, washed in, soaked in, or spotted with gasoline, dry-cleaning solvents, or other fl ammable or explosive substances, because they give off vapors that could ignite or explode.
- Do not use the dryer to dry clothes which have traces of any flammable substance, such as vegetable oil, cooking oil, machine oil, flammable chemicals, thinner, etc., or anything containing wax or chemicals, such as mops and cleaning cloths. Flammable substances may cause the fabric to catch fire by itself.
- Do not store or use gasoline or other flammable vapors and liquids near this or any other appliance.
- Do not allow children or pets to play on, in, or in front of the appliance. Close supervision is necessary when the appliance is used near children and pets.
- Before the appliance is removed from service or discarded, remove the door to the drying compartment to prevent children or animals from becoming trapped inside.
- Do not reach into the appliance when the drum is moving.
- Do not install or store this appliance where it will be exposed to the weather.
- Do not tamper with the controls.
- Do not repair or replace any part of the appliance or attempt any servicing unless specifically recommended in the user-maintenance instructions or published in the user-repair instructions that you understand and have the skills to carry out.
- Do not use fabric softeners or products to eliminate static unless recommended by the manufacturer of the fabric softener or product.
- Clean the lint screen before or after each load.
- Do not use heat to dry articles containing foam rubber or similarly textured rubber-like materials.
- Keep the area around the exhaust opening and surrounding areas free from lint, dust, and dirt.
- The interior of the dryer and exhaust duct should be cleaned periodically by qualified service personnel.
- Do not place items exposed to cooking oils in your dryer. Items contaminated with cooking oils may contribute to a chemical reaction that could cause a load to catch fi re.
- This appliance must be grounded. See "Electrical requirements" and "Grounding" in the "Installing your dryer" section.
- This appliance must be properly grounded. Never plug the power cord into a receptacle that is not grounded adequately and in accordance with local and national codes. Refer to installation instructions for grounding this appliance.
SAVE THESE INSTRUCTIONS
6_Safety instructions
- Ensure pockets are free from small irregularly shaped hard objects and foreign material, i.e. coins, knives, pins, etc. These objects could damage your dryer.
- Gas leaks may occur in your system, resulting in a dangerous situation.
- Gas leaks may not be detected by smell alone.
- Gas suppliers recommend you purchase and install a UL-approved gas detector.

CAUTION
- Do not sit on top of the dryer.
- Because of continuing product improvements, Samsung reserves the right to change specifications without notice. For complete details, see the Installation Instructions packed with your product before selecting cabinetry, making cutouts, or beginning installation.
- Do not wash clothing with large buckles, buttons, or other heavy metal or solid things.
- Install and use in accordance with the manufacturer's instructions.
- Do not place items in your dryer that have been spotted or soaked with vegetable oil or cooking oil. Even after being washed, these items may contain significant amounts of these oils.
- Residual oil on clothing can ignite spontaneously. The potential for spontaneous combustion increases when items containing vegetable oil or cooking oil are exposed to heat. Heat sources such as your dryer can warm these items, allowing an oxidation reaction in the oil to occur. Oxidation creates heat. If this heat cannot escape, the items can become hot enough to catch fire. Piling, stacking, or storing these kinds of items may prevent heat from escaping and can create a fire hazard.
- All washed and unwashed fabrics that contain vegetable oil or cooking oil can be dangerous. Washing these items in hot water with extra detergent will reduce, but not eliminate, the hazard. Always use the Cool Down cycle for these items to reduce their temperature. Never remove these items from the dryer hot or interrupt the drying cycle until the items have run through the Cool Down cycle. Never pile or stack these items when they are hot.
- Take care that children's fingers are not caught in the door when closing it. This may result in injury.
CALIFORNIA SAFE DRINKING WATER AND TOXIC ENFORCEMENT ACT
This act requires the governor of California to publish a list of substances known to the state to cause cancer, birth defects, or other reproductive harm and requires businesses to warn customers of potential exposure to such substances.
Gas appliances can cause minor exposure to four of these substances, namely benzene, carbon monoxide, formaldehyde, and soot, caused primarily by the incomplete combustion of natural gas or LP fuels.
Properly adjusted dryers will minimize incomplete combustion. Exposure to these substances can be minimized further by properly venting the dryer to the outdoors.
SAVE THESE INSTRUCTIONS
Safety instructions _7
Safety instructions
REGULATORY NOTICE
1. FCC Notice

FCC CAUTION:
Any changes or modifications not expressly approved by the party responsible for compliance could void the user's authority to operate the equipment.
This device complies with Part 15 of FCC Rules. Operation is Subject to following two conditions:
- This device may not cause harmful interference, and
- This device must accept any interference received including interference that causes undesired operation.
For product available in the USA/Canada market, only channel 1\~11 can be operated. Selection of other channels is not possible.
FCC STATEMENT:
This equipment has been tested and found to comply within the limits for a Class B digital device, pursuant to part 15 of the FCC Rules. These limits are designed to provide reasonable protection against harmful interference in a residential installation.
This equipment generates, uses, and can radiate radio frequency energy and, if not installed and used in accordance with the instructions, may cause harmful interference to radio communications. However, there is no guarantee that interference will not occur in a particular installation. If this equipment does cause harmful interference to radio or television reception, which can be determined by turning the equipment off and on, the user is encouraged to try to correct the interference by one or more of the following measures:
- Reorient or relocate the receiving antenna.
- Increase the separation between the equipment and receiver.
- Connect the equipment into an outlet on a different circuit from that of the receiver.
- Consult the dealer or an experienced radio/TV technician for help.
FCC RADIATION EXPOSURE STATEMENT:
This equipment complies with FCC radiation exposure limits set forth for an uncontrolled environment. This equipment should be installed and operated with a minimum distance of 20cm between the radiator and your body. This device and its antenna(s) must not be co-located or operated in conjunction with any other antenna or transmitter.
SAVE THESE INSTRUCTIONS
8_Safety instructions
2. IC Notice
The term “IC” before the radio certification number only signifies that Industry Canada technical specifications were met. Operation is subject to the following two conditions: (1) this device may not cause interference, and (2) this device must accept any interference, including interference that may cause undesired operation of the device.
This Class B digital apparatus complies with Canadian ICES-003.
For product available in the USA/Canada market, only channels 1\~11 can be operated. Selection of other channels is not possible.
IC RADIATION EXPOSURE STATEMENT:
This equipment complies with IC RSS-102 radiation exposure limits set forth for an uncontrolled environment. This equipment should be installed and operated with minimum distance of 20cm between the radiator & your body. This device and its antenna(s) must not be co-located or operated in conjunction with any other antenna or transmitter.
SAVE THESE INSTRUCTIONS
Safety instructions _9
Contents
INSTALLING YOUR DRYER
12
12 Unpacking your dryer
12 The dryer exterior
13 Basic requirements
14 Ducting requirements
15 Important to installer
15 Location considerations
15 Alcove or closet installations
16 Mobile home installations
16 Exhausting
17 Gas requirements
17 Commonwealth of massachusetts installation instructions
18 Electrical requirements
18 Grounding
19 Electrical connections
20 Connecting the inlet hose
22 Replacement parts and accessories
22 Installation
25 Final installation checklist
25 Dryer exhaust tips
26 Door Reversal
28 Setting up your dryer for the first time
DRYING A LOAD OF LAUNDRY
30
30 Drying for the first time
30 Basic instructions
31 Using the control panel
36 Drying your laundry using the cycle selection screen
45 Using the Rack Dry
45 Checking the fi Iter
46 Vent Sensor
USING YOUR MOBILE PHONE
47
47 Confi guring your dryer's network settings and connecting to your network
48 Turning on the Wi-Fi networking function of your dryer
49 How to update the software
50 Downloading and running the mobile app, Samsung Smart Washer/Dryer App
51 Using the Mobile App
55 Overview for Wi-Fi Settings and AP Connection
10_ Contents
CARE AND CLEANING

56 Control panel
56 Tumbler
56 Stainless steel tumbler
56 Dryer exterior
56 Dryer exhaust system
SPECIAL LAUNDRY TIPS

57 Special laundry tips
TROUBLESHOOTING

58 Check these points if your dryer...
59 Information codes
61 Network Setup Q&A
APPENDIX

63 Fabric care chart
64 Protecting the environment
64 Declaration of conformity
64 Specifications
65 Cycle chart
Contents _11
Installing your dryer
UNPACKING YOUR DRYER
Unpack your Dryer and inspect it for shipping damage. Make sure you have received all the items shown below. If your Dryer was damaged during shipping, or you do not have all the items, contact 1-800-SAMSUNG (726-7864).
To prevent personal injury or strain, wear protective gloves whenever lifting or carrying the unit.

The packing materials can be dangerous to children. Keep all packaging material (plastic bags, polystyrene, etc.) well out of the reach of children.
THE DRYER EXTERIOR
![Top Cover Control panel Door Filter Frame Front [BACK] Duct Exhaust Water Inlet](/content/2026/06/1284364/images/bb7d004886ff996809352192f5e4a91c905d04748a6a357a0cc28b5df72562c2.jpg)
Parts supplied


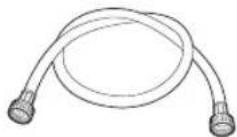
"Y"-connector Short inlet hose Rubber Washer Long inlet hose
12_ Installing your dryer
Tools needed

Pliers Cutting knife


Pipe wrench (gas only)

Nut drivers

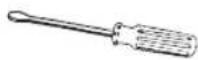


Level Phillips Screwdriver Duct tape Wrench
BASIC REQUIREMENTS
Make sure you have everything necessary for the proper installation
- A GROUNDED ELECTRICAL OUTLET is required. Refer to the "Electrical requirements" section on page 18.
- A POWER CORD for electric dryers (except for Canada).
• GAS LINES (if you have a gas dryer) must meet national and local codes. - The EXHAUST SYSTEM must be rigid metal or fl exible stiff -walled metal exhaust ducting.
Installing your dryer _13
Installing your dryer
DUCTING REQUIREMENTS
- Use a 4-inch (10.2 cm) diameter rigid aluminum or rigid galvanized steel duct.
- Do not use a smaller duct.
- Ducts larger than 4 inches (10.2 cm) in diameter can result in increased accumulation of lint.
- Lint should be removed regularly.
- If a fl exible metal duct must be used, use the type with a stiff sheet metal wall. Do not use a fl exible duct with a thin foil wall. A serious blockage can result if the fl exible metal duct is bent too sharply.
- Never install any type of fl exible duct in walls, ceilings, or other concealed spaces.
- Keep the exhaust duct as straight and short as possible.
- Secure joints with duct tape. Do not use screws.
- Do not use plastic fl exible duct. Plastic fl exible duct can kink, sag, be punctured, reduce airflow, extend drying times, and affect dryer operation.
- Exhaust systems longer than recommended can extend drying times, affect machine operations, and collect lint.
- The exhaust duct should end with an exhaust hood with a swing-out damper to prevent back drafts and entry of wildlife. Never use an exhaust hood with a magnetic damper.
- The hood should have at least 12 inches (30.5 cm) of clearance between the bottom of the hood and the ground or other obstruction. The hood opening should point down.
- Never install a screen over the exhaust outlet.
- To avoid lint buildup, do not exhaust the dryer directly into a window well. Do not exhaust under a house or porch.
- If the exhaust duct must run through an unheated area, the duct should be insulated and slope slightly down towards the exhaust hood to reduce condensation and lint buildup.
- Inspect and clean the interior of the exhaust system at least once a year. Unplug the power cord before cleaning.
- Check frequently to make sure the exhaust hood damper opens and closes freely.
- Check once per month, and clean at least once per year. Note: If your clothes are not getting dry, then check the ducting for obstructions.
- Do not exhaust the dryer into a wall, ceiling, crawl space, or concealed space of a building, gas vent, or any other common duct or chimney. This could create a fi re hazard from the lint expelled by the dryer.
| ELECTRIC AND GAS DRYER | ||||
| Weather Hood Type | ||||
| Recommended | Use only for short-run installation | |||
 4" (10 .16 cm) 4" (10 .16 cm) |  2.5" (6.35 cm) 2.5" (6.35 cm) | |||
| No. of 90° elbows | Rigid Metallic | Flexible* | Rigid Metallic | Flexible* |
| 0 | 24.4 m (80 ft.) 12. | 4 m (41 ft.) | 22.6 m (74 ft.) 10. | 1 m (33 ft.) |
| 1 | 20.7 m (68 ft.) 11. | 2 m (37 ft.) | 18.9 m (62 ft.) 8.8 | m (29 ft.) |
| 2 | 17.4 m (57 ft.) 10. | 1 m (33 ft.) | 15.5 m (51 ft.) 7.6 | m (25 ft.) |
| 3 | 14.3 m (47 ft.) 9.0 | m (29 ft.) | 12.5 m (41 ft.) 6.5 | m (21 ft.) |

* Do not use non-metallic fl exible ducts.

Installing your dryer
If the new dryer is installed into an existing exhaust system you must make sure:
- The exhaust system meets all local, state, and national codes.
- That a fl exible plastic duct is not used.
- To inspect and clean all lint buildup from inside the existing duct.
- The duct is not dented or crushed.
- The exhaust hood damper opens and closes freely.
The static pressure in any exhaust system must not exceed 0.83 inches of water column, or be less than 0. This can be measured with the dryer running with a manometer at the point where the exhaust duct connects to the dryer. A no-heat setting should be used. The dryer tumbler should be empty and the lint fi liter clean.
IMPORTANT TO INSTALLER
Please read the following instructions carefully before installing the dryer. These instructions should be kept for future reference.

Remove the door from all discarded appliances to avoid the danger of a child being trapped and suffocating.
LOCATION CONSIDERATIONS
The dryer should be located where there is enough space at the front for loading the dryer, and enough space behind for the exhaust system. This dryer is factory-ready for the rear exhaust option. To exhaust out the bottom, right or the left, use the accessory exhaust kit. Instructions are included with the kit. It's important to make sure the room has enough fresh air. The dryer must be located where there is no air-flow obstruction.
For gas dryers, adequate clearance must be maintained as noted on the data plate to ensure adequate air for combustion and the proper dryer operation.
The dryer must not be installed or stored in an area where it will be exposed to water and/or weather. The dryer area must be kept clear of combustible materials, gasoline, and other flammable vapors and liquids. A dryer produces combustible lint. The area around the dryer should be kept Lint-Free.
ALCOVE OR CLOSET INSTALLATIONS

The dryer must be exhausted to the outside to reduce the risk of fire when installed in an alcove or closet.
- No other fuel-burning appliance should be installed in the same closet as the dryer.
- WARNING: To reduce the risk of fire, this dryer must be exhausted to the outside. Refer to “Exhausting” section on page 16.
- Minimum clearances between the dryer and adjacent walls or other surfaces are: 2" in front, 17" on top, 1" on either side, and 5" at the back.
- The front of the closet must have two unobstructed air openings for a combined minimum total area of 72 in ^2 with a minimum clearance of 3" at the top and bottom. A slatted door with equivalent space clearances is acceptable.
Installing your dryer
Installing your dryer
MOBILE HOME INSTALLATIONS
The installation of the dryer in a mobile home must conform to the Manufactured Home Construction and Safety Standards Title 24 CFR, Part 3280 {formerly the Federal Standards for Mobile Home Construction and Safety, Title 24, HUD (Part 280), 1975} for the United States) or CSA Standards Z240 (for Canada).
- When installing a dryer in a mobile home, provisions for anchoring the dryer to the floor must be made.
- Locate an area with adequate fresh air.
- A minimum unobstructed space of 72in^2 (465~cm^2) is required.
- Call 1-800-SAMSUNG for information on purchasing the Floor Anchoring Kit as an accessory.
- All mobile home installations must be exhausted to the outside with the exhaust duct termination securely fastened to the mobile home structure, using materials that will not combust.
- The exhaust duct may not terminate underneath the mobile home.
- Refer to the following "Exhausting" section for more information.
EXHAUSTING
The dryer shall not be exhausted into a chimney, a wall, a ceiling, an attic, a crawl space, or a concealed space of a building.
Exhausting the dryer to the outside will prevent large amount of lint and moisture from being blown into the room.

See "Ducting requirements" in installing your dryer section for the maximum duct length and number of bends.
- All dryers must be exhausted to the outside.
- The duct must not be assembled with screws or other fastening means that extend into the duct and catch lint.
- The required exhaust duct is 4 inches (102 mm) in diameter.
- The total length of fl exible metal duct shall not exceed 2.4 m (7.8 ft.).
In the United States:
- Use only those foil-type fl exible ducts, if any, specifically identified for use with the appliance by the manufacturer and that comply with the Outline for Clothes Dryer Transition Ducts, Subject 2158A, shall be used.
In Canada:
- Use only those foil-type fl exible ducts, if any, specifically identified for use with the appliance by the manufacturer shall be used.
Outside the U.S. and Canada:
• Refer to the local codes.

The dryer must be exhausted to the outside to reduce the risk of fire when installed in an alcove or closet.

NEVER USE A PLASTIC OR NON-METAL FLEXIBLE DUCT.
If your existing ductwork is plastic, non-metal, or combustible, replace it with metal.
Use only a metal exhaust duct that is non-fl ammable to ensure containment of the exhaust air, heat, and lint.
GAS REQUIREMENTS
Use only natural or LP (liquid propane) gases.
THE INSTALLATION MUST CONFORM WITH LOCAL CODES, OR IN THE ABSENCE OF LOCAL CODES, WITH THE NATIONAL FUEL GAS CODE ANSI/Z223.1, LATEST REVISION (FOR THE UNITED STATES), OR WITH THE CAN/CGA-B149 INSTALLATION CODES (FOR CANADA).
Gas dryers are equipped with a burner vent for use with natural gas. If you plan to use your dryer with LP (liquid propane) gas, it must be converted for safe and proper performance by a qualified service technician.
A 1/2" (1.27 cm) gas supply line is recommended and must be reduced to connect to the 3/8" (1 cm) gas line on your dryer. The National Fuel Gas Code requires that an accessible, approved manual gas shut-off valve be installed within 6" of your dryer.
Gas dryers installed in residential garages must be raised 18 inches (46 cm) above the floor.
Additionally, a 1/8" (0.3 cm) N.P.T. (National Pipe Thread) plugged tapping, accessible for test gauge connection, must be installed immediately upstream of your dryer's gas supply connection.
Your dryer must be disconnected from the gas supply pipe system during any pressure testing of the system.
DO NOT reuse old flexible metal gas lines. Flexible gas lines must be design certified by the American Gas Association (CGA in Canada).

- Any pipe joint compound used must be resistant to the action of any liquefied petroleum gas.
- As a courtesy, most local gas utilities will inspect a gas appliance installation.
GAS IGNITION - Your dryer uses an automatic ignition system to ignite the burner. There is no constant burning pilot.
COMMONWEALTH OF MASSACHUSETTS INSTALLATION INSTRUCTIONS
Your dryer must be installed by a licensed plumber or gas fi tter. A "T" handle manual gas valve must be installed in the gas supply line to your dryer. If a fl exible gas connector is used to install your dryer, the connector may not be longer than 3' (36").

- Gas leaks may occur in your system, creating a dangerous situation.
• Gas leaks may not be detected by smell alone. - Gas suppliers recommend that you purchase and install a UL-approved gas detector.
- Install and use it in accordance with the manufacturer's instructions.
Installing your dryer _17

Installing your dryer
ELECTRICAL REQUIREMENTS

The wiring diagram is located on the plate below the control panel.

- The improper connection of the equipment grounding conductor can result in a risk of electric shock. Check with a qualified electrician or serviceman if you are in doubt as to whether your dryer is properly grounded. Do not modify the plug provided with your dryer - if it doesn't fit the outlet, have a proper outlet installed by a qualified electrician.
- To prevent unnecessary risk of fire, electrical shock, or personal injury, all wiring and grounding must be done in accordance with local codes, or in the absence of local codes, with the National Electrical Code, ANSI/NFPA No. 70-Latest Revision (for the U.S.) or the Canadian Electrical Code CSA C22.1 - Latest Revisions and local codes and ordinances. It is your responsibility to provide adequate electrical services for your dryer.
- All gas installations must be done in accordance with the national Fuel Code ANSI/Z2231 - Latest Revision (for the U.S.) or CAN/CGA - B149 Installation Codes - Latest Revision (for Canada) and local codes and ordinances.
GROUNDING
This dryer must be grounded. In the event of a malfunction or breakdown, the grounding the product will reduce the risk of electrical shock by providing a path of least resistance for the electrical current.

Gas models
Your dryer has a cord with an equipment-grounding conductor and a grounding plug.
The plug must be plugged into an appropriate outlet that is properly installed and grounded in accordance with all local codes and ordinances.
Do not modify the plug provided with your dryer – if it doesn't fit the outlet, have a proper outlet installed by a qualified electrician.
Never connect the ground wire to the plastic plumbing lines, gas lines, or hot water pipes.

Electric models
Your dryer has an optional cord with an equipment-grounding conductor and a grounding plug. The cord is sold separately.
The plug must be plugged into an appropriate outlet that is properly installed and grounded in accordance with all local codes and ordinances.
Do not modify the plug provided with your dryer – if it doesn't fit the outlet, have a proper outlet installed by a qualified electrician.
If a power cord is not used and the electric dryer is to be permanently wired, the dryer must be connected to a permanently grounded metal wiring system, or an equipment grounding conductor must be run with the circuit conductors and connected to the equipment grounding terminal or lead on the dryer.
ELECTRICAL CONNECTIONS
Before operating or testing, follow all grounding instructions in the "Grounding" section on page 18. An individual branch (or separate) circuit serving only your dryer is recommended. DO NOT USE AN EXTENSION CORD.
Gas models – U.S. and Canada
A 120 volt, 60 Hz AC approved electrical service, with a 15-ampere fuse or circuit breaker is required.
Electric models – U.S. only
Most U.S. dryers require a 120/240 volt, 60 Hz AC approved electrical service. Some require 120/208 volt, 60 Hz approved electrical service. The electric service requirements can be found on the data label located behind the door. A 30-ampere fuse or circuit breaker on both sides of the line is required.
- If a power cord is used, the cord should be plugged into a 30-ampere receptacle.
- The power cord is NOT provided with U.S. electric model dryers.

RISK OF ELECTRIC SHOCK:
When local codes allow, the electrical supply of the dryer may be connected by means of a new power supply cord kit, marked for use with a dryer, that is U.L. listed and rated at a minimum of 120/240 volts, 30-ampere with three No. 10 copper wire conductors terminated with closed loop terminals, open-end spade lugs with turned up ends, or with tinned leads.
- Do not reuse a power supply cord from an old dryer. The power cord electric supply wiring must be retained at the dryer cabinet with a suitable UL-listed strain relief.
- Grounding through the neutral conductor is prohibited for (1) new branch-circuit installations, (2) mobile homes, (3) recreational vehicles, and (4) areas where local codes prohibit grounding through the neutral conductor. (Use a 4-prong plug for 4 wire receptacles, NEMA type 14-30R.)
Electric models – Canada Only
- A 120/240 volt, 60 Hz AC approved electrical service fused through a 30-ampere fuse or circuit breaker on both sides of the line is required.
- All Canadian models are shipped with the power cord attached. The power cord should be plugged into a 30-ampere receptacle.

In Canada, you may not convert a dryer to 208 volts.
Installing your dryer
Installing your dryer
CONNECTING THE INLET HOSE
Method 1
The dryer must be connected to the cold water faucet using the new inlet hoses. Do not use old hoses.
- If space permits, attach the brass female end of the "Y" connector to the cold water faucet.
- Turn the cold water faucet off.
- Attach the straight end of long hose to the "Y" connector.
- Using pliers, tighten the coupling with an additional two-thirds turn.
Do not overtighten, as this may damage the coupling.
-
Attach the angled end of long hoses to fi ll the valve at the bottom of the dryer's rear frame. Screw on the coupling by hand until it is seated on the fi ll valve connector.
-
Using the pliers, tighten the coupling with an additional two-thirds turn.
Do not overtighten, as this may damage the coupling.
-
Check that the water faucets are on.
-
Check for leaks around the "Y" connector, faucets and hoses.


Installing your dryer
Method 2
The dryer must be connected to the cold water faucet using the new inlet hoses. Do not use old hoses.
-
If the "Y" connector cannot be attached directly to the cold water faucet, the short hose must be used.
-
Turn the cold water faucet off.
-
Attach the short inlet hose to the cold water faucet. Screw on the coupling by hand until it is seated on the faucet.
-
Using the pliers, tighten the coupling with an additional two-thirds turn.
Do not overtighten, as this may damage the coupling.
-
Attach the 'Y' connector to the brass male end of the small hose. Screw on the coupling by hand until it is seated on the connector.
-
Using the pliers, tighten the coupling with an additional two-thirds turn.
Do not overtighten, as this may damage the coupling.
-
Attach the angled end of long hoses to the fill valve at the bottom of the dryer rear frame. Screw on the coupling by hand until it is seated on the fill valve connector.
-
Using pliers, tighten the coupling with an additional two-thirds turn.
Do not overtighten, as this may damage the coupling.
-
Check that the water faucets are on.
-
Check for leaks around the "Y" connector, faucets and hoses.


Installing your dryer
REPLACEMENT PARTS AND ACCESSORIES
If your dryer requires replacement parts or accessories, contact the dealer where you purchased your dryer or the SAMSUNG customer care center at 1-800-SAMSUNG (726-7864).
INSTALLATION
For the proper installation, we recommend that you hire a qualified installer.
To install
- Move your dryer to an appropriate location for the installation. Consider installing the dryer and washer side-by-side, to allow access to the gas, electrical, and exhaust connections. Place two of the carton cushion-tops on the floor. Tip your dryer on its side so it lies across both cushion-tops.
- Set your dryer back in an upright position.
- To ensure that the dryer provides the optimal drying performance, it must be level. To minimize vibrations, noise, and unwanted movement, the floor must be a perfectly level, solid surface.

To set the dryer to the same height as the washer, fully retract the leveling feet by turning them counterclockwise, then loosen the legs by turning them clockwise.


Adjust the leveling feet only as much as necessary to level the dryer. Extending the leveling feet more than necessary can cause the dryer to vibrate.
- Review the "Exhausting" section on page 16 before installing the exhaust system. Install the ductwork from your dryer to the exhaust hood. The crimped end of the duct sections must point away from your dryer.
DO NOT use sheet metal screws when assembling the ducting. These joints should be taped.
Never use plastic fl exible exhaust material.
Tip for tight installations: install a section of the exhaust system onto your dryer before putting it in place.
Use duct tape to secure this section to your dryer, but do not cover the ventilation slots at the back of the unit in dryer cabinet.
Installing your dryer
- Review the "Electrical requirements" section on page 18.
BEFORE OPERATING OR TESTING, follow the grounding instructions in the "Grounding" section on page 18.

U.S. MODELS:
RISK OF ELECTRIC SHOCK - All U.S. models are produced for a 3-WIRE SYSTEM CONNECTION.
The dryer frame is grounded to the neutral conductor at the terminal block.
A 4-WIRE SYSTEM CONNECTION is required for new or remodeled construction, mobile homes, or if local codes do not permit grounding through neutral. If the 4-wire system is used, the dryer frame cannot be grounded to the neutral conductor at the terminal block. Refer to the following instructions for 3 and 4-WIRE SYSTEM CONNECTIONS.
Remove the terminal block cover plate.
Insert the power cord with a UL-listed strain relief through the hole provided in the cabinet near the terminal block.

A strain relief must be used.
Do not loosen the nuts already installed on the terminal block. Be sure they are tight.
Use a 3/8" (1 cm) deep well socket.
- Review the "Gas requirements" section on page 17. Remove the pipe thread protective cap. Apply a pipe joint compound or about 1 1/2 wraps of Tefl on tape over all threaded connections.

The pipe joint compound must be resistant to the actions of any liquefi ed petroleum gas.
Connect the gas supply to your dryer. An additional fitting is required to connect the 3/4" (1.9 cm) female thread end of a fl exible connector to the 3/8" (1 cm) male threaded end on the dryer.
Securely tighten the gas line fi tting over the threads.
Turn on the gas supply.
Check all gas connections for leaks using a soap solution.
If bubbles appear, tighten the connections and recheck. DO NOT use an open flame to check for gas leaks.
Installing your dryer
3-WIRE system connections
- Loosen or remove the center terminal block screw.
- Connect the neutral wire (white or center wire) of the power cord to the center, silver-colored terminal screw of the terminal block. Tighten the screw.
- Connect the other wires to the outer terminal block screws. Tighten the screws.
- Tighten the strain relief screws.
- Insert the tab of the terminal block cover into your dryer's rear panel slot.
- Secure the cover with a hold-down screw.
| 1 External ground connector |
| 2 Neutral grounding wire (green/yellow) |
| 3 Center silver-colored terminal block screw |
| 4 Neutral wire (white or center wire) |
| 5 3/4" (1.9 cm) UL-listed strain relief |
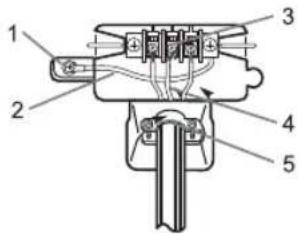

If converting from a 4-wire electrical system to a 3-wire, the ground strap must be reconnected to the terminal block support to ground the dryer frame to the neutral conductor.
4-WIRE system connections
- Remove the center terminal block screw.
- Connect the ground wire (green or unwrapped) of the power cord to the external ground conductor screw.
- Connect the neutral wire (white or center wire) of the power cord and the appliance ground wire (green with yellow stripes) under the central screw of the terminal block.
- Connect the other wires to the outer terminal block screws. Tighten the screws.
- Tighten the strain relief screws.
- Insert the tab of the terminal block cover into your dryer's rear panel slot.
- Secure the cover with a hold-down screw.
| 1 | External ground connector |
| 2 | Green or bare copper wire of the power cord |
| 3 | ^3/_4 in. (1.9 cm) UL-listed strain relief |
| 4 | Center silver-colored terminal block screw |
| 5 | Grounding wire (green/yellow) |
| 6 | Neutral wire (white or center wire) |

-
With a level, check your dryer and make the necessary adjustments to the leveling legs.
-
At this time, make sure all gas connections (on gas models), exhaust and electrical connections are complete. Plug in your dryer, and check its operation by using the checklist below.
-
(GAS MODELS ONLY)
The burner may not ignite initially due to air in the gas line. Allowing your dryer to operate on a heat setting will purge the line. If the gas does not ignite within 5 minutes, turn your dryer off and wait 5 minutes. Be sure the gas supply to your dryer has been turned on. In order to confirm the gas ignition, check the exhaust for heat.
24\_ Installing your dryer
FINAL INSTALLATION CHECKLIST
- the dryer is plugged into an electrical outlet and is properly grounded.
- The exhaust ductwork is hooked up and the joints are taped.
- A plastic fl exible duct is NOT used.
- Use rigid or stiff -walled fl exible metal vent material.
- The dryer is level and is sitting firmly on the floor.
- Gas models – the gas is turned on with no gas leaks.
- Start your dryer to confirm that it runs, heats, and shuts off.
DRYER EXHAUST TIPS

A plastic or non-metal fl exible duct presents a potential fi re hazard.
- Make sure your dryer is installed properly so it exhausts air easily.

- Use a 4" diameter rigid metal duct. Tape all joints, including at the dryer. Never use lint-trapping screws.

- Keep ducts as straight as possible.
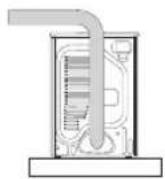
- Clean all old ducts before installing your new dryer. Be sure the vent flap opens and closes freely. Inspect and clean the exhaust system annually.

Don't let a poor exhaust system slow the drying process by:
- Restricting your dryer with a poor exhaust system.
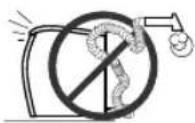
• Using a plastic, thin foil, or non-metal flexible duct.

- Unnecessarily using long ducts that have many elbows.
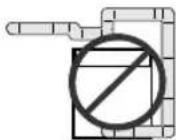
- Allowing dented or clogged ducts and vent.

Installing your dryer
Installing your dryer
DOOR REVERSAL
- Unplug the power cord.
- Remove two door hinge screws.
- Lift the door and remove it.

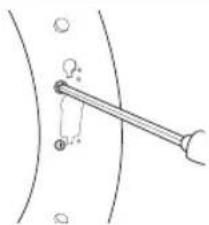
- Remove two screws from the frame front.
natural_image
Simple line drawing of a tool interacting with a curved surface, no text or symbols present- Remove the two screws from the opposite side of the door hinge.

- Remove the two screws from the holder lever.
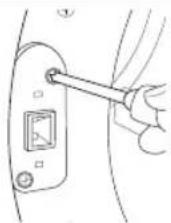
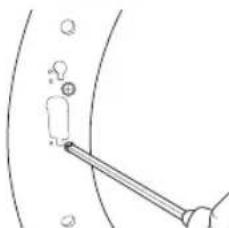
- Reassemble the two screws on the inside holes.
natural_image
Simple line drawing of a hand holding a tool near a curved surface with a light bulb (no text or symbols)- Remove a screw from the door hinge. The screw is for pre-fi xing the door to the frame front.

natural_image
Illustration of a hand using a tool to cut or spread a curved object, no text or symbols present26_ Installing your dryer
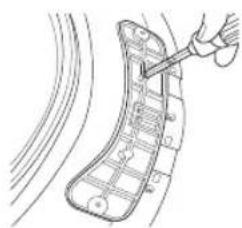
- Reassemble the screw in the other hole.
- Place the door on the other side and reattach it to the dryer.
- Reattach the holder lever.
- Reattach the screws in the remaining holes.
natural_image
Line drawing of a car's seat with a hand holding a tool, showing motion lines (no text or symbols)
natural_image
Line drawing of a medical or surgical procedure showing hands holding a tool over a vertical panel (no text or symbols present)
natural_image
Line drawing of a hand using a screwdriver to adjust a button on a device (no text or symbols present)
natural_image
Line drawing of a car door handle with a switch and control panel (no text or symbols)Installing your dryer _27
Installing your dryer
SETTING UP YOUR DRYER FOR THE FIRST TIME
When your dryer is turned on for the first time, the intro animation is played which shows the Samsung logo and is played each time your dryer is turned in the LCD panel and then you are guided through the initial setup procedures. Through this procedure you can set your preferences for use of your dryer. This procedure consists of the following 5 steps:
- Choosing your language
- Setting the current date
- Setting the current time

Precautions for using the LCD panel
- If you touch the LCD panel while wearing rubber gloves, it may not operate properly.
- If you touch the LCD panel with wet hands, it may not operate properly or may malfunction.
- If the LCD panel is wet, it may malfunction.
Choosing your language
-
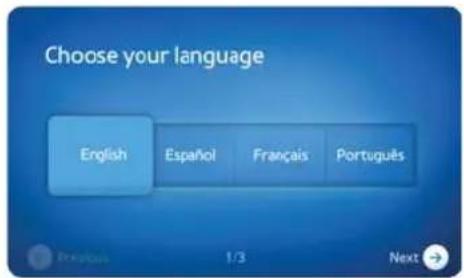
Tap the language you want to use for the controls, instructions and descriptions shown in the LCD panel. There are 4 available languages: English, Español (Spanish), Français (French) and Portuguese.
-
Tap the Next button when done.
Setting the current date
- Tap the up and down arrows to set the date. Tap the left and right arrows at the bottom of the screen to move to other calendar months.
- Tap the Next button when done.

Setting your current time
- Set the desired time by tapping on the up and down arrows.
- Tap the Next button when done.

28
Installing your dryer

After completing the initial setup, you can access each step and change your preferences any time using the Settings control located at the bottom right of the Cycle Selection screen displayed in the LCD panel.
For example, If you want to set the time again...
-
Tap the Settings at the bottom right of the Cycle Selection screen.
-
Tap the Time & Language at the Setting screen.
-
Tap the Change button under the Time.
-
Tap the up and down arrows to change to the desired time.
-
Tap the OK button.
You can view and change the settings of the Language and Date through the same steps above.
Installing your dryer _29
Drying a load of laundry
With your new Samsung Dryer, the hardest part of doing laundry will be deciding which load to dry first.

To reduce the risk of fire, electric shock, or injury to persons, read the IMPORTANT SAFETY INSTRUCTIONS before operating this appliance.
DRYING FOR THE FIRST TIME

Before drying laundry for the first time, you must run a complete empty cycle (i.e. no laundry).
- Press the Power button.
- Press the Start/Pause button.

The dryer runs the Normal cycle. This is the factory default cycle the washer will run until you select another cycle. This fi rst empty cycle removes any water that might be left over in the machine from the manufacturer's test run.
BASIC INSTRUCTIONS
- Load your laundry into the dryer.

Do not overload the dryer.
To determine the load capacity for each type of laundry, refer to the "Cycle chart" section on page 65.

Make sure that laundry is not caught in the door.
- Close the door until it latches.
- Turn the power on.
- Select the appropriate cycle and its options in the LCD panel.
- The selected cycle and its selected options light up and the estimated cycle time appears at the top right of the LCD panel.
- Press the Start/Pause button.

Do not touch the door glass while your dryer is running. It may be hot.
30_
Drying a load of laundry
USING THE CONTROL PANEL
![[Sensor Dry] The Normal cycle is ... Dry Level Normal Temperature High Time Automatic Extras Estimated Time 42 Min Smart Control Save As My Cycles Delay Start Child Lock Light Settings 1 2 3](/content/2026/06/1284364/images/a991fd7ccf4a6c96676eb7e2eaeaaa1e62282001e0422cdec1bbf0001d7f6828.jpg)
| 1 CYCLE PANE | Select the cycle you want to use for your laundry. The Cycle pane contains a list of cycles that you can scroll down or up. To view more cycles, drag from the bottom to the along the Cycle pane.For more information on the cycles you can select in the Cycle pane, refer to the “Available cycles” section on page 32.For more information, refer to the “Drying your laundry using the cycle selection screen” section on page 36. |
| 2 OPTION PANE | Displays the currently selected options for the selected cycle and allows you to change them. There are four options, Dry level, Temperature, Time, and Extras.For more information on the options you can select in the Option pane, refer to the “Available options” section on page 33. |
| 3 STATUS PANE | Consists of three sections: Cycle time, Eco bar and Actions. |
| 4 CYCLE TIME SECTION | Displays the estimated amount of time the selected cycle and its selected options will take to complete. |
| 5 ECO BAR SECTION | Displays the energy efficiency of the selected cycle by showing the estimated environmental friendliness of the selected cycle and its selected options on a scale. |
| 6 ACTIONS SECTION | Provides the following additional controls that allow you to carry out additional actions and view and configure other settings: Smart Control, Save as My Cycles, Delay Start, Child Lock, Light, and Settings.For more information on the additional controls you can use in the Actions section, refer to the “Available actions” section on page 34. |
Drying a load of laundry _31
Drying a load of laundry
Available cycles
The preset cycles listed in the Cycle pane of the Cycle Selection screen can be categorized in the following three groups.
| Sensor Dry cycles | Your dryer automatically determines the optimal duration required to dry your laundry. Because you don't need to set the the duration, the duration controls are unavailable on the Control Panel. |
| Manual Dry cycles | You can manually set the duration, but your dryer automatically determines the necessary dry level (Damp Dry, Less Dry, Normal Dry, More dry, and Very Dry). Because you don't need to set the dry level, the dry level controls are unavailable on the Control Panel. |
| Steam cycles The dryer automatically sets the duration and dry level appropriate for the laundry you are drying. You can change the time, if necessary. | |
Sensor Dry cycles
| Eco Normal The eco | Normal cycle reduces energy usage by up to 15% compared to the Normal Dry course. It adjusts the cycle time and temperature for increased effi ciency. |
| Normal The Normal | cycle is for most fabrics including cotton, underwear and linen. |
| Heavy Duty The Heavy | Duty cycle provides high temperature for a heavy fabrics such as jeans, corduroy or work clothes. |
| Perm Press The Perm | Press cycle is for wrinkle-free cottons, synthetic fabric, knitwear and permanent press fabrics. |
| Delicates The Delicates | cycle is for heat-sensitive items. This cycle uses a low drying temperature. |
| Active wear The active | Wear cycle is for exercise wear and outdoor wear such as sports jerseys, training pants, water-repellent jackets and other performance clothing.Thick fabrics like a zipper or velcro closure of a jacket, or training socks may not be completely dried. |
| Bedding PLUS The | Bedding PLUS cycle is for bulky items such as blankets, sheets and comforters. |
| Sanitize The Sanitize | cycle sanitizes garments at high temperatures and keeps your bedding and curtains clean. |
| Wool |  WOOLMARK APPAREL CAREThe Wool cycle is for machine washable and tumble dryable woolen items only. The load should be under 3 pounds, The wool cycle of this machine has been approved by Woolmark company for Total-Easy-Care Wool products, M0913(DV457E*), M1007(DV457G*). WOOLMARK APPAREL CAREThe Wool cycle is for machine washable and tumble dryable woolen items only. The load should be under 3 pounds, The wool cycle of this machine has been approved by Woolmark company for Total-Easy-Care Wool products, M0913(DV457E*), M1007(DV457G*). |
Manual Dry cycles
| Time Dry The Time Dry cycle allows you to select a cycle time in minutes. | |
| Quick Dry The Quick Dry cycle provides a 30 minute drying cycle. | |
| Air Fluff | The Air Fluff cycle tumbles the load at room temperature. |
32_Drying a load of laundry
Steam cycles
| Refresh The Refresh | cycle is best for smoothing out wrinkles and reducing odors in loads of one to four items. |
| Wrinkle Away The W | Wrinkle Away cycle removes wrinkles from clothes stored in closets, etc. It provides wrinkle release via optimized steam care. You can change the drying time. (Minimum time : 20 minutes)For best results, load no more than 3 items. |
Available options
You can view the currently selected options for the selected cycle and change them in the Option pane of the Cycle Selection screen. There are four options, Dry level, Temperature, Time, and Extras.
Dry level
Tap this option to change the currently selected dry level setting. The available dry level settings are Damp dry, Less dry, Normal dry, More dry, and Very dry. However, depending on the selected cycle, some of these options will be disabled.
Temperature
Tap this option to change the currently selected temperature setting. The available temperature settings are Extra Low, Low, Med Low, Medium, and High. However, depending on the selected cycle, some of these options will be disabled.
Time
Tap this option to change the currently selected time setting. The available time settings are Automatic, 20 min, 30 min, 40 min, 50 min, and 60 min. The Time option cannot be changed in the Sensor Dry cycles and Steam cycles. You can set the Time option in the Manual Dry cycles only.
Extras
Tap this option to add extra cycles to or remove extra cycles from the selected cycle. The available extra cycles are Rack dry, Wrinkle prevent, and Mixed load bell. However, depending on the selected cycle, some of these extra cycles will be disabled. Tap each enabled extra cycle to add it to or remove it from the selected cycle.
| Rack Dry - Rack Dry is available in the Time Dry cycle. the temperature is only set to Extra Low.RACK DRY is for items, such as washable sweaters and lingerie that should dry fl at and and also can be used with items such as stuff ed toys that should not be tumbled. | |
| Wrinkle prevent - Wrinkle Prevent provides approximately 180 minutes of intermittent tumbling in unheated air at the end of the cycle to reduce wrinkling. The load is dry, and can be removed at any time during the Wrinkle Prevent cycle. | |
| Mixed load bell - The mixed load bell that notifi es you when the average dry level in a load is damp dry (80 % dried).This lets you take garments that you don’t want fully dried or that dry quickly out of the dryer early while letting others continue to dry. You can select this function in all Sensor Dry cycles except Wool, Sanitize, and Active Wear. The dry level selections are limited to Normal Dry, More Dry, and Very Dry. |
Drying a load of laundry
Available actions
You can carry out additional actions and view and configure other settings using the controls provided in the Actions section of the Cycle Selection screen. There are six controls, Smart Control, Save as My Cycles, Delay Start, Child Lock, Light, and Settings.
Smart Control (Elec. Model Only)
Tap this control to turn the Smart Control function on or off. When this function is turned on, you can control the dryer using your mobile phone.
Turning the Smart Control function on changes the icon from 📞 to 🌐
Any action you perform on your dryer will turn off the Smart Control Function. (Opening the door, tapping the LCD panel, pushing buttons, etc.)
Smart Monitor (Gas Model Only)
Tap this control to turn the Smart Monitor function on or off. When this function is turned on, you can monitor the drying process and be notified when the cycle is complete.
Turning the Smart Monitor function on changes the icon from 📄 to .
Save as My Cycles
Tap this control (💡) to save the currently selected cycle and its options as a My Cycle. Save your favorite cycle including the drying level, temperature, time, and extras options. You can save up to 3 My Cycles.
For more information, refer to the "Using the My Cycle function" section on page 38.
Delay Start
Tap this control to delay the start of the selected cycle by setting a specific start time. If the dryer recognizes that the Smart Grid is available, the options for turning variable energy use on or off
are accessible. When the Delay Start function is turned on, the icon changes from ⏻ to ⏻ For more information, refer to the "Using the Delay Start function" section on page 39.
Child Lock
Activate and deactivate the Child Lock function using this control.
- Tap this control to activate the deactivated Child Lock function ( ☐).
- Hold down this control for 6 seconds to deactivate the activated Child Lock function ( ). For detailed information on the Child Lock function, refer to "Using the Child Lock function" section on page 40.
34_ Drying a load of laundry
Light
Tap this control to turn the light inside the drum on or off.
Turning the light on changes the icon from 🔒 to 🔒 For more information, refer to the "Turning the Light On/Off" section on page 41.
Settings
Tap this control (💡) to navigate to the Settings screen where you can configure the dryer according to your preferences.
The Settings screen provides the following options:
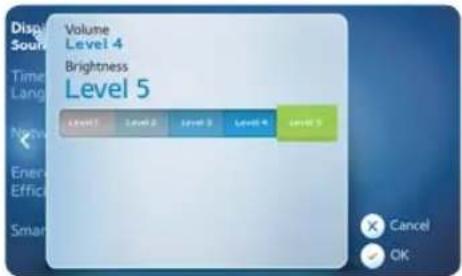
| Display & Sound Tap this control to change the LCD brightness level and sound volume of the dryer. The LCD brightness has 5 levels from Level 1 to Level 5. The sound volume has 5 levels from Mute to Level 4.For more information, refer to the “Controlling the sound volume” section on page 41 and the “Controlling the brightness level” section on page 42. | |
| Time & Language Tap this control to change the current date and time of the dryer and the LCD language. | |
| Network | Tap this control to configure your Wi-Fi network, turn it on or off, view the health of your Wi-Fi network connectivity and/or update the networking software. After your Wi-Fi network is configured, while it is turned on and its status is good, you can control some functions of your dryer using your mobile phone. If the Samsung Smart Washer/Dryer App is installed on the phone. |
| Open Source License Notice | This device uses open source software. Open Source Licenses are available in the product menu.Tab “Settings > Network > Software Update > Legal Information” on the device for more details. |
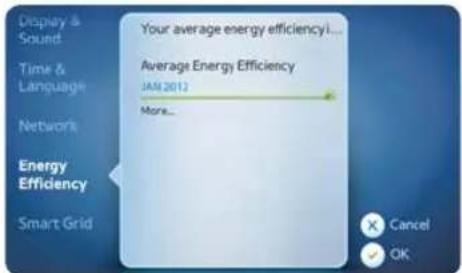
| Energy Efficiency | Tap this control to view the current average energy efficiency of your dryer, which is determined by your energy usage.For more information, refer to the “Viewing the Energy Efficiency” section on page 42. |
| Smart Grid Tap this control to control and save energy and money by adjusting the smart grid settings.For more information, refer to the “Using the Smart Grid” section on page 43. | |
Drying a load of laundry
DRYING YOUR LAUNDRY USING THE CYCLE SELECTION SCREEN
Loading the dryer properly
- Place only one load in your dryer at a time.
- Mixed loads of heavy and lightweight fabrics will dry differently, which may result in lightweight fabrics being dry while heavy fabrics remaining damp at the end of a drying cycle.
- Add one or more similar items to your dryer when only one or two articles of clothing need drying. This improves the tumbling action and drying efficiency.
• Overloading restricts the tumbling action, resulting in uneven drying as well as excessive wrinkling of some fabrics.

Overloading may cause the dryer door to open while drying.
Drying your laundry using the Cycle Selection screen
- Load your dryer loosely - DO NOT overload.
- Close the door.
-
Press the Power button.
-
In the Cycle Selection screen, select the appropriate cycle: Eco Normal, Normal, Heavy Duty, Perm Press, Delicates, Active Wear, Bedding PLUS, Sanitize, Wool, Time Dry, Quick Dry, Air Fluff, Refresh and Wrinkle Away. Select the cycle according to the kind of laundry items you intend to dry.
- Scroll down or up the Cycle pane and tap a cycle.
- The Option pane shows a description of the selected cycle and the options of the currently selected cycle.
![[Sensor Dry] The Normal cycle is Dry Level Normal Temperature High Time Automatic Extras Perm Press Estimated Time 42 Min Smart Control Save As My Cycles Display Start Child Lock Light Settings](/content/2026/06/1284364/images/9ebb767ee8bc4781bf4dc3cbd7cf77323705c35e2ac1341e955319d578e1fdc4.jpg)
Drying a load of laundry
- Tap the appropriate option button to control the drying level, temperature, time, and extras. Depending on each cycle group or cycle, some of the options can be disabled.
- The Dry level option cannot be changed in the Manual Dry cycles and Steam cycles. When you tap the Dry level option, the Dry level buttons appear as disabled.
- The Time option cannot be changed in the Sensor Dry cycles and the only Refresh of Steam cycles. It is automatically set to Automatic in both cycle groups. When you tap the Time option, the time buttons are disabled. See the figure above, right.
- You can set the Time option in Manual Dry cycles (Air Fluff, Quick Dry, and Time Dry) only. Tap a pre-existing time button or tap the up / down arrows to change the time from the automatically set times in the Manual Dry cycles.
- The Extras settings can only be turned On or Off.
![[Sensor Dry]The Normal cycle is Dry Level Normal Temperature High Time Automatic Extra Estimated Time 42 Min Smart Control Save All My Cycles Delay start Child Lock Light Settings](/content/2026/06/1284364/images/6ca37d33ac1e026128ffe8ef40de254e2e2de65a69227f61e4151afc914ea1ad.jpg)

Tap the left arrow (◀) if you want to return to the Cycle pane and select a different cycle.
- Press the Start/Pause button to start the load. The Cycle Status screen is displayed on the LCD panel.

Press the Power button to cancel the cycle and turn off your dryer.

Do not place anything on top of your dryer while it is running.

When the cycle is fi nished:
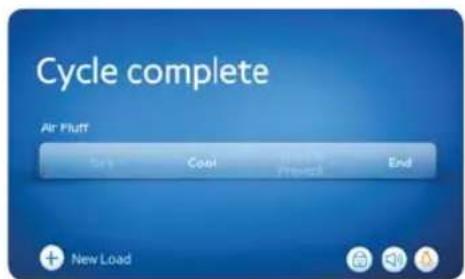
After the total cycle has finished, the Cycle complete screen is displayed. It shows the cycle name and a summary review of its phases, and allows you to start a new load.
- Open the door.
- Remove the laundry.
Drying a load of laundry _37

Drying a load of laundry
Using the My Cycle function
The My Cycle function allows you to activate your custom drying settings (drying level, temperature, time and extras) with one button convenience. You can save up to 3 My Cycles.
Saving a My Cycle
Follow the steps below to save your favourite custom dry cycle as a My Cycle.
-
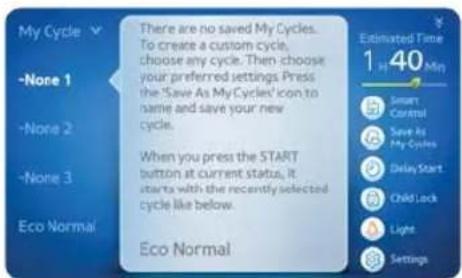
We will assume that there is no saved My Cycle. In this case, when you tap the My Cycle button in the Cycle Selection screen, it will expand and show a list of 3 None buttons (None1 to None3), as shown in the right figure.
-
Select a cycle and its options, such as drying level, temperature, time, and extras, in the Cycle Selection screen.
Refer to the "Cycle chart" section on page 65 for available option settings with the each cycle.
-
Tap the Save As My Cycles button located at the right center of the Cycle Selection screen.
-
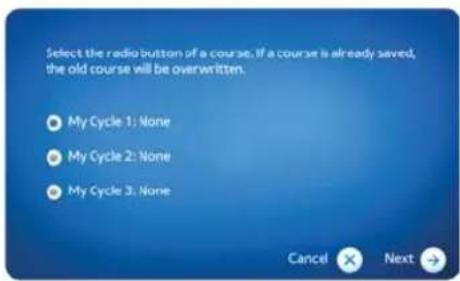
Select the My Cycle you want to overwrite with the selected cycle and its options. In this example, select My Cycle 1: None. Then tap the Next button.
-
The Save as new name screen is displayed. Enter the name you want to give the My Cycle. In this example, enter "J's Wash". Then tap the Save button.
-
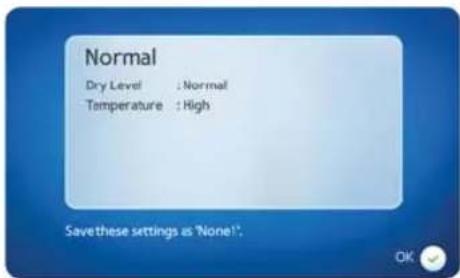
A summary of the My Cycle that will overwrite the existing one (None1 in this example) is displayed, as shown in the figure right. Tap the OK button.
-
The My Cycle "None1" is changed to "J's Wash" in the My Cycle list of the Cycle Selection screen.
![[Sensor Dry] The Normal cycle is Dry Level Normal Temperature High Time Automatic Extra Estimated Time 42 Min -PS Wash -None 2 -None 3 Eco Normal](/content/2026/06/1284364/images/10f0615b4ebf00bdb432b1dbc2bb27e955dbf09b5f573a68365840a973a91aa2.jpg)
38_Drying a load of laundry
Starting a My Cycle
Follow the steps below to start a My Cycle to dry your laundry.
- Tap the My Cycle button in the Cycle Selection screen. It will expand and show a list of 3 My Cycle buttons.
- Tap the desired My Cycle button.
- Press the Start/Pause button to start the load.
Using the Delay Start function
By activating the Delay Start function, you can set your dryer to start a load automatically at a later specific time.
Activating
Follow the steps below to activate the Delay Start function.
-
Tap the Delay Start Off (💡) button located at the bottom right of the Cycle Selection screen. The Delay Start screen is displayed.
-
Tap the up / down arrows to set the time.

- If the Smart Grid function is available, you can allow your dryer to find the most energy efficient time (also called the most eco-friendly time) to run your load within the range around the time you set.
- Press the Start/Pause button to activate the Delay Start function with the options you set. Tap the Cancel button to cancel the function.
- You will be returned to the Cycle Selection screen.
You will see that the Delay Start OFF (💡) button is changed to the Delay Start ON (💡) button.
Deactivating
Follow the steps below to deactivate the Delay Start function.
- Tap the Delay Start ON button located at the bottom right of the Cycle Selection screen.
The Delay Start function is deactivated and the button changes to the Delay Start OFF (💡) button.
Drying a load of laundry _39
Drying a load of laundry
Using the Child Lock function
The Child Lock function allows you to lock the buttons so that the dry cycle you've chosen can't be changed.

Child Lock is a function to prevent children or the infi rm from accidentally operating the dryer and injuring themselves.

If a child enters the dryer, the child may become trapped and suff ocate.

Although the Child Lock function is activated, you must keep an eye on children so that they do not operate your dryer.
Activating
Follow the steps below to activate the Child Lock function.
- Hold down The Child Lock button (☐) for 3 seconds. Then, The Child Lock Function is activated with pop-up "Child Lock ON", and the button changes from (☐) to (☐).
Deactivating
Follow the steps below to deactivate the Child Lock function.
- Hold down The Child Lock button ( ☐) for 3 seconds. The Child Lock Function is deactivated with pop-up "Child Lock Off ", and the button changes from ( ☐) to ( ☐).

When the Child Lock function is activated, only the Child Lock button works. The Child Lock function remains on even after you turn the power off and back on or disconnect and then reconnect the power cord.

To add laundry when the Child Lock function is activated, you have to first pause or deactivate the Child Lock function.

When the Child Lock function is activated, the screen does not change visually (no dimming or greying out). If you tap a button or any part of the screen, a tooltip reminder that the Child Lock function is turned on is displayed.
Turning the Light On/Off
You can turn the light on/off at any time.
Turning on
Tap the Light OFF (💡) button located at the bottom right of the Cycle Selection or Cycle Status screen.
The light is turned on immediately and the button changes to the Light ON ( ) button.
Turning off
Tap the Light ON (💡) button. The light is turned off immediately and the button changes to the Light OFF (💡) button.
Controlling the sound volume
You can control the volume of the sound interactions of your dryer. There are 5 volume levels from Mute to Level 4. Even if the power is turned on and off repeatedly, the setting is retained. Follow the steps below to control the volume level.
- Tap the Settings button in the Cycle Selection screen.
- Tap the Display & Sound button in the Settings screen.

- Tap the Volume section.
- Tap the desired volume level button.
- Tap the OK button to apply the changes.

Drying a load of laundry _41
Drying a load of laundry
Controlling the brightness level
You can control the brightness level of the LCD panel. There are 5 brightness levels from Level 1 to Level 5. Even if the power is turned on and off repeatedly, the setting is retained. Follow the steps below to control the volume level.
- Tap the Settings button in the Cycle Selection screen.
- Tap the Display & Sound button in the Settings screen.

- Tap the Brightness section.
- Tap the desired brightness level button.
- Tap the OK button to apply the changes.
Viewing the Energy Efficiency
You can view the overall energy efficiency of your drying operations or behavior. The energy efficiency is determined based on energy usage. Follow the steps below to view the overall energy efficiency.
- Tap the Settings button in the Cycle Selection screen.
- Tap the Energy Efficiency button in the Settings screen.
- Tap the More... button to view the average energy use for the last 12 months.
- Tap the OK or Cancel button to return to the Settings screen.
42_Drying a load of laundry
Using the Smart Grid
You can control your energy use and save energy and money using the Smart Grid function.
You can view the current energy use level of your neighborhood in the Smart Grid State section of the Smart Grid screen. There are 5 Smart Grid energy use states or levels from Level 0 to Level 4. The higher the level, the closer your neighborhood is to a blackout.
You can also view and change the Override Time. The Override Time is the amount of time that
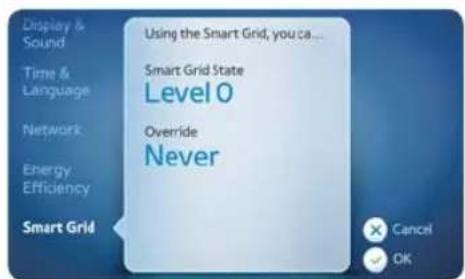
your Dryer will ignore Smart Grid signals to temporarily curtail energy use and continue to use a full complement of energy. This lets you override Smart Grid signals to cut energy use if, for example, you need to dry a load of wash right away.
When the Smart Grid is available for your neighborhood, the Description, Smart Grid State and Override sections are displayed in the Smart Grid screen.
Viewing your neighborhood's current energy level
Follow the steps below to view our neighborhood's current energy level on the smart grid.
- Tap the Settings button at the bottom right of the Cycle Selection screen. The Settings screen is displayed.
- Tap the Smart Grid button in the Settings screen.
- Tap the Smart grid state section to view detailed information on the current energy level.
- Tap the OK or Cancel button to return to the Settings screen.
Drying a load of laundry
Viewing and changing the Override Time
Follow the steps below to view and change the override time.
- Tap the Settings button at the bottom right of the Cycle Selection screen.
- The Settings screen is displayed.
- Tap the Smart Grid button in the Settings screen.
- Tap the Override section.
- Tap the desired override time.
- Tap the OK button to apply the changes.
- You are returned to the Settings screen.
- When the Smart Grid is unavailable for your neighborhood, the description in the figure, right is displayed in the Smart Grid screen.


- When the Smart Grid function is unavailable because of a problem with your power utility, the description as shown in the fi gure right is displayed in the Smart Grid screen.
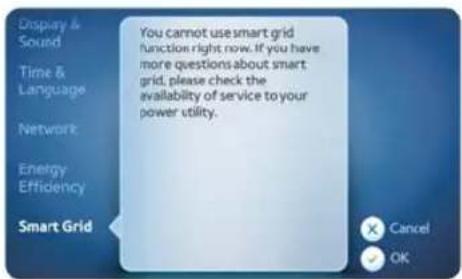
44_ Drying a load of laundry
USING THE RACK DRY
- Open the dryer door.
- Position the drying rack in the tumbler, placing the front lip of the drying rack on the top of the lint filter.
- Place the rear legs in the two recessed areas of the dryer's back wall and push the middle of the drying rack down to fix it in place.
-
Place the items to be dried on the rack, leaving space between them so air can circulate.
-
Close the dryer door.
-
Tap the Time Dry button in the Cycle pane of the Cycle Selection screen. Note that the Rack Dry option is only available in the Time Dry cycle.
-
Tap the Extras section in the Option pane.
-
Tap the Rack Dry button in the Extras section.
-
Select the time according to the moisture and weight of the item.
-
Tap the OK button to apply the changes.
-
Press the Start/Pause button to start drying.
![[Manual Dry] The Time Dry cycle allows you t... Dry Level Off Temperature High Time 40 min Extras Rock Dry Wrinkle Prevent Air Flow Mixed Load Bell Est. Finish time 40 Min Smart Control Save As My Cycles Delay start Child Lock Light Settings](/content/2026/06/1284364/images/13f1309196caa7a6566a1f3f4019a0d1d19679a63092c6ead2d2f46bfad35ea9.jpg)

To dry items made from materials that are vulnerable to heat such as foam rubber, plastic and rubber, use the Air Fluff cycle. If you dry these kinds of items by applying heat, the product may be damaged or a fire may occur as a result.

Never use the drying rack with any cycle other than the Rack Dry cycle.
CHECKING THE FILTER
Checking the fi Iter
The fi liter check notification pops up before the cycle you've set begins, reminding you to check the dryer's fi liter.

Cleaning the fi Iter
Clean the filter to shorten drying time and operate the dryer with greater energy efficiency.

Do not operate your dryer without the filter in place.
Drying a load of laundry
Drying a load of laundry
VENT SENSOR
Your Samsung dryer is equipped with a Vent Sensor, which detects and notifies you when it is time to clean the ductwork. Keep your dryer safe and efficient by cleaning the ducts when prompted.
The Vent Sensor detects any duct blockages
You can figure out whether there is a duct blockage from the message below the process bar.
| Level Message Status Solution | |||
| 0 No message The ductwork is free from blockages. | - | ||
| 1 Check for vent blockage after cycle completes. | When a part of the duct or the lint fi liter is blocked by lint or a foreign object. When the resistance is high because the duct is too long or bent. | Check the duct connection, shorten the duct, or straighten it if necessary.Check the lint fi ter or the duct and clean it if necessary. | |
| 2 Vent is blocked.Do not continue without checking vent. ^1 | When the duct is blocked by lint or a foreign object. When the resistance is very high because the duct is too long or bent excessively. | Check the duct connection, shorten the duct, or straighten it if necessary.Check the lint fi liter or the duct and clean it as soon as possible. | |
^1) In the LEVEL 2 state, this message is displayed for 3 hours after the completion of the cycle. (If the wrinkle prevention function is activated, this message is displayed for up to 3 hours.) If the power button is pressed or the door is opened, the power is immediately turned off.

For more information about the duct installation, please refer to the “Ducting requirements” section on page 14.
- Although the dryer is available even if the blockage message is displayed, the drying time may be extended.
- If the LEVEL 1 message is displayed the first time the dryer is run after installation, check the connection and clean the duct. If the LEVEL 1 message appears even after you have checked and cleaned the ducts, this may indicate that there are some restrictions of the duct due to the length, condition, etc.. If this occurs, you can use the dryer normally and no countermeasures need to be taken. However, the drying time may be extended or the drying performance may be degraded
Using your mobile phone
You can receive notifications and control your dryer from your mobile phone. To do this, you need to do the following.
- Setup a Wi-Fi network for your dryer
- Turn on the Wi-Fi networking function of your dryer
- Download and run the mobile app, Samsung Smart Washer/Dryer App
- Use the mobile app, Samsung Smart Washer/Dryer App

No wired or wireless router (AP) is provided when you purchase your washer. The washer supports the Wi-Fi encryption protocols, WEP, TKIP and TKIP AES. It does not support connecting to a wired or wireless router (AP) that uses a Wi-Fi encryption protocol other than these.

- If a wireless router (or Access Point) is not WPS authenticated, a connection failure might occur.
- If a wireless router that is not WPS authenticated is connected wirelessly to an air conditioner, the Wi-Fi connections of other previously connected units might be disconnected.
- If this appliance is installed in a building where no wireless router (AP) is installed for that floor, the network connectivity may be degraded.
- If this appliance is installed in a location such as inside a utility closet made from metal or reinforced concrete, the network connectivity may be degraded.
- If this appliance or the wireless router (AP) is installed near a microwave or drier, the network connectivity may be degraded due to interference.

- If the wireless router (AP) is a non-certified product, this appliance may not connect to the network.
• This appliance does not support the wireless networking protocols 802.11n and 802.11a.

This product does not contain a wireless router.
CONFIGURING YOUR DRYER'S NETWORK SETTINGS AND CONNECTING TO YOUR NETWORK
To configure your washer's Wi-Fi settings and connect your washer to your network, follow the procedures below.
Configuring the IP address settings
Follow the procedure below to configure the IP address settings of your dryer for a Wi-Fi network.
- Tap the Settings button in the Cycle Selection screen.
- Tap the Network menu in the Settings screen.
- Tap the Wi-Fi network section.
- Tap the Configure button.
- Tap the IP Address button next to the network you want to configure.
- Tap the Automatic button to make your dryer confi gure the IP address settings automatically. Then proceed to step 11.
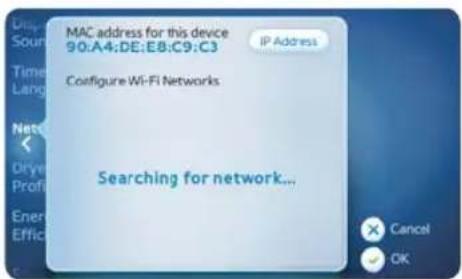
- Tap the User Config button to configure the IP address settings manually.
- Tap the IP address fi eld.
- Enter an IP address and then tap the OK button.
- Repeat steps 8 and 9 for the Subnet mask, Gateway, and DNS fields.
- Tap the OK button in the Settings screen.
Using your mobile phone
Using your mobile phone
Connecting your dryer to the network
Follow the procedure below to connect your dryer to a Wi-Fi network.
-
Tap the Settings button in the Cycle Selection screen.
-
Tap the Network menu in the Settings screen.
-
Tap the Wi-Fi network section.
-
Tap the Configure button.
-
Tap the name of the network to which you want to connect your dryer.
-
Enter your network password and then tap the OK button.
-
The dryer searches for the network. The Connect to Wi-Fi screen is displayed to show the search progress.
-
If the network is found, the "Connection has been successfully established" message is displayed for 1 second. Then you are returned to the Network List screen. A check mark appears to the left of
-
If the network is not found, the message "Connection failed" is displayed.
Tap the Retry button to reattempt the connection.
Tap the Cancel or OK button to return to the Network List screen
TURNING ON THE WI-FI NETWORKING FUNCTION OF YOUR DRYER
Follow the procedure below to turn on the Wi-Fi networking function of your dryer.
-
Tap the Settings button in the Cycle Selection screen.
-
Tap the Network menu in the Settings screen.
-
Tap the Wi-Fi status section.
-
Tap the On button.
-
Tap the left arrow ( < ) button to return to the Settings screen.

48_ Using your mobile phone
HOW TO UPDATE THE SOFTWARE
- When a user tries to check if updates are available, the function is executed by selecting the update function.
• This function does not work in the normal state. - If a user runs the update function, the LCD shows the update progress bar and announces that the product will be restarted when the update is completed.
- If the power cord of the product is unplugged, the AP power is cut, the download fails or the user presses the Cancel button while the update fi le is being downloaded, the fi le is discarded. The version prior to the update is maintained.
- If the download progress of the update fi le does not change for 10 minutes, a connection error message is displayed. When a user runs the update function, and the fi le is already up-to-date (if the FIRMWARE CODE is the same), a message stating this is displayed.

flowchart
graph LR
    A["My Cycle"] --> B{Sensor Dry? The Normal cycle is}
    B --> C["Dry Level"]
    C --> D["Normal"]
    D --> E["Temperature"]
    E --> F["High"]
    F --> G["Time"]
    G --> H["Automatic"]
    H --> I["Extra"]
    I --> J["Green Box"]
    J --> K["Estimated Time 42 Min"]
    K --> L["Smart Control"]
    L --> M["Save As"]
    M --> N["My Cycles"]
    N --> O["Delay Start"]
    O --> P["Child Lock"]
    P --> Q["Light"]
    Q --> R["Display & Sound"]
    R --> S["Volume Level 4"]
    R --> T["Brightness Level 5"]
    T --> U["Energy Efficiency"]
    U --> V["Smart Grid"]
    V --> W["Cancel"]
    V --> X["OK"]

Using your mobile phone
DOWNLOADING AND RUNNING THE MOBILE APP, SAMSUNG SMART WASHER/DRYER APP
Follow the procedure below to download and run the mobile app, Samsung Smart Washer/Dryer App.
-
Download the Samsung Smart Washer/Dryer App into your mobile phone from the Android market. You can skip this step if the app has been already downloaded into your mobile phone.
-
Tap the Samsung Smart Washer/Dryer App icon on your mobile phone to run the app. The initial screen is displayed.

- The Home screen is displayed. It shows that your mobile phone is not yet connected to your dryer.
- Tap the Indoor control or Outdoor control button.

50_ Using your mobile phone
- Tap the Search button. The Samsung Smart Washer/Dryer App searches for your dryer through your Wi-Fi network.
- The Devices screen is displayed. A list of available dryers is shown on the screen. The device name that appears in the list is the name you gave the dryer when you set up its profile.
- The progress screen is displayed while the Samsung Smart Washer/Dryer App tries to connect to your dryer.

Connecting may take a minute or two.

USING THE MOBILE APP
After you dryer has been connected, you can perform the following operations using the Samsung Smart Washer/Dryer App.
- Disconnect the connection
- Start a new dry (including receiving notifications and controlling your dryer)
Disconnecting the connection
Follow the procedure below to disconnect the connection to your dryer.
- Tap the Disconnect button.

Using your mobile phone _51

Using your mobile phone
Starting a new load
Follow the procedure below to start a new dry from your mobile app.
- Tap the Start New Load button.
The Choose cycle screen is displayed.

In your dryer, you must tap the Smart Control button to turn on the Smart Control function.
- Select the cycle you want, and then tap the Start button.

- The cycle status including cycle progress and estimated finish time are shown on the screen.
Tap the Pause button to pause the cycle.

52_ Using your mobile phone
- When the cycle is completed, the message "Cycle complete" and a summary review of all the phases are shown.
- Tap the Dismiss button to return to the Home screen.

Registering your dryer
- Access Samsung Smart appliance website.
(http://www.samsungsmartappliance.com)
- Enter the User ID and Password to log in.

If you don't have an account, press "Create a Samsung account" and fill in the form to become a member.
-
Select "My page" → "My page".
-
Select "Add device".


Using your mobile phone
Using your mobile phone
- After entering the MAC written from following instruction.
1) Tap "Settings" on Home.
2) Tap "Network".
3) Tap "Wi-Fi Network".
4) Tap "Confi gure".
5) Check 12 digit below "mac address for the device".
-
Click the "Certify device".
-
Tap the Smart Control Button.
- When certify device checking window comes on, click the "Ok".

If the dryer you are registering is already registered by other users, a window will come on asking whether you want to delete the usage authority of the existing users, or not.
- After the registration of the dryer is completed, you can check the registered dryer on the device information list.


54_ Using your mobile phone
OVERVIEW FOR WI-FI SETTINGS AND AP CONNECTION
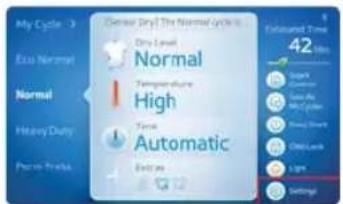
The first screen after booting up The first screen after entering the setup

e fi rst screen after entering the setup
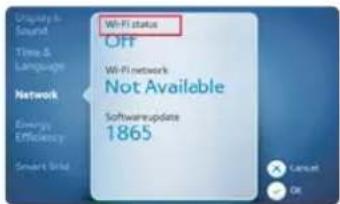
Select this to turn the Wi-Fi on


Select ON Select this to select the AP Select this to search for the AP

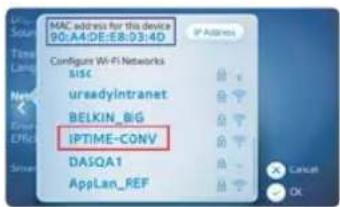
Searching for APs Select an AP

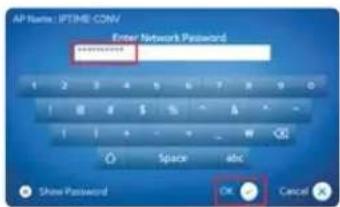
Enter the password for the AP and select OK


Connecting to the AP When the connection with the

AP is established, √ is displayed

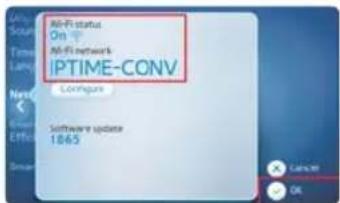
The connection status information is displayed
Move to the Home screen Home screen
The Wi-Fi connection status information is displayed at the top right of the Home screen as an icon.
Using your mobile phone _55
Care and cleaning
CONTROL PANEL
Clean with a soft, damp cloth. Do not use abrasive substances.
Do not spray cleaner directly onto the panel.
The control panel fi nish may be damaged by some laundry pre-treatment soil and stain remover products.
Apply such products away from your dryer and wipe up any spills or overspray immediately.
TUMBLER
Remove any stains from the tumbler caused by crayon, ink, fabric dye (from new items such as towels or jeans) and so on with an all-purpose cleaner.
Tumble old towels or rags to remove any remaining stain or cleaning substance.
Once these steps are followed, stains may still be visible, but should not transfer to subsequent loads.
STAINLESS STEEL TUMBLER
To clean the stainless steel tumbler, use a damp cloth with a mild, non-abrasive cleaner suitable for stainless steel surfaces.
Remove the cleaner residue and dry with a clean cloth.
DRYER EXTERIOR
Clean with a soft, damp cloth. Do not use abrasive substances.
Protect the surface from sharp objects.
Do not place any heavy or sharp objects or a detergent box on the dryer. Keep them on the purchased pedestal or in a separate storage box. This may scratch or damage the top cover of the dryer.
Since the entire dryer has a high-gloss finish, the surface can be scratched or damaged.
Therefore, avoid scratching or damaging the surface when using the dryer.
DRYER EXHAUST SYSTEM
Should be inspected and cleaned yearly to maintain the optimum performance.
The outside exhaust hood should be cleaned more frequently to ensure proper operation.
56_Care and cleaning
Special laundry tips
SPECIAL LAUNDRY TIPS
Please follow the care label or manufacturer's instructions for drying special items. If the care label instructions are not available, use the following information as a guide.
| Bedspreads & Comforters • Follow the care label instructions or dry on the bedding.Make sure the item is thoroughly dry before using or storing it.May require repositioning to ensure that it dries evenly. | |
| Blankets • Use the Normal cycle and dry only one blanket at a time for best tumbling action.Make sure the item is thoroughly dry before using or storing it. | |
| Curtains & Draperies • Use the Perm Press cycle and the Low or Extra Low temperature to help minimize wrinkling.Dry these in small loads for best results and remove as soon as possible. | |
| Cloth Diapers • Use the Normal cycle and the High temperature settings for soft, fluffy diapers. | |
| Down-fi lled Items(jackets, sleeping bags, comforters, etc.) | • Use the Normal cycle and the Low or Extra Low temperature setting.Adding a couple of dry towels shortens the drying time and absorbs moisture. |
| Foam Rubber(rug backs, stuff ed toys, shoulder pads, etc.) | • DO NOT dry on a heat setting. Use the Air Fluff cycle (no heat).WARNING - Drying a rubber item with heat may damage it or become a fi re hazard. |
| Pillows • Use the Normal cycle. | • Add a couple of dry towels and a pair of clean sneakers to help the tumbling action and to fl uff the item.DO NOT heat dry kapok or foam pillows in the dryer. Use the Air Fluff cycle only. |
| Plastics(shower curtains, outdoor furniture covers, etc.) | • Use the Air Fluff cycle or the Time Dry cycle and the Low or Extra Low temperature settings depending on the care label instructions. |
THINGS TO AVOID PUTTING IN THE DRYER:
- Fiberglass items (curtains, draperies, etc.).
- Woolens, unless recommended on the label.
• Vegetable or cooking oil-soaked items.
Special laundry tips _57
Troubleshooting
CHECK THESE POINTS IF YOUR DRYER...
| PROBLEM SOLUTION | |
| Doesn't run. • Make sure the door is properly latched. Be sure the power cord is plugged into a live electrical outlet. Check the home's circuit breaker and fuses. Press the Start/Pause button again if the door is opened during the cycle. | |
| Doesn't heat. • Check your home's circuit breaker and fuses. Select a heat setting other than Air Fluff . On a gas dryer, check that the gas supply is on. Clean the lint filter and exhaust duct. The dryer may have moved into the cool-down phase of the cycle. | |
| Doesn't dry. • Check all of the above, plus... Be sure the exhaust hood outside the home can open and close freely. Check the exhaust system for lint buildup. The ducting should be inspected and cleaned annually. Use a 4" rigid metal exhaust duct. Do not overload. 1 wash load = 1 dryer load. Sort heavy items from lightweight items. Large, bulky items such as blankets or comforters may require repositioning to ensure that they dry evenly. Check that the washer is draining properly to extract adequate water from the load. The load may be too small to tumble properly. Add a few towels. | |
| Is noisy. • Check the load for objects such as coins, loose buttons, nails, etc. Remove immediately. It is normal to hear the dryer gas valve or heating element cycle on and off during the drying cycle. Be sure the dryer is properly level as outlined in the installation instruction. It is normal for the dryer to hum due to the high velocity of air moving through the dryer drum and exhaust system. | |
| Dries unevenly. • Seams, pockets, and other similarly heavy areas may not be completely dry when the rest of the load has reached the selected dryness level. This is normal. Select the Very Dry setting if necessary. If one heavy item is dried with a lightweight load, such as one towel with several sheets, it is possible that the heavy item will not be completely dry when the rest of the load has reached the selected dryness level. Sort heavy items from lightweight items for best drying results. | |
| Has an odor. • Household odors from painting, varnishing, strong cleaners, etc. may enter the dryer with the surrounding room air. This is normal as the dryer draws the air from the room, heats it, pulls it through the tumbler, and exhausts it outside. When these odors linger in the air, ventilate the room completely before using the dryer. | |
58\_ Troubleshooting
| PROBLEM SOLUTION | |
| Shuts off before the load is dry | The dryer load is too small. Add more items or a few towels and restart the cycle.The dryer load is too large. Remove some items and restart the dryer. |
| Lint on clothesMake sure the lint fi lter is cleaned before every load. With some loads that produce high amounts of lint, it may be necessary to clean the fi lter during the cycle.Some fabrics are lint producers (for example, a fuzzy white cotton towel) and they should be dried separately from clothes that are lint trappers(for example, a pair of black linen pants).Divide larger loads into smaller loads for drying.Check pockets thoroughly before washing and drying clothes. | |
| Garments still wrinkled after Wrinkle-Care | Small loads of 1 to 4 items work best.Load fewer garments.Load similar-type garments. |
| Odors remain in clothing after Refresh. | Fabrics having strong odors should be washed in a normal cycle. |
| Water drips from the nozzle when Steam-Care starts | This is steam condensation. The dripping water will stop after a short time. |
| Sprayed water is not visible during Steam-Care | Sprayed water is difficult to see when the door is closed. |
INFORMATION CODES
Samsung's Smart Care, an automatic error-monitoring system, detects and diagnoses problems at an early stage and provides a quick and easy solution through LCD navigation.
When your dryer has a problem, the notification screen will show the information and solution to help you better understand what is occurring with your dryer and how to solve the problem.
![Error Code: dE Running the dryer with the solar oven Close the door and restart. If the problem continue call customized service. [Service Center Callumber] USA - 1-800-726-7844 Canada 1-800-726-7844 Mexico - 01-800-726-7844 Pacama: 805-1323 Columbus: 01-8000-112-112 Brazil: 55-11-4004-0000](/content/2026/06/1284364/images/f17b5903661f173b56ee7aea269c51202228bb62b543618a902d789d4715a9fb.jpg)
Information codes may be displayed to help you better understand what is occurring with your Dryer.
| ERROR DISPLAY TRIGGER ACTION TAKEN | ||
| tE | The thermistor resistance is very low or high. | Clean the screen or vent.If the problem continues, call for service. |
| tE3 | The resistance of the thermistor for the vent blockage detection is very low or very high. | Clean the screen or ventIf the problem continues, call for service. |
| HE | Invalid heating Temp in running the dryer | Call for service. |
| dE Running | the dryer with door open | Clean the door and then restart.If the problem continues, call for service. |
Troubleshooting
Troubleshooting
| ERROR DISPLAY | TRIGGER ACTION TAKEN | |
| dF | Invalid door state for more than 256 milliseconds. | Call for service. |
| bE2 | Invalid state of key circuit short for 30 secs | Make sure a button is NOT being pressed continuously. Try restarting the cycle.If the problem continue, call for service. |
| FE Invalid power source Frequency | Try restarting the cycle.If the problem continues, call for service. | |
| 2E | Electronic Control Problem (Over Voltage Error) | Call for service. |
| AE | Electronic Control Problem (Communication Error) | Call for service. |
| Et | Invalid state of Eeprom communication | Call for service. |
| AE4 | A communication error between the Wi-Fi PBA and the MAIN PBA | Call customer service. |
| AE3 | A A communication error between the DR Modem and the MAIN PBA | Call customer service. |
| AE5 | A A communication error between the LCD PBA and the MAIN PBA | Call customer service. |
For any codes not listed above, call 1-800-726-7864 (1-800-SAMSUNG)
60_ Troubleshooting
NETWORK SETUP Q&A
| QUESTION ANSWER | |
| The washer or dryer is not found in the smartphone app. | Check the power status of the AP.Check if the smartphone is connected with Wi-Fi.Check if the Wi-Fi function of the washer or dryer is turned on.To refresh the screen, press “Confi gure” again.If the AP is installed too far away from the washer or dryer, the strength of the Wi-Fi signal may weak. In this case, move the AP closer to the washer or dryer. |
| The AP is not found on the washer or dryer. | Check the power status of the AP.Check if the Wi-Fi function of the washer or dryer is turned on.To refresh the screen, press “Confi gure” again.If the AP is installed too far away from the washer or dryer, the strength of the Wi-Fi signal may weak. In this case, move the AP closer to the washer or dryer. Ensure that the number of the displayed antenna bars are at least 3.Since if the performance of the AP is low, it may not be found by the washer or dryer, use high performance AP if available. |
| There are more than one washer or dryer in the house.Do I have to install an AP for each of them? | You can install only one AP.I you want to one AP for each of the washer and dryer, select the corresponding AP for each of the products in the “Smart Washer” app.When both washer and dryer are installed, they can be controlled through one AP. |
| Which AP is better? • Since the washer or dryer is controlled through the AP from the inside or outside of the house, high performance AP is recommended.Use an AP with Wi-Fi certifi cation mark.Since an AP with 2 or more antennas provides better performance, purchase and use the AP. | |
| How can I check if the AP is out of order? | Connect to the AP on a smartphone and check if you can connect to the Internet. If you can connect to the Internet, the AP is normal.Check if the LED of the AP is blinking. If all the LEDs are turned off, it indicates that the power is turned off.If the AP doesn’t seem to be working properly, request after-sales service. |
| The customer does not have a PC. Can the customer can use the indoor and outdoor control feature? | If the Internet can be accessed inside of the house, the feature is available. However, you have to sign up the web site and register the product. |
| How many users can control a washer or dryer? | Only if the “Smart Washer” app is authenticated, multiple users can control the washer or dryer. |
Troubleshooting _61
Troubleshooting
| QUESTION ANSWER | |
| Where are the proper place to install a washer or dryer? | Since a washer or dryer is heavy and connected with water, it should be installed in the proper place. Installing the AP near the washer or dryer is recommended. You can check the signal strength through the setup screen of the washer or dryer or a smartphone.Since the performance is seriously affected by a door or steel wall, install the product in an open place. If there is door in front of the installed product, open the door when using the product.Do not place an object maden with steel or glass in front of the front LCD of the washer since it blocks the radio signal.Note that the radio signal may be weaken or interfered and the communication with the smartphone may fail when a microwave oven is used in the house.Install the washer or dryer so that the front of the product faces the AP if available. |
| How can I connect the washer or dryer with a smartphone stably? | When the signal strength that is displayed on the LCE of the washer or dryer is weak, the control may fail. Check the mark as follows or measure the signal strength.At least 3 antenna bars should be displayed on the LCD of the washer or dryer.At least 3 antenna bars for the Wi-Fi connection should be displayed on the smartphone.When the signal strength is measured with a smartphone app that shows the Wi-Fi signal strength, the signal strength should be stronger than -65 dBm. (E.g. -60 dBm and -50 dBm are stronger than -65 dBm.) |
| What should I have to do when the number of the antenna bars that are displayed on the LCD of the washer or dryer is 1? | When the signal strength that is displayed on the LCE of the washer or dryer is weak, the control may fail. In this case, take the following measures for normal operation.Move the AP closer to the washer or dryer.(At least 3 antenna bars should be displayed in the network setup of the washer for proper operation.)Since old AP may provide lower performance, use new one if available.Stand the antenna of the AP if available so that the radio signal is more easily propagated. |
62_ Troubleshooting
Appendix
FABRIC CARE CHART
The following symbols provide garment care directions. The care labels include symbols for washing, bleaching, drying and ironing, or dry cleaning when necessary. The use of symbols ensures consistency among garment manufacturers of domestic and imported items. Follow the care label directions to maximize garment life and reduce laundry problems.
| Wash Cycle Special Instructions | Warning Symbols for Laundering | ||||
| Normal Line Dry/ Hang to | Dry Do Not Wash | ||||
| Permanent Press / Wrinkle Resistant / Wrinkle Control | Drip Dry Do Not Wring | ||||
| Gentle/Delicates Dry Flat Do Not Bleach | |||||
| Hand Wash Heat Setting | Do Not Tumble Dry | ||||
| Water Temperature* | High | No Steam (added to iron) | |||
| Hot Medium Do Not Iron | |||||
| Warm Low Dryclean | |||||
| Cold Any Heat Dry Clean | |||||
| Bleach | No Heat/Air | Do Not Dry Clean | |||
| Any Bleach (when needed) | Iron-Dry or Steam Temperatures | Line Dry/ Hang to Dry | |||
| Only Non-Chlorine (color-safe) Bleach (when needed) | High | Drip Dry | |||
| Tumble Dry Cycle | Medium Dry Flat | ||||
| Normal | Low | ||||
| Permanent Press/ Wrinkle Resistant/ Wrinkle Control | |||||
| Gentle/ Delicates | |||||

* Water Temperature: The dot symbols represent the appropriate wash water temperatures for various items. The temperature range for Hot is 105-125 °F (41-52 °C), for Warm 85-105 °F (29-41 °C) and for Cold 60-85 °F (16-29 °C). (The wash water temperature must be a minimum of 60 °F (16 °C) for detergent activation and effective cleaning.)
Appendix _63
Appendix
PROTECTING THE ENVIRONMENT
This appliance is manufactured from recyclable materials. If you decide to dispose of this appliance, please observe local waste disposal regulations. Cut off the power cord so that the appliance cannot be connected to a power source. Remove the door so that animals and small children cannot get trapped inside the appliance.
DECLARATION OF CONFORMITY
This appliance complies with UL2158.
SPECIFICATIONS

| TYPE FRONT LOADING DRYER | ||
| DIMENSIONS A. Height | 39" (99.0 cm) | |
| B. Width 27" (68.6 cm) | ||
| C. Depth with door open 90° 51.65" (131.2 cm) | ||
| D. Depth 32.28" (82.0 cm) | ||
| WEIGHT 125.7 lb (57 Kg) | ||
| HEATER RATING 5300 W (Elec.) | 22000 BTU/hr (Gas) | |
| WATER PRESSURE 20-116 psi (137-800kPa) | ||
64_ Appendix
CYCLE CHART
(●: factory setting, ○: selectable)
| CYCLE RECOMMENDED ITEMS MAXIMUM AMOUNT | |||
| Sensor Dry | Normal Cottons, Work clothes, Linen, Mixed loads | ◎ | |
| Heavy Duty Heavy fabrics such as jean, Corduroys, Heavy work clothes | ◎ | ||
| Perm Press Shirts, Synthetic fabrics, Knits, Wrinkle-free cottons, Permanent | ◎ | ||
| Bedding Plus Bulky items such as blankets, Sheets, Comforters, Pillows | ◎ | ||
| Delicates Underwear, Blouses, Lingerie | ◎ | ||
| Sanitize Bedding, Curtains, Children' clothing | ◎ | ||
| +Eco Normal Cottons, Work clothes, Linen | ◎ | ||
| Wool | For machine washable and tumble dryable wool only(Maximum amount : 3lb) | ○ | |
| Active Wear | Water-repellent wear, performance clothes, Sports wear(Maximum amount : 4lb) | ○ | |
| Manual Dry | Air Fluff Form, Rubber, Plastic | ○ | |
| Quick Dry Small loads | ○ | ||
| Time Dry Any load | ◎ | ||
| Steam Cycles | Wrinkle Away Shirts, Trouser, Blouses | ○ | |
| Refresh Shirts, Trouser, Comforter, Pillows | ○ | ||
| CYCLE | FUNCTIONS OPTIONS | |||||||||
| Sensor Dry Level | Temp. Control | Time | Wrinkle Prevent | Delay Start | ||||||
| High | Medium | Medium Low | Low | Extra Low | ||||||
| Sensor Dry | Normal Normal dry | ● | ○ | ○ | ○ | ○ | ○ | ○ | ||
| Heavy Duty Normal dry | ● | ○ | ○ | ○ | ○ | ○ | ○ | |||
| Perm Press Normal dry | ● | ○ | ○ | ○ | ○ | |||||
| Bedding Plus Normal dry | ● | ○ | ○ | |||||||
| Delicates Normal dry | ● | ○ | ○ | |||||||
| Sanitize | Very dry (No change) | ● | ○ | ○ | ||||||
| +Eco Normal | Normal dry (No change)* | ●(DV457G)* | ● | ○ | ○ | |||||
| Wool | Normal dry (No change) | ● | ○ | ○ | ||||||
| Active Wear | Normal dry (No change) | ● | ○ | ○ | ||||||
| Manual Dry | Air Fluff | - | ○ | ○ | ○ | |||||
| Quick Dry - | ● | ○ | ○ | ○ | ||||||
| Time Dry - | ● | ○ | ○ | ○ | ○ | ○ | ○ | ○ | ||
| Steam Cycles | Wrinkle Away - | ● | ○ | ○ | ○ | |||||
| Refresh - | ● | ○ | ○ | |||||||
* is only Gas model
Load Size Recommendations
| Large load Fill the drum to about 3⁄4 full. Do not add items over this level as they need to tumble freely. | |
| Medium load | Fill the drum to about 1⁄2 full. |
| Small load | Fill the drum with 3~5 items, not more than 1⁄4 full. |
For best results, follow the load size recommendations for each drying cycle.
Appendix _65
Warranty
SAMSUNG DRYER
LIMITED WARRANTY TO ORIGINAL PURCHASER
This SAMSUNG brand product, as supplied and distributed by SAMSUNG ELECTRONICS AMERICA, INC. (SAMSUNG) and delivered new, in the original carton to the original consumer purchaser, is warranted by SAMSUNG against manufacturing defects in materials and workmanship for a limited warranty period of:
One (1) Year All Parts and Labor
Two (2) Years Control Board Parts
This limited warranty begins on the original date of purchase, and is valid only on products purchased and used in the United States.
To receive warranty service, the purchaser must contact SAMSUNG for problem determination and service procedures.
Warranty service can only be performed by a SAMSUNG authorized service center.
The original dated bill of sale must be presented upon request as proof of purchase to SAMSUNG or SAMSUNG's authorized service center.
SAMSUNG will provide in-home service during the warranty period at no charge, subject to availability within the contiguous United States.
In-home service is not available in all areas.
To receive in-home service, product must be unobstructed and accessible to the service agent.
If service is not available, SAMSUNG may elect to provide transportation of the product to and from an authorized service center.
SAMSUNG will repair, replace, or refund this product at our option and at no charge as stipulated herein, with new or reconditioned parts or products if found to be defective during the limited warranty period specified above.
All replaced parts and products become the property of SAMSUNG and must be returned to SAMSUNG.
Replacement parts and products assume the remaining original warranty, or ninety (90) days, whichever is longer.
This limited warranty covers manufacturing defects in materials and workmanship encountered in normal, noncommercial use of this product and shall not apply to the following: damage that occurs in shipment; delivery and installation; applications and uses for which this product was not intended; altered product or serial numbers; cosmetic damage or exterior fi nish; accidents, abuse, neglect, fi re, water, lightning, or other acts of nature or God; use of products, equipment, systems, utilities, services, parts, supplies, accessories, applications, installations, repairs, external wiring or connectors not supplied or authorized by SAMSUNG that damage this product or result in service problems; incorrect electrical line voltage, fl uctuations and surges; customer adjustments and failure to follow operating instructions, maintenance and environmental instructions that are covered and prescribed in the instruction book; product removal and reinstallation; problems caused by pest infestations.
This limited warranty does not cover problems resulting from incorrect electric current, voltage or supply, light bulbs, house fuses, house wiring, cost of a service call for instructions, or fixing installation errors.
SAMSUNG does not warrant uninterrupted or error-free operation of the product.
Except as set forth herein, there are no warranties on this product either express or implied, and samsung disclaims all warranties including, but not limited to, any implied warranties of merchantability, infringement or fitness for a particular purpose.
No warranty or guarantee given by any person, fi rm, or corporation with respect to this product shall be binding on samsung.
Samsung shall not be liable for loss of revenue or profits, failure to realize savings or other benefits, or any other special, incidental or consequential damages caused by the use, misuse, or inability to use this product, regardless of the legal theory on which the claim is based, and even if samsung has been advised of the possibility of such damages.
Nor shall recovery of any kind against samsung be greater in amount than the purchase price of the product sold by samsung and causing the alleged damage.
Without limiting the foregoing, purchaser assumes all risk and liability for loss, damage, or injury to purchaser and purchaser's property and to others and their property arising out of the use, misuse, or inability to use this product. This limited warranty shall not extend to anyone other than the original purchaser of this product, is nontransferable and states your exclusive remedy.
Some states do not allow limitations on how long an implied warranty lasts, or the exclusion or limitation of incidental or consequential damages, so the above limitations or exclusions may not apply to you. This warranty gives you specific rights, and you may also have other rights, which vary from state to state.
To obtain warranty service, please contact SAMSUNG at:
Samsung Electronics America, Inc. 85 Challenger Road Ridgefi eld Park, NJ 076601-800-SAMSUNG(726-7864)
www.samsung.com
Warranty _67
SAMSUNG
Scan the QR code* or visit www.samsung.com/spsn to view our helpful How-to Videos and Live Shows
*Requires reader to be installed on your smartphone
Scan this with your smartphone
QUESTIONS OR COMMENTS?
| COUNTRY CALL OR VISIT US ONLINE AT | |
| U.S.A 1-800-SAMSUNG(726-7864) www.samsung.com | |
| MEXICO 01-800-SAMSUNG(726-7864) www.samsung.com |
Code No. DC68-02836E_EN
DV457E(G)*
- Programme Sanitize (Stérilisation)
natural_image
Line drawing of a washing machine (no text or symbols)
natural_image
Simple line drawing of a tool interacting with a curved surface, no text or symbols presentnatural_image
Simple line drawing of a hand holding a tool near a curved surface with a light bulb (no text or symbols)natural_image
Illustration of a hand using a tool to cut a curved object with motion lines (no text or symbols)natural_image
Diagram of a car wheel with a hand holding a tool, showing motion lines and components (no text or symbols)natural_image
Line drawing of a hand securing a cable with clamps (no text or symbols)natural_image
Line drawing of a hand using a screwdriver to adjust a small electronic device (no text or symbols visible)natural_image
Diagram of a car interior showing a switch, battery, and electrical socket (no text or labels)

DÉCLARATION DE CONFORMITÉ
Scan the QR code* or visit www.samsung.com/spsn to view our helpful How-to Videos and Live Shows
*Requires reader to be installed on your smartphone
Scan this with your smartphone
DES QUESTIONS OU DES COMMENTAIRES ?
| PAYS APPELEZ LE OU RENDEZ-VOUS SUR LE SITE |
| U.S.A 1-800-SAMSUNG (726-7864) www.samsung.com |
| MEXICO 01-800-SAMSUNG(726-7864) www.samsung.com |
Code No. DC68-02836E_CFR
DV457E(G)*
natural_image
Line drawing of a washing machine with front panel and side door (no text or symbols)
natural_image
Simple line drawing of a tool interacting with a curved surface, no text or symbols presentnatural_image
Simple line drawing of a hand holding a tool near a curved surface with a light bulb (no text or symbols)natural_image
Illustration of a hand using a tool to cut a curved object with motion lines (no text or symbols)natural_image
Line drawing of a foot stepping on a car pedal (no text or symbols)natural_image
Line drawing of a hand adjusting a cable or connector with multiple pins (no text or symbols)natural_image
Line drawing of a hand using a screwdriver to adjust a small electronic device (no text or symbols visible)natural_image
Pure electrical circuit lines without any symbols![SMART APPLIANCE Service Settings My Pair Customer Address My Path User Accounts Form 1 Description: Software name Help Use Home S234035 Call Box [+] Sales of Goods $12.12 (RF) Phone number Address Number Add to Web Add to Web Add to Web Add to Web Add to Web Add to Web Add to Web Add to Web Add to Web Add to Web Add to Web Add to Web Add to Web Add to Web Add to Web Add to Web Add to Web Add to Web Add to Web Add to Web Add to Web Add to Web Add to Web Add to Web Add to Web Add to User Add user name: Add user name: Add user name: Add user name: Add user name: Add user name: Add user name: Add user name: Add user name: Add user name: Add user name: Add user name: Add user name: Add user name: Add user name: Add user name: Add user name: Add user name: Add user name: Add user name: Add user name: Add user name: Add user name: Add user name: Add user name: Add user name:](/content/2026/06/1284364/images/8ebe2ed0a3267cec0e6083e5d17d81a399f74de288a24a93a662f61ae99a86f6.jpg)
Scan the QR code* or visit www.samsung.com/spsn to view our helpful How-to Videos and Live Shows
*Requires reader to be installed on your smartphone
Scan this with your smartphone
- Gas and Electric Dryer user manual
- imagine the possibilities
- Features
- • Extra Large Capacity
- - 8" LCD Touch Screen Display
- • Smart Control (Elec. Model Only)
- • Smart Monitor (Gas Model Only)
- - Smart Care
- - Steam Cycle
- - Sanitize Cycle
- - Vent Sensor
- - Time Saving
- - Energy Saving
- - Easy Reversible Door
- - Pedestal with Storage Drawers
- • 4-way Vent (Electric models only: DV457E\*)
- Safety instructions
- WHAT YOU NEED TO KNOW ABOUT SAFETY INSTRUCTIONS
- IMPORTANT SAFETY SYMBOLS AND PRECAUTIONS
- SAVE THESE INSTRUCTIONS
- WARNING - Risk of Fire
- TO REDUCE THE RISK OF FIRE OR EXPLOSION:
- WHAT TO DO IF YOU SMELL GAS:
- WARNING
- CAUTION
- CALIFORNIA SAFE DRINKING WATER AND TOXIC ENFORCEMENT ACT
- REGULATORY NOTICE
- FCC Notice
- FCC CAUTION:
- FCC STATEMENT:
- FCC RADIATION EXPOSURE STATEMENT:
- IC Notice
- IC RADIATION EXPOSURE STATEMENT:
- Contents
- INSTALLING YOUR DRYER
- DRYING A LOAD OF LAUNDRY
- USING YOUR MOBILE PHONE
- CARE AND CLEANING
- SPECIAL LAUNDRY TIPS
- TROUBLESHOOTING
- APPENDIX
- UNPACKING YOUR DRYER
- Tools needed
- Level Phillips Screwdriver Duct tape Wrench
- BASIC REQUIREMENTS
- DUCTING REQUIREMENTS
- IMPORTANT TO INSTALLER
- LOCATION CONSIDERATIONS
- ALCOVE OR CLOSET INSTALLATIONS
- MOBILE HOME INSTALLATIONS
- EXHAUSTING
- In the United States:
- In Canada:
- Outside the U.S. and Canada:
- GAS REQUIREMENTS
- THE INSTALLATION MUST CONFORM WITH LOCAL CODES, OR IN THE ABSENCE OF LOCAL CODES, WITH THE NATIONAL FUEL GAS CODE ANSI/Z223.1, LATEST REVISION (FOR THE UNITED STATES), OR WITH THE CAN/CGA-B149 INSTALLATION CODES (FOR CANADA).
- COMMONWEALTH OF MASSACHUSETTS INSTALLATION INSTRUCTIONS
- ELECTRICAL REQUIREMENTS
- GROUNDING
- Gas models
- Electric models
- ELECTRICAL CONNECTIONS
- Gas models – U.S. and Canada
- Electric models – U.S. only
- RISK OF ELECTRIC SHOCK:
- Electric models – Canada Only
- CONNECTING THE INLET HOSE
- Method 1
- Method 2
- REPLACEMENT PARTS AND ACCESSORIES
- INSTALLATION
- To install
- U.S. MODELS:
- RISK OF ELECTRIC SHOCK - All U.S. models are produced for a 3-WIRE SYSTEM CONNECTION.
- 3-WIRE system connections
- 4-WIRE system connections
- 24\_ Installing your dryer
- FINAL INSTALLATION CHECKLIST
- DRYER EXHAUST TIPS
- Don't let a poor exhaust system slow the drying process by:
- DOOR REVERSAL
- SETTING UP YOUR DRYER FOR THE FIRST TIME
- Precautions for using the LCD panel
- Choosing your language
- Setting the current date
- Setting your current time
- DRYING FOR THE FIRST TIME
- BASIC INSTRUCTIONS
- USING THE CONTROL PANEL
- Available cycles
- Sensor Dry cycles
- Manual Dry cycles
- Available options
- Dry level
- Temperature
- Time
- Extras
- Available actions
- Smart Control (Elec. Model Only)
- Smart Monitor (Gas Model Only)
- Save as My Cycles
- Delay Start
- Child Lock
- Light
- Settings
- DRYING YOUR LAUNDRY USING THE CYCLE SELECTION SCREEN
- Loading the dryer properly
- When the cycle is fi nished:
- Using the My Cycle function
- Saving a My Cycle
- Starting a My Cycle
- Using the Delay Start function
- Activating
- Deactivating
- Using the Child Lock function
- Turning the Light On/Off
- Turning on
- Turning off
- Controlling the sound volume
- Controlling the brightness level
- Viewing the Energy Efficiency
- Using the Smart Grid
- Viewing your neighborhood's current energy level
- Viewing and changing the Override Time
- USING THE RACK DRY
- CHECKING THE FILTER
- Checking the fi Iter
- Cleaning the fi Iter
- VENT SENSOR
- CONFIGURING YOUR DRYER'S NETWORK SETTINGS AND CONNECTING TO YOUR NETWORK
- Configuring the IP address settings
- Connecting your dryer to the network
- TURNING ON THE WI-FI NETWORKING FUNCTION OF YOUR DRYER
- HOW TO UPDATE THE SOFTWARE
- DOWNLOADING AND RUNNING THE MOBILE APP, SAMSUNG SMART WASHER/DRYER APP
- USING THE MOBILE APP
- Disconnecting the connection
- Starting a new load
- Registering your dryer
- OVERVIEW FOR WI-FI SETTINGS AND AP CONNECTION
- CONTROL PANEL
- TUMBLER
- STAINLESS STEEL TUMBLER
- DRYER EXTERIOR
- DRYER EXHAUST SYSTEM
- THINGS TO AVOID PUTTING IN THE DRYER:
- 58\_ Troubleshooting
- INFORMATION CODES
- FABRIC CARE CHART
- PROTECTING THE ENVIRONMENT
- DECLARATION OF CONFORMITY
- SPECIFICATIONS
- CYCLE CHART
- Warranty
- SAMSUNG DRYER
- LIMITED WARRANTY TO ORIGINAL PURCHASER
- - Programme Sanitize (Stérilisation)
- DÉCLARATION DE CONFORMITÉ
Brand : SAMSUNG
Model : DV457EVGSWR
Category : Tumble dryer