
Reveal Facial Cleansing Brush FC1000 - Facial cleansing brush REMINGTON - Free user manual and instructions
Find the device manual for free Reveal Facial Cleansing Brush FC1000 REMINGTON in PDF.

| Product Type | Facial cleansing brush |
| Brand | Remington |
| Model | Reveal Facial Cleansing Brush FC1000 |
| Dimensions (approx.) | 5.5 x 5.5 x 17 cm |
| Weight (approx.) | 180 g |
| Power Source | 2 x AAA batteries (not included) |
| Speed Settings | 2 (gentle and deep cleansing) |
| Brush Head Material | Soft nylon bristles |
| Water Resistance | IPX5 (splash proof) |
| Timer | 60-second auto shut-off |
| Usage | Facial cleansing with gel or foam |
| Cleaning & Maintenance | Rinse brush head after each use; replace every 3 months |
| Safety Precautions | Do not use on broken or irritated skin; keep dry when not in use |
| Spare Parts | Replacement brush heads (model FC1000-1) available |
| Repairability | Non-user serviceable; contact Remington support |
| Warranty | 1 year limited |
| Battery Life | Approximately 3 months with normal use |
Frequently Asked Questions - Reveal Facial Cleansing Brush FC1000 REMINGTON
User questions about Reveal Facial Cleansing Brush FC1000 REMINGTON
0 question about this device. Answer the ones you know or ask your own.
Ask a new question about this device
Download the instructions for your Facial cleansing brush in PDF format for free! Find your manual Reveal Facial Cleansing Brush FC1000 - REMINGTON and take your electronic device back in hand. On this page are published all the documents necessary for the use of your device. Reveal Facial Cleansing Brush FC1000 by REMINGTON.
USER MANUAL Reveal Facial Cleansing Brush FC1000 REMINGTON
natural_image
Close-up of a white electric toothbrush with green filter brush and water droplets (no text or symbols visible)Thank you for buying your new Remington® product. Please read these instructions carefully and keep them safe. Remove all packaging before use.

IMPORTANT SAFETY INSTRUCTIONS
WARNING – TO REDUCE THE RISK OF BURNS, ELECTROCUTION, FIRE, OR INJURY TO PERSONS:
1 This appliance can be used by children aged from 8 years and above and persons with reduced physical, sensory or mental capabilities or lack of experience and knowledge if they have been supervised/instructed and understand the hazards involved. Children shall not play with the appliance. Cleaning and user maintenance shall not be done by children unless they are older than 8 and supervised. Keep the appliance and cable out of reach of children under 8 years.
2 An appliance should never be left unattended when plugged into a power outlet, except when charging.
3 Do not use this product if it is not working correctly, if it has been dropped or damaged, or dropped in water.
4 Do not twist or kink the cable, and don't wrap it around the appliance.
5 Do not use attachments other than those we supply.
6 Make sure the power plug and cord do not get wet.
7 Do not plug or unplug the appliance with wet hands.
8 Keep the charger away from water and heated surfaces
9 This appliance is not intended for commercial or salon use.
10 Use only as instructed.
11 This cleansing brush is designed for wet use and may be used in the shower. DO NOT fully submerge in water.
12 After use the appliance should be cleaned to avoid the accumulation of grease and other residues.
13 This appliance should be supplied with approved safety isolating adaptors PA-0510E (for Europe) and PA-0510U (for United Kingdom) with the output capacity of 5.0 dc; 1A (adaptor output).

GETTING ACQUAINTED WITH THE REVEAL FACIAL CLEANSING BRUSH
- The REVEAL Cleansing Brush has been designed and developed for cleansing the face and neck.
- The rotating (and vibrating) bristles gently provide a deep cleanse to remove make-up and impurities leaving the skin feeling clean and fresh.
- The REVEAL Cleansing Brush includes 3 Brush Heads for all your cleansing needs:
• NORMAL: For everyday deep cleansing suitable for all skin types. - EXTRA SENSITIVE: Extra-long, super-soft bristles, perfect for gentle everyday cleansing of sensitive skin.
• LUXE: For gentle and luxurious cleansing, ideal to give the skin a treat.
✿ TIP: When used on a high speed setting the LUXE brush head whips cleanser into a thick, foamy lather for a more luxurious cleanse.

WARNINGS AND SAFETY PRECAUTIONS

Before you start using the REVEAL Cleansing Brush, be sure to read all the earnings and safety information to check the product is suitable for you.
1 Avoid using on the delicate skin around the eyes.
2 DO NOT use the cleansing brush on the same area more than twice a day.
3 DO NOT use the cleansing brush on areas with open wounds, sunburnt skin, chapped or irritated skin.
4 DO NOT use if you suffer from skin diseases or skin irritations such as severe/active acne or skin infection.
5 DO NOT use if you are taking steroid-based medication.
6 DO NOT use the Cleansing Brush with cleansers containing harsh chemicals or rough particles.
7 If you wish to share this product with other users, for hygiene reasons, ensure you change the brush head. DO NOT share brush heads between multiple users.
8 If you experience any pain or discomfort, stop using this product and contact your doctor.

KEY FEATURES
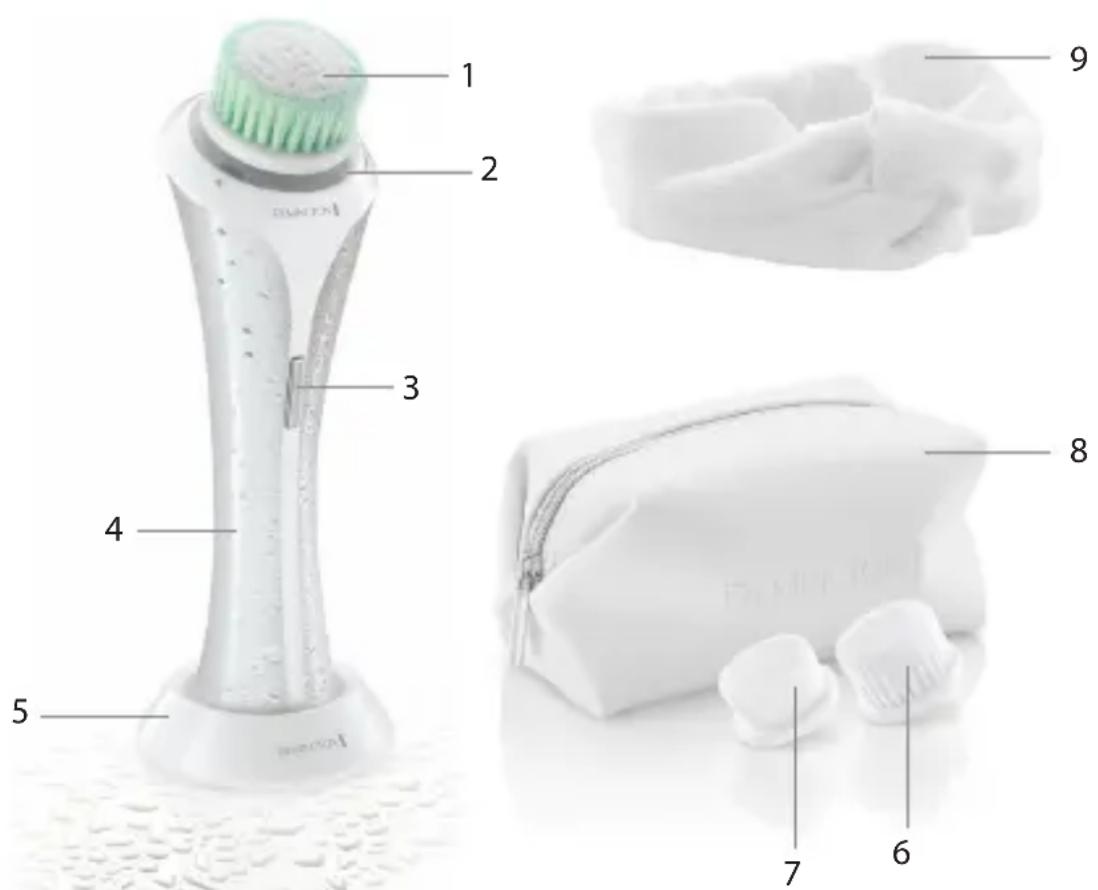
1 N
2 LED Indicator Lights
3 On/Off and Speed Selection Switch
4 Cleansing Brush Handle
5 Charging Stand
6 Extra Sensitive Brush Head
7 Luxe Brush Head
8 Beauty Bag
9 Beauty Headband
10 Power Adaptor (not shown)

GETTING STARTED
Be patient when first using your REVEAL Cleansing Brush as with any new product, it may take a little while to familiarise yourself with the product. Take the time to acquaint yourself with your Cleansing Brush, as we are confident you will receive years of enjoyable use and complete satisfaction.

INSTRUCTIONS FOR CHARGING
1 Always ensure that your hands, cleansing brush and mains adapter are dry before charging.
2 Before using for the first time, fully charge the Cleansing Brush. One full charge will take 6 hours.
3 Ensure the appliance is switched off.
4 Insert the charging adapter into the charging stand Fig. 1.
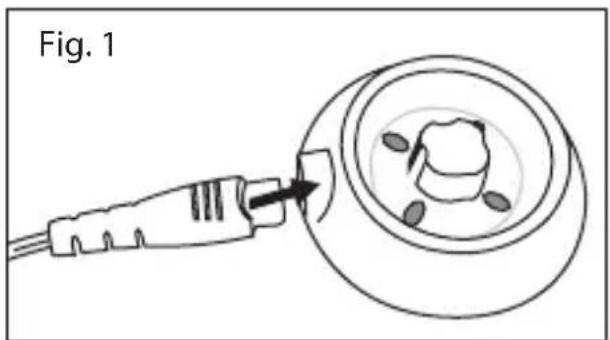
5 Plug the adaptor into the wall socket.
6 Place the Cleansing Brush on the charging stand.
7 The charging indicator lights will glow in a rotating sequence whilst the cleansing brush is charging.
8 When the Cleansing Brush is fully charged, all charging indicator lights will remain illuminated for 5 minutes, then turn off.
9 One full charge will take 6 hours.
10 One full charge allows up to 30 minutes of cordless usage time (30 x 1 min uses).
NOTE: If the battery charge is low, all three LED lights will pulse on and off whilst in use.

QUICK CHARGE FUNCTION
- The cleansing brush is also equipped with a quick charge function.
• To utilise this function, charge the Cleansing Brush for 30 minutes.
• This will provide approximately 4-6 uses.

INSTRUCTIONS FOR USE
• This product is suitable for wet use and may be used in the shower.
• DO NOT submerge in water.
- The charging stand and adaptor can not be used in a bath or shower.
- The Cleansing Brush has 3 speed settings and comes with 3 brush heads.
• Always choose the speed setting & brush head most comfortable for you.
NOTE: If you suffer from sensitive skin, we recommend selecting speed setting 1 for the first few uses. If you do not experience any skin reactions then speeds 2 & 3 may be used.
- The Cleansing Brush also comes equipped with a one minute timer to help ensure thorough cleansing of the whole face. We recommend cleansing in 3 sections: T-Zone (1), Right side (2) and Left side (3). Fig. 2.

- The cleansing brush will gently pause every 20 seconds to indicate when to move to the next zone - The cleansing brush will automatically switch off after 60 seconds to indicate the end of the brushing time.
NOTE: If you change speed settings during cleansing, the timer will set back to zero and the timer will start again.
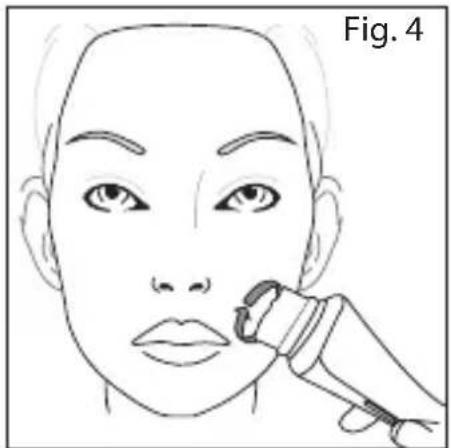
HOW TO USE
1 Select the brush head to suit your skin type and cleansing need. Gently push the bush head onto the cleansing brush handle until you hear a click. Fig. 3.
2 Moisten the brush bristles by running under water.
NOTE: DO NOT use the cleaning brush whilst completely dry as this can cause skin irritation.
3 Dampen your skin with water and apply cleanser onto your skin. Alternatively, apply your cleanser directly onto the brush.
4 Place the cleansing brush directly onto your skin.
5 Switch on using the On/Off button.
6 Select the speed:
- The cleansing brush will automatically start on speed one
- Press the button again for speed 2

natural_image
Line drawing of a hand holding a small object with a dark central feature, labeled 'Fig. 3' (no other text or symbols)- Press the button again twice for speed 3
★ TIP: When changing brush heads, test each head on different speeds to identify which is most comfortable for you.
7 Gently glide the brush over the skin in circular motions avoiding the delicate eye area Fig. 4. When you feel a pause, move to the next area.
natural_image
Line drawing of a human face with a medical device near the lower face (no text or symbols)NOTE: Try to avoid applying too much pressure with the brush when directly on the skin. If this happens the brush will automatically stop its cycle and switch off. This is perfectly normal and helps to ensure a comfortable treatment. The cleansing brush can be restarted by pressing the On switch.
- If you wish to end the cleansing cycle early press the On/Off button as per below:
- When using speed 1, press On/Off button 3 times
- When using speed 2, press On/Off button twice
- When using speed 3, press On/Off button once
- When not in use, store the brush attachments with the protective caps on Fig. 5.
- Ensure the bristles are dry before attaching the protective cap.

natural_image
Illustration of a hand pouring liquid onto a cylindrical object with textured surface (no text or symbols)
REPLACING THE BRUSH HEADS
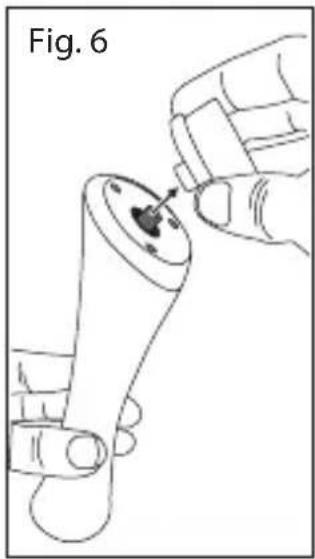
Removing the brush head:
- Hold the brush handle with one hand.
- With the other hand, gently pull the brush head upwards until it comes off. Fig. 6.
• To replace the brush head, gently push the head back on until you hear a click. Fig. 7.
natural_image
Illustration of a hand holding a small mechanical component with a pointed tip, labeled 'Fig. 6' (no text or symbols on the diagram itself)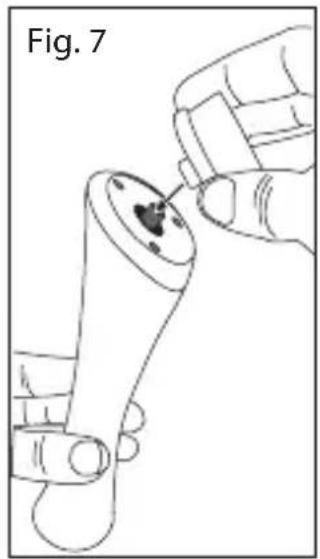
natural_image
Line drawing of a hand inserting a small object into a cylindrical device (no text or symbols)- For best results, we recommend replacing all brush heads approximately every 3 months.
- Replacement Brush Heads are available:
- Normal: SP-FC1
- Sensitive: SP-FC2
- Exfoliating: SP-FC3
- Massage: SP-FC4
- Luxe: SP-FC10
• Extra Sensitive: SP-FC11 - Contact your nearest Remington service centre for more information.

CLEANING AND MAINTENANCE
- To ensure long lasting performance of your cleansing brush, clean the brush head and the handle regularly.
- Ensure the cleansing brush is switched off before cleaning.
• DO NOT attempt to clean any part of this product in a dishwasher.
• DO NOT submerge the brush handle or charging stand in water. - Brush Head: Rinse the brush head and bristles after each use.
- Brush Handle: To clean the handle, wipe with a damp cloth.
- Charging stand: Wipe with a damp cloth.
CAUTION: Ensure all parts are dry before connecting the charger into a wall socket.

BATTERY REMOVAL
- The battery must be removed from the cleansing brush before it is scrapped.
- The appliance must be disconnected from the supply mains when removing the battery.
• To remove the rechargeable battery: - Run the cleansing brush until the motor stops.
- Remove the brush head.
- Remove the two screws at the base of the handle.
• Using a small screwdriver, pry the top cap off the handle. - Pry the battery from the internal assembly.
- Dispose of the battery safely.

ENVIRONMENTAL PROTECTION
To avoid environmental and health problems due to hazardous substances in electrical and electronic goods, appliances marked with this symbol must not be disposed of with unsorted municipal waste, but recovered, reused or recycled.
natural_image
Line drawing of a hand holding a small object with a dark circular feature, labeled 'Abb. 3' (no other text or symbols)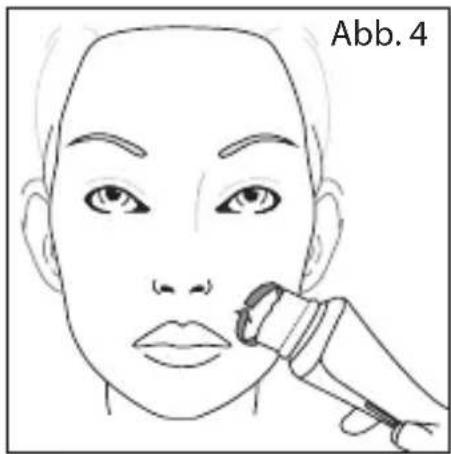
natural_image
Line drawing of a human face with a medical device near the lower face (no text or symbols)natural_image
Line drawing of a hand holding a small mechanical component, labeled 'Abb. 6' (no other text or symbols)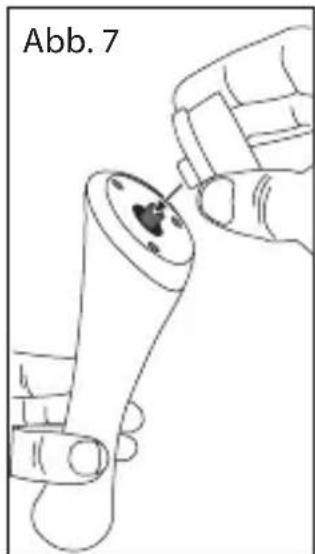
natural_image
Line drawing of a hand holding a small object with a dark circular feature, labeled 'Abb. 7' (no other text or symbols)WAARSCHUWINGEN EN VEILIGHEIDSMAATREGELEN

natural_image
Line drawing of a hand holding a small object with a dark central feature, labeled 'Fig. 3' (no other text or symbols)natural_image
Line drawing of a human face with a medical device near the lower face (no text or symbols)natural_image
Illustration of a hand pouring liquid onto a device with a textured cap (no text or symbols)natural_image
Line drawing of a hand inserting a small object into a mechanical component (no text or symbols)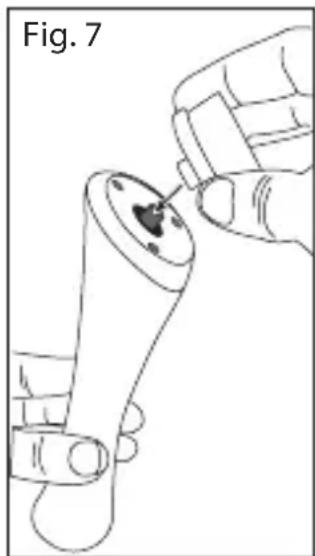
natural_image
Line drawing of a hand holding a small object with a dark spot, labeled 'Fig. 7' (no other text or symbols)natural_image
Line drawing of a hand holding a small object with a dark central feature, labeled 'Fig. 3' (no other text or symbols)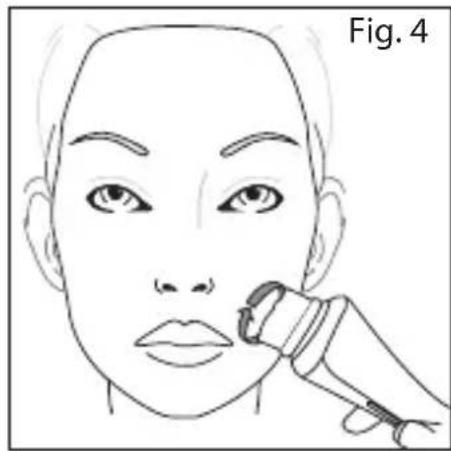
natural_image
Line drawing of a human face with a medical device applied to the lower face (no text or symbols)natural_image
Line drawing of a handheld device with a pipette inserted into a circular component, labeled Fig. 5 (no text or symbols on the device itself)
natural_image
Line drawing of a hand inserting a small component into a mechanical part (no text or symbols)
natural_image
Line drawing of a hand holding a small object with a dark circular feature, labeled 'Fig. 7' (no text or symbols on the diagram itself)natural_image
Line drawing of a human face with a medical device near the lower face (no text or symbols)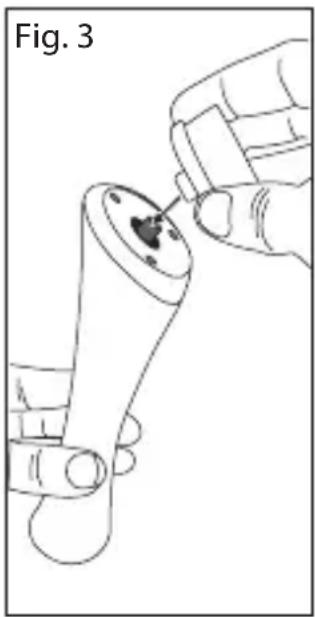
natural_image
Line drawing of a hand holding a small mechanical component with a circular feature, labeled 'Fig. 3' (no text or symbols on the diagram itself)natural_image
Line drawing of a medical or laboratory device with a hand pouring liquid into a container (no text or symbols)
natural_image
Line drawing of a hand holding a small mechanical component, labeled 'Fig. 6' (no text or symbols on the diagram itself)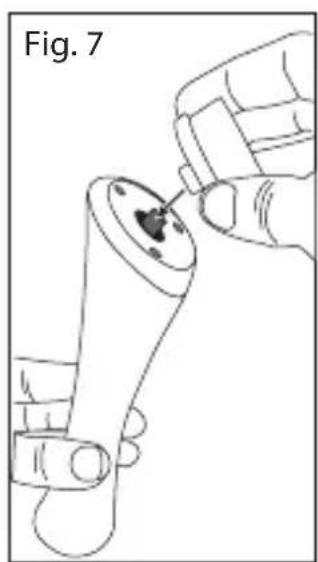
natural_image
Line drawing of a hand holding a small object with a dark spot, labeled 'Fig. 7' (no other text or symbols)natural_image
Line drawing of a human face with a medical device applied to the lower face (no text or symbols)natural_image
Line drawing of a hand holding a small mechanical component with a dark central feature, labeled 'Fig. 3' (no other text or symbols)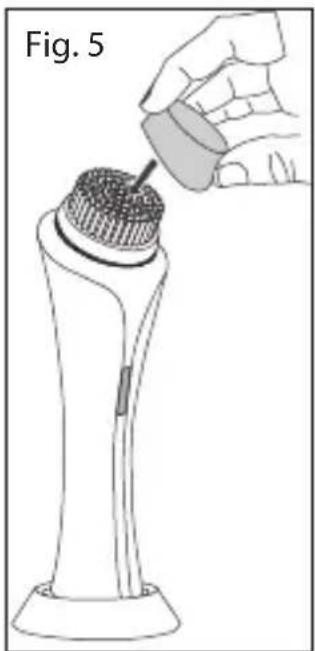
natural_image
Line drawing of a medical or laboratory device with a hand pouring liquid into a cap (no text or symbols)natural_image
Illustration of a hand inserting a small object into a mechanical component (no text or symbols)
natural_image
Line drawing of a hand holding a small object with a dark spot, labeled 'Fig. 7' (no other text or symbols)natural_image
Line drawing of a hand holding a small mechanical component, labeled 'Fig. 3' (no other text or symbols)
natural_image
Line drawing of a human face with a medical or cosmetic tool near the nose (no text or symbols)natural_image
Illustration of a hand pouring liquid into a device component (no text or symbols)
BYTA BORSTHUVUD
natural_image
Line drawing of a hand holding a small object with a dark circular feature, labeled 'Fig. 6' (no text or symbols on the object itself)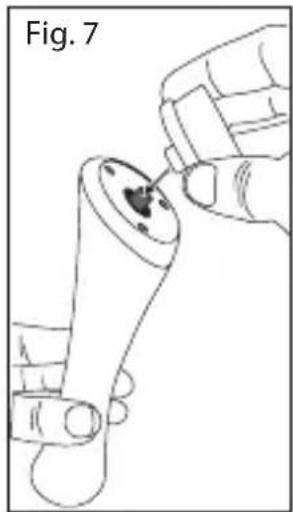
natural_image
Line drawing of a hand holding a small mechanical component with a pointed tip, labeled 'Fig. 7' (no text or symbols on the diagram itself)natural_image
Line drawing of a human face with a medical device applied to the lower face (no text or symbols)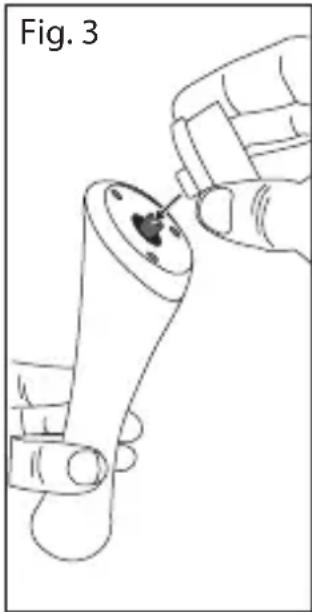
natural_image
Line drawing of a hand holding a small mechanical component, labeled 'Fig. 3' (no other text or symbols)natural_image
Illustration of a hand pouring liquid into a cylindrical container with a textured cap, labeled Fig. 5 (no text or symbols on the diagram itself)SUBSTITUIR AS CABEÇAS DE ESCOVA
natural_image
Line drawing of a hand holding a small mechanical component, labeled 'Fig. 6' (no text or symbols on the diagram itself)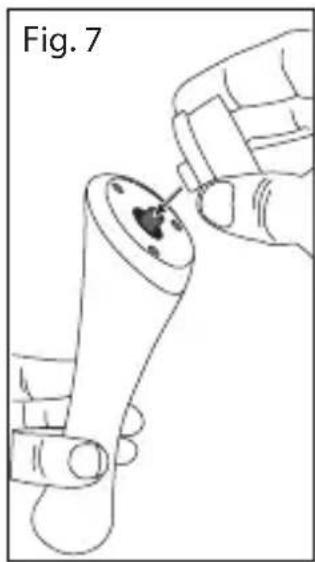
natural_image
Line drawing of a hand holding a small object with a dark spot, labeled 'Fig. 7' (no other text or symbols)natural_image
Line drawing of a hand holding a mechanical component with a circular feature, labeled 'Şekil. 6' (no other text or symbols)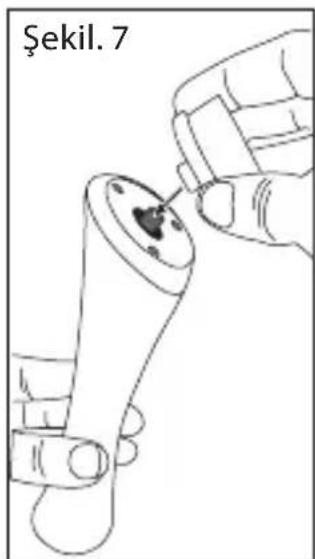
natural_image
Line drawing of a hand holding a small object with a dark spot, labeled 'Şekil. 7' (no other text or symbols)natural_image
Line drawing of a hand holding a small object with a dark central feature, labeled 'Fig. 3' (no other text or symbols)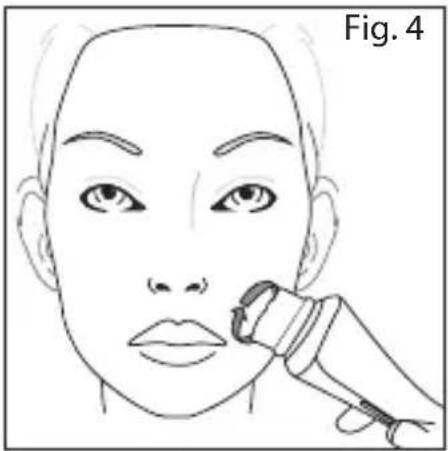
natural_image
Line drawing of a human face with a medical device near the chin, labeled 'Fig. 4' (no text or symbols on the diagram itself)natural_image
Line drawing of a medical or laboratory device with a hand pouring liquid into a cap (no text or symbols)
ÎNLOCUIREA CAPETELOR PERIEI

natural_image
Line drawing of a hand inserting a small object into a mechanical component (no text or symbols)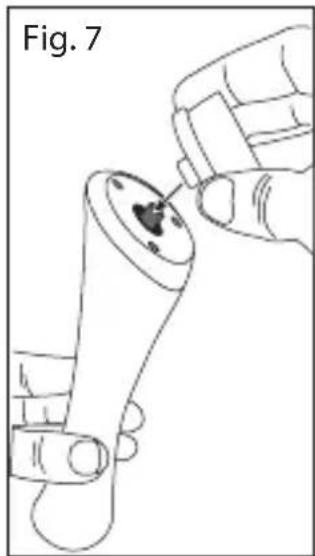
natural_image
Line drawing of a hand holding a small mechanical component, labeled 'Fig. 7' (no text or symbols on the diagram itself)natural_image
Line drawing of a hand holding a small mechanical component with a circular feature, labeled 'Sl. 3' (no other text or symbols)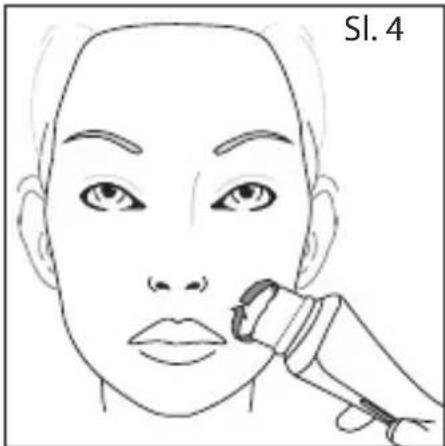
natural_image
Line drawing of a hand inserting a small object into a cylindrical device (no text or symbols)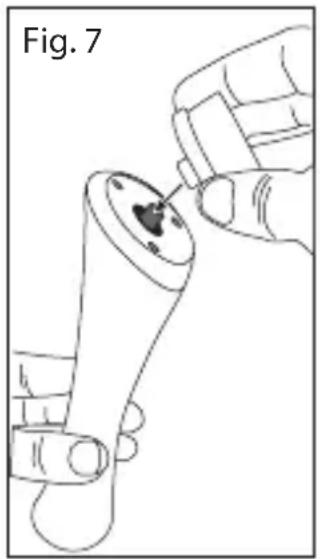
natural_image
Line drawing of a hand holding a small object with a dark central feature, labeled 'Fig. 7' (no text or symbols on the diagram itself)natural_image
Line drawing of a human face with a dental tool applied to the lower lip area (no text or symbols)
natural_image
Illustration of a hand pouring liquid into a cylindrical container on a base, labeled Fig. 5 (no text or symbols on the diagram itself)natural_image
Line drawing of a hand holding a small object with a dark central feature, labeled 'Fig. 3' (no other text or symbols)natural_image
Solid gray rectangular shape with no text, numbers, or symbolsModel No FC1000
Remington ^® is a Registered Trade Mark of Spectrum Brands, Inc., or one of its subsidiaries
VARTA Consumer Batteries GmbH & Co. KGaA, Alfred-Krupp-Str. 9, 73479 Ellwangen, Germany
www.remington-europe.com
© 2017 Spectrum Brands, Inc.
- IMPORTANT SAFETY INSTRUCTIONS
- GETTING ACQUAINTED WITH THE REVEAL FACIAL CLEANSING BRUSH
- WARNINGS AND SAFETY PRECAUTIONS
- KEY FEATURES
- GETTING STARTED
- INSTRUCTIONS FOR CHARGING
- QUICK CHARGE FUNCTION
- INSTRUCTIONS FOR USE
- HOW TO USE
- REPLACING THE BRUSH HEADS
- Removing the brush head:
- CLEANING AND MAINTENANCE
- BATTERY REMOVAL
- ENVIRONMENTAL PROTECTION
- WAARSCHUWINGEN EN VEILIGHEIDSMAATREGELEN
- BYTA BORSTHUVUD
- SUBSTITUIR AS CABEÇAS DE ESCOVA
- ÎNLOCUIREA CAPETELOR PERIEI
- Model No FC1000
Brand : REMINGTON
Model : Reveal Facial Cleansing Brush FC1000
Category : Facial cleansing brush