
DVB-T HDMI10 - Receiver KONIG - Free user manual and instructions
Find the device manual for free DVB-T HDMI10 KONIG in PDF.


| Product Type | Digital Terrestrial Receiver (DVB-T) |
| Model | DVB-T HDMI10 |
| Brand | Konig |
| Input Connector | RF Antenna (IEC female) |
| Output Connector | HDMI |
| Supported Standards | DVB-T, MPEG-2, MPEG-4 |
| Maximum Resolution | 1080i / 720p |
| Power Supply | 5V DC, 1A (via included adapter) |
| Dimensions (W x D x H) | 100 x 80 x 30 mm |
| Weight | 150 g |
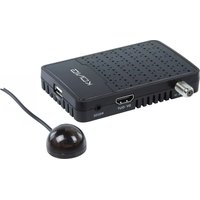
| Functions | Automatic channel scan, electronic program guide (EPG), teletext, parental lock, sleep timer |
| Remote Control | Included (CR2025 battery) |
| Maintenance | Wipe with a soft dry cloth; do not use liquids or solvents |
| Safety | Keep away from moisture and heat; do not open the device |
| Spare Parts & Reparability | Only power adapter available as spare; repair by qualified service center |
| General Information | Designed for indoor use; operating temperature 0°C to 40°C |
Frequently Asked Questions - DVB-T HDMI10 KONIG
User questions about DVB-T HDMI10 KONIG
0 question about this device. Answer the ones you know or ask your own.
Ask a new question about this device
Download the instructions for your Receiver in PDF format for free! Find your manual DVB-T HDMI10 - KONIG and take your electronic device back in hand. On this page are published all the documents necessary for the use of your device. DVB-T HDMI10 by KONIG.
USER MANUAL DVB-T HDMI10 KONIG
MANUAL (p. 7)
FULL HD FTA RECEIVER
MANUAL DE USO (p. 42)
RECEPTOR FTA FULL HD
KÄYTTÖOHJE (s. 77)
FULL HD FTA -VASTAANOTIN
MANUAL DE UTILIZARE (p. 112)
RECEPTOR FTA HD INTEGRAL
General information: 8
General Operation: 8
Remote control: 9
INSTALLATION 10
INSTALLATION GUIDE 12
MAIN MENU 12
-
Program: 12
-
Picture....14
-
Channel search.... 15
-
Time....16
-
Option 16
-
System.... 17
-
USB 18
-
Hotkey....20
TROUBLESHOOTING 22
NEDERLANDS 23
ALGEMENE INFORMATIE....23
This Digital Terrestrial Receiver (DTR) will bring you into the new and exciting world of Digital Television. A world of crystal clear widescreen pictures, digital sound, more information and new services. All this and more is on “Free to Air” Digital Television.
To make full use of your new DTR, please take the time to familiarise yourself with the extensive features of the unit detailed in this User's Guide.
If you need help in setting up please call your retailer or a customer service adviser.
Main Features
• SD MPEG-2/HD H.264 & fully DVB-T compliant
• Automatic PAL/NTSC conversion
• 1000 channels TV and Radio programmable
• 8 different favourite group selections
• Multi-lingual On Screen Display
• Fully supports 7 days Electronic Program Guide (EPG)
• Picture in Graphics (PIG) support
• 256 colors On Screen Display
- Channel search in automatic, manual search
- Various channel editing functions (favourite, move, lock, rename and sort)
• Parental control for channels
- Easy to use Menu System
- Software upgrades through USB port
- Time set by GMT offset automatically and manually, summer time support
• Automatic turn on/off by Timer setting (multiple options)
- Subtitle support DVB EN300743 and EBU
- Teletext support DVB ETS300472 by VBI and OSD
• Automatic save for the last channel
• Support Logic Channel Number (LCN)
• Support FAT16/FAT32/FAT12,NTFS (Option)
• MP3/ JPEG/ BMP/ OGG files
- Lock/Delete/Rename, Preview playback, Browse record files information
- Play/Pause/Stop
- Default 2 hours, user can setting the end time (Support subtitle), record scramble program and descramble program
For your safety:

To avoid the risk of electric shock, do not open the cabinet, refer to qualified personnel only.
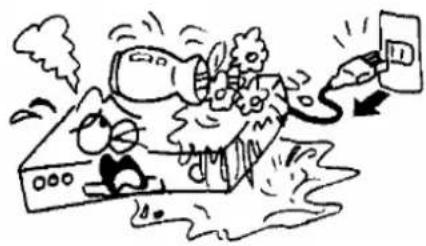
Keep the receiver away from flower vases, tubs, sinks etc in order to avoid damaging the equipment.

Do not expose the receiver to sunlight and keep it away from any heat source.

Do not block the ventilation holes of the receiver so that air can circulate freely.
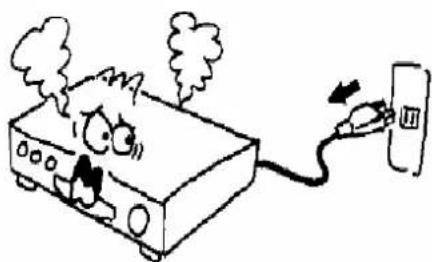
When this occurs you must cut off the power immediately.

Do not touch the receiver during thunderstorms, since that may create electric shock hazards.
General information:


1 Remote control 2x AAA batteries 1 user manual 1 IR 1 p.sup 1 receiver
General Operation:
Throughout this manual you will notice that the everyday operation of the receiver is based on a series of user friendly on screen displays and menus. These menus will help you get the most from your receiver, guiding you through installation, channel organising, viewing and many other functions.
All functions can be carried out using the buttons on the RCU, and some of the functions can also be carried out using the buttons on the front panel.
The receiver is easy to use, always at your command and adaptable for future upgrades.
Please be aware that new software may change the functionality of the receiver.
Should you experience any difficulties with the operation of your receiver, please consult the relevant section of this manual, including the Trouble Shooting, or alternatively call your dealer or a customer service adviser.
Remote control:

Key: Function:

MENU Press once to run MENU on screen

PR+, PR- Channel up/down or move up/down in a menu.

V-FORMAT Change the HD format
TXT Switch to teletext mode
Switch to subtitle mode
SLEEP Enter sleep mode
RECORD Record the program

INSTALLATION
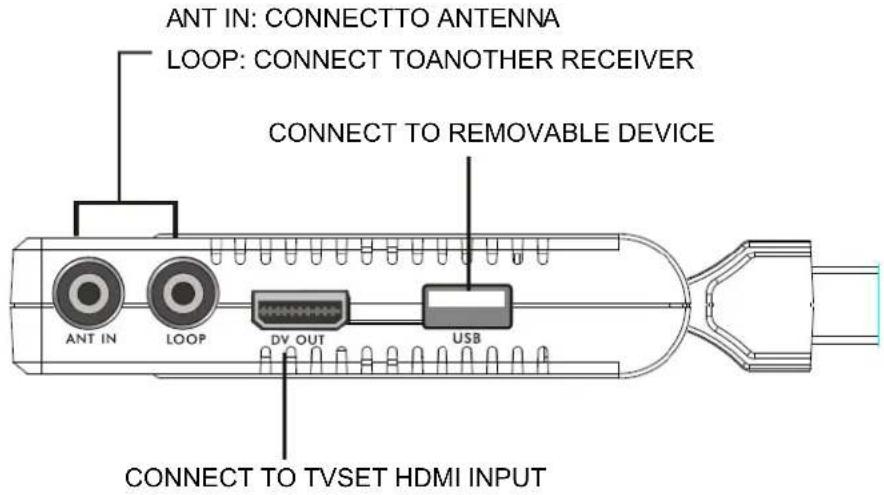
Rear Panel

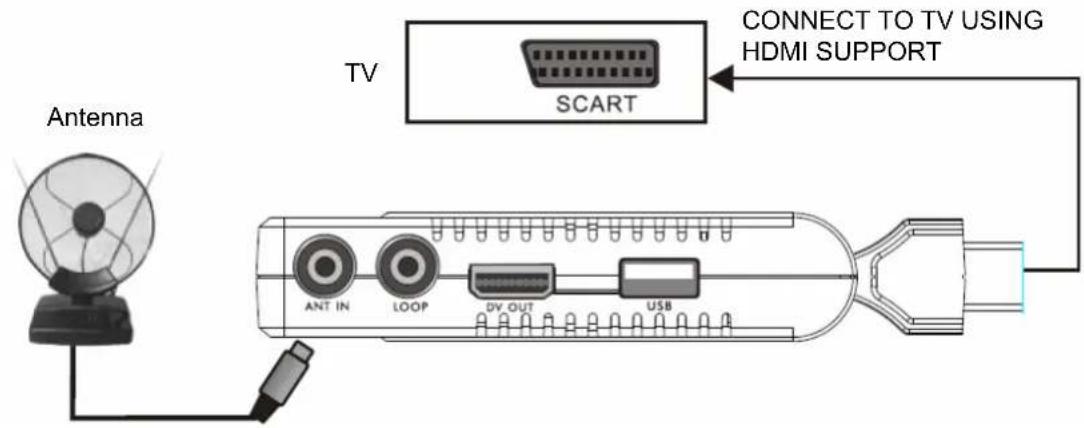
Connecting to TV using SCART cable
Connecting to power supply and external IR-sensor
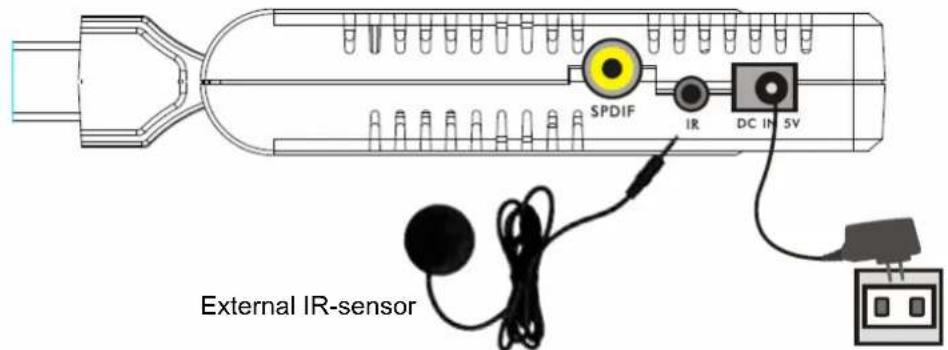
CONNECT TO THE POWER SUPPLY
Connecting to TV using HDMI support

Connecting to Digital Amplifier

• The picture is only for reference, please make the object as the standard.
INSTALLATION GUIDE
When powering on for the first time, the Installation Guide will display as below.
Press PR+, PR- keys to move highlight to select OSD language, Country and Channel Search.
Press △▲ keys to move the cursor to choose your choice.

Move the highlighter to the Channel Search option and press OK key to search channels

Press [EXIT] key to exit this menu.
MAIN MENU
When you press [MENU] key, you enter the Main Menu.
This menu consists of 7 major sub-menus as follows.
- Program
- Picture
- Channel Search
- Time
- Option
- System
- USB

1. Program:
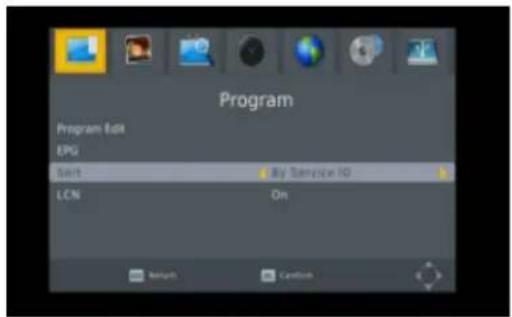
This menu consists of 4 major sub-menus as follow:
- Program edit
- EPG
- Sort
- LCN

1.1 Program edit
Press the OK key to pop up the "Input Password" dialogue box. You cannot enter into the menu unless the correct password is input. The default password is "000000".
- Press PR+, PR- keys to select the program that you want to play, and then press the OK key to view it in the small window. If you move the yellow cursor to select up or down, you will see a gray line which indicates the playing program in the small window.
- Select the program and press the FAV key to pop up the favourite type list. In the list, select the favourite type that you want and press the OK key, and then you will find the favourite icon is displayed to the right of the selected program.
Select Disable in favourite type list to remove all the favourite types you selected, and the favourite icon will disappear behind the program.
- Select the program and press the yellow key to mark this program with the Lock icon. You can cancel this icon by pressing the yellow key once more.
-
Select the program and press the green key to mark this program with the skip icon. You can cancel this mark by pressing the green key once more.
-
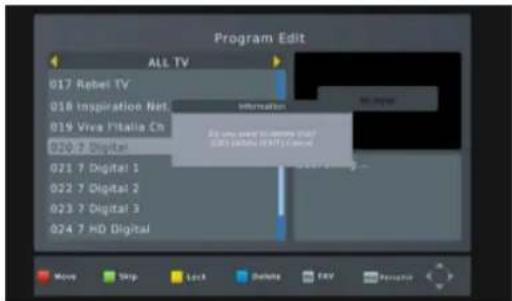
Select the program and press the blue key to pop up a warning dialogue box: "Do you want to delete this?" Press the OK key to delete it and press the EXIT key to cancel.


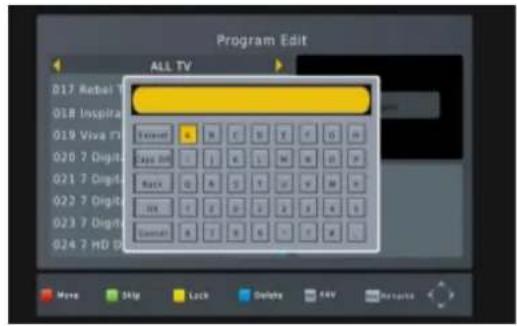
- Press ←PR key to pop up the rename window. Press ➡ keys to move the cursor left or right to select the characters.
1.2 EPG
You can find information for a program in the EPG window. Programs are in the left side list and details of the program are shown on the right side. At the bottom of the window you can see the function keys.
Press the blue key to page up in the program list. Press the yellow key to page down in the program list. Press the green key to page up in the detail list and press the red key to page down in the detail list.

Press the OK key to select the program. You can see the program you selected in the book list.
In EPG mode you can press the INFO key to enter the booking list. All the programs you booked will be in the schedule.
Press the red key to add a program to the booking list, and press the green key to edit the program. Press the blue key to delete the program.

Press the EXIT key to exit the booking list window.
1.3 SORT
Select by service ID, LCN, ONID or service name.

1.4 LCN
Select between On and Off.
2. Picture
This menu consists of 4 major sub-menus as follows:
- Aspect Ratio
- Resolution
- TV Format
- Video Output
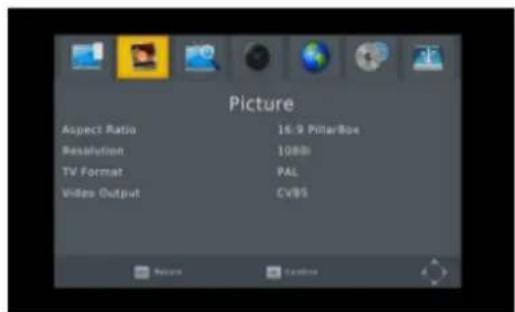
2.1 Aspect Ratio
Select between 16:9 Pillar Box, 16:9 Pan&Scan, 4:3 Letter Box, 4:3 Pan&Scan, 4:3 Full, 16:9 Wide Screen and Auto.
2.2 Resolution
Select between 1080i, 1080p, 576i, 576p, 480i and 720p.
2.3 TV Format
Select between PAL and NTSC.
2.4 Video Output
Select between CVBS and RGB.
3. Channel search
This menu consists of 4 major sub-menus as follows:
- Auto Search
- Manual Search
- Country
- Antenna Power

3.1 Auto search
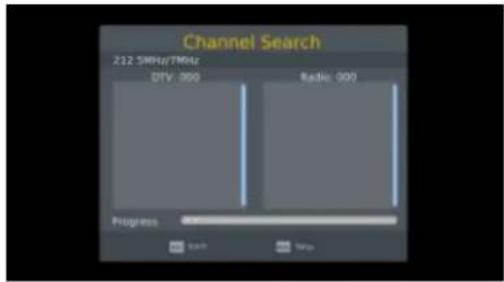
Press the OK key on Auto Search to search channels. For the first searching, all searched TV channels and Radio channels will be displayed on the list in order. Through one colour bar at the bottom of the search window, users can know the searching progress of the current channel. The TV and Radio Channels you searched will be shown in the list, you can know the number of programs at the top of the window. During the search, you can press the EXIT key to cancel. After searching, press the EXIT key to return to the normal mode.
3.2 Manual search
Frequency channel: Press ΔΔ+ key to select the channel. Frequency: Press the number key to input.
Bandwidth: Press ≧ keys to select between 6, 7 and 8M.
Through two colour bars at the bottom of the search window, users can see the signal quality and strength of the current channel.
After setting, press the OK key to enter the searching window.

3.3 Country
Press △ △+ key to select the country.
3.4 Antenna power
Select On or Off.
4. Time
There are 5 sub-menus in this menu
- Time Offset
- Country region
- Time zone
- Sleep
- Power On/Off

Select between Auto and Manual. If you select Auto, the time zone item will turn grey, if select Manual, you can edit the time zone item, but the country region item will turn grey.
4.2 Country Region
Press ≧ keys to select.
4.3 Time zone
Press △▲ keys to select from GMT-12 to GMT+12.
4.4 Sleep
Press ▷ keys to select among Off, 1 hour or 12 hours.
4.5 Power On/Off
Power On/Off: Select disable or enable. When selecting enable you can edit Power On/Off Time by pressing the number keys.
Power On/Off Time: Press the number key to input.

5. Option
There are 5 sub-menus in this menu
- OSD Language
- Subtitle Language
- Audio Language
- Digital Audio
- Audio Description

5.1 OSD language
Press △ △+ keys to select the language in the circle.
5.2 Subtitle language
Press △▲ keys to select the language in the circle.
5.3 Audio language
Press △▲ keys to select the language in the circle.
5.4 Digital audio
Press △▲ keys to select among PCM/, RAW/HDMI RAW, RAW/HDMI PCM and Off.
6. System
There are 5 sub-menus in this menu.
- Parental Guidance
- Set Password
- Restore Factory Default
- Information
- Software update

6.1 Parental guidance
The consumer can select an age from 4-18 or Off.

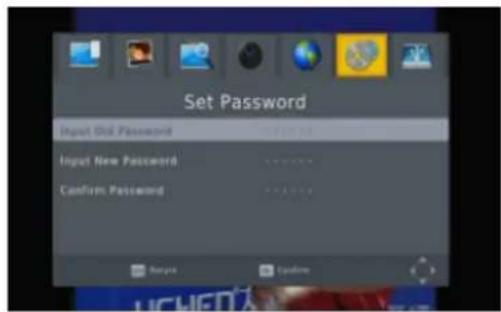
6.2 Set password
Input the old password: Input the password by pressing the number keys 0-9.
Input the new password: Input the password by pressing the number keys 0-9.
Confirm the new password: Press the number keys 0-9 to input the new password again.
Note: The default password is: 000000. Please record your new password. If your new password is lost, please contact your service provider.
6.3 Restore factory default
Choose the option of Restore Factory Default and press [OK] key to restore.
Press [OK] key to start and press [EXIT] key to quit.
Note: Please use this function carefully.
6.4 Information
When you enter the Information menu, the screen displays the receiver information, such as model, SW version and so on.
Press [EXIT] key to leave this menu.

6.5 Software upgrade
Press OK to upgrade through a USB Device.

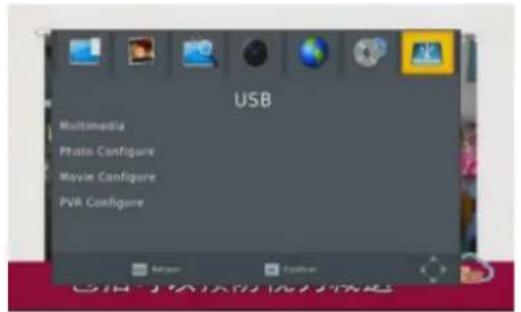
7. USB
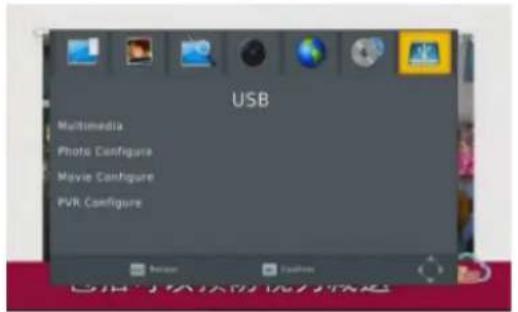
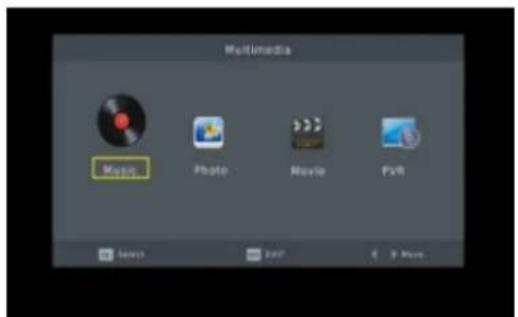
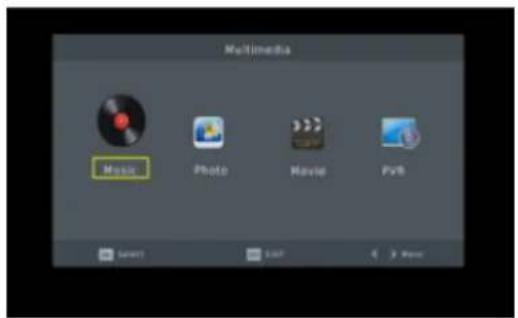
This menu has 5 sub-menus such as: Multimedia, Photo Configuration, Movie Configuration, PVR configuration and Record.

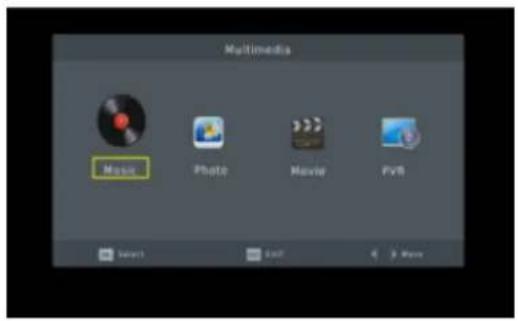
7.1 Multimedia
There are 4 sub-menus in this menu.
- Music
- Photo
- Movie
- PVR

These menus will be disabled when no USB device is plugged in.
7.1.1 Music
Press the OK key to enter the Music window. Press PR+, PR-keys to move the cursor up and down. Press ➕ keys to go back to the folder. Select the music and press the OK key to play it. Press ▶ and || key to play or pause and press ■ key to stop playing.

7.1.2 Photo
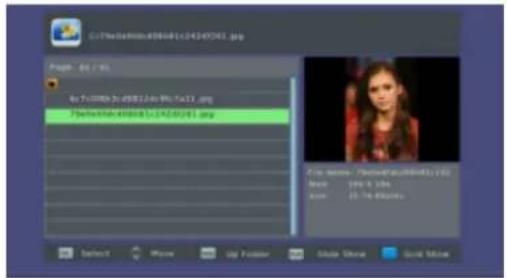
Select the picture and press ▶ key to enter the slide show mode.
Press the blue key to enter grid show mode. In this mode, select the picture and press the OK key to see it in full screen.
7.1.3 Movie
Select the movie you want to watch and press the red key to enter full screen mode.

7.1.4 PVR
In normal mode, press the RECORD key on RCU, then the symbol will appear on the screen. It means you are recording the program now.
Press ■ key and a dialogue box will popup: "Do you want to stop recording?" Press OK to stop recording and save it or press EXIT to continue recording.
If you choose to stop recording, the program you recorded will be added to the PVR RECORD folder in PVR submenu.

In PVR menu you can see the program you recorded.
Press the red key to switch to full screen mode and press the exit key to go back to preview mode. Press the yellow key to delete the program. Press the green key to rename the program. Press OK or ▶ key to play the program. Press ■ key to stop playing.
Press ◀◀▶ keys to fast forward or rewind.

7.2 Photo configuration
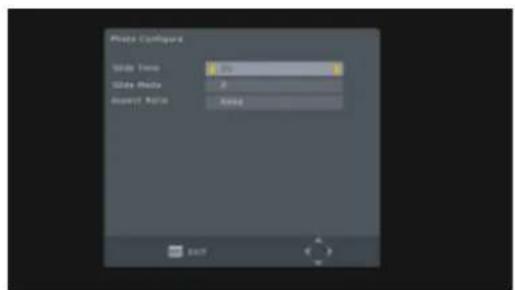
- Slide time: select between 1 s - 8 s.
- Slide mode: Select between 0 - 59 or random.
- Aspect ratio: Select between keep and discard.

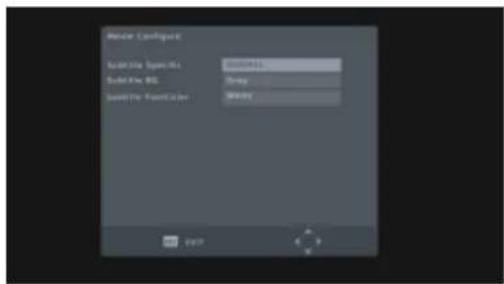
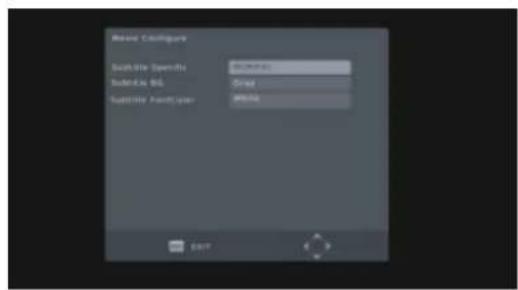
7.3 Movie configuration:
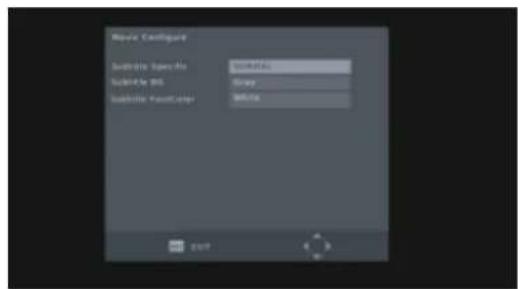
- Subtitle specific: Select normal, big or small.
- Subtitle background: Select transparent, grey, white, and Yellow green.
- Subtitle font color: Select red, white, black, blue or green.
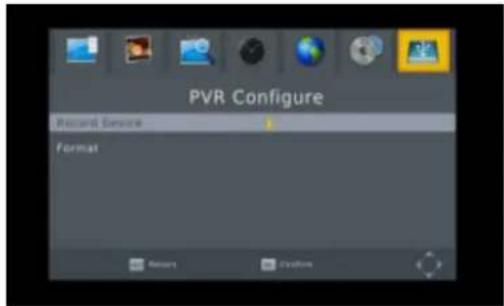
7.4 PVR configuration
-
Record device: Here you see the information of the USB device
-
Format: Press OK key to format the disk.
8. Hotkey
8.1 Number
Use the numeric keys (0-9) to input the number of the desired channel. If the input number is beyond the valid channel number, the system will read "Invalid number", press the OK key to close this message.
8.2 TV/Radio
In normal mode, press the TV/RADIO key to switch between TV mode and Radio mode.
8.3 Up/down
Press PR+, PR- keys to change the channel up or down.
8.4 Left/Right (VOL +/-)
Press △▲ keys or VOL+, VOL- keys to change the volume. Press △ keys to decrease the volume, or press △▲ keys to increase the volume.
8.5 Mute
Press ⚫ key to mute the volume. You can press ⚫ key once again to restore the volume, or press ≧ keys to restore the volume.
8.6 Teletext
Press the Text key to open teletext on the screen.
8.7 Find
Press the red (find) key to pop up the Find window.
Press △▲ keys to enter into the character.

8.8 OK
-
During the viewing or listening, press OK key to Pop up the TV program list or the radio program list.
-
Press PR+, PR- keys to select the channel up or down and then press the OK key to play this channel in Full-screen.
-
Press MENU or EXIT key to close this window.

- Press the AUDIO key to enter the Audio window.
- Press ΔΔ+ keys to select between Left-Left, Right-Right and Left-Right.
- Changing the audio mode is only connected with the current channel, not all the channels.
- Press the EXIT key to close this window.

Press ← PR key to switch the current channel to the previous channel.
8.11 Info
Press the INFO key to enter the information window.

- Press the FAV key to pop up the favourite group window.
- Press ➕ keys to select the desired favourite group. Press PR+, PR- keys to select the channel up or down. Press the OK key at the selected channel to view it in fullscreen. Press the EXIT key to exit.
- If there is no favourite channel, the system will advise you "No Favourite Program!" when you press the FAV key.

Please refer to 1.2 EPG for explanation.

8.14 Subtitle
Press ☐ key to open the subtitle window on the screen.

| Problem Possible causes What to do | ||
| The display on the front panel does not light up. | Main cable is not connected. | Check that the main cable is plugged into the power socket. |
| No sound or picture, but the front panel shows red light. | The receiver is in standby mode. Press the standby button. | |
| No sound or picture. No signal or weak signal. | Weak signal. | Check the cable connections, antenna and other equipment connected between the antenna and the receiver. |
| Bad picture /blocking error. | Signal is too strong. | Connect a signal attenuator to the antenna input. |
| Antenna noise factor too high. | Change to an antenna with lower noise factor. | |
| The antenna is faulty. Change the antenna. | ||
Note:
If you have tried all of the actions suggested above, without solving the problem, please contact your retailer.
Safety precautions:


To reduce risk of electric shock, this product should ONLY be opened by an authorised technician when service is required. Disconnect the product from mains and other equipment if a problem should occur. Do not expose the product to water or moisture.
Maintenance:
Clean only with a dry cloth. Do not use cleaning solvents or abrasives.
Warranty:
No guarantee or liability can be accepted for any changes and modifications of the product or damage caused due to incorrect use of this product.
General:
- Designs and specifications are subject to change without notice.
- All logos, brands or brand logos and product names are trademarks or registered trademarks of their respective holders and are hereby recognised as such.
- This manual was produced with care. However, no rights can be derived. König Electronic can not accept liability for any errors in this manual or their consequences.
- Keep this manual and packaging for future reference.
Attention:

This product is marked with this symbol. It means that used electrical and electronic products should not be mixed with general household waste. There is a separate collections system for these products.
NEDERLANDS
ALGEMENE INFORMATIE
1. Programma:
1.3 SORTEREN
Selecteer "By service ID", "LCN", "ONID" of "Service name".
1.4 LCN
Selecteer tussen "On" en "Off".

2. Beeld
- Aspect Ratio
- Resolution
- TV Format
- Video Output

2.1 Aspectratio
Selecteer tussen "16:9 Pillar Box", "16:9 Pan&Scan", "4:3 Letter Box", "4:3 Pan&Scan", "4:3 Full", "16:9 Wide Screen" en "Auto".
2.2 Resolutie
Selecteer tussen "1080i", "1080p", "576i", "576p", "480i" en "720p".
2.3 TV-formaat
Selecteer tussen "PAL" en "NTSC".
2.4 Video-uitgang
3.3 Land
Selecteer "On" of "Off".
4. Tijd
5.1 OSD-taal
6.3 Fabrieksinstellingen herstellen
6.5 Software-upgrade
7. USB
Dit menu heeft 5 submenu's, zoals: Multimedia, Photo Configuration, Movie Configuration, PVR configuration en Record.

7.1 Multimedia
- Music
- Photo
- Movie
- PVR

7.1.2 Foto
7.1.3 Film

7.4 PVR-configuratie
8. Sneltoets
8.1 Nummer
8.14 Ondertiteling
1 mando a distancia

2 pilas AAA
1 manual de usuario
1 Mando a 1 p. superior 1 receptor distancia
1. Programa:
1.1 Editar programa
2. Imagen
- Aspect Ratio
- Resolution
- TV Format
- Video Output

3.3 País
5.1 Idioma OSD
7. USB
- Music
- Photo
- Movie
- PVR
7.1.2 Fotografía
7.1.4 PVR

8. Tecla caliente
8.1 Número
1 távirányító
1. Programme:
1.4 LCN
- Aspect Ratio
- Resolution
- TV Format
- Video Output

3.1 Auto search (Aut. keresés)
7. USB
- Music
- Photo
- Movie
- PVR

1 Kaukosäädin
1. Program (Ohjelma):
1.4 LCN
Valitse On tai Off.
2. Picture (picture)
- Aspect Ratio
- Resolution
- TV Format
- Video Output

3.3 Country (maa)
4.2 Country Region (alue)
5.1 OSD language (OSD-kieli)
6.2 Set password (salasanan asetus)
7. USB
Tässä valikossa on 5 alavalikkoa: Multimedia, Photo Configuration, Movie Configuration, PVR configuration ja Record.
7.1 Multimedia
1 Dálkové ovládání
2x AAA baterie
1 návod k použití
1 IR
1 nap. zdroj
1 přijímač
Základní instrukce:
1. Program:
1.1 Editace programu
1.4 LCN
Zvolte mezi ZAP a VYP.
2. Obraz
5.1 OSD jazyk
7.1.1 Hudba
7.4 Nastavení PVR
8.14 Titulky
1 telecomandă

2 x baterii AAA
1 manual de utilizare
1 IR 1 p.sup 1 receptor
1. Program:
1.1 Editare program
1.4 LCN
- Aspect Ratio
- Resolution
- TV Format
- Video Output

3.3 Tara
5.1 Limbaj OSD
6.2 Setați parola
7. USB
Acest meniu are 5 sub-meniiuri precum: Multimedia, Photo Configuration, Movie Configuration, PVR configuration and Record.
7.1 Multimedia
- Music
- Photo
- Movie
- PVR

7.1.2 Foto
7.1.4 PVR
7.4 Configurarea PVR
8. Tastă rapidă
8.1 Număr
8.8 OK
2. Picture (Eikóva)
- Aspect Ratio
- Resolution
- TV Format
- Video Output

3.3 Country (Xώρα)
4.2 Country Region (Xώρα)
5.1 OSD language (Γλώσσα OSD)
7. USB
- Music
- Photo
- Movie
- PVR


1. Program:
1.1 Programredigering
2. Billede
- Aspect Ratio
- Resolution
- TV Format
- Video Output

2.1 Aspektomfang
Vælg mellem 16:9 Pillar Box, 16:9 Pan&Scan, 4:3 Letter Box, 4:3 Pan&Scan, 4:3 Full, 16:9 Wide Screen og Auto.
2.2 Opløsning
3.1 Autosøgning
3.3 Land
4.2 Landområde
5.1 OSD-sprog
6.3 Gendan fabriksindstillinger
6.5.1 OTA-opgradering
- Music
- Photo
- Movie
- PVR


7.1.3 Film


8. Hotkey
8.1 Tal

1 fjernkontroll 2x AAA-batterier 1 brukerveiledning 1 IR 1 p.sup. 1 mottaker
Generelt om drift:
1. Program:
1.1 Programendring
Velg by service ID, LCN, ONID eller service name.
1.4 LCN
- Aspect Ratio
- Resolution
- TV Format
- Video Output

2.1 Bildeformat
Velg mellom 16:9 Pillar Box, 16:9 Pan&Scan, 4:3 Letter Box, 4:3 Pan&Scan, 4:3 Full, 16:9 Wide Screen og Auto.
2.2 Oppløsning
Velg mellom 1080i, 1080p, 576i, 576p, 480i og 720p.
2.3 TV-format
3.1 Automatisk søk
3.3 Land
6.2 Angi passord
6.3 Gjenopprette fabrikkinnstillinger
7. USB
- Music
- Photo
- Movie
- PVR
7.1.2 Bilder
7.1.3 Film
1. Program:
- Aspect Ratio
- Resolution
- TV Format
- Video Output

3.3 Country (Страна)
7. USB
- Music
- Photo
- Movie
- PVR
7.1.4 PVR


8.14 Субтитры
EN61000-3-3: 2008; EN 55020: 2007
ERP: EN62087:2009
LVD: EN60065:2002+A 1:2006+A 11:2008
EU Directive(s) / EU richtlijn(en) / Directiva(s) UE / EU direktívák / EU Toimintaohje(et) / Směrnice EU / Directiva(e) UE / Οδηγία(ες) της EE / EU direktiv(er) / EU-direktiv(ene): / Директива(ы) EC:
EMC directive 2004/108/EC; ERP DIRECTIVE 2009/125/EC; LVD DIRECTIVE 2006/95/EC
's-Hertogenbosch, 15-08-2012
Mr. Dhr. / Sr. D. / Úr / Mr. / Pan / DI. / K. / Hr. / Herr: / Γ-Η: Randolf
Richardson
Chief Operating Officer / Operationeel Directeur / Director de
Operaciones / Üzemviteli Igazgató / Käyttöpäällikkö / Provozní ředitel /




- INSTALLATION 10
- INSTALLATION GUIDE 12
- MAIN MENU 12
- TROUBLESHOOTING 22
- NEDERLANDS 23
- ALGEMENE INFORMATIE....23
- MAIN FEATURES
- FOR YOUR SAFETY
- GENERAL INFORMATION
- GENERAL OPERATION
- KEY: FUNCTION
- INSTALLATION
- INSTALLATION GUIDE
- MAIN MENU
- PROGRAM
- 1.1 PROGRAM EDIT
- 1.2 EPG
- 1.3 SORT
- 1.4 LCN
- PICTURE
- 2.1 ASPECT RATIO
- 2.2 RESOLUTION
- 2.3 TV FORMAT
- 2.4 VIDEO OUTPUT
- CHANNEL SEARCH
- 3.1 AUTO SEARCH
- 3.2 MANUAL SEARCH
- 3.3 COUNTRY
- 3.4 ANTENNA POWER
- TIME
- 4.2 COUNTRY REGION
- 4.3 TIME ZONE
- 4.4 SLEEP
- 4.5 POWER ON/OFF
- OPTION
- 5.1 OSD LANGUAGE
- 5.2 SUBTITLE LANGUAGE
- 5.3 AUDIO LANGUAGE
- 5.4 DIGITAL AUDIO
- SYSTEM
- 6.1 PARENTAL GUIDANCE
- 6.2 SET PASSWORD
- 6.3 RESTORE FACTORY DEFAULT
- 6.4 INFORMATION
- 6.5 SOFTWARE UPGRADE
- USB
- 7.1 MULTIMEDIA
- 7.1.1 MUSIC
- 7.1.2 PHOTO
- 7.1.3 MOVIE
- 7.1.4 PVR
- 7.2 PHOTO CONFIGURATION
- 7.3 MOVIE CONFIGURATION
- 7.4 PVR CONFIGURATION
- HOTKEY
- 8.1 NUMBER
- 8.2 TV/RADIO
- 8.3 UP/DOWN
- 8.4 LEFT/RIGHT (VOL +/-)
- 8.5 MUTE
- 8.6 TELETEXT
- 8.7 FIND
- 8.8 OK
- 8.11 INFO
- 8.14 SUBTITLE
- NOTE
- SAFETY PRECAUTIONS
- MAINTENANCE
- WARRANTY
- GENERAL
- ATTENTION
- NEDERLANDS
- ALGEMENE INFORMATIE
- PROGRAMMA
- 1.3 SORTEREN
- BEELD
- 2.1 ASPECTRATIO
- 2.2 RESOLUTIE
- 2.3 TV-FORMAAT
- 2.4 VIDEO-UITGANG
- 3.3 LAND
- TIJD
- 5.1 OSD-TAAL
- 6.3 FABRIEKSINSTELLINGEN HERSTELLEN
- 6.5 SOFTWARE-UPGRADE
- 7.1.2 FOTO
- 7.1.3 FILM
- 7.4 PVR-CONFIGURATIE
- SNELTOETS
- 8.1 NUMMER
- 8.14 ONDERTITELING
- PROGRAMA
- 1.1 EDITAR PROGRAMA
- IMAGEN
- 3.3 PAÍS
- 5.1 IDIOMA OSD
- 7.1.2 FOTOGRAFÍA
- TECLA CALIENTE
- 8.1 NÚMERO
- PROGRAMME
- 3.1 AUTO SEARCH (AUT. KERESÉS)
- PROGRAM (OHJELMA)
- PICTURE (PICTURE)
- 3.3 COUNTRY (MAA)
- 4.2 COUNTRY REGION (ALUE)
- 5.1 OSD LANGUAGE (OSD-KIELI)
- 6.2 SET PASSWORD (SALASANAN ASETUS)
- ZÁKLADNÍ INSTRUKCE
- 1.1 EDITACE PROGRAMU
- OBRAZ
- 5.1 OSD JAZYK
- 7.1.1 HUDBA
- 7.4 NASTAVENÍ PVR
- 8.14 TITULKY
- 1.1 EDITARE PROGRAM
- 3.3 TARA
- 5.1 LIMBAJ OSD
- 6.2 SETAȚI PAROLA
- 7.4 CONFIGURAREA PVR
- TASTĂ RAPIDĂ
- 8.1 NUMĂR
- PICTURE (EIKÓVA)
- 3.3 COUNTRY (XΏΡΑ)
- 4.2 COUNTRY REGION (XΏΡΑ)
- 5.1 OSD LANGUAGE (ΓΛΏΣΣΑ OSD)
- 1.1 PROGRAMREDIGERING
- BILLEDE
- 2.1 ASPEKTOMFANG
- 2.2 OPLØSNING
- 3.1 AUTOSØGNING
- 4.2 LANDOMRÅDE
- 5.1 OSD-SPROG
- 6.3 GENDAN FABRIKSINDSTILLINGER
- 6.5.1 OTA-OPGRADERING
- 8.1 TAL
- GENERELT OM DRIFT
- 1.1 PROGRAMENDRING
- 2.1 BILDEFORMAT
- 2.2 OPPLØSNING
- 2.3 TV-FORMAT
- 3.1 AUTOMATISK SØK
- 6.2 ANGI PASSORD
- 6.3 GJENOPPRETTE FABRIKKINNSTILLINGER
- 7.1.2 BILDER
- 3.3 COUNTRY (СТРАНА)
- 8.14 СУБТИТРЫ
- RICHARDSON
Brand : KONIG
Model : DVB-T HDMI10
Category : Receiver