
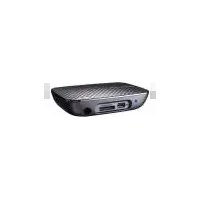
O!Play Air HDP-R3 - Media player ASUS - Free user manual and instructions
Find the device manual for free O!Play Air HDP-R3 ASUS in PDF.


| Product Type | Media Player |
| Brand | ASUS |
| Model | O!Play Air HDP-R3 |
| Dimensions (Approx.) | 180 x 120 x 30 mm |
| Weight | 300 g |
| Power Supply | DC 5V, 2A |
| Connectivity | HDMI, USB 2.0, Wi-Fi 802.11 b/g/n, Ethernet |
| Supported Video Formats | MPEG-1/2/4, DivX, XviD, H.264, MKV, AVI |
| Supported Audio Formats | MP3, WMA, AAC, FLAC, OGG |
| Supported Image Formats | JPEG, BMP, PNG, GIF |
| Main Features | Online streaming, network playback, subtitle support |
| Video Output | HDMI up to 1080p |
| Storage | USB ports for external drives |
| Cleaning and Maintenance | Wipe with a soft dry cloth; avoid liquids |
| Safety Precautions | Keep away from moisture; use supplied adapter |
| Spare Parts | Power adapter, remote control, batteries (for remote) |
| Reparability | No user-serviceable parts; consult qualified technician |
| General Information | Networked media player with smart functionalities |
Frequently Asked Questions - O!Play Air HDP-R3 ASUS
User questions about O!Play Air HDP-R3 ASUS
0 question about this device. Answer the ones you know or ask your own.
Ask a new question about this device
Download the instructions for your Media player in PDF format for free! Find your manual O!Play Air HDP-R3 - ASUS and take your electronic device back in hand. On this page are published all the documents necessary for the use of your device. O!Play Air HDP-R3 by ASUS.
USER MANUAL O!Play Air HDP-R3 ASUS
O!Play Air HDP-R3
User Manual
E4955
First Edition
October 2009
Copyright © 2009 ASUSTeK COMPUTER INC. All Rights Reserved.
No part of this manual, including the products and software described in it, may be reproduced, transmitted, transcribed, stored in a retrieval system, or translated into any language in any form or by any means, except documentation kept by the purchaser for backup purposes, without the express written permission of ASUSTeK COMPUTER INC. ("ASUS").
Product warranty or service will not be extended if: (1) the product is repaired, modified or altered, unless such repair, modification of alteration is authorized in writing by ASUS; or (2) the serial number of the product is defaced or missing.
ASUS PROVIDES THIS MANUAL "AS IS" WITHOUT WARRANTY OF ANY KIND, EITHER EXPRESS OR IMPLIED, INCLUDING BUT NOT LIMITED TO THE IMPLIED WARRANTIES OR CONDITIONS OF MERCHANTABILITY OR FITNESS FOR A PARTICULAR PURPOSE. IN NO EVENT SHALL ASUS, ITS DIRECTORS, OFFICERS, EMPLOYEES OR AGENTS BE LIABLE FOR ANY INDIRECT, SPECIAL, INCIDENTAL, OR CONSEQUENTIAL DAMAGES (INCLUDING DAMAGES FOR LOSS OF PROFITS, LOSS OF BUSINESS, LOSS OF USE OR DATA, INTERRUPTION OF BUSINESS AND THE LIKE), EVEN IF ASUS HAS BEEN ADVISED OF THE POSSIBILITY OF SUCH DAMAGES ARISING FROM ANY DEFECT OR ERROR IN THIS MANUAL OR PRODUCT.
SPECIFICATIONS AND INFORMATION CONTAINED IN THIS MANUAL ARE FURNISHED FOR INFORMATIONAL USE ONLY, AND ARE SUBJECT TO CHANGE AT ANY TIME WITHOUT NOTICE, AND SHOULD NOT BE CONSTRUED AS A COMMITMENT BY ASUS. ASUS ASSUMES NO RESPONSIBILITY OR LIABILITY FOR ANY ERRORS OR INACCURACIES THAT MAY APPEAR IN THIS MANUAL, INCLUDING THE PRODUCTS AND SOFTWARE DESCRIBED IN IT.
Products and corporate names appearing in this manual may or may not be registered trademarks or copyrights of their respective companies, and are used only for identification or explanation and to the owners' benefit, without intent to infringe.
Contents
Contents .... iii
Safety information ...... v
License notice and trademark acknowledgement for Dolby Digital ..... vi
License notice and trademark acknowledgement for DTS ...... vi
About this user guide.... vii
Chapter 1: Getting started
Welcome 1-1
Package contents 1-1
Specifications summary 1-2
System requirements 1-3
Getting to know your O!Play HD media player 1-3
Front/left panel 1-3
Right panel 1-4
Rear panel 1-5
Remote control 1-6
Getting your O!Play HD media player ready 1-8
Connecting the power adapter 1-8
Connecting devices to your HD media player 1-8
Starting for the first time 1-10
Chapter 2: Getting connected
Connecting to a network 2-1
Wired connection 2-1
Wireless connection 2-3
Connecting to a wireless local area network (WLAN) 2-4
Configuring the network clients 2-5
Sharing files over the network 2-7
Sharing files under Windows® XP OS 2-7
Sharing files under Windows® Vista OS 2-8
Chapter 3: Using your O!Play HD media player
The Home screen 3-1
Configuring the system settings....3-1
Playing a video file 3-2
Video control buttons on the remote control 3-2
Playing a video file 3-3
Configuring the subtitle settings 3-4
Configuring the video settings 3-4
Playing music 3-5
Music control buttons on the remote control 3-5
Playing a music file 3-5
Configuring the audio settings 3-6
Viewing photos 3-7
Viewing photos 3-7
Viewing photos in slideshow mode 3-8
Setting the background music for the slideshow 3-8
Configuring the slideshow settings 3-8
Copying files 3-10
Sharing files via your media player 3-10
Chapter 4: Troubleshooting
Troubleshooting 4-1
Display 4-1
Audio 4-3
USB storage device 4-3
Remote Control 4-3
Firmware Update 4-4
Wi-Fi and Internet connections 4-4
Operation/function failure 4-5
Appendices
Notices ......A-1
GNU General Public License ....A-2
ASUS contact information ......A-8
Safety information

Use only a dry cloth to clean the device.

DO NOT place on uneven or unstable work surfaces. Seek servicing if the casing has been damaged. Refer all servicing to qualified service personnel.

DO NOT expose to or use near liquids, rain, or moisture.

SAFE TEMP: This device should only be used in environments with ambient temperatures between 5°C (41°F) and 35°C (95°F).

DO NOT install near any heat-producing devices or sources such as radiators, heat registers, stoves, or amplifiers.

Ensure that you plugged the device into the correct power input rating (12Vdc, 2A).
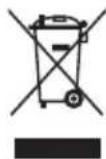
DO NOT throw the device in municipal waste. This device is designed to enable proper reuse and recycling. Check local regulations for disposal of electronic products.
Warning labels
 |  |  |
| The lightning flash with arrowhead symbol, within an equilateral triangle, is intended to alert the user to the presence of uninsulated dangerous voltage within the product's enclosure that may be of sufficient magnitude to constitute a risk of electric shock to persons. | To reduce the risk of electric shock, do not remove the back cover. No user serviceable parts inside. Refer servicing to qualified service personnel. | The exclamation point within an equilateral triangle is intended to alert the user to the presence of important operating and maintenance (servicing) instructions in the literature accompanying the appliance. |

- Danger of explosion if battery is incorrectly replaced. Replace only with the same or recommended battery type.
- Dispose of used batteries according to local regulations.
Manufactured under license from Dolby Laboratories. Dolby and the double-D symbol are trademarks of Dolby Laboratories.

License notice and trademark acknowledgement for DTS
Manufactured under license under US Patent #s: 5,451,942; 5,956,674; 5,974,380; 5,978,762; 6,487,535 & other US and worldwide patents issued & pending. DTS and DTS 2.0 + Digital Out are registered trademarks and DTS logos and symbol are trademarks of DTS, Inc. © 1996-2008 DTS, Inc. All Rights Reserved.
About this user guide
How this user guide is organized
• Chapter 1: Getting started
Provides the basic information about your ASUS O!Play HD Media Player.
• Chapter 2: Getting connected
Provides information on connecting your ASUS O!Play HD Media Player to a home or LAN network.
• Chapter 3: Using the ASUS O!Play HD Media Player
Provides information on using your ASUS O!Play HD Media Player.
• Chapter 4: Troubleshooting
Provides solutions to frequently-asked questions about your ASUS O!Play HD Media Player.
Conventions used in this guide
To ensure that you perform certain tasks properly, take note of the following symbols used throughout this user guide.


Where to find more information
Refer to the following sources for additional information and for product and software updates.
- ASUS Support site
Download the latest firmwares, drivers, and utilities from the ASUS Support site at http://support.asus.com.
- Optional documentation
Your product package may include optional documentation, such as warranty flyers, that may have been added by your dealer. These documents are not part of the standard package.
Chapter 1
Getting started
Welcome
Thank you for buying the ASUS O!Play HD Media Player!
ASUS O!Play HD Media Player allows you to enjoy digital media files from your computer via UPnP function, portable USB/eSATA storage devices, memory cards, or over the network to your TV or entertainment system.
Package contents
 |  | |||
| O!Play Air HDP-R3 HD Media Player Remote control with two AAA batteries | ||||
 |  |  | ||
| Power cord AC adapter Support CD | (User Manual/utilities) | |||
 |  | |||
| Composite AV (audio-video) cable Quick Start Guide | ||||

If any of the above items are damaged or missing, contact your retailer.
Specifications summary
| Wireless standard Wi-Fi 802.11n | |
| Supported video formats MPEG1/2/4, H.264, VC-1, RM/RMVB | |
| Supported video file extension | .mp4, .mov, .xvid, .avi, .asf, .wmv, .mkv, .rm, .rmvb, .flv, .ts, m2ts, .dat, .mpg, .vob |
| Supported audio formats MP3, WAV, AAC, OGG, WAV, FLAC, AIFF, Dolby Digital, DTS Digital Surround | |
| Supported image formats JPEG, BMP, PNG, GIF, TIFF | |
| Supported subtitle formats SRT, SUB, SMI, SSA | |
| I/O ports 1 x Power (DC) input | |
| Dimensions W x D x H: 181.0mm x 125.32mm x 47.73mm | |

Specifications are subject to change without notice.
System requirements
• High-definition TV (HDTV), standard TV, or HDMI monitor - Storage device (USB flash drive / USB HDD/ eSATA flash drive/ eSATA HDD) • Memory card (SD/MMC, CF, or MS/MS-Duo card) - RJ-45 cable to connect to a home or an office network (Optional) • Wi-Fi connection (Optional)

- Use an HDMI cable to connect your HD media player to an HDTV or HDMI monitor.
- Use the bundled composite AV cable to connect your HD media player to a standard TV.
Getting to know your O!Play HD media player Front/left panel

| 1 | eSATA/USB 2.0 combo portConnect a USB 2.0/eSATA device such as an external hard drive into this port. | |
| 2 | Reset buttonUsing a pin or a paper clip, press this button to reset the device to its factory default settings. | |
| 3 | USB 2.0 portConnect a USB 2.0 device into this port. | |
| 4 | IR (Infra-red) ReceiverAllows you to control the HD media player using the IR remote control. | |
| 5 | LED indicators Displays the status of the HD media player. | |
| LED Status Description | ||
| Power OFF | The device is turned off. | |
| Red The device is in sleep mode. | ||
| Blue The device is turned on. | ||
| WiFi Blue Wi-Fi connection is active. | ||
| Storage OFF | No storage device is found. | |
| Blinking Receiving data from a storage device. | ||
| ON A storage device is found. | ||

Ensure that the IR receiver is not blocked. Otherwise, the Media Player will not be able to receive the command from the remote control.
Right panel

| 1 | SD/MMC card slotInsert the SD/MMC card into this slot. The device supports 32GB SDHC v2.0 and 2GB MMC v4.2. |
| 2 | CF card slotInsert the CF card into this slot. The device supports 64GB CF v4.1. |
| 3 | MS/MS-Duo card slotInsert the MS/MS-Duo card into this slot. The device supports 128MB MS v1.43 and 32GB MS Pro v1.03. |
Rear panel

| 1 | Analog audio output (red and white)Insert the left and right audio cable jacks to connect to a television or other audio equipment. |
| 2 | Analog video output (yellow)Insert a composite cable to connect to a television or other video equipment. |
| 3 | Digital audio output (S/PDIF)Insert an optical cable into this port to connect an external Hi-Fi audio system. |
| 4 | HDMI portInsert an HDMI cable into this port to connect to a high-definition multimedia interface (HDMI) device. |
| 5 | LAN (RJ-45) portInsert an RJ-45 cable into this port to connect to a local area network (LAN). |
| 6 | Power (DC-In) inputInsert the power adapter into this port. |
Remote control

Use the remote control to power on/off the O!Play HD media player, browse through menus, and select the media file to play, view, or listen to.

| 1 | PowerTurn the HD media player on or off. | |
| 2 | RewindPress to rewind the playback. | |
| 3 | StopStops the playback. | |
| 4 | PreviousReturns to the previous media file. | |
| 5 | HomeDisplays the home menu. | |
| 6 | Navigation/OK keys | |
| Press the up/down keys to move through the main menus in the Home screen.Press the up/down keys to move through the items in a submenu. | ||
| Press the left/right keys to move through the menu bar in a submenu.Press the left/right keys to decrease/increase a numerical value. | ||
| Press OK to confirm the selection. | ||
| 7 | Volume upIncreases the volume. | |
| 8 | Volume downDecreases the volume. | |
| 9 | SubtitlePress to configure the subtitle settings such as color and font size. | |
| 10 | LanguagePress to select the language for the video you are watching. | |
| 11 | DisplayPress to display the file name, file type, and time. | |
| 12 | Pause/PlayToggles between playback and pause. | |
| 13 | ForwardPress to forward the playback. | |
| 14 | NextGoes to the next media file. | |
| 15 | ReturnReturns to the previous screen. | |
| 16 | SetupLaunches the Setup menu. | |
| 17 | ModeToggles among Music, Photo, and Movies modes. | |
| 18 | ZoomZooms in on the screen. | |
| 19 | RepeatPress to repeat the playback of the currently playing music, movie, or photo file. | |
| 20 | Music shufflePress to group all your music files in your storage device and then play the music files randomly. | |
Getting your O!Play HD media player ready Connecting the power adapter

To connect the power adapter:
- Connect the AC power cord to the AC adapter.
- Connect the AC adapter to the DC-in port at the back of your HD media player.
- Connect the AC adapter to a power source.
Connecting devices to your HD media player
To connect devices to your HD media player:
- Do any of the following to connect a display to your HD media player: Use an HDMI cable to connect your HD media player to an HDTV or an HDMI monitor.
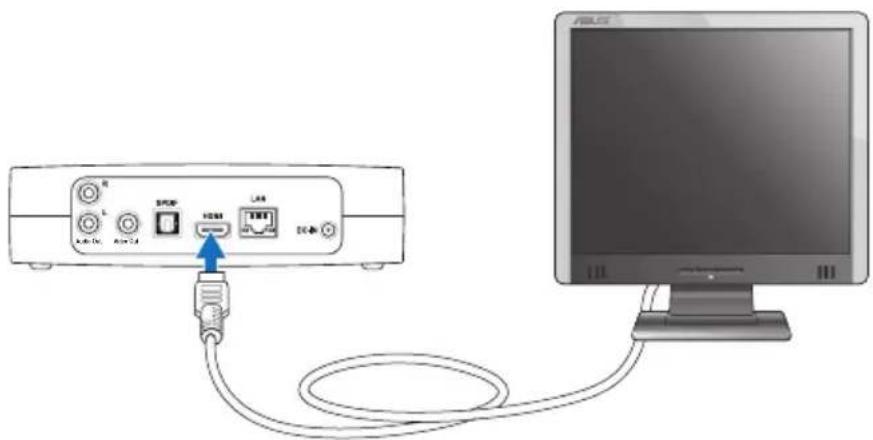

The HDMI cable is purchased separately.
- Use the bundled composite AV cable to connect your HD media player to a standard TV.


- Do any of the following to connect a storage device or memory card to your HD media player:
- Insert a USB/eSATA storage device such as a portable hard disk drive or a USB flash disk to the USB port or USB/eSATA combo port at the left side of your HD media player.

- Insert a memory card such as SD/MMC, CF, and MS/MS-Duo cards into the appropriate card slot on the right side of your HD media player.


You can also access media files from a shared folder on a network computer. For more details, refer to the section "Connecting to a network" in Chapter 3.
- Use either the bundled composite AV cable or an S/PDIF cable to connect your audio system to your HD media player.
- Plug the HD media player's power cable into a power source.
- Turn on the HDTV, TV, or HDMI monitor.
- If you are using an HDTV or a standard TV, set your HDTV/TV to video mode.
If you are using an HDMI monitor, ensure that the monitor's display resolution is set to HDMI.

Refer to the documentation that came with your HDMI monitor.
Starting for the first time
When you start your HD media player for the first time, a series of screens appear to guide you in configuring the basic settings of your HD media player.
To start for the first time:
- Turn on your HD media player and your HDTV, TV, or HDMI monitor.
- If you are using an HDTV or a standard TV, set your HDTV/TV to video mode.
- If you are using an HDMI monitor, ensure that the monitor's display resolution is set to HDMI.
- The Setup Wizard appears. Follow the onscreen instructions to complete the setup process.

Use the remote control to navigate the screen.
Chapter 2
Getting connected
Connecting to a network
Wired connection
Use an RJ-45 cable to connect your HD media player to a home or an office network.
![graph TD A["Router"] -->|LAN| B["Laptop"] A -->|Power| C["Splitter"] A -->|Line| D["Power Supply"] A -->|DSL| E["DSL Connection"] A -->|Phone| F["Phone Connection"] A --> G["External Port 1"]](/content/2026/06/1277669/images/cde4f31db9007be546e76c67839bcf0789dbda60a63eed7e835a3955b3a37d2e.jpg)
To connect to your network:
- Connect one end of the RJ-45 cable to the LAN port at the back of your HD media player and the other end to the LAN port of the router.
- Connect your computer and other necessary devices to your router.

Refer to the documentation that came with your router.
- Connect all the necessary devices to your HD media player.

For more details, refer to the section Connecting devices to your HD media player in Chapter 1.
- From the Home screen, press the up/down keys to navigate to Setup, then press OK.
You may also press to launch the Setup menu.

- Select Network > Wired LAN Setup and press OK.
- Select either DHCP IP (AUTO) or FIX IP (MANUAL) as your setup type:
If you select DHCP IP (AUTO), the DHCP server automatically assigns an IP address for your media player. If you select FIX IP (MANUAL), key in the IP address and Subnet Mask.

- Use the up/down keys to increase/decrease a numerical value.
- Use the left/right keys to move to other items on the System menu.

You may use the Fix IP address default settings:
IP Address: 192.168.0.2 - Subnet mask: 255.255.255.0
- You may also obtain the IP address and subnet mask from your Internet Service Provider (ISP).
- If you cannot connect to your office network, contact your network administration.
- If you want to access shared network files, ensure that the computer's files are shared on the network. For more details, refer to the section Sharing media files over the network in this chapter.
- On the confirmation message, select OK to save the setting or CANCEL to discard the setting.
- On your computer, you may manually configure the IP address settings.

For more details, refer to the section Configuring the network clients in this chapter.
Wireless connection
Accessing files via O!Link
O!Link is a utility that allows you to access files from your computer wirelessly.
To access files via O!Link:
- Install O!Link on your computer.

Install O!Link from the support CD that came with your HD media player package.
- Access files from a shared folder on your computer or over the network.

For more details, refer to the section Sharing media files over the network in this chapter.
Accessing files wirelessly
To access files wirelessly:
- Connect all the necessary devices to set up your wireless network. Set up your wireless network to Ad-Hoc mode.

- Refer to the documentation that came with your wireless router for details.
- For establishing a wireless connection, you may need to use an IEEE 802.11b/g/n compatible WLAN card/adapter on your computer.
- Some computers may come with a built-in wireless capability. Refer to the documentation that came with your computer.
- You may configure the IP settings on your computer.

- For more details, refer to the section Configuring the network clients in this chapter.
- Use the following default IP settings:
- IP address: 192.168.59.xxx (xxx can be any number between 2 and 254. Ensure that the IP address is not used by another device)
- Subnet Mask: 255.255.255.0 (same as the HD media player)
- Ensure that the folder containing the files that you want to access to is shared.

For more details, refer to the section Sharing files over the network in this chapter.
Connecting to a wireless local area network (WLAN)
To connect to a WLAN:
- Connect all the necessary devices to your HD media player.

For more details, refer to the section "Connecting devices to your HD media player" in Chapter 1.
- From the Home screen, press the up/down keys to navigate to Setup, then press OK. You may also press the Setup button to launch the Setup menu.
- Select Network > Wireless Setup, then press OK.
- Press the up/down keys to navigate to your preferred connection profile. Press OK to confirm the selection.
- Select Infrastructure (AP) as your connection mode and press OK. Your HD media player searches for wireless access points.
- From the list, select the access point that you want to connect to. Press OK.
- Wait until your HD media player connects to your selected access point.
- When a wireless connection is successfully established, the IP address of the selected access point is shown on the Network menu.
- You may now start to access files from a network computer's shared folder.
Configuring the network clients
Setting an IP address for wired or wireless client
To access the ASUS HD media player, you must have the correct TCP/IP settings on your wired or wireless clients or computers.
Follow the instructions below that correspond to the operating system installed on your computer.

Use the following default IP settings:
- IP address: 192.168.0.xxx (for wired computer) 192.168.59.xxx (for wireless computer) xxx can be any number between 2 and 254. Ensure that the IP address is not used by another device.
- Subnet Mask: 255.255.255.0 (same as the HD media player)
Windows® XP OS
- Click Start > Control Panel > Network Connection. Right-click Local Area Connection then select Properties.

- Select Internet Protocol (TCP/IP), then click Properties.
- Select Obtain an IP address automatically if you want the IP settings to be assigned automatically. Otherwise, select Use the following IP address: and key in the IP address and Subnet mask.
- Click OK when done.

Windows® Vista OS
- Click Start > Control Panel > Network and Sharing Center. Right-click Local Area Connection then select Properties.

- Select Internet Protocol Version 4(TCP/IPv4), then click Properties.

- Select Obtain an IP address automatically if you want the IP settings to be assigned automatically. Otherwise, select Use the following IP address: and key in the IP address and Subnet mask.
- Click OK when done.
Sharing files over the network
Sharing files under Windows® XP OS
To share files under Windows® XP OS:
- On your computer, select the folder containing the files that you want to share.
- Right-click the selected folder, and select Sharing and Security.

3. Tick Share this folder.
If you want to set permissions for the network users, click Permissions. Click Apply when done.
- A hand icon appears on the folder indicating that the folder's contents are shared over the network.

Sharing files under Windows® Vista OS
In Windows® Vista OS, you can share files in any of these two ways:
• Share files from a folder on your computer. • Share files from the Public folder.
Sharing files from a folder on your computer
To share files from a folder on your computer:
- On your computer, select the folder containing the files that you want to share.
- Right-click the selected folder, and select Share.
- In the File Sharing screen, select the network user that you want to share files with from the dropdown list, then click Add.
- To set permissions for the network user, select any of these permission levels from the dropdown list under Permission Level:
- Reader: Select this option if you want the user to have read-only access rights to the shared files. S/he cannot add, change, or delete the shared files.
- Contributor: Select this option to allow the user to view and add shared files. S/he can only change or delete the files s/he had shared. • Co-owner: Select this option to allow the user to view, add, change, or delete a shared file.
- When done, click Share.
Sharing files from the Public folder
The Public folder allows you to share your files with other people using your computer or with other users in the network.
To share files from the Public folder:
1. Click

ocuments.
- From Favorite Links in the navigation pane, click Public. Put any files or folders that you want to share into any subfolders in the Public folder.

To restrict access to the files and folders in the Public folder, refer to the succeeding sections.
To restrict a user's access to the Public folder:
You can turn on the password-protected sharing function to restrict access to the Public folder only to people with user accounts and passwords on your computer.
- Click > Control Panel > Network and Internet > Network and Sharing Center to launch the Network and Sharing Center.
- From the Password protected sharing dropdown list, select Turn on password protected sharing.
- When done, click Apply.
To set the user's access level to the Public folder:
- Click > Control Panel > Network and Internet > Network and Sharing Center to launch the Network and Sharing Center.
- From the Public folder sharing dropdown list, select any of these three options:
- Turn on sharing so anyone with network access can open files
- Turn on sharing so anyone with network access can open, change, and create files
- Turn off sharing (people logged on to this computer can still access this folder)
- When done, click Apply.
Chapter 3
Using your O!Play HD media player
The Home screen
The Home screen includes these main options: Movies, Music, Photos, All Media, Setup, and File Copy.


The option All Media allows you to view all your photos and videos in your storage device and memory card.
Configuring the system settings
The System menu allows you to configure the menu language, text encoding, system update, and system time, turns on/off the screen saver function, and restore the HD media player to the default settings.
To configure the system settings:
- From the Home screen, press the up/down keys to navigate to Setup, then press OK.
You may also press to launch the Setup menu.

- Press the right key to navigate to the System tab, then press OK.
- Press the up/down keys to navigate and select the function that you want to configure.


Use the up/down keys to increase/decrease a numerical value.
- Press to save or press to cancel the settings made.
Playing a video file
Video control buttons on the remote control
| Button Function | |
 | Press to display the video's file source, file name, file format, and elapsed time. |
 | Press to return to the previous screen. |
 | Press to toggle between playback and pause. |
 | Press to rewind the playback. Press repeatedly to change the rewinding speed to x1.5, x2, x4, x8, x16, x32, or normal speed (x1) |
 | Press to forward the playback. Press repeatedly to change the forward speed to x1.5, x2, x4, x8, x16, x32, or normal speed (x1) |
 | Press to stop the playback. |
 | Press to repeat the playback. |
 | Press to zoom in on the screen. Use the navigation keys to move to a certain area on the enlarged screen. |
 | Press to return to the previous video file. |
 | Press to go to the next video file. |
 | Press to launch the Setup menu. |
Playing a video file
To play a video file:
- From the Home screen, press the up/down keys to navigate to Movies, then press OK.

- Using the up/down keys, select the source of your video file, then press OK. Locate the video that you want to play.

Before you can access a media file over the network, ensure that the folder containing the file is shared. For more details, refer to the section "Sharing files over the network" in Chapter 3.
- Press OK or Play to play the video.
![Movies [Return] Club 40mbps LPCM2 ask.mv3 2/3 00:00:14 / 00:04:49 Name: HD Cub (40mbps LPCM2.0).mp4 Size: 3416 MBytes](/content/2026/06/1277669/images/d63dd54db3f5ce32cc91f18a31dfd0c11aea3eb88e705e8e7ef07f7230ef1774.jpg)
Configuring the subtitle settings
The Subtitle key allows you to configure the subtitle settings such as font size and color.
To configure the video settings:
- From the Home screen, press the up/down keys to navigate to Movies, then press OK.
- Locate and play your selected video file, then press the Menu key.
- Use the navigation keys to move through and make your changes to the subtitle settings.
Configuring the video settings
The Video menu allows you to configure several video settings such as the aspect ratio, brightness, contrast, noise reduction, TV system, 1080P 24HZ, resume play, and movie preview.
To configure the video settings:
- From the Home screen, press the up/down keys to navigate to Setup, then press OK.
You may also press to launch the Setup menu.

- Press the right key to navigate to the Video tab, then press OK.
- Press the up/down keys to navigate to the function that you want to configure. Press to confirm the selection.


Use the up/down keys to increase or decrease a numerical value.
- Press to save or press to cancel the settings made.
Playing music
Music control buttons on the remote control
| Button Function | |
 | Press to display the song's file source, file name, file format, and elapsed time. |
 | Press to return to the previous screen. |
 | Press to toggle between playback and pause. |
 | Press to rewind the playback. Press repeatedly to change the rewinding speed to x1.5, x2, x4, x8, x16, x32, or normal speed (x1) |
 | Press to forward the playback. Press repeatedly to change the forward speed to x1.5, x2, x4, x8, x16, x32, or normal speed (x1) |
 | Press to stop the playback. |
 | Press to return to the previous music file. |
| [KBH3] | Press to go to the next music file. |
 | Press to repeat the playback. |
 | Press to launch the Setup menul |
 | Press to group all your music files in your storage device and then play the music files randomly. |
Playing a music file
To play a music file:
- From the Home screen, press the up/down keys to navigate to Music, then press OK.

- Using the up/down keys, select the source of your music file, then press. Locate the music file that you want to play.

Before you can access a media file over the network, ensure that the folder containing the file is shared. For more details, refer to the section 'Sharing media files over the network' in Chapter 3.
- Press or twice to play the music file.
![Music 02 You Know I'm ... 03 Me & Mr Jones... 04 Just Friends.m... 05 Back To Black... 06 Love Is A Losin... 07 Tears Dry On Their Own.mp3 0:20 artist: Amy Winehouse title: Tears Dry On Their Own album: Back To Black [Explicit] genre: R&B comment: org year: 2006 bitrate: 7/11 Name: 07 Tears Dry On T…](/content/2026/06/1277669/images/35a2e652e2ba267784cd9a50fd1656749a82434a54228d1ac4e8bc42b112526a.jpg)
Configuring the audio settings
The Audio menu allows you to configure the audio settings such as Night Mode and Digital Output.
To configure the audio settings:
- From the Home screen, press the up/down keys to navigate to Setup, then press OK.
You may also press to launch the Setup menu.
- Select the Audio tab, then select the function that you want to configure.

If you want to configure the Digital Output, refer to the following for the descriptions of the options:
• HDMI LPCM (Default): Select this option when connecting your TV to the HDMI port of the media player. - HDMI RAW: Select this option for the multichannel audio receiver. The RAW data of the audio will be sent to the HDMI multichannel receiver for decoding.
- SPDIF LPCM: Select this option for the S/PDIF audio receiver.
- SPDIF RAW: Select this option for the S/PDIF multichannel audio receiver. The RAW data of the audio will be sent to the S/PDIF multichannel receiver for decoding.
Viewing photos
Viewing photos
To view photos:
- From the Home screen, press the up/down keys to navigate to Photos, then press OK.

- Using the up/down keys / , select the source of your photo, then press OK. Locate the photo that you want to view.
- Press to browse the photos. Press to view the photos in slideshow mode.
![Photos [Return] ■ field_001.jpg ■ japanese garden_0... ■ mustang_001.jpg ■ mustang_002.jpg ■ sanfrancisco_001.jpg 4.8 Name: mustang_001.jpg Size: 12 MBytes](/content/2026/06/1277669/images/23281c71819ba2fc75e5cb5a0b3414564aa905827af67a190aa2d140cf5946e2.jpg)
Viewing photos in slideshow mode
To view photos in slideshow mode:
- When the selected photo is displayed in full screen, press on the remote control to start the slideshow. Photos in the same source folder will be displayed in order.
- Press to pause the slideshow. Press or to return to the source folder.
- You can configure the slide show interval and the transition effect from Setup > Photo.
Setting the background music for the slideshow
To set the background music for the slideshow
- Before viewing photos, go to Music and play music files first.
- Press to return to the Home screen and then go to Photo to start the photo slideshow. The slideshow plays with the background music.

Press ⏻ instead of ⏱ while playing music files. Otherwise, the background music will not play.
Configuring the slideshow settings
The Photo menu allows you to configure the slideshow settings such as Slide Show Interval and Transition Effect.

To configure the slideshow settings:
- From the Home screen, press the up/down keys to navigate to Setup, then press OK.
You may also press [button] to launch the Setup menu.

- Select the Photo tab, then select any of these functions that you want to configure.
- Transition Effect
Select the effect displayed between slides in a slideshow. You can select the transition effect from Off, Cross Fade, Left to Right, Top to Bottom, Waterfall, Snake, Dissolve, Strip Left Down, and All Effect Shuffle.

- Slide Show Interval
Set the time interval between the photos in the slideshow from two seconds (default) to two minutes.


From the Home screen, navigate to All Media to view all your photos and videos from your storage device or memory card.
Copying files
To copy files:
- From the Home screen, press the up/down keys to navigate to File Copy, then press OK. You may also press [button] to launch the Setup menu.
- Select your Source, then press OK.
- Select your Destination, then press OK.
- In your source's directory, locate the file that you want to copy to another location, then press ▶. A red checkmark appears next to your selected file.
- Press [button] to go to your destination directory. Select the new location for your selected file.
- Press to confirm the file copy.
Sharing files via your media player
The UPnP function in your HD media player allows you to stream shared media files such as photos, videos, or music from Windows® Media Player 11 or later version on your computer.

Ensure that you have wired or wireless network connection. Refer to Chapter 3 for more details on connecting to a network.
To share files on your media player:
- Launch Windows® Media Player on your computer.
- From the Library tab, click Media Sharing.
- In the Media Sharing screen, tick Share my media to.
- From the list, select the device that you want to share media files with, then click Allow.
Chapter 4
Troubleshooting
Troubleshooting
This section provides answers to some common problems that you may encounter while installing or using the ASUS O!Play HD media player. These problems require simple troubleshooting that you can perform by yourself. Contact ASUS Technical Support if you encounter problems not mentioned in this section.
Display
The media player does not work. You think that the problem might be with the media player's power adapter.
- The media player's power adapter possibly performs the overload protection function — automatic shutdown during overload conditions, such as Over Current, Over Voltage, and Over Temperature.
- Disconnect the media player's power adapter and wait a few minutes before you reinsert the player's power adapter directly into an outlet. Turn on the media player again.
- If the problem still exists, contact your retailer.
The TV screen is blank and the media player power LED remains off.
- Ensure that the TV is turned on.
- Ensure that the media player's power adapter and power outlet are functional.
- Ensure that the media player's power adapter plug is firmly attached to the rear panel of the player and to the power outlet.
I cannot see the Setup Wizard when I turn on the player for the first time. The TV screen is blank and the media player power LED is on.
- Ensure that the TV is turned on.
- Ensure that the AV/HDMI cable is properly connected to the correct terminals on both the TV and the media player.
- Ensure that your TV is switched to the appropriate video source (AV IN or HDMI). You may need to use your TV Remote control to change video sources.
- Turn off your media player and wait for a few minutes before turning it on again or press the reset button at the left panel.
The TV screen is blinking and fuzzy.
- Ensure that the AV/HDMI cable is properly connected to the correct terminals on both the TV and the media player.
- Ensure that the media player power LED is on.
- Ensure that the TV system setting matches the system used in your country.
- Ensure that the correct video resolution option is selected.
I cannot find any of my music, movie, or photo files.
- Ensure that your Media Server (such as USB storage device) or your computer is switched on and that the device is not in standby mode.
- If using a wired network, check that the Ethernet cable is properly attached to the Media Player and to a network router. Check that the router is switched on.
- Check that the Media server (your computer) used has shared the Media Player as a client and that the files are also shared.
- If you are using static IP addresses, check that the IP address is in the same range as other addresses on your network. Verify that the address is not already used by another PC or device.
- Ensure that the files you are sharing use a supported file format.
Certain files cannot be played on the Media Player.
The Media Player may not support the video or audio format used in the file. For information on what media formats the Media Player supports, refer to Specifications summary in Chapter 1.
Only one video/music/photo is played when I selected it. How do I play the entire list?
When selecting a video/music/photo to play, pressing the OK button on the remote control plays just the selected file while pressing the PLAY/PAUSE button plays the entire list of files.
The LEDs on the Ethernet port do not blink and my wired connection does not work.
- Ensure that the LAN Cable plug is firmly connected to the Ethernet port of the Media Player's rear panel.
- Try to replace a functional LAN cable.
- Try to reconnect the LAN cable to the Media Player to keep the network connection active.
Audio
There is no sound.
- Ensure the volume on the entertainment unit is not on mute mode.
- Navigate to the Setup > System screen and ensure that the correct Digital output setting is enabled. If you are using the multiple audio Amplifier, the RAW setting should be enabled.
- If you are watching a video that supports multiple audio channels, press Audio Options button repeatedly until the intended audio channel is displayed.
I cannot hear any sound when I am playing music files.
- Ensure that the audio cables are properly connected.
- If the audio cables are connected to your TV, the TV must be turned on to play any music files.
- If the audio cables are connected to your stereo, ensure that the stereo is on and you have the correct stereo input selected. If you are having trouble selecting the correct audio source, refer to the instructions that came with your stereo.
A few of my Music files do not appear.
The Media Player supports the most common music file formats. However, there are almost an infinite variety of bit rates and sample rates. If a file is not displayed on the screen, it most likely uses an unsupported bit rate or sample rate. Only use files with supported formats, bit rates, and sample rates.
USB storage device
The Media Player does not recognize my USB storage device.
Your USB storage device may not be detected because of problems with the hardware driver, power cord, cable, or longer system response time. Try to re-plug the USB storage device and the power cord to the Media player.
Remote Control
The media player remote control is not working.
- Ensure that the batteries are properly inserted.
- The batteries may already be drained out. Replace the batteries with new ones.
- Ensure that the path between the remote control and the media player is not blocked.
Firmware Update
What version of firmware do I have? How do I upgrade it?
- On the Home screen, press the Stop and then Play/Pause button to display the firmware version (ex. system Rev:01.01). Check the firmware version before the upgrade process. If the firmware is the latest version, you will not need to update the firmware.
- Go to Setup > System > System Update to perform the firmware upgrade process.
- If you are still unable to update the firmware, reset the system and perform the updating process again.
- Download the O!Play Firmware Update manual and the latest firmware from our support website at http://support.asus.com.
Wi-Fi and Internet connections
I cannot connect to the Wi-Fi network.
- Ensure that you have properly configured your Wi-Fi settings.
- Check the documentation that came with your router for the correct wireless settings.
- The network you are trying to access may be protected, secured, or encrypted. If you are trying to connect to a wireless local area network (WLAN), contact your network administrator for the security and encryption settings.
When I searched for a Wi-Fi network, I found several networks, some of which are encrypted. How do I connect to an encrypted network?
Contact your network administrator for the correct SSID (network name) and encryption key or password for the wireless network you want to connect to.
Movies streamed via the Wi-Fi network do not run smoothly.
Possible causes may be:
- Slow connection or high Internet traffic.
- Interference from several sources such as other wireless network devices, Bluetooth devices, wireless phones, or even microwave ovens.
- You may consider using a wired connection instead of a Wi-Fi connection.
There is too much lag while I am watching an online media website.
- Slow connection or high Internet traffic may cause this problem. Try watching the online media during off-peak hours.
- You may have limited bandwidth usage on your network. Contact your Internet Service Provider (ISP) to inquire about increasing your bandwidth for your network connection.
Can I access other online media websites?
No. You can only access the online media services offered on your ASUS O!Play HD Media Player.
Can I connect to the network via both wired and wireless connections?
No, you cannot connect to the network using both wired and wireless connections.
Operation/function failure
An operation/function failed on my HD media player.
Disconnect the AC adapter from the power source, then plug it in again. If you still encounter the same problem, contact the ASUS Technical Support.
Appendices
Notices
REACH
Complying with the REACH (Registration, Evaluation, Authorisation, and Restriction of Chemicals) regulatory framework, we published the chemical substances in our products at ASUS REACH website at http://green.asus.com/english/REACH.htm.
Federal Communications Commission Statement
This device complies with Part 15 of the FCC Rules. Operation is subject to the following two conditions:
- This device may not cause harmful interference.
- This device must accept any interference including interference that may cause undesired operation.
This equipment has been tested and found to comply with the limits for a Class B digital device, pursuant to Part 15 of the FCC Rules. These limits are designed to provide reasonable protection against harmful interference in a residential installation. This equipment generates, uses and can radiate radio frequency energy and, if not installed and used in accordance with manufacturer's instructions, may cause harmful interference to radio communications. However, there is no guarantee that interference will not occur in a particular installation. If this equipment does cause harmful interference to radio or television reception, which can be determined by turning the equipment off and on, the user is encouraged to try to correct the interference by one or more of the following measures:
- Reorient or relocate the receiving antenna.
- Increase the separation between the equipment and receiver.
- Connect the equipment to an outlet on a circuit different from that to which the receiver is connected.
- Consult the dealer or an experienced radio/TV technician for help.

Any changes or modifications to this unit not expressly approved by the party responsible for compliance could void the user's authority to operate this equipment.
Canadian Department of Communications Statement
This digital device does not exceed the Class B limits for radio noise emissions from digital devices set out in the Radio Interference Regulations of the Canadian Department of Communications.
This Class B digital device complies with Canadian ICES-003.
GNU General Public License
Licensing information
This product includes copyrighted third-party software licensed under the terms of the GNU General Public License. Please see The GNU General Public License for the exact terms and conditions of this license. We include a copy of the GPL with every CD shipped with our product. All future firmware updates will also be accompanied with their respective source code. Please visit our web site for updated information. Note that we do not offer direct support for the distribution.
GNU GENERAL PUBLIC LICENSE
Version 2, June 1991
Copyright (C) 1989, 1991 Free Software Foundation, Inc.
59 Temple Place, Suite 330, Boston, MA 02111-1307 USA
Everyone is permitted to copy and distribute verbatim copies of this license document, but changing it is not allowed.
Preamble
The licenses for most software are designed to take away your freedom to share and change it. By contrast, the GNU General Public License is intended to guarantee your freedom to share and change free software--to make sure the software is free for all its users. This General Public License applies to most of the Free Software Foundation's software and to any other program whose authors commit to using it. (Some other Free Software Foundation software is covered by the GNU Library General Public License instead.) You can apply it to your programs, too.
When we speak of free software, we are referring to freedom, not price. Our General Public Licenses are designed to make sure that you have the freedom to distribute copies of free software (and charge for this service if you wish), that you receive source code or can get it if you want it, that you can change the software or use pieces of it in new free programs; and that you know you can do these things.
To protect your rights, we need to make restrictions that forbid anyone to deny you these rights or to ask you to surrender the rights. These restrictions translate to certain responsibilities for you if you distribute copies of the software, or if you modify it.
For example, if you distribute copies of such a program, whether gratis or for a fee, you must give the recipients all the rights that you have. You must make sure that they, too, receive or can get the source code. And you must show them these terms so they know their rights.
We protect your rights with two steps: (1) copyright the software, and (2) offer you this license which gives you legal permission to copy, distribute and/or modify the software.
Also, for each author's protection and ours, we want to make certain that everyone understands that there is no warranty for this free software. If the software is modified by someone else and passed on, we want its recipients to know that what they have is not the original, so that any problems introduced by others will not reflect on the original authors' reputations.
Finally, any free program is threatened constantly by software patents. We wish to avoid the danger that redistributors of a free program will individually obtain patent licenses, in effect making the program proprietary. To prevent this, we have made it clear that any patent must be licensed for everyone's free use or not licensed at all.
The precise terms and conditions for copying, distribution and modification follow.
Terms & conditions for copying, distribution, & modification
- This License applies to any program or other work which contains a notice placed by the copyright holder saying it may be distributed under the terms of this General Public License. The “Program”, below, refers to any such program or work, and a “work based on the Program” means either the Program or any derivative work under copyright law: that is to say, a work containing the Program or a portion of it, either verbatim or with modifications and/or translated into another language. (Hereinafter, translation is included without limitation in the term “modification”.) Each licensee is addressed as “you”.
Activities other than copying, distribution and modification are not covered by this License; they are outside its scope. The act of running the Program is not restricted, and the output from the Program is covered only if its contents constitute a work based on the Program (independent of having been made by running the Program). Whether that is true depends on what the Program does.
- You may copy and distribute verbatim copies of the Program's source code as you receive it, in any medium, provided that you conspicuously and appropriately publish on each copy an appropriate copyright notice and disclaimer of warranty; keep intact all the notices that refer to this License and to the absence of any warranty; and give any other recipients of the Program a copy of this License along with the Program.
You may charge a fee for the physical act of transferring a copy, and you may at your option offer warranty protection in exchange for a fee.
- You may modify your copy or copies of the Program or any portion of it, thus forming a work based on the Program, and copy and distribute such modifications or work under the terms of Section 1 above, provided that you also meet all of these conditions:
a) You must cause the modified files to carry prominent notices stating that you changed the files and the date of any change.
b) You must cause any work that you distribute or publish, that in whole or in part contains or is derived from the Program or any part thereof, to be licensed as a whole at no charge to all third parties under the terms of this License.
c) If the modified program normally reads commands interactively when run, you must cause it, when started running for such interactive use in the most ordinary way, to print or display an announcement including an appropriate copyright notice and a notice that there is no warranty (or else, saying that you provide a warranty) and that users may redistribute the program under these conditions, and telling the user how to view a copy of this License. (Exception: if the Program itself is interactive but does not normally print such an announcement, your work based on the Program is not required to print an announcement.)
These requirements apply to the modified work as a whole. If identifiable sections of that work are not derived from the Program, and can be reasonably considered independent and separate works in themselves, then this License, and its terms, do not apply to those sections when you distribute them as separate works. But when you distribute the same sections as part of a whole which is a work based on the Program, the distribution of the whole must be on the terms of this License, whose permissions for other licensees extend to the entire whole, and thus to each and every part regardless of who wrote it.
Thus, it is not the intent of this section to claim rights or contest your rights to work written entirely by you; rather, the intent is to exercise the right to control the distribution of derivative or collective works based on the Program.
In addition, mere aggregation of another work not based on the Program with the Program (or with a work based on the Program) on a volume of a storage or distribution medium does not bring the other work under the scope of this License.
- You may copy and distribute the Program (or a work based on it, under Section 2) in object code or executable form under the terms of Sections 1 and 2 above provided that you also do one of the following:
a) Accompany it with the complete corresponding machine-readable source code, which must be distributed under the terms of Sections 1 and 2 above on a medium customarily used for software interchange; or,
b) Accompany it with a written offer, valid for at least three years, to give any third party, for a charge no more than your cost of physically performing source distribution, a complete machine-readable copy of the corresponding source code, to be distributed under the terms of Sections 1 and 2 above on a medium customarily used for software interchange; or,
c) Accompany it with the information you received as to the offer to distribute corresponding source code. (This alternative is allowed only for noncommercial distribution and only if you received the program in object code or executable form with such an offer, in accord with Subsection b above.)
The source code for a work means the preferred form of the work for making modifications to it. For an executable work, complete source code means all the source code for all modules it contains, plus any associated interface definition files, plus the scripts used to control compilation and installation of the executable. However, as a special exception, the source code distributed need not include anything that is normally distributed (in either source or binary form) with the major components (compiler, kernel, and so on) of the operating system on which the executable runs, unless that component itself accompanies the executable.
If distribution of executable or object code is made by offering access to copy from a designated place, then offering equivalent access to copy the source code from the same place counts as distribution of the source code, even though third parties are not compelled to copy the source along with the object code.
- You may not copy, modify, sublicense, or distribute the Program except as expressly provided under this License. Any attempt otherwise to copy, modify, sublicense or distribute the Program is void, and will automatically terminate your rights under this License. However, parties who have received copies, or rights, from you under this License will not have their licenses terminated so long as such parties remain in full compliance.
- You are not required to accept this License, since you have not signed it. However, nothing else grants you permission to modify or distribute the Program or its derivative works. These actions are prohibited by law if you do not accept this License. Therefore, by modifying or distributing the Program (or any work based on the Program), you indicate your acceptance of this License to do so, and all its terms and conditions for copying, distributing or modifying the Program or works based on it.
- Each time you redistribute the Program (or any work based on the Program), the recipient automatically receives a license from the original licensor to copy, distribute or modify the Program subject to these terms and conditions. You may not impose any further restrictions on the recipients' exercise of the rights granted herein. You are not responsible for enforcing compliance by third parties to this License.
- If, as a consequence of a court judgment or allegation of patent infringement or for any other reason (not limited to patent issues), conditions are imposed on you (whether by court order, agreement or otherwise) that contradict the conditions of this License, they do not excuse you from the conditions of this License. If you cannot distribute so as to satisfy simultaneously your obligations under this License and any other pertinent obligations, then as a consequence you may not distribute the Program at all. For example, if a patent license would not permit royalty-free redistribution of the Program by all those who receive copies directly or indirectly through you, then the only way you could satisfy both it and this License would be to refrain entirely from distribution of the Program.
If any portion of this section is held invalid or unenforceable under any particular circumstance, the balance of the section is intended to apply and the section as a whole is intended to apply in other circumstances.
It is not the purpose of this section to induce you to infringe any patents or other property right claims or to contest validity of any such claims; this section has the sole purpose of protecting the integrity of the free software distribution system, which is implemented by public license practices. Many people have made generous contributions to the wide range of software distributed through that system in reliance on consistent application of that system; it is up to the author/donor to decide if he or she is willing to distribute software through any other system and a licensee cannot impose that choice.
This section is intended to make thoroughly clear what is believed to be a consequence of the rest of this License.
- If the distribution and/or use of the Program is restricted in certain countries either by patents or by copyrighted interfaces, the original copyright holder who places the Program under this License may add an explicit geographical distribution limitation excluding those countries, so that distribution is permitted only in or among countries not thus excluded. In such case, this License incorporates the limitation as if written in the body of this License.
- The Free Software Foundation may publish revised and/or new versions of the General Public License from time to time. Such new versions will be similar in spirit to the present version, but may differ in detail to address new problems or concerns.
Each version is given a distinguishing version number. If the Program specifies a version number of this License which applies to it and “any later version”, you have the option of following the terms and conditions either of that version or of any later version published by the Free Software Foundation. If the Program does not specify a version number of this License, you may choose any version ever published by the Free Software Foundation.
- If you wish to incorporate parts of the Program into other free programs whose distribution conditions are different, write to the author to ask for permission. For software which is copyrighted by the Free Software Foundation, write to the Free Software Foundation; we sometimes make exceptions for this. Our decision will be guided by the two goals of preserving the free status of all derivatives of our free software and of promoting the sharing and reuse of software generally.
NO WARRANTY
11 BECAUSE THE PROGRAM IS LICENSED FREE OF CHARGE, THERE IS NO WARRANTY FOR THE PROGRAM, TO THE EXTENT PERMITTED BY APPLICABLE LAW. EXCEPT WHEN OTHERWISE STATED IN WRITING THE COPYRIGHT HOLDERS AND/OR OTHER PARTIES PROVIDE THE PROGRAM "AS IS" WITHOUT WARRANTY OF ANY KIND, EITHER EXPRESSED OR IMPLIED, INCLUDING, BUT NOT LIMITED TO, THE IMPLIED WARRANTIES OF MERCHANTABILITY AND FITNESS FOR A PARTICULAR PURPOSE. THE ENTIRE RISK AS TO THE QUALITY AND PERFORMANCE OF THE PROGRAM IS WITH YOU. SHOULD THE PROGRAM PROVE DEFECTIVE, YOU ASSUME THE COST OF ALL NECESSARY SERVICING, REPAIR OR CORRECTION.
12 IN NO EVENT UNLESS REQUIRED BY APPLICABLE LAW OR AGREED TO IN WRITING WILL ANY COPYRIGHT HOLDER, OR ANY OTHER PARTY WHO MAY MODIFY AND/OR REDISTRIBUTE THE PROGRAM AS PERMITTED ABOVE, BE LIABLE TO YOU FOR DAMAGES, INCLUDING ANY GENERAL, SPECIAL, INCIDENTAL OR CONSEQUENTIAL DAMAGES ARISING OUT OF THE USE OR INABILITY TO USE THE PROGRAM (INCLUDING BUT NOT LIMITED TO LOSS OF DATA OR DATA BEING RENDERED INACCURATE OR LOSSES SUSTAINED BY YOU OR THIRD PARTIES OR A FAILURE OF THE PROGRAM TO OPERATE WITH ANY OTHER PROGRAMS), EVEN IF SUCH HOLDER OR OTHER PARTY HAS BEEN ADVISED OF THE POSSIBILITY OF SUCH DAMAGES.
END OF TERMS AND CONDITIONS
ASUS contact information
ASUSTeK COMPUTER INC.
Address 5 Li-Te Road, Peitou, Taipei, Taiwan 11259
Telephone +886-2-2894-3447
Fax +886-2-2890-7798
E-mail info@asus.com.tw
Online support support.asus.com
ASUS COMPUTER INTERNATIONAL (America)
Address 800 Corporate Way, Fremont, CA 94539, USA
Telephone +1-510-739-3777
Fax +1-510-608-4555
Web site usa.asus.com
Technical Support
Telephone +1-812-282-2787
Support fax +1-812-284-0883
Online support support.asus.com
ASUS COMPUTER GmbH (Germany and Austria)
Address Harkort Str. 21-23, D-40880 Ratingen, Germany
Fax +49-2102-959911
Web site www.asus.de
Online support support.asus.com


- O!PLAY AIR HDP-R
- USER MANUAL
- COPYRIGHT © 2009 ASUSTEK COMPUTER INC. ALL RIGHTS RESERVED
- CONTENTS
- CHAPTER 1: GETTING STARTED
- CHAPTER 2: GETTING CONNECTED
- CHAPTER 3: USING YOUR O!PLAY HD MEDIA PLAYER
- CHAPTER 4: TROUBLESHOOTING
- APPENDICES
- SAFETY INFORMATION
- WARNING LABELS
- LICENSE NOTICE AND TRADEMARK ACKNOWLEDGEMENT FOR DTS
- ABOUT THIS USER GUIDE
- HOW THIS USER GUIDE IS ORGANIZED
- CONVENTIONS USED IN THIS GUIDE
- WHERE TO FIND MORE INFORMATION
- CHAPTER
- GETTING STARTED
- WELCOME
- PACKAGE CONTENTS
- SPECIFICATIONS SUMMARY
- SYSTEM REQUIREMENTS
- GETTING TO KNOW YOUR O!PLAY HD MEDIA PLAYER FRONT/LEFT PANEL
- RIGHT PANEL
- REAR PANEL
- REMOTE CONTROL
- GETTING YOUR O!PLAY HD MEDIA PLAYER READY CONNECTING THE POWER ADAPTER
- TO CONNECT THE POWER ADAPTER
- CONNECTING DEVICES TO YOUR HD MEDIA PLAYER
- TO CONNECT DEVICES TO YOUR HD MEDIA PLAYER
- STARTING FOR THE FIRST TIME
- TO START FOR THE FIRST TIME
- GETTING CONNECTED
- CONNECTING TO A NETWORK
- WIRED CONNECTION
- TO CONNECT TO YOUR NETWORK
- WIRELESS CONNECTION
- ACCESSING FILES VIA O!LINK
- TO ACCESS FILES VIA O!LINK
- ACCESSING FILES WIRELESSLY
- TO ACCESS FILES WIRELESSLY
- CONNECTING TO A WIRELESS LOCAL AREA NETWORK (WLAN)
- TO CONNECT TO A WLAN
- CONFIGURING THE NETWORK CLIENTS
- SETTING AN IP ADDRESS FOR WIRED OR WIRELESS CLIENT
- WINDOWS® XP OS
- WINDOWS® VISTA OS
- SHARING FILES OVER THE NETWORK
- SHARING FILES UNDER WINDOWS® XP OS
- TO SHARE FILES UNDER WINDOWS® XP OS
- TICK SHARE THIS FOLDER
- SHARING FILES UNDER WINDOWS® VISTA OS
- SHARING FILES FROM A FOLDER ON YOUR COMPUTER
- TO SHARE FILES FROM A FOLDER ON YOUR COMPUTER
- SHARING FILES FROM THE PUBLIC FOLDER
- TO SHARE FILES FROM THE PUBLIC FOLDER
- CLICK
- OCUMENTS
- TO RESTRICT A USER'S ACCESS TO THE PUBLIC FOLDER
- TO SET THE USER'S ACCESS LEVEL TO THE PUBLIC FOLDER
- USING YOUR O!PLAY HD MEDIA PLAYER
- THE HOME SCREEN
- CONFIGURING THE SYSTEM SETTINGS
- TO CONFIGURE THE SYSTEM SETTINGS
- PLAYING A VIDEO FILE
- VIDEO CONTROL BUTTONS ON THE REMOTE CONTROL
- TO PLAY A VIDEO FILE
- CONFIGURING THE SUBTITLE SETTINGS
- TO CONFIGURE THE VIDEO SETTINGS
- CONFIGURING THE VIDEO SETTINGS
- PLAYING MUSIC
- MUSIC CONTROL BUTTONS ON THE REMOTE CONTROL
- PLAYING A MUSIC FILE
- TO PLAY A MUSIC FILE
- CONFIGURING THE AUDIO SETTINGS
- TO CONFIGURE THE AUDIO SETTINGS
- VIEWING PHOTOS
- TO VIEW PHOTOS
- VIEWING PHOTOS IN SLIDESHOW MODE
- TO VIEW PHOTOS IN SLIDESHOW MODE
- SETTING THE BACKGROUND MUSIC FOR THE SLIDESHOW
- TO SET THE BACKGROUND MUSIC FOR THE SLIDESHOW
- CONFIGURING THE SLIDESHOW SETTINGS
- TO CONFIGURE THE SLIDESHOW SETTINGS
- COPYING FILES
- TO COPY FILES
- SHARING FILES VIA YOUR MEDIA PLAYER
- TO SHARE FILES ON YOUR MEDIA PLAYER
- TROUBLESHOOTING
- DISPLAY
- THE TV SCREEN IS BLINKING AND FUZZY
- I CANNOT FIND ANY OF MY MUSIC, MOVIE, OR PHOTO FILES
- CERTAIN FILES CANNOT BE PLAYED ON THE MEDIA PLAYER
- ONLY ONE VIDEO/MUSIC/PHOTO IS PLAYED WHEN I SELECTED IT. HOW DO I PLAY THE ENTIRE LIST
- THE LEDS ON THE ETHERNET PORT DO NOT BLINK AND MY WIRED CONNECTION DOES NOT WORK
- AUDIO
- THERE IS NO SOUND
- I CANNOT HEAR ANY SOUND WHEN I AM PLAYING MUSIC FILES
- A FEW OF MY MUSIC FILES DO NOT APPEAR
- USB STORAGE DEVICE
- THE MEDIA PLAYER DOES NOT RECOGNIZE MY USB STORAGE DEVICE
- THE MEDIA PLAYER REMOTE CONTROL IS NOT WORKING
- FIRMWARE UPDATE
- WHAT VERSION OF FIRMWARE DO I HAVE? HOW DO I UPGRADE IT
- WI-FI AND INTERNET CONNECTIONS
- I CANNOT CONNECT TO THE WI-FI NETWORK
- WHEN I SEARCHED FOR A WI-FI NETWORK, I FOUND SEVERAL NETWORKS, SOME OF WHICH ARE ENCRYPTED. HOW DO I CONNECT TO AN ENCRYPTED NETWORK
- MOVIES STREAMED VIA THE WI-FI NETWORK DO NOT RUN SMOOTHLY
- THERE IS TOO MUCH LAG WHILE I AM WATCHING AN ONLINE MEDIA WEBSITE
- NOTICES
- REACH
- FEDERAL COMMUNICATIONS COMMISSION STATEMENT
- CANADIAN DEPARTMENT OF COMMUNICATIONS STATEMENT
- GNU GENERAL PUBLIC LICENSE
- LICENSING INFORMATION
- PREAMBLE
- TERMS & CONDITIONS FOR COPYING, DISTRIBUTION, & MODIFICATION
- NO WARRANTY
- ASUS CONTACT INFORMATION
- ASUSTEK COMPUTER INC
- ASUS COMPUTER INTERNATIONAL (AMERICA)
- TECHNICAL SUPPORT
- ASUS COMPUTER GMBH (GERMANY AND AUSTRIA)
Brand : ASUS
Model : O!Play Air HDP-R3
Category : Media player