
LET42T1000HF - Television HAIER - Free user manual and instructions
Find the device manual for free LET42T1000HF HAIER in PDF.


| Product Type | LED TV |
| Brand | Haier |
| Model | LET42T1000HF |
| Screen Size | 42 inches (107 cm) |
| Resolution | 1920 x 1080 pixels (Full HD) |
| Aspect Ratio | 16:9 |
| Backlight | LED |
| Digital Tuner | DVB-T/T2/C/S/S2 |
| Connectivity | 3x HDMI, 2x USB, Composite, Component, VGA, Ethernet, Wi-Fi |
| Audio | Built-in speakers 20 W |
| Power Supply | 100-240 V, 50/60 Hz |
| Typical Power Consumption | 70 W |
| Standby Power Consumption | < 0.5 W |
| Dimensions without Stand (W x H x D) | 970 x 570 x 80 mm |
| Dimensions with Stand (W x H x D) | 970 x 620 x 200 mm |
| Weight without Stand | 10 kg |
| Weight with Stand | 11 kg |
| Wall Mount | VESA 200 x 200 standard |
| Main Features | Timer, parental control, teletext, EPG, USB recording |
| Maintenance and Cleaning | Clean the screen with a soft, dry cloth. Do not use abrasive products. |
| Safety | Do not expose to moisture. Do not block ventilation slots. Use a grounded outlet. |
| Included Accessories | Remote control, stand, power cable, user manual |
| Repairability | Estimated repairability score 6.5/10 |
| General Information | 2-year warranty |
Frequently Asked Questions - LET42T1000HF HAIER
User questions about LET42T1000HF HAIER
0 question about this device. Answer the ones you know or ask your own.
Ask a new question about this device
Download the instructions for your Television in PDF format for free! Find your manual LET42T1000HF - HAIER and take your electronic device back in hand. On this page are published all the documents necessary for the use of your device. LET42T1000HF by HAIER.
USER MANUAL LET42T1000HF HAIER
DIGITAL LED LCD TELEVISION
INSTRUCTION MANUAL
Model: LET32T1000HF
LET42T1000HF
LET39Z18HF
LET46Z18HF
Please read this manual carefully before operating the unit, and keep it for future reference.
Contents
Safety warnings 2
Welcome....2
Important information ....2
About your LED LCD TV 5
Installing the stand ....5
Front control panel 7
Rear terminals control 8
Getting to know your remote control .....9
Connecting your TV 10
Connecting the aerial 10
Improving your signal 10
Connecting your PC to the TV 10
Connecting a DVD player to your TV ....10
Connecting a DVD player or VCR to your TV ..... 10
SCART input 10
HDMI input 10
Mounting your TV onto the wall .....10
Preparing your remote control ....11
Installing the batteries ....11
Caution....11
Getting started 11
Setting up 11
Location....11
Connecting the aerial 11
Switching your TV on 11
Tuning your TV 12
Switching to an external source other than TV ..... 12
Auto Search (Antenna or Cable) 12
Digital manual search (Cable) 13
Analogue manual search ....13
Skip....14
Sort....14
Edit....14
Using your TV 15
Selecting a TV channel 15
Adjusting the volume 15
Adjusting the picture settings ....15
Changing the picture settings 15
Adjusting the sound settings ....16
Changing the sound settings ....16
Function settings ......17
Lock menu settings ......18
Shortcut menu display settings ......20
Using the features 21
Teletext functions ......21
Teletext....21
USB mode 22
To use the USB device 22
Connecting a USB device 22
USB media menu 22
To display pictures 23
To play music 23
To play movies 24
To display text 24
Using an external USB drive for recording ...25
Time Shift 25
Recording....25
Reference sections 26
Troubleshooting....26
Specifications......27
Appendix....28
Safety warnings
Welcome
Thank-you for buying this 32"/39"/42"/46" Full HD Digital LED LCD TV. This manual will help you to set up and begin using your TV.
Firstly, check the contents of your box against the parts checklist below:
• 32"/39"/42"/46" Full HD Digital LED LCD TV
- Remote control
- AAA battery ×2
- Instruction manual
- Warranty
• TV stand
- Screws for TV stand
- Component audio adapter
- Cover bottom
Now you can get started!
Important information
READ ALL INSTRUCTIONS BEFORE USE AND KEEP FOR FUTURE REFERENCE.


WARNING
TO REDUCE THE RISK OF ELECTRIC SHOCK DO NOT REMOVE COVER (OR BACK). NO USER SERVICEABLE PARTS INSIDE. REFER TO QUALIFIED SERVICE PERSONNEL.
* To avoid electric hazards, it is strongly suggested that the back cover is not opened, as there are no any accessories inside the casing.
* If necessary, please contact authorised after-sales services.
* Lighting flash mark in a triangle: A potentially hazardous situation, which, if not avoided, could result in serious injury by high voltage.
* Exclamation mark in a triangle: Major part or accessory of which technical specifications must be followed if it is to be replaced.
WARNING: To avoid the risk of fire or electrical hazards, do not place your television in areas with heavy moisture. Attention should be paid to avoid accidental scratches or impacts on the screen. Ventilation should not be obstructed by items such as newspaper, table-cloths, curtains etc.
CAUTION:
▲ The main plug is used as a disconnection device and must remain readily accessible.
▲ Please read this manual carefully before using your television, and keep it in a safe place for future reference.
▲ To ensure the best performance of your television, please read this manual carefully before using your television, and keep it in a safe place for future reference.
▲ Screenshots and images included in this manual may vary due to changes in product design.
▲ Unauthorised disassembly of this product is prohibited.
TruSurround XT, SRS and the ● symbol are trademarks of SRS Labs, Inc. TruSurround XT technology is incorporated under licence from SRS Labs, Inc.
TruSurround XT ^® creates a truly immersive surround-sound experience with rich bass and clear dialogue from just two speakers.

WARNING: To minimise the risk of fire, keep candles or other open flames away from this product at all times.
The product should be tightly fixed to avoid drop damages and even fire.

natural_image
Cartoon illustration of a smiling computer monitor on a shelf, no text or symbols presentTo avoid fire hazards, do not use this product in direct sunlight or close to heat sources.

Do not place the product close to water or oil(i.e. cooking oil or lubricating oil), which may cause fire hazards.
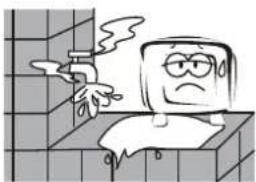
natural_image
Cartoon illustration of a character with glasses standing behind a brick wall, holding a pipe (no text or symbols)Disconnect the power supply and aerial during thunderstorms.
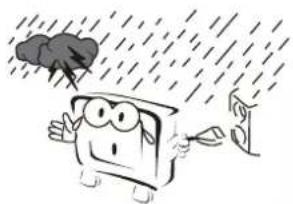
natural_image
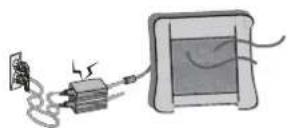
Cartoon illustration of a character with a cloud above his head, holding a phone to hit out of rain (no text or symbols)Do not use damaged or worn electric plugs, and keep the electric cord away from heat sources to avoid electric shocks or fire hazards.
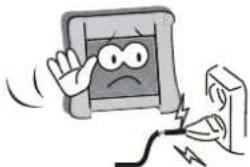
natural_image
Cartoon illustration of a hand holding a sad face next to a damaged tablet device (no text or symbols)Do not connect excessive sockets in parallel or use multiple plugs in the same socket.
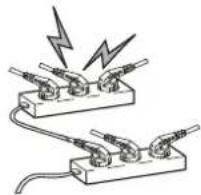
natural_image
Electrical circuit diagram showing three connected components with lightning bolts (no text or symbols)The product must be placed on a solid and stable surface to avoid collapse.

natural_image
Cartoon illustration of a sad, anthropomorphic character standing next to a table with a smiling face (no text or symbols)Unauthorised disassembly of the television is prohibited to avoid the risk of electric shocks or fire. Contact authorised after-sales service if technical service is needed.

natural_image
Cartoon character resembling a computer with glasses and a smiling face, holding pliers (no text or symbols)Keep the product away from a transformer or heat source to avoid the risk of fire.

natural_image
Cartoon illustration of a smiling cube character running away from a wavy path (no text or symbols)If the product is making abnormal sounds, disconnect the power supply and contact the authorised after-sales service.
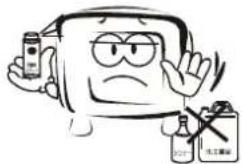
Do not use or store inflammable materials near the product to avoid the risk of explosion or fire.
To avoid the risk of fire, do not place the product in a humid area.

natural_image
Cartoon illustration of a distressed cube with a sad face and a downward arrow, no text or symbols presentThe aerial should be kept away from
electric cables to avoid the risk of electric shock.

natural_image
Cartoon illustration of a distressed computer with a thought bubble showing a house and power lines (no text or symbols)Never touch the plug when your hand is wet as this may result in electric shock.

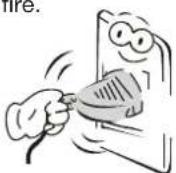
Always make sure that the television is plugged in correctly as a poor electric connection may cause a fire.
When an aerial is used, measures should be taken to prevent water from flowing down
the cable into the television.

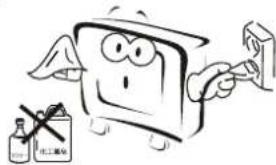
To clean, unplug the television and use a soft, dry cloth. Do not use any chemicals.
Make sure that no water drops in the product.
natural_image
Cartoon illustration of a computer monitor character with arms and legs, holding a magnifying glass (no text or symbols)The plug and electric cable must be kept clean to avoid the risk of electric shock or fire.

natural_image
Cartoon illustration of a computer monitor character with a thought bubble showing a small object, next to a bottle and a cross symbol (no text or labels)Disconnect the power supply and aerial during storms
to avoid the risk of electric shocks or fire.
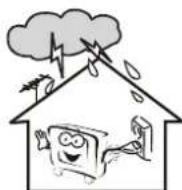
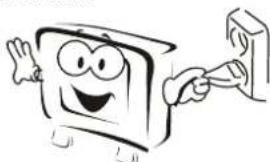
Disconnect the power to avoid the risk of electric shock or fire if the television will be left for a long period of time.
natural_image
Cartoon illustration of a smiling computer character with arms raised (no text or symbols)About your LED LCD TV
Installing the stand
For 32-42" LED LCD models only
(Put your TV on the table with the screen facing down.)
- Put the stand on the TV set

natural_image
Top-down schematic of a computer chassis showing internal components and a red upward arrow indicating orientation (no text or labels)- Screw the stand in the positions with the screws supplied (4 x B4 x 16).

natural_image
Technical line drawing of a mechanical component with internal grid structure and mounting holes (no text or symbols)Installing the stand
For 39-46" LED LCD models only
(Put your TV on the table with the screen facing down.)
- Put the rear board on the stand neck and fix with the screws supplied (4 x B4 x 12F).

Screws: 2xB4X12F Screws: 2xB4X12F
- Put the rear board on the back of TV and fix with the screws supplied (4 x M4 x 14).


Front control panel

| 1 INPUT | Toggles between all the available input sources. |
| 2 MENU | Press to select the main menu. |
| 3 CH+ TV channel up. |
| 4 CH- | TV channel down. |
| 5 VOL+ | Press to increase the volume. |
| 6 VOL- | Press to decrease the volume. |
| 7 POWER Press to turn the TV on and off. | |
Rear terminals control

En
| 1 HDMI1 IN input | |
| 2 HDMI2 IN input | |
| 3 HDMI3 IN | input |
| 4 PC input | |
| 5 PCAUDIO | input |
| 6 SCART | input |
| 7 YPbPr input | |
| 8 AV input | |
| 9 AERIAL input | |
| 10 COAXIAL | |
| 11 USB | |
| 12 Common interface | |
| 13 Earphone output |
Getting to know your remote control
When using the remote control, point it towards the remote sensor on the TV.


Note
RED button, GREEN button, BLUE button and YELLOW button are fast text buttons for the analogue signal. Function button in DVBT (just reference the OSD)
① POWER
② No function
③ No function
④ Picture mode
⑤ Sound mode
⑥ Display information
⑦ Sleep button
⑧ DTV Audio/NICAM
⑨ Screen button
⑩ Channel list
⑪ Display or close subtitle
⑫ Numerical keys
⑬ Source
⑭ Q.View
⑮ Volume selection
⑯ Channel selection
⑰ Mute
18 Menu
⑲ Electronic programme guide
⑳ Favourite
②1 OK button
②2 Cursor mover button
②3 START RECORD
24 Exit
⑲ USB REPEAT
②6 Teletext index / USB zoom
⑳ USB PLAY/PAUSE
28 USB STOP
⑲ Teletext red button / USB fast rewind
③0 Teletext green button / USB fast forward
③1 Teletext yellow button / USB previous file
③2 Teletext blue button / USB next file
③3 Teletext text
③4 Teletext mix
③5 Teletext subcode
③6 Teletext hold
③7 Teletext reveal
38 Teletext size
③9 No function
④0 REC.LIST
Connecting your TV
Connecting the aerial
Connect your aerial into the ANTENNA IN socket at the back of the TV.
Improving your signal
To improve picture quality in poor signal areas, use a signal amplifier (not supplied).
Connecting your PC to the TV
You can use your TV as a monitor for your personal computer using a VGA cable (not supplied).
1 Consult your computer's user guide to check whether it has a VGA connector.
2 Turn the power off on your TV and PC.
3 Connect a D-type 15-pin VGA interface cable to the VGA video interface connector on the PC. Connect the other end of the cable to the PC interface connector on the TV. Tighten the screws on the VGA connectors and connect the audio cable (not supplied) to the audio input socket on the back of the TV.
4 Switch on the TV first, followed by the PC.
5 Press the button on the TV or TV remote control to set the video input mode to PC.
6 If noise is present on the image, change the resolution, refresh rate, brightness and contrast on the menu until the picture is clear.
Connecting a DVD player to your TV
Connect the DVD video outputs (Y, P_b , P_r ) to the COMPONENT (Y, P_b , P_r ) IN socket on your TV.
1 Turn on the DVD player and insert a DVD.
2 Press the SOURCE button to select COMPONENT mode.
3 Refer to the DVD player's user guide for operating instructions.


Connecting a DVD player or VCR to your TV
There are two ways to connect a DVD player or VCR to your TV. Make sure that either the TV and DVD player, or VCR, are switched off before you connect them.
SCART input
1 Connect the scart lead from the external device (DVD player, set-top box or games console) to the TV scart socket.
2 Press the SOURCE button to select SCART mode.
3 Press the PLAY button on the external device.
HDMI input
1 Connect the cable from the HDMI device to the TV HDMI socket.
2 Press the SOURCE button to select HDMI mode.
3 Refer to the HDMI device's user guide for instructions.
Mounting your TV onto the wall
You can mount your TV onto the wall using a wall bracket (not supplied). Use M6 machine screws (4 pcs) to screw the TV onto the bracket (not supplied).
Preparing your remote control
Installing the batteries
1 Place the remote control face down, then open the cover of the battery compartment.

natural_image
Diagram of a remote control device with an arrow indicating rotation (no text or symbols)2 Install two AAA batteries. (The + and - symbols on the battery must match with the symbols on the remote).

natural_image
Simple line drawing of a remote control device with a separate clip, no text or symbols present3 Close the cover of the battery compartment.

natural_image
Simple line drawing of a remote control box with an arrow indicating rotation (no text or symbols)Caution
Confirm that there are no objects between the remote control and the remote sensor on the TV set.
Sunshine or other strong light will interfere with the signal sent by the remote control. Avoid using near special fluorescent lights or neon signs.
Do not store the remote control in hot or damp places as this may damage the remote.
Please use two AAA 1.5V batteries. Do not mix battery types. Install the batteries at the correct polarities. Do not use rechargeable batteries. If your TV is to be stored for a period of time, remove the batteries from the remote control.
Do not discard batteries with common domestic waste. Do not throw batteries in a fire. Ensure batteries are disposed of in accordance with local regulations.
Getting started
Setting up
Location
You will need to place your TV near your plug socket (so the power cable can comfortably reach) and within reach of your aerial socket or extension lead.
Connecting the aerial
1 Insert the TV aerial lead into the aerial input socket on the side of the TV.
2 Insert the batteries into the remote control. Make sure the batteries have been inserted correctly and match the polarity indicated inside the battery compartment.
Switching your TV on
If the indicator light not appears, press the button on the right of the TV bottom, then the light will start flashing.
2 Press POWER on the remote control. The TV will turn on. After a few moments, the following screen will be displayed.
![Initial Setup Welcome Welcome to use the Wizard for Initial Setup!! Please press [OK] to start the wizard.](/content/2026/06/1277283/images/e93ab3ae853db265dd498faf2683fd9aca2e7794720f42d1b5f8fe3594378b18.jpg)
3 Press the OK button on the remote control to enter the Backlight Mode menu.

HOME MODE
Press ▲▼ to select HOME MODE, then press OK to enter the Language menu.
Press ▲▼ to select Language, then press OK to enter the Country menu.
Press ▲▼ to select Country, then press OK to enter the Tuner mode menu.
Press ▲▼ to select Tuner Mode, then OK to enter the Channel Scan menu.
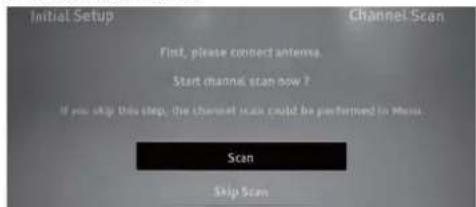
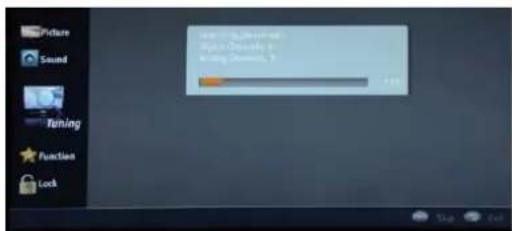
Press ▲▼ to select SCAN, then press OK to start auto-scan. This may take a few minutes to complete.

SHOP MODE
Press ▲▼ to select SHOP MODE and press OK to enter the Shop mode menu.

Shop mode will be displayed, but you cannot do anything except press the EXIT button to exit the screen.
Tuning your TV
Switching to an external source other than TV
If you have connected a DVD player or similar external device to the TV, you will need to tell the TV to display content from it. Simply press SOURCE, which will bring up the source menu in the left-hand corner of the screen, and use the ▲ and ▼ button to highlight the required source before pressing OK to select it. For details on how to plug in other equipment see Connecting your TV on page 10.
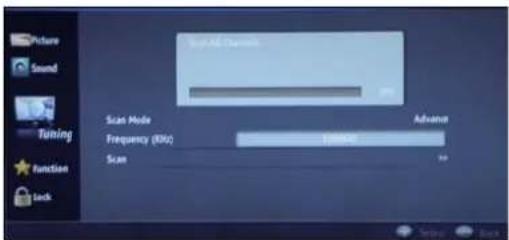
Auto Search (Antenna or Cable)
1 Press the MENU button.
2 Press ▲▼ to select Tuning, then press ▶ to enter.

3 Press ▲▼ button to select Tuner mode (Antenna or Cable) and Country Press ◀▶ button to select you needed.
4 Press ▲▼ to select Channel, then press OK to enter.

Press ▲▼ to select the Channel scan, then press OK to start searching.


5 Press the EXIT button to stop auto search during searching.
Note
It may take a few moments to complete the auto search.
Press the Menu button to exit the DTV search, ATV search will continue.
Digital manual search (Cable)
1 Press the MENU button.
2 Press ▲▼ to select Tuning, then press ▶ to enter.

3 Press ▲▼ to set Antenna (Cable) and Country.
Press ◀▶ to select the option you require.
4 Press ▲▼ to select Channel, then press OK to enter.
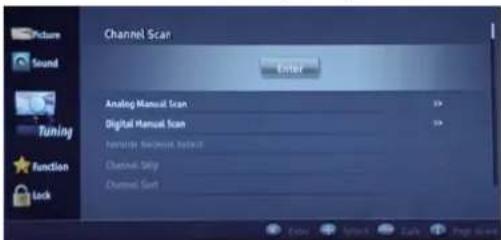
5 Press the number button on the remote control to set the Frequency (KHz).
Press ◀ ▶ to set the Modulation you require.
Press the number button on the remote control to set the Symbol Rate(Ksym/s).
Press OK to start searching.

6 Once a channel is located, you can press OK to save it.
Press the EXIT button to exit.
Analogue manual search
When you need to conduct a manual search, follow the steps below:
1 Press MENU, then ▲▼ to select Tuning and then press the ▶ button to enter.
2 Press ▲▼ to set Antenna (Antenna or Cable) and Country.
Press ◀ ▶ to select the option you require.
3 Press ▲▼ to select Channels, then press OK to enter.
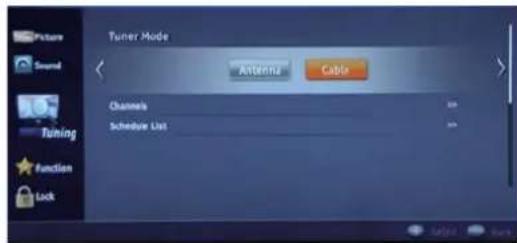
4 Press ▲▼ to select Analogue Manual Scan, then press OK to enter.
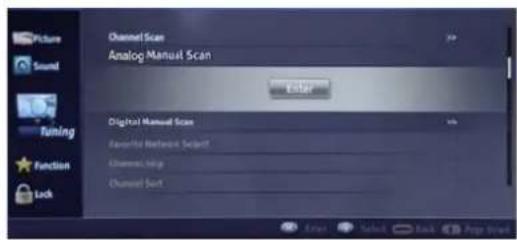
5 Press the number button on the remote control to set Frequency(MHz).
6 Press ▲▼ to select Search Up and press OK to search higher frequency channels.
Select Search Down and press OK to search lower frequency channels.
7 Once a channel is located, you can press OK to save it.
Press the EXIT button to exit.
Skip
1 Press the MENU button.
2 Press ▲▼ to select Tuning, then OK to enter.
3 Press ▲▼ to select Channels, then OK to enter the sub-menu.
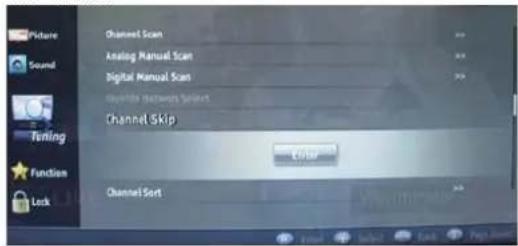
4 Press ▲▼ to select Skip. Press ▶ to enter the sub-menu.

5 Press ▲▼ to select the channel and then OK to select the channel to skip.
Sort
1 Press ▲▼ to select Sort. Press OK to enter the submenu.
2 Press ▲▼ to select the channel you want and then OK to select the channel.

3 Press ▲▼ to select the number position you want to remove, then press OK to confirm.
4 You can press the EXIT button to cancel the changes at anytime.
Edit
1 Press ▲▼ to select Edit. Press OK to enter the submenu.
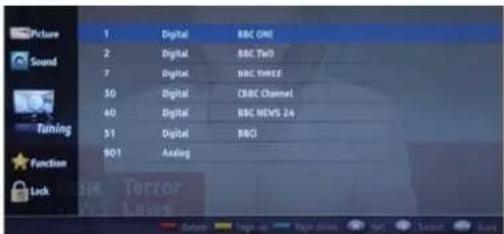
2 Press OK to enter the menu you need to change the required option.

Common interface
The common interface (CI) slot is designed to accept the Conditional Access (CA) Module and Smart card in order to view the pay TV programmes and additional services. Contact your Common Interface service provider to get more information about the modules and subscription. Please note that we do not supply CA modules, smart cards or other optional accessories.
Warning
- Switch off your TV before inserting any module into the Common Interface slot.
1 Insert the CAM correctly, then insert the Smart Card to the CI slot located on the side of the TV.
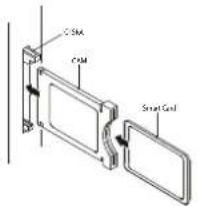
2 When you switch on the TV, a message will be displayed confirming that the CA module has been detected. Wait for few moments until the card is activated.

3 Press OK to enter, then use the ▲ and ▼ buttons to select the option you need and press OK.

4 Detailed information about the Cl card is displayed.
5 Press OK to access the card menu. Refer to the module user's manual for information about the settings.
Using your TV
Selecting a TV channel
1 Use the channel number buttons: Enter the channel number with the number keypad on the remote control.
2 Use the P+/P- button:
Press the P+/P- button to select a channel number.
Adjusting the volume
Press the V+/V- button on the remote control or at the bottom of the TV to adjust the volume level.
Adjusting the picture settings
Changing the picture settings
Press the MENU button, press ▲▼ to select Picture, then press OK to enter.
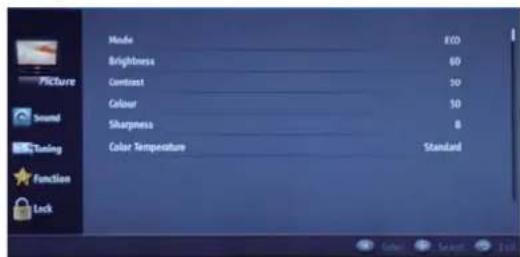
2 Press ▲▼ to select the item that needs to be adjusted.
3 Press ◀ ▶ to adjust the selected item.
4 When you are satisfied with your choice, press EXIT to return to normal viewing or MENU to return to the previous menu.
Mode
This will select the picture mode. Select Standard/User/Vivid/Eco/Cinema/Sport depending on the channel.
You can quickly select the desired mode using the P.MODE button on the remote control.
Brightness
This will adjust the amount of light emitted from the whole picture, which will mainly affect the darker areas.
Contrast
This will adjust the intensity of bright areas in the picture, but leave the darker parts unchanged.
Colour
This will adjust the saturation level of colours to suit your personal preference.
Sharpness
This will adjust the sharpness of details in the picture.
Tint
Allows you to select the colour mix (Tint) of the picture.

Note
The Tint function is only available in NTSC mode.
Colour temperature
Press ◀ ▶ to set Colour temperature as User, Cool, Standard, Warm.
This will increase or decrease Warm (red) standard and Cool (blue) colours to suit your personal preferences.
Select Cool to create a blue tint, Standard to for a neutral tint, and Warm for a red tint.
Advanced video
• DNR
To adjust the level of digital noise: Press ◀ to set DNR as Off, Low, Medium Strong or Auto.
• PEG NR
To adjust the level of MPEG NR: Press ◀ to set MPEG NR as Off, Low, Medium or Strong.
Active Contrast
To adjust the level of luminance of the picture: Press ◀ to set Active Contrast as On/Off.

Adjusting the sound settings
Changing the sound settings
1 Press the MENU button.
2 Press ▲ ▼ to select Sound, then press OK to enter.

3 Press ▲▼ to select the item that needs to be adjusted.
4 Press ◀ ▶ to adjust the selected item.
5 When you are satisfied with your choice, press EXIT to return to normal viewing or MENU to return to the previous menu.
Sound mode
This sound setting can be adjusted to suit your personal preferences.
Balance
This will adjust the output of the right and left speakers to obtain the best stereo reproduction for your listening position.
Bass
To adjust the lower-pitched sounds.
Treble
To adjust the higher-pitched sounds
Surround
This will control the Woofer output.
Press ▲▼ to select Surround.
Press ◀ ▶ to set Surround as ON or OFF.
Equalizer
This sound setting can be adjusted to suit your personal preferences.
SPDIF type
This will control the SPDIF type.
Press button to select SPDIF type.
Press button to set SPDIF type. As OFF, Auto, PCM.
SPDIF delay
This adjusts the sound to make video and audio play at the same time. This function is active when Digital Audio Output is set to PCM.
AVL (Automatic volume control)
This adjusts the volume of each channel automatically to a normal level to ensure the volume is the same.
Press ◀ ▶ to switch AVL AS ON or OFF.
Sound type
Set the sound output type
Type
Press ◀ ▶ to set the type as Normal or Visually Impaired.
Visually Impaired
This function is active when the sound type is set to Visually Impaired.
- Speaker
Press ◀ ▶ to switch the Speaker ON or OFF.
• Volume
This adjusts the volume of Visually Impaired audio.
Function settings
1 Press the MENU button.
2 Press ▲ ▼ to select Function, then press OK to enter.
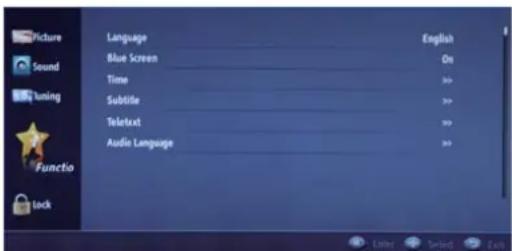
3 Press ▲▼ to select the item that requires adjusting.
4 Press ◀ ▶ to adjust the selected item.
5 When you are satisfied with your choice, press EXIT to return to normal viewing or MENU to return to the previous menu.
Language
To select the menu language.
Screen mode
To set the picture proportion, press ◀ ▶ to select Auto/16:9/4:3/Zoom1/Zoom2. You can quickly select the desired mode using the SCREEN button on the remote control.
• 16:9 mode
Choose 16:9 when you want to adjust the picture horizontally, in a linear proportion to fill the entire screen.
• 4:3 mode
Choose 4:3 when you want to view a picture with an original 4:3 aspect ratio, with grey bars appearing on both the left and right sides.
- Zoom1
Choose Zoom1 when you want to view the picture without any alteration. However, the top and bottom portions of the picture will be cropped.
- Zoom2
Choose Zoom2 when you want the picture to be altered, both vertically extended and cropped. The picture taking a halfway trade off between alteration and screen coverage.
Blue Screen
This will select the character background colour.
Note
The Blue Screen function is only available in ATV mode.
Time
- Time zone
Press ◀ ▶ button to select the appropriate time zone
• Time
Press OK to enter the sub-menu.

Auto Synchronisation: Press ◀ to select ON or OFF. When Auto mode is on, the time cannot be adjusted. If OFF is selected, you can set the time manually.
Date: Press ◀ ▶ to select the position and the number buttons to set the date.
Time: Press ◀ ▶ to select the position and the number buttons to set the time.
On/Off time: Press ◀ ▶ to select Once, Off or Daily. If you select Off, the time cannot be adjusted.
Timer: Press the number buttons to switch on AM and PM.
- Sleep Timer
Press ◀ ▶ to select the number of minutes: Off, 10 minutes, 20 minutes, 30 minutes, 40 minutes, 50 minutes, 60 minutes, 90 minutes or 120 minutes.
- Auto Sleep
According to the latest ERP regulations, this unit will switch itself off automatically if there is no change in status over a period of 4 hours.
OSD Timer
To set how long you want the menus to appear on-screen. Each press of the ◀ ▶ button selects the number of preset seconds, the Time will be set in sequence: 5 sec, 10 sec, 15 sec, 30 sec, 45 sec, 60 sec.
Subtitles
This displays subtitles for the video playing.
- Subtitles
Press ◀ ▶ to set Analogue Subtitles as ON or OFF
• Digital Subtitle Language 1.
This adjusts the default digital subtitle language.
• Digital Subtitle Language 2.
This adjusts the second default digital subtitle language.
- Subtitle type
Press ◀ ▶ to set the subtitle type as Normal or Hearing Impaired.
Teletext
This is used to set the Teletext mode.
• Digital Teletext language
This adjusts the default digital Teletext language.
- Decoding Page Language
This adjusts the decoding page language.
Audio Language
Audio Language 1st
Press ◀ ▶ to set the Audio Language.
This is used to select the default audio language for a digital channel. This function is active for digital channel.
Audio Language 2nd
This is used to select the second default audio language for a digital channel. This function is active for digital channel.
Initial installation
Shop Mode
Press ◀ ▶ to select ON/OFF.
Reset default
Recover to the default value.
Lock menu settings
This function can control the tuner, channel, source volume and so on. Press MENU on the remote control, then press ▲▼ to select Lock menu, press ▶ to enter. You will then be required to enter the password. The initial password is 0000. If you forget your password, you can always input 9443 to regain control.

System Lock
Press ▲▼ to select System Lock.
Press ◀ ▶ to set ON or OFF
Channel Block
Press ▲▼ to select the channel you want to lock.
Parental Lock
Press ▲▼ to select parental lock. Press ◀▶ to select OFF or 4-18 to limit the age of children who will watch TV.
Clear ALL
Press ▲▼ to select Clear Lock mode.
Press ◀ ▶ to unlock all set modes, which sets all lock options to off and restores the maximum volume to 100.
Change Password
1 Press ▲▼ to select Change Password. Press ▶ to enter the sub-menu.
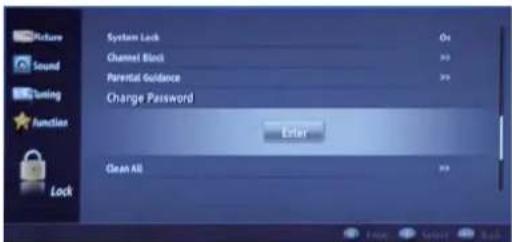
2 Enter the new digital password and confirm it, this password can be changed.
HOTEL SETTING
Press MENU and then press 1,0,0,1,0,8 to enter the menu:
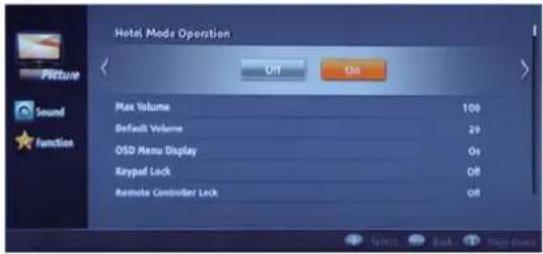
Hotel Mode:
Turns Hotel Mode ON or OFF.
Max Volume:
Sets the max volume for the TV.
Default Volume:
Sets the default volume for the TV.
OSD Menu Display:
Press ◀ ▶ to turn this function ON or OFF.
Keypad Lock:
Forbid TV input sources
Remote Control Lock:
Clears all the locks above.
Remote Control Lock

Source Lock
Default Source
Default Channel
TV Backup to USB
USB Restore to TV
Shortcut menu display settings
Subtitle function
Pressing the SUBTITLE button on the remote control will set
the subtitle function as ON or OFF.
Note
The SUBTITLE button will only display the subtitle languages menu in DTV mode.
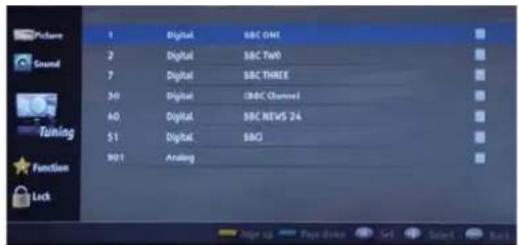
CH.LIST function
1 Pressing the CH.LIST button on the remote control will display the Channel List menu.
2 Press the yellow button to select Digital, Radio or Analogue, press ◀ ▶ to select Air, Cable or Satellite.
3 Press ▲▼ to select the channel and press OK to enter. You can press the EXIT button to cancel the changes at anytime.
GUIDE function
Pressing the GUIDE button on the remote control will display the Programme Guide menu, press ▲▼◀▶ to select the programme.
You can press the EXIT button to cancel the changes at anytime.
![Wednesday, 20-July-2005 13:12:01 20/07/2015 13:00 14:00 BBC News S. Neighbours Cash In the ADMI Diagnosi Pro... This Land Working Lunch The Future Is Will BBC Channel House Get Your Dom Back Stacy Breaker Stacy Breaker BBC News BBC News BBC News 13:00 - 13:30 Wed, 20/jul National and International news from the BBC, followed by Muthieu [6] BBC ONE Front day Schedule](/content/2026/06/1277283/images/c6d929bc921baea24519c580dcc143a67ea1fc39051d3479f553af94b3ac3968.jpg)
Note
Only available in DTV mode.
FAV function
Pressing the FAV button on the remote control will display the Favourites List menu.
Press OK to insert the current channel into the favourites list. Pressing OK again deletes the current channel from the favourites list.


INFO
Pressing INFO on the remote control will display the current channel information.
You can press the EXIT button to cancel the changes at anytime.

AUDIO/I/II
Pressing the AUDIO button on the remote control, will
display the Audio Languages menu.
Note
Pressing the AUDIO button on the remote will only display the Audio Languages menu in the DTV mode.
Mute
When you need to pay attention to something else such as a telephone call or guests, the mute function is very convenient.
If you press the MUTE button on the remote control the word "MUTE" will be displayed at the bottom of the screen. At which point, the sound of the TV set is turned off.
2 If you want to recover the sound, press the MUTE button again or press V+.
Quick channel view
This function enables you to quickly change to the last channel you watched. Press the Q.view button and the TV will go back to the last channel you watched.
For example, if you just watched channel 8 and the channel you are currently watching is channel 18 (as shown in the figure below).
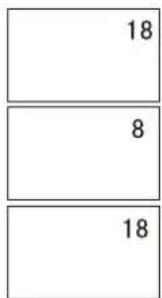
bar
| Category | Value | |---|---| | Top Bar | 18 | | Bottom Bar | 8 | | Bottom Bar | 18 |2 If you want to return to channel 8, you can simply press the Q.View button.
3 If you then want to go back to channel 18, press the button again. Using this function, you can easily change between channels the current and previous channels.
Using the features
Teletext functions
Teletext is an information system, broadcast by certain channels, which can be read like a newspaper. It also provides subtitles for people with hearing difficulties or those who are unfamiliar with the language in which a particular programme is being broadcast (cable networks, satellite channels etc.).
Note
The teletext buttons may work even if there is no teletext signal, but there is no teletext display.
Teletext
Teletext functions
To select "teletext", press the button on the handset. To switch off teletext, press the button again. "Note: not all menu functions are available in teletext mode." Only a few direct button control functions are available in teletext mode, they are:
• Volume adjustment
- Mute function

Page up/down
Use the P+/P- buttons to browse to the next or previous page.

Entering page numbers
To select a Teletext page: enter the page number using the numbers on the remote control; use the P+ or P- buttons; or use the coloured Fast text buttons.

Mix mode
To view the TV picture whilst in Text mode, press the button, this will superimpose Teletext data over the TV picture. Press this button again to return to Full text.
INDEX
Press the INDEX button to go to the Teletext index page.

Hold
Pressing the Button will stop the teletext page updating automatically. This feature is very useful when there are several teletext pages or data items on the same page number.
Size
Pressing the Button switches the display from the top half of the screen to the bottom half. This feature is very useful as it magnifies the image making the characters easier to read.

Reveal
Pressing the Button will reveal hidden text. This feature is used to reveal information such as answers to Teletext on-line interactive puzzles.

Fast text coloured buttons
Fast text automatically displays the four most commonly used pages that the broadcaster thinks that you may want to choose next. Press the same coloured button on the remote control as the coloured link at the bottom of the teletext page to go directly to that page.
Subcode
Press the button to enter the 4-digit number for a secondary page.

USB mode

Note
The diagrams in the following section are schematic and only for your reference. Please see the actual product, if necessary.
The OSD of the USB function may be different from your product as it is just example used in the instructions.
To use the USB device
1 Supported file formats:
- Photo: *.jpg;
- Music: *.mp3 files;
- Movie: *.avi files;
- TEXT: *.txt

Note
Due to the specific nature of file coding, some files may not be readable.
2 Supported equipment:
Supports equipment using the Mass Storage Protocol with an FAT32 file system, such as some USB drives, portable hard drives and MP3 players. If USB equipment cannot be identified due to an unsupported file system, please format the equipment to the abovementioned file system.
3 To achieve smooth playing, ensure the following:
• The file code rate should be lower than 300KB/S;
- Due to the limitations of USB signal transmission distance, it is recommended that your do not use a USB patch cord. If you do use a cord, make sure that the length does not exceed 1m;
- Use high-speed USB equipment that complies with the USB2.0 full speed Interface Standard. If USB equipment does not comply with USB full speed Interface Standard, playback may be interrupted.
Connecting a USB device
1 Turn the TV on.
2 Connect a USB device containing photos, music and/or movie files into the USB port on the side of the TV.
3 When the USB is connected to the TV, you can then select the Media Play option.
USB media menu
1 Plug an external storage device into the USB port.
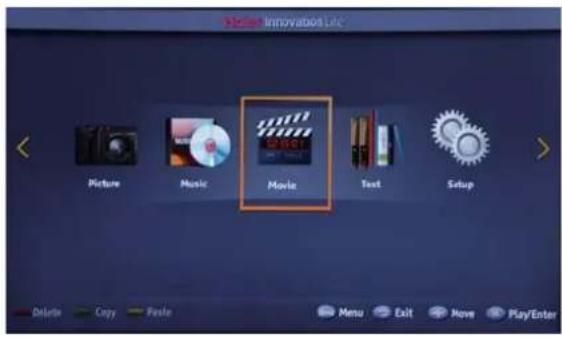
2 Press SOURCE on the remote and then use ▲ /▼ to select USB.
3 Press OK to display the sub page.
To display pictures
1 Press ◀ / ▶ to select the Picture, then press OK on the remote.
2 Press ▲ /▼ / ◀ / ▶ to select the desired picture from the file list, then press OK to display the pictures.

3 Press MENU to display the options list.
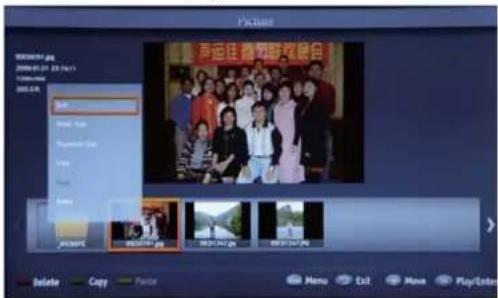
4 Press the button on the remote control to select the adjusted item, press ENTER button to confirm.

- Play or pause
- Stop
- Display pre vious picture
- Display ext picture
5 Press EXIT to return to the previous menu.

You may play the pictures selected.
To play music
1 Press ◀ / ▶ to select Music, then press ENTER in the Media Play menu.

2 Press ▲ /▼/◄ /► to select the desired music from the file list, then press OK to play the music.
3 Press MENU to display the options list.

4 Press OK button on the remote control to select the adjusted item.

| 1. | Play or pause |
| 2 | Stop |
| 3. | Fast rewind |
| 4. | Fast forward |
| 5. | Play previous music |
| 6. | Play next music |
5 Press EXIT to return to the previous menu.
Note
You can press any button except POWER to exit the Audio Only function.
You may play the music selected.
To play movies
1 Press ◀/▶ to select a Movie, then press ENTER in the Media Play menu
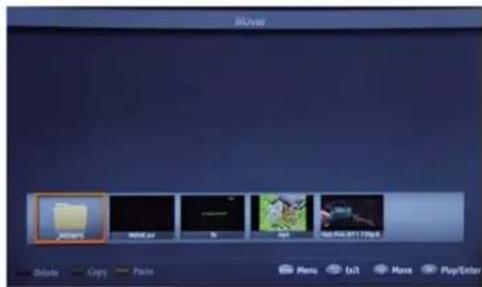
2 Press ▲ /▼/◄ /► to select the desired movie in the file list, then press OK to a movie.
3 Press MENU to display the options list.

4 Press OK button on the remote control to select the adjusted item

- Play or pause
2 Stop - Fast rewind
- Fast forward
- Play previous video
- Play next video
5 Press EXIT to return to the previous menu.
Note
Do not remove the USB device from the TV until you have exited USB mode, otherwise you may damage the USB device.
To display text
1 Press ◀ / ▶ to select Text, then press ENTER in the Media Play menu.

2 Press ▲ /▼ /◄ /► to select the desired text in the file list, then press OK to display the text
3 Press MENU to display the options list.

4 Press OK button on the remote control to select the adjusted item.
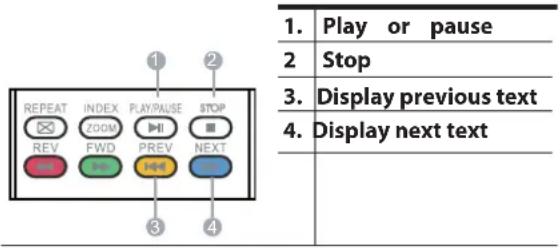
5 Press EXIT to return to the previous menu.
Using an external USB drive for recording
Note
The system will format the whole device. If your device size is bigger than 1GB, you can set the size which is used for time shift.
If you set the entire capacity for time shift, you will not be able to record anything.
You will only need to format the device the first time you use it to record something.
The recommended minimum capacity for recording is 1GB.
Bit rate:
• Device bit-rate>5MB/s REC is safe.
The system cannot work normally if the USB device has one of the following issues:
- The device has bug.
• The device has an error block.

- The device does not accurately report capacity available.
IMPORTANT
- The USB device should be formatted to FAT32 using a PC before being inserted into the USB connector.
Time Shift
1 Insert the USB device with FAT32 format into the USB connector.
2 Press PLAY/PAUSE to start timeshifting.
Time Shift function is only available in DTV mode. Press PLAY/PAUSE to pause the programme. Press PLAY/PAUSE again to restart the programme with time shift. If you want to stop time shift, press STOP.
You can stop the time shift programme from being played by pressing STOP.
Recording
1 Press RECORD to record the programme being played and press EXIT to minimise the recording interface.
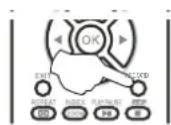

2 Press STOP to stop the programme recording from being played.
3 To play the recorded programme: Select input source USB to open pvr folder.
4 Select the content you recorded.
5 Press OK to play the recorded programme and press STOP to stop it.
Reference sections
Troubleshooting
Please use the guide below to help you determine the cause of possible faults.
| No picture, no sound | Check that the television is plugged in correctly.Check whether the television has an adequate power supply.Check whether the electricity supply to available. |
| Blank screen | Verify if correct signals are input.Try to change the input signal using the remote control.Restart the television if the power supply is interrupted. |
| No sound | Press the MUTE button to check whether Mute mode is currently active.Switch to another channel and check whether the same problem occurs.Try pressing the VOL+ button to see if that solves the problem. |
| Poor sound | Check that the sound system is set up correctly. Refer to the user guide for any adjustments. |
| No picture on some channels | Check that you have selected the correct channelAdjust the aerial. |
| No colour pictures on some channels (black and white) | Check whether there is an issue with other channels.Check the picture settings and the sound systems.Refer to the relevant part of this user's manual to adjust the colours. |
| Spots on some or all pictures | Check that the aerial is connected properly.Make sure the aerial is in good condition.Make fine adjustments to the channel. |
Unable to control television
Disconnect from power supply for 10 seconds and then reconnect. If the problem persists, contact an authorised after-sales service for technical assistance.
Note
If the issue cannot be resolved using the above guide, consult with your local authorised service centre.
The TV set must only be repaired by qualified registered service personnel. Do not attempt to remove the back cover as the TV set has dangerously high voltages that may cause fire or injury.
Specifications
The specifications of the television you have just purchased may differ from the information in this table may vary due to changes in product design.
| 32" 39" 42" 46" | ||||
| Model LET32T1000HF LET39Z18HF LET42T1000HF LET46Z18HF | ||||
| Picture, sound system | PAL/SECAM-B/G,I,D/K.L | |||
| Power 75W 100W | 120W 150W | |||
| Audio output 8W+8W | ||||
| Channels | 100 channels for ATV, 1400 channels for DTV | |||
| External input port | Component input, PC input, PC audio input, SCART, aerial inputVideo input, R/L audio input, HDMI input, USB | |||
| Temperature | Working:5°C-35CStorage:-15 C-45C | |||
| Humidity | Working: 20-80%Storage: 5-90% | |||
| Accessories | Remote control, AAA battery ×2, user's manual, warranty, TV stand4 x screws for TV standComponent audio, adapterCover bottom | |||
| Dimensions with stand(WXDXH) | 751X200X515 | 888X277X608 | 983X250X654 | 1057X255X673 |
| Weight with stand(Kg) | 8.6 | 13 | 14.1 | 16.5 |
| Weight without stand and base (Kg) | 7.3 | 10.0 | 12.5 | 13 |
| Wall mounting | 200X100 | 200X200 | 200X200 | 400X400 |
Appendix
Appendix 1
VGA Timing table
| Item 6 | 1.08H.Freq.(Khz) | Mode Resolution | V.Freq. | (Khz) | 26-32" 39-46' | |
| 1 31.4 | 69 IBMVGA 640X350 | 70.086 | ||||
| 2 31.4 | 69 IBMVGA 720X400 | 70.087 | ||||
| 3 31.4 | 69 IBMVGA 640X480 | 59.94 • • | ||||
| 4 35 | MACINTOSH 640X480 | 67 | ||||
| 5 37.8 | 61 VESA | 640X480 72.089 | • • | |||
| 6 37.5 | VESA | 640X480 75 | • • | |||
| 7 35.1 | 56 VESA | 800X600 56.25 | • • | |||
| 8 37.8 | 79 VESA | 800X600 60.317 | • • | |||
| 9 48.0 | 77 VESA | 800X600 72.188 | • • | |||
| 10 | 46.875 VESA | 800X600 75 | • • | |||
| 11 | 49.7 | MACINTOSH 83 | 2X624 75 | |||
| 12 | 48.363 | VESA | 1024X768 | 60.004 | • | • |
| 13 | 56.476 | VESA | 1024X768 | 70.069 | • | • |
| 14 | 60.023 | VESA | 1024X768 | 75.029 | • | • |
| 15 | 61.08 | IBM XGA-2 | 1024X768 | 75.781 | ||
| 16 | 44.772 VESA CVT | 1280X720 | 59.855 | |||
| 17 | 47.776 VESA | 1280X768 | 59.87 • • | |||
| 18 | 60.289 | VESA | 1280X768 | 75 | • | • |
| 49.702 VESA | 1280X800 | 59.81 • • | ||||
| 19 | 47.72 | VESA CVT | 1360X768 | 59.799 | ||
| 20 | 63.981 VESA | 1280X1024 | 60.02 • • | |||
| 21 | 79.976 | VESA | 1280X1024 | 75.025 | • | • |
| 55.935 VESA | 1440X900 | 59.887 | • • | |||
| 70.635 VESA | 1440X900 | 74.984 | • • | |||
| 22 | 65.29 | CVT1.76MW | 1680X1050 | 59.954 | ||
| 23 | 64.674 | CVT1.76MW-R | 1680X1050 | 59.883 | ||
| 24 | 66.587 CVT2.3MA-R | 1920X1080 | 60 |
Appendix 2
HDMI (High Definition Multimedia Interface) support format
- support 480i/480p, 576i/576p, 720p, 1080i, 1080p, 42" only format with HDCP.
- Digital interface with 4 channels TMDS signal.
Scart input/output description
| TV source Screen display source | Scart out |
| ATV ATV ATV | |
| DTV DTV DTV |
Haier®
DIGITALER LED-LCD-FERNSEHER
BEDIENUNGSANLEITUNG
Modell:
natural_image
Cartoon illustration of a distressed character standing on a wall with steam rising from a pipe (no text or symbols)natural_image
Cartoon illustration of a computer monitor character with raindrops falling (no text or symbols)natural_image
Cartoon illustration of a sad computer monitor with a frowning face and a broken cable, accompanied by a hand holding a battery (no text or symbols)natural_image
Cartoon illustration of a smiling face with a droplet above a table (no text or symbols)natural_image
Cartoon illustration of a smiling cube character with expressive eyes and a small figure, running away from its head (no text or symbols)natural_image
Simple cartoon drawing of a sad, distressed cube with a winking face and a small mouth, standing near a wall (no text or symbols)natural_image
Cartoon illustration of a distressed computer with a house and electrical lines above (no text or symbols)natural_image
Cartoon illustration of a computer monitor character with a thought bubble showing a small object, next to a bottle and a cross symbol (no text or labels)natural_image
Cartoon illustration of a smiling computer character with arms raised (no text or symbols)natural_image
Top-down schematic of a computer chassis showing internal components and a red upward arrow indicating orientation (no text or labels)natural_image
Technical line drawing of a mechanical component with internal grid structure and mounting bracket (no text or symbols)
natural_image
Line drawing of a flat-screen monitor with a stand at the bottom (no text or symbols)
natural_image
Front view of a flat-screen computer monitor with blank screen area and stand (no text or symbols)
natural_image
Line drawing of a remote control device with an arrow indicating rotation (no text or symbols)natural_image
Simple line drawing of a remote control device with a battery and a separate battery (no text or symbols)natural_image
Simple line drawing of a remote control device with an arrow indicating rotation (no text or symbols)Vorsicht
HOME-MODUS
SHOP MODE (VERKAUFSRAUM-MODUS)
Brightness (Helligkeit)
Visually Impaired (Sehbehindert)
• Time zone (Zeitzone)
Audio Language 1st (Audiosprache 1)
System Lock (System sperren)

Hinweis
INFO

5 five The streets of SAN Francisco (384MB)
TELEVISOR LED LCD DIGITAL
Channel Skip (Saltar canal) 14
Channel Sort (Ordenar canales) ....14
Editar (Editar) 14
natural_image
Illustration of a cartoon-style TV with a smiling face on top, placed on a shelf next to a bookshelf (no text or symbols)natural_image
Cartoon illustration of a distressed character standing behind a pipe, with steam rising from the pipe (no text or symbols)natural_image
Cartoon illustration of a smiling computer character falling under rain with a cloud above (no text or symbols)natural_image
Cartoon illustration of a sad face emerging from a broken electrical plug (no text or symbols)natural_image
Electrical circuit diagram showing three connected components with lightning bolts (no text or symbols)natural_image
Cartoon illustration of a smiling face with eyes and a droplet above a tray (no text or symbols)natural_image
Cartoon illustration of a smiling computer character with scissors, no text or symbols presentnatural_image
Cartoon character with large eyes and a mouth, running away from a small object (no text or symbols)natural_image
Simple cartoon drawing of a distressed cube with a sad face and a downward arrow, no text or symbols present.natural_image
Cartoon illustration of a distressed computer character with a speech bubble containing a house and lightning (no text or symbols)natural_image
Cartoon illustration of a computer monitor character with a thought bubble showing a small object, next to a bottle and a cross symbol (no text or labels)natural_image
Cartoon illustration of a smiling computer character with arms raised, next to a door (no text or symbols)Acerca de su televisor LED LCD
natural_image
Top-down schematic of a computer chassis showing internal components and a red upward arrow indicating orientation (no text or labels)natural_image
Technical line drawing of a mechanical component with internal grid structure (no text or symbols)
Tornillos: 4 x B4 x 16
natural_image
Line drawing of a flat-screen monitor with a blank screen and stand (no text or symbols)
natural_image
Front view of a flat-screen computer monitor with blank screen area and stand (no text or symbols)
natural_image
Diagram of a remote control device with an arrow indicating rotation (no text or symbols)natural_image
Simple line drawing of a remote control device with two ports and a label '2' (no text or symbols on the device itself)natural_image
Simple line drawing of a remote control box with an arrow indicating rotation (no text or symbols)Precaución
3 Pulse ▲▼ para establecer Antena/Cable (Antena/Cable) y Country (País).
Channel Skip (Saltar canal)
4 Pulse ▲▼ para seleccionar Channel Skip (Saltar canal). Pulse ▶ para acceder al submenú.
Common interface
Teletext (Teletexto)
System Lock (Bloqueo del sistema)
Hotel Mode (Modo de hotel):


Nota
INFO
natural_image
Cartoon illustration of a smiling TV on a shelf with bookshelves in the background (no text or symbols)natural_image
Cartoon illustration of a distressed character standing in a tiled room with steam rising from a pipe (no text or symbols)natural_image
Cartoon illustration of a computer monitor character with raindrops falling (no text or symbols)natural_image
Cartoon illustration of a sad face on a tablet with a broken fuse and lightning bolt (no text or symbols)natural_image
Cartoon illustration of a smiling face with eyes and a droplet above a tray (no text or symbols)natural_image
Cartoon character running away from a wavy path (no text or symbols)natural_image
Simple cartoon drawing of a sad, distressed cube with a winking face and a tongue, standing near a wall (no text or symbols)natural_image
Cartoon illustration of a distressed electrical outlet with a house and power lines, no text or symbols presentnatural_image
Cartoon illustration of a computer monitor character with a thought bubble showing a small object, next to a bottle and a cross symbol (no text or labels)natural_image
Cartoon illustration of a smiling computer character with arms raised, pointing at a book (no text or symbols present)natural_image
Technical diagram of a computer chassis with labeled components and an upward arrow indicator (no text or symbols present)natural_image
Technical line drawing of a mechanical component with internal grid structure (no text or symbols)
natural_image
Line drawing of a flat-screen monitor with a stand at the bottom (no text or symbols)
natural_image
Front view of a flat-screen computer monitor with blank screen area and stand (no text or symbols)
natural_image
Simple line drawing of a remote control device with an arrow indicating rotation (no text or symbols)natural_image
Simple line drawing of a remote control device with a separate handle and a small detached part, labeled with number 2 (no text or symbols on the device itself)natural_image
Simple line drawing of a remote control device with an arrow indicating rotation (no text or symbols)Attention
MODE HOME (MAISON)
MODE SHOP (MAGASIN)

Interface commune
Sound mode (mode audio)
Audio Language 2nd (langue audio 2nd)
Max Volume (volume maximum):


Remarque
INFO
Afficher des images
natural_image
Cartoon illustration of a computer monitor with a sad face, standing on a tiled wall (no text or symbols)natural_image
Cartoon illustration of a sad, anthropomorphic character standing on a table with eyes and mouth (no text or symbols)natural_image
Cartoon illustration of a computer monitor character with raindrops falling (no text or symbols)natural_image
Cartoon illustration of a smiling cube character running away from a pipe (no text or symbols)natural_image
Simple cartoon drawing of a sad, distressed cube with a winking face and a small mouth, next to a wall (no text or symbols)natural_image
Cartoon illustration of a smiling computer monitor character with a speech bubble containing a house and power lines (no text or symbols)natural_image
Cartoon illustration of a smiling computer monitor character with a thought bubble showing a brain and a bottle, accompanied by a crossed-out 'X' symbol (no text or symbols present)natural_image
Cartoon illustration of a smiling computer with arms raised, pointing at a book (no text or symbols present)Over de LED LCD-televisie
natural_image
Top-down schematic of a computer chassis showing internal components and a red upward arrow indicating orientation (no text or labels)natural_image
Technical line drawing of a mechanical component with internal grid structure and mounting bracket (no text or symbols)
Schroeven: 4xB4X16
natural_image
Line drawing of a flat-screen monitor with a stand at the bottom (no text or symbols)
natural_image
Front view of a flat-screen computer monitor with blank screen area and stand (no text or symbols)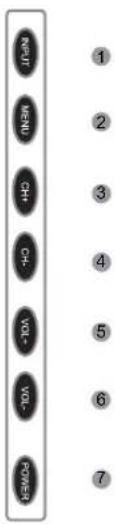

natural_image
Diagram of a remote control panel with an arrow indicating rotation (no text or symbols)natural_image
Simple line drawing of a remote control device with a separate clip and label '2' (no text or symbols on the device itself)natural_image
Simple line drawing of a remote control box with an arrow indicating rotation (no text or symbols)Let op
SHOP MODE (Winkelmodus)
3 Druk op ▲▼ om Antenna (Antenne) (Cable) (Kabel) en Country (Land) in te stellen.
Common Interface
Selecteer Standard/User/Vivid/Eco/Cinema/Sport
Brightness (Helderheid)
Teletext (Teletekst)
System Lock (Systeemvergrendeling)
Hotel Mode (Hotelmodus):
Source Lock (Bronvergrendeling)
Default Source (Standaardbron)


Opmerking
INFO
Beelden weergeven

5 five The streets of SAN Francisco (384MB)


- DIGITAL LED LCD TELEVISION
- INSTRUCTION MANUAL
- Contents
- Safety warnings 2
- About your LED LCD TV 5
- Getting started 11
- Using the features 21
- Reference sections 26
- Safety warnings
- Welcome
- Important information
- WARNING
- About your LED LCD TV
- Installing the stand
- For 32-42" LED LCD models only
- (Put your TV on the table with the screen facing down.)
- For 39-46" LED LCD models only
- Front control panel
- Rear terminals control
- Getting to know your remote control
- Note
- Connecting your TV
- Connecting the aerial
- Improving your signal
- Connecting your PC to the TV
- Connecting a DVD player to your TV
- Connecting a DVD player or VCR to your TV
- SCART input
- HDMI input
- Mounting your TV onto the wall
- Preparing your remote control
- Installing the batteries
- Caution
- Getting started
- Setting up
- Location
- Switching your TV on
- HOME MODE
- SHOP MODE
- Tuning your TV
- Switching to an external source other than TV
- Auto Search (Antenna or Cable)
- Digital manual search (Cable)
- Analogue manual search
- Skip
- Sort
- Edit
- Common interface
- Using your TV
- Selecting a TV channel
- Adjusting the volume
- Adjusting the picture settings
- Changing the picture settings
- Mode
- Brightness
- Contrast
- Colour
- Sharpness
- Tint
- Colour temperature
- Advanced video
- • DNR
- • PEG NR
- Active Contrast
- Adjusting the sound settings
- Changing the sound settings
- Sound mode
- Balance
- Bass
- Treble
- Surround
- Equalizer
- SPDIF type
- SPDIF delay
- AVL (Automatic volume control)
- Sound type
- Type
- Visually Impaired
- - Speaker
- • Volume
- Function settings
- Language
- Screen mode
- • 16:9 mode
- • 4:3 mode
- - Zoom1
- - Zoom2
- Blue Screen
- Time
- - Time zone
- • Time
- - Sleep Timer
- - Auto Sleep
- OSD Timer
- Subtitles
- Teletext
- • Digital Teletext language
- - Decoding Page Language
- Audio Language
- Audio Language 1st
- Audio Language 2nd
- Initial installation
- Reset default
- Lock menu settings
- System Lock
- Channel Block
- Parental Lock
- Clear ALL
- Change Password
- HOTEL SETTING
- Hotel Mode:
- Max Volume:
- Default Volume:
- OSD Menu Display:
- Keypad Lock:
- Source Lock
- Shortcut menu display settings
- Subtitle function
- CH.LIST function
- GUIDE function
- FAV function
- INFO
- AUDIO/I/II
- Mute
- Quick channel view
- Using the features
- Teletext functions
- Page up/down
- Entering page numbers
- Mix mode
- INDEX
- Hold
- Size
- Reveal
- Fast text coloured buttons
- Subcode
- USB mode
- To use the USB device
- Connecting a USB device
- USB media menu
- To display pictures
- To play music
- To play movies
- To display text
- Using an external USB drive for recording
- IMPORTANT
- Time Shift
- Recording
- Reference sections
- Troubleshooting
- Specifications
- Appendix
- Appendix 2
- Haier®
- Vorsicht
- HOME-MODUS
- SHOP MODE (VERKAUFSRAUM-MODUS)
- Brightness (Helligkeit)
- Visually Impaired (Sehbehindert)
- • Time zone (Zeitzone)
- Audio Language 1st (Audiosprache 1)
- System Lock (System sperren)
- Hinweis
- Acerca de su televisor LED LCD
- Precaución
- Channel Skip (Saltar canal)
- Teletext (Teletexto)
- System Lock (Bloqueo del sistema)
- Hotel Mode (Modo de hotel):
- Nota
- Attention
- MODE HOME (MAISON)
- MODE SHOP (MAGASIN)
- Interface commune
- Sound mode (mode audio)
- Audio Language 2nd (langue audio 2nd)
- Max Volume (volume maximum):
- Remarque
- Afficher des images
- Over de LED LCD-televisie
- Let op
- SHOP MODE (Winkelmodus)
- Brightness (Helderheid)
- Teletext (Teletekst)
- System Lock (Systeemvergrendeling)
- Hotel Mode (Hotelmodus):
- Source Lock (Bronvergrendeling)
- Opmerking
- Beelden weergeven
Brand : HAIER
Model : LET42T1000HF
Category : Television