
XAV-A1 - Car radio SONY - Free user manual and instructions
Find the device manual for free XAV-A1 SONY in PDF.


| Product type | 2 DIN Car Radio |
| Brand | Sony |
| Model | XAV-A1 |
| Dimensions (W x H x D) | 178 x 100 x 165 mm |
| Weight | 1.1 kg |
| Power supply | 12 V DC (vehicle) |
| Power consumption | 15 A max |
| Screen type | TFT LCD touch screen |
| Screen size | 6.1 inches |
| Screen resolution | 800 x 480 pixels |
| Playable formats | CD, CD-R/RW, DVD±R/RW, MP3, WMA, AAC, DivX, JPEG |
| Radio | AM/FM, RDS, 30 preset stations |
| Output power | 4 x 52 W (max) |
| Inputs | Auxiliary (3.5 mm), front USB |
| Bluetooth connectivity | Hands-free and A2DP audio streaming |
| Functions | 7-band graphic equalizer, bass/treble control, sound adjustment |
| Anti-theft code | Yes, 4-digit code |
| Maintenance and cleaning | Clean with a soft dry cloth; avoid solvents |
| Operating temperature | -10 °C to +60 °C |
| Included accessories | User manual, remote control, wiring harness, mounting kit |
| Spare parts and repairability | Available on Sony website; repair by authorized centers |
Frequently Asked Questions - XAV-A1 SONY
User questions about XAV-A1 SONY
0 question about this device. Answer the ones you know or ask your own.
Ask a new question about this device
Download the instructions for your Car radio in PDF format for free! Find your manual XAV-A1 - SONY and take your electronic device back in hand. On this page are published all the documents necessary for the use of your device. XAV-A1 by SONY.
USER MANUAL XAV-A1 SONY
Operating Instructions US
The model and serial numbers are located on the bottom of the unit.
Record the serial number in the space provided below.
Refer to these numbers whenever you call upon your Sony dealer regarding this product.
Model No. XAV-A1 Serial No.
For installation and connections, see the supplied Installation/Connections manual.
Laser radiation when open. DO NOT STARE INTO BEAM.
This label is located on the drive unit's internal chassis.
CAUTION
The use of optical instruments with this product will increase eye hazard.
As the laser beam used in this CD/DVD player is harmful to eyes, do not attempt to disassemble the cabinet. Refer servicing to qualified personnel only.
CAUTION
- When installation, be sure to fix certainly.
- While operating, be sure to fasten seatbelts to avoid injury in the event of a sudden movement of the vehicle.
WARNING
This equipment has been tested and found to comply with the limits for a Class B digital device, pursuant to Part 15 of the FCC Rules. These limits are designed to provide reasonable protection against harmful interference in a residential installation. This equipment generates, uses, and can radiate radio frequency energy and, if not installed and used in accordance with the instructions, may cause harmful interference to radio communications. However, there is no guarantee that interference will not occur in a particular installation. If this equipment does cause harmful interference to radio or television reception, which can be determined by turning the equipment off and on, the user is encouraged to try to correct the interference by one or more of the following measures:
— Reorient or relocate the receiving antenna.
— Increase the separation between the equipment and receiver.
— Connect the equipment into an outlet on a circuit different from that to which the receiver is connected.
— Consult the dealer or an experienced radio/TV technician for help.
You are cautioned that any changes or modifications not expressly approved in this manual could void your authority to operate this equipment.
Table of Contents
Features ....4
Precautions....5
Getting Started
Preparations 9
Detaching the front panel....9
Resetting the unit 9
Opening up the monitor....9
Setting the clock 12
DEMO mode 12
Attaching the front panel 12
Location of Controls ....13
Main unit 13
Card remote commander RM-X706 14
Basic Operation
Playing a Disc 15
Playing DVD/Video CD/Audio CD/MP3/JPEG ....15
Watching TV/Listening to the Radio .....17
Watching TV or listening to radio 17
Watching/listening to other video/audio components 17
Player
About the Source Menu ....18
Display items on the CD/MP3 playback 18
Using the Source Menu 19
Playback order of MP3 files 19
Setting the screen — Wallpaper/Screen Effect ..... 20
Setting the Play mode — Play Mode 20
Setting for the Display — Display 21
Setting the sound quality — Equalizer ....23
Resuming Playback — Resume Play .....25
Searching a Specific Point on a Disc — Scan ....26
Using the Menus on DVDs 27
Using PBC Functions — PBC (Playback control)....28
Starting Playback from a Selected Point — Search Play ....29
Various DVD Operations
Changing the Audio Channels 30
Adjusting the Audio Output Level — DVD Level Adjustment ....31
Changing the Angles 32
Displaying the Subtitles ....33
Settings and Adjustments
Using the System Menu 34
Monitor settings — MONITOR ....34
Display settings — DSPL 34
Sound settings — SOUND 35
Other settings — OTHER 36
Using the DVD Setup Menu ....37
Language settings for DVD playback — Language ....37
Settings for digital audio output — Audio ...... 38
Display settings for the player — Display ...... 38
Settings for the parental control — Lock ....38
Setting for the downmix signal — Downmix .....38
Locking discs — Lock 39
TV/Radio/Other Components
Storing Channels/Radio Stations....42
Storing automatically — BTM ....42
Storing manually 42
Receiving the stored stations 42
Using the Local seek mode in tuner function .....43
Switching FM reception to monaural 43
Listening to a XM Satellite Radio Program.....44
Introducing XM™ Satellite Radio 44
Selecting XM source and the desired channel ..... 44
Using category search to locate channels ....44
Storing channels by presetting memory 45
Receiving the stored channels 45
Displaying the XM Radio ID 46
Auxiliary Audio/Video Equipment ....47
Setting for the auxiliary equipment 47
Displaying the image of the back camera 48
Switching the Front/Rear Output
— Zone x Zone ....49
Other Features
Additional Information 50
Card remote commander precautions....50
About the liquid crystal display (LCD) panel ..... 50
Replacing the lithium battery 50
Removing the unit 51
Troubleshooting....53
General 53
Picture 53
Sound 54
Operation 54
Radio reception 56
Messages 56
Specifications 57
Glossary 59
Language Code List ....61
Welcome!
Thank you for purchasing this Sony AV Center. Before operating the unit, please read this manual thoroughly and retain it for future reference.
7-inch in-dash motorized TFT monitor
Innovative in-dash monitor design allows the unit to be mounted in a single DIN slot. At the touch of a button, a 7-inch wide-aspect-ratio screen slides out, for comfortable TV or DVD viewing. (Sony TV tuner is optionally available.)
- High brightness and wide viewing angle monitor.
- Touch panel and graphic user interface.
DVD, CD, VCD playback compatibility
- Compatible with various disc formats, such as DVD-R/-RW, DVD+R/+RW, etc. DVD-RW: compatible with video mode and VR mode (various editing available) DVD+RW: compatible with video mode and +VR mode (various editing available)
- Plays back up to 1,000 tracks* recorded on DVD-R/-RW or DVD+R/+RW in MP3 file format
* Depends on track length
2 video/audio inputs, 1 video input, 1 video/audio output (rear), and 1 digital output provided
Zone × Zone
You can simultaneously listen to a separate sound source in this unit and auxiliary audio equipment in the rear.
DVD level adjustment
Balances the output level differences between PCM, Dolby Digital and DTS, and the volume level differences between disc and source.
EQ7
You can select an equalizer curve for 7 music types.

SATELLITE RADIO
If you have any questions or problem concerning the XM Satellite radio service including the broadcast, consult XM Satellite Radio Inc.
The XM Radio ID (XM-ID) is required when consulting XM. It is located on the side of the main unit, and you can also check it in the display of this unit (see “Displaying the XM Radio ID”).
Precautions
To avoid the risk of injury or accident, read the following precautions before installing and operating the unit.
On safety
Comply with your local traffic rules and regulations.
- While driving
- You must not watch or operate the monitor. It may lead to distraction and cause an accident. Park your car in a safe place to watch the monitor and operate the unit.
- While operating
- Do not insert your hands, fingers or foreign object into the unit while the monitor is functioning. It may cause injury or damage to the unit.
- Keep small articles out of the reach of children.
- Do not touch the TV antenna and monitor at the same time during storms. You may get an electric shock.
- If your car was parked in direct sunlight resulting in a considerable rise in temperature inside the car, allow the unit to cool off before operating it.
Preventing accidents
The TV/video pictures appear only after you park the car and set the parking brake. When the car starts moving, the TV/video pictures automatically disappear for safety reasons, after displaying the following caution.

Picture off for your safety!
Do not operate equipment connected to the TV tuner unit or watch the monitor while driving. You may cause a traffic accident if your attention is distracted by the monitor.
- Do not use the Set Up feature while driving, or perform any other function which could divert your attention from the road.
- When you connect the back camera:
- When you drive, watch the surroundings carefully for your safety. Do not depend on the back camera exclusively.
- When backing up you car, be sure to look back for your safety.
On installation
- We recommend this unit should be installed by a qualified technician or service personnel
- If you try to install this unit by yourself, refer to the supplied “Installation/Connections” manual and read it carefully. Make sure to install this unit properly.
– I mproper installation may cause battery drain or a short circuit.
- If the unit does not work properly, check the connections first (refer to the supplied "Installation/Connections" manual). If everything in order, check the fuse.
- Replacing the fuse
- When replacing the fuse, be sure to use only a fuse of the same rating (ampere rating).

- Using a different fuse or bridging the contacts with wire is highly dangerous and can lead to serious damage.
- Protect unit surface from damage
- Do not expose the unit surface to chemicals such as insecticide, hair spray, insect repellent, etc.
- Do not leave rubber or plastic materials in contact with the unit for a long time. Otherwise the finish of the unit may be impaired, or deformation may occur.
- When installing, be sure to turn the ignition key to the off position. Installing the unit while the ignition is on may cause battery drain or short circuit.
- When installing, be sure not to damage any car parts such as pipes, tubes, fuel tank or wiring by using a drill. It can cause a fire or an accident.
Precautions
Installing location
- Do not install this unit where:
– the driver's view will be obstructed when the monitor is in either open or close position.
– the operation of the car or the airbag system will be obstructed.
– It will obstruct the operation of the vehicle, especially the steering wheel, shift lever or brake pedal.
If you have any questions or problems concerning your unit, please consult your nearest Sony dealer.
About this manual
- Instructions in this manual describe the controls on the card remote commander.
You can also use the controls on the unit if they have the same or similar names to those on the card remote commander. - In this manual, "DVD" is used as the general term for DVD-R/-RW and DVD+R/+RW.
- The meaning of the icons used in this manual is described below:
| Icon Meaning | |
| DVD | Functions available for DVD VIDEOS, DVD-Rs/DVD-RWs, or DVD+Rs/ DVD+RWs in video mode |
| VCD | Functions available for Video CDs or CD-Rs/CD-RWs in video CD format |
| CD | Functions available for music CDs or CD-Rs/CD-RWs in music CD format |
| MP3 | Functions available for files in MP3 format stored on CD-ROMs/CD-Rs/CD-RWs/ DVD-Rs/DVD-RWs/DVD+Rs/ DVD+RWs |
| JPEG | Functions available for files in JPEG format stored on CD-ROMs/CD-Rs/ CD-RWs/DVD-Rs/DVD-RWs/DVD+Rs/ DVD+RWs |
Precautions
- Do not use the custom functions while driving, or perform any other function which could divert your attention from the road.
- The power antenna will extend automatically while the unit is operating.
Moisture condensation
On a rainy day or in a very damp area, moisture condensation may occur inside the lenses and display of the unit. Should this occur, the unit will not operate properly. In such a case, remove the disc and wait for about an hour until the moisture has evaporated.
To maintain high sound quality
Be careful not to splash juice or other soft drinks onto the unit or discs.
playable discs
| Format of discs | ||
| DVD VIDEO |  |  |
| DVD-R* |  | |
| DVD-RW* |  RW RW | |
| DVD+R* |  DVD + R DVD + R | |
| DVD+RW* |  DVD + ReWritable DVD + ReWritable | |
| Video CD |  |  |
| Audio CD |  |  |
| CD-R* |  |  |
| CD-RW* |  |  |
* Discs that are not finalized cannot be played. "DVD VIDEO", "DVD-R", "DVD-RW", "DVD+R", and "DVD+RW" are trademarks.
DVD
A DVD contains both audio and visual data. A 12-cm disc can hold 7 times the amount of data contained in a CD-ROM, which equals to 4 consecutive hours of playing time (8 hours for double-sided discs). DVDs are divided into 4 types: single sided single layer, single sided double layer, double sided single layer, and double sided double layer.
Video CD (VCD)
A Video CD can contain both audio and visual data on a disc with the same size as a regular Audio CD. The playing time is 74 minutes for a standard 12-cm CD.
Audio CD
An Audio CD containing audio data. The playing time is 74 minutes for a standard 12-cm CD.
CD-Recordable (CD-R)
With a CD-R, you can edit audio data. You can write information on a CD-R only once.
CD-Rewritable (CD-RW)
With a CD-RW, you can edit audio data. You can write information on a CD-RW again and again.
CD-Extra
A CD-Extra has two sections (sessions) for audio and data respectively. You can only play the section of audio on this unit.
Notes
- You can play DVD-Rs/DVD-RWs, DVD+Rs/DVD+RWs and CD-Rs/CD-RWs designed for audio with this unit. However, depending on the recorded conditions, you cannot play some discs.
- You cannot play CD-Rs/CD-RWs, DVD-Rs/DVD-RWs or DVD+Rs/DVD+RWs that are not finalized.
• Discs created in Packet Write format cannot be played. - The discs listed below cannot be played on this unit: - 8-cm discs
- CD-ROM (the data other than the MP3 or JPEG files)
- CD-G
- Photo-CD
- VSD (Video single disc)
- DVD-ROM (the data other than the MP3 or JPEG files)
- DVD-RAM
- DVD-Audio
-CPRM - Active-Audio (Data)
- CD-Extra (Data)
- Mixed CD
-SVCD (Super Video CD) - CDV
- CD-F
- SACD (Super Audio CD)
Note on DualDiscs
A DualDisc is a two sided disc product which mates DVD recorded material on one side with digital audio material on the other side. However, since the audio material side does not conform to the Compact Disc (CD) standard, playback on this product is not guaranteed.
Note on transparent discs
12-cm discs containing of only an inner 8 cm data portion (the rest is transparent) cannot be played on this unit.
Music discs encoded with copyright protection
This unit is designed to play back discs that conform to the Compact Disc (CD) standard. Recently, various music discs encoded with copyright protection are marketed by some record companies. Please be aware that among those discs, there are some that do not conform to the CD standard and may not be playable and recordable by this product.
Region code
This system is used to protect software copyrights.
The region code is located on the bottom of the unit, and only DVDs labeled with an identical region code can be played on this unit.

DVDs labeled 📂 can be also played on this unit.
If you try to play any other DVD, the message “Can not play” will appear on the monitor screen. Depending on the DVD, no region code may be labeled even though playing the DVD is prohibited by area restrictions.
Note on playback operations of DVDs and VCDs
Some playback operations of DVDs and VCDs may be intentionally set by software producers.
Since this unit plays DVDs and VCDs according to the disc contents the software producers designed, some playback features may not be available. Also, refer to the instructions supplied with the DVDs or VCDs.
Copyrights
This product incorporates copyright protection technology that is protected by method claims of certain U.S. patents, other intellectual property rights owned by Macrovision Corporation, and other rights owners. Use of this copyright protection technology must be authorized by Macrovision Corporation, and is intended for home and other limited viewing uses only unless otherwise authorized by Macrovision Corporation. Reverse engineering or disassembly is prohibited.
Manufactured under license from Dolby Laboratories.
"Dolby", "Pro Logic", and the double-D symbol are trademarks of Dolby Laboratories.

“DTS” and “DTS 2.0 + Digital Out” are trademarks of Digital Theater Systems, Inc.

Detaching the front panel
You can detach the front panel of this unit to prevent theft.
Caution alarm
If you turn the ignition switch to the OFF position without detaching the front panel, the caution alarm will sound for a few seconds.
The alarm will only sound if the built-in amplifier is used.
1
Press OFF.
The unit is turned off.
2
Press RELEASE, then pull it off towards you.

Notes
- Do not drop the front panel and display window or put excessive pressure on them.
- Do not subject the front panel to heat/high temperature or moisture. Avoid leaving it in a parked car or on a dashboard/rear tray.
Tip
When carrying the front panel, use the supplied front panel case.
Resetting the unit
Before operating the unit for the first time, or after replacing the car battery or changing the connections, you must reset the unit.
Detach the front panel by pressing RELEASE and pull it off towards you.
Use a pointed object such as a mechanical pencil to push the Reset button. To avoid the possibility of damage, you should not use a needle or push the button too strongly.
Push Reset.

Notes
- When the Reset button is pushed, the time and all stored settings are lost and will have to be reprogrammed.
- The reset procedure takes about 10 seconds after the Reset button is pushed.
- When the reset procedure is completed, press OPEN/CLOSE and verify that the monitor opens up properly.
- If you reset the unit while the monitor is open, close the monitor once. Otherwise, it may not operate properly.
Opening up the monitor
Press OPEN/CLOSE on the monitor.

Preparations
The monitor slides out of the main unit.

Notes
- The card remote commander cannot be used for opening up or closing the monitor.
- If movement of the monitor during opening or closing has been impeded by the gear shift lever or another obstacle, press OPEN/CLOSE again.
Adjusting the monitor angle
You can adjust the angle of the monitor for best viewing.
Press ANGLE -/+ repeatedly.
The buttons adjust monitor position in discrete steps.

- button: Monitor is tilted backward.
- button: Monitor is tilted forward.
The adjustment is memorized, and the monitor will move to the same angle the next time it is opened up again after having been closed.
Notes
- Do not move the monitor by hand.
- If OPEN/CLOSE was pressed while the monitor was opening or closing, the monitor may not stop at the original angle. In such a case, press ANGLE - / + to adjust the angle.
Adjusting the monitor position
You can adjust the monitor position by sliding it forward or backward while pressing SLIDE. When the monitor cannot slide any more, the monitor begins to slide in the opposite direction. Press and hold SLIDE for 2 seconds to slide the monitor back to the other direction when the monitor is in halfway through.
The adjustment is memorized, and the monitor will automatically move to the same position when it is opened up again.

Tilting the monitor ahead
In order to operate the button on the dashboard easily, the monitor can be tilted ahead.
Press TILT.

The monitor will be tilted ahead.
To return to the original position, press TILT again.
Tip
If no operation is made for about 25 seconds, the monitor will return to the original position.
Closing the monitor
Press OPEN/CLOSE.
The monitor retracts into the unit, and you can use only the audio functions of the unit.

Shutting down
- If you press OFF on the card remote commander while the monitor is opened up, the sound is turned off, and the unit switches to the standby mode, in which only the clock indication is shown.
- If you set the ignition key of the car to OFF, power to the unit is automatically turned off.*
Tip
If you have pressed OFF when opening up the monitor, you can touch the monitor or press SOURCE to turn the picture on again.
* Warning when installing in a car without an ACC (accessory) position on the ignition key
After turning off the ignition, be sure to press OFF on the unit for 2 seconds to turn off the clock display. Otherwise, the clock display does not turn off and this causes battery drain.
To turn on the unit when it is turned off, press SOURCE on the unit. (You cannot turn on the unit with the card remote commander.)

Note
Do not place any articles, such as cans or bottles, on the monitor. It may cause a malfunction.

Preparations
Setting the clock
The clock uses a 12-hour digital indication.
On the monitor
1 Touch SOURCE LIST.
2 Touch MENU.
3 Touch CLOCK.
The clock adjust display appears.
![Clock 1:00 Hour ▼ △ Minute ▼ △ Enter CLOCK MONITOR OSPL SOUND OTHER SOURCE LIST> ATT — [ICON] + 1:00](/content/2026/06/1277019/images/127aa1a33afd90e36a2db9ceafae372ff1a4899005fedd736235e8a991eccf97.jpg)
4 Touch ▼/▲ to set the hour and minute.
5 Touch Enter.
The clock starts from 00 seconds.
DEMO mode
When the unit is turned off, the demonstration (DEMO) display starts on the monitor.
To cancel the DEMO mode, set "Demo Off" in the system menu (page 36).
Attaching the front panel
Engage part Ⓐ of the front panel with part Ⓑ of the unit, as illustrated, and push the right side into position until it clicks.

Note
Do not put anything on the inner surface of the front panel.
Main unit
Monitor Open

Refer to the pages listed for details.
1 ZxZ button 49
②SOURCE button 11, 17
3SOURCE button 11, 17
4A/V IN jack
5 VOL -/+ button
6 Display window
7 TILT button 10
8 OPEN/CLOSE button 9, 10, 11
9 ANGLE - button 10
10 ANGLE + button 10
11 SLIDE button 10
12 MODE button
13 RELEASE button 9
14▲ (eject) button
15 SEEK -/+ ◀◀/▶▶I button 26
16 OFF button 9, 11
* Warning when installing in a car without an ACC (accessory) position on the ignition key
After turning off the ignition, be sure to press OFF on the unit for 2 seconds to turn off the clock display. Otherwise, the clock display does not turn off and this causes battery drain.
Card remote commander RM-X706
The unit can be operated with the card remote commander. For safety, stop the car before using the card remote commander, or have a passenger operate it.

Refer to the pages listed for details.
1 OFF button 15, 28
To power off the source.
2 ■ button 15, 25
To stop the source (VCD/DVD).
③ SRC (SOURCE) button 15, 17, 44, 47
To power on/change the source (CD/DVD/TUNER/AUX/TV*1/XM*1).
4 TOP MENU button 27
To display the top menu on a DVD.
5 MODE button 17, 44, 47
To select the radio band (FM/AM/XM*1)/select AUX/select TV/select the unit.
6 SHUF button 21
7 REP button 21
8 AUDIO button 30
To change the audio output (VCD/DVD).
9 SEARCH button (VCD*2/DVD) 29
10 Number buttons 27, 28, 29
11 CLEAR button 29
To cancel entered numbers.
12 ATT button
To attenuate the sound. To cancel, press again.
Turning off the sound temporarily.
When you press the button, the sound is turned off and "ATT" appears on the display.
To restore the sound, press the button again (or VOL +/-).
13 DVD▶II button 15, 25
To start/pause playback.
14 ◀◀/▶▶I buttons 15, 26, 46
15 ENTER button 27, 28, 29
To complete a setting.
16 MENU button 27
To display a menu on a DVD.
17 ←/↑/↓/→ buttons 27, 29, 45
To move the cursor, or turn the pages.
18 (Return) button 28
To return to the previous display, or previous operation.
19 EQ7 button 23
To select an equalizer type (Xplod, Vocal, Club, Jazz, New Age, Rock, Custom or Off).
20 ZxZ (Zone x Zone) button 49
To switch the front/rear output.
21 SUBTITLE button 33
To change the subtitle language (DVD).
22 ANGLE button 32
To change the viewing angle (DVD).
23 VOL +/- buttons
To adjust the volume.
*1 Only when an optional device is connected.
*2 Only when PBC is Off.
Note
If the unit is turned off by pressing OFF for 2 seconds, it cannot be operated with the card remote commander unless SOURCE on the unit (3 on page 13) is pressed to activate the unit first.
Tip
See "Replacing the lithium battery" for details on how to replace the battery (page 50).
Playing DVD/Video CD/Audio CD/MP3/JPEG

Note
Depending on the disc, some operations may be different or restricted.
Refer to the operating instructions supplied with your disc.
1 Open up the monitor (page 9).
2 Insert a disc.
Playback starts automatically. (Depending on the disc, press DVD ▶II to start playback.) A menu may appear on the screen when a DVD is inserted.
For details on these menus, see page 27.
To switch from the other sources
1 T ouch "SOURCE LIST".

2 T ouch "CD/DVD".
On the remote, press SRC repeatedly.
Notes
- If a large-size image is rotated, it may take longer to display.
- A JPEG file is designed to be optimally displayed at 640 x 480 pixels. A file in another size may not be displayed correctly, or picture shift (to the left or right) may occur.
- P r ogressive JPEG files cannot be displayed.
When the disc is inserted
Press DVD▶II on the remote to start playback.
Tip
When PBC is On, DVD▶II on the remote may not function to playback VCD. In such a case, press ENTER.
To stop playback DVD VCD
Touch ■ on the monitor (or press ■ on the remote).
To turn off the unit
Press OFF on the main unit or remote.
Tip
You cannot insert a disc while the unit is turned off (if you turn the ignition switch to the off position).
Other operations
| To | Operation on the monitor | Operation on the remote |
| Pause | Touch ▪. | Press DVD ▶II. |
| Resume play after pause | Touch ▶. | Press DVD ▶II. |
| Go to the next chapter, track, or scene in continuous play mode | Touch ▶▶I. | Press ▶▶I. |
| Go back to the previous chapter, track, or scene in continuous play mode | Touch ◀◀. | Press ◀◀. |
Playing a Disc
To select the track directly
You can select the track directly from the album/track list on the display.
1 Touch LIST.
The album/track list appears.
Example for MP3
![List Album 1 Track 1.mp3 Track 2.mp3 Track 3.mp3 Track 4.mp3 Track 5.mp3 Repeat Xmlod List ▶ ▶ ▶ SOURCE LIST ATT — [ ] + 1:00](/content/2026/06/1277019/images/5495cd2dc2f8098c1674aadd9321b642d575e1ebfab05d2154bbe1a838f66dd4.jpg)
2 Touch the desired track name (or number).
Other operations
| To | Operation on the monitor |
| Go to the next page | Touch ▼ |
| Go to the previous page | Touch ▲ |
| Go to the next album*1 | Touch □▼ |
| Go to the previous album*1 | Touch □▲ |
| Go to the previous tree*2 | Touch ↑ |
*1 Available only when MP3 tracks are played.
2 Available only when MP3/JPEG files are played.
To playback a JPEG disc
1 Insert a JPEG disc.
2 Touch LIST.
3 Touch the desired file name.

| To | Operation on the monitor | Operation on the remote |
| Turn the image 90 degree to the left | Touch | Press ←. |
| Turn the image 90 degree to the right | Touch | Press →. |
| Go to the next image | Touch IMAGE+. | Press ►►I. |
| Go to the previous image | Touch IMAGE-. | Press ◀◀. |
To set the duration of the slide show
1 Touch SLIDE.
2 Touch the duration you desire.
If you select Off, the slide show is set to off.
3 Touch SLIDE to close the screen.
Watching TV/Listening to the Radio
Watching TV or listening to radio
Preparation: To view TV programs on this unit, an optional Sony TV tuner unit XT-V70 must be connected.
1 Open up the monitor (page 9).
2 Press SOURCE or touch the screen.
3 Select TV or radio function.
To select the TV function:
1 Touch "SOURCE LIST".

2 Touch "TV".
To select the radio function:
1 Touch "SOURCE LIST".
2 Touch "TUNER".
3 Touch "FM", "AM" or "XM*".
On the remote, press SRC repeatedly to select the TV or radio function.
* Only when XM tuner is connected.
4 Select a channel.
Using auto tuning
Touch SEEK +/- lightly until the desired channel is received.
If you store the TV channels or Radio stations, see "Storing channels/Radio stations" on page 42.
To select the desired mode
1 T ouch the Mode menu box.
![Mode FM 1 2 3 AM 1 2 XM 1 2 3 Mode: FM EQ Off Stereo DX BTM - SEEK + SOURCE LIST> ATT - [ICON] + 1:00](/content/2026/06/1277019/images/86e3fdedc024ba973260b7ff6cb6a35ac4416a8f9bae494af292bae87161e55e.jpg)
2 T ouch the desired mode.
Watching/listening to other video/audio components
Preparation: Connect other component to this unit.
1 Open up the monitor (page 9).
2 Press SOURCE or touch the screen.
3 Select "AUX".
1 Touch "SOURCE LIST".
2 Touch "AUX" on the monitor.
On the remote, press SRC repeatedly.
To select the connected device
1 Touch the Mode menu box.

2 Touch the desired mode.
Select the desired mode depending on the connected devices.
On the remote, press MODE repeatedly.
About the Source Menu
DVD CD MP3 JPEG
Use the source menus of this unit to adjust the various functions and settings for playback.
The displayed menu differs depending on the status of the unit. To adjust each setting, see page 20.
Screen Effect menu (page 20)

Play mode menu (DVD/CD) (page 20)

Equalizer menu (page 23)

Display menu (page 21)

Note
The items on the source menu, and the operation procedures differ depending on the disc.
Display items on the CD/MP3 playback
![ID3 Album Name Track Name 00:00 Repeat X#lod List I← II ▶ SOURCE LIST ATT — [ ] + 1:00 C A D B](/content/2026/06/1277019/images/7f230af1bc512b0b326d0d8d6ebe3e6d21eb27130e82ae20ac6732556f618ca6.jpg)
A Elapsed playback time
B Album name 1 /Disc name 2
©Track name *3
DID3 tag information *1
*1 Appears only when MP3 files are played.
*2 CD TEXT only.
*3 MP3/CD TEXT only.
Using the Source Menu
To scroll the text information
Touch the desired information (B, C or D). When “A. Scroll” is set to “On”, the text information scrolls automatically (page 22).
Note
“*” appears in place of the letters other than the alphabet and numbers.
Playback order of MP3 files
![graph TD Root["Root"] --> 1["1"] 1 --> 2["2"] 1 --> 3["3"] 2 --> 4["4"] 2 --> 5["5"] 3 --> 6["6"] 3 --> 7["7"] 4 --> 5 5 --> 6 6 --> 7](/content/2026/06/1277019/images/d4ed6afe087bece2c367bc61d34477ce60aa0f20baa2c8c5efb72bbc266f2fd3.jpg)
Notes
- The playback order may differ depending on the writing software.
- The unit can play up to 1,000 tracks and 256 albums. Tracks beyond the first 1,000 and albums beyond the first 256 cannot be recognized.
Tips
- If you add numbers (01, 02, 03, etc.) to the front of the track names, the tracks in each album will be played in numerical order.
- Since a disc with many trees takes longer to start playback, it is recommended that you create albums of no more than two tree levels.
- For details on MP3 files, see "About MP3 files" on page 52.
Using the Source Menu
Use the source menus of this unit to adjust the various functions and settings for playback.
The displayed menu differs depending on the status of the unit.
Screen example
For DVDs:
![DVD Repeat Off EQ Off DVD Setup DSPL | | | | | | SOURCE LIST ▶ ATT — [REDACTED] + 1:00](/content/2026/06/1277019/images/49af563fd375bd33d9a68d17115e3f321811a18795e78ffaae02cc4477766ea9.jpg)
Setting the screen
— Wallpaper/Screen Effect
You can set the wallpaper and screen effect. The following setting options are available.
Wallpaper: select the wallpaper.
Effect Type: select the display effect combined with wallpaper.
Basic operation
On the monitor
1 During playback, touch the Screen Effect menu box (✿).
The Screen Effect menu appears.
![Screen Effect WallPaper 1 WallPaper 1 Wallpaper 3 WallPaper 2 Off Effect Type Type 1 Type 3 Type 2 Off Repeat Xload List <<|| || >> SOURCE LIST> ATT - [REDACTED] + 1:00](/content/2026/06/1277019/images/d18b68a33fa860e2a4c68762a33f46241990228cefb7047abed9908a782e5968.jpg)
2 Touch the desired setting.
To close the Screen Effect menu
Touch
◆ Wallpaper
You can select the background picture from "Wallpaper 1", "Wallpaper 2", "Wallpaper 3" or "Off". When you select "Off", the wallpaper is not set.
- You can set a different wallpaper for each function.
◆ Effect Type
You can select the screen effect from "Type 1", "Type 2", "Type 3" or "Off". When you select "Off", the screen effect is not set.
- You can set a different effect type for each function.
Setting the Play mode
— Play Mode
You can set the Repeat play/Shuffle play. The following setting options are available.
Repeat: repeat a title, chapter, album or track after the item being played reaches the end.
Shuffle: play tracks in random order.
Repeat Off: play all tracks in the disc repeatedly (normal play).
Tip
The repeat options differ depending on the disc.
Notes
- The selected play mode is cancelled when the disc being played is ejected.
- When playing a VCD with the PBC function on, Repeat/Shuffle play is not available.
- Shuffle play is not available on DVDs.
Basic operation
On the monitor
1 Touch the Play mode menu box.

The Play mode menu appears.
2 Touch the desired option.
To close the Play mode menu
Touch the Play mode menu box.
On the remote
Press REP or SHUF repeatedly to select the desired option.
◆ Repeat/Shuffle
The unit can repeat a title, chapter, or track after the item being played reaches the end, or play titles, chapters or tracks in random order.
DVD:
Title Repeat repeats the current title.
Chapter Repeat repeats the current chapter.
Repeat Off normal play.
MP3:
Repeat repeats the current track.
Shuffle to play tracks in the album in random order.
Repeat Off normal play.
Album Repeat repeats the tracks in the current album.
VCD (with PBC Off)/Audio CD:
Repeat repeats the current track.
Shuffle to play tracks in random order.
Repeat Off normal play.
Setting for the Display
— Display
The following setting options are available.
A.(Auto) Scroll: scroll long displayed items automatically when the track is changed.
Dimmer: adjust the display brightness.
Wide Mode: besides the normal mode (4:3) the screen can also be set to the full, wide screen, zoom and cinema mode.
Picture Mode: adjust the picture characteristics according to the program type, picture tone or personal preference.
Basic operation
On the monitor
1 During playback, touch DSPL.

The Display mode menu appears.
2 Touch the desired item.
3 Touch the desired setting.
To return to the previous screen
Touch Back on the monitor.
To close the Display mode menu
Touch DSPL.
A. Scroll
You can scroll long displayed items automatically when the track is changed.
A. Scroll On scrolls long displayed items automatically when the track is changed.
A. Scroll Off until touch the album/track, never scroll long displayed items.
Up to 31 characters are displayed.
Dimmer
You can adjust the display brightness.
According to the program type, picture tone or personal preference.
The following setting options are available.
Dimmer On the display always has the same brightness.
Dimmer Auto the display dims according to the illumination lamp of the car.
Adjusting the dimmer level
You can store your own settings of the dimmer level.
On the monitor
1 During playback, touch DSPL.

The Display mode menu appears.
2 Touch Dimmer.
3 Adjust the level while touching the - or +.

◆ Wide Mode (available with visual sources)
Besides the normal mode (4:3) the screen can also be set to full, wide screen, zoom and cinema mode.
Normal an image with an
aspect ratio of 4 to 3 (regular images).

Wide an image with an
aspect ratio of 16 to 9.

Zoom an image with an
aspect ratio of 4 to 3 enlarged to the left and right edges of the screen, with the overflowing parts of the top and bottom cut off to fill the screen.

Cinema an image with an
aspect ratio of 4 to 3, with only the left and right sides of the image being enlarged to fill the screen.

Full an image with an
aspect ratio of 4 to 3 enlarged to the left and right edges of the screen.

◆ Picture Mode
You can adjust the picture characteristics according to the program type, picture tone or personal preference.
Standard standard picture and function setting.
Cinema provides a clear picture with a clear black and white definition.
Dynamic provides beautiful images with bright, clear colors.
User you can adjust the picture characteristics and store the setting.
Adjusting the custom settings
You can store your own user-adjustable settings for different picture tones.
On the monitor
1 During playback, touch DSPL.
The Display mode menu appears.
2 Touch Picture Mode.
3 Touch User.
The setting items appear.
4 Adjust the level while touching the - or +.
You can also adjust the level by touching the setting bar.

Note
"Color" cannot be set when DVD is selected as a source.
Setting the sound quality — Equalizer
You can select the sound quality for each source. Also you can adjust the sound characteristics and store the setting.
Selecting the sound quality On the monitor
1 During playback, touch the Equalizer menu box.

The Equalizer menu appears.
2 Touch the desired setting.
To close the Equalizer menu
Touch the Equalizer menu box.
Adjusting the custom settings
You can store your own user-adjustable settings for different sound quality.
On the remote
During playback, press EQ7 repeatedly.
Each time you press the button, the Equalizer changes cyclically.
Using the Source Menu
On the monitor
1 During playback, touch the Equalizer menu box.
The Equalizer menu appears.
2 Touch the desired setting.
3 Adjust the level touching the ▲or▼.
![Equalizer Custom Xplod Vocal Club Jazz New Age Rock Custom Off 62Hz 157Hz 386Hz 1.0Hz 2.5Hz 6.34Hz 16kHz Back Reset Enter Repeat Xplod List |←→ || ►► SOURCE LIST> ATT - [Image] + 1:00](/content/2026/06/1277019/images/e54612eae8f1f24bc008295681f70f9423d2eb2499aa23844884409efe546f53.jpg)
To reset the setting, touch Reset.
Resuming Playback — Resume Play
DVD
The unit stores the point where you stopped playback for up to 10 discs, and starts Resume playback even after the unit is turned off, or the disc being played is ejected.
To play from the point you previously stopped
On the monitor
1 Touch ■ during playback.
■ appears and playback stops.
2 Touch ▶ to resume playback.
Playback starts from the point you stopped.
On the remote
1 Press ■ during playback.
■ appears and playback stops.
2 Press DVD ▶II to resume playback.
To play from the beginning
Touch ■ (press ■ on the remote) again in step 1, ■ appears and the resume playback is now released. Next time you start playback, the playback starts from the beginning of the DVD.
Or, select the desired chapter on the DVD menu or the Top menu depending on the disc.
Notes
- Resume play is available only for DVDs.
- When storing a resume point for the 11th disc, the stored resume point for the 1st disc is cleared automatically.
- Resume play is cancelled when the setting for the parental controls is changed.
- Depending on the disc or scene, you cannot use the resume play.
- If parental control is applied, the resume play will not work. In this case, playback starts from the beginning of the disc when it is inserted.
Searching a Specific Point on a Disc — Scan

DVD VCD CD MP3
You can quickly locate a specific point on a disc with monitoring the picture.
During playback, touch and hold ◀◀◀ /▶▶◀ on the monitor (or press and hold ◀◀◀ /▶▶◀◀ on the remote), and release at the desired point.
Note
While searching, audio is not output, and subtitles are not displayed.
Using the Menus on DVDs

On the remote
1 During DVD playback, press TOP MENU or MENU.
2 Press ↑/↓/←/→, or the number buttons to select the desired item, then press ENTER.
Note
The items on the menu, and the operation procedures differ depending on the DVD.
DVD
With some DVDs, you can use their original menu(s), such as the Top menu or DVD menu.
If the DVD contains several titles of tracks and scenes, you can use the Top menu to select the desired title, and start playing. If the DVD contains more comprehensive menu items, such as audio and subtitle languages, titles, chapters, etc., you can use the DVD menu to select the desired item, and start playing.
On the monitor
1 During playback, touch TOP MENU or MENU.
The DVD menu or Top menu appears. The contents of the menu differ depending on the DVD.
2 Touch CURSOR.
The cursor box appears.
3 Touch ▲/▼/◄/► to select the desired item, then touch Enter.
To move the position of the cursor box, touch the position where you want to move the cursor.
To close the cursor box, touch CLOSE.
Using PBC Functions — PBC (Playback control)

Notes
- The items on the menu, and the operation procedures differ depending on the disc.
- During PBC playback, the track number, playback time, etc., are not displayed.
- Shuffle play is not available during PBC playback.
Tip
To resume PBC playback, stop playback by pressing
OFF, then press DVD ▶II. PBC playback starts.

The PBC menu assists your operation interactively while a PBC compatible VCD is played.
1 Start playing a PBC compatible VCD.
The PBC menu appears.
2 Press the number buttons to select the desired item, then press ENTER.
3 Follow the instructions in the menu for interactive operations.
To return to the previous menu
Press Ⓞ.
Starting Playback from a Selected Point
— Search Play

DVD VCEth PBC Off)
You can quickly locate a desired point by specifying the title, chapter or track.
The following search options are available depending on the disc:
DVD:
• T itle: starts playing from the selected title.
- Chapter: starts playing from the selected chapter.
1 During playback, press SEARCH repeatedly on the remote.

2 Press ← or →, or the number buttons to select the desired chapter or title.
3 Press ENTER.
Playback starts from the selected point.
To turn off the Play mode menu
Press SEARCH.
Changing the Audio Channels

DVD VCD
When playing a DVD recorded in multiple audio formats (PCM, Dolby Digital, or DTS), you can change the audio format. If the DVD is recorded with multilingual tracks, you can also change the language.
With VCDs, you can select sound from the right or left channel and listen to the sound of the selected channel through both the right and left speakers. For example, when playing a disc containing a song with the vocals on the right channel and the instruments on the left channel, you can hear the instruments from both speakers by selecting the left channel.
On the monitor DVD:
During playback, touch AUDIO repeatedly.

The audio channel menu appears.
If the disc does not contain multiple audio formats, ⊗ appears.
The audio language switches among the available languages.
When 4 digits appear, input the language code corresponding to the desired language (page 61).
When the same language is displayed two or more times, the DVD is recorded in multiple audio formats.
VCD:
1 During playback, touch the Audio channel box.
The audio channel menu appears.
![Stereo/MONO MONO/L MONO/R Stereo Reset Off X+load Stereo DSPL SOURCE LIST> ATT — [ ] + 1:00](/content/2026/06/1277019/images/ca8f29254975ee4de46af8a684befa7061223cd44db3c2c6b8ba896a41d92342.jpg)
2 Touch the desired item.
MONO/L: Left channel sound (monaural) MONO/R: Right channel sound (monaural) Stereo*: Standard stereo sound
* The default setting
To turn off the Audio channel menu
Touch the Audio channel box.
On the remote
During playback, press AUDIO repeatedly to select the desired audio channels.
Tip
You can also change the settings by selecting "AUDIO" on the display.
Adjusting the Audio Output Level
— DVD Level Adjustment
The audio output level for DVD video differs depending on the recorded audio format (PCM, Dolby Digital, or DTS). You can adjust the output level of PCM, Dolby Digital or DTS separately to reduce the volume level differences between disc and source.
DVD
On the monitor
1 Touch SOURCE LIST.
2 Touch MENU.
The System menu appears.
3 Touch SOUND.
4 Touch DVD Level Adjust.
5 Touch On.
6 Adjust the output level while touching the - or +.
![Sound Sub PCM —||||||||||||||||||||+ Bass —||||||||||||||||+ Treble —||||||||||||||||+ Balance Rear Att DVD Level Adjust Beep DVD Level Adj DDD Dts On Off Back CLOCK MONITOR DSPL OTHER SOURCE LIST> ATT — [REDACTED] + 1:00](/content/2026/06/1277019/images/ae44134c2b6588a42c7c176b2d2709145aec529602ca579c4f6efd986266ddba.jpg)
Notes
- You can adjust the output level only when a disc is inserted in the unit.
- You can adjust the output level only after On is touched.
Changing the Angles

DVD
You can change the viewing angle if various angles (multi-angles) for a scene are recorded on a DVD.
On the monitor
Touch ANGLE on the monitor.

On the remote
Press ANGLE repeatedly to select the desired angle number.
The angle changes.
Note
Depending on the DVD, you may not be able to change the angles, even if multi-angles are recorded.
Displaying the Subtitles

DVD
You can turn the subtitles on or off, or change the subtitle language if more are recorded on the DVD.
1 During playback, touch SUBTITLE (or press SUBTITLE on the remote).

The subtitle language appears.
2 Touch SUBTITLE repeatedly.
On the remote, press (SUBTITLE) repeatedly to select the desired language.
Available languages will vary, depending on the disc.
When 4 digits appear, input the language code corresponding to the desired language (page 61).
To turn off the subtitles
Touch SUBTITLE on the monitor (or press SUBTITLE repeatedly to select "OFF").
Note
Depending on the DVD, you may not be able to change (or turn off) the subtitles, even if multilingual subtitles are recorded.
By using the System menu, you can make various adjustments to items, such as picture and sound.
When you change the setting about this unit (e.g.: a language for the subtitle and the on-screen display etc.), you have to set on the Setup menu. For details, see page 37 for details.
Basic operation
On the monitor
1 Touch SOURCE LIST.
2 Touch MENU.

The System menu appears.
3 Touch the desired item.
4 Touch the desired setting.
To turn off the System menu
Touch the monitor.
Monitor settings — MONITOR
"Monitor" setting allows you to set the monitor of this unit.
Auto Close
Selects On and Off the monitor options. If you set to "On", the monitor closes automatically when you turn off the unit.
Auto Close On Closes the monitor automatically when:
- you turn off the unit by pressing OFF of the unit for 2 seconds.
- you turn the ignition switch to the OFF position.
- you remove the front panel.
Auto Close Off Does not close the monitor automatically when you turn off the unit.
Rear Monitor
Selects the DVD/VCD signal format of the rear monitor.
This setting affects when you connect the optional rear monitor.
NTSC When playing back a DVD recorded in NTSC system.
PAL When playing back a DVD recorded in PAL system.
Tips
- This setting is available only when DVD/VCD playback is stopped.
- The default settings are underlined above.
Display settings — DSPL
The following setting options are available.
A. Scroll
You can scroll long displayed items automatically when the track is changed (up to 31 characters are displayed). (CD-TEXT/MP3/XM Radio only)
Dimmer
You can adjust the display brightness.
◆ Wide Mode
Besides the normal mode (4:3), the screen can also be set to full, wide screen, zoom and cinema mode.
◆ Picture Mode
You can adjust the picture characteristics according to the program type, picture tone or personal preference.
For the details of the settings, see page 21.
Sound settings — SOUND
"SOUND" setting allows you to adjust the sound according to the playback conditions and connected equipment.
On the monitor
1 Touch SOURCE LIST.
2 Touch MENU.
The system menu appears.
3 Touch SOUND.
4 Adjust the Sub, Bass or Treble level touching the - or +.

Balance
Adjusting the balance of each speaker.

Touch F/R or L/R of the table on the monitor to adjust the balance by step. You can also touch the desired point directly to adjust the balance.
To reset the setting, touch Reset.
Rear Att
Reducing the audio output level of the REAR MONITOR OUT if the playback sound is distorted.
This setting affects the output of the REAR MONITOR OUT.
| Rear Att On | Reducing the audio output level.Select this if the playback sound fromthe speakers (rear monitor) isdistorted. |
| Rear Att Off | Normally, select this position. |
This setting is available only for DVD or VCD.
♦ DVD Level Adjust
The audio output level for DVD video differs depending on the recorded audio format (PCM, Dolby Digital or DTS). You can adjust the output level of PCM, Dolby Digital or DTS separately to reduce the volume level differences between disc and format.
To adjust the output level, see page 31.
Beep
Turning the beep sound on or off.
| Beep On | Turns the beep sound on. |
| Beep Off | Turns the beep sound off. |
Tips
- When an optional power amplifier is connected, and you are not using the built-in amplifier, the beep does not sound even if it is set to Beep On.
- The beep sound for warning will sound even if it is set to Beep Off.
- The default settings are underlined above.
Other settings — OTHER
♦ AUX 3
You can set the function of the AUX3 jack. When you connect the back camera to AUX3 jack, set to "Back Camera". To adjust the position of the back camera while viewing the image of the camera, set to "Normal".
| Normal •Select this when you connect the other components other than back camera to AUX3 jack. |
| •Select this to test view while connecting the back camera. You can adjust the position of the back camera while viewing the image of the camera without setting the shift lever to the “R(reverse)” position. However, note that the image of the camera will be displayed only when the parking brake is set. |
Back Camera Select this when you connect the back camera to AUX3 jack.
♦ Switching the NTSC/PAL system
You can switch the NTSC/PAL system of the back camera in the AUX 3 mode. Press and hold SEEK + of the main unit for 3 seconds while in AUX3 mode. The short beep sounds and NTSC/PAL system is now switched.
NTSC Switches the back camera to NTSC system.
PAL Switches the back camera to PAL system.
Note
This setting is available also when AUX 3 is set to "Normal".
◆PBC On
Switching on and off the PBC function of VCDs. Available only when VCD is stopped.
PBC On Turns on the PBC function.
PBC Off Turns off the PBC function.
Demo
Switching on and off the Demo mode. The Demo screen is displayed only when the power is off.
Demo On Turns on the Demo mode.
Demo Off Turns off the Demo mode.
Tip
The default settings are underlined.
◆ Touch Panel Adjust
If the touching position does not correspond with the proper item, you will need to adjust the touch panel position.
Touch 1, 2 and 3 of the touch panel in order.

Using the DVD Setup Menu
DVD
By using the DVD Setup menu, you can make various adjustments to items, such as picture and sound.
You can also set a language for the subtitle and the on-screen display, among other things. For details on each setup items, see pages from 37 to 41.
Notes
- Playback settings stored in the disc take priority over the Setup menu settings, and not all the functions described may work.
• Operations of the parental control available only on the remote.
Basic operation
1 Touch DVD Setup while playback is stopped.
![DVD Setup Language Audio Display Lock Downmix Disc Rep ESPL DVD Setup: Off SOURCE LIST > ATT - [Image] + 1:00](/content/2026/06/1277019/images/5963bd8d76185fa29474344184b2abefc78592ba8516a7cedcead3417a5e0c54.jpg)
The DVD Setup menu appears.
2 Touch the desired category.
Language: Language setting for DVD playback.
Audio: Setting for digital audio output.
Display: Display setting for the player.
Lock: Setting for the parental control.
Downmix: Setting for the downmix signal.
3 Touch the desired item.
4 Touch the desired setting.
To close the DVD Setup menu
Touch DVD Setup.
Language settings for DVD playback — Language
DVD Menu
You can select the desired language for the disc's menu.
Note
Regardless of your setting, the language other than you set may be automatically activated, depending on the DVD.
Audio
Switches the language of the sound track. When you select "Original", the language given priority in the disc is selected.
Notes
- Regardless of your setting, the language other than you set may be automatically activated, depending on the DVDs.
- Some DVDs are prohibited to change the audio language output, even if multiple languages are recorded.
Subtitle
Switches the language for the subtitle recorded on the DVD.
Note
Regardless of your setting, the language other than you set may be automatically activated, depending on the DVDs.
Settings for digital audio output — Audio
◆ DRC (Dynamic Range Control)
Makes the sound clear when the volume is turned down then playing a DVD that conforms to "DRC".
This setting affects the outputs of AUDIO OUT.
On Gives you an impression of being at a live performance.
Off Normally, select this position.
Display settings for the player — Display
◆ Display
Selects the aspect ratio of the connected rear monitor.
16:9 Displays the wide picture.
Select this when you connect a wide-screen monitor or a monitor with a wide mode function.
4:3 Letter Box Displays a wide picture with bands on the upper and lower positions of the screen. Select this when you connect a 4:3 screen monitor.
4:3 Panscan Displays a wide picture on the entire screen and automatically cuts off the positions that do not fit. Select this when you connect a 4:3 screen monitor.
Note
Depending on the DVD, "4:3 Letter Box" may be selected automatically instead of "4:3 Panscan", and vice versa.
Tip
The default settings are underlined.
Settings for the parental control — Lock
You can lock a disc, or set playback restrictions according to a predetermined level such as viewer age. For details on the setup procedures, see “Locking discs” on page 39.
Setting for the downmix signal — Downmix
Downmix
You can select the downmix signal for optional audio component with a built-in DTS or Dolby decoder.
This setting affects when you connect the optional audio component with a built-in DTS or Dolby decoder.
Surround Select this when the unit is connected to an audio component with a built-in DTS or Dolby decoder.
Normal Select this when the unit is connected to an audio component lacking a built-in DTS or Dolby decoder.
Tip
The default setting is underlined.
Locking discs — Lock
You can lock a disc, or set playback restrictions according to a predetermined level such as viewer age. Restricted playback scenes are blocked or replaced with different scenes when a parental control compatible DVD is played.
Entering the password
1 Touch DVD Setup while playback is stopped.
The DVD Setup menu appears.
2 Touch Lock.
3 Touch Password.
It is set to "1111" upon purchase.

4 Touch the number to enter your password, then touch Enter.
If a wrong number entered, touch Clear.
To return to the previous menu, touch Back.
5 To confirm, touch the number to enter your password, then touch Enter.
The password is set.
Changing the password
1 Touch DVD Setup while playback is stopped.
The DVD Setup menu appears.
2 Touch Lock.
3 Touch Password.
4 Touch the number to enter your old password, then touch Enter.
5 Touch the number to enter your new password, then touch Enter.
If a wrong number entered, touch Clear.
To return to the previous menu, touch Back.
6 To confirm, touch the number to enter your new password, then touch Enter.
The new password is set.
Using the DVD Setup Menu
Setting the parental control on
1 Touch DVD Setup while playback is stopped.
The DVD Setup menu appears.
2 Touch Lock.
3 Touch Rating.
4 Touch the number to select the rating level, then touch Enter.
When you set the parental control off, select "Unlock".
To return to the previous menu, touch Back.
5 Touch the number to enter your password, then touch Enter.
Note
When you play discs which do not have the parental control, playback cannot be restricted on this unit.
Changing the area and its movie rating level
You can set the restriction levels depending on the area and its movie ratings.
1 Touch DVD Setup while playback is stopped.
The DVD Setup menu appears.
2 Touch Lock.
3 Touch Area Code.
The password setting display appears.
4 Touch the number to enter your password, then touch Enter.
5 Touch the number to enter the Area code, then touch Enter.
If a wrong number entered, touch Clear.
To return to the previous menu, touch Back.
6 To confirm, touch the number to enter your password, then touch Enter.
The area is selected.
Area code list
| Standard Code number | |
| Argentina 2044 | |
| Australia 2047 | |
| Austria 2046 | |
| Belgium 2057 | |
| Brazil 2070 | |
| Canada 2079 | |
| Chile 2090 | |
| China 2092 | |
| Denmark 2115 | |
| Finland 2165 | |
| France 2174 | |
| Germany 2109 | |
| India 2248 | |
| Indonesia 2238 | |
| Italy 2254 | |
| Japan 2276 | |
| Korea 2304 | |
| Malaysia | 2363 |
| Mexico | 2362 |
| Netherlands | 2376 |
| New Zealand | 2390 |
| Norway | 2379 |
| Pakistan | 2427 |
| Philippines | 2424 |
| Portugal | 2436 |
| Russia | 2489 |
| Singapore 2501 | |
| Spain 2149 | |
| Sweden | 2499 |
| Switzerland | 2086 |
| Thailand | 2528 |
| United Kingdom | 2184 |
Caution
When tuning in stations while driving, use Best Tuning Memory (BTM) to prevent an accident.
Storing automatically — BTM
You can store up to 18 VHF/UHF stations or 18 for FM, 12 for AM stations. You can have the unit automatically select the stations with the strongest signals and store them in order.
Note
You can select "TV" only when you connect the optional Sony TV tuner unit XT-V70.
On the monitor
1 Touch SOURCE LIST.
2 Touch TV or TUNER.
When you select "TUNER", proceed to step 3.
When you select "TV", proceed to step 4.
3 Touch to select the band "FM", "AM".
4 Touch the Mode menu box to select the desired mode.
5 Touch BTM.
6 Touch BTM ON.

Stored stations are memorized in order.
When the storing procedure is completed, the regular display appears again.
To cancel the storing procedure
Touch BTM ON during the storing procedure.
Notes
- It takes several minutes to complete the storing procedure.
- If you cancel BTM during the storing procedure, the presetting will be proceeded partway.
Storing manually
While receiving the station that you want to store, touch and hold a number on the top of the display.
On the remote, press and hold a number button (1 to 6).
The number button indication appears in the display.
Note
If you try to store another station on the same number button, the previous stored station will be replaced.
Receiving the stored stations
Touch the number on the top of the display (or press a number button (1 to 6) on the remote).
Using the Local seek mode in tuner function
If you set "Local" function to "On", you can receive to only tune into stations with stronger signals.
On the monitor
1 Touch SOURCE LIST.
2 Touch TUNER.
3 Touch "FM" or "AM" to select the band.
4 Touch the Local menu box.

5 Touch "Local (Local On)" or "DX (Local Off)".
6 Touch and close the Local menu box.
Switching FM reception to monaural
If the FM broadcast is noisy, switch to FM reception to monaural.
1 During FM reception mode, touch the Stereo/MONO menu box.

2 Touch MONO.
To restore the stereo reception, touch Stereo.
Listening to a XM Satellite Radio Program
Note
If you listen to a XM Satellite Radio program, you need to connect the commercially available XM Satellite Radio Receiver.
Introducing XM™ Satellite Radio
There's a world beyond AM and FM. XM Satellite Radio. Up to 100 channels. Coast-to-Coast Coverage. Digital quality sound. With many commercial-free music channels. Plus, the best sports, comedy, talk, news and entertainment, including USA Today, Discovery Radio, NASCAR, Sesame Workshop, CNNfn. Questions? Visit www.xmradio.com. The future is waiting.
How to Subscribe
Listeners can subscribe by visiting XM on the Web at www.xmradio.com or by calling XM's Listener Care at (800)852-9696. Customers should have their Radio ID ready; it is located on the side of this unit, and you can also check it in the display of this unit (see "Displaying the XM Radio ID").
Technology. It is prohibited to copy, decompile, disassemble, reverse engineer or manipulate any technology incorporated in receivers compatible with the XM Satellite Radio system.
Furthermore, the AMBE ® voice compression software included in this product is protected by intellectual property rights including patent rights, copyrights, and trade secrets of Digital Voice Systems, Inc. The user of this or any other software contained in an XM Radio is explicitly prohibited from attempting to copy, decompile, reverse engineer, or disassemble the object code, or in any other way convert the object code into human-readable form. The software is licensed solely for use within this product.
Selecting XM source and the desired channel
On the monitor
1 Touch SOURCE LIST.
2 Touch TUNER.
3 Touch XM.
4 Touch MODE to select "XM1", "XM2" or "XM3".
On the remote or main unit
1 Press SOURCE repeatedly until "XM" appears.
2 Press MODE to select "XM1", "XM2" or "XM3".
To select the desired channel, press SEEK +/- on the monitor or main unit.
Using category search to locate channels
Each XM channel is associated with a category that describes the type of music or programming is played on the channel. Examples of categories include “rock”, “jazz”, “news”, and so on. Users unfamiliar with XM’s program may use the radio’s search-by-category function to select channels.
On the monitor
1 Touch CAT to enter the category search mode.
2 Touch SELECT repeatedly until the desired category appears.
3 Touch SEEK +/- repeatedly until the desired channel appears.
The display shows "CAT SRCH" to indicate that the radio is in category search mode. While in this mode, you will only be able to tune to channels in the selected category.
To exit from category search mode and return to normal mode, touch CAT.
Note
The radio automatically returns to normal mode if no key is pressed within 5 seconds.
Storing channels by presetting memory
While receiving the channel that you want to store, touch and hold a number on the top of the display.
On the remote, press and hold the number button (1 to 6).
Note
If you try to store another station on the same number button, the previous stored station will be replaced.
Receiving the stored channels
Touch the desired number on the top of the display (or press the number button (1 to 6) on the remote). Or press ↑/↓ on the remote to select the desired number.
Display items
The XM Satellite Radio information (Channel Number, Artist Name, Song Title, Category Name, Channel Name) is available on the display.
Touch CH on the monitor.
Touch the item you want to display.
- C H No (Channel Number)
- Artist Name
- Song Title
- Category Name
- Channel Name
Notes
- If you select a channel while Artist Name or Song Title is displayed, the Channel Name will be displayed for 2 to 3 seconds and then returns to the previous display.
- If there is no information about Artist Name or Song Title, “----” will be displayed.
- The display indicates up to 8 characters. The characters on the display cannot be scrolled even when the "A.Scroll" function is set to "On".
Note
The radio automatically returns to normal mode if no key is pressed within 5 seconds.
Displaying the XM Radio ID
1 During XM Satellite Radio reception, touch SEEK +/- to select "CHANNEL 0".
2 Touch I◀◀ or ▶▶▶I.
On the remote, press ◀◀◀ or ▶▶◀. "RADIO ID" is indicated for 2 seconds and the XM Radio ID number is indicated for 10 seconds. These will be displayed alternately.
To cancel the XM Radio ID display, press the SEEK +/- button to select a channel.
To scroll the text information
Touch the desired information. When "A.Scroll" is set to "On", the text information scrolls automatically.
Note
“*” appears in place of the letters other than the alphabet and numbers.
Auxiliary Audio/Video Equipment
You can connect optional devices to the AUX IN terminal on the unit.
Selecting auxiliary equipment
1 Touch SOURCE LIST.
2 Touch AUX.

3 Touch the Mode menu box.
4 Touch the desired mode.
Select the desired mode depending on the connected devices.
On the remote
1 Press SRC repeatedly to select "AUX".
2 Press MODE repeatedly to select "AUX1", "AUX2" or "AUX3".
Setting for the auxiliary equipment
You can change the setting of the auxiliary equipment.
Basic operation
On the monitor
1 Touch SOURCE LIST.
2 Touch AUX.
3 Touch Setup menu box.
The Menu display appears.
4 Touch the desired setting.
To turn off the Setup menu
Touch Setup.
◆ AUX 1
♦ AUX 2
Selecting the type of device connected to the AUX 1 and AUX 2 jacks.
Audio Selects this when you connect the audio device. The wallpaper will be displayed on the screen.
Video Selects this when you connect the video component.
♦ AUX Volume
Adjusting the volume of the auxiliary equipment.
You can adjust while touching + or - on the monitor.
Displaying the image of the back camera
You can display the image of a back camera (when you connect an optional back camera).
Make sure that you have connected the camera cable to the unit's AUX 3 jack correctly. During the connection of the back camera, set the AUX3 to "Normal" to check the location of the back camera.
If you switch to "Back Camera", the image of the back camera will be displayed when the back lamp lights up (or the shift lever is set to the "R (reverse)" position).
You can also switch the NTSC/PAL system of the back camera in the AUX3 mode. For details about the function of AUX3 jack and switching NTSC/PAL system, see page 36.
For details about connecting the camera cable, refer to the supplied "Installation/Connections" manual.
Notes
- When you drive, watch the surroundings carefully for your safety. Do not depend on the back camera exclusively.
- If a rear monitor is connected, its display gets black when the shift lever is set to the R position. When the shift lever is set to the other position, the display turns back.
Switching the Front/Rear Output — Zone x Zone

You can simultaneously listen to a separate sound source in this unit and auxiliary audio equipment in the rear.
This function is convenient when you want to enjoy radio, music playback, etc, in the front, and DVD playback in the rear.
1 Press ZxZ on the main unit.

2 Touch Zone x Zone On.
3 Touch the source of the front.
4 Touch the source of the rear.
5 Press ZxZ on the main unit.
To operate the source of the front, use the buttons of the main unit*.
To operate the source of the rear, use the card remote commander.
* To use the PBC function (VCD) on the main unit, inactivate Zone x Zone and set the PBC function with the card remote commander.
Notes
- On the remote, press to activate and press again or press to inactivate Zone x Zone.
-
The combinations of the sources below cannot be set.
-
TV - AUX2 or AUX3
-AUX2-AUX3 - XM (front) - TV (rear)
Additional Information
Card remote commander precautions
- Do not leave the card remote commander on the dashboard, on the steering wheel, or in other locations exposed to direct sunlight. Especially in summer, very high temperatures can occur in such locations, causing deformation of the commander.
- When parking the car in sunlight, remove the card remote commander from its mounting location and store it in the glove compartment or in another protected location.
- In direct sunlight, the signals from the card remote commander may sometimes not be picked up properly by the unit. In such a case, move the commander closer to the remote sensor on the front panel of the main unit.
About the liquid crystal display (LCD) panel
- Do not press on the LCD panel on the monitor unit as doing so can distort the picture or cause a malfunction. The picture may become unclear, or the LCD panel may be damaged.
- Do not touch other than the finger. A display gets damaged or break.
- Notes on cleaning
- Clean the LCD panel with a dry soft cloth.
- Do not use solvents such as benzine, thinner, commercially available cleaners or antistatic spray.
- Do not use this unit in temperatures under 5°C or over 45°C .
- If your car was parked in a cold or hot place, the picture may not be clear. The monitor is not damaged. The picture will become clear after the temperature in your car becomes normal.
Some stationary blue or red dots may appear on the monitor.
These are called bright spots, and can happen with any LCD.
The LCD panel is highly sophisticated, and more than 99.99% of the segments used in the panel are flawless. However, there is a possibility that less than 0.01% of the segments are defective and may not light up properly. However, these segments will not interfere with your viewing.
Replacing the lithium battery
Under normal conditions, batteries will last approximately 1 year. (The service life may be shorter, depending on the conditions of use.) When the battery becomes weak, the range of the card remote commander becomes shorter. Replace the battery with a new CR2025 lithium battery. Use of any other battery may present a risk of fire or explosion.

- side facing up

Notes on lithium battery
- Keep the lithium battery out of the reach of children. Should the battery be swallowed, immediately consult a doctor.
- Wipe the battery with a dry cloth to assure a good contact.
- Be sure to observe the correct polarity when installing the battery.
- Do not hold the battery with metallic tweezers, otherwise a short-circuit may occur.
WARNING
Battery may explode if mistreated. Do not recharge, disassemble, or dispose of in fire.
Fuse replacement
When replacing the fuse, be sure to use one matching the amperage rating stated on the original fuse. If the fuse blows, check the power connection and replace the fuse. If the fuse blows again after replacement, there may be an internal malfunction. In such a case, consult your nearest Sony dealer.
Fuse (10 A)

Cleaning the connectors
The unit may not function properly if the connectors between the unit and the front panel are not clean. In order to prevent this, detach the front panel (page 9) and clean the connectors with a cotton swab dipped in alcohol. Do not apply too much force.
Otherwise, the connectors may be damaged.
Notes
- For safety, turn off the ignition before cleaning the connectors, and remove the key from the ignition switch.
- Never touch the connectors directly with your fingers or with any metal device.
Removing the unit
1 Remove the protection collar.
1 Detach the front panel (page 9).
2 Engage the release keys together with the protection collar.
3 Pull out the release keys to remove the protection collar.

2 Remove the unit.
1 Insert both release keys simultaneously until they click.

2 Pull the release keys to unseat the unit.

3 Slide the unit out of the mounting.

Additional Information
Notes on discs
- To keep a disc clean, do not touch its surface. Handle the disc by its edge.
- Keep your discs in their cases or disc magazines when not in use.
- Do not subject discs to heat/high temperature.
Avoid leaving them in a parked car or on a dashboard/rear tray. - Do not attach labels, or use discs with sticky ink/residue. Such discs may stop spinning when used, causing a malfunction, or may ruin the disc.
- Do not use any discs with labels or stickers attached.
The following malfunctions may result from using such discs: - Inability to eject a disc (due to a label or sticker peeling off and jamming the eject mechanism).
- Inability to read audio data correctly (e.g., playback skipping, or no playback) due to heat shrinking of a sticker or label causing a disc to warp.
- Discs with non-standard shapes (e.g., heart, square, star) cannot be played on this unit. Attempting to do so may damage the unit. Do not use such discs.
- Y ou cannot play 8-cm discs.
- Before playing, clean the discs with a commercially available cleaning cloth. Wipe each disc from the center out. Do not use solvents such as benzine, thinner, commercially available cleaners, or antistatic spray intended for analogue discs.
About MP3 files
MP3, which stands for MPEG-1 Audio Layer-3, is a music file compression format standard. It compresses audio CD data to approximately 1/10 of its original size.
- The unit is compatible with the following standards.
For CD
– ISO 9660 level 1/level 2 format, Joliet/Romeo in the expansion format
- M ulti Session
For DVD
- UDF Bridge format (combined UDF and ISO 9660)
For MP3
– ID3 tag version 1.0, 1.1, 2.2, 2.3 and 2.4
• The maximum number of:
– Albums: 256 (including root and empty folders).
- M P3 files (tracks) and albums contained in a disc: 1,000.
– displayable characters for an album/track name is 31; ID3 tag is 31 characters.
Notes
- Be sure to finalize the disc before using on the unit.
- When naming an MP3 file, be sure to add the file expansion ".mp3" to the file name.
- If you play a high-bit-rate MP3, such as 320 kbps, sound may be intermittent.
- During playback of a VBR (variable bit rate) MP3 file or fast-forward/reverse, elapsed playing time may not display accurately.
- When the disc is recorded in Multi Session, only the first track of the first session format is recognized and played (any other format is skipped). The priority of the format is CD-DA and MP3.
- When the first track is a CD-DA, only CD-DA of the first session is played.
- When the first track is not a CD-DA, MP3 session is played.
If the disc has no data in any of these formats, "DISC Error" is displayed. - The unit cannot play back Multi Border recorded MP3.
- DVD of sampling rate other than 44.1 kHz or 48 kHz cannot be played.
Troubleshooting
The following checklist will help you remedy problems you may encounter with your unit. Before going through the checklist below, check the connection and operating procedures.
General
No power is being supplied to the unit.
- The power connection has not been made correctly.
→Check the connection. If everything is in order, check the fuse. - The car does not have an ACC position.
→Press SOURCE on the main unit repeatedly. - If the unit is turned off and the display disappears, it cannot be operated with the remote commander.
→Turn on the unit.
Stored stations and correct time are erased.
The fuse has blown.
Makes noise when the position of the ignition key is switched.
The leads are not matched correctly with the car's accessory power connector.
The display disappears from/does not appear in the display window.
- The dimmer is set to "Dimmer On" (page 34).
- The display disappears if you press and hold (OFF).
→Press SOURCE on the main unit repeatedly.
• The connectors are dirty (page 51).
The display does not respond to your touch correctly.
- Touch one part of a screen at a time. If two or more parts are touched simultaneously, the display does not operate correctly.
- Adjust the touch point of the display (page 36).
Picture
There is no picture/picture noise appears.
- A connection has not been made correctly.
- Check the connection to the connected equipment, and set the input selector of the equipment to the source corresponding to this unit.
- The disc is dirty, flawed, or deteriorated.
- The unit is installed at an angle of more than 30° .
- The unit is not installed in a sturdy part of the car.
- The parking cord (light green) is not connected to the parking brake switch cord, or the parking brake is not applied.
Picture does not fit in the screen.
The aspect ratio is fixed on the DVD.
The picture does not appear in the rear monitor.
- The source/mode which is not connected is selected. If there is no input, no image will be displayed in the rear monitor.
- The image of the back camera is displayed in the front monitor. When the front monitor displays the image of the back camera, no image is output into the rear monitor.
Sound
There is no sound/sound skips/sound cracks.
- A connection has not been made correctly.
- Check the connection to the connected equipment, and set the input selector of the equipment to the source corresponding to this unit.
- The disc is dirty, flawed, or deteriorated.
- The unit is installed at an angle of more than 30° .
- The unit is not installed in a sturdy part of the car.
- The unit is in fast-forward or fast-reverse mode.
- The settings for the outputs are not made correctly.
- Adjust DVD output level (page 35).
• The volume is too low. - The position of the fader control (FAD) is not set for a 2-speaker system.
- Att is set. Press ATT to release the Att setting or press VOL +/-
Sound is noisy.
Keep cords and cables away from each other.
Operation
The remote does not function.
- There are obstacles between the remote and the unit, or the remote receptor.
- The distance between the card remote commander and the unit is too far.
- The card remote commander is not pointed at the remote sensor, or the receptor on the unit properly.
- The batteries in the card remote commander are weak.
The operation buttons do not function.
Press the Reset button (page 9).
The menu items cannot be selected.
The menu item of the function that is not available is shown in grey.
The disc will not eject.
Press and hold ▲ (eject) for two seconds.
No beep sound.
• The beep sound is cancelled (page 35).
- The built-in amplifier is not used.
The contents of the memory have been erased.
- The Reset button has been pressed.
→Store again into the memory. - The power connecting lead or battery has been disconnected.
- The power connecting lead is not connected properly.
The display items do not scroll.
- For discs with so many characters, those may not scroll.
- "A.Scroll" is set to off.
→Set "A.Scroll On" (page 22).
The disc cannot be loaded.
- Another disc is already loaded.
- The ignition key switch of the car is set to the OFF position.
The unit does not start playing.
- The disc is inserted upside down.
→Insert the disc with the playback surface down. - The disc inserted is not applicable.
- The DVD inserted is not applicable due to the region code.
- Moisture has condensed inside the unit.
- The inserted DVD-R, DVD-RW, DVD+R, DVD+RW, CD-R, or CD-RW is not finalized.
You cannot select a source.
Zone x Zone is activated.
→Deactivate Zone x Zone.
MP3 files cannot be played.
- Recording was not performed according to the ISO 9660 level 1 or level 2 format, or the Joliet or Romeo in the expansion format.
- The MP3 file does not have the extension ".mp3".
- Files are not stored in MP3 format.
- The unit cannot play files stored in MP3PRO format.
- The unit cannot play files stored in a format other than the MPEG1 Audio Layer 3.
MP3 files take longer to play back than others.
The following discs take a longer time to start playback.
- a disc recorded with a complicated tree structure.
- a disc recorded in Multi Session.
- a disc to which data can be added.
The JPEG files cannot be played.
- JPEG files do not have the extension ".jpg".
- Files are not stored in JPEG format.
- The disc contains both MP3 and JPEG files.
The title of the MP3 audio album or track is not correctly displayed.
The player can only display numbers and alphabet. Other characters are displayed as “*”.
The disc does not start playing from the beginning.
Resume play has taken effect (page 25).
Playback stops automatically.
While playing discs with an auto pause signal, the unit stops playback at the auto pause signal.
You cannot perform certain functions.
Depending on the disc, you may not be able to perform operations such as Stop, Search, Slow-motion play, or Repeat play. For details, see the operating manual supplied with the disc.
The language for the sound track cannot be changed.
- Use the DVD menu instead of the direct selection (page 27).
- Multilingual tracks are not recorded on the DVD being played.
- The DVD prohibits the changing of the language for the sound track.
The subtitle language cannot be changed or turned off.
- Use the DVD menu instead of the direct selection (page 27).
- Multilingual subtitles are not recorded on the DVD being played.
- The DVD prohibits the changing of the subtitles.
The angles cannot be changed.
- Use the DVD menu instead of the direct selection (page 27).
- Multi-angles are not recorded on the DVD being played.
- The DVD prohibits changing of the angles.
Radio reception
The stations cannot be received. The sound is hampered by noises.
- Connect a power antenna control lead (blue) or accessory power supply lead (red) to the power supply lead of a car's antenna booster (only when your car has built-in FM/AM antenna in the rear/side glass).
- Check the connection of the car antenna.
- The auto antenna will not go up. Check the connection of the power antenna control lead.
- Check the frequency.
Preset tuning is not possible.
- Store the correct frequency in the memory.
• The broadcast signal is too weak.
Automatic tuning is not possible.
- The local seek mode is set to "Local".
→Set "Local" to "DX" (page 43).
• The broadcast signal is too weak.
→Perform manual tuning.
During FM reception, the "ST" indication flashes.
- Tune in the frequency accurately.
- The broadcast signal is too weak.
→Set "Stereo/MONO" to "MONO" (page 43).
An FM programme broadcast in stereo is heard in monaural.
The unit is in monaural reception mode.
→Set "Stereo/MONO" to "Stereo" (page 43).
Messages
Error displays/Messages
The following indications appear when a malfunction occurs on the unit.
On the monitor
DISC Error
- The disc is dirty or inserted upside down. Clean or insert the disc correctly.
- The disc cannot play because of some problem. Insert another disc.
Can not play
- The DVD is prohibited for playback due to the different region code.
- The disc is not compatible with this unit.
On the display window
ERR-1
- The disc is dirty or inserted upside down. Clean or insert the disc correctly.
- The disc cannot play because of some problem. Insert another disc.
ERR-2
- The DVD is prohibited for playback due to the different region code.
- The disc is not compatible with this unit.
Specifications
AUDIO POWER SPECIFICATIONS
POWER OUTPUT AND TOTAL HARMONIC DISTORTION
22 watts per channel minimum continuous average power into 4 ohms, 4 channels driven from
20 Hz to 20 kHz with no more than 5 % total harmonic distortion.

CEA2006 Standard
Power Output: 17 Watts RMS × 4 at
4 Ohms < 1% THD+N
SN Ratio: 82 dBA
(reference: 1 Watt into 4 Ohms)
System
Laser Semiconductor laser
Signal format system
NTSC
Monitor section
Display type Wide LCD color monitor
Size 7 in.
System TFT active matrix
Number of pixel
336,960 pixels
DVD/CD Player section
Signal-to-noise ratio
100 dB
Frequency response
10 - 20,000 Hz
Wow and flutter
Below measurable limit
Harmonic distortion (DVD)
0.01%
Tuner section
FM
Tuning range
87.5 - 107.9 MHz
Intermediate frequency
10.7 MHz/550 kHz
Usable sensitivity
9 dBf
Frequency response
30 - 15,000 Hz
Selectivity 75 dB (400 kHz)
S/N ratio 64 dB (stereo)
69 dB (mono)
Harmonic distortion at 1 kHz
0.5% (stereo)
0.4% (mono)
Separation 35 dB at 1 kHz
AM
Tuning range
530 - 1,710 kHz
Intermediate frequency
10.8 MHz / 450 kHz
Usable sensitivity
30 μV
Amplifier section
Outputs Speaker outputs
(sure seal connectors)
Speaker impedance
4 - 8 ohms
Maximum power output
50 W × 4 (into 4 ohms, at 1 kHz)
General
Power requirements
12 V DC, from car battery (negative ground)
Inputs Power supply (1)
AUX (3)
Outputs Front PRE out (1)
Rear PRE out (1)
Subwoofer (mono) (2)
Power antenna relay control lead (1)
Power amplifier control lead (1)
Rear Monitor OUT (1)
Tone controls Bass ±10 dB at 100 Hz
Treble ±10 dB at 10 kHz
Dimensions With monitor closed
Approx. 178 × 50 × 185 mm (71 / 8 ×
Supplied accessories
Remote commander RM-X706 (1)
(incl. 1 lithium battery)
Connection box for XM tuner (1)
Parts for installation and connections (1 set)
Operating Instructions (1 set)
Specifications
Design and specifications are subject to change without notice.
US and foreign patents licensed from Dolby Laboratories.

- Lead-free solder is used for soldering certain parts. (more than 80 %)
- H alogenated flame retardants are not used in cabinets.
- VOC (Volatile Organic Compound)-free vegetable oil based ink is used for printing the carton.
- Packaging cushions do not use polystyrene foam.
Glossary
Chapter
Sections of a picture or a music feature that are smaller than titles. A title is composed of several chapters. Depending on the disc, no chapters may be recorded.
Dolby Digital
Digital audio compression technology developed by Dolby Laboratories. This technology conforms to 5.1-channel surround sound. The rear channel is stereo and there is a discrete subwoofer channel in this format. Dolby Digital provides the same 5.1 discrete channels of high quality digital audio found in Dolby Digital cinema audio systems. Good channel separation is realized because all of the channel data are recorded discretely and little deterioration is realized because all channel data processing is digital.
DTS
Digital audio compression technology that Digital Theater Systems, Inc. developed. This technology conforms to 5.1-channel surround sound. The rear channel is stereo and there is a discrete subwoofer channel in this format. DTS provides the same 5.1 discrete channels of high quality digital audio.
Good channel separation is realized because all of the channel data is recorded discretely and little deterioration is realized because all channel data processing is digital.
DVD VIDEO
A disc that contains up to 8 hours of moving pictures even though its diameter is the same as a CD.
The data capacity of a single-layer and single-sided DVD is 4.7 GB (Giga Byte), which is 7 times that of a CD. The data capacity of a double-layer and single-sided DVD is 8.5 GB, a single-layer and double-sided DVD is 9.4 GB, and double-layer and double-sided DVD is 17 GB.
The picture data uses the MPEG 2 format, one of the worldwide standards of digital compression technology. The picture data is compressed to about 1/40 (average) of its original size. The DVD also uses a variable rate coding technology that changes the data to be allocated according to the status of the picture. Audio information is recorded in a multi-channel format, such as Dolby Digital, allowing you to enjoy a more real audio presence.
Furthermore, various advanced functions such as the multi-angle, multilingual, and Parental Control functions are provided with the DVD.
DVD-RW
A DVD-RW is a recordable and rewritable disc with the same size as the DVD VIDEO. The DVD-RW can be recorded in two different modes: VR mode and Video mode. VR (Video Recording) mode enables various programming and editing functions, some of which are limited in the case of Video mode. Video mode complies with DVD VIDEO format and can be played on other DVD players while a DVD-RW recorded in VR mode can only be played on DVD-RW compliant players. The “DVD-RW” appearing in this manual, and the on-screen displays refer to DVD-RWs in VR mode.
Glossary
DVD+RW
A DVD+RW is a recordable and rewritable disc.
DVD+RWs use a recording format that is comparable to the DVD VIDEO (digital video disc, video) format.
Film based software, Video based software
DVDs can be classified as Film based or Video based software. Film based DVDs contain the same images (24 frames per second) that are shown at movie theaters. Video based DVDs, such as television dramas or sit-coms, display images at 30 frames (or 60 fields) per second.
JPEG (Joint Photographic Expert Group)
Under the auspices of the International Organization for Standardization (ISO), JPEG is defined as a universal standard format for digital compression and decompression of still images for use in computer related systems. Usually, the compression rate is variable before visible degradation occurs. Still images are compressed about 1/10 to 1/100 original size.
Title
The longest section of a picture or music feature on a DVD, movie, etc., in video software, or the entire album in audio software.
Track
Sections of a picture or a music feature on a CD or VIDEO CD (the length of a song).
Language Code List
The language spellings conform to the ISO 639: 1988 (E/F) standard.
| Code Language | Code Language | Code Language | Code Language |
| 1027 Afar | 1174 French | 1332 Lithuanian | 1507 Samoan |
| 1028 Abkhazian | 1181 Frisian | 1334 Latvian; Lettish | 1508 Shona |
| 1032 Afrikaans | 1183 Irish | 1345 Malagasy | 1509 Somali |
| 1039 Amharic | 1186 Scots Gaelic | 1347 Maori | 1511 Albanian |
| 1044 Arabic | 1194 Galician | 1349 Macedonian | 1512 Serbian |
| 1045 Assamese | 1196 Guarani | 1350 Malayalam | 1515 Sundanese |
| 1051 Aymara | 1203 Gujarati | 1352 Mongolian | 1516 Swedish |
| 1052 Azerbaijani | 1209 Hausa | 1353 Moldavian | 1517 Swahili |
| 1053 Bashkir | 1217 Hindi | 1356 Marathi | 1521 Tamil |
| 1057 Byelorussian | 1226 Croatian | 1357 Malay | 1525 Telugu |
| 1059 Bulgarian | 1229 Hungarian | 1358 Maltese | 1527 Tajik |
| 1060 Bihari | 1233 Armenian | 1363 Burmese | 1528 Thai |
| 1066 Bengali; Bangla | 1235 Interlingua | 1365 Nauru | 1529 Tigrinya |
| 1067 Tibetan | 1248 Indonesian | 1369 Nepali | 1531 Turkmen |
| 1070 Breton | 1253 Icelandic | 1376 Dutch | 1532 Tagalog |
| 1079 Catalan | 1254 Italian | 1379 Norwegian | 1535 Tonga |
| 1093 Corsican | 1257 Hebrew | 1408 Oriya | 1538 Turkish |
| 1097 Czech | 1261 Japanese | 1417 Punjabi | 1540 Tatar |
| 1103 Welsh | 1269 Yiddish | 1428 Polish | 1543 Twi |
| 1105 Danish | 1283 Javanese | 1435 Pashto; Pushto | 1557 Ukrainian |
| 1109 German | 1287 Georgian | 1436 Portuguese | 1564 Urdu |
| 1130 Bhutani | 1297 Kazakh | 1463 Quechua | 1572 Uzbek |
| 1142 Greek | 1298 Greenlandic | 1481 Rhaeto- | 1581 Vietnamese |
| 1144 English | 1299 Cambodian | Romance | 1587 Volapük |
| 1145 Esperanto | 1300 Kannada | 1483 Romanian | 1613 Wolof |
| 1149 Spanish | 1301 Korean | 1489 Russian | 1632 Xhosa |
| 1150 Estonian | 1305 Kashmiri | 1495 Sanskrit | 1665 Yoruba |
| 1151 Basque | 1307 Kurdish | 1498 Sindhi | 1684 Chinese |
| 1157 Persian | 1311 Kirghiz | 1502 Serbo-Croatian | 1697 Zulu |
| 1165 Finnish | 1313 Latin | 1503 Singhalese | 1703 Not specified |
| 1166 Fiji | 1326 Lingala | 1505 Slovak | |
| 1171 Faroese | 1327 Laothian | 1506 Slovenian |
CAUTION-
Laser radiation when open. DO NOT STARE INTO BEAM.
Picture off for your safety!
Préparatifs
Remarques
Mise hors tension
Préparatifs
Réglage de l'heure
Remarque
③ Touche SRC (SOURCE) 15, 17, 44, 47
5 Touche MODE 17, 44, 47
13 Touche DVD ▶II 15, 25
14 Touche ◀◀/▶▶ 15, 26, 46
15 Touche ENTER 27, 28, 29
17 Touches ←/↑/↓/→ 27, 29, 45
Menu Play mode (DVD/CD) (page 20)

Menu Equalizer (page 23)

Menu Display (page 21)

Remarque
Balance
◆ Touch Panel Adjust
2 Touchez MONO.
2 Touchez Zone x Zone On.
3 Touchez la source avant.
Face + vers le haut

→Désactivez Zone x Zone.
JPEG (Joint Photographic Expert Group)
Laser radiation when open. DO NOT STARE INTO BEAM.
Picture off for your safety!
Código de región
Preparativos
Notas
Presione OPEN/CLOSE.
Apagado
Preparativos
Ajuste del reloj
Nota
3 Botón SRC (SOURCE) 15, 17, 44, 47
11 Botón CLEAR (borrado) 29
Nota
♦ Rear Monitor (Monitor trasero)
Balance
♦ Rear Att (Att trasero)
5 Toque "Local (Local On)" o "DX (Local Off)".
6 Toque y cierre el recuadro de menú Local.
2 Toque MONO.
2 Toque Zone x Zone On.
→Desactive Zone x Zone.
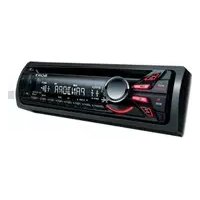
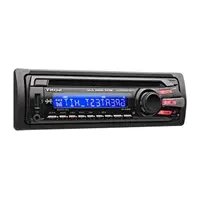
- CAUTION
- WARNING
- TABLE OF CONTENTS
- GETTING STARTED
- BASIC OPERATION
- PLAYER
- VARIOUS DVD OPERATIONS
- SETTINGS AND ADJUSTMENTS
- TV/RADIO/OTHER COMPONENTS
- OTHER FEATURES
- WELCOME
- INCH IN-DASH MOTORIZED TFT MONITOR
- DVD, CD, VCD PLAYBACK COMPATIBILITY
- VIDEO/AUDIO INPUTS, 1 VIDEO INPUT, 1 VIDEO/AUDIO OUTPUT (REAR), AND 1 DIGITAL OUTPUT PROVIDED
- ZONE × ZONE
- DVD LEVEL ADJUSTMENT
- EQ
- PRECAUTIONS
- ON SAFETY
- PREVENTING ACCIDENTS
- PICTURE OFF FOR YOUR SAFETY
- ON INSTALLATION
- INSTALLING LOCATION
- ABOUT THIS MANUAL
- MOISTURE CONDENSATION
- TO MAINTAIN HIGH SOUND QUALITY
- DVD
- VIDEO CD (VCD)
- AUDIO CD
- CD-RECORDABLE (CD-R)
- CD-REWRITABLE (CD-RW)
- CD-EXTRA
- NOTES
- NOTE ON DUALDISCS
- NOTE ON TRANSPARENT DISCS
- MUSIC DISCS ENCODED WITH COPYRIGHT PROTECTION
- REGION CODE
- NOTE ON PLAYBACK OPERATIONS OF DVDS AND VCDS
- COPYRIGHTS
- DETACHING THE FRONT PANEL
- CAUTION ALARM
- TIP
- RESETTING THE UNIT
- PUSH RESET
- OPENING UP THE MONITOR
- PRESS OPEN/CLOSE ON THE MONITOR
- PREPARATIONS
- ADJUSTING THE MONITOR ANGLE
- PRESS ANGLE -/+ REPEATEDLY
- ADJUSTING THE MONITOR POSITION
- TILTING THE MONITOR AHEAD
- PRESS TILT
- CLOSING THE MONITOR
- PRESS OPEN/CLOSE
- SHUTTING DOWN
- WARNING WHEN INSTALLING IN A CAR WITHOUT AN ACC (ACCESSORY) POSITION ON THE IGNITION KEY
- NOTE
- SETTING THE CLOCK
- ON THE MONITOR
- DEMO MODE
- ATTACHING THE FRONT PANEL
- MAIN UNIT
- CARD REMOTE COMMANDER RM-X
- PLAYING DVD/VIDEO CD/AUDIO CD/MP3/JPEG
- OPEN UP THE MONITOR (PAGE 9)
- INSERT A DISC
- TO SWITCH FROM THE OTHER SOURCES
- WHEN THE DISC IS INSERTED
- TO STOP PLAYBACK DVD VCD
- TO TURN OFF THE UNIT
- PLAYING A DISC
- TO SELECT THE TRACK DIRECTLY
- TOUCH LIST
- TOUCH THE DESIRED TRACK NAME (OR NUMBER)
- TO PLAYBACK A JPEG DISC
- TO SET THE DURATION OF THE SLIDE SHOW
- WATCHING TV/LISTENING TO THE RADIO
- WATCHING TV OR LISTENING TO RADIO
- TO SELECT THE RADIO FUNCTION
- SELECT A CHANNEL
- TO SELECT THE DESIRED MODE
- WATCHING/LISTENING TO OTHER VIDEO/AUDIO COMPONENTS
- TO SELECT THE CONNECTED DEVICE
- ABOUT THE SOURCE MENU
- DVD CD MP3 JPEG
- DISPLAY ITEMS ON THE CD/MP3 PLAYBACK
- USING THE SOURCE MENU
- TO SCROLL THE TEXT INFORMATION
- PLAYBACK ORDER OF MP3 FILES
- TIPS
- SETTING THE SCREEN
- WALLPAPER/SCREEN EFFECT
- DURING PLAYBACK, TOUCH THE SCREEN EFFECT MENU BOX (✿)
- TOUCH THE DESIRED SETTING
- TO CLOSE THE SCREEN EFFECT MENU
- ◆ WALLPAPER
- ◆ EFFECT TYPE
- SETTING THE PLAY MODE
- PLAY MODE
- TOUCH THE PLAY MODE MENU BOX
- TOUCH THE DESIRED OPTION
- TO CLOSE THE PLAY MODE MENU
- ON THE REMOTE
- ◆ REPEAT/SHUFFLE
- MP
- VCD (WITH PBC OFF)/AUDIO CD
- SETTING FOR THE DISPLAY
- DISPLAY
- DURING PLAYBACK, TOUCH DSPL
- TOUCH THE DESIRED ITEM
- TO RETURN TO THE PREVIOUS SCREEN
- TO CLOSE THE DISPLAY MODE MENU
- SCROLL
- DIMMER
- ADJUSTING THE DIMMER LEVEL
- TOUCH DIMMER
- ADJUST THE LEVEL WHILE TOUCHING THE - OR
- ◆ WIDE MODE (AVAILABLE WITH VISUAL SOURCES)
- ◆ PICTURE MODE
- ADJUSTING THE CUSTOM SETTINGS
- SETTING THE SOUND QUALITY — EQUALIZER
- SELECTING THE SOUND QUALITY ON THE MONITOR
- TO CLOSE THE EQUALIZER MENU
- RESUMING PLAYBACK — RESUME PLAY
- TO PLAY FROM THE POINT YOU PREVIOUSLY STOPPED
- TO PLAY FROM THE BEGINNING
- SEARCHING A SPECIFIC POINT ON A DISC — SCAN
- DVD VCD CD MP
- USING THE MENUS ON DVDS
- USING PBC FUNCTIONS — PBC (PLAYBACK CONTROL)
- STARTING PLAYBACK FROM A SELECTED POINT
- SEARCH PLAY
- DVD VCETH PBC OFF)
- TO TURN OFF THE PLAY MODE MENU
- CHANGING THE AUDIO CHANNELS
- DVD VCD
- ON THE MONITOR DVD
- DURING PLAYBACK, TOUCH AUDIO REPEATEDLY
- VCD
- DURING PLAYBACK, TOUCH THE AUDIO CHANNEL BOX
- TO TURN OFF THE AUDIO CHANNEL MENU
- ADJUSTING THE AUDIO OUTPUT LEVEL
- CHANGING THE ANGLES
- TOUCH ANGLE ON THE MONITOR
- DISPLAYING THE SUBTITLES
- TO TURN OFF THE SUBTITLES
- TO TURN OFF THE SYSTEM MENU
- MONITOR SETTINGS — MONITOR
- AUTO CLOSE
- REAR MONITOR
- DISPLAY SETTINGS — DSPL
- ◆ WIDE MODE
- SOUND SETTINGS — SOUND
- BALANCE
- REAR ATT
- ♦ DVD LEVEL ADJUST
- BEEP
- OTHER SETTINGS — OTHER
- ♦ AUX
- ♦ SWITCHING THE NTSC/PAL SYSTEM
- ◆PBC ON
- DEMO
- ◆ TOUCH PANEL ADJUST
- USING THE DVD SETUP MENU
- TOUCH DVD SETUP WHILE PLAYBACK IS STOPPED
- TOUCH THE DESIRED CATEGORY
- TO CLOSE THE DVD SETUP MENU
- LANGUAGE SETTINGS FOR DVD PLAYBACK — LANGUAGE
- DVD MENU
- AUDIO
- SUBTITLE
- SETTINGS FOR DIGITAL AUDIO OUTPUT — AUDIO
- ◆ DRC (DYNAMIC RANGE CONTROL)
- DISPLAY SETTINGS FOR THE PLAYER — DISPLAY
- ◆ DISPLAY
- SETTINGS FOR THE PARENTAL CONTROL — LOCK
- SETTING FOR THE DOWNMIX SIGNAL — DOWNMIX
- DOWNMIX
- LOCKING DISCS — LOCK
- ENTERING THE PASSWORD
- CHANGING THE PASSWORD
- SETTING THE PARENTAL CONTROL ON
- CHANGING THE AREA AND ITS MOVIE RATING LEVEL
- STORING AUTOMATICALLY — BTM
- TO CANCEL THE STORING PROCEDURE
- STORING MANUALLY
- RECEIVING THE STORED STATIONS
- USING THE LOCAL SEEK MODE IN TUNER FUNCTION
- SWITCHING FM RECEPTION TO MONAURAL
- LISTENING TO A XM SATELLITE RADIO PROGRAM
- INTRODUCING XM™ SATELLITE RADIO
- HOW TO SUBSCRIBE
- SELECTING XM SOURCE AND THE DESIRED CHANNEL
- USING CATEGORY SEARCH TO LOCATE CHANNELS
- STORING CHANNELS BY PRESETTING MEMORY
- RECEIVING THE STORED CHANNELS
- DISPLAY ITEMS
- TOUCH CH ON THE MONITOR
- DISPLAYING THE XM RADIO ID
- AUXILIARY AUDIO/VIDEO EQUIPMENT
- SELECTING AUXILIARY EQUIPMENT
- SETTING FOR THE AUXILIARY EQUIPMENT
- TO TURN OFF THE SETUP MENU
- DISPLAYING THE IMAGE OF THE BACK CAMERA
- SWITCHING THE FRONT/REAR OUTPUT — ZONE X ZONE
- PRESS ZXZ ON THE MAIN UNIT
- TOUCH ZONE X ZONE ON
- TOUCH THE SOURCE OF THE FRONT
- TOUCH THE SOURCE OF THE REAR
- ADDITIONAL INFORMATION
- CARD REMOTE COMMANDER PRECAUTIONS
- ABOUT THE LIQUID CRYSTAL DISPLAY (LCD) PANEL
- REPLACING THE LITHIUM BATTERY
- NOTES ON LITHIUM BATTERY
- FUSE REPLACEMENT
- CLEANING THE CONNECTORS
- REMOVING THE UNIT
- REMOVE THE PROTECTION COLLAR
- REMOVE THE UNIT
- NOTES ON DISCS
- ABOUT MP3 FILES
- FOR CD
- FOR DVD
- FOR MP
- TROUBLESHOOTING
- GENERAL
- NO POWER IS BEING SUPPLIED TO THE UNIT
- STORED STATIONS AND CORRECT TIME ARE ERASED
- MAKES NOISE WHEN THE POSITION OF THE IGNITION KEY IS SWITCHED
- THE DISPLAY DISAPPEARS FROM/DOES NOT APPEAR IN THE DISPLAY WINDOW
- THE DISPLAY DOES NOT RESPOND TO YOUR TOUCH CORRECTLY
- PICTURE
- THERE IS NO PICTURE/PICTURE NOISE APPEARS
- PICTURE DOES NOT FIT IN THE SCREEN
- THE PICTURE DOES NOT APPEAR IN THE REAR MONITOR
- SOUND
- THERE IS NO SOUND/SOUND SKIPS/SOUND CRACKS
- SOUND IS NOISY
- OPERATION
- THE REMOTE DOES NOT FUNCTION
- THE OPERATION BUTTONS DO NOT FUNCTION
- THE MENU ITEMS CANNOT BE SELECTED
- THE DISC WILL NOT EJECT
- NO BEEP SOUND
- THE CONTENTS OF THE MEMORY HAVE BEEN ERASED
- THE DISPLAY ITEMS DO NOT SCROLL
- THE DISC CANNOT BE LOADED
- THE UNIT DOES NOT START PLAYING
- YOU CANNOT SELECT A SOURCE
- MP3 FILES CANNOT BE PLAYED
- MP3 FILES TAKE LONGER TO PLAY BACK THAN OTHERS
- THE JPEG FILES CANNOT BE PLAYED
- THE TITLE OF THE MP3 AUDIO ALBUM OR TRACK IS NOT CORRECTLY DISPLAYED
- THE DISC DOES NOT START PLAYING FROM THE BEGINNING
- PLAYBACK STOPS AUTOMATICALLY
- YOU CANNOT PERFORM CERTAIN FUNCTIONS
- THE LANGUAGE FOR THE SOUND TRACK CANNOT BE CHANGED
- THE SUBTITLE LANGUAGE CANNOT BE CHANGED OR TURNED OFF
- THE ANGLES CANNOT BE CHANGED
- RADIO RECEPTION
- THE STATIONS CANNOT BE RECEIVED. THE SOUND IS HAMPERED BY NOISES
- PRESET TUNING IS NOT POSSIBLE
- AUTOMATIC TUNING IS NOT POSSIBLE
- DURING FM RECEPTION, THE "ST" INDICATION FLASHES
- AN FM PROGRAMME BROADCAST IN STEREO IS HEARD IN MONAURAL
- MESSAGES
- ERROR DISPLAYS/MESSAGES
- DISC ERROR
- CAN NOT PLAY
- ON THE DISPLAY WINDOW
- ERR
- SPECIFICATIONS
- AUDIO POWER SPECIFICATIONS
- SYSTEM
- MONITOR SECTION
- DVD/CD PLAYER SECTION
- TUNER SECTION
- AM
- AMPLIFIER SECTION
- GLOSSARY
- CHAPTER
- DOLBY DIGITAL
- DTS
- DVD VIDEO
- DVD-RW
- DVD+RW
- FILM BASED SOFTWARE, VIDEO BASED SOFTWARE
- JPEG (JOINT PHOTOGRAPHIC EXPERT GROUP)
- TITLE
- TRACK
- LANGUAGE CODE LIST
- PRÉPARATIFS
- REMARQUES
- MISE HORS TENSION
- RÉGLAGE DE L'HEURE
- REMARQUE
- TOUCHEZ ZONE X ZONE ON
- TOUCHEZ LA SOURCE AVANT
- PREPARATIVOS
- NOTAS
- PRESIONE OPEN/CLOSE
- APAGADO
- AJUSTE DEL RELOJ
- NOTA
- ♦ REAR MONITOR (MONITOR TRASERO)
- ♦ REAR ATT (ATT TRASERO)
- TOQUE ZONE X ZONE ON
Brand : SONY
Model : XAV-A1
Category : Car radio