TDS700 - Printer Océ - Free user manual and instructions
Find the device manual for free TDS700 Océ in PDF.


| Product Type | Large Format Multifunction Printer |
| Brand | Océ |
| Model | TDS700 |
| Dimensions (W x D x H) | 139 cm x 60 cm x 120 cm |
| Weight | Approx. 250 kg |
| Power Supply | 220–240 V, 50/60 Hz |
| Power Consumption | Max 1500 W (printing), < 5 W (standby) |
| Functions | Print, Copy, Scan |
| Max Print Width | 914 mm (36 inches) |
| Print Technology | Electrophotographic (LED) |
| Resolution | 600 x 600 dpi |
| Print Speed | Up to 7 D-size (A0) prints per minute |
| Media Handling | Roll feed, single sheet bypass |
| Paper Sizes | A4 to A0, custom sizes up to 914 mm wide |
| Connectivity | Ethernet, USB, optional Wi-Fi |
| Maintenance | Clean rollers and print head regularly |
| Safety | CE certified |
| Spare Parts & Repairability | Parts available; service by certified technicians |
| Intended Use | Professional, high-volume printing |
Frequently Asked Questions - TDS700 Océ
User questions about TDS700 Océ
0 question about this device. Answer the ones you know or ask your own.
Ask a new question about this device
Download the instructions for your Printer in PDF format for free! Find your manual TDS700 - Océ and take your electronic device back in hand. On this page are published all the documents necessary for the use of your device. TDS700 by Océ.
USER MANUAL TDS700 Océ
Océ, Océ TDS700 are registered trademarks of Océ-Technologies B.V..
Adobe ^® , Acrobat ^® , Reader ^® and Distiller ^® are registered trademarks of Adobe ^® Systems Incorporated.
PostScript ^® 3 ^TM is a registered trademark of Adobe ^® Systems Incorporated.
Apple ^® , Mac ^® , Mac OS ^® and Macintosh ^® are registered trademarks of Apple ^® Computer, Inc.
True Type ^® is a registered trademark of Apple ^® Computer, Inc.
AutoCAD ^® and Autodesk ^® are registered trademarks of Autodesk ^® Inc.
InstallShield ^® is a registered trademark of InstallShield ^® Software Corporation.
WIN-OS/2 ^® , OS/2 ^® Lotus Notes ^® , OS 390 ^® , z/OS ^® are registered trademarks of International Business Machines Corporation in the United States, other countries, or both. FLEXlm ^™ is a trademark of Macrovision ^™ Corporation.
LMTOOLS (License Manager Tools) is a trademark of Macrovision™ Corporation. Microsoft®, Windows®, Windows NT®, Windows 98®, Windows 2000®, Windows XP®, Windows Server 2003® are either registered trademarks or trademarks of Microsoft® Corporation in the United States and/or other countries.
Netscape ^® is a registered trademark of the Netscape ^® Communications Corporation in the U.S. and other countries.
NetWare ^® , Novell ^® , Novell ^ iPrint, Novell Distributed Print Services ^TM , NDPS ^® are registered trademarks of Novell ^® , Inc.
Siemens ^® , Siemens ^® BS2000 and Siemens ^® Server are registered trademarks of Siemens ^® AG.
Sun ^® , Sun ^® Microsystems, Solaris ^® , the Sun ^® Logo are trademarks or registered trademarks of Sun ^® Microsystems, Inc. in the United States and other countries.
Java™ and all Java-based trademarks are trademarks or registered trademarks of Sun® Microsystems, Inc. in the United States and other countries.
UNIX ^® is a registered trademark of The Open Group in the United States and other countries.
Xconnect™ 100 server is a trademark of Troy XCD, Inc.
Products in this publication are referred to by their general trade names. In most, if not all cases, these designations are claimed as trademarks or registered trademarks of their respective companies.
Copyright
© 2006, Océ-Technologies B.V. Venlo, The Netherlands.
All rights reserved. No part of this work may be reproduced, copied, adapted, or transmitted in any form or by any means without written permission from Océ.
Océ-Technologies B.V. makes no representation or warranties with respect to the contents hereof and specifically disclaims any implied warranties of merchantability or fitness for any particular purpose.
Further, Océ-Technologies B.V. reserves the right to revise this publication and to make changes from time to time in the content hereof without obligation to notify any person of such revision or changes.
Notes for the reader
Introduction
This manual helps you to use the Océ TDS700. The manual contains a description of the Océ TDS700 and guidelines to use and operate the Océ TDS700. There are also tips to increase your knowledge of the Océ TDS700 and to help you manage the workflow even better.
Definition
Attention Getters
Parts of this manual require your special attention. These parts provide important, additional information or are about the prevention of damage to your properties.
Note, Attention and Caution
The words Note, Attention and Caution indicate these important parts.
■ The word Note comes before additional information about the correct operation of the Océ TDS700 or a tip.
■ A part marked with Attention contains information to prevent damage to items, for example the Océ TDS700, an original or a file.
■ A part marked with Caution contains information to prevent personal injury. Caution is found only in manuals that describe physical products.
Safety information
The safety information for this product is included in a separate manual with the title Safety manual. This manual is part of the documentation set that you received with your product.
Contents
Chapter 1
Introduction 15
The product concept and complete workflow.... 16
Available documentation 18
How to use this manual 22
The Océ TDS700 key concepts 24
User interaction 27
The Océ TDS700 users 29
Get to know the Océ TDS700 32
The Océ TDS700 32
The Océ TDS700 components 33
Turn on and off the Océ TDS700 37
Climate control on the Océ TDS700 41
Chapter 2
Use the Océ TDS700 to
print a job.... 43
Actions on the printer operator panel. 44
The printer operator panel 44
Printer operator panel actions. 47
Off-line settings 50
Select a language 50
Off-line folding settings (optional) 51
Media type and size on the printer 52
Special media indication 54
Positioning the reinforcement knives (optional) 55
Stop a print job 56
Administrator settings 56
Make a demo print 56
Print the system settings 58
Access the 'Administrator only' menu. 59
Configure the network settings.... 60
Activate the password 62
Activate the buzzer. 64
Clear the set memory.... 65
Print job submission software 66
Introduction to the Océ printer drivers 66
Use an Océ printer driver to send a print job 67
Introduction to Océ Print Exec® Workgroup Basic 68
Connect to Océ Print Exec® Workgroup Basic. 69
Use Océ Print Exec® Workgroup Basic to send a print job ..... 70
Introduction to Océ Repro Desk® 72
Océ Print Exec® Department 73
Print jobs on the Océ TDS700 Power Logic® controller application .... 74
Introduction 74
Job management in the 'Scheduled jobs' 76
Print a job in the 'Scheduled jobs'. 76
Move up the jobs in the 'Scheduled jobs' 77
View the job properties of jobs in the 'Scheduled jobs'. 78
Delete a job in the 'Scheduled jobs' 79
Hold a running job in the 'Scheduled jobs' 80
Give priority to a job in 'Scheduled jobs'. 81
Give priority to copy jobs over print jobs. 82
Postpone a job in the 'Scheduled jobs'. 83
Job management in the 'Waiting jobs'. 84
View the job properties of jobs in the 'Waiting jobs' 84
Print a job to the 'Scheduled jobs' 85
Delete a job in the 'Waiting jobs'. 86
Job management in the 'Printed jobs' 87
Re-print a job in the 'Printed jobs'. 87
View the job properties of jobs in the 'Printed jobs' 88
Delete a job in the 'Printed jobs' 89
Disable the 'Printed jobs' 90
Chapter 3
Use the Océ TDS700 flexible scanner 91
Introduction to copy jobs 92
Use the scanner operator panel. 94
Basic copy jobs on the Océ TDS700 flexible scanner . . . . . . . . . . . . . . . 97
Do a basic copy job 97
Stop a copy job 98
Extended copy jobs 99
Do an extended copy job. 99
Available settings for copy jobs 101
Improve the copy quality according to the original 104
Make multiple sets of copies.... 108
Make a copy with a stamp. 110
Scale to another media size 112
Make a copy on a cut sheet 113
Make a copy and add a strip 114
Make a copy and remove a strip 116
Make a copy of a specific area of an original 118
Make a copy and delete a specific area of an original 120
Basic scan-to-file jobs on the flexible scanner 122
Introduction to scan-to-file jobs 122
Do a basic scan-to-file job. 124
Do an extended scan-to-file job 125
Stop a scan-to-file job 127
Extended scan-to-file jobs 128
Available settings for scan-to-file jobs.... 128
'File type' 130
'Resolution' 132
'Original type' and background compensation 133
'Original width'.... 134
'Remove strip' 135
Scan jobs on the Océ TDS700 Power Logic® controller application . . . 136
Scan jobs management 136
Manage scan destinations in the 'Scan jobs' workspace ..... 139
Scan jobs tasks.... 143
Define file names 144
View the properties of the scanned file 146
Delete scanned files 147
Print scanned files.... 148
Resend scanned files from the Unsent scans folder. 149
How to retrieve scanned files via FTP.... 150
Océ View Station LT® 152
View locally scanned files with Océ View Station® LT ..... 152
Functions in Océ View Station® LT 154
View error in Océ View Station® LT 157
Océ Matrix Logic 158
What is Océ Matrix Logic®. 158
Create a Matrix Job. 160
Add templates.... 162
Print the Matrix job 163
Copy templates.... 164
Edit template 165
Banners.... 166
Chapter 4
Use the Océ TDS700 productive scanner 167
Introduction to copy jobs 168
The scanner operator panel 170
Sections on the scanner operator panel 172
Scanner templates 174
Change the operator panel language on the scanner.... 176
Settings on the Océ TDS700 scanner operator panel 177
Basic copy jobs on the Océ TDS700 productive scanner. 179
Perform basic copy jobs 179
Make copies 180
Select the required media 182
Select the input mode 184
Select the scale factor 185
Lighter/darker 187
Background compensation 188
Bold 189
Deliver originals after scanning 190
Define settings for the next original 191
Account logging.... 192
Use the manual feed function for copy jobs 193
Define delivery of copies 195
Interrupt a job 196
Stop a job on the scanner 197
Stamping (optional) 198
Basic scan-to-file jobs on the Océ TDS700 productive scanner ..... 199
Perform basic scan-to-file jobs 199
Océ Scan Logic® 200
Make a scan-to-file 201
Settings for scan-to-file on the scanner operator panel ..... 203
Destination card settings.... 204
File mode 204
Destination 205
Resolution. 206
File type 207
Image card settings 209
Scale. 209
Scale table 210
Mirror 211
Optimization card setting. 212
Optimisation 212
Scan jobs on the Océ TDS700 Power Logic® controller application . . . 213
Introduction to scan jobs on the Océ TDS700 Power Logic® controller application 213
Océ View Station LT® 214
Introduction to Océ View Station LT 214
Océ Matrix Logic 215
Introduction to Océ Matrix Logic 215
Special copy and scan jobs on the Océ TDS700 productive scanner . . 216
Non-standard size originals 216
The scan width 217
The copy size 218
Scanning originals with filing strip 219
Improving the image quality 222
Automatic background compensation 224
Editing functions 225
Auto align 225
Shift the image 228
Mirror-image copies 230
Make a set copy 231
Chapter 5
Océ TDS700 Power Logic® controller Remote. 233
Introduction to Océ TDS700 Power Logic® controller ..... Remote 234
Install and start Océ TDS700 Power Logic® controller Remote ..... 235
Install Océ TDS700 Power Logic controller Remote on your system. 235
Start the Océ TDS700 Power Logic® application with Océ TDS700
Power Logic controller Remote 237
Connect to the controller 240
Use Océ TDS700 Power Logic® controller Remote 241
Automatic logon 241
Log on to Océ TDS700 Power Logic® controller Remote. 242
Change the 'Password' 244
Chapter 6
The Océ TDS700 Power Logic® controller application 245
Introduction 246
The Océ TDS700 Power Logic® controller software application . . . 246
Toolbars and workspaces 248
Log on as a different user 254
Change the password 255
Concepts of the Workspaces 256
Concepts of the 'Print jobs' workspace. 256
Concept of the 'Scheduled jobs'. 259
Concept of the 'Waiting jobs' 260
Concept of the 'Printed jobs' 261
Concepts of the 'Scan jobs' and the 'Scan destinations'. . . . . . 262
Concept of the 'Scan destinations' 264
Concept of the 'Templates' on the flexible scanner ..... 267
Concept of the 'Templates' of the productive scanner ..... 268
Concept of the 'Preferences' workspace 270
Concept of the 'Configuration' workspace 272
Chapter 7
Océ License Logic.... 275
About Océ License Logic.... 276
The possibilities of Océ License Logic. 277
The basic workflow of license activation 278
The structure of license files and licenses 279
Control your licenses with Océ License Logic 281
Log on to Océ License Logic 281
View the current active licenses 283
Get the host id of the Océ system 285
Save the current active licenses 286
Perform a license activation job 287
Chapter 8
Accounting software: Océ Account Center 289
An overview of Océ Account Center 290
Océ Account Logic® 292
Introduction to Océ Account logic 292
Summary of Océ Account Logic 293
Océ TDS700 Power Logic® controller setup 294
Océ Account Console® 296
Introduction to Océ Account Console 296
Summary of Océ Account Console 297
Chapter 9
The finishing options 301
Get to know the folder options 302
The folder components 302
The folder 304
Set the standard folding settings 305
Maximum folding length 308
Off-line folding 311
The reinforcement unit 313
The belt unit. 315
Paper jam in the folder 316
Maintain the folder options 322
The reinforcement unit 322
Introduction.... 322
Insert a new tape roll 323
Empty the waste box 329
Clean the reinforcement knives 330
Handle errors at the reinforcement unit. 332
Clear a tape jam in the reinforcement unit 332
No reinforcement strips on the output 334
Get to know the Océ Double Decker® (Pro) 336
The functions of the Océ Double Decker® (Pro).... 336
The Océ Double Decker (Pro).... 337
Product specifications 339
Make the settings for the Océ Double Decker® (Pro) 340
How to set the media separation method 340
How to set the tray selection method 341
Chapter 10
Maintain the Océ TDS700 343
Maintain the flexible scanner 344
Clean the scan area 344
Calibrate the scanner 346
Clear an original jam on the flexible scanner 348
Scanner error-messages and solutions 349
Maintain the productive scanner 350
Clean the scan area of the productive scanner. 350
Clear an original jam on the productive scanner. 352
Maintain the printer 354
Media 354
Load rolls of media. 354
Use the optional roll loader 358
Load cut sheet material 360
Define the media type and media size 362
Toner.... 363
Refill the toner 363
Solve problems on the printer 370
Introduction to problem solving 370
Clear paper jams on the printer 371
Paper jam in the fuser section 373
Paper jam in the manual feed section 375
Paper jam in the roll feed section. 376
Paper jam in the cut sheet section 377
Paper jam at the integrated receiving tray . . . . . . . . . . . . . . . 378
Appendix A
Overview and tables 381
Overview of the Océ TDS700 system 382
Printer operator panel 385
Scanner operator panel 386
Specifications of the Océ TDS700 389
Specifications of the Océ TDS700 389
Specifications Océ Power Logic® controller 396
Specifications Océ Scan Logic®. 399
Specifications drivers and job submission software 402
Original types for the scanner 404
Supported media types and sizes for the printer 406
Available media types 406
Available media sizes 409
Standard scale factor 412
Appendix B
Miscellaneous 415
Reader's comment sheet 416
Addresses of local Océ organisations 418
Chapter 1 Introduction
The product concept and complete workflow
Definition
A complete Océ solution includes several different hardware and software products to manage your complete document workflow. The complete document workflow includes several different jobs and documents. The following illustration gives an overview of a complete Océ solution and the document workflow.
Illustration
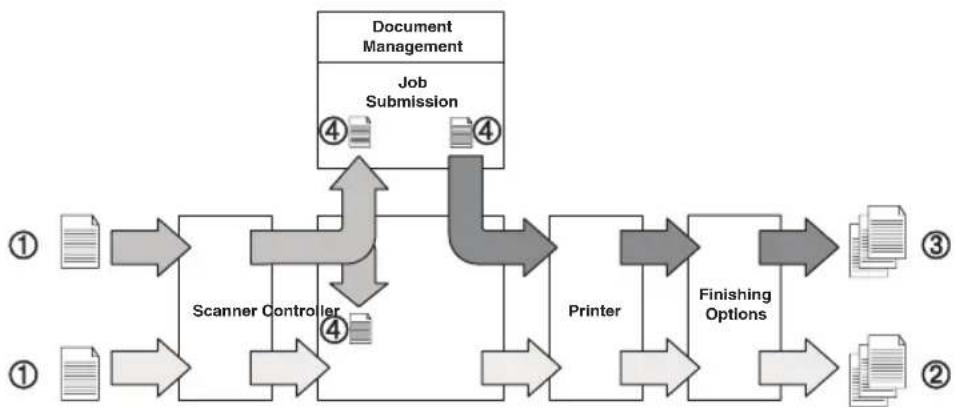
flowchart
graph TD
    A["Document Management"] --> B["Job Submission"]
    B --> C["Scanner Controller"]
    C --> D["Printer"]
    D --> E["Finishing Options"]
    E --> F["Output ③"]
    style A fill:#f9f,stroke:#333
    style B fill:#ccf,stroke:#333
    style C fill:#cfc,stroke:#333
    style D fill:#fcc,stroke:#333
    style E fill:#ffc,stroke:#333
    style F fill:#cfc,stroke:#333
[1] Overview of a complete Océ solution. The system set-up and control.
Different documents
The complete workflow includes the following different documents.
| Nr. Document | |
| 1 Original | |
| 2 | C o p y |
| 3 | P r i n t |
| 4 File | |
Different products
The complete Océ solution is a combination of the following elements.
■Scanner
■Controller
■Printer
■Finishing options
■Job submission software
■Document management software.
Different jobs
The arrows in the illustration show the different possible jobs. The complete document workflow of the Océ solution includes the following different jobs.
■Print job.
A print job starts with a file (4) and ends with a print (3).
■Copy job.
A copy job starts with an original (1) and ends with a copy (2).
■Scan-to-file job.
A scan-to-file job starts with an original (1) and ends with a file (4).
■Set-up and control the complete workflow.
Do which job where
Use the following products to do the following jobs.
■Print jobs on the job submission software or printer drivers.
■Copy jobs on the scanner operator panel
■Scan-to-file jobs on the scanner operator panel
■ Set up and control the complete workflow on the controller.

Note: A setting in the job submission software or driver always overrules a system setting.
Available documentation
Introduction
This manual is part of a complete documentation set. The following table shows a complete overview of the available documentation.
Available documentation
[2] Available documentation (1 - 3)
| Product Documentation | Medium | |
| The Océ TDS700 Océ TD | S700 Reference manual. | CD-ROM, PDF file in 8 main languages. |
| Océ TDS700 Quick navigation manual. | CD-ROM, 3 multilingual hardcopy manuals, 3 multilingual PDF files covering 19 languages in total. | |
| Océ TDS700 Safety manual. | 1 manual, PDF file, multilingual. | |
| The Océ TDS700 Power Logic® controller | Océ TDS-TCS connectivity manual. | CD-ROM, as a PDF file in English only. |
| Integrated Océ TDS700 Power Logic® controller application on-line help | Embedded in the application, as an on-line help file in 19 languages. | |
| Océ Windows® Printer Driver | Océ Windows® Printer Driver User Manual | CD-ROM, as a PDF file in multiple languages on Océ Driver Pack CD-ROM. |
| Océ Windows® Printer Driver on-line help | Embedded in the driver application as on-line help file in multiple languages. | |
| Océ PostScript® 3 driver | Océ PostScript® 3 driver Getting Started | CD-ROM, as a PDF file in multiple languages on Océ Driver Pack CD-ROM. |
| Océ PostScript® 3 driver Getting Started | Embedded in the driver application as on-line help file in multiple languages. | |
| Océ HDI Driver Océ HDI | Driver User Manual | CD-ROM, as a PDF file in multiple languages on Océ Driver Pack CD-ROM. |
| Océ HDI driver on-line help | Embedded in the driver application as on-line help file in multiple languages. |
[2] Available documentation (2 - 3)
| Product Documentation | Medium | |
| Océ Windows® Raster Driver | Océ Windows® Raster Driver User Manual | CD-ROM, as a PDF file in multiple languages on Océ Driver Pack CD-ROM. |
| Océ Windows® Raster Driver on-line help | Embedded in the driver application as on-line help file in multiple languages. | |
| Océ Account Center Océ | Account Center User Manual | CD-ROM, as a PDF file in multiple languages. |
| Océ Account Logic on-line help. | Embedded in the application, as an on-line help file in multiple languages. | |
| Océ Account Console on-line help. | Embedded in the application, as an on-line help file in multiple languages. | |
| Océ License Logic Océ License | License Logic on-line help | Embedded in the application, as an on-line help file in multiple languages. |
| Océ TDS700 Power Logic® controller Remote | Océ TDS700 Power Logic® controller Remote on-line help | Embedded in the application, as an on-line help file in multiple languages. |
| Océ Print Exec® Workgroup Basic | Océ Print Exec® Workgroup Basic User Manual | CD-ROM, as a PDF file in multiple languages. |
| Océ Print Exec® Workgroup Basic on-line help | Embedded in the application as on-line help file in multiple languages. | |
| Océ Print Exec® Department | Océ Print Exec® Department User Manual | CD-ROM, as a PDF file in multiple languages. |
| Océ Print Exec® Department on-line help | Embedded in the application as on-line help file in multiple languages. |
[2] Available documentation (3 - 3)
| Product Documentation | Medium | |
| Océ Repro Desk Océ Repro | Pro Desk User Manual | CD-ROM, as a PDF file in multiple languages. |
| Océ Repro Desk on-line help | Embedded in the application as on-line help file in multiple languages. |

Note: Visit Océ on the internet at www.oce.com for the latest information.
How to use this manual
Introduction
You can access a topic quickly with the following methods.
■Refer to the alphabetical index at the end of the manual.
■Refer to the table of contents at the beginning of this manual.
Before you turn to the complete table of contents, you can also use the following table to find a topic quickly.
This manual contains the following chapters.

Note: The Océ TDS700 system has 3 main configurations: the printer only configuration, the printer and flexible colour scanner and the printer and productive black and white scanner. In addition the system can be extended with various finishing equipment. It can therefore occur that certain information does not apply to the configuration you have bought.
| Chapters Section Topics | ||
| 1 Introduction | contains a general int | roduction to the OcéTDS700 and the concept, including a general description of the main features. |
| 2 Use the Océ | TDS700to print a job | contains a brief description of the actions that can be performed on the printer operator panel of the Océ TDS700.gives an introduction to the printer drivers and other print job submission tools. |
| 3 Use the flexible scanner | ■introduction■basic and extended copy jobs■basic and extended scan-to-file jobs■scan job management on the OcéTDS700 Power Logic® controller application■scan destination management on the OcéTDS700 Power Logic® controller application■introduction to Océ View Station ® LT | |
| Chapters Section Topics | ||
| 4 Use the productivescanner | ■introduction■basic copy jobs■basic scan-to-file jobs■special copy and scan-to-file jobs■scan job management on the Océ TDS700 Power Logic® controller application (see previous chapter)■scan destination management on the Océ TDS700 Power Logic® controller application (see previous chapter)■introduction to Océ View Station ® LT (see previous chapter) | |
| 5 Océ TDS700 PowerLogic® controllerRemote | ■introduction■Install and start the application■Use the application | |
| 6 Océ TDS700 PowerLogic® controllerapplication | ■introduction■concepts of the Print jobs, Scan jobs, Scanner templates, Preferences and Configuration | |
| 7 Océ License Logic | ■introduction■perform tasks in the Océ License Logic application | |
| 8 Océ Account Center | ■Océ Account Logic■Océ Account Console | |
| 9 Finishing options | ■get to know the folder options■maintain the folder options■get to know the Océ Double decker (Pro)■make the settings for the Océ Double decker (Pro) | |
| 10 Maintain the OcéTDS700 | ■maintain the flexible scanner■maintain the productive scanner■maintain the printer | |
| Appendix A | Overview and tables | ■overview of the system■overview of the graphical operator panels■system specifications |
| Appendix B | Miscellaneous Reader's | comment sheetAddresses of local Océ organisations |
| Index Index | indicates where you can | find the informationin the manual with the use of key words. |
The Océ TDS700 key concepts
Printer configuration
The Océ TDS700 is available in a number of printer configurations, ranging from two rolls in a single drawer (the minimum configuration) to a maximum of six rolls with one sheet feeder and four rolls with three sheet feeders. The Océ TDS700 printer can be combined with a flexible colour scanner or a productive black and white scanner. Also a number of optional features are available, including an integrated folder, an output delivery tray, paper roll loaders and a paper switch for supporting customer finishing units.
Copy functionality
The Océ TDS700 offers you a configuration with a flexible colour or a productive black and white scanner. With these Océ TDS700 scanners a large number of copy activities can be performed. A wide variety of original and copy related settings are supported. You can specify particular layout, media, finishing, feeding and quality enhancement options from the scanner operator panel.
Green key principle
The Océ TDS700 is a very user-friendly system. The scanners, in particular, are very easy to operate. Basic copy jobs can be performed by simply pressing the green start key on the scanner operator panel. Only if you want to perform more complex copy jobs, you have to change the default copy settings with the help of the other settings on the scanner operator panel. The scanner templates offer you extended ease of use because you can use them to store preferred combinations of settings.
Scanner templates
Both the flexible colour and the productive black and white scanner offer you a number of customisable templates for the job settings of a copy or scan job. The scanner templates allow you to store your preferred job settings. To start a job you simply select a template on the scanner operator panel and press the green start key. Templates can be managed in the new Océ TDS700 Power Logic® controller application.
Integrated Océ TDS700 Power Logic® controller application
The Océ TDS700 Power Logic® controller application supports a centralised workflow. Only one application with a transparent and intuitive layout where you can perform many tasks based on user role defined access. Separate workspaces give you a full overview and full control on print and scan job management, but also allow you to manage your scanner templates, stamps, system preferences and network connectivity settings.
Océ Scan Logic®
The Océ TDS700 offers optional scan-to-file functionality for both the flexible colour and the productive black and white scanner. Documents are scanned then stored digitally. Ten customised scan destinations are supported. Scan jobs and scan destinations can be managed in the new Océ TDS700 Power Logic® controller application.
Adobe® PostScript® 3™/PDF
The Océ TDS700 fully supports Adobe® PostScript® 3™. For Japanese 5 extra fonts are optional. They can be enabled in Océ License Logic.
Network connectivity
The Océ TDS700 supports a number of popular network protocols. This means that it can be used in multiple networking environments such as TCP/IP, and Novelf® Pserver (IPX/SPX). You can configure the system in the network via the Océ TDS700 Power Logic® controller application or via the printer operator panel in the Administrator menu.
Set processing
The Océ TDS700 supports set processing. This means that a job can consist of several files or originals. You can print or scan these files or originals multiple times and in sorted sets. The Océ TDS700 is equipped with a set memory for storing up to 250 A0s which allows for the creation of identical sets that are sorted either by page or by set.
Print and copy jobs
A print and copy job is a job sent to the Océ TDS700 printer from a user application (print job) or from the scanner (copy job). A print or copy job can consist of several sets, which in turn may consist of several pages. Sorting of a job can take place based on sets or on pages.
Spool memory
The Océ TDS700 has a spool memory which provides a queuing system for files you want to print. The spool memory allows multiple users to send print jobs to the Océ TDS700 simultaneously. The print jobs are then placed in the Scheduled jobs of the Océ TDS700 Power Logic® controller application where they will be printed. The job that is put first into the list of Scheduled jobs is printed first.
Job recovery
The Océ TDS700 is equipped with a job recovery function that safeguards users against data loss in case of a printer failure. After a restart, the data submitted to the printer before the crash will be automatically processed and printed. This means that jobs do not have to be re-submitted after a printer malfunction, thus saving valuable time for the users.
User interaction
Introduction
The user can communicate with the Océ TDS700 from local locations and remote locations.
Operator panels
The Océ TDS700 offers the following user interfaces on the system.
■ A printer operator panel gives status information on the printer and allows you to manipulate the machine behaviour.
■ A scanner operator panel for the flexible scanner allows you to define the settings for copy and scan jobs but also allows you to set scanner settings.
■A scanner operator panel for the productive scanner allows you to define the settings for copy and scan jobs but also allows you to set scanner settings.
Integrated Océ TDS700 Power Logic® controller application
The Océ TDS700 Power Logic ^® controller application supports a centralised workflow. Only one application with a transparent and intuitive layout where you can perform many tasks based on user role defined access. Separate work spaces give you a full overview and full control on print and scan job management, but also allows you to manage your scanner templates, system preferences and network connectivity settings. You can also monitor the status of your system in this application.
Océ TDS700 Power Logic controller Remote
Océ TDS700 Power Logic controller Remote enables you to access the integrated Océ TDS700 Power Logic® controller application from any networked workstation.
Printer drivers
With the Océ TDS700 a number of printer drivers can be used, including a Windows ^® raster driver, AutoCAD ^® HDI driver and a PostScript ^® driver. With these drivers users in remote locations can print their files directly from their applications to the Océ TDS700. More information about installing, configuring and using drivers can be found in the documentation provided with the drivers. All Océ drivers (PostScript ^® driver not included) can be freely downloaded from the internet at www.oce.com.
Océ Print Exec® Workgroup Basic
Océ Print Exec ^® Workgroup Basic is software that allows you to create and send a set of files to any Océ TDS printer. You can send the settings for these jobs from your workstation, using your web browser or from your Microsoft Windows ^® environment.
Océ Repro Desk®
Océ Repro Desk is a print management solution for the reprographer and their clients.
FTP
The Océ TDS700 supports printing via FTP. You can print files via FTP from a command line prompt, an FTP application, or from an Internet browser.
The following Internet browsers support drag and drop of files
■Netscape ^® Navigator 4.x. Drag the job into the jobs folder on the FTP site of your Océ TDS700. The jobs will appear in the Scheduled jobs area in the Print jobs workspace.
The following internet browsers support copy and paste of files.
■Netscape ^® Navigator 4.x.
■Microsoft ^® Internet Explorer 5.5. Paste the jobs into the jobs folder on the FTP site of your Océ TDS700. The jobs will appear in the Scheduled jobs area in the Print jobs workspace.
The Océ TDS700 users
Introduction
The Océ TDS700 will be used by various users within your company or department. Depending on the tasks that you need to perform on the Océ TDS700 you may need certain access rights to the Océ TDS700 and the Océ TDS700 Power Logic® controller. The access rights are appointed by your company. Please contact the person responsible for the system to find out what rights and user role you need to work with the Océ TDS700. With the appointment of the user roles and the dedicated workspaces you can fully customise the system to fit with your workflow. You can configure the system for example as a centralised or a de-centralised printroom or you can configure a workflow for walk-up users.
On the Océ TDS700 the following user roles can be identified.
Overview of user rights per workspace in the Océ TDS700 Power Logic® controller
The table below indicates if the users have read rights or only view rights in the 5 main workspaces.
■X: indicates that the user has full rights in this workspace
■ 0: indicates that the user is only allowed to view the information in the workspace
■ 1: indicates that the user can switch scanner templates from the template library to the scanner operator panel.
■ ^2 : indicates that the user is allowed to lock or unlock scan destinations.
| Workspace —> 'PrintUser role | 'Printjobs' | 'Scanjobs' | Scanner'Templates' | 'Preferences' 'Configuratio n' |
| 'Anonymous' X X 0 | 0 0 | |||
| Repro operator X X | 0 | 1 | 0 | |
| Key operator X X | 2 | X | X | |
| System administrator | X | 0 | 0 | 0 |
'Anonymous' user
The 'Anonymous' user is a common user who uses the Océ TDS700 for print jobs, and possibly for walk-up copy or scan jobs. The common or walk-up user has no permission to change the system settings.
In the integrated Power Logic ^® controller application, the anonymous user can delete his or her own print jobs in the 'Print jobs' workspace and the scan-to-file jobs in the 'Scan jobs' workspace.

Note: You do not have to logon to the Océ TDS700 Power Logic® controller application when you are an 'Anonymous' user.
Repro operator
The repro operator is responsible for the daily use of the Océ TDS700 in a central repro department. This person makes prints, copies and scans on the system and is responsible for replacing media and toner, making sure the right media is loaded for jobs, separating jobs for delivery, finishing as required. A repro operator also takes care of the production of priority jobs (printing or copying).
In the integrated Power Logic ^® controller application, the repro operator has no permission in the 'Preferences' and 'Configuration' workspaces, limited permission in the 'Templates' workspace and full permission in the 'Print jobs' and 'Scan jobs' workspaces.
Key operator
The key operator is responsible for the ongoing management of the system and the availability of the system for all users. In a large organisation he or she will be responsible for the smooth production of documents and scanned files from external departments. The key operator will also have to ensure that the staff of the internal department are able to perform their tasks swiftly and efficiently.
In the integrated Power Logic ^® controller application, the key operator has full permission in all workspaces ('Print jobs', 'Scan jobs', 'Templates', 'Preferences') except the 'Configuration' workspace, which is the responsibility of the system administrator.
System administrator
The system administrator is responsible for the installation and configuration of the Océ TDS700 in its environment. This person defines the security settings, manages licenses, printer language settings and pen settings. The system administrator can also provide assistance to normal users who need to install the printer drivers on their workstations.
In the integrated Power Logic ^® controller application, the system administrator has exclusive permission in the 'Configuration' workspace.
Océ Service
Dedicated user mode for service purposes.
Get to know the Océ TDS700
The Océ TDS700
The configuration of the Océ TDS700
The Océ TDS700 is a wide format, black and white, mid volume multifunctional printing system. The Océ TDS700 is available as a printer only configuration and as a combination with a flexible colour scanner, or a productive black and white scanner. The Océ TDS700 offers a broad range of print, copy, and scan-to-file functionality. The system is available in a number of printer configurations, ranging from two rolls in a single drawer (the minimum configuration) to a maximum of six rolls (with one sheet feeder) and three sheet feeders (with four rolls). The Océ TDS700 can also be combined with various finishing options such as a folder, the Océ Double Decker Pro and a reinforcement unit. The Océ TDS700 can be adapted to the fit in just the way you want it.
The illustrations below show the 2 main configurations with the optional folder and a copy delivery tray.
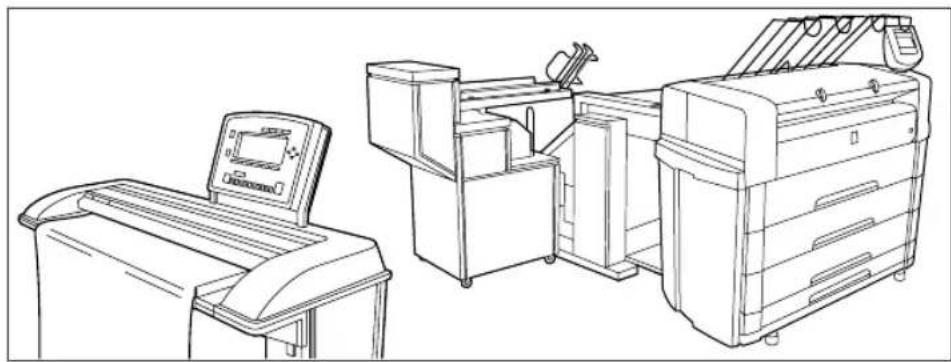
natural_image
Line drawing of a printing machine with control panel and paper feeders (no text or symbols)[2] The Océ TDS700 system in combination with the productive scanner
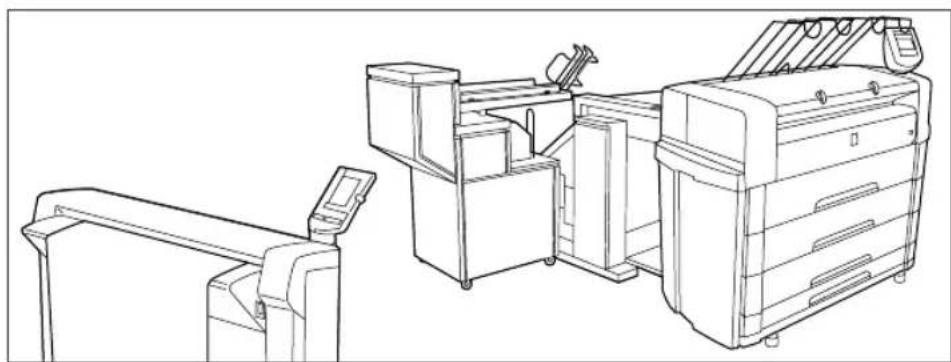
natural_image
Line drawing of an industrial printing machine with control panel and conveyor (no text or symbols)[3] The Océ TDS700 system in combination with the flexible scanner
The Océ TDS700 components
Introduction
The Océ TDS700 is available as a digital network printer, a printer and scanner or as a full combination which can print, copy or scan-to-file and finish the output. The Océ TDS700 consists of the following components.

Note: You can combine the printer with 1 scanner at a time
| Number Component | |
| 1 | P r i n t e r |
| 2 Flexible colour scanner | |
| 3 Productive black and white scanner | |
| 4 Océ TDS700 Power Logic ® controller | |
These components, in combination with your network, Print Exec ^® Workgroup Basic, Print Exec ^® Pro, Repro Desk ^® , Print Exec ^® Department and one or more drivers (Windows ^® driver, AutoCAD ^® HDI or PostScript ^® ), allow you to use the Océ TDS700 as your default enterprise print and copy solution. See the Océ Connectivity Manual for more details about making networking settings on the Océ TDS700 printer. You find more information about installing, configuring and using drivers in the documentation provided with the drivers.

Note: All Océ drivers for the Océ TDS700 (except PostScript ^® 3) can be downloaded free of charge from the internet at www.oce.com.
The Océ TDS700 printer

natural_image
Line drawing of a printer with multiple spools and a top handle (no text or symbols)[4] printer with 3 drawer configuration with one sheet feeder
The Océ TDS700 printer incorporates two rolls in a single drawer (the minimum configuration) and offers a maximum of six rolls with one sheet feeder and four rolls with three sheet feeders. The printer delivers your jobs on the integrated receiving tray, on top of the printer.
You can buy the following optional devices.
■a roll loader
■a copy delivery tray
■ a folder to fold the output (first fold, second fold)
■ a reinforcement unit to add a reinforcement strip to the folded output
■a belt unit
■a paper switch
■an Océ Double Decker (Pro)
The Océ TDS700 flexible scanner

natural_image
Line drawing of a mechanical device with no visible text or symbols[5] flexible scanner
Use the Océ TDS700 flexible scanner to make copy or scan-to-file jobs, in colour, greyscales or black and white. The optional original delivery tray enables you to stack your originals behind the scanner.
You can buy the original delivery tray as an optional device.
The Océ TDS700 productive scanner

natural_image
Line drawing of a vintage typewriter with control panel (no text or symbols)[6] productive scanner
Use the Océ TDS700 productive scanner to make copies or with Océ Scan Logic ^® , to scan-to-file. The optional original delivery tray enables you to stack your originals behind the scanner.
You can buy the original delivery tray as an optional device.
The Océ TDS700 Power Logic® controller
The Océ TDS700 is equipped with a Océ TDS700 Power Logic® controller which helps you to make optimum use of your system. In a standard configuration, the controller is located inside the printer. You can access the controller by opening the side cover on the left flank of the printer. The controller is placed on a stand that you can turn to the left to create a better access to the controller. To be able to turn the stand in its outward position, loosen the screw below the controller stand a little. You can buy an optional monitor, mouse, keyboard and controller console. On the Océ Power Logic® controller an integrated application runs which allows you to control control your entire workflow.
User role defined access allows you to log on to the following workspaces.
■ 'Print jobs'. In this workspace you manage the following areas: 'Scheduled jobs', 'Waiting jobs' and 'Printed jobs'.
■ 'Scan jobs'. In this workspace you can manage your scan-to-file jobs and scan job destinations on the controller and on the network.
- Scanner 'Templates'. In this workspace you customise and maintain the copy and scan templates that are visible on the scanner operator panel of the scanner. This workspace also gives access to the optional Stamping feature.
■ 'Preferences'. In this workspace you have a transparent overview of all the system defaults of the printer, scanner and controller.
- 'Configuration'. In this workspace you manage all settings related to network connectivity, security, PDL management and pen settings.
■ The system control bar is always visible in the application and provides you with status information about the printer, scanner and controller. It monitors the set memory to display the available storage space on the controller and it gives an overview of the loaded media types and sizes.
Additional software
■Océ View Station LT ®
■Océ Print Exec ® Workgroup Basic
Optional software
You can order the following optional features for the Océ TDS700 Power Logic® controller.
■Account Logging. Account Logging is for accounting purposes, the Océ TDS700 Power Logic® controller is able to keep track of all your jobs. For each job the job information and the paper usage is stored.
■Océ Matrix Logic ^ allows you to create, in one single operation, different copy sets from one set of scanned originals using pre-defined settings.
■Stamping allows you to print a predefined text on all your copies.
Turn on and off the Océ TDS700
Introduction
You can separately turn on and off the Océ TDS700 printer and the Océ TDS700 scanner. The Océ TDS700 Power Logic® controller is incorporated in the printer and is switched on and off separately from the printer. You do not have to use a specific order in which you turn on and off the Océ TDS700 printer and scanner.
[6] Power On / off options
| Part Description | |
| Productive scanner / flexible scanner | Use the On / off switch at the front underneath the original feed table on the productive scanner to turn on and off the scanner.Use the On / Off switch at the front underneath the original feed table on the flexible scanner to turn on and off the scanner. |
| Printer Use the | On /off switch at the rear of the printer to turn on and off power to the printer. When you are facing the front side of the printer, the power switch is located at the left hand side at the rear of the printer. Note: With this switch you also turn on and off the power for the climate control function of the printer (see ‘Climate control on the Océ TDS700’ on page 41). Keep the power turned on to be able to use the Climate control function. Configure the Sleep mode setting in the Power logic controller application to ensure minimal power consumption when the system switches to sleep mode. Note: With this switch you also turn on and off the power for the climate control function of the printer (see ‘Climate control on the Océ TDS700’ on page 41). Keep the power turned on to be able to use the Climate control function. Configure the Sleep mode setting in the Power logic controller application to ensure minimal power consumption when the system switches to sleep mode. |
| Océ TDS700 Power Logic® controller | Use the On / off key at the front of the printer to turn on and off the controller that is located inside the printer.When the controller is on:Press the key only once and wait 30-60 seconds. The green LED of the key turns off to indicate that the controller is turned off. Keep the key pressed for 4 seconds to immediately turn off the controller.When the controller is off:Press the key only once ot start up the controller. The green LED is turned on when you press the key.You can also shut down the controller in the Océ TDS700 Power Logic® controller application. Access the System menu in the top toolbar to do so. Note: Use the power key at the front of the controller when the controller is not placed in the printer but in a separate console. Note: Use the power key at the front of the controller when the controller is not placed in the printer but in a separate console. |
Illustration

natural_image
Line drawing of a mechanical device with a close-up inset showing a button and control panel (no text or symbols)[7] On / off switch at the rear of the printer
Turn on and off the printer
- Set the On / off switch at the rear of the printer to position '1'. The green LED turns on. The message Ready to print appears on the printer operator panel.

Note: You must separately switch on the controller that is located inside the printer.
- Set the On / off switch at the rear of the printer to position '0'. This action only turns off the printer.

Note: Before you turn off the printer, make sure that the printer is not printing a job.
Illustration

natural_image
Line drawing of a printer with a circular inset showing a button (no text or symbols)[8] On / off button on the incorporated Océ TDS700 Power Logic® controller
Turn on and off the controller
- The printer can be in standby mode, in sleep mode or it can be turned off completely. Press the On / off key at the front of the printer to turn on the controller inside the printer. The green LED turns on.

Note: This action only turns on the controller. Separately from this action, you can turn on the printer and scanner.
- Press the On / off key at the front of the printer to turn off the controller inside the printer. The green LED turns off 30-60 seconds after you have pressed the key.
Illustration

natural_image
Line drawing of a mechanical component with no visible text or symbols[9] On / off switch on the flexible scanner
Turn on and off the flexible scanner
-
Set the On / off switch to position '1'. The green LED turns on. The message Ready to scan' appears.
-
Set the On / off switch to position '0'.
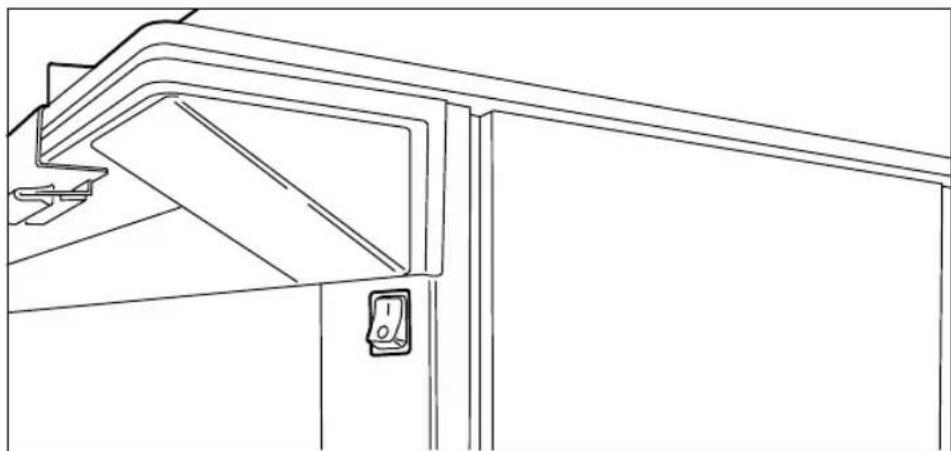
Illustration
natural_image
Line drawing of a door frame with a handle and lock, no text or symbols present[10] On / off switch on the productive scanner
Turn on and off the productive scanner
-
Set the On / off switch at the front of the scanner to position '1'. The green LED turns on. The message Ready to scan' appears.
-
Set the On / off switch at the front of the scanner to position '0'.
Climate control on the Océ TDS700
Introduction
The Océ TDS700 gives the best print results when the printer is located in a room with air conditioning. This way, the temperature and humidity levels in the room can be kept at a level that guarantees optimal print results on the Océ TDS700. The quality of the prints on the Océ TDS700 can be negatively influenced by humidity in the environment and humidity of the media that the printer uses to print on.
For printers that are located in a room that has no climate control facilities or that is known to be humid from time to time, the Océ TDS700 can be furnished with an optional climate control function. The climate control function helps to keep the media rolls in the drawers dry. The climate control function is active when the printer is in sleep mode. The printer has a very low energy consumption in the sleep mode.

Attention: If you turn off the printer with the power switch located at the back of the printer, you also turn off the climate control function. Leave the printer switched on to be able to use the climate control function.
Climate control function
The climate control function monitors the humidity level with a sensor inside the printer. When this sensor registers a humidity level in the printer environment that is higher than 50 %, the climate control function is automatically activated inside the printer when the printer is in sleep mode. The temperature inside the drawers with the media rolls increases just enough to prevent the media inside the drawers from becoming humid. This way you can prevent the adverse effect of moisture in the media on the print quality.
The climate control function is a fully automatic system that does not need to be configured. The climate control function can only operate when the power to the printer remains switched on (see 'Turn on and off the Océ TDS700' on page 37).

Note: A media roll that already contains a lot of moisture cannot be dehydrated by the climate control function.

Note: Always make sure that you store the media rolls in a dry, cool and dark place, preferably in its original wrapping.
Chapter 2
Use the Océ TDS700 to print a job
Actions on the printer operator panel
The printer operator panel
Introduction
The printer operator panel consists of a number of keys and a graphical display. At the top of the panel you will find an attention light which starts flashing when operator intervention is required. If enabled you will also hear a buzzer to alert you in case operator intervention is needed.

[11] Printer operator panel
The display
The graphical (LCD) display offers feedback about the current printer status. It provides you with the following information.
■ Status information (e.g. ‘Preparing for run’ or ‘Ready to print’). During normal operation the following message types may appear:
-Status/action message: indicates the actual status of the printer plus the action to be taken, e.g. 'Roll empty. Feed A2, plain paper'.
-Warning message: during a warning message the printer will continue to operate, but it is possible that the print quality is not optimal, e.g. 'Fill TDS700 toner'.
-A graphical overview of available rolls and sheet feeders, including the material type and size used by each roll or sheet feeder.
■ A symbol indicating the paper orientation (for sheet feeders only).
■ An indication that a particular roll or sheet feeder is empty (if applicable). An empty roll is represented by a dotted roll symbol. An empty sheet feeder is displayed as an empty paper tray.
In the event of an error, a graphical representation of any error location (cover or panel), together with instructions on how to solve the problem is displayed.
The counter
On the operator panel of the Océ TDS700 printer a counter will be displayed that gives the user feedback about the progress of the job that is currently being printed. The counter, which is located at the bottom of the upper window on the operator panel, displays the number of sets and/or pages printed. Counting starts at 1.
The following options are available.
- When no sets are made, only the current page and the total number of pages are displayed (e.g. ‘Page 3 of 5’). At the beginning of a job, when the system does not know the total number of pages yet, only the current page may be displayed (e.g. ‘Page 5’).
- With set input: set counter. In this case the counter shows the current, the total number of sets and the current page (e.g. ‘Set 3 of 5, Page 10’). At the beginning of a job, when the system does not know the total number of sets yet, only the current set and page may be displayed (e.g. ‘Set 2, Page 5’).
- With set input: multiple sheet counter. In this case the counter shows the current page, the total number of pages and the current copy, e.g. ‘Page 2 of 12, Copy 5’). At the beginning of a job, when the system does not know the total number of pages yet, only the current page and copy may be displayed (e.g. ‘Page 2, Copy 5’).
The keys
With the keys on the operator panel you can make a number of settings for the Océ TDS700 printer, such as the media type and size or the preferred language.
The following keys are available.
| Nr Key types Function | ||
| 1 | K e operator key | yThis key gives access to a number of printer related options.■Demo print■Print settings■Administrator only■Service only |
| 2 Up | / Down key | This key situated to the right of the graphical display is used to display the next or previous option from the selected menu choice and to select the desired option. Use the top key to move in upward direction through a list. Use the lower key to move down a list. |
3 Stop key The red stop key is used to stop the present print job. After this key is pressed, a dialogue will be displayed asking for confirmation. Note: The printing process does not stop immediately since a number of prints may already have been submitted to the printer after processing. The prints cannot be stopped. Note: The printing process does not stop immediately since a number of prints may already have been submitted to the printer after processing. The prints cannot be stopped. | ||
| 4+5 Selection keys | The selection keys are located immediately below the graphical display.■ The left key can be used to activate one of the main menu choices (Language, Folding or Media) on the left part of the display.■The right selection key can be used to activate the options on the right part of the graphical display. Note: A shadow highlighting effect is used to indicate the active menu option.[BTA7] Note: To identify the active selection, the dotted line around this selection is changed into an uninterrupted line and the small selection triangles next to the specified option are no longer dimmed. These selection triangles indicate that you can select an option from a pre-defined list with the help of the Up / down key. Note: A shadow highlighting effect is used to indicate the active menu option.[BTA7] Note: To identify the active selection, the dotted line around this selection is changed into an uninterrupted line and the small selection triangles next to the specified option are no longer dimmed. These selection triangles indicate that you can select an option from a pre-defined list with the help of the Up / down key. | |
| 6 | On-line key | Use the on-line key to put the printer on-line or off-line. If the green light above the on-line key is on, the printer is on-line; if this light is off, the printer is off-line. |
Printer operator panel actions
On the Océ TDS700 printer operator panel you can perform a limited number of actions in the off-line menu. The tables below display the settings.
Off-line menu options
[8] Off-line menu
| Menu Secondary menu(s) | Description | |
| Language List of 2 languages | You can toggle between | the 2 main language on the printer operator panel. |
| Off-line folding (optional) | Input■Method■Legend | All the settings except the Special setting are job settings that can be set for an individual off-line folding job. The default values for these settings are set by the key operator in the Océ TDS700 Power Logic® controller application. |
| Binding■Binding■ReinforceBinding■Edge■on /off | ||
| Package■Width■Length | ||
| Special■Knife | ||
| Media Roll | ■Type■Material■Size | You can use the Media menu to define the contents of the media drawer(s) and / or sheet feeder(s) and the manual feeder. |
| Manual■Type■Material■Size | ||
| Sheets■Type■Material■Size |
Key operator settings
Use the key above the graphical display of the printer operator panel to access the following options. Make sure that the printer is put in off-line mode first.

Note: The settings you access via this key are not the same as the key operator settings in the Océ TDS700 Power Logic® controller application.
| Menu Secondary menu(s) | Description | |
| Demo print - Follow the instructions to | print a demo file. | |
| Print settings - Follow the instructions to | print a report of the system settings. | |
| Administrator only Network settings adapter Follow the instructions in the wizard to configure the network settings for the adapter. Restart the controller to implement the settings. | ||
Off-line settings
Select a language
Introduction
On the operator panel of the Océ TDS700 printer you can specify which language you want to use to display printer information, such as status and error messages. By default, you can choose between two languages defined in the Océ TDS700 Power Logic® controller application.
Select a language
-
Press the On-line key on the printer operator panel to put the printer off-line. The message Off-line is displayed in the status window.
-
Press the left selection key to shift the focus to the Language option. A shadow effect is used to indicate that the focus is set to this option.
-
Activate the Language option by pressing the right selection key. The dotted line around the current selection is changed into an uninterrupted line and the small selection triangles next to the specified language are no longer dimmed.
-
Use the Up / down keys to switch between the predefined languages.
-
The language specific elements on the display are immediately customized to reflect your language choice. Only the indicator for the language itself, is in the alternative language. This way you always know what your alternative language is.
-
Put the printer on-line again by pressing the on-line key. The printer now uses the selected language.
Off-line folding settings (optional)
Introduction
The default values for off-line folding are set in the Océ TDS700 Power Logic® controller application by the key operator. You can change these default values for an off-line folding job on the printer operator panel. The settings include defining the length and width of the folded package, enabling and defining the binding edge, selecting the input method and legend position and cleaning the reinforcement knife. After the folding job is completed the adjusted values return to their defaults.
Illustration
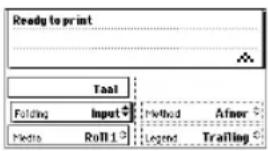
[12] Set off-line folding
Make off-line folding settings
- Press the on-line key on the printer operator panel to put the printer off-line. The message Off-line is displayed in the status window.
- Activate the Folding option by pressing the left selection key. The dotted line around the current selection is changed into an uninterrupted line and the small selection triangles next to the specified option are no longer dimmed.
- Use the Up / down keys to switch between the available options.
- Activate the Input option and press the right selection key to activate the Legend option.
- If necessary, change the value in the Legend field with the Up / down keys.
- Press the right selection key again to activate the Method option.
- If necessary, change the value in the Width field with the Up / down keys.
- Press the left selection key again and use the Up / down keys to select another option. This can be Package (with optional Length and Width), Binding (with optional Size and Binding), or Special (with optional Knife).
- Feed the original at the back of the folder on the input table to start the off-line folding job.
Result
When the job is completed the settings on the printer operator panel return to the default values set in the Océ TDS700 Power Logic® controller application.
Media type and size on the printer
Introduction
One of the features of the Océ TDS700 printer is the automatic media change function. This function allows the printer to switch to another roll of the same format and material when the roll or sheet feeder becomes empty during printing.
Since the Océ TDS700 printer cannot detect the loaded media type and format itself, you have to specify type and size after you (re)load media. The Océ TDS700 supports both DIN and ANSI media formats.
See (see ‘Available media types’ on page 406) for an overview of all materials that can be used on the Océ TDS700 printer.
Illustration

[13] Set the media type, material and size
Set media type
- Press the on-line key on the printer operator panel to put the printer off-line. The message Off-line is displayed in the status window.
The focus is shifted to the Media option (indicated by the shadow effect). - Use the Up / Down keys to select the roll or sheet feeder for which you have just loaded new media.
- Press the right selection key to activate the Type and the Mat. (Material) option. The dotted line around the current selection is changed into an uninterrupted line and the small selection triangles next to the specified material are no longer dimmed.
- Use the Up / down keys to select the type and the material you just loaded.
If you select 'Special' an exclamation mark will appear behind the media name to indicate this status. - Press the on-line key to put the printer on-line again. The printer now knows which material is used for the specified roll or sheet feeder.
Set media type for manual feed
- Press the on-line key on the printer operator panel to put the printer off-line. The message Off-line is displayed in the status window.
- Press the left selection key to shift the focus to the Media option. A shadow effect is used to indicate that the focus is set to this option.
- Use the Up / down keys to select the Manual option.
- Press the right selection key to activate the Mat. (Material) option. The dotted line around the current selection is changed into an uninterrupted line and the small selection triangles next to the specified material are no longer dimmed.
- Use the Up / down keys to select the material you just loaded.
- Press the on-line key to put the printer on-line again. The printer now knows which material is used by the manual feeder.
Set media size
- Press the on-line key on the printer operator panel to put the printer off-line. The message Off-line is displayed in the status window.
- Press the left selection key to shift the focus to the Media option. A shadow effect is used to indicate that the focus is set to this option.
- Use the Up / down keys to select the roll or sheet feeder for which you have just loaded new media.
- Press the right selection key to activate the Size option. The dotted line around the current selection is changed into an uninterrupted line and the small selection triangles next to the specified size are no longer dimmed.
- Use the Up / down keys to select the size for the media you just loaded. The printer shows both DIN and ANSI sizes. Select a size from the correct format.
- Press the on-line key to put the printer on-line again. The printer now knows which media size is used for the specified roll or sheet feeder.
Special media indication
Introduction
On the Océ TDS700 printer, you can attach a special indication (exclamation mark (!)) to a roll or sheet feeder which uses special media (for instance coloured paper). This indication is used to identify the roll or sheet feeder to the printer. For this roll or sheet feeder the automatic media change option is disabled.
Set a special media indication
- Press the on-line key on the printer operator panel to put the printer off-line. The message Off-line is displayed in the status window.
- Press the left selection key to shift the focus to the Media option. A shadow effect is used to indicate that the focus is set to this option.
- Use the Up / down keys to select the roll or sheet feeder for which you have just loaded special media.
- Press the right selection key to activate the Type option. The dotted line around the current selection is changed into an uninterrupted line and the small selection triangles next to the specified type are no longer dimmed.
- Use the Up / down keys to select the Special option for the specified roll or sheet feeder.
- Press the on-line key to put the printer on-line again. The printer now knows that the specified roll or sheet feeder contains special material.
Positioning the reinforcement knives (optional)
Introduction
Because the knives of the optional reinforcement unit of the folder get sticky from the glue on the reinforcement tape, they have to be cleaned regularly. You are recommended to clean the knives each time you have inserted a new tape roll or when an error in the reinforcement unit has occurred.
Before you can clean the reinforcement knives, you have to place them in such a position that all the parts that need to be cleaned are accessible. You can do this from the printer operator panel.

[14] Cleaning the reinforcement knife
Prepare the reinforcement knives for cleaning
- Press the On-line key on the printer operator panel to put the printer off-line. The message Off-line is displayed in the status window.
- Press the left selection key to shift the focus to the Folding menu. A shadow effect is used to indicate that the focus is set to this menu.
- Select the Special option from the Folding menu.
- Press the right selection key to activate the Knife option.
The illustration above displays the information on the panel display. - You can now continue to clean the reinforcement knives.
Stop a print job
Introduction
The red Stop key on the Océ TDS700 printer operator panel stops the active print process. You can cancel or continue the current print job.
Cancel a print job
- Press the Stop key. A dialogue is displayed informing you that you can press on-line to continue or stop to cancel the job.
- Press the Stop key again to cancel the current job.

Note: In general, the printer cannot be stopped immediately because the started prints have to be finished. Printing will be stopped at the end of the page.
Continue a print job
- Press the Stop key. A dialogue is displayed informing you that you can press on-line to continue or stop to cancel the job.
- Press the On-line key to continue the current print job.
Administrator settings
Make a demo print
Purpose
You can make a demo print to check the print quality of the printer.
Illustration
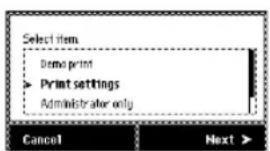
[15] Select the demo print option
How to make a demo print
- Press the On-line key to put the system in off-line mode.
- Press the key above the graphical display.
- Use the Up/down key to scroll through the list with options.
- Press the right selection key below the graphical display to go to the next step.
- Follow the instructions on the printer operator panel.
- When ready press the On-line key again to put the printer on-line again.
Result
The Océ TDS700 will print the demo print.
Print the system settings
When to do
If you want to have a printed overview of the system settings.
Illustration

[16] Select the Print settings option
How to print the settings
- Press the On-line key to put the system in off-line mode.
- Press the key above the graphical display.
- Use the Up/down key to scroll through the list with options.
- Press the right selection key below the graphical display to go to the next step.
- Follow the instructions on the printer operator panel.
- When ready press the On-line key again to put the printer on-line again.
Result
The Océ TDS700 will print a report with the system settings of the Océ TDS700.
Access the 'Administrator only' menu
Introduction
The 'Administrator only' menu is a password protected menu that gives you access to a number of additional settings.
Purpose
Change the settings accessible through the 'Administrator only' menu.
How to access the 'Administrator only' menu
- Press the On-line key to put the system in off-line mode. The green light above the key is off when the system is in off-line mode.
- Press the key above the graphical display. A message appears on the printer operator panel.

-
Press the right selection key below the graphical display to go to the next step.
-
Use the Up/down key to scroll through the list with menu options.

-
Select the 'Administrator only' menu option.
-
Press the right selection key below the graphical display to go to the next step.
-
If the password is enabled, you need to enter the password before you can continue.
Result
The printer operator panel displays a list with the 'Administrator only' settings. Use the Up/down key to scroll through the list.

[19] List with Administrator only items (1)

[20] List with Administrator only items (2)
Configure the network settings
Introduction
The Océ TDS700 needs to be configured in the network for example in order to receive print jobs and store scan-to-file jobs. The network settings of the adapter can be configured in the Océ TDS700 Power Logic® controller application, but it is also possible to configure or update the network settings on the printer operator panel. The network settings can be set or changed with the configuration wizard in the Administrator only menu.
Before you begin
Access the Administrator only menu (see ‘Access the 'Administrator only' menu' on page 59)
Illustration

[21] Select the adapter
How to configure the network settings of the adapter
- Press the right selection key below the graphical display to go to the next step.

- Use the Up/down key at the right hand side of the operator panel to view the network settings.
- Press Edit to change the network settings. Follow the instructions in the wizard.

Note: You can configure the settings manually or you can use DHCP to automatically configure the settings.

- Configure the IP address, Subnet mask, Default gateway, DNS, primary and secondary WINS.
Use the Up/down key to enter the numbers.
Use Next to move to the next box or screen.
Press Back to correct or undo a change or to leave the configuration wizard.

- At the end of the configuration wizard you can view the new network settings.
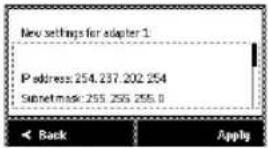
Result
When you are ready the following message is displayed. Follow the instructions to implement the changes (see figure 8). Changes made on the operator panel are also visible in the 'Configuration' workspace of the Océ TDS700 Power Logic® controller application.

Activate the password
When to do
You can activate the password to protect the 'Administrator only' menu against unauthorised use. By default the password is not active.
Before you begin
Access the Administrator only menu (see 'Access the 'Administrator only' menu' on page 59)

Note: It is not possible to choose a password yourself because the password is fixed.
Illustration

[27] Activate/deactivate the password
Activate the password
- Use the Up/Down key to select the 'Activate password' option from the list.
- Press next to continue.

-
Press Ok to confirm.
-
Press the On-line key to return the printer to the on-line status.

Note: To deactivate the password after you have activated it, repeat the procedure described above. As an extra step you must use the Up/Down key to enter the password. When the password is activated, you must choose the Deactivate password option as an item in the menu list.
Result
The next time you access the 'Administrator only' menu you will be asked to enter the password. Use the Up/down key in the following sequence: up, down, down, up, down. Also see the illustration above.
Activate the buzzer
Purpose
You can activate or deactivate a sound signal on the printer. The sound signal alerts the key operator when the printer needs operator intervention.
Before you begin
Access the Administrator only menu (see 'Access the 'Administrator only' menu' on page 59)
Illustration

[29] Activate/deactivate the buzzer
Activate the buzzer
- Use the Up/down key at the right hand side of the operator panel to scroll through the items in the list and to select hte 'Activate buzzer' menu option.
- Press Next to activate the buzzer.
- Press Ok to confirm.
- Press the On-line key to return the printer to the on-line status.

Note: To deactivate the buzzer, repeat the procedure described above. When the buzzer is activated, you must select the 'Deactivate buzzer' option as an item in the list.
Result
The printer will give a sound signal when operator intervention is needed, for example when the printer runs out of toner or media.
Clear the set memory
Purpose
You can clear the set memory in the Océ TDS700 Power Logic® controller application but it is also possible to clear the set memory directly on the printer operator panel.
When to do
When the system is blocked due to a corrupt job or when the set memory is full.
Before you begin
Access the Administrator only menu (see ‘Access the 'Administrator only' menu' on page 59)

Attention: Make sure there are no active print jobs because you must restart the controller after you have chosen to clear the set memory (see 'Turn on and off the controller' on page 39). Please take note that all the jobs will be cleared from the memory.
Illustration
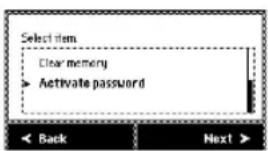
[30] Clear the set memory
Clear the set memory
- Use the Up/down key at the right hand side of the operator panel to scroll through the items in the list.
- Select the 'Clear memory' menu option.
- Press Next to clear the set memory.
- Press Ok to confirm.
- A message informs you that you must restart the controller.
Print job submission software
Introduction to the Océ printer drivers
Introduction
A printer driver is an easy to use tool to prepare a print job for printing. You can use the Océ Windows ^® printer drivers from any Windows application to print to your Océ printer. They translate the data into graphics languages and enable your printer to generate monochrome and colour outputs.
For the Océ TDS700 there is also an Océ PostScript ^® driver available.
Océ Windows® printer driver
The Océ Windows ^® printer driver (WPD) translates the data into HP-GL/2 (graphics language designed by Hewlett-Packard). It includes the Océ Ticket (specific Océ Job Ticket or RCF (Remote Control Format) header), a set of information sent to the printer on how, when and where to print the job.
Océ Windows® raster driver
The Océ Windows ^® raster driver (WRD) converts your document into HP-RTL data, the raster transfer language designed by Hewlett-Packard. It includes the Océ Ticket or an RCF (Remote Control Format) header added to the HP-RTL file in order to activate printer specific features.
Océ PostScript® driver
The Océ PostScript ^® driver converts your document into PDF data, the universal language designed by Adobe ^® .
The documentation set
| Application Available documentation | |
| Océ Windows® printer drivers | ■The Océ Windows ® printer driver user manual■On-line help files in the drivers. |
Use an Océ printer driver to send a print job
Before you begin
Make sure that you previously installed the driver and defined the default Device settings.

Note: Check that the printer measurements units are the same in the application and in the driver.
How to print a drawing on the Océ TDS700
- Create the document in your application.
- Select File - Page setup or File - Print setup.
- Select your printer.
- Define the document format for the selected printer by defining the Page size. In the Page size list you can select a standard Page size, or select a Custom size previously registered.
- Display the application preview if the function is available.

Note: The preview only takes into account the settings available in the application. It does not display the driver transformation settings ('Mirror', 'Rotation', 'Alignment', 'Shift'...).
- Select File - Print.
- Send the document directly for printing.
Instead, you can also open 'Properties' to access the printer settings. Then you can modify the driver settings, attach a user identification to the output using the accounting option, define the number of copies, set the layout and image quality before printing.
Introduction to Océ Print Exec® Workgroup Basic
Actions in Océ Print Exec® Workgroup Basic
Océ Print Exec ^® Workgroup Basic is a print job submission application which allows you to send print jobs to the Océ TDS700 through your web browser.
Océ Print Exec ^® Workgroup Basic allows you to do the following actions.
■ Select and collect the files to print (documents and drawings), in a print job
■Configure the print job
■Preview the files to print
■Submit the print job
■ Check the print job and the printer configuration status
Options in Océ Print Exec® Workgroup Basic
Océ Print Exec ^® Workgroup Basic has the following options.
| Application Options | |
| Océ Print Exec® Workgroup Basic | ■ View status information about the printer configuration and available media.■ View status information of submitted print jobs in the historic queue.■Set the document or drawing settings.■Set the job settings for a print job.■Add a settings template for a print job.■Add a maximum of 100 documents or drawings to a print job.■Add documents or drawings from the Océ Doc Exec ® archive.■Add a stamp to the document or drawing.■Add a banner to the print job.■Preview the document or drawing before you print.■Save and retrieve print jobs.■ Submit print jobs to 'Scheduled jobs' or the 'Waiting jobs' in the Océ TDS700 Power Logic® controller application.■Manage several print jobs. |
The documentation set
| Application Available documentation | |
| Océ Print Exec®Workgroup Basic | ■The Océ Print Exec ® Workgroup Basic user manual■On-line help files in the Océ Print Exec ® Workgroup Basic application |
Connect to Océ Print Exec® Workgroup Basic
Before you begin
Requirements for the browser software and network.
■Microsoft ^® Internet Explorer ^® 5.0 or higher versions, or
■Netscape Navigator ^® 6.0 or higher versions.
■ TCP/IP network which connects the printer and the end user workstation.
How to connect to Océ Print Exec® Workgroup Basic
- Check with Océ License Logic if Océ Print Exec ^® Workgroup Basic is enabled.
- Enter the following link URL in you browser: http://printer name. When you enter the URL for the first time, the required software is installed automatically at your workstation.
Use Océ Print Exec® Workgroup Basic to send a print job
Introduction
Océ Print Exec® Workgroup Basic is a print job submission application that allows you to send print jobs to the Océ TDS700 through your web browser. You do not need to make unnecessary trips to the printer, because you can preview your files, check the printer status and define your media choice remotely.

Note: For this application a separate Océ Print Exec® Workgroup Basic user manual is available.
When to do
Use Océ Print Exec ^® Workgroup Basic to perform the actions described below.
- Select and collect the files to print (documents and drawings), in a print job. You can add a maximum of 100 documents or drawings to a print job.
- Configure the print job.
You can set the document or drawing settings and the print job settings. You can add a banner to the print job and add a settings configuration for a print job. - Submit the print jobs to the 'Scheduled jobs' or the 'Waiting jobs' in the Océ TDS700 Power Logic® controller application.
- Check the print job and the printer configuration status.
You can view the status information of the printer configuration and the available media.
How to create a job in Océ Print Exec® Workgroup Basic
- From the 'Composition' tab, enter the job name.
- Specify the number of copies you want to print. You must enter a number in this field. Default is one copy.
Note: The maximum number of copies at job level may vary when 'Banner' is selected and 'Collate' is off. The reason why is that the number of copies at job level multiplied by the number of copies at document level cannot exceed 999. - Define the job settings.


Note: To set the options 'Ignore documents headers' or 'Send to waiting jobs queue', go to the 'Preferences' menu.
How to submit a job in Océ Print Exec® Workgroup Basic
- From the 'Composition' tab, compose the job (define the job and user settings, add documents, apply templates, add stamps, banners).
- Click 'Print'.
Introduction to Océ Repro Desk®
Océ Repro Desk ^® is the preferred print management solution for reprographers.
The application consists of the following two parts.
■Océ Repro Desk ^® Remote software which facilitates the electronic submission of drawing files and print requests from the clients to their reprographers.
■Océ Repro Desk ^® Server which provides the reprographers with extensive print management and accounting functions to maximise the productivity of their print equipment assets.
The documentation set
The complete documentation set of Océ Repro Desk ^® includes the following parts.
| Application Available documentation | |
| Océ Repro Desk® | ■The Océ Repro Desk ® user manual■On-line help files in the Océ Repro Desk ® application |
Océ Print Exec® Department
Introduction
Océ Print Exec ^® Department is an integrated suite of applications to distribute, print and archive documents across the enterprise.
Océ Print Exec® Department products
Océ Print Exec ^® Department includes the following products.
■Océ Publisher Engineering
Océ Publisher Engineering is a job submission application that allows the composition, submission and tracking of jobs on queues defined on the Océ Print Exec® Department server, using predefined settings and rules (templates, banners, stamps, automatic queue selection, etc).
■Océ Publisher Printlet
Océ Publisher Printlet is a Windows-based driver that allows printing documents from any application to one of the queues defined on the Océ Print Exec® Department server.

Note: Visit Océ on the internet at www.oce.com for the latest information.
Print jobs on the Océ TDS700 Power Logic® controller application
Introduction
Introduction
The print jobs you send to the Océ TDS700 are first received on the controller. Depending on the workflow settings of the system, the print jobs are sent immediately to the printer or they are stored for further processing. Processing and managing the print jobs can be done in the Océ TDS700 Power Logic® controller application. A key operator has maximum control over the print jobs and copy jobs in the Print jobs workspace. The 3 areas in which the workspace is divided give a complete overview of the jobs that are ready to be printed, waiting to be sent to the scheduled print jobs, or already printed and temporarily stored for reprinting.
The next paragraphs give an overview of the main functions in the three work areas:
■'Scheduled jobs'
contains the print and copy jobs that do not need operator intervention
■'Waiting jobs'
contains the print jobs that are held for further processing or that have a lower priority.
■'Printed jobs'
contains the copy and print jobs that were printed on the Océ TDS700.

[31] Example of the 3 work areas
For more information about the Océ TDS700 Power Logic® controller and the other workspaces ('Scan jobs', 'Templates', 'Preferences' and 'Configuration'), please refer to the on-line help embedded in the application. You can also refer to the chapter in this manual that describes the main concepts of the Océ TDS700 Power Logic® controller application.
Job management in the 'Scheduled jobs'
Print a job in the 'Scheduled jobs'
Introduction
When a user sends a print job to the Océ TDS700, the job appears in the 'Print jobs' workspace. You can set the print job destination in the print job to determine if the job goes directly to the 'Scheduled jobs' or if the job goes to the 'Waiting jobs'.
Before you begin
Create a print job on a networked workstation and use the printer driver or the job submission software to send the job to the Océ TDS700. Make sure you have sufficient permissions when you log on to the Océ TDS700 Power Logic® controller application.
■'Anonymous' - permission
■Repro operator - permission
■Key operator - permission
■System administrator - permission

Note: It can occur that the workflow setting of the 'Scheduled jobs' sends all the jobs to the 'Waiting jobs'. This setting does not overrule the print job destination of the print job when it is set in the print job submission tool. In this case, you must find the print job in the 'Waiting jobs' and print the job from there to the 'Scheduled jobs'.
How to print a job in the 'Scheduled jobs'
- Click 'Print jobs' in the vertical icon toolbar on the left hand side of the screen.
- Find the job in the 'Scheduled jobs'.
The jobs in the 'Scheduled jobs' are printed in the same order in which they are shown.
Result
When the job turns active the Océ TDS700 starts the print process. Jobs that are active can no longer be modified. These jobs are displayed in bold and in a contrasting colour. It is still possible to delete or interrupt the job.
Move up the jobs in the 'Scheduled jobs'
Purpose
The Océ TDS700 prints the jobs in the order in which they are presented in the 'Scheduled jobs'. To rearrange the order of the jobs in the 'Scheduled jobs' use the button 'Move to top'.
Before you begin
Make sure you have sufficient permissions when you log on to the Océ TDS700 Power Logic® controller application.
■'Anonymous' - no permission, only viewing access
■Repro operator - permission, editing and other actions are allowed
■ Key operator - permission, editing and other actions are allowed
■ System administrator - no permission, only viewing access

Note: If the 'Copy priority' setting is active the print jobs always follow after the copy jobs in the 'Scheduled jobs'. If the destination of the print jobs is set to the 'Waiting jobs', all the jobs arrive in the 'Waiting jobs' instead of directly in the 'Scheduled jobs'.
How to move up the jobs in the 'Scheduled jobs'
- Click 'Print jobs' in the vertical icon toolbar on the left hand side of the screen.
- Select the job(s) that you want to move up in the 'Scheduled jobs'.
- Click 'Move to top' to move the jobs up in the list directly after the active job(s).
Result
The selected jobs will be moved to the top of the list, directly below the active job.
View the job properties of jobs in the 'Scheduled jobs'
Introduction
The 'Scheduled jobs' area contains print jobs and copy jobs. Print job properties are defined with the printer driver or the job submission software. Copy job properties are defined on the user interface panel of the Océ TDS700 scanner. As long as the jobs in the 'Scheduled jobs' are not active jobs (jobs ready to be printed), you can view the job properties.
Purpose
View the properties of a copy or print job in the 'Scheduled jobs'.
Before you begin
Make sure you have sufficient permissions when you log on to the Océ TDS700 Power Logic® controller application.
■'Anonymous' - no permission, only viewing access
■ Repro operator - permission, editing and other actions are allowed
■Key operator - permission, editing and other actions are allowed
■ System administrator - no permission, only viewing access
How to view job properties in the 'Scheduled jobs'
- Click 'Print jobs' in the vertical icon toolbar to access the 'Scheduled jobs'.
- Select the job you want to view. You can only view one job at a time.
- Click 'Properties' to access a secondary window where you can see the job properties.
- Click OK to close the window.
Delete a job in the 'Scheduled jobs'
Purpose
You decide to immediately stop and delete a print job that is in the 'Scheduled jobs'.
Before you begin
Make sure that you have sufficient permissions to perform the action in the 'Scheduled jobs'.
■'Anonymous' - no permission, only viewing access
■Repro operator - permission
■Key operator - permission
■ System administrator - no permission, only viewing access
How to remove a job in the 'Scheduled jobs'
- Click 'Print jobs' in the vertical icon toolbar to access the 'Scheduled jobs'.
- Select the job you want to delete.
- Press the 'Delete' button in the toolbar. This action deletes the selected print job immediately.
Result
The job is now removed from the 'Scheduled jobs'. In addition, the job is not present in the 'Printed jobs' either.

Note: If you delete a job in the 'Scheduled jobs' that was reprinted from the 'Printed jobs', this action will also remove the job in the 'Printed jobs'.
Hold a running job in the 'Scheduled jobs'
Introduction
The 'Scheduled jobs' offers an 'Interrupt' and 'Exit interrupt' function that you can use to stop a running job in favour of a high priority job. After the high priority job is completed you can resume the print job at the push of a button. The printer picks up where the job was stopped without loss of information.
Purpose
You need to print a high priority job immediately and cannot wait until the running print job is finished.
Before you begin
Make sure that you have sufficient permissions to perform the action in the 'Scheduled jobs'.
■'Anonymous' - no permission, only viewing access
■Repro operator - permission
■Key operator - permission
■ System administrator - no permission, only viewing access

Note: It is possible to interrupt a job on the printer operator panel of the Océ TDS700. This behaviour is not the same as interrupting a job in the 'Scheduled jobs'. If you interrupt a job on the printer with the red Stop key, you cancel the job instead of temporarily holding the job. You must create the cancelled job again, after the high priority job is completed.
How to interrupt a running job
- Click 'Print jobs' in the vertical icon toolbar on the left hand side of the screen.
- Click 'Interrupt' to stop the running job.
The job is stopped. The 'Interrupt' button in the toolbar is replaced by the 'Exit Interrupt' button. - Select the high priority job and press 'Move to top'.
- When the high priority job is finished click 'Exit Interrupt' to continue the printing of the interrupted job.
Give priority to a job in 'Scheduled jobs'
Introduction
The 'Scheduled jobs' contains all the jobs that are printed on the Océ TDS700 without operator interaction.
Purpose
Change the order in which the jobs are placed in the 'Scheduled jobs' area. The order in the 'Scheduled jobs' is the same as the order in which the jobs are printed. The job that is placed highest in the 'Scheduled jobs' area is printed first.
Before you begin
Make sure that you have sufficient permissions to perform the action in the 'Scheduled jobs'.
■'Anonymous' - no permission, only viewing access
■Repro operator - permission
■Key operator - permission
■ System administrator - no permission, only viewing access

Note: If 'Copy priority' is active, copy jobs are always printed before print jobs in the 'Scheduled jobs'. You can change the 'Copy priority' setting in the 'Preferences' workspace in the 'System defaults' tab.
How to give priority to a job in the 'Scheduled jobs'
- Click 'Print jobs' in the vertical icon toolbar to access the 'Scheduled jobs'.
- Select the job that needs to get priority over the other jobs.
- Click 'Move to top'.
Result
The job is moved up in the 'Scheduled jobs'. The selected job is placed directly after the running job(s).
Give priority to copy jobs over print jobs
Introduction
The tool bar of the 'Scheduled jobs' area allows you to configure the setting that defines the priority of copy jobs in the list with jobs to be printed. If enabled, this means that a print job only starts to print if there are no copy jobs in the 'Scheduled jobs' at that time.

Note: The 'Preferences' workspace also offers you the same function to give priority to copy jobs over print jobs in the 'Scheduled jobs'.
Purpose
The jobs in the 'Scheduled jobs' are re-arranged to separate the copy jobs from the print jobs. The copy jobs precede the print jobs in the 'Scheduled jobs'. The jobs are printed in the order in which they are present in the 'Scheduled jobs'.
Before you begin
Make sure that you have sufficient permissions to perform the action in the 'Preferences' workspace.
■'Anonymous' - no permission, only viewing access
■Repro operator - no permission, only viewing access
■Key operator - permission, editing is allowed
■ System administrator - no permission, only viewing access
How to give priority to copy jobs over print jobs
- Click 'Preferences' in the vertical icon toolbar on the left-hand side of the screen.
- Click 'System defaults' - 'Job management' - 'Copy priority'.
- Check if the 'Copy priority' to set to On.
Result
All jobs that appear in the 'Scheduled jobs' are sorted into print jobs and copy jobs. The copy jobs are placed before the print jobs in the 'Scheduled jobs'. Therefore, the copy jobs get priority over the print jobs.
Postpone a job in the 'Scheduled jobs'
Purpose
If you do not yet want to print a job that is in the 'Scheduled jobs' you can postpone the printing process. You move the job to the 'Waiting jobs'. In this area you can temporarily park jobs from the 'Scheduled jobs' until you want to print them.
Before you begin
Make sure that you have sufficient permissions to perform the action in the 'Scheduled jobs'.
■'Anonymous' - no permission, only viewing access
■Repro operator - permission
■Key operator - permission
■ System administrator - no permission, only viewing access
How to postpone jobs in the 'Scheduled jobs'
- Click 'Print jobs' in the vertical icon toolbar to access the 'Scheduled jobs'.
- Select the job you want to postpone for later use.
- Click 'to Waiting jobs' to remove the job from the 'Scheduled jobs' and move it to the 'Waiting jobs'.
Result
The job is now removed from the 'Scheduled jobs' and moved to the 'Waiting jobs'. There you can view or edit the job properties, delete the job or print the job to the 'Scheduled jobs' again at a suitable time.
Job management in the 'Waiting jobs'
View the job properties of jobs in the 'Waiting jobs'
Purpose
View the properties of a job in the 'Waiting jobs'.
Before you begin
Make sure you have sufficient permissions when you log on to the Océ TDS700 Power Logic ^® controller application.
■'Anonymous' - no permission, only viewing access
■ Repro operator - permission, editing and other actions are allowed
■Key operator - permission, editing and other actions are allowed
■ System administrator - no permission, only viewing access
How to view job properties in the 'Waiting jobs'
- Click 'Print jobs' in the vertical icon toolbar to access the 'Waiting jobs'.
- Select the job you want to view. You can only view one job at a time.
- Click 'Properties' to access a secondary window where you can see the job properties.
- Click OK to close the window again.
Print a job to the 'Scheduled jobs'
Purpose
As long as the job is in the 'Waiting jobs', the job is no printed. You need to send a job to the 'Scheduled jobs' in order to print the job on the Océ TDS700.
Before you begin
Make sure you have sufficient permissions when you log on to the Océ TDS700 Power Logic® controller application.
■'Anonymous' - no permission, only viewing access
■Repro operator - permission, editing and other actions are allowed
■ Key operator - permission, editing and other actions are allowed
■ System administrator - no permission, only viewing access
How to print a job to the 'Scheduled jobs'
- Click 'Print jobs' in the vertical icon toolbar to access the 'Waiting jobs'.
- Select the job(s) you want to print. You can select more than one job at a time.
- Click 'Print' to send the job(s) to the 'Scheduled jobs'.
Result
The jobs are now added at the bottom of the 'Scheduled jobs' list. If you send the jobs to the 'Scheduled jobs' one at a time, each job is added after the last job. If you select more than one job, the complete selection is added to the 'Scheduled jobs' in the same order as shown in the 'Waiting jobs' area.
Delete a job in the 'Waiting jobs'
Purpose
Clean up the 'Waiting jobs'.
Before you begin
Make sure you have sufficient permissions when you log on to the Océ TDS700 Power Logic® controller application.
■'Anonymous' - no permission, only viewing access
■ Repro operator - permission, editing and other actions are allowed
■Key operator - permission, editing and other actions are allowed
■ System administrator - no permission, only viewing access
How to delete a job in the 'Waiting jobs'
- Click 'Waiting jobs' in the vertical icon toolbar.
- Select the job you want to delete in the 'Waiting jobs'.
- Click 'Delete' in the toolbar of the 'Waiting jobs' to permanently delete the job.
Result
The job is now deleted. You can not recover this job. The delete action is irreversible.
Job management in the 'Printed jobs'
Re-print a job in the 'Printed jobs'
Introduction
You can re-print a job from the 'Printed jobs' without changing the job settings. You can also change the job settings before you reprint the job. This job is sent to 'Scheduled jobs' and will be printed on the Océ TDS700. The job disappears from the 'Printed jobs' when it arrives in the 'Scheduled jobs'. If the 'Printed jobs' destination is enabled the job goes to the 'Printed jobs' after the print process is completed.
Before you begin
Make sure you have sufficient permissions when you log on to the Océ TDS700 Power Logic ^® controller application.
■'Anonymous' - no permission, only viewing access
■Repro operator - permission, editing and other actions are allowed
■ Key operator - permission, editing and other actions are allowed
■ System administrator - no permission, only viewing access

Note: Use the functions in the 'Waiting jobs' toolbar or right-click when you have selected the job.
How to print a job from the 'Printed jobs'
- Click 'Print jobs' in the vertical icon toolbar to access the 'Printed jobs'.
- Select the job(s) you want to print. You can select more than one job at a time.
- Click 'Print' to send the job(s) to the 'Scheduled jobs'.
Keep in mind that the original job disappears from the 'Printed jobs' and is sent to the 'Scheduled jobs'.
Result
The selected jobs are now added at the bottom of the 'Scheduled jobs'. If you reprint the jobs to the 'Scheduled jobs' one at a time, each job is added after the last job. If you select more than one job, the complete selection is added to the 'Scheduled jobs' in the same order as shown in the 'Printed jobs'.
View the job properties of jobs in the 'Printed jobs'
Purpose
View the properties of a job in the 'Printed jobs'.
Before you begin
Make sure you have sufficient permissions when you log on to the Océ TDS700 Power Logic® controller application.
■'Anonymous' - no permission, only viewing access
■ Repro operator - permission, editing and other actions are allowed
■Key operator - permission, editing and other actions are allowed
■ System administrator - no permission, only viewing access

Note: Use the functions in the 'Waiting jobs' toolbar or right-click when you have selected the job.
How to view the job properties in the 'Printed jobs'
- Click 'Print jobs' in the vertical icon toolbar to access the 'Printed jobs'.
- Select the job you want to view. You can only view the properties of one job at a time.
- Click 'Properties' to access a secondary window where you can see the job properties.
- Click OK to close the window again.
Delete a job in the 'Printed jobs'
Introduction
The jobs that are printed leave the 'Scheduled jobs' area and are stored in the 'Printed jobs' area (if this area is enabled). If you do not use the jobs in the 'Printed jobs' you can wait until their job lifetime expires and the jobs are automatically deleted. You can also delete the jobs manually.
Purpose
Clean up the 'Printed jobs'.
Before you begin
Make sure you have sufficient permissions when you log on to the Océ TDS700 Power Logic® controller application.
■'Anonymous' - no permission, only viewing access
■Repro operator - permission, editing and other actions are allowed
■ Key operator - permission, editing and other actions are allowed
■ System administrator - no permission, only viewing access

Note: Use the functions in the 'Waiting jobs' toolbar or right-click when you have selected the job.
How to delete a job in the 'Printed jobs'
- Click 'Print jobs' in the vertical icon toolbar to access the 'Printed jobs'.
- Select the job you want to delete in the 'Printed jobs'.
- Click 'Delete' in the tool bar of the 'Waiting jobs' to permanently delete the job.
Result
The job is now deleted. You can not recover this job. The delete action is irreversible.
Disable the 'Printed jobs'
Purpose
You do not want to use the 'Printed jobs'. You do not want to re-print the jobs that are printed on the Océ TDS700.
Before you begin
Make sure you have sufficient permissions when you log on to the Océ TDS700 Power Logic® controller application.
■'Anonymous' - no permission, only viewing access
■Repro operator - no permission, only viewing access
■Key operator - permission, editing and other actions are allowed
■ System administrator - no permission, only viewing access
How to enable or disable the 'Printed jobs'
- Click 'Print jobs' in the vertical icon toolbar on the left hand side of the screen.
- Access the setting 'Enable printed jobs' in the top right-hand corner of the toolbar in the 'Waiting jobs'.
- Click Off to deny the printed jobs from the 'Scheduled jobs' access to the 'Printed jobs'.
- Click On to allow the printed jobs to be stored in the 'Printed jobs'.

Note: You can also access the 'Printed jobs' setting in the 'Preferences' workspace. To do so select the 'System defaults' tab, the 'Job management' settings group and 'Enable printed jobs'.
Chapter 3 Use the Océ TDS700 flexible scanner
This chapter describes how to use the flexible colour scanner. The behaviour of the flexible colour scanner is in some ways similar to the productive black and white scanner but there are also differences.
Introduction to copy jobs
Introduction
A basic copy job only takes two steps. Feed the original and press the start key. Every other type of copy job is called an extended copy job. An extended copy job takes one additional step, you define the copy job settings on the scanner operator panel. When you turn the Océ TDS700 on or when you select 'Copy', the scanner operator panel shows five copy job templates. The copy job templates provide access to the different settings per copy job template. When you select a copy job template, the scanner operator panel shows the top 5 settings of the selected copy job template. The top 5 settings are the most often used settings. You can define the top 5 settings for each copy job template with the Océ TDS700 Power Logic® controller application. You can use the scroll wheel to see the other settings. After you start a copy job, you can manage your jobs from the 'Print jobs' workspace in the Océ TDS700 Power Logic® controller application.

Note: When you select 'Scan-to-file' you have access to 5 pred-defined scan-to-file templates. Scan-to-file jobs can be managed in the 'Scan jobs' workspace.
Illustration

[32] The copy job templates
Steps in a basic copy job
- Feed the original.
- Press the green start key.
Result
You do a basic copy job in 2 steps. The basic copy job uses the settings of the first template.
Steps in an extended copy job
- Feed the original.
- Define the job settings.
Select the required template at the scanner operator panel and change the pre-defined settings only if necessary.
- Press the green start key.
Result
An extended copy job takes one additional action only.
Use the scanner operator panel
Introduction
Use the scanner operator panel to define the job settings. You can define the job settings in two ways.
■Use the left softkeys and the scroll wheel.
You can use this method if you prefer a general step by step method.
■Use the scroll wheel and scroll-wheel key only.
You can use this method if you prefer a fast method.
Note that the scanner operator panel also uses icons to explain a setting. The following illustration shows the scanner operator panel. For more information about the keys on the scanner operator panel (see ‘Flexible scanner’ on page 387)
Illustration

[33] The operator panel of the Océ TDS700 scanner
Define job settings with the left soft keys and the scroll wheel
- Select 'Copy' or 'Scan-to-file' with the upper-left softkey.
The five job templates appear. If you did not buy the templates, you will see a single default template.
- Select a job template with one of the left softkeys.
The top 5 settings appear.
- Find a setting with the scroll wheel.
A small rectangle in front of a setting name indicates the focus of the scroll wheel.
- Select a setting with the left softkey.
There are several types of settings. The behaviour of the scanner operator panel and the definition of a setting depends on the type of setting you selected. You can select one of the following types of settings.
■A setting that contains two values only, like 'On' or 'Off'.
When you select this setting while the setting was not in focus, the setting becomes in focus. When you select this setting while the setting was already in focus, the setting stays in focus and there are no changes.
Change the value of the setting with the left softkey. The value and icon changes.
■A setting that contains a list of values, like 'Lighter/darker'.
Define the required value with the scroll wheel. The value and icon changes.
■A setting that contains a list of settings, like 'Media'.
Define the required value with the scroll wheel. The value and icon changes.
Select the next setting of the list of settings with the left softkey.

Note: You can enter a numeric value with the numeric keys. To enter a negative numeric value, scroll to a negative value first and then enter the value with the numeric keys.
-
Select 'Close' with the lower-right softkey.
-
Repeat from step 4 to define the next setting.

Note: Use the 'Defaults' option at the lower-left key to set all settings of the job template to default.
Define job settings with the scroll wheel and scroll-wheel key only
- Select 'Copy' or 'Scan-to-file' with the upper-left softkey.
The five job templates appear.
- Focus on a job template with the scroll wheel.
A small diamond in front of a template indicates the focus of the scroll wheel.
- Select a job template with the scroll-wheel key.
The top 5 settings appear.
- Find a setting with the scroll wheel.
A small rectangle in front of a setting name indicates the focus of the scroll wheel.
- Select the setting with the scroll-wheel key.
There are several types of settings. The behaviour of the scanner operator panel and the definition of a setting depends on the type of setting you selected. You can select one of the following types of settings.
■A setting that contains two values only, like 'On' or 'Off'.
Change the value of the setting with the scroll-wheel key to change the value of the setting. The value and icon changes.
■ A setting that contains a list of values, like 'Lighter/darker'.
Open the setting with the scroll-wheel key.
Define the required value with the scroll wheel. The value and icon changes.
Close the setting with the scroll-wheel key.
■A setting that contains a list of settings, like 'Media'.
Focus on a setting with the scroll wheel. The bold text of a value indicates the focus of the scroll wheel. The icon changes.
Open the setting with the scroll-wheel key. The list of values appears.
Open the setting with the scroll-wheel key.
Define the required value with the scroll wheel. The value and icon changes.
Close the setting with the scroll-wheel key.

Note: You can enter a numeric value with the numeric keys. To enter a negative numeric value, scroll to a negative value first and then enter the value with the numeric keys.
-
Select 'Close' with the lower-scroll-wheel key.
-
Repeat from step 4 to define the next setting.

Note: Use the 'Defaults' option at the lower-left key to set all settings of the job template to default.
Basic copy jobs on the Océ TDS700 flexible scanner
Do a basic copy job
Introduction
The main steps of a basic copy job consists of the following steps.
■ Place your original face-down, right aligned along the original guide. Keep the legend at your right hand side.
■Press the green start key.
How to copy on the scanner
- Place the original face down and right aligned according to the illustration below. The scanner takes the original.

natural_image
Diagram of a printer or printer with a paper roll being inserted, showing motion arrows (no text or symbols present)[34] Place the original face down and right aligned
- Press the green start key.
The scanner operator panel shows the copy job number and the status of the copy job.

Note: You can copy faster when you feed the original in landscape direction.
Result
The scanner makes a copy. The copy is sent to the Océ TDS700 printer and will be printed immediately or stored in the 'Waiting jobs' workspace of the Océ TDS700 Power Logic® controller application.
Stop a copy job
Introduction
You can stop a copy job with the red stop key on the scanner operator panel.
How to stop a copy job
- Press the red stop key.

Note: This will not affect a set job.
Result
When you press the red stop key while the scanner scans, the scan process stops. The scanner rewinds the original and the copy job is cancelled.
When you press the red stop key while the scanner rewinds, the rewind process continues. The copy job is cancelled.
Extended copy jobs
Do an extended copy job
Introduction
The main steps of an extended copy job are described below.
■Feed the original.
■Define the job settings.
■Press the green start key.
Before you begin
If you must enter the same value for a setting very often, you can set this value as the default value for that setting in the 'Scan jobs' workspace in the Océ TDS700 Power Logic® controller application.
Using scan templates makes the process of defining job settings much easier, because you can set a group of pre-defined settings for frequent use.
After you press the start key, the scanner operator panel always shows the job number and status of the job. A copy job appears temporarily in the 'Scheduled jobs' of the Océ TDS700 Power Logic® controller application, a scan-to-file job appears in the selected destination of the 'Scan jobs'.
How to copy on the Océ TDS700
- Place your original face-down, right aligned along the original guide. Keep the legend at your right hand side. The scanner takes the original.

natural_image
Diagram of a printer or printer with a paper roll being inserted, showing motion arrows (no text or symbols present)[35] Place the original face down and right aligned
2. Define the job settings.

[36] The top 5 settings of a copy job template
■Select 'Copy' with the upper-left softkey.
The copy job templates appear.
■Open a copy job template with a left softkey.
The top 5 settings appear.
■Scroll to a setting.
■Select a setting with the left softkey.
■Scroll to the required value.
■Select the next setting with the left softkey.
■Scroll to the required value.
■Select 'Close' to close the setting.
- Define the number of copies if necessary and press the green start key.

Note: You can copy faster when you feed the original landscape, unless you must scale your original to another media size. In that case you must feed the original portrait.
Result
The Océ TDS700 makes a copy according to the defined settings.
Available settings for copy jobs
Introduction
The Océ TDS700 provides a lot of settings to manage all your different copy jobs. These settings are used for extended copy jobs. The following table gives an overview and a very short description of the available settings. This table is not complete, because a setting can contain more than one setting. You find a detailed description of each setting in the on-line help of the Océ TDS700 Power Logic® controller application. You can change the default value of a setting that you use very often in the scanner template in Templates workspace of the Océ TDS700 Power Logic® controller application.
Available settings for copy jobs
[14] The available settings for copy jobs, a setting can contain more than one setting. (1 - 3)
| Setting Function | |
'Original type' Define the type of original you use [37] 'Original type' (example) [37] 'Original type' (example) | |
'Scale' Scale an original [38] 'Scale' (example) [38] 'Scale' (example) | |
'Media' Define the type of media you use [39] 'Media' (example) [39] 'Media' (example) | |
'Lighter/darker' Make a lighter or darker copy [40] 'Lighter/darker' (example) [40] 'Lighter/darker' (example) |
[14] The available settings for copy jobs, a setting can contain more than one setting. (2 - 3)
| Setting Function | |
'Remove strip' Copy without strips [41] 'Remove strip' (example) [41] 'Remove strip' (example) | |
'Original width' Define the width of the original [42] 'Original width' (example) [42] 'Original width' (example) | |
'Delete area' Copy without a specific area [43] 'Delete area' (example) [43] 'Delete area' (example) | |
'Cut method' Define the cut method of the printer [44] 'Cut method' (example) [44] 'Cut method' (example) | |
'Add strip' Copy with a strip [45] 'Add strip' (example) [45] 'Add strip' (example) | |
'Alignment' Align the image of the copy [46] 'Alignment' (example) [46] 'Alignment' (example) | |
[14] The available settings for copy jobs, a setting can contain more than one setting. (3 - 3)
| Setting Function | |
'Shift' Shift the image of the copy [47] 'Shift' (example) [47] 'Shift' (example) | |
'Mirror' Mirror the image of the copy [48] 'Mirror' (example) [48] 'Mirror' (example) | |
| 'Drawing method' | Define the legend location |
'Stamp' Copy with a stamp [49] Stamp (example) [49] Stamp (example) | |
'Collate' Define how to collate the copies. [50] 'By set' (left) and 'By page' (example) [50] 'By set' (left) and 'By page' (example) | |
'Optimisation' Optimise the copy for speed or fine details [51] Scan quality mode (example)■'Fine details'■'Normal'■'Productive' [51] Scan quality mode (example)■'Fine details'■'Normal'■'Productive' | |
| Folding Optional setting to define the folding method | |
| Binding Optional setting to use a binding strip or a reinforcement strip |
Improve the copy quality according to the original
Introduction
You can improve the copy or scan quality even more for the following situations.
■You have an original from a special type.
The Océ TDS700 scanner makes sure that the copy or the scanned file has a sharp image. You can define the 'Original type' setting manually to improve the copy or scan quality according to the type of original you use.
■You have a dark or light original.
The Océ TDS700 scanner detects the brightness of the image on the original automatically and makes sure that the copy or the scanned file has a bright image. You can adjust the brightness manually with the 'Lighter/darker' setting to improve the copy or scan quality according to the type of original you use.
■You have an original with very fine details.
The Océ TDS700 scanner optimizes the image of the original automatically. You can optimise the image manually to sharpen the fine details with the Scan quality setting.
With the original type you identify what kind of original you want to copy or scan. The Océ TDS700 offers you a range of original types, one range for the colour mode 'Greyscale' and one range specific for the colour mode 'Colour'. If you select an original type, the Océ TDS700 optimises the print quality automatically for that particular type of input. The illustrations below explain on which aspects the original types are optimised and how they relate to each other in terms of optimisation manipulation.

bubble
| Category | Shape | Value | | ---------------- | ----------- | ----- | | Photo | Circle 1 | 1 | | Artwork | Circle 2 | 2 | | Map | Circle 3 | 3 | | Lines & Text | Circle 4 | 4 |[52] Original type characterisation for the colour mode: Colour
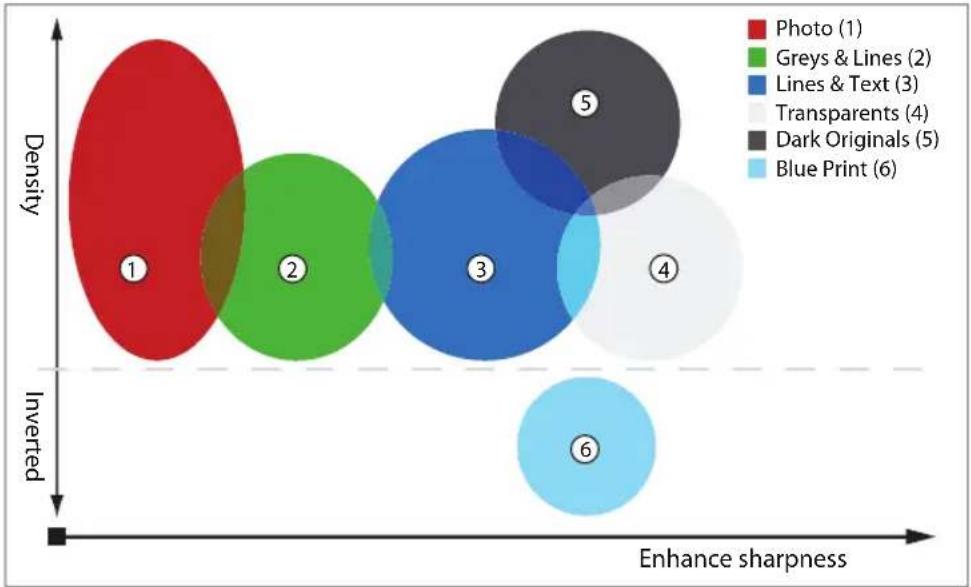
bubble
| Category | Shape | Value | | ------------------ | ------ | ----- | | Photo | Circle | 1 | | Greys & Lines | Circle | 2 | | Lines & Text | Circle | 3 | | Transparents | Circle | 4 | | Dark Originals | Circle | 5 | | Blue Print | Circle | 6 |[53] Original type characterisation for the colour mode: Greyscale
Before you begin
If you must enter the same value for a setting very often, you can set this value as the default value for that setting in the Océ TDS700 Power Logic® controller application.
After you press the start key, the scanner operator panel always shows the job number and status of the job. A copy job appears temporarily in the 'Scheduled jobs' in the Océ TDS700 Power Logic® controller application, a scan-to-file job appears in the selected destination of the 'Scan jobs' workspace.
How to improve the copy quality of originals from a special type
- Place the original face down and right aligned.
The scanner takes the original.
- Define the job settings.

[54] The 'Line Art' icon of the 'Original type' setting
■Select 'Copy' with the upper-left softkey.
The copy job templates appear.
■Open a copy job template with a left softkey.
The top 5 settings appear.
■ Scroll to 'Original type' and open this setting with the left softkey.
■Scroll to the original type you have.
- Define the number of copies if necessary and press the green start key.
Result
The copy quality was improved according to the original type.
How to improve the copy quality of dark and light originals
- Place the original face down and right aligned.
The scanner takes the original.
- Define the job settings.
[55] The 'Lighter/darker' icon
■Select 'Copy' with the upper-left softkey.
The copy job templates appear.
■Open a copy job template with a left softkey.
The top 5 settings appear.
■ Scroll to 'Lighter/darker' and open this setting with the left softkey.
■Adjust the required value.
A positive value lightens the copy, a negative value darkens the copy.
- Define the number of copies if necessary and press the green start key.
Result
The copy quality improved according to the brightness of the original.
How to improve the copy quality of an original with very fine details
- Place the original face down and right aligned.
The scanner takes the original.
- Define the job settings.

[56] The Fine details icon of the Scan quality setting
■Select 'Copy' with the upper-left softkey.
The copy job templates appear.
■Open a copy job template with a left softkey.
The top 5 settings appear.
■ Scroll to 'Optimisation' and open this setting with the left softkey.
■Scroll to the option 'Fine details'.
- Define the number of copies if necessary and press the green start key.
Result
The copy quality improved according to the fine details on the original.
Make multiple sets of copies
Introduction
You can use the 'Create set' option to make multiple sets of copies.
Before you begin
If you must enter the same value for a setting very often, you can set this value as the default value for that setting in the Océ TDS700 Power Logic® controller application.
After you press the start key, the scanner operator panel always shows the job number and status of the job. A copy job appears temporarily in the 'Scheduled jobs' in the Océ TDS700 Power Logic® controller application, a scan-to-file job appears in the selected destination of the 'Scan jobs' workspace.
Illustration

[57] The 'By set' (left) and 'By page' icon of the 'Collate' setting.
How to make multiple sets of copies sorted by set
- Feed the first original face down and right aligned.
The scanner takes the original.
- Define the job settings.
■Select 'Copy' with the upper-left softkey.
The copy job templates appear.
■Open a copy job template with a left softkey.
The 'Create set' option appears at the upper-right corner of the screen.
■Select 'Create set' with the upper-right softkey.
The 'Cancel set' option appears at the upper-left corner of the screen. The 'Close set' option appears at the upper-right corner of the screen.
- Scroll to 'Collate' and define 'By set' with the left softkey. This setting is disabled after you press the green start key for the first time.
- Scroll to another setting if necessary, select the setting with the left softkey and define the value with the scroll wheel.
■ Define the number of copies and press the green start key.
You can not change the number of copies after you press the green start key for the first time.
■ Feed the next original, define the enabled settings for this original if necessary and press the green start key.
Repeat this step until all originals are fed.
- Select 'Close set' with the upper-right softkey.
How to make multiple sets of copies sorted by page
-
Feed the first original face down and right aligned. The scanner takes the original.
-
Define the job settings.
■Select 'Copy' with the upper-left softkey. The copy job templates appear.
■Open a copy job template with a left softkey. The 'Create set' option appears at the upper-right corner of the screen.
- Select 'Create set' with the upper-right softkey. The 'Cancel set' option appears at the upper-left corner of the screen. The 'Close set' option appears at the upper-right corner of the screen.
- Scroll to 'Collate' and define 'By page' with the left softkey. This setting is disabled after you press the green start key for the first time.
- Scroll to another setting if necessary, select the setting with the left softkey and define the value with the scroll wheel.
■ Define the number of copies for the first original if necessary and press the green start key.
- Feed the next original, define the enabled settings and the number of copies for this original if necessary and press the green start key. Repeat this step until all originals are fed.
- Select 'Close set' with the upper-right softkey.
Result
The Océ TDS700 copies a set of originals sorted by set or by page.
Make a copy with a stamp
Introduction
A stamp is a pre-defined text you can set on every copy. The stamp function is an option. Use Océ License logic to enable this option. Use the Océ TDS700 Power Logic® controller application to define a maximum of 10 stamps and their default values.
Before you begin
If you must enter the same value for a setting very often, you can set this value as the default value for that setting in the Océ TDS700 Power Logic® controller application.
After you press the start key, the scanner operator panel always shows the job number and status of the job. A copy job appears temporarily in the 'Scheduled jobs' in the Océ TDS700 Power Logic® controller application, a scan-to-file job appears in the selected destination of the 'Scan jobs' workspace.
How to make a copy with a stamp
-
Place the original face down and right aligned. The scanner takes the original.
-
Define the job settings.

[58] The stamp icon
■Select 'Copy' with the upper-left softkey. The copy job templates appear.
■Open a copy job template with a left softkey. The top 5 settings appear.
■ Scroll to 'Stamp' and open this setting with the left softkey.
■Select a stamp with the scroll wheel.
■Select 'Position' with the left softkey. Select a position with the scroll wheel.
■Select 'Size' with the left softkey. Select a size with the scroll wheel.
■Select 'Colour' with the left softkey. Select a colour with the scroll wheel.
- Define the number of copies and press the green start key.
Result
The copy contains the selected stamp.
Scale to another media size
Introduction
You can use the 'Scale' setting to copy to a larger or smaller media format. Use one of the following methods to scale a copy.
■Select another media format with the 'To fit' setting.
■ Adjust a value in terms of percentage with the 'Custom' setting.
You can adjust a value between 25 and 400%. A value lower than 100% reduces the copy, a value greater than 100% enlarges the copy.
Before you begin
If you must enter the same value for a setting very often, you can set this value as the default value for that setting in the Océ TDS700 Power Logic ^® controller application.
After you press the start key, the scanner operator panel always shows the job number and status of the job. A copy job appears temporarily in the 'Scheduled jobs' in the Océ TDS700 Power Logic® controller application, a scan-to-file job appears in the selected destination of the 'Scan jobs' workspace.
How to copy to another media size
- Place the first original face down and right aligned. Make sure that you feed the original portrait.
The scanner takes the original.
- Define the job settings.

[59] Example of a 'Scale' icon
■Select 'Copy' with the upper-left softkey. The copy job templates appear.
■Open a copy job template with a left softkey. The top 5 settings appear.
- Scroll to 'Scale' and open this setting with the left softkey. The 'To fit' and the 'Custom' setting appear.
■ Define the media format at the 'To fit' setting with the scroll wheel.
- Define the number of copies and press the green start key.
Result
The Océ TDS700 copies to another media size.
Make a copy on a cut sheet
Introduction
You can copy on cut sheet media if the required media type or size is not available on the media rolls of the printer.
Before you begin
If you must enter the same value for a setting very often, you can set this value as the default value for that setting in the Océ TDS700 Power Logic ^® controller application.
After you press the start key, the scanner operator panel always shows the job number and status of the job. A copy job appears temporarily in the 'Scheduled jobs' in the Océ TDS700 Power Logic® controller application, a scan-to-file job appears in the selected destination of the 'Scan jobs' workspace.
How to copy on a cut sheet
- Place the original face down and right aligned.
The scanner takes the original.
- Define the job settings.
[60] Example of a 'Size' icon
■Select 'Copy' with the upper-left softkey.
The copy job templates appear.
■Open a copy job template with a left softkey.
The top 5 settings appears.
■Scroll to 'Media' and open this setting with the left softkey.
The 'Feed' setting appears.
■Define 'Manual' at the 'Feed' setting with the scroll wheel.
The settings 'Size' and 'Type' appear.
■ Select 'Size' with the left softkey and define the 'Size' with the scroll wheel.
■ Select 'Type' with the left softkey and define the 'Type' with the scroll wheel.
- Define the number of copies if necessary and press the green start key.
- Place the cut sheet media on the manual feed table of the printer.
Result
The Océ TDS700 copies on a cut sheet.
Make a copy and add a strip
Introduction
You can use a strip to file a drawing. Use 'Add strip' to copy an original without a strip and add a strip to the copy. Use 'Remove strip' to copy an original with a strip and remove the strip from the copy. You can adjust a strip at the leading or trailing side of a copy.
Before you begin
If you must enter the same value for a setting very often, you can set this value as the default value for that setting in the Océ TDS700 Power Logic® controller application.
After you press the start key, the scanner operator panel always shows the job number and status of the job. A copy job appears temporarily in the 'Scheduled jobs' in the Océ TDS700 Power Logic® controller application, a scan-to-file job appears in the selected destination of the 'Scan jobs' workspace.
How to make a copy and add a strip
-
Place the original face down and right aligned. The scanner takes the original.
-
Define the job settings.
■Select 'Copy' with the upper-left softkey. The copy job templates appear.
■Open a copy job template with a left softkey. The top 5 settings appears.
■ Scroll to 'Add strip' and open this setting with the left softkey.
■ Select 'Leading' or 'Trailing' with the left softkey and define the value with the scroll wheel or numeric keys.
 |  |
| The 'Leading' strip The 'Trailing' strip |
- Define the number of copies if necessary and press the green start key.

Note: To measure the size of a strip you can use the ruler available at the scanner (metric).
Result
The Océ TDS700 adds a trailing or leading strip from the copy.
Make a copy and remove a strip
Introduction
You can use a strip to file a drawing. Use 'Add strip' to copy an original without a strip and add a strip to the copy. Use 'Remove strip' to copy an original with a strip and remove the strip from the copy. You can adjust a strip at the leading or trailing side of a copy.
Before you begin
If you must enter the same value for a setting very often, you can set this value as the default value for that setting in the Océ TDS700 Power Logic® controller application.
After you press the start key, the scanner operator panel always shows the job number and status of the job. A copy job appears temporarily in the 'Scheduled jobs' in the Océ TDS700 Power Logic® controller application, a scan-to-file job appears in the selected destination of the 'Scan jobs' workspace.

Attention: When you remove a strip, make sure that you copied all the required information.
How to make a copy and remove a strip
- Place the original face down and right aligned.
The scanner takes the original.
- Define the job settings.
■Select 'Copy' with the upper-left softkey.
The copy job templates appear.
■Open a copy job template with a left softkey.
The top 5 settings appears.
■Scroll to 'Remove strip' and open this setting with the left softkey.
■ Select 'Leading' or 'Trailing' with the left softkey and define the value with the scroll wheel or numeric keys.
 |  |
| The 'Leading' strip The 'Trailing' strip |
- Define the number of copies if necessary and press the green start key.

Note: To measure the size of a strip you can use the ruler available at the scanner (metric).
Result
The Océ TDS700 removes a trailing or leading strip to the copy.
Make a copy of a specific area of an original
Introduction
You can make a copy of a specific area of an original with the 'Remove strip' setting. Define the following strips to specify the area.
■'Leading'
■'Trailing'
■'Left'
■'Right'
Before you begin
If you must enter the same value for a setting very often, you can set this value as the default value for that setting in the Océ TDS700 Power Logic ^® controller application.
After you press the start key, the scanner operator panel always shows the job number and status of the job. A copy job appears temporarily in the 'Scheduled jobs' in the Océ TDS700 Power Logic® controller application, a scan-to-file job appears in the selected destination of the 'Scan jobs' workspace.

Attention: When you remove a strip, make sure that you copied all the required information.
How to copy a specific area of an original
-
Place the original face down and right aligned. The scanner takes the original.
-
Define the job settings.
■Select 'Copy' with the upper-left softkey.
The copy job templates appear.
■Open a copy job template with a left softkey. The top 5 settings appears.
■Scroll to 'Remove strip' and open this setting with the left softkey.
■ Define the 'Leading' strip value with the scroll wheel or numeric keys.
■ Select 'Trailing' with the left softkey and define the value with the scroll wheel or numeric keys.
■ Select 'Left' with the left softkey and define the value with the scroll wheel or numeric keys. 'Left' is the left side of an original that is turned face up.
■ Select 'Right' with the left softkey and define the value with the scroll wheel or numeric keys and close the setting. 'Right' is the right side of an original that is turned face up.
■ Scroll to 'Alignment' and open this setting with the left softkey.
■ Define the value of the 'Horizontal' setting to 'Centre' with the scroll wheel.
■ Select 'Vertical' with the left softkey and define 'Centre' with the scroll wheel.
 |  |  |  |
| The 'Leading' strip | The 'Trailing' strip | The 'Left' strip | The 'Right' strip |
- Define the number of copies if necessary and press the green start key.

Note: To measure the size of a strip you can use the ruler available at the scanner (metric).
Result
The Océ TDS700 copies a specific area of the original to the specified position on the copy.
Make a copy and delete a specific area of an original
Introduction
You can make a copy without a specific area of an original with the 'Delete area' setting. You can use 2 settings to define the dimensions of the delete area and you can use 2 settings to define the relative position of the delete area on the sheet.
Define the relative position of the delete area with the following settings.
■'Y Offset'
■'X Offset'
Define the dimensions of the delete area
■'Width'
■'Length'

Attention: When you copy without a specific area, make sure that you copied all the required information.
How to copy a specific area of an original
- Place the original face down and right aligned.
The scanner takes the original.
- Define the job settings.


[69] The icons of 'Y Offset', 'X Offset', 'Width' and 'Length' setting
■Select 'Copy' with the upper-left softkey.
The copy job templates appear.
■Open a copy job template with a left softkey.
The top 5 settings appears.
■Scroll to 'Delete area' and open this setting with the left softkey.
■Define the 'X Offset' with the scroll wheel or numeric keys.
■ Select 'Y Offset' with the left softkey and define the value with the scroll wheel or numeric keys.
- Select 'Width' with the left softkey and define the value with the scroll wheel or numeric keys.
■ Select 'Length' with the left softkey and define the value with the scroll wheel or numeric keys and close the setting.
- Define the number of copies if necessary and press the green start key.
Result
The Océ TDS700 copies an original without the specified area.
Basic scan-to-file jobs on the flexible scanner
Introduction to scan-to-file jobs
Introduction
A basic scan-to-file job takes three steps. Feed the original, select 'Scan-to-file' and press the start key. Every other type of scan-to-file job, where you change the scan-to-file settings, is called an extended scan-to-file job. An extended scan-to-file job takes one additional step. Define the scan-to-file job settings on the scanner operator panel. When you select 'Scan-to-file', the scanner operator panel shows five scan-to-file job templates. The scan-to-file job templates provide access to the different settings per scan-to-file job template. When you select a scan-to-file job template, the scanner operator panel shows the top 5 settings of the selected scan-to-file job template. The top 5 settings are the most often used settings. You can define the top 5 settings and their values for each scan-to-file job template with the Océ TDS700 Power Logic® controller application. You can use the scroll wheel to see the other settings. After you start a scan-to-file job, you can manage your jobs from the 'Scan jobs' workspace in the Océ TDS700 Power Logic® controller application.
Illustration

[70] The scan-to-file job templates
Steps in a basic scan-to-file job
- Feed the original.
- Select 'Scan-to-file'
- Press the green start key.
Result
You get a digital file of your original.
Steps in an extended scan-to-file job without fine tuned job templates
- Feed the original.
- Select 'Scan-to-file'.
-
Define the scan-to-file job settings at the scanner operator panel.
■Open a template.
■Select the first setting and define the value.
■Select the second setting and define the value.
■...
■Select the last setting and define the value. -
Press the green start key.
Result
The second step takes several additional actions.
Steps in an extended scan-to-file job with fine tuned job templates
- Feed the original.
- Select 'Scan-to-file'.
- Define the job settings.
Select the required template at the scanner operator panel and change the pre-defined settings only if necessary. - Press the green start key.
Result
You get a tuned digital file of your original.
Do a basic scan-to-file job
Introduction
This section describes a general workflow for a basic scan-to-file job.
Before you begin
If you must enter the same value for a setting very often, you can set this value as the default value for that setting in the Océ TDS700 Power Logic® controller application.
After you press the start key, the scanner operator panel always shows the job number and status of the job. A copy job appears temporarily in the 'Scheduled jobs' in the Océ TDS700 Power Logic® controller application, a scan-to-file job appears in the selected destination of the 'Scan jobs' workspace.
How to do a basic scan-to-file job on the Océ TDS700
- Place the original face down and right aligned. The scanner takes the original.

natural_image
Diagram of a printer or printer with a paper sheet being inserted, showing motion arrows (no text or symbols present)[71] Place the original face down and right aligned.
- Select 'Scan-to-file' with the upper-left softkey.
- Press the green start key.
Result
The scanner scans the original and the sends the scanned file to the default scan-to-file destination.
Do an extended scan-to-file job
Introduction
This section describes a general workflow for an extended scan-to-file job.
Before you begin
If you must enter the same value for a setting very often, you can set this value as the default value for that setting in the Océ TDS700 Power Logic® controller application.
After you press the start key, the scanner operator panel always shows the job number and status of the job. A copy job appears temporarily in the 'Scheduled jobs' in the Océ TDS700 Power Logic® controller application, a scan-to-file job appears in the selected destination of the 'Scan jobs' workspace.
How to do an extended scan-to-file job on the Océ TDS700
- Place the original face down and right aligned. The scanner takes the original.

natural_image
Diagram of a printer or printer with a paper roll being inserted, showing motion arrows (no text or symbols present)[72] Place the original face down and right aligned
-
Select 'Scan-to-file' with the upper-left softkey. The scan-to-file job templates appear.
-
Define the job settings.
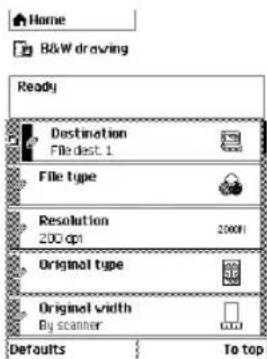
[73] The top 5 settings of a scan job template
(see 'Available settings for scan-to-file jobs' on page 128)
■ Open a scan-to-file job template with a left softkey. The top 5 settings appear.
■Scroll to a setting.
■Select a setting with the left softkey.
■Scroll to the required value.
■Select the next setting with the left softkey.
■Scroll to the required value.
■Select 'Close' to close the setting.
■ Repeat the selection of settings from bullet 3 if you need to define more settings.
- Press the green 'Start' key.
Result
The scanner scans the original and sends the scanned file to the defined scan-to-file destination.
Stop a scan-to-file job
Introduction
You can stop a scan-to-file job with the red stop key at the scanner operator panel.
How to stop a scan-to-file job
- Press the red stop key.
Result
When you press the red stop key while the scanner scans, the scan process stops. The scanner rewinds the original and the scan-to-file job is cancelled.
When you press the red stop key while the scanner rewinds, the rewind process continues. The scan-to-file job is cancelled.
Extended scan-to-file jobs
Available settings for scan-to-file jobs
The scan-to-file settings
| Setting Description | |
'Destination' Use this setting to define the default destination for scan-to-file jobs on the controller. You can define a maximum of 10 remote destinations and one of these destinations is the default destination. | |
| 'File type' Depending on the colour mode and file type you select the values for the compression mode and organisation will change. For some File types, the Compression and Organisation settings cannot be set in all situations.(see 'File type" on page 130)Available file types:■PDF■TIFF■JPEG■CALS | |
| 'Resolution' Use this setting to define the resolution of the scanned images. The higher the resolution you select, the finer the image quality but the larger the file size. (see "Resolution" on page 132) | |
| 'Original type' Use this setting to define the type of original for your scan-to-file jobs. The defined type influences the quality of the output.(see 'Original type' and background compensation' on page 133) | |
| 'Original width' Use this setting to define the width of the original that the scanner scans.(see 'Original width" on page 134) | |
| 'Remove strip' Use this setting to define blank areas on the sides of the scanned image. (see 'Remove strip" on page 135) | |
| 'Mirror' Use this setting to | create a mirrored image of an original. Mirroring occurs in the transport direction.(The image is mirrored along the vertical axis.) |
| 'Lighter/darker' | Use this setting to define the exposure of the original.Negative values mean less exposure and darker scanned output. Positive values mean more exposure and greyer scanned output.  Note: This setting can only be set if the colour mode you select is grey or black and white. Note: This setting can only be set if the colour mode you select is grey or black and white. |
| 'Checkprint' Use this setting | to define if the system prints a checkprint for a scan-to-file job. The checkprint represents the quality of the scanned document.  Note: This setting can not be used for scan-to-file jobs with colour. Note: This setting can not be used for scan-to-file jobs with colour. |
'File type'
Depending on the colour mode and file type you select the values for the compression mode and organisation will change. For some File types, the Compression and Organisation settings cannot be set in all situations.
Colour mode: Greyscale
| Colour mode File type Compression Organisation | |||
'Greyscale' | 'TIFF' ■'None' | ■'Packbits'■'LZW' | ■'Raw'■'Tiled'■'Striped' |
| 'PDF' | ■'None'■'Flate'■'LZW' | Not available | |
| ■JPEG Quality | ■Maximum■High■Medium■Low | ||
| JPEG Quality | ■Maximum■High■Medium■Low | ||
Colour mode: Black and White
| Colour mode File type Compression Organisation | |||
'Black&white' | 'TIFF' ■'None' | ■'Group 3'■'Group 4'■'Packbits' | ■'Raw'■'Tiled'■'Striped' |
| 'PDF' | ■'None'■'LZW''Flate'■'Group 4' | Not available | |
| 'CALS' Not available | Not available | ||
Colour mode: Colour
| Colour mode File type Compression Organisation | |||
'Colour' | 'TIFF' ■'None' | ■'Packbits'■'LZW' | ■'Raw'■'Tiled'■'Striped' |
| 'PDF' | ■'None'■'LZW'■'Flate' | Not available | |
| ■JPEG Quality | ■Maximum■High■Medium■Low | ||
| JPEG Not available | Quality | ■Maximum■High■Medium■Low | |
'Resolution'
Use this setting to define the resolution of the scanned images. The higher the resolution you select, the finer the image quality.
Select the required scan resolution with the scroll wheel.
| Setting Value in dots per inch | |
| 'Resolution' | ■'72 dpi'■'100 dpi'■'150 dpi'■'200 dpi'■'300 dpi'■'400 dpi'■'600 dpi' |

Note: A higher resolution increases the file size.
'Original type' and background compensation
Use the 'Original type' setting to define the type of original for copy and scan-to-file jobs. The defined type influences the quality of the output.
Use the 'Backgnd comp' setting to define the background compensation for your original.
Select the type of original and the background compensation with the scroll wheel.
| Setting Value | |
'Original type' | ■'Line Art' for paper■'Greys&Lines'■'Dark original'■'Blueprint'■'Photo'■'Transparent' for transparencies |
'Backgnd comp' | When the background on the original has pollution, use this setting to improve the quality of the background.The compensation depends on the type of the originals. If enabled, the background compensation for 'Photo' or 'Greys&Lines' originals is a standard value. |

Note: If the colour mode of a scan to file job is set to colour, the original type is fixed.
'Original width'
Use this setting to define the width of the original that the scanner scans.
Select one of the following.
| Setting Icon Result | |||
| 'Auto' |  | The scan width is automatically determined based on the actual width of the original. | |
| 'Standard' |  | Use this setting to a 'Standard' width of the original.The standard widths that you can select depend on the media series that you selected in the Océ Settings Editor. | |
| 'Custom' |  | Custom-selected width. Use this setting if the 'Auto' setting or the 'Standard' setting does not give the required result. | |
'Remove strip'
Use the 4 settings below to define the blank areas around the image.
[25] Remove strips
| Setting Icon Result | ||
| 'Remove strip' - 'Leading' |  | Use this setting to remove a strip at the top of the image. This action decreases the print or file length.Note: The top side of the image is the side that you first feed into the scanner. |
| 'Remove strip' - 'Trailing' |  | Use this setting to remove a strip at the bottom of the image. This action decreases the print or file length. |
| 'Remove strip' - 'Left' |  | Use this setting to remove a strip from the left side of the image/original viewed from the face-up direction. This action decreases the print or file width. |
| 'Remove strip' - 'Right' |  | Use this setting to remove a strip from the right side of the image/original viewed from the face-up direction. This action decreases the print or file width. |
Scan jobs on the Océ TDS700 Power Logic® controller application
Scan jobs management
'Scan jobs' workspace
The 'Scan jobs' workspace in the Power Logic® controller application allows you to configure your scan jobs workflow.
The 'Scan jobs' workspace is divided in three areas that manage the complete scan jobs workflow.
[26] Areas in the Scan jobs workspace
| Scan jobs workspace | Description |
| Destinations on the controller | Define and manage the local scan destinations. |
| Remote destinations | Define and manage the remote scan destinations. |
| Scan job view area | View scanned documents or view or edit the properties of a scanned document. |

Note: Not all options are available to all users. You must log on as a key operator to perform all tasks in the 'Scan jobs' workspace.
![Océ TDS 700 Power Logic Controller File Edit View System Job Scan Log on Help Scan destinations New Delete Properties View Refresh Print Destinations on controller On Controller Unsent Name Size Type Modified Resolution [db] Image size [mm] Remote destinations Machine administrator](/content/2026/06/1276860/images/cd79a803e1f312a1312c2f27fb022984517db7d738cbdd513d88639aec2e81f9.jpg)
[90] Scan jobs workspace
Scan destinations on the controller
In this area of the workspace you find the default destination of the scan jobs. By default, all the scan jobs are stored on the controller. The default scan job destination cannot be deleted.
Use the toolbar at the top of the 'Scan jobs' workspace to create, edit and delete the local scan job destinations on the controller.
The Scan destination area also gives access to the Unsent scan jobs folder. These jobs must go to a remote destination but cannot be delivered. The jobs are temporarily stored in the Unsent scans folder on the controller.
Remote destinations
You can create scan job destinations at a remote location instead of at a local destination on the controller. The remote scan destinations area displays the remote destinations that you create. The remote destination is a directory on a workstation that is accessible through the network.
Use the toolbar at the top of the 'Scan jobs' workspace to create, edit and delete the remote scan job destinations.
When you select a remote scan job destination the jobs that are stored at the selected destination are displayed in the right hand side of the workspace, the 'Scan jobs' view area.
Scan jobs view area
The 'Scan jobs' view area displays all the scan jobs that are stored at the selected scan destination. The 'Scan jobs' view area can give access to the scan jobs at the local and remote destinations. You can select a file from the list and view the file properties. Some properties, for example the scan job name can be edited.
Use the toolbar at the top of the 'Scan jobs' workspace to delete, view, edit, send or print the selected scan job(s).

Note: Only a scan job that is stored at a local destination on the controller can be opened with the (optional) view application Océ View Station LT®. Océ View Station LT® is only accessible from the controller. Power Logic controller Remote does not support this functionality.
Manage scan destinations in the 'Scan jobs' workspace
Introduction
A scan destination is a place where you send your scanned file to for storage. You can create, delete and lock scan destinations. You can also define automatic file naming to ensure your files get the desired names.
A scan destination can also be a file server or a PC of an end user. It is better to select remote destinations instead of the local ones. The local destinations are temporary and cannot contain a lot of scanned files.
Before you begin
All users have access to the 'Scan jobs' workspace. Make sure you log in as key operator to the Océ TDS700 Power Logic® controller application to have all rights. A key operator can determine whether a scan destination can be modified by another user. This is done by locking and unlocking a destination.
Illustration

Create a local destination
- Click the 'Scan jobs' icon in the vertical icon toolbar.
- Select the 'On controller' area in the 'Scan jobs' workspace.
- Open the 'File' menu and select 'New' or click the 'New' button in the toolbar. A secondary window appears in which you can define the properties of the new local destination.
- Enter a logical name for the destination in the 'Name' text box.
This logical name also appears on the scanner operator panel.
- Select 'On controller' from the 'Type' drop-down list box.
- Enter a path of the target folder in the 'Path' text box. You can also click the 'Browse...' button to select the path.
- Click Ok to accept the destination properties.
Create a network destination with SMB
- Create a shared folder on a workstation. For example c:\Scan
- In the 'Scan jobs' area open the 'File' menu and select 'New' or click the 'New' button in the toolbar. The properties window appears.
- Select SMB from the 'Type' drop-down list box.
- Enter the system name of the workstation where you created the shared folder.

Note: Make sure that you enable the setting 'NetBIOS over TCP/IP' in the Power Logic controller application to resolve the system name

Note: Find the system name of the workstation on the control panel of the workstation (Control panel - Network - Identification - System name)
- Enter the system name of the remote location and click 'Find' to identify the system location easily.
- Enter the path name. This is the name of the shared folder on your workstation. For Windows NT ^® , Windows ^® 2000 and XP, use the DOS name of the shared folder. For Windows 95/98 ^® use the folder name. This is case sensitive.
- Enter a path of the target folder in the 'Path' text box. You can also click the 'Browse...' button to select the path.
- If you have set a username and a password for the shared folder on the workstation, then enter the username and the password in the required fields.
- Set the required file naming properties
- Click Ok.
The Power Logic ^® controller application connects to the new SMB destination. The 'Scan jobs' view area then shows the contents of the new SMB destination.
Create a web destination with FTP
- Create a home directory and a subdirectory on a workstation. For example c:Ftp/Scan
- Enable FTP on the workstation
- In the 'Scan jobs' area open the 'File' menu and select 'New' or click the 'New' button in the toolbar. The properties window appears.
- Select FTP from the 'Type' drop-down list box.
-
Enter the system name of the workstation where you created the shared folder. Find the system name of the workstation on the control panel of the workstation (Control panel - Network - Identification - System name)
-
Enter the system name of the remote location and click 'Find' to identify the system location easily.
- Enter the path name. This is the name of the shared folder on your workstation. For Windows NT ^® , Windows ^® 2000 and XP, use the DOS name of the shared folder. For Windows 95/98 ^® use the folder name. This is case sensitive.
- For access to the directory on the workstation through FTP, a user name and password is set on the FTP server that runs on the workstation. Enter this user name and this password in the required fields on the properties window.
- Set the required file naming properties
- Click Ok.
The Power Logic ^® controller application connects to the new FTP destination. The 'Scan jobs' view area then shows the contents of the new FTP destination.

Note: You can create a maximum number of 10 destinations. Names in Japanese can only be entered for remote destinations in SMB.
Lock a scan destination
- Select a scan destination.
- Open the 'File' menu and select 'Properties'.
- Check the 'Locked' check box.
- Click Ok to accept the scan destination settings.
The destination properties are now locked.

Note: This option is only available if you are logged on as a key operator.
Unlock a scan destination
- Select a scan destination.
- Open the 'File' menu and select 'Properties'.
- Uncheck the 'Locked' check box.
- Click OK to accept the destination settings. The destination properties are now unlocked.

Note: This option is only available if you are logged on as a key operator.
Delete a scan destination
- Select a destination.
- Open the 'File' menu and select 'Delete' or click the 'Delete' button in the toolbar. The selected scan destination is deleted.

Note: You are not able to delete the last scan destination.
Scan jobs tasks
Introduction
The 'Scan jobs' workspace in the Océ TDS700 Power Logic® controller application allows you to configure and manage the scan job settings and the scan destinations. In addition you can manage your scan jobs workflow. You only set up your scan workflow once. Thereafter, the main tasks in the scanning process take place at the scanner where you define the individual scan job settings.
Scan destinations
Actions
■ Create, edit, delete scan destinations on the controller and on the network
■ Create protected scan destinations (only possible for authorised user: key operator)
Scan-to-file jobs
Actions
■Define the settings for automatic file naming
■ View scanned files stored at various destinations
■Check the properties of a scanned file
■Delete scanned files
■Print scanned files
■Resend scanned files
■Send scanned files to another destination
■Retrieve files via FTP
Define file names
Introduction
You can define the file names in the following two methods.
- by automatic file number definition for all originals in the scan-to-file job
- by manual file name definition per original in the scan-to-file job.
Illustration

Automatic file number definition
- Select a destination in the 'Scan jobs' workspace.
- Open the 'File' menu and select 'Properties'. The 'properties' window appears.
- Enter a name in the 'Base name' text box. Do not change the ‘###’ part, this part is used for automatic file name numbering. Océ Scan Logic replaces ‘###’ by an ascending number. You can put dots in the 'Base name'.
- Check or uncheck the check box 'Add the appropriate file extension' to add or leave out the file extension. Set the file extension in the 'Preferences' workspace of the Power Logic® controller application.
- Enter the start value for the automatic file naming in the 'Start value for ###' field.
- Click 'Ok' to accept the file naming properties.
- Scan the originals. You can scan now with automatic file name numbering. Select the above destination on the scanner operator panel and set all scan-to-file properties. While you scan, the scanner operator panel displays the file name. The settings are active until a copy job interrupts the scan job.
Manual file name definition
- Select a destination in the 'Scan jobs' workspace.
- Open the ‘File’ menu and select ‘Properties’. The ‘properties’ window appears.
- Check or uncheck the check box 'Add the appropriate file extension' to add or leave out the file extension. Set the file extension in the 'Preferences' workspace of the Power Logic® controller application.
- Enter a name in the 'Base name' text box. Remove the ‘###’ part, this part is used for automatic file naming. You can put dots in the 'Base name'.
- Click ‘Apply’ to accept the destination properties. The ‘properties’ window stays open and is ready for the next scan-to-file action after the current original is scanned.
- Scan the original.
- Repeat step 4, 5 and 6 for each original.
View the properties of the scanned file
Purpose
Check the properties of a scanned file.
Before you begin
Make sure you have sufficient permissions when you log on to the Océ TDS700 Power Logic® controller application.
■ 'Anonymous' - permission, editing and other actions are allowed
■ Repro operator - permission, editing and other actions are allowed
■Key operator - permission, editing and other actions are allowed
■System administrator - permission, editing and other actions are allowed
How to view the scanned file properties
- Click 'Scan jobs' in the vertical icon toolbar on the left hand side of the screen.
- Select a remote or a local destination.
- Select a scanned file in the right-hand section of the workspace.
- Right-click the scanned file and select 'Properties'.
- The properties window displays the file name, file size, type and location information. In addition the image size and resolution is also displayed.
Delete scanned files
Purpose
Delete scanned files from a selected local scan destination.
When to do
■You do not want to keep the scanned file.
■You want to clean up a local scan destination.
Before you begin
Make sure you have sufficient permissions when you log on to the Océ TDS700 Power Logic ^® controller application.
■'Anonymous' - permission, editing and other actions are allowed
■Repro operator - permission, editing and other actions are allowed
■ Key operator - permission, editing and other actions are allowed
■ System administrator - permission, editing and other actions are allowed

Note: You cannot remove scanned files stored at a remote location.
How to delete a scanned file
- Click 'Scan jobs' in the vertical icon toolbar on the left hand side of the screen.
- Select a local scan job destination in the 'Scan destinations'.
- Select the job(s) you want to delete in the 'Scan jobs' view area in the left hand side of the screen.

Note: Make sure that you select one or more scan jobs. If you select the scan job destination, the 'Delete' action removes the (local) scan job destination instead of the scan job(s).
- Click 'Delete' in the toolbar of the 'Scan destinations' or right-click and select 'Delete' from the drop down menu.
- Repeat these actions for each scanned file that you want to delete.
Print scanned files
Purpose
Print a scanned file that is stored on the controller.
Before you begin
Make sure you have sufficient permissions when you log on to the Océ TDS700 Power Logic® controller application.
■ 'Anonymous' - permission, editing and other actions are allowed
■ Repro operator - permission, editing and other actions are allowed
■Key operator - permission, editing and other actions are allowed
■System administrator - permission, editing and other actions are allowed
How to print a scanned file
- Click 'Scan jobs' in the vertical icon toolbar on the left hand side of the screen.
- Select a local destination.

Note: You can also print jobs in the Unsent scans folder.
- Select a scanned file in the right hand section of the workspace.
- Click 'Print' in the toolbar. Depending on the workflow settings, the job is sent to the 'Scheduled jobs' or to the 'Waiting jobs'.
Resend scanned files from the Unsent scans folder
Purpose
To send scanned files that could not be delivered to their initial destination to the same destination.
Before you begin
Make sure you have sufficient permissions when you log on to the Océ TDS700 Power Logic® controller application.
■'Anonymous' - permission, editing and other actions are allowed
■Repro operator - permission, editing and other actions are allowed
■ Key operator - permission, editing and other actions are allowed
■ System administrator - permission, editing and other actions are allowed
How to send scanned files from the Unsent scans folder to the same destination
- Click 'Scan jobs' in the vertical icon toolbar on the left hand side of the screen.
- Select the Unsent scans folder.
- Select a scanned file and click 'Send' in the toolbar.
- The document will be resent from the Unsent folder to its initial destination.
Result
If the destination cannot be reached, the scanned file remains in the Unsent scans folder.
How to retrieve scanned files via FTP
Introduction
The scanned files are stored in the logging directory of the controller. You can retrieve your files from the local host via File Transfer Protocol (FTP). FTP retrieval can be done in the following ways.
■Via an internet browser
■Via an FTP application, or
■Via a command line prompt.
When you scan to file, your files will be stored in the destination you set. This can be on the local controller (1) or on a remote system (2). You can retrieve your files from the local host via File Transfer Protocol (FTP). Also if during scanning to a remote destination, something goes wrong, you can retrieve your files from the local host.

[93] How to retrieve scan files
Retrieve files via an FTP command line prompt
- Launch an FTP client.
- Enter the 'FTP' command.
A DOS box now appears with the FTP prompt.
- Enter the ‘Open’ command followed by either the registered name of the Océ Power Logic® controller or the IP address (for example: 194.2.66.146) to connect to the controller and press Enter: ‘open 194.2.66.146’.
The connection with the controller is now established and a window appears asking you for a user name.
- Enter your user name ‘Anonymous’, and enter as your password also ‘Anonymous’. A connection is now set up for the default user ‘Anonymous’.
- Set the transmission mode to binary by entering 'Binary'.
- Go to the ‘Tempstore’ directory using the following command: ‘cd tempstore’.
- Go to the 'Scan' directory if you want to retrieve a file from a destination on the local host,
or
go to the ‘Unsent’ directory if you want to retrieve a file from ‘Unsent’ folder on the local host.
- Get the data file (for example: bugatti.tif) via the 'Get' command.
- Quit FTP by entering the 'bye' command.
Océ View Station LT®
View locally scanned files with Océ View Station® LT
Introduction
With the use of the software application (Océ View Station® LT) you can automatically view a file after scanning or you can view a locally stored scanned file. You can configure the settings for Océ View Station® LT in such a way that the scanned file is opened automatically.
Purpose
Check the quality of the scanned file before you print or archive the scanned file.
Before you begin
Make sure you have sufficient permissions when you log on to the Océ TDS700 Power Logic® controller application.
■ 'Anonymous' - permission, editing and other actions are allowed
■ Repro operator - permission, editing and other actions are allowed
■Key operator - permission, editing and other actions are allowed
■System administrator - permission, editing and other actions are allowed

Note: It is not possible to view scanned files that are stored at a remote location. You cannot use Océ TDS700 Power Logic controller Remote to view scanned files.
How to view a file automatically after scanning
- Open the Océ TDS700 Power Logic ^® controller application.
- Open the 'System' menu and select Autoview.
Result
When you scan to file the next time, Océ View Station ^® LT will start up a secondary window and show the scanned file. If the autoview function is not enabled you can use the view button in the Océ TDS700 Power Logic ^® controller application to open the secondary window manually. The procedure below describes this action in detail.
How to view a locally stored scanned file
- Access the Océ TDS700 Power Logic ^® controller application.
- Click 'Scan jobs' in the vertical icon toolbar on the left hand side of the screen.
- Select a local destination.
- Select a scanned file in the right hand section of the workspace.
- Click the 'View' button in the toolbar to display the scanned file in the right hand section of the workspace.
Functions in Océ View Station® LT
Menu options
[27] File menu
| Command What does it do | |
| Close Closes the active document. | |
| Properties Provides technical information about, and allows you to change certain properties of, the document. |
[28] View menu
| Command What does it do | |
| Fit | Scales the image to fill th |
| 1:1 Displays the image at a 1:1 scale factor. | |
| Magnify Zooms into the page. | |
| Reduce Zooms out of the page. | |
| Refresh Redraws all windows displaying the active document. | |
| Invert Reverses the black and white parts of the image. | |
| Mirror | Mirrors the image. |
| Rotate 90 CCW | Rotates the image 90 degrees counter-clockwise. |
| Rotate 90 CW | Rotates the image 90 degrees clockwise. |
| Rotate 180 Rotates the image 180 degrees. | |
| Sample When | active, displays only a sample of bilevel raster pixels. |
| Negate | Reverses the raster image pixels on display and changes which are dominant for scaling. |
| Scale to grey | When active, displays the active bilevel raster image as though it were a greyscale image. |
| Monochrome | An image or screen having only background and foreground colours. Same as black-and-white or bilevel. |
[29] Preference menu
| Command What does it do | |
| View toolbar View toolbar displays and removes the toolbar that contains buttons. The View toolbar appears, by default, below the menu bar. It serves as a fast means of selecting some File, View, and Preference menu commands. | |
| Status bar Status Bar displays and removes the Status Bar at the bottom of the Océ View Station LT window. The Status Bar displays the pointer co-ordinates and a status line. | |
| Reference Reference displays or removes a small, usually floating window. This window displays the entire current page in miniature. The crossed box inside the Reference window indicates which part of the page is displayed in the document window. By moving or resizing the crossed box, you change which area of the page is displayed. | |
| Detail Displays or removes the Detail window. | |
| Measurement When active, allows you to measure lines and areas on the image. |
[30] Help menu
| Command What does it do | |
| About Shows information about Océ View Station LT. |
Toolbar options
Below the menu options you find the function buttons in a toolbar. This toolbar can be turned on and off.

[94] toolbar options
| Nr Description | |
| 1 Invert: Reverses the black and white parts of the image. | |
| 2 Fit: Scales the image to fill the window. | |
| 3 1:1: Displays the image at a 1:1 scale factor. | |
| 4 Magnify: Zooms into the page. | |
| 5 Reduce: Zooms out of the page. | |
| 6 Mirror: Mirrors the image. | |
| 7 Rotate 90 CCW: Rotates the image 90 degrees counter-clockwise. | |
| 8 Rotate 90 CW: Rotates the image 90 degrees clockwise. | |
| 9 Rotate 180: Rotates the image 180 degrees. | |
| 10 Measurement: When active, allows you to measure lines and areas on the image. | |
| 11 Reference: This small floating window displays the entire current page in miniature for reference. | |
| 12 Displays or removes the Detail window. |
View error in Océ View Station® LT
When the memory is almost full it can occur that the viewer does not show the scanned file. Instead it shows a red border with a red cross.

natural_image
Simple geometric diagram of a square with red diagonal lines forming an X shape (no text or symbols)[95] View error
Océ Matrix Logic
What is Océ Matrix Logic®
Introduction
Océ Matrix Logic ^® is an optional software application for the Océ TDS700 multifunction systems. It allows users to easily create different copy set outputs from one set of scanned originals.
Matrix Logic copying of a set is based upon storing the entire set of scanned originals (up to 100 documents) on the Océ Power Logic ^® controller. You can then apply 2 to 30 different templates to that set. The result is that the output from the one set of scanned originals can be printed out up to 30 different ways. You need a license to enable matrix copying.
Workflow
Here are the steps to follow to compose and print a matrix job.

Note: Some steps are mandatory whereas others are only optional as mentioned below.
■Access Océ Matrix Logic ®
■Scan a Matrix Job
■Create a template (optional)
■Define settings for the template (optional)
■Save the template (optional)
■Modify existing templates (optional)
■Compose an Océ Matrix Logic Job
■Add templates
■Add banners
■Print
■Reprint
[32] Workflow Matrix jobs
| Step Action Location | ||
| 1 One | scan job is scanned in Scanner | |
| 2 Templates are applied to the scan job Controller | ||
| 3 The | Matrix copy jobs are sent to the printer | Controller |
| 4 The | Matrix jobs are printed Printer | |
Access to Océ Matrix Logic®
Provided you have a valid license, Océ Matrix Logic ^® can be accessed from the vertical icon toolbar in the Océ TDS700 Power Logic ^® controller application.

Note: Océ Matrix Logic® can not be accessed via Océ TDS700 Power Logic® controller Remote. You need a monitor, keyboard and mouse connected to the controller to work with the software.
Actions to access Océ Matrix Logic.
■Access the Océ TDS700 Power Logic ^® controller application.
- Click the Océ Matrix Logic icon at the bottom of the vertical icon toolbar. A secondary window appears on top of the window of the Océ TDS700 Power Logic® controller application. Please note that when you click the screen in the background, the smaller screen with Océ Matrix Logic disappears to the background. Minimise the screen in the foreground to retrieve the Océ Matrix Logic screen.
■ Access the three tabs to compose a matrix job, select a copy template and monitor the pending jobs queue.
Create a Matrix Job
Introduction
The Matrix composition tab allows you to perform the following tasks:
■ set ‘Job Level’ parameters (User name, User ID, Job name, Account ID)
■view a list of the originals (up to 100 originals per job)
■remove originals from the job
■ add, delete and manage pre-defined Copy templates to apply to the Matrix job.
■change settings to applied Copy templates
■select banners
■initiate the Matrix job printing
Access Océ Matrix Logic®
- Select Océ Matrix Logic ^® from the vertical icon toolbar in the Océ TDS700 Power Logic ^® controller application.
- Click the 'Matrix composition' tab where the set of scanned originals is displayed.
Prepare the Matrix job
- Fill in the 'User name' and 'Job name' fields ('User ID' and 'Account ID' are optional).

Note: If your Océ TDS700 system has Océ Account Logging activated, then the 'User ID' and 'Account ID' will be stored by Océ Account Logging.
- Every original in the set that you scan is assigned a name by Océ Matrix Logic®.
■To remove a specific original from the matrix job, highlight that original by clicking on its name, and then click 'Remove'.
■ To remove all the originals from the matrix job, click 'Remove all'.
Scan your Matrix Job originals
-
Open the 'Original' section on the scanner operator panel.
-
Select the 'Feeding' card.
-
Once the feeding card is open, use the 'Input mode' button to select 'Matrix Logic'.

Note: After you select Matrix Logic, the 'File' and 'Copy' sections as well as the 'Legend location' and 'Drawing method' cards on the scanner panel are disabled).

[96] Name
- Scan your entire set of originals (up to 100 originals), and remember to press the green start button to close the set when you are done.
Add templates
Introduction
You can add predefined copy templates to your Matrix Job. These templates are created in the ‘Copy templates’ tab.
Add templates to your Matrix Job
- Click ‘Add’ in the ‘Matrix composition’ window. The ‘Select a copy template’ window appears.
- Select one or several templates to apply to the job (up to 50).
- Click 'OK'.
The ‘Matrix composition’ window now contains the templates selected for the matrix job. The user may want to make changes to any particular template selected for this job. This can be done in the edit window.
Modify templates from the Matrix Composition window
- From the Matrix Composition section, highlight the template to modify. The settings are displayed.
- Click the setting to modify. The value of the setting is displayed in the 'Edit' field.
- Change the value.
- Repeat steps 2 and 3 for every setting to modify.

Note: When editing a template, the change is not permanent. The original settings for that template are not changed. They are only changed for the Matrix job being printed at that time.
- Print the Matrix Job.
Print the Matrix job
Print the Matrix job
- Click 'Print' In the toolbar of the Matrix composition tab.
- Click the 'Submission queue' tab to follow the submission status.
■Current job: displays the progress bar of the job being processed.
■ Pending jobs queue: displays the list of jobs that are pending to be submitted (busy printer).
■ Submitted jobs queue: displays the list of jobs that have been submitted to the printer.
- Click ‘Remove’ or ‘Remove all’ or ‘Delete’ if you want to remove one or several matrix jobs while they are pending or submitted.
- Click ‘Move up’ or ‘Move down’ in the Pending Jobs queue if you want to change the print order.
Reprint the Matrix job
- From the Submitted jobs queue, select the Matrix job.
- Click 'Print'.
Copy templates
Copy templates are pre-programmed copy settings. These settings are applied to the originals in the matrix job. Users can create and save up to 50 different templates.
| Location Description | |
| The left side of the Copy templates tab | Displays the template list. This shows all currently saved templates. Users can create and save up to 50 different templates. templates may be edited when applied to a particular matrix job. |
| The right side of the Copy templates tab | Displays the settings list. These are the available settings that can be stored in a template. |
You can perform the following actions in the Copy template tab.
■Create or delete a template.
■Define or modify settings.
■Save the changes
Edit template
Create a new template
- Click 'Create' in the toolbar on the left hand side of the Copy template tab. A default name is added in the template list:
- Rename the template.
- Press 'Enter' to validate.
- Define the settings to apply to the template.
- Click 'Save'. Successful saving is confirmed with a message.

Note: If you exit the tab without saving the changes in the template, a message asks you whether you want to save, discard or cancel the template.
Edit the settings
- Select a template in the list.
- Select the setting to define or modify. The setting is displayed in the Editing zone.
- Select the value to apply to the setting from the scrolling list.
- Repeat steps 2 & 3 with all the settings to edit.
- Click 'Save'.
Delete a template
- Select a template in the list.
- Click 'Delete' in the toolbar.
- Save.
Save changes
- Whatever the changes you apply to template (Delete, create, edit settings), you need to save the changes.
- Click 'Save' to confirm the changes.
Banners
Introduction
Banners are extra informative pages added to a job. They list a number of attributes that are set in the Banner Selection Page (company name, logo).
Define a banner
- From the Matrix Composition view, click ‘Banners’. The Banner selection page is displayed:
- Check the 'Enable banner' option.
- Define the banner settings.
■Template name: Select a banner template.
■Media source: select Automatic or Roll or Tray.

Note: When you select roll or tray, an extra field is displayed to select the roll or tray number.
■Notes: You can insert notes to your banner in this window. Notes are persistent from one job to another.
■Enter a company name.
■Company logo: click the 'Load' button to load your company logo.
- Click 'OK' to apply the defined banner to the job.
Chapter 4 Use the Océ TDS700 productive scanner
This chapter describes how to use the productive printer. The behaviour of the productive black and white scanner is in some ways similar to the flexible colour scanner scanner but there are also differences.
Introduction to copy jobs
Introduction
A basic copy or scan-to-file job only takes two steps. Feed the original and press the start key. Every other type of copy or scan-to-file job is called an extended job. An extended copy job takes one additional step, you define the job settings on the scanner operator panel. When you turn the scanner on the scanner templates become visible. The job templates provide access to the different settings per template. When you select a template, the scanner operator panel preferred settings in the custom card of the selected job template. The custom card settings are the most often used settings. You can define the contents of the custom card for each template with the Océ TDS700 Power Logic® controller application. You can use the selection keys to see the other settings. After you start a job on the scanner, you can manage your jobs from the 'Print jobs' workspace in the Océ TDS700 Power Logic® controller application. Scan-to-file jobs can be managed in the 'Scan jobs' workspace.
Illustration

flowchart
graph TD
    A["Connecting to controller"] --> B["Preference"]
    B --> C["Job definition"]
    D["Template 1"] --> E["Description 1"]
    D --> F["Description 2"]
    D --> G["Description 3"]
    D --> H["Description 4"]
    D --> I["Last used"]
    J["Template 2"] --> K["Description 2"]
    J --> L["Description 3"]
    J --> M["Description 4"]
    N["Template 3"] --> O["Description 3"]
    N --> P["Description 4"]
    N --> Q["Last used"]
[97] The scanner templates
Steps in a basic copy job
- Place your original face-down, right aligned along the original guide. Keep the legend at your right hand side.
- Feed the original.

Note: When you feed the original, keep it in place until it is transported (about 1 cm) into the machine.

natural_image
Line drawing of a vintage typewriter with control panel (no text or symbols)- Press the green start key.
Result
You do a basic copy job in 2 steps. The basic copy job uses the settings of the first template.
Steps in an extended copy job
- Feed the original.
- Define the job settings.
Select the required template at the scanner operator panel and change the pre-defined settings only if necessary.

Note: The changes you make are not stored in the template itself. You can use the Last used template if you want to use the same settings as in the previous scan job.
- Press the green start key.
Result
An extended copy job takes one additional action only.
The scanner operator panel
Introduction
The Océ TDS700 is a very user-friendly system. The scanner, in particular, is very easy to operate. Basic copy jobs can be performed by simply pressing the green start key on the scanner operator panel. Only if you want to perform more complex copy jobs, you have to change the default copy settings with the help of the other settings on the scanner operator panel.
This section consists of two parts. The first part explains the basic use of the keys. The second part deals with special use of the display. It describes how to use the soft keys above and along the sides of the display to define your copy settings.
The scanner operator panel
The operator panel is located above the original feed. As you can see in the illustration below, the panel consists of a display in the centre surrounded by a number of function, section and arrow keys. To the left of the display, you can find the Stop key and below the display you can find the Start, Numeric and Correction keys as well as the Counter window.
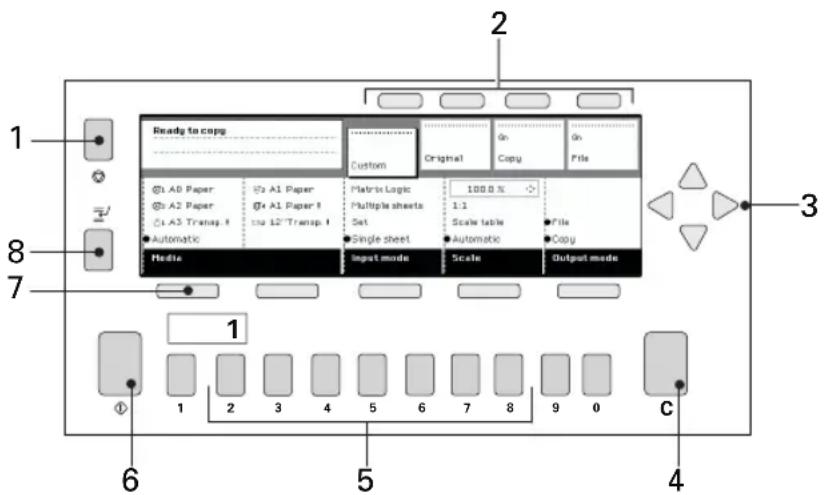
[99] scanner operator panel
The keys
With the keys on the scanner operator panel you can make a number of settings for the Océ TDS700.
The following keys are available.
[34] Keys
| Nr. Key type | Function | |
| 1 Stop key | Press the red key | left of the display to stop the copy process for the current original. You can stop the original transport immediately when an original jam occurs. |
| 2 Section | keys | The section keys are the four keys located above the display. These keys provide access to the ‘Custom’, ‘Original’, ‘Print’ and “File” sections on the display. Each section contains several functions (cards). These can be accessed with the help of the left most function key, which is also called the card selection key. |
| 3 Arrow keys | The arrow keys can be used, like the numeric keys, to define numeric settings. The arrow keys are also used for selecting subfunctions. | |
| 4 Correction | key | The orange key marked with C is located at the bottom of the central section of the operator panel. Press the correction key one time to reset the selected setting to its default value. Press the correction key two times to reset the numeric display to ‘1’. Press the correction key three times to return to the first screen on the display. |
| 5 | Nkeys | The keys with numbers on the lower part of the operator panel are used to enter numbers. |
| 6 Start key | The green key | marked with is used to start the feeding of the original, or to re-start the copy process. |
| 7 | Fkeys | The five function keys (below the display) allow you to select functions or subfunctions within a card. |
| 8 | Jinterruptkey | Use the job interrupt key to set extra priority to your copy job or to remove extra priority from your copy job. Determine the priority of your copy job with the Job interrupt key before you scan your originals. The job is placed on top of the Scheduled jobs in the Power Logic® controller application. The interrupt job will start running directly after the current page is completed. No new job is sent to the printer. |
Sections on the scanner operator panel
Information in the scanner operator panel
When the scanner templates are not active on the system, the scanner operator panel displays the following sections with an active 'Custom' section.
■ The ‘Custom’ section which provides direct access to frequently used settings, defined by the customer.
■ The ‘Original’ section which provides access to the settings of the scanner input, the original.
■ The ‘Print’ section which provides access to the settings of the printer output, the print.
■ The ‘File’ section which provides access to the settings of the scan-to-file output, the file.
Custom section
The ‘Custom’ section contains the frequently used settings. The illustration below shows an example with the following settings.
■Media
■Input mode
Scale
■File mode

[100] Custom section
The key operator defines the contents of the custom section for each template in the Power Logic® controller application. The key operator can change the contents, dependent on your configuration, for example into the settings illustrated above.
Original section
The ‘Original’ section contains all settings for the scanner input, the original.
The settings are divided over the following cards.
■Scanner
■Image
■Sheet
■Feeding

[101] Original section
Print section
The 'Print' section contains all settings for the printer output, the print.
The settings are divided over the following cards.
■Image
■Layout
■Finishing
■Sheet
■Stamping (optional)

[102] Print section
File section
The ‘File’ section contains all settings for the scan-to-file output, the file. The ‘File’ section is only available if you have the scan-to-file option installed .
The settings are divided over the following cards.
■Optimization
■Image
■Destination

[103] File section
Scanner templates
A scanner template contains all the settings for a job. You can use a scanner template to store your favourite settings. For example, you can store and access the settings that you use for specific jobs, customers or departments. You only need to select the template and press the green key to start your job. The illustration below shows an example with the following job templates.
■Template 1
■Template 2
■Template 3
■Template 4
■Last used

flowchart
graph TD
    A["Connecting to controller"] --> B["Template 1"]
    A --> C["Template 2"]
    A --> D["Template 3"]
    A --> E["Template 4"]
    A --> F["Last used"]
    G["Preference"] --> H["Job definition"]
    I["Description 1"] --> A
    J["Description 2"] --> A
    K["Description 3"] --> A
    L["Description 4"] --> A
    M["Last used"] --> A
[104] Scanner templates
In the Océ TDS700 Power Logic ^® controller application the key operator configures the scanner template settings. The key operator can change the job template names, except for ‘Last used’, for example into the following job names.
■Single copy
■Set copy
■Matrix copy
■Scan-to-file
■Last used
When you select the ‘Last used’ job template, the scanner recalls all the settings from the previous job. You can change the settings or do the same job again. The ‘Last used’ job template does not display when you turn on the scanner. After you select a scanner template, the sections display. The sections provide access to the settings for the scanner input, the printer output and the scan-to-file output (see ‘Sections on the scanner operator panel’ on page 172). Use the Custom Card here to provide access to frequently used settings referred to the type of job.
When the scanner templates are active you also have a separate section to define the following default scanner settings. The illustration below shows the 'Preference' settings.
■Automatic feed
■Rewind original
■Language
■Account (optional)
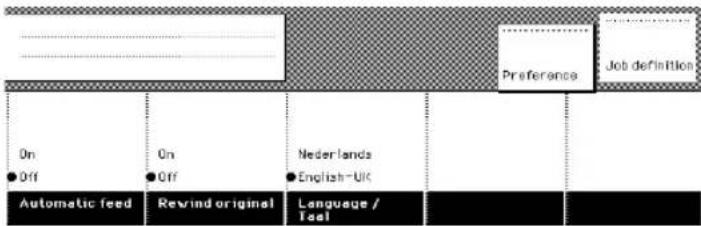
[105] The scanner templates - Preference
Change the operator panel language on the scanner
Introduction
It is possible to change the operator panel language. You can choose between two preferred languages.
Press the 'Language' function key to set the needed language.
Illustration
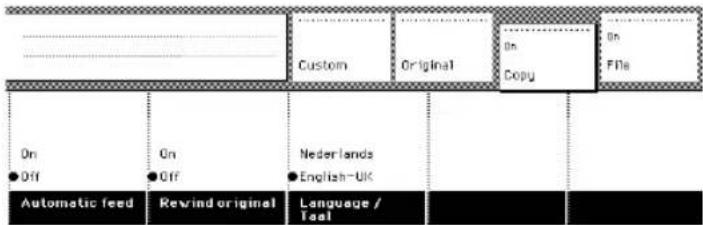
Select a language
- Open the 'Scanner' card in the 'Original' section.
- Press the 'Language' function key to set the needed language.
Illustration
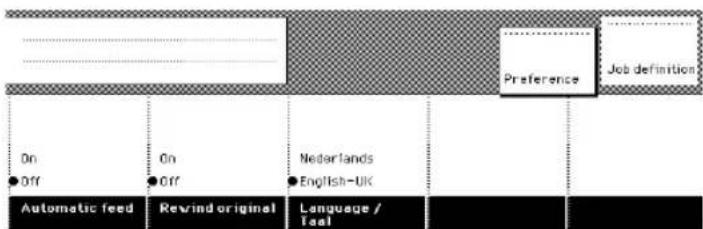
Select a language when the scanner templates are installed
- Select the 'Preference' section.
- Press the ‘Language’ function key to set the needed language. You can select one of 2 pre-defined languages. In the Océ TDS700 Power Logic® controller application, the key operator can define which 2 display languages you can choose on the scanner operator panel.
Settings on the Océ TDS700 scanner operator panel
Introduction
When the scanner templates are enabled in the Océ TDS700 Power Logic® controller application the templates are displayed on start-up of the Océ TDS700 flexible scanner. When the templates are not enabled in the Océ TDS700 Power Logic® controller application, the ‘Custom’ card is displayed on start-up.
The Custom card gives access to the settings you defined in the Océ TDS700 Power Logic® controller application. This card contains a number of settings which are immediately accessible. The key operator defines the Custom card in the Océ TDS700 Power Logic® controller application.
How to make settings on the scanner operator panel
- Select a template (only applies when scanner templates on the scanner operator panel are enabled in the Océ TDS700 Power Logic® controller application).
- Press one of the Section keys to activate the desired menu.

Note: The active menu is slightly moved downwards to visually separate it from the other menus. Apart from that, a shadow highlighting effect is used for extra highlighting.
- Press the Card selection key to select the appropriate card. You can switch cards (from bottom to top) by pressing the key again.
- Select the desired function values in one of the following ways.
Simple (non-numeric) selection: Press the Function key to activate the desired (non-numeric) value. The selected value is preceded by a bullet.
Long list selection: If you want to select a value from a list of options that cannot be fully displayed on the panel, you first activate the selection triangles next to the specified option (the dotted line around this selection is changed into an uninterrupted line and the selection triangles are no longer dimmed). The triangles indicate that there are additional options available. Select one of the non-displayed values with the arrow keys.
Numeric selection: Activate the selection triangles and select the desired value with the arrow keys or with the numeric keys.

Note: A combination of simple selection and numeric selection is possible as well.
Correct the settings with the correction key
-
Press the Correction key one time to return to the default value of the active setting.
-
Press the Correction key two times to set the numeric display to 1.
-
Press the Correction key three times to return to the top layer of the scanner operator panel. When the scanner templates are enabled in the Océ TDS700 Power Logic® controller application, the top layer shows the templates. When the templates are not enabled in the Océ TDS700 Power Logic® controller application, the top layer shows the ‘Custom’ section.
When ‘Automatic feed’ is selected for a single sheet job, this setting stays active after the job is completed.
Job interrupt only stays active for one job. You have to press the Job interrupt key before each new job you want to give interrupt priority.
The scanner operator panel will automatically return to the top layer and the default settings after the time defined in the 'panel time-out' setting in the Océ TDS700 Power Logic® controller application.
Basic copy jobs on the Océ TDS700 productive scanner
Perform basic copy jobs
Introduction
On the Océ TDS700 productive scanner you can perform a number of basic tasks.
The following tasks are described in more detail in the sections hereafter.
■Make copies
■Select the required media
■Select the input mode
■Specify the scale factor
■ Select the Lighter/darekr setting to make the printout lighter or darker
■Use background compensation
■Deliver originals after scanning
■Define settings for the next original
■Use account logging
■Use the manual feed function for copying
■Define delivery of copies
■Use job interrupt
■Stop a job
Make copies
Before you begin
- Place your original face-down, right aligned along the original guide. Keep the legend at your right hand side.

Note: When you feed the original, keep it in place until it is transported (about 1 cm) into the machine.
Illustration
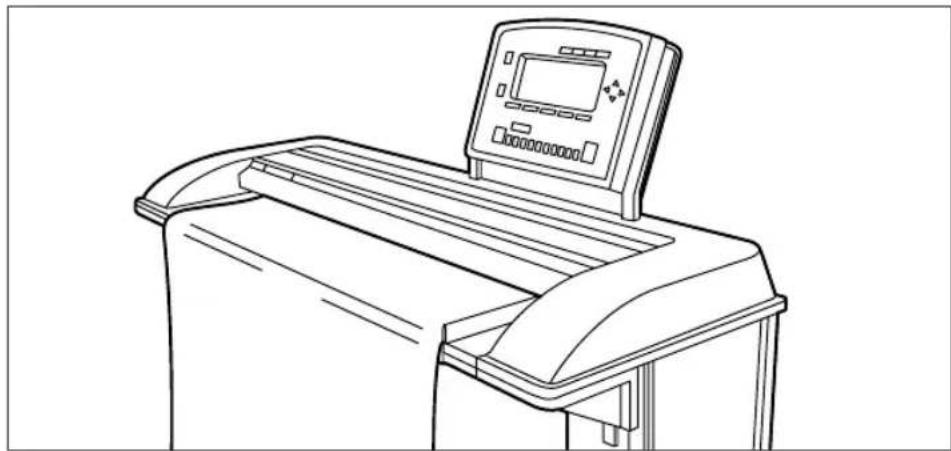
natural_image
Line drawing of a vintage typewriter with control panel (no text or symbols)[108] Feed the original
How to make a copy
-
Specify the number of copies with the numeric keys.
-
Specify the ‘Media sizes’ on the ‘Sheet’ card in the ‘Original’ section. The Océ TDS700 supports both DIN and ANSI media formats.
-
Specify the desired media on the scanner operator panel. If you select 'Automatic', the Océ TDS700 will use a scale factor that is needed to obtain a copy without loss of information. After inserting the original, the scale factor that is used is indicated with a bullit symbol.
The scale factor is based on the selected media size.
-
Use the 'Media' function to select copy material and format.
-
Specify how a job will be sorted: 'Single sheet', 'Multiple sheets' (output: 1-1-1, 2-2-2, 3-3-3) or 'Set' (output: 1-2-3, 1-2-3, 1-2-3). The currently selected input mode is indicated by the 'l' symbol.
-
Specify a reduction or enlargement factor on the operator panel by using the 'Scale' function. If you select 'Automatic', the productive scanner will use a scale factor that is needed to obtain a copy without loss of information. After inserting the original, the scale factor that is used is indicated by the bullit symbol.

Note: The scale factor is based on the selected media size.
- Specify the desired brightness of the output. You can use the 'Lighter/darker' setting to correct for a lighter or darker original.
- Specify folding options on the operator panel. If the optional folder is installed, you can use the 'Folding' settings to get a neatly folded copy.
- Press the green start key to start the copy job.
Result
Your original is fed into the scanner. The printer starts to print. You can collect your output. Your printed copy will be delivered on the selected output unit of the printer. By default the print is sent to the integrated receiving tray
Select the required media
Introduction
The ‘Media' setting can be used to select the output material and format. The printer operator panel will show you what rolls or sheet feeders are currently loaded. The currently selected roll or sheet feeder is indicated with a bullit symbol.
If you select ‘Automatic’, the Océ TDS700 will try to use a roll or sheet feeder format that matches the original size. After inserting the original, the roll or sheet feeder that is used is indicated by the bullet symbol. The bullet symbol remains in place until a new original is inserted. Then it may move to indicate another roll or sheet feeder, depending on the original format.
First select the 'media sizes', then select one of the sizes. The scale factor is based on the selected media size.

Note: You can also select the desired media from the ‘Custom’ section, if this setting is defined for the ‘Custom’ section in the Océ TDS700 Power Logic® controller application.
Illustration

[109] Select the required Media sizes
Select the media sizes
- Select the 'Sheet' card in the 'Original' section
- Select the required paper series with the 'Media sizes' function key.
Illustration

[110] Select the required media
Select the required media
- Select the 'Sheet' card in the 'Copy' section.
- Select the required media with the 'Media' function key.
Select the input mode
Introduction
You can use the ‘Input mode’ setting to specify how a job will be sorted. The ‘Single sheet’ option treats each sheet as a separate job. ‘Multiple sheets’ produces the specified number of copies for each sheet in a job and then continues with the next sheet. ‘Multiple sheets’ is illustrated below.

[111] Multipe sheets
‘Set’ produces one copy for each sheet in a set and then continues with the next copy of the entire set, see the illustration below.

[112] Set copy
The active input mode can be closed by pressing the Stop key.
The currently selected input mode is marked with the bullet symbol.
Illustration

[113] Select the input mode
Select the input mode
- Select the 'Feeding' card in the 'Original' section.
- Select the desired media with the 'Input mode' function key.

Note: You can also select the input mode from the ‘Custom’ section (if this setting has been defined for this).
Select the scale factor
Introduction
You can use the ‘Scale’ setting to select a scale factor. This scale factor is used to recalculate the size of the original to fit onto the output material which can have a different size.

Note: You can also select the scale factor from the 'Custom' card (if this setting has been defined for this card).
Illustration

[114] Select the scale factor
Select the scale factor
- Select the 'Image' card in the 'Copy' section.
- Select Automatic, scale table, 1:1, or set the scale factor on the display of the scanner operator panel.
■ Automatic scale selection. The system automatically calculates the scale ratio based on the original size and the output media size
■ 1:1. Results in an image that is exactly the same size as the original.
■ Scale table. Gives access to the scale table conversions. You can choose between 4 pre-defined enlargement steps and 4 reduction steps. These steps translate the original size to a pre-defined output size.
- Set the scale factor manually on the display of the scanner operator panel. Use the arrow keys on the right of the display. If you press one of the vertical keys, the scale factor will increase or decrease with steps of 0.1%. If you press one of the horizontal keys, the scale factor will increase or decrease with the steps pre-defined in the Océ TDS700 Power Logic® controller application.
Use the numeric keys at the bottom of the scanner operator panel. You can specify the exact scale factor with 0.1% increments. For example, if you want to specify a scale factor of 25.4%, you type 254. If you want to specify a scale factor of 254%, you type 254.
Selecting the scale conversion
- Select the 'Image' card in the 'Copy' section.
- Select scale table. The 8 pre-defined conversion steps become active.
- Select the preferred enlargement or reduction step with the Scale table function key. The scale step immediately converts the original media size to another, fixed media size, for example from A0 to A1.

Note: The values of the conversions are defined by the key operator in the Océ TDS700 Power Logic® controller application.
Lighter/darker
Purpose
You can use the ‘Lighter/darker’ setting to correct for a lighter or darker original. If you choose to make the print darker, you must take into account that anything in the background is also made darker. This can create pollution.
Illustration

[115] Set the Lighter/darker setting
Set the Lighter/darker setting
-
Select the 'Image' card in the 'Original' section.
-
Select the desired Lighter/darker level by using the arrow keys to the right of the display.

Note: You can also select the Lighter/darker level from the 'Custom' card (if this setting has been defined for this).
Background compensation
Purpose
You can use the ‘Background compensation’ function with dark originals or originals on coloured paper. In the latter case the colour is filtered out and is no longer visible on the printed output.
Illustration

[116] Selecting the background compensation
Set the background compensation
- Select the 'Image' card in the 'Original' section.
- Select 'Background compensation' on, to get all information correct on the copy. A grey background is visible.
- Select 'Background compensation' off, to get no grey background. Please note, weak lines will be affected.
Bold
Purpose
You can use the ‘Bold’ function with originals that contain very thin lines. If you use the Bold function all the information on the print is accentuated. Use this function to accentuate very thin lines that may otherwise become too weak on the printed output.
Illustration

[117] Selecting Bold
Set the bold setting
-
Select the 'Image' card in the 'Original' section.
-
Select 'Bold' on, to get all information correct on the copy. Very thin lines will be accentuated to avoid these lines form disappearing or becoming too faint.
-
Select 'Bold' off, if you do not want to accentuate very thin lines. Please note, weak lines can become difficult to see.
Deliver originals after scanning
Introduction
You can choose for delivery of the original at the front (rewind) or the back side of the scanner.
- ‘On’: Originals are delivered at the front side of the scanner. You have to collect each original by hand.
■'Off': Originals are delivered at the back side of the scanner.
Purpose
When you copy thick or very thin originals, originals that are damaged or originals in a carrier sheet, it is recommended to use the output at the back side of the scanner to ensure correct delivery ('Rewind' function off).

Attention: The ‘Rewind’ function is disabled when the optional original delivery tray is installed.
Illustration

[118] Rewind the original
Select original delivery
- Open the 'Scanner' card in the 'Original' section.
- Press the ‘Rewind original’ function key to make your selection.
- On'. The originals are delivered at the front side of the scanner. You have to collect each original by hand.
- 'Off'. The originals are delivered at the back side of the scanner.
Define settings for the next original
Introduction
You can define the settings for each original you want to copy. When ‘Automatic feed’ is enabled, you should bear in mind that the original is automatically pulled into the scanner. If you want to be absolutely sure about the settings that belong to an original, insert an original when the settings are correct.

Note: To increase your versatility at the scanner input side, you can ask your key operator to turn off Automatic feed. When you use the scanner with automatic feed off, you must press the start key for each new original to be scanned. This offers you the possibility to change the settings for the next original, even if you already put the original in place on the scanner feed table.
Illustration

[119] Set the automatic feed option
Define the settings for the next copy job
- Select all the settings required for the next original.
- Insert the next original.
If ‘Automatic feed’ is off, press the start key.
If ‘Automatic feed’ is on, the original is fed automatically.
Account logging
Introduction
For accounting purposes, the system is able to log job information for each job. The job identification attributes and the number of print jobs are logged in the account file.

Note: The account settings are only available if the accounting option is enabled in the system configuration.
Illustration
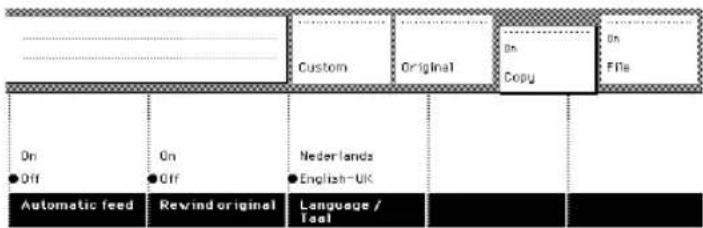
[120] Set accounting data
Select the accounting function
- Open the 'Scanner' card in the 'Original' section.
- Press the ‘Accounting’ function key to set ‘Accounting’.
- Select the needed 'Account id' or 'User id' with the arrow keys to the right of the display.
- Enter the 'Account ID' or the 'User ID' with the numeric keys.
Use the manual feed function for copy jobs
Introduction
If you want to copy a job on a media type or size that is not available on one of the paper rolls or sheet feeders, it can be convenient to manually feed sheets instead of switching paper rolls or sheet feeders. The sheet feed is a special slot just above the roll drawers on the printer. You can insert pre-cut copy material in this slot, one sheet at a time.
Illustration
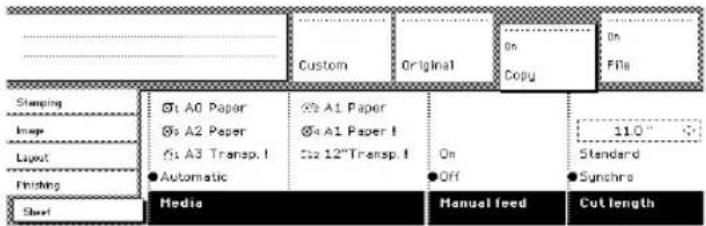
[121] Define the manual feed setting
Copy jobs on pre-cut sheets
-
Open the 'Sheet' card in the 'Copy' section.
-
Press the 'Manual feed' key to change the setting to 'On'.

Note: If templates are present on the scanner, open the 'Preferences' section to access the 'Manual feed' setting.
-
Select any required other settings.
-
Enter the number of copies using the numeric keys.
-
Feed the original.
-
Press the start key.
-
Take your sheet of copy material to the side of the printer that contains the sheet feed. Use both hands to align the copy material in accordance with the format indication and the sticker on the manual feed table.
-
Move the copy material forward in the nip of the roller. This action must cause an ample paper bulge over the full width of the page. Hold the paper with both hands until the printer pulls in the first part of the sheet. The bulge will be reduced or it will disappear. A few seconds later the complete sheet will be pulled in the printer.

Note: If the copy job requires more sheets, the display will ask you to feed the next sheet.
- Repeat steps 7 and 8 to complete the job.
Result
Collect your output. The image will be printed on the side of the sheet which is facing up.
Define delivery of copies
Introduction
Normally, your copies are delivered on the integrated receiving tray on top of the Océ TDS700 printer. However, you can specify to deliver your copies in the optional output delivery tray or in a folder or the Océ Double Decker Pro. If you want to a deliver your output to for example a finishing device, take the steps described below.
Illustration
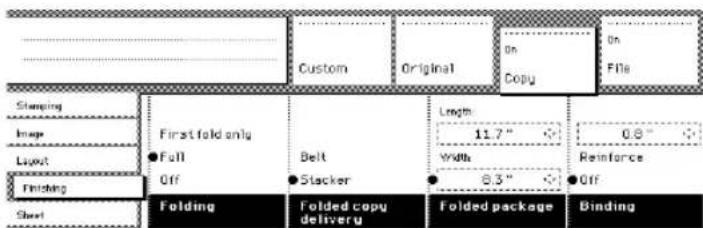
[122] Delivering copies to the Stacker
Deliver copies to the Stacker
- Open the 'Finishing' card in the 'Copy' section.
- Use the 'Folded copy delivery' function key to select the 'Stacker' option.
Result
The copies are delivered to the stacker of the folder. If you select the 'Belt' option, the folded copies are delivered to the lower belt of the folder.
Define the folding settings
- Open the 'Finishing' card in the 'Copy' section.
- Define the fold method, You can choose between a full fold or 'First fold only'.
- Define the folding width and length of the package.
- Indicate if you want to add a binding strip. If yes, also define the size of the binding strip.
If you choose a binding strip, you cannot reinforce the copies.
Interrupt a job
Introduction
Use the Job interrupt key on the scanner operator panel to give extra priority to a copy job. When you press the Job interrupt key your copy job will be placed on top of the 'Scheduled jobs' in the Power Logic® controller application. When you select Job interrupt a message appears on the scanner panel display. The print process will be interrupted after the current page is printed. The transport of originals on the scanner will not be interrupted.
There can be several new jobs in the list during Job interrupt. They are put in a First In First Out sequence. In the 'Scheduled jobs' area in the Océ TDS700 Power Logic® controller application you can manage interrupt jobs in the following way.
■ An interrupt job can be cancelled in 'Scheduled jobs' area.
■ An interrupt job can be put on hold. An interrupt job will lose its priority position in the list when put on hold.
■ When there are more interrupt jobs, an interrupt job can be moved to the top of the 'Scheduled jobs'.
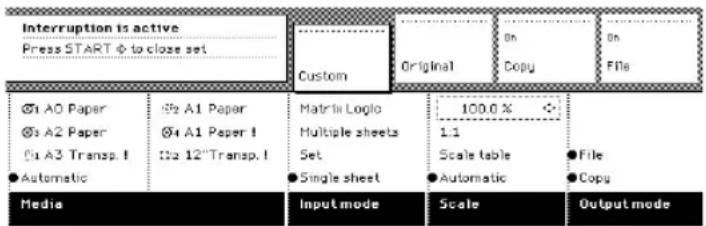
[123] Feedback on the scanner panel display when Job interrupt is selected
Interrupt a copy job
-
Press the Job interrupt key on the scanner operator panel.
The printer interrupts the active job and stops after the current page is printed. The 'Scheduled jobs' area in the Power Logic® controller application displays the interrupt job in the list at the active job position.
The 'Scheduled jobs' area marks the interrupted job with an icon.
The 'Scheduled jobs' area also marks the interrupt job with an icon.
The 'Scheduled jobs' area changes the Exit interrupt button from grey into coloured and changes this button into the active condition. -
Make copies (see 'Make copies' on page 180).
- Press the Job interrupt key again to do another interrupt job. Press the Exit interrupt button in the 'Scheduled jobs' area to continue with the interrupted job and collect the output at a later time. Collect the output and press the Exit interrupt button at the 'Scheduled jobs' area to continue with the interrupted job.

Note: An interrupt job cannot interrupt another interrupt job.
Stop a job on the scanner
When to do
Press the Stop key to interrupt the original transport on the scanner.
How to stop a job
- Press the Stop key.
The original transport is now stopped and you are prompted to open the scanner cover in order to remove the original.
- Open the cover, remove the original and close the cover again. You are now ready to start the next copy job.
Stamping (optional)
Introduction
Stamping is an Océ TDS700 option which allows you to print a pre-defined text on all your copies. Stamping is enabled in the Océ TDS700 Power Logic® controller application. The key operator can predefine a maximum of 50 stamps in the Océ TDS700 Power Logic® controller application.
You can select one stamp per original and you can select the Colour, Font size and Position. A stamp can consist of the following parts.
■pre-defined text
■date
■time
Illustration
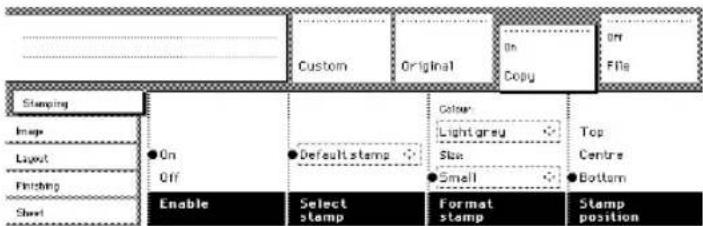
[124] Set the stamping options
How to select a stamp
- Open the 'Stamping' card in the 'Copy' section.
- Select stamp 'On' with the 'Enable' function key.
- Select a stamp with the 'Select stamp' function key.

Note: The following steps are optional.
- Select a 'Colour' with the 'Format stamp' function key and the arrow keys.
- Select a 'Size' with the 'Format stamp' function key and the arrow keys.
- Select a 'Position' with the 'Stamp position' function key and the arrow keys.
Result
The output will contain a stamp to indicate for example its status as a draft or classified document.
Basic scan-to-file jobs on the Océ TDS700 productive scanner
Perform basic scan-to-file jobs
Introduction
This chapter describes the scan-to-file functionality of the Océ TDS700 productive scanner.
The following topics are described in more detail hereafter.
■Océ Scan Logic ®
■Make a scan-to-file
■Settings for scan-to-file
■Scan jobs management in Océ TDS700 Power Logic ^® controller application
■Actions in Scan jobs area
■Retrieve scanned files
■Océ View station LT ^®
Océ Scan Logic®
Océ Scan Logic ^® enables you to scan a document to a file for later use. The scan-to-file function is a licensed option that you can buy and activate through a license.
You use scan-to-file in order to do the following actions.
■print documents at a later time
■archive documents
■email documents
■ reuse the information included in the documents in another application
A scan-to-file is made at the Océ TDS700 scanner. On the scanner operator panel you can, among other things, choose at which resolution you want to scan and where you want to store your file. The result of the scan-to-file can be stored on the controller (temporary store) or directed forward towards a network destination. Océ View Station LT ^® , linked to the 'Scan jobs' area in the Power Logic ^® controller application, enables you to automatically or manually view the scanned documents afterwards.
Make a scan-to-file
Introduction
Take the following steps to scan an original to file.
Illustration

[125] Destination card in the File section
How to scan-to-file
- Place your original face-down, right aligned along the original guide.
- Select the appropriate original type.
- Select the 'Destination' card in the 'File' section.
- Press the section key 'File', to select 'File mode' On. The status message displays: Ready to scan to file.
- Select a Destination.
- Press the start key ◇ The original is scanned.
How to scan- to-file using a template
- Place your original face-down, right aligned along the original guide.
- Select the appropriate scanner template.
Make sure the 'Output' mode is set to 'File' or 'Copy&file'.
- Press the start key
The original is scanned. The digitised document will be stored on the controller or at a remote location.
Result
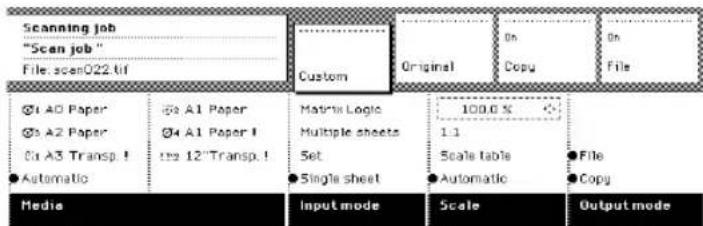
A status message displays : "Scanning job "Scan job number X"
"File scan22.tif"
When enabled in the view menu in the 'Scan jobs' workspace, Océ View Station LT® starts automatically on the controller, showing the result of the scan.

Note: Files that are stored at a remote destination cannot be viewed. Océ View Station LT ^® can only be used when you are working directly on the controller. It is not accessible from the Océ TDS700 PLC Remote application.
Settings for scan-to-file on the scanner operator panel
Introduction
The settings for scan-to-file on the scanner operator panel are divided into three cards: Optimisation, Image and Destination.
Optimisation
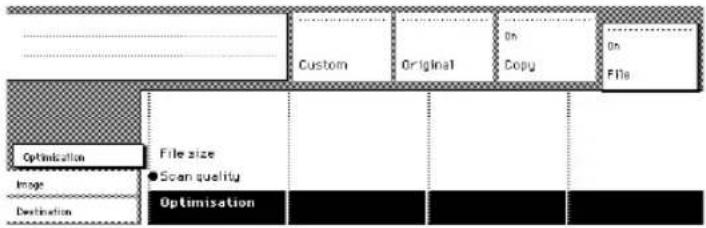
[127] Scanner operator panel: Optimization card
■Optimisation
Image

[128] Scanner operator panel: Image card
Scale
■Scale table
■Mirror
Destination

[129] Scanner operator panel: Destination card
■Destination
■Resolution
■File type (PDF, CALS, TIFF)
■TIFF subformat or PDF compression
Destination card settings
File mode
Introduction
The File mode can be ‘Off’, ‘On’ or ‘On with check print’.
■‘Off’ means that the scan-to-file function is not active.
■‘On’ means scan-to-file is active.
■ To scan-to-file with a check print, activate both the file mode and the print mode on the scanner operator panel. The check print quality is the same as the scan resolution. A check print is a print of the scanned original, ensuring consistency with a later print of the scanned file.
How to scan-to-file with check print
- Press the section key above the File section two times. The File mode is enabled.
- Press the section key above the Copy section two times. The Copy mode is enabled.
- The system is now ready to scan to file with check print.

Note: The Océ TDS700 system does not allow you to change the ‘File mode’ setting during a set from ‘On’ to ‘Off’ and the other way round. However changing from ‘On’ to ‘On with check print’ and vice versa is allowed.

Note: In scan-to-file mode the automatic behaviour is optimized for scanning. Turning check print on or off does not influence this automatic behaviour.
Destination
Introduction
You can store your scanned file either in the temporary store on the controller or on a network destination. You can define up to ten destinations in the Power Logic ^® controller application. On the scanner operator panel you can choose one of these destinations. The destination can be a local destination, this means that the files are stored on the Power Logic ^® controller. The destination can also be a remote destination, this means that you can send scanned files to a workstation that is connected to the same network as the printer.
Select a scan destination
- Press the function key to select destination 1 until 4.
- To select destination four till ten, initially you have the select destination four. Press the arrow keys to select destination 4 until 10.

Note: The names of the destinations can be any. However, for your convenience, you are able to define understandable names in the Power Logic® controller application.
Resolution
The Océ TDS700 scan-to-file option allows you to scan at the following three resolutions.
■200 dots per inch (dpi)
■300 dpi
■400 dpi
The higher the resolution the better the image quality. Higher resolution also leads to larger file sizes. The default value is 200 dpi.
File type
Introduction
To define the internal organisation of the scanned files, choose between TIFF (Tagged Image File Format), CALS-I (Continuous Acquisition and Life-Cycle support), and Adobe® PDF (Portable Document Format).
TIFF
Describes image data that typically comes from scanners, frame grabbers, and paint-and photo-retouching programmes. The purpose of TIFF is to describe and store raster image data. A primary goal of TIFF is to provide a rich environment within which applications can exchange image data. This richness is required to take advantage of the varying capabilities of scanners and other imaging devices. For example TIFF supports lossless image compression. Though TIFF is a rich format, it can easily be used for simple scanners and applications as well because the number of required fields is small.
TIFF subformat

[130] TIFF subformat settings
Within the ‘TIFF subformat’ option, you can define the ‘Organisation’ and ‘Compression’ of the file.
Choose one of the following Organisation options (select with the arrow keys).
■Striped
■Tiled
■Raw

Note: Only choose ‘Striped’ or ‘Tiled’ when you are sure you can use these organisations afterwards. Choose ‘Raw’ in any other case.
Choose one of the following Compression options (select with the arrow keys).
■Group 4
■Group 3
■None
Only choose ‘Group 4’ or ‘Group 3’ when you are sure you can use these compressions afterwards. Choose ‘None’ in any other case. If you scan greyscales or dark originals use Group 3 compression. In these cases group 4 can increase the file size. Group 4’ or ‘Group 3’ are compression methods which are optimised for text and vector drawings. If you choose these compressions when scanning a photo with many greyscales these compressions can result in a negative compression: the file size increases instead of decreases. So use these compressions with care.
CALS
Is an industry strategy for transition of paper-intensive processes to highly automated, integrated processes for defence system acquisition, design, manufacturing, and life cycle support.
Portable Document Format (Adobe® Postscript® 3TM /PDF) is a file format that has captured all the elements of a printed document as an electronic image that you can view, navigate, print or forward.
PDF compression

[131] PDF compression
Within the 'PDF compression' option, you can define the 'Compression' of the file.
Choose one of the following Compression options (select with the arrow keys).
■Group 4
■None

Note: Only choose ‘Group 4’ when you are sure you can use this compression afterwards. Choose ‘None’ in any other case.
Image card settings
Scale
Introduction
The ‘Scale’ option allows you to scale while scanning to a file. When you set ‘File mode’ to ‘On’ then the automatic ‘Scale’ setting will result in ‘1:1’.
You can change this default setting into one of the following three settings.
■Custom
■1:1
■Scale table
■Automatic
Custom
This option lets you specify a scale value. You can enter a range from 25% through 400%. This value also shows the scale value when the option ‘Automatic’ is chosen.
1:1
With this option selected, scan to file will result in an image that is exactly the same size as the original. ‘Scale’ displays 100%.
Scale table
This option lets you select a pre-defined reduction or an enlargement conversion.
Automatic
Selecting ‘Automatic’ always results in a 1:1 scan-to-file.
Scale table
Purpose
Use the scale table to choose an automatic reduction or enlargement conversion of your scanned file. The scanner offers 8 pre-defined scale size conversions to make resizing your original easy and error free.
Before you begin
Make sure you have selected 'Scale table' in the 'Scale' section (see 'Scale' on page 209).
Illustration
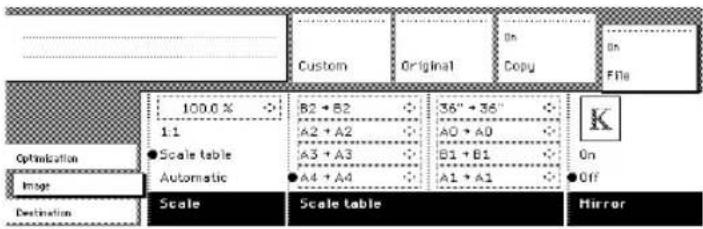
[132] Scale table
Use the scale table
- Select the 'Image' card in the 'File' section.
- Select scale table with the Scale function key. The 8 pre-defined conversion steps become active.
- Select the preferred enlargement or reduction step with the Scale table function keys. The scale step immediately converts the original media size to another, fixed media size, for example: A0 --> A1.

Note: The default values of the conversions are defined by the key operator in the Océ TDS700 Power Logic ^® controller application.
- Use the arrow up and down key to choose another conversion value for the selected scale step. This change is only valid for the current job. After completion of the job the default values for the scale steps are restored again.
Mirror
Purpose
You can use the 'Mirror' option to scan a horizontally mirrored image of an original. Mirroring is performed in the vertical axis.
Illustration

[133] Mirror setting
Use the Mirror setting
- Select the 'Image' card in the 'File' section.
- Select Mirror with the function key.
■ On. The original document is a mirror image. The scanner mirrors this image in the vertical axis to create a normal image.
■ Off. The original document is not a mirror image and therefore does not have to be converted.
Optimization card setting
Optimisation
Introduction
There are two ways to optimise a scan-to-file.
■Scan quality
■File size
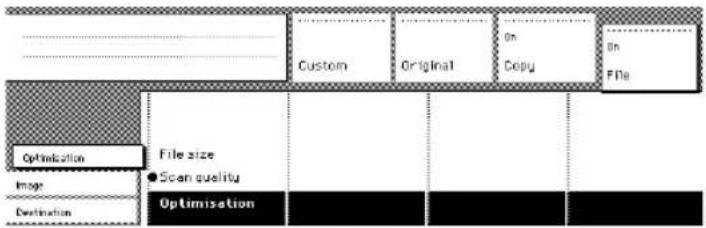
Scan quality
Optimises for the best image quality. The scan resembles the original as close as possible.
File size
Optimises for better compression. Generally resulting in a smaller file size.
Scan jobs on the Océ TDS700 Power Logic® controller application
Introduction to scan jobs on the Océ TDS700 Power Logic® controller application
Please refer to the previous chapter for more information about scan jobs on the Océ TDS700 Power Logic ^® controller application. Also see the on-line help of the Océ TDS700 Power Logic ^® controller application for more information on this subject.
Océ View Station LT®
Introduction to Océ View Station LT
Please refer to the previous chapter for more information about Océ View Station LT. Also see the on-line help of the Océ TDS700 Power Logic ^® controller application for more information on this subject.
Océ Matrix Logic
Introduction to Océ Matrix Logic
Please refer to the previous chapter for more information about Océ Matrix Logic. Also see the on-line help of the Océ TDS700 Power Logic ^® controller application for more information on this subject.
Special copy and scan jobs on the Océ TDS700 productive scanner
Non-standard size originals
The productive scanner of the Océ TDS700 system automatically detects the width of the inserted original. The Océ TDS700 supports both DIN and ANSI formats. The Océ TDS700 system uses a memory table that contains all standard width - standard length combinations to predict the length of the original. The scanner also measures the real length of each original while it is transferred through the scanner.

Note: If you copy thick, thin or damaged originals or originals in a carrier sheet, it is recommended to use the output at the rear side of the scanner to ensure correct delivery (see 'Deliver originals after scanning' on page 190).
The scan width
Introduction
To prevent information loss when copying a non-standard original, you can select the ‘non-standard’ scan width. The scanned width will then be larger than the original width. It is also possible to define the scanned width and length yourself.
Illustration

[135] Selecting 'Non-standard' scan size
Define the scan width
- Open the 'Sheet' card in the 'Original' section.
- Press 'Scan width' to select the required setting:
■Standard. This option must be used to copy a standard-size original.
■Non-standard. This option can be used to copy a non-standard original. The scanned width will be larger than the original width (to the next larger, standard size), to prevent information loss.
■ Numeric. You can define the scan width yourself, using the higher/lower keys or the numeric keys.
The copy size
Introduction
The copy width depends on the selected roll and the custom defined scan width. The copy length depends on the selected cut option.
Illustration
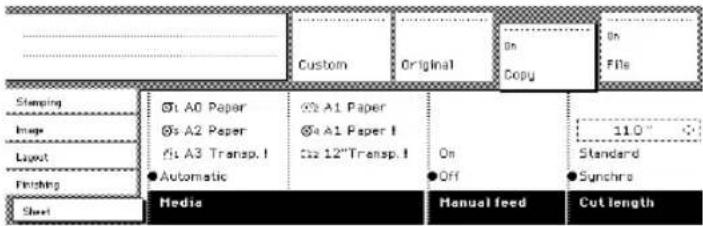
[136] Selecting roll or sheet feeder in the media section
Copy non-standard size originals
- Open the 'Sheet' card of the 'Copy' section.
- Use the function key to select 'Media'.
- Select 'Automatic', or select the roll or sheet feeder with the correct width.

Note: The media can also be selected directly from the 'Custom' section.
- Press the 'Cut length' function key to select the required cut option.
■Standard, which cuts copies at a standard length.
■ Synchro, which cuts copies at the end of the image. The system cuts at the measured length of the original times the scale factor.
■ Custom (numeric), which cuts copies on a specified length. You can define the copy length yourself, using the arrow keys or the numeric keys.
- Make other settings as required.
- Feed the original.
Scanning originals with filing strip
Introduction
Left hand side
You can adjust the original guide of the scanner to remove a filing strip along the left hand side (right hand side in the feed direction, face-down). This side can be reduced by up to 60 mm.
Right hand side
You can also remove the filing strip along the right hand side (left hand side in the feed direction, face-down) by selecting a specific roll or sheet feeder. If the paper width of the original is larger than the paper width of the selected roll or sheet feeder, the remaining paper part on the right hand side will not be scanned.
Leading and trailing strip
It is also possible to adjust the length of both the leading and trailing strip to eliminate or add a filing strip. Leading and trailing strips can be extended up to 400 millimetres (mm) or shortened up to 100 mm.
Illustration

natural_image
Silhouette of a single pine tree with no text or symbols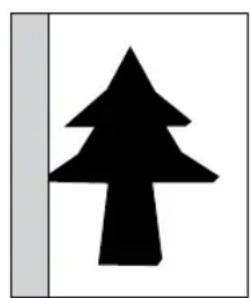
natural_image
Silhouette of a single pine tree against a white background (no text or symbols)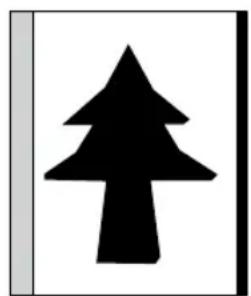
natural_image
Black silhouette of a tree on white background (no text or symbols)[137] Example of adjusting the left hand side of an original
Make a copy with removed filing strip along the left hand side
- Press the handle underneath the original guide, and move it to the right.

natural_image
Line drawing of a hand holding a tray with an arrow indicating direction (no text or symbols)[138] Adjusting the original guide to add or remove a filing strip along the left hand side
-
Make all required settings.
-
Insert the original face-down, right aligned with the original guide on the original feed table.
Illustration

[139] Example of removing the right hand side of an original
Make a copy with removed filing strip along the right hand side
-
Select the required media in the 'Custom' section on the operator panel.
-
Select the 100% value for the 'Scale' function.
-
Make other settings as required.
-
Feed the original.
Illustration

natural_image
Silhouette of a single pine tree with no text or symbols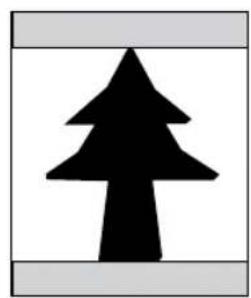
natural_image
Silhouette of a single pine tree inside a rectangular frame (no text or symbols)
natural_image
Black silhouette of a single pine tree on white background (no text or symbols)[140] Example of adjusting the leading or trailing strip of an original
Copy with removed filing strips along the leading and trailing strip
- Open the 'Sheet' card in the 'Original' section.
- Press the 'Remove strip' function key.
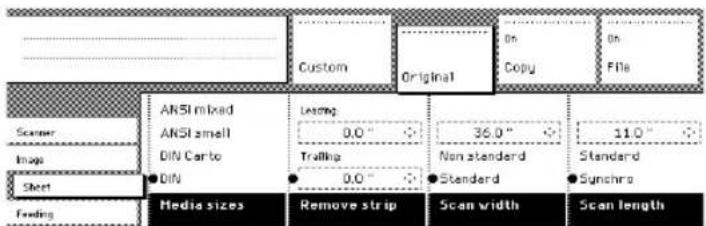
[141] Removing strip
- Adjust the values in mm for the trailing strip using the numeric or arrow keys.
- Press the 'Remove strip' function key again.
- Adjust the values in mm for the leading strip using the numeric or arrow keys.
- Make other settings as required.
- Feed the original.
Copy with added filing strips along the leading and trailing strip
- Open the 'Layout' card in the 'Copy' section.
- Press the function key 'Add strip' function key.

[142] Adding strip
- Adjust the values in mm for the trailing strip using the numeric or arrow keys.
- Press the function key 'Add strip' again.
- Adjust the values in mm for the leading strip using the numeric or arrow keys.
- Make other settings as required.
- Feed the original.
Improving the image quality
Introduction
You can improve the image quality by modifying the exposure setting, or making use of special functions. You will learn how to switch on and off automatic background compensation, how to use the lighter and darker keys to achieve the best possible copy quality, or how to adjust the brightness based on the type of image you want to copy. In addition you will learn when to use the Bold function to enhance weak lines.
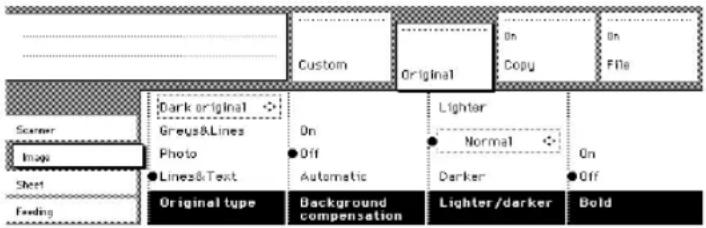
Original type
The Original type you choose influences a number of system settings that optimise the print quality. By choosing an original type, you choose a number of automated optimisation actions performed by the printer to get the best result.
Automatic background compensation
The automatic background compensation will provide a good quality copy from a large variety of originals. The automatic background compensation setting, which is switched on (by default), ensures the production of background-free copies of most line drawings.
Brightness
You can change the brightness of a print or copy by modifying the Lighter/darker of the scanner. The setting can be set to lighter and darker.
Press the ‘Lighter/darker’ function key and use the arrow keys to set the values as desired.
The Up and Down arrow keys can be used to gradually increase or decrease the Lighter/darker setting; the Left or Right arrow keys can be used to go to the highest or lowest available level at once. If you want to go from any negative value to the highest possible positive value, or vice versa, you have to press the appropriate Left or Right key twice.

Note: If you choose to make the print darker, you must take into account that possible background pollution is accentuated as well.
Accentuate thin lines
You can use the 'Bold' function with originals that contain very thin lines. If the lines of an original are very weak you can accentuate the lines to prevent them from becoming too faint on the copied output. If you use the 'Bold' function the thin lines are printed a little bit 'fatter'.

Note: The Bold function accentuates all the data on the print, not only thin lines. The Bold function does not enhance any background pollution.
Automatic background compensation
Illustration

[144] Brightness settings
Set the automatic background compensation
- Open the 'Image' card in the 'Original' section.
- Press the 'Background compensation' function key if this function is disabled.

Note: When copying extremely light or dark originals, or originals with unequal background density, the result may not meet your requirements (e.g. too much background). In such cases you can manually adjust the brightness using the lighter/darker key.
Set the original type of your image
- The Océ TDS700 scanner allows you to adjust the Lighter/darker setting according to the type of image on the original. There are six original types available. Select a suitable mode according to the original.
Press the ‘Original type’ function key to select the appropriate image type.
- By default ‘Lines / text’ is selected with ‘Background compensation’ enabled. This is the most suitable setting for originals that contain characters and line art.
- Press the ‘Original type’ function key to select ‘Photo’ when the original consists of a combination of characters, line art and picture images.

Note: If you select 'Photo' or 'Greys&lines', the 'Background compensation' will be switched off automatically, by default.
- Press the ‘Original type’ function key to select ‘Greys & lines’ when the original contains many grey scales and lines.
■ Press the ‘Original type’ function key to select ‘Blueprint’ when you want to copy an original with an image in ‘negative’ (image in white on dark background). The copy will be ‘positive’ (image in black on white background). - Press the ‘Original type’ function key to select ‘Printed matter’ when you want to copy an original that is already a print itself, containing raster information.
-
Press the ‘Original type’ function key to select ‘Dark original’ when the original has an extremely dark background (i.e. low contrast).
-
Make other settings as required.
- Feed the original.
Editing functions
Auto align
Introduction
To align the image automatically to a side of the print you can use the alignment functions of the scanner. Alignment is possible in the following directions.
[35] Alignment options
| Step Action | |||||
| 1 | T | o | p | l | e |
| 2 Top centre | |||||
| 3 | T | o | p | r | i |
| 4 | L | e | f | t | |
| 5 | C | e | n | t | r |
| 6 | R | i | g | h | t |
| 7 Bottom left | |||||
| 8 Bottom centre | |||||
| 9 Bottom right | |||||
Illustration

[145] Auto align options with standard cut option active
Select default settings for auto shifting with standard cut option

Note: You must switch on standard cut length to get output like the one in the example above.
- 1 Open the 'Layout' card in the 'Copy' section.
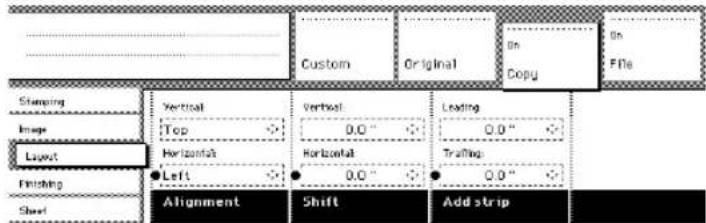
[146] Automatic shift with the Align function
-
Press the ‘Align’ function key and select a horizontal alignment value (Left, Centre or Right) with the arrow keys.
-
Press the ‘Align’ function key again and select a vertical alignment value (Top, Centre, or Bottom) with the arrow keys.

Note: If you select ‘Centre’, make sure the original width is specified as indicated (see figure 135 on page 217):
■‘Standard’ if a standard sized original is used
■The exact original width (numeric) if a non standard sized original is used.
- Feed your original.

Note: You must switch on standard cut length to get output like the one in the example of the illustration above. If Synchro cut length has been switched on, the result will be as illustrated below, the media is cut at the edge of the printed image.


In (see ‘Shift the image’ on page 228) you can read how to define the exact place of your image on the page.
Shift the image
Introduction
In some cases the margin may be too narrow to accommodate filing strips without loss of information. To avoid this, you can shift the image in horizontal or vertical direction, as shown below.

flowchart
graph TD
    A["House 1"] --> B["House 2"]
    B --> C["House 3"]
    C --> D["House 4"]
    D --> A
[148] Example of shifting the image
Shift the image
- Open the 'Layout' card in the 'Copy' section.
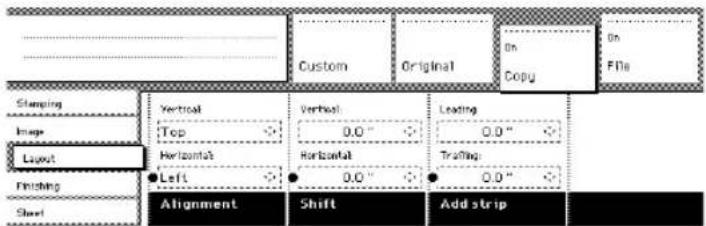
[149] Shift the image
- Press the 'Shift' function key and select a horizontal shift value by pressing the numeric or arrow keys until the required distance is set to shift the image to the left or to the right.
When you shift the image horizontally, you can only shift to the left or to the right.
- Press the 'Shift' function key again and select a vertical shift value by pressing the numeric or arrow keys until the required distance is set to shift the image upwards or downwards.
When you shift the image vertically you can only shift up or down.
-
Make other settings as required.
-
Feed the original.

Note: You can use horizontal and vertical shift simultaneously.
Mirror-image copies
Introduction
With the scanner you can make a mirror-image copy of an original, as shown in the next figure.
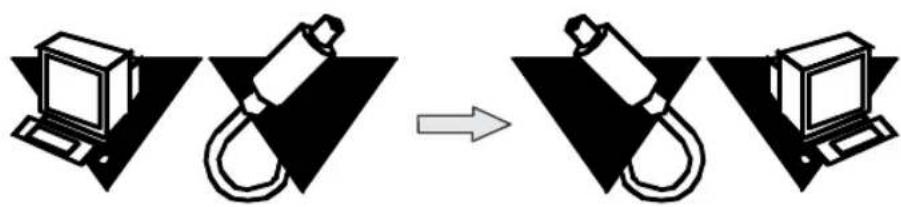
natural_image
Diagram showing a computer connected to a cable, with an arrow indicating transformation (no text or symbols present)[150] Example of a mirror-image copy
Make mirror-image copy
- Open the 'Image' card in the 'Copy' section.

[151] Mirror-image
-
Press the 'Mirror' function key to enable the 'Mirror' function.
-
Make other settings as required and feed the original.
Make a set copy
Introduction
Set copying is an input mode which enables you to make one job out of multiple originals. It is distinguished from the ‘Multiple sheets’ input mode by the way the job is sorted. See (see ‘Select the input mode’ on page 184) for a description of the input modes.
Illustration

[152] Input mode
Make a set copy
-
Open the 'Feeding' card in the 'Original' section.
-
Use the 'Input mode' function key to select 'Set'.
-
Make other settings as required and feed the original.
-
Press the green Start key to start the copy job. Your original is fed into the scanner. The printer starts.
-
Feed the other originals that make up your set. When 'Automatic feed' is enabled, you do not have to press the green Start key every time you feed an original.
-
When all originals are scanned, press the green Start key to close the set.
-
When you want to abort your job, press the red Stop key. When you press the red Stop key, the entire job is deleted.
Chapter 5
Océ TDS700 Power Logic® controller Remote
Introduction to Océ TDS700 Power Logic® controller Remote
Use the Océ TDS700 Power Logic® controller Remote to access the Océ TDS700 Power Logic® application
In order to access the Océ TDS700 Power Logic ^® controller application from a remote workstation (e.g. when you have bought a system without a monitor, mouse and keyboard) you must use Océ TDS700 Power Logic ^® controller Remote to connect to the controller.
You can use Océ TDS700 Power Logic® controller Remote to access the following workspaces from a remote workstation.
■'Print jobs'
Use this workspace to manage the print and copy jobs.
■'Scan jobs'
Use this workspace to manage your scan jobs and scan destinations.
■Scanner 'Templates'
Use this workspace to manage the scanner templates.
■'Preferences'
Use this workspace to change the default settings of the system.
■'Configuration'
Use this workspace to set all the connectivity and security settings.

Note: Certain functions cannot be used when you logon remotely to the Océ TDS700 Power Logic® controller application e.g. (Océ Matrix Logic and scan-to-file viewing with Océ View station LT).
User modes
The Océ TDS700 Power Logic® controller application has different user modes (see 'The Océ TDS700 users' on page 29). An additional user mode is the Océ Service mode. This mode is for the Océ service technician only. You can check in which user mode you are logged on because the user name is displayed in the left hand side of the status bar at the bottom of the screen.
Install and start Océ TDS700 Power Logic® controller Remote
Install Océ TDS700 Power Logic controller Remote on your system
Introduction
The Océ TDS700 Power Logic controller Remote application can run on all platforms with Java™ Virtual Machine. This section describes the installation procedures for the different types of platforms.
Before you begin
To install Océ TDS700 Power Logic controller Remote on Windows ^® 9.x, NT, ME, XP, or 2000, your system must be at least equipped with a Pentium ^® 233 with 32 Mb RAM.

Note: The file name TDS700PLCRemote, used in the installation procedure below is an example. It can occur that you need to use another name during the installation procedure.
Installation procedure for Microsoft® Windows® platforms
- Insert the Océ TDS700 Power Logic ^® controller Remote CD-ROM or the Océ Power Logic ^® controller CD-ROM into the CD-ROM drive of your PC.
- The installation starts automatically. If it does not start automatically, run Setup.exe.
- Select the required language in the installation wizard and click 'OK'.
- Follow the instructions on the screen to complete the installation of Océ TDS700 Power Logic® controller Remote.

Note: You can only use Océ TDS700 Power Logic controller Remote when TCP/IP is enabled on your system. Ask your system administrator for help with the installation procedure for TCP/IP.
Installation procedure for UNIX™ platforms
- Check if a Java™ Runtime Environment (JRE) is installed on the system (minimum version 1.4.2).
- From the directory Products/TDS700PLCRemote/UNIX, unpack the contents of the file TDS700PLCRemote_vX.tar to a subdirectory on the system.
- Use tar xvf TDS700PLCRemote_vX.tar to unpack the file.
- Set the environment variable RL_VM_HOME to point to the installation of the JVM.
- Run the file TDS700PLCRemote.
Installation procedure for other platforms
- Install Java™ Virtual Machine (version 1.4.2).
- From the Océ TDS700 Power Logic controller Remote CD-ROM, load TDS700PLCRemote_vX.tar or TDS700PLCRemote_vX.zip.
- Set the environment variable RL_VM_HOME to point to the Java™ Products/TDS700PLCRemote/UNIX installation directory.
- If necessary, edit the Océ TDS700 Power Logic controller Remote script or batch file.
- Use the Océ TDS700 Power Logic controller Remote script or batch file to start the applications.
Start the Océ TDS700 Power Logic® application with Océ TDS700 Power Logic controller Remote
Introduction
Use the following 2 methods to start the application with Océ TDS700 Power Logic controller ^® Remote.
■Use the programs menu of your operating system.
■Use a command line parameter.
Use the programs menu to start the Océ Power Logic® controller application
- Select 'Start'.
- Select 'Programs'.
- Select TDS700 Power Logic controller application Remote.
The application starts with your default system.

Note: You can select another system than your default system (see 'Connect to the controller' on page 240).
Use command line parameters to start the applications
Six command line parameters are available to facilitate the start of the applications.
■configfile=
■server=server
Sets the indicated server as the server to connect to.
■language1=lang
Specifies the first language in combination with the parameter country1=country.
■country1=country
Specifies the first language in combination with the parameter language1=language.
■language2=lang
Specifies the second language in combination with the parameter country2=country.
■country2=country
Specifies the second language in combination with the parameter language2=language.

Note: Always use a matching combination of language and country (see the following table).
Parameters of supported languages
[36] Parameters of supported languages
| Language Language | parameters Country parameters | |
| Danish da DK | ||
| Swedish sv SV | ||
| Norwegian no NO | ||
| Finnish fi FI | ||
| Hungarian hu HU | ||
| Czech cs CZ | ||
| Polish pl PO | ||
| German | de DE | |
| Dutch | nl NL | |
| UK English | en GB | |
| US English | en US | |
| French | fr | FR |
| Italian | it | IT |
| Spanish | es ES | |
| Portuguese pt PT | ||
| Chinese simplified | cn CN | |
| Chinese traditional | cn TW | |
| Japanese | ja | JP |
| Russian | ru RU |
Apply the parameters to the Océ TDS700 Power Logic controller Remote application
Apply the parameters to the following application: TDS700 Power Logic® controller application remote.exe
The easiest method to apply the parameters to the application is to create a shortcut for the application. Then add the command line properties.

Note: The .exe file is usually located in C:\Program Files\TDS 700 Power Logic Controller Remote\Bin\OceRemoteLogic.exe.
Example of a command line parameter
The example below shows how to start the controller applications with the configuration file 'Myconfig.cfg', connected to the 'MyTDS700' server. The first language is set to UK English and the second language is set to French.
C:\Program Files\Remote Logic\Bin\AL.exe configFile=Myconfig.cfg server=MyTDS700 language1=en country1=GB language2=fr country2=FR .
Connect to the controller
Introduction
After you start Océ TDS700 Power Logic ^® controller Remote, you must connect to the Océ TDS700 Power Logic ^® controller.
You can do the following when you connect to the controller.
■Select a system from the drop-down list.
■Add a system to the drop-down list.
■Remove a system from the drop-down list.
When the Océ TDS700 is not available in the 'Connect to' window, you must add the Océ TDS700 to the list of available systems.
How to connect to a system
- Run the application.
- From the 'File' menu, select 'Connect to'.
- Select the system from the drop-down list.
- Click 'OK'.

Note: From the 'Edit' menu, select 'Options' to define the default system. This is recommended if you frequently connect to the same system.
How to add a system
- From the 'File' menu, select 'Connect to'.
- Click 'Edit'.
The 'Edit systems' dialogue box appears. - Enter the IP address or the name of the system in the 'Systems' box.
- Click 'Add'.
The system is added to the list. - Click 'OK' 2 times to return to the application.
How to remove a system
- From the 'File' menu, select 'Connect to'.
- Click 'Edit'.
The 'Edit systems' dialogue box appears. - Select the system you want to remove.
- Click 'Remove'.
The system is removed from the list. - Click 'OK' 2 times to return to the application.
Use Océ TDS700 Power Logic® controller Remote
Automatic logon
Introduction
The 'Automatic logon' option enables you to start an application automatically in the indicated user mode.
How to enable automatic logon

| Step Action | |
| 1 Access Océ TDS700 Power Logic controller Remote.From the 'Edit' menu, select 'Options'.The 'Options' window appears. | |
| 2 Make sure that the Host name and Default system are configured correctly otherwise you cannot connect to the controller. | |
| 3 Select the 'Enable automatic logon' checkbox. | |
| 4 From the drop-down box, select the user mode for the automatic logon. | |
| 5 Enter the password that corresponds to the selected user mode. | |
| 6 Click 'OK'. |
Automatic logon is now enabled.
Log on to Océ TDS700 Power Logic® controller Remote
User modes
The Océ TDS700 Power Logic ^® controller application has the following user modes.
■Repro operator
■Key operator
■System administrator
■Océ Service.
Only assigned operators are allowed to use the user modes. Different passwords are required to access the user modes.
You do not need a password for the anonymous user mode.
Passwords
■ The default password for the system administrator is SysAdm.
■ The default password for the repro operator is RepOp.
■ The default password for the key operator is KeyOp.
It is advised to change the default passwords to prevent unauthorised access. When a user is logged on, the user can change the password for the current user mode. (see 'Change the 'Password" on page 244)

Note: The passwords are case sensitive.
Authorisation
There can only be one system administrator, key operator or repro operator active at a time in the application. Only one user at a time that is logged on in a certain user role is authorised to change the settings. An error message appears when a second user tries to log on in a certain user role. There is no limitation of users authorised to view the settings.
How to log on to the controller application

- Select the 'Log on' menu to access the logon dialogue box.
- Select the required user name.
- Enter the password.
- Click 'OK'.
You are now logged on as special user. When you are not logged on, you have 'Anonymous' user permissions.
The status bar at the bottom shows the user mode. The logon is limited to one user only.
How to log off from the controller application
Select the 'Log on' menu and choose 'Log off'. You return to the anonymous user mode. Log off from the controller application to prevent unauthorised use.
Change the 'Password'
Illustration
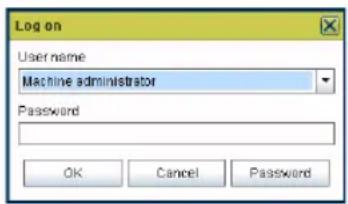
How to change the password
- Select the 'Log on' menu in the toolbar to logon to the system.
- Click 'Password' in the dialogue box.
- Open the drop-down list and select a user.
- Enter the old password.
- Enter the new password.
- Enter the new password a second time to confirm.
- Click 'OK' to save the new password.
Chapter 6 The Océ TDS700 Power Logic® controller application
Introduction
The Océ TDS700 Power Logic® controller software application
Definition
The Océ TDS700 Power Logic® controller offers one integrated software application that contains separate work spaces for users that have different permissions and tasks. The users can access their workspaces on the controller or through remote access.
The big advantage of this integrated application is that it combines a number of independent software applications into one powerful application. You only need to logon to one application to have all functionality at your disposal.
Illustration

[156] Print jobs screen
The software application on the Océ TDS700 Power Logic® controller
The software application on the Océ TDS700 Power Logic ^® controller allows users to perform different tasks, depending on the role they choose to log on.
The software application offers the following tasks in separate workspaces, accessible through the vertical icon toolbar in the left hand side of the screen (see illustration above).
| Workspace Description | |
| 'Print jobs' Print | and copy job management (Advanced queue management). |
| 'Scan jobs' Scan | job management. |
| Scanner 'Templates' | Copy and scan templates management (optional Stamps function). |
| Defaults If your | system does not include the optional scanner templates, you will use this workspace to define the default values for the copy and scan-to-file settings |
| 'Preferences' System settings management. | |
| 'Configuration' Network management and connectivity settings. | |
| Océ Matrix Logic | Optional copy job submission tool. |
| Océ Account Logic | Optional accounting module for tracking of costs. |
Toolbars and workspaces
Introduction
The Océ TDS700 Power Logic® controller application is divided in a number of workspaces. After you have logged on, you can access the workspaces. Each workspace is divided in smaller areas with specific functions.
The workspaces can be managed with the functions in the various toolbars. You can also use the top toolbar menu options to manage the workspaces. The status bar displays messages and icons to give the user for example status information about the Océ TDS700.
Illustration

Available toolbars
| Toolbar Description | |
Top menu bar Manage the general application functions.Available toolbar menus.■'File'■Edit■'View'■'System'■Job■Scan■'Log on'■'Help'. Note: Each menu contains a dynamic group of options. Depending on the workspace you access, certain options can be displayed or hidden. Note: Each menu contains a dynamic group of options. Depending on the workspace you access, certain options can be displayed or hidden. | |
| Vertical icon toolbar (Launcher) | Access the different workspaces.Available workspaces.■'Print jobs'■'Scan jobs' (optional)■Scanner 'Templates' (optional) or Defaults (when no Templates are available)■'Preferences'■'Configuration'■Océ Matrix Logic (optional)■Océ Account Logic (optional) |
| Various toolbars in the workspaces | Perform actions in each workspace or area within a workspace. Note: you can also right-click in the area to access a menu with the options available in the toolbar. Note: you can also right-click in the area to access a menu with the options available in the toolbar. |
| Status bar Give feedback on the status of the Océ TDS700.■Controller status feedback■Log on information■Workspace status feedback■System control panel feedback. | |
Available workspaces
When you have started the application you can access the workspaces via the vertical icon toolbar. The user role with which you log on determines the read and write permissions for each workspace. Every user is allowed to view the workspaces and settings but not all users can modify the settings or perform actions in the workspace.
You can resize the columns in the workspaces by dragging the table header separators. You can also change the order of the columns by dragging a selected column headers to a new position.
| Workspace Description | |
| 'Print jobs' Manage | print and copy jobs.The workspace contains the following areas.■'Scheduled jobs'■'Waiting jobs'■'Printed jobs' |
| Workspace Description | |
| 'Scan jobs' Manage | scan destinations and scan jobs.The workspace contains the following areas.■Local scan destinations on the controller■Remote scan destinations on the network■Optional file viewing function for scan jobs■View area scan jobs |
| Workspace Description | |
| 'Templates' for the flexible or the productive scanner | Manage the copy and scan templates of the scanner operator panel.The Templates workspace contains the following areas.■Active templates on the scanner operator panel.■Template library with pre-defined templates.■View area of the template settings.Note:The Océ TDS700 can include a flexible scanner or a productive scanner. Depending on your configuration, you will use the templates dedicated for the available scanner. |
| Manage the stamps for copy jobs (optional).The 'Stamp' tab contains the following areas.■Active stamps■View area stamp settings |
If you have a configuration without the scanner templates you will have another workspace (called Defaults) to replace the 'Templates' workspace in which you can set all the copy and scan to file related settings.
| Workspace Description | |
| 'Configuration' Manage the general system settings and global settings. 'Print job defaults' tab ■'Basic' settings ■'Media' settings ■'Image' settings ■'Layout' settings ■'Finishing' settings | |
| 'System defaults' tab ■'Contact' settings ■'Regional settings' ■'Print job defaults' ■Sleep mode and sleep timer settings ■'Printer' settings ■'Scanner' settings (flexible or productive scanner, depending on the configuration) ■'Memory' settings ■'Scan cleanup' settings ■'Logging' settings | |
| 'Pens' tab ■Pen settings | |
| 'Finishing (Océ Double Decker Pro)' tab ■'Separation' settings ■'Tray selection' settings | |
| Folder settings tab Off-line folding | |
| 'Configuration' | Manage the network connectivity, security settings and licenses.'Network' tab■Power Logic ® controller identification■'TCP/IP'■'FTP'■'LPD'■'Novell'■'IPX/SPX' |
| 'System setup' tab■'HP-GL'■'HP-GL/2'■'CalComp'■'PostScript'■'NIRS'■'C4'■'TIFF'■'ALS'■'ASCII'■'JPEG'■'Printer PDLs' | |
| 'Security' tab■Normal■Medium■High |
Log on as a different user
Purpose
Each user has specific rights and authorisations to perform actions in the application. To be able to perform an action in a workspace you must logon with the user role that has read and write access.
Before you begin
Make sure that you are the only user that is logged on in the selected user role. If there is another user active in the same user role, you only have read-access to the workspaces. The first user who logs on in a certain user role always has read and write permissions.
How to log on as a different user
- Click the Log on menu option in the menu bar of the Océ TDS700 Power Logic® controller application. A secondary window appears.
- Select the required user role from the drop-down box.
- Enter the password.
- Click OK.

Note: You can set a default logon role if you only want to log on as key operator for example.
Result
If you have entered the correct password, you are now logged on. The status bar at the bottom of the screen displays the log on status. If the password is not correct a message appears that asks you to enter the correct password.
Change the password
Purpose
For security reasons it may be useful to periodically change the default passwords.
Before you begin
There are 4 user roles and a service access mode in which you can log on to the system. The default passwords for the 4 user roles are listed here. It is advised to change the passwords after the system is installed to avoid unauthorised use of the system.
■'Anonymous' - no password necessary
■Repro operator - RepOp
■Key operator - KeyOp
■System administrator - SysAdmin
How to change the password
- Click the Log on menu option in the menu bar of the Océ TDS700 Power Logic® controller application. A secondary window appears.
- The drop-down box displays a user role already. if necessary select another user role.
- Click the 'Password' button.
- A second window appears where you need to fill in the new password.
- Click ok to close the window and accept the changes.
Concepts of the Workspaces
Concepts of the 'Print jobs' workspace
Introduction
You submit a print job on a workstation. A print job can be created with a printer driver or with special job submission software (e.g. Océ Print Exec® Workgroup). Next, you send the print job to the Océ TDS700. All the print jobs appear in the 'Print jobs' workspace.
Definition
The 'Print jobs' workspace is the main work area for the key operator and the repro operator of the Océ TDS700. They are in full control of the workflow on the Océ TDS700. He or she can manage all the print and copy jobs on the Océ TDS700. Depending on the status of the jobs and the configuration of the 'Print jobs' area, the jobs are printed directly or held for further processing. It is possible to store completed jobs for reprinting purposes.
Illustration
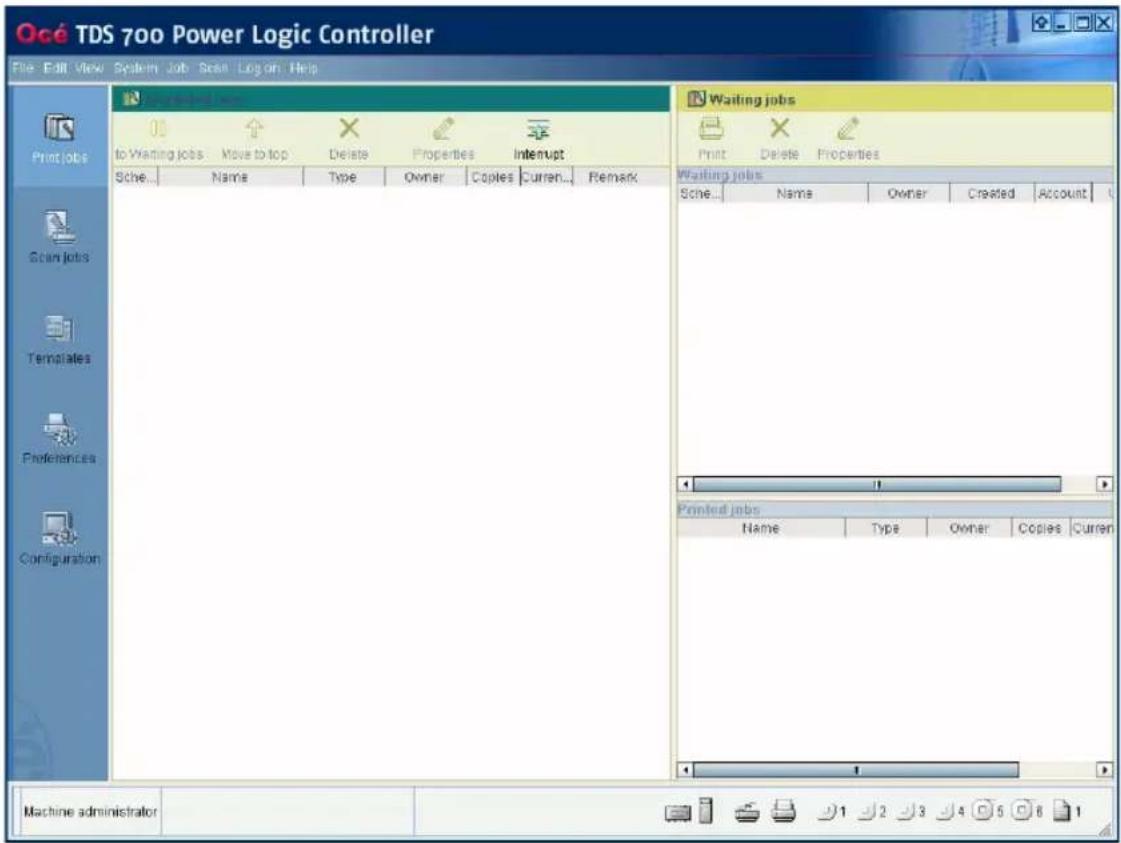
'Scheduled jobs'
The 'Scheduled jobs' area displays print jobs and copy jobs (this can also be check plots or scan to file jobs) that are printed directly on the printer without operator interaction.
The 'Scheduled jobs' area allows you to change the order in which the jobs are printed and you can move jobs to the 'Waiting jobs' area. In addition you can hold the active job to process another job first. If a job is currently printing you can interrupt the job in favour of another job. When the other job is ready you can resume the interrupted job without having to resend the job. It is also possible to delete jobs from the 'Scheduled jobs' area.
'Waiting jobs'
The 'Waiting jobs' area is a temporary holding space for jobs that need operator interaction before they are printed. You can send print jobs directly to the 'Waiting jobs' area, you can move jobs from the 'Printed jobs' to the 'Waiting jobs' area or you can set up the system to force all jobs to the 'Waiting jobs'. In the 'Waiting jobs' area the operator has full control over the jobs. It is also possible to delete jobs from the 'Waiting jobs' area.
'Printed jobs'
The 'Printed jobs' contain the jobs that have been printed. The 'Printed jobs' area gives you the opportunity to view and edit the properties of the jobs in the 'Printed jobs'. It is not necessary to create a print job again, because you can re-print a job directly from the 'Printed jobs'.
The 'Printed jobs' area is not an archive and has only limited space to store printed jobs. The jobs are removed after a pre-defined time and you can limit the number of jobs present in the 'Printed jobs' area.
Concept of the 'Scheduled jobs'
'Scheduled jobs'
The 'Scheduled jobs' receives print jobs and copy jobs that are printed directly on the printer without operator interaction. The main task of the 'Scheduled jobs' is to process the jobs in a productive and efficient way without operator interaction. If necessary, the operator can intervene to manage the jobs in the 'Scheduled jobs' area in the following way.
Toolbar options in the 'Scheduled jobs'
| Options in:'Scheduled jobs' | Description |
| 'to Waiting jobs' This option | option moves the selected job from the 'Scheduled jobs' to the 'Waiting jobs'. The job can be edited or deleted in the 'Waiting jobs'. |
| 'Move to top' This option | moves the selected job to another place in the list of jobs. The highest possible position is directly after the job that is currently active. |
| 'Delete' This option allows you to delete the selected job(s) from the 'Scheduled jobs'. | |
| 'Properties' This option | opens a secondary window in which you can view the properties of the selected job. |
| 'Interrupt'Exit Interrupt' | Firs move a priority job to the top of the list. Then use this toggle option to interrupt the currently active print job to put the print job on hold. The next job in the list can be printed. When this job is finished, the job on hold can be resumed again and will pick up where it was interrupted. |
| 'Copy priority' | This drop down list enables you to set the 'Copy priority' and to define the print job workflow. |
| Print jobs workflow This drop down list allows you to define the destination of the print jobs:'Always to Waiting jobs', 'Directly to Scheduled jobs' or 'Defined by user'. | |
If you do not want to use the toolbar options, there are 2 alternative methods to perform the same actions. You can use the menu options in the top toolbar of the Océ TDS700 Power Logic® controller application or you can right-click in the 'Scheduled jobs' to access a menu to perform actions on the selected jobs in the 'Scheduled jobs'.
Concept of the 'Waiting jobs'
Introduction
The 'Waiting jobs' area receives print jobs that do not go directly to the 'Scheduled jobs'. The 'Waiting jobs' also receive all the jobs from the 'Scheduled jobs' that are postponed for example because they have a media request time-out. You can manage the 'Waiting jobs' and the jobs in it with the toolbar options at the top of the 'Waiting jobs'.
Use the 'Waiting jobs' as your central work area to check and edit the job settings and to decide the order in which the jobs are sent to the Scheduled jobs. You can temporarily store jobs in the 'Waiting jobs' for postponed printing.

Note: Use the toolbar options that are available in the 'Waiting jobs' to manage the 'Printed jobs' as well.
Toolbar options of the 'Waiting jobs'
| Options in: 'Waiting jobs' | Description |
| 'Print' Sends the selected job(s) to the 'Scheduled jobs'. | |
| 'Delete' Deletes the selected job(s) from the 'Waiting jobs'. | |
| 'Properties' Opens a secondary window in which you can view the properties of the selected job. | |
| Enable printed jobs This drop down menu allows you to admit or block jobs from the 'Printed jobs' area. When 'Printed jobs' is enabled the jobs that are printed on the Océ TDS700 are stored there for reprinting. | |
If you do not want to use the toolbar options, there are 2 alternative methods to perform actions. You can use the menu options in the top toolbar of the Océ TDS700 Power Logic ^® controller application or you can right-click to access a menu to perform the same actions on the selected jobs in the 'Waiting jobs'.
Concept of the 'Printed jobs'
Introduction
The 'Printed jobs' is a temporary storage area for the jobs that are printed on the Océ TDS700. When the jobs leave the 'Scheduled jobs' they can go to the 'Printed jobs' or they are removed from the system. You can define if the 'Printed jobs' workspace is enabled in the toolbar of the 'Waiting jobs' or in the 'Preferences' workspace.
The main advantage of the 'Printed jobs' is that you can re-print a job that was printed before on the Océ TDS700. It is not necessary to recreate the print job because you can use the stored job in the 'Printed jobs'.
Keep in mind that the storage capacity in the 'Printed jobs' is limited. Therefore, do not use the 'Printed jobs' as an archive. If the capacity of the 'Printed jobs' is reached, you will notice a decreased performance of the Océ TDS700 can occur.
The 'Printed jobs' is managed in the 'Preferences' workspace where you can define a maximum job lifetime and a maximum number of jobs in the 'Printed jobs'.

Note: Use the toolbar options that are available in the 'Waiting jobs' to manage the 'Printed jobs'.
| Options in the 'Printed jobs' | Description |
| 'Print' This option sends | the selected job(s) in the 'Printed jobs' to the 'Scheduled jobs' for re-printing.You can even edit some of the job properties of the job in the 'Printed jobs', the copy that is sent to the 'Scheduled jobs' contains the changed settings. When this copy is printed, it also goes to the 'Printed jobs' (provided the 'Printed jobs' destination is enabled). |
| 'Delete' This option deletes the selected job(s) from the 'Printed jobs'. | |
| 'Properties' This option opens a secondary window in which you can view the properties of the selected job. You can only view one job at a time. | |
Concepts of the 'Scan jobs' and the 'Scan destinations'
Definition
A scan job is an analogue document that is scanned in on the Océ TDS700 scanner. The result is a digital version of the analogue document. You can print this digitised document (copy job) or save it to a pre-defined destination (scan-to-file). The scan-to-file jobs that you create on the Océ TDS700 scanner appear in the 'Scan jobs' workspace in the Océ TDS700 Power Logic® controller application.
The 'Scan jobs' workspace is divided in three areas that manage the complete scan jobs workflow.
■ 'Scan destinations' on the controller. Define and manage the local scan destinations.
■ 'Scan destinations' on the network. Define and manage the remote scan destinations.
■ 'Scan jobs' view area. View scanned documents or view or edit the properties of a scanned document.
'Scan destinations' on the controller
In this area of the workspace you find the default destination of the scan jobs. By default, all the scan jobs are stored on the controller. The default scan job destination cannot be deleted.
Use the toolbar at the top of the 'Scan jobs' workspace to create, edit and delete the local 'Scan destinations' on the controller.
The 'Scan destinations' area also gives access to the Unsent scan jobs folder. These jobs must go to a remote destination but cannot be delivered. The jobs are temporarily stored in the Unsent scans folder on the controller.
'Scan destinations' on the network
You can create 'Scan destinations' at a remote location instead of at local destination on the controller. The remote scan destinations area displays the remote destinations that you create. The remote destination is a folder on a workstation that is accessible through the network.
Use the toolbar at the top of the 'Scan jobs' workspace to create, edit and delete the remote scan job destinations in the 'Scan jobs' history area.
When you select a remote scan job destination the jobs that are stored at the selected destination are displayed in the right hand side of the workspace, the 'Scan jobs' view area.
'Scan destinations' view area
The 'Scan jobs' view area displays all the scan jobs that are stored at the selected scan destination. The scan job view area can give access to the scan jobs at the local and remote destinations. You can select a file from the list and view the file properties. Some properties, for example the scan job name can be edited.
Use the toolbar at the top of the 'Scan jobs' workspace to delete, view, edit, send or print the selected scan job(s).

Note: Only a scan job that is stored at a local destination on the controller can be opened with the (optional) view application Océ View Station LT®.
Concept of the 'Scan destinations'
Definition
A scan destination is a storage area for scan-to-file jobs that you create on the Océ TDS700. The scan-to-file jobs are sent to a temporary storage area where you can access the jobs for additional processing. You can create local scan destinations on the Océ TDS700 Power Logic® controller and you can create remote scan destinations on any networked PC connected to the Océ TDS700. Jobs that cannot be delivered to the indicated destination are temporarily stored in the Unsent scans folder.
The default destinations 'On controller' and Unsent scans can not be removed.
'Scan destinations'
The 'Scan destinations' area consists of 2 sections. The table below describes the 'Scan jobs' workspace.
| 'Scan destinations' | Description |
| Destination on controller | The following local storage areas can be present.■'On controller'.■Unsent scans. |
| Remote destination | You can create a maximum of 10 storage areas (local and remote destinations) on one or more networked workstations. |
Illustration
![Océ TDS 700 Power Logic Controller File Edit View System Job Scan Log on Help Scan destinations New Delete Properties View Refresh Print Originations on controller On Controller Unsent Name Size Type Modified Resolution (db) Image size [mm] Remote destinations Machine administrator](/content/2026/06/1276860/images/4e72c0f076ea1dddc61df02489b39ef61f3f5ca31f7be1c3abadc4a45e868b5a.jpg)
'Scan destinations' toolbar options

Note: Some of the toolbar options have a dual function. You can use the options to perform actions on the 'Scan destinations' and on the scan jobs that you have selected. The last three options described below are only used to perform actions on the selected scan job(s).
| Options in the 'Scan jobs' workspace | Description |
| 'New' Create a new | scan job destination. |
| 'Delete' | ■Delete the selected scan jobs destination(s).■Delete the selected scan job(s) in the 'Scan jobs' view area. Note: You cannot remove scanned files that are stored at a remote location. Note: You cannot remove scanned files that are stored at a remote location. |
| 'Properties' | ■ View and / or edit the properties of a scan job destination.■View the properties of the selected scan job. |
'View' This option is present if you have a valid license for the Océ View Station® LT application. The option allows you to view a scanned file that is stored at a local destination. Note: Files that are stored at a remote destination cannot be viewed. Note: Files that are stored at a remote destination cannot be viewed. | |
| 'Print' | Use this option to print a scan job to the 'Scheduled jobs'. |
| Send (future function) | Use this option to send the selected scanned file(s) on the controller to their initial destination. You cannot use this function for scanned files that are located at a remote location. |
If you do not want to use the toolbar options, there are 2 alternative methods to perform actions. You can use the menu options in the top toolbar of the Océ TDS700 Power Logic® controller application or you can right-click to access a menu to perform actions on the selected scan destinations or scan jobs.
Concept of the 'Templates' on the flexible scanner
'Templates'
With a template you can pre-define the settings you need for a copy or scan job. This way you can store a number of settings that are often used. The pre-defined settings are saved in a template. The template can be selected on the scanner operator panel.
The scanner operator panel of the flexible scanner offers 5 copy and 5 scan-to-file templates.
For each template you can define the following items.
[50] Template details
| Name Description | |
| 'Template name' | Give each template a unique name. |
| 'Template description' | Give additional information about the template and / or its settings. |
| 'Top 5 settings' | Allows you to display the settings in the order that you prefer. When you can place the settings you use most often at the top of the list you avoid the need to scroll through the list of settings. |
| Individual settings | Allows you to set the values for each setting, used in the template. |
Concept of the 'Templates' of the productive scanner
'Templates'
With a template you can pre-define the settings you need for a copy or scan job. You only need to set the job settings once and you can store the settings in a template that is presented on the scanner operator panel. You can re-use the template for each next job without the need to redefine all the settings every time. The scanner operator panel of the productive scanner offers 4 templates for scant to file or copy jobs. The scanner operator panel also displays a template with the settings you used last. This template is only visible on the local scanner operator panel. It cannot be displayed in the 'Templates' area.
The templates function supports the green button approach: the user only needs to select a template and start a job with the required settings instead of having to define all the settings manually for every job.
For each template you can define the following items.
[51] Template details
| Name Description | |
| 'Template name' | Give each template a unique name. |
| 'Template description' | Give additional information about the template and / or its settings. |
| 'File' mode Select one of three output types for each template. | |
| 'Custom Card' | Allows you to put together on one card the 5 settings that you require, in the order that you prefer. |
| 'Original', 'Print' and 'File' cards | Define the settings in the cards. |
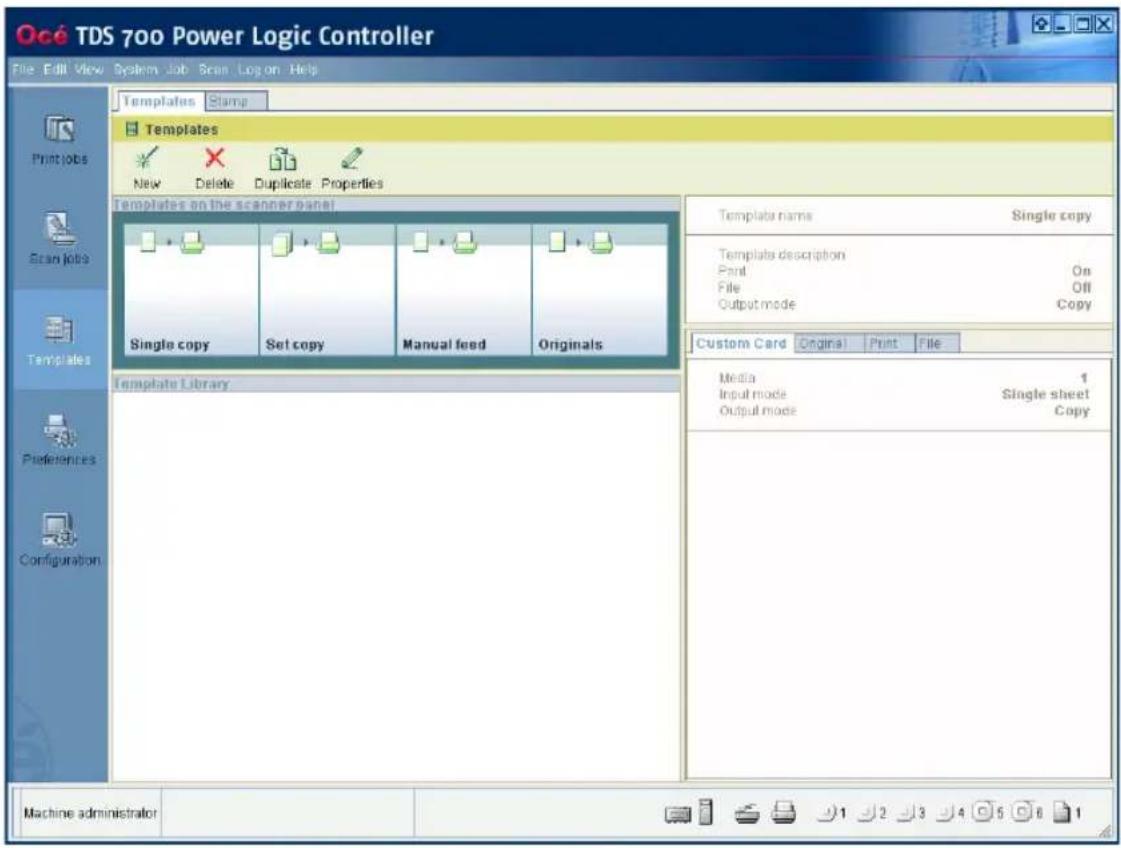
Concept of the 'Preferences' workspace
Definition
The 'Preferences' workspace allows you to define a number of overall workflow and system settings that manage the behaviour of the Océ TDS700. These settings are usually set during the installation and are not changed often after installation.
The 'Preferences' workspace consists of the following groups of settings.

Note: Only the key operator has all rights to access and changes the settings in this workspace.
| Group Description | |
| 'Print job defaults' Allows you to pre-define the values for the print job settings. | |
| 'System defaults' Allows you to pre-define the values for the settings that manage the functioning of the entire system■'Contact' details■'Regional settings'■'Job management' settings■'Sleep mode timer' setting■'Enable sleep mode' setting■'Printer' settings■'Scanner' settings (flexible scanner or productive scanner)■'Memory' settings■'Scan cleanup' settings■'Logging' setting | |
| 'Pens' settings Allows you to pre-define the pen settings for a maximum of 1000 pens. | |
| 'Finishing' settings (optional) | Allows you to pre-define the settings for the Océ Double Decker Pro. |
| 'Finishing (Folder)' settings (optional) | Allows you to pre-define the settings for the folder. |
Illustration

Concept of the 'Configuration' workspace
Definition
The 'Configuration' workspace allows you to define a number of network and connectivity settings that manage the Océ TDS700. In this workspace you also define the printer protocols and the PDL settings. These settings are usually set during the installation and are not changed often after installation.
The 'Configuration' workspace consists of the following groups of settings. You have to logon as system administrator to be able to edit the settings.
| Group Description | |
| 'Network' settings Allows you to define the standard settings for the following protocols.■'TCP/IP'■'FTP'■'LPD'■'Novell'■'IPX/SPX' | |
| 'System setup' Allows you to define the values for the security settings and the settings for the PDLs.■'HP-GL'■'HP-GL/2'■'CalComp'■'PostScript'■'NIRS'■'C4'■'TIFF'■'CALS'■JPEG■'ASCII'■'Printer PDLs' | |
| 'Security' 'Security Level'■Low■Medium■High | |
Illustration

Chapter 7 Océ License Logic

About Océ License Logic
Introduction
The Océ applications and options are protected against unauthorised use. You need to activate the license to enable an application or option for use. Océ License Logic enables you to manage the licenses very easy.
This section describes the following.
■The basic concept of Océ License Logic
■How to use Océ License Logic.
The possibilities of Océ License Logic
Introduction
Océ License Logic has the following possibilities.
Possibilities
■View the current active licenses
■Get the host id of the Océ system
■Save the active licenses
■Perform a license activation job.
You can activate new licenses or saved licenses.
The basic workflow of license activation
Introduction
Before you can use the possibilities of Océ License Logic, you must log on to Océ License Logic. The following workflow describes per step when to use which possibility.
The workflow
- Select the new options you need.
Use the following possibilities of Océ License Logic to do so.
■View the current active licenses
You can make a list of new options you need and make a list of license numbers.
Océ needs the list of new options and the license numbers to create a new license file.
■Get the host id of the Océ system.
Océ needs the host id of your Océ system to create a new license file.
- Send the list of new options you need, the list of license numbers and the host id to Océ.
Océ creates and delivers one or more new license files.
- Create a back-up of the current active licenses if necessary.
Use the following possibility of Océ License Logic to do so.
■Save the current active licenses
- Activate the licenses.
Use the following possibility of Océ License Logic to do so.
■Perform a license activation job.
The license activation job guides you through the following steps.
- Locate the license file
- Preview the new active licenses
- Accept the end user license agreement
- Finish the license activation job
- Restart the controller of the Océ system.

Note: Perform the license activation job for each license file.
The structure of license files and licenses
Introduction
A license file contains a license per option of your Océ system. You can view the current active licenses with Océ License Logic. You can preview the new active licenses with Océ License Logic during the license activation job.
A license file contains licenses of the same license-type
A license file you receive from Océ contains only licenses of the same license-type. The following license types are possible.
■Demo
■Resale.
If you order demo and resale licenses, you receive 2 license files.
What you see per situation
What you see per situation depends on the license file you use.
[54] What you see depends on the situation (1 - 2)
| Situation What do you see | |
| View the current active licenses. | You see the following.■All current active demo licenses■All current active resale licenses■All current other not active options. |
| Océ delivered one or more license files. | You see one of the following options.■A demo license file■A resale license file■A demo license file and a resale license file. |
| Preview the demo licenses during the license activation job if you use the license file with demo licences. | You see the following.■All current active demo licenses■All new active demo licenses. Note: You can not see the current active resale licenses at this point. Note: You can not see the current active resale licenses at this point. |
[54] What you see depends on the situation (2 - 2)
| Situation What do you see | |
| Preview the resale licenses during the license activation job if you use the license file that contains the resale licences. | You see the following.■All current active resale licenses■All new active resale licenses. Note: You can not see the current active demo licenses at this point. Note: You can not see the current active demo licenses at this point. |
| Preview the demo and resale licenses during the license activation job if you use the saved licenses of your back-up file. | You see the following.■All demo licenses that where active at the time you created the back-up file■All resale licenses that where active at the time you created the back-up file |
| The license activation job is finished. | You see the following.■All current active demo licenses■All new active demo licenses■All current active resale licenses■All new resale licenses■All current other not active options. |
Control your licenses with Océ License Logic
Log on to Océ License Logic
Introduction
You can run Océ License Logic on the controller of the Océ system or remote through a web browser. Access to Océ License Logic is password protected. Use the same network administrator password as you use on the Océ system to log on.
Purpose
Log on to Océ License Logic for the following purposes.
■View the current active licenses
■Get the host id of the Océ system
■Save the current active licenses
■Perform a license activation job.
You can activate new licenses or saved licenses.
Before you begin
To run Océ License Logic remote, you need the host name or IP address of the Océ system.
How to log on to Océ License Logic on the Océ TDS700 Power Logic® controller
- Open the Océ TDS700 Power Logic ^® controller application.
- Click 'Edit' in the menu bar.
- Click 'Licenses...'.
The logon window opens.
- Select system administrator.
- Enter the 'Password'.
- Click the 'Logon' button.
How to log on to Océ License Logic from a remote web browser
- Open the web browser.
Océ License logic supports Microsoft® Internet Explorer® version 5.5 or higher. - Enter the following URL in your browser: http://'printer-name'/LicenseLogic.html.

Note: 'Printer-name' is the host name or IP address of the printer.
The logon window opens.
-
Select system administrator.
-
Enter the 'Password'.
-
Click the 'Logon' button.
-
Select system administrator.
- Enter the 'Password'.
- Click the 'Logon' button.
Result
Océ License Logic starts with one of the following windows.
■The 'No active license' window.
This window opens if there are no active licenses.
■The 'View licenses' window.
This windows opens if Océ License Logic detects active licenses.

Note: If the log on failed, Océ License Logic displays a message. Read the message carefully and follow the instructions.
View the current active licenses
Introduction
When you log on and Océ License Logic detects active licenses, the 'View licenses' window opens and displays the current active licenses. Per option the following fields with license information display.
■'Option'
This field displays the name of the option.
■'State'
This field displays one of the following license states.
- 'Authorised'
- 'Not authorised'
- 'Expired'
- 'Update configuration'
■'License type'
This field displays one of the following license types.
- 'Resale'
- 'Demo'
■'Duration in days'
This field displays the time your license is valid.
■'License number'
This field displays a license number.
Purpose
View the license information for the following purposes.
■ Check the active licenses on license state, license type and license duration
■Check how long a demo license is valid
■View all options available for your Océ system.
The list of options depends on the type and version of the Océ system.
■Make a list of new options you need
■Make a list of license numbers.
When to do
View the license information to make a list of new options you need and to make a list of license numbers.

Note: If an error occurs, Océ License Logic displays a message. Read the message carefully and follow the instructions.
Before you begin
Make sure that the print system has active licenses. If Océ License Logic does not detect active licenses, the 'No active license' opens (see 'Log on to Océ License Logic' on page 281).
How to view license
- Log on to Océ License Logic.
Result
The 'View licenses' window opens.
Get the host id of the Océ system
Introduction
Océ needs the host id and the license numbers of your Océ system to create a new license file.
When to do
Get the host id to order a new demo or resale license file from Océ.
Before you begin
Open a text editor on the same system that you start Océ License Logic. You can store the host id in a document.
How to get the host id
- Log on to Océ License Logic.
The 'No active license' window opens if there are no active licenses.
The 'View licenses' windows opens if Océ License Logic detects active licenses. - Click the 'Host id' link.
The 'The host id of your Océ system' window opens. - Click the 'Copy' button to copy the host id to the clipboard.
- Open a new document in a text editor.
- Use the paste option of the text editor to copy the host id into the document.
- Enter the different license numbers into the document.
- Save the document.
Result
The host id is stored in a document. You can use this document to send the host id and license numbers to Océ.
Save the current active licenses
Introduction
You can save all current active licenses of different licenses types into one single file.
Purpose
Save the current active licenses for the following purposes.
■ Collect and save all active licenses of different types into one single file
■Create a back-up file before you start a license activation job.
When to do
Save the current active licenses before you start a license activation job or to save the current license situation.
Before you begin
Make sure that the print system has active licenses. If Océ License Logic does not detect active licenses, the 'No active license' opens (see 'Log on to Océ License Logic' on page 281).
How to save the license
- Log on to Océ License Logic.
The 'View licenses' window opens. -
Click the 'Save' button.
The 'Save licenses' window opens. -
Select a directory, enter the file name and click the 'Save' button to back-up the current active licenses.
Result
All current active resale and demo licenses are stored into one single file.
Perform a license activation job
Introduction
You need to activate the licenses on the Océ system to enable an option for use. Océ delivers the new licenses through one or more license files.
Purpose
Activate the licenses for the following purposes.
■Activate a new demo or resale license to enable a new option
■ Activate the saved licenses of your back-up file to return to the saved situation.
When to do
Activate the licenses in the following situations.
■ Activate the new licenses when you received one or more new license files from Océ
■Activate the saved licenses when an activation job for new licenses failed.
Before you begin
To activate the new licenses, you need a license file from Océ. Perform a license activation job per new license file. Make sure you use the correct license file: the host id in the license file must be the same host id as the host id on your Océ system. Make sure the license file is available on the system you run Océ License Logic.

Note: If an error occurs, Océ License Logic displays a message. Read the message carefully and follow the instructions.
How to activate the licenses
- Log on to Océ License Logic.
The 'No active license' window opens if there are no active licenses.
The 'View licenses' windows opens if Océ License Logic detects active licenses.
- If the 'No active license' window opens, click the 'Next' button.
The 'View licenses' window opens.
-
Click the 'Activate' button.
-
Click the 'Browse' button to select the location of the license file and click 'OK'
-
Click the 'Next' button
A preview of the new license situation displays. What you see depends on the license types in the license file you use (see ‘The structure of license files and licenses’ on page 279). You see one of the following options.
■ If you use a license file with demo licenses, the current active and the new demo licenses display
■ If you use a license file with resale licenses, the current active and the new resale licenses display
■ If you use a saved file with demo and resale licenses, the demo and resale licenses display like the time you created the back-up file.
- Click the 'Next' button.
The end user license agreement displays.
-
Read the end user license agreement carefully. If you agree, select 'I accept'.
-
Click the 'Finish' button to activate the license.
The 'View licenses' window displays.
- Restart the controller of the Océ system.
Result
The licenses are active and the options are ready for use.
Chapter 8
Accounting software: Océ Account Center
An overview of Océ Account Center
Introduction
Use Océ Account Center to manage the account information of the print, copy and scan-to-file jobs for your Océ TDS and Océ TCS devices.
Definition
Océ Account Center consists of the following two software modules.
■Océ Account Logic
Océ Account Logic runs on the Océ Power Logic® controller. You can connect to Océ Account Logic from a remote workstation through a web browser.
The users use Océ Account Logic to enter the account information. The user can enter the account information for the copy and scan-to-file jobs and for the print jobs. The users can enter the account information at the Océ Power Logic ^® controller and at the workstation.
The administrator can manage Océ Account Logic from the 'Administration' screen on the application.
■Océ Account Console.
Océ Account Console runs on a PC that functions as a server. You can connect to Océ Account Console from a remote workstation through Internet Explorer.
Access to Océ Account Console application is password protected and limited to authorised personnel.
The administrator uses Océ Account Console to create the 'Account information' dialogue. The administrator publishes the 'Account information' dialogue for Océ Account Logic and other applications.
The bookkeeper uses Océ Account Console to retrieve and export the log data. The bookkeeper uses the log data for accounting purposes.
Illustration
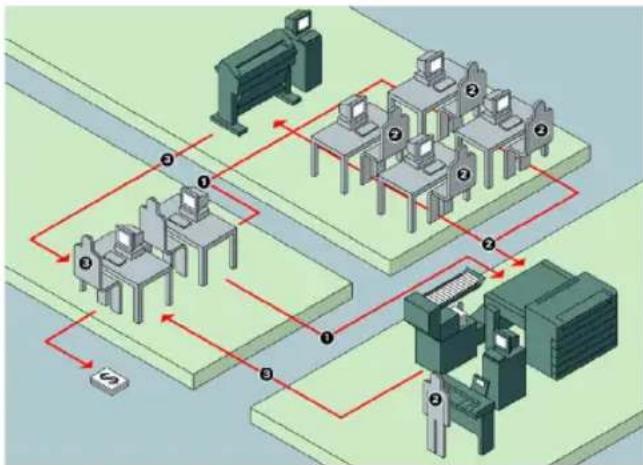
flowchart
graph TD
    A["User"] --> B["Computer"]
    B --> C["Computer 1"]
    B --> D["Computer 2"]
    B --> E["Computer 3"]
    B --> F["Computer 4"]
    B --> G["Computer 5"]
    C --> H["Data Bus"]
    D --> H
    E --> H
    F --> H
    G --> H
    H --> I["Server"]
    style A fill:#999,stroke:#333
    style B fill:#999,stroke:#333
    style C fill:#999,stroke:#333
    style D fill:#999,stroke:#333
    style E fill:#999,stroke:#333
    style F fill:#999,stroke:#333
    style G fill:#999,stroke:#333
    style H fill:#ccc,stroke:#333
    style I fill:#ccc,stroke:#333
User roles and tasks in Océ Account center
[55] User roles and tasks in Océ Account center
| Users Tasks | |
| 1) Administrator A) Create, manage and delete the account dialogue.B) Publish the account dialogue to the Océ TDS700 Power Logic® controller. | |
| 2) Users C) Use the dialogue of Océ Account Logic or the dialogue in the Océ Windows Printer Driver (WPD) or Océ Print Exec Workgroup to specify the account information for each copy, print and scan-to-file job. | |
| 3) Bookkeeper D) Retrieve and use the account information of the copy, print and scan-to-file jobs that is stored on the Océ TDS700 Power Logic® controller. The log data serves as input for the accounting reports and invoices. | |
Access to Océ Account Logic
Provided you have a valid license, you can access the application via the vertical icon tollbar in the Océ TDS700 Power Logic® controller application.
Actions to access Océ Account Logic.
■Access the Océ TDS700 Power Logic ^® controller application.
- Click the Océ Account Logic icon at the bottom of the vertical icon toolbar. A secondary, smaller window appears on top of the window of the Océ TDS700 Power Logic® controller application. Please note that when you click the screen in the background, the smaller screen with Océ Account Logic disappears to the background. Minimise the screen in the foreground to retrieve the Océ Account Logic screen.
■ Access the 2 tabs to define the accounting data for the copy& file and print jobs.
Océ Account Logic®
Introduction to Océ Account logic
Definition
Use Océ Account Logic to link account information to your job. The account information requirements are defined and managed by the administrator.
Purpose
Use Océ Account Logic for the following.
■Enter the account information for the print jobs
■Manage print jobs that do not have valid account information
■ Enter account information for the copy and scan-to-file jobs
■Lock and unlock the scanner
■ Administer Océ Account Logic (administrators only).
Summary of Océ Account Logic
Sections
Océ Account Logic has the following three sections.
■The 'Copy & File' tab
Use this tab to enter account information for copy jobs and scan-to-file jobs.
■The 'Print' tab
Use this tab to enter account information for print jobs.
■The 'Administration' window.
Use this window to define the administrative settings for the application. Access to this window is password protected and limited to the application administrator.
Océ TDS700 Power Logic® controller setup
Introduction
Before you begin to use Océ Account Logic, you must do the following.
■ Activate Océ Account Logic by activating the licence in Océ License Logic.
■Check the correct settings in the Océ TDS700 Power Logic ^® controller application. When you have activated Océ Account Logic the relevant settings in the Océ TDS700 Power Logic ^® controller application will be set to the correct value.
Before you begin
Before you begin you can check and if necessary modify the correct settings in the Océ TDS700 Power Logic ^® controller application on the Océ TDS700 Power Logic ^® controller application, log on as a machine administrator.

Note: Refer to the on-line help of the Océ TDS700 Power Logic® controller application for information about the settings and the location of the settings.

Note: After an upgrade of Oce Account Logic all the administrative settings are maintained. You can check the settings in the 'Administration' window.
The correct settings
| The path to the setting in the Océ TDS700 Power Logic® controller application | Definition Explanation | |
| Path: 'Preferences' - 'System defaults' - 'Job management' - 'Print jobs' | Select 'Always to Waiting jobs'. | Océ Account Logic requires that all jobs are sent to the 'Waiting jobs' area. Note: The print jobs that have valid account information are automatically moved from the 'Waiting jobs' to the 'Scheduled jobs'. Enter the account information for the print jobs that do not have valid account information on the 'Print' tab of Océ Account Logic. Note: The print jobs that have valid account information are automatically moved from the 'Waiting jobs' to the 'Scheduled jobs'. Enter the account information for the print jobs that do not have valid account information on the 'Print' tab of Océ Account Logic. |
| Path: 'Preferences' - 'System defaults' - 'Job management' - 'Rights for printing from waiting jobs' | Repro operator & key operator only | These users are special users on the Océ TDS700 Power Logic® controller application that have all rights in the 'Print jobs' workspace. |
| Path: 'Preferences' - 'System defaults' - 'Scanner' (productive) - 'Panel time-out'Path: 'Preferences' - 'System defaults' - 'Scanner' (flexible) - 'Panel time-out' | Océ advises you to set the panel timeout to the minimum value (30 seconds). | The scanner locks when the scanner panel timeout expires. The scanner locks to prevent users to use the scanner without entering account information. When you set the timeout to a minimum value, the scanner locks after a minimum of time has passed. |
Océ Account Console®
Introduction to Océ Account Console
Definition
Océ Account Console is installed on the administrator's workstation. Access to Océ Account Console is password protected and limited to the administrator.
Purpose
Use Océ Account Console is intended for the following actions.
■Manage, preview, and publish the account information dialogue for Océ Account Logic.
■Retrieve and export the log files.
■Manage the devices.

Note: For this application a separate user manual is available.
Summary of Océ Account Console
Main parts of Océ Account Console
An administrator uses Océ Account Console to perform a number of maintenance and configuration tasks.
The main functional areas of Océ Account Console are described in the table below.
[57] Main parts of Océ Account Console (1 – 2)
| Part Description | |
| The 'Dialogue' tab 'Fields' section.■ Create an accounting dialogue. The accounting dialogue consists of a number of accounting fields.■ Delete an accounting dialogue. Please note that this action cannot be reversed.■Edit an accounting dialogue. You can change the type of accounting field.■ Change the order of the accounting field in the list.■ Make a preview of the accounting dialogue to test the validity.■Publish the accounting dialogue. Make the accounting dialogue available to external applications.'Values' section.■Create values for each accounting field.■Add values for each accounting field. You add existing values to an accounting field.■ Delete values for each accounting field. Please note that this action cannot be reversed.■Edit values for the selected accounting field■Move the selected value up or down in the list.■'Sort A..Z'. Use this option to organise the list in ascending order.■ 'Sort Z..A'. Use this option to organise the list in descending order. | |
| The 'Devices' tab 'Devices' section.■'Create...'. Use this option to create a new device.■'Delete'. Use this option to remove the device. The log data for the device is removed as well. Please note that this action cannot be reversed.■'Edit...'. Use this option to change the values for a device.■ 'Delete log data'. Use this option to remove log data of a device.■ 'Upgrade'. Use this option to upgrade Océ Account Logic.'Tasks' section.■'Compress database'. Use this option to clean up the database.■ 'Start'. Use this option to run an update dialogue or to retrieve log data.■'Edit...'. Use this option to change the conditions for the update dialogue and the log data retrieval. | |
[57] Main parts of Océ Account Console (2 - 2)
| Part Description | |
| The 'Export filters' tab | 'Overview' section.■ 'Create...'. Use this option to define the conditions to export data■'Delete'. Remove the export filter.■ 'Edit...'. Change the conditions to export log data.■ 'Copy...'. Make a duplicate of the filter settings to create another export filter.■ 'Run...'. Select the required filter and start the export of the log data.'Statistics' section.■'Create...'■'Delete'■'Edit...'■'Run...' |
| The 'Licences' screen | The license screen enables you to perform the following actions.■ Determine the host ID necessary to receive a valid licence file.■Activate the licence file.■Create a back-up of the licence file. |
| The 'Administration' screen. | The administrator screen enables you to perform the following actions.■Change the password.■Publish the data that are retrieved from other applications.■Define the remaining settings for Océ Account Console.■Set the regional settings-Application language-Units of measure (metric or imperial values)-Units of measure of the print area (metric or imperial values). |
Chapter 9
The finishing options
Get to know the folder options
The folder components
Introduction
The folder folds the output according to the selected folding settings.

Attention: You can only fold paper. If you attempt to fold polyester, transparent or vellum media, a media jam will occur.
Illustration

[164] Océ TDS700 folder
Folder components
[58] The components of the folder (1 - 2)
| Component Function | |||
| 1 | L | e | v e |
| 2 | S | t | a c |
| 3 Belt unit | |||
| 4 Second fold section | |||
| 5 Reinforcement unit | |||
r k
[58] The components of the folder (2 - 2)
| Component Function | |
| 6 Folder transport section | |
| 7 First fold section | |
| 8 First fold delivery |
The folder
Introduction
The Océ TDS700 can have a folder to fold your output. The output is folded according to the selected folding width and length with a drawing method. You can only fold paper. Polyester, transparent or vellum media cannot be folded. When you attempt to fold polyester, transparent or vellum media, a media jam will occur. The Océ TDS700 can be configured with the following finishing options.
Finishing options of the folder
[59] Océ TDS700 finishing options
| Component | Function Position of the component | component |
| Folder Folds | and stacks the output | 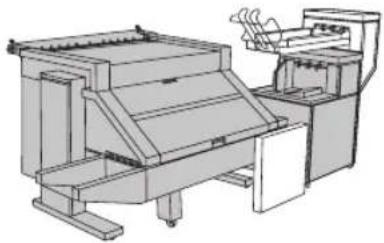 [165] Folder [165] Folder |
| Reinforcement unit | The optional reinforcement unit adds reinforcement strips to folded output |  [166] Reinforcement unit [166] Reinforcement unit |
| Belt unit The | optional belt unit transports the folded output and provides high capacity stacking of the folded output | 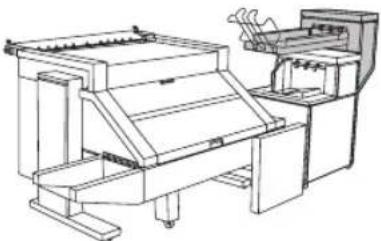 [167] Belt unit [167] Belt unit |
Set the standard folding settings
Introduction
For print jobs, you use the standard folding settings the key operator defines the settings for your Océ TDS700 system in the Océ TDS700 Power Logic® controller application.
For off-line folding, you can change the values of the settings on the printer operator panel when you press the off-line key. You can modify the folder settings on the printer operator panel for each individual off-line folding job. After the job is competed, the default settings (defined in the Océ TDS700 Power Logic® controller application) are restored on the printer operator panel.
For copy jobs, you set the folding settings manually on the scanner operator panel of the productive scanner and the flexible scanner. The settings are valid for the individual copy job. If you use the scanner templates, you can also define the folding settings for a copy job in the template.
The folding settings for a copy job on the productive scanner are described in the example below.
Illustration

[168] Folding settings of the original
Set the folding legend
- Press the 'Feeding' card in the 'Original' section.
- Press the function key 'Legend location'.
- Select 'Leading' or 'Trailing'.

Note: In the drivers, this setting is called the ‘Folding orientation’, with the options ‘Portrait’, ‘Landscape’ and ‘Automatic’.
Set the drawing method
-
Press the 'Feeding' card in the 'Original' section.
-
Press the function key 'Drawing method'.
-
Select 'Standard', 'Ericsson' or 'Afnor'.
Illustration
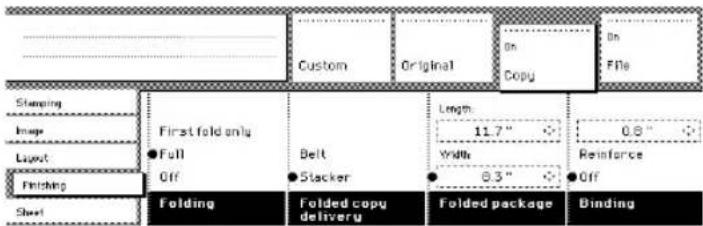
[169] Folding settings of the print
Set the folding method
- Press the 'Finishing' card in the 'Print' section.
- Press the function key 'Folding'.
- Select 'First fold only', 'Full', or 'Off'.
Set the folded print delivery
- Press the 'Finishing' card in the 'Print' section.
- Press the function key 'Folded print delivery'.
- Select 'Stacker' or 'Belt'.
Set the folded package width
- Press the 'Finishing' card in the 'Print' section.
- Press the function key 'Folded package'.
- Select 'Width'. Enter a range between 186 - 230 mm in steps of 1 mm; default 210 mm.
Set the binding strip
- Press the 'Finishing' card in the 'Print' section.
- Press the function key 'Binding'.
- Select binding enabled or disabled.
- If you selected enabled enter a range between 15 - 30 mm in steps of 1 mm; default 20 mm.
Set the reinforcement
- Press the 'Finishing' card in the 'Print' section.
- Press the function key 'Binding'.
- Select 'Reinforce'.

Note: It is not possible to select binding when you reinforce your document.
Maximum folding length
Introduction
There are maximum values for different kinds of media. The table below shows the maximum values for three types of media and the possible folding methods.
Maximum folding settings for long prints
| Paper density (g/m2) --> Fold methods | 60 75 110 | ||
| First fold output 1 fold (mm / inch) | 1220 / 48 6000 / 236 2500 / 98 | ||
| Stacker 2nd fold 2 folds (mm / inch) | 1220 / 48 2500 / 98 1220 / 48 | ||
| Stacker 2nd fold 3 folds (mm / inch) | 1220 / 48 2000 / 79 not possible | ||
| Belt 2nd fold 2 folds (mm / inch) | 1220 / 48 1220 / 48 1220 / 48 |
Folding settings 75 grams
| Output selection | Output length Delivery | |
| ‘Stacker’ or ‘Belt’ | < 2.5 m Delivered on stacker or belt | |
| ‘Stacker’ or ‘Belt’ | 2.5 m - 6 m First fold only, delivered in first fold delivery | |
| ‘Stacker’ or ‘Belt’ | >6 m length known at start Unfolded, delivered in IRT | |
| ‘Stacker’ or ‘Belt’ | >6 m length not known at start Possible paper jam | |
| ‘First fold only’ | < 6 m Delivered in first fold delivery | |
| Output selection | Output length Delivery | |
| 'First fold only' | >6 m length known at | start Unfolded, delivered in IRT |
| 'First fold only' | >6 m length not known | at start Possible paper jam |
Folding settings 110 grams
| Output selection | Output length Delivery |
| ‘Stacker’ or ‘Belt’ | < 1.22 m (3 folds) Delivered in first fold delivery |
| ‘Stacker’ or ‘Belt’ | < 1.22 m (2 folds) Delivered on stacker or belt |
| ‘Stacker’ or ‘Belt’ | > 1.22 m < 2.5 m Delivered in first fold delivery |
| ‘Stacker’ or ‘Belt’ | > 2.5 m Unfolded, delivered in IRT |
| ‘First fold only’ | < 2.5 m Delivered in first fold delivery |
| ‘First fold only’ | > 2.5 m Unfolded, delivered in IRT |
Off-line folding
Introduction
An important feature provided by the folder is off-line folding. You can use the same settings for off-line folding and normal folding. Define the default settings for off-line folding in the Océ TDS700 Power Logic® controller application or on the pritner operator panel (in Off-line mode). Do not fold Polyester or transparent media. This media can cause media jams.
[63] Off-line folding settings
| Output selection Output length Delivery | |
| ‘Stacker’ or ‘Belt’ = | < 2 m Delivered on stacker or belt |
| ‘Stacker’ or ‘Belt’ 2 | m - 2.5 m (2 folds) Delivered on stacker or belt |
| ‘Stacker’ or ‘Belt’ 2 | m - 2.5 m (3 folds) Stopped in second fold (possible paper jam) |
| ‘Stacker’ or ‘Belt’ > | 2.5 m Unfolded, delivered in Ingrated Receiving Tray |
| ‘Stacker’ or ‘Belt’ < | 6 m First fold only, delivered in first fold delivery |

Note: Use off-line folding only for the sheets that do not exceed a maximum length of 6 m. If you try to fold a sheet longer than 6 m, an error occurs.
How to make off-line folds
- Press the 'on-line' key on the printer operator panel and watch the light on the top cover of the folder.
[64] Indication light folder
| If Then | |
| the light is off the printer is | on-line and off-line folding is not possible. |
| the light blinks slowly | the printer is off-line but the folder is still processing the last prints. |
| the light blinks rapidly an error has occurred | |
| the light is on | the printer is off-line and you can feed a sheet. |

Note: See the label on the top cover of the folder.
- Make any setting for (off-line) folding on the printer operator panel.
- Feed the sheet of paper face down and with the legend on your right-hand side.

Note: Wait until the light on the folder no longer blinks before you feed a new sheet. A media jam can occur.
- Collect your output.
The reinforcement unit
Introduction
If you install a reinforcement unit, output can be delivered with a pre-punched, self-adhesive strip, see the illustration below.
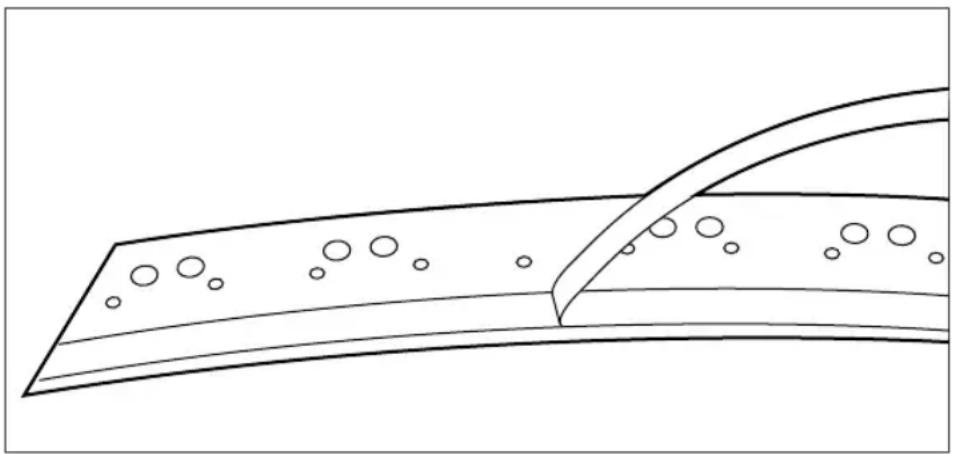
natural_image
Simple line drawing of a curved surface with scattered circular features, no text or symbols present[170] Example of a reinforcement unit
With this strip the copy can be stored in a binder, without running the risk that the punching holes tear out. You can unfold a folded map in a binder without opening the binder mechanism, see figure below.
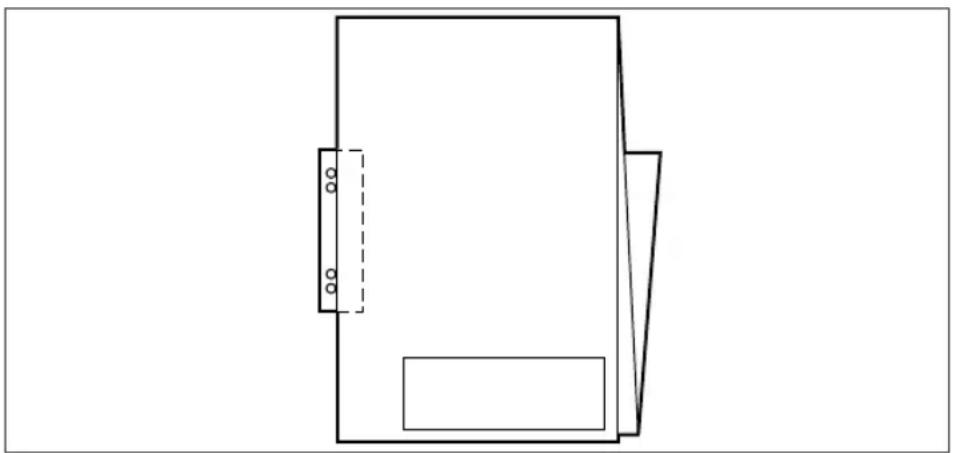
natural_image
Simple line drawing of a rectangular object with a dashed vertical line and two rectangular cutouts, no text or symbols present.[171] Example of a folded map
The optional reinforcement unit supports all media sizes larger than A4. (see ‘Clean the reinforcement knives’ on page 330) for more information about inserting a new tape roll and other maintenance issues.

Note: Reinforcement is only possible with the Standard folding method.
Enable reinforcement
- Access the Océ TDS700 Power Logic ^® controller application.
- Log on as key operator or repro operator.
- Click 'Preferences' - 'Print job defaults' - 'Finishing' - 'Binding strip'
- Select reinforcement to enable the reinforcement option.

Note: You can also set reinforcement on the printer operator panel in the off-line mode.
Set reinforcement for the copy job in the scanner operator panel of the flexible scanner
- Access the Copy templates.
- Open the 'Binding' option in the template.
- Select 'Reinforce'.
Set reinforcement for the copy job in the scanner operator panel of the productive scanner
- Press the ‘Finishing’ card in the ‘Print’ section.
- Press the function key 'Binding'.
- Select 'Reinforce'.
The belt unit
Introduction
A belt unit offers a large capacity and more flexibility. On the belt unit up to 100 A0 prints can be delivered offset stacked. You can adjust the side guides of the belt, depending on the width of the folded package.
Selecting belt as folded copy delivery on scanner operator panel of the flexible scanner
- Access the Copy templates.
- Open the 'Folding' option in the template.
- Use the scroll wheel to select full belt.
- Define the folding width and length.
Selecting belt as folded copy delivery on scanner operator panel of the productive scanner
- Open the 'Finishing' card in the 'Copy' section of the scanner operator panel.
- Press the 'Folding' function key to select full folding.
- Press the 'Folded copy delivery' function key to select the belt.
How to adjust the side guides of the belt
- Loosen the nuts, see the illustration below.

natural_image
Technical line drawing of a mechanical assembly with directional arrows indicating motion (no text or symbols)[172] Adjust the side guides
-
Adjust the plate in accordance with the width of the fold package.
-
Tighten the nuts.
Paper jam in the folder
Introduction
When printing material feeds wrongly in section 1 (see ‘Clear paper jams on the printer’ on page 371) a jam has occurred in the folding section. Any jams in the folder can occur in either the first fold section, the second fold section, the folder transport section or the belt unit.
How to clear a jam in the first fold section
- Open the top cover of the folder. The green light on the right of the folder is blinking quickly.
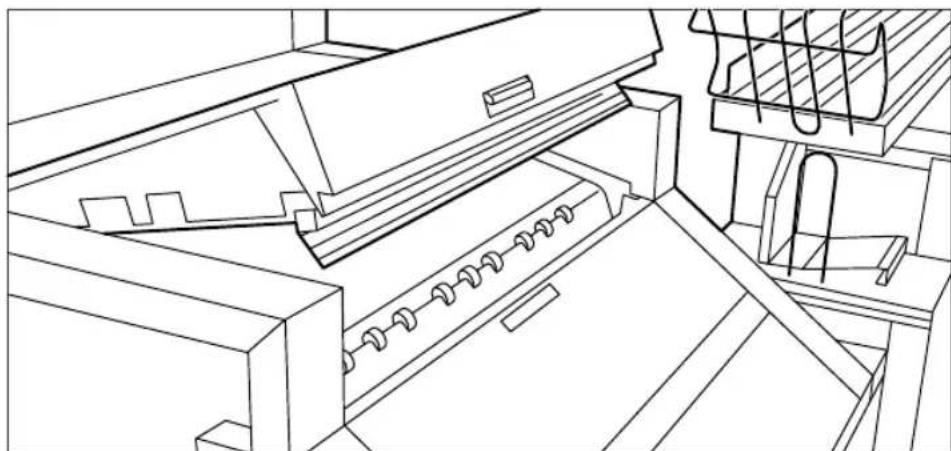
natural_image
Line drawing of an industrial machine with conveyor system and storage bin (no text or symbols)[173] Top cover of the folder
-
Remove any jammed printing material.
-
Open the cover of the first fold section.
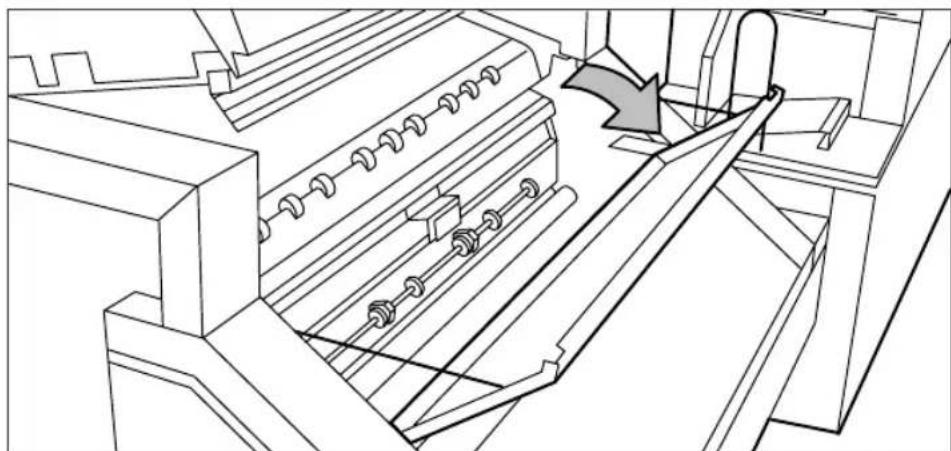
natural_image
Technical line drawing of a mechanical device with internal components and a directional arrow indicating motion (no text or symbols)[174] Opening first fold section
- Open the guide plate.

natural_image
Technical line drawing of a mechanical assembly with no visible text or symbols[175] Opening guide plate
- Remove any jammed printing material.
- Close the guide plate.
- Close the cover of the first fold section.
- Close the top cover of the folder.
How to clear a jam in the folder transport section
- Open the cover of the transport to the first fold delivery.

natural_image
Technical line drawing of a mechanical device with internal components and no visible text or symbols[176] Opening the cover of the folder transport section
- Remove any jammed printing material.
- Close the cover of the folder transport section from the left side by lifting it up and pushing the hinge away from you.
How to clear a jam in the second fold section
- Open the front door of the second fold section.

natural_image
Technical line drawing of an open industrial machine or control unit with internal components (no text or symbols)[177] Opening the front door of the second fold section
-
Remove any jammed printing material at the bottom of the second fold section.
-
Close the front door of the second fold section.
-
If you have a belt unit, put the belt in an upright position.

natural_image
Line drawing of an industrial machine with a handle and arrow indicating rotation or movement (no text or symbols)[178] Putting the belt in an upright position
- Open the delivery unit.

natural_image
Line drawing of a mechanical assembly with no visible text or symbols[179] Opening the delivery unit
- Open the guide plate with the green lever.
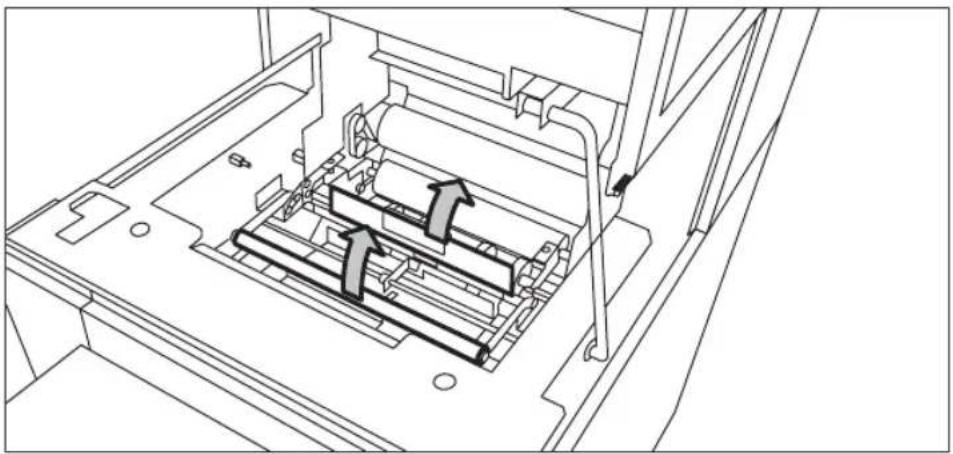
natural_image
Technical line drawing of a mechanical assembly with internal components and directional arrows (no text or symbols)[180] Opening the guide plate with the green lever
-
Remove any jammed printing material.
-
Open the vertical transport with the green lever.

natural_image
Technical line drawing of a mechanical assembly with no visible text or symbols[181] Opening the vertical transport
-
Remove any jammed printing material.
-
Close the vertical transport.

natural_image
Technical line drawing of a mechanical device with rollers and tubing, showing an upward arrow indicating motion (no text or symbols present)[182] Closing the vertical transport
-
Close the guide plate.
-
Close the delivery unit
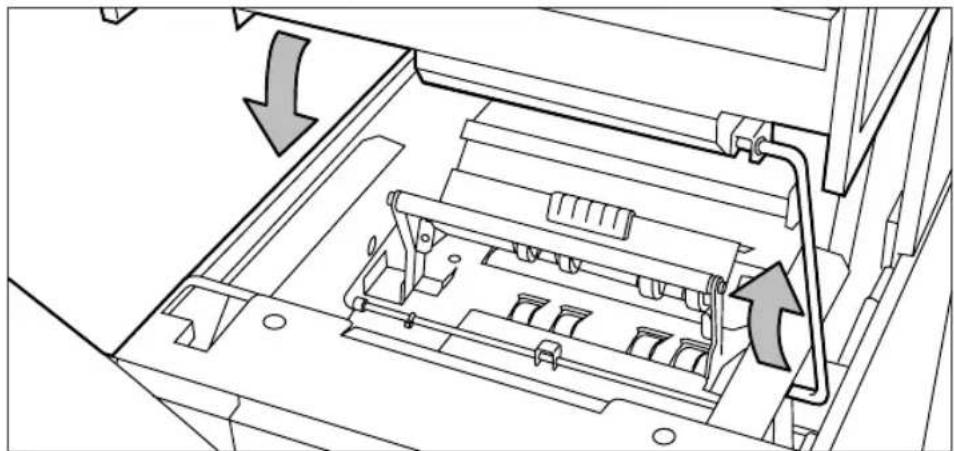
natural_image
Technical line drawing of a mechanical assembly with arrows indicating direction (no text or symbols)[183] Closing the delivery unit
How to clear a jam in the belt unit
- Open the door of the belt unit.

natural_image
Technical line drawing of a mechanical device with internal components and housing (no text or symbols)[184] Opening the belt unit door
- Squeeze the two green knobs in the upper section of the belt unit and open the plate.

natural_image
Line drawing of a mechanical device with internal components and directional arrows (no text or symbols)[185] Opening the plate
- Remove any jammed printing material.
- Squeeze the two knobs again and put the plate in its original position.
- Release the green lever in the lower section of the belt unit (by slightly lifting it and pulling it forward) to open the lower plate.

natural_image
Technical line drawing of a mechanical assembly with internal components and a directional arrow (no text or symbols)[186] Opening the lower plate
- Remove any jammed printing material.
- Pull up the green lever again (until it locks into position) to close the plate.
- Close the belt unit door.
- Put the belt in its operating position by pushing it down gently.
Maintain the folder options The reinforcement unit
Introduction

Note: To avoid damage to the reinforcement unit, only use the original reinforcement strips from Océ.
Maintenance of the reinforcement unit
This section covers maintenance activities for the optional reinforcement unit of the folder.
The following actions will be described.
■Insert a new tape roll
■Empty the waste box
■Clean the reinforcement knives.
Insert a new tape roll
Introduction
When the tape roll is empty while the printer is in stand-by, one of these messages will appear on the display
■When the tape roll is empty while the printer is in stand-by, one of these messages will appear on the display:
■‘Reinforcement unit empty’ (if the printer was running when the roll ran out of tape).
When a tape roll is empty while the printer is running, this message will be accompanied by a picture of the printer with the side door of the reinforcement unit blinking.

Attention: To prevent damage to the reinforcement unit, only use the original reinforcement strips from Océ.
Remove an empty tape roll
- Open the side door of the reinforcement unit, see the illustration below.
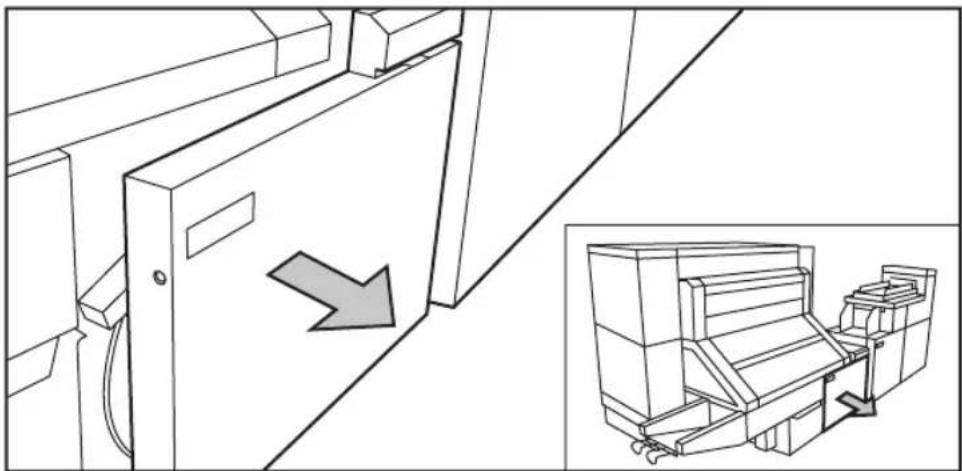
natural_image
Technical line drawing of a mechanical assembly with an arrow indicating direction, showing internal components and a close-up inset (no text or symbols)[187] Opening the side door of the reinforcement unit
- Turn the two guide plates away from the pin roller and lock the two guide plates into their open position.

natural_image
Mechanical assembly diagram showing a motor and gear mechanism with no visible text or symbols[188] Opening the guide plates
- Remove the trailing strip of the old tape.
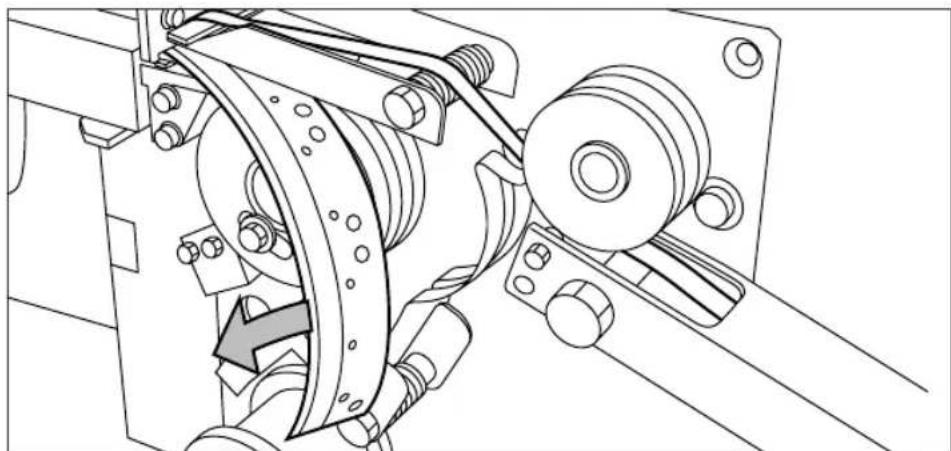
natural_image
Technical line drawing of a mechanical assembly with no visible text or symbols[189] Removing the trailing strip of the old tape
- Open the front side plate of the roll holder (remove the screw and the old kernel.)

Note: Clean the reinforcement knives before you put in a new roll. See ‘(see ‘Clean the reinforcement knives’ on page 330)
Insert a new tape roll
- Place the new roll and close the side plate. Make certain that the roll is placed with the holes to the back and the protection sheet to the front, see the illustration below.

natural_image
Technical line drawing of a mechanical assembly with rollers and shafts (no text or symbols)[190] Placing the new roll
- Loosen the end of the roll and lead the tape over the large guide roller.

natural_image
Technical line drawing of mechanical components including gears, springs, and linkages (no text or symbols)[191] Guiding the tape around the guide roller
- Guide the tape between the upper and lower knife and over the pin roller.
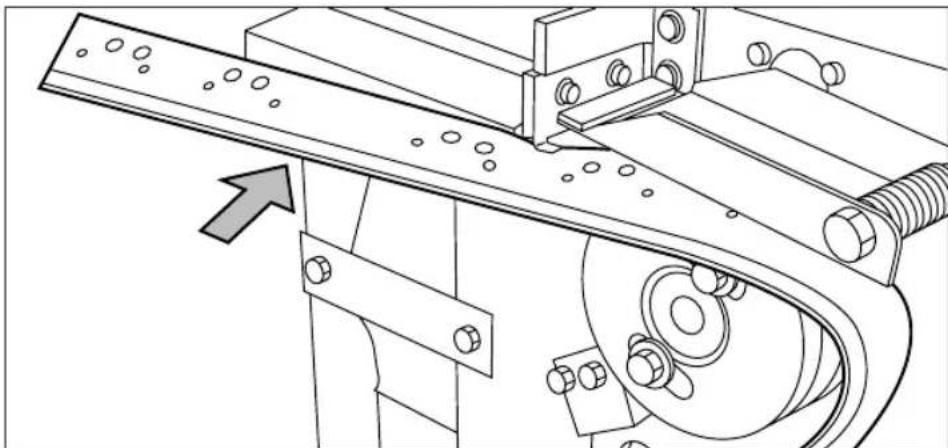
natural_image
Technical line drawing of a mechanical conveyor system with rollers and bolts (no text or symbols)[192] Leading the tape between upper and lower knife
- Make sure that at least 200 mm (2 strip lengths) of tape bulges out of the knife section.

natural_image
Technical line drawing of a mechanical assembly with gears and brackets (no text or symbols)[193] Protruding tape
- Align the holes in the tape with the hole pattern on the label. (You can find the label on the frame plate of the reinforcement unit.) Lift the tape from the pin roller and push the tape between the two knives until the holes are aligned.

natural_image
Technical line drawing of a mechanical assembly with mounting brackets and bolts (no text or symbols)[194] Adjusting the holes on the tape
- Close the guide plates of the pin roller.

natural_image
Mechanical assembly diagram showing a motor and pulley system with no visible text or symbols[195] Closing the guide plates
Prepare the tape roll for operation
- Remove the protection sheet from the tape.

natural_image
Technical line drawing of a mechanical assembly with rollers and a spring, showing no text or symbols.[196] Peeling off the protection sheet
- Guide the protection sheet back between the upper and lower knife.
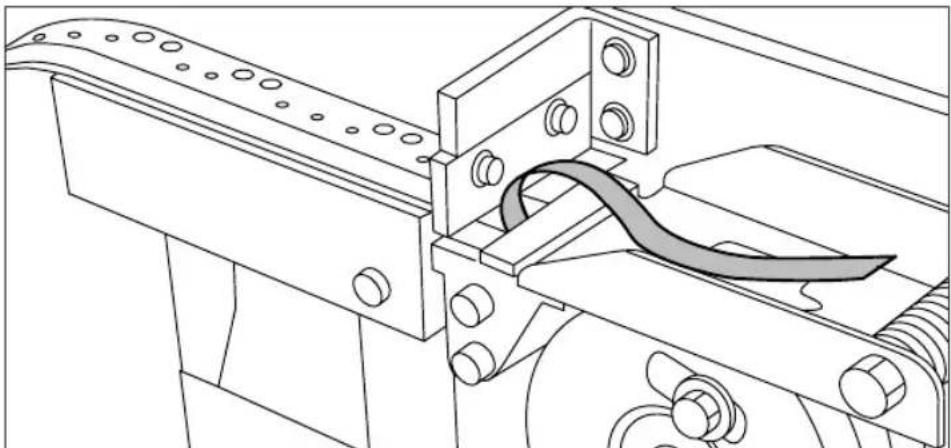
natural_image
Technical line drawing of a mechanical assembly with no visible text or symbols[197] Leading the protection sheet between upper and lower knife
- Lift the guide and move the protection sheet between the protection sheet rollers. Pull the protection sheet tight.

natural_image
Mechanical assembly diagram showing a belt drive system with pulleys and rotating components (no text or labels)[198] Leading the protection sheet between the rollers
- Insert the strip of the tape into the closed section of the slide.

natural_image
Technical line drawing of a mechanical assembly with pulleys and gears (no text or symbols)[199] Inserting the tape into the closed section of the slide.
- Hold the upper guide plate down and cut the tape at the knife section. (Quickly pull the strip up so that the upper knife cuts the tape.)

natural_image
Technical line drawing of a mechanical assembly with gears and springs (no text or symbols)[200] Cutting the tape at the knife section
- Close the side door of the reinforcement unit.
Empty the waste box
Introduction
If a reinforcement unit is installed, the protective sheet from the reinforcement tape is stored in a waste box. For each roll of tape, you must empty the box twice.

Note: You can empty the waste box while the printer is running.
Empty the waste box
- Open the waste box.
■First pull the waste box to the left hand side.
■Next pull the waste box to the front'.

natural_image
Line drawing of a cabinet with wires inside, showing a directional arrow indicating flow or movement (no text or symbols)[201] Opening the waste box
- Empty the box.
- Close the waste box.
■First push the waste box forward.
■Next push the waste box to the right hand side.

natural_image
Line drawing of a kitchen appliance with two arrows indicating airflow or movement (no text or symbols)[202] Closing the waste box
Clean the reinforcement knives
Introduction
The knives of the reinforcement unit get sticky from the glue on the reinforcement tape. You must clean the knives regularly. If you clean the reinforcement knives, you must put the knives in such a position that you have access to all the parts.
You are recommended to clean the knives when:
■ You install a new tape roll (see 'Insert a new tape roll' on page 323) or
■ When an error in the reinforcement unit has occurred.

Attention: Only use the original Cleaner K and Fixing Unit Cleaning Oil (silicon oil) from Océ, to prevent damage to the reinforcement unit.
Clean the reinforcement knives
- Press the 'On-line' key on the printer operator panel to put the printer off-line.
- Select 'Folding' with the left selection key.
- Press the down key to enter the 'Folding' menu.
- Select 'Clean knife' with the left or right key.

Note: When a job is running, the message 'Job interrupted' appears. The machine stops running after it has correctly finished the prints that were already printing. The focus can now be set to the Folding menu. A picture of the printer appears on the display with the side door of the reinforcement unit blinking.
- Press the down key to put the reinforcement unit knives in the correct position.
- Open the side door of the reinforcement unit.
- Clean the upper and lower knife using Cleaner K.

natural_image
Technical line drawing of a mechanical assembly with directional arrows indicating movement or force (no text or symbols present)[203] Cleaning the upper and lower knife
- Use the Fixing Unit Cleaning Oil (silicon oil) to oil the felt.
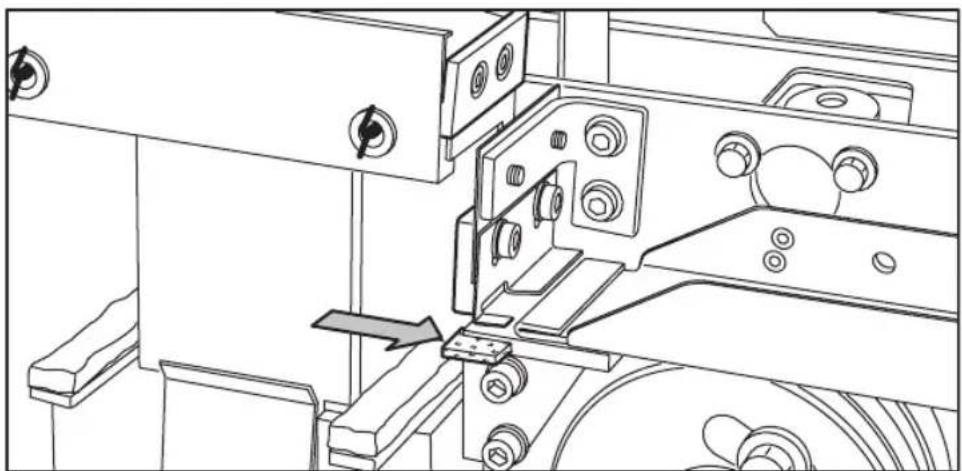
natural_image
Technical line drawing of a mechanical assembly with no visible text or symbols[204] Oiling the felt
-
Close the side door of the reinforcement unit. The knives are automatically put back in their home positions. The picture on the display disappears, and the message 'Press start to resume job' or 'Ready to print' appears, depending on whether or not a job was interrupted to clean the knives.
-
Press the 'On-line key.
Handle errors at the reinforcement unit
Clear a tape jam in the reinforcement unit
Introduction
When a tape jam occurs in the reinforcement unit, an error message appears on the display.
Illustration

natural_image
Line drawing of a mechanical machine with no visible text or symbols[205] Location of the reinforcement unit
Clear a tape jam
- Open the front door of the reinforcement unit

natural_image
Technical line drawing of a mechanical assembly with an arrow indicating direction, showing internal components and a close-up inset (no text or symbols)[206] Opening the front door of the reinforcement unit
- Turn the two guide plates away from the pin roller and lock the two guide plates into their open position.
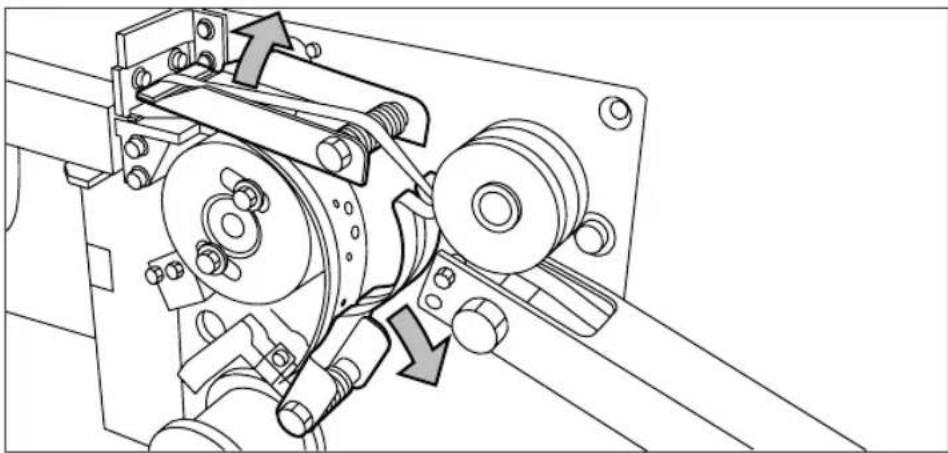
natural_image
Mechanical assembly diagram showing a motor and gear mechanism with no visible text or symbols[207] Open the guide plates
- Remove all tape between the rollers and the knives.

natural_image
Technical line drawing of a mechanical assembly with no visible text or symbols[208] Removing the tape
- Move a new trailing strip of tape between the rollers and the knives.
No reinforcement strips on the output
Introduction
When there is no reinforcement strip on the output, then
■ The reinforcement strip is not correctly installed, or
■The reinforcement strip is not available.
Install a new reinforcement strip
-
Press the On-line key on the operator panel to put the printer off-line.
-
Open the side door of the reinforcement unit.
-
Check for loose reinforcement strips in the unit with the protection sheet on (see situation B in figure 118).

natural_image
Technical line drawing of mechanical components with mounting holes and a cable (no text or symbols)[209] Situation A: No mechanical error. Situation B: Mechanical error.
- If there are, remove the tape strips in the reinforcement unit.
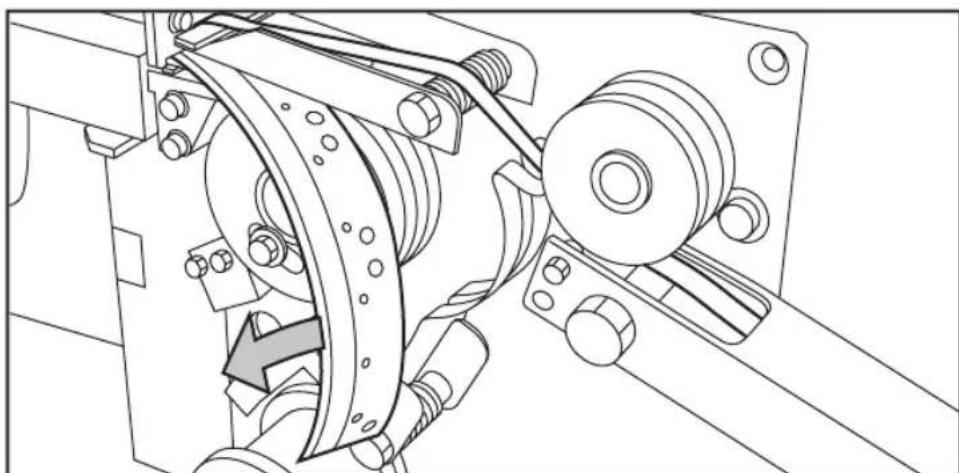
natural_image
Technical line drawing of a mechanical assembly with no visible text or symbols[210] Removing the tape

Note: If the protection sheet is not on the reinforcement strip, there is no mechanical error. You must insert a new tape roll (see 'Insert a new tape roll' on page 323). If this error frequently occurs, you must call your Océ representative.
- Remove all tape between the rollers and the knives.
- Install a new trailing strip of tape between the rollers and the knives.
Get to know the Océ Double Decker® (Pro)
The functions of the Océ Double Decker® (Pro)
Introduction
The Océ Double Decker is an optional finishing module for the Océ TDS700 to stack high-volume output in an efficient and productive manner. The Océ Double Decker Pro is the advanced version of the Océ Double Decker with additional functionality that can be used through the Océ Power Logic® controller. This section describes the components, product specifications and how to make the settings for the Océ Double Decker (Pro). For more information please refer to the on-line help of the Océ TDS700 Power Logic® controller application and the user manual of the Océ Double Decker (Pro).
The functions of the Océ Double Decker ^® and Océ Double Decker Pro ^®
The following table displays the functions and the possible product combinations.
[65] The functions of the Océ Double Decker and Océ Double Decker Pro.
| Model Function | |
| Océ Double Decker | ■Manual tray selection. |
| Océ Double Decker Pro | ■Manual tray selection■Optimised separation methods■Optimised tray selection methods■Error recovery support. |
The Océ Double Decker (Pro)
Introduction
The Océ Double Decker is an optional finishing module for the Océ TDS700 to stack high-volume output in an efficient and productive manner. The Océ Double Decker Pro is the advanced version of the Océ Double Decker with additional functionality that can be used through the Océ Power Logic®controller.
The Océ Double Decker (Pro) offers you the following functions.
■Manual tray selection
■ Optimised separation methods (Océ Double Decker Pro only)
■Optimised tray selection methods (Océ Double Decker Pro only)
■ Error recovery support (Océ Double Decker Pro only)
Illustration
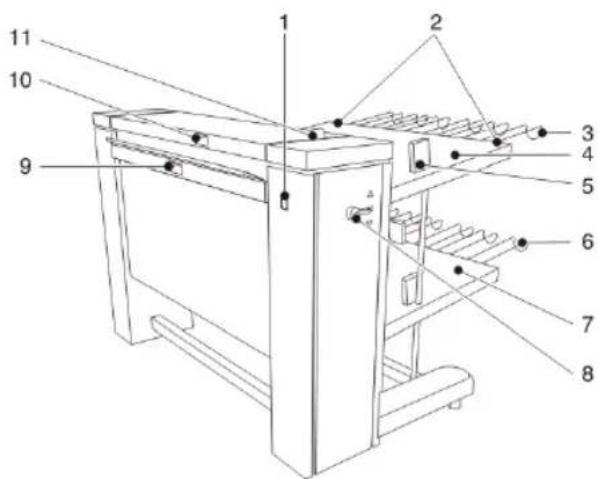
[211] Océ Double decker (Pro)
The function of the components
The following table displays the components and their function.
[66] The components of the Océ Double decker (Pro) (1 - 2)
| Nr. Component Function | ||
| 1 On / off button Turn the Océ Double decker (Pro)on and off | ||
| 2 Upper | tray handles Move the Océ Double decker (Pro) | |
| 3 Upper | tray extension Increase the size of the media traysfor large media | |
[66] The components of the Océ Double decker (Pro) (2 - 2)
| Nr. Component Function | ||
| 4 Upper | tray Collect the media output | |
| 5 Alignment guide Improve the stack accuracy | ||
| 6 Lower | tray extension Increase the size of the media trays for large media | |
| 7 Lower | tray Collect the media output | |
| 8 Tray selection lever Select the tray manually | ||
| 9 Side cover handle Access the inside to remove jammed media | ||
| 10 Top cover handle Access the inside to remove jammed media | ||
| 11 Top cover lever Close the top cover. | The top cover lever only appears when the top cover is open. | |
Product specifications
Stack capacity
The stack capacity depends on the media type. The numbers of sheets in the following table apply to the Engineering Bond 20 lbs and Plain Paper 75 g/m ^2 media with a same size. The Océ Double decker (Pro) stacks other media types with a lower capacity and a lower stack- accuracy.
[67] The stack capacity of the Océ Double decker (Pro)
| Tray Number of sheets( Engineering Bond 20 lbs and Plain Paper 75 g/m2 ) |
| Upper tray Approximate 750 |
| Lower tray Approximate 750 |
Supported media types
The Océ Double decker (Pro) supports the same media that is described in the documentation of the Océ TDS700 with the following exception. You can not use polyester film if you use the Océ Double decker (Pro) with the Océ TDS700.
Make the settings for the Océ Double Decker® (Pro)
How to set the media separation method
Introduction
You can set one of the following media separation settings in the 'Preferences' workspace of the Océ TDS700 Power Logic® controller application.
■'Separation method'
■'Separation sheet selection'
■'Separation sheet roll'.
■'Separation sheet length'
■'Leading strip'
Before you begin
Enable the settings of the Océ Double Decker Pro in the 'Preferences' workspace. Make sure you log on as key operator to be able to define the settings.
Set the media separation settings
- Log on as key operator.
- Access the 'Preferences' workspace on the Océ TDS700 Power Logic® controller application.
- Click the 'Finishing (Océ Double Decker Pro)' settings.
- Select the settings to define the 'Separation method'.
Result
The media separation method is made.
How to set the tray selection method
Introduction
You can set one of the following tray selection settings in the 'Preferences' workspace of the Océ TDS700 Power Logic® controller application.
■"Tray selection method"
■'Job type delivery'
■'Switch tray on set size'
■'Switch tray for each set'
■'Select on media size'
Before you begin
Enable the settings of the Océ Double Decker Pro in the 'Preferences' workspace. Make sure you log on as key operator to be able to define the settings.
Set the tray selection setting
- Switch the tray selection lever to the middle position.
- Log on as key operator.
- Access the 'Preferences' workspace on the Océ TDS700 Power Logic ^© controller application.
- Click the 'Finishing (Océ Double Decker Pro)' settings.
- Select the settings to define the 'Tray selection method'.
Result
The tray selection method is made.
Chapter 10
Maintain the Océ TDS700
Maintain the flexible scanner
Clean the scan area
Introduction
You need to keep the glass plate clean. A dirty glass plate causes a decreased copy and scan quality. Clean the glass plate when you have lines on the image that are not on the original.

Attention: Use Océ cleaner A to get the best results.

Attention: Make sure you do not damage the sensor at the right of the glass plate.
How to clean the glass plate
- Turn off the Océ TDS700 scanner.
- Pull the top cover towards you and lift the top cover to open it.

natural_image
Line drawing of a printer with a rotating blade and clamped mechanism (no text or symbols)[212] Open the top cover
- Clean the glass plate and the white plate with a lint-free cloth and a small quantity of the cleaner.

natural_image
Line drawing of a machine with a control panel and ruler, no text or symbols present[213] Do not damage the sensor at the right side in front of the glass plate.
-
Dry the glass plate and the white plate with another lint-free cloth.
-
Clean the white plate.
-
Lift the top cover, turn the top cover towards you and push the top cover down until you hear or feel a click.
-
Turn on the Océ TDS700 scanner.
Calibrate the scanner
Introduction
You can calibrate the scanner when you are not satisfied with the scan quality. Use the calibration wizard to calibrate the scanner.
Before you begin
Clean the glass plate clean before you start the calibration procedure (see 'Clean the scan area' on page 344). A dirty glass plate causes a decreased copy and scan quality. Clean the glass plate when you have lines on the image that are not on the original.
How to calibrate the scanner
- Select 'System' with the lower-right softkey.
The 'System settings' screen opens.
- Select 'Scanner calibration' with a left softkey to start the calibration wizard.
The message 'Insert calibration sheet' and the following icon appears.

[214] The 'Insert calibration sheet' icon
- Insert the calibration sheet and press the green start key to start the calibration process.
The message 'Scanner is calibrating...' and the following icon appears.
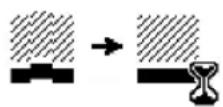
[215] The 'Scanner is calibrating...' icon
When the calibration process is ready, the message 'Press OK to continue' and the following icon appears.

[216] The remove the calibration sheet icon
- Select 'OK' with the lower-right softkey.

Note: When the calibration process stops or fails, follow the instructions on the scanner operator panel carefully.
Result
The Océ TDS700 scanner is calibrated and the scan quality is correct again.
Clear an original jam on the flexible scanner
Introduction
A red light at the scanner operator panel indicates that an original jam occurred.
How to remove a jammed original
- Pull the top cover towards you and lift the top cover to open it.
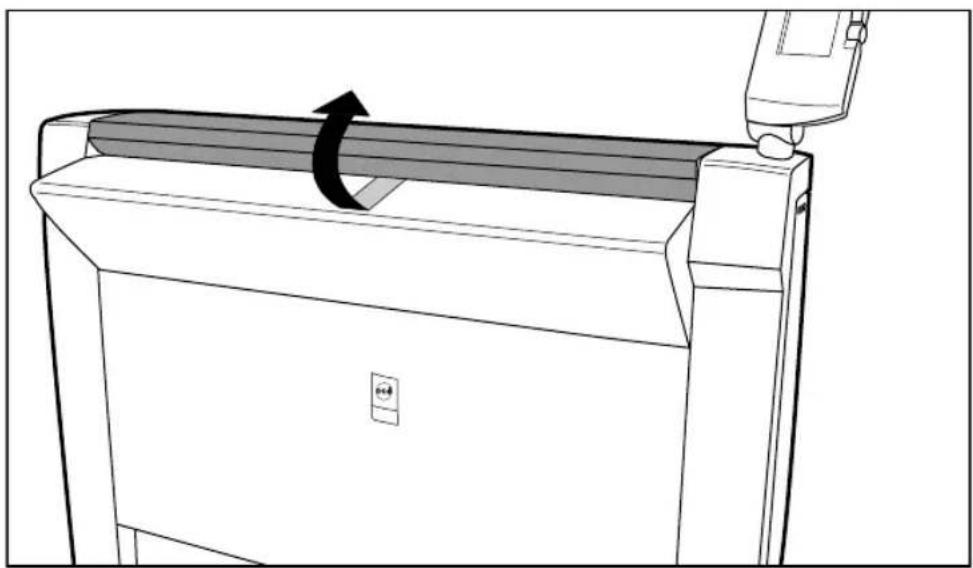
natural_image
Line drawing of a printer with a paper roll and mechanical component, no text or symbols present[217] Open the top cover
-
Remove the original.
-
Lift the top cover, turn the top cover towards you and push the top cover backwards until you hear or feel a click.
Result
The green light at the scanner operator panel is on.
Scanner error-messages and solutions
Introduction
When an error occurs, the scanner operator panel shows the following information.
■The error-message icon
■The error message
■A description of the solution
■An error code
■Functions at the lower softkeys.
In some cases you need these functions, like wind and rewind for example, to come to the solution.
How to handle error messages at the scanner
- Read the error message carefully.

[218] The error-message icon
- Follow the instructions on the scanner operator panel.
Result
You solved the error with the help of the instructions on the scanner operator panel.
Maintain the productive scanner
Clean the scan area of the productive scanner
Introduction
If the glass plate is dirty or static, it should be cleaned to ensure top quality output. A dirty glass plate causes a decreased copy and scan quality.
Clean the glass plate when you have lines on the image that are not on the original.
At the same time you can clean the white reference roller.

Attention: When you clean the reference roller, be careful not to damage the sensors on the scanner.

Attention: Make sure you do not damage the sensor at the right of the glass plate.
Clean the glass plate and reference roller
- Turn off the scanner.
- Open the top cover of the scanner, see the illustration below.

natural_image
Line drawing of a hand operating a machine with a scroll wheel (no text or symbols)[219] Open the top cover
- Clean the glass plate and the white plate with a lint-free cloth and a small quantity of the cleaner, see the illustration below.

natural_image
Technical line drawing of a mechanical assembly with no visible text or symbols[220] Do not damage the sensor at the right side in front of the glass plate.
-
Clean the white reference roller with soft cloth moistened with a small quantity of Cleaner A
-
Lift the top cover of the scanner to release the lock of the hinge, and close the cover, see the illustration below.
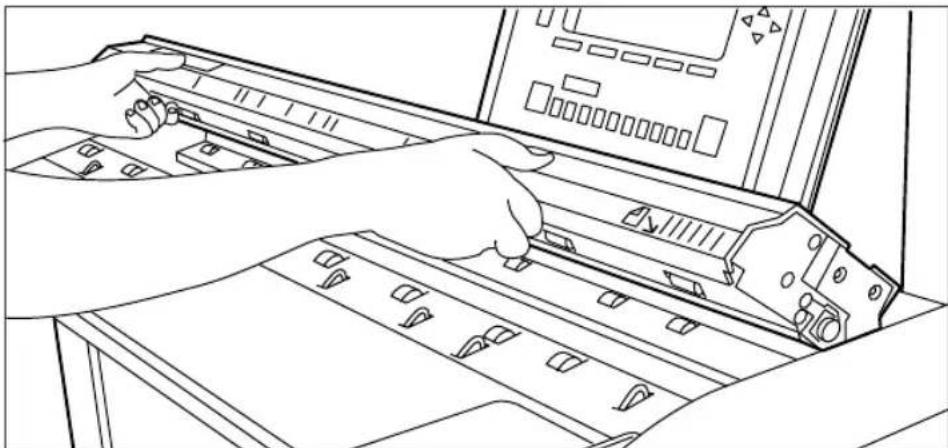
natural_image
Line drawing of hands operating a computer drive (no text or symbols present)[221] Close the top cover of the scanner
- Turn on the scanner.
Clear an original jam on the productive scanner
Introduction
When an original jam occurs on the scanner, the message ‘Original jam’ appears on the scanner display. You must remove the original from the scanner.
If an original jam occurs often:
■Check if you use the correct type of original.
■Check if you insert the original along the guide.
■Check if the original is damaged before you insert it.
How to remove a jammed original
- Open the top cover of the scanner, see the illustration below.

natural_image
Line drawing of a hand operating a machine with a scroll wheel (no text or symbols)[222] Open the top cover of the scanner
- Remove the original.
- Lift the top cover of the scanner to release the lock of the hinge, and close the cover, see the illustration below.

natural_image
Line drawing of hands operating a computer interface with ports and buttons (no text or symbols)[223] Close the top cover of the scanner
- Make the original smooth and feed the original.

Note: When you are working with poor-quality or valuable originals, you are advised to disable the rewind function to avoid the risk of jams during rewind.
Maintain the printer Media
Load rolls of media
Introduction
When a roll is empty during a print job, a 'Roll empty' indication is displayed on the printer operator panel and on the status bar of the Océ TDS700 Power Logic® controller application. You then have to load a new roll of media.
If you load new print media, you must tell the system the size of the material and the type of print material (paper, transparent, or polyester).
Currently the following media are supported on the Océ TDS700.
■Plain paper (Red label plus) 64g/m2
■Plain paper (Red label plus) 75g/m2
■Plain paper (Red label) 110g/m2
■Transparent paper 90-95g/m2
■Polyester film (CPRF) 3.5mil
■Polyester film 4.5mil
■Vellum (9020/9022) 20lbs.
When you load the media, you can place one roll at a time conveniently on top of the printer. Two protruding roll retainers prevent the roll from dropping off the printer.
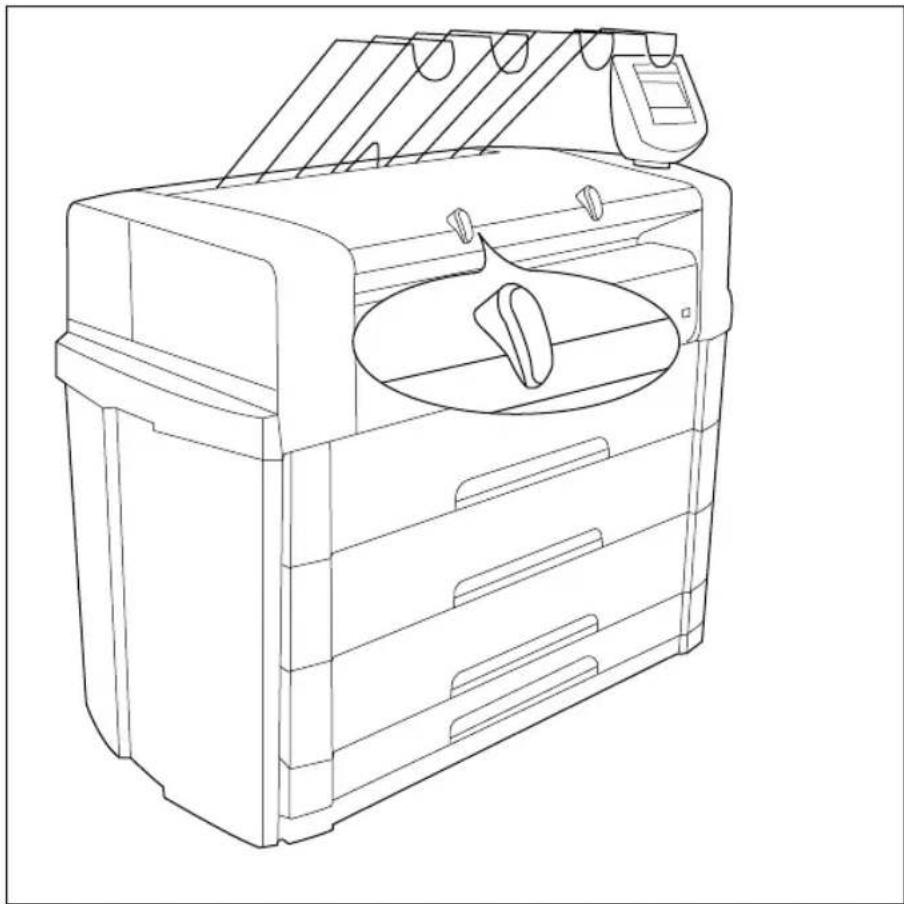
natural_image
Line drawing of a printer with handle and spout (no text or symbols)[224] Roll retainer
Load the media
- Open the appropriate roll drawer.

Note: Do not open more than one roll drawer at a time to prevent overbalance of the printer.

natural_image
Line drawing of a printer with rollers and base stations (no text or symbols)[225] Open the drawer
-
If necessary remove any scrap material from the paper roll drawer.
-
Remove the roll holder from the paper roll drawer.
-
Press the green knob inside the roll holder (on the right side) to release the locking mechanism see figure below and remove the core from the holder.

natural_image
Diagram of a roller roller assembly with an inset showing the internal component (no text or symbols present)[226] Press the knob
-
Slide the roll holder in the new roll of material while pressing the green knob.
-
Align the roll with the appropriate size indicator on the roll holder and release the locking mechanism. This line has to be completely visible.
-
Use both hands to place the holder in the roll drawer.

natural_image
Diagram of a printer printing process with rollers and a pulley, showing no text or symbols[227] Position the media
- Use both hands to slide the material under the metal paper guide until it makes contact, as shown in the above figure.

Note: When the media is particularly curled it may be somewhat difficult to slide the material under the paper guide. In that case you can slightly fold back the top few centimetres (no more than 10) of the media to facilitate the load process.
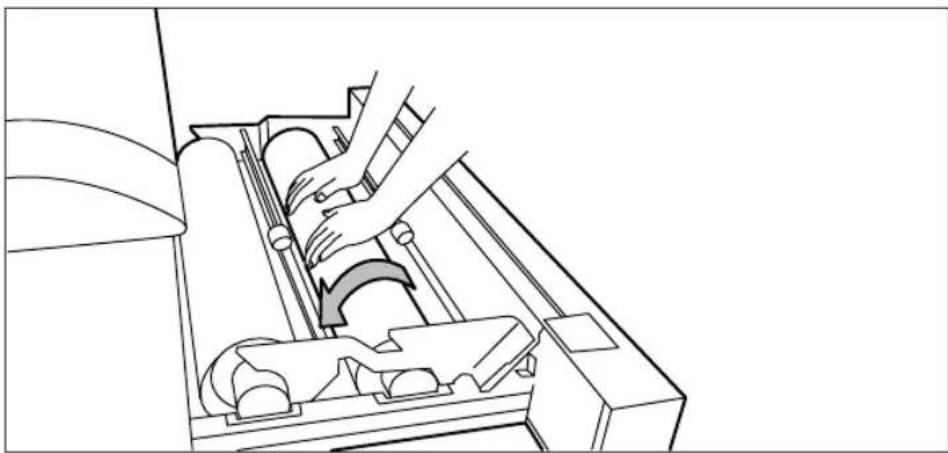
natural_image
Line drawing of a hand operating a mechanical device with no visible text or symbols[228] Use both hands
- Press the appropriate green key inside the paper roll drawer. The material will automatically be fed into the machine. Also refer to the sticker inside the drawer.

natural_image
Line drawing of a device interior with two smartphones and a tray (no text or symbols)[229] Buttons for feeding and cutting the paper
- Press the green button a second time to cut off the material protruding from the paper path.
- Remove the scrap material.
- Close the roll drawer.
Use the optional roll loader
Introduction
In order to help customers and to comply with the international safety regulations as far as maximum roll weights are concerned, Océ has developed a roll loader for use with the Océ TDS700.
Use the optional roll loader to load a roll
- Fully open the roll drawer. Inside the drawer, the roll loaders are installed. The roll loaders consist of a metal frame with a lever and a green knob in the middle of the lever.

Note: Do not open more than one roll drawer at a time to prevent overbalance of the printer.
-
Put the appropriate horizontal lever in an upright position by pulling it to the right.
-
Pull the lever completely forward. The roll holder is lifted up, see the illustration below.

natural_image
Line drawing of a printer with rollers and mechanical components (no text or symbols)[230] Roll loader
-
Remove the roll holder from the paper roll drawer using both hands.
-
Press the green knob inside the roll holder to release the locking mechanism and remove the core from the holder.
-
Slide the roll holder in the new roll of material while pressing the green knob.
-
Align the roll with the appropriate size indicator on the roll holder and release the locking mechanism. This line has to be completely visible.
-
Use both hands to place the holder in the roll loader, see the illustration below.

natural_image
Line drawing of a hand operating a cylindrical tool on a workbench (no text or symbols)[231] Use both hands
- Place the roll holder back in the roll drawer by returning the roll loader lever to its upright position. The roll will now be loaded.

Note: Be careful when you lift the lever to avoid any possible damage to the roll drawer.
-
Use both hands to slide the material under the metal paper guide until it makes contact, as described in the procedure for loading rolls of media.
-
Press the appropriate green key inside the roll drawer. The material will automatically be fed into the machine.

Note: Also refer to the sticker inside the drawer.
-
Press the green key a second time to cut off the material protruding from the paper path.
-
Remove the scrap material.
-
Return the roll loader lever to its starting position by pushing it to the left.
-
Close the paper roll drawer.
-
Press the 'On-line' key to put the system off-line.
-
Specify the size and type of material on the printer operator panel.

Note: Both DIN and ANSI paper series are available on the printer operator panel.
- Press the 'On-line' key again.
Load cut sheet material
Introduction
When a sheet feeder is empty during a print job, a 'Sheet feeder x empty' message is displayed on the printer operator panel and in the status bar of the Océ TDS700 Power Logic controller® application. You then have to load new cut sheet media.

Note: You must fan polyester cut sheet before use to prevent sticking together. Also avoid the use of sheets that have already been printed on one side.

Attention: If you decide to reload the media when the drawer is not entirely empty, it is recommended to remove all remaining media from the drawer before you insert the new media. This way you can avoid the risk of inadvertently shifting any remaining media out of place and blocking the path. This could result in a jam.
Load cut sheet material
- Open the appropriate drawer, see the illustration below.

Note: Do not open more than one roll drawer at a time to prevent overbalance of the printer.

natural_image
Technical line drawing of a mechanical assembly with no visible text or symbols[232] Open the appropriate drawer
- Release the right-hand guide by squeezing the light green release handle on the guide, see the illustration below. Move the guide to the required media size indicator.

Note: Make certain that the handle is properly aligned with the appropriate indicator.

natural_image
Technical line drawing of a mechanical assembly or mounting bracket (no text or symbols)[233] Adjust the position of the right-hand guide
- Remove the packaging of the media. In case of wrapped paper, also remove the top and bottom sheets.

Note: If you use polyester as media you have to fan the sheets before you load them to avoid that they stick together.
- Position the media in the drawer against the front plate. The side to be printed should be facing downwards.

Note: You can check if the material is properly loaded by looking through the view holes in the drawer, see the illustration above.
-
Adjust the right-hand guide. Carefully place the media in the drawer to avoid damage to the media.
-
Slide the two other guides into position. Also refer to the sticker inside the drawer.
-
Close the drawer.
Define the media type and media size
Purpose
To define the media type and media size of a media roll, sheet feeder or manual feed.
When to do
After you insert a new media roll or cut sheet material.
Define the media type and size
- Press the 'On-line' key on the printer operator panel to put the printer Off-line. The message 'Off-line' is displayed in the status window. The green LED above the 'On-line' key is off.
- Press the left selection key to shift the focus to the media selection.
- Use the arrow keys to select roll 1, to 6, sheet feeder or Manual.
- Press the right selection key to select the setting you want to define.
- Use the arrow keys to scroll through and define the settings.

Note: Media sizes of both the DIN and ANSI media sizes are available. Use the arrow keys to select either a DIN or ANSI format.
- Put the printer On-line again by pressing the 'On-line' key.

Note: You only adjust the settings on the printer operator panel when you alter the size or media type.
Toner
Refill the toner
Introduction
If the ‘Refill toner’ message appears on the printer panel, you must refill the toner immediately. Use only 1 bottle of Océ TDS700 toner each time the Océ TDS700 indicates the toner must be refilled.

Note: Every second time you have have refilled the toner, you must also replace the waste toner container.
Refill the toner
- You can leave the printer turned on when you refill the toner.
- Open the left-hand cover.

natural_image
Technical line drawing of a mechanical component with an arrow indicating a directional movement (no text or symbols present)[234] Open the side cover
-
Shake the toner bottle thoroughly. Leave the bottle closed.
-
Place the bottle on the refill opening of the toner unit.

natural_image
Technical line drawing of a mechanical device with an inset showing a lever mechanism (no text or symbols)[235] Place the bottle
- Pull the slider towards you to open both the bottle and the refill opening of the toner unit.
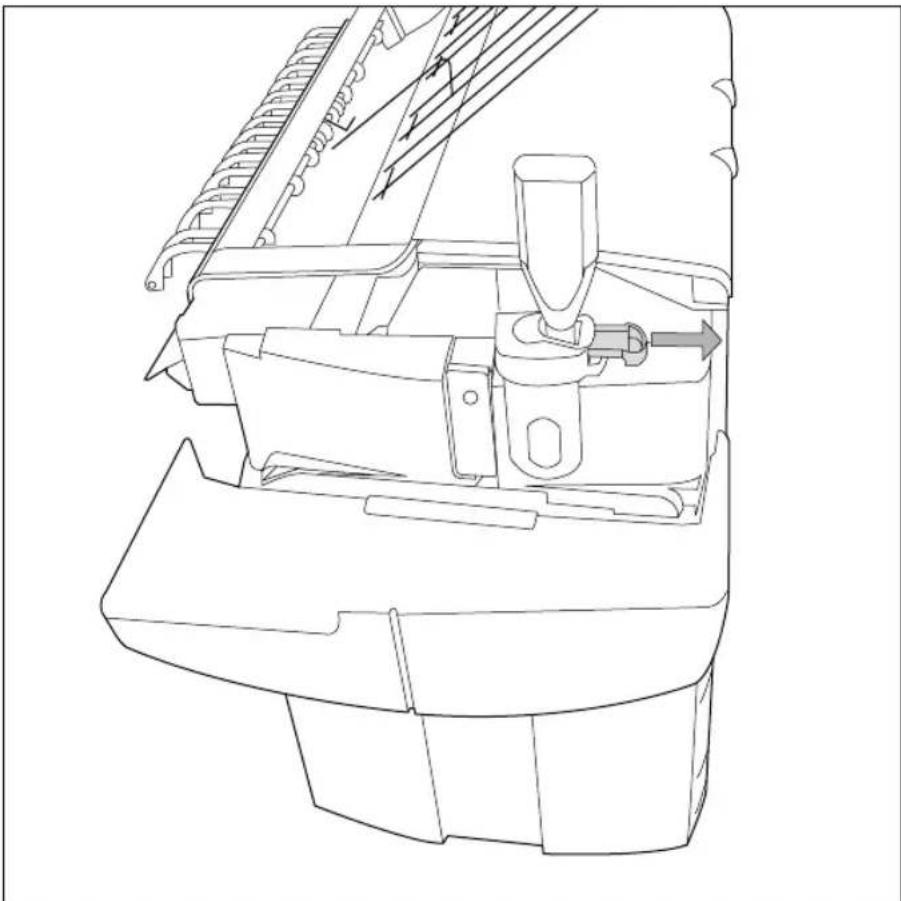
natural_image
Technical line drawing of a mechanical device interior with no visible text or symbols[236] Open the slider of the toner refill opening
-
Tap the toner bottle gently (sideways) to let the toner flow from the bottle.
-
When the toner bottle is empty, return the slider of the toner unit to the original position to close the refill opening and the toner bottle. You can now remove the toner bottle from the opening.

[237] Close the slider and remove the bottle
Replace the waste toner container

Attention: Replace the waste toner container every second time you refill the toner.
- Access the location of the waste toner container behind the toner refill unit.

Note: It is advised to change the waste toner container when the printer is not printing a job.

natural_image
Technical line drawing of a mechanical component with internal parts and mounting brackets (no text or symbols)[238] Location of the waste toner container
- Remove the waste toner container carefully from the waste toner tube and place the cap provided with the container on the opening.

natural_image
Technical line drawing of a mechanical device interior with a magnified inset showing a component detail (no text or symbols)[239] Remove the waste toner container
- Place a new waste toner container over the waste toner tube and push it into place. Make sure the container is fixed tightly.

natural_image
Technical line drawing of a mechanical component with a highlighted lever and adjustment arrow (no text or symbols)[240] Place a new waste toner container
- Close the left-hand cover to make the system available again for normal use.
Solve problems on the printer
Introduction to problem solving
Introduction
When an error occurs, the display indicates the following information.
■The nature of the problem.
■The location of the problem.
■The solution to the problem.
An attention light will flash above the printer operator panel when operator attention is required.
A buzzer can be activated to alert the operator whenever operator intervention is needed (see ‘Activate the buzzer’ on page 64).
Normally the paper moves through the system without problems. On the graphic display a cover or door indicates in which part of the system the paper has stopped. The display guides you through a sequence of steps to correct the problem. If a jam occurs in more than one location, the display will continue to instruct you until all jammed paper has been removed. If you corrected the error the display gives instruction how to continue the job.
Stickers on some parts of the system indicate which green handles, green knobs, green bars and covers, etc. you have to lift, press or open to remove any jammed paper.
Clear paper jams on the printer
When paper jams occur, the copy process stops and the message ‘Paper jam’ appears on the printer operator panel. The error location is shown by an illustration on the printer operator panel. A highlighted section of the system indicates the error location.
Take the following steps to solve a paper jam.
■Follow the instructions on the printer operator panel.
■ Leave the main power turned on to prevent loss of data, and correct the paper jam as described in the following chapters.
■Remove all the pieces of paper from the printer.
If a paper jam occurs often you can perform the following checks.
■Is the media refilled correctly.
■ Did you use the correct media (see ‘Available media types’ on page 406).
■Did you remove all the pieces of media from the paper path.
If you have a problem that you cannot correct, call your Océ service representative. In that case, turn off the system with the main switch at the back of the printer and leave the system as it is.
Paper jams can occur in the following areas.
| Nr Location | |
| 1 Folding section | |
| 2 Fuser section | |
| 3 Manual feed section | |
| 4 Roll feed section | |
| 5 Cut sheet section | |

[241] Locations where paper jams can occur
Paper jam in the fuser section

Caution: During normal use the fuser must be closed. Only open it to remove paper after a paper jam. Because of hot surfaces the operator always has to be cautious and wear heat-protective gloves, when removing printing material in the fuser section.
How to clear a jam in the fuser section
- Turn off the printer.
- Wait a few moments to let the fuser cool down.
- Open the manual feeder to release the printing material.

natural_image
Line drawing of a printer internal structure showing internal components (no text or symbols)[242] Manual feed section

Note: If you fail to do so, the OPC drum might get damaged when you remove jammed material.
- Open the cover on the left-hand side, see the illustration below. During normal use the left-hand cover has to be closed. This is necessary to ensure proper operation.
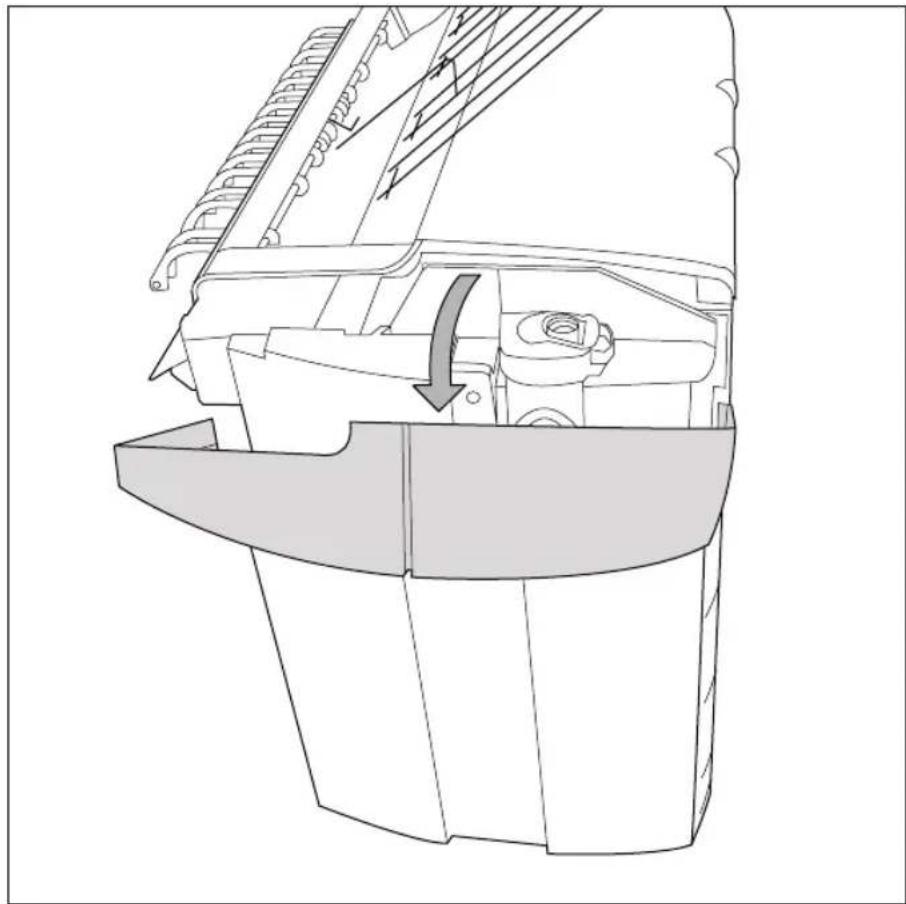
natural_image
Technical line drawing of a mechanical component with an arrow indicating a directional flow (no text or symbols present)[243] Open the left cover
- Open the fuser section cover by lifting the cover by the green handle, see the illustration below.

natural_image
Technical line drawing of a mechanical device with internal components and directional arrows (no text or symbols)[244] Open the fuser section cover
- Remove any jammed printing material from the fuser section. If the printing material is visible for the manual feed section, remove it from the front side of the Océ TDS700.
- Pull the green knob to release the fuser section cover and close the cover with the help of the green handle.
- Close the covers.
- Turn the printer on again.
Paper jam in the manual feed section
How to clear a jam in the manual feed section
- Open the manual feed by tilting it towards you, see the illustration below.

natural_image
Line drawing of a printer internal structure showing internal components (no text or symbols)[245] Open manual feeder
- Remove any jammed printing material.

Note: If the material cannot be removed easily, you must open the cover of the fusing section to get access to the jammed material. Otherwise, the OPC drum may become damaged.
- Close the manual feeder again.
Paper jam in the roll feed section
Paper jam in the roll feed section
- Open the appropriate roll drawer.

Note: Only one compartment can be open at a time.
- Remove any jammed printing material from the paper path and, if necessary, pull back the paper and rewind it.

Note: Occasionally, a jam may occur before the printing material has been cut. In that case, you can cut the material manually by pressing the appropriate green load button in the roll drawer.
- Reload the roll if the system asks you to do so (see 'Load rolls of media' on page 354).
- Close the roll drawer again.

Note: If the roll drawers are still highlighted in the illustration on the printer operator panel, re-check the roll feed section.
Paper jam in the cut sheet section
How to clear a paper jam in the sheet feeder
- Open the appropriate sheet feeder.

Note: Only one sheet feeder can be open at a time.
- Remove any jammed printing material from the paper path, see the illustration below.

natural_image
Technical line drawing of a mechanical assembly with no visible text or symbols[246] Remove jammed material from the paper path
- Close the sheet feeder again.
If the covers of the sheet feeder are still highlighted in the illustration on the scanner operator panel, re-check the sheet feeder section.
Paper jam at the integrated receiving tray

Caution: During normal use the fuser must be closed. Only open it to remove paper after a paper jam. Because of hot surfaces the operator always has to be cautious and wear heat-protective gloves, when removing printing material in the fuser section.
How to clear a jam at the integrated receiving tray
- Open the manual feeder to release the printing material.

natural_image
Line drawing of a printer internal structure showing internal components (no text or symbols)[247] Manual feed section

Note: If you fail to do so, the OPC drum might get damaged when you remove jammed material.
- Open the cover on the left-hand side of the printer.

Note: Make sure the printer is switched off before you open the fuser section.

natural_image
Technical line drawing of a mechanical component with an arrow indicating a directional flow (no text or symbols present)[248] Open the left-hand cover
- Open the fuser section cover by lifting the cover by the green handle.
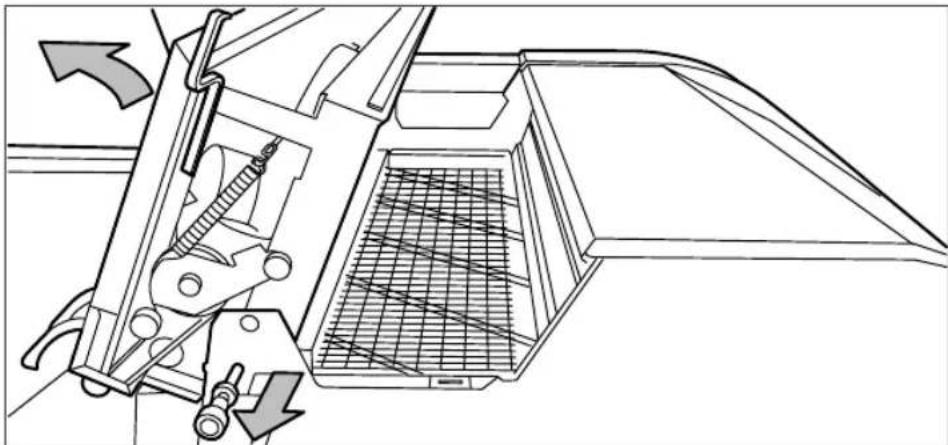
natural_image
Technical line drawing of a mechanical device with internal components and directional arrows (no text or symbols)[249] Opening the fuser section
- Remove any jammed printing material from the Integrated Receiving Tray.
- Pull the green knob to release the fuser section cover and close the cover with the help of the green handle.
- Close the left-hand cover.
- Turn the printer on again.
Appendix A Overview and tables
Overview of the Océ TDS700 system
Introduction
The Océ TDS700 is a wide format mid volume multifunctional system for printing, scanning and copying engineering documents. The Océ TDS700 offers a broad range or print, copy and scan to file functionality. The system is available in various hardware and software configurations. Depending on your needs the Océ TDS700 is available as a printer only, a printer combined with a flexible colour scanner or a printer combined with a productive scanner.
Océ TDS700 printer only configuration

natural_image
Line drawing of a printer with multiple drawers and a paper feeding tray (no text or symbols)[250] Océ TDS700, 6 roll configuration with one sheetfeeder
The Océ TDS700 supports up to 6 rolls (3 roll drawers) and up to 3 sheet feeders in the following configurations. The Océ TDS700 can combine up to 4 rolls (maximum of 2 rolls per drawer) with a maximum of 3 sheet feeders, 5 or 6 rolls can be combined with 1 sheet feeder. The default configuration includes 1 drawer with 2 rolls.
| Paper roll drawer(s) | Number of rolls | Possible combination with sheetfeeder(s) |
| 1 2 0, 1, 2 or 3 | ||
| 2 3 0, 1, 2 or 3 | ||
| 2 4 0, 1, 2 or 3 | ||
| 3 5 0 or 1 | ||
| 3 6 0 or 1 |
Océ TDS700 configuration with the flexible colour scanner
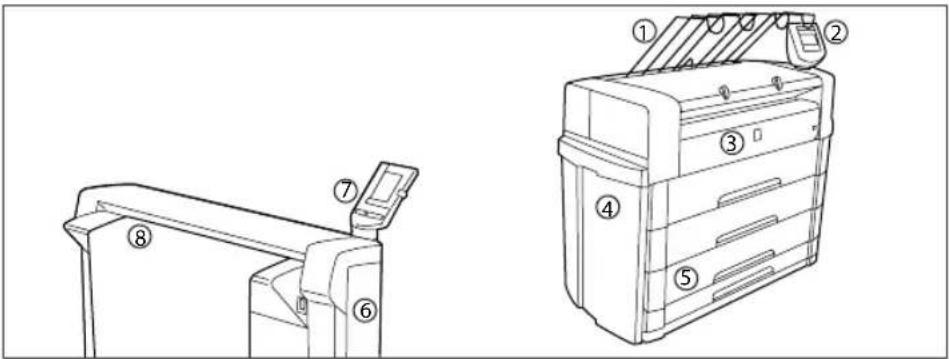
[70] Océ TDS700 components
| Nr Component | |
| 1 Integrated receiving tray | |
| 2 Printer operator panel | |
| 3 Manual feed section | |
| 4 Location of the integrated controller | |
| 5 Roll drawers or cut sheet feeders | |
| 6 Flexible colour scanner | |
| 7 Scanner operator panel | |
| 8 Scanner feed table | |
Océ TDS700 configuration with the productive black and white scanner

[71] Océ TDS700 components
| Nr | Component |
| 1 | Integrated receiving tray |
| 2 | Printer operator panel |
| 3 | Manual feed section |
| 4 | Location of the integrated controller |
| 5 | Roll drawers or cut sheet feeders |
| 6 | Productive black and white scanner |
| 7 | Scanner operator panel |
| 8 | Scanner feed table |
Printer operator panel

| Nr Component | |
| 1 Key operator key | |
| 2 Up/Down toggle key | |
| 3 | S t o p k e y |
| 4 Right selection key | |
| 5 Left selection key | |
| 6 On-line key | |
Scanner operator panel
Productive scanner

| Nr | Component |
| 1 | S t o p k e y |
| 2 | S e l e c t i o n k e y s |
| 3 | A r r o w k e y s |
| 4 | Correction key |
| 5 | N u m e r i c k e y s |
| 6 | Green start key |
| 7 | Function keys |
| 8 | Job interrupt key |
Flexible scanner

| Nr Component | |
| 1 LED (green and red attention light) | |
| 2 | D i s p l a y |
| 3 | U p p e r s o f t k e y |
| 4 | S c r o l l w h e e l k e |
| 5 | S c r o l l w h e e l |
| 6 | L o w e r s o f t k e y |
| 7 | G r e e n s t a r t k e y |
y
| Nr Component | |
| 8 | S t o p k e y |
| 9 | N u m e r i c k e y s |
| 10 Lower softkey | |
| 11 Left softkeys | |
| 12 Upper softkey | |
Specifications of the Océ TDS700
Specifications of the Océ TDS700
Introduction
The Océ TDS700 is a wide format, black and white, mid volume multi-functional printer with an optional productive black and white scanner or a flexible colour scanner. The Océ TDS700 offers a broad range of print, copy, and scan-to-file functionality.
The table below gives you more information on the performance of the system, the technical and safety requirements and general information regarding dimensions, weight, power consumption etc.
Printer
| Technology Electrophotographic LED head with organic photoconductor (OPC) drum and closed toner system | |
| Print resolution 600dpi x 1200dpi | |
| Print speed | ■6.0 m/min, 4.7 A0 portrait /min, 8.5 D-ARCH portrait/min, 9.1 D-ANSI portrait/min for Bulk material■3.6 m/min for heavy materials |
| Media sources Several possible configurations from 2 to 6 rolls, up to 3 sheetfeeders, and a manual sheet feed section (see ‘Océ TDS700 printer only configuration’ on page 382). | |
| Output sizes DIN and ANSI formats from A4 to A0 and 36”, up to 15 meters long | |
| Media types Plain, transparent, recycled, fluorescent and coloured papers; films and vellums | |
| Output reception Standard Integrated Receiving Tray (IRT) for 100 prints | |
| Warm up time None, instant behaviour | |
| Electrical requirements | 120/200/230 V, 50/60 Hz |
| Dimensions Printer | ■Width: 1440 mm■Depth: 800 mm■Height: 1475 mm Note: Reduced footprint due to an integrated Océ Power logic ® controller in the printer Note: Reduced footprint due to an integrated Océ Power logic ® controller in the printer |
| Weight | Default configuration: 290 kg |
| Safety approvals TuV GS, CETECOM, CE, UL, (c)UL, CB, FCC Class B | |
| Functionality | ■Multiple prints: up to 999■Automatic Language Sensing (ALS)■Optional climate controle function to prevent the influence of humidity on print quality■Auto roll/cassette tray selection and switching■Print manipulation: auto positioning, rotation, auto scaling, shift, adding / removing leading and trailing strips, image inversion, horizontal mirroring, and copy stamping■File spooling on the controller■Set memory: send once, process once, print many ; capacity to store up to 250 A0s and create identical sets sorted by page or by set■Concurrent receiving, processing, printing, and finishing of digital jobs■Sophisticated local and remote user communication system■Improved job management and settings management■Improved scanner templates |
Flexible scanner
| Technology■Optional console■Océ Image Logic ® real-time image processing■1 x Reduction type CCD camera | |
| Scan speed(standard) | Black&white■3 m/min. or 2 inch/sec.Greyscale & Colour (STF capability)■1 m/min. or 0.7 inch/sec. |
| Scan speed(option) | Black&white■up to 5 m/min. or 3.3 inch/sec.Greyscale & Colour■up to 4 m/min. or 2.8 inch/sec. |
| Resolution 575 dpi | |
| Camera 3 colour linear CCD21360 Pixels24 bits colour | |
| Scan width 914.4 mm | |
| Original feed Right aligned | |
| Original size Minimum■210 mm x 210 mm (L x W)Maximum■6000 mm x 1016 mm (L x W). | |
| Data format | ■TIFF (uncompressed, Packbits, G3, G4 and LZW)■PDF (uncompressed, Flate, LZW and G4)■CALS |
| Maximum media thickness | 1.5 mm |
| Scale method | ■Scale to format.Scale range 25% - 400% (0.1% fixed step interval).■Custom scale.Scale range 10% - 1000% (0.1% fixed step interval).■Exact (1 to 1).No scaling. |
| Input mode | ■Single sheet■Set |
| Number of copies | - 999 (scan once print many) |
| Colour space sRGB | |
| Image quality | ■ Original type selection (see ‘Original types for the scanner’ on page 404)■Colour selection (Black&White / Grey / Colour)■Brightness lighter/darker■Image optimization for fine details or speed |
| Image editing | ■Remove strips (leading/trailing/left/right)■Mirroring horizontal■Delete area |
| Other functionalities | ■Pre-programming of next job■Programmable default settings■Synchro cut mode■Leading and trailing strip adjustment (0 mm - 400 mm)■Concurrent scanning and printing■Scan to file Black&White / Grey (option).■Scan to file Colour (option). |
| Interface Firewire | |
| Voltage 85-264 V | |
| Frequency 47/63 Hz | |
| Power consumption | In operation: < 105 WStandby: < 20 W |
| Dimensions | ■Width: 1,300 mm■Depth: 650 mm■Height: 1,300 mm |
| Weight 70 Kg | |
| Safety approvals TuV GS, CE, UL, (c)UL, CB, EMC Directive 89/336/EEC, FCC | |
Productive scanner
| Model ■Optional console■Optional: Original delivery tray | |
| Technology CCD, | Océ Image Logic® real-time image processing hardware |
| Scan speed(standard) | 5 linear metres per minute or approximately 4A0s per minute |
| Scan resolution Scan resolution is 200 x 400 dpi (400 dpi in transport direction) in grey scale domain. Image logic converts the 200 dpi (CCD resolution) into 400dpi | |
| Warm up time None, the scanner has an instant start up behaviour. | |
| Original feed | ■Face down, right aligned ■Automatic feed off/on ■Rewind original to front off/on |
| Originals | ■Automatic original size detection ■Image width: 210 - 914 mm ■Original width: 210 - 1020 mm ■Original length:150 mm - 15 m |
| Data format | ■TIFF (uncompressed, Packbits, G3, G4 and LZW) ■PDF (uncompressed, Flate, LZW and G4) ■CALS |
| Maximum thickness | 1 mm |
| Exposure control | ■Automatic Background Compensation (ABC) ■Background Correction BC ■Monochrome image are produced by halftoning (Error diffusion, dithering) ■Automatic, manual fine adjustment ■Special modes: Lines & Text (default), Photo, Greys & lines, Dark Original, Blueprint, Printed matter ■Bold function to enhance thin lines |
| Media selection Manual or automatic, based on original size (autodetect) and scale factor | |
| Reproduction scale | ■Scale: 25% - 400% (adjustable in 1% and 0.1% steps) ■Programmable fixed steps ■Auto scale to paper size ■Scale table with pre-defined media size conversions |
| Input mode | ■Single sheet ■Set (sets processing/set collation) ■Multiple sheets |
| Number of copies 1 | - 999 (scan once print many) |
| Other operating functions | ■Concurrent scanning and printing■Scan to file Black&White■Pre-programming of next job■Programmable scanner templates■Programmable custom card■Automatic roll selection■Automatic reduction/enlargement■Standard cut, synchro cut and custom cut modes■Leading and trailing strip adjustment (up to +/- 400 mm)■Two languages available on scanner operator panel |
| Image quality | ■ Original type selection (see ‘Original types for the scanner’ on page 404)■Bold, enhancement of fine lines■Brightness, lighter/darker■Automatic Background compensation |
| Image editing | ■Image align: Horizontal left, middle, right■Image align: Vertical top, centre, bottom■Image shift: horizontal/vertical■Image mirroring |
| Voltage 230 V | |
| Frequency 50/60 Hz | |
| Power consumption | In operation: < 200 WStandby: < 12 W |
| Dimensions | ■Width: 1,314 mm■Depth: 583 mm■Height: 1,353 mm |
| Weight 90 Kg | |
| Safety approvals TuV GS, CETECOM, CE, UL, (c)UL, CB, FCC | |
Specifications Océ Power Logic® controller
Océ Power Logic® controller hardware
| Platform Océ controller with Windows ^ XP embedded | |
| Memory 512 Mb, expandable to | 1024 Mb for productive scanner1024 Mb for flexible scanner |
| Hard disc capacity 80 Gb. Two high speed hard discs, one dedicated to file spooling and one for set memory | |
| Graphical user interface None, | optional keyboard, mouse and monitor |
| Standard interface 10/100BaseT with RJ45 | |
| Optional interfaces 10/100BaseT with RJ45 | |
| Network protocols TCP/IP, SMB (for scan-to-file only), IPX/SPX, FTP, LPD | |
| Power consumption Controller: | < 100 W |
| Electrical requirements 100-120 / 230 V, 50/60 Hz | |
| Applicable software Océ Power | Logic ^ controller software |
Océ Power Logic® controller software
The Océ Power Logic ^® controller software consists of a basic module and a print module.
[79] Basic module
| Basic functions File spooling on the controller. Concurrent receiving, processing and printing of digital jobs. | |
| Basic applications | ■Océ TDS700 Power Logic ® controller application, one integrated application for print job management, scan job management, system status management, scanner templates, system preferences and network configuration. ■Océ TDS700 Power Logic ® controller Remote ■Océ Print Exec ® Workgroup Basic ■Océ View Station LT |
| Optional | ■Océ Account Center ■Océ Matrix Logic ® ■Océ Scanner Templates ■Océ Copy Stamping ■Océ Scan Logic ® ■Océ Scan Logic ® Basic ■Océ High speed Logic ■Océ Colour Logic |
[80] Print module (1 - 2)
| Print processing technology Océ | Image Logic |
| Number of prints 1 - 999 | Set memory: send once, process once, print many |
| Roll selection and switching Manual | Automatic |
| Print manipulation Rotation | Auto-scalingPositioningPen managementTrailing strip adjustment; add up to 400 mm |
[80] Print module (2 - 2)
| Colour modes Flexible scanner only■Black and white■Greyscale (STF capability)■Colour (STF capability) |
| Quality modes Productive scanner only■Standard■Lines & Text■Poster |
| Language sensing Automatic Language Sensing (ALS) |
| Standard file formats■Vector: HP-GL, HP-GL/2, Calcomp■Raster: HP-RTL, TIFF 6.0, CALS-I, NIRS, C4, ASCII, JPEG |
| Cut length■Standard cut■Synchro cut■Custom cut |
| Optional Adobe® PostScript 3TM PDF printing |
Specifications Océ Scan Logic®
Flexible scanner
Océ Scan Logic ^® offers you a flexible growth path with functionality designed to answer your (future) needs for productivity, quality and advanced functionality.
| Application Scan jobs | workspace, part of the Océ TDS700 Power Logic controller application, integrated scanning solution with Océ View Station LT. |
| Scan destinations Max | imum of 10 destinations.■Scan to the local controller■Scan to a Microsoft® Windows network location with Server Message Block (SMB)■ Scan to an internet location with File Transfer Protocol (FTP) |
| Resolution 72, 150, 200, 300, 400, and 600 dpi. | |
| Supported PDLs | ■HP-GL■HP-GL/2 (includes HP-RTL)■CalComp 906/907/(951)■TIFF 6.0■NIRS■C4■Adobe certified PostScript level 3 (Option)■Adobe certified PDF 1.6 (Option)■CALS-I■JPEG |
| Available file organization types for TIFF files | ■RAW■Striped■Tiled |
| Available compression for PDF file type with JPEG compression | ■Maximum (low compression, excellent quality)■High■Medium■Low (high compression, low quality) |
| Available file compression methods | TIFF file format■None (uncompressed)■Group 3 2D■Group 4■Packbits■LZW.PDF file format■JPEG compression■Group 4■Flate■LZW.CALS-I file format■Group 4. |
| Available colour depths | TIFF file format■Black & white, 1 bit per pixel■Greyscale, 8 bits per pixel■RGB, 24 bits per pixel.PDF file format■Black & white, 1 bit per pixel■Greyscale, 8 bits per pixel■RGB, 24 bits per pixel.CALS-I file format■Black & white, 1 bit per pixel. |
| Scan mode Single scan | |
| File naming Automatically generate unique file names for each scan. | |
| Viewing View scans at point of scanning. | |
| Océ Image Logic® The best scan quality for different image types. | |
| Ease of use Green key | principleScanner templatesScan to file from the scanner operator panel.Scan directly to a local or a remote destination. |
| Requirements Océ TDS700 Power Logic® controller and Océ TDS700 Power Logic® controller Remote to have access to the system. | |
| Options Océ View Station for editing and enhancement of scanned documentsOcé Batch Processor for automated editing. | |
Productive scanner
| Application Scan jobs | obs workspace, part of the Océ TDS700 Power Logic® controller application, integrated scanning solution with Océ View Station LT. |
| Scan destinations | Maximum of 10 destinations.■Scan to the local controller■Scan to a Microsoft® Windows network location with Server Message Block (SMB)■ Scan to an internet location with File Transfer Protocol (FTP) |
| Resolution 200, 300, 400 dpi. | |
| Supported PDLs | ■HP-GL■HP-GL/2 (includes HP-RTL)■CalComp 906/907/(951)■TIFF 6.0■NIRS■C4■Adobe certified PostScript level 3 (Option)■Adobe certified PDF 1.6 (Option)■CALS-I |
| Available file organization types for TIFF files | ■RAW■Striped■Tiled. |
| Scan modes Single | scan, stream feed productive batch scanning. |
| File naming Automatically generate unique file names for each scan. | |
| Viewing View scans at point of scanning. | |
| Océ Image Logic® | Optimum scan quality with six special original modes. |
| Ease of use Green key principle Scanner templates Scan-to-file from the scanner operator panel. Scan directly to a local or a remote destination. | |
| Requirements Océ | TDS700 Power Logic® controller and Océ TDS700 Power Logic® controller Remote to have access to the system. |
| Options Océ View | Station for editing and enhancement of scanned documentsOcé Batch Processor for automated editing. |
Specifications drivers and job submission software
Océ drivers
| Software environment | Required printer driver | Description |
| AutoCAD®14 (for Windows) | ADI Plotter Driver for AutoCAD®14 | The driver allows you to plot from the AutoCAD® R14 application for Windows® 95, Windows® 98, Windows® ME, Windows® NT to Océ printers. |
| HDI AutoCAD®2000 family | AutoCAD®2000 family HDI drivers | The drivers allow you to plot from the AutoCAD® 2000, 2000i, 2002, 2004, 2005 and 2006 based applications to Océ printers. |
| Graphical application software | Océ TDS/TCS Adobe® Postscript 3 Drivers | The drivers allow you to print from a Windows 95®, Windows 98®, Windows ME®, Windows NT®, Windows 2000®, Windows XP®, Macintosh MacOS 8.6/9.x or Macintosh Mac OS X application to an Océ TDS300, Océ TDS400 Océ TDS400-CS , Océ TDS600, Océ TDS700, Océ TDS800 or Océ TCS400 wide-format printer. |
| Océ Windows Printer Driver (TDS), 32 bits and 64 bits | This driver is a mixed raster-vector HP-GL/2 printer driver that allows you to print from any application under Windows NT 4.0, Windows 2000, Windows XP or Windows Server 2003 to your Océ TDS systems. | |
| Océ Windows Raster Driver (TDS) | The driver allows you to print from a Windows 98®, Windows ME®, Windows NT 4.0®, Windows 2000®, Windows XP® or Windows Server 2003® application to an Océ TDS400, Océ TDS600, Océ TDS700 or an Océ TDS800 wide format printer. | |
| Océ PostScript® 3 driver | The driver allows you to print from Adobe applications and supports PDF and Adobe. | |
| Adobe Japanese fonts | Optional | |
| Adobe Chinese fonts (traditional, simplified) | Optional |

Note: Visit Océ on the internet at www.oce.com for the latest information.
Optional application software
| Function Application | software |
| Print job submission | ■Océ Print Exec ® Pro■Océ Print Exec ® Workgroup Full■Océ Print Exec ® Department■Océ Repro Desk ® |
| Advanced copy job submission | Océ Matrix Logic® |
| Viewing of scanned jobs | ■Océ View Station ® LT■Océ View Station & Batch Processor |
| Account data collection | Océ Account Center |
| License management Océ License Logic ® | |
Original types for the scanner
Flexible scanner
The original types that you can use for your flexible colour scanner are listed in the table below.
[85] Original types
| Original type Type Icon | ||
| Black & white / grey | 'Line Art' |  |
| [256] Lines / text icon | ||
| 'Greys&Lines' |  | |
| [257] Greys & lines icon | ||
| 'Transparent' |  | |
| [258] Transparent icon | ||
| 'Blueprint' |  | |
| [259] Blueprint icon | ||
| 'Dark original' |  | |
| [260] Dark original icon | ||
| Colour 'Photo' |  | |
| [261] Photo icon | ||
Productive scanner
The original types that you can use for your productive black and white scanner are listed in the table below.
| Image After an original is scanned, the following functions are performed. | |
| Lines&text | ■Error diffusion■Automatic background compensation (operator choice) |
| Greys&lines | ■An additional OD in-OD out lookup table is used to get a smooth greyscale.■Automatic background compensation is disabled■Manual background compensation can be set. |
| Photo | ■Dithering■Automatic background compensation (operator choice) |
| Printed matter | Printer optimisation to take into account the fact that the original already is a print itself, containing raster information. |
| Dark original | ■Error diffusion■Manual background compensation |
| Blueprint | ■(Greyscale) image inversion.■Optimised error diffusion for blueprints. |
Supported media types and sizes for the printer
Available media types
Introduction
Océ machines and media are matched for the best quality and performance. Océ advises only approved Océ media. You can receive a full list of the Océ media that you can use in your printer (that includes plain paper, transparent paper, coloured papers and different polyester films) from your Océ representative.

Attention: Do not store the paper in rooms where temperature and humidity are high. Avoid dust and direct sunlight. Wrap not used paper in the plastic to prevent it absorbing moisture.
Media types
The following media types are available for the Océ TDS700:

Note: The Océ TDS700 can also handle media with a weight of 64 g/m2. At the time this manual was produced the Code and Rating was not yet known.
[87] Materials
| DIN Weight Code Rating | |||
| Engineering Standard Paper | 75 g/m2 LFM010 *** | ||
| Black Label Paper | 75 g/m2 LFM021 *** | ||
| Red Label Paper 75 | g/m2 LFM050 *** | ||
| Top Label Paper 75 | g/m2 LFM115 *** | ||
| Top S Label Paper | 75 g/m2 LFM116 *** | ||
| Top Label Paper 90 | g/m2 LFM120 *** | ||
| Top Label Paper 100 | g/m2 LFM124 *** | 1) | |
| Top Label Paper 120 | g/m2 LFM130 - | ||
| Green Label TCF | 80 g/m2 LFM140 *** | ||
| Transparent Paper | 80 g/m2 LFM220 *** | ||
| Transparent Paper | 90 g/m2 LFM230 *** | ||
| Transparent Paper | 110 g/m2 | LFM240 *** | 1) |
| Polyester Film | 3.5 mil | LFM310 *** | |
| Antistatic Film | 3.5 mil | LFM320 * | |
| Coloured Paper | 80 g/m2 LFM420 *** | ||
| Clear Film | 4 mil | LFM440 * | |
| Contrast Film | 3.5 mil | LFM450 * | |
| Coloured Paper | 120 g/m2 LFM010 | - | |
| ANSI | Weight Code Rating | ||
| Standard Bond | 20 lb | 45111 | *** |
| Premium Bond | 24 lb | 45800 | *** |
| Recycled Bond 20 lb | 45 | 111R * | |
| Tinted Bond | 20 lb | 45111X | *** |
| Translucent Bond | 18 lb | 450018 | * |
| Non-erasable Vellum | 20 lb | 459000 | *** |
| Non-erasable Vellum | 20 lb | 459020 | *** |
| Double Matte Film | 3 mil | 44532 | * |
| ANSI Weight Code | Rating | ||
| Double Matte Film | 4 mil 44542 *** | ||
| Double Matte White Opaque Film | 4 mil 44543 ? | ||
| Clear Film 4 mil 44540 ? | |||
| TDS Film 3 mil 44632 ? |
Not all information was available at the time this list was compiled. Please contact your Océ representative or visit Océ on the internet at www.oce.com for the latest information.
^1) Guaranteed up to 50% ambient relative humidity
■*** = Very Good
■** = Good
■* = Acceptable
■- = Not suitable
Available media sizes
Introduction
Océ machines and media are matched for the best quality and performance. Océ advises only approved Océ media. You can receive a full list of the Océ media that you can use in your printer (that includes plain paper, transparent paper, coloured papers and different polyester films) from your Océ representative.

Attention: Do not store the paper in rooms where temperature and humidity are high. Avoid dust and direct sunlight. Wrap not used paper in the plastic to prevent it absorbing moisture.
Media sizes in the paper roll drawers
| Media width Media length | ||
| Minimum 210 mm or 11” 279 mm or 11" | ||
| Maximum 914 mm or 36” Guaranteed print | quality ca. 6 meters or 20 feet. | |
DIN range
| Media Width [mm] Length [mm] | ||
| A4 210 297 | ||
| A3 297 420 | ||
| A2 420 594 | ||
| A1 594 841 | ||
| A0 841 1189 |
8,5 Inch range
| Media Width [inch] Length [inch] | ||
| 8,5 inch / A 8,5 11 | ||
| 11 inch / B 11 17 | ||
| 17 inch / C 17 22 | ||
| 22 inch / D 22 34 | ||
| 34 inch / E 34 44 |
9 Inch range
| Media Width [inch] Length [inch] | ||
| 9 inch / A+ 9 12 | ||
| 12 inch / B+ 12 18 | ||
| 18 inch / C+ 18 24 | ||
| 24 inch / D+ 24 36 | ||
| 36 inch / E+ | 36 44 |
Others
| Media | Width | Length |
| 30 inch | 30 inch | 42 inch |
| B1+ | 700 mm | 1000 mm |
| B1 (DIN) 707 mm | 1000 mm | |
| B2+ | 500 mm | 700 mm |
| B2 (DIN) 500 mm | 707 mm |

Note: For manual feed, only Portrait orientation is supported. B1/B1 DIN are not discriminated on the input table.
Media sizes in the cut sheetfeeders
DIN range
| Media Width [mm] Length [mm] | ||
| A4 portrait* 210 297 | ||
| A3 landscape* 420 297 | ||
| A3 portrait 297 420 | ||
| A2 landscape 594 420 |
8,5 Inch range
| Media Width [inch] Length [inch] | ||
| 8,5 portrait* 8,5 11 | ||
| 11 landscape* 17 11 | ||
| 11 portrait 11 17 | ||
| 17 landscape 22 17 |
9 Inch range
| Media Width [inch] Length [inch] | ||
| 9 portrait* 9 12 | ||
| 12 landscape* 18 12 | ||
| 18 portrait 12 18 | ||
| 24 landscape 24 18 |
If a Océ TDS700 configuration has three sheetfeeders (see 'Overview of the Océ TDS700 system' on page 382), the sheetfeeder in the lowest position cannot handle the marked small sheet sizes. The 1st and 2nd sheetfeeder can handle all sheet sizes, independent of the configuration.
Standard scale factor
Introduction
The Océ TDS700 can scale (reduce and enlarge) the image to a defined format. The overview below shows the scale factor if you need to copy on media of different sizes.

Attention: If you select the wrong scale factor you can loose information.
Supported DIN media series
The table shows the scale factor if you copy from one media size (original column) to another media size (first row)
[97] DIN table
| Originals | Standard scale fixed steps for the DIN media series [%] | ||||||
| A0 A1 A2 | A3 36 Inch | B1 B2 | |||||
| A0 100 7 | 1 50 35 109 | 84 59 | |||||
| A1 141 1 | 00 71 50 1 | 53 119 84 | |||||
| A2 200 1 | 41 100 71 | 218 168 119 | |||||
| A3 283 2 | 00 141 100 | 308 238 168 | |||||
| 36 Inch 1 | 07 65 46 3 | 2 100 77 55 | |||||
| B1 119 8 | 4 59 42 129 | 100 71 | |||||
| B2 168 1 | 19 84 59 1 | 83 141 100 | |||||
Generic ISO media series
The table shows the scale factor if you copy from one media size (original column) to another media size
[98] ISO table
| Originals | Standard scale fixed steps for the ISO media series [%] | |||||
| A0 A1 A2 | A3 A4 A5 | |||||
| A | 0 | 1 | 0 | 0 | 7 | 1 |
| A1 141 100 | 71 50 35 - | |||||
| A2 200 141 | 100 71 50 | 35 | ||||
| A3 283 200 | 141 100 71 | 50 | ||||
| A4 400 283 | 200 141 100 | 77 | ||||
| A5 565 400 | 283 200 141 | 100 | ||||
Appendix B Miscellaneous
Reader's comment sheet
Questions
Have you found this manual to be accurate?
O Yes
O No
Were you able to operate the product, after reading this manual?
O Yes
O No
Does this manual provide sufficient background information?
O Yes
O No
Is the format of this manual convenient in size, readability and arrangement (page layout, chapter order, etc.)?
O Yes
O No
Could you find the information you were looking for?
O Always
O Most of the times
O Sometimes
O Not at all
What did you use to find the required information?
O Table of contents
O Index
Are you satisfied with this manual?
O Yes
O No
Thank you for evaluating this manual.
If you have other comments or concerns, please explain or suggest improvements overleaf or on a separate sheet.
Comments:
Date:
This reader's comment sheet is completed by:
(If you prefer to remain unknown, please do fill in your occupation)
Name:
Occupation:
Company:
Phone:
Address:
City:
Country:
Please return this sheet to:
Océ-Technologies B.V.
For the attention of ITC User Documentation.
P.O. Box 101,
5900 MA Venlo
The Netherlands
Send your comments by E-mail to: itc-userdoc@oce.nl
For the addresses of local Océ organisations see: http://www.oce.com
Addresses of local Océ organisations
| Océ-Australia Ltd.P.O. Box 363Ferntree Gully MDCVic 3165Australiahttp://www.oce.com.au/ | Océ-Österreich GmbHPostfach 951233 ViennaAustriahttp://www.oce.at/ |
| Océ-Belgium N.V./S.A.J. Bordetlaan 321140 BrusselBelgiumhttp://www.oce.be/ | Océ-Brasil Comércio e Indústria Ltda.Av. das Nações Unidas, 11.857Brooklin NovoSão Paulo-SP 04578-000Brasilhttp://www.oce-brasil.com.br/ |
| Océ-Canada Inc.4711 Yonge Street, Suite 1100Toronto, Ontario M2N 6K8Canadahttp://www.oce.ca/ | Océ Office Equipment (Beijing) Co., Ltd.Xu Mu ChengChaoyang DistrictBeijing 100028Chinahttp://www.oce.com.cn/ |
| Océ-Czech Republic ltd.Hanusova 18140 21 Praha 4Czech Republichttp://www.oce.cz/ | Océ-Danmark a/sVallensbækvej 452605 BrøndbyDenmarkhttp://www.oce.dk/ |
| Océ Finland OYValkjärventie 7 D, PL 302130 EspooFinlandhttp://www.oce.fi/ | Océ-France S.A.32, Avenue du Pavé Neuf93161 Noisy-le-grand, CedexFrancehttp://www.oce.fr/ |
| Océ-Deutschland GmbHSolinger Straße 5-745481 Mülheim/RuhrGermanyhttp://www.oce.de/ | Océ-Hong Kong and China head office12/F 1202 The Lee Gardens33 Hysan AvenueCauseway BayHong Konghttp://www.oce.com.hk/ |
| Océ-Hungaria Kft.1241 BudapestPf.: 237Hungaryhttp://www.oce.hu/ | Océ-Ireland Ltd.3006 Lake DriveCitywest Business CampusSaggartCo. DublinIrelandhttp://www.oce.ie/ |
| Océ-Italia S.p.A.Strada Padana Superiore 2/B20063 Cernusco sul Naviglio (MI)Italiahttp://www.oce.it/ | Océ Japan Corporation3-25-1, Nishi ShinbashiMinato-KuTokyo 105-0003Japanhttp://www.ocejapan.co.jp/ |
| Océ-Belgium S.A.Rue Astrid 2/A1143 Luxembourg-Belairhttp://www.oce.lu/ | Océ Malaysia Sdn. Bhd.#3.01, Level 3, Wisma AcademyLot 4A, Jalan 19/146300 Petalig JayaSelangor Darul EhsanMalaysiahttp://www.ocemal.com.my/ |
| Océ-Mexico S.A. de C.V.Prolongación Reforma 1236,4to PisoCol. Santa Fé, Del. CuajimalpaC.P. 05348México, D.F.Méxicohttp://www.oceusa.com/ | Océ-Norge A.S.Postboks 4434 NydalenGjerdrums vei 80403 OsloNorwayhttp://www.oce.no/ |
| Océ-Poland Ltd. Sp.z o.o.ul. Bitwy Warszawskiej 1920 r. nr. 702-366 WarszawaPolandhttp://www.oce.com.pl/ | Océ-Lima Mayer, S.A.Av. José Gomes Ferreira, 11 Piso 2 - Miraflores1497-139 AlgésPortugalhttp://www.oce.pt/ |
| Océ Singapore Pte Ltd.190 MacPherson Road#03-00 Wisma GulabSingapore 348548 | Océ Printing Systems (PTY) Ltd.P.O.Box 629Rivonia 2128South Africa |
| Océ España SABusiness Park Mas BlauOsona, 2 08820 El Prat de LlobregatBarcelonaSpainhttp://www.oce.es/ | Océ-Svenska ABSollentunavägen 84191 27 SollentunaSwedenhttp://www.oce.se/ |
| Océ-Schweiz AGSägereistrasse 10CH8152 GlattbruggSchweizhttp://www.oce.ch/ | Océ (Thailand) Ltd.B.B. Building 16/Floor54 Asoke RoadSukhumvit 21Bangkok 10110Thailand |
| Océ-Nederland B.V.P.O.Box 8005201 AV 's-HertogenboschThe Netherlandshttp://www.oce.nl/ | Océ (UK) LimitedOcé HouseChatham WayBrentwood, Essex CM14 4DZUnited Kingdomhttp://www.oce.co.uk/ |
| Océ North America Inc.5450 North Cumberland AvenueChicago, IL 60656USAhttp://www.oceusa.com/ |

Note: The web site http://www.oce.com gives the current addresses of the local Océ organisations and distributors.

Note: The addresses of local Océ organisations for information about the Wide Format Printing Systems and the Production Printing Systems can be different from the addresses above. Refer to the web site http://www.oce.com for the addresses you need.
Index
'Custom' section 172
'File' section 172
'Original' section 172
'Print' section 172
1 1 209
A
About the scan destinations 264
Accentuate thin lines Productive scanner .... 223
Access Océ Account Logic 291
Access the Administrator only menu 59
Account ID 192
Account logging Productive scanner .... 192
Account Logic Access 291
Activate Password 62
Activate the buzzer 64
Activate the password 62
Adapter Configure 60
Add a leading strip 114
Add a trailing strip 114
Add templates 162
Add templates to your Matrix Job 162
Adjust the side guides of the belt ..... 315
Administrator only 59
Administrator only option Password 62
Adobe 25
Anonymous 255
Anonymous user 30
Arrow keys 170
attention light 44
Auto align Productive scanner .... 225
Automatic 209
Automatic background compensation Productive scanner .... 222
Automatic feed Productive scanner .... 191
Automatic file number definition ..... 144
Automatic logon Enable 241
Available media sizes 409
Available media types 406
Available settings 101
Available toolbars 249
Available workspaces 250
B
Background compensation Productive scanner .... 188
Banners 166
Basic copy job 97
Belt unit 302, 304
Definition 315
Bold Productive scanner .... 189
Brightness Productive scanner .... 222
Calibrate scanner 346
Calibrate wizard 346
can your Matrix Job originals ..... 161
Cancel a print job 56
Change the operator panel language ..... 176
Change the password 255
Check print 204
Clean the glass plate 344, 350
Clean the reinforcement knives 330
Clean the scan area 344, 350
Clean up the Printed jobs 89
Clear a tape jam 332
Clear a tape jam in the reinforcement unit .... 332
Clear an original jam 348, 352
Clear an original jam on the flexible scanner .. 348
Clear paper jams on the printer 371
Clear the set memory 65
Climate control 41
Colour mode Black and White 130
Colour 131
Greyscale 130
Common user 30
Components
Finishing options 304
Flexible colour scanner 33
Folder 302
Printer 33
Productive black and white scanner .....33
concept 16
Concept of the Preferences workspace ..... 270
Concept of the Printed jobs ..... 261
Concept of the scan destinations .....264
Concept of the Scheduled jobs 259
Concept of the templates of the productive scanner 268
Concept of the templates on the flexible scanner .. 267
Concept of the Waiting jobs 260
Configuration 272
Configure
Buzzer on the operator panel 64
Clear set memory on the printer operator panel 65
Password on the printer operator panel .... 62
Configure the network settings of the adapters .. 60
Connect to Océ Print Exec® Workgroup Basic . 69
Connect to the controller 240
Connecting workstations ..... 150
Continue a print job 56
Controller
Software Specifications ....397
Start up 37
Controller Hardware
Specifications 396
Controller setup 294
Copy
A specific area .....118, 120
Make a set copy 231
Originals 216
copy
On a cut sheet 113
with a stamp 110
Copy an area 118
Copy functionality 24
Copy job priority 82
Copy jobs
Available settings 101
Basic copy job 97
Clear an original jam .....348, 352
Extended copy job 99
Introduction .....92, 168
copy jobs
stop a copy job 98
Copy jobs on pre-cut sheets
Productive scanner 193
Copy non-standard size originals .....218
Copy quality, according to
Fine details 104
Original brightness 104
Original type 104
Copy sets 108
Copy size
Productive scanner 218
Copy template
Create a new template .....165
Delete a template 165
Edit settings 165
Save changes 165
Copy templates 164
Copy with added filing strips along the leading and trailing strip .....221
Copy with removed filing strips along the leading and trailing strip 221
Copying with removed filing strip along the left hand side 220
Copying with removed filing strip along the right hand side 220
Counter 45
Create a job in Océ Print Exec Workgroup Basic 70
Create a local destination .....139
Create a Matrix Job 160
Create a network destination with SMB .....140
Create a web destination with FTP .....140
Custom 209
Custom section 172
Cut sheet 113
Cut sheet material 360
D
Deactivate
Password 62
Default settings 170
Define a banner 166
Define delivery of copies
Productive scanner 195
Define file names .....144
Define job settings with the left soft keys and the scroll wheel 95
Define settings for the next original
Productive scanner 191
Define the delete area dimensions ..... 120
Define the folding settings Productive scanner .... 195
Define the media size of the printer 362
Define the media type and size 362
Define the media type of the printer ..... 362
Define the scan width 217
Define the settings for the next copy job ..... 191
Delete Jobs in the Printed jobs .... 89 Jobs in the Waiting jobs .... 86
Delete a destination 139
Delete a job Printed jobs 89
Scheduled jobs 79
Waiting jobs 86
Delete a job in the Printed jobs 89
Delete a job in the Scheduled jobs 79
Delete a job in the Waiting jobs 86
Delete a scan destination 142
Delete an area 120
Delete scanned files 147
Deliver copies to the Stacker Productive scanner .... 195
Deliver originals after scanning 190
Demo print 56
Destination 203
DIN media series 412
Disable the Printed jobs 90
Display 44
Double Decker (Pro) Set the media separation setting ..... 340
Set the tray selection setting 341
Stack capacity 339
Supported media types 339
Drivers 402
E
Edit template 165
Empty the waste box 329
Enable reinforcement 314
Error messages Scanner error messages .... 349
Extended copy job 99
F
File section 173
File size 212
File type
CALS 207
PDF 207
Scan to file 130
TIFF 207
Finishing Océ Double Decker (Pro) ..... 336
Finishing options 304
Belt unit 304
Folder 304
Reinforcement unit 304
Flexible scanner 114
Basic copy job 92
Copy an area 118
Copy jobs 99
Copy sets 108
Cut sheet 113
Delete an area 120
Do a basic copy job 97
Extended copy job 93
Extended scan-to-file job 125
Original types 404
Remove a leading or trailing strip ..... 116
Scale 112
Scanner operator panel 94
Scan-to-file 122, 124
Sets copy 108
Settings for copy jobs 101
Specifications 389
Templates 92
Folder 304
Belt unit 302
Components 302
Reinforcement unit 302
Stacker 302
Folder components Belt unit 302
First fold delivery 302
First fold section 302
Folder transport section 302
Lever 302
Reinforcement unit 302
Second fold section 302
Stacker 302
Folding Off-line .... 311
Forgot the password to the Administrator only menu 62
Frequently used settings 172
FTP 28,150 printing 27
Function keys 170
Functions
Océ TDS700 32
G
Get files 150
Give priority to a job in Scheduled jobs ..... 81
Give priority to copy jobs over print jobs ..... 82
Glass plate 344, 350
Green key principle 24
H
Hold
Jobs 80
Hold a running job in the Scheduled jobs ..... 80
How to change the password .....244, 255
How to clear a jam in the belt unit ..... 320
How to clear a jam in the first fold section .... 316
How to clear a jam in the folder transport section . 317
How to clear a jam in the second fold section . 318
How to connect to a system
Power Logic controller Remote 240
How to connect to Océ Print Exec® Workgroup
Basic 69
How to delete a job in the Printed jobs ..... 89
How to delete a job in the Waiting jobs ..... 86
How to delete a scanned file ..... 147
How to enable or disable the Printed jobs .....90
How to give priority to a job in the Scheduled jobs 81
How to give priority to copy jobs over print jobs 82
How to handle error messages at the scanner .. 349
How to interrupt a running job 80
How to log on as a different user 254
How to make a copy 180
How to move up the jobs in the Scheduled jobs . 77
How to postpone jobs in the Scheduled jobs ... 83
How to print a drawing 67
How to print a job from the Printed jobs .....87
How to print a job in the Scheduled jobs .....76
How to print a job to the Scheduled jobs ..... 85
How to print a scanned file 148
How to scan to file 201
How to scan- to-file using a template .....201
How to scan-to-file with check print .....204
How to select a stamp
Productive scanner 198
How to send scanned files from the Unsent scans
folder to the same destination 149
How to stop a job
Productive scanner 197
How to view a file after scanning .....152
How to view a locally stored scanned file .....153
How to view job properties in the Printed jobs .. 88
How to view job properties in the Scheduled jobs 78
How to view job properties in the Waiting jobs .. 84
How to view the scanned file properties .....146
|
Image 203
Improving the image quality
Productive scanner 222
Information in the scanner operator panel ....172
Input mode
Multiple sheets 184
Set 184
Single sheet 184
Insert a new tape roll 324
Install Power Logic controller Remote .....235
Install reinforcement strip
Reinforcement unit 334
Integrated Power Logic controller application ..24
Integrated receiving tray 378
Interrupt a copy job ....196
Interrupt a job 196
Introduction
Océ Account Console .....296
Introduction to Océ Matrix Logic .....215
Invert the image
Productive scanner 230
ISO media series 412
J
Japan support 24
Job history
Properties Printed jobs 261
Job interrupt ....177, 196
Job interrupt key 170
Job interruption 80
Job management 83
Copy job priority 82
Delete a job in the Printed jobs .....89
Delete a job in the Scheduled jobs .....79
Delete a job in the Waiting jobs .....86
Give priority to a job ....81
Hold a job in the Scheduled jobs .....80
Print a job 76
Print to the Scheduled jobs ....85
View a job in the Printed jobs 88
View a job in the Scheduled jobs ..... 78
View a job in the Waiting jobs 84
Job priority
In Scheduled jobs 81
Job recovery 26
Job templates
Scan-to-file 122
Jobs in Scheduled jobs
Move up 77
K
Key operator ....30, 242, 255
Key operator settings
Printer operator panel 48
Key operator settings printer operator panel 56, 58
Keys
Correction 170
Printer operator panel 45
Selection keys 45, 170
Stop 45,170
L
Language
Scanner operator panel 176
Leading and trailing strip
Productive scanner 219
Length 120
Licenses 276
Load cut sheet material 360
Load media 354
Load paper 360
Roll loader 358
Load rolls of media 354
Load the media 355
Lock a destination 139
Lock a scan destination 141
Log on
Different user 254
Log on as a different user 254
M
Make a copy and delete a specific area of an original 120
Make a copy and remove a strip .... 116
Make a copy of a specific area of an original .. 118
Make a copy on a cut sheet 113
Make a demo print 56
Make a scan-to-file 201
Make a set copy
Productive scanner 231
Make copies
Productive scanner 180
Make mirror-image copy
Productive scanner 230
Make multiple sets of copies
Make off-line folding settings
Manual feed
Productive scanner 193
Manual feed section
Paper jam 375
Manual file name definition
Matrix
Workflow 158
Matrix logic
Access 159
Add templates 162
Banners 166
Copy a template 164
Create a Matrix job 160
Edit a template 165
Print 163
Reprint 163
Maximum folding length
Media 354
Humidity 41
Productive scanner 182
Media sizes 409
Media sizes in the cut sheetfeeders ..... 411
Media sizes in the paper roll drawers ..... 409
Media type
Manual feed 53
Media types 406
Mirror 211
Mirror-image copies
Productive scanner 230
Modify templates 162
Move up the jobs in the Scheduled jobs ..... 77
N
Network connectivity 25
Network settings on the printer 60
New password 244
Non-standard size originals
Productive scanner 216
Non-standard sized originals
0
Océ Account center Administrator ..... 291 Bookkeeper ..... 291 Users ..... 291
Océ Account Console Introduction ...... 296
Océ Double Decker (Pro) 336
Océ License Logic 276 Active licenses 283
Océ Print Exec Workgroup Basic ....68 The documentation set ....68
Océ Print Exec® Department .....73
Océ Print Exec® Workgroup Basic 70
Océ Repro Desk The documentation set ....72
Océ TDS700 functions 32
Océ TDS700 printer 32
Off-line folding 311
Off-line folding settings 51
Off-line menu options Printer operator panel .... 48
On/Off behaviour printer 37
Operator panel Flexible scanner ....387 Productive scanner ....170, 386 Scanner operator panel usage ....94
operator panel printer 44
Operator panels 27
Optimisation 203
Optimization 212
File size 212
Scan quality 212
Options 68
Options in the Printed jobs 261
Options in the Scheduled jobs ..... 259
Options in the Waiting jobs ..... 260
Original Automatic feed .... 191
Original delivery Select front or rear output 190
Original type Background compensation ..... 133 Blueprint ..... 133 Dark original ..... 133 Greys & lines ..... 133 Lines / text for paper ..... 133 Photo ..... 133 Productive scanner ..... 222
Transparent for transparencies .....133
Original types for the scanner 404
Original width Auto .... 134 Custom .... 134 Standard .... 134
Originals ....216
Copying thick originals ....190
Thick ....216
Overview 290
TDS700 printer 382
P
Paper jam at the integrated receiving tray .....378
Paper jam in the cut sheet section 377
Paper jam in the folder 316
Paper jam in the fuser section 373
Paper jam in the manual feed section .....375
Paper jam in the roll feed section .....376
Paper roll drawers and sheet feeder configuration . 382
Paper series Productive scanner ....182
Park a job in the Waiting jobs ....83 Password ....242, 255 Change ....244
PDF Compression .....208
Perform basic scan to file jobs .....199
Positioning the reinforcement knives .....55
Postpone jobs in the Scheduled jobs .....83
PostScript driver 66
Power Logic controller Log off .....243 Power Logic controller Remote .....234 Supported languages .....238
Power Logic controller application .....27
Power Logic controller Remote 27
Add system 240
Applications 234
Connect 240
Connect to controller 240
Log on 243
Remove system 240
Start application 237
Preferences 270
Prepare the Matrix job 160
Prepare the reinforcement knives for cleaning . . 55
Prepare the tape roll for operation .....327
Prevent information loss
Image shifting 228
Océ Print Exec® Workgroup Basic ..... 70
Printed jobs 87
to the Scheduled jobs 85
Print a drawing 67
Print a high priority job 80
Print a job in the Scheduled jobs 76
Print a job to the Scheduled jobs 85
Print and copy jobs 25
Print jobs 256
Print scanned files 148
Print section 173
Print the Matrix job 163
Print the system settings 58
Printed jobs 258
Delete a job 89
Disable 90
Enable or disable the Printed jobs ..... 90
Options 261
Print 87
Printer
Buzzer 64
Define the media size 362
Define the media type 362
Specifications 389
Printer configuration 24
Printer driver 66
Printer drivers 27
The documentation set 66
Printer keys 45
Printer operator panel 385
Administrator settings 59
Clear the set memory 65
Key operator settings 48
Key operator settings key 45
Off-line menu options 48
On-line key 45
Password 62
Selection keys 45
Stop key 45
Up / Down key 45
Printer operator panel actions 47
Printer settings
Selecting language 50
Setting a special media indication .....52, 54
Setting media type and size 52
Stop a print job 56
Productive scanner
Accentuate thin lines 223
Account logging 192
Auto align 225
Automatic background compensation 222, 224
Automatic feed 191
Background compensation ..... 188
Basic copy job 168
Bold 189
Brightness 222
Change the language on the operator panel 176
Copy jobs 168
Copy jobs on pre-cut sheets 193
Copy size 218, 219
Correct the settings with the correction key 178
Define delivery of copies 195
Define settings 191
Define the folding settings ..... 195
Deliver copies to the Stacker 195
Extended copy job 169
File mode 204
How to make settings on the scanner operator panel 177
How to select a stamp 198
How to stop a job 197
Improving the image quality 222
Leading and trailing strip 219
Make a set copy 231
Make copies 180
Manual feed 193
Media 182
Mirror-image copies 230
Non-standard size originals 216
Original delivery 190
Original type 222
Original types 404
Paper series 182
Perform basic copy jobs 179
Scale 185
Scan destination 205
Scan width 217
Scanner templates 174
Scanning originals with filing strip ..... 219
Sections on the operator panel 172
Select lighter/darker 187
Select the exposure 187
Select the input mode 184
Select the required media ..... 182
Set copy 231
Settings 177
Sheet feed 193
Shift the image 228
Sort 184
Specifications 389
Stamping 198
Stop a copy job ....197
Stop key 197
Templates 168
R
Raster driver 66
Refill the toner 363
Reinforcement knives Oil the felt .... 330
Reinforcement unit 330
Reinforcement strip Reinforcement unit 334
Reinforcement unit .....302, 304 Install reinforcement strip .....334
Reinforcement knives 330
Tape jam 332
Tape roll 323
Waste box 329
Remote access Power Logic controller .... 237
Remote destinations 137
Remote Logic Install UNIX 236
Install on Windows 235
Remote logic Command line parameters 237
Remote scan job destinations .....137, 262
Remove a leading strip 116
Remove a trailing strip 116
Remove an empty tape roll 323
Remove strip leading 135
left 135
right 135
trailing 135
Replace the waste toner container ..... 366
Re-print a job in the Printed jobs 87
Reprint a Matrix job 163
Repro Desk 28
Repro operator 30, 242, 255
Resend scanned files from the Unsent scans folder 149
Resolution 206
Scan to file jobs 132
Resume Jobs 80
Retrieve files via an FTP command line prompt 151
Retrieve scanned files 150
Roll loader 358
S
Save jobs Scheduled jobs ....83
Save jobs in the Scheduled jobs 83
Scale 112, 209
Scale formats Standard 412
Scale table 209
Scale to another media size .....112
Scan area 344, 350
Scan destination Local ....264
Remote 264
Scan destination toolbar options .....265
Scan destinations 143, 262, 264
Default destination on controller ....137, 262
Remote destination .....137, 262
Remote scan destinations .....137, 262
Unsent scan jobs folder .....137, 262
Scan destinations on the controller . 136, 137, 262
Scan destinations on the network .. 136, 137, 262
Scan job view area ..... 136, 138, 263
Scan jobs 262
Print 265
Properties 265
Send 265
View 265
Scan jobs management 136
Scan jobs tasks 143
Scan jobs workspace ....136
Delete a destination ..... 139
Local destination .....139
Lock destination 139
Network destination 139
Unlock destination 139
Web destination ..... 139
Scan logic 25
Scan quality .....212, 346
Scan to file Colour mode ....130
Compression method 130
File type 130
How to ....201
Organisation 130
Scan to file jobs Resolution 132
Scan width Productive scanner .....217
Scanned file properties 146
Scanned files
Print 148
View 152
Scanner error messages 349
Scanner operator panel
Productive scanner 170
Usage 94
Scanner panel
Correction key 170
Job interrupt key 170
Keys 170
Numeric key 170
Start key 170
Scanner panel keys
Stop key 170
Scanner templates 24
Job definition 172
Preference 172
Productive scanner 174
Scanning originals with filing strip
Productive scanner 219
Scan-to-file
Destination 201
Enable 200
Enlargement steps 210
File mode 201
FTP destination 139
Job templates 122
Local destination 139
Reduction steps 210
Scale table 210
Settings 203
SMB destination 139
Scan-to-file job 122
Basic 122, 124
Extended 122, 125
Introduction 122
Scan-to-file jobs 143
Checkprint setting 128
Clear an original jam 348, 352
Destination setting 128
Lighter/darker setting 128
Mirror setting 128
Settings 128
scan-to-file jobs
stop 127
Scheduled jobs 257, 259
Delete a job 79
Job priority 81
Options 259
Print a job 76
Scheduled jobs area
Copy job priority 82
How to delete a job in the Scheduled jobs . . 79
Scheduled jobs properties
Copy job priority 259
Section keys
Section, function and arrow keys
Select a language
Select a scan destination
Select default settings for auto shifting with standard
cut option
Select lighter/darker
Productive scanner 187
Select original delivery
Select the accounting function . .
Select the exposure
Productive scanner 187
Select the input mode
Select the media sizes
Select the required media
Productive scanner 182
Select the
Selecting belt as folded copy delivery on scanner
operator panel ..
selecting language
Selection keys
Send
Unsent scan jobs 149
Send jobs to the Waiting jobs
Send scanned files to the sam
Set a special media indication
Set copy
Productive scanner 231
Set media size
Set media type
Set media type for manual feed
Set proces
Set reinforcement for the copy job in the scanner
operator panel
Set the automatic background compensation
Productive scanner 224
Set the background compensation
Set the binding strip
Set the bold setting
Set the drawing method
Set the folded package width
Set the folded print delivery
Set the folding legend
Set the folding method
Set the Lighter/darker setting
Set the original type of your image Productive scanner .... 224
Set the reinforcement 307
Set the standard folding settings ..... 305
Sets copy 108
Setting media type and size 52
Setting special media indication ..... 54
Settings Scanner operator panel .... 177
Sheet feed Productive scanner .... 193
Shift the image Productive scanner ....228, 229
Solutions Scanner error messages 349
Solve paper jam Folder .... 316 Fuser section .... 373 Integrated receiving tray .... 378 Manual feed section .... 375
Sort Productive scanner .... 184
Sound signal 64
Specifications Controller Hardware .... 396
Flexible scanner ....387, 389
Optional application software ..... 403
Printer 389
Productive scanner ....386, 389
Scanner operator panel 386
Specifications flexible scanner Océ Scan Logic” .... 399
Specifications productive scanner Océ Scan Logic” .... 401
Spool memory 25
Stacker 302
Stamp 110
Stamping Productive scanner .... 198
Standard scale formats 412
Start key Set copy 231
Status bar 249
stop scan-to-file jobs 127
Stop a copy job Productive scanner .... 197
stop a copy job 98
Stop a print job ....56 Stop key ....56
Stop key .....170 Productive scanner .....197
Strip Add a leading or trailing strip ..... 114 Remove a leading or trailing strip ..... 116
Submit a job in Océ Print Exec Workgroup Basic 71
System administrator ..... 30, 242, 255
T
Tape jam Reinforcement unit 332
Tape roll Reinforcement unit 323
Tasks in the scan jobs workspace .....143
Templates ....168, 177 Flexible scanner ....92, 267 Productive scanner ....268
The components of the Océ Double Decker (Pro) . 337
The Océ TDS700 users .....29
The reinforcement unit ....313
TIFF Compression .....207 Organisation .....207
Toner Refill ....363
Toolbar options in the Scheduled jobs .....259
Enter Interrupt / Exit interrupt .....259
Move to top .....259
Properties .....259
Scheduled jobs properties .....259
To Waiting jobs .....259
Toolbar options of the Waiting jobs Delete ....260 Print ....260 Properties ....260
Toolbar options Printed jobs Delete .....261 Print .....261 Properties .....261
Toolbars 248
Top toolbar 249
Turn on Controller ....37 Printer ....37 Scanner ....37
Turn on and off 37
Turn on and off the controller 39
Turn on and off the flexible scanner ..... 40
Turn on and off the printer 38
Turn on and off the productive scanner ..... 40
U
Unlock a destination ..... 139
Unlock a scan destination ..... 141
Unsent scans folder 149
Use the manual feed function for copy jobs . . . 193
Use the Mirror setting 211
Use the optional roll loader 358
Use the scale table 210
User ID 192
User interaction 27
User mode 242
User roles
Log on 254
Océ Account center 291
V
Vertical icon toolbar 249
View
Scanned files 152
View job properties in the Printed jobs ..... 88
View job properties in the Scheduled jobs ..... 78
View job properties in the Waiting jobs ..... 84
View scan jobs
Scan job view area 138, 263
View scanned files 152
View Station LT
File menu 154
Help menu 154
Menu options 154
Preference menu 154
Toolbar options 155
View error 157
View menu 154
View station LT
View a scanned file 201
View the current active licenses 283
View the scanned file properties ..... 146
W
Waiting jobs 257
Options 260
Waiting jobs area
Delete a job 86
Waste box
Reinforcement unit 329
Waste toner container
Replace 366
What is Matrix logic 158
Width 120
Windows
Printer driver 66
Workflow 291
workflow 16
Documents 16
Jobs 16
Overview 16
Products 16
Workspace
Configuration 250
Preferences 250
Print jobs 250
Scan jobs 250
Templates 250
Workspaces 248
X
X Offset 120
Y
Y Offset 120

- Copyright
- Notes for the reader
- Introduction
- Definition
- Attention Getters
- Note, Attention and Caution
- Safety information
- Contents
- Chapter 1
- Chapter 2
- Chapter 3
- Use the Océ TDS700 flexible scanner 91
- Chapter 4
- Chapter 5
- Océ TDS700 Power Logic® controller Remote. 233
- Chapter 6
- The Océ TDS700 Power Logic® controller application 245
- Chapter 7
- Océ License Logic.... 275
- Chapter 8
- Accounting software: Océ Account Center 289
- Chapter 9
- The finishing options 301
- Chapter 10
- Maintain the Océ TDS700 343
- Appendix A
- Overview and tables 381
- Appendix B
- Miscellaneous 415
- Chapter 1 Introduction
- The product concept and complete workflow
- Illustration
- Different documents
- Different products
- Different jobs
- Do which job where
- Available documentation
- How to use this manual
- The Océ TDS700 key concepts
- Printer configuration
- Copy functionality
- Green key principle
- Scanner templates
- Integrated Océ TDS700 Power Logic® controller application
- Océ Scan Logic®
- Adobe® PostScript® 3™/PDF
- Network connectivity
- Set processing
- Print and copy jobs
- Spool memory
- Job recovery
- User interaction
- Operator panels
- Océ TDS700 Power Logic controller Remote
- Printer drivers
- Océ Print Exec® Workgroup Basic
- Océ Repro Desk®
- FTP
- The Océ TDS700 users
- Overview of user rights per workspace in the Océ TDS700 Power Logic® controller
- 'Anonymous' user
- Repro operator
- Key operator
- System administrator
- Océ Service
- Get to know the Océ TDS700
- The Océ TDS700
- The configuration of the Océ TDS700
- The Océ TDS700 components
- The Océ TDS700 printer
- The Océ TDS700 flexible scanner
- The Océ TDS700 productive scanner
- The Océ TDS700 Power Logic® controller
- Additional software
- Optional software
- Turn on and off the Océ TDS700
- Turn on and off the printer
- Turn on and off the controller
- Turn on and off the flexible scanner
- Turn on and off the productive scanner
- Climate control on the Océ TDS700
- Climate control function
- Use the Océ TDS700 to print a job
- Actions on the printer operator panel
- The printer operator panel
- The display
- The counter
- The keys
- Printer operator panel actions
- Off-line menu options
- Key operator settings
- Off-line settings
- Select a language
- Off-line folding settings (optional)
- Make off-line folding settings
- Result
- Media type and size on the printer
- Set media type
- Set media type for manual feed
- Set media size
- Special media indication
- Set a special media indication
- Positioning the reinforcement knives (optional)
- Prepare the reinforcement knives for cleaning
- Stop a print job
- Cancel a print job
- Continue a print job
- Administrator settings
- Make a demo print
- Purpose
- How to make a demo print
- Print the system settings
- When to do
- How to print the settings
- Access the 'Administrator only' menu
- How to access the 'Administrator only' menu
- Configure the network settings
- Before you begin
- How to configure the network settings of the adapter
- Activate the password
- Activate the buzzer
- Clear the set memory
- Print job submission software
- Introduction to the Océ printer drivers
- Océ Windows® printer driver
- Océ Windows® raster driver
- Océ PostScript® driver
- The documentation set
- Use an Océ printer driver to send a print job
- How to print a drawing on the Océ TDS700
- Introduction to Océ Print Exec® Workgroup Basic
- Actions in Océ Print Exec® Workgroup Basic
- Options in Océ Print Exec® Workgroup Basic
- Connect to Océ Print Exec® Workgroup Basic
- How to connect to Océ Print Exec® Workgroup Basic
- Use Océ Print Exec® Workgroup Basic to send a print job
- How to create a job in Océ Print Exec® Workgroup Basic
- How to submit a job in Océ Print Exec® Workgroup Basic
- Introduction to Océ Repro Desk®
- Océ Print Exec® Department
- Océ Print Exec® Department products
- Print jobs on the Océ TDS700 Power Logic® controller application
- Job management in the 'Scheduled jobs'
- Print a job in the 'Scheduled jobs'
- How to print a job in the 'Scheduled jobs'
- Move up the jobs in the 'Scheduled jobs'
- How to move up the jobs in the 'Scheduled jobs'
- View the job properties of jobs in the 'Scheduled jobs'
- How to view job properties in the 'Scheduled jobs'
- Delete a job in the 'Scheduled jobs'
- How to remove a job in the 'Scheduled jobs'
- Hold a running job in the 'Scheduled jobs'
- How to interrupt a running job
- Give priority to a job in 'Scheduled jobs'
- How to give priority to a job in the 'Scheduled jobs'
- Give priority to copy jobs over print jobs
- How to give priority to copy jobs over print jobs
- Postpone a job in the 'Scheduled jobs'
- How to postpone jobs in the 'Scheduled jobs'
- Job management in the 'Waiting jobs'
- View the job properties of jobs in the 'Waiting jobs'
- How to view job properties in the 'Waiting jobs'
- Print a job to the 'Scheduled jobs'
- How to print a job to the 'Scheduled jobs'
- Delete a job in the 'Waiting jobs'
- How to delete a job in the 'Waiting jobs'
- Job management in the 'Printed jobs'
- Re-print a job in the 'Printed jobs'
- How to print a job from the 'Printed jobs'
- View the job properties of jobs in the 'Printed jobs'
- How to view the job properties in the 'Printed jobs'
- Delete a job in the 'Printed jobs'
- How to delete a job in the 'Printed jobs'
- Disable the 'Printed jobs'
- How to enable or disable the 'Printed jobs'
- Chapter 3 Use the Océ TDS700 flexible scanner
- Introduction to copy jobs
- Steps in a basic copy job
- Steps in an extended copy job
- Use the scanner operator panel
- Define job settings with the left soft keys and the scroll wheel
- Define job settings with the scroll wheel and scroll-wheel key only
- Basic copy jobs on the Océ TDS700 flexible scanner
- Do a basic copy job
- How to copy on the scanner
- Stop a copy job
- How to stop a copy job
- Extended copy jobs
- Do an extended copy job
- How to copy on the Océ TDS700
- Define the job settings.
- Available settings for copy jobs
- Improve the copy quality according to the original
- How to improve the copy quality of originals from a special type
- How to improve the copy quality of dark and light originals
- How to improve the copy quality of an original with very fine details
- Make multiple sets of copies
- How to make multiple sets of copies sorted by set
- How to make multiple sets of copies sorted by page
- Make a copy with a stamp
- How to make a copy with a stamp
- Scale to another media size
- How to copy to another media size
- Make a copy on a cut sheet
- How to copy on a cut sheet
- Make a copy and add a strip
- How to make a copy and add a strip
- Make a copy and remove a strip
- How to make a copy and remove a strip
- Make a copy of a specific area of an original
- How to copy a specific area of an original
- Make a copy and delete a specific area of an original
- Basic scan-to-file jobs on the flexible scanner
- Introduction to scan-to-file jobs
- Steps in a basic scan-to-file job
- Steps in an extended scan-to-file job without fine tuned job templates
- Steps in an extended scan-to-file job with fine tuned job templates
- Do a basic scan-to-file job
- How to do a basic scan-to-file job on the Océ TDS700
- Do an extended scan-to-file job
- How to do an extended scan-to-file job on the Océ TDS700
- Stop a scan-to-file job
- How to stop a scan-to-file job
- Extended scan-to-file jobs
- Available settings for scan-to-file jobs
- 'File type'
- 'Resolution'
- 'Original type' and background compensation
- 'Original width'
- 'Remove strip'
- Scan jobs on the Océ TDS700 Power Logic® controller application
- Scan jobs management
- 'Scan jobs' workspace
- Scan destinations on the controller
- Remote destinations
- Scan jobs view area
- Manage scan destinations in the 'Scan jobs' workspace
- Create a local destination
- Create a network destination with SMB
- Create a web destination with FTP
- Lock a scan destination
- Unlock a scan destination
- Delete a scan destination
- Scan jobs tasks
- Scan destinations
- Actions
- Scan-to-file jobs
- Define file names
- Automatic file number definition
- Manual file name definition
- View the properties of the scanned file
- How to view the scanned file properties
- Delete scanned files
- How to delete a scanned file
- Print scanned files
- How to print a scanned file
- Resend scanned files from the Unsent scans folder
- How to send scanned files from the Unsent scans folder to the same destination
- How to retrieve scanned files via FTP
- Retrieve files via an FTP command line prompt
- Océ View Station LT®
- View locally scanned files with Océ View Station® LT
- How to view a file automatically after scanning
- How to view a locally stored scanned file
- Functions in Océ View Station® LT
- Menu options
- Toolbar options
- View error in Océ View Station® LT
- Océ Matrix Logic
- What is Océ Matrix Logic®
- Workflow
- Access to Océ Matrix Logic®
- Create a Matrix Job
- Access Océ Matrix Logic®
- Prepare the Matrix job
- Scan your Matrix Job originals
- Add templates
- Add templates to your Matrix Job
- Modify templates from the Matrix Composition window
- Print the Matrix job
- Reprint the Matrix job
- Copy templates
- Edit template
- Create a new template
- Edit the settings
- Delete a template
- Save changes
- Banners
- Define a banner
- Chapter 4 Use the Océ TDS700 productive scanner
- The scanner operator panel
- Sections on the scanner operator panel
- Information in the scanner operator panel
- Custom section
- Original section
- Print section
- File section
- [104] Scanner templates
- Change the operator panel language on the scanner
- Select a language when the scanner templates are installed
- Settings on the Océ TDS700 scanner operator panel
- How to make settings on the scanner operator panel
- Correct the settings with the correction key
- Basic copy jobs on the Océ TDS700 productive scanner
- Perform basic copy jobs
- Make copies
- How to make a copy
- Select the required media
- Select the media sizes
- Select the input mode
- Select the scale factor
- Selecting the scale conversion
- Lighter/darker
- Set the Lighter/darker setting
- Background compensation
- Set the background compensation
- Bold
- Set the bold setting
- Deliver originals after scanning
- Select original delivery
- Define settings for the next original
- Define the settings for the next copy job
- Account logging
- Select the accounting function
- Use the manual feed function for copy jobs
- Copy jobs on pre-cut sheets
- Define delivery of copies
- Deliver copies to the Stacker
- Define the folding settings
- Interrupt a job
- Interrupt a copy job
- Stop a job on the scanner
- How to stop a job
- Stamping (optional)
- How to select a stamp
- Basic scan-to-file jobs on the Océ TDS700 productive scanner
- Perform basic scan-to-file jobs
- Make a scan-to-file
- How to scan-to-file
- How to scan- to-file using a template
- Settings for scan-to-file on the scanner operator panel
- Optimisation
- Image
- Destination
- Destination card settings
- File mode
- How to scan-to-file with check print
- Select a scan destination
- Resolution
- File type
- TIFF
- TIFF subformat
- CALS
- PDF compression
- Image card settings
- Scale
- Custom
- 1:1
- Scale table
- Automatic
- Use the scale table
- Mirror
- Use the Mirror setting
- Optimization card setting
- Scan quality
- File size
- Introduction to Océ View Station LT
- Introduction to Océ Matrix Logic
- Special copy and scan jobs on the Océ TDS700 productive scanner
- Non-standard size originals
- The scan width
- Define the scan width
- The copy size
- Copy non-standard size originals
- Scanning originals with filing strip
- Left hand side
- Right hand side
- Leading and trailing strip
- Make a copy with removed filing strip along the left hand side
- Make a copy with removed filing strip along the right hand side
- Copy with removed filing strips along the leading and trailing strip
- Copy with added filing strips along the leading and trailing strip
- Improving the image quality
- Original type
- Automatic background compensation
- Brightness
- Accentuate thin lines
- Set the automatic background compensation
- Set the original type of your image
- Editing functions
- Auto align
- Select default settings for auto shifting with standard cut option
- Shift the image
- Mirror-image copies
- Make mirror-image copy
- Make a set copy
- Océ TDS700 Power Logic® controller Remote
- Introduction to Océ TDS700 Power Logic® controller Remote
- Use the Océ TDS700 Power Logic® controller Remote to access the Océ TDS700 Power Logic® application
- User modes
- Install and start Océ TDS700 Power Logic® controller Remote
- Install Océ TDS700 Power Logic controller Remote on your system
- Installation procedure for Microsoft® Windows® platforms
- Installation procedure for UNIX™ platforms
- Installation procedure for other platforms
- Start the Océ TDS700 Power Logic® application with Océ TDS700 Power Logic controller Remote
- Use the programs menu to start the Océ Power Logic® controller application
- Use command line parameters to start the applications
- Parameters of supported languages
- Apply the parameters to the Océ TDS700 Power Logic controller Remote application
- Example of a command line parameter
- Connect to the controller
- How to connect to a system
- How to add a system
- How to remove a system
- Use Océ TDS700 Power Logic® controller Remote
- Automatic logon
- How to enable automatic logon
- Log on to Océ TDS700 Power Logic® controller Remote
- Passwords
- Authorisation
- How to log on to the controller application
- How to log off from the controller application
- Change the 'Password'
- How to change the password
- Chapter 6 The Océ TDS700 Power Logic® controller application
- The Océ TDS700 Power Logic® controller software application
- The software application on the Océ TDS700 Power Logic® controller
- Toolbars and workspaces
- Available workspaces
- Log on as a different user
- How to log on as a different user
- Change the password
- Concepts of the Workspaces
- Concepts of the 'Print jobs' workspace
- 'Scheduled jobs'
- 'Waiting jobs'
- 'Printed jobs'
- Concept of the 'Scheduled jobs'
- Concept of the 'Waiting jobs'
- Concept of the 'Printed jobs'
- Concepts of the 'Scan jobs' and the 'Scan destinations'
- 'Scan destinations' on the controller
- 'Scan destinations' on the network
- 'Scan destinations' view area
- Concept of the 'Scan destinations'
- 'Scan destinations'
- 'Scan destinations' toolbar options
- Concept of the 'Templates' on the flexible scanner
- 'Templates'
- Concept of the 'Templates' of the productive scanner
- Concept of the 'Preferences' workspace
- Concept of the 'Configuration' workspace
- Chapter 7 Océ License Logic
- About Océ License Logic
- The possibilities of Océ License Logic
- Possibilities
- The basic workflow of license activation
- The workflow
- The structure of license files and licenses
- A license file contains licenses of the same license-type
- What you see per situation
- Control your licenses with Océ License Logic
- Log on to Océ License Logic
- How to log on to Océ License Logic on the Océ TDS700 Power Logic® controller
- How to log on to Océ License Logic from a remote web browser
- View the current active licenses
- How to view license
- Get the host id of the Océ system
- How to get the host id
- Save the current active licenses
- How to save the license
- Perform a license activation job
- How to activate the licenses
- Accounting software: Océ Account Center
- An overview of Océ Account Center
- User roles and tasks in Océ Account center
- Access to Océ Account Logic
- Océ Account Logic®
- Introduction to Océ Account logic
- Summary of Océ Account Logic
- Sections
- Océ TDS700 Power Logic® controller setup
- Océ Account Console®
- Introduction to Océ Account Console
- Summary of Océ Account Console
- Main parts of Océ Account Console
- The finishing options
- Get to know the folder options
- The folder components
- Folder components
- The folder
- Finishing options of the folder
- Set the standard folding settings
- Set the folding legend
- Set the drawing method
- Set the folding method
- Set the folded print delivery
- Set the folded package width
- Set the binding strip
- Set the reinforcement
- Maximum folding length
- Off-line folding
- How to make off-line folds
- The reinforcement unit
- Enable reinforcement
- Set reinforcement for the copy job in the scanner operator panel of the flexible scanner
- Set reinforcement for the copy job in the scanner operator panel of the productive scanner
- The belt unit
- Selecting belt as folded copy delivery on scanner operator panel of the flexible scanner
- Selecting belt as folded copy delivery on scanner operator panel of the productive scanner
- How to adjust the side guides of the belt
- Paper jam in the folder
- How to clear a jam in the first fold section
- How to clear a jam in the folder transport section
- How to clear a jam in the second fold section
- How to clear a jam in the belt unit
- Maintain the folder options The reinforcement unit
- Maintenance of the reinforcement unit
- Insert a new tape roll
- Remove an empty tape roll
- Prepare the tape roll for operation
- Empty the waste box
- Clean the reinforcement knives
- Handle errors at the reinforcement unit
- Clear a tape jam in the reinforcement unit
- Clear a tape jam
- No reinforcement strips on the output
- Install a new reinforcement strip
- Get to know the Océ Double Decker® (Pro)
- The functions of the Océ Double Decker® (Pro)
- The functions of the Océ Double Decker ® and Océ Double Decker Pro ®
- The Océ Double Decker (Pro)
- The function of the components
- Product specifications
- Stack capacity
- Supported media types
- Make the settings for the Océ Double Decker® (Pro)
- How to set the media separation method
- Set the media separation settings
- How to set the tray selection method
- Set the tray selection setting
- Maintain the Océ TDS700
- Maintain the flexible scanner
- Clean the scan area
- How to clean the glass plate
- Calibrate the scanner
- How to calibrate the scanner
- Clear an original jam on the flexible scanner
- How to remove a jammed original
- Scanner error-messages and solutions
- How to handle error messages at the scanner
- Maintain the productive scanner
- Clean the scan area of the productive scanner
- Clean the glass plate and reference roller
- Clear an original jam on the productive scanner
- Maintain the printer Media
- Load rolls of media
- Load the media
- Use the optional roll loader
- Use the optional roll loader to load a roll
- Load cut sheet material
- Define the media type and media size
- Define the media type and size
- Toner
- Refill the toner
- Replace the waste toner container
- Solve problems on the printer
- Introduction to problem solving
- Clear paper jams on the printer
- Paper jam in the fuser section
- How to clear a jam in the fuser section
- Paper jam in the manual feed section
- How to clear a jam in the manual feed section
- Paper jam in the roll feed section
- Paper jam in the cut sheet section
- How to clear a paper jam in the sheet feeder
- Paper jam at the integrated receiving tray
- How to clear a jam at the integrated receiving tray
- Appendix A Overview and tables
- Overview of the Océ TDS700 system
- Océ TDS700 printer only configuration
- Océ TDS700 configuration with the flexible colour scanner
- Océ TDS700 configuration with the productive black and white scanner
- Printer operator panel
- Scanner operator panel
- Flexible scanner
- Specifications of the Océ TDS700
- Specifications Océ Power Logic® controller
- Océ Power Logic® controller software
- Specifications Océ Scan Logic®
- Specifications drivers and job submission software
- Original types for the scanner
- Productive scanner
- Supported media types and sizes for the printer
- Available media types
- Media types
- Available media sizes
- 8,5 Inch range
- Inch range
- Others
- Media sizes in the cut sheetfeeders
- DIN range
- Standard scale factor
- Supported DIN media series
- Generic ISO media series
- Appendix B Miscellaneous
- Reader's comment sheet
- Questions
- Comments:
- Date:
- Name:
- Occupation:
- Company:
- Phone:
- Address:
- City:
- Country:
- Index
- A
- B
- D
- E
- F
- G
- H
- |
- J
- K
- L
- M
- N
- 0
- P
- R
- S
- T
- U
- V
- W
- X
- Y
Brand : Océ
Model : TDS700
Category : Printer