
LET22C430 - Television HAIER - Free user manual and instructions
Find the device manual for free LET22C430 HAIER in PDF.


| Product type | LED TV |
| Brand | Haier |
| Model | LET22C430 |
| Screen size | 22 inches (55.9 cm) |
| Resolution | HD (1366 x 768 pixels) |
| Dimensions (without stand) | 51 x 31 x 5 cm |
| Dimensions (with stand) | 51 x 35 x 15 cm |
| Net weight | 3.5 kg |
| Power supply | 100-240 V, 50/60 Hz |
| Power consumption (operating) | 30 W |
| Power consumption (standby) | 0.5 W |
| Connectivity | HDMI, VGA, USB, Composite, Antenna |
| Main features | Remote control, stereo speakers, DTT tuner, noise reduction |
| Maintenance and cleaning | Soft non-linting cloth, avoid chemicals |
| Safety | Do not expose to moisture, do not block ventilation slots |
| Spare parts | Available from Haier technical support |
| General information | Made in China, manual included |
Frequently Asked Questions - LET22C430 HAIER
User questions about LET22C430 HAIER
0 question about this device. Answer the ones you know or ask your own.
Ask a new question about this device
Download the instructions for your Television in PDF format for free! Find your manual LET22C430 - HAIER and take your electronic device back in hand. On this page are published all the documents necessary for the use of your device. LET22C430 by HAIER.
USER MANUAL LET22C430 HAIER
Please read this manual carefully before using your television and keep this manual in a good place for future reference.
MODEL:
LET26C430
LET32C430
Contents
01 Safety and warnings
Welcome P.02
Important information P.02
Safety notice P.03
Warnings and cautions P.04
02 Introduction
Main Parameter P.05
Base Stand Assembly Instruction P.07
Wall mounting installation guidelines P.08
Front panel P.09
Read AV connections P.09
Connecting your TV P.10
Common interface P.11
03 Remote Control
Remote Control P.12
04 Operation
Installation Guide P.14
05 Trouble shooting
Trouble shooting P.22
Specification P.23
01 Safety and Warnings
WELCOME
Thanks for buying this 26"/32" LED LCD TV. This guide will help you set up and begin using your TV.
First, check the contents of your box with the parts check list below:
26" Full HD 1080p Digital LED LCD TV
32" HD Ready LED LCD TV
Remote control
Remote control
AAA battery
AAA battery2
Instruction Manual
Instruction Manual
Quick start guide
Quick start guide
Scart cable x1
Scart cable x1
Now you can get started!
IMPORTANT INFORMATION
READ ALL INSTRUCTIONS BEFORE USE AND KEEP FOR FUTURE REFERENCE.

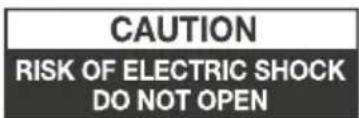

CAUTION
TO REDUCE THE RISK OF ELECTRIC SHOCK, DO NOT REMOVE COVER (OR BACK). NO USER SERVICEABLE PARTS INSIDE. FOR ANY PROBLEMS, REFER SERVICING TO THE CUSTOMER HELP LINE. THERE IS A LIGHTNING ARROW SYMBOL IN THE TRIANGLE: THIS SYMBOL INDICATES HIGH VOLTAGE IS PRESENT INSIDE. IT IS DANGEROUS TO MAKE ANY KIND OF CONTACT WITH ANYINSIDE PART OF THIS PRODUCT.
THERE IS A EXCLAMATION MARK IN THE TRIANGLE: THIS SYMBOL ALERTS YOU THAT IMPORTANT LITERATURE CONCERNING OPERATION AND MAINTENANCE HAS BEEN INCLUDED WITH THIS PRODUCT.

CAUTION: TO REDUCE THE RISK OF ELECTRIC SHOCK AND FIRE, DO NOT PUT THE TV SET NEAR SOURCES OF HUMIDITY. DO NOT USE ANY ABRASIVE CLEANERS WHICH MAY SCRATCH OR DAMAGE THE LCD SCREEN. AVOID CONTACT WITH OBJECTS THAT MAY SCRATCH THE LCD SCREEN.

NOTE: SERVICING THE UNIT YOURSELF IS UNAUTHORISED AND COULD LEAD TO INJURY OR PRODUCT DAMAGE. REFER ALL SERVICING TO THE CUSTOMER HELPLINE.
SAFETY NOTICE
- Warning: To reduce the risk of electric shock, do not remove the cover or back. There are no user-serviceable parts inside. Refer servicing to qualified personnel.
- Warning: To prevent fire or electric shock hazard, do not expose the unit to rain or moisture.
- Do not expose the Adaptor and product to water (dripping or splashing) and no objects filled with liquids, such as vases, should be placed on the unit.
- Keep the product away from direct sunlight and heat source such as radiators or stoves.
- Do not block the ventilation openings. Slots and openings on the unit are provided for ventilation. The openings should never be blocked by placing your product on a cushion, sofa or other similar surface.
- Do not place the product on unstable cart, stand, tripod, bracket or table. The unit may fall, resulting in possible damage or injury.
- Never place heavy or sharp objects on the panel or frame.
- Only use the AC adapter included with product. Using any other adapter will void your warranty.
- Unplug the power from the outlet when the unit is not in use. - Attention should be drawn to the environmental aspects of battery disposal.
- WARNING: The battery (battery or batteries or battery pack) shall not be exposed to excessive heat such as sunshine, fire or the like.
- WARNING: Excessive sound pressure from earphones or headphones can cause hearing loss.
- WARNING: Only use attachments/accessories specified provided by the manufacturer, the product is supplied by AC adapter, the AC adapter is used as disconnect device, the disconnect device shall remain readily operable.
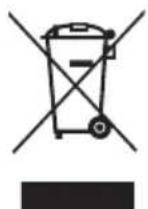
This marking indicates that this product should not be disposed with other household wastes throughout the EU. To prevent possible harm to the environment or human health from uncontrolled waste disposal, recycle it responsibly to promote the sustainable reuse of material resources. To return your used device, please use the return and collection systems or contact the retailer where the product was purchased. They can take this product for environmental safe recycling.

WARNINGS AND CAUTIONS
natural_image
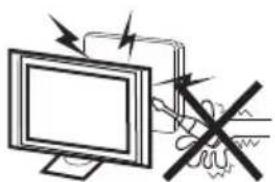
Illustration of a computer monitor with a warning symbol and a crossed-out hand gesture (no text or labels)Warning

High voltages are used in the operation of this television receiver. Do not remove the cabinet back from your set. Refer servicing to qualified service personnel.
natural_image
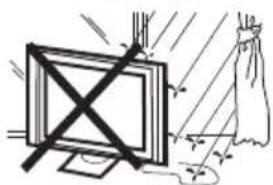
Simple line drawing of a monitor with X marks and a hanging curtain, no text or symbols presentWarning

To prevent fire or electrical shock hazard, do not expose the television receiver to rain or moisture.
natural_image
Simple line drawing of a computer monitor with a crossed X symbol and stars around (no text or symbols)Warning

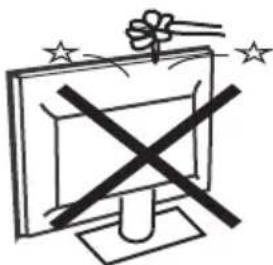
Do not drop or push objects into the television cabinet slots or openings. Never spill any kind of liquid on the television receiver.

natural_image
Simple line drawing of a computer monitor with a stand and curved frame (no text or symbols)Caution

Do not block the ventilation holes in the back cover. Adequate ventilation is essential to prevent failure of electrical components.
natural_image
Simple line drawing of a flat-screen monitor with a black X mark on the stand (no text or symbols)Caution

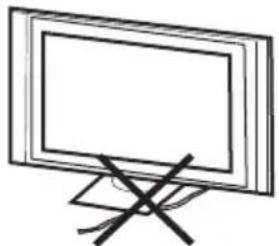
Do not trap the power supply cord under the television receiver.

natural_image
Cartoon illustration of a person running away from a computer screen with a crossed-out X symbol (no text or symbols present)Caution

Never stand on, lean on, or suddenly push the television or its stand. You should pay special attention to children. Serious injury may result if it should fall.

Caution

Do not place your television on an unstable cart, stand, shelf or table. Serious injury to an individual, and damage to the television, may result if it should fall.

natural_image
Illustration of a person reacting to a computer screen with a device, no text or symbols presentCaution

When the television receiver is not used for an extended period of time, it is advisable to disconnect the AC power cord from the AC outlet.
Minimum distances


Caution
If the television is to be built into a compartment or similar enclosure, the minimum distances must be maintained. Heat build-up can reduce the service life of your television, and can also be dangerous.
CAUTION
Never tamper with any components inside the TV, or any other adjustment controls not mentioned in this manual. All LED-TVs are high voltage instruments. When you clean up dust or water drops on the LED PANEL or CABINET, the power cord should be pulled out from the receptacle, then wipe the TV with a dry soft cloth. During thunder and lighting, unplug the power cord and antenna cord to prevent damage to your TV. All repairs to this TV should only be performed by qualified TV service personnel.
INSTALLATION
*Locate the TV in the room where light does not strike the screen directly.
*Total darkness or a reflection on the picture screen can cause eyestrain. Soft and indirect lighting is recommended for comfortable viewing.
*Allow enough space between the TV and the wall to permit ventilation.
*Avoid excessively warm locations to prevent possible damage to the cabinet or premature component failure.
*Do not cover the ventilation openings when using the TV.
Main features
① Used as Television, display terminal, PC display;
② High luminance, wide viewing Angle;
③ Time-shift
④ HDMI interface and SCART Interface;
⑤ NICAM;
Main parameter
| Panel | 26" | 32" |
| TV System | PAL-B/G、I、D/KSECAM-B/G、D/K、L、L' | |
| Video Signal System PAL/SECAM | ||
| Input Power Voltage AC 100V-240V | 50/60Hz | |
| Power consumption | 55W | 90W |
| Audio Output Power (THD≤7%) | 2x5W | 2x8W |
| Signal Input | Analog RGB(PC) x1; PC audio x1High-Definition Multimedia Interface (HDMI)x2Video INput x2Audio Input x2Y、Pb-Prx1Mini SCARTx1CI x 1USB x 1Tuner x 1 | |
| Horizontal definition (TV line) | Composite Video input >=350YPbPr >=400 | |
PC
PRESET MODE
| RESOLUTION | V.Freq.(Hz) H.Freq.(KHz) | ||
| 1 | 640x480 | 60 | 31.47 |
| 2 | 800x600 | 60 | 37.88 |
| 3 | 1024x768 | 60 | 48.36 |
| 4 | 1360x768 | 60 | 47.7 |
| 5 | 1280x1024 | 60 | 63.98 |
Base Stand Assembly Instruction
- Insert the stand support pillar into the stand as the arrow indicated direction, and then fastened with three screws.

natural_image
Technical line drawing of a mechanical component with internal parts and mounting holes (no text or symbols)- Insert the stand Ass'y into back cover as the arrow indicated direction, and then fastened with one screw.

natural_image
Technical line drawing of a laptop chassis showing internal components and exterior view (no text or symbols)INSTALLATION NOTES
Locate the TV in a room where light does not strike the screen directly. Total darkness or a reflection on the screen can cause eyestrain. Soft and indirect lighting is recommended for comfortable viewing.
Allow enough space between the TV and the wall to permit ventilation.
Avoid excessively warm locations to prevent possible damage to the cabinet or premature component failure.
WALL MOUNTING INSTALLATION GUIDELINES
This television can be wall mounted as follows:
-
Place the LED LCD Television onto a solid surface. Please place some soft material over the front of the screen to protect it from any damage.
-
Remove the screws from the lower part of the television, where the base joins to the TV, and take away the stand (put the stand somewhere safe for future use).

natural_image
Technical line drawing of an electronic device rear panel with connectors and ports (no text or symbols)
natural_image
Technical line drawing of a computer chassis showing front panel, rear panel, and internal components (no text or labels)- Use the four screws provided to fix the TV onto a wall mounting bracket (not included) via the four VESA standard holes on the back of the television.

Remote Control
Front control panel


1 Remote control sensor.
2 Indicator LED:
BLUE: POWER ON. RED: STAND BY.
3 Key board.
1 SOURCE Display the input source menu.
2 MENU Display main MENU.
3 CH+/CH- In TV mode, press CH+ or CH- to change the channel up and down.
In MENU, press CH+ or CH- to select items. In standby mode, it can Turn on the TV.
4 VOL+/VOL- Adjust sound level. In MENU, adjust the item that you Selected.
5 STANDBY
Rear/Side Sockets
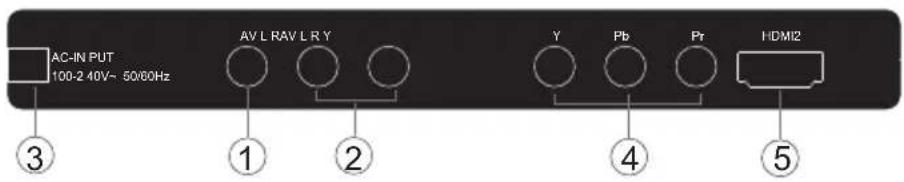

| 1 | AV | input |
| 2 | L/R AUDIO | input |
| 3 | AC Power Source | input |
| 4 | YPbPr | input |
| 5 | HDMI2 | input |
| 6 | HDMI1 | input |
7 USB input
8 PC AUDIO input
9 COMMON INTERFACE(CI) Input
10 SCART Input
11 VGA INPUT Input
12 ANT input
CONNECTING YOUR
TV
ANTENNA CONNECTION
Connect your aerial to the back of the TV into the ANT IN socket.
IMPROVE YOUR SIGNAL
To improve picture quality in a poor signal area, use a signal amplifier (not supplied).
CONNECT YOUR PC TO THE TV
You can use your TV as a monitor for your personal computer by connecting it with a VGA cable (not supplied).
1 Read your computer user guide and check it has a VGA connector.
2 Turn the power off on your TV and PC.
3 Connect a D type 15-pin VGA interface cable to the VGA video interface connector on the PC. Connect the other end of the cable to the PC interface connector on the TV. Tighten the screws on the VGA connectors and connect the audio cable (not supplied) to the audio input socket on the back of the TV.
4 Turn on the power of the TV firstly and then the PC.
5 Press the button on the TV or TV remote control to set the video input mode to VGA.
6 Once the image shows, if there is noise present, change the VGA mode to another resolution, change the refresh rate to another rate or adjust the brightness and contrast on the menu until the picture is clear.
CONNECT A DVD PLAYER OR VCR TO YOUR TV
There are two ways in which you can connect a DVD player or VCR to your TV. Make sure that both the TV and DVD player or VCR are switched off before you connect them.
1 Connect the AV DVD/VCR outputs to the AV IN socket on your TV.
2 Connect the AV audio L & R to the audio input (8) Press the SOURCE button on the TV to set the video input mode to AV.
SCART INPUT
Connect the scart lead from the external device (DVD player, Set-top box or games console) to the TV scart socket.
2 Press the SOURCE button to select SCART mode.
3 Press the PLAY button on the external device.
HDMI input
1 Connect the cable from the HDMI device to the TV HDMI socket.
2 Press the SOURCE button to select HDMI mode.
3 Refer to the HDMI device user guide for how to operate.
COMMON INTERFACE
The common interface (CI) slot is designed to accept the conditional Access (CA) Module and Smart card in order to view the pay TV programmes and additional services.
Contact your Common Interface service provider to get more information about the modules and subscription.
Please noted that CA modules and smart cards are neither supplied nor optional accessories from us.
4 Detailed information on the CI card in use is displayed.
5 Press OK button to access the card menu. Refer to the module instruction manual for setting details.
6 When module is removed, the following message will appear on the screen.
CI Module Removed
Warning
- Switch off your TV before any module is inserted in the Common Interface slot.
1 Insert the CAM correctly, then Smart Card to the CI slot that is located at the side of the TV.
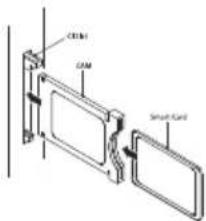
2 Turn on the TV and it will display the below message if the CA module is detected. Wait for few moments until the card is activated.
CI Module Inserted
3 Press the MENU button then press ▲▼ button to select CI Information option.

03 Remote control
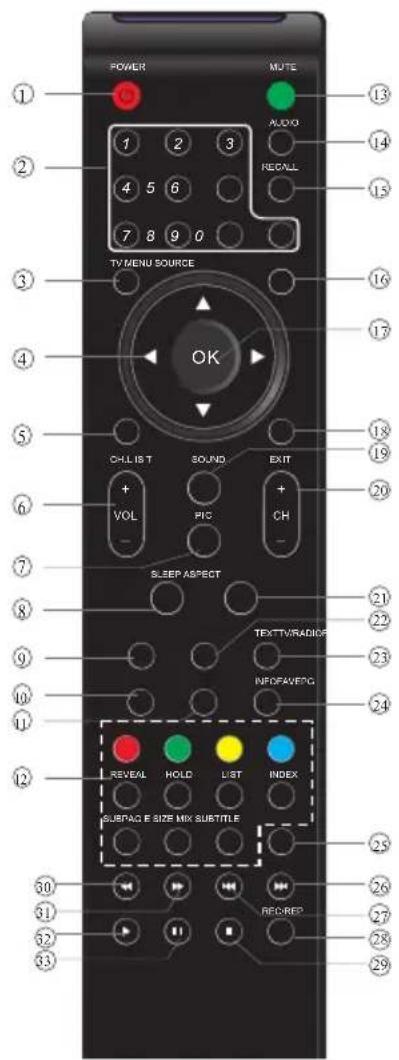
Insert Batteries Into the Remote Control

natural_image
Three-panel technical illustration showing a mechanical component with internal channels and a labeled section (no text or symbols present)- Remove the battery cover.
- Inserting the 2 AAA 1.5V batteries making sure the polarity (+ or -) of the batteries matches the polarity marks inside the unit.
- Mount the battery cover. Replace with new batteries when the TV set begins to show the following symptoms: Operation is unsteady or erratic. Sometimes the TV set does not function with Remote Control Unit.
Remark:
1) Alkaline Battery Recommended.
2) Remove batteries when they are exhausted or if the remote control is not to be used for Long time.
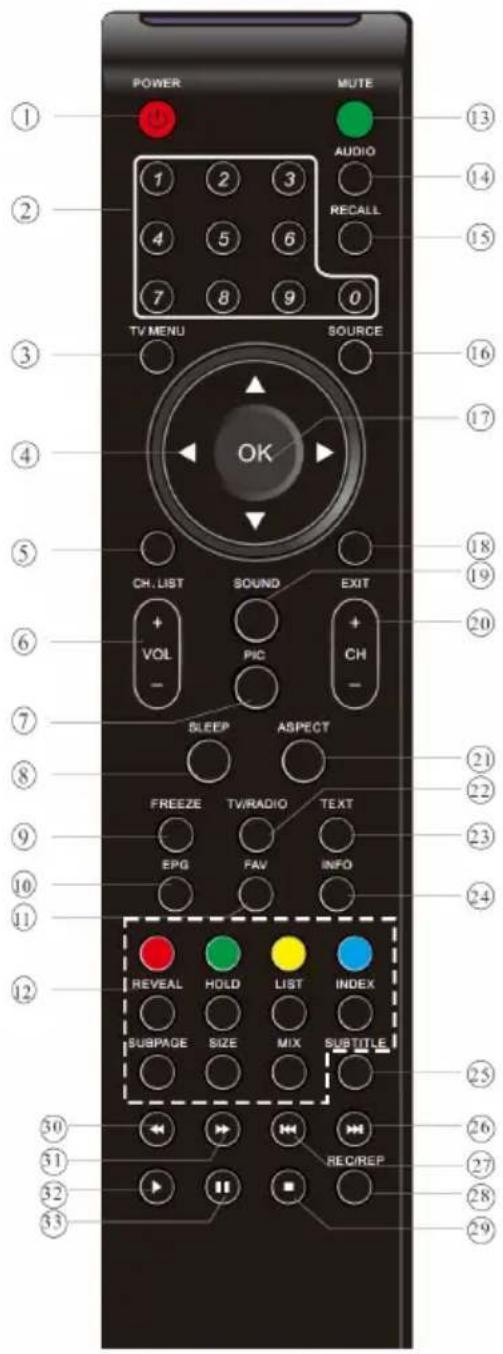
1: POWER: To set the TV to standby or power on.
2: NUMERIC KEY: For direct access to channels.
3: TV MENU: To display TV menu.
4: CURSOR: To move within the menu.
5:CH.LIST:To display the channels list.
6:VOL+/- :To adjust sound level.
7:PIC:To switch picture mode.
8:SLEEP:S et timer to turn off the TV.
9:FREEZE : To freeze the picture.
10: EPG:T o display information about the program being viewed and what's on next in DTV mode.
11:FAV:To access your favourite channels list in TV or DTV mode.
12:TELETEXT KEYS: Please refer to next page.
13:MUTE:To disable or enable the sound output.
14: AUDIO: To select the available audio /language of TV programs.
15: RECALL: To access the previously viewed channel.
16: SOURCE: To select input source.
17: OK: To confirm selection.
18: EXIT:T o return to the previous menu or exit menu.
19: SOUND: To switch sound mode.
20: CH+/CH-: To access the next or previous channels.
21: ASPECT: To change picture aspect ratio.
22:TV/RADIO:In DVB mode, it is used to switch between digital TV channels and radio stations. Display/remove the programme information.
23: TEXT: To enter or exit TELETEXT.
24: INFO:T o display information about the channel being viewed or further information about the program when in small EPG screen in DTV mode.
25: SUBTITLE:T o switch between different subtitles in DTV mode.
26. To skip to the next file in USB mode.
27. To skip to the previous file in USB mode.
28. REC/REP: Press to record the TV program you are watching in DTV Mode or press to repeat play in USB Mode.
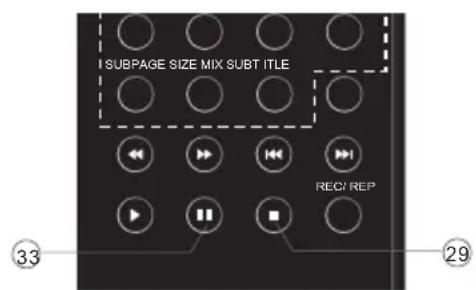
29. Stop the media player in USB mode.
30. To scan in reverse, during USB, USB playback.
31. To scan in forward, during USB, USB playback.
32. Play the media player in USB mode.
33. Pause the media player in USB mode, time shift in DTV mode.
NOTE:
With no operation for 4 hours, the unit will swift into the standby mode automatically.
REMOTE CONTROL
TELETEXT
Teletext is an information system broadcast by certain channels which can be consulted like a newspaper. It also offers access to subtitles for viewers with hearing problems or who are not familiar with the transmission language(cable networks, satellite channels, etc.)
| Press: | You will obtain : |
| TEXT | This is used to call or exit teletext modes. The summary appears with a list of items that can be accessed. Each item has a corresponding 3 digit page number. If the channel selected does not broadcast teletext, theindication 100 will be displayed and the screen will remain blank (in this case, exit teletext and select another channel). |
| SELECTING A PAGE | Enter the number of the page required using the 0 to 9 up/down. Example: page 120, enter 120. The number is displayed top left, the counter turns and then the page is displayed. Repeat this operation to view another page. If the counter continues to search, this means that the page is not transmitted. Select another number. |
| DIRECT ACCESS TO THE ITEMS | Coloured are as are displayed at the bottom of the screen. The 4 coloured keys are used to access the items or corresponding pages. The coloured areas flash when the item or the page is not yet available. |
| INDEX | This returns to the contents page (usually page 100). |
| SUB PAGE | Certain pages contain sub-pages which are automatically displayed successively. This key is used to stop or resume sub-page acquisition. The indication appears top left. |
| HOLD | To freeze the page. |
| REVEAL | To display or hide the concealed information (games solutions). |
| LIST | The user can set four favorite pages to be directly linked to the four color keys. While list mode is activated, it is not possibility to use TOP or FLOF navigation with the colorkeys. The favorite page numbers should be stored and restored to/from nonvolatile memory for each channel by the system software. |
04 OPERATION
Installation Guide

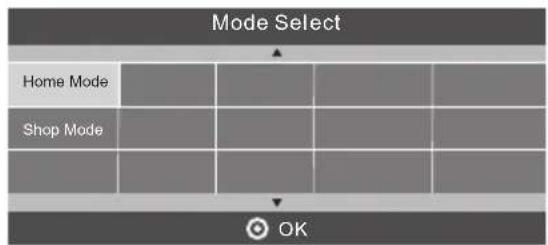

This screen only appear when the TV first time turn on or reset to factory set. You can choose language, energy-saving mode and country, auto turning programs. And after turning the screen will skip to the first DTV program.
1.CHANNEL MENU
The first item of the MENU is channel menu( for TV or DTV source only).

You can search channels and edit programs here.
1). Auto tuning:
Search all the channels automatically(you can select ATV and DTV)

PIs press ◀▶▼▲ to select country at first, then press OK button to start auto tuning.

NOTE:
All the channels including ATV, DTV and Radio can be tuning by one time, if the Tune Type is DTV+ATV.
All the stored channels will be disappear after auto tuning.
After auto tuning, the channel will skip to the first DTV channel.
2).DTV Manual tuning:
You can select a DTV channel then find the program in this channel.
Pls press ◀▶ to select the channel, then press OK to search the programs.
NOTE:
Bad Normal Good means signal intensity.

3). ATV Manual tuning :
You can change the sound system to search the analog TV channels and fine tune the channels, then storage the channels you selected.

NOTE:
Press teletext red button to storage to channels after manual tuning.
4). Program edit:
You can Delete ,Rename ,Move, Skip , FAV any programs.

Delete
Press teletext red button, the program in cursor will delete.

Rename:
Only can rename ATV programs.
Move the cursor to the program, press teletext green button to rename the program.
Press ▼▲ to choose the character. Press ◀▶to move the cursor.
Press MENU button to exit edit, Press EXIT to exit the menu.
Note: ATV programs name only can be 5 character, DTV programs name can be 25 character.

Move
Use the Arrow Buttons to select the channel you wish to move. Then press the Yellow Button to select Move function. Once active, enter the number button and then press OK to confirm.

Skip
Press ▼▲ to choose the program, press teletext blue button to skip this program, The 📷 will show on the right side of the program.
Choose the skipped program, press blue button again, you can cancel the skip, The will disappear.

Favourite
Press ▼▲ to choose the program, press FAV button, it will show ♥ on the right side of the program. Choose the FAV program, press FAV button again, you can cancel the FAV, ♥ the will disappear.
Once your favorite group is created, you can press the FAV key to quickly access your favorite channel.
5). CI information: (optional)
This menu can display the CI card's information.
2. PICTURE MENU
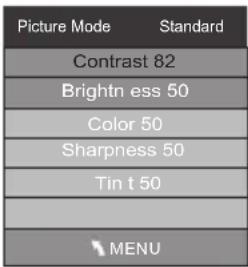
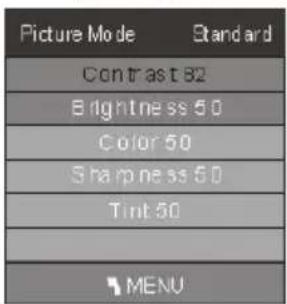
The second item of the MENU is PICTURE MENU. You can adjust picture effect here, such as contrast, brightness, etc.
Press OK to move, press OK to adjust.
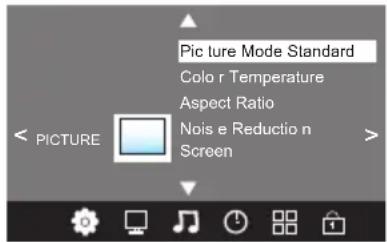

NOTE:
1). Tint is available in NTSC system only.
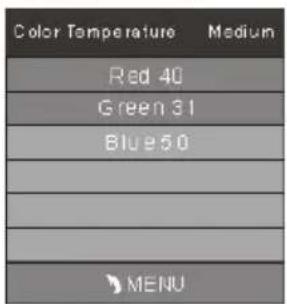
2). There are four colors temperature modes can be selected medium, warm, cool, user
3).Screen is available in PC mode only which, can adjust Horizontal position, vertical position, size and phase.
3.SOUND MENU
The third item of the MENU is the SOUND MENU.
You can adjust the sound effect here such as treble, bass, balance etc.
Press ▼▲ to move, press OK to adjust.

Note:
Auto volume: only available when the input signal volume is too large or distortion.
4.TIME MENU
The forth item of the menu is the TIME MENU You can adjust the clock, power on/off time, sleep time etc Press ◀▶to move, press OK to adjust

NOTE:
Within 15 minutes there is no signal, the TV will auto sleep, if Auto Sleep is set ON. The clock time can get from the DTV system auto.
5. OPTION MENU
The fifth item of the MENU is the OPTION MENU. You can adjust the Menu language, Audio language, Subtitle language etc.

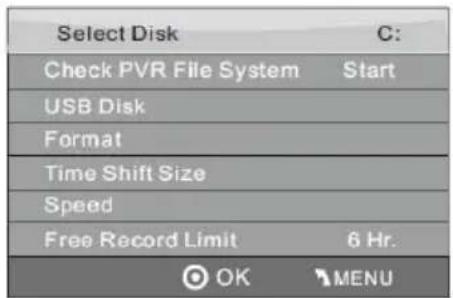
In PVR File system menu you can set up USB disk for PVR.
| Select Disk C: |
| Check PVR File System Start |
| USB Disk |
| Format |
| Time Shift Size |
| Speed |
| Free Record Limit 6 Hr. |
NOTE:
Restore factory default will clear all the programs and password.
6. LOCK MENU
The sixth item of the menu is the LOCK MENU You can lock system, set password, block program and set parental guidance Once you set the lock system on you can not search the channels or change any programs.

NOTE:
The default pass word is 6666.
Block program: Press ▼▲to choose the program, press teletext green button to block the program. If you want unblock the program, pls enter the main menu, input the password, then press green button again. Parental guidance: Press ◀▶to choose rating.
7. EPG Menu (Electronic Program Guide).
The EPG menu is used to look at what is being broadcasted on DTV or Radio channel in the day. To access the EPG menu, press the EPG bottom, the following menu will be displayed:


INFO
Use ✦ to choose the programs, Press INFO key, you can display the highlight program's information.

Schedule
Press the teletext yellow key, It can list all the reminder schedule, press ▼▲ to choose the list, press red key ● DELETE to delete the schedule list, Press EPG to return to EPG menu.
| Schedule List 04:55 28th Apr Delete | |||||
| Time Date | Program me Title | Chann el Nam e | |||

Record
Press the red key, It can set the program to be recorded.

Remind
Press the blue key to choose one program and set up one reminder time, the TV screen will skip to the chosen program in the reminder time automatically.

8.PVR function
1. Prepare to record the program
From OPTION MENU enter into PVR File System In "OPTION MENU", please choose "check PVR File System". Click "OK", until "checking" change into "Success".
Note: please check the term “speed”. If it is “HD support”, that means the speed of USB device is available for time shift and record. If not, please format the device, to make sure the device available. The default “Free Record Limit” is 6 hour, if the space on the disk is big enough. If the space is not big enough, the record time should be shorter, depends on the room on the device. During the “check PVR File System” checking, please do not take any other operation until it finished.
The recordings have to be done with TV PVR system. It can only be played in the same TV, not in other kind of devices (computer, DVD, etc...) which doesn't be compatible with .TS. Format.
See that in order to carry out any kind of recording, the TV will oblige you to format the connected device to store the recording.
WARNING. WHEN YOU FORMAT, THE EXTERNAL DEVICE WILL LOSE ALL THE FILES AND INFORMATION YOU STORAGE IN THE DEVICE.
From OPTION MENU enter into PVR File System as below:
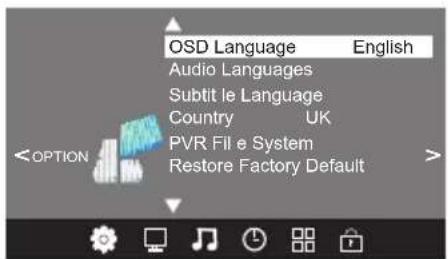

Select Disk:select which disc to save the record file.

Check PVR File System: check if the PVR File System set up in the USB device or not.
Format:


(Suggest to format the format the device by "High Speed Fs...", which can speed up the record.)


below menu appear after Format finish:


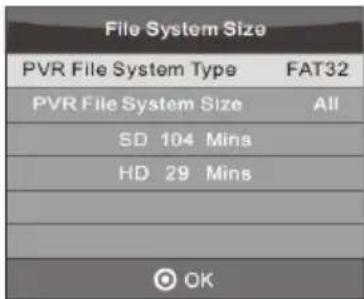
If you select the "Hi Speed FS" format mode, then you can change the time shift size:

2. Record the program
As playing the DTV source, choose the channel and click “record”, the record frame will pop up. Click “record” again, the record frame will disappear and the “REC” icon still on the left top. It will disappear until you click “stop”.
3.Play the record
In “USB”, the record program will be saved in the folder “_MSTPVR” on the device.
- The USB storage size needs to be the size between 4GB to 500GB.
- Video may become pixelated when Video bit rate is too low.
- Not all USB devices are compatible. Below is a list of recommended USB drivies. Models that are not listed may be compatible, but it is not guaranteed to work.
The USB support list are the same as Timeshift function, see page 21
9. Timeshift function
1. Prepare to record the program
This TV allows you to pause and record the currently watched digital program to a USB storage device, and to resume to the point where it was paused.
NOTE:
- Formatting a USB 2.0 storage device will be needed. Save your original data before formatting. All the data stored in the USB device will be erased after formatting.
- Sleep timer will be suspended if it had been set before activating the Time Shift function.
USB Drive Storage Format
Select to format the USB device and allocate the amount of space for the Time Shift function.
NOTE:
- The format process will take at least 2 minutes. Please do not turn off the power or remove the USB device during formatting.
- During formatting, a speed test will be done on the USB device. If it fails, it means the USB device may not support the Time Shift function.
Record a paused DTV program to USB storage device
- While in the DTV input source, insert USB storage device to the USB port on the side of your TV.
- Press PAUSE 33 to start Time Shift function. The TV program paused. The Time Shift OSD appears, and starts recording.
- Press STOP 29 to stop Time Shift function and stop recording program.

NOTE:
- Please do not unplug the USB storage device when the Time Shift function is activated.
- Approximately 4GB of memory buffers about offer 140 minutes.
Time Shift limitations:
- When the Time Shift feature is activated, only the PLAY/PAUSE/STOP/FWD/REV/VOL+/VOL-/MUTE keys and some basic operation keys (ENTER/EXIT/navigation keys) are available.
- Video playback may not be smooth and skip if USB recording speed does not meet the minimum requirements.
- Do Not remove USB disk or switch off the power during Time Shift operations. It will abort once the signal is lost.
- Do Not remove the signal source during Time Shift operations.
- Do Not quickly and repeatedly change operations between PLAY/PAUSE/FWD/REV.
- Sleep timer will be terminated if it had been set before Time Shift.
- Video may become pixelated when Video bit rate is too low.
- Not all USB devices are compatible, The USB hard disk drive electricity should be < 500MA.
Below is a list of recommended USB dryies. Models that are not listed may be compatible, but it is not guaranteed to work.
- SanDisk Extreme® Contour™ USB Flash Drive - 8GB SDCZ8-8192-E75
-
SanDisk Extreme® Contour™ USB Flash Drive - 16GB SDCZ8-016G-A75
• Kingston DataTraveler 410 USB 2.0 Flash Drive - 8GB DT410/8GB
• Kingston DataTraveler 410 USB 2.0 Flash Drive - 16GB DT410/16GB
• OCZ Technology Rally2 USB 2.0 Flash Drive - 4GB OCZUSBR2DC-4GB
• OCZ Technology ATV USB 2.0 Flash Drive - 8GB OCZUSBATV-8GB
• OCZ Technology Rally2 USB 2.0 Flash Drive - 8GB OCZUSBR2DC-8GB
• SAMSUNG-HM500JI-500G -
This feature is not available for all digital TV, such as scrambled or audio only channels.
10.USB Player
Press source key, and select USB in source list, press OK button to enter the USB menu.
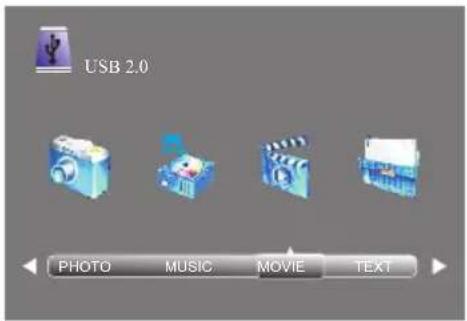
Please make sure that the USB device have plugged in the slot. There are four type media item can be selected, such as photo, music, Movie, and text. Select the type media item by pressing ◀▶, press OK button to enter the disk selection menu.

Press the ◀▶to select the right disk and press OK to display media files and folder list or choose Return to back to the media type selection menu.
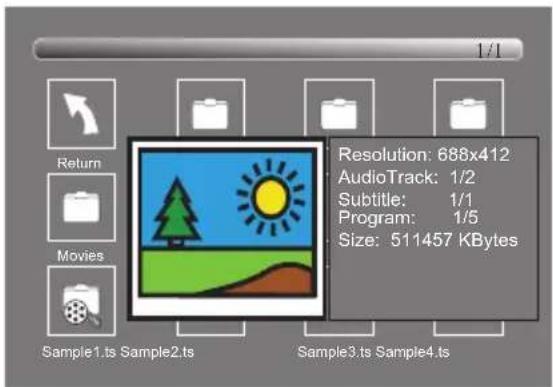
Select the media file by pressing ◀ or ▼, then the preview frame will pop up. Press the button ▶ to play the media file in full screen. When the media file (photo, music, Movie, or text type) is playing, press the OK or Info button can display the control bar.

Press ◀▶ to select the function icon, press OK button to confirm the function.
Press ▼ or EXIT button to exit the control bar. NOTE:
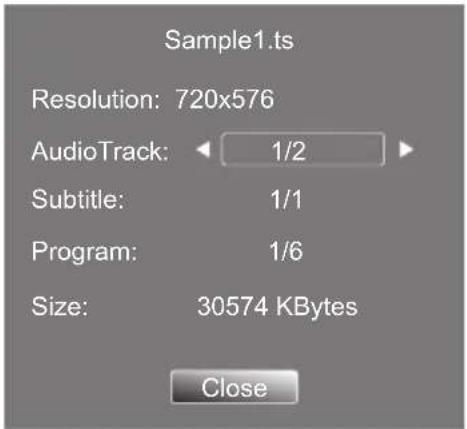
You can adjust the audio track, or program in the Info menu while Playing the video file. Choose the Info icon and press OK can display the Info MENU.
05 Trouble shooting
| Trouble phenomenon Symptom | Inspection Check | ||
| Picture Audio | |||
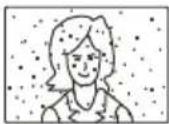 | Snow Noise |  | antenna position, direction or connection |
 | Ghost |  Normal audio Normal audio | antenna position, direction or connection |
 | Interference |  Noise Noise | electronic equipment, car/ motorcycle, fluorescent light |
 | Normal Picture |  Mute Mute | Volume(check if mute is activated or if the audio system connections are not correct) |
 | No picture Mut | 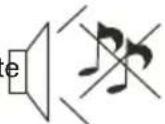 | Power cord is not inserted Power switch is not opened Contrast and brightness/volume setup Press standby key on the remote control for inspecting |
 | No colour Norm |  our control our control | |
 | Picture breaking up |  Normal audio or weak Normal audio or weak | retune channel |
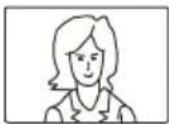 | No colour |  Noise Noise | TVsystem |
Specification
| Colour system | PAL-B/G、I、D/KSECAM- B/G、D/K、L、L' | |
| Sound system BG, DK, I, L,L' | ||
| Video input | SCART,YPbPr,AV,VGA, HDMI, USB. | |
| Y/Pb/Pr | 480i/p, 576i/p,720p, 1080i, 1080p | |
| HDMI | 480i/p, 576i/p, 720p, 1080i, 1080p | |
| Power requirements | 100-240V~ 50/60Hz | |
| Power consumption | 55W (26") | 90W (32") |
| Audio output 2x5W | 2x8W | |
| Environment conditions | Working temperature:+5°C - +35°CWorking humidity:20% - 80%Storage temperature:-15°C - +45°CStorage humidity:5% - 90% | |
| Accessory | User manualRemote controlBattery (x2)Quick start guide | |
* The part specifications of this TV set provided here are for reference only.
Differences may occur as product technology is updated.
Design and specifications are subject to change without notice.
Scart input/output description
| TV Source | SCART Out |
| ATV | ATV |
| DTV | DTV |
| Other Source | ATV |
Haier
LCD-FERNSEHER
BEDIENUNGSANLEITUNG
natural_image
Illustration of a computer monitor with arrows indicating motion and a crossed-out black symbol (no text or labels)Warning

natural_image
Simple line drawing of a monitor with a cross mark and a hanging fabric (no text or symbols)Warning

natural_image
Illustration of a computer monitor with a crossed X symbol and stars above (no text or symbols present)Warning

natural_image
Simple line drawing of a computer monitor with steam rising from its top (no text or symbols)Caution

natural_image
Simple line drawing of a flat-screen monitor with a black X mark on the stand (no text or symbols)Caution

Mindestabstände
natural_image
Technical line drawing of a mechanical assembly with internal components and a downward arrow indicating motion (no text or symbols)natural_image
Technical line drawing of a laptop chassis showing internal components and an external housing (no text or symbols)HINWEISE ZUR INSTALLATION
natural_image
Technical line drawing of an electronic device casing with internal components and mounting points (no text or symbols)
natural_image
Top-down schematic of a computer chassis showing internal components and ventilation duct (no text or labels)
1 Sensor Fernbedienung
2 Status-LED:
BLAU: eingeschaltet
ROT: Stand-by-Modus
3 Funktionstasten

03 Fernbedienung
natural_image
Three-step mechanical assembly diagram showing a component being cut, with no visible text or symbols
3) ATV Manuelle Suche:


BITTE BEACHTEN SIE:
Bitte beachten Sie:
BITTE BEACHTEN SIE:
3.

Aufnahme

| File System Size | |
| PVR File System Type | FAT32 |
| PVR File System Size | All |
| SD 104 Mins | |
| HD 29 Mins | |

BITTE BEACHTEN SIE:
RISQUES D'ELECTROCUTION NE PAS OUVRIR
ATTENTION
AFIN DE REDUIRE LES RISQUE DE CHOC ELECTRIQUE, N'ENLEVEZ PAS LE COUVERCLE (OU LE PANNEAU ARRIERE).
AUCUNE PIÈCE RÉPARABLE PAR L'UTILISATEUR À L'INTÉRIEUR. POUR TOUT PROBLÈME, ADRESSEZ-VOUS AU SERVICE D'ASSISTANCE CLIENT. IL Y A UN SYMBOLE DE FLÈCHE D'ÉCLAIR DANS UN TRIANGLE ; CE SYMBOLE INDIQUE QU'UNE HAUTE TENSION EST PRESENTE À L'INTÉRIEUR. IL EST DONC DANGEREUX D'ÉTABLIR LE MOINDRE CONTACT AVEC LES COMPOSANTS INTERNES DU PRODUIT.
IL Y A UNE MARQUE D'EXCLAMATION DANS UN TRIANGLE : CE SYMBOLE PRÉVIENT L'UTILISATEUR QUE DES DIRECTIVES D'UTILISATION ET DE MAINTENANCE SONT FOURNIES AVEC CET APPAREIL.

ATTENTION : POUR RÉDUIRE LE RISQUE DE CHOC ÉLECTRIQUE ET D'INCENDIE, NE METTEZ PAS LE TÉLÉVISEUR PRÈS DES SOURCES D'HUMIDITÉ. N'UTILISEZ PAS DE NETTOYANTS ABRASIFS QUI PEUVENT RAYER OU ENDOMMAGER L'ÉCRAN LCD. ÉVITEZ TOUT CONTACT AVEC DES OBJETS SUSCEPTIBLES DE RAYER L'ÉCRAN LCD.

REMARQUE : L'ENTRETIEN DE L'APPAREIL PAR VOUS-MÊME N'EST PAS AUTORISÉ ET POURRAIT ENTRAÎNER DES
BLESSURES OU ENDOMMAGER LE PRODUIT. CONFIEZ TOUTE RÉPARATION AU SERVICE D'ASSISTANCE CLIENT.
INSTRUCTIONS DE SÉCURITÉ
natural_image
Technical line drawing of a mechanical assembly with internal components and a downward arrow indicating motion (no text or symbols)natural_image
Technical line drawing of a laptop chassis showing internal components and an external housing (no text or symbols)REMARQUES SUR L'INSTALLATION
natural_image
Technical line drawing of an electronic device casing with internal components and mounting points (no text or symbols)
natural_image
Top-down schematic of a computer chassis showing internal components and ventilation duct (no text or labels)
03 Télécommande

natural_image
Three-step mechanical assembly diagram showing a component with a highlighted section (no text or symbols)
REMARQUE :
REMARQUE :
3. Enregistrer


REMARQUE :
05 Dépannage
Common interface P. 14
03 Telecomando
Telecomando P.15
04 Operatività
natural_image
Technical line drawing of a mechanical component with internal cavities and mounting holes (no text or symbols)natural_image
Technical line drawing of a laptop chassis showing internal components and an external housing (no text or symbols)natural_image
Technical line drawing of an electronic device casing with internal components and mounting brackets (no text or symbols)
natural_image
Top-down schematic of a device rear panel with ventilation grilles and control buttons (no text or labels)
03 Telecomando

natural_image
Three-step mechanical assembly diagram showing a component being cut into a housing (no text or symbols)

NOTA:
NOTA:

Format (formattare):


NOTA:
MSD306 POWER SUPPLY

+1.2V FOR MST CORE


Schemi Elettrici
TV LEDLCD mod. "LET26C430, LET32C430"
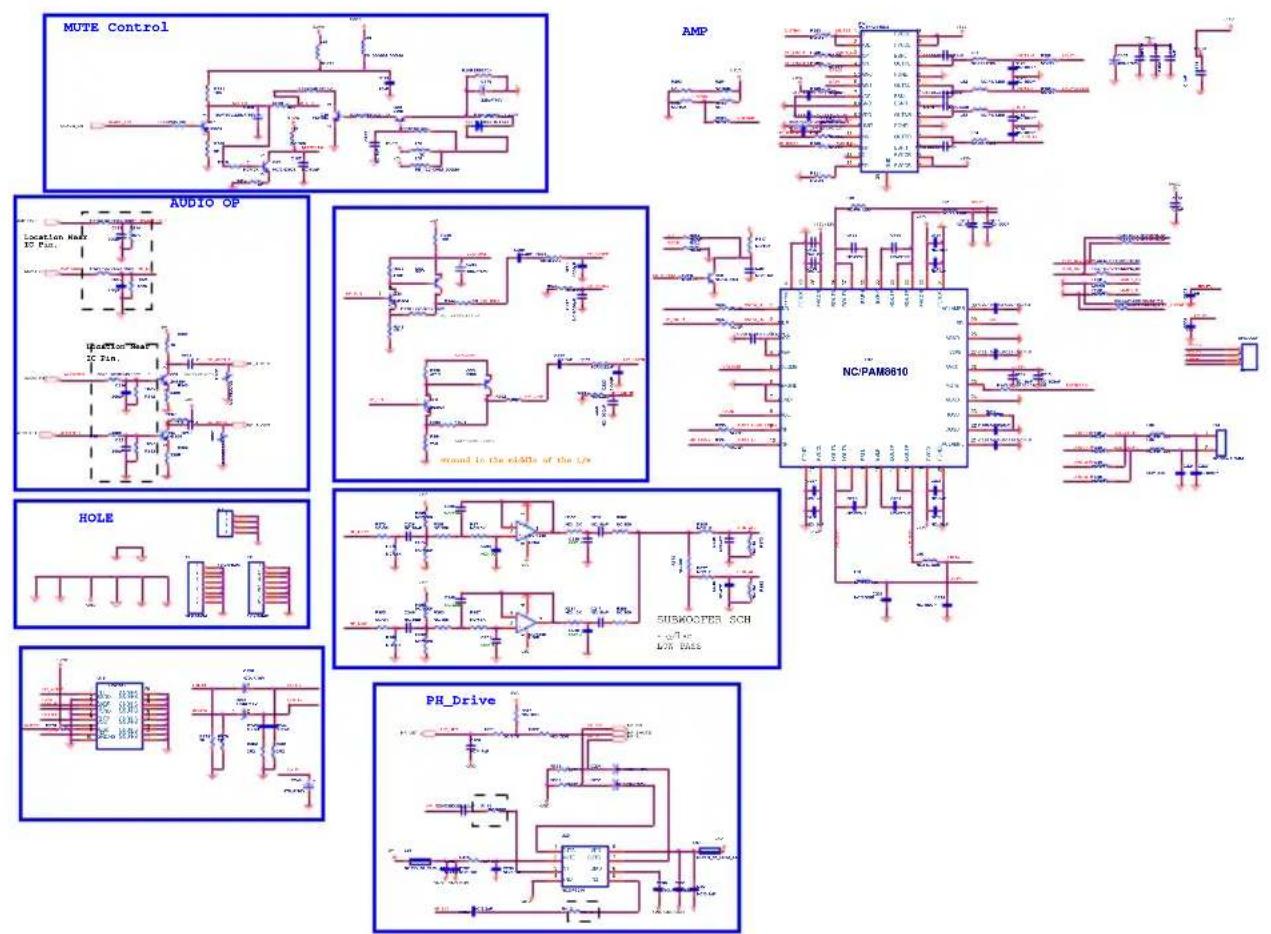


Schemi Elettrici
TV LEDLCD mod. "LET26C430, LET32C430"
SCART
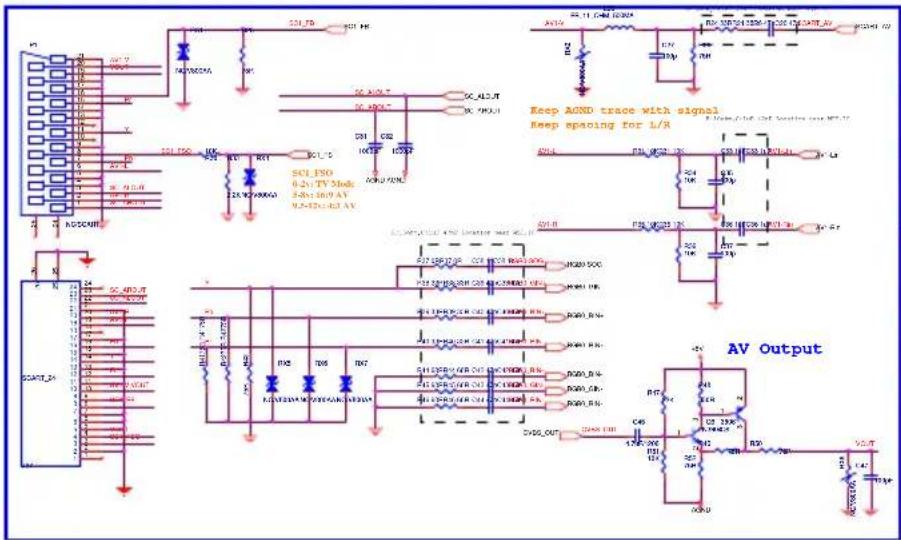
(AV+SPDIF) Output


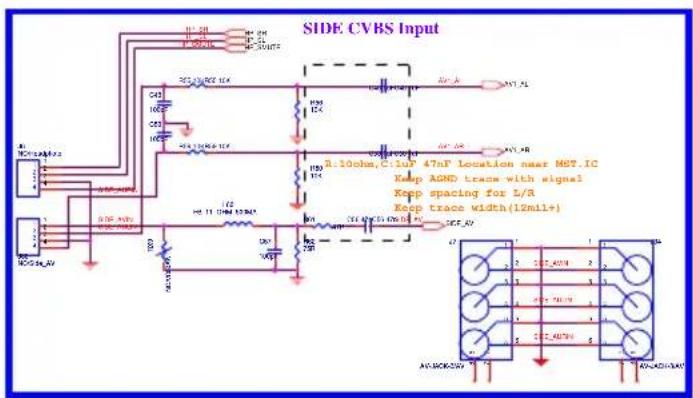
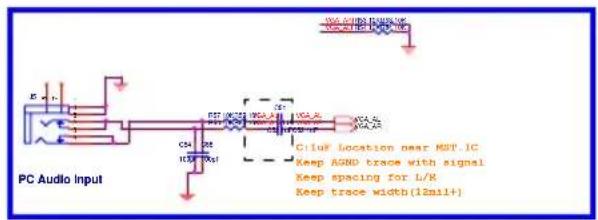
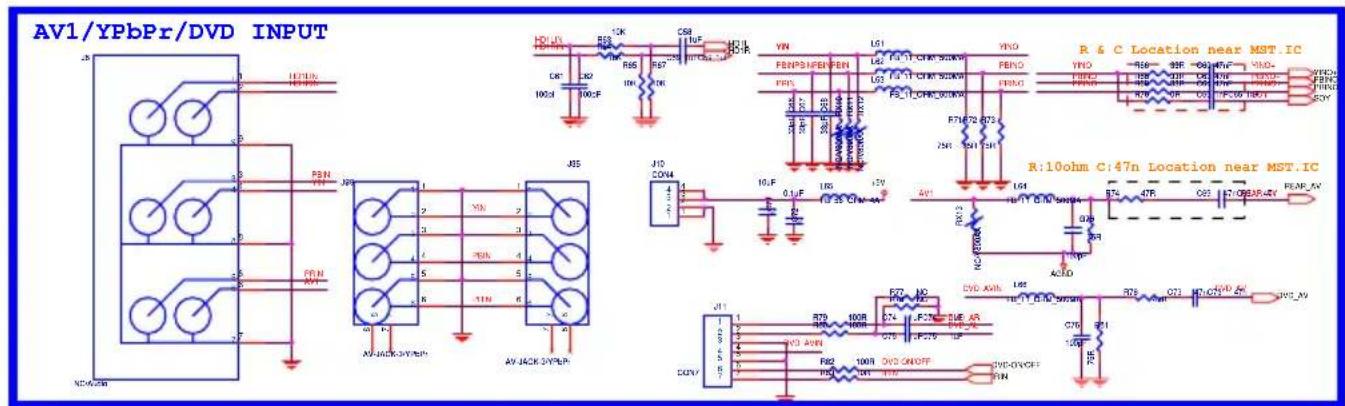
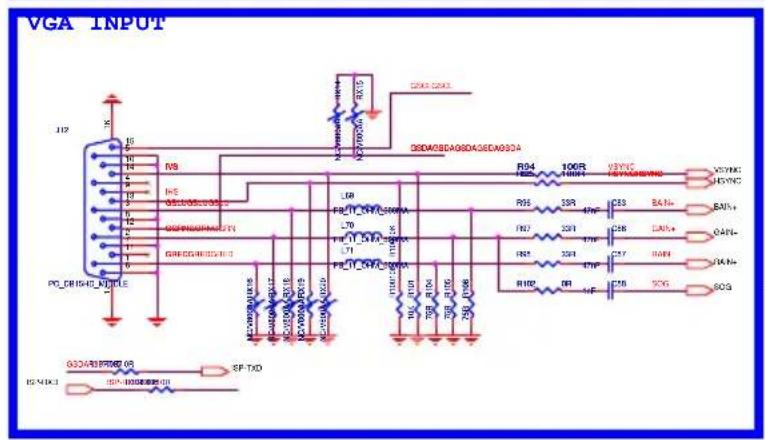

Schemi Elettrici
TV LED LCD mod. "LET26C430, LET32C430"


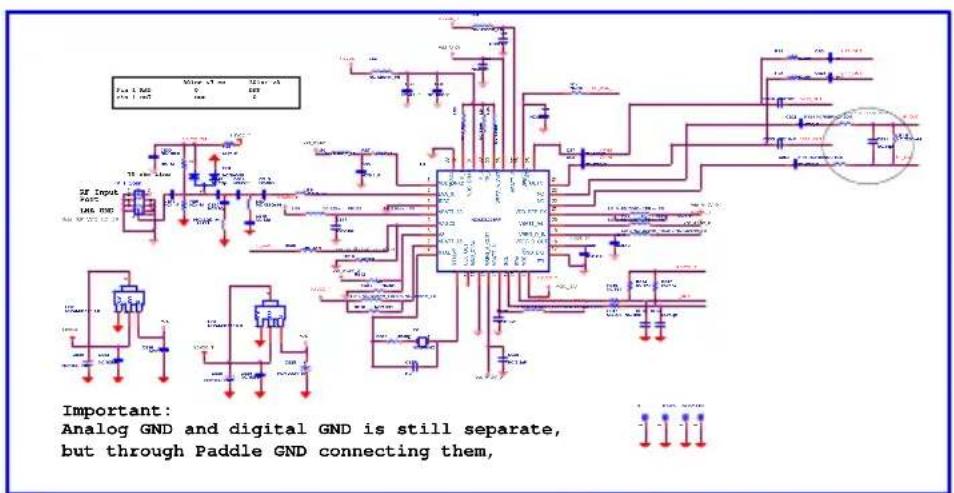

Schemi Elettrici
TV LED LCD mod."LET26C430, LET32C430"
CARD DETECT
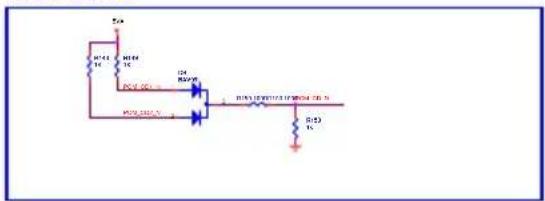
PWR CTRL 5V card

PCMCIA Connector



- Contents
- Safety and warnings
- Introduction
- Remote Control
- Operation
- Trouble shooting
- WELCOME
- IMPORTANT INFORMATION
- SAFETY NOTICE
- WARNINGS AND CAUTIONS
- CAUTION
- INSTALLATION
- Main features
- PC
- Base Stand Assembly Instruction
- INSTALLATION NOTES
- WALL MOUNTING INSTALLATION GUIDELINES
- Remote Control
- CONNECTING YOUR
- TV
- ANTENNA CONNECTION
- IMPROVE YOUR SIGNAL
- CONNECT YOUR PC TO THE TV
- CONNECT A DVD PLAYER OR VCR TO YOUR TV
- SCART INPUT
- HDMI input
- COMMON INTERFACE
- Warning
- Remark:
- NOTE:
- TELETEXT
- 1.CHANNEL MENU
- 1). Auto tuning:
- 2).DTV Manual tuning:
- 3). ATV Manual tuning :
- 4). Program edit:
- Delete
- Rename:
- Move
- Skip
- Favourite
- 5). CI information: (optional)
- PICTURE MENU
- 3.SOUND MENU
- 4.TIME MENU
- OPTION MENU
- LOCK MENU
- EPG Menu (Electronic Program Guide).
- INFO
- Schedule
- Record
- Remind
- 8.PVR function
- Prepare to record the program
- Format:
- Record the program
- 3.Play the record
- Timeshift function
- USB Drive Storage Format
- Record a paused DTV program to USB storage device
- Time Shift limitations:
- 10.USB Player
- Haier
- LCD-FERNSEHER
- BEDIENUNGSANLEITUNG
- HINWEISE ZUR INSTALLATION
- Fernbedienung
- 3) ATV Manuelle Suche:
- BITTE BEACHTEN SIE:
- 3.
- RISQUES D'ELECTROCUTION NE PAS OUVRIR
- ATTENTION
- INSTRUCTIONS DE SÉCURITÉ
- REMARQUES SUR L'INSTALLATION
- Télécommande
- REMARQUE :
- Enregistrer
- Dépannage
- Telecomando
- Operatività
- NOTA:
- Format (formattare):
- Schemi Elettrici
- TV LEDLCD mod. "LET26C430, LET32C430"
- TV LED LCD mod. "LET26C430, LET32C430"
- TV LED LCD mod."LET26C430, LET32C430"
Brand : HAIER
Model : LET22C430
Category : Television