
FinePix X-Pro2 - Camera FUJIFILM - Free user manual and instructions
Find the device manual for free FinePix X-Pro2 FUJIFILM in PDF.


| Product Type | Mirrorless Digital Camera |
| Brand | Fujifilm |
| Model | FinePix X-Pro2 |
| Sensor Type | APS-C X-Trans CMOS III |
| Effective Pixels | 24.3 MP |
| Lens Mount | Fujifilm X Mount |
| ISO Sensitivity | 200 - 12800 (expandable to 51200) |
| Shutter Speed | Mechanical: 30 sec. to 1/8000 sec.; Electronic: up to 1/32000 sec. |
| Continuous Shooting | Up to 8 fps (with mechanical shutter), up to 14 fps (electronic shutter) |
| Viewfinder | Hybrid Multi Viewfinder (Optical/Electronic) |
| LCD Screen | 3.0-inch (1.04M dot) TFT color LCD |
| Video Recording | Full HD 1920x1080 at up to 60fps |
| Storage Media | SD / SDHC / SDXC (UHS-II compatible), Dual Slots |
| Power Source | NP-W126 rechargeable Li-ion battery |
| Battery Life (CIPA) | Approximately 350 frames |
| Dimensions (W x H x D) | 140.5 x 82.8 x 45.9 mm (5.5 x 3.3 x 1.8 in.) |
| Weight (with battery and memory card) | 495 g (1.09 lb) |
| Cleaning | Use a blower to remove dust; gently wipe with a soft, dry cloth. Avoid solvents. |
| Safety | Do not disassemble or expose to moisture. Keep away from magnets and static electricity. |
| Spare Parts & Repairability | For repairs, contact Fujifilm service centers. Spare batteries and accessories available online. |
| General Information | Free user manual available for download at notice-facile.com in PDF format. |
Frequently Asked Questions - FinePix X-Pro2 FUJIFILM
User questions about FinePix X-Pro2 FUJIFILM
0 question about this device. Answer the ones you know or ask your own.
Ask a new question about this device
Download the instructions for your Camera in PDF format for free! Find your manual FinePix X-Pro2 - FUJIFILM and take your electronic device back in hand. On this page are published all the documents necessary for the use of your device. FinePix X-Pro2 by FUJIFILM.
USER MANUAL FinePix X-Pro2 FUJIFILM
Thank you for your purchase of this product. This manual describes how to use your FUJIFILM X-Pro2 digital camera. Be sure that you have read and understood its contents before using the camera.
■ Product website:
http://fujifilm-x.com/x-pro2/

■ Additional information may be found in online manuals available from:
http://fujifilm-dsc.com/manuals/

Before You Begin
First Steps
Basic Photography and Playback
Basic Movie Recording and Playback
The Q (Quick Menu) Button The Fn (Function) Buttons
More on Photography and Playback
Menus
Connections
Technical Notes
Troubleshooting
Appendix
ForYourSafety
IMPORTANT SAFETY INSTRUCTIONS
- Read Instructions: All the safety and operating instructions should be read before the appliance is operated.
- Retain Instructions: The safety and operating instructions should be retained for future reference.
- Heed Warnings: All warnings on the appliance and in the operating instructions should be adhered to.
- Follow Instructions: All operating and use instructions should be followed.
Installation
Power Sources: This video product should be operated only from the type of power source indicated on the marking label. If you are not sure of the type of power supply to your home, consult your appliance dealer or local power company. For video products intended to operate from battery power, or other sources, refer to the operating instructions.
Grounding or Polarization: This video product is equipped with a polarized alternating-current line plug (a plug having one blade wider than the other). This plug will fit into the power outlet only one way. This is a safety feature. If you are unable to insert the plug fully into the outlet, try reversing the plug. If the plug should still fail to fit, contact your electrician to replace your obsolete outlet. Do not defeat the safety purpose of the polarized plug.
Alternate Warnings: This video product is equipped with a three-wire grounding-type plug, a plug having a third (grounding) pin. This plug will only fit into a grounding type power outlet. This is a safety feature. If you are unable to insert the plug into the outlet, contact your electrician to replace your obsolete outlet. Do not defeat the safety purpose of the grounding type plug.
Overloading. Do not overload wall outlets and extension cords as this can result in a risk of fire or electric shock.
Ventilation: Slots and openings in the cabinet are provided for ventilation, to ensure reliable operation of the video product and to protect it from overheating, and these openings must not be blocked or covered. The openings should never be blocked by placing the video product on a bed, sofa, rug, or other similar surface.
This video product should not be placed in a built-in installation such as a bookcase or rack unless proper ventilation is provided or the manufacturer's instructions have been adhered to. This video product should never be placed near or over a radiator or heat register.
Attachments: Do not use attachments not recommended by the video product manufacturer as they may cause hazards.
Water and Moisture: Do not use this video product near water—for example, near a bath tub, wash bowl, kitchen sink, or laundry tub, in a wet basement, or near a swimming pool, and the like.
Power-Cord Protection: Power-supply cords should be routed so that they are not likely to be walked on or pinched by items placed upon or against them, paying particular attention to cords at plugs, convenience receptacles, and the point where they exit from the appliance.
Accessories: Do not place this video product on an unstable cart, stand, tripod, bracket, or table. The video product may fall, causing serious injury to a child or adult, and serious damage to the appliance. Use only with a cart, stand, tripod, bracket, or table recommended by the manufacturer, or sold with the video product. Any mounting of the appliance should follow the manufacturer's instructions, and should use a mounting accessory recommended by the manufacturer.
An appliance and cart combination should be moved with care. Quick stops, excessive force, and uneven surfaces may cause the appliance and cart combination to overturn.

Antennas
Outdoor Antenna Grounding: If an outside antenna or cable system is connected to the video product, be sure the antenna or cable system is grounded so as to provide some protection against voltage surges and built-up static charges. Section 810 of the National Electrical Code, ANSI/NFPA No. 70, provides information with respect to proper grounding of the mast and supporting structure, grounding of the lead-in wire to an antenna discharge unit, size of grounding conductors, location of antenna discharge unit, connection to grounding electrodes, and requirements for the grounding electrode.
EXAMPLE OF ANTENNA GROUNDING AS PER NATIONAL ELECTRICAL CODE

Power Service Grounding Electrode System (NEC ART 250. PART H)
Grounding Conductors (NEC SECTION 810-21)
Power Lines: An outside antenna system should not be located in the vicinity of overhead power lines or other electric light or power circuits, or where it can fall into such power lines or circuits. When installing an outside antenna system, extreme care should be taken to keep from touching such power lines or circuits as contact with them might be fatal.
Use
Cleaning: Unplug this video product from the wall outlet before cleaning. Do not use liquid cleaners or aerosol cleaners. Use a damp cloth for cleaning.
Object and Liquid Entry: Never push objects of any kind into this video product through openings as they may touch dangerous voltage points or short out parts that could result in a fire or electric shock. Never spill liquid of any kind on the video product.
Lightning: For added protection for this video product receiver during a lightning storm, or when it is left unattended and unused for long periods of time, unplug it from the wall outlet and disconnect the antenna or cable system. This will prevent damage to the video product due to lightning and power-line surges.
Service
Servicing: Do not attempt to service this video product yourself as opening or removing covers may expose you to dangerous voltage or other hazards. Refer all servicing to qualified service personnel.
Damage Requiring Service: Unplug this video product from the wall outlet and refer servicing to qualified service personnel under the following conditions:
- If liquid has been spilled, or objects have fallen into the video product.
- When the power-supply cord or plug is damaged
• If the video product has been exposed to rain or water. - If the video product has been dropped or the cabinet has been damaged.
If the video product does not operate normally follow the operating instructions. Adjust only those controls that are covered by the operating instructions as an improper adjustment of other controls may result in damage and will often require extensive work by a qualified technician to restore the video product to its normal operation.
When the video product exhibits a distinct change in performance — this indicates a need for service.
Replacement Parts: When replacement parts are required, be sure the service technician has used replacement parts specified by the manufacturer or have the same characteristics as the original part. Unauthorized substitutions may result in fire, electric shock or other hazards.
Safety Check: Upon completion of any service or repairs to this video product, ask the service technician to perform safety checks to determine that the video product is in proper operating condition.
Be sure to read these notes before use
| Safety Notes |
| Make sure that you use your camera correctly. Read these safety notes and your Owner's Manual carefully before use. After reading these safety notes, store them in a safe place. |
| About the Icons |
| The icons shown below are used in this document to indicate the severity of the injury or damage that can result if the information indicated by the icon is ignored and the product is used incorrectly as a result. |
| WARNING | This icon indicates that death or serious injury can result if the information is ignored. | |
| CAUTION | This icon indicates that personal injury or material damage can result if the information is ignored. |
The icons shown below are used to indicate the nature of the instructions which are to be observed.
| Triangular icons tell you that this information requires attention ("Important"). | |
| Circular icons with a diagonal bar tell you that the action indicated is prohibited ("Prohibited"). | |
| Filled circles with an exclamation mark indicate an action that must be performed ("Required"). |
| WARNING | |
| If a problem arises, turn the camera off, remove the battery, and disconnect and unplug the AC power adapter. Continued use of the camera when it is emitting smoke, is emitting any unusual odor, or is in any other abnormal state can cause a fi re or electric shock. Contact your FUJIFILM dealer. | |
| Do not allow water or foreign objects to enter the camera. If water or foreign objects get inside the camera, turn the camera off, remove the battery and disconnect and unplug the AC power adapter. Continued use of the camera can cause a fi re or electric shock. Contact your FUJIFILM dealer. | |
| Do not use the camera in the bathroom or shower. This can cause a fi re or electric shock. | |
| Never attempt to change or take apart the camera (never open the case). Failure to observe this precaution can cause fi re or electric shock. | |
| Should the case break open as the result of a fall or other accident, do not touch the exposed parts. Failure to observe this precaution could result in electric shock or in injury from touching the damaged parts. Remove the battery immediately, taking care to avoid injury or electric shock, and take the product to the point of purchase for consultation. | |
| Do not change, heat or unduly twist or pull the connection cord and do not place heavy objects on the connection cord. These actions could damage the cord and cause a fi re or electric shock. If the cord is damaged, contact your FUJIFILM dealer. | |
| Do not place the camera on an unstable surface. This can cause the camera to fall or tip over and cause injury. | |
| Never attempt to take pictures while in motion. Do not use the camera while walking or driving. This can result in you falling down or being involved in a traffic accident. | |
For Your Safety
| WARNING | |
| Do not touch any metal parts of the camera during a thunderstorm. This can cause an electric shock due to induced current from the lightning discharge. | |
| Do not use the battery except as specified. Load the battery as shown by the indicator. | |
| Do not heat, change or take apart the battery. Do not drop or subject the battery to impacts. Do not store the battery with metallic products. Any of these actions can cause the battery to burst or leak and cause fire or injury as a result. | |
| Use only batteries or AC power adapters specified for use with this camera. Do not use voltages other than the power supply voltage shown. The use of other power sources can cause a fire. | |
| If the battery leaks and fluid gets in contact with your eyes, skin or clothing, fluid the affected area with clean water and seek medical attention or call an emergency number right away. | |
| Do not use the charger to charge batteries other than those specified here. The supplied charger is for use only with batteries of the type supplied with the camera. Using the charger to charge conventional batteries or other types of rechargeable batteries can cause the battery to leak, overheat or burst. | |
| Using a flash too close to a person's eyes may cause visual impairment. Take particular care when photographing infants and young children. | |
| Do not use in the presence of flammable objects, explosive gases, or dust. | |
| When carrying the battery, install it in a digital camera or keep it in the hard case. When storing the battery, keep it in the hard case. When discarding, cover the battery terminals with insulation tape. Contact with other metallic objects or batteries could cause the battery to ignite or burst. | |
| WARNING | |
| Keep memory cards, hot shoes, and other small parts out of the reach of small children. Children may swallow small parts; keep out of reach of children. Should a child swallow a small part, seek medical attention or call emergency. | |
| Keep out of reach of small children. Among the elements that could cause injury are the strap, which could become entangled about a child's neck, causing strangulation, and the flash, which could cause visual impairment. | |
| Follow the directions of airline and hospital personnel. This product generates radio-frequency emissions that could interfere with navigational or medical equipment. |
| CAUTION | |
| Do not use this camera in locations aff ected by oil fumes, steam, humidity or dust. This can cause a fi re or electric shock. | |
| Do not leave this camera in places subject to extremely high temperatures. Do not leave the camera in locations such as a sealed vehicle or in direct sun-light. This can cause a fi re. | |
| Do not place heavy objects on the camera. This can cause the heavy object to tip over or fall and cause injury. | |
| Do not move the camera while the AC power adapter is still connected. Do not pull on the connection cord to disconnect the AC power adapter. This can damage the power cord or cables and cause a fi re or electric shock. | |
| Do not cover or wrap the camera or the AC power adapter in a cloth or blanket. This can cause heat to build up and distort the casing or cause a fi re. | |
| When you are cleaning the camera or you do not plan to use the camera for an extended period, remove the battery and disconnect and unplug the AC power adapter. Failure to do so can cause a fi re or electric shock. | |
| When charging ends, unplug the charger from the power socket. Leaving the charger plugged into the power socket can cause a fi re. | |
| When a memory card is removed, the card could come out of the slot too quickly. Use your finger to hold it and gently release the card. Injury could result to those struck by the ejected card. | |
| Request regular internal testing and cleaning for your camera. Build-up of dust in your camera can cause a fi re or electric shock. Contact your FUJIFILM dealer to request internal cleaning every two years. Please note that this service is not free of charge. | |
| Danger of explosion if battery is incorrectly replaced. Replace only with the same or equivalent type. | |
The Battery and Power Supply
Note: Check the type of battery used in your camera and read the appropriate sections.
The following describes the proper use of batteries and how to prolong their life. Incorrect use can shorten battery life or cause leakage, overheating, fire, or explosion.
Li-ion Batteries
Read this section if your camera uses a rechargeable Li-ion battery.
The battery is not charged at shipment. Charge the battery before use. Keep the battery in its case when not in use.
Notes on the Battery
The battery gradually loses its charge when not in use. Charge the battery one or two days before use.
Battery life can be extended by turning the camera off when not in use.
Battery capacity decreases at low temperatures; a depleted battery may not function when cold. Keep a fully charged spare battery in a warm place and exchange as necessary, or keep the battery in your pocket or other warm place and insert it in the camera only when shooting. Do not place the battery in direct contact with hand warmers or other heating devices.
■ Charging the Battery
Charge the battery in the supplied battery charger. Charging times will increase at ambient temperatures below +10 °C (+50 °F) or above +35 °C (+95 °F). Do not attempt to charge the battery at temperatures above 40 °C (+104 °F); at temperatures below 0 °C (+32 °F), the battery will not charge.
Do not attempt to recharge a fully charged battery. The battery does not however need to be fully discharged before charging.
The battery may be warm to the touch immediately after charging or use. This is normal.
Battery Life
At normal temperatures, the battery can be recharged about 300 times. A noticeable decrease in the length of time the battery will hold a charge indicates that it has reached the end of its service life and should be replaced.
Storage
Performance may be impaired if the battery is left unused for extended periods when fully charged. Run the battery flat at before storing it.
If the camera will not be used for an extended period, remove the battery and store it in a dry place with an ambient temperature of from +15 °C to +25 °C (+59 °F to +77 °F). Do not store in locations exposed to extremes of temperature.
■ Cautions: Handling the Battery
- Do not transport or store with metal objects such as necklaces or hairpins.
- Do not expose to flame or heat.
- Do not disassemble or modify.
- Use with designated chargers only.
- Dispose of used batteries promptly.
- Do not drop or subject to strong physical shocks.
- Do not expose to water.
- Keep the terminals clean.
• The battery and camera body may become warm to the touch after extended use. This is normal.
■ Disposal
Dispose of used batteries in accord with local regulations.
AC Power Adapters (Available Separately)
Use only FUJIFILM AC power adapters designated for use with this camera. Other adapters could damage the camera.
• The AC power adapter is for indoor use only.
- Be sure the DC plug is securely connected to the camera.
- Turn the camera off before disconnecting the adapter. Disconnect the adapter by the plug, not the cable.
- Do not use with other devices.
- Do not disassemble.
- Do not expose to high heat and humidity.
• Do not subject to strong physical shocks.
- The adapter may hum or become hot to the touch during use. This is normal.
- If the adapter causes radio interference, reorient or relocate the receiving antenna.
Using the Camera
- Do not aim the camera at extremely bright light sources, such as the sun in a cloudless sky. Failure to observe this precaution could damage the camera image sensor.
- Strong sunlight focused through the viewfinder may damage the panel of electronic viewfinder (EVF). Do not aim the electronic viewfinder at the sun.
Take Test Shots
Before taking photographs on important occasions (such as at weddings or before taking the camera on a trip), take a test shot and view the results to ensure that the camera is functioning normally. FUJIFILM Corporation can not accept liability for damages or lost profits incurred as a result of product malfunction.
Notes on Copyright
Unless intended solely for personal use, images recorded using your digital camera system cannot be used in ways that infringe copyright laws without the consent of the owner. Note that some restrictions apply to the photographing of stage performances, entertainments, and exhibits, even when intended purely for personal use. Users are also asked to note that the transfer of memory cards containing images or data protected under copyright laws is only permissible within the restrictions imposed by those copyright laws.
Handling
To ensure that images are recorded correctly, do not subject the camera to impact or physical shocks while images are being recorded.
For Your Safety
Liquid Crystal
In the event that the display is damaged, care should be taken to avoid contact with liquid crystal. Take the urgent action indicated should any of the following situations arise:
- If liquid crystal comes in contact with your skin, clean the area with a cloth and then wash thoroughly with soap and running water.
- If liquid crystal enters your eyes, flush the affected eye with clean water for at least 15 minutes and then seek medical assistance.
- If liquid crystal is swallowed, rinse your mouth thoroughly with water. Drink large quantities of water and induce vomiting, then seek medical assistance.
Although the display is manufactured using extremely high-precision technology, it may contain pixels that are always lit or that do not light. This is not a malfunction, and images recorded with the product are unaffected.
Trademark Information
Digital Split Image is a trademark or registered trademark of FUJIFILM Corporation. xD-Picture Card and 20 are trademarks of FUJIFILM Corporation. The typefaces included herein are solely developed by DynaComware Taiwan Inc. Macintosh, QuickTime, and Mac OS are trademarks of Apple Inc. in the U.S.A. and other countries. The Windows logo is a trademark of the Microsoft group of companies. Wi-Fi® and Wi-Fi Protected Setup® are registered trademarks of the Wi-Fi Alliance. Adobe and Adobe Reader are either trademarks or registered trademarks of Adobe Systems Incorporated in the U.S.A. and/or other countries. The SDHC and SDXC logos are trademarks of SD-3C, LLC. The HDMI logo is a trademark. All other trade names mentioned in this manual are the trademarks or registered trademarks of their respective owners.
Electrical Interference
This camera may interfere with hospital or aviation equipment. Consult with hospital or airline staff before using the camera in a hospital or on an aircraft.
Color Television Systems
NTSC (National Television System Committee) is a color television telecasting specification adopted mainly in the U.S.A., Canada, and Japan. PAL (Phase Alternation by Line) is a color television system adopted mainly in European countries and China.
Exif Print (Exif Version 2.3)
Exif Print is a newly revised digital camera file format in which information stored with photographs is used for optimal color reproduction during printing.
IMPORTANT NOTICE: Read Before Using the Software
Direct or indirect export, in whole or in part, of licensed software without the permission of the applicable governing bodies is prohibited.
NOTICES
To prevent fire or shock hazard, do not expose the unit to rain or moisture.
Please read the "Safety Notes" and make sure you understand them before using the camera.
Perchlorate Material—special handling may apply. See http://www.dtsc.co.gov/hazardouswaste/perchlorate.
For Customers in the U.S.A.
Tested To Comply With FCC Standards FOR HOME OR OFFICE USE

Contains IC : 7736B-02000002 Contains FCC ID : W2Z-02000002
FCC Statement: This device complies with Part 15 of the FCC Rules. Operation is subject to the following two conditions: (1) This device may not cause harmful interference, and (2) this device must accept any interference received, including interference that may cause undesired operation.
CAUTION: This equipment has been tested and found to comply with the limits for a Class B digital device, pursuant to Part 15 of the FCC Rules. These limits are designed to provide reasonable protection against harmful interference in a residential installation. This equipment generates, uses, and can radiate radio frequency energy and, if not installed and used in accordance with the instructions, may cause harmful interference to radio communications. However, there is no guarantee that interference will not occur in a particular installation. If this equipment does cause harmful interference to radio or television reception, which can be determined by turning the equipment off and on, the user is encouraged to try to correct the interference by one or more of the following measures:
• Reorient or relocate the receiving antenna.
- Increase the separation between the equipment and receiver.
- Connect the equipment into an outlet on a circuit different from that to which the receiver is connected.
- Consult the dealer or an experienced radio/TV technician for help.
FCC Caution: Any changes or modifications not expressly approved by the party responsible for compliance could void the user's authority to operate this equipment.
This transmitter must not be co-located or operating in conjunction with any other antenna or transmitter.
Radiation Exposure Statement: This device meets the government's requirements for exposure to radio waves. This device is designed and manufactured not to exceed the emission limits for exposure to radio frequency (RF) energy set by the Federal Communications Commission of the U.S. Government.
The exposure standard for wireless device employs a unit of measurement known as the Specific Absorption Rate, or SAR. The SAR limit set by the FCC is 1.6W/kg. *Tests for SAR are conducted using standard operating positions accepted by the FCC with the device transmitting at its highest certified power level in all tested frequency bands.
Notes on the Grant: To comply with Part 15 of the FCC Rules, this product must be used with a Fujifi Im-specific ferrite core A/V cable, USB cable, and DC supply cord.

A lithium ion battery that is recyclable powers the product you have purchased. Please call 1-800-8-BATTERY for information on how to recycle this battery.
For Customers in Canada
CAN ICES-3 (B)/NMB-3(B)
CAUTION: This Class B digital apparatus complies with Canadian ICES-003.
Industry Canada statement: This device complies with Industry Canada's licence-exempt RSSs. Operation is subject to the following two conditions: (1) This device may not cause interference; and (2) This device must accept any interference, including interference that may cause undesired operation of the device.
This device and its antenna(s) must not be co-located or operating in conjunction with any other antenna or transmitter, except tested built-in radios. The County Code Selection feature is disabled for products marketed in the US/Canada.
Radiation Exposure Statement: The available scientific evidence does not show that any health problems are associated with using low power wireless devices. There is no proof, however, that these low power wireless devices are absolutely safe. Low power Wireless devices emit low levels of radio frequency energy (RF) in the microwave range while being used. Whereas high levels of RF can produce health effects (by heating tissue), exposure of low-level RF that does not produce heating effects causes no known adverse health effects. Many studies of low-level RF exposures have not found any biological effects. Some studies have suggested that some biological effects might occur, but such findings have not been confirmed by additional research. X-Pro2 has been tested and found to comply with IC radiation exposure limits set forth for an uncontrolled environment and meets RSS-102 of the IC radio frequency (RF) Exposure rules.
Disposal of Electrical and Electronic Equipment in Private Households
In the European Union, Norway, Iceland and Liechtenstein: This symbol on the product, or in the manual and in the warranty, and/or on its packaging indicates that this product shall not be treated as household waste. Instead it should be taken to an applicable collection point for the recycling of electrical and electronic equipment.

By ensuring this product is disposed of correctly, you will help prevent potential negative consequences to the environment and human health, which could otherwise be caused by inappropriate waste handling of this product.
This symbol on the batteries or accumulators indicates that those batteries shall not be treated as household waste.

If your equipment contains easy removable batteries or accumulators please dispose these separately according to your local requirements.
The recycling of materials will help to conserve natural resources. For more detailed information about recycling this product, please contact your local city office, your household waste disposal service or the shop where you purchased the product.
In Countries Outside the European Union, Norway, Iceland and Liechtenstein: If you wish to discard this product, including the batteries or accumulators, please contact your local authorities and ask for the correct way of disposal.
In Japan: This symbol on the batteries indicates that they are to be disposed of separately.

For Your Safety
Be sure to read these notes before use
Safety Notes
Thank you for your purchase of this product. For repair, inspection, and internal testing, contact your FUJIFILM dealer.
- Make sure that you use the lens correctly. Read these safety notes and the camera Owner's Manual carefully before use.
• After reading these safety notes, store them in a safe place.
About the Icons
The icons shown below are used in this document to indicate the severity of the injury or damage that can result if the information indicated by the icon is ignored and the product is used incorrectly as a result.

WARNING
This icon indicates that death or serious injury can result if the information is ignored.

CAUTION
This icon indicates that personal injury or material damage can result if the information is ignored.
The icons shown below are used to indicate the nature of the instructions which are to be observed.

Triangular icons tell you that this information requires attention ("Important").

Circular icons with a diagonal bar tell you that the action indicated is prohibited ("Prohibited").

Filled circles with an exclamation mark indicate an action that must be performed ("Required").

WARNING

Do not use in the bathroom or shower
Do not immerse in or expose to water. Failure to observe this precaution can cause a fire or electric shock.

Do not disas sempie
Do not disassemble (do not open the case). Failure to observe this precaution can cause fire, electric shock, or injury due to product malfunction.

Do not touch internal parts
Should the case break open as the result of a fall or other accident, do not touch the exposed parts. Failure to observe this precaution could result in electric shock or in injury from touching the damaged parts. Remove the camera battery immediately, taking care to avoid injury or electric shock, and take the product to the point of purchase for consultation.

WARNING

Do not place on unstable surfaces. The product may fall, causing injury.

Do not view the sun through the lens or camera viewfnders. Failure to observe this precaution can cause permanent visual impairment.

CAUTION

Do not use or store in locations that are exposed to steam, or smoke or are very humid or extremely dusty. Failure to observe this precaution can cause fire or electric shock.

Do not leave in direct sunlight or in locations subject to very high temperatures, such as in a closed vehicle on a sunny day. Failure to observe this precaution can cause fire.

Keep out of the reach of small children. This product could cause injury in the hands of a child.

Do not handle with wet hands. Failure to observe this precaution can cause electric shock.

Keep the sun out of the frame when shooting backlit subjects. Sunlight focused into the camera when the sun is in or close to the frame can cause fire or burns.

When the product is not in use, replace the lens caps and store out of direct sunlight. Sunlight focused by the lens can cause fire or burns.

Do not carry the camera or lens while they are attached to a tripod. The product can fall or strike other objects, causing injury.
European Union regulatory notice
This product complies with the following EU Directives:
• RoHS Directive 2011/65/EU
• R & TTE Directive 1999/5/EC
Compliance with these directives implies conformity to applicable harmonized European standards (European Norms) which are listed on the EU Declaration of Conformity issued by FUJIFILM Corporation for this product or product family.
This compliance is indicated by the following conformity marking placed on the product:
CE
This marking is valid for non-Telecom products and EU harmonized Telecom products (e.g. Bluetooth).
Regarding the Declaration of Conformity, visit http://www.fujifilm.com/products/digital_cameras/x/fujifilm_x_pro2/pdf/index/fujifilm_x_pro2_cod.pdf.
IMPORTANT: Read the following notices before using the camera's built-in wireless transmitter.
① This product, which contains encryption function developed in the United States, is controlled by the United States Export Administration Regulations and may not be exported or re-exported to any country to which the United States embargoes goods.
- Use only as part of a wireless network. FUJIFILM does not accept liability for damages resulting from unauthorized use. Do not use in applications requiring a high degree of reliability, for example in medical devices or other systems that may directly or indirectly impact human life. When using the device in computer and other systems that demand a greater degree of reliability than wireless networks, be sure to take all necessary precautions to ensure safety and prevent malfunction.
- Use only in the country in which the device was purchased. This device conforms to regulations governing wireless network devices in the country in which it was purchased. Observe all location regulations when using the device. FUJIFILM does not accept liability for problems arising from use in other jurisdictions.
- Wireless data (images) may be intercepted by third parties. The security of data transmitted over wireless networks is not guaranteed.
- Do not use the device in locations subject to magnetic fields, static electricity, or radio interference. Do not use the transmitter in the vicinity of microwave ovens or in other locations subject to magnetic fields, static electricity, or radio interference that may prevent reception of wireless signals. Mutual interference may occur when the transmitter is used in the vicinity of other wireless devices operating in the 2.4 GHz band.
• The wireless transmitter operates in the 2.4 GHz band using DSSS and OFDM modulation.
Wireless Network Devices: Cautions
- This device operates on the same frequency as commercial, educational, and medical devices and wireless transmitters. It also operates on the same frequency as licensed transmitters and special unlicensed low-voltage transmitters used in RFID tracking systems for assembly lines and in other similar applications.
- To prevent interference with the above devices, observe the following precautions. Confirm that the RFID transmitter is not in operation before using this device. Should you observe that the device causes interference in licensed transmitters used for RFID tracking, immediately stop using the affected frequency or move the device to another location. If you notice that this device causes interference in low-voltage RFID tracing systems, contact a FUJIFILM representative.
2.4DS/OF4
This sticker indicates that this device operates in the 2.4 GHz band using DSSS and OFDM modulation and may cause interference at distances of up to 40 m.
About This Manual
Before using the camera, read this manual and the warnings in "For Your Safety" (📖 ii). For information on specific topics, consult the sources below.
Table of Contents...... xiii
The "Table of Contents" gives an overview of the entire manual. The principal camera operations are listed here.
Troubleshooting.... 137
Having a specific problem with the camera? Find the answer here.
Warning Messages and Displays 142
Find out what's behind that flashing icon or error message in the display.
Restrictions on Camera Settings...... 153
See page 153 for restrictions on the options available in each shooting mode.

Memory Cards
Pictures are stored on optional SD, SDHC, and SDXC memory cards (24), referred to in this manual as "memory cards."
ProductCare
Camera body: For continued enjoyment of your camera, use a soft, dry cloth to clean the camera body after each use. Do not use alcohol, thinner, or other volatile chemicals, which could discolor or deform the leather on the camera body. Any liquid on the camera should be removed immediately with a soft, dry cloth. Use a blower to remove dust from the monitor, taking care to avoid scratches, and then gently wipe with a soft, dry cloth. Any remaining stains can be removed by wiping gently with a piece of FUJIFILM lens-cleaning paper to which a small amount of lens-cleaning fluid has been applied. To prevent dust entering the camera, replace the body cap when no lens is in place.
Image sensor: Dust can be removed from the image sensor using the ✅ USER SETTING > SENSOR CLEANING (📖 108) option in the camera menus.
Interchangeable lenses: Use a blower to remove dust, then gently wipe with a soft, dry cloth. Any remaining stains can be removed by wiping gently with a piece of FUJIFILM lens-cleaning paper to which a small amount of lens-cleaning fluid has been applied. Replace the front and rear caps when the lens is not in use.
Product Features
Frequently-used options can be added to the Q menu or a custom "my" menu or assigned to an Fn (function) button for direct access. Customize camera controls to suit your style or situation.
The Q Menu (47)
The Q menu is displayed by pressing the Q button.

Use the Q menu to view or change the options selected for frequently-used menu items.
"My Menu" (100)
Add frequently-used options to this custom menu, which can be viewed by pressing MENU/OK and selecting the MY ("MY MENU") tab.

The MY tab is only available if options have been assigned to "MY MENU".
The Function Buttons (50)
Use the function buttons for direct access to selected features.

Press the button for direct access to the assigned function. The illustration shows the Fn2 button being used to display the bright frame simulation.
Table of Contents
For Your Safety....ii
IMPORTANT SAFETY INSTRUCTIONS......ii
Safety Notes......iii
NOTICES......vi
Safety Notes......viii
About This Manual....x
Product Care....xi
Product Features.....xii
The Q Menu.....xii
"My Menu"......xii
The Function Buttons....xii
Before You Begin
Symbols and Conventions....1
Supplied Accessories....1
Parts of the Camera 2
The Selector ....4
The Focus Stick (Focus Lever)......4
The Shutter-Speed/ISO Dial....4
The Front Command Dial....5
The Rear Command Dial....6
The Indicator Lamp....7
Camera Displays....8
Shooting: Optical Viewfinder 8
Shooting: Electronic Viewfinder/LCD Monitor 10
Playback....12
Lenses 13
Parts of the Lens....13
Removing the Caps....13
Attaching the Hood....13
Lenses with Aperture Rings....14
Lenses with No Aperture Rings....14
Lenses with O.I.S. Switches....15
Manual Focus Lenses....15
First Steps
Attaching the Strap 16
Attaching a Lens 18
Charging the Battery 19
Inserting the Battery....20
Inserting Memory Cards....22
Using Two Cards....23
Compatible Memory Cards....24
Turning the Camera on and Off 25
Basic Setup 26
Changing Basic Settings 27
Display Settings 28
Choosing a Display....28
The Viewfinder Selector 29
Bright Frame Simulation 30
The Viewfinder Display 31
Focusing the Viewfinder 31
Adjusting Display Brightness 31
The DISP/BACK Button 32
Shooting: Optical Viewfinder 32
Shooting: Electronic Viewfinder....32
LCD Monitor: Shooting 32
Customizing the Standard Display 33
Viewfinder/LCD Monitor: Playback 34
Table of Contents
Basic Photography and Playback
Program AE (P) 35
Shutter-Priority AE (S) 36
Aperture-Priority AE (A) 37
Manual Exposure (M) 38
Viewing Pictures 39
Viewing Pictures Full Frame....39
Viewing Photo Information 40
Playback Zoom 41
Multi-Frame Playback....42
Deleting Pictures 43
Basic Movie Recording and Playback
Recording Movies....44
Using an External Microphone....45
Viewing Movies 46
The Q (Quick Menu) Button
Using the Q Button 47
The Quick Menu Display 47
Viewing and Changing Settings 48
Editing the Quick Menu 49
The Fn (Function) Buttons
Using the Function Buttons....50
Assigning Roles to the Function Buttons....51
More on Photography and Playback
Drive Mode....52
Burst Mode (CONTINUOUS) 53
Bracketing....54
Adv Advanced Filters....55
☐ Multiple Exposures....56
Exposure Compensation....57
C (Custom) 57
Sensitivity 58
Metering 59
Film Simulation 60
White Balance 61
Focus Mode 63
The Focus Indicator....64
MF Assist....65
Autofocus Options (AF Mode) 66
Focus-Point Selection....67
The Focus Point Display 68
Single Point AF 68
Zone AF....69
Tracking (Focus Mode C Only) 70
Long Time-Exposures (T/B)....71
Time (T)....71
Bulb (B)....71
Using a Remote Release....72
The Self-Timer 73
Interval Timer Photography 74
Focusing and Taking Pictures 75
Focus/Exposure Lock 76
Flash Photography....78
Recording Pictures in RAW Format 80
Creating JPEG Copies of RAW Pictures....81
Saving Settings....82
Using a Mount Adapter 83
Bright Frame Brightness....83
Lens Registration....83
Choosing a Focal Length 83
Distortion Correction 83
Color Shading Correction 84
Peripheral Illumination Correction 84
PhotoBook Assist....85
Creating a PhotoBook 85
Viewing Photobooks 86
Editing and Deleting Photobooks....86
Menus
Using the Menus: Shooting Mode....87
Using the Shooting Menu 87
10 IMAGE QUALITY SETTING....88
IMAGE SIZE 88
IMAGE QUALITY 88
RAW RECORDING 88
FILM SIMULATION....89
GRAIN EFFECT 89
DYNAMIC RANGE 89
WHITE BALANCE....89
HIGHLIGHT TONE 89
SHADOW TONE 89
COLOR 89
SHARPNESS 89
NOISE REDUCTION 89
LONG EXPOSURE NR....90
LENS MODULATION OPTIMIZER....90
COLOR SPACE....90
PIXEL MAPPING....90
SELECT CUSTOM SETTING....90
EDIT/SAVE CUSTOM SETTING....90
Table of Contents
AF MF AF/MF SETTING 91
FOCUS AREA 91
AF MODE 91
NUMBER OF THE FOCUS POINTS 91
PRE-AF 91
AF ILLUMINATOR....91
FACE/EYE DETECTION SETTING....92
AF+MF 93
MF ASSIST 93
FOCUS CHECK 93
INTERLOCK SPOT AE & FOCUS AREA 93
INSTANT AF SETTING....93
DEPTH-OF-FIELD SCALE 94
RELEASE/FOCUS PRIORITY 94
CORRECTED AF FRAME....94
SHOOTING SETTING 95
SELF-TIMER 95
INTERVAL TIMER SHOOTING....95
FILM SIMULATION BKT 95
PHOTOMETRY....95
SHUTTER TYPE....96
IS MODE 96
ISO AUTO SETTING 97
MOUNT ADAPTOR SETTING....97
WIRELESS COMMUNICATION 97
FLASH SETTING 98
FLASH MODE 98
FLASH COMPENSATION....98
RED EYE REMOVAL....98
MOVIE SETTING 99
MOVIE MODE....99
MIC LEVEL ADJUSTMENT 99
MIC/REMOTE RELEASE 99
MY MY MENU....100
Using the Menus: Playback Mode....101
Using the Playback Menu....101
PLAY BACK MENU 102
SWITCH SLOT 102
RAW CONVERSION....102
ERASE....102
CROP 102
RESIZE....103
PROTECT....103
IMAGE ROTATE....103
RED EYE REMOVAL....104
COPY 104
WIRELESS COMMUNICATION ....104
SLIDE SHOW....105
PHOTOBOOK ASSIST....105
PC AUTO SAVE 105
PRINT ORDER (DPOF)....105
instax PRINTER PRINT 105
DISP ASPECT 105
The Setup Menu....106
Using the Setup Menu 106
SET UP Menu Options....107
USER SETTING 107
FORMAT 107
DATE/TIME 107
TIME DIFFERENCE 108
言語/LANG....108
MY MENU SETTING....108
SENSOR CLEANING....108
RESET 108
SOUND SETTING 109
AF BEEP VOL....109
SELF-TIMER BEEP VOL....109
OPERATION VOL. 109
SHUTTER VOLUME 109
SHUTTER SOUND 109
PLAYBACK VOLUME....109
SCREEN SETTING....110
EVF BRIGHTNESS....110
EVF COLOR....110
LCD BRIGHTNESS....110
LCD COLOR 110
IMAGE DISP. 110
EVF AUTOROTATE DISPLAYS ....110
PREVIEW EXP./WB IN MANUAL MODE....110
PREVIEW PIC. EFFECT....111
FRAMING GUIDELINE....111
AUTOROTATE PB 111
FOCUS SCALE UNITS....111
DISP. CUSTOM SETTING....111
BUTTON/DIAL SETTING....112
FOCUS LEVER SETTING....112
EDIT/SAVE QUICK MENU 112
FUNCTION (Fn) SETTING....112
COMMAND DIAL SETTING....112
ISO DIAL SETTING (H) 112
SHOOT WITHOUT LENS....112
FOCUS RING 112
AE-L/AF-L BUTTON SETTING 113
AE/AF-LOCK MODE....113
AF-LOCK MODE....113
APERTURE SETTING....113
POWER MANAGEMENT 114
AUTO POWER OFF 114
POWER MANAGEMENT....114
SAVE DATA SETTING 115
FRAME NO....115
SAVE ORG IMAGE 115
EDIT FILE NAME 115
CARD SLOT SETTING (STILL IMAGE)......116
SWITCH SLOT (SEQUENTIAL) 116
CONNECTION SETTING....117
WIRELESS SETTINGS....117
PC AUTO SAVE SETTING ....117
GEOTAGGING SET-UP 117
instax PRINTER CONNECTION SETTING ....117
"My Menu" 118
Editing "My Menu"......118
Factory Defaults....119
Table of Contents
Connections
Wireless Transfer....122
Wireless Connections: Smartphones 122
Wireless Connections: Computers....122
Viewing Pictures on a Computer....123
Windows....123
Macintosh 123
Connecting the Camera....124
Creating a DPOF Print Order 126
WITH DATE 📄/WITHOUT DATE....126
RESET ALL....127
instax SHARE Printers....128
Establishing a Connection....128
Printing Pictures....129
Viewing Pictures on TV 130
Technical Notes
Optional Accessories....131
Accessories from FUJIFILM....131
Connecting the Camera to Other Devices....134
Caring for the Camera 135
Use and Storage Precautions....135
Traveling....135
Cleaning the Image Sensor....136
Troubleshooting
Problems and Solutions....137
Warning Messages and Displays....142
Appendix
Memory Card Capacity 145
Links....146
FUJIFILM X-Pro2 Product Information....146
Firmware Updates 146
Free FUJIFILM Apps....146
Specifications....147
Restrictions on Camera Settings 153
Before You Begin
Symbols and Conventions
The following symbols are used in this manual:
① This information should be read before use to ensure correct operation.
Additional information that may be helpful when using the camera.
Other pages in this manual on which related information may be found.
Menus and other text in the displays are shown in bold. In the illustrations in this manual, displays may be simplified for explanatory purposes.
Supplied Accessories
The following items are included with the camera:

NP-W126 rechargeable battery BC-W126 battery charger Body cap


Clip attaching tool Metal strap clips (× 2)

- Protective covers (× 2)
- Shoulder strap
• Hot shoe cover (comes attached to hot shoe) - Sync terminal cap (comes attached to camera)
- Owner'sManual (this manual)
Parts of the Camera
For more information, refer to the page listed to the right of each item.

① Movie-record button ....44
Function button (Fn1)....50
② Shutter button ....75
③ Exposure compensation dial ....57
④ Shutter speed dial/Sensitivity dial 4, 35, 36, 37, 38
⑤ Dial lock release 4,36,38
⑥ AF-assist illuminator ....91
Self-timer lamp ....73
⑦ Hot shoe 78,79
⑧ Microphone ....45
⑨ Viewfinder window 8,28,32
⑩ Diopter adjustment control ....31
⑪ Strap eyelet 16
⑫ Sync terminal 79
⑬ Connector cover 45,72,124,130
⑭ Focus mode selector ....63
⑮ Lens signal contacts ....13
⑯ Lens release button ....18
⑰ Viewfi nder selector 29,30
⑱ Bright frame simulation display button ....30
Function button (Fn2)....50
⑲ Front command dial ....5
⑳ ON/OFF switch .....25
②1 Hot shoe cover 78
②2 Micro HDMI connector ....130
②3 Micro USB connector ....124
⑳ Microphone/remote release connector ..... 45, 72
⑲ Eye sensor 28
⑳ VIEW MODE button 28
②7 Metering button ....59
Function button (Fn3)....50
⑳ AE-L (exposure lock) button 76,113
⑲ Focus stick (focus lever) 4, 67, 68
③0 Rear command dial ....6
③1 AF-L (focus lock) button 63, 76, 113
③2 Q (quick menu) button *....47 Quick menu edit/custom settings button (press and hold) *....49 RAW conversion button ( playback mode) ....81
③3 Selector 4,26
Function buttons 50
③4 MENU/OK button .... 87, 101, 106
ON (control lock) button (press and hold) .....11
③5 Memory card slot cover 22
③6 Cable channel cover for DC coupler .....131
③7 Battery-chamber cover latch ....20
③8 Battery-chamber cover 20
⑲39 Speaker....46
④0 Tripod mount
④1 Indicator lamp 7
④2 LCD monitor 10, 28, 32
④3 DISP (display)/BACK button ....32
Function button role selection (press and hold) ....51
④4 (delete) button 6,43
④5 ▶ ( playback) button ....39
④6 Body cap 18
④7 Memory card slot 2 ......22
④8 Memory card slot 1 ......22
④9 Battery latch ....20
⑤0 Battery chamber 20
* In shooting mode, press and release to display quick menu or press and hold to display quick menu edit options. When quick menu is displayed, press and hold to edit custom settings.

Control Lock
To prevent accidental operation of the selector and Q button during shooting, press MENU/OK until ON is displayed. The controls can be unlocked by pressing MENU/OK until ON is no longer displayed.
TheSelector
Press the selector up (①), right (③), down (④), or left (②) to highlight items. The up, left, right, and down buttons also double as the DRIVE (52), Fn4 (film simulation; 60), Fn5 (white balance; 61), and Fn6 (AF mode; 66) buttons, respectively (50).

The Focus Stick (Focus Lever)
Tilt or press the focus stick to select the focus area (☐ 67).

The Shutter-Speed/ISO Dial
Choose a shutter speed and ISO sensitivity.

Rotate the dial to choose a shutter speed (☐ 35, 36, 37, 38).
If the dial is in the A position, press the lock release while rotating the dial.
Lift and rotate the dial to choose ISO sensitivity (58).


The Front Command Dial
The front command dial is used as described below.

Rotate the dial to choose the desired combination of shutter speed and aperture (program shift; 35), fine-tune shutter speed (36, 38), adjust exposure compensation when C is selected with the exposure compensation dial (57), or view other pictures in playback mode (39).
Press the center of the dial to switch back and forth between shutter speed and exposure compensation when C is selected with the exposure compensation dial (☐ 35, 36, 38, 57).


The Rear Command Dial
The rear command dial is used as described below.

Rotate the dial to choose the desired combination of shutter speed and aperture (program shift; 35), adjust aperture (14, 37, 38), adjust settings in the quick menu (48), choose the size of the focus frame (68, 69), or zoom in or out in full-frame or thumbnail playback (

Press the center of the dial to zoom in on the selected focus area (64) or in playback mode to zoom in on the active focus point (40). In manual focus mode, you can choose a focus display by pressing and holding the center of the dial (65).


Formatting Memory Cards
To format memory cards, press the center of the command dial while pressing and holding the button. The FORMAT menu will be displayed; select a slot and format the card as described on page 107.
The Indicator Lamp
When the viewfinder is not in use (28), the indicator lamp shows camera status.
| Indicator lamp | Camera status |
| Glows green Focus | locked. |
| Blinks green Focus | or exposure warning. Pictures can be taken. |
| Blinks green and orange | Recording pictures. Additional pictures can be taken. |
| Glows orange | Recording pictures. No additional pictures can be taken at this time. |
| Blinks orange Flash | charging; flash will not fire when picture is taken. |
| Blinks red Lens or | memory error. |
Warnings may also appear in the display (142).

Indicator lamp
CameraDisplays
The following types of indicator may be displayed during shooting and playback. In the description that follows, all available indicators are shown for illustrative purposes; the indicators actually displayed vary with camera settings. Note that the LCD monitor and electronic viewfinder have different aspect ratios.
■ Shooting:OpticalViewfinder

① IS mode 96
② Control lock 3
③ Depth-of-fi eld preview ....37
④ Location data download status 117
⑤ Movie mode 44,99
⑥ Time remaining 44
⑦ Card slot options 23, 116
⑧ Number of available frames * ....145
⑨ Image quality and size 88
⑩ Battery level 25
⑪ Bright frame 30
⑫ Focus frame 67, 75, 76
⑬ Temperature warning ....144
⑭ Virtual horizon 34
⑮ Distance indicator 63
⑯ Sensitivity....58
⑰ Exposure compensation ....57
⑱ Aperture 35, 37, 38
⑲ Shutter speed 35, 36, 38
⑳ AE lock indicator ....76
② Metering....59
②2 Shooting mode 35, 36, 37, 38
②3 Focus indicator 64
②4 Manual focus indicator 64
⑲ Focus mode ....63
②6 Histogram....34
⑳ Dynamic range 89
⑳ Film simulation 60
⑲ White balance ....61
③0 Exposure indicator 38,57
③1 AF+MF indicator 93
③2 Shutter type....96
③3 Continuous mode 52, 53
③4 Self-timer indicator 73
③5 Microphone/remote release 45,72,99
③6 Flash mode/Flash compensation 78, 98
■ Shooting: Electronic Viewfinder/LCD Monitor

Parts of the Camera
① Focus check....64
② Depth-of-fi eld preview ....37
③ Location data download status ....117
④ Movie mode 44,99
⑤ Time remaining 44
⑥ Card slot options 23,116
⑦ Number of available frames *....145
⑧ Image quality and size 88
⑨ Date and time 26, 27
⑩ Focus frame 67, 75, 76
⑪ White balance 61
⑫ Film simulation 60
⑬ Dynamic range ....89
⑭ Temperature warning ....144
⑮ Control lock 3
⑯ Virtual horizon ....34
⑰ Histogram....34
⑱ Distance indicator ....63
⑲ Battery level 25
⑳ Sensitivity....58
② Exposure compensation ....57
② Aperture 35, 37, 38
②3 Shutter speed 35, 36, 38
⑳ AE lock indicator ....76
⑲ Metering....59
②6 Shooting mode 35, 36, 37, 38
⑳ Focus indicator 64
⑳ Manual focus indicator ....64
⑲ Focus mode ......63
③0 AF+MF indicator 93
③1 Shutter type....96
③2 Continuous mode 52, 53
③3 Exposure indicator 38,57
③4 Self-timer indicator 73
③5 Microphone/remote release 45, 72, 99
③6 Flash mode 78
Flash compensation 98
③7 IS mode 96
* Shows "9999" if there is space for over 9999 frames.

Control Lock

Pressing a locked control (📖 3) displays a 📄 icon.
■ Playback

① Date and time ..... 26, 27 ⑨ Gift image ..... 39 ⑰ Sensitivity ..... 58
② Face detection indicator .....92 ⑩ Photobook assist indicator .....85 ⑱ Exposure compensation .....57
③ Red-eye removal indicator .....104 ⑪ DPOF print indicator .....126 ⑲ Aperture .....35, 37, 38
④ Advanced filter .....55 ⑫ Battery level .....25 ⑳ Shutter speed .....35, 36, 38
⑤ Location data ....117 ⑬ Image size/quality ....88 ⑳ Playback mode indicator....39
⑥ Protected image ....103 ⑭ Film simulation ....60 ⑫ Movie icon ....46
⑦ Card slot ....39, 102 ⑮ Dynamic range ....89 ⑳ Rating ....39
⑧ Frame number ....115 ⑯ White balance ....61
Lenses
The camera can be used with lenses for the FUJIFILM X-mount.
Parts of the Lens

① Lens hood
② Mounting marks
③ Focus ring
④ Zoom ring
⑤ Aperture ring
⑥ 0.I.S. switch
⑦ Aperture mode switch
⑧ Lens signal contacts
⑨ Front lens cap
⑩ Rear lens cap
Removing the Caps
Remove the caps as shown.

① Lens caps may differ from those shown.
Attaching the Hood
When attached, lens hoods reduce glare and protect the front lens element.

Lenses
Lenses with Aperture Rings
At settings other than A, you can adjust aperture by rotating the lens aperture ring (exposure modes A and M).
Aperture ring


The Aperture Mode Switch
If the lens has an aperture mode switch, aperture can be adjusted manually by sliding the switch to ⚙ and rotating the aperture ring.

① When the aperture ring is set to A, rotate the rear command dial to adjust aperture.
Lenses with No Aperture Rings
The method used to adjust aperture can be selected using 📋 BUTTON/DIAL SETTING > APERTURE SETTING (图标 113). When an option other than AUTO is selected, aperture can be adjusted using the rear command dial.

Aperture control defaults to the rear command dial, but can be reassigned to the front command dial using BUTTON/DIAL SETTING > COMMAND DIAL SETTING (112).
Lenses with O.I.S. Switches
If the lens supports optical image stabilization (O.I.S.), the image stabilization mode can be chosen in the camera menus. To activate image stabilization, slide the O.I.S. switch to ON.

O.I.S. switch
Manual Focus Lenses
Slide the focus ring to the front for autofocus.
For manual focus, slide the focus ring to the back and rotate it while checking the results in the camera display. The focus distance and depth-of-fi eld indicators can be used to assist manual focus. Note that manual focus may not be available in all shooting modes.


The Depth-of-Field Indicator
The depth-of-fi eld indicator shows the approximate depth of fi eld (the distance in front of and behind the focus point that appears to be in focus).

Distance indicator
The indicator is displayed in film format (37).
First Steps
Attaching the Strap
Attach the strap clips to the camera and then attach the strap.
1 Open a strap clip.
Use the clip attaching tool to open a strap clip, making sure that the tool and clip are in the orientations shown.

① Keep the tool in a safe place. You will need it to open the strap clips when removing the strap.
2 Place the strap clip on an eyelet.
Hook the strap eyelet in the clip opening. Remove the tool, using the other hand to keep the clip in place.

3 Pass the clip through the eyelet.
Rotate the clip fully through the eyelet until it clicks closed.

4 Attach a protective cover.
Place a protective cover over the eyelet as shown, with the black side of the cover toward the camera. Repeat Steps 1–4 for the second eyelet.

5 Insert the strap.
Insert the strap through a protective cover and strap clip.

6 Fasten the strap.
Fasten the strap as shown. Repeat Steps 5–6 for the second eyelet.

First Steps
① To avoid dropping the camera, be sure the strap is correctly secured.
Attaching a Lens
Lenses attach as described below.
① Care is required to prevent dust or other particles from entering the camera while attaching and removing lenses.
1 Remove the body and rear caps.
Remove the body cap from the camera and the rear cap from the lens.

① Do not touch the camera's internal parts.
2 Attach the lens.
Place the lens on mount, keeping the marks on the lens and camera aligned, and then rotate the lens until it clicks into place.

① Do not press the lens release button while attaching the lens.
Removing Lenses
To remove the lens, turn the camera off, then press the lens release button and rotate the lens as shown.

Lens release button
① To prevent dust accumulating on the lens or inside the camera, replace the lens caps and camera body cap when the lens is not attached.
Lenses and Other Optional Accessories
The camera can be used with lenses for the FUJIFILM X-mount and the other accessories listed from page 131.
Charging the Battery
The battery is not charged at shipment. Before use, charge the battery in the supplied battery charger.
1 Place the battery in the charger.
Place the battery in the supplied battery charger as shown.

The camera uses an NP-W126 rechargeable battery.
The supplied AC cord is for use exclusively with the supplied battery charger. Do not use the supplied charger with other cords or the supplied cord with other devices.
2 Plug the charger in.
Plug the charger into an indoor power outlet. The charging indicator will light.
| Charging indicator | Battery status | Action |
| Off | Battery not inserted. | Insert the battery. |
| Battery fully charged. | Remove the battery. | |
| On | Battery charging. | — |
| Blinks | Battery fault. | Unplug the charger and remove the battery. |
3 Charge the battery.
Remove the battery when charging is complete. See the specifications (151) for charging times (note that charging times increase at low temperatures).
① Unplug the charger when it is not in use.
Inserting the Battery
After charging the battery, insert the battery in the camera as described below.
1 Open the battery-chamber cover.
Slide the battery-chamber latch as shown and open the battery-chamber cover.

① Do not open the battery-chamber cover when the camera is on. Failure to observe this precaution could damage image files or memory cards.
① Do not use excessive force when handling the battery-chamber cover.
2 Insert the battery.
Using the battery to keep the battery latch pressed to one side, insert the battery contacts first in the direction shown by the arrow. Confirm that the battery is securely latched.

① Insert the battery in the orientation shown. Do not use force or attempt to insert the battery upside down or backwards. The battery will slide in easily in the correct orientation.
3 Close the battery-chamber cover.

Removing the Battery
Before removing the battery, turn the camera off and open the battery-chamber cover.
To remove the battery, press the battery latch to the side, and slide the battery out of the camera as shown.

Battery latch
① The battery may become hot when used in high-temperature environments. Observe caution when removing the battery.
① Batteries
- Remove dirt from the battery terminals with a clean, dry cloth. Failure to observe this precaution could prevent the battery from charging.
- Do not affi x stickers or other objects to the battery. Failure to observe this precaution could make it impossible to remove the battery from the camera.
- Do not short the battery terminals. The battery could overheat.
- Read the cautions in "The Battery and Power Supply" (v).
- Use only battery chargers designated for use with the battery. Failure to observe this precaution could result in product malfunction.
- Do not remove the labels from the battery or attempt to split or peel the outer casing.
- The battery gradually loses its charge when not in use. Charge the battery one or two days before use.
Inserting Memory Cards
The camera has no internal memory; instead, pictures are stored on optional SD, SDHC, and SDXC memory cards (sold separately). The camera can be used with two cards, one in each of its two slots. Movies are recorded only to the card in the first slot, which supports UHS-II.
1 Open the memory card slot cover.


① Do not open the memory card slot cover when the camera is on. Failure to observe this precaution could damage image files or memory cards.
2 Insert a memory card.
Holding the memory card in the orientation shown, slide it in until it clicks into place at the back of the first slot (if you are using two cards, insert the second card into second slot).

① Be sure card is in the correct orientation; do not insert at an angle or use force.
① SD/SDHC/SDXCmemory cards can be locked, making it impossible to format the card or to record or delete images.

Write-protectswitch
Before inserting a memory card, slide the write-protect switch to the unlocked position.
3 Close the memory card slot cover.
Removing Memory Cards
Before removing memory cards, turn the camera off and open the memory card slot cover.
To remove a memory card, press it in and release it slowly. The card can then be removed by hand. When a memory card is removed, the card could be ejected too quickly. Use your finger to hold it and gently release the card.

Using Two Cards
At default settings, the card in the second slot is used only if the card in the first slot is full (SEQUENTIAL). This can be changed using SAVE DATA SETTING > CARD SLOT SETTING (STILL IMAGE) (116).
| Option | Description | Display |
| SEQUENTIAL (default) | The card in the second slot is used only when the card in the first slot is full.◆ If the second slot is selected for SAVE DATA SETTING > SWITCH SLOT (SEQUENTIAL), recording will start on the card in the second slot and switch to the first slot when the card in the second slot is full. |  |
| BACKUP Each picture is recorded twice, once to each card. |  | |
| RAW/JPEG | As for SEQUENTIAL, except that the RAW copy of pictures taken with FINE + RAW or NORMAL + RAW selected for IMAGE QUALITY SETTING > IMAGE QUALITY will be saved to the card in the first slot and the JPEG copy to the card in the second slot. |  |

Movies
Regardless of the option selected for CARD SLOT SETTING (STILL IMAGE), movies will be recorded to the card in the first slot; if SEQUENTIAL is selected, movies will be recorded to the card in the first slot even after recording has moved on to the card in the second slot.
■ Compatible Memory Cards
FUJIFILM and SanDisk SD, SDHC, and SDXC memory cards have been approved for use in the camera; UHS-II cards can be used in the first slot. A complete list of approved memory cards is available at http://www.fujifilm.com/support/digital_cameras/compatibility/. Operation is not guaranteed with other cards. The camera can not be used with xD-Picture Cards or MultiMediaCard (MMC) devices.
① Memory Cards
- Do not turn the camera off or remove the memory card while the memory card is being formatted or data are being recorded to or deleted from the card. Failure to observe this precaution could damage the card.
- Format memory cards before first use, and be sure to reformat all memory cards after using them in a computer or other device. For more information on formatting memory cards, see page 107.
- Memory cards are small and can be swallowed; keep out of reach of children. If a child swallows a memory card, seek medical assistance immediately.
- miniSD or microSD adapters that are larger or smaller than the standard dimensions of an SD/SDHC/SDXC card may not eject normally; if the card does not eject, take the camera to an authorized service representative. Do not forcibly remove the card.
- Do not affi x labels to memory cards. Peeling labels can cause camera malfunction.
- Movie recording may be interrupted with some types of SD/SDHC/SDXC memory card. Use a UHS speed class 1 card or better for movies and burst photography.
- Formatting a memory card in the camera creates a folder in which pictures are stored. Do not rename or delete this folder or use a computer or other device to edit, delete, or rename image files. Always use the camera to delete pictures; before editing or renaming files, copy them to a computer and edit or rename the copies, not the originals. Renaming the files on the camera can cause problems during playback.
Turning the Camera on and Off
Rotate the ON/OFF switch to ON to turn the camera on. Select OFF to turn the camera off.
◆ Press the ▶ button to start playback. Press the shutter button halfway to return to shooting mode.
The camera will turn off automatically if no operations are performed for the length of time selected for POWER MANAGE-
MENT > AUTO POWER OFF (114). To reactivate the camera after it has turned off automatically, press the shutter button halfway or turn the ON/OFF switch to OFF and then back to ON.
① Fingerprints and other marks on the lens or viewfinder can affect pictures or the view through the viewfinder. Keep the lens and viewfinder clean.


Battery Level
After turning the camera on, check the battery level in the display.
| Indicator | Description |
| Battery partially discharged. | |
| Battery about 80% full. | |
| Battery about 60% full. | |
| Battery about 40% full. | |
| Battery about 20% full. | |
| (red) | Low battery. Charge as soon as possible. |
| (blinks red) | Battery exhausted. Turn camera off and recharge battery |

BasicSetup
A language-selection dialog is displayed the first time the camera is turned on.
1 Choose a language.
Highlight a language and press MENU/OK.
Press DISP/BACK to skip the current step. Any steps you skip will be displayed the next time the camera is turned on.
2 Set the date and time.

Press the selector left or right to highlight the year, month, day, hour, or minute and press up or down to change. To change the order in which the year, month, and day are displayed, highlight the date format and press the selector up or down. Press MENU/OK to exit to shooting mode when settings are complete.


If the battery is removed for an extended period, the camera clock will be reset and the language-selection dialog will be displayed when the camera is turned on.
Changing Basic Settings
To change the language or reset the clock:
1 Display the desired option.
Display the setup menu and select ✅ USER SETTING > 言語/LANG. to change the language or DATE/TIME to reset the clock (☐ 106).
2 Adjust settings.
To choose a language, highlight the desired option and press MENU/OK. To set the clock, press the selector left or right to highlight the year, month, day, hour, or minute and press up or down to change, then press MENU/OK once the clock has been set to your satisfaction.
DisplaySettings
The camera is equipped with a hybrid optical/electronic viewfinder (OVF/EVF) and an LCD monitor (LCD).
Choosing a Display
Press the VIEW MODE button to cycle through displays as shown below.

![graph TD A["EYE SENSOR: Automatic display selection using eye sensor"] --> B["VIEWFINDER"] B --> C["LCD"] D["VIEWFINDER ONLY: Viewfi nder only"] --> E["Viewfinder"] E --> F["LCD"] G["VIEWFINDER ONLY + SEESE: Viewfi nder only; eye sensor turns display on or off"] --> H["Viewfinder"] H --> I["LCD"] J[…](/content/2026/06/1275348/images/40d473f2628d86d66c76007524b568996d0d813b683dd13e0be47e36f88a65e7.jpg)
The Eye Sensor
The eye sensor turns the viewfi nder on when you put your eye to the viewfi nder and turns it off when you take your eye away (note that the eye sensor may respond to objects other than your eye or to light shining directly on the sensor). If automatic display selection is enabled, the LCD monitor will turn on when the viewfi nder turns off.

The Viewfinder Selector
Use the viewfinder selector to switch between the electronic viewfinder (EVF), the optical viewfinder (OVF), and a dual optical viewfinder/electronic range finder (ERF) display.


Keep the selector pressed up to choose the optical viewfinder display zoom ratio.
Display Settings

The Hybrid (EVF/OVF/ERF) Viewfinder
The features of the different displays are described below.
| Display | Description |
| OVF | The optical display is sharp and free of blur so that your subject's expression is always visible. In addition, the OVF shows the area just outside the frame, making it easier to compose shots on the fly. Because the viewfinder window is a slight distance from the lens, the area visible in photographs may however differ slightly from the display in the viewfinder due to parallax. |
| EVF | The live view display gives you a preview of the final picture (including depth of field, focus, exposure, and white balance) with exactly the same frame coverage. |
| ERF (dual display) | As for the optical viewfinder but with a focus preview. A magnified view of an area of the frame including the current focus position is shown at the bottom right corner of the display. |
Bright Frame Simulation
The angle of view covered by the bright frame in the OVF display varies with the focal length of the lens. Pressing a function button (by default, Fn2) displays a bright frame simulation that shows the area covered by the bright frame at different focal lengths.
- Keep the viewfinder selector pressed up to toggle between the bright frames for maximum and minimum aperture.

The Viewfinder Display
When ON is selected for 📋 SCREEN SETTING > EVF AUTOROTATE DISPLAYS(☐ 110), the indicators in the viewfi nder automatically rotate to match camera orientation.

Orientation changed from "wide" to "tall"
① The display in the LCD monitor is unaffected.
Focusing the Viewfinder
The camera is equipped with diopter adjustment in the range -4 to +2 m -1 to accommodate individual differences in vision. Rotate the diopter adjustment control until the viewfinder display is in sharp focus.

Diopter adjustment control
Adjusting Display Brightness
The brightness and hue of the viewfinder and LCD monitor can be adjusted using the options under SCREEN SETTING. Choose EVF BRIGHTNESS or EVF COLOR to adjust viewfinder brightness or hue (110), LCD BRIGHTNESS or LCD COLOR to do the same for the LCD monitor (110).
The DISP/BACK Button
The DISP/BACK button controls the display of indicators in the viewfinder and LCD monitor.

■ Shooting: Optical Viewfinder
Standard Information off

■ Shooting: Electronic Viewfinder
Standard Information off

LCD Monitor: Shooting
Standard Information off
![graph TD A["Input Display"] --> B["Processing"] B --> C["Output Display"] D["Time/Resolution"] --> B E["ISO 51200"] --> B F["4.0"] --> B G["12000"] --> H["5.6"] I["ISO 51200"] --> H J["4.0"] --> K["ISO 51200"]](/content/2026/06/1275348/images/d6144b596e576e46648415004edd73e396f694d7644566b1b4a64ee940a6cc73.jpg)
Info display
■ Customizing the Standard Display
To choose the items shown in the standard display:
1 Display standard indicators.
Press the DISP/BACK button until standard indicators are displayed.
2 Select DISP. CUSTOM SETTING.
Select 📋 SCREEN SET-UP > DISP. CUSTOM SETTING (📖 111) in the setup menu.
3 Choose a display.
Highlight OVF or EVF/LCD and press MENU/OK.
4 Choose items.
Highlight items and press MENU/OK to select or deselect.
| Option | OVF | EVF | Option | OVF | EVF | Option | OVF | EVF |
| FRAMING GUIDELINE | INFORMATION BACKGROUND | — | DUAL IS MODE | |||||
| ELECTRONIC LEVEL | Expo. Comp. (Digit) | WHITE BALANCE | ||||||
| FOCUS FRAME | Expo. Comp. (Scale) | FILM SIMULATION | ||||||
| AF DISTANCE INDICATOR | FOCUS MODE | DYNAMIC RANGE | ||||||
| MF DISTANCE INDICATOR | PHOTOMETRY | FRAMES REMAINING | ||||||
| HISTOGRAM | SHUTTER TYPE | IMAGE SIZE/QUALITY | ||||||
| SHOOTING MODE | FLASH | MOVIE MODE & REC. TIME | ||||||
| APERTURE/S-SPEED/ISO | CONTINUOUS MODE | BATTERY LEVEL |
5 Save changes.
Press DISP/BACK to save changes.
6 Exit the menus.
Press DISP/BACK as needed to exit the menus and return to the shooting display.
See page 8 for the locations of these items in the displays.

Virtual Horizon
Selecting ELECTRONIC LEVEL displays a virtual horizon. The camera is level when the two lines overlap.
The virtual horizon may not be displayed if the camera lens is pointed up or down.


Viewfinder/LCD Monitor: Playback
![graph LR A["Standard Information off\n12/31/2050 10:00 AM\n10:00"] --> B["Info"] B --> C["display\nS.S.12000 F 5.6 ISO 51200 -17s"] C --> D["Favorites\n12/31/2050 10:00 AM\n10:00"]](/content/2026/06/1275348/images/e84a1e5e1c69a835919a4d0f09f8853fdb0230eefb689592702066f9528fd2b2.jpg)

Histograms
Histograms show the distribution of tones in the image. Brightness is shown by the horizontal axis, the number of pixels by the vertical axis.

Optimal exposure: Pixels are distributed in an even curve throughout the tone range.
Overexposed: Pixels are clustered on the right side of the graph.
Underexposed: Pixels are clustered on the left side of the graph.


Basic Photography and Playback
Program AE (P)
To allow the camera to adjust both shutter speed and aperture for optimal exposure, set shutter speed and aperture to A. P will appear in the display.
① If the subject is outside the metering range of the camera, the shutter speed and aperture displays will show “---.

Aperture mode switch


Program Shift
If desired, you can rotate the front or rear command dial to select other combinations of shutter speed and aperture without altering exposure (program shift). Program shift is not available if the attached flash supports TTL auto, or if an auto option is selected for IMAGE QUALITY SETTING > DYNAMIC RANGE (89). To cancel program shift, turn the camera off.

Shutter-Priority AE (S)
To adjust shutter speed manually while letting the camera select aperture for optimal exposure, set aperture to A and use the shutter speed dial (if A is currently selected for shutter speed, press the dial lock release while rotating the shutter speed dial).
S will appear in the display.
Shutter speed can also be adjusted in increments of EV by rotating the front command dial. Shutter speed can be adjusted even while the shutter button is pressed halfway.
① If the correct exposure can not be achieved at the selected shutter speed, aperture will be displayed in red when the shutter button is pressed halfway. Adjust shutter speed until the correct exposure is achieved.
① If the subject is outside the metering range of the camera, the aperture display will show “---”.

Aperture mode switch

Aperture-Priority AE (A)
To adjust aperture manually while letting the camera select shutter speed for optimal exposure, rotate the shutter speed dial to A and adjust aperture as desired. A will appear in the display.
◆ Aperture can be adjusted even while the shutter button is pressed halfway.
① If the correct exposure can not be achieved at the selected aperture, the shutter speed will be displayed in red when the shutter button is pressed halfway. Adjust aperture until the correct exposure is achieved.
① If the subject is outside the metering range of the camera, the shutter speed display will show “---.

Aperture mode switch


Previewing Depth of Field
When 🎨 PREVIEW DEPTH OF FIELD is assigned to a function button (51), pressing the button stops aperture down to the selected setting, allowing depth of field to be previewed in the display.
Depth of fi eld can also be previewed using the depth-of-fi eld indicator in the standard display (☐ 33). Press DISP/BACK to cycle through display modes until standard indicators are displayed.
Use the AF/MF SETTING > DEPTH-OF-FIELD SCALE option (94) to choose how depth of field is displayed. Choose FILM FORMAT BASIS to help you make practical assessments of depth of fi eld for pictures that will be viewed as prints and the like, PIXEL BASIS to help you assess depth of field for pictures that will be viewed at high resolutions on computers or other electronic displays.


Depth of field
Manual Exposure (M)
Exposure can be altered from the value suggested by the camera by setting both shutter speed and aperture to values other than A (if A is currently selected for shutter speed, press the dial lock release while rotating the shutter speed dial). M will appear in the display.
◆ Shutter speed can also be adjusted in increments of EV by rotating the front command dial.

Aperture mode switch
Exposure indicator


Exposure Preview
To preview exposure in the LCD monitor, select an option other than OFF for SCREEN SETTING > PREVIEW EXP./WB IN MANUAL MODE (110). Select OFF when using the flash or on other occasions on which exposure may change when the picture is taken.


ViewingPictures
Viewing Pictures Full Frame
Pictures can be viewed in the viewfinder or LCD monitor. When taking important pictures, take a test shot and check the results.
To view pictures full frame, press ▶.

Additional pictures can be viewed by pressing the selector left or right or rotating the front command dial. Press the selector or rotate the dial right to view pictures in the order recorded, left to view pictures in reverse order. Keep the selector pressed to scroll rapidly to the desired frame.
Pictures taken using other cameras are marked with a ☐ ("gift image") icon to warn that they may not display correctly and that playback zoom may not be available.

Favorites: Rating Pictures
To rate the current picture, press DISP/BACK and press the selector up and down to select from zero to five stars.

Two Memory Cards
If two memory cards are inserted, you can press and hold the ▶ button to choose a card for playback.
You can also select a card using the ☑ PLAYBACK MENU > SWITCH SLOT option (☐ 102).
Viewing Photo Information
The photo information display changes each time the selector is pressed up.

Basic data Info display 1

Info display 2
Rotate the front command dial to view other images.

Zooming in on the Focus Point
Press the center of the rear command dial to zoom in on the focus point. Press again to return to full-frame playback.


PlaybackZoom
Rotate the rear command dial right to zoom in on the current picture, left to zoom out (to view multiple images, rotate the dial left when the picture is displayed full frame; 42). When the picture is zoomed in, the selector can be used to view areas of the image not currently visible in the display. To exit zoom, press DISP/BACK, MENU/OK, or the center of the rear command dial.

The maximum zoom ratio varies with image size (88). Playback zoom is not available with cropped or resized copies saved at a size of 640 (102, 103).
Multi-FramePlayback
To change the number of images displayed, rotate the rear command dial left when a picture is displayed full frame.


Rotate left to view more images.


Rotate right to view fewer images.
Use the selector to highlight images and press MENU/OK to view the highlighted image full frame (to zoom in on the selected image, rotate the rear command dial right when the picture is displayed full frame; 41). In the nine- and hundred-frame displays, press the selector up or down to view more pictures.
Deleting Pictures
To delete individual pictures, multiple selected pictures, or all pictures, press the ☑ button when a picture is displayed full frame and choose from the options below. Note that deleted pictures can not be recovered. Copy important pictures to a computer or other storage device before proceeding.

| Option | Description |
| FRAME | Press the selector left or right to scroll through pictures and press MENU/OK to delete the current picture (a confirmation dialog is not displayed). |
| SELECTED FRAMES | Highlight pictures and press MENU/OK to select or deselect (pictures in photobooks or print orders are shown by ☐). When the operation is complete, press DISP/BACK to display a confirmation dialog, then highlight OK and press MENU/OK to delete the selected pictures. |
| ALL FRAMES | A confirmation dialog will be displayed; highlight OK and press MENU/OK to delete all unprotected pictures. Pressing DISP/BACK cancels deletion; note that any pictures deleted before the button was pressed can not be recovered. |
◆ Protected pictures can not be deleted. Remove protection from any pictures you wish to delete (103).
Pictures can also be deleted from the menus using the PLAY BACK MENU > ERASE option (102).
If a message appears stating that the selected images are part of a DPOF print order, press MENU/OK to delete the pictures.
Basic Movie Recording and Playback
Recording Movies
The camera can be used to record short high-definition movies. Sound is recorded in stereo via the built-in microphone; do not cover the microphone during recording.
① Movies are recorded to the card in the first slot. Be sure a card is inserted in the first slot before proceeding.
1 Press the movie-record (Fn1) button to start recording.

Recording indicator

2 Press the button again to end recording. Recording ends automatically when the maximum length is reached or the memory card is full.
Zoom can be adjusted while recording is in progress.
Frame size and rate can be selected using MOVIE SETTING > MOVIE MODE (99). Focus mode is selected using the focus mode selector (63); for continuous focus adjustment, select C, or choose S and enable Intelligent Face Detection (92). Intelligent Face Detection is not available in focus mode M.
During recording, exposure compensation can be adjusted by up to ±2 EV.
The indicator lamp lights while movies are being recorded.
① If the lens is equipped with an aperture mode switch, select the aperture mode before beginning recording. If an option other than A is selected, shutter speed and aperture can be adjusted while recording is in progress.
① The microphone may pick up lens noise and other sounds made by the camera during recording.
① Vertical or horizontal streaks may appear in movies containing very bright subjects. This is normal and does not indicate a malfunction.

Depth of Field
Adjust aperture before recording begins. Choose low f-numbers to soften background details.
Using an External Microphone
Sound can be recorded with external microphones that connect using jacks 2.5 mm in diameter; microphones that require bus power can not be used. See the microphone manual for details.

The dialog shown at right will be displayed when a microphone is connected to the microphone/remote release connector. Press MENU/OK and select MIC/REMOTE RELEASE > ◎ MIC.

ViewingMovies
During playback, movies are displayed as shown at right. The following operations can be performed while a movie is displayed:
| Operation | Description |
| Start/pause playback | Press the selector down to start playback. Press again to pause. While playback is paused, you can press the selector left or right to rewind or advance one frame at a time. |
| End playback | Press the selector up to end playback. |
| Adjust speed | Press the selector left or right to adjust playback speed during playback. |
| Adjust volume | Press MENU/OK to pause playback and display volume controls. Press the selector up or down to adjust the volume; press MENU/OK again to resume playback. Volume can also be adjusted using ☑ SOUND SETTING > PLAYBACK VOLUME (109). |

Movie icon
Progress is shown in the display during playback.
① Do not cover the speaker during playback.
Progress bar


Playback Speed
Press the selector left or right to adjust playback speed during playback. Speed is shown by the number of arrows (▶ or ◀).
Arrow

The Q (Quick Menu) Button
Using the Q Button
Press Q for quick access to selected options.
The Quick Menu Display
At default settings, the quick menu contains the following items.

① SELECT CUSTOM SETTING
② AF MODE
③ DYNAMIC RANGE
④ WHITE BALANCE
⑤ NOISE REDUCTION
⑥ IMAGE SIZE
⑦ IMAGE QUALITY
⑧ FILM SIMULATION
⑨ HIGHLIGHT TONE
⑩ SHADOW TONE
⑪ COLOR
⑫ SHARPNESS
⑬ SELF-TIMER
⑭ FACE/EYE DETECTION SETTING
⑮ FLASH MODE
⑯ EVF/LCD BRIGHTNESS
The quick menu shows the options currently selected for items ②—⑯, which can be changed as described on page 49. The IMAGE QUALITY SETTING > SELECT CUSTOM SETTING item (item ①) shows the current custom settings bank:
• BASE: No custom settings bank selected.
- C1 — C7: Select a bank to view the settings saved using the IMAGE QUALITY SETTING > EDIT/SAVE CUSTOM SETTING option (82).
• BASE C1 — BASE C7: The current custom settings bank.
Viewing and Changing Settings
1 Press Q to display the quick menu during shooting.
2 Use the selector to highlight items and rotate the rear command dial to change.
Changes are not saved to the current settings bank (47). Settings that differ from those in the current settings bank (C1 — C7) are shown in red.
3 Press Q to exit when settings are complete.


Editing the Quick Menu
To choose the items displayed in the quick menu:
1 Press and hold the Q button during shooting.


2 The current quick menu will be displayed; use the selector to highlight the item you wish to change and press MENU/OK. You will be given the following choice of items to assign to the selected position:
- SELECT CUSTOM SETTING *
• DYNAMIC RANGE* - WHITE BALANCE *
-
NOISE REDUCTION *
• IMAGE SIZE
• IMAGE QUALITY
• FILM SIMULATION * -
GRAIN EFFECT *
• HIGHLIGHTTONE* - SHADOW TONE*
• COLOR* - SHARPNESS *
-
SELF-TIMER
• FACE/EYE DETECTION SETTING -
PHOTOMETRY
- AF MODE
- FLASH MODE
- FLASH COMPENSATION
- MF ASSIST
• MOVIE MODE - MIC LEVEL ADJUSTMENT
• EVF/LCD BRIGHTNESS
- EVF/LCD COLOR
- SHUTTER TYPE
- NONE
* Stored in custom settings bank.
Select NONE to assign no option to the selected position. When SELECT CUSTOM SETTING is selected, current settings are shown in the quick menu by the label BASE.
3 Highlight the desired item and press MENU/OK to assign it to the selected position.
The quick menu can also be edited using 📋 BUTTON/DIAL SETTING > EDIT/SAVE QUICK MENU (112).
The Fn (Function) Buttons
Using the Function Buttons
The roles played by each of the six function buttons can be selected by pressing and holding the button. The default options are shown below:
Fn1 button

Recording movies (44)
Fn2 button

Bright frame simulation (30)
Fn3 button
![Diagram of a DSLR camera with a close-up view showing the camera's screen labeled [o] and AE button (no text or symbols on the device itself)](/content/2026/06/1275348/images/66c0e83259320408c894001190b239f8e78f4c996596b96908d1501837aa2d88.jpg)
Metering (59)
Fn4 button

Film simulation (60)
Fn5 button

White balance (61)
Fn6 button

AF mode (图 66)
Assigning Roles to the Function Buttons
To assign roles to the function buttons, press and hold the DISP/BACK button until the menu below is displayed. Select buttons to choose their roles.

- PREVIEW DEPTH OF FIELD
- ISO AUTO SETTING
- SELF-TIMER
-
IMAGE SIZE
• IMAGE QUALITY
• DYNAMIC RANGE
• FILM SIMULATION -
GRAIN EFFECT
- WHITE BALANCE
- PHOTOMETRY
- AF MODE
- FOCUS AREA
- FLASH MODE
-
FLASH COMPENSATION
-
SELECT CUSTOM SETTING
• MOVIE
• FACE/EYE DETECTION SETTING - RAW
- APERTURE SETTING
• WIRELESS COMMUNICATION - SHUTTER TYPE
• PREVIEW EXP./WB IN MANUAL MODE
- PREVIEW PIC. EFFECT
• BRIGHT FRAME SIMULATOR
• BRIGHT FRAME BRIGHTNESS
- NONE
To disable the selected button, choose NONE.
You can also display options for any of the function buttons by pressing and holding the button.
The roles played by the six function buttons can also be selected using 📁 BUTTON/DIAL SETTING > FUNCTION (Fn) SETTING (112).
More on Photography and Playback
DriveMode
Use the DRIVE (▲) button to choose the drive mode.
1 Press the DRIVE (▲) button to display drive mode options.

2 Press the selector up or down to highlight a drive mode.

| Icon | Drive mode | |
| STILL IMAGE | — | |
| CONTINUOUS | 53 | |
| AE BKT | 54 | |
| ISO BKT | ||
| FILM SIMULATION BKT | ||
| WHITE BALANCE BKT | ||
| DYNAMIC RANGE BKT | ||
| MULTIPLE EXPOSURE | 56 | |
| ADVANCED FILTER | 55 |
3 Press the selector left or right to choose a setting.
- Burst mode (CONTINUOUS): Choose the frame-advance rate.
- AE/ISO/WB BKT: Choose the bracketing increment.
• ADVANCED FILTER: Choose a filter effect.
• Other modes: Proceed to Step 4.
4 Press MENU/OK.
5 Take pictures.

In burst mode, pictures will be taken while the shutter button is pressed. Shooting ends when the button is released, the maximum number of pictures has been taken, or the memory card is full.
Burst Mode (CONTINUOUS)
Capture motion in a series of pictures.
Frame rate varies with the subject, shutter speed, sensitivity, and focus mode and may slow as more shots are taken.
Depending on shooting conditions, the frame rate may drop or the flash may not fire.
Additional time may be required to record pictures when shooting ends.
If file numbering reaches 999 before shooting is complete, the remaining pictures will be recorded to a new folder (115).
Burst shooting may not begin if the space available on the memory card is insufficient.
Focus and Exposure
To vary focus and exposure with each shot, select focus mode C; in other modes, focus and exposure are determined by the first shot in each series.
① Selecting 8.0 fps in focus mode C restricts the choice of focus frames (70).
① Exposure and focus tracking performance may vary with aperture, sensitivity, and shooting conditions.
Bracketing
Automatically vary settings over a series of pictures.
| Option | Description |
| AE BKT | Select a bracketing amount. Each time the shutter button is pressed, the camera will take three shots: one using the metered value for exposure (57), the second overexposed by the selected amount, and the third underexposed by the same amount (regardless of the amount selected, exposure will not exceed the limits of the exposure metering system). |
| ISO ISO BKT | Select a bracketing amount. Each time the shutter is released, the camera will take a picture at the current sensitivity (58) and process it to create two additional copies, one with sensitivity raised and the other with sensitivity lowered by the selected amount (regardless of the amount selected, sensitivity will not exceed ISO 12800 or fall below ISO 200). |
| FILM SIMULATION BKT | Each time the shutter is released, the camera takes one shot and processes it to create copies at the settings chosen using SHOOTING SETTING > FILM SIMULATION BKT (60, 95). |
| WHITE BALANCE BKT | Select a bracketing amount. Each time the shutter button is pressed, the camera takes three shots: one at the current white balanced setting (61), one with fine-tuning increased by the selected amount, and another with fine-tuning decreased by the selected amount. |
| DYNAMIC RANGE BKT | Each time the shutter button is pressed, the camera takes three shots with different dynamic ranges (89): 100% for the first, 200% for the second, and 400% for the third. While dynamic range bracketing is in effect, sensitivity will be restricted to a minimum of ISO 800 (or to a minimum of ISO 200 to 800 when an auto option is selected for sensitivity); the sensitivity previously in effect is restored when bracketing ends. |

Advanced Filters
Take photos with filter effects.
| Filter | Description |
| TOY CAMERA | Choose for a retro toy camera eff ect. |
| MINIATURE | The tops and bottoms of pictures are blurred for a diorama eff ect. |
| POP COLOR | Create high-contrast images with saturated colors. |
| HIGH-KEY | Create bright, low-contrast images. |
| LOW-KEY | Create uniformly dark tones with few areas of emphasized highlights. |
| DYNAMIC TONE | Dynamic tone expression is used for a fantasy eff ect. |
| SOFT FOCUS | Create a look that is evenly soft throughout the whole image. |
| PARTIAL COLOR (RED) | Areas of the image that are the selected color are recorded in that color. All other areas of the image are recorded in black-and-white. |
| PARTIAL COLOR (ORANGE) | |
| PARTIAL COLOR (YELLOW) | |
| PARTIAL COLOR (GREEN) | |
| PARTIAL COLOR (BLUE) | |
| PARTIAL COLOR (PURPLE) |
Depending on the subject and camera settings, images may in some cases be grainy or vary in brightness and hue.
Multiple Exposures
Create a photograph that combines two exposures.

1 Select □ for drive mode (📖 52).
2 Take the first shot.

3 Press MENU/OK. The first shot will be shown superimposed on the view through the lens and you will be prompted to take the second shot.

To return to Step 2 and retake the fi rst shot, press the selector left. To save the fi rst shot and exit without creating a multiple exposure, press DISP/BACK.
4 Take the second shot, using the first frame as a guide.

5 Press MENU/OK to create the multiple exposure, or press the selector left to return to Step 4 and retake the second shot.

ExposureCompensation
Rotate the exposure compensation dial to adjust exposure when photographing very bright, very dark, or high-contrast subjects. The effect is visible in the display.

① The amount of compensation available varies with the shooting mode.
C (Custom)
When the exposure compensation dial is rotated to C, exposure compensation can be adjusted by rotating the front command dial.


The front command dial can be used to set exposure compensation to values between -5 and +5 EV.
The front command dial can be used to set shuttle speed or exposure compensation. Press the dial to toggle between the two.
Choosing an Exposure Compensation Value
- Backlit subjects: Choose values from +21/3 EV to +11/3 EV.

• Highly refl ective subjects or very bright scenes (e.g., snowfields): +1 EV

• Scenes that are mostly sky: +1 EV
- Spotlit subjects (particularly if photographed against dark backgrounds): -2/3 EV
- Subjects with low reflectivity (pine trees or dark-colored foliage): -2/3 EV
Sensitivity
"Sensitivity" refers to the camera's sensitivity to light. Lift and rotate the ISO dial to choose from values between 200 and 12800, or select L (100), H (25600), or H (51200) for special situations (112). Higher values can be used to reduce blur when lighting is poor, while lower values allow slower shutter speeds or wider apertures in bright light; note, however, that mottling may appear in pictures taken at high sensitivities, particularly at H (51200), while choosing L (100) reduces dynamic range. Values of from ISO 200 to ISO 6400 are recommended in most situations. If A is selected, the camera will adjust sensitivity automatically in response to shooting conditions according to the option selected for SHOOTING SETTING > ISO AUTO SETTING (97). Choose from AUTO 1, AUTO 2, and AUTO 3.

- Sensitivity is not reset when the camera is turned off.
Metering
Choose how the camera meters exposure. Press the function (Fn3) button to display the options shown below, then use the selector to highlight an option and press MENU/OK to select.
① The selected option will only take effect when AF/MF SETTING > FACE/EYE DETECTION SETTING is off (92).

| Mode | Description |
| [∅](MULTI) | The camera instantly determines exposure based on an analysis of composition, color, and brightness distribution. Recommended in most situations. |
| [∅](CENTERWEIGHTED) | The camera meters the entire frame but assigns the greatest weight to the area at the center. |
| [•](SPOT) | The camera meters lighting conditions in an area at the center of the frame equivalent to 2% of the total. Recommended with backlit subjects and in other cases in which the background is much brighter or darker than the main subject. |
| [ ] (AVERAGE) | Exposure is set to the average for the entire frame. Provides consistent exposure across multiple shots with the same lighting, and is particularly effective for landscapes and portraits of subjects dressed in black or white. |
Metering options can also be accessed using ⚙ SHOOTING SETTING > PHOTOMETRY (📖 95).
FilmSimulation
Simulate the effects of different kinds of fi lm, including black-and white (with or without color fi Iters). Press the function (Fn4) button to display the options shown below, then use the selector to highlight an option and press MENU/OK to select.

| Option | Description |
| STD (PROVIA/STANDARD) | Standard color reproduction. Suited to a wide range of subjects, from portraits to landscapes. |
| VL (Velvia/VIVID) | A high-contrast palette of saturated colors, suited to nature photos. |
| SF (ASTIA/SOFT) | Enhances the range of hues available for skin tones in portraits while preserving the bright blues of day-light skies. Recommended for outdoor portrait photography. |
| CC (CLASSIC CHROME) | Soft color and enhanced shadow contrast for a calm look. |
| NR (PRO Neg. HI) | Offers slightly more contrast than NE (PRO Neg. Std). Recommended for outdoor portrait photography. |
| NE (PRO Neg. Std) | A soft-toned palette. The range of hues available for skin tones is enhanced, making this a good choice for studio portrait photography. |
| AF (ACROS) * | Take black-and-white photos with rich gradation and outstanding sharpness. Available with yellow (Ye), red (R), and green (G) filters. |
| EF (MONOCHROME) * | Take pictures in standard black and white. Available with yellow (Ye), red (R), and green (G) filters. |
| SEFA (SEPIA) | Take pictures in sepia. |
* Filters deepen shades of gray corresponding to hues complementary to the selected color. The yellow (Ye) filter deepens purples and blues and the red (R) filter blues and greens. The green (G) filter deepens reds and browns, including skin tones, making it a good choice for portraits.
Film simulation options can be combined with tone and sharpness settings (89).
Film simulation options can also be accessed using IMAGE QUALITY SETTING > FILM SIMULATION (89).
WhiteBalance
For natural colors, choose a white balance option that matches the light source. Press the function (Fn5) button to display the options shown below, then press the selector up or down to highlight an option and press MENU/OK to select.

| Option | Description |
| AUTO | White balance adjusted automatically. |
| 1 | Measure a value for white balance (62). |
| 2 | |
| 3 | |
| K | Selecting this option displays a list of color temperatures (62); highlight a temperature and press MENU/OK to select the highlighted option and display the fi ne-tuning dialog. |
| Option | Description |
| For subjects in direct sunlight. | |
| For subjects in the shade. | |
| Use under "daylight" fl fluorescent lights. | |
| Use under "warm white" fl fluorescent lights. | |
| Use under "cool white" fl fluorescent lights. | |
| Use under incandescent lighting. | |
| Reduces the blue cast typically associated with underwater lighting. |

- White balance is adjusted for flash lighting only in AUTO and 📋 modes. Turn the flash off using other white balance options (78).
Results vary with shooting conditions. Play pictures back after shooting to check colors.
White balance options can also be accessed using IMAGE QUALITY SETTING > WHITE BALANCE (89).

: Custom White Balance
Choose ☐ to adjust white balance for unusual lighting conditions. White balance measurement options will be displayed; frame a white object so that it fills the display and press the shutter button all the way down to measure white balance (to select the most recent custom value and exit without measuring white balance, press DISP/BACK, or press MENU/OK to select the most recent value and display the fine-tuning dialog).
- If "COMPLETED!" is displayed, press MENU/OK to set white balance to the measured value.
- If "UNDER" is displayed, raise exposure compensation (57) and try again.
- If "OVER" is displayed, lower exposure compensation (57) and try again.

K: Color Temperature
Color temperature is an objective measure of the color of a light source, expressed in Kelvin (K). Light sources with a color temperature close to that of direct sunlight appear white; light sources with a lower color temperature have a yellow or red cast, while those with a higher color temperature are tinged with blue. You can match color temperature to the light source as shown in the following table, or choose options that differ sharply from the color of the light source to make pictures “warmer” or “colder.”

Choose for redder light sources or "colder" pictures
Choose for bluer light sources or "warmer" pictures
2,000K
5,000K
Candlelight
Direct sunlight
Sunset/sunrise Shade
15,000K
Blue sky
FocusMode
Use the focus mode selector to choose how the camera focuses (note that regardless of the option selected, manual focus will be used when the lens is in manual focus mode).
- S (single AF): Focus locks while the shutter button is pressed halfway. Choose for stationary subjects.
- C (continuous AF): Focus is continually adjusted to reflect changes in the distance to the subject while the shutter button is pressed halfway. tion. Eye-detection AF is not available.
- M (manual): Focus manually using the lens focus ring. Rotate the ring left to reduce the focus distance, right to increase. The manual focus indicator indicates how closely the focus distance matches the distance to the subject in the focus brackets (the white line indicates the focus distance, the blue bar the depth of field, or in other words the distance in front of and behind the focus point that appears to be in focus); you can also check focus visually in the viewfinder or LCD monitor. Choose for manual control of focus or in situations in which the camera is unable to focus using autofocus (77).


Use 📄 BUTTON/DIAL SETTING > FOCUS RING (112) to reverse the direction of rotation of the focus ring.
To use autofocus to focus on the subject in the selected focus area (67), press the AF-L button (the size of the focus area can be chosen with the rear command dial). In manual focus mode, you can use this feature to quickly focus on a chosen subject using either single or continuous AF according to the option chosen for AF/MF SETTING > INSTANT AF SETTING (93).
Focus Mode
R The camera can show focus distance in meters or feet. Use ↗ SCREEN SETTING ▶ FOCUS SCALE UNITS (P 111) to choose the units used.
R If ON is selected for AF/MF SETTING> PRE-AF (P 91), focus will be adjusted continuously in modes S and C even when the shutter button is not pressed.
■ The Focus Indicator
The focus indicator turns green when the subject is in focus and blinks white when the camera is unable to focus. Brackets (“( )”) indicate that the camera is focusing and are displayed continuously in mode C. MF is displayed in manual focus mode.
Focus indicator
Checking Focus
To zoom in on the current focus area (P 67) for precise focus, press the center of the rear command dial. Press the center of the rear command dial again to cancel zoom. In manual focus mode, zoom can be adjusted by rotating the rear command dial when STANDARD or FOCUS PEAK HIGHLIGHT is selected for AF/MF SET-TING> MF ASSIST (P 93), while if ON is selected for AF/MF SET-
TING> FOCUS CHECK (P 93), the camera will automatically zoom in on the selected focus area when the focus ring is rotated. Focus zoom is not available in focus mode C or when AF/MF SETTING> PRE-AF (P 91) is on or an option other than r SINGLE POINT is selected for AF MODE (P 66).
MFAssist
The AF/MF SETTING > MF ASSIST (93) option can be used to check focus when pictures are framed in the LCD monitor or electronic viewfinder in manual focus mode.
The MF ASSIST menu can be displayed by pressing and holding the center of the rear command dial.
The following options are available:
- FOCUS PEAK HIGHLIGHT: Highlights high-contrast outlines. Rotate the focus ring until the subject is highlighted.
- DIGITAL SPLIT IMAGE: Displays a split image in the center of the frame. Frame the subject in the split-image area and rotate the focus ring until the three parts of the split image are correctly aligned.

Autofocus Options (AF Mode)
To choose the AF mode for focus modes S and C, press the function button (Fn6) to display the options shown below, then press the selector up or down to highlight an option and press MENU/OK to select.
- SINGLE POINT: The camera focuses on the subject in the selected focus point (68). The number of focus points available can be selected using AF/MF SETTING > NUMBER OF THE FOCUS POINTS (91). Use for pin-point focus on a selected subject.

- ☐ ZONE: The camera focuses on the subject in the selected focus zone (☐ 69). Focus zones include multiple focus points (7 × 7, 5 × 5, or 3 × 3), making it easier to focus on subjects that are in motion.
- WIDE/TRACKING: In focus mode C, the camera tracks focus on the subject in the selected focus point while the shutter-release button is pressed halfway (70). In focus mode S, the camera automatically focuses on high-contrast subjects; the areas in focus are shown in the display. The camera may be unable to focus on small objects or subjects that are moving rapidly.
◆ AF mode options can also be accessed using AF/MF AF/MF SETTING > AF MODE (☐ 91).
Focus-PointSelection
Use the focus stick (focus lever) to choose a focus point for autofocus. The procedure for selecting the focus point varies with the option chosen for AF mode (☐ 66).
◆ Focus-area selection can also be used to choose the focus point for manual focus and focus zoom.
The focus-area grid is reduced to 9 × 7 at an aspect ratio of 1:1 (88).
Tilt the focus stick to position the focus frame, or press the center of the stick to return to the center focus point.


Available Focus Points
Fewer focus points are available for intelligent hybrid AF, which combines phase-detection with TTL contrast-detect AF.

The Focus Point Display
The focus stick (focus lever) can be used to display available focus points.
Focus-area selection can also be accessed using AF/MF SETTING > FOCUS AREA (91).
■ Single Point AF
Press the center of the focus stick to display the focus points ("+") and focus frame. Use the stick to position the focus frame over the desired focus point, or press the center of the stick to return to the center point.
![graph TD A["Start"] --> B["Focus point"] B --> C["Focus frame"] C --> D["End"]](/content/2026/06/1275348/images/c0ee6c737f65e76f922751c2c7f0efc64adad87cd94ab385ae400567817b1344.jpg)
To choose the size of the focus frame, rotate the rear command dial. Rotate the dial left to reduce the frame by up to 50%, right to enlarge it by up to 150%, or press the center of the dial to restore the frame to its original size. Press MENU/OK to put your selection into effect.
ZoneAF
Press the center of the focus stick to display the focus zone. Use the stick to position the zone or press the center of the stick to return the zone to the center of the display.
![graph TD A["Top Left: Top-Left Gear Icon"] --> B["Focus zone"] C["Bottom Right: Top-Right Gear Icon"] --> D["Focus zone"]](/content/2026/06/1275348/images/efc753cf313eb6090263d212c2c028c8b46baaac0ab3bd53867b736f5a118ac6.jpg)
To choose the number of focus frames in the zone, rotate the rear command dial. Rotate the dial right to cycle through zone sizes in the order 3 × 3 , 5 × 5 , 7 × 7 , 3 × 3 ..., left to cycle through zone sizes in reverse order, or press the center of the dial to select a zone size of 3 × 3 . Press MENU/OK to put your selection into effect.
Focus Mode
■ Tracking (Focus Mode C Only)
Press the center of the focus stick to display the focus frame. Use the stick to position the focus frame, or press the center of the stick to return the frame to the center of the display. Press MENU/OK to put your selection into effect. The camera will track focus on the subject while the shutter button is pressed halfway.
![graph LR A["Start"] --> B["Arrow to Focus Frame"] B --> C["Output: Grid with 2x3 grid of squares"]](/content/2026/06/1275348/images/3e2a337d436e7c15601684e58d6e0d8978ef90f34f5c62d2cbd46f99e4420a91.jpg)
① Manual focus-frame selection is not available when wide/tracking is selected in focus mode S.

Burst Mode Focus-Frame Selection
When continuous high-speed (8.0 fps) is selected for drive mode, the number of focus frames available in focus mode C drops.

Single point Zone Wide/Tracking
LongTime-Exposures(T/B)
Select a shutter speed of T (time) or B (bulb) for long time-exposures.
Use of a tripod is recommended to prevent the camera from moving during the exposure.
To reduce "noise" (mottling) in long time-exposures, select ON for IMAGE QUALITY SETTING > LONG EXPOSURE NR (90). Note that this may increase the time needed to record images after shooting.
Time (T)
1 Rotate the shutter speed dial to T.

2 Rotate the front command dial to choose a shutter speed.

3 Press the shutter button all the way down to take a picture at the selected shutter speed. A count-down timer will be displayed while the exposure is in progress.

Bulb (B)
1 Rotate the shutter speed dial to B.

2 Press the shutter button all the way down. The shutter will remain open for up to 60 minutes while the shutter button is pressed; the display shows the time elapsed since the exposure started.
Selecting an aperture of A fixes shutter speed at 30 s.
Using a Remote Release
An optional RR-90 remote release can be used for long time-exposures. See the manual provided with the RR-90 for more information.

Third-Party Remote Releases
Electronic releases from third-party suppliers can be connected via the microphone/remote release connector. A confirmation dialog will be displayed when a third-party release is connected; press MENU/OK and select ☑ REMOTE for MIC/REMOTE RELEASE.


TheSelf-Timer
Use the timer for self-portraits or to prevent blur caused by camera shake.
1 Press MENU/OK in shooting mode to display the shooting menu.

2 Select the 📋 SHOOTING SETTING tab (87), then highlight SELF-TIMER and press MENU/OK.
3 Press the selector up or down to highlight the desired option and press MENU/OK to select.
| Option | Description |
| 2 SEC | The shutter is released two seconds after the shutter button is pressed. Use to reduce blur caused by the camera moving when the shutter button is pressed. |
| 10 SEC | The shutter is released ten seconds after the shutter button is pressed. Use for photographs in which you wish to appear yourself. |
| OFF Self-timer off . | |

4 Press the shutter button halfway to focus.
① Stand behind the camera when using the shutter button. Standing in front of the lens can interfere with focus and exposure.
5 Press the shutter button the rest of the way down to start the timer. The display in the monitor shows the number of seconds remaining until the shutter is the timer before the picture DISP/BACK.
The self-timer lamp on the front of the camera will blink immediately before the picture is taken. If the two-second timer is selected, the self-timer lamp will blink as the timer counts down.

The self-timer turns off automatically when the camera is turned off.
IntervalTimerPhotography
Follow the steps below to configure the camera to take photos automatically at a preset interval.
1 Press MENU/OK in shooting mode to display the shooting menu. Select the 📄 SHOOTING SETTING tab (87), then highlight INTERVAL TIMER SHOOTING and press MENU/OK.

2 Use the selector to choose the interval and number of shots. Press MENU/OK to proceed.

3 Use the selector to choose the starting time and then press MENU/OK. Shooting will start automatically.

① Interval timer photography can not be used at a shutter speed of B (bulb) or with multiple exposure photography. In burst mode, only one picture will be taken each time the shutter is released.
Use of a tripod is recommended.
Check the battery level before starting. We recommend using an optional AC-9V AC power adapter and CP-W126 DC coupler.
The display turns off between shots and lights a few seconds before the next shot is taken. The display can be activated at any time by pressing the shutter button.
Focusing and Taking Pictures
Press the shutter button halfway to focus and the rest of the way down to shoot.
1 Focus.
Frame the picture with your subject in the center of the display and press the shutter button halfway to focus.
If the subject is poorly lit, the AF-assist illuminator may light (91).
If the camera is able to focus, it will beep twice and the focus indicator and frame in focus will glow green. Focus and exposure will lock while the shutter button is pressed halfway.


Focus indicator
If the camera is unable to focus, the focus frame will turn red, !AF will be displayed, and the focus indicator will blink white.
2 Shoot.
Smoothly press the shutter button the rest of the way down to take the picture.

Focus/ExposureLock
To compose photographs with off -center subjects:
1 Focus: Position the subject in the focus frame and press the shutter button halfway to lock focus and exposure. Focus and exposure will remain locked while the shutter button is pressed halfway (AF/AE lock).

Focus and exposure can also be locked with the AF-L and AE-L buttons, respectively (if AE/AF LOCK is selected for BUTTON/DIAL SETTING > AF-LOCK MODE, pressing the AF-L button will lock both focus and exposure; 113).
2 Recompose: Keep the shutter button pressed halfway or keep the AF-L or AE-L button pressed.

Focus and/or exposure will remain locked while the AF-L or AE-L button is pressed, whether or not the shutter button is pressed halfway. If AE&AF ON/OFF SWITCH is selected for BUTTON/DIAL SETTING > AE/AF-LOCK MODE (113), focus and/or exposure lock when the button is pressed and remain locked until the button is pressed again.
3 Shoot: Press the button all the way down.

The roles of the AE-L and AF-L buttons can be reversed using 📋 BUTTON/DIAL SETTING > AE-L/AF-L BUTTON SETTING (113).

Autofocus
Although the camera boasts a high-precision autofocus system, it may be unable to focus on the subjects listed below.
• Very shiny subjects such as mirrors or car bodies.
- Fast-moving subjects.


- Subjects photographed through a window or other reflective object.
- Dark subjects and subjects that absorb rather than reflect light, such as hair or fur.
- Insubstantial subjects, such as smoke or flame.
- Subjects that show little contrast with the background (for example, subjects in clothing that is the same color as the background).
- Subjects positioned in front of or behind a high-contrast object that is also in the focus frame (for example, a subject photographed against a backdrop of highly contrasting elements).
FlashPhotography
Use an optional flash unit for additional lighting when shooting at night or indoors under low light.
1 Remove the hot shoe cover and slide the flash onto the hot shoe as shown, stopping when it clicks into place.

2 Turn the flash on.

For more information, see the documentation provided with the flash unit.
3 Choose a flash mode in the FLASH SETTING > FLASH MODE menu (87).
| Mode | Description |
| AUTO (AUTO FLASH)/ [IMAGE] (RED EYE REDUCTION)* | The fl ash fi res when required. Recommended in most situations. |
| ‡ (FORCED FLASH)/ [IMAGE] (FORCED FLASH)* | The fl ash fi res whenever a picture is taken. Use for backlit subjects or for natural coloration when shooting in bright light. |
| ‡ (SLOW SYNCHRO) / [IMAGE] (RED EYE & SLOW)* | Capture both the main subject and the background under low light (note that brightly lit scenes may be overexposed). |
| ‡ (2ND CURTAIN SYNC.)/ [IMAGE] (2ND CURTAIN SYNC.)* | The fl ash fi res immediately before the shutter closes. |
| ‡ (COMMANDER) | A fl ash mounted on the hot shoe can be used to control optional remote fl ash units. |
| ‡ (SUPPRESSED FLASH) | The fl ash does not fi re even when the subject is poorly lit. A tripod is recommended. |
* Red-eye removal is available in these modes when Intelligent Face Detection is active (92) and red-eye removal is on (98). Red-eye removal minimizes "red-eye" caused when light from the flash is reflected from the subject's retinas as shown in the illustration at right.

① Depending on the distance to the subject, some lenses may cast shadows in photos taken with the flash.
Lowering the flash turns the flash off (③) and prevents it fi ring even when the subject is poorly lit; use of a tripod is recommended. Lower the fl ash where fl ash photography is prohibited or to capture natural lighting under dim light. We also recommend that you lower the fl ash when the camera is off.
If 🎨 is displayed when the shutter button is pressed halfway, the flash will fire when the photo is taken.
Except in commander mode, the flash may fire eral times with each shot. Do not move the camera until shooting is complete.

The Sync Terminal
Use the sync terminal to connect flash units that require a sync cable.


Flash Sync Speed
The flash will synchronize with the shutter at shutter speeds of 1/250 s or slower.

Optional Flash Units
The camera can be used with optional FUJIFILM shoe-mounted flash units (132). Do not use third-party flash units that apply over 300 V to the camera hot shoe.

Flash Mode and Shooting Mode
The flash modes available vary with the shooting mode (153):
| Flash mode | P | S | A | M | Adv | |||
| AUTO | √ | √ | √ | √ | ||||
| √ | √ | √ | √ | √ | √ | √ | ||
| SLOW | √ | √ | √ | √ | √ | |||
| REAR | √ | √ | √ | √ | √ | √ | √ | |
| √ | √ | √ | √ | √ | √ | √ | ||
| √ | √ | √ | √ | √ | √ | √ |
* Wireless remote photography.
Recording Pictures in RAW Format
To record raw, unprocessed data from the camera image sensor, select a RAW option for image quality in the shooting menu as described below. JPEG copies of RAW images can be created using ☐ PLAY BACK MENU > RAW CONVERSION, or RAW images can be viewed on a computer using the RAW FILE CONVERTER application (☐ 81, 123).
1 Press MENU/OK in shooting mode to display the shooting menu. Select the IMAGE QUALITY SETTING tab (87), then highlight IMAGE QUALITY (88) and press MENU/OK.
2 Highlight an option and press MENU/OK. Select RAW to record only RAW images, or FINE+RAW or NORMAL+RAW to record both JPEG copy together with the RAW images. FINE+RAW uses lower JPEG compression ratios for higher-quality JPEG images, while NORMAL+RAW uses higher JPEG compression ratios to increase the number of images that can be stored.
The Function Buttons
To toggle RAW image quality on or off for a single shot, assign RAW to a function button (☐ 51). If a JPEG option is currently selected for image quality, pressing the button temporarily selects the equivalent JPEG+RAW option. If a JPEG+RAW option is currently selected, pressing the button temporarily selects the equivalent JPEG option, while if RAW is selected, pressing the button temporarily selects FINE. Taking a picture or pressing the button again restores the previous setting.
Creating JPEG Copies of RAW Pictures
RAW pictures store information on camera settings separately from the data captured by the camera image sensor. Using ☐ PLAY BACK MENU > RAW CONVERSION (☐ 102), you can create JPEG copies of RAW pictures using different options for the settings listed below. The original image data are unaffected, allowing a single RAW image to be processed in a multitude of different ways.
1 Press MENU/OK during playback to display the playback menu, then press the selector up or down to highlight ☑ PLAY BACK MENU > RAW CONVERSION (☐ 101) and press MENU/OK to display the settings listed in the table at right.
These options can also be displayed by pressing Q button during playback.
2 Press the selector up or down to highlight a setting and press the selector right to select. Press the selector up or down to highlight

the desired option and press MENU/OK to select and return to the settings list. Repeat this step to adjust additional settings.
3 Press the Q button to preview the JPEG copy and press MENU/OK to save.
| Setting | Description |
| REFLECT SHOOTING COND. | Create a JPEG copy using the settings in effect at the time the photo was taken. |
| PUSH/PULL PROCESSING | Adjust exposure by -1 EV to +3 EV in increments of 1/3 EV. |
| DYNAMIC RANGE | Enhance details in highlights for natural contrast (89). |
| FILM SIMULATION | Simulate the effects of different types of fi lm (60). |
| GRAIN EFFECT | Add a fi lm grain effect (89). |
| WHITE BALANCE | Adjust white balance (61). |
| WB SHIFT | Fine-tune white balance (61). |
| HIGHLIGHT TONE | Adjust highlights (89). |
| SHADOW TONE | Adjust shadows (89). |
| COLOR | Adjust color density (89). |
| SHARPNESS | Sharpen or soften outlines (89). |
| NOISE REDUCTION | Process the copy to reduce mottling (89). |
| LENS MODULATION OPTIMIZER | Improve definition by adjusting for diff ration and the slight loss of focus at the periphery of the lens (90). |
| COLOR SPACE | Choose the color space used for color reproduction (90). |
SavingSettings
Save up to 7 sets of custom camera settings for commonly-encountered situations. Saved settings can be recalled using IMAGE QUALITY SETTING > SELECT CUSTOM SETTING (90).
1 Press MENU/OK in shooting mode to display the shooting menu. Select the IQ IMAGE QUALITY SETTING tab (87), then highlight EDIT/SAVE CUSTOM SETTING (90) and press MENU/OK.

2 Highlight a custom settings bank and press MENU/OK to select. Adjust the following as desired and press DISP/BACK when adjustments are complete: DYNAMIC RANGE, FILM SIMULATION, GRAIN EFFECT, WHITE BALANCE, COLOR, SHARPNESS, HIGHLIGHT TONE, SHADOW TONE, and NOISE REDUCTION.

To replace the settings in the selected bank with the settings currently selected with the camera, select SAVE CURRENT SETTINGS and press MENU/OK.
3 A confirmation dialog will be displayed; highlight OK and press MENU/OK.

Using a Mount Adapter
When M-mount lenses are attached using an optional FUJIFILM M MOUNT ADAPTER, the camera processes pictures as they are taken to maintain image quality and correct for a variety of effects.
Pressing the function button on the mount adapter displays LENS MOUNT ADAPTOR SETTING options.
Mount adapter settings can also be accessing using
☐ SHOOTING SETTING > MOUNT ADAPTER SETTING (📖 97).
Before checking focus, set the focus mode selector to M (63).
Bright Frame Brightness
Adjust the brightness of the bright frame in the OVF display. Use the BRIGHT FRAME BRIGHTNESS option to adjust the brightness of the bright frame in the OVF display.
Lens Registration
■ Choosing a Focal Length
If the lens has a focal length of 21, 24, 28, or 35 mm, choose a matching option in the
LENS MOUNT ADAPTOR SETTING menu.
For other lenses, select option 95 or 6 and use the selector to enter the focal length.
Distortion Correction
Choose from STRONG, MEDIUM, or WEAK options to correct BARREL or PINCUSHION distortion.


Barrel distortion Pincushion distortion
To determine the amount required, adjust distortion correction while taking photos of graph paper or other objects featuring repeating vertical and horizontal lines, such as the windows in a high-rise.
■ Color Shading Correction
Color (shading) variations between the center and edges of the frame can be adjusted separately for each corner.

To use color shading correction, follow the steps below.
1 Rotate the rear command dial to choose a corner. The selected corner is indicated by a triangle.
2 Use the selector to adjust shading until there is no visible difference in color between the selected corner and the center of the image. Press the selector left or right to adjust colors on the cyan-red axis, up or down to adjust colors on the blue-yellow axis.
To determine the amount required, adjust color shading correction while taking photos of blue sky or a sheet of gray paper.
■ Peripheral Illumination Correction
Choose from values between -5 and +5. Choosing positive values increases peripheral illumination, while choosing negative values reduces peripheral illumination. Positive values are recommended for vintage lenses, negative values to create the effect of images taken with an antique lens or a pinhole camera.

To determine the amount required, adjust peripheral illumination correction while taking photos of blue sky or a sheet of gray paper.
PhotoBook Assist
Create books from your favorite photos.
Creating a PhotoBook
1 Select NEW BOOK for ☑ PLAY BACK MENU > PHOTOBOOK ASSIST (☐ 101).
2 Scroll through the images and press the selector up to select or deselect. To display the current image on the cover, press the selector down. Press MENU/OK to exit when the book is complete.
Neither photographs 640 or smaller nor movies can be selected for photobooks.
The first picture selected becomes the cover image. Press the selector down to select a different image for the cover.
3 Highlight COMPLETE PHOTOBOOK and press MENU/OK (to select all photos or all photos matching the specified search conditions for the book, choose SELECT ALL). The new book will be added to the list in the photo-book assist menu.
① Books can contain up to 300 pictures. ① Books that contain no photos are automatically deleted.
PhotoBook Assist
Viewing Photobooks
Highlight a book in the photobook assist menu and press MENU/OK to display the book, then press the selector left or right to scroll through the pictures.
Editing and Deleting Photobooks
Display the photobook and press MENU/OK. The following options will be displayed; select the desired option and follow the on-screen instructions.
- EDIT: Edit the book as described in "Creating a PhotoBook" (85).
- ERASE: Delete the book.

Photobooks
Photobooks can be copied to a computer using MyFinePix Studio software (☐ 123).
Menus
Using the Menus: Shooting Mode
The shooting menu is used to adjust settings for a wide range of shooting conditions. Frequently-used options can be saved to a personalized custom menu ("my menu").
Using the Shooting Menu
1 Press MENU/OK in shooting mode to display the menus.

2 Press the selector left to highlight the tab for the current menu.


3 Press the selector down to highlight the tab (LQ, AF, MF, 📋, 🔊, 🌐, or MY) containing the desired item.

4 Press the selector right to place the cursor in the menu.
5 Press the selector up or down to highlight the desired item.
6 Press the selector right to view options for the highlighted item.
7 Press the selector up or down to highlight the desired option.
8 Press MENU/OK to select the highlighted option.
9 Press DISP/BACK to return to the shooting display.
Use the front command dial to scroll through the menus a page at a time.


10. IMAGE QUALITY SETTING
To adjust shooting settings that affect image quality, press MENU/OK in the shooting display and select the 📄 (IMAGE QUALITY SETTING) tab (☐ 87).

IMAGE SIZE
Choose the size and aspect ratio at which still pictures are recorded.

Aspect Ratio
Pictures with an aspect ratio of 3:2 have the same proportions as a frame of 35 mm fi lm, while an aspect ratio of 16:9 is suited to display on High Defi nition (HD) devices. Pictures with an aspect ratio of 1:1 are square.
IMAGE SIZE is not reset when the camera is turned off or another shooting mode is selected.
| Option | Image size |
| L 3:2 | 6000×4000 |
| L 16:9 | 6000×3376 |
| L 1:1 | 4000×4000 |
| M 3:2 | 4240×2832 |
| M 16:9 | 4240×2384 |
| M 1:1 | 2832×2832 |
| Option | Image size |
| S 3:2 | 3008×2000 |
| S 16:9 | 3008×1688 |
| S 1:1 | 2000×2000 |
IMAGE QUALITY
Choose a file format and compression ratio. Select FINE or NORMAL to record JPEG images, RAW to record RAW images, or FINE+RAW or NORMAL+RAW to record both JPEG and RAW images. FINE and FINE+RAW use lower JPEG compression ratios for higher-quality JPEG images, while NORMAL and NORMAL+RAW use higher JPEG compression ratios to increase the number of images that can be stored.
RAW RECORDING
Choose whether to compress RAW images.
| Option | Description |
| UNCOMPRESSED RAW images are not compressed. | |
| LOSSLESS COMPRESSED | RAW images are compressed using a reversible algorithm that reduces fi le size with no loss of image data.The images can be viewed in RAW FILE CONVERTER (☐ 123) or other compatible software. |
FILM SIMULATION
Simulate the effects of different types of fi lm (60).
GRAINEFFECT
Add a film grain effect.
DYNAMIC RANGE
Control contrast. Choose lower values to increase contrast when shooting indoors or under overcast skies, higher values to reduce loss of detail in highlights and shadows when photographing high-contrast scenes. Higher values are recommended for scenes that include both sunlight and deep shade, for such high-contrast subjects as sunlight on water, brightly-lit autumn leaves, and portraits taken against a blue sky, and for white objects or people wearing white; note, however, that mottling may appear in pictures taken at higher values.
If AUTO is selected, the camera will automatically choose either 100 100% or 200 200% according to the subject and shooting conditions. Shutter speed and aperture will be displayed when the shutter button is pressed halfway.
200 200% is available at sensitivities of ISO 400 and above, 400 400% at sensitivities of ISO 800 and above.
WHITE BALANCE
Adjust colors to match the light source (61).
HIGHLIGHT TONE
Adjust the appearance of highlights.
SHADOW TONE
Adjust the appearance of shadows.
COLOR
Adjust color density.
SHARPNESS
Sharpen or soften outlines.
NOISE REDUCTION
Reduce noise in pictures taken at high sensitivities.
Using the Menus: Shooting Mode
LONG EXPOSURE NR
Select ON to reduce mottling in long time-exposures (71).
Select ON to improve definition by adjusting for diffraction and the slight loss of focus at the periphery of the lens.
COLOR SPACE
Choose the gamut of colors available for color reproduction.
| Option | Description |
| sRGB Recommended in most situations. | |
| Adobe RGB For commercial printing. | |
PIXELMAPPING
Use this option if you notice bright spots in your pictures.
1 Press MENU/OK in the shooting display and select the IMAGE QUALITY SETTING tab (87).
2 Highlight PIXEL MAPPING and press MENU/OK to perform pixel mapping.
① Results are not guaranteed.
① Be sure the battery is fully charged before beginning pixel mapping.
① Pixel mapping is not available when the camera temperature is elevated.
① Processing may take a few seconds.
SELECT CUSTOM SETTING
Recall settings saved with EDIT/SAVE CUSTOM SETTING.
EDIT/SAVE CUSTOM SETTING
Save settings (82).
AF MF AF/MF SETTING
To adjust focus settings, press MENU/OK in the shooting display and select the (AF/MF SETTING) tab (87).

FOCUSAREA
Choose the focus area (68). Focus-area selection can also be used to choose the focus point for manual focus and focus zoom.
AFMODE
Choose the AF mode for focus modes S and C (☐ 66).
NUMBER OF THE FOCUS POINTS
Choose the number of focus points available for focus-point selection in manual focus mode or when SINGLE POINT is selected for AF MODE.
| Option | Description |
| 77 POINTS (7 × 11) Choose from 77 focus points arranged in a 7- by 11-point grid. | |
| 273 POINTS (13 × 21) Choose from 273 focus points arranged in a 13- by 21-point grid. | |
PRE-AF
If ON is selected, the camera will continue to adjust focus even when the shutter-release button is not pressed halfway. Note that this increases the drain on the battery.
AFILLUMINATOR
If ON is selected, the AF-assist illuminator will light to assist autofocus.
① The camera may be unable to focus using the AF-assist illuminator in some cases. If the camera is unable to focus in macro mode, try increasing the distance to the subject.
① Avoid shining the AF-assist illuminator directly into your subject's eyes.
FACE/EYE DETECTION SETTING
Intelligent Face Detection sets focus and exposure for human faces anywhere in the frame, preventing the camera from focusing on the background in group portraits. Choose for shots that emphasize portrait subjects. Faces can be detected with the camera in vertical or horizontal orientation; if a face is detected, it will be indicated by a green border. If there is more than one face in the frame, the camera will select the face closest to the center; other faces are indicated by white borders. You can also choose whether the camera detects and focuses on eyes when Intelligent Face Detection is on. Choose from the following options:

| Option | Description |
| FACE ON/EYE OFF Intelligent Face Detection only. | |
| FACE ON/EYE AUTO | The camera automatically chooses which eye to focus on when a face is detected. |
| FACE ON/RIGHT EYE PRIORITY | The camera focuses on the right eye of subjects detected using Intelligent Face Detection. |
| FACE ON/LEFT EYE PRIORITY | The camera focuses on the left eye of subjects detected using Intelligent Face Detection. |
| FACE OFF/EYE OFF | Intelligent Face Detection and eye priority off. |
If the camera is unable to detect the subject's eyes because they are hidden by hair, glasses, or other objects, the camera will instead focus on faces.
① In some modes, the camera may set exposure for the frame as a whole rather than the portrait subject.
① If the subject moves as the shutter button is pressed, the face may not be in the area indicated by the green border when the picture is taken.
AF+MF
If ON is selected in focus mode S, focus can be adjusted manually by rotating the focus ring while the shutter button is pressed halfway. Both standard and focus peaking MF assist options are supported. Lenses with a focus distance indicator must be set to manual focus mode (MF) before this option can be used. Selecting MF disables the focus distance indicator. Set the focus ring to the center of the focus distance indicator, as the camera may fail to focus if the ring is set to infinity or the minimum focus distance.

AF + MF Focus Zoom
When ON is selected for AF/MF SETTING > FOCUS CHECK and SINGLE POINT selected for AF MODE, focus zoom can be used to zoom in on the selected focus area. Focus zoom is not available when ZONE or WIDE/TRACKING is selected for AF MODE. The zoom ratio (2.5× — 6×) can be selected using the rear command dial.
MF ASSIST
Choose how focus is displayed in manual focus mode (65).
| Option | Description |
| STANDARD Focus is displayed normally (focus peaking and digital split image are not available). | |
| DIGITAL SPLIT IMAGE | A black-and-white (MONOCHROME) or color (COLOR) split-image display. |
| FOCUS PEAK HIGHLIGHT | The camera heightens high-contrast outlines. Choose a color and peaking level. |
FOCUSCHECK
If ON is selected, the camera will automatically zoom in on the view through the lens when the focus ring is rotated in manual focus mode (64).
INTERLOCK SPOT AE & FOCUS AREA
Select ON to meter the current focus frame when SINGLE POINT is selected for AF MODE (66) and SPOT is selected for PHOTOMETRY (59).
INSTANT AF SETTING
Choose how the camera focuses when the AF-L button is pressed in manual focus mode (☐ 63).
DEPTH-OF-FIELDSCALE
Choose FILM FORMAT BASIS to help you make practical assessments of depth of field for pictures that will be viewed as prints and the like, PIXEL BASIS to help you assess depth of field for pictures that will be viewed at high resolutions on computers or other electronic displays.
RELEASE/FOCUS PRIORITY
Choose how the camera focuses in focus mode AF-S or AF-C.
| Option | Description |
| RELEASE | Shutter response is prioritized over focus. Pictures can be taken when the camera is not in focus. |
| FOCUS | Focus is prioritized over shutter response. Pictures can be only taken when the camera is in focus. |
CORRECTED AF FRAME
If ON is selected, a second focus frame for focus distances of about 50 cm (1.6 ft) will be added to the display in the optical viewfinder. The focus frame for the current focus distance is displayed in green when the shutter button is pressed halfway.
| ON | OFF | |
| Focus frame | Focus frame for focus distance of infi nity Focus frame for focus distance of about 50 cm (1.6 ft) Focus frame for focus distance of about 50 cm (1.6 ft) |  |
SHOOTING SETTING
To adjust shooting options, press MENU/OK in the shooting display and select the
(SHOOTING SETTING) tab (87).

SELF-TIMER
Take pictures with the self-timer (73).
INTERVAL TIMER SHOOTING
Adjust settings for interval timer photography (☐ 74).
FILM SIMULATION BKT
Choose fi Im types for fi Im simulation bracketing (54,60).
PHOTOMETRY
Choose how the camera meters exposure (59).
SHUTTER TYPE
Choose the shutter type. Choose the electronic shutter to mute the shutter sound.
| Option | Description |
| MS MECHANICAL SHUTTER | Take pictures with the mechanical shutter. |
| ES ELECTRONIC SHUTTER | Take pictures with the electronic shutter. |
| MS MECHANICAL + ES ELECTRONIC | The camera chooses the shutter type according to shooting conditions. |
If ES ELECTRONIC SHUTTER or MS MECHANICAL + ES ELECTRONIC is selected, shutter speeds faster than 1/8 ,000 s can be chosen by rotating the shutter speed dial to 8000 and then rotating the front command dial.
When the electronic shutter is used, shutter speed and sensitivity are restricted to values of V32,000 - 1 s and ISO 12800-200 respectively, and long exposure noise reduction has no effect. In burst mode, focus and exposure are fixed at the values for the first shot in each burst.
① Distortion may be visible in shots of moving subjects with electronic shutter, while banding and fog may occur in shots taken under fluorescent lights or other flickering or erratic illumination. When taking pictures with the shutter muted, respect your subjects' image rights and right to privacy.
IS MODE
Reduce blur. This option is available only with lenses that support image stabilization.
| Option | Description |
| CONTINUOUS | Image stabilization on. |
| SHOOTING ONLY | Image stabilization enabled only when the shutter button is pressed halfway or the shutter is released. |
| OFF | Image stabilization off; appears in the display (8, 10). Recommended when using a tripod. |
ISO AUTO SETTING
Choose the base sensitivity, maximum sensitivity, and minimum shutter speed for auto ISO sensitivity control, which is selected by rotating the ISO dial to A. Settings for AUTO1, AUTO2, and AUTO3 can be adjusted separately.
| Option | Default |
| DEFAULT SENSITIVITY 200 | |
| MAX. SENSITIVITY | 800 (AUTO1)/1600 (AUTO2)/3200 (AUTO3) |
| MIN. SHUTTER SPEED 1/60 |
The camera automatically chooses a sensitivity between the default and maximum values. Sensitivity is only raised above the default value if the shutter speed required for optimal exposure would be slower than the value selected for MIN. SHUTTER SPEED.
If the value selected for DEFAULT SENSITIVITY is higher than that selected for MAX. SENSITIVITY, DEFAULT SENSITIVITY will be set to the value selected for MAX. SENSITIVITY.
The camera may select shutter speeds slower than MIN. SHUTTER SPEED if pictures would still be underexposed at the value selected for MAX. SENSITIVITY.
MOUNT ADAPTOR SETTING
Adjust settings for M-mount lenses connected using an optional FUJIFILM M MOUNT ADAPTER (☐ 83).
WIRELESS COMMUNICATION
Connect to a smartphone or tablet over a wireless network (122).
For more information, visit http://fujifilm-dsc.com/wifi/.
FLASH SETTING
To adjust flash-related settings, press MENU/OK in the shooting display and select the FLASH SETTING tab (87).

FLASHMODE
Choose a flash mode (78).
FLASHCOMPENSATION
Adjust flash brightness. Note that the desired results may not be achieved depending on shooting conditions and the distance to the subject.
RED EYE REMOVAL
Choose ON to remove red-eye effects caused by the flash.
◆ Red-eye reduction is performed only when a face is detected.
◆ Red-eye removal is not available with RAW images.
MOVIE SETTING
To adjust options for movie recording, press MENU/OK in the shooting display and select the ☑ (MOVIE SETTING) tab (☐ 87).

MOVIEMODE
Select a frame size and rate for movie recording.
• HD 1080/60 P: 1920×1080 (60 fps) • HD 720/60 P: 1280×720 (60 fps)
- HD 1080/50 P: 1920×1080 (50 fps)
- HD 720/50 P: 1280×720 (50 fps)
• HD 1080/30 P: 1920×1080 (30 fps) • HD 720/30 P: 1280×720 (30 fps)
- HD 1080/25 P: 1920×1080 (25 fps)
- HD 720/25 P: 1280×720 (25 fps)
• HD 1080/24 P: 1920×1080 (24 fps) • HD 720/24 P: 1280×720 (24 fps)
MIC LEVEL ADJUSTMENT
Adjust the microphone recording level.
MIC/REMOTERELEASE
Specify whether the device connected to the microphone/remote release connector is a microphone or a remote release (☐ 45, 72).
MY MYMENU
To display a personalized menu of frequently-used options, press MENU/OK in the shooting display and select the MY (MY MENU) tab (87).
To edit "my menu", select ✅ USER SETTING > MY MENU SETTING (📖 118).
The MY tab is only available if options have been assigned to MY MENU.

Using the Menus: Playback Mode
The playback menu is used to adjust playback settings.
Using the Playback Menu
1 Press MENU/OK in playback mode to display the menus.

2 Press the selector up or down to highlight the desired item.
3 Press the selector right to view options for the highlighted item.


4 Press the selector up or down to highlight the desired option.

5 Press MENU/OK to select the highlighted option.

6 Press DISP/BACK to return to the play-back display.

Use the front command dial to scroll through the menus a page at a time.
PLAY BACK MENU
To access playback options, press MENU/OK in the playback display and select the ☑ (PLAY BACK MENU) tab (☐ 101).

SWITCHSLOT
Choose the card from which images will be played back (📖 39).
RAWCONVERSION
Create JPEG copies of RAW pictures (81).
ERASE
Delete pictures (43).
CROP
Create a cropped copy of the current picture.
1 Display the desired picture.
2 Select ▶ CROP in the playback menu.
3 Use the rear command dial to zoom in and out and press the selector up, down, left, or right to scroll the picture until the desired portion is displayed.
4 Press MENU/OK to display a confirmation dialog.
5 Press MENU/OK again to save the cropped copy to a separate file.
Larger crops produce larger copies; all copies have an aspect ratio of 3:2. If the size of the final copy will be 640, OK will be displayed in yellow.
RESIZE
Create a small copy of the current picture.
1 Display the desired picture.
2 Select ☐ RESIZE in the playback menu.
3 Highlight a size and press MENU/OK to display a confirmation dialog.
4 Press MENU/OK again to save the resized copy to a separate file.
The sizes available vary with the size of the original image.
PROTECT
Protect pictures from accidental deletion. Highlight one of the following options and press MENU/OK.
- FRAME: Protect selected pictures. Press the selector left or right to view pictures and press MENU/OK to select or deselect. Press DISP/BACK when the operation is complete.
- SET ALL: Protect all pictures.
- RESET ALL: Remove protection from all pictures.
① Protected pictures will be deleted when the memory card is formatted (☐ 107).
IMAGE ROTATE
Rotate pictures.
1 Display the desired picture.
2 Select IMAGE ROTATE in the playback menu.
3 Press the selector down to rotate the picture 90° clockwise, up to rotate it 90° counterclockwise.
4 Press MENU/OK. The picture will automatically be displayed in the selected orientation whenever it is played back on the camera.
◆ Protected pictures can not be rotated. Remove protection before rotating pictures.
The camera may not be able to rotate pictures created with other devices. Pictures rotated on the camera will not be rotated when viewed on a computer or on other cameras.
Pictures taken with SCREEN SETTING > AUTOROTATE PB are automatically displayed in the correct orientation during playback (111).
RED EYE REMOVAL
Remove red-eye from portraits. The camera will analyze the image; if red-eye is detected, the image will be processed to create a copy with reduced red-eye.
1 Display the desired picture.
2 Select ☑ RED EYE REMOVAL in the playback menu.
3 Press MENU/OK.
Red eye may not be removed if the camera is unable to detect a face or the face is in profile. Results may differ depending on the scene. Red eye can not be removed from pictures that have already been processed using red-eye removal or pictures created with other devices.
The amount of time needed to process the image varies with the number of faces detected.
Copies created with RED EYE REMOVAL are indicated by a 📄 icon during playback.
◆ Red eye removal can not be performed on RAW images.
COPY
Copy pictures between the cards in the first and second slots.
1 Select ☐ COPY in the playback menu.
2 Highlight one of the following options and press the selector right:
- SLOT1 → SLOT2: Copy pictures from the card in the first slot to the card in the second slot.
- SLOT2 → SLOT1: Copy pictures from the card in the second slot to the card in the first slot.
3 Highlight one of the following options and press MENU/OK:
- FRAME: Copy selected pictures. Press the selector left or right to view pictures and press MENU/OK to copy the current picture.
- ALL FRAMES: Copy all pictures.
◆ Copying ends when the destination is full.
WIRELESS COMMUNICATION
Connect to a smartphone or tablet over a wireless network (☐ 122).
For more information, visit http://fujifilm-dsc.com/wifi/.
SLIDE SHOW
View pictures in an automated slide show. Press MENU/OK to start. Press DISP/BACK at any time during the show to view on-screen help. The show can be ended at any time by pressing MENU/OK.
The camera will not turn off automatically while a slide show is in progress.
PHOTOBOOK ASSIST
Create books from your favorite photos (85).
PC AUTO SAVE
Upload pictures to a computer over a wireless network (122).
For more information, visit http://fujifilm-dsc.com/wifi/.
PRINT ORDER (DPOF)
Select pictures for printing (📖 126).
instax PRINTER PRINT
Print pictures on optional FUJIFILM instax SHARE printers (☐ 129).
DISP ASPECT
Choose how High Definition (HD) devices display pictures with an aspect ratio of 3:2 (this option is available only when an HDMI cable is connected). Select 16:9 to display the image so that it fills the screen with its top and bottom cropped out, 3:2 to display the entire image with black bands at either side.

3:2
16:9


The Setup Menu
View and adjust basic camera settings.
Using the Setup Menu
1 Press MENU/OK in shooting mode to display the menus.

2 Press the selector left to highlight the tab for the current menu.


3 Press the selector down to highlight the ⚙ (SET UP) tab.

4 Press the selector right to display setup menu categories.

5 Press the selector up or down to highlight the category containing the desired item.

6 Press the selector right to view the option in the highlighted category.

7 Press the selector up or down to highlight the desired item.

8 Press the selector right to view options for the highlighted item.

9 Press the selector up or down to highlight the desired option.

10 Press MENU/OK to select the highlighted option.

11 Press DISP/BACK to return to the shooting display.

Use the front command dial to scroll through the menus a page at a time.
SET UP Menu Options
To access basic camera settings, press MENU/OK in the playback display and select the ⚙ (SET UP) tab (☐ 106).

USER SETTING
FORMAT
To format a memory card:
1 Highlight ✅ USER SETTING > FORMAT in the setup menu and press MENU/OK.
2 Highlight the slot containing the card you wish to format and press MENU/OK.
3 A confirmation dialog will be displayed. To format the memory card, highlight OK and press MENU/OK. To exit without formatting the memory card, select CANCEL or press DISP/BACK.
① All data—including protected pictures—will be deleted from the memory card. Be sure important fi les have been copied to a computer or other storage device.
① Do not open the battery-chamber cover during formatting.
The format menu can also be displayed by pressing the center of the rear command dial while pressing and holding the button.

DATE/TIME
Set the camera clock (☐ 26, 27).
The Setup Menu
TIME DIFFERENCE
Switch the camera clock instantly from your home time zone to the local time at your destination when traveling. To specify the difference between local time and your home time zone:
2 Use the selector to choose the time difference between local time and your home time zone. Press MENU/OK when settings are complete.
To set the camera clock to local time, highlight ✦ LOCAL and press MENU/OK. To set the clock to the time in your home time zone, select ⏻ HOME. If ✦ LOCAL is selected, ✦ will be displayed for three seconds when the camera is turned on.
言語/LANG.
Choose a language.
MY MENU SETTING
Edit "my menu" (118).
SENSOR CLEANING
Remove dust from the camera image sensor.
- OK: Clean sensor immediately (☐ xi).
- WHEN SWITCHED ON: If this option is selected, sensor cleaning will be performed when the camera turns on.
- WHEN SWITCHED OFF: If this option is selected, sensor cleaning will be performed when the camera turns off (sensor cleaning is not however performed if the camera turns off in playback mode).
◆ Dust that can not be removed using sensor cleaning can be removed manually (☐ 136).
RESET
Reset shooting or setup menu options to default values. Custom white balance, custom settings banks created using EDIT/SAVE CUSTOM SETTING, WIRELESS SETTINGS, and the setup menu DATE/TIME, TIME DIFFERENCE options are not affected.
1 Highlight the desired option and press the selector right.
2 A confirmation dialog will be displayed; highlight OK and press MENU/OK.
SOUND SETTING
AF BEEP VOL.
Choose the volume of the beep that sounds when the camera focuses (75). The beep can be muted by selecting OFF.
SELF-TIMER BEEP VOL.
Choose the volume of the beep that sounds while the self-timer is active (73). The beep can be muted by selecting OFF.
OPERATION VOL.
Adjust the volume of the sounds produced when camera controls are operated. Choose OFF (mute) to disable control sounds.
SHUTTER VOLUME
Adjust the volume of the sounds produced when the shutter is released. Choose OFF (mute) to disable the shutter sound.
SHUTTER SOUND
Choose the sound made by the shutter.
PLAYBACKVOLUME
Adjust the volume for movie playback.
The Setup Menu
SCREEN SETTING
EVFBRIGHTNESS
Adjust the brightness of the display in the electronic viewfinder, or choose AUTO for automatic brightness adjustment.
EVF COLOR
Adjust the hue of the display in the electronic viewfinder.
LCDBRIGHTNESS
Adjust monitor brightness.
LCD COLOR
Adjust monitor hue.
IMAGEDISP.
Choose how long images are displayed after shooting. Colors may differ slightly from those in the final image and "noise" mottling may be visible at high sensitivities.
| Option | Description |
| CONTINUOUS | Pictures are displayed until the MENU/OK button is pressed or the shutter button is pressed halfway. To zoom in on the active focus point, press the center of the rear command dial; press again to cancel zoom. |
| 1.5 SEC | Pictures are displayed for 1.5 seconds (1.5 SEC) or 0.5 seconds (0.5 SEC) or until the shutter button is pressed halfway. |
| 0.5 SEC | |
| OFF Pictures are | not displayed after shooting. |
EVF AUTOROTATE DISPLAYS
Choose whether the indicators in the viewfinder rotate to match camera orientation (☐ 31). Regardless of the option selected, the indicators in the monitor do not rotate.
PREVIEW EXP./WB IN MANUAL MODE
Select PREVIEW EXP./WB to enable exposure and white balance preview in manual exposure mode (38), or choose PREVIEW WB to preview only white balance. Select OFF when using a flash or on other occasions on which exposure may change when the picture is taken.
PREVIEW PIC. EFFECT
Choose ON to preview the effects of film simulation, white balance, and other settings in the monitor. Choose OFF to make shadows in low-contrast, back-lit scenes and other hard-to-see subjects more visible.
If OFF is selected, the effects of camera settings will not be visible in the monitor and colors and tone will differ from those in the final picture. The display will however be adjusted to show the effects of advanced filters and of monochrome and sepia settings.
FRAMINGGUIDELINE
Choose the type of framing grid available in shooting mode.
GRID9

GRID 24

HD HD FRAMING

For "rule of thirds" composition. A six-by-four grid. Frame HD pictures in the crop shown by the lines at the top and bottom of the display.
AUTOROTATEPB
Choose ON to automatically rotate "tall" (portrait-orientation) pictures during playback.
FOCUS SCALE UNITS
Choose the units used for the focus distance indicator (☐ 64).
DISP. CUSTOM SETTING
Choose items for the standard display (☐ 33).
The Setup Menu
BUTTON/DIAL SETTING
FOCUS LEVER SETTING
Choose the functions performed by the focus stick (focus lever).
| Option | Description |
| LOCK (OFF) The focus stick can not be used during shooting. | |
| PUSH ⚙ TO UNLOCK | Press the stick to view the focus-point display and tilt the stick to select a focus point. |
| ON Tilt the stick to view the focus-point display and select a focus point. | |
| EDIT/SAVE QUICK MENU | |
| Choose the options displayed in the quick menu (☐ 49). | |
| FUNCTION (Fn) SETTING | |
| Choose the roles played by the function buttons (☐ 51). | |
| COMMAND DIAL SETTING | |
| Choose the roles played by the command dials. | |
| ISO DIAL SETTING (H) | |
| Choose the ISO sensitivity assigned to the H position on the ISO dial. | |
| SHOOTWITHOUTLENS | |
| Choose whether shutter release is enabled when no lens is attached. | |
| FOCUS RING | |
| Choose the direction in which the focus ring is rotated to increase the focus distance. | |
AE-L/AF-L BUTTON SETTING
Switch the roles of the AF-L and AE-L buttons.
AE/AF-LOCKMODE
If AE & AF ON WHEN PRESSING is selected, exposure and/or focus will lock while the AE-L or AF-L button is pressed (76). If AE & AF ON/OFF SWITCH is selected, exposure and/or focus will lock when the AE-L or AF-L button is pressed and remain locked until the button is pressed again.
AF-LOCKMODE
Choose the role played by the AF-L button (76).
APERTURE SETTING
Choose the method used to adjust aperture when using lenses with no aperture rings.
- AUTO + 📋 MANUAL: Rotate the rear command dial to choose the aperture. Rotate past minimum aperture to choose A (auto).
- AUTO: Aperture is selected automatically; camera functions in exposure mode P (program AE) or S (shutter-priority AE).
- MANUAL: Rotate the rear command dial to choose the aperture; camera functions in exposure mode A (aperture-priority AE) or M (manual).

POWER MANAGEMENT
AUTO POWER OFF
Choose the length of time before the camera turns off automatically when no operations are performed. Shorter times increase battery life; if OFF is selected, the camera must be turned off manually. Note that in some situations the camera turns off automatically even when OFF is selected.
POWER MANAGEMENT
Adjust power management settings.
| Option | AF performance (speed) | LCD/EVF display quality | Battery endurance |
| HIGH PERFORMANCE | Fast | Very high | Low |
| STANDARD | Fast | High | Normal |
| ECONOMY | Normal | Normal | High |
When ECONOMY is selected, the frame rate will drop when no operations are being performed. Operating camera controls returns the frame rate to normal.
SAVE DATA SETTING
FRAMENO.
New pictures are stored in image fi les named using a four-digit fi le number assigned by adding one to the last file number used. The file number is displayed during playback as shown at right. FRAME NO. controls whether fi le numbering is reset to 0001 when a new memory card is inserted or the current memory card is formatted.
Frame number

| Option | Description |
| CONTINUOUS | Numbering continues from the last file number used or the first available file number, whichever is higher. Choose this option to reduce the number of pictures with duplicate file names. |
| RENEW | Numbering is reset to 0001 after formatting or when a new memory card is inserted. |
If the frame number reaches 999-9999, the shutter release will be disabled (143).
◆ Selecting ↗ USER SETTING > RESET (108) sets FRAME NO. to CONTINUOUS but does not reset the file number.
Frame numbers for pictures taken with other cameras may differ.
SAVE ORG IMAGE
Choose ON to save unprocessed copies of pictures taken using FLASH SETTING > RED EYE REMOVAL (98).
EDIT FILE NAME
Change the file name prefix. sRGB images use a four-letter prefix (default "DSCF"), Adobe RGB images a three-letter prefix ("DSF") preceded by an underscore.
The Setup Menu
CARD SLOT SETTING (STILL IMAGE)
Choose the role played by the card in the second slot.
| Option | Description |
| SEQUENTIAL | The card in the second slot is used only when the card in the first slot is full. |
| BACKUP Each picture is recorded twice, once to each card. | |
| RAW / JPEG | As for SEQUENTIAL, except that the RAW copy of pictures taken with FINE + RAW or NORMAL + RAW selected for IMAGE QUALITY SETTING > IMAGE QUALITY will be saved to the card in the first slot and the JPEG copy to the card in the second slot. |
Regardless of the option selected for CARD SLOT SETTING (STILL IMAGE), movies will be recorded to the card in the first slot; if SEQUENTIAL is selected, movies will be recorded to the card in the first slot even after recording has moved on to the card in the second slot.
SWITCH SLOT (SEQUENTIAL)
Choose the card that is recorded to first when SEQUENTIAL is selected for CARD SLOT SETTING (STILL IMAGE).
■ CONNECTION SETTING
For more information on wireless connections, visit http://fujifilm-dsc.com/wifi/
WIRELESS SETTINGS
Adjust settings for connection to wireless networks.
| Option | Description |
| GENERAL SETTINGS | Choose a name (NAME) to identify the camera on the wireless network (the camera is assigned a unique name by default) or select RESET WIRELESS SETTINGS to restore default settings. |
| RESIZE IMAGE FOR SMARTPHONE 3M | Choose ON (the default setting, recommended in most circumstances) to resize larger images to 3M for upload to smartphones, OFF to upload images at their original size. Resizing applies only to the copy uploaded to the smartphone; the original is not aff ected. |
| PC AUTO SAVE SETTINGS | Choose DELETE REGISTERED DESTINATION PC to remove selected destinations, DETAILS OF PREVIOUS CONNECTION to view computers to which the camera has recently connected. |
PC AUTO SAVE SETTING
Choose an upload destination. Choose SIMPLE SETUP to connect using WPS, MANUAL SETUP to configure network settings manually.
GEOTAGGINGSET-UP
View location data downloaded from a smartphone and choose whether to save the data with your pictures.
| Option | Description |
| GEOTAGGING | Choose whether location data downloaded from a smartphone are embedded in pictures as they are taken. |
| LOCATION INFO | Display the location data last downloaded from a smartphone. |
instax PRINTER CONNECTION SETTING
Adjust settings for connection to optional FUJIFILM instax SHARE printers (128).
"My Menu"
Selecting the MY (MY MENU) tab displays a personalized custom menu of frequently-used options (100).
Editing "My Menu"
1 In the setup menu ✅ USER SETTING tab, highlight MY MENU SETTING and press MENU/OK to display the following options (📖 106).

2 Press the selector up or down to highlight MY MENU SETTING and press MENU/OK. Options that can be added to "my menu" are highlighted in blue.
◆ Options currently in "my menu" are indicated check marks.

3 Highlight an item and press MENU/OK to add it to "my menu".

4 Press MENU/OK to return to the edit display.
5 Repeat Steps 3 and 4 until all the desired items have been added.
"My menu" can contain up to 16 items.

Editing "My Menu"
To reorder or delete items, select RANK ITEMS or REMOVE ITEMS in Step 1.
Factory Defaults
The factory default settings for the options in the shooting and setup menus are listed below. These settings can be restored using ✅ USER SETTING > RESET (📖 108).
■ Shooting Menu
| Menu | Default | |
| IMAGE QUALITY SETTING | ||
| IMAGE SIZE | 3:2 | |
| IMAGE QUALITY FINE | ||
| RAW RECORDING UNCOMPRESSED | ||
| FILM SIMULATION PROVIA/STANDARD | ||
| GRAIN EFFECT OFF | ||
| DYNAMIC RANGE 100% | ||
| WHITE BALANCE AUTO | ||
| HIGHLIGHT TONE O | ||
| SHADOW TONE O | ||
| COLOR O | ||
| SHARPNESS O | ||
| NOISE REDUCTION O | ||
| LONG EXPOSURE NR | ON | |
| LENS MODULATION OPTIMIZER | ON | |
| COLOR SPACE | sRGB | |
| SELECT CUSTOM SETTING | CUSTOM 1 | |
| Menu | Default | |
| AF/MF SETTING | ||
| AF MODE | SINGLE POINT | |
| NUMBER OF THE FOCUS POINTS | 77 POINTS (7×11) | |
| PRE-AF | OFF | |
| AF ILLUMINATOR ON | ||
| FACE/EYE DETECTION SETTING | FACE OFF/EYE OFF | |
| AF+MF | OFF | |
| MF ASSIST | STANDARD | |
| FOCUS CHECK | OFF | |
| INTERLOCK SPOT AE & FOCUS AREA | ON | |
| INSTANT AF SETTING | AF-S | |
| RELEASE/FOCUS PRIORITY• AF-S PRIORITY SELECTION• AF-C PRIORITY SELECTION | RELEASERELEASE | |
| CORRECTED AF FRAME | OFF | |
Factory Defaults
| Menu | Default | |
| SHOOTING SETTING | ||
| SELF-TIMER OFF | ||
| FILM SIMULATION BKT· FILM 1· FILM 2· FILM 3 | PROVIA/STANDARDVelvia/VIVIDASTIA/SOFT | |
| PHOTOMETRY MULTI | ||
| SHUTTER TYPE MECHANICAL | SHUTTER | |
| IS MODE CONTINUOUS | ||
| ISO AUTO SETTING AUTO1 | ||
| MOUNT ADAPTOR SETTING· BRIGHT FRAME BRIGHTNESS· LENS REGISTRATION | 0LENS 5 (50mm) | |
| FLASH SETTING | ||
| FLASH MODE AUTO | ||
| FLASH COMPENSATION ±0 | ||
| RED EYE REMOVAL OFF | ||
| MOVIE SETTING | ||
| MOVIE MODE | 1920/60P | |
| MIC LEVEL ADJUSTMENT 3 | ||
| MIC/REMOTE RELEASE MIC | ||
Setup Menu
| Menu | Default | |
| F USER SETTING | ||
| TIME DIFFERENCE | HOME | |
| SENSOR CLEANINGWHEN SWITCHED ONWHEN SWITCHED OFF | OFFON | |
| F SOUND SETTING | ||
| AF BEEP VOL. | ### | |
| SELF-TIMER BEEP VOL. | ### | |
| OPERATION VOL. | OFF | |
| SHUTTER VOLUME | ### | |
| SHUTTER SOUND | SOUND 1 | |
| PLAYBACK VOLUME | 7 | |
| F SCREEN SETTING | ||
| EVF BRIGHTNESS | AUTO | |
| EVF COLOR | 0 | |
| LCD BRIGHTNESS | 0 | |
| LCD COLOR | 0 | |
| IMAGE DISP. | OFF | |
| EVF AUTOROTATE DISPLAYS | ON | |
| PREVIEW EXP./WB IN MANUAL MODE | PREVIEW EXP./WB | |
| PREVIEW PIC. EFFECT | ON | |
| FRAMING GUIDELINE | GRID 9 | |
| AUTOROTATE PB | OFF | |
| FOCUS SCALE UNITS | METERS | |
| DISP. CUSTOM SETTING See page 33. | ||
Factory Defaults
| Menu | Default |
| BUTTON/DIAL SETTING | |
| FOUCS LEVER SETTING ON | |
| EDIT/SAVE QUICK MENU See page 47. | |
| FUNCTION (Fn) SETTING See page 50. | |
| COMMAND DIAL SETTING | S.S.F |
| ISO DIAL SETTING 25600 | |
| SHOOT WITHOUT LENS OFF | |
| FOCUS RING | CW |
| AE-L/AF-L BUTTON SETTING AE-L/AF-L | |
| AE/AF-LOCK MODE | AE&AF ON WHEN PRESS-ING |
| AF-LOCK MODE AF LOCK ONLY | |
| APERTURE SETTING | AUTO + MANUAL |
| POWER MANAGEMENT | |
| AUTO POWER OFF 2 MIN | |
| POWER MANAGEMENT STANDARD | |
| Menu | Default | |
| SAVE DATA SETTING | ||
| FRAME NO. CONTINUOUS | ||
| SAVE ORG IMAGE OFF | ||
| CARD SLOT SETTING(STILL IMAGE) | SEQUENTIAL | |
| CONNECTION SETTING | ||
| WIRELESS SETTINGS• RESIZE IMAGE FOR SMARTPHONE 3M | ON | |
| PC AUTO SAVE SETTING | SIMPLE SETUP | |
| GEOTAGGING SET-UP• GEOTAGGING• LOCATION INFO | ONON | |
Connections
WirelessTransfer
Access wireless networks and connect to computers, smartphones, or tablets. For downloads and other information, visit http://fujifilm-dsc.com/wifi/.
Wireless Connections: Smartphones
Install the "FUJIFILM Camera Remote" app on your smartphone to browse the images on the camera, download selected images, control the camera remotely, or copy location data to the camera. To connect to the smartphone, set the camera to playback mode and press the function button (Fn1).

You can also connect using SHOOTING SETTING/PLAY BACK MENU > WIRELESS COMMUNICATION (97, 104).
Wireless Connections: Computers
Once you have installed the "FUJIFILM PC AutoSave" application and configured your computer as a destination for the images copied from the camera, you can upload pictures from the camera using PLAY BACK MENU >PC AUTO SAVE (105) or by pressing and holding the function button (Fn1) in playback mode.
![graph LR A["Camera"] --> B["Device"] B --> C["Laptop"]](/content/2026/06/1275348/images/aa31c2b9e1bd0d194d4d681f9476cabfcd4241a6423572907d334b9648757832.jpg)
Viewing Pictures on a Computer
Read this section for information on copying pictures to a computer.
Windows
Use MyFinePix Studio to copy pictures to your computer, where they can be stored, viewed, organized, and printed. MyFinePix Studio is available for download from the following website:
http://fujifilm-dsc.com/mfs/
Once download is complete, double-click the downloaded file ("MFPS_Setup.EXE") and follow the on-screen instructions to complete installation. Proceed to "Connecting the Camera" (124) when installation is complete.
Macintosh
Pictures can be copied to your computer using Image Capture (supplied with your computer) or other software. Proceed to "Connecting the Camera" (124).

Viewing RAW Files
To view RAW fi les on your computer, use the RAW FILE CONVERTER, available for download from: http://fujifilm-dsc.com/rfc/
Connecting the Camera
1 Find a memory card containing pictures you want to copy to the computer and insert the card into the camera.
Windows users may require the Windows CD when starting the software for the first time.
① Loss of power during transfer could result in loss of data or damage to the memory card. Insert a fresh or fully-charged battery before connecting the camera.
2 Turn the camera off and connect a USB cable (available separately from third-party suppliers) as shown, making sure the connectors are fully inserted. Connect the camera directly to the computer; do not use a USB hub or keyboard.
① The USB cable must be no more than 1.5 m (4.9 ft.) long and be suitable for data transfer.

3 Turn the camera on.
4 Copy pictures to the computer using MyFinePix Studio or applications provided with your operating system.
For more information on using the software, start the application and select the appropriate option from the Help menu.
① If a memory card containing a large number of images is inserted, there may be a delay before the software starts and you may be unable to import or save images. Use a memory card reader to transfer pictures.
① Make sure that the computer does not display a message stating that copying is in progress and that the indicator lamp is out before turning the camera off or disconnecting the USB cable (if the number of images copied is very large, the indicator lamp may remain lit after the message has cleared from the computer display). Failure to observe this precaution could result in loss of data or damage to the memory card.
① Disconnect the camera before inserting or removing memory cards.
① In some cases, it may not be possible to access pictures saved to a network server using the software in the same way as on a standalone computer.
① The user bears all applicable fees charged by the phone company or Internet service provider when using services that require an Internet connection.

Disconnecting the Camera
After confirming that the indicator lamp is out, turn the camera off and disconnect the USB cable.
Creating a DPOF Print Order
The ☑ PLAY BACK MENU > PRINT ORDER (DPOF) (105) option can be used to create a digital "print order" for DPOF-compatible printers.

DPOF
DPOF (Digital Print Order Format) is standard that allows pictures to be printed from "print orders" stored on the memory card. The information in the order includes the pictures to be printed and the number of copies of each picture.

WITH DATE ⓒ/WITHOUT DATE
To modify the DPOF print order, select ☑ PLAY BACK MENU > PRINT ORDER (DPOF) (☐ 101) and press the selector up or down to highlight WITH DATE ☐ or WITHOUT DATE.

WITH DATE ☐: Print date of recording on pictures.
WITHOUT DATE: Print pictures without date.
Press MENU/OK and follow the steps below.
1 Press the selector left or right to display a picture you wish to include in or remove from the print order.

2 Press the selector up or down to choose the number of copies (up to 99). To remove a picture from the order, press the selector down until the number of copies is 0.


3 Repeat steps 1–2 to complete the print order. Press MENU/OK to save the print order when settings are complete, or DISP/BACK to exit without changing the print order.
4 The total number of prints is displayed in the monitor. Press MENU/OK to exit.
The pictures in the current print order are indicated by a icon during playback.


RESET ALL
To cancel the current print order, select RESET ALL for PLAY BACK MENU > PRINT ORDER (DPOF) (101). The confirmation shown at right will be displayed; press MENU/OK to remove all pictures from the order.

Print orders can contain a maximum of 999 pictures.
If a memory card is inserted containing a print order created by another camera, the message shown at right will be displayed. Pressing MENU/OK cancels the print order; a new print order must be created as described above.

instax SHARE Printers
Print pictures from your digital camera to instax SHARE printers.
Establishing a Connection
Select CONNECTION SETTING > instax PRINTER CONNECTION SETTING (117) and enter the instax SHARE printer name (SSID) and password.

The Printer Name (SSID) and Password
The printer name (SSID) can be found on the bottom of the printer; the default password is "1111". If you have already chosen a different password to print from a smartphone, enter that password instead.

PrintingPictures
1 Turn the printer on.

2 Select ☑ PLAY BACK MENU > instax PRINT-ER PRINT (☐ 101). The camera will connect to the printer.

To print a frame from a burst sequence, display the frame before selecting instax PRINTER PRINT.
3 Use the selector to display the picture you want to print, then press MENU/OK.

Pictures taken with other cameras can not be printed.
The area printed is smaller than the area visible in the LCD monitor.
4 The picture will be sent to the printer and printing will start.

Viewing Pictures on TV
To show pictures to a group, connect the camera to a TV using an HDMI cable (available separately from third-party suppliers; note that the TV can only be used for playback, not shooting).
1 Turn the camera off.
2 Connect the cable as shown below.

① Use an HDMI cable no more than 1.5 m (4.9 ft.) long.
Be sure the connectors are fully inserted.
3 Tune the television to the HDMI input channel. See the documentation supplied with the television for details.
4 Turn the camera on and press ▶ button. The camera monitor turns off and pictures and movies are played back on the TV. Note that the camera volume controls have no effect on sounds played on the TV; use the television volume controls to adjust the volume.
The USB cable can not be used while an HDMI cable is connected.
Some televisions may briefly display a black screen when movie playback begins.
Technical Notes
OptionalAccessories
The camera supports a wide range of accessories from FUJIFILM and other manufacturers.
Accessories from FUJIFILM
The following optional accessories are available from FUJIFILM. For the latest information on the accessories available in your region, check with your local FUJIFILM representative or visit http://www.fujifilm.com/products/digital_cameras/index.html.
Rechargeable Li-ion batteries
NP-W126: Additional large-capacity NP-W126 rechargeable batteries can be purchased as required.

Battery chargers
BC-W126: Replacement battery chargers can be purchased as required. At +20°C/+68°F, the BC-W126 charges an NP-W126 in about 150 minutes.

AC power adapters
AC-9V (requires CP-W126 DC coupler): Use for extended shooting and playback or when copying pictures to a computer.
DCcouplers
CP-W126: Connect the AC-9V to the camera.
Remote releases
RR-90: Use to reduce camera shake or keep the shutter open during a time exposure.

Optional Accessories
Stereo microphones
| MIC-ST1: An external microphone for movie recording. |

FUJINONlenses
| XF-series lenses: Interchangeable lenses for use exclusively with the FUJIFILM X-mount. |

| XC-series lenses: Interchangeable lenses for use exclusively with the FUJIFILM X-mount. |

Shoe-mounted flash units
| EF-20: This clip-on flash unit (powered by two AA batteries) has a Guide Number of 20/65 (ISO 100, m/ft.) and supports TTL flash control. The flash head can be rotated upwards 90° for bounce lighting. |

| EF-42: This clip-on flash unit (powered by four AA batteries) has a Guide Number of 42/137 (ISO 100, m/ft.) and supports TTL flash control and auto power zoom in the range 24–105 mm (35 mm format equivalent). The flash head can be rotated 90° up, 180° left, or 120° right for bounce lighting. |

| EF-X20: This clip-on flash unit has a Guide Number of 20/65 (ISO 100, m/ft.). |

Grips
MHG-XPRO2: Features an improved grip. Batteries and memory cards can be removed with the grip in place, and the grip is equipped with a rail for quick-shoe camera mounts. The tripod mount can be aligned with the lens optical axis.
Leather cases
BLC-XPRO2: This case combines practicality with the luxury of leather and comes with a cloth that can be used to wrap the camera before putting it in the case and on other occasions. Pictures can be taken and batteries inserted or removed with the camera still in its case.
Grip belt
GB-001: GB-001 enhances the camera's hold, allowing users to carry the camera firmly with just one hand.
Macro extension tubes
MCEX-11/16: Attach between the camera and the lens to shoot at high reproduction ratios.
Protective filters
PRF-39/PRF-43/PRF-52/PRF-58/PRF-62/PRF-67/PRF-72/PRF-77: Use to protect the lens.
Teleconverters
XF1.4X TC WR: Increases the focal length of the lens by about 1.4x.
Mount adapters
FUJIFILM M MOUNT ADAPTER: Allows the camera to be used with a wide selection of M-mount lenses.
Front lens caps
FLCP-39/FLCP-43/FLCP-52/FLCP-58/FLCP-62/FLCP-67/FLCP-72/FLCP-72 II/FLCP-77: Protect the front lens element when the lens is not in use.
Rear lens caps
RLCP-001: Protect the rear lens element when the lens is not attached to the camera.
Body caps
BCP-001: Cover the camera lens mount when no lens is attached.
instax SHARE printers
SP-1: Connect via wireless LAN to print pictures on instax fi lm.
Connecting the Camera to Other Devices
![graph TD A["Remote Shutter Release"] --> B["RR-90 remote release*"] C["External Microphones"] --> D["MIC-ST1 stereo microphone*"] E["Flash Photography"] --> F["EF-20 shoe mount fl ash*"] E --> G["EF-42 shoe mount fl ash"] E --> H["EF-X20 shoe mount fl ash*"] I["Printing"] --> J["SP-1 instax SHARE pr…](/content/2026/06/1275348/images/ece85bfea7f788f990b678a8f2150d7cbb7f628b4a65f47d81d44164f8b112eb.jpg)
Caring for the Camera
To ensure continued enjoyment of the product, observe the following precautions.
Use and Storage Precautions
If the camera will not be used for an extended period, remove the battery and memory card. Do not store or use the camera in locations that are:
• exposed to rain, steam, or smoke
• very humid or extremely dusty
- exposed to direct sunlight or very high temperatures, such as in a closed vehicle on a very hot day
• extremely cold
- subject to strong vibration
- exposed to strong magnetic fields, such as near a broadcasting antenna, power line, radar emitter, motor, transformer, or magnet
- in contact with volatile chemicals such as pesticides
- in contact with rubber or vinyl products
Water and Sand
Exposure to water and sand can also damage the camera and its internal circuitry and mechanisms. When using the camera at the beach or seaside, avoid exposing the camera to water or sand. Do not place the camera on a wet surface.
Condensation
Sudden increases in temperature, such as occur when entering a heated building on a cold day, can cause condensation inside the camera. If this occurs, turn the camera off and wait an hour before turning it on again. If condensation forms on the memory card, remove the card and wait for the condensation to dissipate.
Traveling
Keep the camera in your carry-on baggage. Checked baggage may suffer violent shocks that could damage the camera.
Cleaning the Image Sensor
Multiple photographs marred by spots or blotches in identical locations may indicate the presence of dust on the camera image sensor. Clean the sensor using ✅ USER SETTING > SENSOR CLEANING (108); if the problem persists, you can clean the sensor manually as described below. Note that there will be a charge to repair or replace the image sensor if it is damaged during cleaning.
1 Use a blower (not a brush) to remove dust from the sensor.

① Do not use a brush or blower brush. Failure to observe this precaution could damage the sensor.
2 Check whether the dust has been successfully removed.
◆ Repeat Steps 1 and 2 as necessary.
3 Replace the body cap or lens.
Troubleshooting
Problems and Solutions
■ Power and Battery
| Problem | Solution |
| The camera does not turn on. | The battery is exhausted: Charge the battery (19) or insert a fully-charged spare battery (20).The battery is inserted incorrectly: Reinsert in the correct orientation (20).The battery-chamber cover is not latched: Latch the battery-chamber cover (20). |
| The monitor does not turn on. | The monitor may not turn on if the camera is turned off and then on again very quickly. Press the shutter button halfway to activate the monitor. |
| The battery runs down quickly. | The battery is cold: Warm the battery by placing it in a pocket or other warm place and reinsert it in the camera immediately before taking a picture.There is dirt on the battery terminals: Clean the terminals with a soft, dry cloth.ON is selected for AF/MF SETTING > PRE-AF: Turn PRE-AF off (91).The battery has been charged many times: The battery has reached the end of its charging life. Purchase a new battery. |
| The camera turns off suddenly. | The battery is exhausted: Charge the battery (19) or insert a fully-charged spare battery (20). |
| Charging does not start. | Reinsert the battery in the correct orientation and make sure that the charger is plugged in (19). |
| Charging is slow. | Charge the battery at room temperature (v). |
| The charging lamp blinks, but the battery does not charge. | There is dirt on the battery terminals: Clean the terminals with a soft, dry cloth.The battery has been charged many times: The battery has reached the end of its charging life. Purchase a new battery. If the battery still fails to charge, contact your FUJIFILM dealer. |
■ Menus and Displays
| Problem | Solution |
| Display is not in English. | Select ENGLISH for ✅ USER SETTING> 言語/LANG. (回 27,108). |
■ Shooting
| Problem | Solution |
| No picture is taken when the shutter button is pressed. | The memory card is full: Insert a new memory card or delete pictures (22, 43).The memory card is not formatted: Format the memory card (107).There is dirt on the memory card contacts: Clean the contacts with a soft, dry cloth.The memory card is damaged: Insert a new memory card (22).The battery is exhausted: Charge the battery (19) or insert a fully-charged spare battery (20).The camera has turned off automaticallyTurn the camera on (25). |
| Mottling ("noise") appears in the monitor or view-fi nder when the shutter button is pressed halfway. | Gain is increased to aid composition when the subject is poorly lit and aperture is stopped down, which may result in noticeable mottling when images are previewed in the displays. Images taken with the camera are unaffected. |
| The camera does not focus. | The subject is not suited to autofocus: Use focus lock (76) or manual focus (63). |
| Intelligent Face Detection is not available. | Intelligent Face Detection is not available in the current shooting mode: Choose a different shooting mode (153). |
| No face is detected. | The subject's face is obscured by sunglasses, a hat, long hair, or other objects: Remove the obstructions.The subject's face occupies only a small area of the frame: Change the composition so that the subject's face occupies a larger area of the frame (92).The subject's head is tilted or horizontal: Ask the subject to hold their head straight.The camera is tilted: Keep the camera level.The subject's face is poorly lit: Shoot in bright light. |
| Wrong subject is selected. | The selected subject is closer to the center of the frame than the main subject. Recompose the picture or turn face detection off and frame the picture using focus lock (76). |
| The flash does not fire. | The flash can not be used at current settings See the list of the settings that can be used with the flash 153).The battery is exhausted: Charge the battery ( 19) or insert a fully-charged spare battery ( 20). |
| The flash does not fully light the subject. | The subject is not in range of the flash Position the subject in range of the flash.The flash window is obstructed Hold the camera correctly.Shutter speed is faster than 1/250 s: Choose a slower shutter speed ( 36, 38, 79). |
| Pictures are blurred. | The lens is dirty: Clean the lens ( xi).The lens is blocked: Keep objects away from the lens.! AF is displayed during shooting and the focus frame is displayed in red: Check focus before shooting ( 75). |
| Pictures are mottled. | Shutter speed is slow and the ambient temperature is high: This is normal and does not indicate a malfunction.Pixel mapping is required: Perform pixel mapping using IMAGE QUALITY SETTING > PIXEL MAPPING ( 90).The camera has been used continuously at high temperatures or a temperature warning is displayed: Turn the camera off and wait for it to cool down. |
Problems and Solutions
■ Playback
| Problem | Solution |
| Pictures are grainy. | The pictures were taken with a different make or model of camera. |
| Playback zoom is unavailable. | The pictures were created using RESIZE or with a different make or model of camera. |
| No sound in movie playback. | ·Playback volume is too low: Adjust playback volume (46, 109). · The microphone was obstructed: Hold the camera correctly during recording (2, 44). · The speaker is obstructed: Hold the camera correctly during playback (2, 46). |
| Selected pictures are not deleted. | Some of the pictures selected for deletion are protected. Remove protection using the device with which it was originally applied (103). |
| File numbering is unexpectedly reset. | The battery-chamber cover was opened while the camera was on. Turn the camera off before opening the battery-chamber cover (20, 25). |
■ Connections/Miscellaneous
For additional information on troubleshooting wireless connections, visit:
http://faq.fujifilm.com/digitalcamera/faq_product.html?pid=X
| Problem | Solution |
| Problem connecting or uploading pictures to smartphone. | The smartphone is too far away: Move the devices closer.Nearby devices are causing radio interference: Move the camera and smartphone away from microwave ovens or cordless phones. |
| Can not upload images. | The smartphone is connected to another device: The smartphone and camera can connect to only one device at a time. End the connection and try again.There are several smartphones in the vicinity: Try connecting again. The presence of multiple smartphones can make connection difficult.The current image is a movie or was created on another device and can not be uploaded to a smartphone. |
| Smartphone will not display pictures. | Select ON for CONNECTION SETTING > WIRELESS SETTING > RESIZE IMAGE FOR SMARTPHONE 3M. Selecting OFF increases upload times for larger images; in addition, some phones may not display images over a certain size. |
| No picture or sound on TV. | The camera is not properly connected: Connect the camera properly (130). Note that once the camera is connected, pictures will be displayed on the TV instead of in the camera monitor.Input on the television is set to "TV": Set input to "HDMI".The volume on the TV is too low: Use the controls on the television to adjust the volume. |
| The computer does not recognize the camera. | Be sure the camera and computer are correctly connected (124). |
| Can not transfer RAW or JPEG files to computer. | Use MyFinePix Studio to transfer pictures (Windows only; 123). |
| The camera is unresponsive. | Temporary camera malfunction: Remove and reinsert the battery (20).The battery is exhausted: Charge the battery (19) or insert a fully-charged spare battery (20).The camera is connected to a wireless LAN: End the connection. |
| The camera does not function as expected. | Remove and reinsert the battery (20). If the problem persists, contact your FUJIFILM dealer. |
| No sound. | Adjust the volume (109). |
Warning Messages and Displays
The following warnings appear in the display.
| Warning | Description |
| (red) | Low battery. Charge the battery (19) or insert a fully-charged spare battery (20). |
| (blinks red) | Battery exhausted. Charge the battery (19) or insert a fully-charged spare battery (20). |
| !AF(displayed in red with red focus frame) | The camera can not focus. Use focus lock to focus on another subject at the same distance, then recompose the picture (76). |
| Aperture or shutter speed displayed in red | The subject is too bright or too dark and the picture will be over- or under-exposed. Use the flash for additional lighting when taking photographs of poorly-lit subjects (78). |
| FOCUS ERROR | Camera malfunction. Turn the camera off and then on again. If the message persists, contact a FUJIFILM dealer. |
| TURN OFF THE CAMERA AND TURN ON AGAIN | |
| LENS CONTROL ERROR | |
| LENS ERROR | Turn the camera off, remove the lens, and clean the mounting surfaces, then replace the lens and turn the camera on. If the problem persists, contact a FUJIFILM dealer. |
| BUSY | The memory card is incorrectly formatted. Use the camera to format the card (107). |
| CARD NOT INITIALIZED | The memory card is not formatted or the memory card has been formatted in a computer or other device: Format the memory card using USER SETTING >FORMAT(107).The memory card contacts require cleaning: Clean the contacts with a soft, dry cloth. If the message is repeated, format the card (107). If the message persists, replace the card.Camera malfunction: Contact a FUJIFILM dealer. |
| PROTECTED CARD | The memory card is locked. Unlock the card. |
| CARD ERROR | The memory card is not formatted for use in the camera: Format the card (107).The memory card contacts require cleaning or the memory card is damaged: Clean the contacts with a soft, dry cloth. If the message is repeated, format the card (107). If the message persists, replace the card.Incompatible memory card: Use a compatible card (24).Camera malfunction: Contact a FUJIFILM dealer. |
| SD MEMORY FULL | The memory card is full and pictures can not be recorded. Delete pictures (43) or insert a memory card with more free space (22). |
| NO CARD | The shutter can only be released when a memory card is inserted. Insert a memory card. |
| WRITE ERROR | Memory card error or connection error: Reinsert the card or turn the camera off and then on again. If the message persists, contact a FUJIFILM dealer.Not enough memory remaining to record additional pictures: Delete pictures (43) or insert a memory card with more free space (22).The memory card is not formatted: Format the memory card (107). |
| READ ERROR | The file is corrupt or was not created with the camera The file can not be viewed.The memory card contacts require cleaning: Clean the contacts with a soft, dry cloth. If the message is repeated, format the card (107). If the message persists, replace the card.Camera malfunction: Contact a FUJIFILM dealer. |
| FRAME NO. FULL | The camera has run out of frame numbers (current frame number is 999-9999). Format the memory card and select RENEW for SAVE DATA SETTING>FRAME NO.. Take a picture to reset frame numbering to 100-0001, then select CONTINUOUS for FRAME NO.. |
Warning Messages and Display
| Warning | Description |
| PROTECTED FRAME | An attempt was made to delete or rotate to a protected picture. Remove protection and try again (103). |
| CAN NOT CROP | The picture is damaged or was not created with the camera. |
| CANNOT EXECUTE | Red-eye removal can not be applied to pictures created with other devices. |
| CANNOT EXECUTE | Red-eye removal can not be applied to movies. |
| CAN NOT ROTATE | The selected picture can not be rotated. |
| CAN NOT ROTATE | Movies can not be rotated. |
| DPOF FILE ERROR | The DPOF print order on the current memory card contains more than 999 images. Copy the pictures to a computer and create a new print order. |
| CAN NOT SET DPOF | The picture can not be printed using DPOF. |
| CAN NOT SET DPOF | Movies can not be printed using DPOF. |
| ! (yellow) | Turn the camera off and wait for it to cool. Mottling may increase in pictures taken when this warning is displayed. |
| ! (red) | Turn the camera off and wait for it to cool. Display quality and burst rate will drop, and mottling may increase in pictures taken when this warning is displayed. |
Appendix
Memory Card Capacity
The following table shows the recording time or number of pictures available at different image sizes. All figures are approximate; fi le size varies with the scene recorded, producing wide variations in the number of fi les that can be stored. The number of exposures or length remaining may not diminish at an even rate.
| Capacity | 8 GB | 16 GB | |||
| FINE | NORMAL | FINE | NORMAL | ||
| Photographs | L 3:2 | 540 | 800 | 1110 | 1660 |
| RAW (UNCOMPRESSED) | 150 | 320 | |||
| RAW (LOSSLESS COMPRESSED) | 300 | 630 | |||
| Movies1 | HD 1080/60 P2 HD 1080/50 P2 HD 1080/30 P2 HD 1080/25 P2 HD 1080/24 P2 | 26 min. | 54 min. | ||
| HD 720/60 P3 HD 720/50 P3 HD 720/30 P3 HD 720/25 P3 HD 720/24 P3 | 51 min. | 105 min. | |||
1 Use a UHS speed class 1 card or better.
2 Individual movies can not exceed 14 minutes in length.
3 Individual movies can not exceed 28 minutes in length.
Links
For more information on FUJIFILM digital camera, visit the websites listed below.
FUJIFILM X-Pro2 Product Information
Optional accessories and support information can be found on the following website.

Firmware Updates
Updates to product fi rmware may result in changes not described in the manual. For more information, visit:
http://www.fujifilm.com/support/digital_cameras/software/fw_table.html

Free FUJIFILM Apps
FUJIFILM apps give you more opportunities to enjoy your pictures on smartphones, tablets, and computers.
http://fujifilm-dsc.com/


For the latest version of MyFinePix Studio, visit:
http://fujifilm-dsc.com/mfs/

For the latest version of RAW FILE CONVERTER, visit:
http://fujifilm-dsc.com/rfc/

Specifications
| System | |||
| Model | FUJIFILM X-Pro2 digital camera | ||
| Eff ective pixels | Approx. 24.3 million | ||
| Image sensor | 23.5 mm × 15.6 mm (APS-C), X-Trans CMOS III sensor with primary color filter | ||
| Storage media | FUJIFILM-recommended SD/SDHC/SDXC memory cards | ||
| Memory card slots | Two SD memory card slot | ||
| File system | Compliant with Design Rule for Camera File System (DCF), Exif 2.3, and Digital Print Order Format (DPOF) | ||
| File format | Still pictures: Exif 2.3 JPEG (compressed); RAW (original RAF format, uncompressed or compressed using a lossless algorithm; special purpose software required); RAW+JPEG availableMovies: H.264 standard with stereo sound (MOV) | ||
| Image size | L 3:2: 6,000 × 4,000M 3:2: 4,240 × 2,832S 3:2: 3,008 × 2,000 | L 16:9: 6,000 × 3,376M 16:9: 4,240 × 2,384S 16:9: 3,008 × 1,688 | L 1:1: 4,000 × 4,000M 1:1: 2,832 × 2,832S 1:1: 2,000 × 2,000 |
| Lens mount | FUJIFILM X mount | ||
| Sensitivity | Standard output sensitivity equivalent to ISO 200 – 12800; AUTO; extended output sensitivity equivalent to ISO 100, 25600, or 51200 | ||
| Metering | 256-segment through-the-lens (TTL) metering; MULTI, SPOT, AVERAGE, CENTER WEIGHTED | ||
| Exposure control | Programmed AE (with program shift); shutter-priority AE; aperture-priority AE; manual exposure | ||
| Exposure compensation | -5 EV – +5 EV in increments of γ3 EV | ||
| Shutter speed | MECHANICAL SHUTTERP mode4 sec. to γ8,000 sec.Bulb Max. 60 min.ELECTRONIC SHUTTERP,S,A,and M modes: 1 sec. to γ32,000 sec.Bulb Fixed at 1 sec.MECHANICAL + ELECTRONICP mode4 sec. to γ32,000 sec.Bulb Max. 60 min. | ||
Specifications
| System | |||
| Continuous | Mode | Frame rate (fps) | Frames per burst |
| 8.0 fps | 8.0 | Up to approximately 53 | |
| 3.0 fps | 3.0 | Up to approximately 62 | |
| The frame rate and number of frames per burst may vary depending on the type of memory card used. The fi gures above are for UHS speed class 1 cards.The frame rate varies with shooting conditions and the number of images recorded. | |||
| Focus | Mode: Single or continuous AF; manual focus with focus ringFocus-area selection: SINGLE POINT, ZONE, WIDE/TRACKINGAutofocus system: Intelligent hybrid AF (TTL contrast-detect/phase-detection AF) with AF-assist illuminator | ||
| White balance | Custom 1, Custom 2, Custom 3, color temperature selection, auto, direct sunlight, shade, daylight fluorescent, warm white fl uorescent, cool white fl uorescent, incandescent, underwater | ||
| Self-timer | Off, 2 sec., 10 sec. | ||
| Flash | Accessory shoe with TTL contacts and sync contact (X contact) that supports sync speeds as fast as 1/250 s | ||
| Mode | Auto, fi ll fl ash, off, slow sync, rear-curtain sync, commande(red-eye removal off); auto with red-eye removal, fi ll fl ash with red-eye removal, off, slow sync with red-eye removal, rear-curtain sync with red-eye removal, commander(red-eye removal on) | ||
| Hot shoe | Accessory shoe with TTL contacts | ||
| Sync terminal | Provided | ||
| Hybrid viewfi nder | Optical viewfi nder (OVF)Reverse Galilean viewfi nder with electronic bright frame display and approx. 0.36×/0.6× magnifi cation; frame coverage approx. 92%Electronic viewfi nder (EVF) 0.48-in., 2,360k-dot color LCD viewfi nder with diopter adjustment (-4 to +2 m); magnifi cation 0.59× with 50 mm lens (35 mm format equivalent) at infi nity and diopter set to -1.0 m diagonal angle of view approximately 29.1° (horizontal angle of view approximately 24.4°); eye point approx. 16 mm | ||
| LCD monitor | Fixed 3.0-in/7.6 cm, 1620k-dot color LCD monitor | ||
System
| Movies | FULLHD 1080/60P: Frame size 1,920 × 1,080 (1080p); 60 fps; stereo soundFULLHD 1080/50P: Frame size 1,920 × 1,080 (1080p); 50 fps; stereo soundFULLHD 1080/30P: Frame size 1,920 × 1,080 (1080p); 30 fps; stereo soundFULLHD 1080/25P: Frame size 1,920 × 1,080 (1080p); 25 fps; stereo soundFULLHD 1080/24P: Frame size 1,920 × 1,080 (1080p); 24 fps; stereo soundHD 720/60P: Frame size 1,280 × 720 (720p); 60 fps; stereo soundHD 720/50P: Frame size 1,280 × 720 (720p); 50 fps; stereo soundHD 720/30P: Frame size 1,280 × 720 (720p); 30 fps; stereo soundHD 720/25P: Frame size 1,280 × 720 (720p); 25 fps; stereo soundHD 720/24P: Frame size 1,280 × 720 (720p); 24 fps; stereo sound |
Input/output terminals
| HDMI output | Micro HDMI connector (Type D) |
| Digital input/output | Micro USB connector (USB 2.0 High-Speed) |
| Microphone/remote release connector | 2.5 mm mini-stereo jack |
Power supply/other
| Power supply | NP-W126 rechargeable battery | |||
| Battery life (approximate number of frames that can be taken with a fully-charged battery in mode P, XF 35 mm f/1.4 R lens) | Battery type NP-W126 (type supplied with camera)Approximate number of frames: | |||
| LCD | EVF | OVF | ||
| HIGH PERFORMANCE | 250 | 210 | 350 | |
| STANDARD | 280 | 250 | 350 | |
| ECONOMY | 330 | 330 | 380 | |
| CIPA standard, measured using battery supplied with camera and SD memory card. | ||||
| Note: Number of shots that can be taken with battery varies with battery charge level and will decline at low temperatures. | ||||
Specifications
| Power supply/other | |
| Camera size (W × H × D) | 140.5 mm × 82.8 mm × 45.9 mm (34.8 mm excluding projections, measured at thinnest part)/5.5 in. × 3.3 in. × 1.8 in. (1.4 in.) |
| Camera weight | Approx. 445 g/15.7 oz., excluding battery, accessories, and memory card |
| Shooting weight | Approx. 495 g/17.5 oz., including battery and memory card |
| Operating conditions | • Temperature: -10 °C to +40 °C/+32 °F to +104 °F • Humidity: 10% – 80% (no condensation) |
| Wireless transmitter | |
| Standards | IEEE 802.11b/g/n (standard wireless protocol) |
| Operating frequency | • U. S. A., Canada, Taiwan 2,412 MHz–2,462 MHz (11 channels)• Other countries: 2,412 MHz–2,472 MHz (13 channels) |
| Access protocols | Infrastructure |
| NP-W126 rechargeable battery | |
| Nominal voltage | 7.2V DC |
| Nominal capacity | 1,260 mAh |
| Operating temperature | 0 °C to +40 °C/+32 °F to +104 °F |
| Dimensions (W × H × D) | 36.4 mm × 47.1 mm × 15.7 mm/1.4 in. × 1.9 in. × 0.6 in. |
| Weight | Approx. 47 g/1.7 oz. |
| BC-W126 battery charger | |
| Rated input | 100 V – 240 V AC, 50/60 Hz |
| Input capacity | 13 – 21 VA |
| Rated output | 8.4 V DC, 0.6 A |
| Supported batteries | NP-W126 rechargeable batteries |
| Chargingtime | Approx. 150 minutes (+20 °C/+68 °F) |
| Operatingtemperature | 5 °C to +40 °C/+41 °F to +104 °F |
| Dimensions (W × H × D) | 65 mm × 91.5 mm × 28 mm/2.6 in. × 3.6 in. × 1.1 in., excluding projections |
| Weight | Approx. 77 g/2.7 oz., excluding battery |
Weight and dimensions vary with the country or region of sale. Labels, menus, and other displays may differ from those on the actual camera.
Specifications
Notices
- Specifications subject to change without notice; for the latest information, visit http://www.fujifilm.com/products/digital_cameras/index.html. FUJIFILM shall not be held liable for damages resulting from errors in this manual.
- Although the viewfinder and LCD monitor are manufactured using advanced high-precision technology, small bright points and anomalous colors may appear, particularly in the vicinity of text. This is normal for this type of LCD display and does not indicate a malfunction; images recorded with the camera are unaffected.
- Digital cameras may malfunction when exposed to strong radio interference (e.g., electric fields, static electricity, or line noise).
- Due to the type of lens used, some distortion may occur at the periphery of images. This is normal.
Restrictions on Camera Settings
The options available in each shooting mode are listed below. Some options may not be available for the items that are supported in any given mode, and function may be restricted depending on shooting conditions.
| Shooting mode/scene position | P | S | A | M | BKT | ||||||
| F | √ | √1 | √ | √ | √ | √ | √ | √ | √ | √ | |
| S.S. | √ | √ | √1 | √ | √ | √ | √ | √ | √1 | √ | |
| Program shift | √ | √ | √ | √ | √ | √7 | |||||
| Exposure compensation | √ | √ | √ | √5 | √ | √ | √ | √ | √2 | √ | |
| Focus mode | S | √ | √ | √ | √ | √ | √ | √ | √1 | √ | √7 |
| C | √ | √ | √ | √ | √ | √ | √ | √ | √1 | ||
| M | √ | √ | √ | √ | √ | √ | √ | √ | √7 | ||
| Sensitivity | AUTO | √ | √ | √ | √ | √ | √ | √ | √ | √ | √ |
| H (51200) /H (25600) | √ | √ | √ | √ | √ | √3 | √ | √ | |||
| 12800 – 1000 | √ | √ | √ | √ | √ | √ | √ | √5 | √ | ||
| 800 | √ | √ | √ | √ | √ | √ | √ | √ | √ | √ | |
| 640 – 200 | √ | √ | √ | √ | √ | √3 | √ | √ | √ | √ | |
| L (100) | √ | √ | √ | √ | √ | √3 | √ | √ | |||
| IMAGE SIZE | √ | √ | √ | √ | √ | √ | √ | √ | √7 | ||
| M | √ | √ | √ | √ | √ | √ | √ | √ | √7 | ||
| S | √ | √ | √ | √ | √ | √ | √ | √ | √7 | ||
| IMAGE QUALITY | FINE/NORMAL | √ | √ | √ | √ | √ | √ | √ | √ | √7 | |
| RAW | √ | √ | √ | √ | √ | √3 | √7 | ||||
| FILM SIMULATION | √ | √ | √ | √ | √ | √ | √ | √1 | √ | √ | |
| W/ W/ C | √ | √ | √ | √ | √ | √ | √ | √ | √ | ||
| N/ N | √ | √ | √ | √ | √ | √ | √ | √ | √ | ||
| W/ W/ W/ W | √ | √ | √ | √ | √ | √ | √ | √ | √ | ||
| W/ W/ W/ W | √ | √ | √ | √ | √ | √ | √ | √ | √ | ||
| W | √ | √ | √ | √ | √ | √ | √ | √ | √ | ||
| GRAIN EFFECT | √ | √ | √ | √ | √ | √ | √ | √7 | |||
Restrictions on Camera Settings
| Shooting mode/scene position | P | S | A | M | BKT | ||||||
| DYNAMIC RANGE | AUTO | √ | √ | √ | √ | √ | √ | √ | √ | √ | |
| #100/#200/#400 | √ | √ | √ | √ | √ | √ | √ | √ | √7 | ||
| WHITE BALANCE | √ | √ | √ | √ | √ | √ | √ | √1 | √ | √ | |
| HIGHLIGHT TONE | √ | √ | √ | √ | √ | √ | √ | √7 | |||
| SHADOW TONE | √ | √ | √ | √ | √ | √ | √ | √7 | |||
| COLOR | √ | √ | √ | √ | √ | √ | √ | √7 | |||
| SHARPNESS | √ | √ | √ | √ | √ | √ | √ | √7 | |||
| NOISE REDUCTION | √ | √ | √ | √ | √ | √ | √ | √7 | |||
| LONG EXPOSURE NR | √ | √ | √ | √ | √ | √ | √ | √ | √7 | ||
| LENS MODULATION OPTIMIZER | √ | √ | √ | √ | √ | √ | √ | √ | √7 | ||
| COLOR SPACE | √ | √ | √ | √ | √ | √ | √ | √ | √5 | √7 | |
| SELECT CUSTOM SETTINGEDIT/SAVE CUSTOM SETTING | √ | √ | √ | √ | √ | √ | √ | ||||
| AF MODE | √ | √ | √ | √ | √ | √ | √ | √ | √1 | ||
| √ | √ | √ | √ | √ | √ | √ | √ | √1 | |||
| √ | √ | √ | √ | √ | √ | √ | √ | ||||
| AF ILLUMINATOR | √ | √ | √ | √ | √ | √ | √ | √ | √7 | ||
| FACE DETECTION | √ | √ | √ | √ | √ | √ | √ | √ | √ | ||
| EYE DETECTION AF | √ | √ | √ | √ | √ | √ | √ | √ | |||
| AF+MF | √ | √ | √ | √ | √ | √ | √ | ||||
| MF ASSIST | STANDARD | √ | √ | √ | √ | √ | √ | √ | |||
| DIGITAL SPLIT IMAGE | √ | √ | √ | √ | √ | √ | |||||
| FOCUS PEAK HIGHLIGHT | √ | √ | √ | √ | √ | √ | |||||
| FOCUS CHECK | √ | √ | √ | √ | √ | √ | √ | ||||
| SELF-TIMER | √ | √ | √ | √ | √ | √ | √ | √ | √ | ||
| PHOTOMETRY | √ | √ | √ | √ | √ | √ | √ | √1 | √1 | √7 | |
| √ | √ | √ | √ | √ | √ | √ | √ | ||||
| √ | √ | √ | √ | √ | √ | √ | √7 | ||||
| √ | √ | √ | √ | √ | √ | √ | √7 | ||||
Restrictions on Camera Settings
| Shooting mode/scene position | P | S | A | M | BKT | AD | ||||||
| SHUTTER TYPE | MS | √ | √ | √ | √ | √ | √ | √ | √ | √7 | ||
| MS+ES | √ | √ | √ | √ | √ | √ | √ | √ | √7 | |||
| ES | √ | √ | √ | √ | √ | √ | √ | √ | √1 | √7 | ||
| IS MODE | (3)1 | √ | √ | √ | √ | √ | √ | √ | √ | √ | √7 | |
| (3)2 | √ | √ | √ | √ | √ | √ | √ | √ | √ | √7 | ||
| OFF | √ | √ | √ | √ | √ | √ | √ | √ | √ | √7 | ||
| FLASH MODE | RED EYE REMOVAL: OFF | AUTO | √ | 3 | 3 | √ | √ | √ | ||||
| √ | √ | √ | √ | 3 | 3 | √ | √ | √ | ||||
| Slow | √ | √ | 3 | 3 | √ | √ | √ | |||||
| DREF | √ | √ | √ | √ | 3 | 3 | √ | √ | √ | |||
| GO | √ | √ | √ | √ | 3 | 3 | √ | √ | √ | |||
| 4 | √ | √ | √ | √ | √ | √ | √ | √ | √ | |||
| RED EYE REMOVAL: ON | AUTO | √ | √ | |||||||||
| √ | √ | √ | √ | √ | ||||||||
| Slow | √ | √ | √ | |||||||||
| REFR | √ | √ | √ | √ | √ | |||||||
| GO | √ | √ | √ | √ | √ | |||||||
| 4 | √ | √ | √ | √ | √ | √ | √ | √ | √ | |||
| FLASH COMPENSATION | √ | √ | √ | √ | √ | √ | √7 | |||||
| RED EYE REMOVAL | √ | √ | √ | √ | ||||||||
| PREVIEW EXP./WB IN MANUAL MODE | √ | √ | √ | √ | √ | √7 | ||||||
Restrictions on Camera Settings
| Shooting mode/scene position | P | S | A | M | BKT | ||||||
| DISP. CUSTOM SETTING | FRAMING GUIDELINE | √ | √ | √ | √ | √ | √ | √ | √ | ||
| ELECTRONIC LEVEL | √ | √ | √ | √ | √ | √ | √ | √ | √ | ||
| FOCUS FRAME | √ | √ | √ | √ | √ | √ | √ | √ | |||
| AF DISTANCE INDICATOR | √ | √ | √ | √ | √ | √ | √ | √ | |||
| MF DISTANCE INDICATOR | √ | √ | √ | √ | √ | √ | √ | √ | |||
| HISTOGRAM | √ | √ | √ | √ | √ | √ | √ | ||||
| SHOOTING MODE | √ | √ | √ | √ | √ | √ | √ | √ | |||
| APERTURE/S-SPEED/ISO | √ | √ | √ | √ | √ | √ | √ | √ | |||
| INFORMATION BACKGROUND | √ | √ | √ | √ | √ | √ | √ | √ | √ | ||
| Expo. Comp. (Digit) | √ | √ | √ | √ | √ | √ | √ | √ | √ | ||
| Expo. Comp. (Scale) | √ | √ | √ | √ | √ | √ | √ | √ | √ | ||
| FOCUS MODE | √ | √ | √ | √ | √ | √ | √ | ||||
| PHOTOMETRY | √ | √ | √ | √ | √ | √ | √ | ||||
| SHUTTER TYPE | √ | √ | √ | √ | √ | √ | √ | √ | |||
| FLASH | √ | √ | √ | √ | √ | √ | √ | √ | |||
| CONTINUOUS MODE | √ | √ | √ | √ | √ | √ | |||||
| DUAL IS MODE | √ | √ | √ | √ | √ | √ | √ | √ | √ | ||
| WHITE BALANCE | √ | √ | √ | √ | √ | √ | √ | √ | |||
| FILM SIMULATION | √ | √ | √ | √ | √ | √ | √ | √ | |||
| DYNAMIC RANGE | √ | √ | √ | √ | √ | √ | √ | √ | |||
| FRAMES REMAINING | √ | √ | √ | √ | √ | √ | √ | √ | |||
| IMAGE SIZE/QUALITY | √ | √ | √ | √ | √ | √ | √ | √ | |||
| MOVIE MODE & REC. TIME | √ | √ | √ | √ | √ | √ | √ | √ | √ | ||
| BATTERY LEVEL | √ | √ | √ | √ | √ | √ | √ | √ | √ | ||
| AF-LOCK MODE | AF-L | √ | √ | √ | √ | √ | √ | √ | √ | √? | |
| AE+AF | √ | √ | √ | √ | √ | √ | √ | √? | |||
1 Fixed automatically.
2 Restricted to range of ±2.0 EV during movie recording.
3 Options available vary with shooting mode.
4 A is not available.
5 Available only with auto ISO sensitivity.
6 sRGB selected automatically.
7 Still photography settings are used.
8 Wireless remote photography.
9 Maximum sensitivity for movies is ISO 6400.
Memo
FUJIFILM
FUJIFILM Corporation
http://www.fujifilm.com/products/digital_cameras/index.html
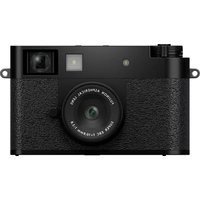
- FORYOURSAFETY
- IMPORTANT SAFETY INSTRUCTIONS
- INSTALLATION
- ANTENNAS
- USE
- SERVICE
- FOR YOUR SAFETY
- THE BATTERY AND POWER SUPPLY
- LI-ION BATTERIES
- NOTES ON THE BATTERY
- CHARGING THE BATTERY
- BATTERY LIFE
- STORAGE
- CAUTIONS: HANDLING THE BATTERY
- DISPOSAL
- AC POWER ADAPTERS (AVAILABLE SEPARATELY)
- USING THE CAMERA
- TAKE TEST SHOTS
- NOTES ON COPYRIGHT
- HANDLING
- LIQUID CRYSTAL
- TRADEMARK INFORMATION
- ELECTRICAL INTERFERENCE
- COLOR TELEVISION SYSTEMS
- EXIF PRINT (EXIF VERSION 2.3)
- IMPORTANT NOTICE: READ BEFORE USING THE SOFTWARE
- NOTICES
- FOR CUSTOMERS IN THE U.S.A
- TESTED TO COMPLY WITH FCC STANDARDS FOR HOME OR OFFICE USE
- FOR CUSTOMERS IN CANADA
- CAN ICES-3 (B)/NMB-3(B)
- DISPOSAL OF ELECTRICAL AND ELECTRONIC EQUIPMENT IN PRIVATE HOUSEHOLDS
- BE SURE TO READ THESE NOTES BEFORE USE
- SAFETY NOTES
- ABOUT THE ICONS
- WARNING
- CAUTION
- EUROPEAN UNION REGULATORY NOTICE
- CE
- WIRELESS NETWORK DEVICES: CAUTIONS
- 2.4DS/OF4
- ABOUT THIS MANUAL
- TABLE OF CONTENTS...... XIII
- TROUBLESHOOTING.... 137
- WARNING MESSAGES AND DISPLAYS 142
- RESTRICTIONS ON CAMERA SETTINGS...... 153
- MEMORY CARDS
- PRODUCTCARE
- PRODUCT FEATURES
- THE Q MENU (47)
- MY MENU" (100)
- THE FUNCTION BUTTONS (50)
- TABLE OF CONTENTS
- BEFORE YOU BEGIN
- FIRST STEPS
- BASIC PHOTOGRAPHY AND PLAYBACK
- BASIC MOVIE RECORDING AND PLAYBACK
- THE Q (QUICK MENU) BUTTON
- THE FN (FUNCTION) BUTTONS
- MORE ON PHOTOGRAPHY AND PLAYBACK
- MENUS
- CONNECTIONS
- TECHNICAL NOTES
- TROUBLESHOOTING
- APPENDIX
- SYMBOLS AND CONVENTIONS
- SUPPLIED ACCESSORIES
- PARTS OF THE CAMERA
- CONTROL LOCK
- THESELECTOR
- THE FOCUS STICK (FOCUS LEVER)
- THE SHUTTER-SPEED/ISO DIAL
- THE FRONT COMMAND DIAL
- THE REAR COMMAND DIAL
- FORMATTING MEMORY CARDS
- THE INDICATOR LAMP
- CAMERADISPLAYS
- PLAYBACK
- LENSES
- REMOVING THE CAPS
- ATTACHING THE HOOD
- LENSES WITH APERTURE RINGS
- THE APERTURE MODE SWITCH
- LENSES WITH NO APERTURE RINGS
- LENSES WITH O.I.S. SWITCHES
- MANUAL FOCUS LENSES
- THE DEPTH-OF-FIELD INDICATOR
- ATTACHING THE STRAP
- 1 OPEN A STRAP CLIP
- 2 PLACE THE STRAP CLIP ON AN EYELET
- 3 PASS THE CLIP THROUGH THE EYELET
- 4 ATTACH A PROTECTIVE COVER
- 5 INSERT THE STRAP
- 6 FASTEN THE STRAP
- ATTACHING A LENS
- 1 REMOVE THE BODY AND REAR CAPS
- 2 ATTACH THE LENS
- REMOVING LENSES
- LENSES AND OTHER OPTIONAL ACCESSORIES
- 1 PLACE THE BATTERY IN THE CHARGER
- 2 PLUG THE CHARGER IN
- 3 CHARGE THE BATTERY
- INSERTING THE BATTERY
- 1 OPEN THE BATTERY-CHAMBER COVER
- 2 INSERT THE BATTERY
- 3 CLOSE THE BATTERY-CHAMBER COVER
- REMOVING THE BATTERY
- ① BATTERIES
- INSERTING MEMORY CARDS
- 1 OPEN THE MEMORY CARD SLOT COVER
- 2 INSERT A MEMORY CARD
- 3 CLOSE THE MEMORY CARD SLOT COVER
- REMOVING MEMORY CARDS
- USING TWO CARDS
- MOVIES
- COMPATIBLE MEMORY CARDS
- ① MEMORY CARDS
- TURNING THE CAMERA ON AND OFF
- BATTERY LEVEL
- BASICSETUP
- 1 CHOOSE A LANGUAGE
- 2 SET THE DATE AND TIME
- CHANGING BASIC SETTINGS
- DISPLAYSETTINGS
- CHOOSING A DISPLAY
- THE EYE SENSOR
- THE VIEWFINDER SELECTOR
- DISPLAY SETTINGS
- THE HYBRID (EVF/OVF/ERF) VIEWFINDER
- BRIGHT FRAME SIMULATION
- THE VIEWFINDER DISPLAY
- FOCUSING THE VIEWFINDER
- ADJUSTING DISPLAY BRIGHTNESS
- THE DISP/BACK BUTTON
- CUSTOMIZING THE STANDARD DISPLAY
- VIRTUAL HORIZON
- VIEWFINDER/LCD MONITOR: PLAYBACK
- HISTOGRAMS
- PROGRAM AE (P)
- PROGRAM SHIFT
- SHUTTER-PRIORITY AE (S)
- APERTURE-PRIORITY AE (A)
- PREVIEWING DEPTH OF FIELD
- MANUAL EXPOSURE (M)
- EXPOSURE PREVIEW
- VIEWINGPICTURES
- VIEWING PICTURES FULL FRAME
- FAVORITES: RATING PICTURES
- TWO MEMORY CARDS
- VIEWING PHOTO INFORMATION
- ZOOMING IN ON THE FOCUS POINT
- PLAYBACKZOOM
- MULTI-FRAMEPLAYBACK
- DELETING PICTURES
- RECORDING MOVIES
- DEPTH OF FIELD
- USING AN EXTERNAL MICROPHONE
- VIEWINGMOVIES
- PLAYBACK SPEED
- USING THE Q BUTTON
- THE QUICK MENU DISPLAY
- VIEWING AND CHANGING SETTINGS
- EDITING THE QUICK MENU
- USING THE FUNCTION BUTTONS
- ASSIGNING ROLES TO THE FUNCTION BUTTONS
- DRIVEMODE
- BURST MODE (CONTINUOUS)
- FOCUS AND EXPOSURE
- BRACKETING
- ADVANCED FILTERS
- MULTIPLE EXPOSURES
- EXPOSURECOMPENSATION
- C (CUSTOM)
- CHOOSING AN EXPOSURE COMPENSATION VALUE
- SENSITIVITY
- METERING
- FILMSIMULATION
- WHITEBALANCE
- CUSTOM WHITE BALANCE
- K: COLOR TEMPERATURE
- FOCUSMODE
- FOCUS MODE
- THE FOCUS INDICATOR
- CHECKING FOCUS
- MFASSIST
- AUTOFOCUS OPTIONS (AF MODE)
- FOCUS-POINTSELECTION
- AVAILABLE FOCUS POINTS
- THE FOCUS POINT DISPLAY
- SINGLE POINT AF
- ZONEAF
- TRACKING (FOCUS MODE C ONLY)
- BURST MODE FOCUS-FRAME SELECTION
- LONGTIME-EXPOSURES(T/B)
- TIME (T)
- BULB (B)
- USING A REMOTE RELEASE
- THIRD-PARTY REMOTE RELEASES
- THESELF-TIMER
- INTERVALTIMERPHOTOGRAPHY
- FOCUSING AND TAKING PICTURES
- 1 FOCUS
- 2 SHOOT
- FOCUS/EXPOSURELOCK
- AUTOFOCUS
- FLASHPHOTOGRAPHY
- THE SYNC TERMINAL
- FLASH SYNC SPEED
- OPTIONAL FLASH UNITS
- FLASH MODE AND SHOOTING MODE
- RECORDING PICTURES IN RAW FORMAT
- THE FUNCTION BUTTONS
- CREATING JPEG COPIES OF RAW PICTURES
- SAVINGSETTINGS
- USING A MOUNT ADAPTER
- BRIGHT FRAME BRIGHTNESS
- LENS REGISTRATION
- CHOOSING A FOCAL LENGTH
- LENS MOUNT ADAPTOR SETTING MENU
- DISTORTION CORRECTION
- COLOR SHADING CORRECTION
- PERIPHERAL ILLUMINATION CORRECTION
- PHOTOBOOK ASSIST
- CREATING A PHOTOBOOK
- VIEWING PHOTOBOOKS
- EDITING AND DELETING PHOTOBOOKS
- PHOTOBOOKS
- USING THE MENUS: SHOOTING MODE
- USING THE SHOOTING MENU
- IMAGE QUALITY SETTING
- IMAGE SIZE
- ASPECT RATIO
- IMAGE QUALITY
- RAW RECORDING
- FILM SIMULATION
- GRAINEFFECT
- DYNAMIC RANGE
- WHITE BALANCE
- HIGHLIGHT TONE
- SHADOW TONE
- COLOR
- SHARPNESS
- NOISE REDUCTION
- LONG EXPOSURE NR
- COLOR SPACE
- PIXELMAPPING
- SELECT CUSTOM SETTING
- EDIT/SAVE CUSTOM SETTING
- AF MF AF/MF SETTING
- FOCUSAREA
- AFMODE
- NUMBER OF THE FOCUS POINTS
- PRE-AF
- AFILLUMINATOR
- FACE/EYE DETECTION SETTING
- AF+MF
- AF + MF FOCUS ZOOM
- MF ASSIST
- FOCUSCHECK
- INTERLOCK SPOT AE & FOCUS AREA
- INSTANT AF SETTING
- DEPTH-OF-FIELDSCALE
- RELEASE/FOCUS PRIORITY
- CORRECTED AF FRAME
- SHOOTING SETTING
- SELF-TIMER
- INTERVAL TIMER SHOOTING
- FILM SIMULATION BKT
- PHOTOMETRY
- SHUTTER TYPE
- IS MODE
- ISO AUTO SETTING
- MOUNT ADAPTOR SETTING
- WIRELESS COMMUNICATION
- FLASH SETTING
- FLASHMODE
- FLASHCOMPENSATION
- RED EYE REMOVAL
- MOVIE SETTING
- MOVIEMODE
- MIC LEVEL ADJUSTMENT
- MIC/REMOTERELEASE
- MY MYMENU
- USING THE MENUS: PLAYBACK MODE
- USING THE PLAYBACK MENU
- PLAY BACK MENU
- SWITCHSLOT
- RAWCONVERSION
- ERASE
- CROP
- RESIZE
- PROTECT
- IMAGE ROTATE
- COPY
- SLIDE SHOW
- PC AUTO SAVE
- PRINT ORDER (DPOF)
- INSTAX PRINTER PRINT
- DISP ASPECT
- THE SETUP MENU
- USING THE SETUP MENU
- SET UP MENU OPTIONS
- USER SETTING
- FORMAT
- DATE/TIME
- TIME DIFFERENCE
- 言語/LANG
- MY MENU SETTING
- SENSOR CLEANING
- RESET
- SOUND SETTING
- AF BEEP VOL
- SELF-TIMER BEEP VOL
- OPERATION VOL
- SHUTTER VOLUME
- SHUTTER SOUND
- PLAYBACKVOLUME
- SCREEN SETTING
- EVFBRIGHTNESS
- EVF COLOR
- LCDBRIGHTNESS
- LCD COLOR
- IMAGEDISP
- EVF AUTOROTATE DISPLAYS
- PREVIEW EXP./WB IN MANUAL MODE
- PREVIEW PIC. EFFECT
- FRAMINGGUIDELINE
- AUTOROTATEPB
- FOCUS SCALE UNITS
- DISP. CUSTOM SETTING
- BUTTON/DIAL SETTING
- AE-L/AF-L BUTTON SETTING
- AE/AF-LOCKMODE
- AF-LOCKMODE
- APERTURE SETTING
- POWER MANAGEMENT
- AUTO POWER OFF
- SAVE DATA SETTING
- FRAMENO
- SAVE ORG IMAGE
- EDIT FILE NAME
- CARD SLOT SETTING (STILL IMAGE)
- SWITCH SLOT (SEQUENTIAL)
- CONNECTION SETTING
- WIRELESS SETTINGS
- PC AUTO SAVE SETTING
- GEOTAGGINGSET-UP
- INSTAX PRINTER CONNECTION SETTING
- MY MENU
- EDITING "MY MENU
- FACTORY DEFAULTS
- WIRELESSTRANSFER
- WIRELESS CONNECTIONS: SMARTPHONES
- WIRELESS CONNECTIONS: COMPUTERS
- VIEWING PICTURES ON A COMPUTER
- WINDOWS
- MACINTOSH
- VIEWING RAW FILES
- CONNECTING THE CAMERA
- DISCONNECTING THE CAMERA
- CREATING A DPOF PRINT ORDER
- DPOF
- WITH DATE Ⓒ/WITHOUT DATE
- RESET ALL
- INSTAX SHARE PRINTERS
- ESTABLISHING A CONNECTION
- THE PRINTER NAME (SSID) AND PASSWORD
- PRINTINGPICTURES
- VIEWING PICTURES ON TV
- OPTIONALACCESSORIES
- ACCESSORIES FROM FUJIFILM
- RECHARGEABLE LI-ION BATTERIES
- BATTERY CHARGERS
- AC POWER ADAPTERS
- DCCOUPLERS
- REMOTE RELEASES
- OPTIONAL ACCESSORIES
- GRIPS
- LEATHER CASES
- GRIP BELT
- MACRO EXTENSION TUBES
- PROTECTIVE FILTERS
- TELECONVERTERS
- MOUNT ADAPTERS
- FRONT LENS CAPS
- REAR LENS CAPS
- BODY CAPS
- CARING FOR THE CAMERA
- USE AND STORAGE PRECAUTIONS
- WATER AND SAND
- CONDENSATION
- TRAVELING
- CLEANING THE IMAGE SENSOR
- PROBLEMS AND SOLUTIONS
- CONNECTIONS/MISCELLANEOUS
- WARNING MESSAGES AND DISPLAYS
- MEMORY CARD CAPACITY
- LINKS
- FUJIFILM X-PRO2 PRODUCT INFORMATION
- FIRMWARE UPDATES
- FREE FUJIFILM APPS
- SPECIFICATIONS
- RESTRICTIONS ON CAMERA SETTINGS
- MEMO
- FUJIFILM
Brand : FUJIFILM
Model : FinePix X-Pro2
Category : Camera