
TT401CD - DJ Equipment THOMSON - Free user manual and instructions
Find the device manual for free TT401CD THOMSON in PDF.


| Product Type | CD/Media DJ Player |
| Brand | Thomson |
| Model | TT401CD |
| Dimensions (W x H x D) | 482 x 132 x 280 mm |
| Weight | 5.2 kg |
| Power supply | 230 V AC, 50 Hz |
| Power consumption | 30 W |
| Supported audio formats | CD, CD-R, CD-RW, MP3 |
| Main functions | Play, Pause, Cue, Pitch (adjustable ±16%), Loop, Track search |
| Audio outputs | Stereo RCA, 6.35 mm jack (headphones) |
| Connectivity | Auxiliary input (3.5 mm jack) |
| Housing material | Metal |
| Operating temperature | 5°C to 35°C |
| Maintenance and cleaning | Use a soft, dry cloth. Do not use abrasive products or solvents. |
| Safety | Do not expose to moisture, dust or shocks. Unplug before cleaning. |
| Spare parts and repairability | Contact Thomson aftersales service for spare parts. Professional repair recommended. |
| Included accessories | Power cable, RCA cable, user manual |
| Warranty | 2 years |
Frequently Asked Questions - TT401CD THOMSON
User questions about TT401CD THOMSON
0 question about this device. Answer the ones you know or ask your own.
Ask a new question about this device
Download the instructions for your DJ Equipment in PDF format for free! Find your manual TT401CD - THOMSON and take your electronic device back in hand. On this page are published all the documents necessary for the use of your device. TT401CD by THOMSON.
USER MANUAL TT401CD THOMSON
natural_image
White portable CD or DVD machine with open lid and control panel (no visible text or symbols)MODED'EMPLOI
LISEZCOMPLÈTEMENTCEMANUELD'UTILISATIONAVANT
D'UTILISERCETAPPAREILETCONSERVEZCELIVRETPOUR
VOUSYRÉFÉRERULTÉRIEUREMENT.
Encodage vers USB
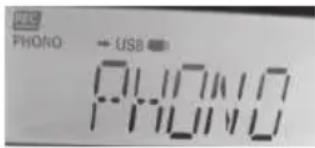
Encodage vers USB
natural_image
White portable vinyl record with open lid and control panel (no visible text or symbols)OPERATINGINSTRUCTIONS
PLEASEREADTHISUSERMANUALCAREFULLYBEFORE
OPERATINGTHISUNITANDRETAINFOR
FUTUREREFERENCE.
REV4
Important safety instructions
- Readtheseinstructions.
- Keeptheseinstructions.
- Heedallwarnings.
- Followallinstructions.
● Refer all servicing to qualified service personnel. - Do not expose the unit to dripping or splashing and make sure that no objects filled with liquids, such as vases, areplacedonit.
Class I appliances must be connected to the mains socket outlet with a protective-earth connection.
● The mains plug connects the device and should remain operable during use. - To disconnect the unit from the mains, the plug should be fully disconnected from the mains socket outlet. The mains plug should not be obstructed and should be easily accessible during use.
- When a power indicator light is on, it indicates the unit is connected to the mains supply. When the light is off, it indicates the unit is fully disconnected from the mains supply.
INFORMATION ABOUT BATTERIES (applicable only if batteries included)
- Polarity must be respected when inserting batteries.
Thebatteriesshouldbeinsertedinsuchawayastoavoidanyshortcircuit. - Donotmixusedandnewbatteries.
- Do not mix alkaline, standard (carbon-zinc) and rechargeable (nickel-cadmium) batteries.
- Do not expose the battery to excessive heat such as sunshine or fire.
- Remove the batteries when they have not been used for a long time.
- If the liquid contained in the batteries comes in contact with eyes or skin, immediately and carefully washtheaffectedareawithclearwaterandconsultadoctor.
● The product/remote control may contain a coin/button type battery:
WARNING
Do not ingest the battery. Chemical burn hazard. This product contains a coin/button cell battery. If the coin/button cell battery is swallowed, it can cause severe internal burns in just 2 hours and can lead to death. Keep new and used batteries away from children. If the battery compartment does not close securely, stop using the product and keep it away from children. If you think batteries might have been swallowed or placed inside any part of the body, seek immediate medical attention.
CAUTION
Dangerofexplosionifbatteryisincorrectlyreplaced.
Replace battery only with the same or equivalent type.

CAUTION RISK OF ELECTRIC SHOCK DO NOT OPEN

CAUTION: TO REDUCE THE RISK OF ELECTRIC SHOCK, DO NOT REMOVE COVER (OR BACK). NO USER SERVICEABLE PARTS INSIDE. REFER SERVICING TO QUALIFIED SERVICE PERSONNEL.

The lightning flash with arrowhead symbol, within an equilateral triangle, is intended to alert the user to the presence of un-insulated "dangerous voltage" within the product's enclosure that may be of sufficient magnitude to constitute a risk of electric shock to persons.

The exclamation point within an equilateral triangle is intended to alert the user to the presence of important operating and maintenance (servicing) instructions in the literature accompanying the appliance.
WARNING:
- TO REDUCE THE RISK OF FIRE OR ELECTIC SHOCK, DO NOT EXPOSE THIS APPLIANCE TO RAIN OR MOISTURE.
- To avoid any damage, don't force the cover over its foreseen amplitude.
CAUTION!

Visible and invisible laser radiation when open and interlocks defeated. Avoid exposure to beam.
Meaning of the "Dustbin" Symbol
Protect our environment: do not dispose of electrical equipment in the domestic waste.
Please return any electrical equipment that you will no longer use to the collection points provided for their disposal.
This helps avoid the potential effects of incorrect disposal on the environment and human health.
This will contribute to the recycling and other forms of reutilisation of electrical and electronic equipment.
Information concerning where the equipment can be disposed of can be obtained from your local authority.

natural_image
Symbol of a trash bin crossed out by two crossed lines, with no text or labels present.



TIMER SET
- Press TIMER SET two second, the LCD will be displayed 24 or 12 hours for setting, press CLOCK SET ▶▶▶ or to set time.
- Press TIMER SET two second again, the LCD will be displayed "00" for setting, press CLOCK SET ▶▶▶ or ◀◀◀ to set time, press TIMER SET to confirm the clock set.
LOCATION OF CONTROLS
MAIN UNIT

| 1. Turntable 18. Volume Control - Button | |
| 2. Speed Selector – 33, 45, 78 RPM 19. Volume Control + Button | |
| 3.. Auto Stop (ON/OFF) Selector 20. Open/Close Button | |
| 4. Tone Arm 21. Function button | |
| 5. 45 RPM Adaptor 22. On/Standby | |
| 6. Cue-lever (use this lever to lift the tone arm) 23. Dust Cover | |
| 7. Remote Control Holder 24. Standby Indicator | |
| 8. TS Function (Track/file separation) 25. Display | |
| 9. Record Button 26. Speaker | |
| 10. Delete file Button 27. IR Sensor | |
| 11. Mode/Program Button 28. CD Door | |
| 12. EQ Button (Equalization - Pop, Rock, Jazz) 29. USB Port | |
| 13. Folder Up Button 30. FM Antenna | |
| 14. Play / Pause Button 31. Audio LINE OUT Jacks | |
| 15. Stop/Timer Set Button | 32. External Speakers Connection Jacks |
| 16. Tuning/Clock Set Skip - Button | 33. Headphone Jack |
| 17. Tuning/Clock Set Skip + Button | 34. AC Power Cord |
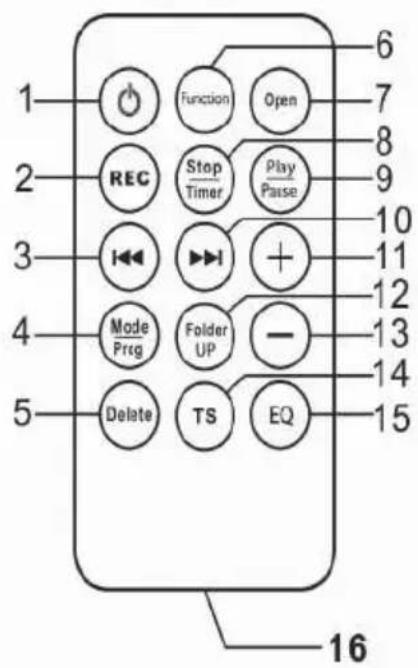
REMOTE CONTROL UNIT
- ON STANDBY BUTTON
- RECORD BUTTON
- SKIP- BUTTON
- MODE/PROGRAM BUTTON
- DELETE FILE BUTTON
- FUNCTION BUTTON
- CD DOOR OPEN BUTTON
- STOP/TIMER SET BUTTON
- PLAY/PAUSE BUTTON
- SKIP+ BUTTON
- VOLUME + BUTTON
- FOLDER UP BUTTON
- VOLUME - BUTTON
- TS BUTTON (Track / file separation)
- EQ BUTTON (Equalizer - POP, ROCK, JAZZ
- BATTERY COMPARTMENT
Remark: Inordertosaveenergywhentheunithasnosoundoutputforawhile, theunitwillbe switchedtostand-byautomatically. It can be switched ON by using the function selector again.
Remark: PlesenotethatonlytheUSBkeyswithformatFAT32andunderacapacityofcanbe 32GB readbytheunit.
ACTIVATING THE REMOTE CONTROL
Remove the plastic insulator tag sticking out of the Battery Compartment of the Remote Control by pulling on it. Once the tag is removed, the Remote Control will be ready for use.
BATTERY CARE
i. If the unit is not to be used for an extended period of time, remove the battery. An old or leaking battery can cause damage to the Remote Control.
ii. Do not dispose of batteries in fire, batteries may explode or leak.
BATTERY REPLACEMENT
When the battery becomes weak, the operating distance of the Remote Control is greatly reduced and you will need to replace the Lithium battery.
- Remove the battery compartment from bottom of the Remote Control.
- Install 1 "CR2025" Lithium battery with the positive side facing up.
- Replace the battery compartment.

IMPORTANT: Be sure that the battery is installed correctly. Wrong polarity may damage the Remote Control and void the warranty.
FM RADIO OPERATION
- PRESS THE FUNCTION BUTTON (21) TO THE "TUNER" POSITION. Only FM Radio.
- Press the TUNING SKIP + or - (16, 17) until you reach the radio station you wish to listen to. The radio FM station frequency shows on the LCD DISPLAY.
- Adjust the sound level by press the VOLUME CONTROL (18, 19).
- To turn off the radio, Press the ON/STANDBY (22) key once to turn the unit "OFF". The LCD DISPLAY will go "off".
FM STEREO RECEPTION
The FM Stereo Indicator "ST" will light up when listening to a strong station that is broadcasting in "Stereo".
TIPS FOR BEST RECEPTION
FM – During FM reception, always keep the FM Wire Antenna fully extended. If FM reception is weak try repositioning the FM Wire Antenna until you find the strongest FM signal.
At any time during playback, press the EQ key (on remote control) repeatedly to choose the desired sound effect according to the music you are listening to:

flowchart
graph LR
    EQ_OFF --> ROCK --> POP --> JAZZ --> BASS --> CLASSIC
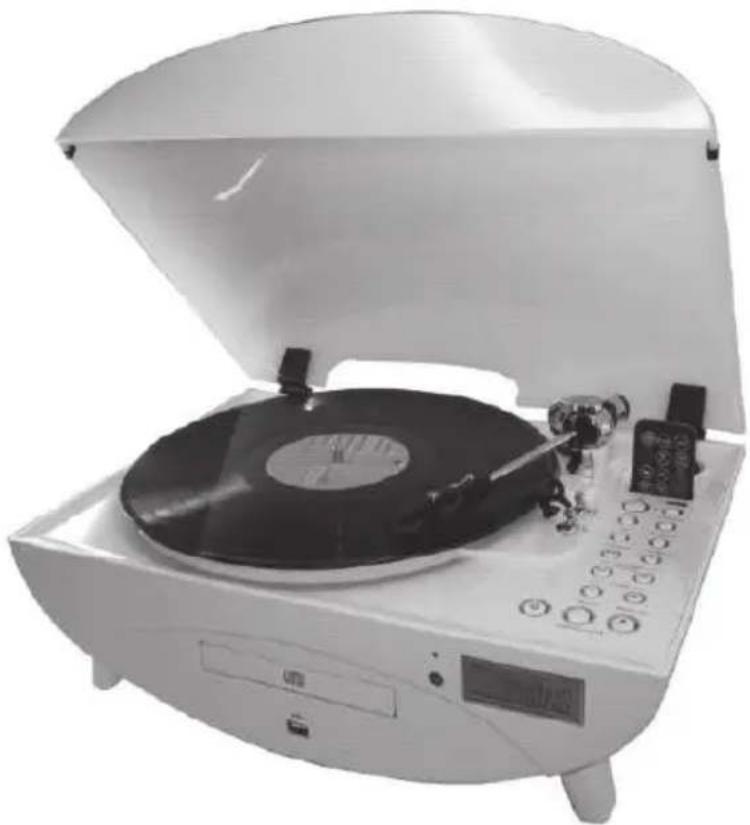
- Raise the Turntable Dust Cover.
- Remove the stylus protector and release the Tone Arm Clamp (4)
- Press the Function button(21) to "PHONO".
- Place a record on the turntable, over the center spindle.
- Set the Speed Selector Switch to 33, 45 or 78 rpm according to the record you
are playing. Place the included 45 RPM adaptor (5) over the center spindle when playing 45 rpm records. - Move the Tone Arm to the beginning of the record or to the beginning of a particular track. Gently lower the Tone Arm onto the record to start playing. Adjust the Volume if needed. The Turntable will stop automatically when the record finishes.
- To stop the record before it ends, lift the Tone Arm (4) using the Cue-lever (6) and return it carefully onto the Tone Arm Clamp (4).
- Replace the stylus protector on the stylus when not in use.

NOTE:
i. Do not stop or turn the platter manually.
ii. Moving or jarring the turntable without securing the Tone arm clamp could result in damage to the Tone arm.
AUTO-STOP SWITCH OPERATION
The Auto-Stop area on some records may extend beyond the preset setting. As a result the turntable could possibly stop before the last track finishes. If you experience this during playback, set the AUTO-STOP Selector (3) to the "OFF" position. The turntable will now run to the end of the record, but will no longer stop automatically. To stop the turntable you will need to either Press ON/STANDBY (22) key once to turn the unit "OFF", or return the AUTO-STOP Switch (3) to the "ON" position. After the record stops, lift and return the Tone Arm (4) carefully back onto the Tone Arm Clamp (6).
IMPORTANT:
Moving or jarring the Turntable without securing the Tone Arm Clamp (6) could result in damage to the Tone Arm (4).
ENCODING RECORDS TO MP3
You can convert you favorite records into MP3 files and store them on a USB Flash Drive.
- Insert a USB flash drive into the USB PORT (29) located on the front panel.
- Press the RECORD Button (9), "WAITING" will begin in the display to CHECK THE USB CAPACITY, then "REC" and "USB" will begin to flash in the display, if a USB Flash Drive is
inserted.
-
Select the track to be encoded and start playing the record.
-
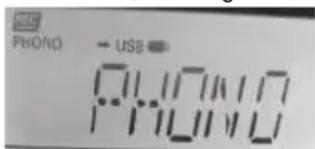
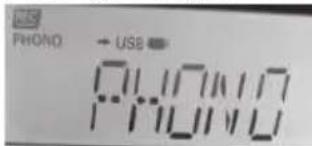
Press the Record button to start sync encoding. The following will be displayed depending on what media you are using to store the music.

Encoding to USB
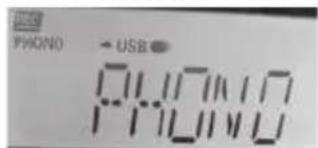
Encoding to USB
- To stop encoding press the STOP/TIMER Button (15).
Note: To ensure the encoding is successful, remove the USB a few seconds after pressing the STOP Button.
- To start recording again, press the RECORD Button (9) again and follow step
2 above.
PLEASE NOTE: If you want to encode an entire side of a record and have separated MP3 files for each track, you must manually press the STOP/TIMER Button (15) at the end of each track and then press the RECORD Button (9) again to start recording the next track. If you do not manually Stop and Start the recording process after each track, you will end up with one large MP3 file that will have all the songs from the side of the record playing one after the other.
TS BUTTON (Track separation, press it to split next song)
When recording form vinyl to USB, press TS button once at the end of song. Then, it will create a new file to another song for record.
If the USB capacity more than 4GB, the record time may delay about 6-10 seconds for 2^nd song. To prevent incomplete song recording, lift up "Tone Arm" while the USB drive under checking. Lift down "Tone Arm" when USB ready to record.
LOADING AND UNLOADING COMPACT DISCS
Select CD/MP3 with the Function button (21) on the unit to choose the CD/MP3 mode.
Open the disc compartment by pressing the CD Open Button (20).
LISTENING TO COMPACT DISC AND MP3 DISC (CD)
Select CD mode by Function button (21):
A) In the CD mode
This unit can read CD, CD-R, CD-RW.
B) In the MP3 mode
It can read MP3 format and several albums.
Listening to CD
- Select CD mode by Function button (21)
- Press the PLAY/PAUSE button on the unit once to start playing the CD from the first track.
- Press the PLAY /PAUSE button again to playing the CD "pause" indicator will appear on the display (the track number is flash).
- To stop playback, press the "Stop" button.
TRACK SKIP
Selecting a different track during CD Play
1. Press the SKIP (REW. or F.F.) button on the unit.
The required track number appears on the display.
- Press the PLAY / PAUSE button on the unit. Starting again with the track that is currently selected.
SKIP MODE FOR MP3 DISC
- Press FOLDER UP /DOWN by REMOTE, the Album no. will change.
- Press SKIP +/SKIP buttons the Track no. will change.
- When the desired track is being selected, press the "PLAY" button to start playback.
REPEAT
- When playing CD, press MODE button (11) once to repeat the same track/song.
- To repeat the whole disc, press the MODE twice and the "REP ALL" display will light up.
- To cancel repeat play, press the STOP button or press the MODE button repeatedly until the repeat indicator disappears.
Note: If in "REPEAT ALL" mode, the normal & program playing will also effect in this function.
RANDOM PLAY CD
-
When playing the CD or MP3 disc, press the MODE button three times, the "RANDOM" will show on display.
-
Press the SKIP +/- button, tracks will play randomly.
-
To cancel random play, press the STOP button once, the random indicator disappears.
PROGRAMMED DISC PLAY (CD)
It is not possible to enter programs during Playing. You must be in STOP mode.
- Press the PROGRAM button (11) on the unit. The following information will be displayed on the CD Display.
- Press the Skip Track buttons (16/17) on the unit to select the track to be stored.
- Press the PROGRAM button. The first program selection is now stored in the program memory.
Listening to Programmed Tracks
Press the Play Pause button. Disc play will start at the beginning of the first programmed track.
To clear the program memory
If the disc is playing, press the Stop button.
ENCODING AND STORING FROM A NORMAL CD
You can encode you favorite CD songs to mp3 format and store them into your memory device through the USB port.
-
Set the Function button (21) on the unit to choose the CD mode
-
Press the TUNING/SKIP >> button (16/17) to select the track, and then press the PLAY/PAUSE button (14) to be encoded.
-
Press the RECORD button(9) to start sync encoding and the display will show "USB-ONE" flashing, If you want to record one song only, press RECORD button again. It starts record the selected one song.
-
If you want to record all songs. Press the TUNING/SKIP >> button (16/17), it prompt to "USB-ALL."
Then press the RECORD button to confirm, it will record ALL song in one file.
-
Press the STOP button (15) to stop encoding.
-
Remarks: Recording CD must be synchronized.
WARNING: Some originals CD's may unable record as they are protected against copying.
You can copy your favorite CD/MP3CD file into USB drive.
- Set the Function button (21) on the unit to choose the CD mode
- Press the TUNING/SKIP >> button (16, 17) to select the track, then press the PLAY/PAUSE button (14) to be copied.
-
Press the RECORD button(9) to start sync copy and the display will show "USB-ONE" flashing, If you want to record one song only, press RECORD button again. It starts record the selected one song.
-
If you want to record all folder. Press the TUNING/SKIP >> button (16, 17), it prompt to "USB-FOL. Then press the RECORD button to confirm, it will record ALL FOLDER.
-
If you want to record all songs. Press the TUNING/SKIP >> button (16, 17), it prompt to "USB-ALL. Then press the RECORD button to confirm, it will record ALL song in one file.
-
Press the STOP button (15) to stop encoding.
USB OPERATION
The following tasks can be accomplished by either using the controls on the REMOTE Control or those which have similar function markings on the main unit.
-
Select the USB function mode by setting the Function button (21) to "USB". The Display will show "NO FILE" when the USB port is empty.
-
The total number of tracks on the USB will be displayed and playback will automatically start from the first track depending which mode you have chosen (USB).

NOTE : i. Only MP3 file formats are supported.
ii. Not all brands of USB flash drives are supported and only PEN-DRIVE.
iii. The Display will show "NO FILE" if there are no MP3 files on the USB inserted.
-
To interrupt playback, press the ▶ button (14) the track being played will flash.
-
To resume playback, press the ▶Button (14) again.
-
To stop playback, briefly press the STOP/TIMER SET button (15).
TRACK SKIP
To select a particular track, in Stop mode or during playback, press the ▶▶▶or◀◀ Buttons (16/17) repeatedly until the desired track number appears on the display. The selected track will start playback automatically.
DELETING FILES
-
With the USB in the playback stop mode, press ▶▶ or ◀◀ Buttons to select the track to delete, for example track 5 is selected.
-
When the track number appear in the display, press the DELETE (10) button to confirm delete. 'DEL' will flash few times and then disappear.
-
The chosen track, '005', will appear and blink in the Display to prompt for confirmation. In case you want to cancel the delete function just briefly press the STOP Button.

- To confirm, briefly press the DELETE (10) button once. 'DEL' will appear steadily in the Display for few seconds and then the Display will resume to USB playback stop mode with the total track number deducted by 1.

Original 38 Files

After Deleting Track 5
- Repeat 1-3 above to delete more tracks as desired.
- Delete function can "DEL ONE", "DEL DIR", "DEL ALL" by the press▶▶ or◀◀ Buttons to select the track.
LINE OUT OPERATION
For better playback sound, you can connect this unit to an external Audio Amplifier via the RCA LINE OUT JACKS located at the back panel. Please proceed as following:
- Connect the "L" & "R" LINE OUT Jacks and the AUX IN of external Audio Amplifier. (Connection cable is not included).
- Select the music source by setting the Function button (21) to "PHONO", "USB" or "FM" as desired.
- Turn on the external Amplifier.
- Sound will then come out from the system's built-in speakers and the external Amplifier's speakers simultaneously.
- Turn the System and the external Amplifier off when you have finished listening.
- Unplug the connection cable.
Note: The sound from the original built-in speakers still be heard, even after connected to the external speakers.
SPEAKER CONNECTION FOR EXTERNAL SPEAKERS RCA JACK
You can connect the external speakers (4 ohm) by "Speaker output" socket L, R (cables and external speakers are Not included).
Note: The sound from the original built-in speakers still be heard, even after connected to the external speakers
USING HEADPHONES (NOT INCLUDED)
This System accepts stereo headphones with a 3.5mm plug and an impedance of 8 ohms or greater. Plug your headphone to the Headphone jack (33), It will let you to listen privately. When using headphones, the speakers will be disconnected automatically.
PROTECT YOUR EAR
Listening advice to avoid hearing damage
Listening via headphones or earphones at a high volume may cause permanent hearing loss.
The louder the volume, the less time is required before your hearing could be affected.
NOTE:
We recommend that you reduce the volume control to a lower level before putting on the headphones. After putting on the headphones, gradually increase the volume to a comfortable listening level.
CARE AND MAINTENANCE
- Clean your unit with damp cloth (never wet). Solvent, alcohol or detergent should never be used.
- Avoid leaving your unit in direct sunlight or in hot, humid or dusty places.
- Keep your unit away from heating appliances and sources of electrical noise such as fluorescent lamps or motors.
TROUBLESHOOTING GUIDE
| PROBLEM POSSIBLE CAUSE REMEDY | ||
| The unit will not play | •The unit is disconnected from the AC outlet | •Connect to an outlet. |
| • The AC outlet has no power | • Try the unit on another outlet | |
| Poor FM reception | •Weak signal on distant stations | •Rotate the cabinet for better reception, loose the FM wire antenna to better reception. |
| Unit turn ON but there is no sound | •The volume Control has been turned all the way down | •Turn the Volume control to a higher output |
| •Headphones are inserted into the Headphone jack | •Pull the headphones out | |
SPECIFICATIONS
Power Supply
AC230V\~50Hz
Power Consumption: 15W
Radio Frequency Coverage
FM: 87.5 - 108MHz
Don't discard the electrical and electronic appliances in the regular wasted disposal.
• Takethemtoacollection point.
- Somecomponentsintheseappliancesmaybehazardoustohealthandthe environment.
Manufactured by BIGBEN INTERACTIVE SA
396, Rue de la Voyette
CRT2 - FRETIN
CS 90414
59814 LESQUIN Cedex - France
www.bigben.eu

bigben
Fabricant : Bigben Interactive FRANCE
- Rue de la Voyette, C.R.T. 2 Fretin.
CS 90414 - 59814 LESQUIN Cedex
customerservice@bigben-interactive.be
ESPAÑA, sat@bigbeninteractive.es
ITALIA, support@bigbeninteractive.it
www.bigben.eu
THOMSONisattrademarkofTECHNICOLORSAoritsaffiliatesusedunderlicensetoBigben Interactive.
MadeinChina


THOMSON
SP
natural_image
White portable radio with a black CD and open lid, no visible text or symbols on the device.Codificación a USB
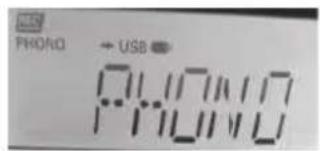
Codificación a USB
customerservice@bigben-interactive.be
ESPAÑA, sat@bigbeninteractive.es
ITALIA, support@bigbeninteractive.it
www.bigben.eu
THOMSONesunamarcacomercialdeTECHNICOLORSAosusafiliadasutilizadabajolicenciapor BigbenInteractive.
FabricadoenChina


THOMSON
IT
GIRADISCHI, CD / MP3 / USB CON CODIFICA MP3, RADIO FM PLL STEREO
TT400 CDTT401CD
MANUALE UTENTE

natural_image
White portable radio with a black vinyl record and open lid, no visible text or symbols on the device itself.ISTRUZIONID'USO
PRIMADIUTILIZZAREL'APPARECCHIO, LEGGEREPER INTEROILPRESENTEMANUALEECONSERVARLOPER CONSULTAZIONIFUTURE.
REV4
natural_image
Simple line drawing of a trash bin with crossed lines indicating no waste or discharge (no text or symbols)


SET TIMER
Codifica su USB
- Per interrompere la codifica, premere il tasto STOP / TIMER (15).
customerservice@bigben-interactive.be
ESPAÑA, sat@bigbeninteractive.es
ITALIA, support@bigbeninteractive.it
www.bigben.eu
THOMSONèunmarchiodiTECHNICOLORSAodellesuesocietàafilliateutilizzatoconunalicenza dataalasocietàBigbenInteractive.
ProdottoinCina


THOMSON
PT
GIRA-DISCOS, CD/MP3/USB COM CODIFICAÇÃO MP3, RÁDIO ESTÉREO FM PLL
TT400CD/TT401CD
MANUAL DE INSTRUÇÕES
natural_image
White portable radio with open lid and control panel, no visible text or symbols on device bodycustomerservice@bigben-interactive.be
ESPAÑA, sat@bigbeninteractive.es
ITALIA, support@bigbeninteractive.it
www.bigben.eu
THOMSONéumamarcaregistradadaTECHNICOLORSAoudassuassubsidiáriasutilizadasoblicença pelaBigbenInteractive.
FabricadonaChina


THOMSON
DE
natural_image
White portable radio with open lid and control panel, no visible text or symbolsBEDIENUNGSANLEITUNG
Encoding to USB
Encoding to USB
customerservice@bigben-interactive.be
ESPAÑA, sat@bigbeninteractive.es
ITALIA, support@bigbeninteractive.it
www.bigben.eu
natural_image
White portable vinyl record with open lid and control panel (no visible text or symbols)VEILIGHEIDSINSTRUCTIES
LEES DEZE GEBRUIKSAANWIJZING VOLLEDIG DOOR ALVORENS DEZE EENHEID TE BEDIENEN, EN BEWAAR DIT BOEKJE VOOR UW ADMINISTRATIE.
Coderen naar USB
Coderen naar USB
GEPROGRAMMEERDE SCHIJFWEERGAVE (CD)


- OPERATINGINSTRUCTIONS
- Important safety instructions
- INFORMATION ABOUT BATTERIES (applicable only if batteries included)
- WARNING
- CAUTION
- CAUTION RISK OF ELECTRIC SHOCK DO NOT OPEN
- WARNING:
- CAUTION!
- Meaning of the "Dustbin" Symbol
- TIMER SET
- LOCATION OF CONTROLS
- REMOTE CONTROL UNIT
- ACTIVATING THE REMOTE CONTROL
- BATTERY CARE
- BATTERY REPLACEMENT
- FM RADIO OPERATION
- FM STEREO RECEPTION
- TIPS FOR BEST RECEPTION
- NOTE:
- AUTO-STOP SWITCH OPERATION
- IMPORTANT:
- ENCODING RECORDS TO MP3
- LISTENING TO COMPACT DISC AND MP3 DISC (CD)
- Listening to CD
- TRACK SKIP
- SKIP MODE FOR MP3 DISC
- REPEAT
- RANDOM PLAY CD
- PROGRAMMED DISC PLAY (CD)
- Listening to Programmed Tracks
- ENCODING AND STORING FROM A NORMAL CD
- USB OPERATION
- DELETING FILES
- LINE OUT OPERATION
- SPEAKER CONNECTION FOR EXTERNAL SPEAKERS RCA JACK
- USING HEADPHONES (NOT INCLUDED)
- PROTECT YOUR EAR
- CARE AND MAINTENANCE
- TROUBLESHOOTING GUIDE
- SPECIFICATIONS
- bigben
- THOMSON
- TT400 CDTT401CD
- MANUALE UTENTE
- ISTRUZIONID'USO
- SET TIMER
- TT400CD/TT401CD
- MANUAL DE INSTRUÇÕES
- BEDIENUNGSANLEITUNG
- VEILIGHEIDSINSTRUCTIES
- GEPROGRAMMEERDE SCHIJFWEERGAVE (CD)
Brand : THOMSON
Model : TT401CD
Category : DJ Equipment