
VisaCare SC6250 - Skin care device PHILIPS - Free user manual and instructions
Find the device manual for free VisaCare SC6250 PHILIPS in PDF.


| Product type | Skin care device |
| Brand | Philips |
| Model | VisaCare SC6250 |
| Dimensions (L x l x h) | 180 x 45 x 45 mm |
| Weight | 120 g |
| Power type | Rechargeable lithium-ion battery |
| Battery life | Approximately 30 minutes |
| Charging time | 1 hour |
| Main functions | Deep cleansing, gentle exfoliation, massage |
| Speeds | 2 speeds |
| Included accessories | 2 brush heads (sensitive and normal) |
| Charge indicator | LED |
| Water resistance | IPX5 protection rating (splash-resistant) |
| Body material | ABS plastic and silicone |
| Maintenance | Clean brush head after each use |
| Safety | Automatic shut-off after 1 minute, water-resistant |
| Spare parts | Replacement brush heads (model SC6250/01) |
| Repairability | Battery non-replaceable by user |
| Warranty | 2 years |
Frequently Asked Questions - VisaCare SC6250 PHILIPS
User questions about VisaCare SC6250 PHILIPS
0 question about this device. Answer the ones you know or ask your own.
Ask a new question about this device
Download the instructions for your Skin care device in PDF format for free! Find your manual VisaCare SC6250 - PHILIPS and take your electronic device back in hand. On this page are published all the documents necessary for the use of your device. VisaCare SC6250 by PHILIPS.
USER MANUAL VisaCare SC6250 PHILIPS
natural_image
White Philips ViaCare medical device with a power button and a small conical base (no visible text or symbols on the device body)
natural_image
Illustration of an open book with a grid pattern on the left and a closed page on the right, showing no text or symbols.
-1
1_
-1
1
English 6
Deutsch 23
Français 42
Italiano 61
Nederlands 79
6 English
Introduction
Congratulations on your purchase and welcome to Philips! To fully benefit from the support that Philips offers, register your product at www.philips.com/welcome.
What is VisaCare Prestige and how can it help your skin?
When your skin is young, it renews itself fast, the skin is firm, elastic and bright. With time, the metabolism of the skin slows down. For instance, in the morning, sleep mark recovery slows down - a sign that skin is losing elasticity and volume. Nothing can stop time, but there are ways to maintain your beauty and youthfulness longer.
Everybody knows that exercising regularly keeps your body fit and toned. In much the same way, your skin can become firmer and brighter if you give it a regular stimulating work-out, bringing oxygen and nutrients to skin cells. That is why we have developed VisaCare Prestige: your daily facial workout device to address two major signs of aging – loss of firmness and dull complexion.
You can use VisaCare Prestige in the comfort of your own home to enjoy firmer feeling, brighter looking skin.
Ready to get started? Use VisaCare Prestige at home every day to enjoy real and visible results.
How Philips VisaCare Prestige works
Philips VisaCare Prestige offers a DualAction Air Lift & Exfoliation system, which massages and exfoliates at the same time. Two tailored tips (Firming and brightening tip) work with different intensities to specifically address the anti-aging needs of your skin:
- Firmer feeling skin: The Firming tip stimulates a deeper level of the skin where collagen is produced. It helps the skin to produce more skin cells and to thicken the epidermis. Use it twice a week.

natural_image
Diagram showing a container with an upward arrow emerging from a wavy surface, no text or symbols present.
natural_image
Diagram showing a submerged object with water flowing through it, indicating fluid flow or pollution (no text or symbols present)- Youthful complexion: The brightening tip gently removes the top layer of dead skin cells where melanin accumulates. It stimulates blood circulation for a youthful, rosy glow today and tomorrow. Use it daily.
General description (fig. 1)
1 Filter
2 Exfoliation ring
3 Brightening tip for daily use
4 Firming tip
5 On/off button
6 Charging light and 'battery low' indication
7 Handle
8 Air outlet
9 Charging stand
10 Small plug
11 Adapter
- Pouch (not shown)
- Cleaning brush (not shown)
Important
Read this user manual carefully before you use the device and save it for future reference.
Danger

- Keep the adapter dry.
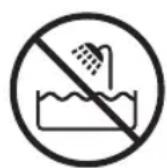
- Do not charge this device in wet surroundings (e.g. near a filled bath, a running shower or near a filled swimming pool).
Warning

- To charge the battery, only use the detachable supply unit (SSW-2600) provided with the appliance.

- This device is not intended for use by persons (including children) with reduced physical, sensory or mental capabilities, or lack of experience and knowledge, unless they have been given supervision or instruction concerning safe use of the appliance by a person responsible for their safety.
- Children should be supervised to ensure that they do not play with the appliance.
- Do not use the device or the adapter if it is damaged or broken to avoid injuries.
- If the adapter is damaged, always have it replaced with one of the original type in order to avoid a hazard.
- The adapter contains a transformer. Do not cut off the adapter to replace it with another plug, as this causes a hazardous situation.
- Do not use the device in the shower or in the bath.
- Do not use the appliance if the tip is broken, cracked, damaged or dirty. Always inspect the tip before use. When in doubt, replace the tip.
- Do not insert metal-containing material into the socket for the small plug to avoid short circuiting.
- This device contains a magnet. Keep magnets away from cardiac pacemakers. Persons with cardiac pacemakers or other devices implanted in their bodies should not come into close proximity with magnets. Specialist medical opinion must be sought before such persons handle or come into contact with magnets.
Caution
- Do not use the device for any other purpose than to massage and gently remove the dead upper skin layer to speed up normal skin turnover.
-
To avoid skin irritation:
-
Do not use the device more than once a day.
- Do not use the Firming tip more than twice a week.
Do not use the Firming tip and Brightening tip on the same day.
- Do not use the device in combination with (scrub) creams or with chemical or mechanical peelings, this may cause damage to the device and your skin.
- Charge, use and store the device at a temperature between 5^ C/ 40^ F and 35^ C/ 95^ F.
- Fully charge the device at least every 3 months to sustain battery lifetime.
- VisaCare Prestige enhances the absorption of your creams and facial masks. Due to this enhanced uptake, a negative skin reaction can occur. The advice is to not change between creams during the first 2-4 weeks of using VisaCare Prestige. When you start to use a new cream after this period, first test this cream on a small area. Do not continue to use this cream if there is a negative skin reaction when you apply it on the skin on which you used VisaCare Prestige. When you start to use the device, or when you restart after discontinuing for more than 2 weeks, begin again with the Brightening tip. This will allow your skin to once again become used to the device.
Contraindications and other warnings
- This device has been developed to address dull and sagging facial skin. The focus of this device is facial skin (excluding the area underneath and above the eyes).
Do not use this appliance:
- If you have skin infections, open wounds, rashes, burns, sunburn, inflammation, eczema, psoriasis, rosacea, telangiectasia (couperose or spider veins), sensitive skin, active infections like herpes or active acne breakouts in the areas to be treated.
- If you have large moles, tattoos, port wine stains, permanent make-up or any skin irritation in the areas to be treated.
- If your skin is still recovering from a cosmetic procedure, such as a chemical or mechanical peeling, laser resurfacing, fractional laser treatment, or mesotherapy treatment or any other treatment with dermal fillers in the past two weeks.
- If you are taking medication that may affect your skin, such as steroids or acne medication (Accutane, Isotretinoine or Roaccutane). Consult your doctor.
- If you have warts, do not try to erase them with this device. It can spread the warts.
- If you have scars, consult your doctor or dermatologist before you start using the device.
- In combination with any other home skincare system containing an active peeling ingredient.
General advice
- After each session it is advised to use a sun protection factor (SPF) of 30 or above on the areas on which you used the device, for a minimum of 3 days.
- If you have a significant skin condition (including but not limited to melanoma, basal cell carcinoma, actinic keratosis, melasma, systemic lupus erythematosus, porphyria, coagulation abnormality and collagen abnormalities such as keloid wounds, excessive scar formation or a history of bad wound healing), consult your doctor before you start using the device.
- If you plan to enjoy the sun (e.g. summer holidays) we recommend that you stop using the Firming tip and only use the Brightening tip one week before the holidays and as long as you are extensively exposed to the sun.
Electromagnetic fields (EMF)
This Philips device complies with all applicable standards and regulations regarding exposure to electromagnetic fields.
Charging
Charging the appliance
Note: You can use the appliance before the battery is fully charged. However, its performance and operating time will not be optimal in this case.
Note: Charging normally takes approximately 8 hours. When the appliance is fully charged, it has a cordless operating time of up to 30 minutes.
1 Make sure the appliance is switched off.

natural_image
Diagram of a medical or laboratory procedure showing a device connected to a cup with tubing, no text or symbols present.2 Insert the small plug in the socket of the charging stand and insert the adapter in the wall socket.

natural_image
Illustration of a blue handheld device with a curved base and cable, no text or symbols present3 Put the appliance in the charging stand.
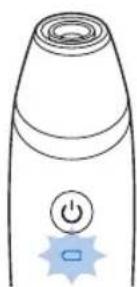
natural_image
Line drawing of a handheld electric shaver with power button and star-shaped button (no text or symbols)- The charging light flashes white to indicate that the appliance is charging.
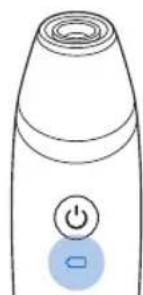
natural_image
Line drawing of a handheld electric shaver with power button and control knob (no text or symbols)- When the battery is fully charged, the charging light lights up white continuously. After approx. 30 minutes, the charging light goes out to save energy.
'Battery low' indication
When the battery is almost empty, the charging light flashes amber for 4 seconds during use and after you have switched off the appliance. The battery still contains enough energy for a complete 5-minute session. When the battery is completely empty, the device switches off automatically and the charging light flashes amber very quickly.
Preparing for use
Always clean your face before you use VisaCare Prestige. Depending on your preference, use the device on a dry or wet face.
12 English
Note: The device is intended for use on a dry face or a face moistened with water. Do not use it in combination with a facial mask, (scrub) cream or similar products, as this may clog the device.
Wet use

natural_image
Illustration of a person applying facial care to their forehead with a magnified inset showing a toilet (no text or symbols)This device is made to be used on wet skin. You can moisten your skin with some water before use. You can decide for yourself whether you prefer to use the device on wet or dry skin, both types of usage make your skin feel firmer, but the tip glides over wet skin more easily for a more pleasant and gentle experience.
The device can only be used on a clean skin. Make sure you rinse your face thoroughly after using foam, cleansers or other skincare products for optimal performance and a longer lifetime.

Tip: If your skin is dry before the end of the session, apply some more water to your skin to make the tip glide over the skin more easily again.
Warning: Do not use the device in the shower or in the bath.
To make sure your VisaCare Prestige works optimally on wet skin, the device is equipped with a smart system that is activated when a lot of water is inside. As a result the device might produce an intermittent humming sound until the conditions are optimal again to continue usage on wet skin. This is normal and ensures that you can use the device on wet skin. It does not have any impact on your skin or your device.
Water may drip from the socket at the bottom of the device when you use it on a wet face. This is normal and not dangerous.
Using the device
Warning: Always check the tip before use to see if it damaged. If the tip is damaged, replace it. Do not use a damaged tip, as this may cause injury.
Warning: Do not move the device over large moles, tattoos, port wine stains or permanent makeup.
First time use
Skin test
Before you use the device on your face for the first time, we advise you to test the tip on your inner forearm before you use it on your face.

1 Put the Brightening tip on the handle.
2 For wet use: apply some water to your inner forearm.
3 Press the on/off button to switch on the device.
4 Make a pass on your inner forearm and then wait for approximately one hour.
If a possible skin reaction diminishes within one hour, you can safely use the tip on your face.
First use on the face
Note: When you use the device for the first time we advise you to use the Brightening tip and to make just 2 passes. If you don't experience any skin reactions and your skin is used to the device, you can increase the number of passes. Never make more than 4 passes with the Brightening tip and 6 passes with the Firming tip.
1 Put the Brightening tip on the handle.
14
English

natural_image
Illustration of a person receiving facial massage with a dropper above her head (no text or symbols)2 For wet use: apply some water to your face.
natural_image
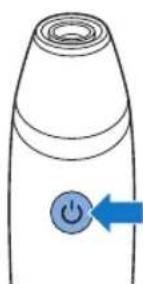
Simple line drawing of a device with a power button and arrow (no text or symbols)3 Press the on/off button to switch on the device.

natural_image
Illustration of a person applying makeup to their face, showing a blue brush and a pie chart (no text or symbols)4 Put the tip on your cheek in such a way that you feel the suction.
Make sure there is always full skin contact between the tip and the skin. However, do not press the tip hard onto the skin's surface.
5 Gently move the tip in a straight line up towards your temple and then wait for approximately one hour.
If a possible skin reaction diminishes within one hour, you can safely use the tip on your whole face (see 'General use').
Selecting the right tip

natural_image
Line drawing of a conical frustum with vertical ridges (no text or symbols)VisaCare Prestige comes with two different tips:
- Brightening tip for daily use
- 2-4 passes per area
- Gentle exfoilation and massage
- Mild/gentle airlift
The brightening tip gently removes top layer of dead skin cells where melanin accumulates. It stimulates blood circulation for youthful, rosy glow.

natural_image
Simple line drawing of a conical frustum (no text or symbols)- Firming tip for more intense use twice a week
- maximum usage: 2 times a week
- 4-6 passes per area (start with 2-4 passes)
- more intense exfoliation and massage
- stronger airlift
Use the Firming tip to stimulate a deeper level of the skin where collagen is produced. It helps the skin to produce more skin cells and thicken the epidermis, for bouncy and elastic skin.
We advise you to use the brightening tip during the first session to see how your skin reacts. If the skin reacts well to the Brightening'tip, you can try the Firming tip.
Tip: For optimal results you can use the Firming tip twice a week and the Brightening tip on all other days. So this means you use the Brightening tip every day except the days on which you use the Firming tip. See the example weekly schedule below:
| Day | Tip used |
| Monday Brightening tip | |
| Tuesday Brightening tip | |
| Wednesday Firming tip | |
| Thursday Brightening tip | |
| Friday Brightening tip | |
| Saturday Brightening tip | |
| Sunday Firming tip |
Warning: Never use both tips on the same day, because this may cause skin irritation. After you have used one of the tips, wait until the next day before you use the other tip.
Warning: Do not use the Firming tip one week before you are going to be exposed to extensive sunlight (for example if you go on a sunny holiday). When summer starts, we advise to use only the Brightening tip for a while.
General use
Note: For a maximum effect, use the appliance every day. Do not use the appliance more often, as this may cause skin irritation.
Warning: If you suspect damage to the appliance (such as after a drop or bump), check the tip carefully. If the tip is damaged, replace it. Do not use a damaged tip, as this may cause injury.
Tip: We recommend using the appliance in the evening to avoid possible skin reactions from being visible during the day. Mild redness and a warm tingling sensation are normal and should disappear within 1 hour.
English

natural_image
Diagram showing a conical object being lowered into a cylindrical container, with a blue arrow indicating the process (no text or symbols present)1 Put the preferred tip on the appliance.
Note: Do not use the appliance without the tip as this does not benefit your skin and may cause an unwanted skin reaction.
natural_image
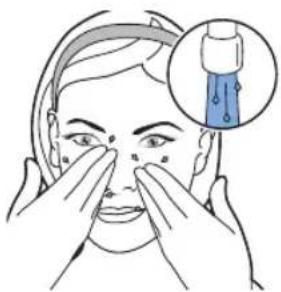
Illustration of a person applying facial care to their nose, with a magnified inset showing liquid droplets (no text or symbols)2 For wet use: apply some water to your skin.

natural_image
Line drawing of a handheld device with a power button and arrow indicator (no text or symbols)3 Press the on/off button to switch on the appliance.

natural_image
Illustration of a person applying makeup to their face, showing a blue brush and a magnified inset (no text or symbols)4 Put the tip on your chin in such a way that you feel the suction. Make sure these is always full contact between the tip and the skin. However, do not press the tip hard onto the skin's surface.
5 Gently move the tip in straight lines. See the first illustration of how to use the appliance on facial zones on the fold-out page at the back of this manual.
Note: Do not keep the tip on the same spot when you have placed it on the skin.

natural_image
Illustration of a person applying a blue bandage to the ear (no text or symbols)Tip: Use your other hand to stretch and hold the skin and move the appliance away from your hand. This makes it easier to achieve proper suction, especially on the temples and cheeks.
6 Start using the appliance on the chin, and then move to the cheeks, forehead, nose and temples. Make sure you pass the device over all areas. Check the illustration of facial zones at the back of this manual.
Warning: Do not use the appliance on the skin below or above the eyes, as it is thin and delicate. When you use the appliance on the fine lines on the side of the eyes, put a finger of the other hand in the corner of the eyelid and move the appliance away from the finger.
7 Depending on the type of tip and the condition of your skin, pass the appliance over each area a number of times:
- First use: pass the daily tip over each area 1 or 2 times.
- After several uses: pass the daily tip over each area 3 to 4 times, or pass the normal tip over each area 2 times.
- For optimal results: pass the daily tip over each area 4 times or pass the normal tip over each area 6 times.
8 When you have treated all areas, press the on/off button to switch off the appliance. A complete session normally does not take more than 5 minutes.
9 During and after the session, you will experience the stimulating massaging action of the Air Lift System™, which stimulates the blood circulation.
Tip: In areas where full skin contact is harder to achieve, such as the forehead, try different ways of holding the appliance. Explore vertical and horizontal movements to find the best way to establish proper contact with your skin. You can also hold your hand still and move your head instead.
After treatment
After the session, apply a nourishing mask, moisturizer, day cream or night cream. After each session, apply a sunscreen with a sun protection factor (SPF) of 30 or higher on the treated areas for a minimum of 3 days.
Warning: take into account the following actions for the next 3 days after you have used the device:
- Do not use any other method of mechanical or chemical exfoliation.
- Do not undergo electrolysis, facial waxing or use depilatories.
You can apply make-up immediately after you have used the device.
Cleaning and maintenance
Warning: Do not immerse the appliance in water.
Warning: Never use scouring pads, abrasive cleaning agents or aggressive liquids such as petrol or acetone to clean the handle or tips.
Note: Clean the tip after every use for hygienic reasons and to prevent clogging of the filter. Only use washing-up liquid or an alcohol solution (max. 70%) to clean the tip.
English

natural_image
Simple line drawing of a handheld device with a power button and arrow (no text or symbols)1 Switch off the device.
natural_image
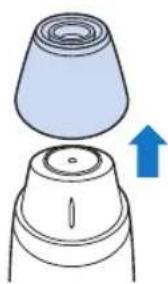
Diagram showing a conical object being lifted by an upward arrow, with no text or symbols present.2 Remove the tip from the appliance.

3 Clean the tip under the tap with hot water (max. 70°C) and some washing-up liquid.
Tip: You can use the cleaning brush to clean the tip.
Tip: If the exfoliation ring is dirty, let the tip soak in hot water with washing-up liquid or in alcohol solution for 5-10 minutes.
Note: Clean the filter of the tip upside down to rinse off any dirt left in the filter.
4 Dry the tip with a lint-free towel or leave it to air dry. Place it back onto the handle when it is dry.
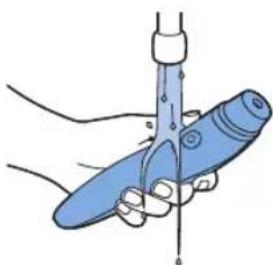
5 Clean the handle under the tap (max. 40°C).
Note: Only use water to clean the handle.
6 Dry the handle with a dry cloth.
7 Clean the charging stand with a moist cloth.
Danger: Keep the adapter and the charging stand dry. Never immerse them in water or rinse them under the tap.

natural_image
Illustration of a hand holding a blue tool with a pointed tip, no text or symbols presentStorage
Store the appliance with the tip attached in the charging stand or pouch.
Tip: Leave the tip you use most often on the device, and store the other tip in the pouch to help you stick to your usage plan.
Note: Do not store a wet tip on the device or in the pouch.
Note: It is harmless to store a slightly wet handle on the charging stand.
Replacement
For optimal results, it is recommended to replace the Firming tip (SC6891, with the text "2x/week" inside the tip) every six months and Brightening tip (SC6895, with the text "Daily" on the tip) every two months (or earlier if the abrasive structure is deformed or damaged). Replacement tips are available on our website.
Ordering accessories
To buy accessories or spare parts, visit www.shop.philips.com/service or go to your Philips dealer. You can also contact the Philips Consumer Care Center in your country (see the international warranty leaflet for contact details).
Recycling

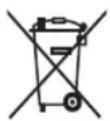
- This symbol means that this product shall not be disposed of with normal household waste (2012/19/EU).
- This symbol means that this product contains a built-in rechargeable battery which shall not be disposed of with normal household waste (2006/66/EC). Please take your product to an official collection point or a Philips service center to have a professional remove the rechargeable battery.
- Follow your country's rules for the separate collection of electrical and electronic products and rechargeable batteries. Correct disposal helps prevent negative consequences for the environment and human health.
Removing the rechargeable battery
Only remove the rechargeable batteries when you discard the appliance. Before you remove the batteries, make sure that the appliance is disconnected from the wall socket and that the batteries are completely empty.
Take any necessary safety precautions when you handle tools to open the appliance and when you dispose of the rechargeable battery.

1 Remove the back and front panel of the appliance with a screwdriver and take out the inner housing of the appliance.
2 Remove the clips from the inner body using a screwdriver.
3 Remove the electronics from the inner housing (1) and detach the rechargeable battery (2).
Warranty and support
If you need information or support, please visit www.philips.com/support or read the international warranty leaflet.
Troubleshooting
This chapter summarises the most common problems you could encounter with the device. If you are unable to solve the problem with the information below, visit www.philips.com/support for a list of frequently asked questions or contact the Consumer Care Center in your country.
| Problem | Solution |
| I do not know if the device is suitable for use on my skin. | Please check if the device is suitable for your skin (see 'Contraindications and other warnings'). |
| The device does not charge. | Make sure the socket to which you connect the device is live. Check if the voltage indicated on the device corresponds to the local mains voltage. Check if you have placed the device in the stand properly. If you use a socket in a bathroom cabinet, you may need to switch on the light to activate the socket. If the light on the device still does not light up or if the device still does not charge, contact the Philips Consumer Care Center in your country. |
| The device does not work anymore. | Charge the device according to the instructions in this user manual. Check if there is a power failure and if the wall socket is live. Check if the charging light on the device lights up to make sure the device is charging. Make sure that you have pressed the on/off button properly. If the device still does not work, contact the Philips Consumer Care Center in your country. |
Problem Solution
| The device does not work when it is charging. | This is a safety measure. The device is not intended to work when it is charging. Let the device charge approximately 1 hour for a 5-minute session. |
| My skin is reacting to usage of the device. | Using this device may lead to mild redness directly after use. You may experience a warm, tingling sensation during use. These effects usually disappear within several minutes and are generally experienced as pleasant. It is possible that you experience dry or flaky skin, prolonged redness or swelling. In that case you may have pressed the device too hard on your face or have passed it over the same area too many times. Try to exert less pressure onto the device during the next session or pass the device over the area fewer times. In rare cases the device may cause a bruise or blister, scratch or pigmentation change. Almost all skin reactions will disappear within a week, pigmentation change will decrease within several weeks or a few months. To avoid possible side effects, use a day cream with sun protection factor or a sun protection cream after the treatment. This helps to avoid sunburn. The device has been tested and confirmed safe for use when used as described in the user manual. Medicines or products and their possible side effects can affect individual people in different ways. Since there is always the possibility that a rare or previously unknown side effect may occur with the use of this device or any other product, please contact the Philips Consumer Care Center in case you experience a side effect which is not mentioned above. |
| It is difficult to slide the device over my skin/I do not feel the suction/the effect seems to be less than after previous sessions. | Check if the filter is clogged. Clean the tip by rinsing it under the tap. If the exfoliation ring is dirty, let the tip soak in hot water with washing-up liquid for 5-10 minutes. You can use the cleaning brush to clean it. Make sure you clean the filter with the tip upside down to rinse off any dirt left in the filter. Dry the tip with a lint-free towel or let it air-dry. Check if you can feel the suction of the device when the tip is taken off: you remove the tip and then switch on the device. When you put your finger on the hole, you should be able to feel the suction. If you do not feel the suction, the device might be broken. Please contact your Philips Consumer Care Center in your country. |
| I have trouble maintaining the suction on my forehead. | Try different ways of holding the device in order to find the right angle of the tip with the forehead for proper skin contact. Make sure to move the device slowly over the forehead. You can try to hold your hand still and move your head instead. |
| I do not know when to start using the Firming tip. | As soon as you do not experience side effects from using the Brightening tip, you may try the Firming tip. Please note that the first time you use a new treatment tip, you may have a different skin reaction. Give your skin some time to get used to the new tip. |
| Can I combine the use of VisaCare Prestige with sunbathing? | If you plan to enjoy the sun (e.g. summer holidays) we recommend that you stop using the Firming tip one week before the holidays and as long as you are extensively exposed to the sun. You may continue to use the Brightening tip. After each session it is advised to use a sun protection factor (SPF) of 30 or above on the treated areas for a minimum of 3 days. |
22 English
Problem Solution
| My skin is still sensitive from the last session. Can I already start with a new session? | If your last use was already 2 days or longer ago, you can use the VisaCare Prestige again. You may want to be careful with the number of passes. Do not make overlapping passes. |
Einführung
natural_image
Diagram showing a container with an upward arrow rising above a wavy surface, no text or symbols presentnatural_image
Diagram showing a submerged object with water flowing into a channel, indicated by an arrow (no text or symbols present)natural_image
Diagram of a medical or laboratory device with a bulb, tubing, and a connector (no text or symbols)natural_image
Illustration of a blue electric shaver with a curved base and cable, no text or symbols presentnatural_image
Line drawing of a handheld electric shaver with power button and star-shaped button (no text or symbols)natural_image
Line drawing of a handheld electric shaver with power button and control knob (no text or symbols)natural_image
Illustration of a person applying facial care to the forehead with a magnified inset showing the cup and tooth (no text or symbols)natural_image
Diagram showing a conical object with a downward arrow indicating compression or dislocation (no text or symbols present)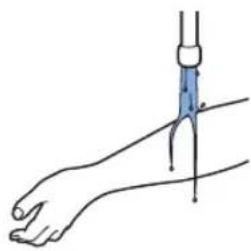
natural_image
Illustration of a hand holding a medical instrument with a blue tip inserted, no text or symbols presentnatural_image
Simple line drawing of a device with a power button and arrow indicator (no text or symbols)natural_image
Illustration of a hand holding a blue object over a human leg (no text or symbols)natural_image
Diagram showing a conical object with a downward arrow indicating compression or dislocation (no text or symbols present)
natural_image
Illustration of a person applying facial care to their nose, with a dropper above the nose (no text or symbols)natural_image
Line drawing of a handheld device with a power button and arrow indicator (no text or symbols)natural_image
Illustration of a person applying makeup to the nose area with a brush (no text or symbols)natural_image
Simple line drawing of a conical frustum with vertical ridges (no text or symbols)natural_image
Simple line drawing of a conical frustum (no text or symbols)natural_image
Diagram showing a conical object being lifted by a blue arrow, with no text or symbols present.
natural_image
Simple line drawing of a device with a power button and arrow (no text or symbols)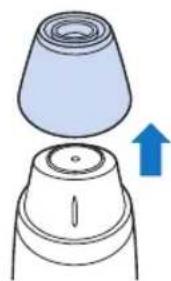
natural_image
Diagram showing a conical object being lifted by an upward arrow, with no text or symbols present.

natural_image
Illustration of a hand holding a blue medical device with a needle inserted (no text or symbols)natural_image
Diagram showing fluid flow between a container and a submerged object, with no text or symbols present.natural_image
Diagram of a medical or laboratory procedure showing a device connected to a cup and tubing with blue arrows indicating direction (no text or symbols present)natural_image
Illustration of a blue electric shaver with a curved base and cable, no text or symbols presentnatural_image
Line drawing of a handheld electric shaver with power button and control knob (no text or symbols)natural_image
Illustration of a person applying facial care to the forehead with a magnified inset showing the cup and tooth (no text or symbols)natural_image
Diagram showing a conical object with a downward arrow indicating compression or dislocation (no text or symbols present)
natural_image
Line drawing of a human hand with a medical instrument inserted, no text or symbols presentnatural_image
Simple line drawing of a device with a power button and arrow indicator (no text or symbols)natural_image
Illustration of a hand holding a blue object over a forearm (no text or symbols)natural_image
Diagram showing a conical object with a downward arrow indicating compression or dislocation (no text or symbols present)
natural_image
Line drawing of a handheld device with a power button and arrow indicator (no text or symbols)natural_image
Illustration of a person applying makeup to their face with a brush (no text or symbols)natural_image
Simple line drawing of a conical frustum with vertical ridges (no text or symbols)natural_image
Simple line drawing of a conical frustum (no text or symbols)natural_image
Diagram showing a conical object being dropped into a cylindrical container with a blue arrow indicating downward motion (no text or symbols)natural_image
Simple line drawing of a handheld device with a power button and arrow indicator (no text or symbols)natural_image
Illustration of a person applying makeup to their face with a blue brush (no text or symbols)natural_image
Illustration of a person applying a blue bandage to the ear area (no text or symbols)natural_image
Line drawing of a device with a power button and arrow indicator (no text or symbols)natural_image
Diagram showing a conical object being lifted by a blue upward arrow, with no text or symbols present.natural_image
Illustration of a hand holding a blue medical device with a needle inserted (no text or symbols)natural_image
Diagram showing a container with an upward arrow emerging from a wavy surface, no text or symbols present.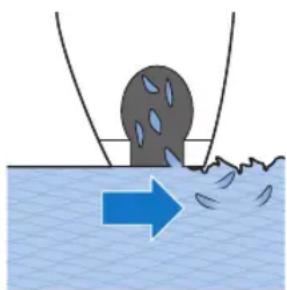
natural_image
Diagram showing a pipe with a submerged object and water flowing, with an arrow indicating direction (no text or symbols)natural_image
Diagram of a medical or laboratory device with a bulb, tubing, and a connector (no text or symbols)natural_image
Illustration of a blue handheld device with a curved base and cable, no text or symbols presentnatural_image
Line drawing of a handheld electric shaver with power button and star-shaped button (no text or symbols)natural_image
Line drawing of a handheld electric shaver with power button and control knob (no text or symbols)natural_image
Illustration of a person applying facial care to their face with a magnified inset showing a toilet (no text or symbols)natural_image
Diagram showing a conical object being dropped into a cylindrical component with a blue arrow indicating downward motion (no text or symbols present)Test cutaneo
natural_image
Illustration of a human hand with a blue instrument inserted into the wrist area (no text or symbols)natural_image
Line drawing of a handheld device with a power button and blue arrow (no text or symbols)natural_image
Illustration of a hand holding a blue circular object over a human leg (no text or symbols)natural_image
Diagram showing a conical object being dropped into a cylindrical container with a blue arrow indicating downward motion (no text or symbols)natural_image
Simple line drawing of a handheld device with a power button and blue arrow (no text or symbols)natural_image
Illustration of a person applying makeup to the nose area, showing a blue brush and circular product (no text or symbols)natural_image
Simple line drawing of a conical frustum with vertical ridges (no text or symbols)natural_image
Simple line drawing of a conical frustum (no text or symbols)natural_image
Diagram showing a conical object being dropped into a base, with a blue arrow indicating downward motion (no text or symbols)natural_image
Simple line drawing of a device with a power button and blue arrow (no text or symbols)natural_image
Illustration of a person applying makeup to their face, showing a blue brush and a magnified inset (no text or symbols)natural_image
Illustration of a person applying a blue bandage to the ear (no text or symbols)natural_image
Line drawing of a handheld device with a power button and arrow indicator (no text or symbols)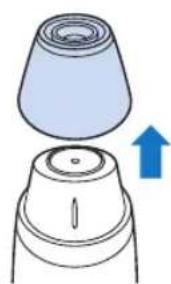
natural_image
Diagram showing a conical object being lifted by an upward arrow, with no text or symbols present.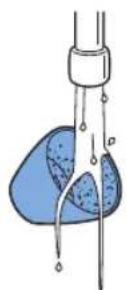
natural_image
Illustration of a hand holding a blue medical device with a needle inserted (no text or symbols)natural_image
Diagram showing a container with an upward arrow rising above a wavy surface (no text or symbols)natural_image
Diagram showing a submerged object partially submerged in water with a blue arrow indicating flow direction (no text or symbols)natural_image
Diagram of a medical or laboratory procedure showing a tube connected to a cap with blue arrows indicating force direction (no text or symbols)natural_image
Illustration of a blue electric shaver with a cable, emitting a downward arrow (no text or symbols)natural_image
Line drawing of a handheld electric shaver with power button and star-shaped button (no text or symbols)natural_image
Line drawing of a handheld electric shaver with power button and button (no text or symbols)natural_image
Illustration of a person applying facial care to their forehead, with an inset showing a hand holding a basin (no text or symbols)natural_image
Diagram of a conical object with a downward arrow indicating compression or dislocation (no text or symbols present)
natural_image
Illustration of a hand with a blue instrument inserted into the wrist area (no text or symbols)natural_image
Line drawing of a handheld device with a power button and arrow indicator (no text or symbols)natural_image
Illustration of a hand holding a blue object over a human leg (no text or symbols)natural_image
Line drawing of a conical frustum with vertical ridges (no text or symbols)natural_image
Simple line drawing of a conical frustum (no text or symbols)natural_image
Illustration of a conical object with a downward arrow indicating compression or disassembly (no text or symbols)natural_image
Line drawing of a handheld device with a power button and arrow indicator (no text or symbols)natural_image
Illustration of a person applying makeup to their face with a brush (no text or symbols)natural_image
Illustration of a person applying a medical or cosmetic tool to the ear (no text or symbols present)natural_image
Simple line drawing of a device with a power button and arrow indicator (no text or symbols)
natural_image
Illustration of a conical object with a blue upward arrow indicating rotation or change (no text or symbols)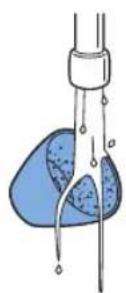
natural_image
Illustration of a hand holding a blue medical device with a needle inserted (no text or symbols)© 2017 Koninklijke Philips N.V. All rights reserved. Specifications are subject to change without notice. Trademarks are the property of Koninklijke Philips N.V. (Royal Philips) or their respective owners.
www.philips.com 4222.100.3780.2




- English
- Introduction
- How Philips VisaCare Prestige works
- General description (fig. 1)
- Important
- Danger
- Warning
- Caution
- Contraindications and other warnings
- Do not use this appliance:
- General advice
- Electromagnetic fields (EMF)
- Charging
- Charging the appliance
- 'Battery low' indication
- Preparing for use
- English
- Wet use
- Warning: Do not use the device in the shower or in the bath.
- Using the device
- First time use
- Skin test
- First use on the face
- English
- Selecting the right tip
- - Brightening tip for daily use
- - Firming tip for more intense use twice a week
- General use
- After treatment
- Warning: take into account the following actions for the next 3 days after you have used the device:
- Cleaning and maintenance
- Storage
- Replacement
- Ordering accessories
- Recycling
- Removing the rechargeable battery
- Warranty and support
- Troubleshooting
- English
- Einführung
- Test cutaneo
Brand : PHILIPS
Model : VisaCare SC6250
Category : Skin care device