
One+ R18PS - Sander RYOBI - Free user manual and instructions
Find the device manual for free One+ R18PS RYOBI in PDF.


| Product Type | Cordless 1/4 Sheet Palm Sander |
| Model | One+ R18PS |
| Brand | RYOBI |
| Power Source | 18V Lithium-ion battery (RYOBI One+ system) |
| Battery Voltage | 18 V |
| No-Load Speed | 12,000 OPM |
| Pad Size | 1/4 sheet (115 x 140 mm) |
| Orbit Diameter | 1.6 mm (1/16") |
| Dust Collection | Built-in dust bag with micro-filter |
| Switch Type | Slide switch with lock-on |
| Variable Speed | No (single speed) |
| Weight (without battery) | 1.4 kg (3.1 lbs) |
| Dimensions (L x W x H) | 275 x 115 x 130 mm (10.8 x 4.5 x 5.1 in) |
| Hook and Loop Pad | Yes |
| Sandpaper Attachment | Hook and loop (Velcro) or clamp |
| Dust Port Diameter | 35 mm (1-3/8") |
| Included Accessories | Dust bag, 3 sandpaper sheets, operator's manual |
| Vibration Level (typical) | 8.0 m/s² |
| Sound Pressure Level | 78 dB(A) |
| Warranty | 3-year limited warranty |
Frequently Asked Questions - One+ R18PS RYOBI
User questions about One+ R18PS RYOBI
0 question about this device. Answer the ones you know or ask your own.
Ask a new question about this device
Download the instructions for your Sander in PDF format for free! Find your manual One+ R18PS - RYOBI and take your electronic device back in hand. On this page are published all the documents necessary for the use of your device. One+ R18PS by RYOBI.
USER MANUAL One+ R18PS RYOBI
Important!
This appliance is not intended for use by persons (including children) with reduced physical, sensory or mental capabilities, or lack of experience and knowledge, unless they have been given supervision or instruction concerning use of the appliance by a person responsible for their safety. Children should be supervised to ensure that they do not play with the appliance.
It is essential that you read the instructions in this manual before assembling, maintaining and operating the product.
Subject to technical modifications.
Safety, performance, and dependability have been given top priority in the design of your sweeper.
INTENDED USE
The sweeper is intended to be used only by adults who have read and understood the instructions and warnings in this manual and can be considered responsible for their actions.
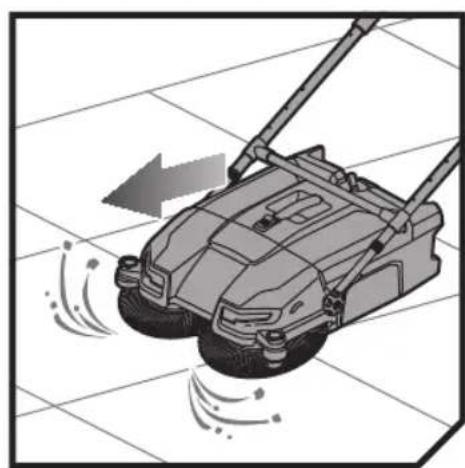
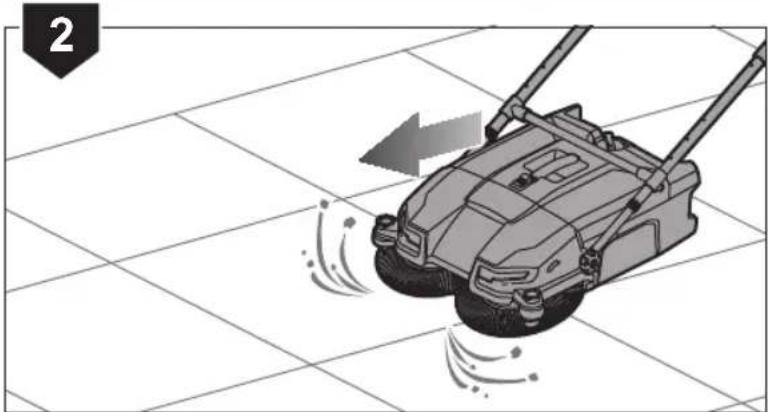
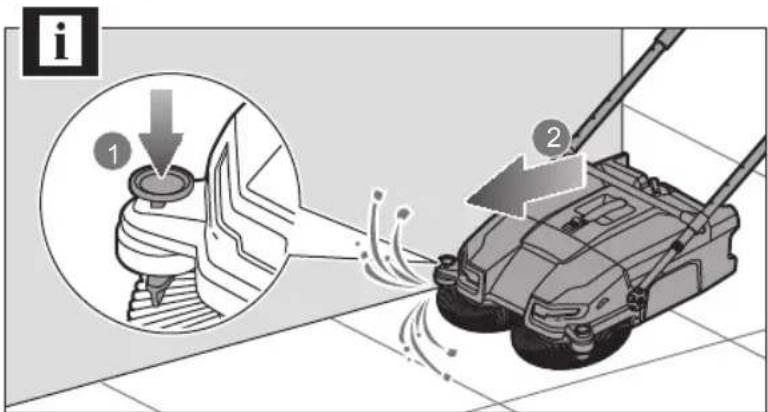
The product can be used for removing saw dust, nails, screws, leaves, small garden debris and grass cuttings from hard surfaces such as workshops, garages and driveways. The product is for domestic use only.
Do not use the product in any way other than those stated for intended use.
SWEEPER SAFETY WARNINGS
-
Do not sweep chemicals, fertilizers, or any other toxic substances. Sweeping these materials can cause them to become airborne and could result in serious injury to the operator or bystanders.
■ The product is designed for dry sweeping only. Do not use to clean up liquids.
■ Never direct discharge of material toward bystanders or allow anyone near the area of operation. Use care in directing discharge to avoid glass enclosures, automobiles, and the like.
■ Wear sturdy and dry shoes or boots. Do not operate while barefoot.
■ Always wear safety glasses with side shields. Everyday glasses have only impact resistant lenses. They are not safety glasses. Following this rule will reduce the risk of eye injury.
■ If the product strikes a foreign object, follow these steps: -
Turn the product off and wait for the brushes to come to a complete stop.
- Remove the battery pack.
• Thoroughly inspect the product for any damage. -
Repair any damage before restarting and continuing to operate the product.
-
Do not lift or hold the product above the ground when operating, which can result in loss of control and possible serious personal injury. Only operate the product in accordance with the operating instructions provided in this operator's manual.
■ Clean rotating brushes with warm soapy water. Do not use compressed air or streams of water as this could damage the brushes.
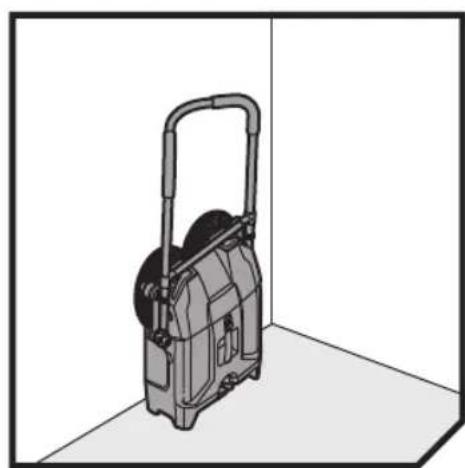
■ Store the product indoors.
If the product is not working as it should, has been dropped, damaged, left outdoors, or dropped into water, return it to an authorised service centre.
BATTERY AND CHARGER SAFETY WARNINGS
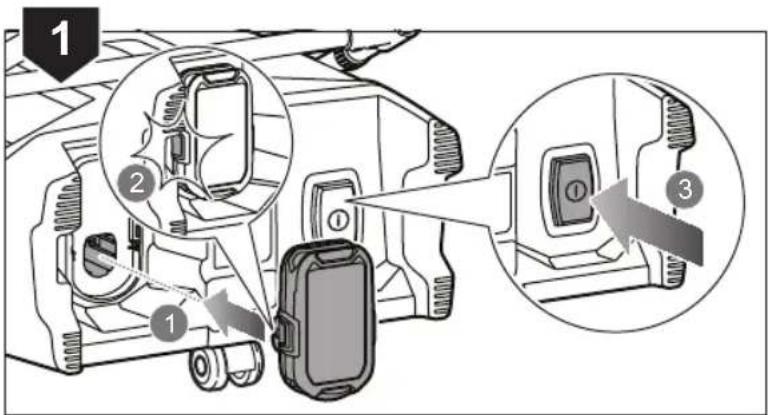
■ Connect and disconnect the battery pack properly.
• To install battery pack:
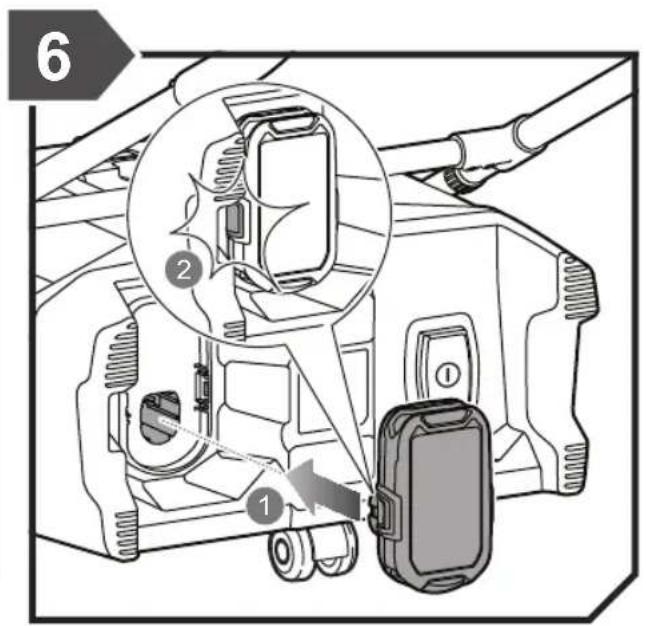
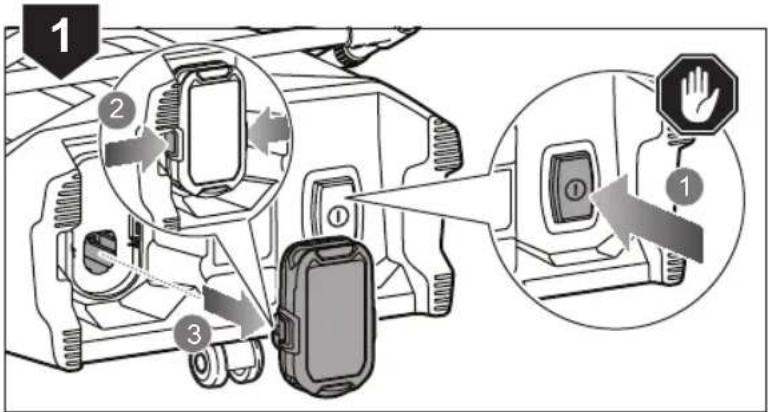
- Place the battery pack on the product.
- Make sure the latches on each side of the
battery pack snap into place and the battery pack is secured on the product before beginning operation.
• To remove battery pack:
- Depress the latches on the side of the battery pack.
- Remove the battery pack from the product.
■ Remove battery when the product is not in use and before servicing.
- Do not place batteries near fire or heat. They may explode.
■ Rechargeable batteries are to be removed from the product before being charged.
■ Different types of batteries or new and used batteries are not to be mixed.
■ Batteries are to be inserted with the correct polarity.
■ Exhausted batteries are to be removed from the product and safely disposed of.
If the product is to be stored unused for a long period, the batteries should be removed.
■ The supply terminals are not to be short-circuited.
■ Under extreme usage or temperature conditions, battery leakage may occur. If liquid comes in contact with skin, wash at least 10 minutes then seek immediate medical attention.
■ Batteries vent hydrogen gas and can explode in the presence of a source of ignition, such as a pilot light. To reduce the risk of serious personal in jury, never use any cordless product in the presence of an open flame. An exploded battery can propel debris and chemicals. If exposed, flush with water immediately.
■ Electric shock could occur if the battery is charged outdoors or on wet surfaces.
■ Do not expose charger to wet or damp conditions.
■ Use of an attachment not recommended or sold by the battery charger manufacturer may result in a risk of fire, electric shock, or injuries to person.
■ To reduce risk of damage to charger body and cord, pull by charger plug rather than cord when disconnecting charger.
■ Make sure cord is located so that it will not be stepped on, tripped over, or otherwise subjected to damage and stress.
An extension cord should not be used unless absolutely necessary. Use of improper extension cord could result in a risk of fire and electric shock. If extension cord must be used, make sure:
a) That pins on plug of extension cord are the same number, size and shape as those of plug on charger.
b) That extension cord is properly wired and in good electrical condition.
■ Do not operate charger with a damaged cord or plug. If
damaged, have it replaced immediately by a qualified serviceman.
- Do not operate charger if it has received a sharp blow, been dropped, or otherwise damaged in any way; take it to a qualified serviceman.
- Do not disassemble charger; take it to a qualified serviceman when service or repair is required. Incorrect reassembly may result in a risk of electric shock or fire.
■ To reduce risk of electric shock, unplug the charger from outlet before attempting any maintenance or cleaning. Turning off controls will not reduce this risk.
■ Disconnect charger from power supply when not in use.
■ Risk of electric shock. Do not touch uninsulated portion of output connector or uninsulated battery terminal.
ADDITIONAL SAFETY WARNINGS
WARNING
The product is not intended for use by persons (including children) with reduced physical, sensory or mental capabilities, or lack of experience and knowledge, unless they have been given supervision or instruction concerning use of the product by a person responsible for their safety.
Children should be supervised to ensure that they do not play with the product.
ADDITIONAL BATTERY SAFETY WARNINGS
WARNING
To reduce the risk of fire, personal injury, and product damage due to a short circuit, never immerse your tool, battery pack or charger in fluid or allow a fluid flow inside them. Corrosive or conductive fluids, such as seawater, certain industrial chemicals, and bleach or bleach-containing products, etc., can cause a short circuit.
TRANSPORTING LITHIUM BATTERIES
Transport the battery in accordance with local and national provisions and regulations.
Follow all special requirements on packaging and labelling when transporting batteries by a third party. Ensure that no batteries can come in contact with other batteries or conductive materials while in transport by protecting exposed connectors with insulating, non-conductive caps or tape. Do not transport batteries that are cracked or leaking. Check with the forwarding company for further advice.
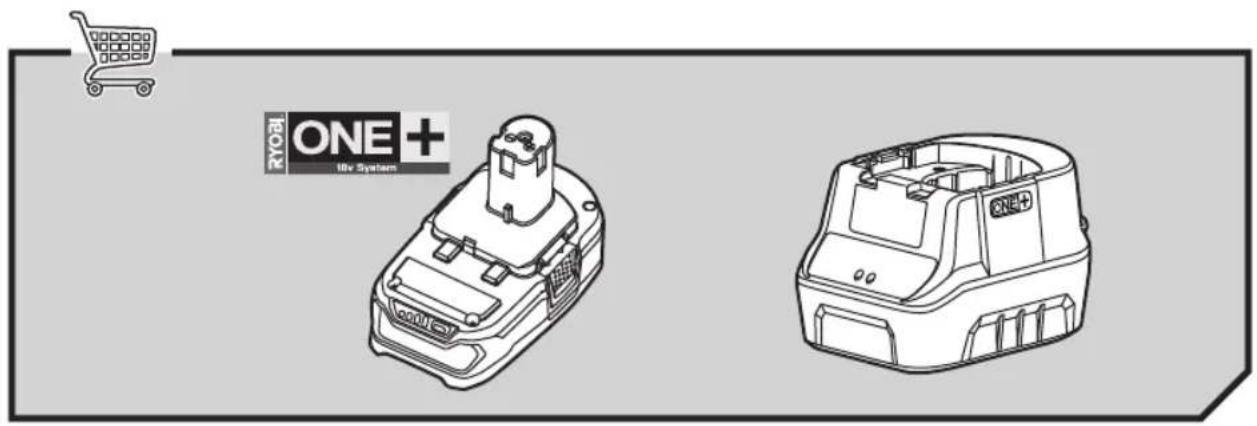
BATTERY AND CHARGER
| Model | Compatible battery pack (not included) | Compatible charger (not included) |
| Lithium-Ion | RB18L13 | BCS618G |
| RB18L15 | BCL14181H | |
| RB18L20 | BCL14183H | |
| RB18L25 | BCL1418IV* | |
| RB18L40 | RC18150 | |
| RB18L50 | RC18150U | |
| RB18L60A | RC18627U | |
| RB18L90A | RC18115 | |
| RC18120 |
* for vehicles with 12V DC outlets
RESIDUAL RISKS
Even when the product is used as prescribed, it is still impossible to completely eliminate certain residual risk factors. The following hazards may arise and the operator should pay special attention to avoid the following:
■ Use the product only for its intended use. Do not alter or modify the product from the original design or function.
■ Always be aware that misuse and improper handling of the product can cause injury to yourself and others.
RISK REDUCTION
It has been reported that vibrations from handheld tools may contribute to a condition called Raynaud's Syndrome in certain individuals. Symptoms may include tingling, numbness and blanching of the fingers, usually apparent upon exposure to cold. Hereditary factors, exposure to cold and dampness, diet, smoking, and work practices are all thought to contribute to the development of these symptoms. There are measures that can be taken by the operator to possibly reduce the effects of vibration:
- Keep your body warm in cold weather. When operating the product, wear gloves to keep the hands and wrists warm. It is reported that cold weather is a major factor contributing to Raynaud's Syndrome.
■ After each period of operation, exercise to increase blood circulation.
■ Take frequent work breaks. Limit the amount of exposure per day.
If you experience any of the symptoms of this condition, immediately discontinue use and see your doctor about these symptoms.
WARNING
Injuries may be caused, or aggravated, by prolonged use of a tool. When using any tool for prolonged periods, ensure you take regular breaks.
MAINTENANCE
WARNING
The product should never be connected to a power supply when assembling parts, making adjustments, cleaning, performing maintenance, or when the product is not in use. Disconnecting the product from the power supply will prevent accidental starting that could cause serious injury.
WARNING
When servicing, use only original manufacturer's replacement parts, accessories and attachments. Use of any other parts may create a hazard or cause product damage.
■ Avoid using solvents when cleaning plastic parts. Most plastics are susceptible to various types of commercial solvents and may be damaged by their use. Use clean cloths to remove dirt, carbon dust, etc.
WARNING
Do not at any time let brake fluids, gasoline, petroleum-based products, penetrating oils, etc., come in contact with plastic parts. Chemicals can damage, weaken or destroy plastic which may result in serious personal injury.
WARNING
For greater safety and reliability, all repairs should be performed by an authorised service centre.
ENVIRONMENTAL PROTECTION
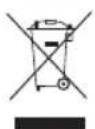
Recycle raw materials instead of disposing of as waste. The machine, accessories and packaging should be sorted for environment-friendly recycling.
SYMBOLS ON THE PRODUCT

Safety alert
V Volts

Direct current

Regulatory Compliance Mark (RCM). Product meets applicable regulatory requirements.

Please read the instructions carefully before starting the machine.

Failure to keep long hair away from air inlet could result in personal injury.
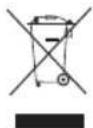
Waste electrical products should not be disposed of with household waste. Please recycle where facilities exist. Check with your local authority or retailer for recycling advice.
SYMBOLS IN THIS MANUAL

Note

Parts or accessories sold separately

Unlock

Lock

Speed, minimum

Speed, maximum
The following signal words and meanings are intended to explain the levels of risk associated with this product:

DANGER
Indicates an imminently hazardous situation, which, if not avoided, will result in death or serious injury.

WARNING
Indicates a potentially hazardous situation, which, if not avoided, could result in death or serious injury.

CAUTION
Indicates a potentially hazardous situation, which, if not avoided, may result in minor or moderate injury.
CAUTION
(Without Safety Alert Symbol) Indicates a situation that may result in property damage.
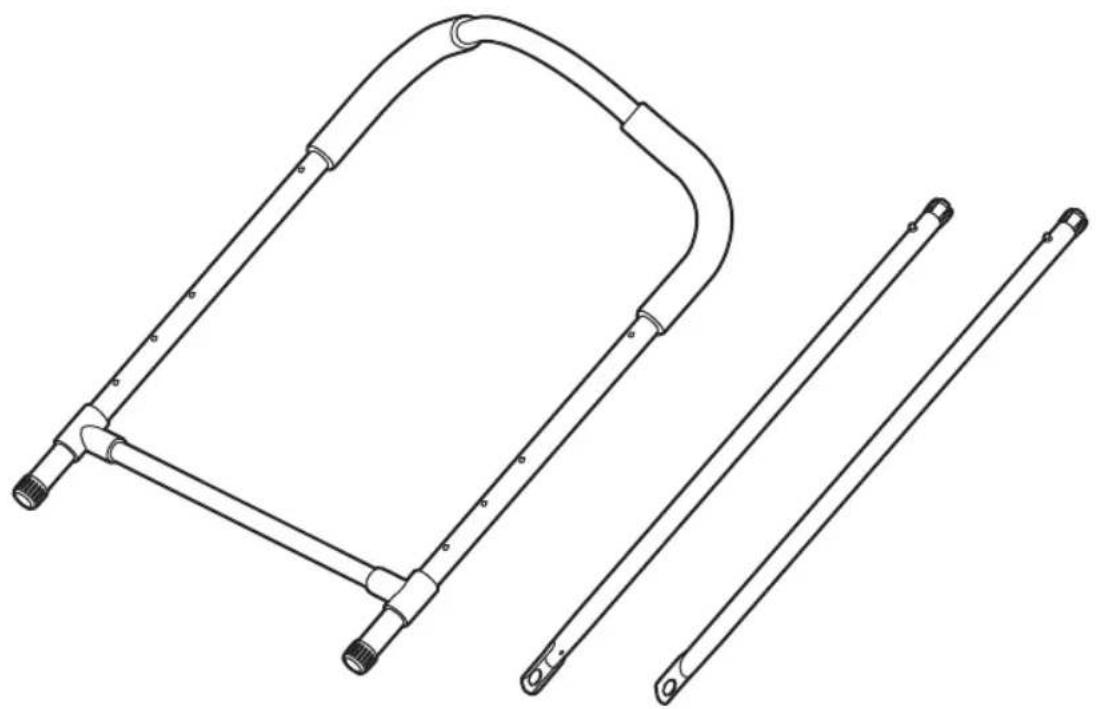
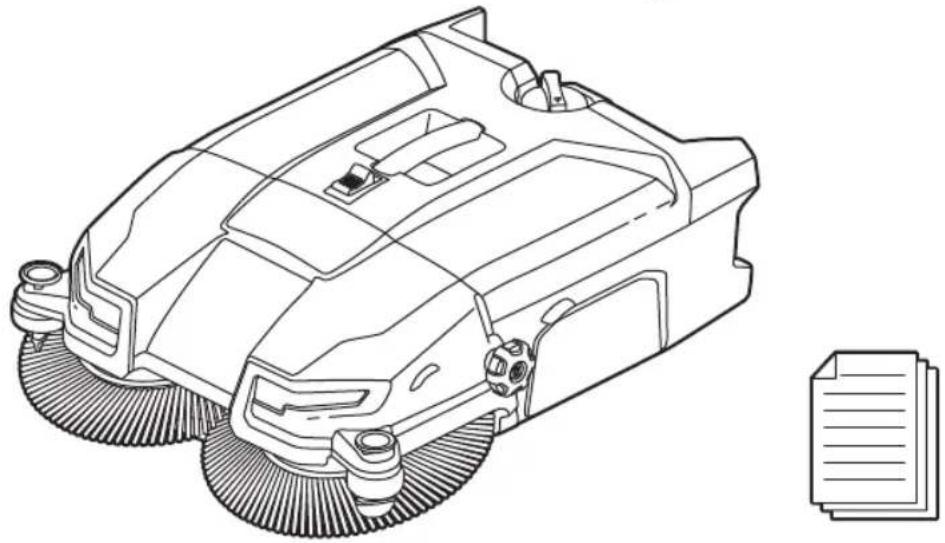
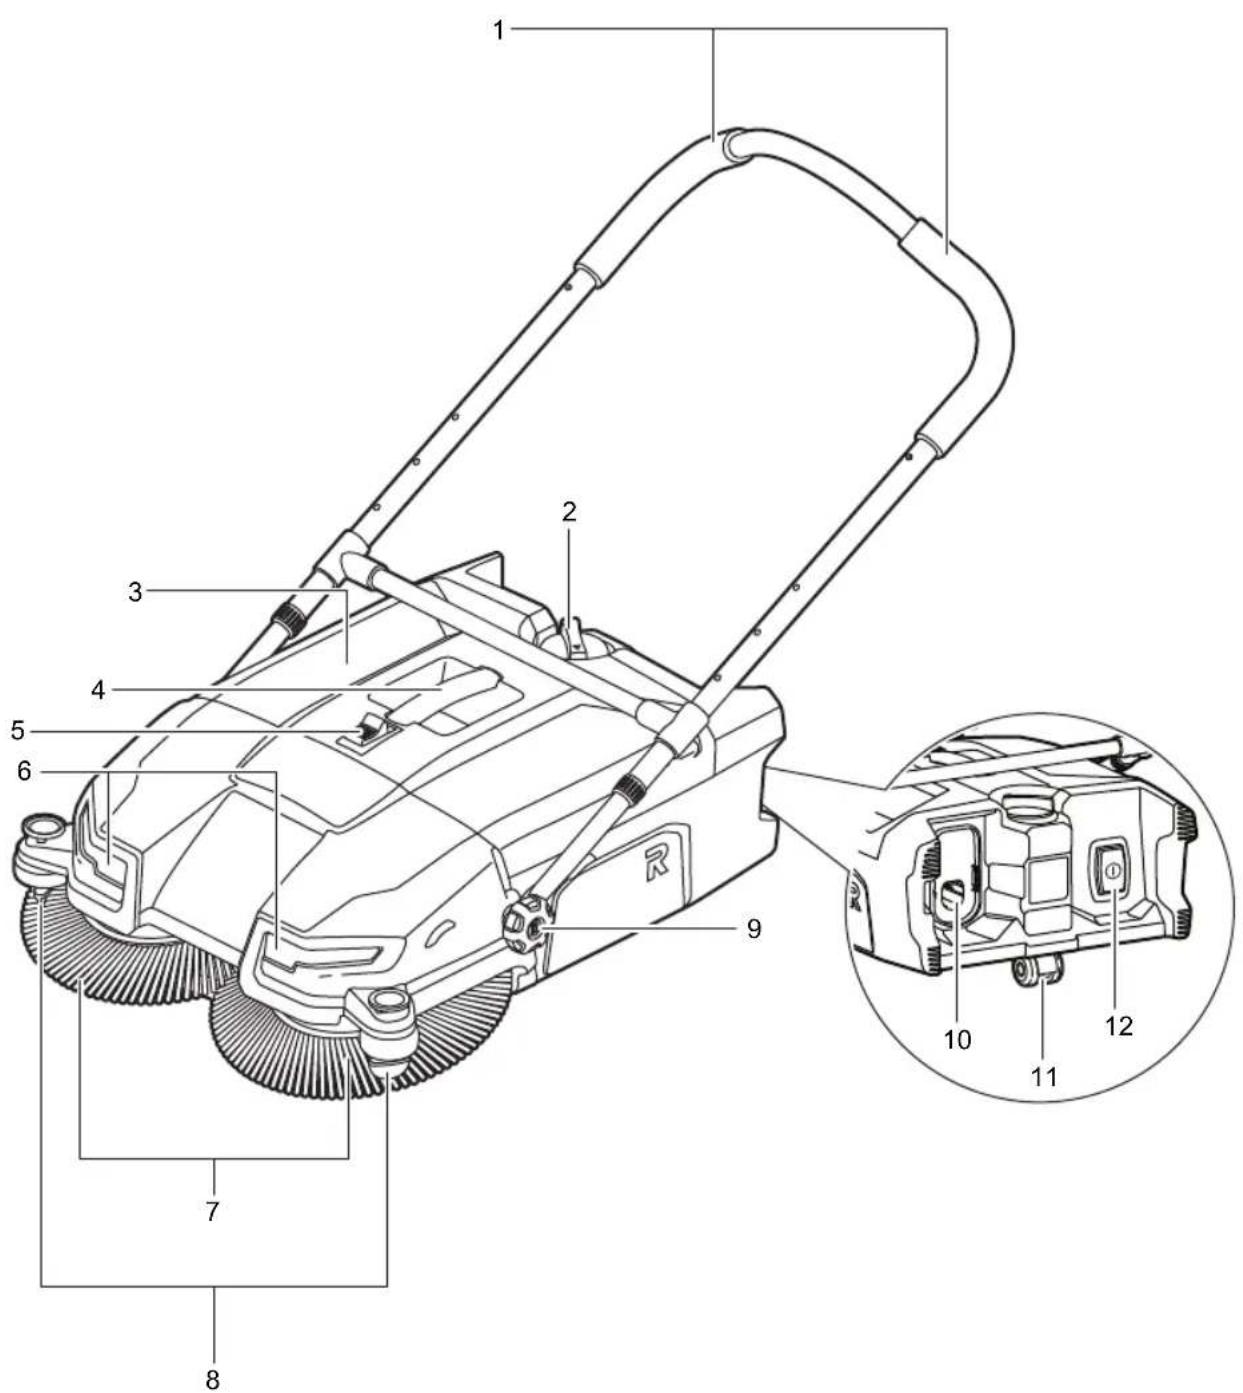
KNOW YOUR PRODUCT
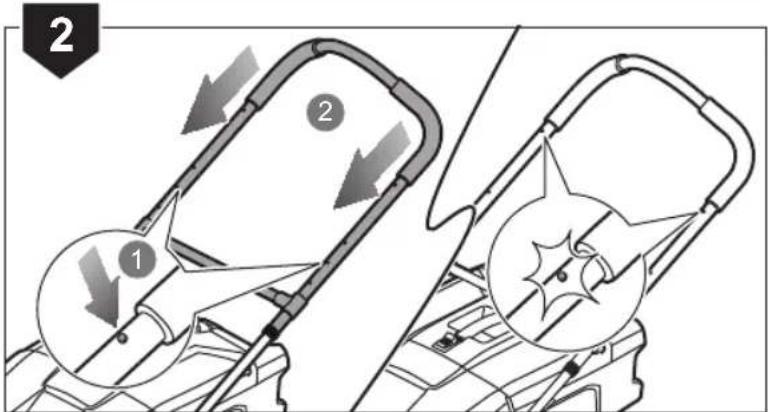
- Handle
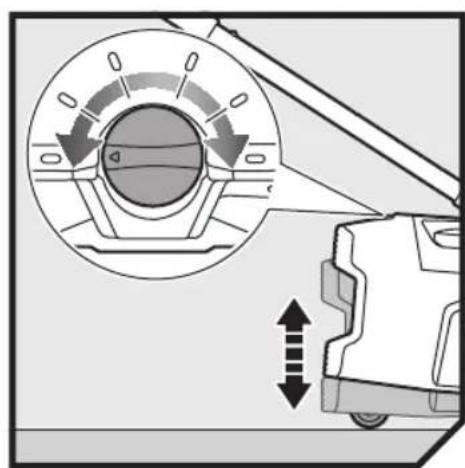
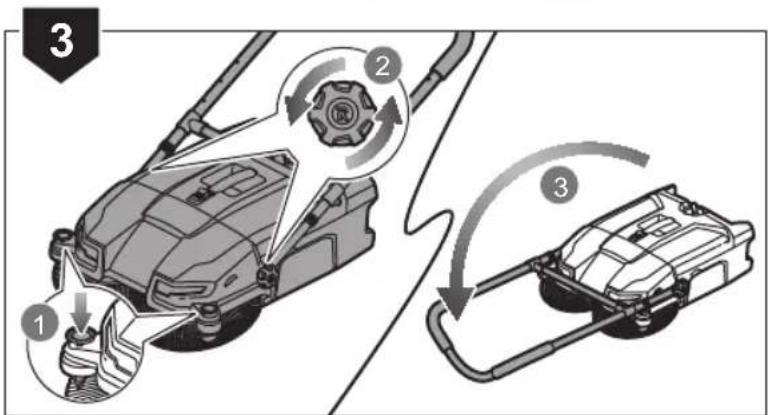
- Brush height adjustment dial
- Debris container
- Container handle
- Latch
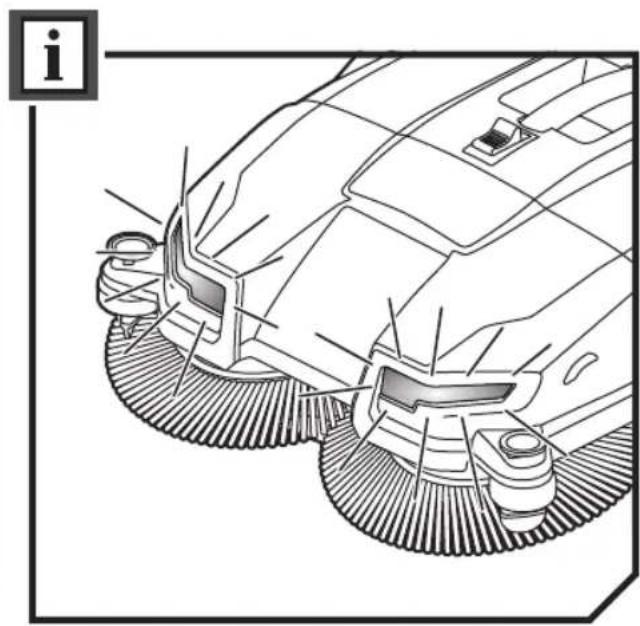
- LED headlights
- Brushes
- Bristle deflector
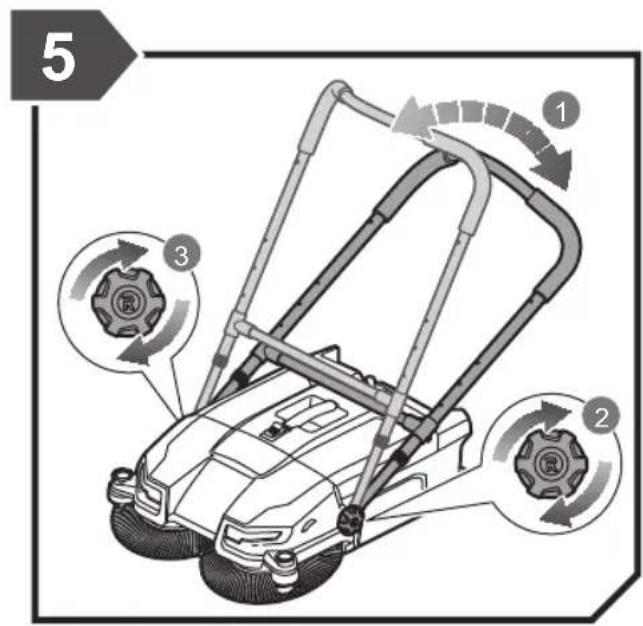
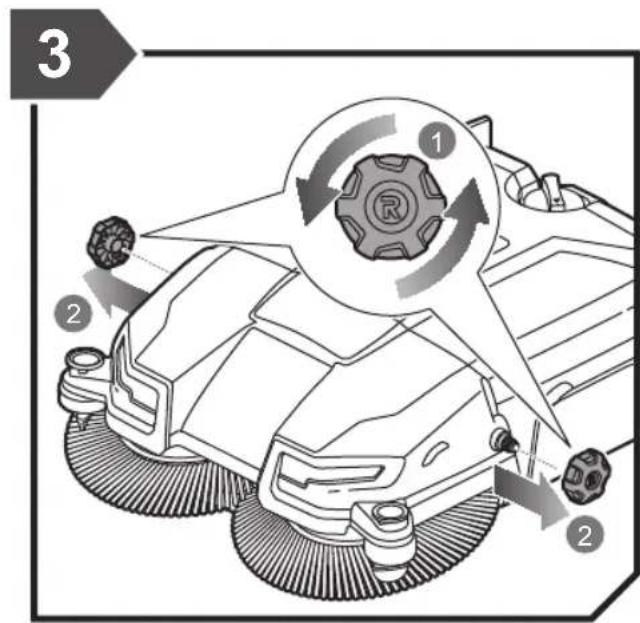
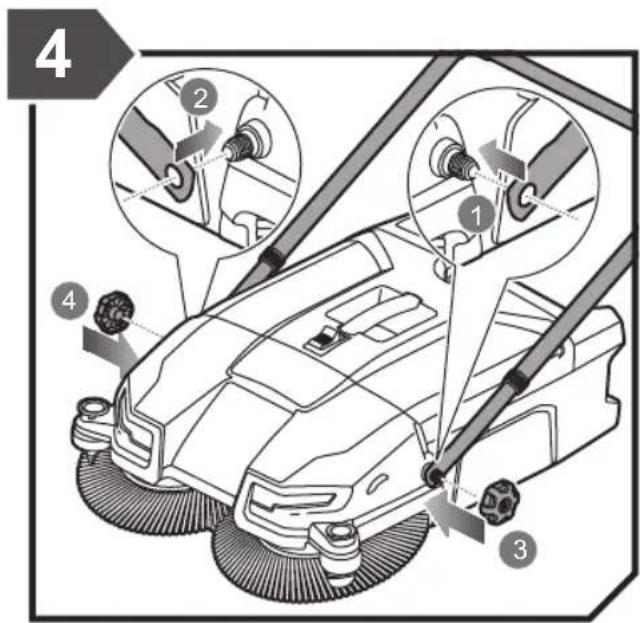
- Handle locking knob
- Battery port
- Rear caster
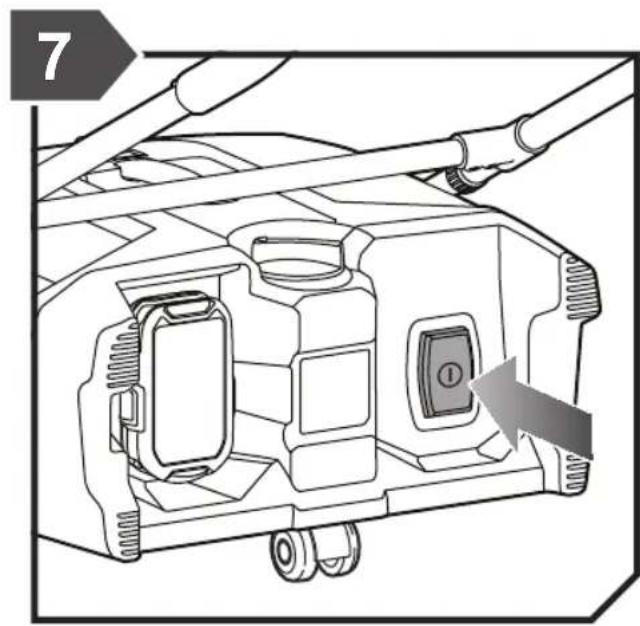
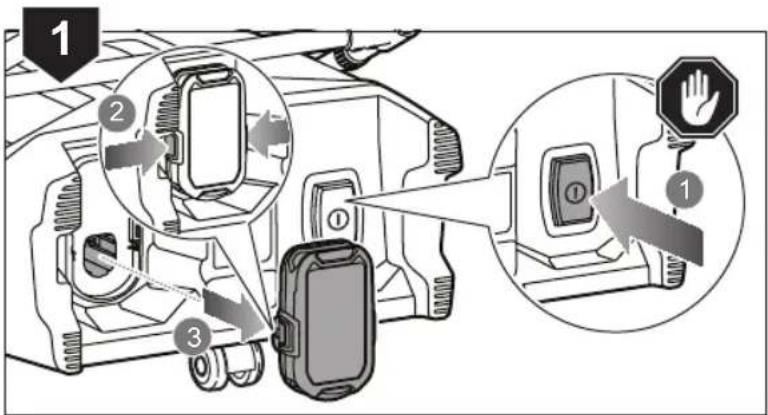
- On/off button
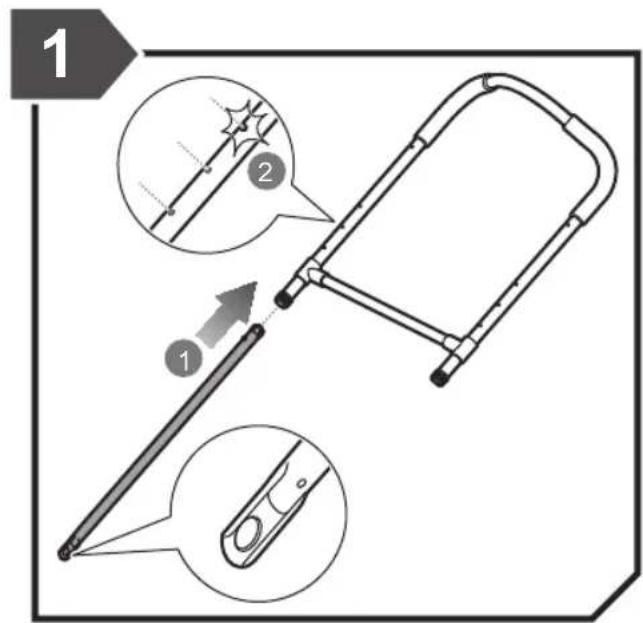
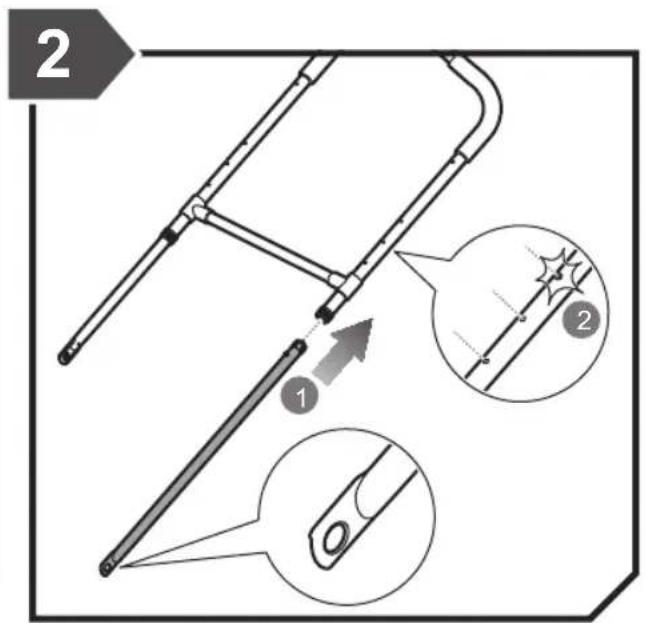
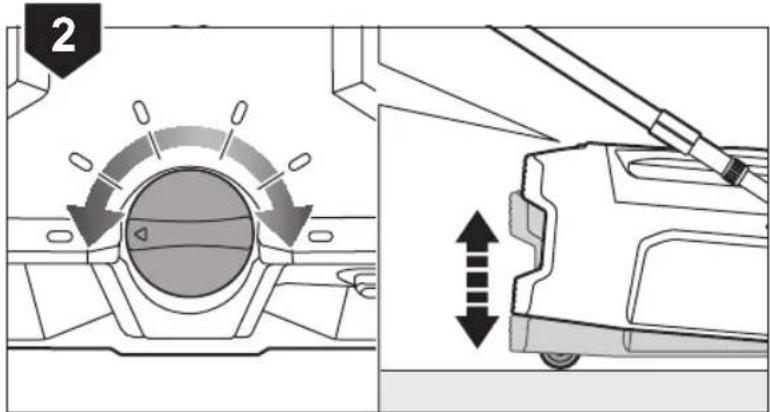
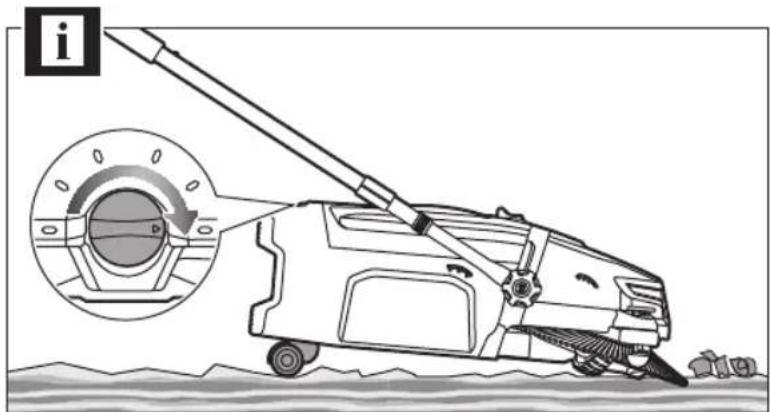
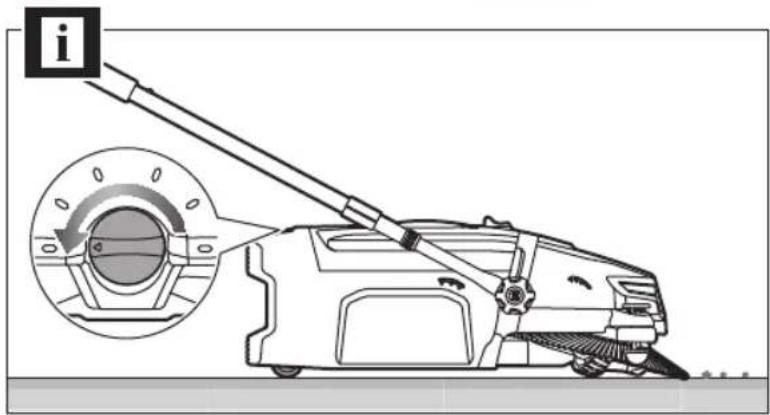
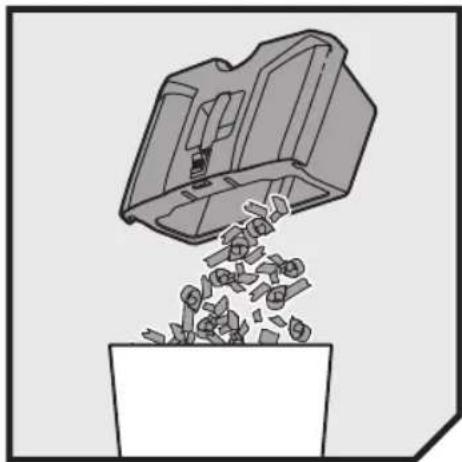
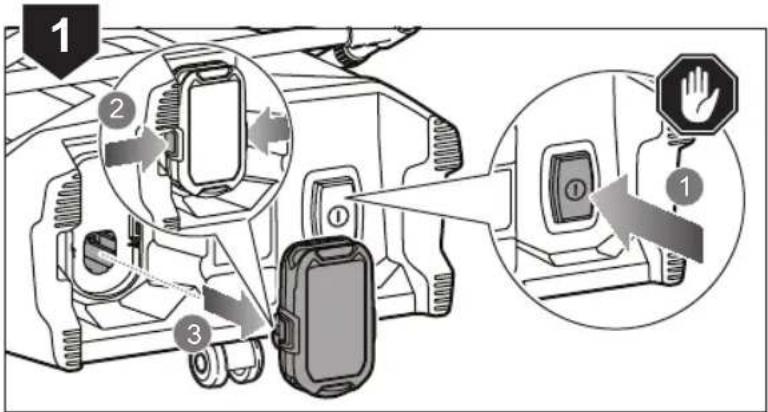
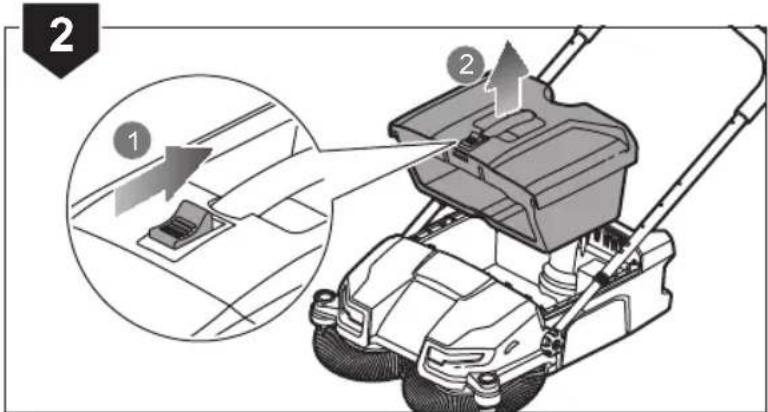
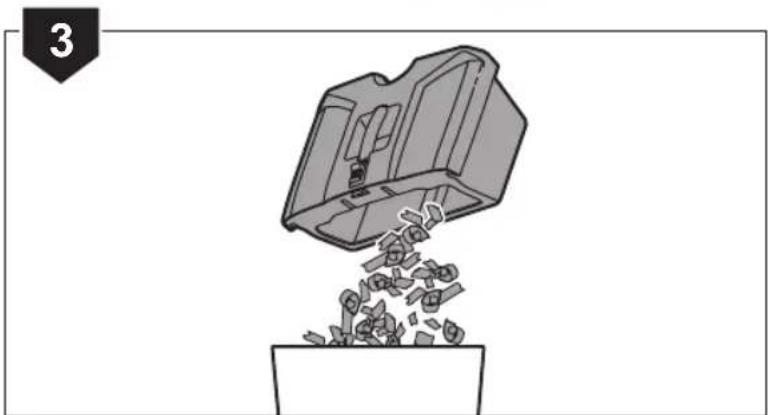
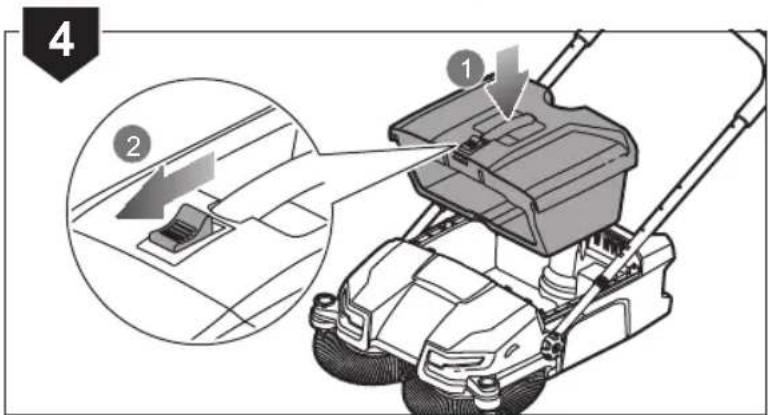
PRODUCT SPECIFICATIONS
Motorised Sweeper
Model R18SW3
Voltage 18 V
Brush rotation 140 min -1
Canister capacity 17 L
Cleaning width 533 mm
Weight - not incl. battery pack 8.28 kg
VIBRATION LEVEL
WARNING
The vibration emission level given in this information sheet has been measured in accordance with a standardised test given in EN 62841 and may be used to compare one tool with another. It may be used for a preliminary assessment of exposure. The declared vibration emission level represents the main applications of the tool. However if the tool is used for different applications, with different accessories or poorly maintained, the vibration emission may differ. This may significantly increase the exposure level over the total working period.
An estimation of the level of exposure to vibration should also take into account the times when the tool is switched off or when it is running but not actually doing the job. This may significantly reduce the exposure level over the total working period. Identify additional safety measures to protect the operator from the effects of vibration such as: maintain the tool and the accessories, keep the hands warm and organisation of work patterns.


RYOBI®
RYOBI is a trademark of Ryobi Limited, and is used under license.
Imported by:
Techtronic Industries Australia Pty Ltd
31 Gilby Road, Mount Waverley, VIC 3149
Melbourne, Australia
Techtronic Industries N.Z. Limited
2 Landing Drive, Mangere
Auckland, 2022, New Zealand


- IMPORTANT
- INTENDED USE
- SWEEPER SAFETY WARNINGS
- BATTERY AND CHARGER SAFETY WARNINGS
- ADDITIONAL SAFETY WARNINGS
- WARNING
- ADDITIONAL BATTERY SAFETY WARNINGS
- TRANSPORTING LITHIUM BATTERIES
- RESIDUAL RISKS
- RISK REDUCTION
- MAINTENANCE
- ENVIRONMENTAL PROTECTION
- SYMBOLS ON THE PRODUCT
- SYMBOLS IN THIS MANUAL
- DANGER
- CAUTION
- KNOW YOUR PRODUCT
- PRODUCT SPECIFICATIONS
- VIBRATION LEVEL
Brand : RYOBI
Model : One+ R18PS
Category : Sander