
POWX0550 - Saw PowerPlus - Free user manual and instructions
Find the device manual for free POWX0550 PowerPlus in PDF.


| Product Type | Circular Saw |
| Brand | PowerPlus |
| Model | POWX0550 |
| Supply Voltage | 230 V ~ 50 Hz |
| Rated Power | 1200 W |
| Blade Diameter | 185 mm |
| Blade Bore | 20 mm |
| Cutting Depth at 90° | 65 mm |
| Cutting Depth at 45° | 45 mm |
| No-Load Speed | 5000 rpm |
| Weight | 4.5 kg |
| Cable Length | 2 m |
| Sound Level | 95 dB(A) |
| Vibration Level | 3.5 m/s² |
| Main Functions | Longitudinal and cross cuts, bevel cuts up to 45° |
| Maintenance and Cleaning | Clean ventilation slots regularly, lubricate the blade after each use |
| Safety | Retractable blade guard, safety switch, emergency stop |
| Spare Parts and Repairability | Blade, carbon brushes, non-slip pads available |
| General Information | 2-year warranty, delivered with 24-tooth blade and hex key |
Frequently Asked Questions - POWX0550 PowerPlus
User questions about POWX0550 PowerPlus
0 question about this device. Answer the ones you know or ask your own.
Ask a new question about this device
Download the instructions for your Saw in PDF format for free! Find your manual POWX0550 - PowerPlus and take your electronic device back in hand. On this page are published all the documents necessary for the use of your device. POWX0550 by PowerPlus.
USER MANUAL POWX0550 PowerPlus
natural_image
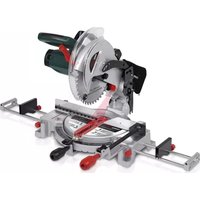
PowerPlus power cutter tool with yellow and silver blade, mounted on metal base (no visible text or symbols)
| NL | NEDERLANDS | VERTAALDE VERSIE VAN DE ORIGINELE HANDLEIDING |
| FR | FRANÇAIS | TRADUCTION DU MODE D'EMPLOI D'ORIGINE |
| EN | ENGLISH | ORIGINAL INSTRUCTION MANUAL |
| DE | DEUTSCH | ÜBERSETZUNG DER ORIGINALBETRIEBSANLEITUNG |
| ES | ESPAÑOL | TRADUCCIÓN DEL MANUAL DE INSTRUCCIONES ORIGINAL |
| IT | ITALIANO | TRADUZIONE DEL MANUALE DI ISTRUZIONI ORIGINALE |
| PT | PORTUGUÊS | TRADUÇÃO DO MANUAL DE INSTRUÇÕES ORIGINAL |
| NO | NORSK | OVERSETTELSE AV ORIGINAL BRUKERVEILEDNING |
| DA | DANSK | OVERSÆTTELSE AF DEN ORIGINALE BRUGSVEJLEDNING |
| SV | SVENSKA | ÖVERSÄTTNING AV DEN URSPRUNGLIGA BRUKSANVISNINGEN |
| FI | SUOMI | ALKUPERÄISEN OHJEKIRJAN KÄÄNNÕS |
| EL | Ελληνικά | Μετάφραση του πρωτότυπου εγχειριδίου οδηγιών |
| HR | HRVATSKI | PRIJEVOD ORIGINALNOG PRIRUČNIKA S UPUTAMA ZA RAD |
| SR | SRPSKI | PREVOD ORIGINALNOG UPUTSTVA ZA UPOTREBU |
| CS | ČESKY | PŘEKLAD ORIGINÁLNÍHO NÁVODU K POUŽITÍ |
| SK | SLOVENČINA | PREKLAD NÁVODU NA POUŽÍVANIE Z ORIGINÁLU |
| RO | ROMÂNÃ | TRADUCEREA MANUALULUI DE INSTRUCTIUNI ORIGINALE |
| PL | POLSKI | TŁUMACZENIE ORYGINALNEJ INSTRUKCJI OBSŁUGI |
| HU | MAGYAR | AZ EREDETI KEZELÉSI UTASÍTÁS FORDÍTÁSA |
| RU | РУССКИЙ | ОРИГИНАЛЬНАЯ ИНСТРУКЦИЯ ПО ЭКСПЛУАТАЦИИ |
| BG | БЪЛГАРСКИ | ПРЕВОД НА ОРИГИНАЛНОТО РЪКОВОДСТВО |
Fig. A

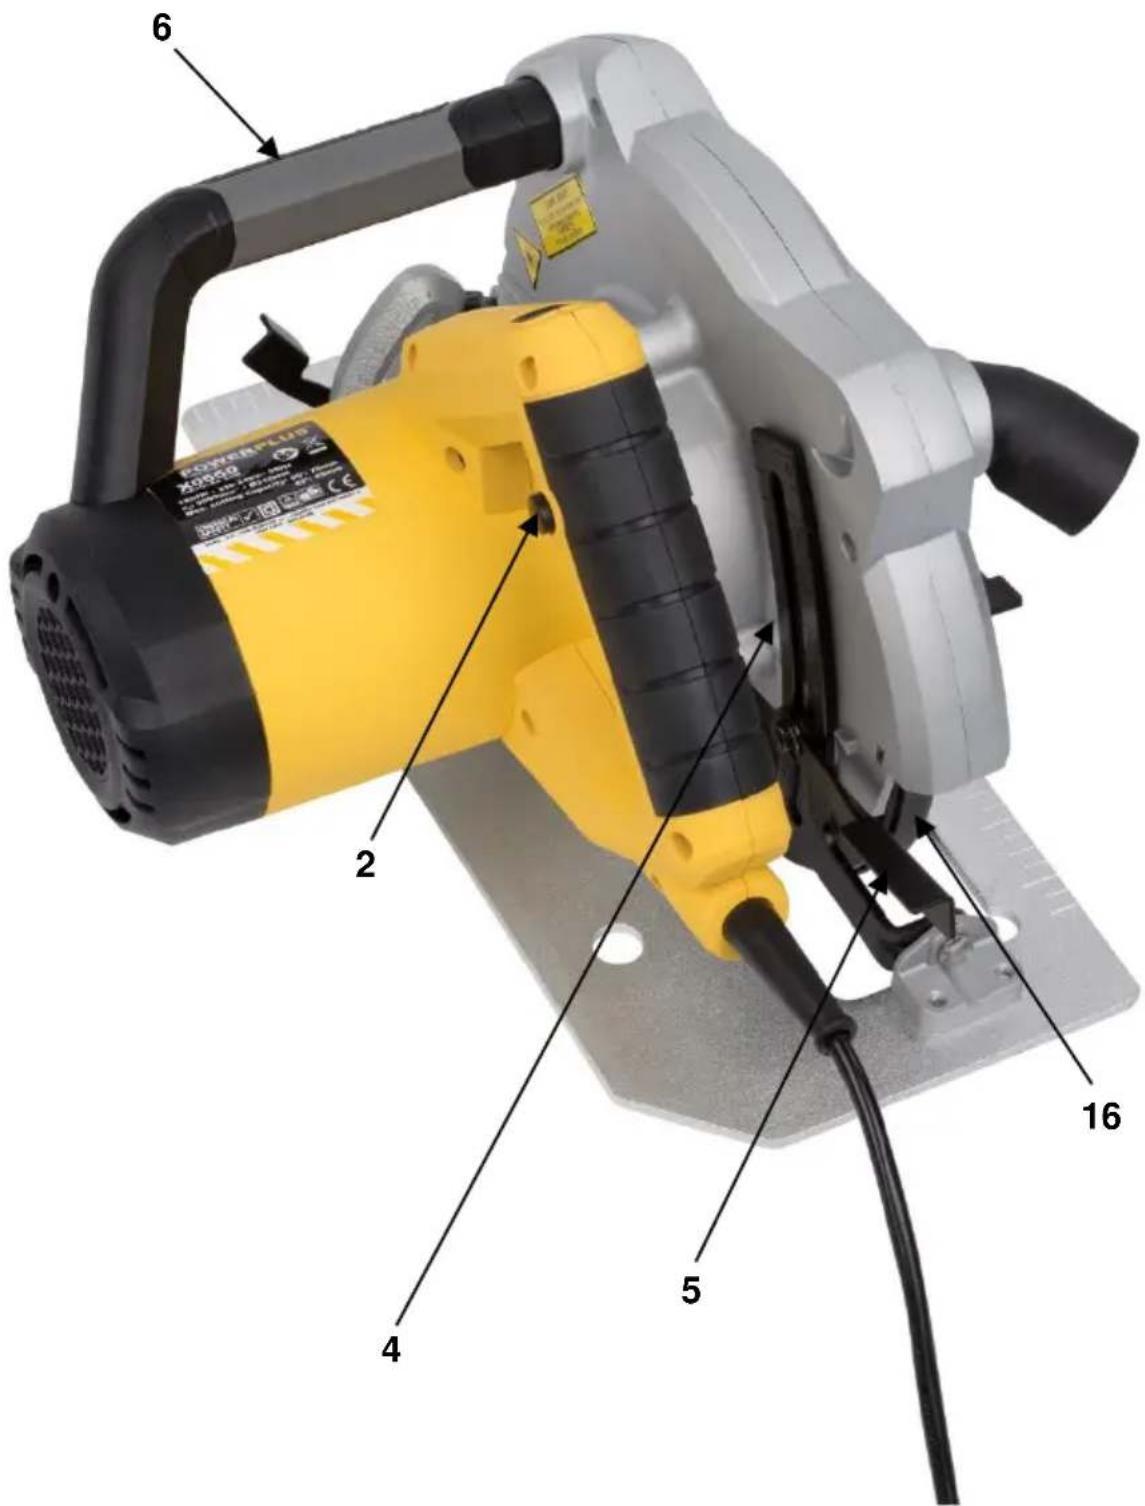
Fig 1


Fig 2

Fig 3
natural_image
Close-up of a sewing machine needle and metal base (no visible text or symbols)Fig 4

natural_image
Top-down view of a sewing machine on a wooden surface, showing blade, fork, and base plate (no text or symbols visible)Fig 5

2 BESCHRIJVING (FIG. A)
21/02/2022, Lier - Belgium
1 UTILISATION .... 3
2 DESCRIPTION (FIG. A) 3
3 LISTE DES PIÈCES CONTENUES DANS L'EMBALLAGE ...... 3
4 PICTOGRAMMES 4
5 CONSIGNES DE SÉCURITÉ GÉNÉRALES ....4
10.2 Lubrification....10
11 DONNÉES TECHNIQUES ...... 11
12 BRUIT 11
13 SERVICE APRÈS-VENTE 11
POWERPLUS® HIGH QUALITY TOOLS
POWX0550 FR
14 ENTREPOSAGE 11
15 GARANTIE 12
16 ENVIRONNEMENT 12
17 DÉCLARATION DE CONFORMITÉ .... 13
SCIE CIRCULAIRE 1800 W POWX0550
1 UTILISATION
21/02/2022, Lier - Belgium
1 APPLICATION....3
2 DESCRIPTION (FIG. A) 3
3 PACKAGE CONTENT LIST....3
4 SYMBOLS 3
5 GENERAL POWER TOOL SAFETY WARNINGS ....4
5.1 Work area 4
5.2 Electrical safety....4
5.3 Personal safety 4
5.4 Power tool use and care....5
5.5 Service....5
6 SPECIFIC SAFETY WARNINGS FOR CIRCULAR SAWS...... 5
6.1 Guard function 7
7 ADDITIONAL SAFETY INSTRUCTIONS FOR LASERS......7
8 ADJUSTMENTS....8
8.1 Replacing the saw blade (Fig. 1)....8
8.2 Adjusting the depth of cut (Fig. 2) 8
8.3 Setting the mitre angle (Fig. 3)....8
8.4 Mounting the parallel fence (Fig. 4) 8
9 OPERATION....9
9.1 Instructions for use....9
9.2 Switching on and off (Fig. 5) 9
9.3 Dust extraction....9
9.4 Laser beam....9
10 CLEANING AND MAINTENANCE....9
10.1 Cleaning....9
10.2 Lubrication (Fig. B) 9
11 TECHNICAL DATA 10
12 NOISE....10
13 SERVICE DEPARTMENT....10
14 STORAGE....10
POWERPLUS® HIGH QUALITY TOOLS
POWX0550 EN
15 WARRANTY....11
16 ENVIRONMENT 12
17 DECLARATION OF CONFORMITY 12
CIRCULAR SAW 1800 W
POWX0550
1 APPLICATION
Your circular saw has been designed for sawing wooden workpieces. The machine is only suitable for right-hand use. The machine is not suitable for stationary use. It is not designed for commercial use.

WARNING! Read this manual and general safety instructions carefully before using the appliance, for your own safety. Your power tool should only be passed on together with these instructions.
2 DESCRIPTION (FIG. A)
- On/off switch
- Lock-off button
- Dust extraction outlet
- Scale for saw blade depth (depth gauge)
- Adjusting screw for depth of cut
- Auxiliary handle
- Main handle
- Scale for mitre angle
- Lock lever for angle adjustment
- Base plate
- Adjusting screw for guide bar
- Guide bar
- Laser on/off switch
- Laser
- LED
- Lower guard
- Lever of lower guard
- Lock screw
- Dust extraction adapter
- Spindle lock button
3 PACKAGE CONTENT LIST
■ Remove all packing materials.
- Remove remaining packaging and transit supports (if existing).
- Check the completeness of the packing content.
- Check the appliance, the power cord, the power plug and all accessories for transportation damages.
- Keep the packaging materials as far as possible till the end of the warranty period. Dispose it into your local waste disposal system afterwards.

WARNING: Packing materials are no toys! Children must not play with plastic bags! Danger of suffocation!
1 x spanner
1 x guide bar
1 x saw blade
1 x dust extraction adapter

When parts are missing or damaged, please contact your dealer.
4 SYMBOLS
In this manual and/or on the machine the following symbols are used:
 | Denotes risk of personal injury or damage to the tool. |  | In accordance with essential requirements of the European directive(s). |
 | Read manual before use. |  | Class II - The machine is double insulated; earthing wire is therefore not necessary. |
 | Always wear hearing protection. |  | Always wear safety goggles. |
 | Always wear protective gloves. |  | Always wear a dust mask. |
 | Electrical products must not be disposed with the domestic waste. | ||
5 GENERAL POWER TOOL SAFETY WARNINGS
Read all safety warnings and all instructions. Failure to follow all warnings and instructions may result in electric shock, fire and/or serious injury. Save all warnings and instructions for future reference. The term "power tool" in the warnings refers to your mains operated (corded) power tool or battery operated (cordless) power tool.
5.1 Work area
- Keep work area clean and well lit. Cluttered and dark areas invite accidents.
- Do not operate power tools in explosive atmospheres, such as in the presence of flammable liquids, gases or dust. Power tools create sparks which may ignite the dust or fumes.
- Keep children and bystanders away while operating a power tool. Distractions can cause you to lose control.
5.2 Electrical safety

Always check that the power supply corresponds to the voltage on the rating plate.
■ Power tool plugs must match the outlet. Never modify the plug in any way. Do not use any adapter plugs with earthed (grounded) power tools. Unmodified plugs and matching outlets will reduce risk of electric shock.
- Avoid body contact with earthed or grounded surfaces such as pipes, radiators, ranges and refrigerators. There is an increased risk of electric shock if your body is earthed or grounded.
- Do not expose power tools to rain or wet conditions. Water entering a power tool will increase the risk of electric shock.
- Do not abuse the cord. Never use the cord for carrying, pulling or unplugging the power tool. Keep cord away from heat, oil, sharp edges or moving parts. Damaged or entangled cords increase the risk of electric shock.
- When operating a power tool outdoors, use an extension cord suitable for outdoor use. Use of a cord suitable for outdoor use reduces the risk of electric shock.
- If operating a power tool in a damp location is unavoidable, use a residual current device (RCD) protected supply. Use of an RCD reduces the risk of electric shock.
5.3 Personal safety
- Stay alert, watch what you are doing and use common sense when operating a power tool. Do not use a power tool while you are tired or under the influence of drugs, alcohol or medication. A moment of inattention while operating power tools may result in serious personal injury.
- Use safety equipment. Always wear eye protection. Safety equipment such as dust mask, non-skid safety shoes, hard hat, or hearing protection used whenever conditions require will reduce personal injuries.
- Avoid accidental starting. Ensure the switch is in the off position before plugging in. Carrying power tools with your finger on the switch or plugging in power tools that have the switch on invites accidents.
- Remove any adjusting key or wrench before turning the power tool on. A wrench or a key left attached to a rotating part of the power tool may result in personal injury.
- Do not overreach. Keep proper footing and balance at all times. This enables better control of the power tool in unexpected situations.
- Dress properly. Do not wear loose clothing or jewellery. Keep your hair, clothing and gloves away from moving parts. Loose clothes, jewellery or long hair can be caught in moving parts.
- If devices are provided for the connection of dust extraction and collection facilities, ensure these are connected and properly used. Use of these devices can reduce dust related hazards.
5.4 Power tool use and care
- Do not force the power tool. Use the correct power tool for your application. The correct power tool will do the job better and safer at the rate for which it was designed.
- Do not use the power tool if the switch does not turn it on and off. Any power tool that cannot be controlled with the switch is dangerous and must be repaired.
- Disconnect the plug from the power source before making any adjustments, changing accessories, or storing power tools. Such preventive safety measures reduce the risk of starting the power tool accidentally.
- Store idle power tools out of the reach of children and do not allow persons unfamiliar with the power tool or these instructions to operate the power tool. Power tools are dangerous in the hands of untrained users.
- Maintain power tools. Check for misalignment or sticking of moving parts, breakage of parts and any other condition that may affect the power tool's operation. If damaged, have the power tool repaired before use. Many accidents are caused by poorly maintained power tools.
- Keep cutting tools sharp and clean. Properly maintained cutting tools with sharp cutting edges are less likely to stick and are easier to control.
- Use the power tool, accessories and tool bits etc., in accordance with these instructions and in the manner intended for the particular type of power tool, taking into account the working conditions and the work to be performed. Use of the power tool for operations different from intended could lead to a hazardous situation.
5.5 Service
- Have your power tool serviced by a qualified repair person using only identical replacement parts. This will ensure that the safety of the power tool is maintained.
6 SPECIFIC SAFETY WARNINGS FOR CIRCULAR SAWS
■ Make sure that all devices screening the saw blade are in perfect working order.
- Make sure that the saw blade is screened correctly. Especially observe the following instructions:
- Never block the saw blade guard. Repair a jammed saw blade guard before using the machine again.
- Replace a broken tension spring before using the machine again.
- Never remove the riving knife. The distance between the toothed rim and the riving knife should be 5 mm maximum. The height difference between the riving knife and the toothed rim should be 5 mm maximum.
- Do not use saw blades made of HSS steel.
- Do not use bent, deformed or otherwise damaged saw blades.
- Do not use saw blades which do not meet the specifications stated in this manual.
■ Before sawing, remove all nails and other metal objects from the workpiece. - Never start sawing before the saw reaches its full speed.
- Securely clamp the workpiece. Never attempt to saw extremely small workpieces.
- Only put the machine aside after switching off and when the saw blade has come to a complete standstill.
- Never try to slow the saw blade down by exerting pressure on the side.
■ Before performing maintenance to the machine, always unplug the machine.
Cutting procedures
- Keep hands away from cutting area and the blade. Keep your second hand on the auxiliary handle or motor housing. If both hands are holding the saw, they cannot be cut by the blade.
- Do not reach underneath the work piece. The guard cannot protect you from the blade below the work piece.
- Adjust the cutting depth to the thickness of the work piece. Less than a full tooth of the blade teeth should be visible below the work piece.
- Never hold piece being cut in your hands or across your leg. Secure the work piece to a stable platform. It is important to support the work properly to minimize body exposure, blade binding or loss of control.
- Hold the power tool by insulated gripping surfaces only when performing an operation where the cutting tool may contact hidden wiring or its own cord. Contact with a 'live' wire will also make exposed metal parts of the power tool 'live' and could give the operator an electric shock.
- When ripping, always use a rip fence or straight edge guide. This improves the accuracy of cut and reduces the chance of blade binding.
- Always use blades with correct size and shape (diamond versus round) or arbour holes. Blades that do not match the mounting hardware of the saw will run eccentrically, causing loss of control.
- Never use damaged or incorrect blades washers or bolt. The blade washers and bolt were specially designed for your saw, for optimum performance and safety of operation.
Causes and operator prevention of kickback
- Kickback is a sudden reaction to a pinched, bound or misaligned saw blade, causing an uncontrolled saw to lift up and out of the work piece toward the operator.
- When the blade is pinched or bound tightly by the kerf closing down, the blade stalls and the motor reaction drives the unit rapidly back toward the operator.
- If the blade becomes twisted or misaligned in the cut, the teeth at the back edge of the blade can dig into the top surface of the wood causing the blade to climb out to the kerf and jump back toward the operator.
- Kickback is the result of saw misuse and/or incorrect operating procedures or conditions and can be avoided by taking proper precautions as given below.
- Maintain a firm grip with both hands on the saw and position your arms to resist kickback forces. Position your body to either side of the blade, but not in line with the blade. Kickback could cause the saw to jump backwards, but kickback forces can be controlled by the operator, if proper precautions are taken.
- When blade is binding or when interrupting a cut for any reason, release the trigger and hold the saw motionless in the material until the blade comes to a complete stop. Never attempt to remove the saw from the work or pull the saw backward while the blade is in motion or kickback may occur. Investigate and take corrective actions to eliminate the cause of blade binding.
- When restarting a saw in the work piece, centre the saw blade in the kerf and check that saw teeth are not engaged into the material. If saw blade is binding, it may walk up or kickback from the work piece as the saw is restarted.
- Support large panels to minimize the risk of blade pinching and kickback. Large panels tend to sag under their own weight. Supports must be placed under the panel on both sides near the line of cut and near the edge of the panel.
- Do not use dull or damaged blades? Unsharpened or improperly set blades produce narrow kerf causing excessive friction, blade binding and kickback.
- Blade depth and bevel adjusting locking levers must be tight and secure before making cut. If blade adjustment shifts while cutting, it may cause binding and kickback.
- Use extra caution when sawing into existing walls or other blind areas. Protruding blade may cut objects that can cause kickback.
Lower guard function
- Check lower guard for proper closing before each use. Do not operate the saw if lower guard does not move freely and close instantly. Never clamp or tie the lower guard into the open position. If saw is accidentally dropped, lower guard may be bent. Raise the lower guard with the retracting handle and make sure it moves freely and does not touch the blade or any other part, in all angles and depths of cut.
- Check the operation of the lower guard spring. If the guard and the spring are not operating properly, they must service before use? Lower guard may operate sluggishly due to damaged parts, gummy deposits or build-up of debris.
- Lower guard may retract manually only for special cuts such as 'plunge cuts' and 'compound cuts'. Raise lower guard by retracting handle and as soon as blade enters the material, the lower guard must be released. For all other sawing, the lower guard should operate automatically.
- Always observe that the lower guard is covering the blade before placing saw down on bench or floor. An unprotected, coasting blade will cause the saw to walk backwards, cutting whatever is in its path. Be aware of the time takes for the blade to stop after switch is released.
6.1 Guard function
- Check guard for proper closing before each use. Do not operate the saw if guard does not move freely and enclose the blade instantly. Never clamp or tie the guard so that the blade is exposed. If saw is accidentally dropped, guard may be bent. Check to make sure that guard moves freely and does not touch the blade or any other part, in all angles and depths of cut.
- Check the operation and condition of the guard return spring. If the guard and the spring are not operating properly, they must be serviced before use. Guard may operate sluggishly due to damaged parts, gummy deposits, or a build-up of debris.
- Assure that the base plate of the saw will not shift while performing the "plunge cut" when the blade bevel setting is not at 90°. Blade shifting sideways will cause binding and likely kick back.
- Always observe that the guard is covering the blade before placing saw down on bench or floor. An unprotected, coasting blade will cause the saw to walk backwards, cutting whatever is in its path. Be aware of the time it takes for the blade to stop after the switch is released.

7 ADDITIONAL SAFETY INSTRUCTIONS FOR LASERS

Laser beam warning.
Laser beam characteristics.
- Warning! The laser beam potentially causes severe eye damage. Never look or stare directly into the laser beam.
- During use, do not point the laser beam at people, directly or indirectly through reflecting surfaces.
- This laser complies with class 2 according to EN 60825-1:2007. The unit includes no servicing components. Do not open the housing for any reason. If the unit is damaged, have the damage repaired by an authorized repair agent.
8 ADJUSTMENTS
8.1 Replacing the saw blade (Fig. 1)
Only use sharp and undamaged saw blades. Cracked or bent saw blades must be replaced immediately.
- Place this circular saw on its side on a flat surface. Advice you bring the base plate (10) down as if a minimum depth cut which is ease to operate.
- Push the spindle lock button toward motor housing as the arrow shows in Fig. 1 and firmly hold it
- Turn the blade clamp bolt anti-clockwise by using the spanner that supplied with the tool.
■ Remove the blade clamp bolt and outer flange. - Raise the lower guard (16) by using the lever for lower guard (17), and then remove the saw blade.
- Clean the saw blade flanges, then mount the new saw blade onto the output spindle and against the inner flange.
- Make sure the saw teeth and arrow on the blade is to be the same direction as the arrow on the lower guard.
■ Reinstall the outer flange, and tighten the blade clamp bolt.
■ Make sure that the saw blade runs freely by turning the blade by hand.

Before replacing the saw blade always unplug the tool.
8.2 Adjusting the depth of cut (Fig. 2)
The depth of cut is infinitely adjustable. A clean cut is achieved with the saw blade protruding from the material by approx. 3 mm.
■ Loosen the lock lever for depth adjustment (5).
- Hold the base plate (10) flat against the edge of the work piece and lift the body of the saw until the blade is at the right depth determined by the depth gauge (4) (align the scale line).
- Tighten the lock lever for depth adjustment.
8.3 Setting the mitre angle (Fig. 3)
The mitre angle is infinitely variable between 0^ and 45^ .
■ Loosen the lock lever for angle adjustment (9).
- Adjust the shoe to the desired angle between 0^ to 45^ . [See Angle gauge (8)].
- Tighten the lock lever for angle adjustment.
8.4 Mounting the parallel fence (Fig. 4)
The parallel fence allows sawing parallel to an edge at a maximum distance of 10 cm.
■ Loosen the lock knob of edge guide (11).
■ Slide the edge guide (12) through the slots in the shoe to the desired width.
- Tighten the lock knob to secure it in the position.
■ Ensure that the edge guide rests against the wood along its entire length to give a consistent parallel cuts.
9 OPERATION
9.1 Instructions for use
- Clamp the workpiece. Make sure that the side which will be visible later is facing down, because the cut is most accurate at that side.
- Switch on the machine before it touches the workpiece. Do not exert pressure on the saw blade. Allow the machine enough time to cut the workpiece.
- Hold the machine with both hands using both grips. This ensures optimum control over the machine.
- For straight cuts along a drawn line use the marking for straight cuts.
- For bevel cuts along a drawn line use the marking for bevel cuts.
9.2 Switching on and off (Fig. 5)
- To switch the tool on, keep the lock-off button (2) depressed and press the on/off switch (1).
- To switch the tool off, release the on/off switch.
9.3 Dust extraction
A vacuum cleaner can be connected to the dust extraction outlet, either directly to the connector or using an adapter.
- If necessary, connect an adapter to the extraction outlet.
9.4 Laser beam
The laser beam is used for projection of the cut on the workpiece.
Switch the laser (14) on by means of the laser on/off switch (13). If you press again the LED light works and if you press a 3^rd time, the LED light as well as the laser will work.
- Place the machine on the workpiece with the saw marking above the start of the cutting line.
- Check that the laser line aligns with the cutting line as marked on the workpiece.
■ Switch on the machine. - Follow the “instructions for use” to perform a cut.
■ After use, switch off the laser.
10 CLEANING AND MAINTENANCE

Attention! Before performing any work on the equipment, pull the power plug.
10.1 Cleaning
- Keep the ventilation slots of the machine clean to prevent overheating of the engine.
- Regularly clean the machine housing with a soft cloth, preferably after each use.
- Keep the ventilation slots free from dust and dirt.
- If the dirt does not come off use a soft cloth moistened with soapy water.

Never use solvents such as petrol, alcohol, ammonia water, etc. These solvents may damage the plastic parts.
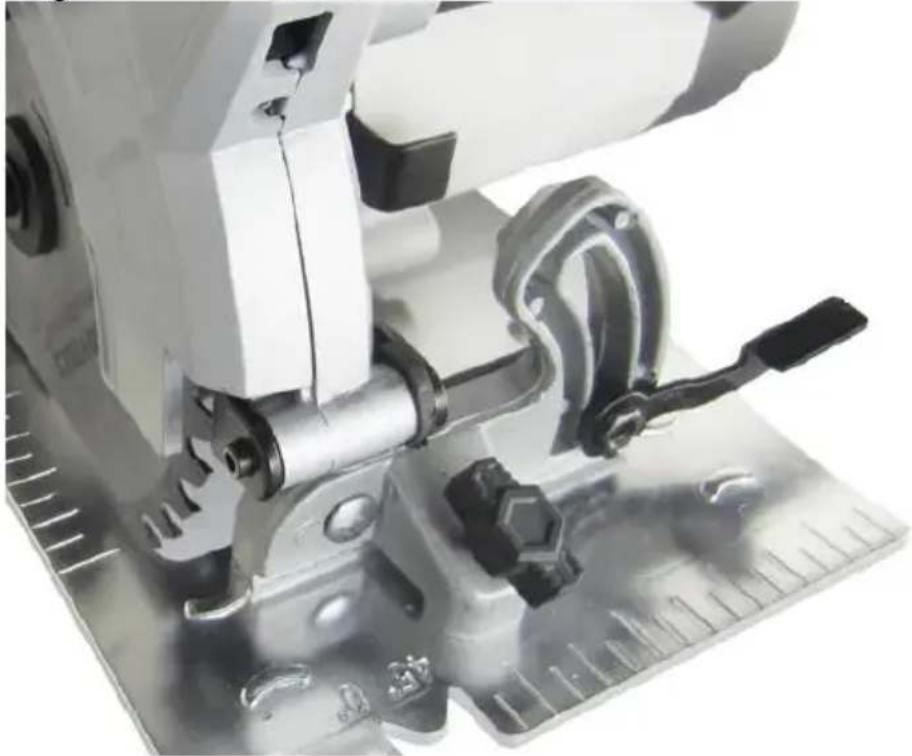
10.2 Lubrication (Fig. B)
From time to time, apply a drop of oil to the thread of the lock screw (18).
11 TECHNICAL DATA
| Voltage / frequency | 230-240 V / 50 Hz |
| Power input | 1800 W |
| No load speed | 5000 min ^-1 |
| Saw blade | ∅ 210 x ∅ 30 x 2.4 mm |
| Max. depth of cut 90° | 70 mm |
| Max. depth of cut 45° | 52 mm |
| Mitre angle | 0 – 45° |
12 NOISE
Noise emission values measured according to relevant standard. (K=3)
Acoustic pressure level LpA 100 dB(A)
Acoustic power level LwA 107 dB(A)

ATTENTION! Wear hearing protection when sound pressure is over 85 dB(A).
aw (Vibration)
3.9 m/s²
K = 1.5 ~m / s^2
- The specified total vibration values and the specified noise emission values were measured according to a standardised test method and can be used to compare one power tool with another.

The vibration emission and the sound emission during actual use of the power tool can differ from the declared emission value depending on the ways in which the tool is used.

Be sure to identify safety measures to protect the operator that are based on an estimation of exposure in the actual conditions of use (taking account of all parts of the operating cycle such as the times when the tool is switched off and when it is running idle in addition to the trigger time).
13 SERVICE DEPARTMENT
- Damaged switches must be replaced by our after-sales service department.
- If the connecting cable (or mains plug) is damaged, it must be replaced by a particular connecting cable which is available from our service department. Replacement of the connecting cable must only be carried out by our service department (see last page) or by a qualified person (qualified electrician).
14 STORAGE
- Thoroughly clean the whole machine and its accessories.
- Store it out of the reach of children, in a stable and secure position, in a cool and dry place, avoid too high and too low temperatures.
- Protect it from exposure to direct sunlight. Keep it in the dark, if possible.
- Don't keep it in plastic bags to avoid humidity build-up.
15 WARRANTY
- This product is warranted for a 36-month period effective from the date of purchase by the first user.
- This warranty covers all material or production flaws excluding : batteries, chargers, defective parts subject to normal wear & tear such as bearings, brushes, cables, and plugs, or accessories such as drills, drill bits, saw blades, etc. ; damage or defects resulting from maltreatment, accidents or alterations; nor the cost of transportation.
- Damage and/or defects resulting from inappropriate use also do not fall under the warranty provisions.
■ We also disclaim all liability for any bodily injury resulting from inappropriate use of the tool. - Repairs may only be carried out by an authorised customer service centre for Powerplus tools.
- You can always obtain more information at the number 00 32 3 292 92 90.
- Any transportation costs shall always be borne by the customer, unless agreed otherwise in writing.
- At the same time, no claim can be made on the warranty if the damage of the device is the result of negligent maintenance or overload.
- Definitely excluded from the warranty is damage resulting from fluid permeation, excessive dust penetration, intentional damage (on purpose or by gross carelessness), inappropriate usage (use for purposes for which the device is not suitable), incompetent usage (e.g. not following the instructions given in the manual), inexpert assembly, lightning strike, erroneous net voltage. This list is not exhaustive.
- Acceptance of claims under warranty can never lead to the prolongation of the warranty period nor commencement of a new warranty period in case of a device replacement.
■ Devices or parts which are replaced under the warranty therefore remain the property of Varo NV. - We reserve the right to reject a claim whenever the purchase cannot be verified or when it is clear that the product has not been properly maintained. (Clean ventilation slots, carbon brushes serviced regularly, etc.).
- Your purchase receipt must be kept as proof of date of purchase.
- Your appliance must be returned undismantled to your dealer in an acceptably clean state, (in its original blow-moulded case if applicable to the unit), accompanied by proof of purchase.
16 ENVIRONMENT
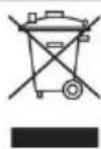
Should your appliance need replacement after extended use, do not discard it with the household rubbish but dispose of it in an environmentally safe way. Waste produced by electrical machine items should not be handled like normal household rubbish. Please recycle where recycle facilities exist. Check with your Local Authority or retailer for recycling advice.
17 DECLARATION OF CONFORMITY


VARO N.V. - Vic. Van Rompuy N.V.- Joseph Van Instraat 9 - BE2500 Lier - BELGIUM, declares that,
product: Circular saw trade mark: POWERplus
model: POWX0550
is in conformity with the essential requirements and other relevant provisions of the applicable European Directives, based on the application of European harmonized standards. Any unauthorized modification of the apparatus voids this declaration.
European Directives (including, if applicable, their amendments up to the date of signature):
2011/65/EU 2014/30/EU 2006/42/EC
European harmonized standards (including, if applicable, their amendments up to the date of signature):
EN62841-1:2015
EN62841-2-5:2014
EN IEC 55014-1:2021
EN IEC 55014-2:2021
EN IEC 61000-3-2:2019
EN IEC 61000-3-11:2019
Keeper of the Technical Documentation: Philippe Vankerkhove, VARO – Vic. Van Rompuy N.V.
The undersigned acts on behalf of the company CEO,

Philippe Vankerkhove Regulatory Affairs – Compliance Manager 21/02/2022, Lier - Belgium
1 EINSATZBEREICH .... 3
HANDKREISSÄGE 1800 W
POWX0550
1 EINSATZBEREICH
21/02/2022, Lier - Belgium
1 APLICACIÓN....3
21/02/2022, Lier - Belgium
Regulatory Affairs – Compliance Manager
21/02/2022, Lier - Belgium
21/02/2022, Lier - Belgium
1 BRUKSOMRÅDE 3
2 BESKRIVELSE (FIG. A) 3
3 PAKKENS INNHOLD....3
4 SYMBOLFORKLARING .... 4
5 GENERELLE SIKKERHETSADVARSLER 4
5.1 Arbeidsplassen 4
5.2 Elektrisk sikkerhet 4
5.3 Personsikkerhet....5
5.4 Vær nøyaktig og omhyggelig når du omgås elektroverktøy 5
5.5 Service....5
6 ANBEFALTE SIKKERHETSREGLER FOR SIRKELSAGER ...... 6
6.1 Funskjonen til det nedre vernet 7
7 YTTERLIGERE SIKKERHETSINSTRUKSJONER FOR LASERE . 8
8 JUSTERINGER 8
8.1 Bytte sagblad (Fig. 1)....8
8.2 Stille inn sagdybde (Fig. 2)....8
8.3 Innstilling av gjæringsvinkel (Fig. 3)....8
8.4 Montere parallellanslag (Fig. 4)....9
9 BRUK....9
9.1 Anvisninger for bruk av maskinen....9
9.2 Slå maskinen på og av (Fig. 5)....9
9.3 Støvutsug....9
9.4 Laserstråle....9
10 RENGJ∅RING OG VEDLIKEHOLD 9
10.1 Rengjøring....9
10.2 Smøring 9
11 TEKNISKE DATA....10
12 ST∅Y 10
13 SERVICEAVDELING....10
14 OPPBEVARING 10
POWERPLUS® HIGH QUALITY TOOLS
POWX0550 NO
15 GARANTI....11
16 MILJ∅ 11
17 SAMSVARSERKLÆRING 12
SIRKELSAG 1800 W
POWX0520
1 BRUKSOMRÅDE
21/02/2022, Lier - Belgium
1 ANVENDELSE 3
2 BESKRIVELSE (FIG. A) 3
3 MEDF∅LGENDE INDHOLD 3
4 SYMBOLER....4
5 GENERELLE SIKKERHEDSFORSKRIFTER ....4
3 FÖRPACKNINGSINNEHÅLL 3
4 SYMBOLER....4
5 ALLMÄNNA SÄKERHETSANVISNINGAR FÖR ELEKTRISKA VERKTYG....4
9.3 Dammavsugning....9
9.4 Laserstråle....9
10 RENGÖRING OCH UNDERHÅLL 9
10.1 Rengöring....9
10.2 Smörjning....10
11 TEKNISKA DATA....10
12 BULLER 10
13 SERVICEVERKSTAD 10
POWERPLUS HIGH QUALITY TOOLS
POWX0550 SV
14 FÖRVARING 10
15 GARANTI....11
16 MILJÖHÄNSYN....11
17 FÖRSÄKRAN OM ÖVERENSSTÄMMELSE....12
CIRKELSÅG 1800 W POWX0550
1 ANVÄNDNINGSOMRÅDE
3 FÖRPACKNINGSINNEHÅLL
21/02/2022, Lier - Belgium
21/02/2022, Lier - Belgium
1 ЕФАРМОГН 3
21/02/2022, Lier - Belgium
1 PRIMJENA .... 3
2 OPIS (SL. A) 3
3 POPIS SADRŽAJA PAKETA 3
4 SIMBOLI 3
5 OPĆA UPOZORENJA O SIGURNOSTI RUKOVANJA
ELEKTRIČNIM ALATIMA 4
5.1 Radno mjesto....4
5.2 Električna sigurnost....4
5.3 Osobna sigurnost 4
5.4 Upotreba i održavanje električnog alata....5
5.5 Servis....5
6 POSEBNA SIGURNOSNA UPOZORENJA ZA KRUŽNE PILE ..... 5
7 DODATNE SIGURNOSNE UPUTE ZA LASERE....7
8 PRILAGODBE....8
8.1 Zamjena lista pile (slika 1)....8
8.2 Podešavanje dubine reza (slika 2) 8
8.3 Podešavanje oštrog kuta (slika 3)....8
8.4 Ugradnja paralelnog graničnika (slika 4)....8
9 UPOTREBA....9
9.1 Upute za korištenje....9
9.2 Uključivanje i isključivanje (slika 5)....9
9.3 Izvlačenje prašine 9
9.4 Laserska zraka....9
10 ČIŠĆENJE I ODRŽAVANJE....9
10.1 Čišćenje....9
10.2 Podmazivanje....9
11 TEHNIČKI PODACI....10
12 BUKA....10
13 SERVIS....10
14 SKLADIŠTENJE....10
POWERPLUS HIGH QUALITY TOOLS
POWX0550 HR
15 JAMSTVO....11
16 OKOLIŠ 11
17 IZJAVA O SUKLADNOSTI 12
KRUŽNA PILA 1800 W POWX0550
1 PRIMJENA
21/02/2022, Lier - Belgium
1 PRIMENA 3
2 OPIS (SL. A) 3
3 SPISAK SADRŽAJA PAKOVANJA 3
4 SIMBOLI 4
5 OPŠTA BEZBEDNOSNA UPUTSTVA ZA ELEKTRIČNE ALATE . 4
5.1 Radna oblast 4
5.2 Električna bezbednost....4
5.3 Bezbednost osoba....5
5.4 Korišćenje i održavanje električnog alata ....5
5.5 Servisiranje 6
6 SPECIFIČNA UPOZORENJA O BEZBEDNOSTI ZA KRUŽNE
TESTERE ....6
6.1 Funkcija donjeg štitnika 8
7 DODATNE BEZBEDNOSNE NAPOMENE ZA LASERE 8
8 PODEŠAVANJA....8
8.1 Zamena lista testere (Sl. 1)....8
8.2 Podešavanje dubine reza (Sl. 2)....9
8.3 Podešavanje ugla ugaonika (Sl. 3)....9
8.4 Montaža paralelne ograde (Sl. 4)....9
9 RUKOVANJE 9
9.1 Uputstvo za upotrebu 9
9.2 Uključivanje i isključivanje (Sl. 5)....9
9.3 Izvlačenje prašine 9
9.4 Laserski zrak....9
10 ČIŠĆENJE I ODRŽAVANJE....10
10.1 Čišćenje....10
10.2 Podmazivanje....10
11 TEHNIČKI PODACI....10
12 BUKA....10
13 SERVISNO ODELJENJE....11
POWERPLUS® HIGH QUALITY TOOLS
POWX0550 SR
14 ODLAGANJE 11
15 GARANCIJA....11
16 ŽIVOTNA SREDINA....12
17 IZJAVA O USKLAĐENOSTI....12
KRUŽNA TESTERA MODELA 1800 W POWX0550
1 PRIMENA
Vaša kružna testere je konstruisana za sečenje drvenih radnih materijala. Mašina je pogodna samo za dešnjake. Mašina nije pogodna za stacionarnu upotrebu. On nije dizajniran za komercijalnu upotrebu.

21/02/2022, Lier - Belgium
1 OBLAST POUŽITÍ....3
2 POPIS (OBR. A) 3
3 SEZNAM OBSAHU BALENÍ....3
4 SYMBOLY 4
5 OBECNÁ BEZPEČNOSTNÍ UPOZORNĚNÍ PRO ELEKTRICKÉ NÁSTROJE 4
KOTOUČOVÁ PILA 1800 W POWX0550
1 OBLAST POUŽITÍ
- Make sure the saw teeth and arrow on the blade is to be the same direction as the arrow on the lower guard.
21/02/2022, Lier - Belgium
1 POUŽÍVANIE 3
2 POPIS (OBR. A)....3
3 OBSAH BALENIA....3
4 SYMBOLY 4
5 VŠEOBECNÉ BEZPEČNOSTNÉ VAROVANIA PRE ELEKTRICKÉ NÁRADIE....4
5.1 Pracovná plocha 4
5.2 Elektrická bezpečnost'......4
5.3 Osobná bezpečnost'......5
5.4 Používanie elektrického náradia a starostlivost' oň....5
5.5 Servis....6
6 DOPLNKOVÉ BEZPEČNOSTNÉ POKYNY PRE CIRKULÁRKY ... 6
6.1 Funkcia spodného krytu....7
7 DOPLNKOVÉ BEZPEČNOSTNÉ POKYNY PRE LASERY ...... 8
8 NASTAVENIA....8
8.1 Výmena pílového listu (obr. 1) 8
8.2 Nastavenie híbky rezu (obr. 2)....9
8.3 Nastavenie rohového uhla (obr. 3)....9
8.4 Montáž paralelného deliaceho prvku (obr. 4)....9
9 PREVÁDZKA....9
9.1 Pokyny na používanie....9
9.2 Zapnutie a vypnutie (obr. 5)....9
9.3 Odsávanie prachu....9
9.4 Používanie lasera....9
10 ČISTENIE A ÚDRŽBA 10
10.1 Čistenie....10
10.2 Mazanie....10
11 TECHNICKÉ ÚDAJE....10
12 HLUK....10
13 SERVISNÁ SLUŽBA....11
POWERPLUS® HIGH QUALITY TOOLS
POWX0550 SK
14 SKLADOVANIE....11
15 ZÁRUKA....11
16 ŽIVOTNÉ PROSTREDIE....12
17 VYHLÁSENIE O ZHODE 12
CIRKULÁRKA 1800 W POWX0550
1 POUŽÍVANIE
21/02/2022, Lier - Belgium
21/02/2022, Lier - Belgium
21/02/2022, Lier - Belgium
21/02/2022, Lier - Belgium
21/02/2022, Lier - Belgium

natural_image
Power-cutting power plant with yellow and silver blade, no visible text or symbols on the main subjectvaro
WWW.VARO.COM
DESIGNED AND MARKETED BY VARO
©copyright by varo
VARO - VIC. VAN ROMPUY nv
JOSEPH VAN INSTRAAT 9 - 2500 LIER - BELGIUM



- BESCHRIJVING (FIG. A)
- POWERPLUS® HIGH QUALITY TOOLS
- POWX0550 FR
- SCIE CIRCULAIRE 1800 W POWX0550
- UTILISATION
- POWX0550 EN
- CIRCULAR SAW 1800 W
- POWX0550
- APPLICATION
- DESCRIPTION (FIG. A)
- PACKAGE CONTENT LIST
- SYMBOLS
- GENERAL POWER TOOL SAFETY WARNINGS
- Work area
- Electrical safety
- Always check that the power supply corresponds to the voltage on the rating plate.
- Personal safety
- Power tool use and care
- Service
- SPECIFIC SAFETY WARNINGS FOR CIRCULAR SAWS
- Cutting procedures
- Causes and operator prevention of kickback
- Lower guard function
- Guard function
- ADDITIONAL SAFETY INSTRUCTIONS FOR LASERS
- Laser beam characteristics.
- ADJUSTMENTS
- Replacing the saw blade (Fig. 1)
- Before replacing the saw blade always unplug the tool.
- Adjusting the depth of cut (Fig. 2)
- Setting the mitre angle (Fig. 3)
- Mounting the parallel fence (Fig. 4)
- OPERATION
- Instructions for use
- Switching on and off (Fig. 5)
- Dust extraction
- Laser beam
- CLEANING AND MAINTENANCE
- Cleaning
- Lubrication (Fig. B)
- NOISE
- ATTENTION! Wear hearing protection when sound pressure is over 85 dB(A).
- The vibration emission and the sound emission during actual use of the power tool can differ from the declared emission value depending on the ways in which the tool is used.
- Be sure to identify safety measures to protect the operator that are based on an estimation of exposure in the actual conditions of use (taking account of all parts of the operating cycle such as the times when the tool is switched off and when it is running idle in addition to the trigger time).
- SERVICE DEPARTMENT
- STORAGE
- WARRANTY
- ENVIRONMENT
- DECLARATION OF CONFORMITY
- HANDKREISSÄGE 1800 W
- EINSATZBEREICH
- POWX0550 NO
- SIRKELSAG 1800 W
- POWX0520
- BRUKSOMRÅDE
- POWERPLUS HIGH QUALITY TOOLS
- POWX0550 SV
- CIRKELSÅG 1800 W POWX0550
- ANVÄNDNINGSOMRÅDE
- FÖRPACKNINGSINNEHÅLL
- POWX0550 HR
- KRUŽNA PILA 1800 W POWX0550
- PRIMJENA
- POWX0550 SR
- KRUŽNA TESTERA MODELA 1800 W POWX0550
- PRIMENA
- KOTOUČOVÁ PILA 1800 W POWX0550
- OBLAST POUŽITÍ
- POWX0550 SK
- CIRKULÁRKA 1800 W POWX0550
- POUŽÍVANIE
Brand : PowerPlus
Model : POWX0550
Category : Saw