
D83 - Vacuum Cleaner ECOVACS - Free user manual and instructions
Find the device manual for free D83 ECOVACS in PDF.


| Product Type | Robot Vacuum |
| Brand | ECOVACS |
| Model | D83 |
| Dimensions (diameter × height) | 34 cm × 8.5 cm |
| Net Weight | 3.2 kg |
| Power Source | Lithium-ion battery 14.4 V / 2600 mAh, AC adapter 100-240 V |
| Battery Life | 110 minutes |
| Charging Time | 4 to 5 hours |
| Suction Power | 2200 Pa |
| Dustbin Capacity | 0.3 L |
| Filtration | Washable HEPA H10 filter |
| Brushes | Silicone main brush + 2 nylon side brushes |
| Sensors | 5 infrared sensors, 2 drop sensors, threshold detection |
| Connectivity | Wi-Fi, ECOVACS HOME app |
| Voice Assistant Compatibility | Amazon Alexa, Google Assistant |
| Noise Level | 55 dB |
| Cleaning Modes | Auto, Edge, Spot, Scheduled |
| Main Features | Auto suction, scheduling via app, anti-drop and anti-collision sensors, quiet operation |
| Maintenance and Cleaning | Removable dustbin, washable HEPA filter, removable side brushes and main brush |
| Safety | Auto shut-off in case of overload, drop sensors to avoid stairs |
| Spare Parts Available | Main brush, side brushes, HEPA filter, battery, wheels |
| Warranty | 2 years |
| Color | Black |
Frequently Asked Questions - D83 ECOVACS
User questions about D83 ECOVACS
0 question about this device. Answer the ones you know or ask your own.
Ask a new question about this device
Download the instructions for your Vacuum Cleaner in PDF format for free! Find your manual D83 - ECOVACS and take your electronic device back in hand. On this page are published all the documents necessary for the use of your device. D83 by ECOVACS.
USER MANUAL D83 ECOVACS
THE FLOOR CLEANING ROBOT
Congratulations on your purchase of the Ecovacs DEEBOT patented floor cleaning robot. We hope it brings you many years of satisfaction. We trust the purchase of your new product will help you to keep your home clean and provide you more quality time to enjoy other things.
Before you go any further, we suggest you register your product on the Ecovacs website at www.Ecovacs.com/register.html. We also suggest you record your model number, serial number, date of purchase and attach your receipt to this page for safe keeping. (The serial number is located on a label in the robot under the dust bin and on the last page of the Instruction Manual)
MODEL # ____
SERIAL #
DATE OF PURCHASE ____ / ____ / ____
Should you have any problems programming the unit or getting your product to function properly, please call us before contacting or returning the product to the place of purchase. Call 1-844-ECOVACS (1-844-326-8227) for assistance.
Thank you for choosing Ecovacs!
Contents
1. Safety Instructions ...... 3
1.1 User Guidelines 3
1.2 Power Supply 3
1.3 Product Application Range 4
1.4 Notes Before Cleaning 4
2. Package Contents and Technical Specifications .... 5
2.1 Package Contents 5
2.2 Technical Specifications....5
2.3 Product Diagram 6
2.4 Robot Control Panel 7
2.5 Remote Control with LED Panel 7
3. Operation and Programming 8
3.1 Assemble and Charge 8
3.2 Choose Suction Option 10
3.3 Power ON, Pause, Power OFF, Start 10
3.4 Mode Selection 11
3.5 Optional Mopping Feature 12
3.6 Programming the Robot 12
3.7 Voice Reporting 13
4. Maintenance 14
4.1 Multi-Function Cleaning Tool 14
4.2 Cleaning the Robot and Charging Dock 15
4.3 Main Brush, Side Brushes and Driving Wheels 15
4.4 Dust Bin and Filter 16
4.5 Cleaning the Robot's Dust Sensors and Anti-Drop Sensors 16
5. Troubleshooting 17
1. Safety Instructions
1.1 User Guidelines
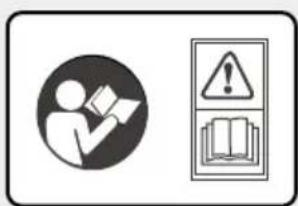
- DEEBOT must be used in accordance with the directions in the Instruction Manual. Ecovacs Robotics, Inc. cannot be held liable or responsible for any damages or injuries caused by improper use.

natural_image
Line drawing of a person seated in a chair inside a building with a circular structure above (no text or symbols)- If there is a drop off in the cleaning area due to a step or stairs, you should operate the unit to ensure that it can detect the step without falling over the edge. It may become necessary to place a physical barrier at the edge to keep the unit from falling. Make sure the physical barrier is not a trip hazard.

natural_image
Cartoon illustration of a baby sitting on a circular object (no text or symbols)• This product is NOT intended for use by children or anyone lacking knowledge on proper use. Supervision may be necessary.
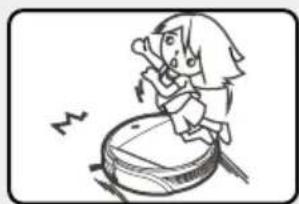
natural_image
Cartoon illustration of a person running on a floating platform with a small number nearby (no text or symbols)- When the product is working, please inform your family and supervise children/pets.

natural_image
Simple line drawing of a campfire with a cross mark and fire symbol (no text or labels)• The product and its charging equipment should be kept away from water and fire.

- Should you encounter situations that have not been properly addressed to your satisfaction in this Instruction Manual, we ask that you contact our Customer Service Center at 1-844-ECOVACS (1-844-326-8227) where a Technician can properly address your specific problem or question.
1.2 Power Supply
- Use only the original rechargeable battery and charging equipment provided with the product.
- Please make sure your power supply voltage matches the power voltage marked on charging dock.
- Take care not to damage the cord. Do not remove plug from the power supply by pulling on the cord. To unplug, grasp the plug, not the cord.
- When not using the charging dock for a long period of time, please unplug it.
- Ecovacs Robotics, Inc. is an eco-friendly company. Please dispose of used batteries in accordance with your local regulations.
1.3 Product Application Range
▶ DEEBOT is capable of cleaning all types of flooring, whether it's wood, marble, tile, linoleum or short-pile carpet (up to 0.79 inch). It is not suitable for use on long-pile (longer than 0.79 inch) carpet.
Inappropriate Environments :

natural_image
Simple line drawing of a vacuum cleaner with a cross mark and a small object below (no text or symbols)- Wet floors or floors with standing water.

natural_image
Simple line drawing of a sun, a circular object with a cross mark, and a checkmark (no text or symbols)● Outdoor, commercial or industrial sites.

- Extremely hot or cold environments (below 32^ or above 85^ )
Do not allow the unit to ingest the following
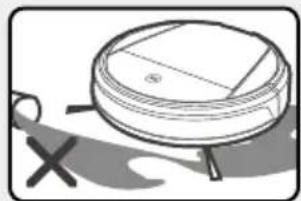
natural_image
Simple line drawing of a vacuum cleaner with a handle and no text or symbols- Liquid, such as water or cleansing solution, etc.

natural_image
Line drawing of a vacuum cleaner with scissors and a lid, no text or symbols present● Sharp objects, such as pins, paper clips or broken glass, etc.

natural_image
Line drawing of a vacuum cleaner with a dotted pattern and a small 'X' symbol at the bottom (no text or labels)● Large objects like stones, large pieces of paper, debris, or any other item that may clog the machine or cause motor damage.
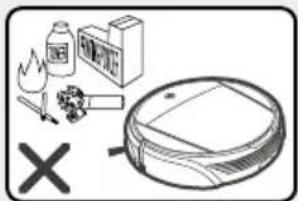
● Soot, coals, burning cigarette butts, matches, laser printer or copier toner, or any other items that could cause a fire.
1.4 Notes before Cleaning
Before operating DEEBOT, take a few moments to survey the area of operation and remove obstacles that may cause the robot to stop working.
natural_image
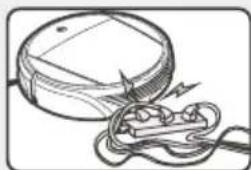
Simple line drawing of a cylindrical device with wires and a lightning bolt, no text or symbols present.- D8 is equipped with Anti-Tangle Technology which helps the robot avoid getting tangled in items in its path, however, we still recommend preparing the environment. Remove power cords and small objects from the floor that could entangle the product. Tuck rug fringe under the rug base, and lift items such as curtains and tablecloths off the floor.

natural_image
Line drawing of a sofa with a pillow placed on top, surrounded by a coiled cord (no text or symbols)- Please be aware that the robot needs at least a 4-inch clearance to clean under furniture without complications.

natural_image
Close-up of a hand inserting a component into a device (no visible text or symbols)- Ensure the Dust Bin, Main Brush and Side Brushes are correctly installed. Make sure the Anti-Drop Sensors and Dust Sensors are wiped clean with the provided Multi-Function Cleaning Tool.
Note: The robot can be used without the main brush installed for direct suction. This avoids hair tangling around the Main Brush.

natural_image
Simple line drawing of a satellite with wings and a marked cross symbol (no text or labels)- When using the mopping feature with the Cleaning Cloths attached, please fold area rug edges under themselves so the robot will avoid the rug.
2. Package Contents and Technical Specifications
2.1 Package Contents
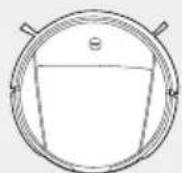
Robot Charging Dock (4) Side Brushes


Instruction Manual and Quick Start Guide

Remote Control with Batteries

Multi-Function Cleaning Tool

Main Brush Option (pre-installed)
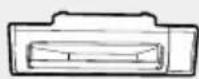
Direct Suction Option (for D83 ONLY)
(10) Disposal Dry Cleaning Cloths

(10) Disposal Wet Cleaning Cloths

Washable/Reusable Microfiber Cleaning Cloth

Cleaning
Cloth Plate
2.2 Technical Specifications
Robot Model: D83D80
| Working Voltage (V) | 12 | |
| Rated Power (W) | 30 | |
| Battery Capacity (mAh) | 2500 | |
| Interchangeable Suction Options | Main Brush Option | Main Brush Option or Direct Suction Option |
| Speed (in/s) | 11.4 | |
| Dust Bin Capacity (L) | 0.7 | |
| Charging Time (h) | Approximately 3~4 | |
| Working Time Per Charge (min) | 120 100 | |
| Noise (dB) | ≤56 | |
| Size (in) | 13.27*13.27*3.47 | |
| Net Weight (lb) | 6.17 | |
| Carpet Capability (in) | 0.79 | |
| Charging Dock Model: | CH1442 | |
| Rated Input Voltage (V) | 120~ | |
| Rated Output Voltage (V) | 14.5 | |
| Rated Output Current (A) | 0.75 | |
| Rated Power (W) | 20 | |
| Remote Control Model: | RC1360A | |
| Working Voltage (V) | 3 | |
* Technical and design specifications may be changed in the course of continuous product improvement.
2.3 Product Diagram
Main Unit

Elevation of Robot
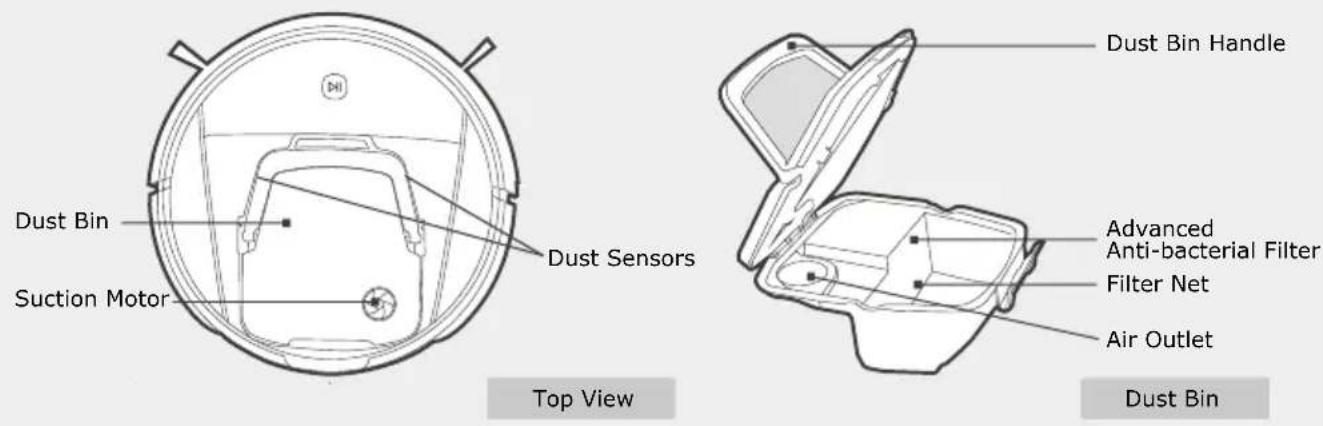
Charging Dock
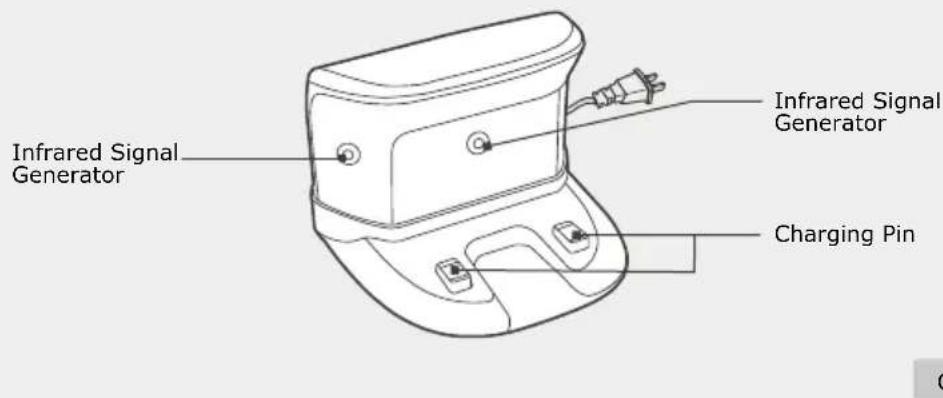
D8 has a small, unobtrusive, and stylish charging dock that fits with any decor. Its new design ensures a proper connection every time the robot returns for charging.
2.4 Robot Control Panel
D80 D83

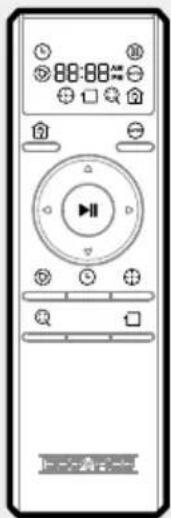
2.5 Remote Control with LED Screen
Front View
natural_image
Front view of a classic remote control device with playback buttons and display (no text or symbols)Return to Charger Button: Start Return to Charger Mode.
AUTO Cleaning Mode Button: Start AUTO Cleaning Mode.
Start/Pause/Confirm Button: Push to Start or Pause the current function
Direction Control Button: Push and hold the appropriate button to drive the robot in any direction.
Set Cleaning Time Button: Set the time for the robot to automatically clean.
Set Current Time Button: Set the current time of day.
Spot Cleaning Mode Button: Start Spot Cleaning Mode.
Intensive Cleaning Mode Button: Start Intensive Cleaning Mode.
Edge Cleaning Mode Button: Start Edge Cleaning Mode.
Notice

- Please make sure the Remote Control's batteries are properly installed and Bottom Power Switch ON.
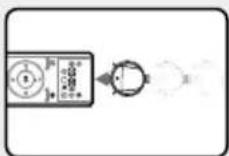
- The robot is not able to vacuum when it is being moved using the Remote Control.

- Remove batteries if Remote Control will not be used for a long time.
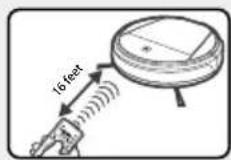
- When using the Remote Control, be sure to point it towards the infrared signal receiver on the robot, and be within 16 feet of the robot.

● The Charging Dock or other sources that use an infrared signal may interfere with the Remote Control signal.
3. Operating and Programming
3.1 Assemble and Charge
▶ Charging Dock Placement

- Assemble the Charging Dock and place it on a level floor surface with the base perpendicular to the ground. Keep the immediate area in front of the charger (approximately 5 feet) clear of objects and reflective surfaces that would interfere with the infrared receiver. Plug the Charging Dock in.
▶ Charge the Robot
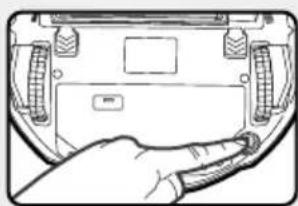
- Turn the switch on the bottom of the robot to the ON position.
- Place the robot on the Charging Dock making sure the Charging Dock electrode and the Charging Pin on the robot make a connection.
- Charge the robot at least 12 hours before the first 3 uses.
▶ Three Ways to Charge
| Automatic Charging | Command Charging Manual Charging | |
| The robot can perceive a low battery when it is working, and will automatically switch to Back to Charger Mode when necessary. | You can command the robot to switch to Back to Charger Mode at any time with the Remote Control or the button on the robot's control panel. | Turn ON the power switch on the bottom of the robot and place it on the Charging Dock by hand.Ensure that the Charging Dock Electrode and the Charging Pin on the robot make a connection. |
- The START/PAUSE key ▷ on the robot blinks when the robot is charging.
- Charging normally takes about 3 hours.
- After charging finishes, the START/PAUSE key ▷ on the robot stays illuminated.
Notice
- After the robot's battery is fully charged, DEEBOT's battery management system will reduce to a trickle charge to save electricity.
- To confirm the robot is charging when it is on the Charging Dock, please make sure the START/PAUSE key ▶II is blinking or stays illuminated.
- Remove batteries if the robot will not be used for a long time or before the robot is recycled.

natural_image
Top-down view of a vehicle's rear bumper with visible gear and dashboard (no text or symbols)2


natural_image
Illustration of a hand using a tool to adjust or install a mechanical component, with no visible text or symbols.To remove or replace the robot's batteries:
① Unscrew the battery cover screws, remove battery cover, and take out batteries.
② Insert new batteries according to the corresponding positive and negative electrodes.
③ Reassemble the battery cover.

Note
- When the batteries are fully discharged or not used for a long time, their capacity may decrease, so it's suggested to reactivate them.
- Method of reactivating batteries: place the robot on the Charging Dock by hand, remove after charging for 3 minutes; repeat 3 times, then charge normally for 3-5 hours.
3.2 Choose Your Suction Option
▶ DEEBOT D83 has 2 interchangeable suction options for your convenience.
 |  | |
| Main Brush Option Direct Suction Option | ||
| Function | The best choice for deep cleaning with a combination of the Main Brush and strong suction. | The best choice for daily cleaning with the Main Brush removed for direct suction.This option avoids hair tangling around the Main Brush, and is ideal for cleaning up pet hair. |
| Notes | Install Main Brush Option (pre-installed) Install Direct Suction Option | |
| To Remove the Main Brush Option or the Direct Suction Option | Turn the robot over. Push both 🎨 buttons below suction inlet at the same time, and the Suction Option component will pop out Remove or insert the Main Brush. | |
| To Install the Main Brush Option or the Direct Suction Option | Line up the Suction Option component tabs with the slots on the bottom of the robot.Press until the component clicks into place. | |
3.3 Power ON/Pause/Power OFF/Start
Power ON
natural_image
Hand inserting a cable into a device casing (no text or symbols visible)- Turn ON the power switch on the bottom of the robot.
Pause
- Pause the robot by pressing the START/PAUSE key ▷ or by lifting the unit off of the floor.
- Press the START/PAUSE key ▷II, and the robot will resume work.
Power OFF
After pausing work, turn OFF the power switch at the bottom of the robot.
Note: When the robot is not working, it is suggested to keep it charging instead of powered OFF.
Start

- Press the START/PAUSE key ▷ on the robot to begin cleaning immediately in Automatic Cleaning Mode.
- To schedule a cleaning time in the future, please see section 3.5 in this Instruction Manual.
* In addition to pushing the START/PAUSE key ▷ to begin Automatic Cleaning, you can choose any Cleaning Mode by pushing the corresponding key directly on control panel of the robot (for D83 ONLY) or on the Remote Control (for D80 and D83), then push START/ PAUSE key ▷ to begin. See section 3.4 for Cleaning Mode details.


Spot Cleaning Mode Edge Cleaning Mode


Intensive Cleaning Mode Return to Charger Mode
3.4 Cleaning Mode Selection
The robot has several Cleaning Modes for you to choose from to effectively clean all of your floors.

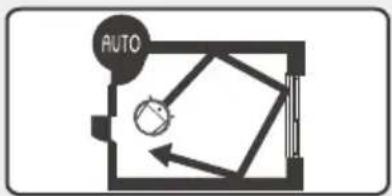
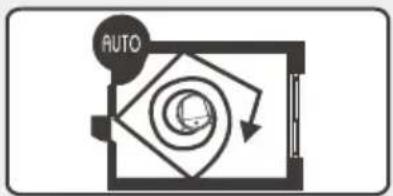
AUTO Cleaning Mode: This is the most commonly used mode with the largest cleaning coverage. When a cleaning time is scheduled in the future, DEEBOT will always work in Automatic Cleaning Mode.

flowchart
graph TD
    A["AUTO"] --> B((Circular Process Path))
    B --> C["Return Path"]
    C --> D["Return Path"]
    D --> E["Return Path"]
    E --> F["Return Path"]
- In Automatic Cleaning Mode the robot will proceed in a straight line until it comes in contact with an obstacle and then it will change course in a straight line.
- If DEEBOT's Dust Sensors detect a lot of dust during its initial route, it will automatically change its path to fan-shaped or spiral route to clean more effectively.

Spot Cleaning Mode: This mode is applicable for an area of highly concentrated dirt or dust.

natural_image
Pure diagram of a mechanical or electrical component without any text, numbers, or symbols- In Spot Cleaning Mode the robot operates in a "zigzag" pattern from left to right, focusing on a specific area to clean. After the cleaning, the robot will return to its starting point and emit a beep.

Edge Cleaning Mode: This mode is good for cleaning the edges and corners of a room.

flowchart
graph TD
    A["Start"] --> B{Decision}
    B -->|Yes| C["Process"]
    B -->|No| D["End"]
- In Edge Cleaning Mode, the DEEBOT will detect a border, such as a wall, and it will continue along that path until it meets an obstacle at which point it will alter its direction.

Intensive Cleaning Mode: This mode is good for aggressive cleaning, or for extremely dirty or dusty floors.

natural_image
Pure mechanical diagram showing a rotating component and internal structure without any text or symbols- When the robot works in Intensive Cleaning Mode, it follows the same pattern as the Automatic Cleaning Mode but performs a more thorough cleaning.
- In Intensive Cleaning Mode, the Dust Sensor's sensitivity is increased, so cleaning is more efficient.

natural_image
Pure technical diagram of a mechanical assembly without any text, numbers, or symbols
natural_image
Pure mechanical diagram showing a piston and spring mechanism without any text or symbolsSmall Areas
When cleaning a small area like corners or a hallway in Intensive Cleaning or Automatic Cleaning Mode, the robot will automatically conduct a "zigzag" pattern, then will return to the previous mode to continue cleaning.
3.5 Optional Mopping Feature
▶ DEEBOT D8 Series has an exclusive optional mop feature with specially designed cleaning cloths to clean in ways you never thought a robot could. D8 can mop and vacuum at the same time if a cleaning cloth is attached. D8 comes with the following:
- Disposable wet cleaning cloths for mopping
- Disposable dry cleaning cloths for dry mopping and polishing
- A washable and reusable dry cleaning cloth for dry mopping and polishing
To use the mop feature, attach any of the provided cleaning cloths.


natural_image
Illustration of a hand holding a smartphone with arrows indicating left and right motion (no text or symbols)
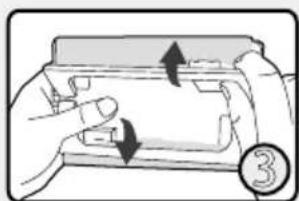
① Lift the brackets up on the Cleaning Cloth Plate.
② Cover the Cleaning Cloth Plate with your chosen cleaning cloth and smooth.
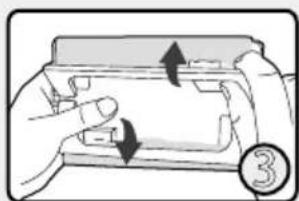
③ Press the yellow brackets back down to secure the cleaning cloth.
④ Install the Cleaning Cloth Plate on the bottom of the robot.
3.6 Programming the Robot
▶ DEEBOT can be programmed to automatically clean once per day, at a specific time, even if nobody is at home. When a cleaning time is scheduled in the future, DEEBOT will always work in Automatic Cleaning Mode.
- All cleaning times are scheduled using the Remote Control.
* When scheduling a cleaning time, please make sure the robot is in PAUSE Mode and point the Remote Control towards the robot.
• Before scheduling a cleaning time the first time, please set the current time of day.
Set the Current Time of Day
- Press ⏻ key on the Remote Control until ⏻ blinks on the screen and 88:88 illuminates. Set current time of day with Direction Control Button.
- Press ▶ key to confirm the time of day. Once the time of day is saved correctly, Ⓧ icon and the time display will stay on for 3 seconds.
Schedule a Cleaning Time
- Press 🔒 key on the Remote Control until 🔒 blinks on the screen and 88:88 illuminates. Press Direction Control Button to schedule a cleaning time.
- Press ▶ key to confirm. The scheduling is finished once 🔒 icon and the time display stays on for 3 seconds.
Cancel a Scheduled Cleaning Time
Press and hold the Ⓧ key for 3 seconds until Ⓧ key on the screen disappears. The scheduled cleaning time is cancelled.
3.7 Voice Reporting
When the robot detects a problem, it will stop working, the START/PAUSE key || will flash red, and announce the problem with a voice report. Please troubleshoot according to the voice report.
| Possible Problems Solution | |
| My Driving Wheel is suspended.Please move me to a flat surface. | Place the robot on an even surface so it can regain traction. |
| My Dust Bin is missing or is not installed properly. Please check my Dust Bin. | Install the Dust Bin and ensure it is properly seated. |
| My Driving Wheels are stuck.Can you please check them? | Check Driving Wheels for debris or tangled hair and clean with the provided Multi-Function Cleaning Tool. |
| My Main Brush or Side Brushes are stuck. Can you please check them? | Check Side Brushes and Main Brush for debris or tangled hair and clean with the provided Multi-Function Cleaning Tool. |
| I am stuck. Can you please help me? | The robot is trapped by obstacles on the floor. Move the robot by hand to a different area and/or remove the obstacles. |
| My Anti-Drop Sensors need cleaning.Can you please help me?My Dust Sensors need cleaning.Can you please help me? | Use the provided Multi-Function Cleaning Tool to wipe Anti-Drop Sensors and Dust Sensors. |
| I can not find the Charging Dock.Can you please help me? | Put the robot on the Charging Dock by hand. |
4. Maintenance
4.1 Multi-Function Cleaning Tool
Multi-Function Cleaning Tool


Warning
Handle with care
This cleaning tool has sharp edges and should not be used by children. Follow instructions and use with caution to avoid injury.
natural_image
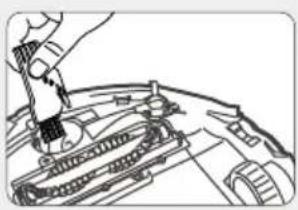
Technical line drawing of a mechanical assembly with no visible text or symbols- Dust Brush: Brush off any dust on the Anti-Drop Sensors, Driving Wheels or other components for longer product life span.

natural_image
Line drawing of a person using a tool on a mechanical component (no text or symbols)- Dust Cloth: Wipe the Dust Sensors clean to keep them sensitive.

natural_image
Diagram of a mechanical assembly with coiled spring and fastener (no text or labels)- Cutting Blade: Cut off hair tangled around the Main Brush, Side Brushes or other components, then remove it with the Removal Tool.

natural_image
Line drawing of a hand using a tool to adjust or install a mechanical component (no text or symbols visible)- Removal Tool: After using the Cutting Blade, remove tangled hair from the Main Brush, Side Brushes or other components by pulling the Removal Tool through the brush bristles.
4.2 Cleaning the Robot and Charging Dock
Clean the Robot Clean Charging Dock
Turn the bottom power switch to the OFF position.
Unplug the Charging Dock.
Use a cleaning cloth dampened with water or neutral detergent, wipe and dry the product. Do not let water penetrate inside the product.
4.3 Main Brush, Side Brushes and Driving Wheels
Cleaning the Main Brush
It is suggested to clean Main Brush after every 4 - 5 cleaning cycles.

natural_image
Top-down view of a car interior showing front seats and rear-mounted sensors (no text or symbols visible)Push the ↘ buttons on both sides of the suction inlet at the same time. Remove the Main Brush Suction Option component.
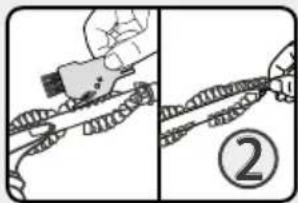
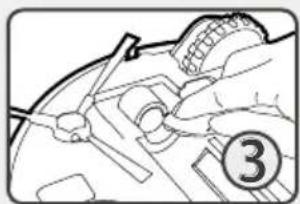
Take out the Main Brush. Remove hair and debris that may be tangled around the Main Brush with the Multi-Function Cleaning Tool. Each row of bristles on the Main Brush can also be removed and cleaned separately.
natural_image
Illustration of a hand holding a tool with a numbered circle (3) nearby, no visible text or symbols.Wipe the robot's suction intake with a dry cloth.
natural_image
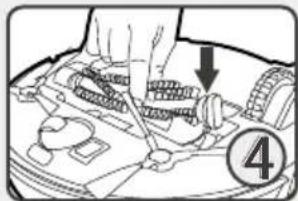
Diagram of a hand using a tool to adjust or install components on a vehicle (no text or symbols visible)After cleaning, reinstall Main Brush and Main Brush Suction Option component.
Cleaning and Replacing the Side Brushes

natural_image
Hand holding a small mechanical component with a hexagonal base (no text or symbols visible)Remove each Side Brush by pressing the center segment, then pulling the brush out. Wipe the Side Brush with a dry cloth.

natural_image
Pure mechanical diagram showing gear and shaft components without any text or symbolsTo replace, insert each Side Brush into the slot with the matching color. Press until you hear a click.
Tips:
- The Side Brushes incur a lot of wear. We suggest you inspect them after each use and change if necessary.
- When installing a Side Brush, make sure its color matches the slot color or the brush will not work normally.
Cleaning the Driving Wheels

natural_image
Hand inserting a component into an electronic circuit board (no visible text or symbols)Use the Multi-Function Cleaning Tool to remove any dust or hair tangled in the Driving Wheels.
4.4 Dust Bin and Filter
Cleaning the Robot's Dust Bin and Filter

natural_image
Diagram of a mechanical component with an open lid and internal structure, no text or symbols presentTurn the robot's power OFF and open the cover.

natural_image
Diagram showing a hand inserting a device into a box, with no visible text or symbols.Grasp the handle of the Dust Bin. Slowly and carefully remove the Dust Bin to avoid spilling dust.

Open the Dust Bin cover, empty it, and remove the filter components. Clean and/or replace the filter.

natural_image
Diagram of a cleaning or cleaning process with a tool and component (no text or symbols)If you notice a lot of dust build-up on the inside of the Dust Bin and filter that cannot be removed using the method described in section 4.3, you can rinse the Bin and filter under running water to get rid of the dust. It is important that you allow them to completely dry for 24 hours before reinstalling into the robot.

natural_image
Hand pressing down on a circular object with a downward arrow, no text or symbols presentAfter cleaning and/or replacing the filter, close the filter cover and ensure you hear it click closed. Place the Dust Bin back into the robot and close the cover.
4.5 Cleaning the Robot's Dust Sensors and Anti-Drop Sensors
| Dust SensorsAnti-Drop Sens | ||
| Location |  |  |
| Anti-Drop Sensors are located on the bottom of the robot. | Dust Sensors are located in front of the robot's Dust Bin. | |
| Function | Detects a drop-off of over 3 inches so the robot does not fall down a step or stairs. | Detects dust quantity so the robot can automatically determine and change to the most effective cleaning mode. |
| Cleaning Method | 1. Turn OFF the power and empty the Dust Bin.2. Invert the robot then put it on an even, clean surface.3. Use the provided Multi-Function Cleaning Tool to wipe the three panels of the Anti-Drop Sensors. | 1. Turn OFF power.2. Remove and empty the Dust Bin and clean it if necessary.3. Use the provided Multi-Function Cleaning Tool to wipe the two Dust Sensors.4. Reinstall Dust Bin. |
- Troubleshooting (✗)
| Malfunction Possible Causes Solutions | ||
| Robot will not charge | Power switch on the bottom of the robot is not turned ON. | Turn ON the power switch on the bottom of the robot. |
| The robot has not made a connection with the charging dock. | Be sure that the robot has made a connection with the electrodes on the charging dock. You may move the robot manually to make the connection if necessary. | |
| The robot is powered ON, but the Charging Dock is not plugged in. | Plug in the Charging Dock. | |
| The battery is completely discharged. | Re-activate the battery. Please refer to "Assemble and Charge" section 3.1. | |
| The robot goes around in circles and turns back after starting up. | Anti-Drop sensors on the bottom of the robot are covered with dust. | Use the provided Multi-Function Cleaning Tool to wipe Anti-Drop sensors. |
| Driving Wheels are tangled with foreign matter. | Clean foreign matter from Driving Wheels. | |
| The robot may not be able to detect objects properly. | Please contact Customer Service at 1-844-ECOVACS (1-844-326-8227) for more information. | |
| The robot does not work according to set Cleaning Mode and Side Brushes do not rotate. | The battery is low, so the Side Brushes stop rotating and the robot automatically returns to charge itself. | Fully charge the robot, and adjust it to Automatic Cleaning Mode, then start. |
| The robot gets into trouble while working and stops. | The robot is tangled with something on the floor (electrical cords, drooping curtains, carpet fringe etc). | The robot will try various ways to get itself out of trouble. If it is unsuccessful, manually remove the obstacles. |
| The robot cleans for a short time. | Working time varies according to floor surface and room complexity. For example, a carpeted surface will use more battery than a hard floor surface. | This is normal. No solution necessary. |
| Main Brush and/or Side Brushes have not been cleaned in a long time causing the motor to work harder so cleaning time is reduced. | Clean Main Brush and Side Brushes. | |
| The battery is completely discharged. | Re-activate the battery. Please refer to "Assemble and Charge" section 3.1. | |
| The robot's moving speed slows down and/or begins to work in a spiral pattern. | When the robot's Dust Sensors detects a large amount of dust, it will automatically slow down and/or work in a spiral route to clean more effectively. | This is normal. No solution necessary. |
| The robot's Dust Sensors are dirty. | Wipe Dust Sensors with the provided Multi-Function Cleaning Tool. | |
| The robot cannot detect stairs or a drop off of more than 3 inches when working. | The robot's Anti-Drop Sensors are dirty. | Wipe Anti-Drop Sensors with the provided Multi-Function Cleaning Tool. |
| The floor is too shiny for the Anti-Drop Sensors to function. | Place protective barriers to keep the robot from falling. | |
| Anti-Drop sensor malfunction. | Please contact Customer Service at 1-844-ECOVACS (1-844-326-8227). | |
| When the robot is working, side brushes do not rotate. | Side Brushes are tangled with hair or foreign matter. | Clean Side Brushes. |
| Side Brushes are not correctly installed. | Reinstall Side Brushes making sure slot color is matched with the corresponding brush. | |
| The plastic piece of the Side Brush retaining screw is broken or stripped. | Replace Side Brush. | |
| If cleaning or replacing the Sides Brushes does not correct the problem, the brush motor may need repair. | Please contact Customer Service at 1-844-ECOVACS (1-844-326-8227). | |
| When the robot is working, Main Brush does not rotate. | Turn robot's power OFF and try to rotate the Main Brush by hand. If the brush will not spin, the brush may be installed incorrectly. | Remove the Main Brush and reinstall it correctly. |
| Main Brush is tangled with hair or foreign matter. | Clean the Main Brush with the provided Multi-Function Cleaning Tool. | |
| Main Brush is stuck in long pile carpet. | The robot cannot clean carpet with hair longer than 0.79 inch. | |
| If all causes above have been eliminated, the Main Brush may need repair. | Please contact our Customer Service Department at 1-844-ECOVACS (1-844-326-8227). | |
| The robot will not clean automatically at programmed time. | The robot is not set to the correct time of day. | Reset the current time of day on the robot. |
| Power switch on the bottom of the robot is OFF. | Turn ON the power switch on the bottom of the robot. | |
| The robot's battery is low. | Keep the robot on the Charging Dock to make sure it has full battery to work at any time. | |
| The robot's cleaning time has been cancelled or cleaning mode has been incorrectly set. When the robot is set to Spot Cleaning Mode or scheduled cleaning time has been cancelled, the robot will not automatically clean. | Correctly set scheduled cleaning time again. | |
| The robot works with a louder noise and a lower suction. | The robot's intake is blocked or the Main Brush may be tangled with dirt and debris. | Clean the Main Brush with the provided Multi-Function Cleaning Tool, and clean suction inlet. |
| Dirt in the robot's Dust Bin leaks out. | Too much dirt in Dust Bin. | Clean Dust Bin. |
| Main Brush is tangled with hair or other debris. | Clean Main Brush | |
| The robot is being held improperly. | When holding the robot, keep the end marked with "DEEBOT" tilted slightly up. | |
| The robot has accidentally absorbed liquid. | Immediately turn OFF the power switch on the bottom of the robot. Remove Dust Bin, Main Brush, Side Brushes and clean them. Dry all components for 12 hours in the sun if possible, reinstall and restart the robot. | |
| Remote Control failure (effective control range of remote control is 16 feet). | The batteries in the Remote Control need to be replaced. | Replace with new batteries making sure they are installed correctly. |
| The power switch on the bottom of the robot is OFF, or the robot's battery is low. | Make sure the robot's power switch is ON and fully charged. | |
| Infrared emitter on Remote Control or the robot's infrared receiver is dirty, so the signal cannot be transmitted. | Use the provided Multi-Function Cleaning Tool to wipe the infrared emitter on Remote Control and the robot's infrared receiver. | |
| There is other equipment interfering with infrared signal to the robot. | Avoid using the Remote Control near other equipment that uses infrared signals. | |
| The robot's Control Panel is scratched. | The robot's Control Panel can be scratched if it is placed upside down on a rough surface. | When installing the Cleaning Cloth Plate, please place robot on a soft surface. |
Ecovacs DEEBOT Limited Warranty to Original Purchaser
Ecovacs Robotics, Inc. stands behind the DEEBOTS they build with the following Limited Warranty
- Limited Warranty. Ecovacs Robotics, Inc. also warrants to you, the original purchaser, that your DEEBOT will be free from defects in materials and workmanship when used under normal conditions for one (1) year from the product purchase date. This Limited Warranty applies only to new products purchased and used in the United States and Canada. Some states/jurisdictions do not allow limitations on duration on an implied warranty, so the above limitation may not apply to you.
- Proof of Purchase. To make a claim under our Limited Warranty, you must first show us the date on which you purchased the DEEBOT. Your bill of sale or similar document is sufficient. If you are unable to show us the original date of purchase, the time periods in this Limited Warranty will start on the date we shipped your DEEBOT from our factory.
- Exclusions. This Limited Warranty does not cover defects or damages caused by (1) alterations not approved by us, improper repairs or service, or improper parts and accessories not supplied by us; (2) misuse or failure to follow operating instructions, and failure to perform recommended maintenance; (3) parts that must be replaced periodically; or (4) use in any other manner than normal and expected use.
- Your Responsibilities. You are responsible for (1) preventative maintenance of the product and (2) insuring that the instruction manual is following for care and use of your product.
- Customer Service. Please contact Customer Service at 1-844-ECOVACS (1-844-326-8227) to determine your problem and the next steps. Ecovacs Robotics, Inc. and its suppliers' entire liability and your exclusive remedy shall be, at our option, either (1) return of the price paid, or (b) replacement of parts or product. Replacement parts and products assume the remaining original Limited Warranty or thirty (30) days, whichever time period is greater.
- No Other Warranties. Ecovacs Robotics, Inc. does not warrant the functions contained in the DEEBOT will meet your requirements. The entire risk as to the quality and performance of the DEEBOT is with you. To the maximum extent permitted by applicable law, Ecovacs Robotics, Inc. and its suppliers disclaim all other warranties, either express or implied, including, but not limited to, implied warranties of merchantability and fitness for a particular purpose, with regard to the DEEBOT and the accompanying written materials. This Limited Warranty gives you specific legal rights. You may have others which vary from state/jurisdiction to state/jurisdiction.
- No Liability for Consequential Damages. To the maximum extent permitted by applicable law, in no event shall Ecovacs Robotics, Inc. or its suppliers be liable for any damages whatsoever (including without limitation, damages for loss of business profits, business interruption, loss of business information, or any other pecuniary loss) arising out of the use or inability to use the DEEBOT, even if Ecovacs Robotics, Inc. has been advised of the possibility of such damages. Because some states/jurisdictions do not allow the exclusion or limitation of liability for consequential or incidental damages, the above limitation may not apply to you.
- California Law. The terms of our Limited Warranty shall be governed by, construed, interpreted and enforced in accordance with the laws of the State of California without reference to conflict of laws provisions. The exclusive venue for any dispute arising out of this agreement shall be a court of competent jurisdiction in Los Angeles County, California. Should any of the provisions of our Limited Warranty be declared invalid by any court of competent jurisdiction, the balance of our Limited Warranty will remain in full force and effect.
ECOVACS
natural_image
Line drawing of a person sitting on a bench in an indoor setting with a circular object above (no text or symbols)natural_image
Cartoon illustration of a baby riding a large object (no text or symbols)natural_image
Cartoon illustration of a person running on a large object with motion lines indicating speed (no text or symbols)natural_image
Simple line drawing of a vacuum cleaner with flames and a cross symbol (no text or labels)natural_image
Simple line drawing of a vacuum cleaner with a cross mark and a small object below (no text or symbols)natural_image
Simple line drawing of a sun, a battery, and a cross symbol (no text or labels)natural_image
Simple line drawing of a vacuum cleaner with a cross symbol (no text or labels)natural_image
Line drawing of a vacuum cleaner with scissors and a lid, no text or symbols presentnatural_image
Simple line drawing of a vacuum cleaner with a cross symbol below (no text or symbols)natural_image
Simple line drawing of a device with wires and a lightning bolt (no text or symbols)natural_image
Line drawing of a sofa with a pillow placed on top, surrounded by wheels and legs (no text or symbols)natural_image
Close-up of a hand inserting a component into a circular device (no visible text or symbols)natural_image
Simple line drawing of a circular object with a central rectangle and two protruding legs, surrounded by birds (no text or symbols)natural_image
Front view of a remote control device with buttons and a play button (no text or symbols visible)natural_image
Top-down view of a vehicle's rear dashboard and steering wheel (no text or symbols visible)2


natural_image
Line drawing of a hand holding a device with a downward arrow and numbered circle (no text or symbols)natural_image
Line drawing of a hand pressing down on a device component (no text or symbols visible)natural_image
Pure diagram of a mechanical or electrical component without any text, numbers, or symbolsnatural_image
Pure mechanical diagram showing a rotating component and internal structure without any text or symbolsnatural_image
Pure technical diagram of a mechanical assembly without any text, numbers, or symbols
natural_image
Pure mechanical diagram showing a piston-cranked piston assembly without any text or symbolsÁreas Pequeñas


natural_image
Illustration of a hand holding a smartphone with arrows indicating left and right motion (no text or symbols)
natural_image
Technical line drawing of a mechanical assembly with no visible text or symbolsnatural_image
Line drawing of a hand operating a mechanical component (no text or symbols)natural_image
Illustration of a hand using a tool to adjust a mechanical component with coiled spring-like parts (no text or symbols)natural_image
Line drawing of a hand using a tool to adjust or install a mechanical component (no text or symbols visible)natural_image
Top-down view of a vehicle rear panel with attached-mounted sensors and a numbered marker (1), no visible text or symbols.natural_image
Line drawing of a hand holding a tool, with a numbered circle highlighting the number 3 (no text or symbols present)natural_image
Mechanical component diagram showing a hand holding a car engine with attached hoses and a numbered circle (no text or symbols)natural_image
Hand holding a small mechanical component (no text or symbols visible)natural_image
Pure mechanical diagram showing gear and shaft components without any text or symbolsnatural_image
Hand inserting a component into a circuit board (no visible text or symbols)natural_image
Diagram of a mechanical component with an open lid and internal structure, no text or symbols presentnatural_image
Diagram showing a device being inserted into a box, with no visible text or symbolsnatural_image
Diagram of a hairbrush with a handle and lever mechanism, no text or symbols presentnatural_image
Hand pressing down on a circular object with a downward arrow, no text or symbols presentnatural_image
Illustration of a person seated in a chair inside a building with a circular structure above (no text or symbols)natural_image
Cartoon illustration of a baby sitting on a large circular object (no text or symbols)natural_image
Cartoon illustration of a person running on a robot-like platform with motion lines indicating speed (no text or symbols)- When the product is working, please inform your family and supervise children/pets.

natural_image
Simple line drawing of a cooking pot with flames and a cross mark (no text or symbols)natural_image
Simple line drawing of a vacuum cleaner with a cross mark and a small object below (no text or symbols)natural_image
Simple line drawing of a sun, a battery, and a cross symbol (no text or labels)natural_image
Simple line drawing of a vacuum cleaner with a cross symbol (no text or labels)natural_image
Line drawing of a vacuum cleaner with attached components and a pair of scissors (no text or symbols)natural_image
Simple line drawing of a vacuum cleaner with a cross symbol below (no text or symbols present)1.4 Notes before Cleaning
natural_image
Simple line drawing of a device with a coiled cable and a circular housing (no text or symbols)natural_image
Illustration of a sofa with a pillow and armrest (no text or symbols)natural_image
Close-up of a hand inserting a component into a device (no visible text or symbols)natural_image
Simple line drawing of a circular object with a diagonal line and a cross mark, surrounded by birds (no text or symbols)natural_image
Front view of a remote control with playback button and control buttons (no text or symbols on the device itself)
natural_image
Diagram of a vehicle rear panel with sensors and a curved component, no text or symbols present2


natural_image
Illustration of a hand holding a device with a downward arrow and numbered circle (no text or symbols)natural_image
Line drawing of a hand pressing down on a laptop keyboard (no text or symbols)natural_image
Pure diagram of a mechanical or electrical component with no text, numbers, or symbolsnatural_image
Pure mechanical diagram showing a rotating component and intersecting beams (no text or symbols)natural_image
Pure technical diagram of a mechanical assembly without any text, numbers, or symbols
natural_image
Pure mechanical diagram showing a piston-cranked piston assembly without any text or symbolsPetit espace

natural_image
Illustration of a hand holding a smartphone with bidirectional arrows indicating action (no text or symbols)
natural_image
Line drawing of a hand using a tool to adjust or install electronic components on a mechanical device (no text or symbols visible)natural_image
Line drawing of a mechanical assembly or tool, possibly a cutting or fastening tool, with no visible text or symbols.natural_image
Illustration of a hand holding a coiled spring or chain (no text or symbols)natural_image
Line drawing of hands operating a mechanical component (no text or symbols visible)natural_image
Top-down view of a car rear panel with two sensors and a numbered marker (1), no visible text or symbols.natural_image
Line drawing of a hand holding a tool, with a numbered circle highlighting the number 3 (no text or symbols present)natural_image
Diagram of a car engine bay with hoses and a numbered circle marker (no text or symbols)natural_image
Hand holding a small mechanical component with a hexagonal nut (no text or symbols visible)natural_image
Pure mechanical diagram showing gear and shaft components without any text or symbolsnatural_image
Hand inserting a component into a circuit board (no visible text or symbols)natural_image
Diagram of a mechanical component with an open lid and internal structure, labeled with number 1 (no text or symbols on the diagram itself)natural_image
Diagram showing a hand holding a device next to an open case containing internal components (no text or symbols visible)natural_image
Diagram of a cleaning or cleaning process with a tool and component (no text or symbols)natural_image
Hand pressing down on a circular object with a downward arrow, no text or symbols present


- Contents
- Safety Instructions ...... 3
- Package Contents and Technical Specifications .... 5
- Operation and Programming 8
- Maintenance 14
- Troubleshooting 17
- Safety Instructions
- User Guidelines
- Power Supply
- Product Application Range
- Notes before Cleaning
- Package Contents and Technical Specifications
- Package Contents
- Technical Specifications
- Product Diagram
- Robot Control Panel
- Remote Control with LED Screen
- Operating and Programming
- Assemble and Charge
- ▶ Charging Dock Placement
- ▶ Charge the Robot
- ▶ Three Ways to Charge
- Notice
- Note
- Choose Your Suction Option
- Power ON/Pause/Power OFF/Start
- Pause
- Power OFF
- Cleaning Mode Selection
- Small Areas
- Optional Mopping Feature
- Programming the Robot
- Set the Current Time of Day
- Schedule a Cleaning Time
- Cancel a Scheduled Cleaning Time
- Voice Reporting
- Maintenance
- Multi-Function Cleaning Tool
- Warning
- Handle with care
- Cleaning the Robot and Charging Dock
- Clean the Robot Clean Charging Dock
- Main Brush, Side Brushes and Driving Wheels
- Cleaning the Main Brush
- Cleaning and Replacing the Side Brushes
- Tips:
- Cleaning the Driving Wheels
- Dust Bin and Filter
- Cleaning the Robot's Dust Bin and Filter
- Cleaning the Robot's Dust Sensors and Anti-Drop Sensors
- Ecovacs DEEBOT Limited Warranty to Original Purchaser
- ECOVACS
- Áreas Pequeñas
- Petit espace
Brand : ECOVACS
Model : D83
Category : Vacuum Cleaner