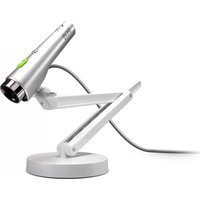
CDVU-03IP - Document camera Ipevo - Free user manual and instructions
Find the device manual for free CDVU-03IP Ipevo in PDF.


| Product Type | Document Camera |
| Brand | Ipevo |
| Model | CDVU-03IP |
| Image Sensor | 8 MP CMOS |
| Max Resolution | 3264 x 2448 pixels |
| Frame Rate | 30 fps at 1080p |
| Optical Zoom | 8x digital zoom |
| Connectivity | USB 2.0 (Type A) |
| Lighting | Built-in LED lights |
| Dimensions (LxWxH) | 260 x 60 x 40 mm (folded) |
| Weight | 0.5 kg |
| Power | USB powered (5V, 500mA) |
| Compatible Operating Systems | Windows, macOS, Chrome OS |
| Main Functions | Capture, Record, Live streaming, Snapshot |
| Maintenance | Wipe lens with dry microfibre cloth; store in dry place |
| Safety | Keep away from liquids; do not disassemble |
| Spare Parts | Not user-serviceable; contact support for repairs |
| Repairability | Not designed for user repair; refer to service center |
| Warranty | 1 year limited warranty |
Frequently Asked Questions - CDVU-03IP Ipevo
User questions about CDVU-03IP Ipevo
0 question about this device. Answer the ones you know or ask your own.
Ask a new question about this device
Download the instructions for your Document camera in PDF format for free! Find your manual CDVU-03IP - Ipevo and take your electronic device back in hand. On this page are published all the documents necessary for the use of your device. CDVU-03IP by Ipevo.
USER MANUAL CDVU-03IP Ipevo
Point 2 View User Manual
natural_image
Line drawing of a desktop desk lamp with adjustable arm and base (no text or symbols)1 GETTING STARTED.... 3
Key benefits of your Point 2 View:.... 3
Flexible positioning.... 3
Easy autofocus.... 3
Smart P2V Software.... 3
Installing the P2V Software.... 4
System requirements....4
Installing P2V Software.... 4
Connecting your Point 2 View....4
Reviewing key parts of the Point 2 View Hardware....5
Reviewing key parts of the P2V Software.... 6
Navigating the P2V Software interface.... 7
Camera mode: For viewing video and taking snapshots....7
Review mode: For reviewing and navigating taken snapshots....7
Full Screen mode: For sharing video and images with others....7
2 Using BASIC FEATURES....8
Seeing how easy it is to stay focused.... 8
Selecting Autofocus (AF) mode on Point 2 View....8
Bringing Point 2 View into focus....8
Disabling the "beep" sound (optional)....9
Taking snapshots.... 10
Navigating photos in Review mode....10
Disabling the "snapshot" sound (optional).... 10
Modifying or disabling Instant Preview (optional).... 11
Using the Timer function.... 11
Positioning Point 2 View....12
Viewing objects and the macro capability.... 12
Sharing documents.... 13
Using Point 2 View as a standard webcam....13
3 WORKING WITH VIDEO IMAGES.... 14
Zooming images.... 14
Controlling exposure.... 14
Flipping images (the Mirror function).... 15
Changing resolution.... 15
Changing window size.... 16
4 WORKING WITH PHOTOS.... 17
Zooming photos.... 17
Rotating photos.... 17
Copying photos....17
Deleting photos.... 17
Opening photo library folder.... 18
5 VIEWING IN FULL SCREEN....19
Entering Full Screen mode.... 19
Canceling Full Screen mode.... 19
6 ADVANCED FEATURES.... 20
Adjusting the video images.... 20
Changing the photo file name format.... 21
Starting P2V Software automatically when your computer starts (Windows).... 21
Selecting language.... 22
Keeping the Camera mode settings.... 22
7 USING POINT 2 VIEW IN OTHER APPLICATIONS...... 23
Step 1: Preparing Point 2 View.... 23
Step 2: Preparing the application.... 24
Step 3: Selecting Point 2 View as the webcam.... 24
8 USEFUL TIPS 25
Accessing the Help information.... 25
Viewing version information.... 25
Closing P2V Software.... 26
List of shortcut keys.... 26
9 APPENDIX.... 27
FAQ and Troubleshooting.... 27
User Manual version information.... 27
Safety information.... 27
Acknowledgement.... 27
Welcome to Point 2 View, a next-generation webcam that provides advanced features and flexibility to make your web video experience rich and creative.
KEY BENEFITS OF YOUR POINT 2 VIEW:
FLEXIBLE POSITIONING
natural_image
Illustration of a computer monitor displaying a circular screen, alongside a hand holding a stylus (no text or symbols present)Traditionally, webcams are mounted on your desk or monitor. Point 2 View gives you a wider range of options.
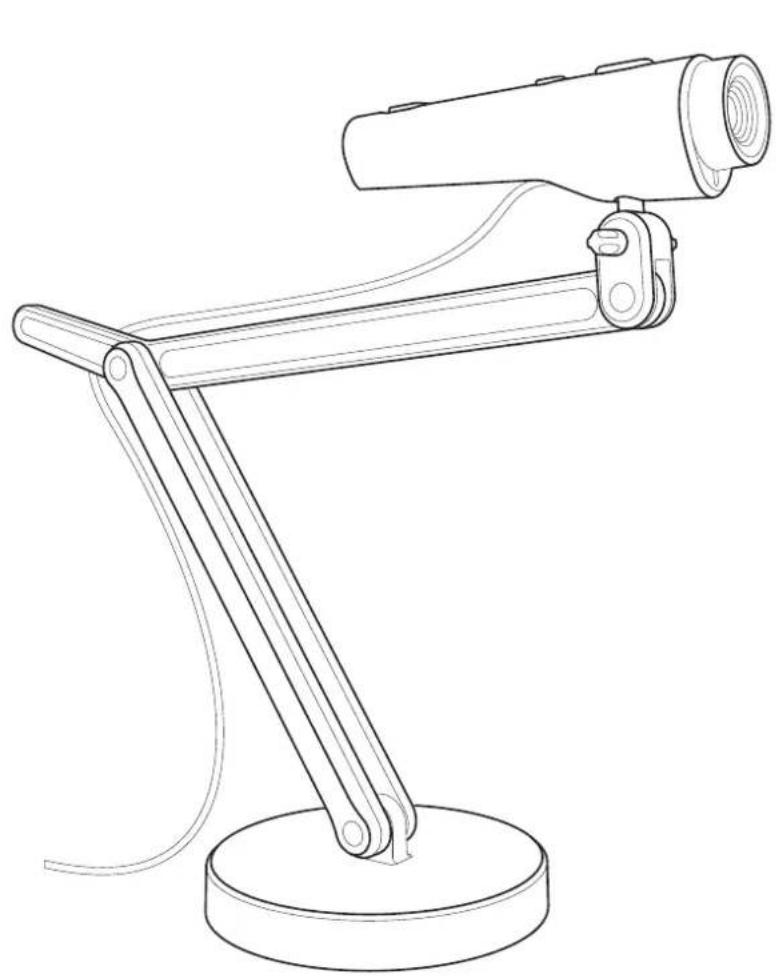
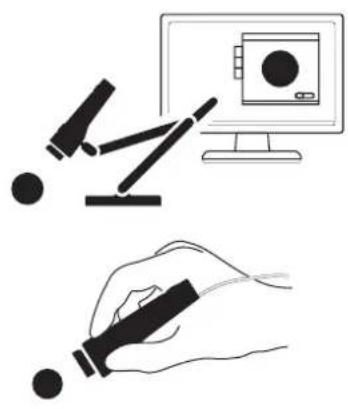
- Point 2 View comes with a unique jointed stand which allows you to position the webcam as you choose. You can flex the stand to different configurations; you can tilt and rotate the webcam on top of the stand, or attach it to either side of the stand. The stand provides broad flexibility while remaining stable and secure.
- Your Point 2 View is shaped like a pen and has a natural feel in your hand. Hold the Point 2 View and move it anywhere you like, letting the camera capture your personal Point of View - you're the director.
EASY AUTOFOCUS

natural_image
Line drawing of a hand holding a cup and eraser, with a small teacup on the surface (no text or symbols)You don't have to worry about being out of focus with the Point 2 View. It has two autofocus modes:
- Continuous Autofocus automatically brings itself into focus when its position or objects in the image change, giving you hands-free operation.
- Single Autofocus delivers a video or snapshot with a fixed focus point. Press the Focus key or Focus Button (in the Software) to adjust the focus to your liking.
And, your Point 2 View delivers first-rate macro performance, which allows you to get within inches of an object - and still get a crisp picture.
SMART P2V SOFTWARE
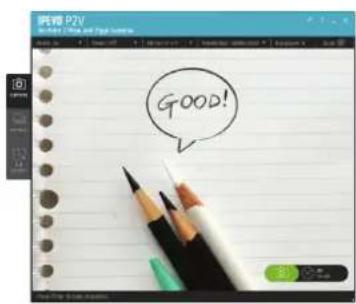
P2V (Point 2 View) Software is dedicated software developed to expand Point 2 View's capabilities and give you more choices. P2V Software lets you view the video image and make adjustments, and with one click you're in Full Screen mode - excellent for presentations. The software allows you to focus and take snapshots, and then helps you store and manage those photos. P2V Software makes it easier than ever to capture your Point of View.
INSTALLING THE P2V SOFTWARE
SYSTEM REQUIREMENTS
PC:
• Microsoft Windows 7, Vista or XP
• 1.4GHz CPU or higher (2.4GHz recommended)
• 512MB RAM (1GB recommended)
• 200MB free hard disk space
Mac:
• Mac OS X 10.5 or higher
• 1.4GHz CPU or higher (2.4GHz recommended)
• 512MB RAM (1GB recommended)
• 200MB free hard disk space
INSTALLING P2V SOFTWARE
PC:
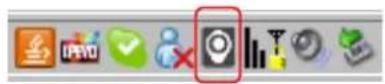
Insert the CD into your computer and run the setup program. Follow the on-screen prompts to complete the software installation process. As part of the installation, a P2V Software icon will be installed into the task bar at the bottom of your computer screen.
Mac:
Insert the CD into your computer and activate the disk image file (*.dmg). Copy the P2V application file into the Applications directory.
CONNECTING YOUR POINT 2 VIEW
- Connect Point 2 View to a USB port on your computer using the webcam's built-in USB connector.
- Open your P2V Software, if it's not already running. It opens in Camera mode by default. You will see the video image being transmitted by Point 2 View.

REVIEWING KEY PARTS OF THE POINT 2 VIEW HARDWARE
The manual controls on Point 2 View let you bring Point 2 View into focus and take snapshots. The three-jointed stand provide both flexibility and stability.


natural_image
Simple line drawing of a circular mechanical component with concentric rings and two labeled points E and F (no text or symbols on the object itself)| A | AF (Autofocus) mode switch | Selects auto-focusing behavior between S (Single) and C (Continuous). For more information, see Selecting Autofocus (AF) mode on Point 2 View, page 8. |
| B Focus key Press to bring Point 2 View into focus. For more information,see Bringing Point 2 View into focus, page 8. | ||
| C Snapshot key Press to take a snapshot photo of the image presented in theP2V Software screen when you're in Camera mode. For more information, see Taking snapshots, page 10. | ||
| D Stand Desktop stand with three hinges and vertical/horizontalconnectors allows you to position Point 2 View however you like. For examples of usage, see Positioning Point 2 View,page 12. | ||
| E Power indicator Turns on (green) when Point 2 View is connected to a computer. | ||
| F Video indicator Turns on (red) when Point 2 View video input is recognized bythe computer. | ||
REVIEWING KEY PARTS OF THE P2V SOFTWARE
P2V Software's easy-to-use, intuitive interface makes it easy to view and manage videos and snapshots. The main screen gives you three modes to work in:
- Camera mode shows you the video the webcam is capturing.
- Review mode shows your photo snapshots.
• Full Screen mode shows the video in full screen.


A Mode tab Switches between the three function modes: Camera, Review and Full Screen.
B Menu bar Lists menu for major functions and shows currently selected options.
C Snapshot / Focus control Provides indicators and software buttons for Snapshot and Focus functions.
D Thumbnail view
Lists thumbnail views and file information of taken snapshots.
E Esc button Brings Full Screen mode back to Camera mode.
NAVIGATING THE P2V SOFTWARE INTERFACE

Review mode Full Screen mode


CAMERA MODE: FOR VIEWING VIDEO AND TAKING SNAPSHOTS.
Camera mode is the default view on the main screen in Point 2 View Software. Here you can monitor and adjust the video images, control the focus, and take snapshots. When you want to review your snapshots or share a video image in presentations, switch to the other modes by clicking the Mode tab. When you're done, return to Camera mode.
REVIEW MODE: FOR REVIEWING AND NAVIGATING TAKEN SNAPSHOTS.
After you take snapshots in Camera mode, you can review your photos. Select Review mode to view your photos and do simple editing (zoom, copy and delete). You can open the Photo Library folder to work with your snapshots in graphics programs.
FULL SCREEN MODE: FOR SHARING VIDEO AND IMAGES WITH OTHERS.
Choose Full Screen mode to share your video images. The video image will fill the whole screen, with two floating icons that allow you to control focus and snapshot (as in Camera mode). You can choose not to show the icons by clicking on the screen, so your full-screen video is completely clear of distractions.
SEEING HOW EASY IT IS TO STAY FOCUSED
Point 2 View makes it easy to focus clearly. You can choose either Continuous or Single Autofocus, and bring it into focus only when necessary. Before you begin, make sure you are either in Camera mode or Full Screen mode with a video image on the screen.
SELECTING AUTOFOCUS (AF) MODE ON POINT 2 VIEW
Use the AF switch on Point 2 View to select either Continuous (C) or Single (S) Autofocus, depending on your purpose.

flowchart
graph LR
    A["Green Node"] --> B["Gray Node"]
    B --> C["Red Box Label"]
    style C fill:#f9f,stroke:#333
Mode Description Useful for...
Continuous Point 2 View automatically refreshes its focus when its position changes, or objects in the image change.
Single Point 2 View refocuses only when the Focus key on Point 2 View is pressed, or the Focus button in P2V Software is clicked.
- Hands-free operation - Frequent switching between near and far objects
• Taking multiple photos in a static condition
Whichever Autofocus mode is currently selected is indicated in the bottom right corner of P2V Software's Camera mode.

BRINGING POINT 2 VIEW INTO FOCUS
You can bring Point 2 View into focus by pressing the Focus key on Point 2 View, or by clicking the Focus button in P2V Software. The functionality is the same in either case and is especially useful when you have selected Single AF (Autofocus) mode, but it also works in Continuous AF mode.

natural_image
Diagram of a device with three labeled buttons and a red circle highlighting a button (no text or symbols present)Focus key (hardware) Focus button (software)

Follow these steps to bring Point 2 View into focus.
- Press the Focus key on Point 2 View or click the Focus button in P2V Software.
- A red focus frame appears at the center of the display, indicating focusing has begun. A single “beep” sound is generated.
- When focusing is complete, the focus frame turns green, accompanied by a dual "beep" sound.
- The focus frame disappears.
DISABLING THE "BEEP" SOUND (OPTIONAL)

Windows:
- Click the Settings icon in the menu bar
- Click the General tab
- In the Sound Effect on box, uncheck Focus
Mac:
- Click P2V > Preferences...menu
- Click the General tab
- In the Sound Effect on box, uncheck Focus

TAKING SNAPSHOTS
Taking snapshots of a video image is simple and straightforward. First, make sure that P2V Software is running. Then choose the most convenient way to take a snapshot:
- Press the Snapshot key on Point 2 View, or
- Click the Snapshot button in P2V Software, or
- Press the Enter (Windows) or Return (Mac) key
When you take a snapshot:
• A snapshot sound is generated.
- The video image in Camera mode freezes for a moment, showing the Instant Preview of your snapshot.
TIP:
Instant Preview provides a quick glance at your snapshot, so you can see whether or not you've captured the desired photo without going to Review mode
NAVIGATING PHOTOS IN REVIEW MODE
You can review your snapshots in P2V Software's Review mode.
- Click the Review mode tab to switch to Review mode. The most recently taken photo is displayed in the main screen with file information below the photo.
- Recent photos are shown at the bottom. You can move from photo to photo by using the Left / Right key or clicking the Left / Right icon. You can also use the scroll bar at the bottom to scroll through your photo library.
DISABLING THE "SNAPSHOT" SOUND (OPTIONAL)

Windows:
- Click the Settings icon in the menu bar
- Click the General tab
-
In the Sound Effect on box, uncheck Snapshot Mac:
-
Click P2V > Preferences...menu
- Click the General tab
- In the Sound Effect on box, uncheck Snapshot

MODIFYING OR DISABLING INSTANT PREVIEW (OPTIONAL)
Instant Preview is set to 2 seconds as a default. You can choose to reset Instant Preview to 4 seconds, or you can turn it off.
Instant Preview


Windows:
-
Click the Settings icon in the menu bar
-
Click the General tab
-
In the Instant Preview box, click your preference: 4 seconds or 2 seconds, or turn Instant Preview off. Mac:
-
Click P2V > Preferences...menu
-
Click the General tab
-
In the Instant Preview box, click your preference: 4 seconds or 2 seconds, or turn Instant Preview off.
USING THE TIMER FUNCTION

Make sure that P2V Software is in Camera mode, and then locate the Timer menu. You can choose between 3 seconds and 10 seconds.
- The 10-second mode is useful for taking group shots with your family and friends.
- The 3-second mode is particularly useful when taking a snapshot with Point 2 View; it allows a buffer time for Point 2 View to stabilize, making for a crisper picture.
When using the Timer function:
- A countdown "beep" will be generated each second until the shutter snaps.
- Countdown number icons will replace the Focus/Snapshot graphics.
POSITIONING POINT 2 VIEW
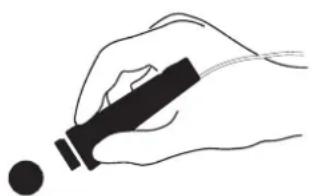
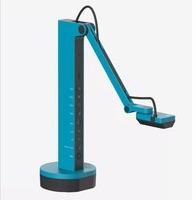
With Point 2 View, your webcam is no longer tethered to your monitor. Point 2 View is shaped like a pointer, making it easy to use in your hand. And its flexible, stable stand allows you to share views of objects and documents.
VIEWING OBJECTS AND THE MACRO CAPABILITY
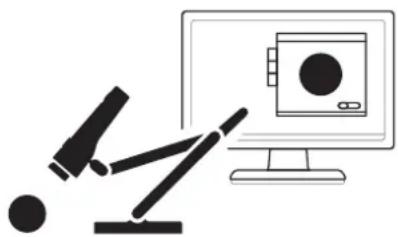
You can move your Point 2 View on its stand to view an object, or arrange the stand and then attach the Point 2 View. The stand has three joints and a swivel. Once you arrange it however you choose, it remains stable in that position until you change it.
Point 2 View's Single Autofocus is recommended for viewing stationary objects.
natural_image
Simple line drawing of a microscope and computer monitor (no text or symbols)Point 2 View also delivers excellent macro performance in both Single and Continuous Autofocus, which ensures a clear image even in close-up.
natural_image
Line drawing of a hand holding a pen, no text or symbols presentTIPS:
- Point 2 View enables you to get within about 2 inches (5cm) of an object and still focus clearly.
- When you are in Single Autofocus mode, press the Focus key on Point 2 View or click the Focus button in P2V Software to bring Point 2 View into focus.
SHARING DOCUMENTS
It's easy to use Point 2 View to share documents. Just follow these steps:
- Place your Point 2 View stand at the side of the document (so that it does not block the document or your view).
- Flex the arm so that the head of the stand is above the center of the page.
- You can also Point 2 View to the side connector on the head (so that the image orientation matches your view).
- Turn on your P2V Software, make any necessary adjustments, and select Full Screen mode.

natural_image
Simple line drawing of a mechanical setup with a lever, block, and circle (no text or symbols)TIP:
You can also use the Mirror (flip) function to adjust the image orientation. For more information, see Flipping images (the Mirror function), page 15.
3 WORKING WITH VIDEO IMAGES
Point 2 View's Camera mode contains various features for managing how video images are presented onscreen. You can fine-tune image quality using the Image Adjustment function in the Settings window. For more information, see Advanced Features, page 20.
ZOOMING IMAGES
In Camera mode, open the Zoom menu and select the ratio. The video image will zoom toward its center. If you take a snapshot at this point, your photo will be of the zoomed image.

Zooming from 1 X (left) to 3 X (right)
TIP: This is a digital zoom, therefore the image itself does not change when the zoom ratio is changed.
CONTROLLING EXPOSURE
In Camera mode, open the Exposure menu and select the exposure level. It's useful to experiment with exposure using day and night lighting levels so you know what to expect when using Point 2 View in your environment.
TIPS:
- This is a digitally simulated exposure, therefore the Point 2 View lens does not change its position.
- You can also control other image properties such as Brightness/Saturation/Hue from the Settings window, Image Adjustment tab. For more information, see Adjusting the video images, page 20.
FLIPPING IMAGES (THE MIRROR FUNCTION)
You can flip an image vertically or horizontally. In Camera mode, open the Mirror menu and choose functions. Flipping can be useful to help position an image for better viewing.

Original Horizontal flip


Vertical flip Horizontal + Vertical flip
CHANGING RESOLUTION
In Camera mode, open the Resolution menu. Higher resolution provides a better image, but it also makes a bigger (in bits), and thus slower, picture. When resolution is high, frame rate becomes lower and video response gets slower. When resolution is lowered, video gets faster.
TIPS:
- "fps" means frames per second, also called "frame rate."
- Note that your actual frame rate will fluctuate, depending on the images.
CHANGING WINDOW SIZE
To change the size of the viewing window, grab the bottom right corner of the window and drag it. Zoom ratio and video resolution do not change when the window size changes.

TIPS:
• If you want the video to fill the entire screen, try Full Screen mode.
- In the Windows version of P2V software, you can also change the window size by dragging the right or bottom edge of the window.
4 WORKING WITH PHOTOS
With Point 2 View, it's easy to take and review snapshots (see Using Basic Features, page 8). P2V Software's Review mode also offers simple, useful editing functions so you don't have to rely on other applications for routine tasks. You can zoom into a snapshot; rotate, copy or delete a photo; or access the Photo Library folder, into which all photos are automatically saved.
ZOOMING PHOTOS
In Review mode, open the Zoom menu and select the ratio. The photo image will zoom toward its center. When you close P2V Software, the photo will be reset to the normal (100%) view.
More ways to zoom:
- The scroll key on your mouse. Scroll forward to zoom in; scroll backwards to zoom out.
- Right-click on any part of the photo. The context menu pops up and offers zoom capability.
After zooming into the photo, you can pan it. Click the screen and drag it to see more areas of the photo.
ROTATING PHOTOS
In Review mode, open the Rotate menu. The photo rotates 90 degrees per each selection (four rotations will bring the photo back to its original orientation). The photo size will be automatically adjusted to fit the screen. When you close P2V Software, the image will be reset to standard orientation.

Rotate left Original Rotate right
COPYING PHOTOS
You can copy a photo into Clipboard and paste it into another application. Just right-click on the photo and select Copy, or use the Ctrl + C (Windows) / Command + C (Macintosh) shortcut keys.
DELETING PHOTOS
- Select the photos you want to delete. You can select multiple photos or even all photos by pressing Ctrl + A (Windows) / Command + A (Macintosh) shortcut keys. By default, the currently highlighted photo is selected.
- In Review mode, click the Delete menu or right-click on the photo and select Delete. You can also press the Del (Windows) / Command + Delete (Macintosh) shortcut keys.
- A confirmation prompt will appear. Click "OK" to confirm deletion.
OPENING PHOTO LIBRARY FOLDER
You have two ways to access your photo library folder:
- Right-click on a photo and select the Go to Image foldermenu.
- Click the folder icon below the photo in the main window.

Folder icon
The File Manager activates, showing the photo library folder and its contents.
TIP: The photos you take in Point 2 View are JPEG files; they can be opened and manipulated in any graphics editing program.
5 VIEWING IN FULL SCREEN
The Full Screen mode expands the video images into a full-screen presentation. This mode is particularly useful for presenting to an audience.
ENTERING FULL SCREEN MODE
-
Make sure you are in Camera mode with a video image showing on the screen.
-
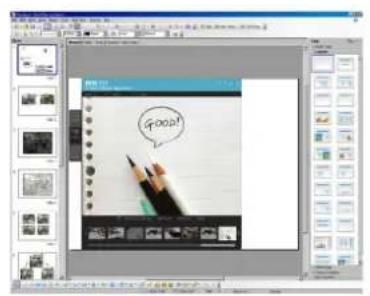
Click the Full Screen tab. The video image will expand into full screen.
Before After
The video image will expand into full screen.

- By default, the same set of functional icons as in Camera mode will appear in the screen.

Clicking any part of the screen will hide the icons, providing an unobstructed view. Click the screen again to bring the icons back.
CANCELING FULL SCREEN MODE
- To cancel Full Screen mode, click the Esc icon esc at the top right corner of the screen, or press the Esc key.
- The screen goes back to the Camera mode.
TIP:
You can switch to Full Screen mode from Review mode, but you will always go to Camera mode when canceling Full Screen mode.
The advanced features are located in the Settings window. To open the Settings window:
- (Windows) Click the Settings icon in the menu bar.

• (Macintosh) Select P2V > Preferences...menu.
ADJUSTING THE VIDEO IMAGES
You can fine-tune the video image quality using the Image Adjustment function.
- Make sure you are in Camera mode with a video image showing on the screen.
- Go to Settings window > Image Adjustment tab.
- Move the slider for each characteristic and check its effect. The video image changes in real time.
To bring the characteristics back to their default values, click the Default button.
Parameter Description
Brightness Brightens or darkens the image.
Contrast Increases or decreases the image contrast.
Gamma Increases or decreases the middle gray levels.
Hue Shifts color values and alters colors towards another one.
Saturation Changes the image color from monochrome (low saturation) to high color value (high saturation).
Sharpness Makes the image sharper or blurrier.
TIPS:
- You can also control another characteristic - exposure level - from the Exposure menu in Camera mode. For more information, see Controlling exposure, page 14.
- You cannot adjust snapshot photos in Review mode; the adjustments must be made before the snapshot is taken.
CHANGING THE PHOTO FILE NAME FORMAT
Snapshot photos are saved as JPEG files, and the file extension is always ".jpg". To help you manage your snapshots, you have two choices for file name formats, which can be edited from Settings, General tab > Photo Name Format.

| YYYY-MM-DD_4digit Prefixes the file name with | the date information, followed by4-digit serial number.Example: 2009-06-22_0001.jpg( = The first photo taken in June 22nd, 2009) |
| ____4digit Prefixes the file name with user-defined words, followed by4-digit serial number.Example: IPEVO_0001.jpg( = The first photo taken with IPEVO as the user-defined word) | |
STARTING P2V SOFTWARE AUTOMATICALLY WHEN YOUR COMPUTER STARTS (WINDOWS)
If you are using a Windows operating system, P2V Software automatically opens when you turn your computer on, by default. The P2V Software icon remains in the bottom task bar.
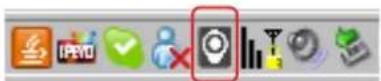
You can turn this start feature off from the Settings window: Go to the System tab and check the No radio button on the box labeled Auto run P2V when computer starts

You can open P2V Software by right-clicking the icon in the task bar and selectingOpen.

SELECTING LANGUAGE
You can select English (default) or Traditional Chinese as the menu language.
Windows: Select the language from Settings window > System tab > Language.
Macintosh: In Macintosh, language selection has to be done in the system level. Follow these steps.
- Quit P2V Software.
- Go to System Preference > International and select the language.
- Make sure the language in the OS has changed.
- Reopen P2V Software. The menu appears in the selected language.
KEEPING THE CAMERA MODE SETTINGS (WINDOWS ONLY)
You can let the P2V software memorize the Camera mode menu bar settings so that you do not have to reconfigure them each time you activate it.
You can toggle the setting on or off from Settings window > General tab > Keeping the Camera mode settings.
Keep Camera Mode Settings
Yes
○ No
TIPS:
The P2V software always memorizes the configurations inside the Settings window (General tab, Image Adjustment tab) regardless of this setting.
You can use Point 2 View as a generic webcam in other applications for video calling, streaming, etc. As an example, we will illustrate how to use Point 2 View for video calls in Skype, a popular web call/chat software.
The diagram below summarizes which Point 2 View functionalities are available when used in other applications. Note that functions configured with P2V Software will be disabled while using Point 2 View in other applications.
Enabled:
Video stream AF mode switch

natural_image
Pure electrical circuit lines without any symbolsDisabled: Snapshot key Focus key
TIPS:
• To use Point 2 View in other applications, first close P2V Software, then open the other application.
- Different applications use different methods of selecting Point 2 View as the webcam. Check each application's Help files.
- In some applications the Focus key might work, but not guaranteed.
STEP 1: PREPARING POINT 2 VIEW
- Connect Point 2 View to a USB port on your computer.
- Set the AF switch to C (continuous) mode.
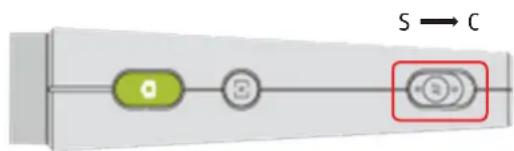
flowchart
graph LR
    A["a"] --> B["b"]
    B --> C["Output"]
    style A fill:#90EE90
    style B fill:#FFB6C1
    style C fill:#FFD700
TIP:
While using Point 2 View in other applications, selecting the S (Single) Autofocus mode might generate unfocused images because the Focus key is not guaranteed to work outside P2V Software. This may prevent you from bringing Point 2 View into focus.
C (Continuous) Autofocus is generally a better choice, as it focuses whenever necessary.
STEP 2: PREPARING THE APPLICATION
- Activate the application (in this case, Skype).
- Open the configuration window fromTools > Optionsmenu (Windows) or Skype > Preferences...menu (Macintosh).
- Select the Video settings tab.
STEP 3: SELECTING POINT 2 VIEW AS THE WEBCAM
- In the Skype configuration window, Video settings tab, select Point 2 View as the webcam. (Point 2 View might be labeled as a generic USB webcam)
- Check that the real-time video images of Point 2 View appears inside the preview area.
- Before making calls, make sure Video Call is enabled. You can enable it from the Calls tab > Call settings.
ACCESSING THE HELP INFORMATION
Clicking the Help link opens the IPEVO Support website, where you can check your version and update your P2V Software if needed. You can also download the most recent version of the User Manual.
- (Windows) Click the Help icon in the menu bar.

• (Macintosh) Select Help > P2V Help.
VIEWING VERSION INFORMATION
To view the software and firmware of Point 2 View, use the "About P2V" menu.
• (Windows) Right-click the bottom task bar icon and select About.

• (Macintosh) Select P2V > About P2Vmenu.
You can also view the version information from the Settings window.
- (Windows) Click the Settings icon in the menu bar and select the System tab.

• (Macintosh) Select P2V > Preferences...menu and select the System tab.
Clicking the "Check for updates" link opens the IPEVO Support website in a browser where you can download the latest version of P2V Software.

CLOSING P2V SOFTWARE
To close the window:
• (Windows) Click the Close button at the top right corner of the window, or press Alt + F4 shortcut keys.
- (Macintosh) Click the Close button at the top left corner of the window, or press Command + W shortcut keys.
To close the Point 2 View Software:
• (Windows) Right-click the bottom taskbar icon and select Close.
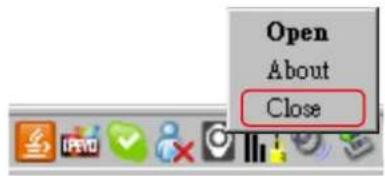
• (Macintosh) Select P2V > Quit P2Vmenu or press Command + Q shortcut keys.
TIP:
Closing the window does not turn the P2V Software off. To quit the application entirely, follow the instructions for closing the P2V Software.
LIST OF SHORTCUT KEYS
Function Mode Windows Mac
Take snapshot All Enter Return
Close window Camera/Review Alt + F4 Command+ W
Close application All ---- Command+ Q
Cancel Full Screen mode Full Screen Esc Esc
| Zoom in | Review | + / forward scroll | + / forward scroll |
| Zoom out | Review | - / backward scroll | - / backward scroll |
| Copy photo | Review | Ctrl + C | Command + C |
| Delete photo | Review | Del | Del / Command + Del |
| Switch to previous photo | Review | ← | ← |
| Switch to next photo | Review | → | → |
| Select all photos | Review | Ctrl + A | Command + A |
FAQ AND TROUBLESHOOTING
- Please visit the product support page on www.ipevo.com for all the latest FAQ and up-to-date product information.
- If there are problems with connections between Point 2 View and P2V Software, please reconnect Point 2 View and restart P2V Software, then try again.
USER MANUAL VERSION INFORMATION
Version Date Details
V1.2 February 20
^th , 2012 Image updates.
SAFETY INFORMATION
For your safety and the best performance of your Point 2 View webcam:
- Keep your Point 2 View from touching heat sources such as radiators and stoves.
- Do not immerse your Point 2 View in liquids, and protect it from moisture.
• Supervise children using Point 2 View.
This device complies with Part 15 of the FCC Rules. Operation is subject to the following two conditions: (1) this device may not cause harmful interference, and (2) this device must accept any interference received, including interference that may cause undesired operation.
ACKNOWLEDGEMENT
- “Windows” is a registered trademark of Microsoft Corporation, registered in the US and other countries.
- “Mac” and “Macintosh” are registered trademarks of Apple Computer, Inc., registered in the US and other countries.
- “Skype” is a registered trademark of Skype Technologies S.A., registered in the US and other countries.
© 2009 IPEVO Inc. All rights reserved. IPEVO, Point 2 View, the IPEVO logo, and other IPEVO marks are owned by IPEVO Inc. and may be registered. All other trademarks are the property of their respective owners.
All screen images are either simulated or properties of IPEVO Inc.

- Point 2 View User Manual
- GETTING STARTED.... 3
- Using BASIC FEATURES....8
- WORKING WITH VIDEO IMAGES.... 14
- WORKING WITH PHOTOS.... 17
- VIEWING IN FULL SCREEN....19
- ADVANCED FEATURES.... 20
- USING POINT 2 VIEW IN OTHER APPLICATIONS...... 23
- USEFUL TIPS 25
- APPENDIX.... 27
- KEY BENEFITS OF YOUR POINT 2 VIEW:
- FLEXIBLE POSITIONING
- EASY AUTOFOCUS
- SMART P2V SOFTWARE
- INSTALLING THE P2V SOFTWARE
- SYSTEM REQUIREMENTS
- PC:
- Mac:
- INSTALLING P2V SOFTWARE
- CONNECTING YOUR POINT 2 VIEW
- REVIEWING KEY PARTS OF THE POINT 2 VIEW HARDWARE
- REVIEWING KEY PARTS OF THE P2V SOFTWARE
- NAVIGATING THE P2V SOFTWARE INTERFACE
- CAMERA MODE: FOR VIEWING VIDEO AND TAKING SNAPSHOTS.
- REVIEW MODE: FOR REVIEWING AND NAVIGATING TAKEN SNAPSHOTS.
- FULL SCREEN MODE: FOR SHARING VIDEO AND IMAGES WITH OTHERS.
- SEEING HOW EASY IT IS TO STAY FOCUSED
- SELECTING AUTOFOCUS (AF) MODE ON POINT 2 VIEW
- BRINGING POINT 2 VIEW INTO FOCUS
- DISABLING THE "BEEP" SOUND (OPTIONAL)
- Windows:
- TAKING SNAPSHOTS
- NAVIGATING PHOTOS IN REVIEW MODE
- DISABLING THE "SNAPSHOT" SOUND (OPTIONAL)
- MODIFYING OR DISABLING INSTANT PREVIEW (OPTIONAL)
- Instant Preview
- USING THE TIMER FUNCTION
- POSITIONING POINT 2 VIEW
- VIEWING OBJECTS AND THE MACRO CAPABILITY
- TIPS:
- SHARING DOCUMENTS
- WORKING WITH VIDEO IMAGES
- ZOOMING IMAGES
- CONTROLLING EXPOSURE
- FLIPPING IMAGES (THE MIRROR FUNCTION)
- CHANGING RESOLUTION
- CHANGING WINDOW SIZE
- WORKING WITH PHOTOS
- ZOOMING PHOTOS
- ROTATING PHOTOS
- COPYING PHOTOS
- DELETING PHOTOS
- OPENING PHOTO LIBRARY FOLDER
- VIEWING IN FULL SCREEN
- ENTERING FULL SCREEN MODE
- CANCELING FULL SCREEN MODE
- ADJUSTING THE VIDEO IMAGES
- CHANGING THE PHOTO FILE NAME FORMAT
- STARTING P2V SOFTWARE AUTOMATICALLY WHEN YOUR COMPUTER STARTS (WINDOWS)
- SELECTING LANGUAGE
- KEEPING THE CAMERA MODE SETTINGS (WINDOWS ONLY)
- Enabled:
- STEP 1: PREPARING POINT 2 VIEW
- TIP:
- STEP 2: PREPARING THE APPLICATION
- STEP 3: SELECTING POINT 2 VIEW AS THE WEBCAM
- ACCESSING THE HELP INFORMATION
- VIEWING VERSION INFORMATION
- CLOSING P2V SOFTWARE
- LIST OF SHORTCUT KEYS
- FAQ AND TROUBLESHOOTING
- USER MANUAL VERSION INFORMATION
- SAFETY INFORMATION
- ACKNOWLEDGEMENT
Brand : Ipevo
Model : CDVU-03IP
Category : Document camera