
CDVH-01IP - Document camera Ipevo - Free user manual and instructions
Find the device manual for free CDVH-01IP Ipevo in PDF.


| Product Type | Document Camera |
| Model | CDVH-01IP |
| Brand | IPEVO |
| Resolution | Up to 8 MP (3264 x 2448) |
| Zoom | 4x digital zoom |
| Frame Rate | Up to 30 fps |
| Connectivity | USB 2.0 (UVC compliant) |
| Image Capture | Snapshot via software or remote |
| Video Recording | Supported via software |
| Light Source | Built-in LED light |
| Software Compatibility | Windows, macOS, Chrome OS |
| Dimensions (L x W x H) | Approx. 280 x 80 x 30 mm (folded) |
| Weight | Approx. 0.3 kg |
| Power Supply | Via USB (5V, 0.5A) |
| Cable Length | 1.5 m |
| Cleaning | Wipe with soft, dry cloth. Avoid solvents. |
| Safety | Do not expose to liquids. Keep away from children. |
| Spare Parts & Repairability | USB cable replaceable. No user-serviceable parts inside. |
| Warranty | 1 year limited |
| Package Contents | Document camera, USB cable, quick start guide |
Frequently Asked Questions - CDVH-01IP Ipevo
User questions about CDVH-01IP Ipevo
0 question about this device. Answer the ones you know or ask your own.
Ask a new question about this device
Download the instructions for your Document camera in PDF format for free! Find your manual CDVH-01IP - Ipevo and take your electronic device back in hand. On this page are published all the documents necessary for the use of your device. CDVH-01IP by Ipevo.
USER MANUAL CDVH-01IP Ipevo
natural_image
Line drawing of a vertical robotic arm with articulated joints and base mount (no text or symbols)Quick Start Guide
VZ-R HDMI/USB Dual Mode 8MP Document Camera
IPEVO
www.ipevo.com
Customer Service
Email: cs@ipevo.com
Tel: +1-408-490-3085 (USA)
The Basics
VZ-R HDMI/USB Dual Mode 8MP Document Camera captures all your material — documents, textbooks, artwork, devices and 3D objects — and streams real-time images directly to your TV or projector via HDMI, skipping the need for a computer. It is also compatible with most monitors with an HDMI input. In addition, VZ-R also supports USB connection for using with a computer when an HDMI connection is not available.
Attaching the Weighted Base
VZ-R consists of two parts — an 8MP camera with a versatile multi-jointed stand, and a weighted base. Before using, you’ll first need to manually attach VZ-R’s base to its stand. Please use the screwdriver (included) to secure the base to the stand using the included screws. Please be careful not to drop the base while doing so.

Getting to Know Your VZ-R
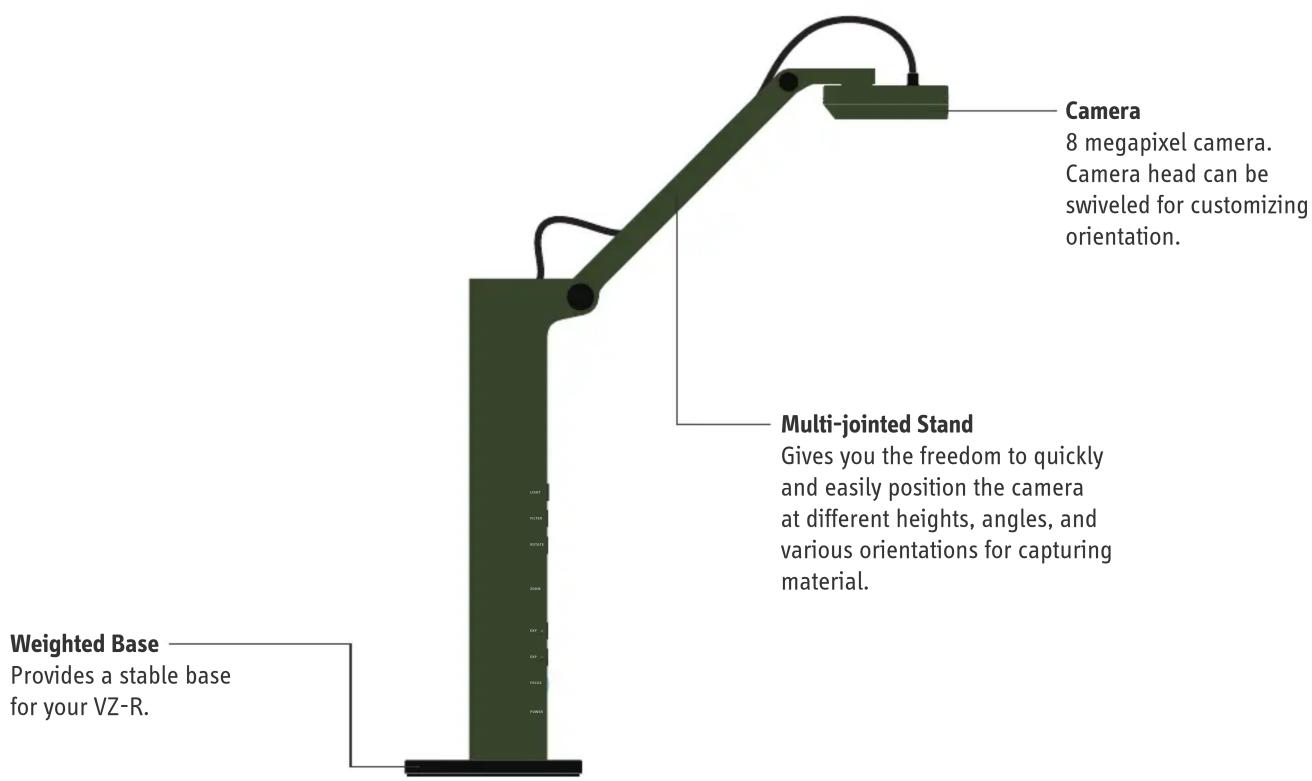


Connecting to Your HDMI Displays
Please follow the steps below to connect your VZ-R directly to a TV, projector or monitor via HDMI:
- Connect an HDMI cable (not included) to the HDMI port of VZ-R. Then, connect the other end of the cable to the HDMI port of a TV, projector or monitor.
- Connect the included Micro-USB cable to the Micro-USB port of VZ-R. Then, connect the other end of the cable to the USB port of your TV, projector or computer to provide power for VZ-R. Or, you can also power VZ-R on by connecting the cable to a 5V/1A USB power adapter (not included) and then to an outlet.
- Turn on VZ-R using the Power Switch. A live image from VZ-R should appear on your TV, projector or monitor. VZ-R is now ready to use.
Using VZ-R in the USB Mode
Use VZ-R in its USB mode with a computer via USB when an HDMI connection is not available. You can then project live images to a large screen through a projector connected to your computer. When in USB mode, VZ-R is compatible with a variety of software, allowing you to use it in different ways. You may wish to use it with our IPEVO Visualizer software. You may download it at: http://support.ipevo.com/vzr.
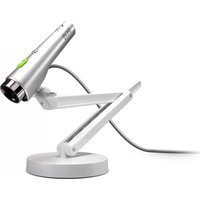
Brand : Ipevo
Model : CDVH-01IP
Category : Document camera