PHOENIX 301 - Surveillance Camera Defender - Free user manual and instructions
Find the device manual for free PHOENIX 301 Defender in PDF.


| Product Type | Surveillance Camera |
| Brand | Defender |
| Model | PHOENIX 301 |
| Resolution | 1080p Full HD |
| Night Vision | Yes, up to 20 meters |
| Viewing Angle | 90° |
| Dimensions (L x H x D) | 200 x 70 x 70 mm |
| Weight | 500 g |
| Power Supply | 12 V DC / PoE |
| Power Consumption | 5 W max |
| Main Functions | Motion detection, continuous recording, push notification |
| Connectivity | Ethernet RJ45, Wi-Fi 2.4 GHz |
| Storage | microSD card up to 128 GB, optional cloud |
| Audio | Built-in microphone and speaker |
| Protection Rating | IP65 (outdoor) |
| Maintenance and Cleaning | Clean with a soft, dry cloth. Do not use solvents. |
| Safety | Do not expose to extreme temperatures or excessive humidity. |
| Spare Parts and Repairability | Contact Defender customer service for spare parts. |
| General Information | Manufacturer's warranty 2 years. Indoor/outdoor use. |
Frequently Asked Questions - PHOENIX 301 Defender
User questions about PHOENIX 301 Defender
0 question about this device. Answer the ones you know or ask your own.
Ask a new question about this device
Download the instructions for your Surveillance Camera in PDF format for free! Find your manual PHOENIX 301 - Defender and take your electronic device back in hand. On this page are published all the documents necessary for the use of your device. PHOENIX 301 by Defender.
USER MANUAL PHOENIX 301 Defender
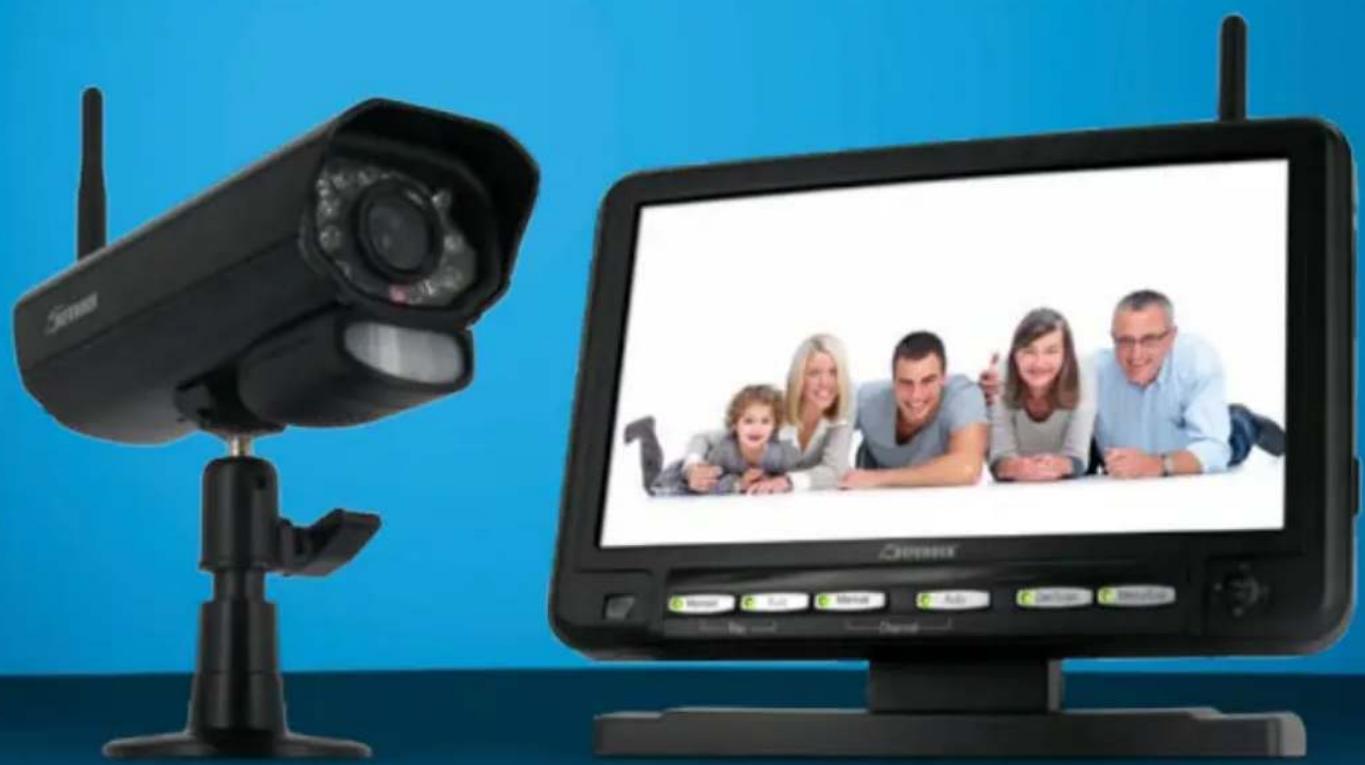
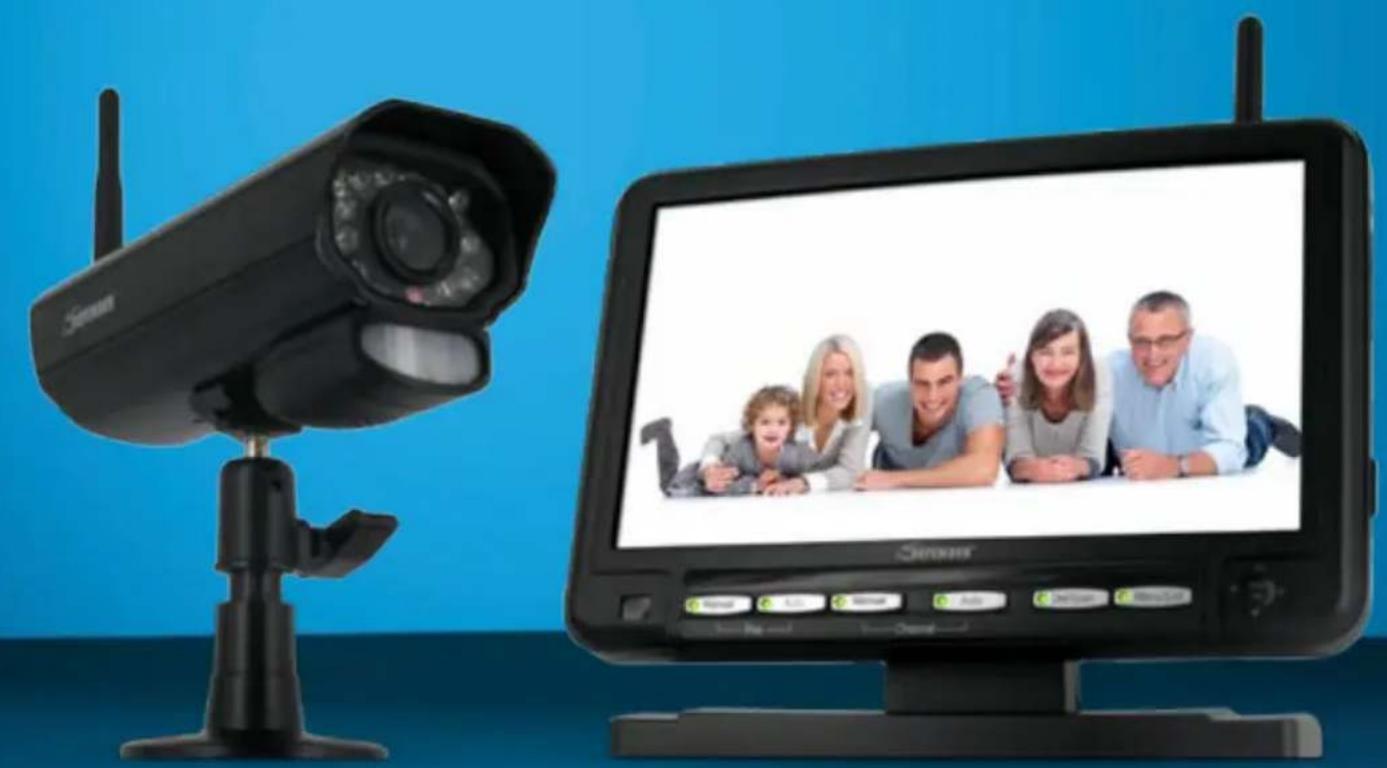
Digital Wireless DVR Security System
7" Monitor with SD Card Recording and Long Range Night Vision Camera
natural_image
Exterior view of a security camera and a digital TV displaying a family photo (no text or symbols visible on the devices themselves)INSTRUCTION MANUAL v1.0
Model#: PX301 www
PRODUCT WARRANTY INFORMATION
Please visit our website at www.defender-usa.com for information about your product's warranty
We take quality very seriously. This is why all of our products come with a one year warranty from the original purchase date against defects in workmanship and materials. If you have warranty or support issues please contact us using any of the following methods:
Support: www.defender-usa.com/contact_us
Website: www.defender-usa.com
Cheektowaga, NY Niagara Falls, ON
USA 14227 Canada L2H 1J9
DEFENDER® USA
60 Industrial Parkway #Z64
DEFENDER® CANADA
4080 Montrose Road
Warranty Terms
- Defender products are guaranteed for a period of one year from the date of purchase against defects in workmanship and materials. This warranty is limited to the repair, replacement or refund of the purchase price at Defender's option.
- This warranty becomes void if the product shows evidence of having been misused, mishandled or tampered with contrary to the applicable instruction manual.
- Routine cleaning, normal cosmetic and mechanical wear and tear are not covered under the terms of this warranty.
- The warranty expressly provided for herein is the sole warranty provided in connection with the product itself and no other warranty, expressed or implied is provided. Defender assumes no responsibilities for any other claims not specifically mentioned in this warranty.
- This warranty does not cover shipping costs, insurance, or any other incidental charges.
- You MUST call Defender before sending any product back for repair. You will be sent a Return Authorization form with return instructions. When returning the product for warranty service, please pack it carefully in the original box with all supplied accessories, and enclose your original receipt or copy, and a brief explanation of the problem (include RA #).
- This warranty is valid only in Canada and the continental U.S.
- This warranty cannot be re-issued.
CAUTION
RISK OF ELECTRIC SHOCK, DO NOT OPEN MONITOR

TO REDUCE THE RISK OF ELECTRIC SHOCK, DO NOT REMOVE THE COVER (BACK). NO USER SERVICEABLE PARTS INSIDE. REFER SERVICING TO QUALIFIED SERVICE PERSONNEL.
This device complies with Part 15 of the FCC Rules.
Operation is subject to the following two conditions: (1) this device may not cause harmful interference, and (2) this device must accept any interference received, including interference that may cause undesired operation.
FCC NOTE: THE MANUFACTURER IS NOT RESPONSIBLE FOR ANY RADIO OR TV INTERFERENCE CAUSED BY UNAUTHORIZED MODIFICATIONS TO THIS EQUIPMENT. SUCH MODIFICATIONS COULD VOID THE USER'S AUTHORITY TO OPERATE THE EQUIPMENT.
IC NOTE: LOW POWER DECIVES RF
Operation is subject to the following two conditions: (1) this device may not cause harmful interference, and (2) this device must accept any interference, including interference that may cause undesired operation of the device."
CLASS B OR A PRODUCTION: This Class [B] digital apparatus complies with Canadian ICES-003.
INTRODUCTION
Congratulations on your purchase of the Phoenix 301! This wireless, audio enabled video camera with SD card recording capabilities is an excellent security product for any home or business. With motion detection, alarm activation and scheduled recording, you can be sure that you will never miss an unsuspected guest or movement. Feel secure in knowing that you will never miss a thing with your PX301 allowing you to see, hear and record events which are happening at all times.
TABLE OF CONTENTS
WARRANTY 2
FEATURES 4
WHAT'S INCLUDED....6
ALTERNATE KITS ....6
ADDITIONAL ACCESSORIES ....6
BUTTONS AND CONNECTIONS....7
Monitor 7
Remote....9
Camera....9
INSTALLATION 10
Things to Consider 10
Avoiding Interference....10
Mounting the Camera 11
Plugging in Monitor 12
Connecting 7" LCD Monitor into another Monitor....12
Joystick Operation ....13
PAIRING 13
GETTING STARTED....14
Inserting SD Card into monitor 14
Live View 14
CAMERA VIEWING....15
RECORDING....15
MAIN MENU 16
Camera ON/OFF Menu 16
Record Menu 17
Quality 17
Trigger Record....18
Scheduled Record....18
Overwrite 19
TABLE OF CONTENTS
Settings....19
Date and Time 20
Brightness....20
AV Out....21
Screen Saver....21
Alarm Volume 22
Format the SD Card 22
Digital Zoom 23
Default....23
PLAYBACK....24
Watching Recorded Footage Through monitor 24
Computer Playback....25
Backing Footage up on a Computer 27
TROUBLESHOOTING 28
SPECIFICATIONS 29
Camera....29
Monitor ....30
REPLACEMENT PARTS/ADDITIONAL ACCESSORIES ....31
DRILLING TEMPLATE 32
NEED HELP? 33
FEATURES
Digital Wireless Technology
Superior digital frequency with a wireless range of 100ft ensures clear video and audio. The convenience of a digital wireless signal also allows you to set your system up in just a matter of minutes.
SD Card Recording
Record up to 350 minutes of video and audio directly onto the included 2GB SD card. Choose to record constantly, based on a set schedule or only when motion is detected.
Long Range Night Vision
Eighteen infrared (IR) LEDs let you see in the dark, up to 40ft away! ^1 The LEDs automatically activate when it gets dark, giving you around the clock protection.
2 Way Intercom Feature
The 2 way intercom allows you to speak with whomever you are monitoring. Safely carry on conversations or monitor your entrance without ever having to open the door to strangers.
Weather Resistant Camera
The camera is built with durable aluminum, weather resistant housing ^2 so you can use it outdoors in almost any weather condition. Use it indoors for monitoring your business, inventory or home.
Expandable up to 4 Cameras
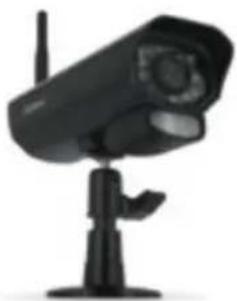
This system can support up to four cameras so you can monitor multiple offices, entrances and outdoor areas at the same time. ^3 Additional Camera: PX301-C
Motion Detection Settings
Motion detection gives you the option to record only when movement is detected to conserve your SD card memory. Your system will start recording and alert you when motion is detected.
24 Hour Scheduled Recording
Personalize a 24 hour recording schedule. Record video footage using three different types of recording modes: manual, scheduled, and motion activated.
7" LCD Monitor
View your live or recorded footage easily on the 7" LCD monitor. Its functional design allows it to be wall mounted or placed on a table.
Remote Control Access
Control your system directly from the monitor or from a distance with the included remote control.
Easily Connects to a TV
Use the included 6ft AV wire to connect to any television so you can see and hear your footage on a larger screen.
Lifetime Live Customer Support
Our customer support team can be reached on our website at www.defender-usa.com/contact_us or via live web chat. Our experts will be happy to assist you in English, French and Spanish.
-
IR illumination range up to 40ft under ideal conditions. Objects at or beyond this range may be partially or completely obscured, depending on the camera application.
-
Not for use in direct exposure to water, rain or snow. Although the cameras are water resistant they are not waterproof.
-
Recording in quad screen mode not supported. Single channel recording only.
natural_image
Black-and-white photo of a flat-screen TV displaying a group photo (no visible text or symbols)
natural_image
Black surveillance camera on a stand (no text or symbols visible)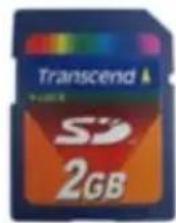
Digital wireless Camera Digital wireless monitor 2GB SD Card

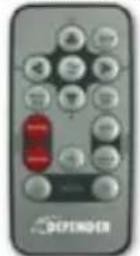
4 Window Warning Stickers Remote Control
- Mounting Hardware
• Power Adapter for Monitor - Manual
• Power Adapter for Camera
• RCA to RCA (male) cable
ALTERNATE KITS
The following kits have the following items included (as well as what is mentioned above):
natural_image
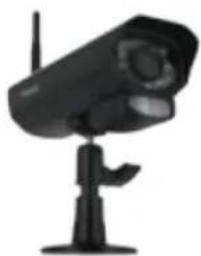
Black surveillance camera on a stand, no visible text or symbolsPX301 - 011
Additional Camera
ADDITIONAL ACCESSORIES
natural_image
Black surveillance camera on a stand, no visible text or symbolsPX 301-C Additional Camera
For more information please visit:
www.defender-usa.com
BUTTONS AND
CONNECTIONS
MONITOR
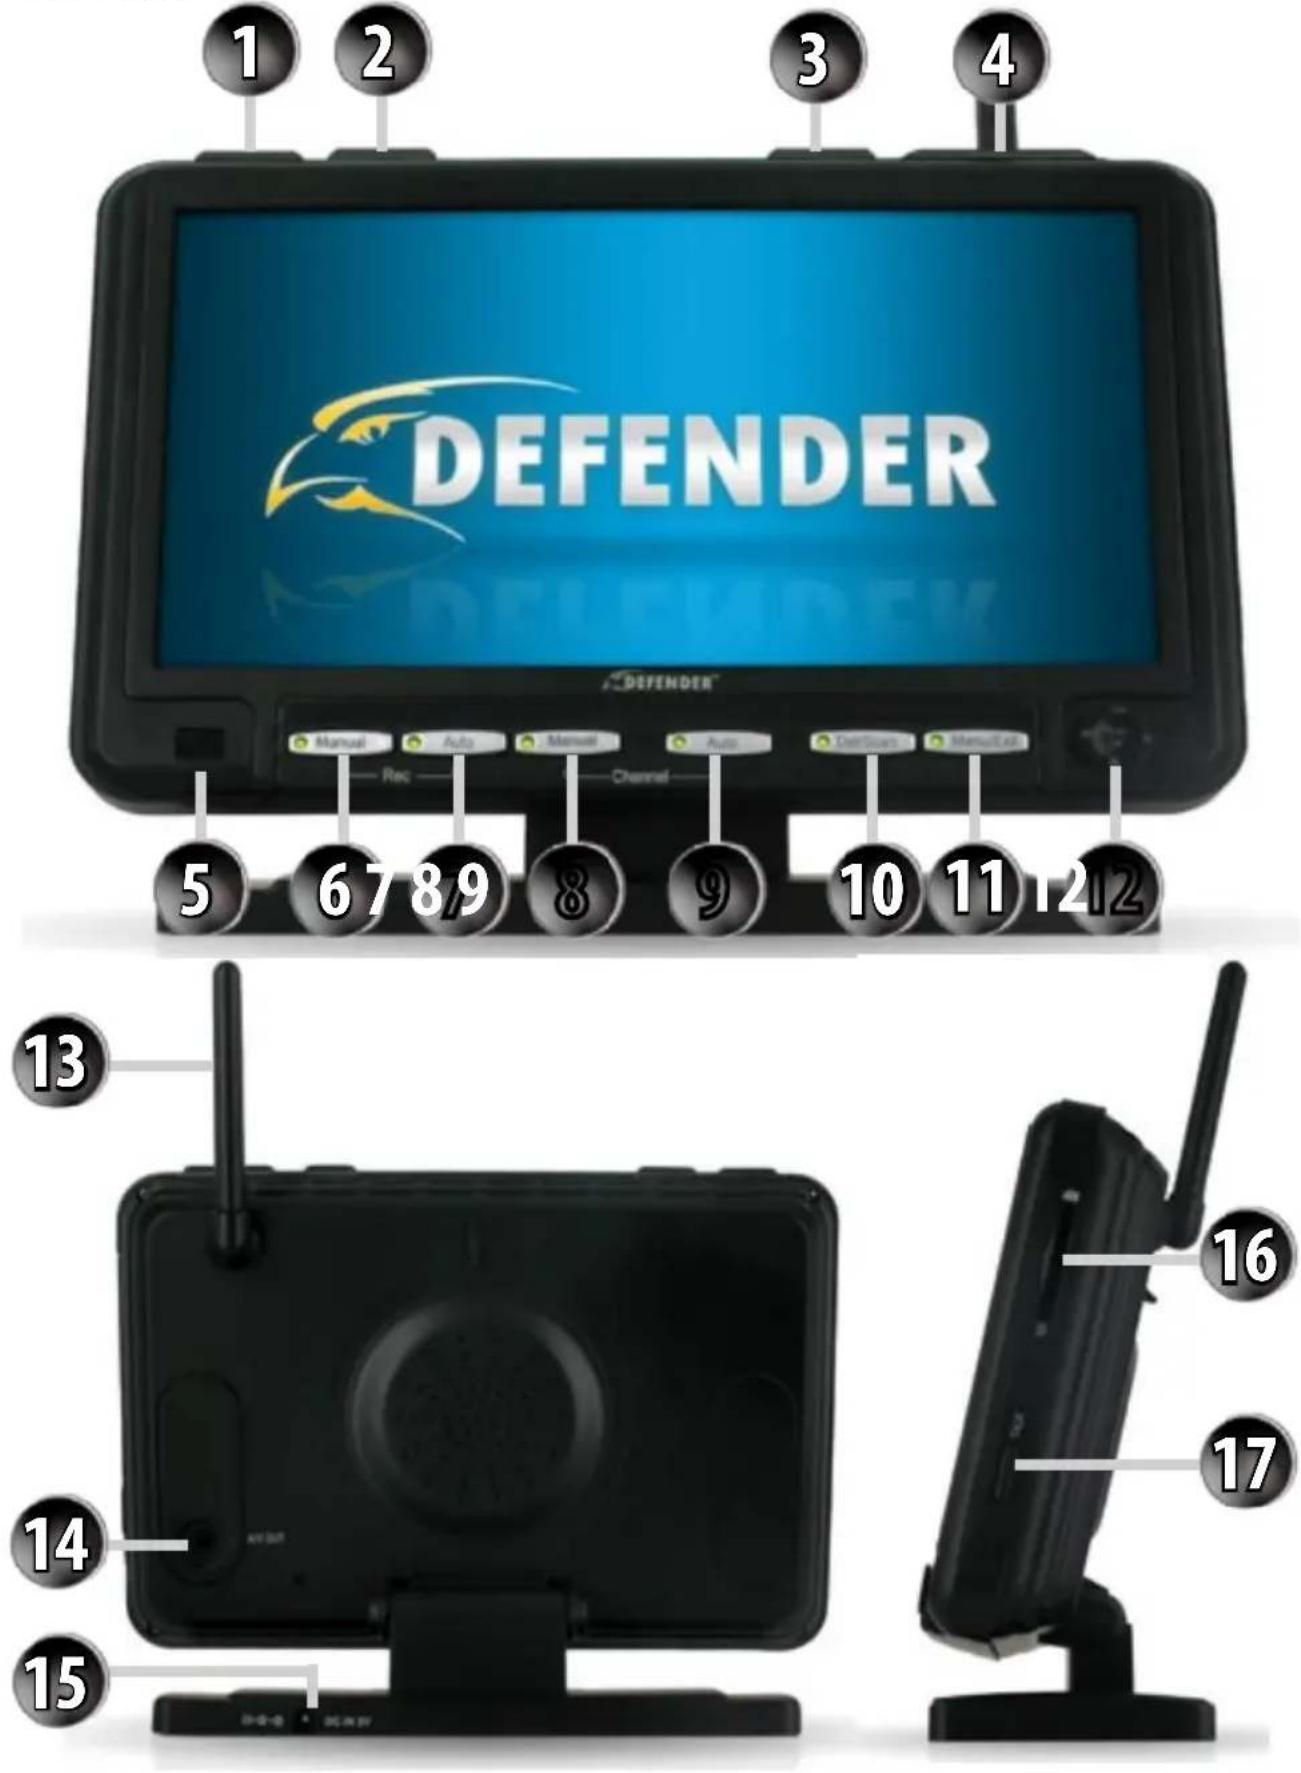
MONITOR
- Power: Pressing this button turns the monitor on and off
- TV/AV: If your monitor is connected to another video source, pressing this button will transfer the image from the 7" LCD monitor to the attached monitor.
- Quad: Opens up a quad screen view. For more information on camera viewing, please see "Camera Viewing" on Pg. 16
- Volume: This adjusts the volume of the audio that plays through your monitor
- IR Sensor: The IR sensor is how the remote and monitor communicate
- Manual Record: Prompts the monitor to begin constant recording. To stop recording, press this button again
- Motion Record: Prompts the monitor to record only when motion is detected. To stop motion recording, press this button again
- Manual Channel: Manually changes which camera is being viewed on screen
- Auto Channel: Turns auto channel on and off. When this function is on, the camera channels will sequence through automatically
- Delete/Scan: This button will turn on the screen saver. The screen saver will display until motion is detected, once detected, the screen saver will close and the monitor will display the camera that detected motion. During playback this button allows you to delete single clips of recorded footage. For more information on deleting recorded footage, please see "DELETE" on Pg. 27
- Menu/Exit: Enters and exits the main menu
- Joystick: This tab has many functions when accessing the menu as well as playing back footage. For information about how to use this joystick, please see "Joystick" on Pg. 14 of the manual
- Antenna: This antenna allows for a stronger signal between the camera and monitor
- A/V Out: Plug the single end of the included A/V cable into this area
- Power Input: Plug the small end of the included power adapter marked "monitor" into this area
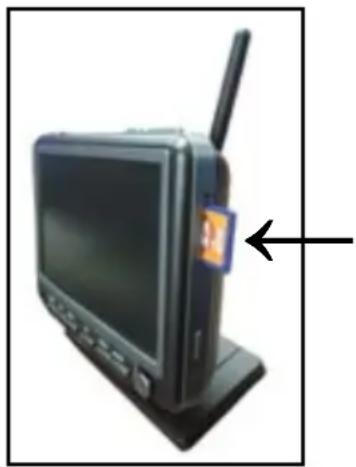
- SD Card Insert: Your SD card can be inserted into this area to record and save footage
- Talk: This button allows for two-way communication. The monitor and camera are both equipped with a microphone and a speaker, pressing this button allows you to speak through the camera from the monitor
Note: To jump to a particular paired camera while in quad mode, select the camera number on the joystick. This function only works while in quad viewing mode.
BUTTONS AND CONNECTIONS
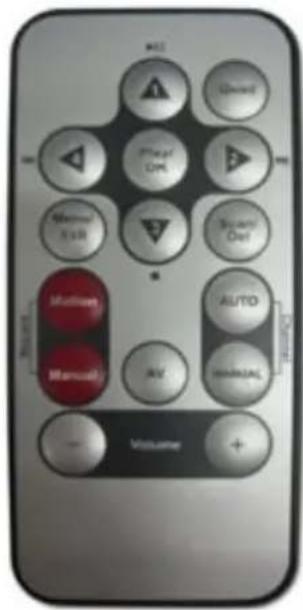
REMOTE
The included remote control has the same functions as the monitor with the exception of two commands that are NOT included on the remote control, they are:
• Talk: Cannot access talk function with remote
• Power: Cannot power on or off the monitor from the remote control
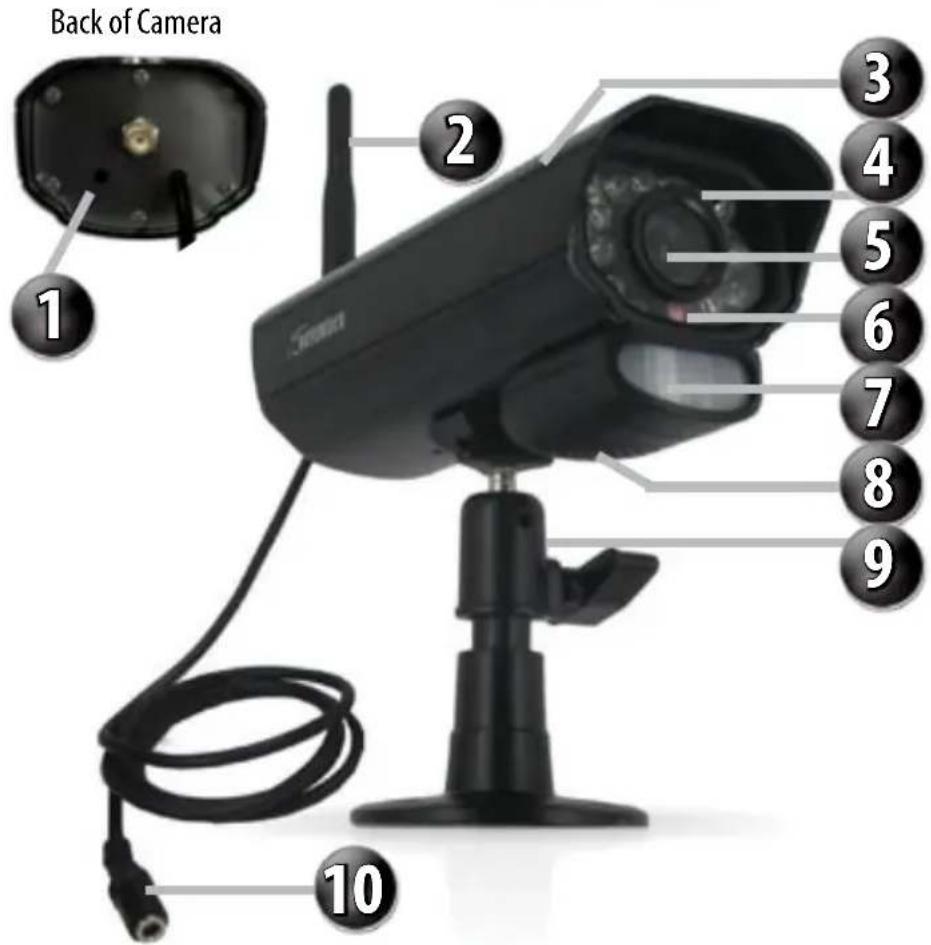
CAMERA
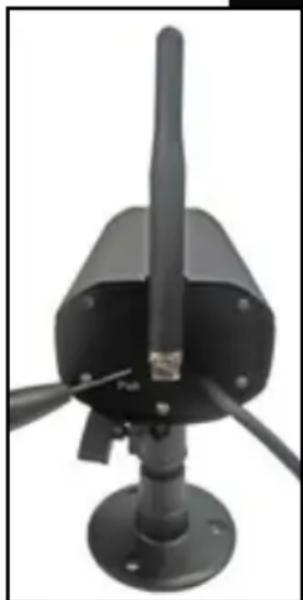
1. Pair Button:
Located at the back of the camera, you press this button when pairing the camera and monitor. For more information, please see "Pairing" on Pg 14
2. Antenna:
This removable antenna allows for a better signal between the camera and monitor
3. Camera Housing:
Made of anodized aluminum to prevent rust
4. Infrared (IR):
The 18 LEDs allow the camera to see in the dark up to 40ft away
5. Camera Lens:
The camera lens is located in the center of the LEDs
- CDS Sensor: Automatically turns on the infrared LEDs when it gets dark
- Motion Detection: Detects any motion in front of the camera
- Speaker/Microphone: Allows you to hear and record sounds, and talkback to whomever you are recording
- Camera Mount: Allows the camera to be desk or wall mounted
- Power connection: This 3 ft. cord connects to the power adapter (marked "Camera")
THINGS TO CONSIDER BEFORE INSTALLATION
• The camera should be installed between 8 to 13ft above the area to be monitored
- Ensure that the camera is installed NO MORE than 100 ft away from the monitor's position to maintain a strong signal between the camera and monitor
- Before mounting the camera, ensure there are no obstructions in the camera's view
- Place camera in the most strategic place where it can provide detailed video of your home or business. Having the camera in the open for people to see can help deter criminals
- To cover large, dark areas such as backyards, garages, and driveways, place camera in a strategic location, such as on the roof or deck. This way, more area is covered by the camera
- Ensure that the camera is positioned to avoid glare. Be sure to position camera away from direct sunlight or indoor lighting
- For best results, light in front of the camera should be around the same brightness as the light around the area or object being monitored
- Decide whether the camera will be wall-mounted, or mounted on a desk/table top. We recommend that the mount is secured using the included screws and hardware for all installations
AVOIDING INTERFERENCE
The PX301 utilizes Clear Signal Technology, meaning that it is designed to avoid the frequencies of common wireless devices. By doing so, the system does not receive interference from any standardized 2.4GHz or 5.8 GHz wireless devices within your home or business.
The signal also passes easily through interior walls. However, buildings with metal frames or placing the camera near large metal objects may cause signal interference. If reception is poor, moving the camera and/or monitor closer to one another may fix this problem. Interference is also possible if another device within the building (such as a cordless phone) is operating on the same frequency.
natural_image
Black surveillance camera mounted on a black base with antenna and antenna (no visible text or symbols)MOUNTING THE CAMERA
-
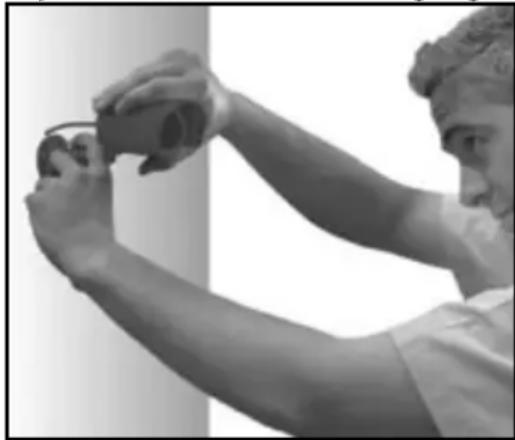
Decide if the camera will be wall-mounted or sitting on a desk/tabletop. The camera can be adjusted for many mounting scenarios by rotating it to the required position.
-
Keep in mind that the camera is microphone equipped. If you would like audio recorded, make sure the camera is within a close enough range of the area being monitored to record any sounds (within 6 ft)
- Be sure to mount the camera no further than 100ft away from your monitor
-
Be sure to mount the camera no further than 8ft away from a power source
-
Screw the mounting bracket into the camera's mounting hole, turning it clockwise.
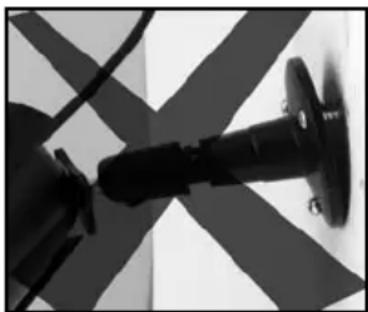
- Ensure that the camera is strongly secured into the wall.
- Adjust camera to the desired viewing angle.
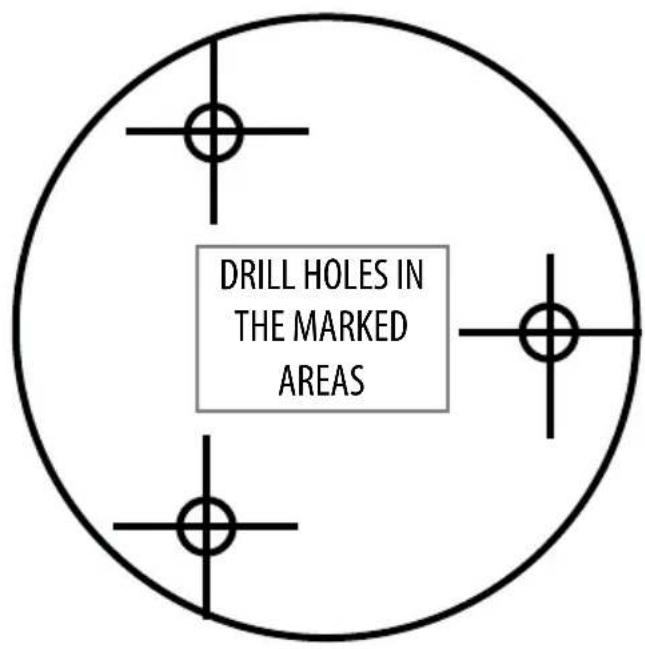
- For additional help with mounting the camera, please see the drilling template located at the back of the manual.
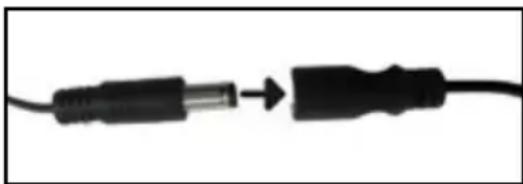
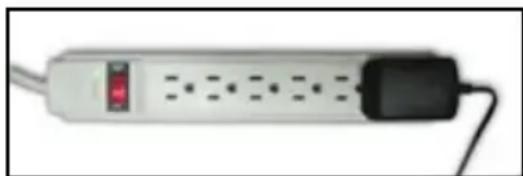
- Once you have mounted the camera and placed it at the desired viewing angle, plug the camera's power adapter (marked for camera) into the cord on the camera and then plug the adapter into a power source. (A surge protected power source is recommended)
- If you purchased a kit with additional cameras, repeat the above steps for all additional cameras.
Note: The above photos are examples of mounting a camera, your camera will look different from the above images.
Adjust camera to desired viewing angle
natural_image
Black-and-white photo of a sculptor holding a small object, no visible text or symbolsEnsure the camera is secure
natural_image
Close-up of a black mechanical component with a flanged end, set against a patterned background (no visible text or symbols)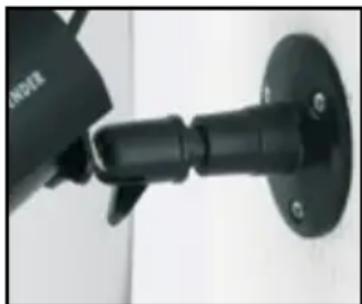
natural_image
Close-up of a black wall-mounted security camera mounted on a wall, no visible text or symbolsPlug power adapter into Camera's cord
natural_image
Close-up of a black cable with a connector, showing an arrow indicating direction (no text or symbols)Plug into Surge Protected power source
natural_image
Exterior view of a white power strip with black buttons and a red indicator light (no text or symbols visible)PLUGGING IN MONITOR
Once the monitor is connected to a power source, turn it on using the power button and it will automatically pair with the camera. If the camera and monitor do not automatically pair please see "PAIRING" Pg 14.
To plug monitor in:
- Make sure that the monitor is set up no more than 100ft from the camera. This is to ensure a strong signal between the camera and monitor.
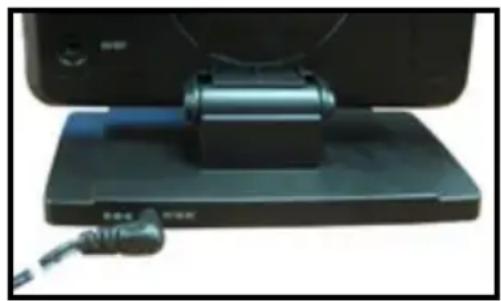
- Plug the monitor's power adapter (marked for monitor) into the monitor's power input area (marked "9V DC").
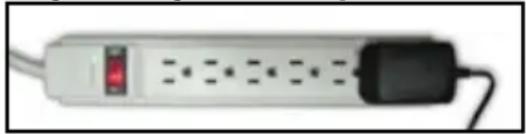
- Plug the other end of the power adapter into a power source (surge protected power source recommended).
- Press the power button to turn the monitor on to view and hear the camera.
Plug adapter into 9VDC
natural_image
Close-up of a black electronic device with a cylindrical component mounted on a base, connected to a cable (no visible text or symbols)Plug into Surge Protected power source
natural_image
Exterior view of a white rectangular power strip with a black plug and red indicator light (no text or symbols visible)CONNECTING TO ANOTHER MONITOR
The PX301 comes equipped with an audio/video cable that can be plugged into any monitor with an audio/video input. Once plugged in, you will be able to watch and hear live video, access and view the menu as well as watch playback footage from the monitor you have plugged into.
To plug the 7" LCD Monitor into another Monitor:
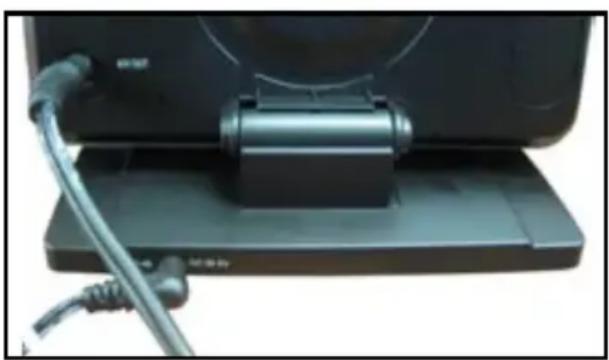
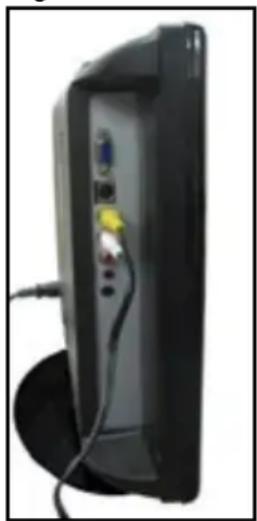
- Plug single end of the A/V cable into A/V out area on back of monitor.
- Plug the video jack (yellow) into the video input on your monitor and the audio jack (white) into the audio input on your monitor, then press the A/V button on the 7" LCD monitor
- You may have to adjust the channels or video source input on your monitor to view the footage.
- Once the proper channel is set, the footage from the camera will display on the monitor.
Plug A/V cable into A/V out on monitor
natural_image
Close-up of a black electronic device with a coiled cable and a cylindrical component mounted on a base (no visible text or symbols)Plug A/V cord into monitor
natural_image
Back view of a black rectangular electronic device with attached cables and ports (no visible text or symbols)The joystick on the monitor has many functions, the functions include:
Pressing down: Pressing this tab down when accessing the menu will select whatever option is highlighted (if any). When in live view mode, pressing this tab down will open the footage list. For more information on footage and playback, see "Playback" on Pg. 25
Moving up: When you move this tab upwards when accessing the menu it will scroll up, when viewing recorded footage, moving the tab up will Pause/Play the footage
Moving down: Moving this tab down when accessing the menu will scroll down, when viewing recorded footage, moving the tab down will stop the footage
Moving left: Moving the tab to the left when accessing the menu will scroll left, when viewing recorded footage, moving the tab left will rewind the footage
Moving right: Moving this tab to the right when accessing the menu will scroll right, when viewing recorded footage, moving this tab to the right will fast forward through the footage
PAIRING
Pairing the camera and monitor will be necessary if the camera and monitor do not automatically pair or if you purchased a kit with additional cameras. A small pen or screwdriver is necessary to press the camera's pair button.
To pair a camera and monitor:
- On the monitor, press the menu button.
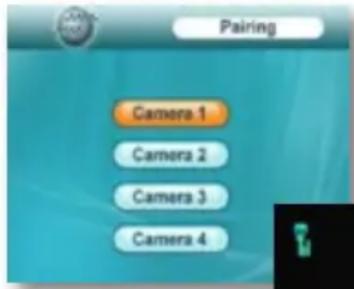
- Using the joystick, scroll to "Pairing" and press OK.
-
A list of camera channels will appear numbered Camera 1 – Camera 4. If you purchased additional cameras or if your kit came with additional cameras, you must use a different channel for each camera.
-
Select the camera channel you would like to pair your camera to and press OK.
-
A screen will appear counting back from 30 seconds.
-
Within that 30 seconds, use a pin or small screw-driver to press the pairing button on the back of the camera that you are pairing to the monitor.
-
The camera and monitor will then pair and you will see the camera's view appear on screen.
-
If you purchased additional cameras or your kit came with additional cameras repeat the above pairing steps using different camera channels for each additional camera.
Select Camera
30 Seconds to pair
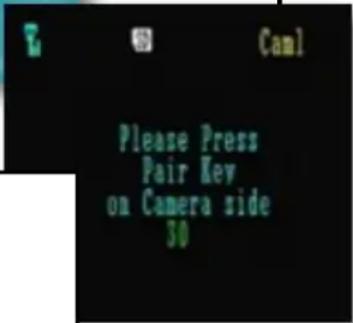
Press pair button
natural_image
Close-up of a black mechanical sensor or camera unit with a vertical spike and three protruding cables (no visible text or symbols)INSERTING SD CARD INTO MONITOR
The PX301 comes equipped with a 2GB SD card. The SD card will be what the recorded footage is saved to. You are able to watch the recorded footage from the SD card through the monitor or through your computer using an SD
card reader.
To insert SD card:
- Insert the SD card into the provided SD card slot on the side of the monitor.
- Ensure that the SD card is inserted properly with the metal readers being inserted first.
- Once inserted the [SD] icon will appear on the screen.
- If the icon does not appear, ensure that the SD card was put in correctly and that the lock on the side of the SD card is not in the locked position.
Insert SD card
natural_image
Front view of a black electronic device with antenna and control panel (no visible text or symbols)LIVE VIEW
Once your monitor is plugged in, turned on and paired with a camera, you will see a live view of the screen. The screen can display the following information:






Signal: Indicates the signal strength between the camera and monitor. The bars vary based on connectivity, one bar represents a low connectivity and four bars represents high connectivity
SD Card: Indicates that there is a SD card inserted into monitor and that it is functioning properly
No Signal: Indicates that there is no signal between the camera and monitor. The words NO SIGNAL will also appear on the screen
Unplugged: Indicates that the monitor was recently unplugged from a power source. If a file name is displayed below this icon the monitor is indicating that there was lost footage when the monitor was unplugged
Unwatched Footage: This icon indicates that you have unwatched footage on your monitor. If this icon is red it indicates that you have new footage and that your SD card is full. To get this icon to stop blinking you must access your recorded footage list. To access footage see "Playback" on Pg 24-27
Camera: This indicates which camera you are viewing. For more information on camera views please see "Camera Viewing" on Pg 16
Date/Time: Appears on "CAM1" only. This indicates the set date and time on your monitor. To adjust the date and time settings, see "Settings" on Pg 20
Record: This icon indicates that you are recording footage. Recording will take place based on what recording mode is set. For more information about recording modes, please see "Recording" on Pg 16
To manually switch through cameras:
- Press the "manual" channel button
To have the cameras sequence through automatically:
- Press the "auto" channel button
To view all paired cameras at once:
- Press the quad button: when the quad button is pressed scheduled recording will not take place; however, motion record will. When the camera detects motion, the screen will appear in full screen mode and begin recording. Once recording is complete the screen will switch back to quad screen mode. To jump to a particular paired camera while in quad mode, select the camera number on the joystick
Note: Only one camera can record at a time. You cannot access the menu, adjust channels, manually record or view your playback list when in quad screen mode.
RECORDING
You can set your monitor to record manually, record all motion detected or record during a set schedule.
To set your monitor to record manually:
Press the manual record button. Pressing this button will prompt your monitor to constantly record. Pressing it again during recording will stop the recording. The "Manual Record" light will be lit up when manual record is on and turned off when it is stopped.
To set your monitor to record all motion detected:
Press the motion record button to have the monitor prompt recording whenever motion is detected. To turn off motion record, press the motion record button again. The "Motion Record" light will be lit when motion record is on and unlit when it is stopped.
To set your monitor to record based on a schedule:
The other record functions overtake the schedule record. A long as manual and motion are turned off and schedule record is turned on, your monitor will record during your set times. Therefore, to record based on your set schedule, ensure that all other recording modes (motion and manual) are stopped and that the schedule recording is turned on. Turning on manual or motion record will stop the schedule record.
Note: Make sure the correct date and time are set in the "setting" menu to ensure proper recording times for the schedule record. (See Page 21)
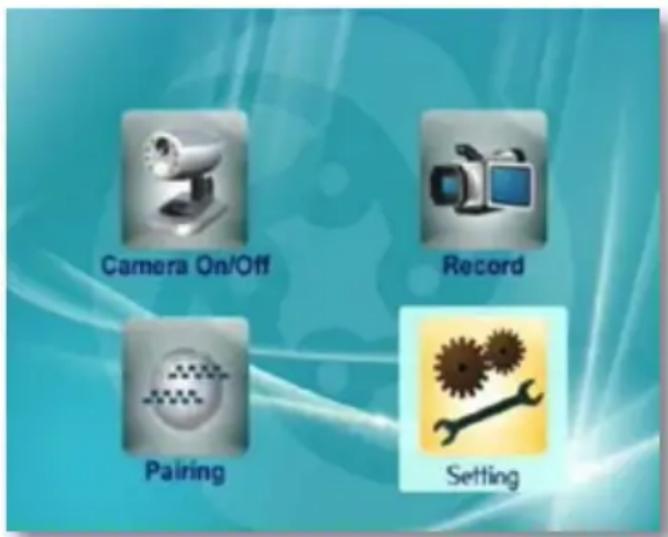
The main menu has the following options:
- Camera On/Off menu
- Record menu
- Pairing menu
- Setting menu
Menu Basics
• To access the main menu, press the menu button
• To navigate through the menu, use the joystick
- To select anything within the main menu, press OK by pressing the joystick down
• To exit the main menu, press the menu button again
- If the menu is opened and untouched for 30 seconds, it will close automatically
• You must be in single camera view to be able to access the main menu
Main Menu
CAMERA ON/OFF MENU
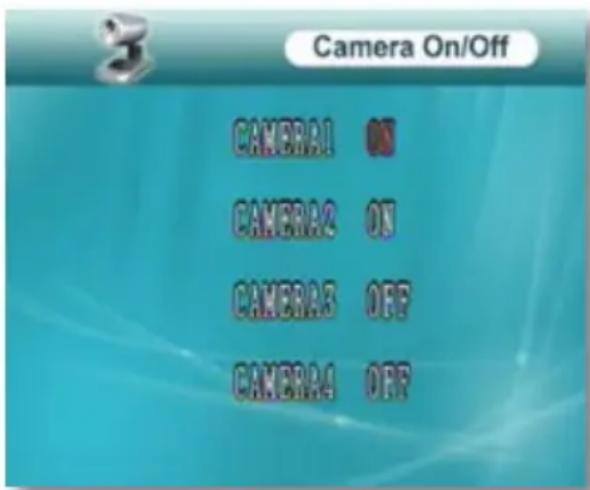
This menu option allows you to turn paired cameras on and off. When a camera is turned off, motion will not be detected, footage will not be recorded and the cameras live view will not appear on the monitor.
To turn a camera on/off:
- Press the menu button to open the main menu.
- Use the joystick to scroll to the "camera on/off" icon and press OK.
- Scroll to the camera you would like to turn on/off.
- Use the joystick to change the settings from on or off for each camera you would like to adjust.
- When the word "ON" appears next to a camera that indicates that the camera is on, when the word "OFF" appears next to a camera that indicates that the camera is turned off
- Once you have adjusted the cameras to your liking, press OK. This will exit the camera on/off menu and save your settings.
- To exit the main menu, press the menu button.
Camera Menu
RECORD MENU
The record menu allows you to adjust the quality of your recorded footage, adjust the recording time when motion is detected, set and adjust a daily schedule, and turn on/off the overwrite functions.
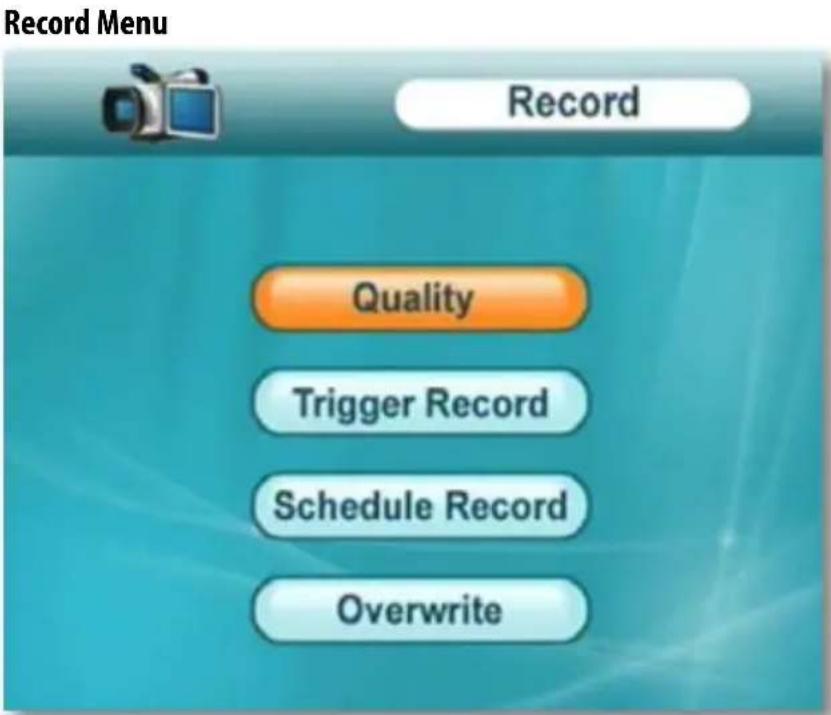
QUALITY
You can adjust the quality of your recorded footage to be low quality (320x240) or high quality (640 x 480). Recording when set to low quality uses less space on your SD card, where recording with high quality uses more space.
To adjust quality:
- Press the menu button to open the main menu.
- Use the joystick to scroll to the "Record" icon and press OK.
- Use the joystick to scroll to "Quality" and press OK.
- Use the joystick to highlight the quality you would like.
- Once the quality you would like is highlighted, press OK. This will exit the quality adjustment menu and save your settings.
- To exit the menu, press the menu button.
Quality Adjust
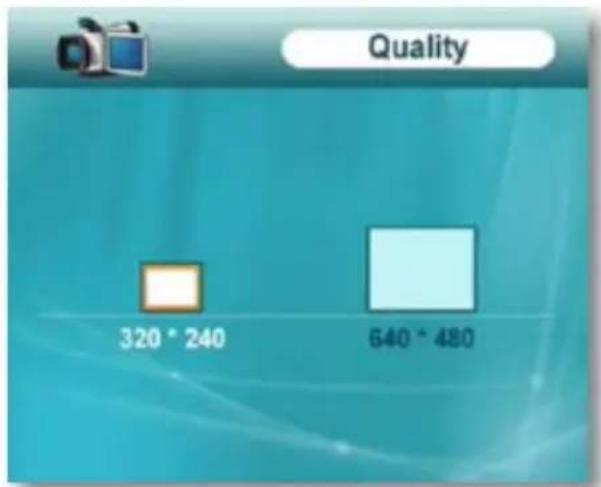
bar
| Category | Value | |---|---| | Quality | 320 * 240 | | Quality | 640 * 480 |TRIGGER RECORD
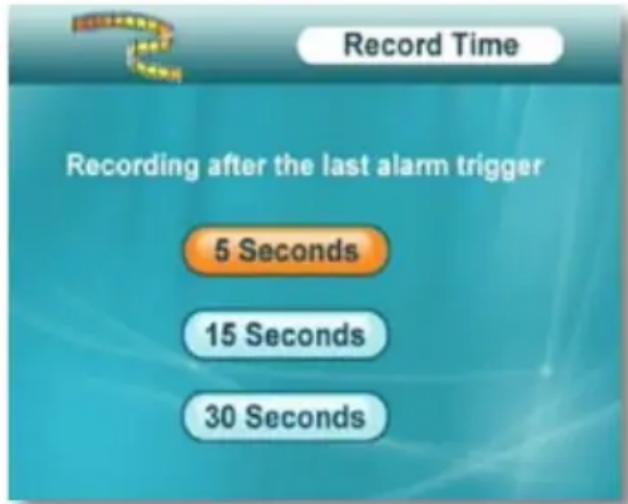
Trigger record allows you to adjust how long your camera records after motion is detected. You have the option of
5 seconds, 15 seconds and 30 seconds.
To adjust trigger record:
- Press the menu button to open the main menu.
- Use the joystick to scroll to the "Record" icon and press OK.
- Use the joystick to scroll to "Trigger Record" and press OK.
- Use the joystick to scroll to and highlight the time you would like to set your trigger record settings to, press OK. This will exit the trigger record menu and save your settings.
- To exit the menu, press the menu button.
Trigger Record
SCHEDULE RECORD
You can set your monitor to record during a scheduled time. You are able to adjust the schedule to record daily based on a 24hr. schedule. This is good if you are away from home during a portion of the day and you do not want to miss anything that may happen while you are away.
To set the schedule record:
- Press the menu button to open the main menu.
- Use the joystick to scroll to the "Record" icon and press OK.
- Use the joystick to scroll to "Schedule Record" and press OK.
- Adjust the start time and stop time to your liking.
- Use the joystick to scroll to the time you would like to adjust and to adjust the hour and/or minutes within that time
-
Once your times are set to your liking, use the joystick to scroll to the ON icon and press OK.
-
Your schedule will now be turned on to record during your set times.
-
To turn the schedule off scroll to the OFF icon and select OK.
-
Once OK is selected (from turning schedule on or off), you will exit the schedule record menu and save your settings.
-
To exit the menu, press the menu button.
Schedule Record
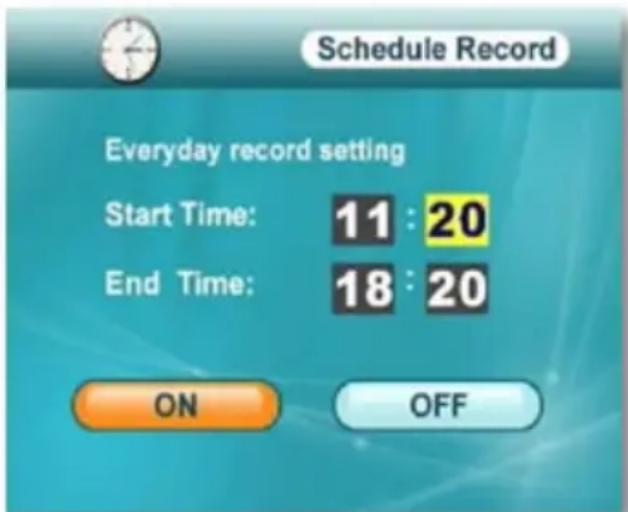
Note: In order for schedule recording to take place, all other recording modes must be turned off.
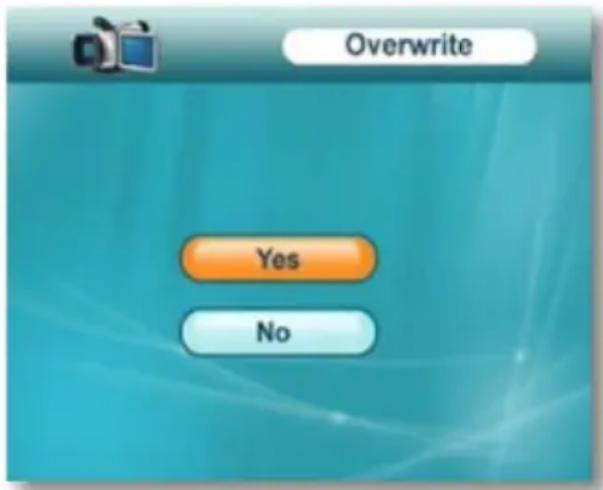
OVERWRITE
You have the option to record over old footage once your SD card is full, so your device will always record when prompted. The device will record new footage over the oldest footage. If you choose not to have your device overwrite saved footage, the device will stop recording once the SD card is full.
To turn on/off Overwrite:
- Press the menu button to open the main menu.
- Use the joystick to scroll to the "Record" icon and press OK.
- Use the joystick to scroll to "Overwrite" and press OK.
- Use the joystick to scroll to "Yes" or "No". Yes will turn the overwrite function on and no will turn the overwrite function off.
- Once you have highlighted which overwrite function you would like, press OK. This will exit the overwrite menu and save your settings.
- To exit the menu, press the menu button.
Overwrite Option
PAIRING
Pairing the camera and monitor will be necessary if the camera and monitor do not automatically pair or if you purchased a kit with additional cameras. For information on how to pair a camera to the monitor please see "PAIRING" on Pg. 14.
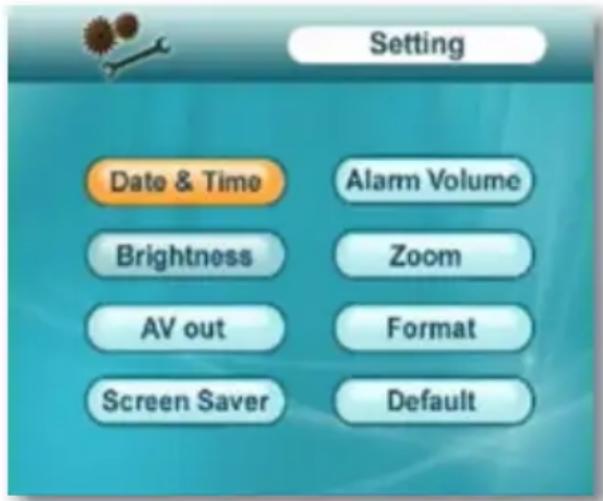
SETTINGS
The settings menu allows you to do the following:
- Adjust the date and time
- Adjust brightness
• Change the video standard (AV type) - Set a screen saver
- Adjust the alarm volume
- Adjust the camera zoom
- Format your SD card
- Restore factory default settings
Settings Menu
DATE AND TIME
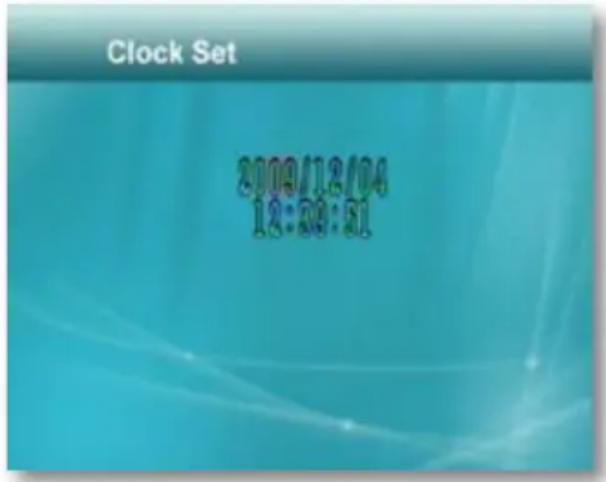
You are able to adjust the date and time on your monitor. The years range from 2000–2099 and the clock is based on a 24hr clock.
To adjust the date and time:
- Press the menu button to open the main menu.
- Use the joystick to scroll to the "Settings" icon and press OK.
- Use the joystick to scroll to "Date and Time" and press OK.
- The date is in the format of YYYY/MM/DD.
- Use the joystick to scroll to the date/time you would like to adjust and to adjust the numbers within that time.
- Once you have set the proper date and time press OK, this will exit the date and time menu and save your settings.
- To exit the menu, press the menu button.
Set Date and Time
BRIGHTNESS
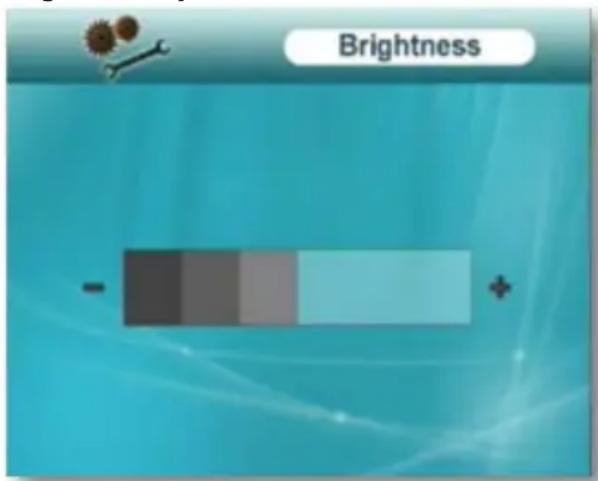
You are able to adjust the brightness of the video you are viewing. Brightness should be adjusted based on the type of lighting around the camera.
To adjust brightness:
- Press the menu button to open the main menu.
- Use the joystick to scroll to the "Settings" icon and press OK.
- Use the joystick to scroll to "Brightness" and press OK.
- There are six brightness levels, use the joystick to turn the brightness up or down.
- Its best to turn the brightness up if the camera is positioned in a dark area and turn the brightness down if the camera is positioned in an area with a lot of light.
- Once you have adjusted the brightness to your liking press OK, this will exit the brightness menu and save your settings.
- To exit the menu, press the menu button.
Brightness Adjustment
AV OUT
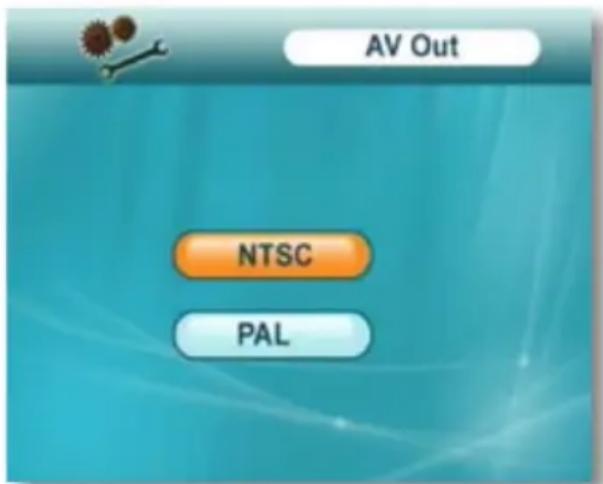
The AV out menu represents the video standard NTSC and PAL are the two most common types of video standards in the world, adjusting this will effect video output. North America uses the NTSC video standard. Therefore, if you are living in North America, leave this setting set to NTSC.
To adjust the AV out:
- Press the menu button to open the main menu.
- Use the joystick to scroll to the "Settings" icon and press OK.
- Use the up or down joystick to scroll to "AV Out" and press OK.
- Use the joystick scroll to which video standard you would like to use and press OK. (Default is NTSC)
- Pressing OK will exit the "AV Out" menu and save your settings.
- To exit the menu, press the menu button.
AV Out
SCREEN SAVER
The PX301 allows you to set a screen saver to display on the monitor when footage is not recording or motion is not being detected. You have the option between a blank screen and five pre-installed pictures.
The pre-installed pictures are on the top of Pg. 23:
- To view your screen saver, make sure you are in live view and press the "Scan/Del" This will turn on the screen saver. The screen saver will shut off if you have a scheduled recording set, if motion is detected, if you select any of the channel switching buttons or if you select the Scan/Del button again
To set the screen saver:
- Press the menu button to open the main menu.
- Use the joystick to scroll to the "Settings" icon and press OK.
- Use the joystick to scroll to "Screen saver" and press OK.
- Use the joystick to scroll to and highlight the picture you would like to set your screen saver to and press OK. This will exit the screen saver menu and save your settings.
- To exit the menu, press the menu button.
Screen Saver Screen
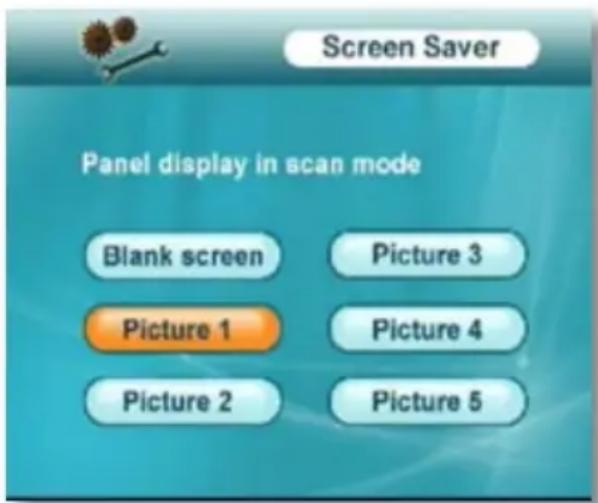
You have the option to choose between the following screen savers:

ALARM VOLUME
Your monitor will sound an alarm every time motion is detected by one of the cameras. You can adjust the volume of the alarm through the settings menu. Adjusting the alarm volume also adjusts the volume of the tone that you hear whenever you press a button.
To adjust alarm volume:
- Press the menu button to open the main menu.
- Use the joystick to scroll to the "Settings" icon and press OK.
- Use the joystick to scroll to "Alarm Volume" and press OK.
- Use the joystick to turn the volume up and/or down, 1 bar mutes the alarm and 6 bars is the loudest the alarm can go.
- Once you have set the alarm to your liking, press the OK. This will exit the screensaver menu and save your settings.
- To exit the menu, press the menu button.
FORMAT THE SD CARD
Formatting your SD card will erase all recorded footage and data from the SD card inserted into the monitor. Be sure to back up any important footage you would like to keep before formatting the SD card.
To format the SD card:
- Press the menu button to open the main menu.
- Use the joystick to scroll to the "Settings" icon and press OK.
- Use the joystick to scroll to "Format" and press OK.
- A prompt screen will appear informing you that all the data will be deleted.
- To format the SD card, use the joystick to scroll to "Yes" and press OK.
- To cancel and return to the settings menu, use the joystick to scroll to "No" and press OK.
- Pressing OK for either option will exit the format menu and save your settings.
- To exit the menu, press the menu button.
DIGITAL ZOOM
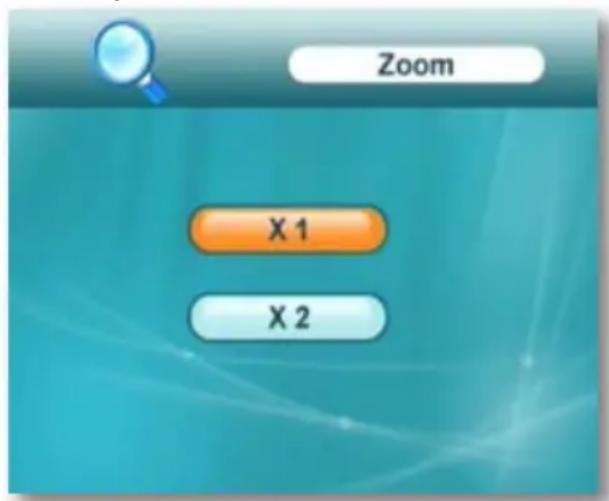
You have the option to zoom the picture in x2. This is good if you are trying to monitor something that is situated far away or if you would like to get a better look at something you are monitoring.
To adjust the image zoom:
- Press the menu button to open the main menu.
- Use the joystick to scroll to the "Settings" icon and press OK.
- Use the joystick to scroll to "Zoom" and press OK.
- Use the joystick to scroll to the zoom setting you prefer. (x1 is normal picture and x2 is zoomed in).
- Once you have selected the zoom setting you would like press OK. This will exit the zoom menu and save your settings.
- To exit the menu, press the menu button.
Zoom In/Out
Note: Adjusting zoom to x2 changes the video quality to 320x240.
DEFAULT
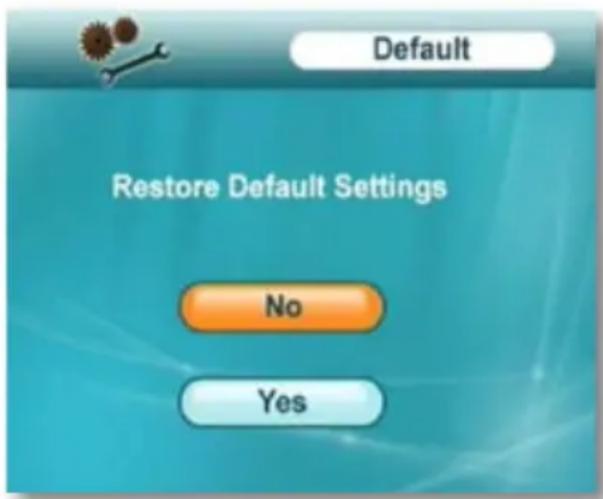
This option allows you to restore all of the monitor's default settings. Footage will not be deleted but all settings except date and time, will be restored to default levels.
To adjust to default settings:
- Press the menu button to open the main menu.
- Use the joystick to scroll to the "Settings" icon and press OK.
- Use the joystick to scroll to "Default" and press OK.
- A screen will appear asking if you would like to restore the default settings. Use the joystick to scroll to "Yes" to restore the default settings or "No" to keep your current settings.
- Once you have selected whether you would like to restore the default settings or not, press OK. This will exit the default menu and save your settings.
- To exit the menu, press the menu button.
Restore Default
You can playback recorded footage that is saved on your SD card through the monitor as well as backup and play recorded footage through a computer equipped with a SD card reader.
WATCHING RECORDED FOOTAGE ON MONITOR
- To open up your recorded footage list, ensure that you are in live view mode and select the OK button.
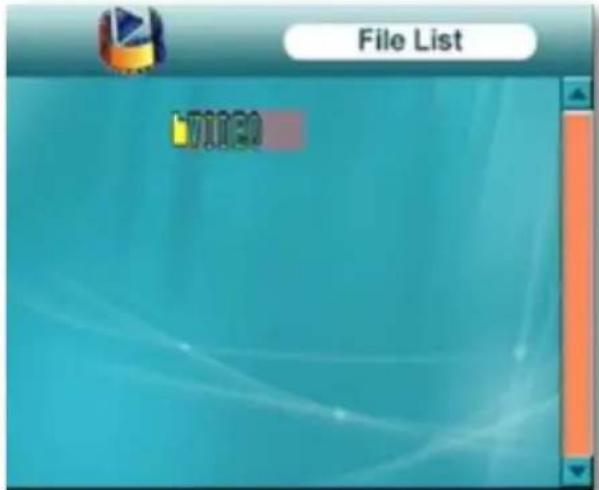
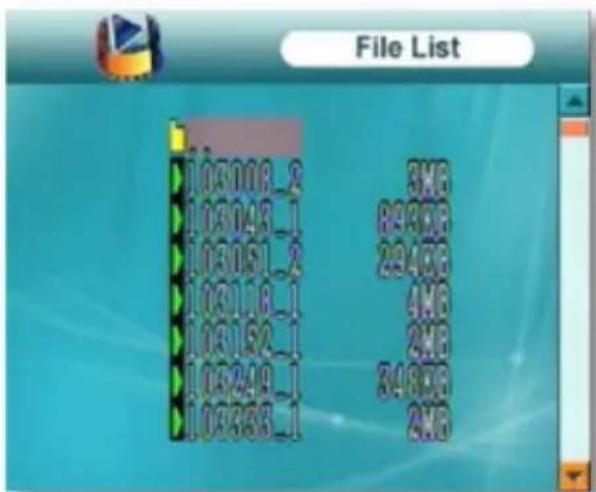
- You will see the main files that are saved on your SD card, use the joystick and scroll to the file named "VIDEO" and press OK.
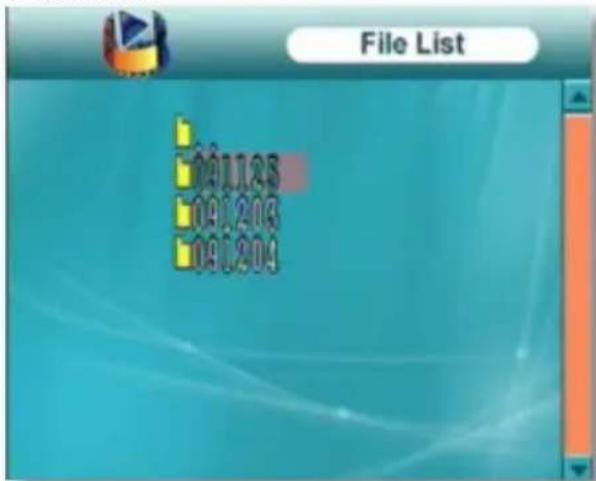
- The event list will then appear with the footage organized into dates (YYMMDD). The oldest footage will be at the top of the list and the most recent footage will be last.
- Use the joystick to scroll to the date you would like to watch the footage from and press OK.
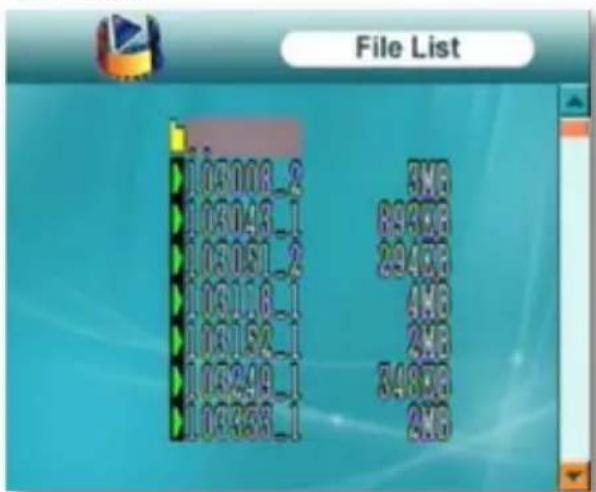
- The footage recorded on the selected dates will appear organized by time. The oldest footage will be at the top of the list and the most recent footage will be last. The times are based on a 24hr clock setting. (Format: HHMMSS)
- To view footage from a particular time, use the joystick and scroll to the time you would like to view and press OK.
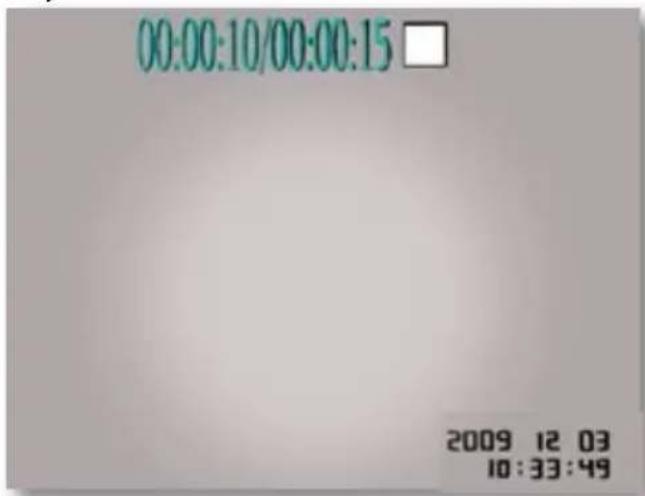
- The footage will then begin to play with the date and time the footage was recorded displaying in the bottom right corner of the screen.
Playback Screen
Video File
Video Dates
Video Times
COMPUTER PLAYBACK
The removable SD card allows you to open, save and play recorded files from your PX301 on your computer. All you need is a SD compatible card reader and a media player that supports .avi files.
Insert SD card into your card reader
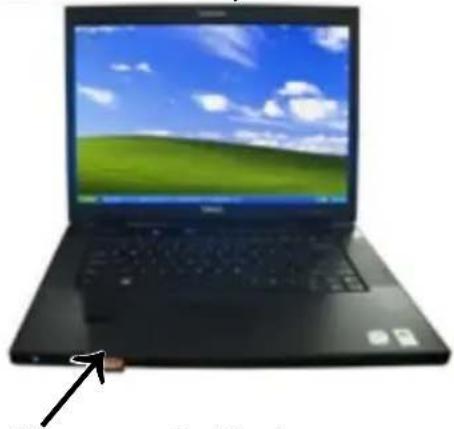
natural_image
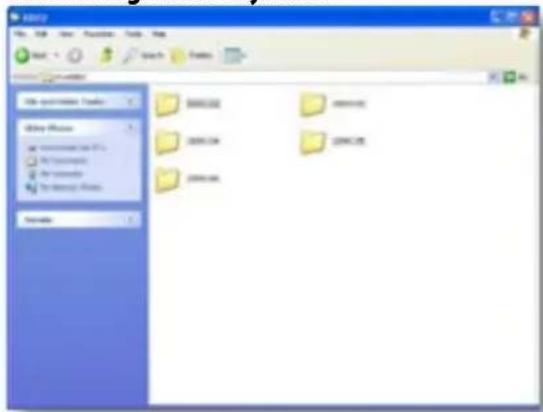
Black laptop with green screen and blue sky background, no visible text or symbols on screen or keyboardVideos organized by date
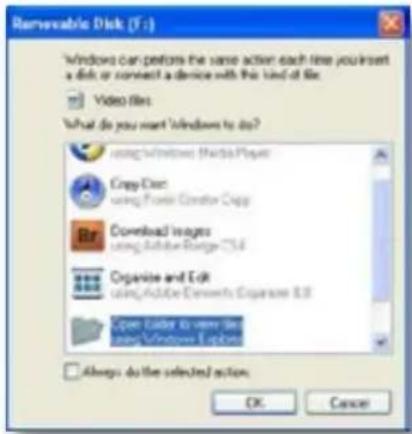
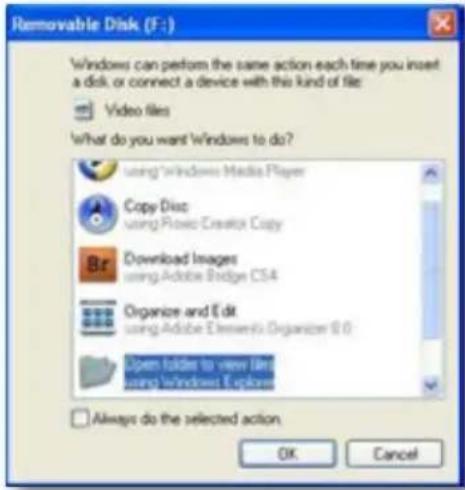
Open folder to view files
Windows Media Player
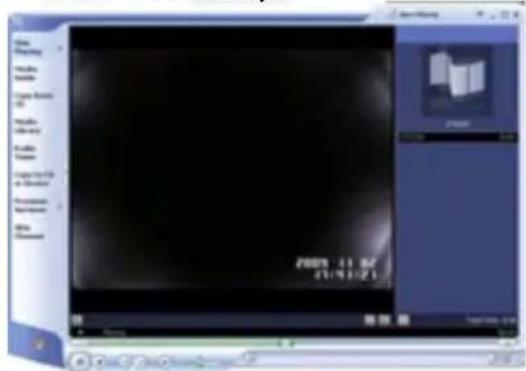
To watch recorded footage on your computer:
- Lightly push the SD card on the side of the monitor to unlock it from its position and then remove it from the SD slot.
- Insert the SD card into your card reader on your computer.
- Select the option to open the folder to view the files.
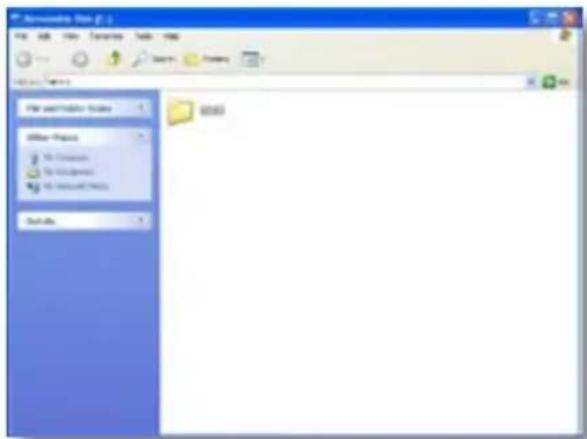
- Open the folder called "VIDEO."
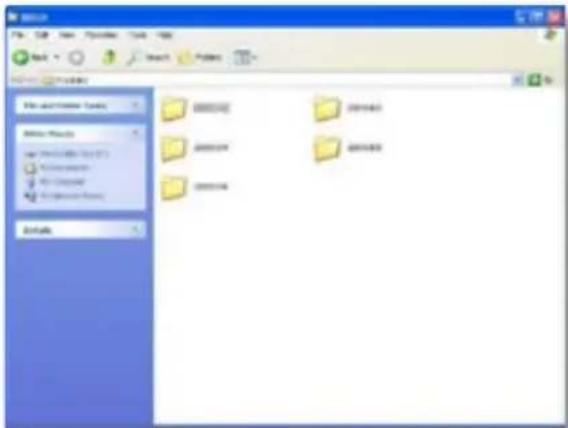
- The footage is organized by the date it was recorded, double click the day you would like to view footage from.
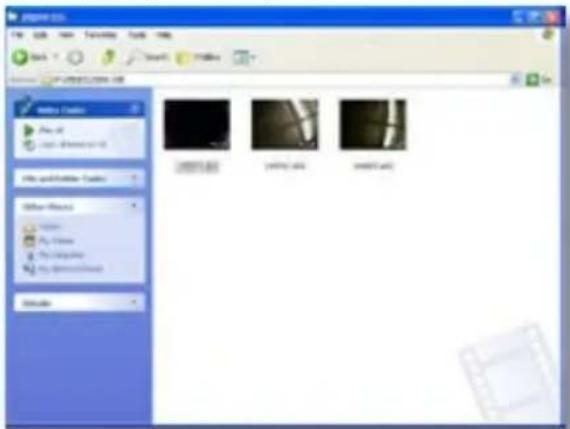
- The footage is then organized by the times it was recorded, if your default player is Windows Media Player, double click the footage and it will open and play through Windows Media Player.
- If your default player is NOT Windows Media Player, you can also use any other default media player that can view .avi files. As .avi files are very common, most video players will be able to play the recorded footage.
- The footage will play with the date and time that the footage was recorded displayed in the bottom right corner or the screen.
- For information on the playback controls for your selected media player, see the player's user manual.
PLAYBACK WITH THE JOYSTICK

Up /Pause/Play:
Moving the joystick up will pause the footage and pressing it while the footage is paused, rewinding, fast forwarding or stopped will play the recorded footage again

Left/Rewind:
Moving the joystick left will rewind the recorded footage. The more times you press the button the faster the footage will rewind. (x2, x4, and x8). To stop rewinding, press the pause/play button

Right/Fast forward:
Moving the joystick right will fast forward the recorded footage. The more times you press the button the faster the footage will fast forward. (x2, x4, x8, x16, x32, x64) To stop fast forwarding, press the pause/play button

Down/Stop:
Moving the joystick down in will stop the recorded footage. Pressing the pause/play button will resume playback from the beginning of the clip
DELETE
Your monitor gives you the option to delete individual clips of recorded footage from your SD card.
- To open up your recorded footage list, ensure that you are in live view and select the OK button.
- You will see the main files that are saved on your SD card, use the joystick and scroll to the file named "VIDEO" and press OK.
- The event list will then appear with the footage organized into dates (year/month/day). The oldest footage will be at the top of the list and the most recent footage will be last.
- Use the joystick to scroll to the date you would like to delete the footage from, once the desired date is highlighted, press OK.
- The footage recorded on the selected dates will appear organized by time. The oldest footage will be at the top of the list and the most recent footage will be last. The times are based on a 24hr clock setting. (Format: HHMMSS)
- Highlight the footage that you would like to delete and select the "Delete" button.
- A prompt screen will appear asking if you would like to delete the recorded footage. Use the joystick to highlight yes and press the OK button. The footage will then delete and you will return back to the file list.
Open folder to view files
Open video folder
Videos organized by date
Footage organized by time
To save recorded footage on your computer:
- Lightly push the SD card on the side of the monitor to unlock it from its position and then remove it from the SD slot.
- Insert the SD card into your card reader.
- Open folder to view the files.
- Open the folder called "VIDEO."
- The footage is organized by date it was recorded, double click the day you would like to save footage from.
- The footage is organized by the times it was recorded, right click the footage you would like to save and select "Copy".
- On your computer, locate the area or folder that you would like to save the footage to, then right click and select "Paste".
- The footage will then be saved to that particular location on your computer.
| No Picture/Signal • | Make sure all the connections are secure and properly connectedMake sure your monitor is plugged into a power source from the 9VDC input on the backMake sure there is nothing obstructing the view of the cameraTry re-pairing the camera and monitor |
| Picture too Bright Dark | The night vision comes on automatically when the light levels drop; try the camera in a pitch black setting. The area that the camera is in may get too much light to activate the sensorTry adjusting the brightness settings on your monitor |
| No Audio • Make sure | nothing is interfering with the microphone on the cameraMake sure whatever you are trying to hear is close enough to the microphone on the camera (within 6ft)Disconnect and reconnect the wires from the camera and the monitor to make sure they are secureTry re-pairing the camera and monitorTry adjusting the volume on the monitor that the monitor is plugged intoEnsure that the camera volume is turned up using the remoteEnsure that the AV cord is connected to the proper connections on the monitor and on the monitor that the monitor is connected to |
| Buttons are not working | The buttons do not work in quad screen mode, ensure you are viewing full screenMake sure the button lock function (on the front of the monitor) is not switched on |
| Devices are not pairing | Ensure that the camera and monitor are within 100ft of each other.Try moving the devices closer together, sometimes walls/other obstructions can get in the way of the camera and monitor's signalEnsure that both devices are connected to a proper power source |
| Night Vision not Working | The night vision comes on automatically when the light levels drop; try the camera in a pitch black setting. The area that the camera is in may get too much light to activate the sensor |
| Monitor is reading “No Signal” | Try re-pairing the camera and monitorMake sure there is nothing obstructing the view of the cameraMake sure the camera and monitor are within 100 ft from one another |
| Footage not recording | Adjust what recording setting you are set toMake sure SD card is completely in the monitorMake sure SD card is not full and that overwrite function is turned onMake sure SD card is not locked by adjusting the tab on the side of the card |
| Remote not working | Ensure that the remote control has batteries inserted into it and that those batteries are not deadTry plugging the IR sensor inTry using the remote control closer to the monitor |
CAMERA
Image sensor....1/4" CMOS Color
Outdoor use ....Yes
IP Rating IP56
Maximum Wireless Range (Line of Sight)....300ft
Optimum Wireless Range (Line of Sight)....100ft
Wireless Frequency 2400\~2483.5Mhz
Wireless Channel Frequencies ...... Hopping frequency
Resolution....360 TV Lines
Night Vision......Yes
Number of IR LEDs and Range 18, up to 40ft
IR LED control....Automatic (CDS Sensor)
IR Cut Filter......Yes
Min. Illumination .... 0 lux
Viewing Angle....62 degree
TV System ....NTSC
Focal Length....4.5mm
Focus Type....Fixed Focus
Optimal Focal Distance....20ft
Microphone....Yes
Motion Detection......Yes, triggers audio alarm
Sun Shield ....Yes, not adjustable
Housing Material....Aluminum & ABS
Housing Color....Black
Electronic shutter speed....1/60 \~ 1/15,000 sec
Signal/Noise Ratio....>48dB
Camera Bracket .... Yes
Operating Temperature 14°F \~ 104°F
Operating Humidity 85%
Mounting Hardware......Included
Camera Power Input....9V DC 600mA
Power Adapter Input....AC 100\~240 50/60 Hz
Dimensions 5.25" x 4.75" x 2" (With Stand)
Weight 0.75 lbs
MONITOR
Wireless Frequency 2400\~2483.5Mhz
Channel Frequencies.... Hopping Frequency
Number of Cameras Supported 4
Output Terminal 1/8th inch to RCA A/V output
Resolution....640x480 or 320x240
Speaker....Internal Buzzer
Maximum SD Card Size....32 GB
Compression ......MPEG-4
File Type ...... AVI
Operation Mode ....Simplex
Scheduled Recording 24 Hour clock
Automatic Overwrite when Full ....... Optional
Motion Activated Alert....Compatible
Post Motion Recording 5, 15, 30 seconds
Digital Zoom 1x,2x
Auto-Scanning......Yes
Button Lock....Yes
Remote Control....IR
IR Remote Extension 6 ft
New Video Footage Notifier......Yes, LED
Viewing Modes Single, Quad, Manual, Automatic
Recording Mode....Manual, Schedule
Adjustable Brightness .... Yes
Video Output....PAL/NTSC
Operating Temperature 14°F \~ 120°F
Operating Humidity 85%
Housing Material....Aluminum and ABS Plastic
Housing Color......Silver and Black
Monitor Power Input....5V DC 2A
Power Adapter Input....AC 100\~240 V 50/60Hz
Dimensions 4.25" x 3" x 0.75"
Weight 4 lbs
REPLACEMENT PARTS
If you accidentally damage or lose any parts they can be replaced with ease. The following are parts that came with your system and their reference model numbers so you can continue to effectively monitor your premises.
| PRODUCT MODEL# DESCRIPTION | ||
 | Power Adapters | |
| [XYW] | Audio/Video Cable | |
 | SOFTWARE/MANUALS | Your product software and manual are available for download at: http://www.defender-usa.com/downloads.php |
ADDITIONAL ACCESSORIES
You may wish to add to your system and upgrade some components of it. Here are some items that can boost the effectiveness of your video security system.
| PRODUCT MODEL# DESCRIPTION | ||
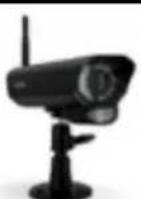 | SP301-C | Expand your system to a maximum of four cameras to monitor more locations |
 | SP100-ST | Alert all potential criminals of your security system and help deter crime with a window sticker |
 | SGN100 | Alert all potential criminals of your security system and help deter crime with this durable aluminum sign |
For more information on additional accessories, parts and much more, please visit:
www.defender-usa.com
Cut along the dotted line for a drilling template.
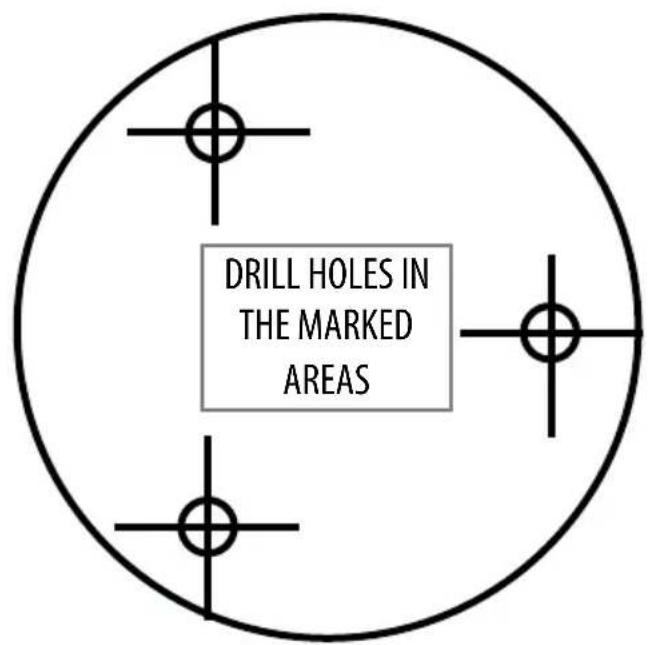
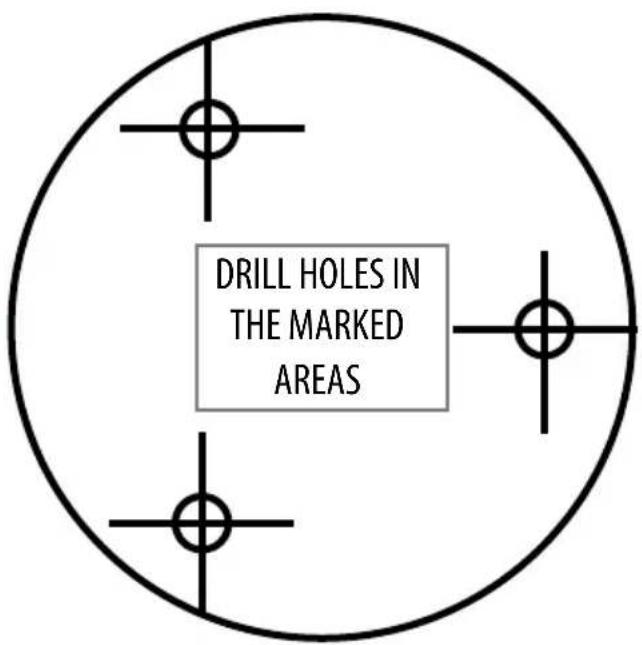

NEED HELP?
DO NOT RETURN THIS PRODUCT TO THE STORE
Please contact a DEFENDER customer support representative first regarding any additional information on product features, specifications or assistance with setup.
Please contact us via one of the methods below:
Support:
www.defender-usa.com/contact_us

Online live web chat:
Visit www.defender-usa.com
For more product information visit www.defender-usa.com
Note: This is manual version 1.0 for this product, you may find updated versions by visiting our website.
▶ Specification Sheets
▶ User Manuals
▶ Technical Support
www.defender-usa.com
DISCLAIMER
Defender does not endorse any of defender products for any illegal activities. Defender is not responsible or liable in any way shape or form for any damage, vandalism, theft or any other action that may occur while a Defender product is in use by the consumer.
VISITEZ-NOUS SUR LE WEB!
www.defender-usa.com
Avertissement
NE RETOURNEZ PAS CE PRODUIT AU MAGASIN !
www.defender-usa.com/contact_us

Visit www.defender-usa.com
www.defender-usa.com
ÉCRAN
Fréquence sans fil....2400\~2483,5Mhz
natural_image
Black laptop with green screen and blue sky background, no visible text or symbols on screen or keyboardFichier vidéo
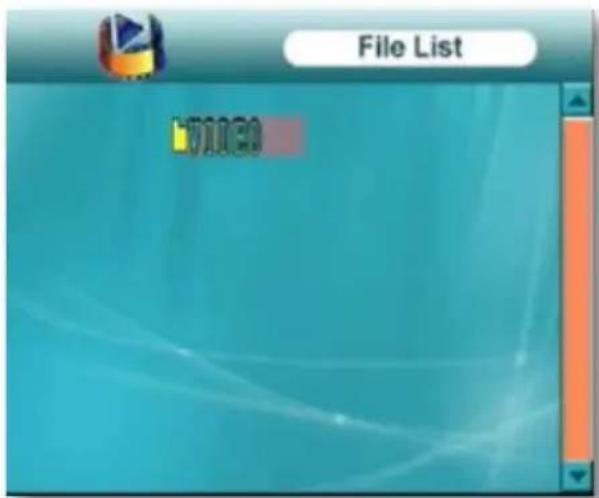
Dates de Vidéo
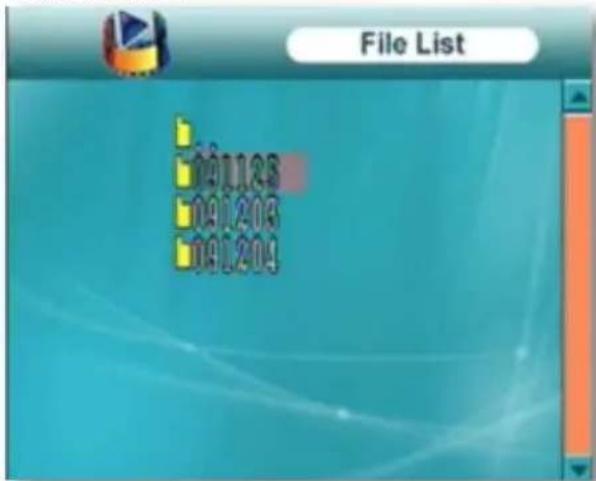
Temps de Vidéo
ZOOM NUMÉRIQUE
natural_image
Collage of five nature and sky photos: tropical waves, pyramid, turquoise beach, sunset over water, and green grassland with tree (no text or symbols)VOLUME DE L'ALARME
ÉCRASEMENT
DÉCLENCHER L'ENREGISTREMENT
HORAIRE D'ENREGISTREMENT
QUALITÉ
MENU POUR CAMÉRA ON/OFF
natural_image
Front view of a black electronic device with antenna and control panel (no visible text or symbols)VUE EN DIRECT
BRANCHER L'ÉCRAN
natural_image
Close-up of a black electronic device with a cylindrical component mounted on a base, connected to a cable (no visible text or symbols)natural_image
White power strip with black plug and red indicator light (no text or symbols visible)RACCORDEMENT À UN AUTRE ÉCRAN
natural_image
Close-up of a black electronic device with a cable and connector, no visible text or symbolsnatural_image
Black electronic device with visible ports and cables, no text or symbols presentMONTAGE DE LA CAMERA
natural_image
Black-and-white photo of a sculptor holding a small object, no visible text or symbolsnatural_image
Close-up of a black mechanical component with a flanged end, set against a patterned background (no visible text or symbols)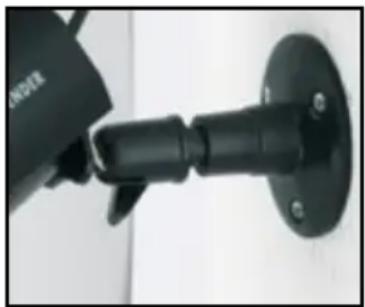
natural_image
Close-up of a black wall-mounted security camera mounted on a wall (no visible text or symbols)natural_image
Close-up of a black cable with a connector, showing an arrow indicating transformation (no text or symbols visible)natural_image
Exterior view of a white electrical strip with black buttons and a red indicator light (no text or symbols visible)CHOSES À CONSIDERER AVANT L'INSTALLATION
natural_image
Black surveillance camera with antenna and mounted base (no visible text or symbols)ÉCRAN
natural_image
Black-and-white photo of a flat-screen TV displaying a group photo (no visible text or symbols)
natural_image
Black surveillance camera on a stand (no text or symbols visible)natural_image
Black surveillance camera on a stand (no text or symbols visible)PX301 - 011
natural_image
Black surveillance camera mounted on a stand, no visible text or symbolsCE QUI EST INCLUS ....6
AUTRES KITS 6
ACCESSOIRES SUPPLEMENTAIRES ....6
TOUCHES ET CONNEXIONS ....7
Écran ....7
Télécommande....9
Caméra....9
INSTALLATION....10
INFORMATIONS DE GARANTIE DU PRODUIT
Site Web: www.defender-usa.com
Cheektowaga, NY Niagara Falls, ON
USA 14227 Canada L2H 1J9
DEFENDER® USA
60 Industrial Parkway #Z64
DEFENDER® CANADA
4080 Montrose Road
Conditions de garantie
natural_image
Exterior view of a security camera and a digital TV displaying a family photo (no visible text or symbols)MANUEL D'INSTRUCTION v1.0
Modèle#: PX301 www
- Digital Wireless DVR Security System
- PRODUCT WARRANTY INFORMATION
- Please visit our website at www.defender-usa.com for information about your product's warranty
- Warranty Terms
- CAUTION
- This device complies with Part 15 of the FCC Rules.
- IC NOTE: LOW POWER DECIVES RF
- INTRODUCTION
- TABLE OF CONTENTS
- Settings....19
- PLAYBACK....24
- TROUBLESHOOTING 28
- SPECIFICATIONS 29
- REPLACEMENT PARTS/ADDITIONAL ACCESSORIES ....31
- DRILLING TEMPLATE 32
- NEED HELP? 33
- FEATURES
- Digital Wireless Technology
- SD Card Recording
- Long Range Night Vision
- Way Intercom Feature
- Weather Resistant Camera
- Expandable up to 4 Cameras
- Motion Detection Settings
- Hour Scheduled Recording
- 7" LCD Monitor
- Remote Control Access
- Easily Connects to a TV
- Lifetime Live Customer Support
- ALTERNATE KITS
- ADDITIONAL ACCESSORIES
- BUTTONS AND
- CONNECTIONS
- MONITOR
- BUTTONS AND CONNECTIONS
- REMOTE
- CAMERA
- Pair Button:
- Antenna:
- Camera Housing:
- Infrared (IR):
- Camera Lens:
- THINGS TO CONSIDER BEFORE INSTALLATION
- AVOIDING INTERFERENCE
- MOUNTING THE CAMERA
- PLUGGING IN MONITOR
- To plug monitor in:
- CONNECTING TO ANOTHER MONITOR
- To plug the 7" LCD Monitor into another Monitor:
- The joystick on the monitor has many functions, the functions include:
- PAIRING
- To pair a camera and monitor:
- INSERTING SD CARD INTO MONITOR
- To insert SD card:
- LIVE VIEW
- To manually switch through cameras:
- To have the cameras sequence through automatically:
- To view all paired cameras at once:
- RECORDING
- To set your monitor to record manually:
- To set your monitor to record all motion detected:
- To set your monitor to record based on a schedule:
- The main menu has the following options:
- Menu Basics
- CAMERA ON/OFF MENU
- To turn a camera on/off:
- RECORD MENU
- QUALITY
- To adjust quality:
- TRIGGER RECORD
- To adjust trigger record:
- SCHEDULE RECORD
- To set the schedule record:
- OVERWRITE
- To turn on/off Overwrite:
- SETTINGS
- DATE AND TIME
- To adjust the date and time:
- BRIGHTNESS
- To adjust brightness:
- AV OUT
- To adjust the AV out:
- SCREEN SAVER
- To set the screen saver:
- ALARM VOLUME
- To adjust alarm volume:
- FORMAT THE SD CARD
- To format the SD card:
- DIGITAL ZOOM
- To adjust the image zoom:
- DEFAULT
- To adjust to default settings:
- WATCHING RECORDED FOOTAGE ON MONITOR
- COMPUTER PLAYBACK
- To watch recorded footage on your computer:
- PLAYBACK WITH THE JOYSTICK
- Up /Pause/Play:
- Left/Rewind:
- Right/Fast forward:
- Down/Stop:
- DELETE
- To save recorded footage on your computer:
- REPLACEMENT PARTS
- NEED HELP?
- DO NOT RETURN THIS PRODUCT TO THE STORE
- DISCLAIMER
- VISITEZ-NOUS SUR LE WEB!
- Avertissement
- NE RETOURNEZ PAS CE PRODUIT AU MAGASIN !
- ÉCRAN
- ZOOM NUMÉRIQUE
- VOLUME DE L'ALARME
- ÉCRASEMENT
- DÉCLENCHER L'ENREGISTREMENT
- HORAIRE D'ENREGISTREMENT
- QUALITÉ
- MENU POUR CAMÉRA ON/OFF
- VUE EN DIRECT
- BRANCHER L'ÉCRAN
- RACCORDEMENT À UN AUTRE ÉCRAN
- MONTAGE DE LA CAMERA
- CHOSES À CONSIDERER AVANT L'INSTALLATION
- INFORMATIONS DE GARANTIE DU PRODUIT
- Conditions de garantie
Brand : Defender
Model : PHOENIX 301
Category : Surveillance Camera